


gjdale
-
Posts
4,822 -
Joined
-
Last visited
Content Type
Profiles
Forums
Gallery
Events
Posts posted by gjdale
-
-
Congratulations Glen - that looks fantastic! I’ll hold the champagne until the base is done - if it’s anything like your previous efforts, that will be special too.
- Glen McGuire, Keith Black and mtaylor
-
 2
2
-
 1
1
-
-
Thanks for the reminder Keith. Yes, I followed along with Gary’s Autoshop diorama - spectacular work! Don’t think I’m in the same league but hoping that by following the very good instructions and seeking advice from the guys on the SierraWest forum, I’ll produce something passable.
- Glen McGuire, mtaylor, Jack12477 and 6 others
-
9
-
Woohoo! Well done Glen - I can breathe again! That’s looking superb.
- mtaylor, Glen McGuire and Keith Black
-
2
-
1
-
-
Thanks Glen. This is all new to me, so I’m following the instructions very closely and asking for clarification when in doubt.
-
Preparing the Strip Wood
The strip wood provided in the kit appears to be good quality bass wood. Before it can be used for the actual building, it must first be prepared through a multi-step process to add both texture and colour, as well as details such as knots and splits.
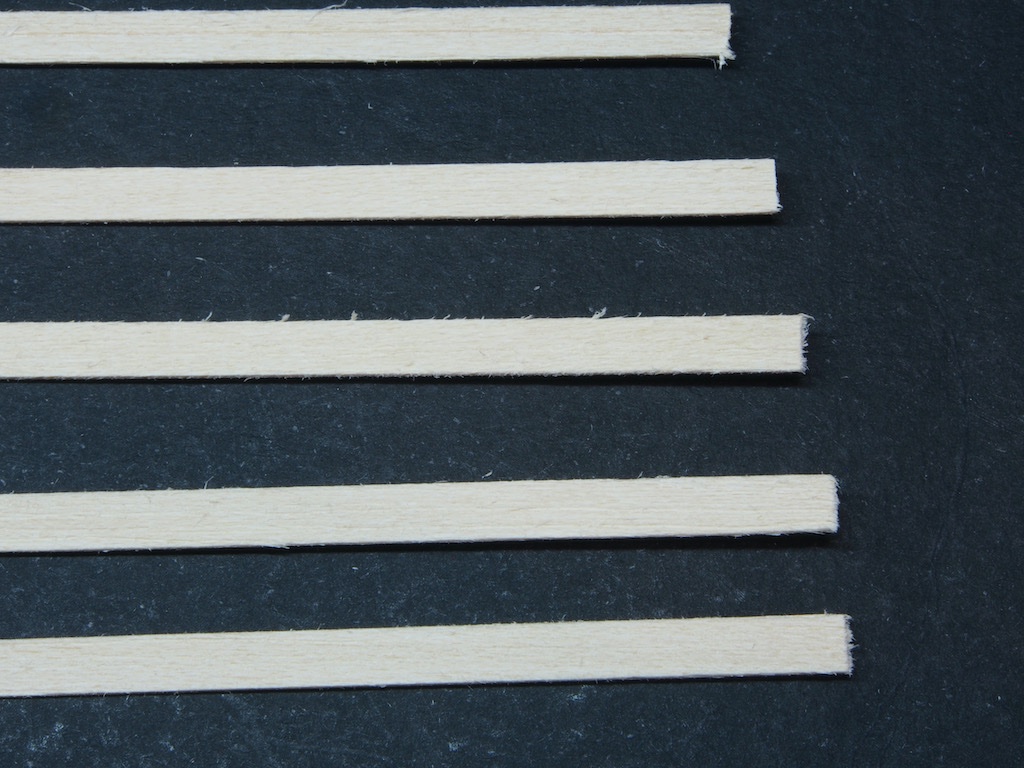
The initial texturing is done by creating “grain”. This is achieved using stiff wire brushes of the modeller’s choosing. In the picture below, you can see that I have commenced this process. My initial brush of choice was a brass cleaning brush (obtained at the local hardware store). Prior to brushing, the backs of each batch are marked with line across the grain to indicate the “back” side. As we are only texturing one side of these, this mark will help to identify which side is “up”. Brushing was then implemented in batches of five strips at a time.
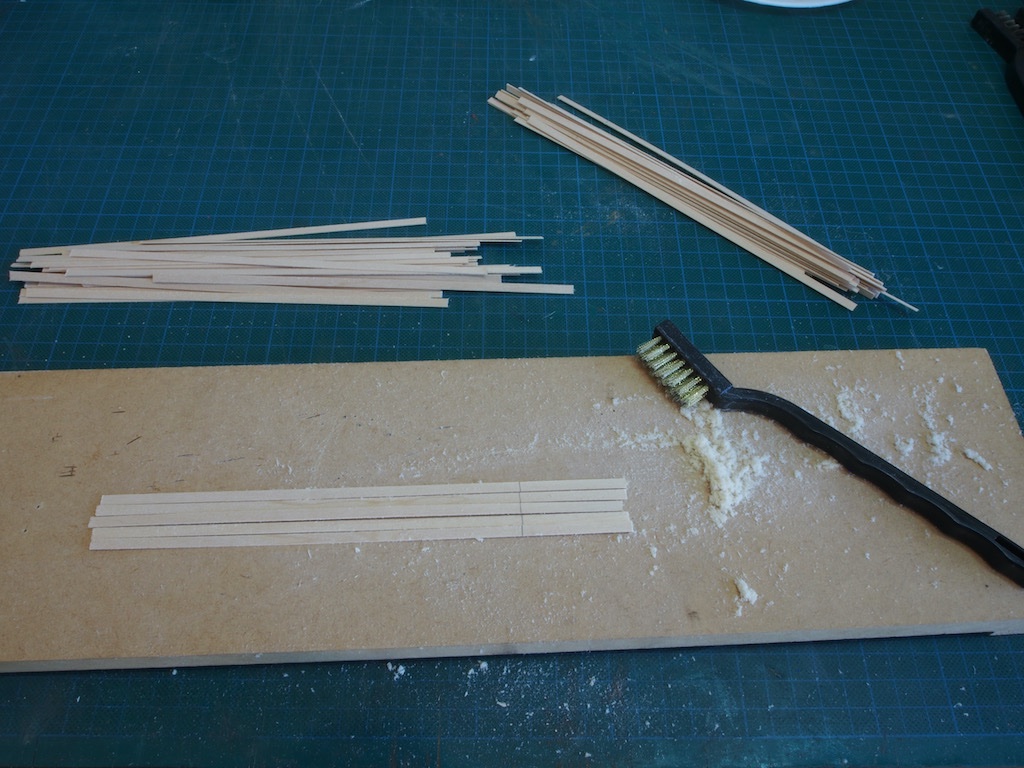
This is the result after brushing.
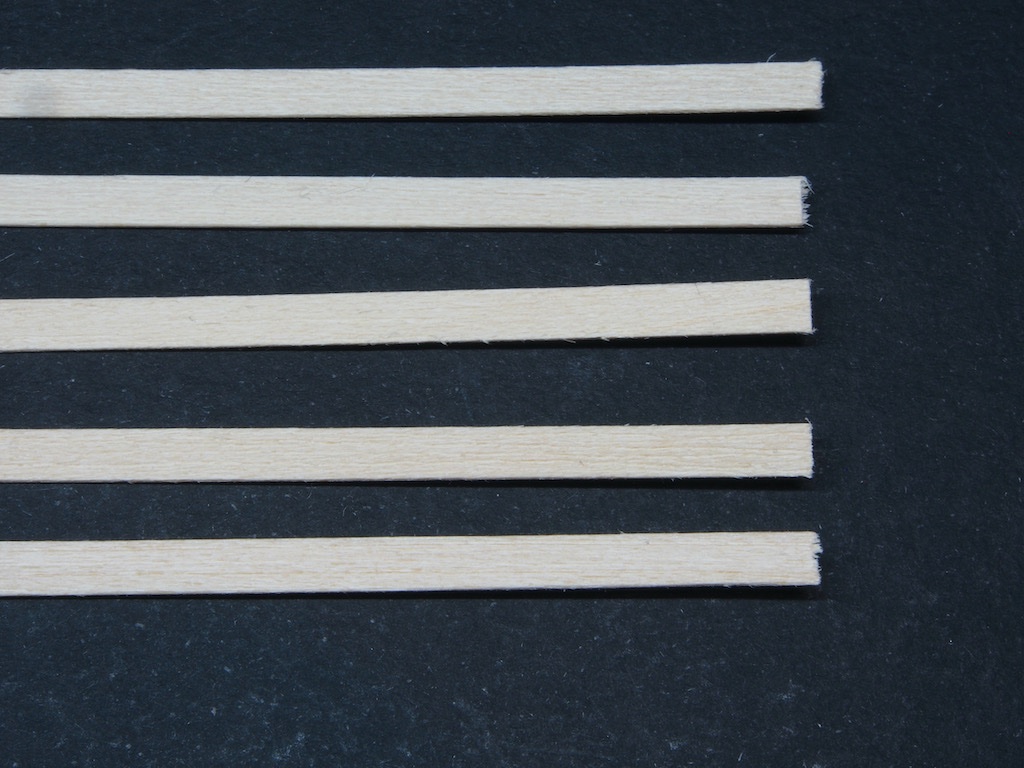
Despite the amount of “shavings” produced, I was not particularly satisfied with the result and decided a more aggressive brush was required. This is the brush I used for the second round.
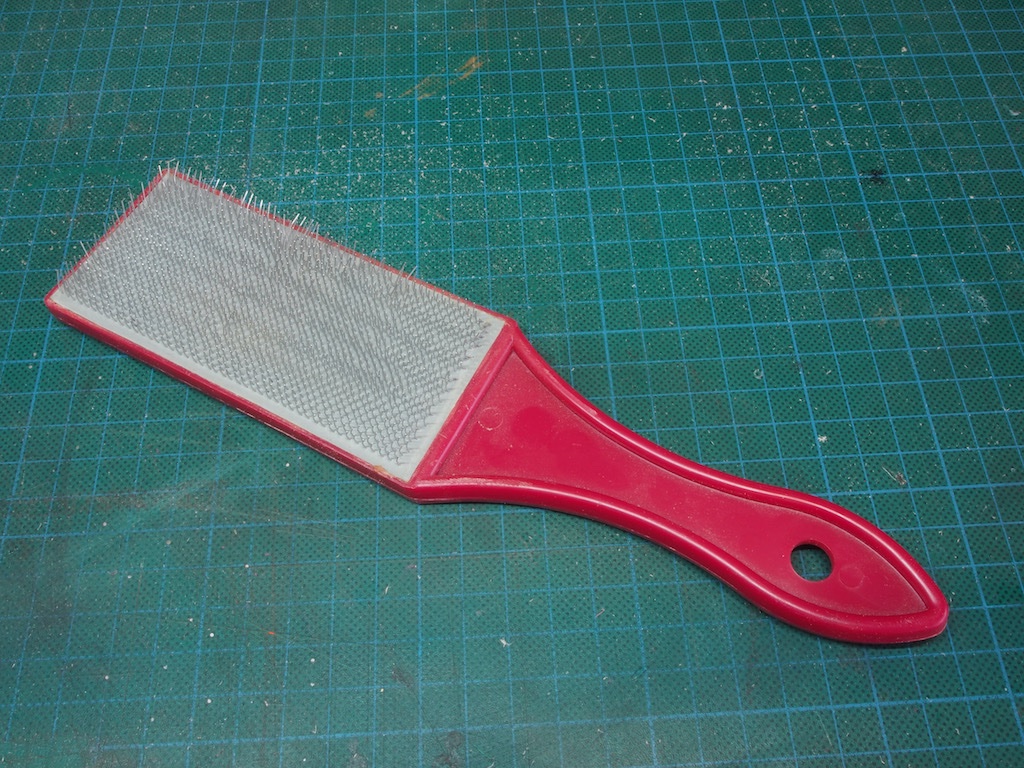
It is actually a File Card (used for cleaning the swarf from the teeth of files). The teeth are steel and quite hard. I found that around five to six firm strokes with this brush were sufficient to impart a grain-like texture.
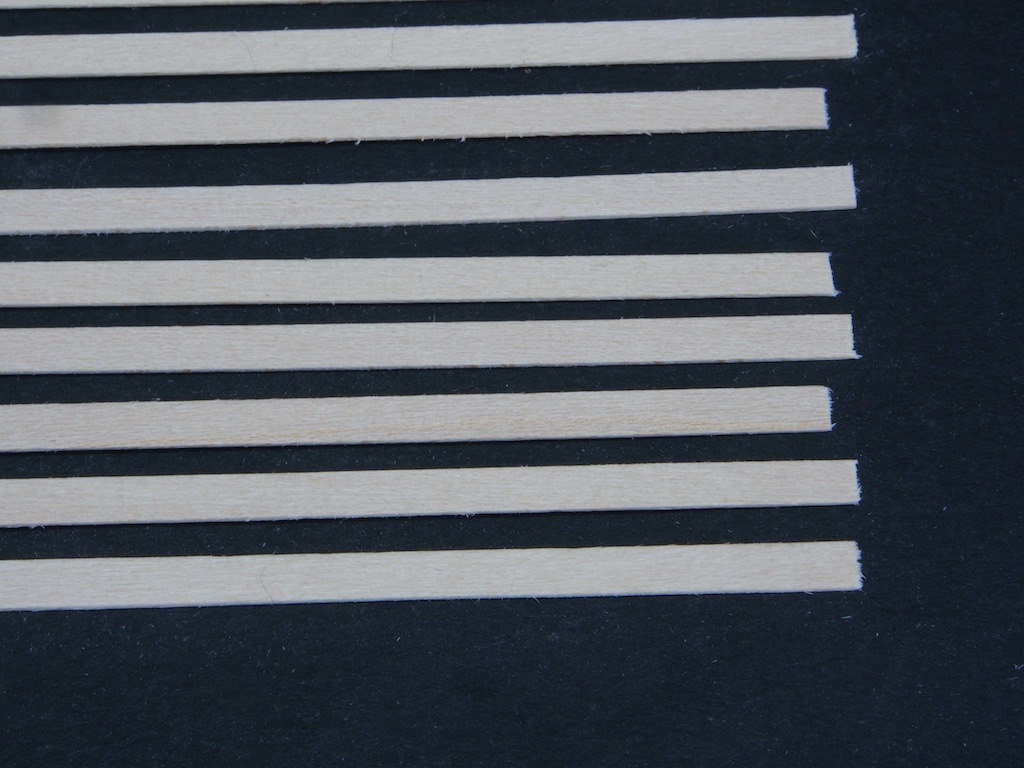
To provide greater contrast, here is a photo of that same batch on a black background.
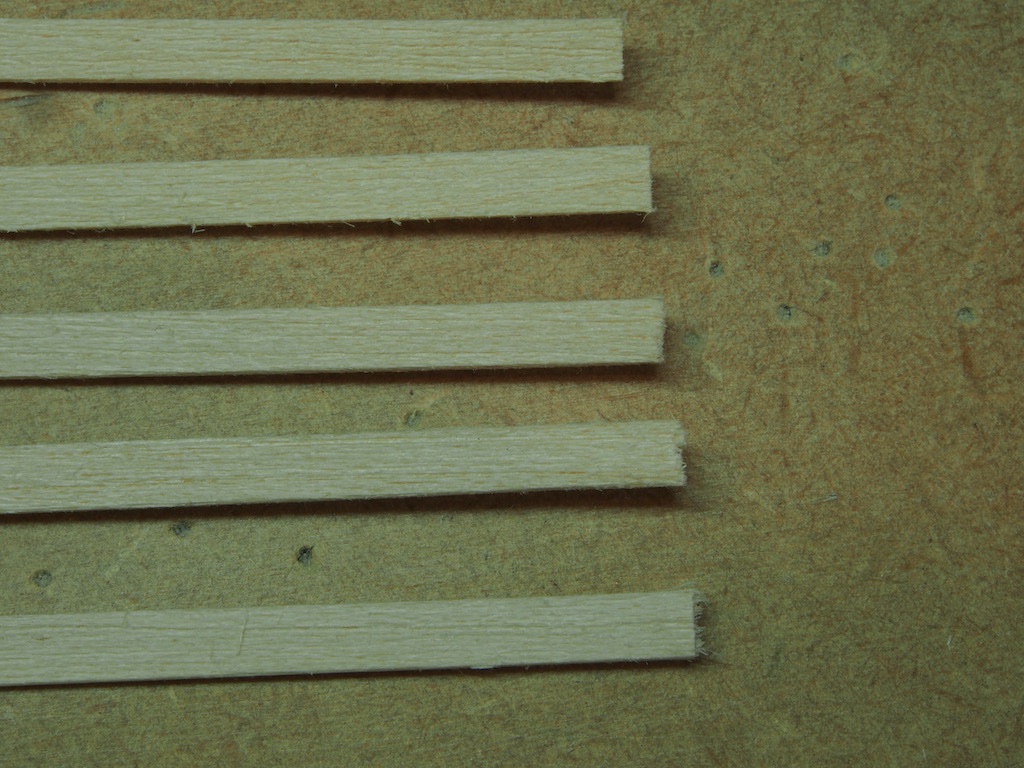
Note the amount of “fuzzies” left after this process. These were cleaned up by drawing each strip through some 0000 steel wool, first with firm pressure on the edges of the strip, then with light pressure on the face. Here is the result after this initial cleaning up.
This has removed around 90% of the fuzzies, which is sufficient for this stage. Next up will be adding some initial colour.
- BLACK VIKING, Canute, Charter33 and 17 others
-
20
-
The reason that these were limited edition kits is that Brett wanted to maintain the quality of the castings and the masters only last for so long. I believe (though I’m not certain this is the case), that he is re-releasing some kits with 3D-printed parts instead of cast parts. That would certainly make sense. The Shipyard kit is one of those that is getting the 3D transition, so the “special order” is because it’s not quite ready yet.
- thibaultron, king derelict, mtaylor and 4 others
-
7
-
Thanks for all the encouraging comments and the likes - this is certainly charting new waters for me.
Advance Preparations (continued)
The instructions emphasise that a successful, appropriately weathered model relies on both colour and texture. Colour for this model is achieved in several ways: Paint, Alcohol/Ink washes, and “Chalk”. The Chalk adds both colour and texture. The chalks contain very finely ground pigments that do not totally dissolve when applied and leave behind a natural appearing texture (so says the instruction manual). These are applied by scraping fine artists' pastel chalk sticks to create a fine powder. Emphasis is placed on using high quality pastels for this and in particular, the Rembrandt brand is recommended. So of course, I followed that advice and ordered in a few sticks. I had to do a bit of digging through the manual and the website to find the actual colours I might need – the Rembrandt numbering system can be quite confusing – and I think I may have slightly overdone it. Here is a chart of the colours I now have – I made this up as a ready reference for myself.

We are advised to prepare two “palettes” of these in advance – a “wood” palette and a “rust” palette, each containing four colours. The wood palette contains three separate brown tones and a white, while the rust palette contains one orange, two red and a cool grey. To keep these palettes in a useable form, some sort of storage was needed. A quick visit to the local Spotlight (sewing/craft) store produced this:
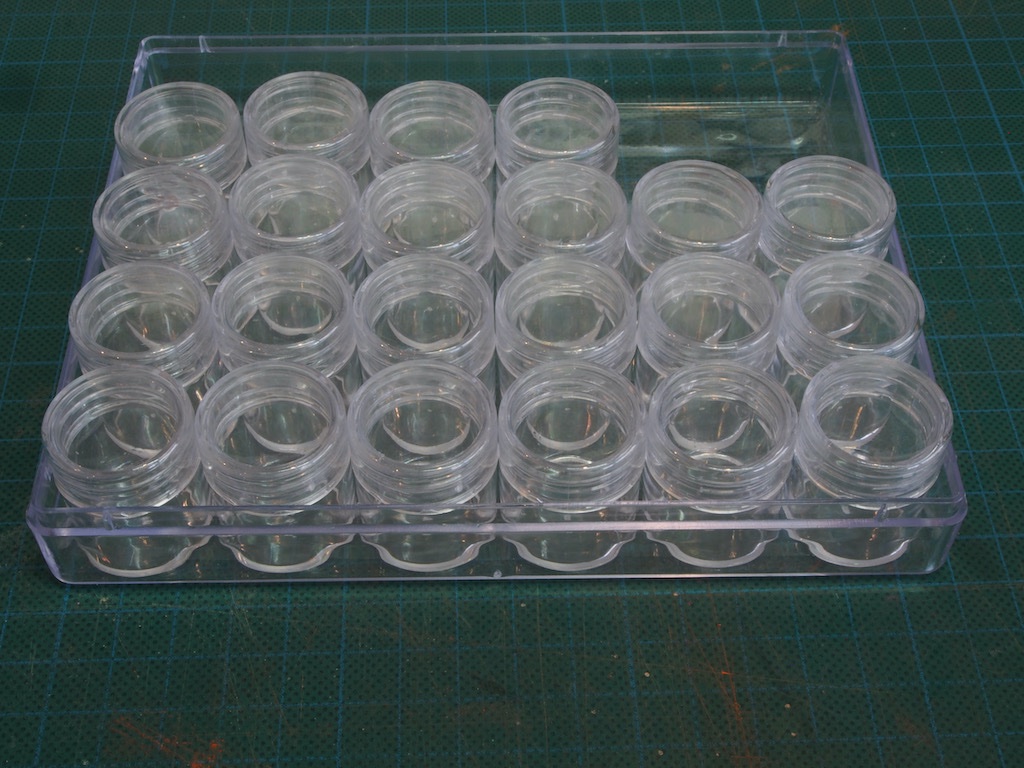
This version has 30 separate containers, each with a screw-top lid, which was very handy as 30 happens to be the exact number of chalks that I have (so far!).
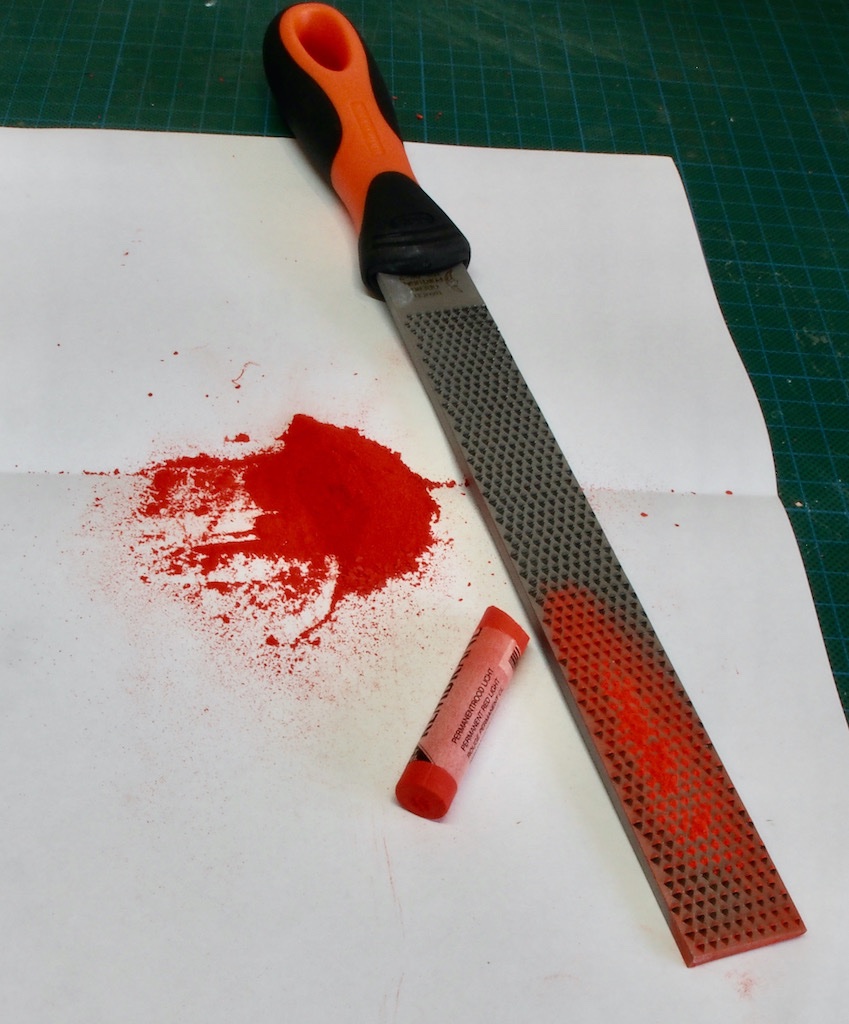
The instructions suggest creating the powder by scraping a single edge razor blade along the stick. While this certainly works, I came across a tip on the SierraWest forum that suggested a quicker/easier way was to use a rasp. I tried this and it seems to have worked well. I used it a bit like a cheese grater, holding it over a sheet of paper that had previously been folded to create a pouring “funnel”.
I did this for the eight colours needed for the initial palettes. In the photo below, the wood palette is on the right, and the rust palette is on the left. Each jar contains about 1/3 to 1/2 of a chalk pastel stick.
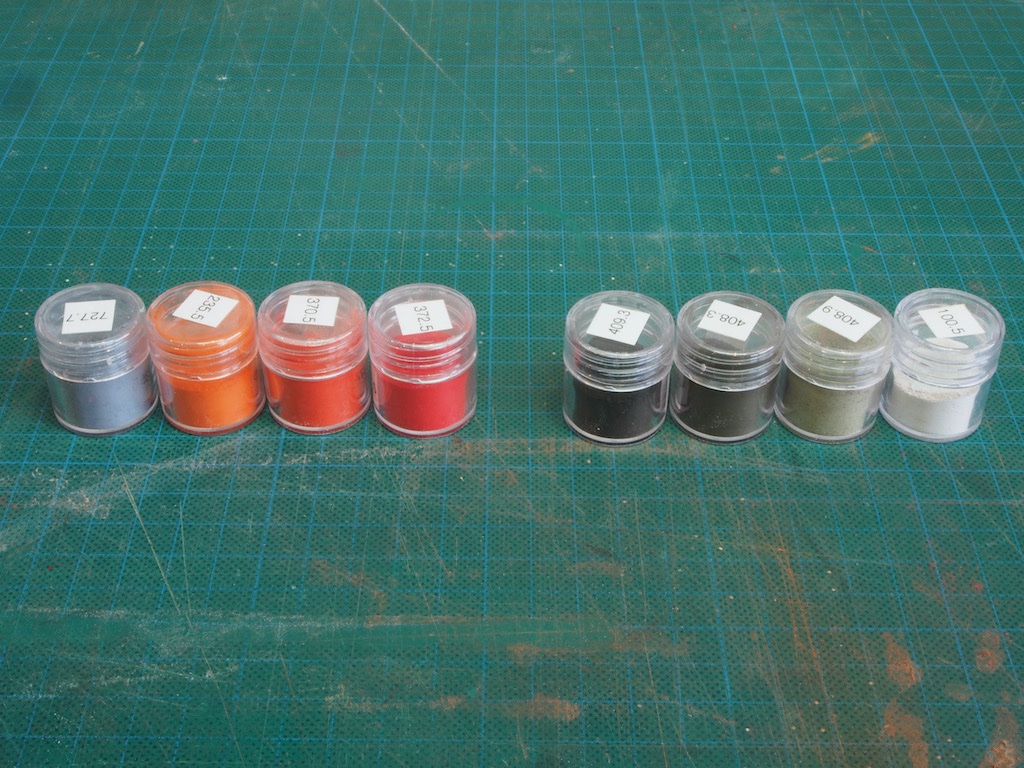
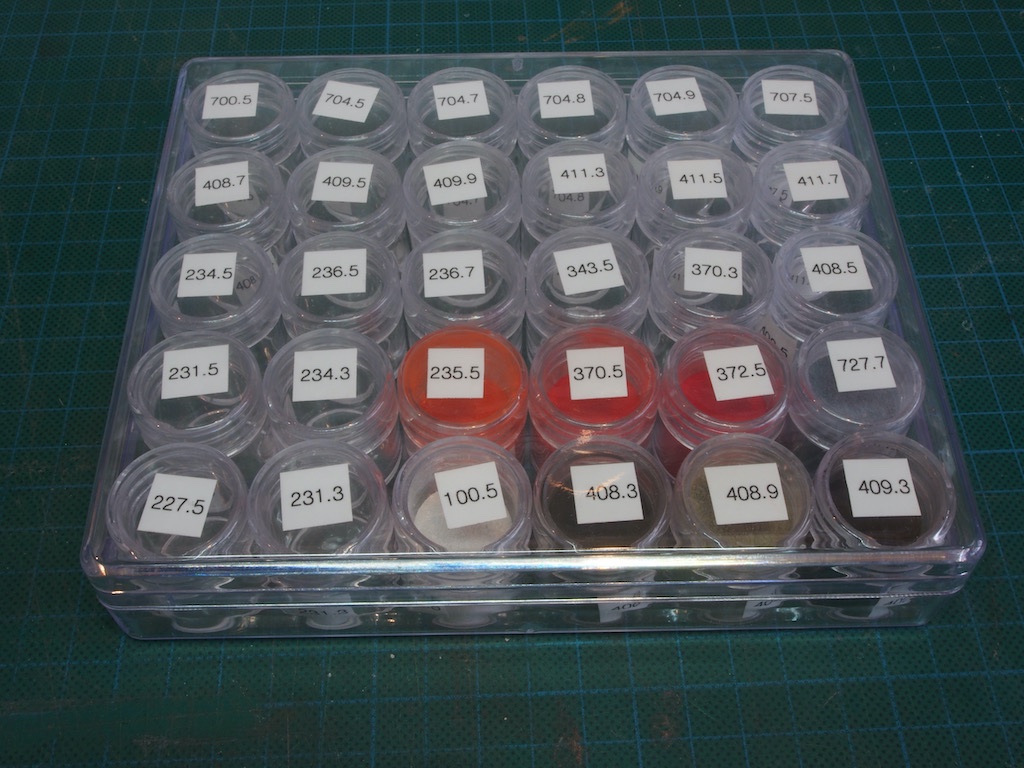
All the jars have two labels on them – one on the lid and one on the body – to ensure correct identification. I went ahead and labelled the remaining jars while I was at it and will fill them with pigment as/when needed.
So here is my “ready use locker”, ready for action.
Next up will be preparing the strip wood….
-
They are definitely high-end kits - very well put together, high quality materials, and very comprehensive instruction manuals. There is a plethora of support, information and further tutorials, including video tutorials on the SierraWest website. They have their own forum that is also full of very friendly, generous and supportive folks.
I’ve just started a build log of one of their kits here (link in my signature block) as well as on the SierraWest forum.
-
-
Congratulations on completing a fine build. She looks terrific and you should be justifiably proud.

-
I have found that any pause in the feed rate will likely cause this issue, so as suggested above a steady, consistent feed rate with minimal “depth of cut” might help. More passes might mean more time, but it also means lower likelihood of issues.
-
3 hours ago, Glen McGuire said:
Her work requires real artistic talent which automatically disqualifies me.
…and me……😪
- mtaylor, Keith Black and Glen McGuire
-
1
-
 2
2
-
9 hours ago, Jack12477 said:
Try this:
That is a terrific resource all round thanks Jack! Some really good tips and even more equipment I didn’t know I needed to boot!😊
- Egilman, Canute, king derelict and 6 others
-
9
-
Thanks Glen. The blurb says 18” x 17” when complete.
- mtaylor, king derelict, Jack12477 and 7 others
-
10
-
Looking forward to the bottling Glen.
In the meantime, there is a treat for you in my signature block........
- mtaylor and Keith Black
-
2
-
Introduction
I came across this kit by accident some years ago when a fellow modeller posted something about it on the forum here. I can’t remember now exactly who that was, but whoever you are, it’s all your fault!
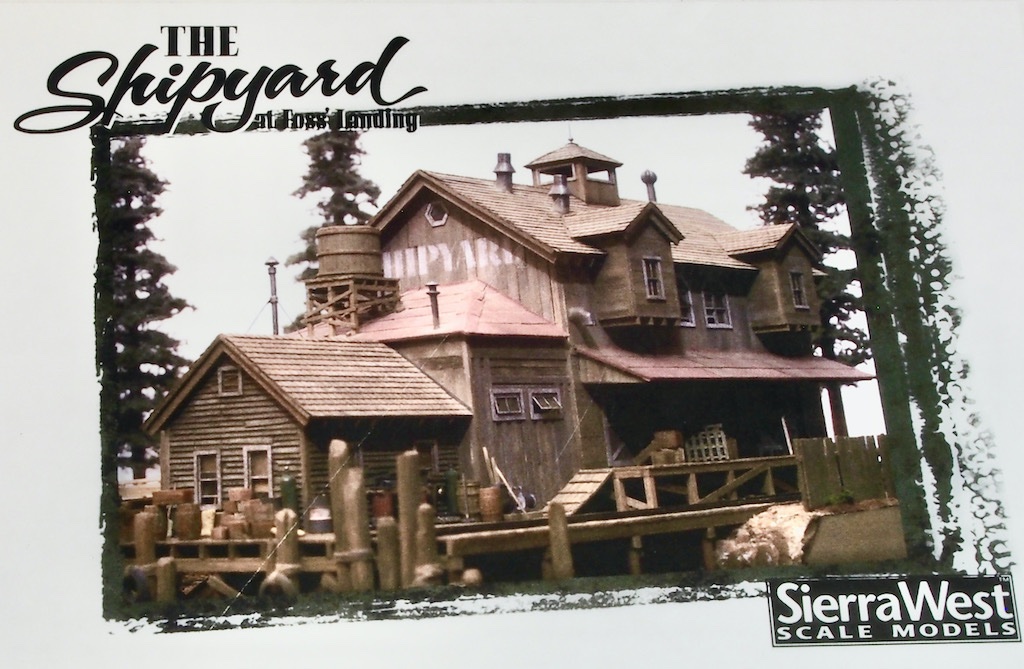
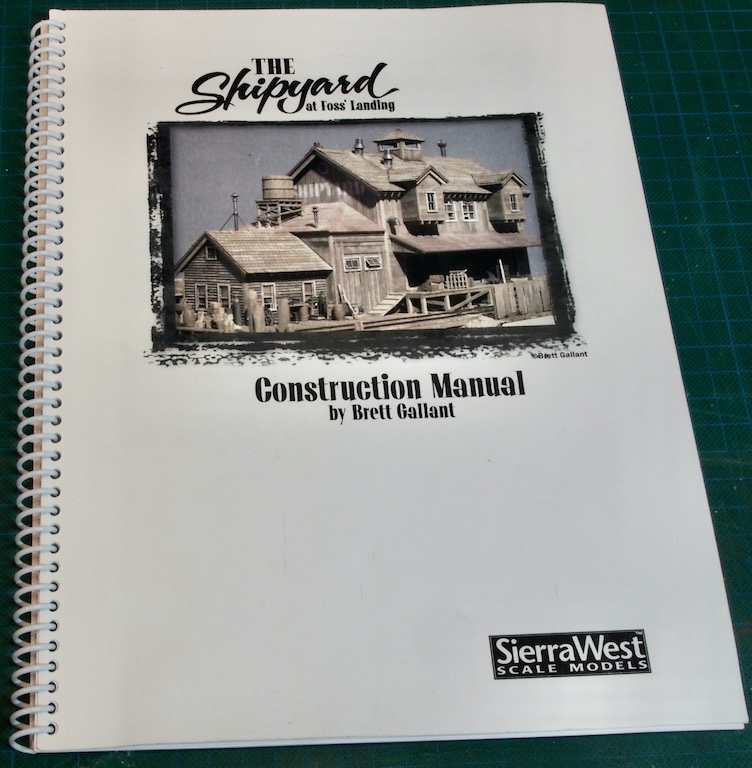
I thought this was a lovely diorama – something I had not tried my hand at before, and even though I’m not a “trains” guy, I was intrigued to learn more. My investigation led me to the SierraWest website, where I learned that this model kit uses a number of interesting and innovative modelling techniques that are certainly new to me. I just had to give it a try. And while I was at it, I couldn’t help myself and bought a “companion” diorama of Foss’ Landing – something for a future build… The kit designer and website owner, Brett Gallant, has done an excellent job of putting this kit together, including a substantial 106pg instruction manual that covers a lot about the techniques as well as building instructions. His website also has several videos demonstrating some of these techniques, and a forum area where there are several build logs of this and other kits.
When I broke the kit out the other day, I was thinking it was only a couple of years ago that I had bought the kit(s). When I thought further on this, I realised that it was actually in 2015 that I bought these, fully intending at the time that these would be the “next” model. Well, seven years later, I’m finally ready to start!
What’s in the box?
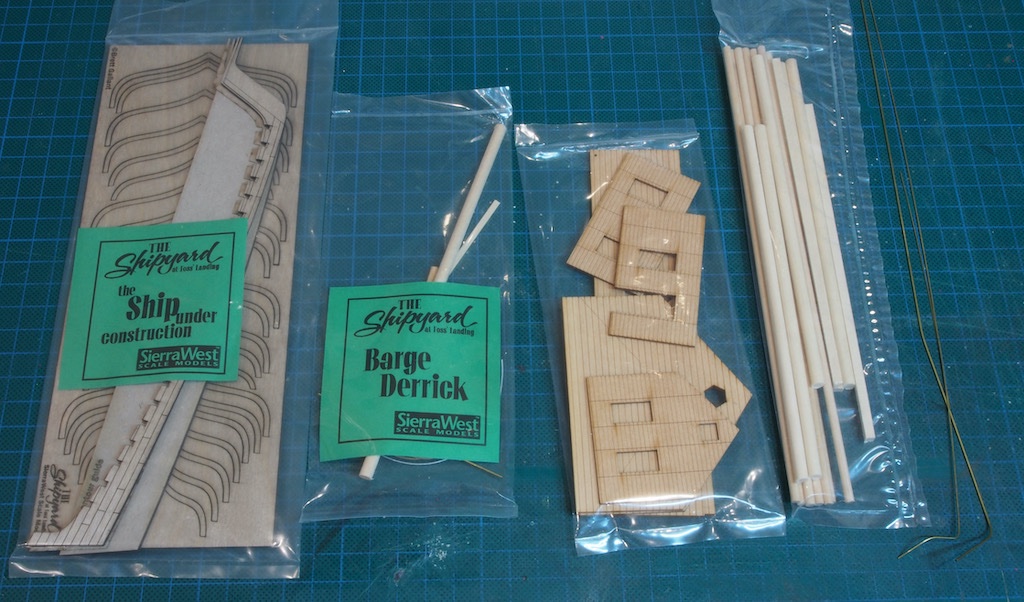
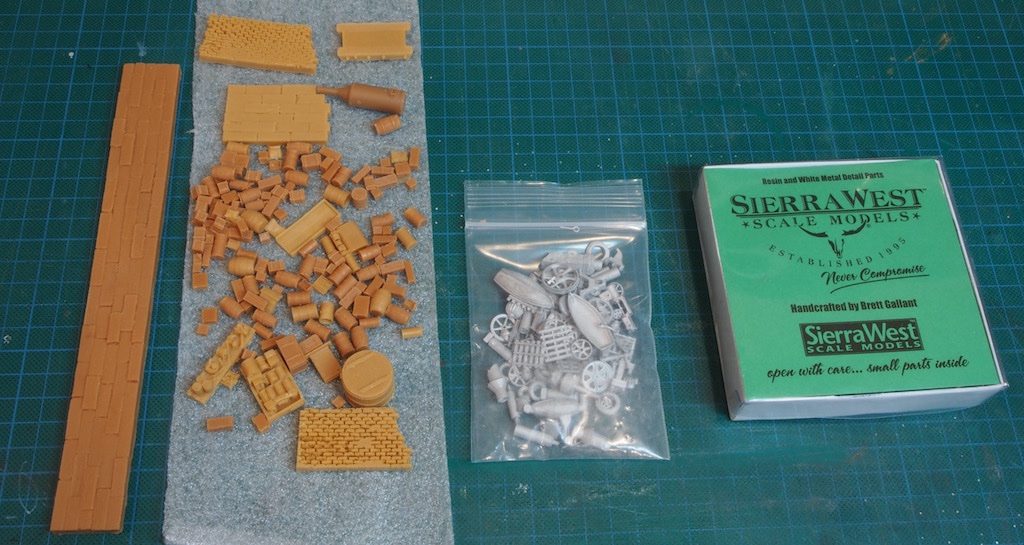
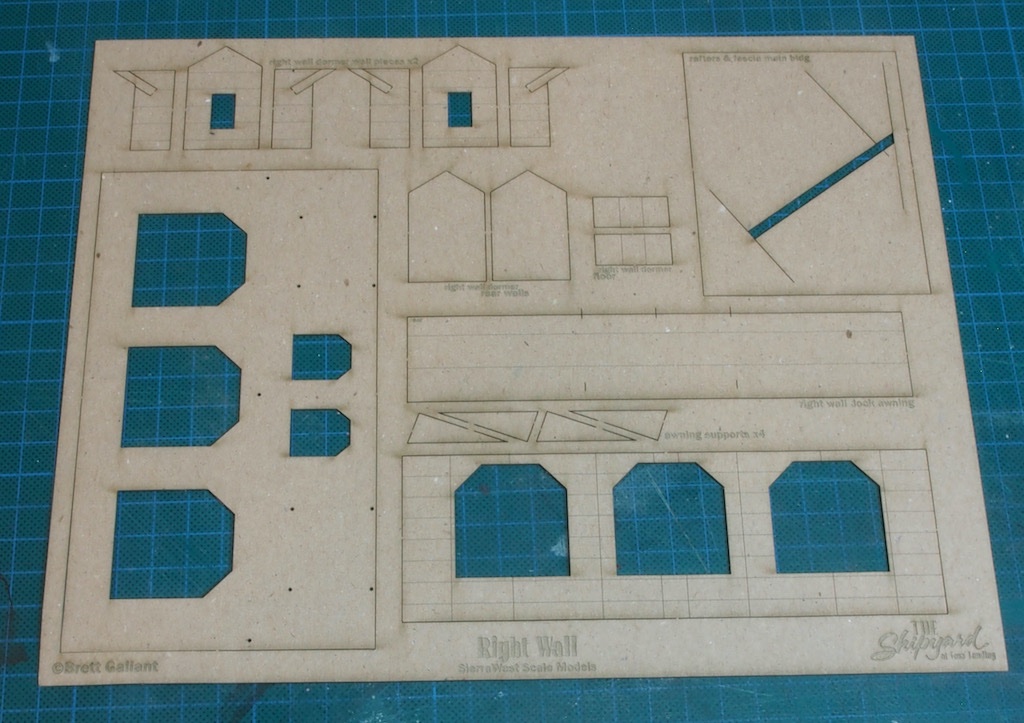
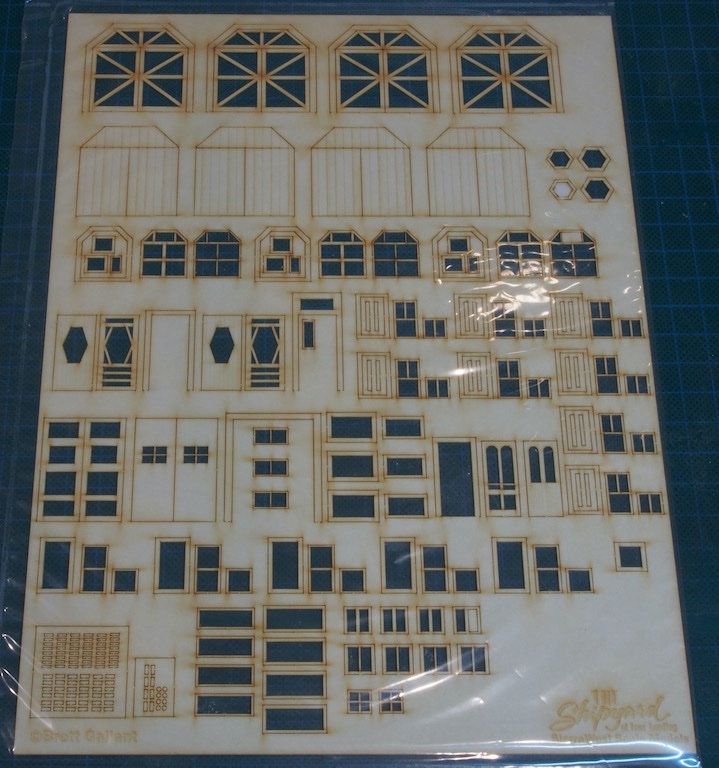
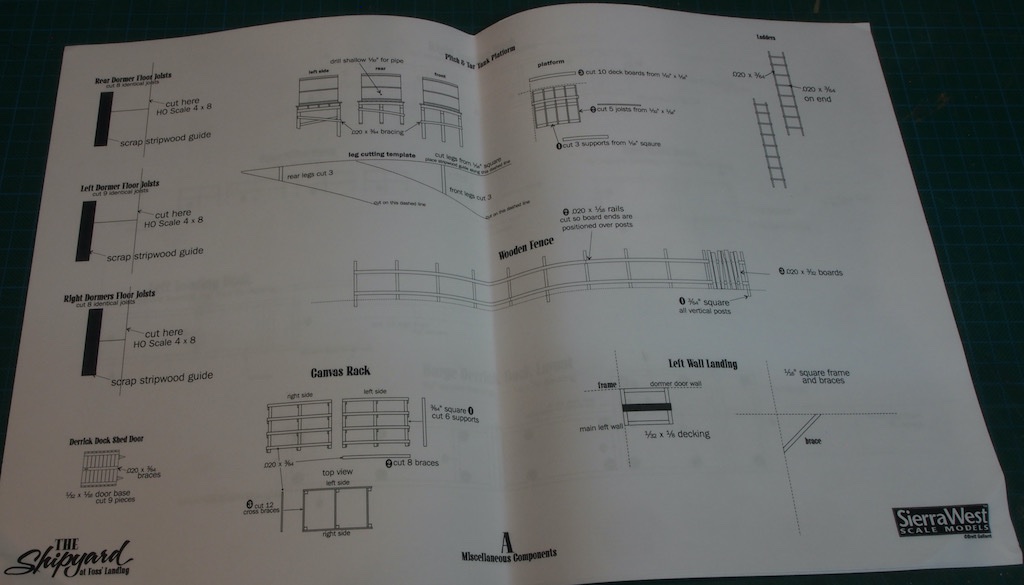
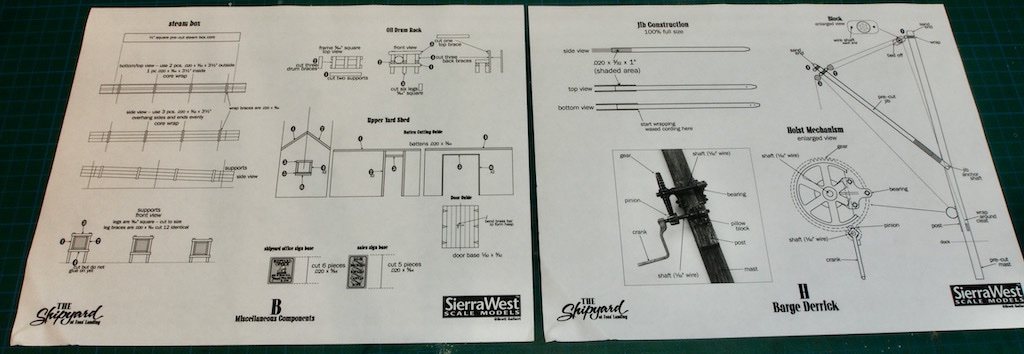
The box is well packed and organised, containing a number of individually numbered sealed bags of strip wood and other content, several laser-cut sheets of card, drawings/plans and templates, a box of resin mouldings and metal castings, and a substantial instruction manual.
Numbered bags indicate the contents of each:
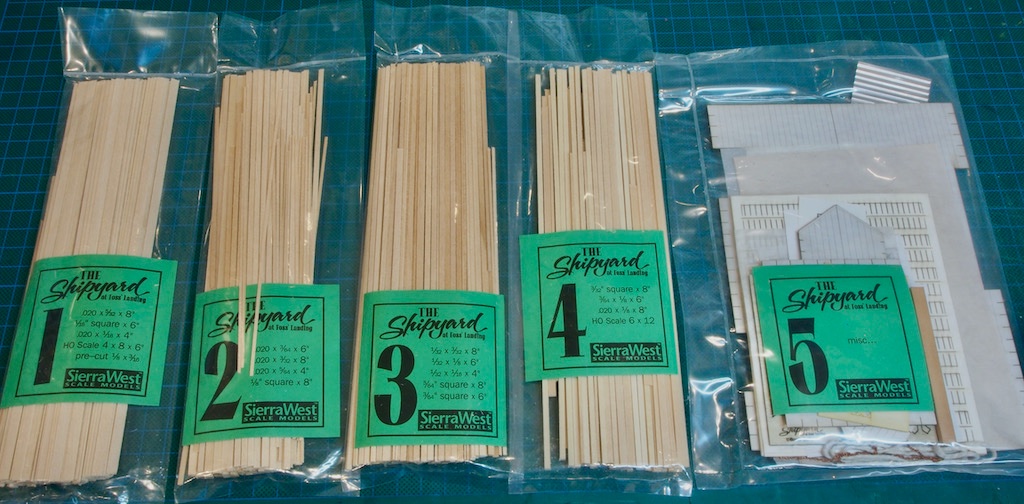
Some bags specific to a particular part of the model:
The mouldings and castings:
Laser cut card:


Windows and mylar inserts:
Plans/Drawings:
Instruction Manual – wire bound “lay flat”
Advance Preparations
Construction begins with some advance preparations. Being a railroad model, there is reference throughout the manual to Floquil paint colours. These were discontinued some years ago, and the kit designer now favours acrylic paints from AK Interactive. However, there is no direct conversion suggestion from named Floquil colours. I spent a considerable time researching on the internet to try to get as close a match as I could to the Floquil colours. Try as I might, I could not find a conversion chart that included both the Floquil and AK paints. I ended up using a site that specialised in paint matching, typed in the Floquil colour name and then used the resultant screen depiction to try to match against an AK colour. Although there are certainly limitations on screen/monitor colour representation, I think I got reasonably close in the end. At the end of the day, an exact match isn’t important, but I’d like to be “in the ballpark”.
Three Floquil colours are needed for the advance preparation: Grimy Black, Boxcar Red, and Earth. My AK matches were Basalt Grey, Mahogany Brown, and Grimy Grey respectively. Why paint manufacturers use obscure names instead of a scientific identification system is beyond me!
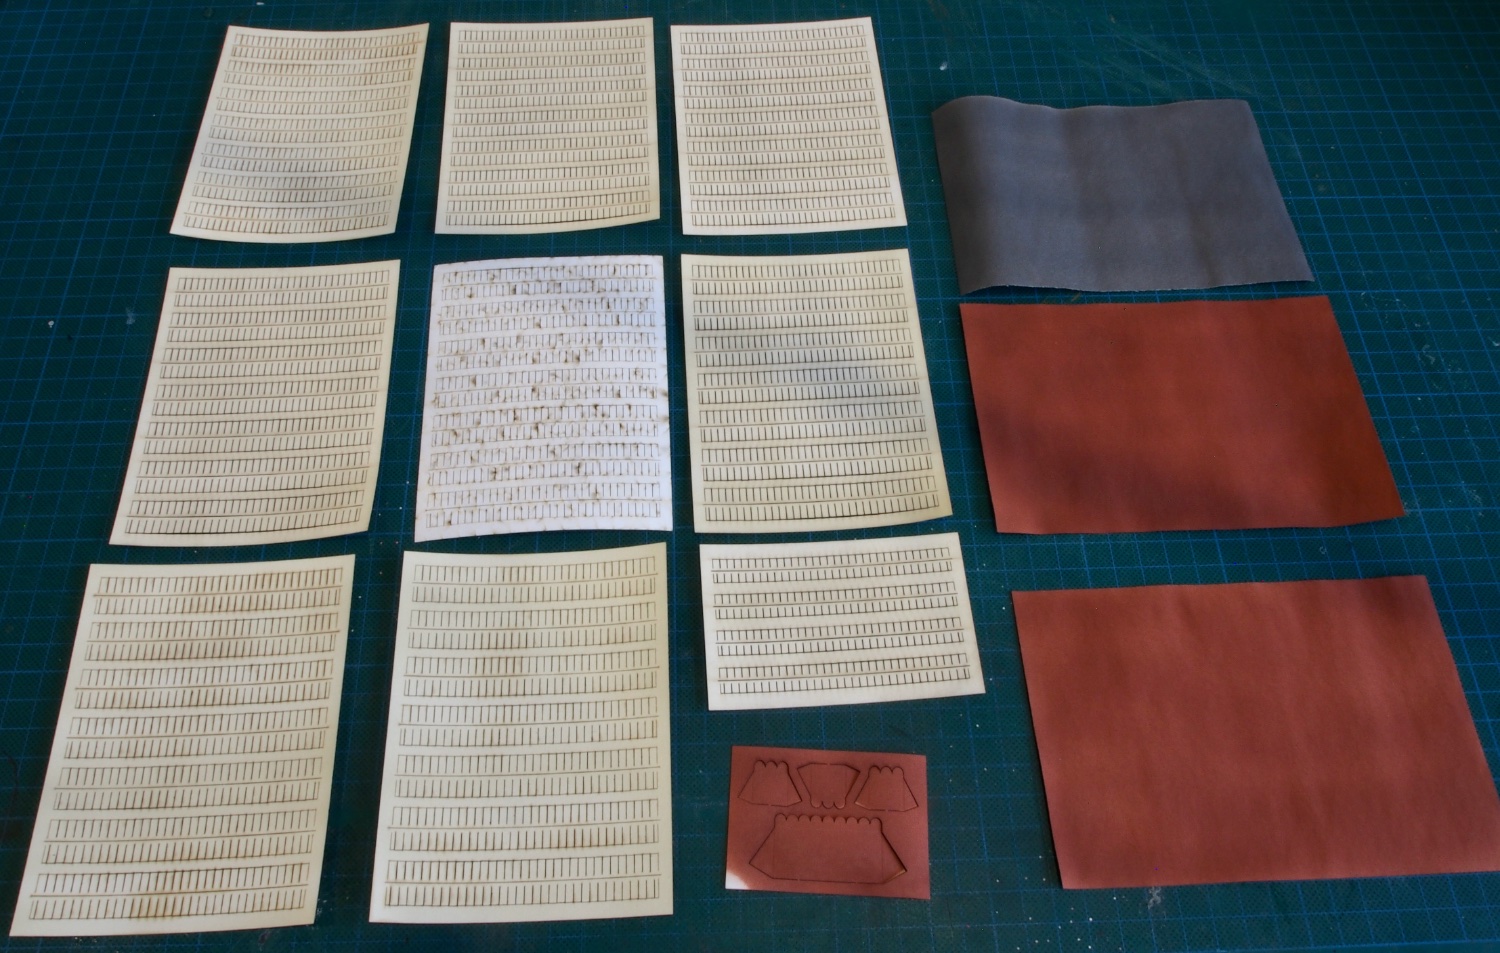
First up, Bag #5 is called for:
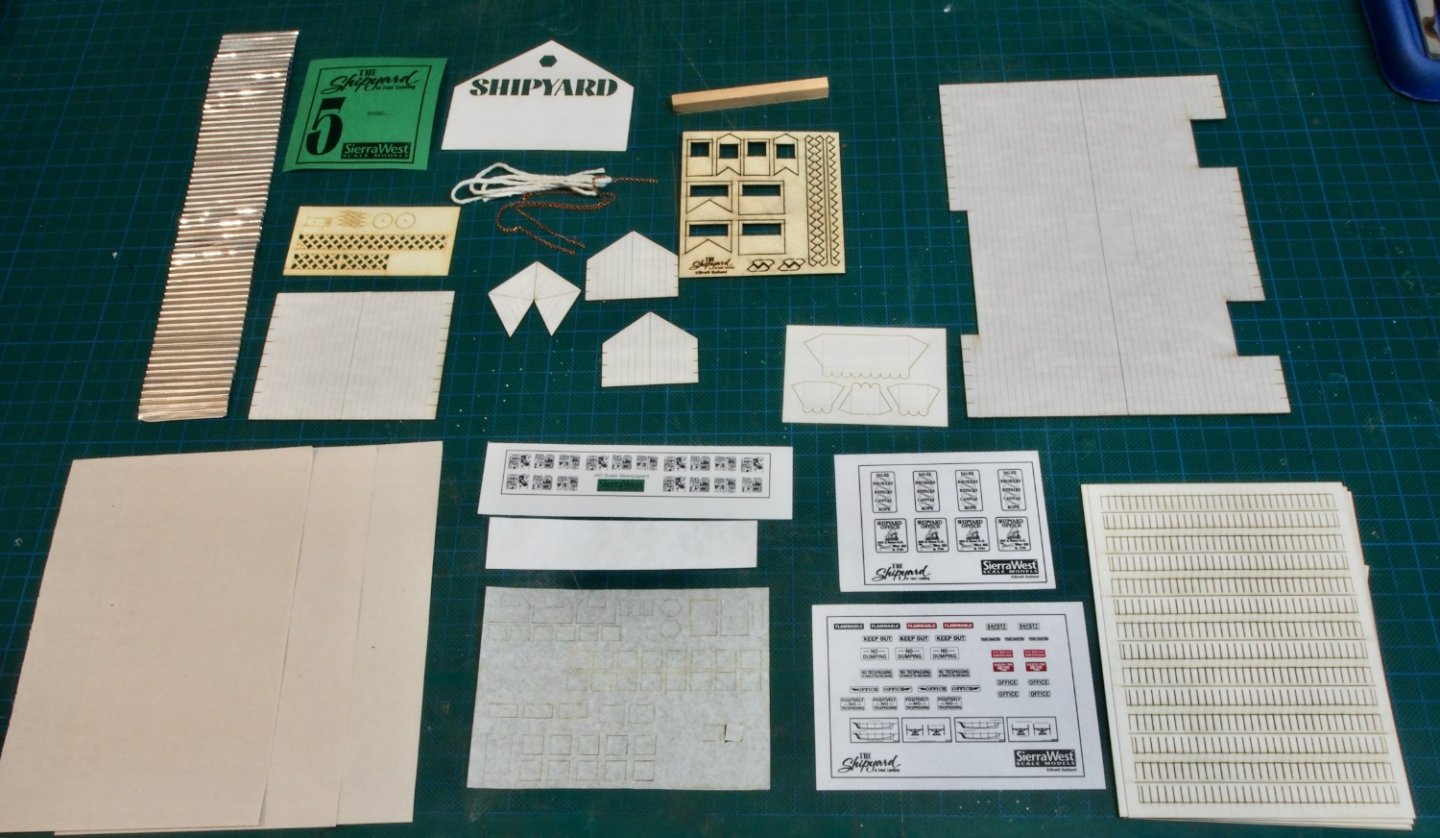
From there we are instructed to extract the three sheets of 4” x 6: tar paper, the laser cut sheet of awnings, and the sheets of laser cut shingles.
The three sheets of tar paper are all sprayed with a coat of Grimy Black/Basalt Grey on one side. One sheet has the same on the reverse, while the other two get a coat of Boxcar Red/Mahogany Brown.
The laser cut sheet of awnings gets the same treatment, and the laser cut sheets of shingles get a light coat of Earth/Grimy Grey – “just enough to hide the white paper”.
This was my first experience of using AK Interactive paints, so I was somewhat apprehensive about leaping in. My research suggested that for airbrushing they should be reduced with AK’s own thinner at a ratio of about 70/30 thinner to paint ratio. So that’s what I did. I took a little while to do some practice and fiddle with air pressure and paint delivery. With the air pressure dialled down (about 15-18psi) and the paint delivery shut almost right down, I was pleasantly surprised at how well it sprayed, with absolutely no tip-dry occurring. Here’s a picture of the completed painted parts. I’ve turned one sheet of the shingles over to show the original state. I’m pretty happy with the colours as they’ve turned out.

The other advance preparation was to make up an alcohol stain using non-waterproof black ink dissolved in isopropyl alcohol at a ratio of 1 teaspoon (5ml) of ink to one pint (600ml) of alcohol. More to be revealed on how this will be used, along with plain isopropyl alcohol, later.
Okay, we’re off and running – or crawling, anyway!
- GrandpaPhil, popeye the sailor, Papa and 22 others
-
21
-
1
-
 3
3
-
Yet another Wow! factor Glen, to go with the many already achieved.
- Ian_Grant, Glen McGuire, Keith Black and 1 other
-
3
-
1
-
Lovely work Bob. She really is looking quite beautiful.
- FrankWouts and Dave_E
-
2
-
8 hours ago, Glen McGuire said:
Still waiting to hear what's next!!??
You’ll have to wait a little longer Glen. I’m waiting on delivery of some necessary supplies, and also finishing up a furniture building project at the moment. Suffice to say, it will NOT be something suggested by your son.
Teaser……it will be something quite different……..
- mtaylor, Glen McGuire and Keith Black
-
1
-
2
-
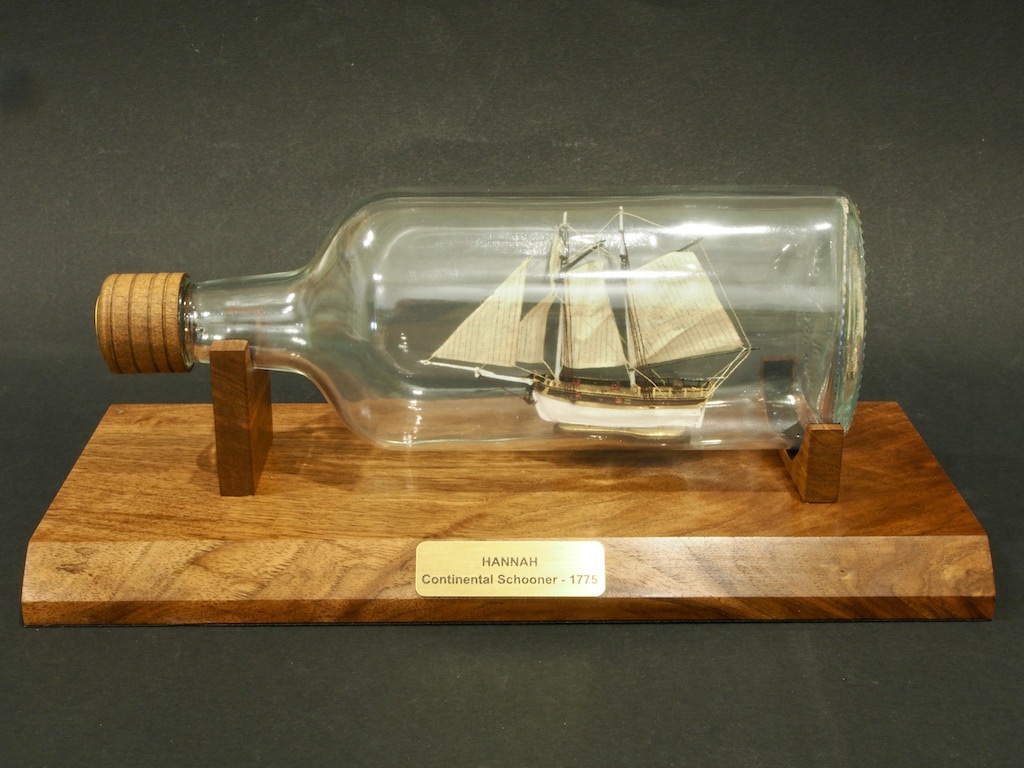
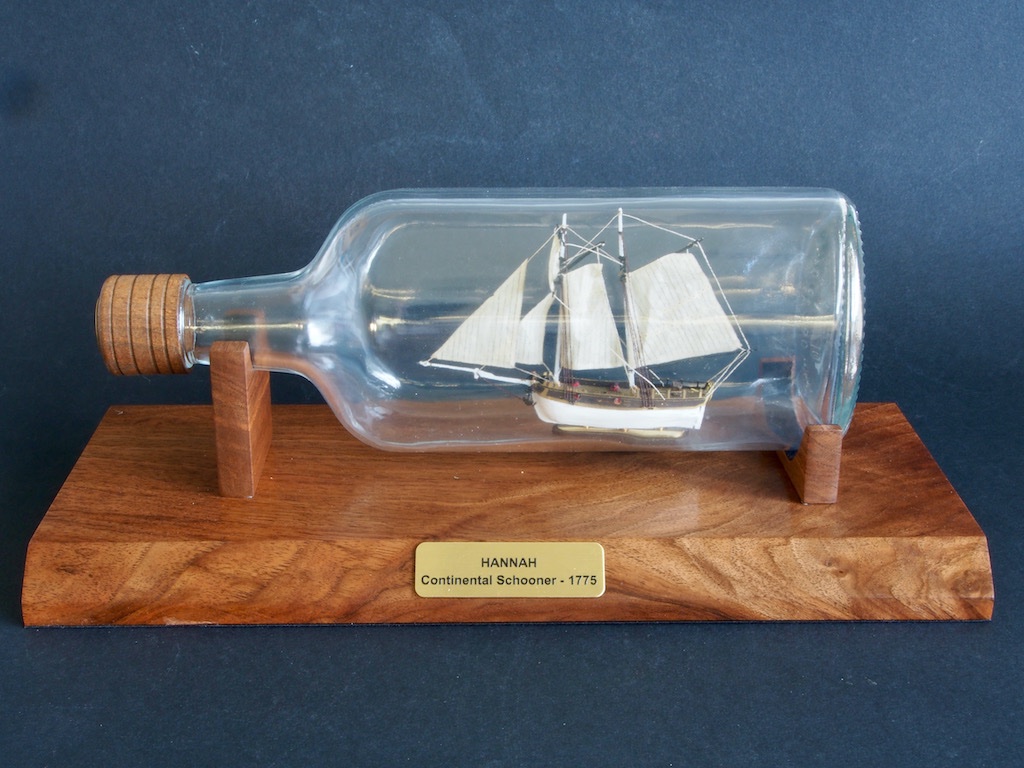
I finally received the name plaque for my SIB. A couple of final photos – the curvature of the glass bottle made it somewhat difficult to get a good shot.
- Keith Black, Blue Ensign, a49kid and 5 others
-
6
-
2
-
John,
My garage is also my “dirty” workshop. To overcome some of the weather-related issues, as well as to make it a more pleasant environment to work, I put insulation on the inside of the garage door as well as in the roof over the garage, and added a split system reverse cycle air conditioner. I also had an epoxy floor laid and installed a bunch of “daylight” LED panels to replace the somewhat inadequate fluros. It’s now a really nice workshop…….that I still have to share with two cars.
-
Very impressed by how you managed to get the two hull halves together inside the bottle, Glen. and an ingenious solution to the problem of the ladders. Well played, Sir! 👏👏👏
- Keith Black, Glen McGuire and mtaylor
-
2
-
1

The Shipyard at Foss' Landing (Diorama) by gjdale (Grant) - FINISHED - SierraWest - Scale 1:87 (HO)
in Non-ship/categorised builds
Posted · Edited by gjdale
Thanks for the kind comments and all the likes. Onwards...
Initial Weathering
The technique used to create the effect of weathered timber is both interesting and easy, not to mention quick!
We start by grabbing a half dozen of our previously “grained” boards, a pastel/chalk stick, a single edge razor blade, some isopropyl alcohol (IPA), a paint brush, and a glass work surface (in this case I’m using a piece of glass about 12: square). The technique is to firstly use the razor blade to scrape finely powdered chalk randomly over the boards.
Next, we dip our paintbrush in the IPA and wash the chalk powder into the boards.
The level of colouration is controlled by the relative amounts of chalk and alcohol, the key being to use lots of alcohol to ensure that most of the chalk is dissolved. Further tonal variations can be achieved by using a couple of different shades of chalk. The glass surface is not cleaned between batches, which also helps.
The alcohol evaporates quickly, so the boards dry in next to no time. Here is a random sample from different batches showing the variation in tone.
And a close-up of some of the same selection.
I also did some preliminary preparation of some laser-cut siding. These pieces will eventually be covered by the boards just prepared, but they are given an initial colouring so that any gaps in the boards will show this. The key here was to achieve a non-homogenous look. This is done by staining the boards with paint and thinner, and then adding a little chalk blotted into the surface using a paper towel wet with the paint thinner. Here is the result.
The next stage will be to add some details such as knots, knot holes, splits, insect damage etc to some of the boards.