


gjdale
-
Posts
4,897 -
Joined
-
Last visited
Content Type
Profiles
Forums
Gallery
Events
Everything posted by gjdale
-
 Congratulations on finishing a fine model - she looks superb on that display base - what a great idea!
- 366 replies
-
- 1
-

-
- granado
- caldercraft
- (and 1 more)
-
Congratulations Danny! No surprise to me, but nice to see you get the recognition you so thoroughly deserve.
-
Congratulations on completing a truly fine model Vince. You can be justifiably very proud of your achievement.
- 593 replies
-
- 2
-
-
- royal william
- euromodels
- (and 1 more)
-
For Landlubber Mike, Paul Budzik, who is an occasional contributor on this forum, has his own website and has produced a number of very useful videos about airbrushes (and other aspects of modelling), how they work, how to use them, and which one is right for you. The videos are really well done and worth a look. Here’s a link to his site: http://www.paulbudzik.com/tools-techniques/Airbrushing/airbrushing_for_modelers.html
-
https://www.harder-airbrush.eu/en/infinity.html
-
Thank you very much GrandpaPhil and Michael for your kind words.
-
Great to see you back working on your fine model Mike.
- 969 replies
-
- 4
-
-
- hahn
- oliver cromwell
- (and 1 more)
-
Nice to see you back Bob - it’s always a delight to follow your builds,
- 78 replies
-
- 4
-
-
- medway longboat
- Syren Ship Model Company
- (and 1 more)
-
Congratulations - that looks like a real find! All that extra tooling is probably worth more than the lathe itself - what a bonus!
- 525 replies
-
- 4
-
-
- cutty sark
- mantua
- (and 2 more)
-
Superb work Danny. The kit may be a good one, but it takes a true master to realise its full potential and you are doing just that.
-
Congratulations on another fine build B.E. Your logs are always a pleasure to follow and I look forward to your next project.
- 574 replies
-
- 2
-
-
- cheerful
- Syren Ship Model Company
- (and 1 more)
-
It’s all been said already Ed, so I’ll just add another voice to the throng. Thank you for an inspirational journey - this truly is a masterpiece of modelling.
- 3,618 replies
-
- 1
-
-
- young america
- clipper
- (and 1 more)
-
There are tabs there Jim - they just don't show well in the photos. I may re-visit these anyway before I glue the frames to the keel. Thanks for the close scrutiny - it's nice to have a pair of eagle eyes checking things. It certainly wouldn't be the first time that someone has saved me from myself! 😊
- 109 replies
-
- 1
-
-
- medway longboat
- Syren Ship Model Company
- (and 1 more)
-
Thanks for the observation Jim. It was hard to tell from Chuck's photos just how much tape he used. Is there a down side to the extra tape?
-
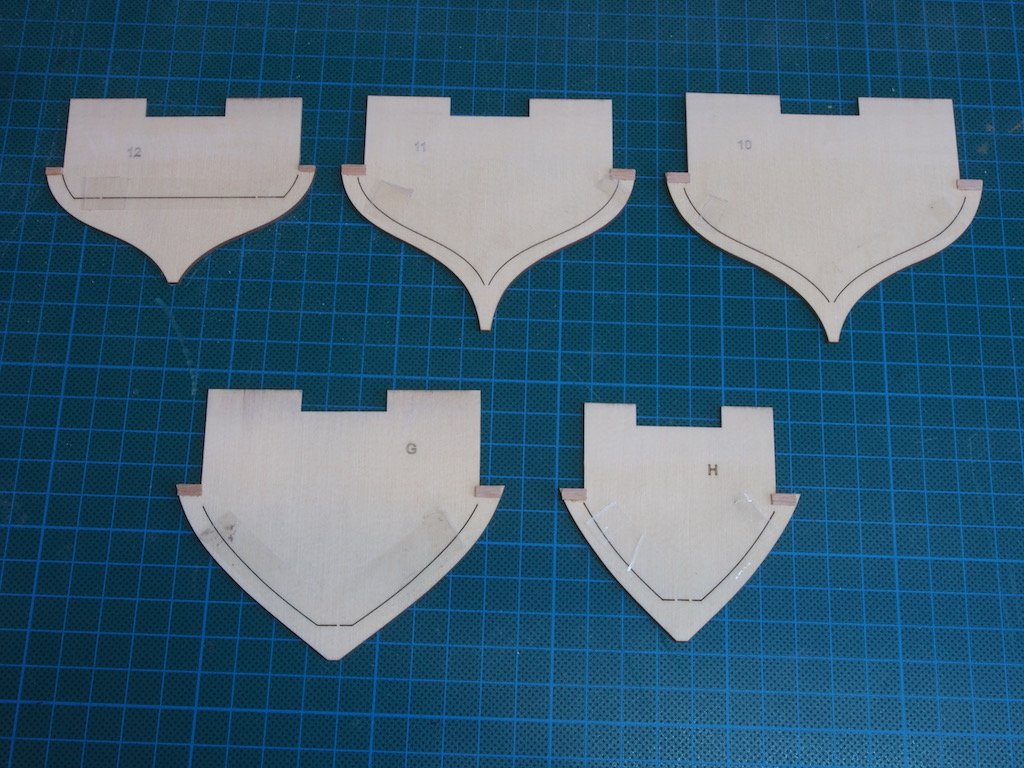
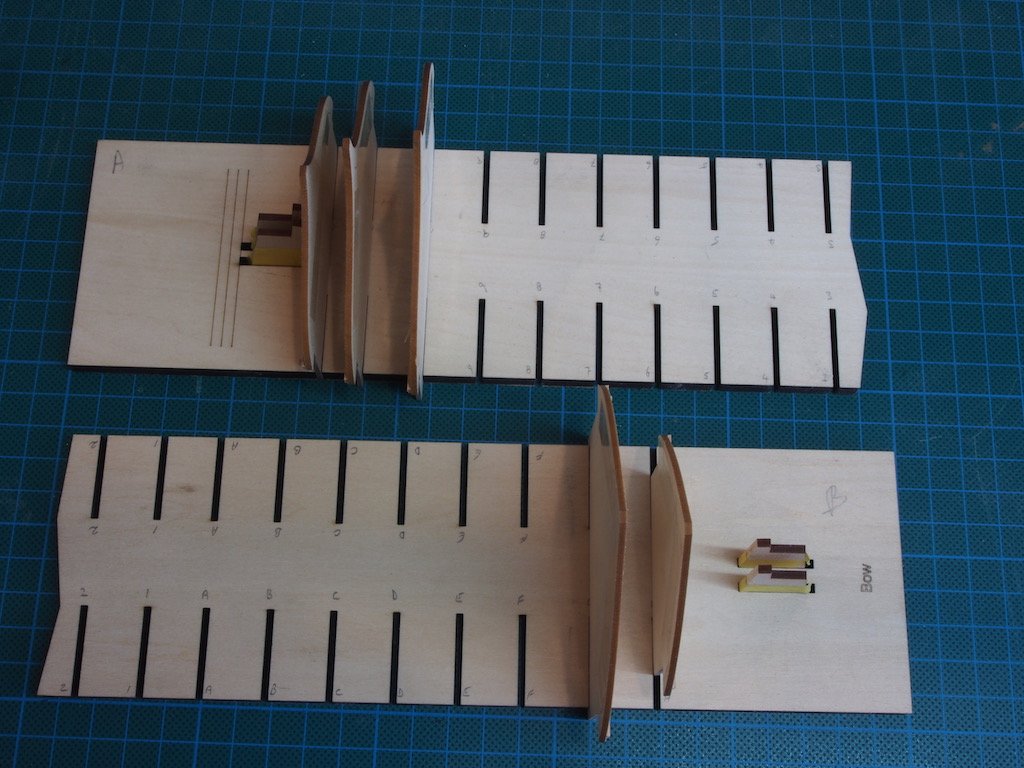
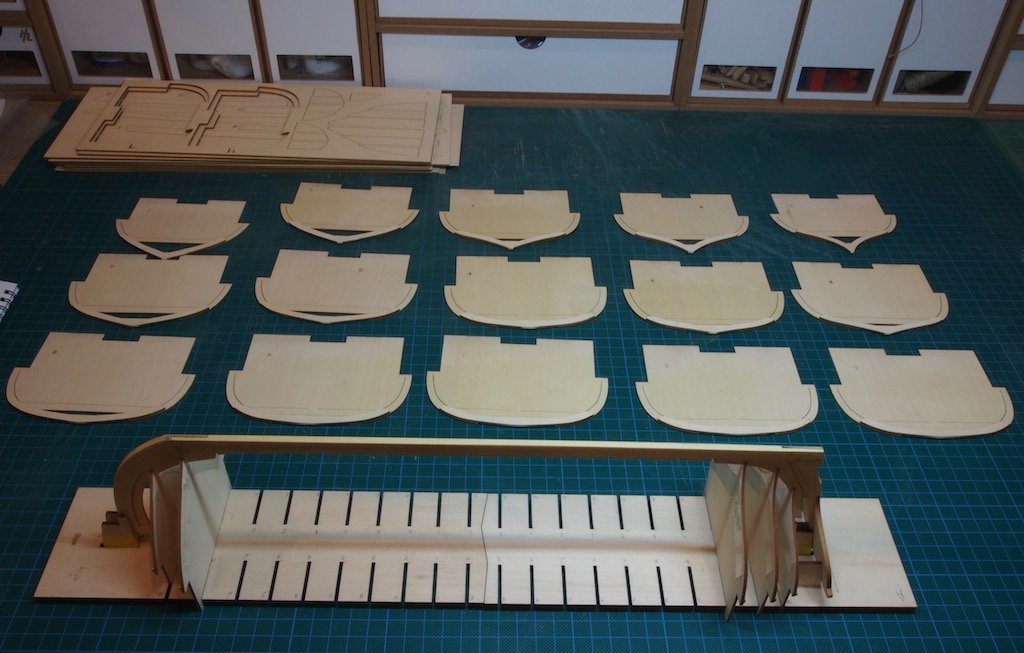
It's been a couple of weeks, but I did manage to get some 'shop time' in this weekend. The four additional 3/32” keel pieces were then fit, following the advice in Chuck’s instructions. I used some scraps of 1/32” material to ensure that these pieces were centred on the 5/32” thick keel. I then traced the keel bolt locations from the plan sheet and used this to mark the bolt locations on the keel. Holes were drilled using a #70 drill bit to provide a tight fit for the kit-supplied 25lb monofilament fishing line that simulates the bolts. These were dipped in glue prior to fixing in place. Once the glue dried they were trimmed with a single edge razor and sanded flush. The whole assembly was then given a coat of satin Wipe-on Poly. I then made my first real boo-boo…. When fitting the transom piece, I glued it to the wrong side of the stern post! 😱I didn’t realise this until I went to test fit the single frames with the keel. Fortunately, a little isopropyl alcohol and some patience enabled me to de-bond the joint without any significant damage. I cleaned up the locating slot using some of my Russian micro chisels (thanks Mikhail😊) and re-glued the piece on the correct side. Phew! (Was too busy fixing the boo-boo to take a picture!) The single frames were then prepared just as Chuck advises. I used packing tape to cover the laser cut on both sides of each frame, and then added some reinforcing pieces using some 1/32” x 1/8” cherry strips that I had in my stash. I then tested and adjusted these for a snug but not too tight fit in the build board and the keel notches. I next made up all of the two-piece frames, again following Chuck’s instructions to the letter. The laser-cut reference line makes this a very simple process. All of these frames were then tested and adjusted in the build board and the keel slots. The frames are now ready for permanent attachment to the keel.

- 109 replies
-
- 5
-
-
- medway longboat
- Syren Ship Model Company
- (and 1 more)
-
Looking really sweet Mark. I hope you spent the dime wisely...perhaps on some TicTacs, the international unit of scale measurement! 😉
-
Nicely done Daria! Good to see you’ve got Dad back to work with you. 😊
-
I see you found that giant fake hand again Danny! 😉
-
You can buy a set of Eisnor’s plans in either 1/4” or 3/16” scale here: http://modelshipbuilder.com/page.php?26
-
I’m seeing them all just fine Danny - seems like the problem is at Pav’s end.
-
Congratulations on completing another fine model Danny. It looks superb.
-
Eiffel Tower by Mark Pearse - father/daughter build - WOOD
gjdale replied to Mark Pearse's topic in Completed non-ship models
What a great thing to do with your daughter Mark! You can both be very proud of the results. -
Thanks for the tips guys. Her only real concern was potential damage to the model, so my “temporary” solution is no real problem - will only be “temporary” until she forgets that it’s “temporary” and then it is “temporary” no more!😄😁😁 Our son dropped in for a visit yesterday and thought it was a really cool model, so another vote of confidence to help it keep its place.
-
Thanks guys. I had a few brownie points after the jewellery box that I made her for her Birthday last month (which included some jewellery inside it too), so didn't have too hard a time convincing her of a new "temporary" home for the flying machine. 😀
