


gjdale
-
Posts
4,897 -
Joined
-
Last visited
Content Type
Profiles
Forums
Gallery
Events
Everything posted by gjdale
-
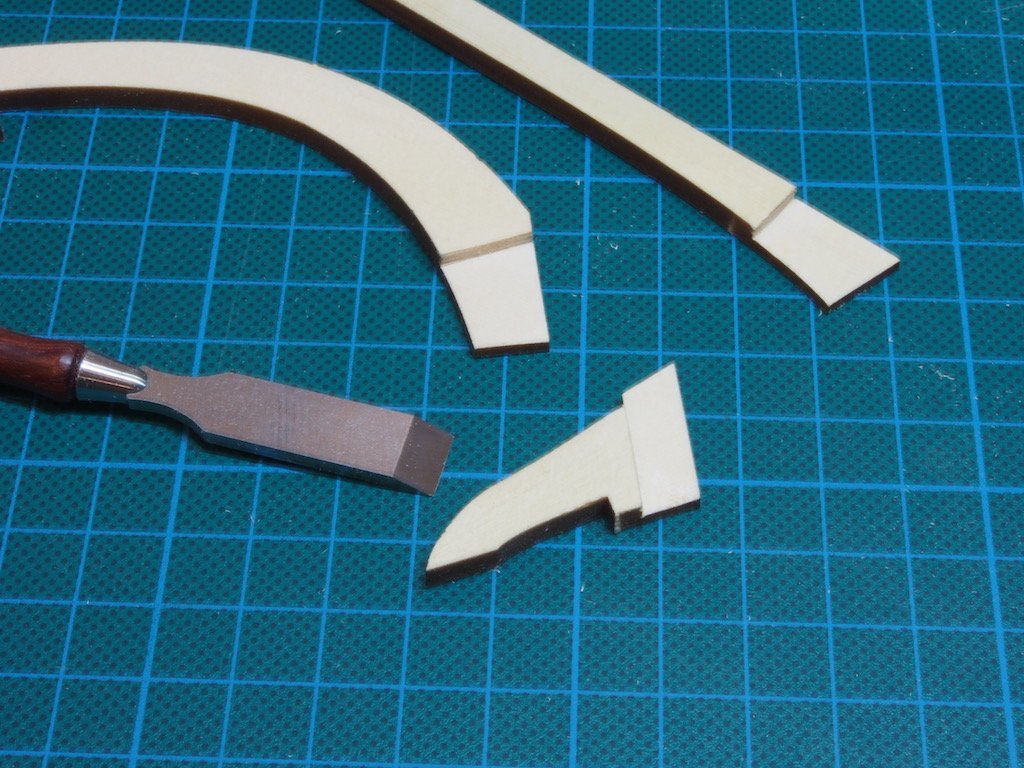
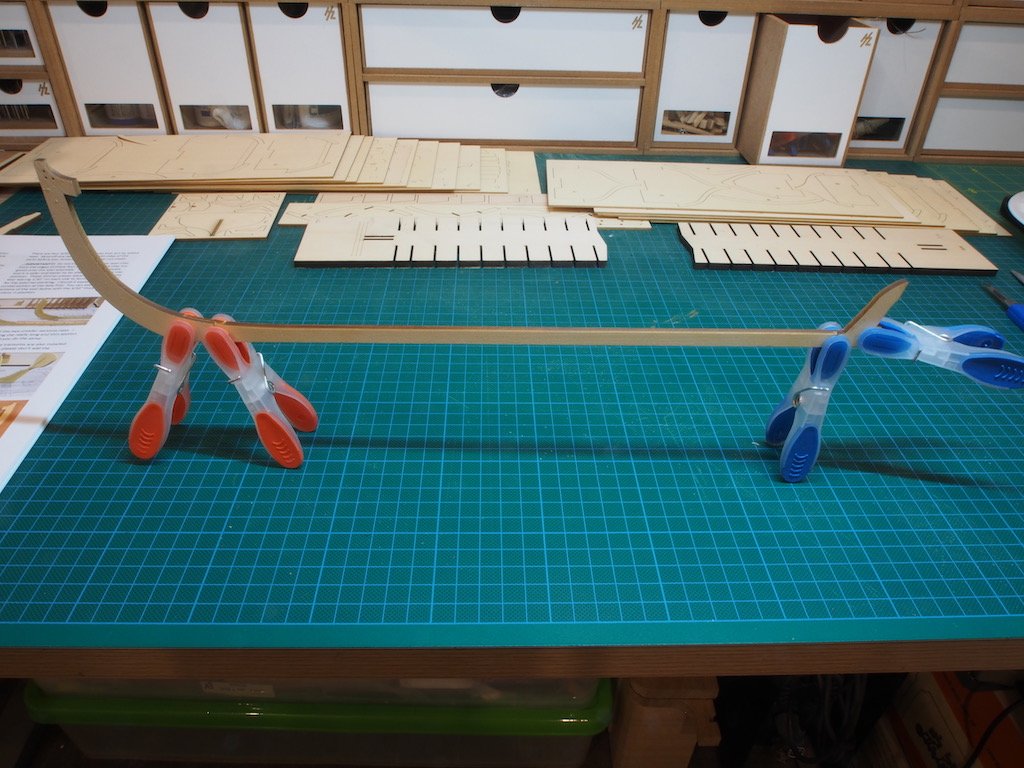
 At long last I am ready to start this kit! I had originally intended to start over the Christmas holiday period, but other priorities and life just kept getting in the way. Now, over the Easter period I have finally managed to finish my previous project (Da Vinci Flying Machine) and today I spent a couple of hours cleaning up the modelling space in preparation for this build. Of course, a clean and tidy modelling space is just not on, so I had to make a start on this today. 😀 Opening the kit for only the second time, I was just so impressed with the quality. The laser cutting is nothing short of superb, with a super fine kerf and virtually no char on the faces of the sheets. I won't go into the "what's in the box" as that has been done to death already, but I will echo others comments that this kit sets the standard to which all kit manufacturers should aspire! I opted to go for the more complex keel design, secure in the knowledge that if I botched it up I could always fall back on the simpler version. How many other kit manufacturers offer that? With the laser cutting providing a very clearly defined edge to the joints, I resisted the urge to reach for power tools and instead used a combination of a miniature chisel (one of the Veritas miniatures), a scalpel, a modellers rasp (Aurio), a file and a sanding block. Here is my array of weapons along with the completed joints: These tools made short work of this task and I soon had some nicely fitting lap joints. The three keel pieces were then glued up and clamped. I darkened the edge of one side of each joint with a pencil prior to gluing up to enhance the joint line. I've only put three parts together, but I can't tell you how much fun I'm having with this kit already! 😊😊😊
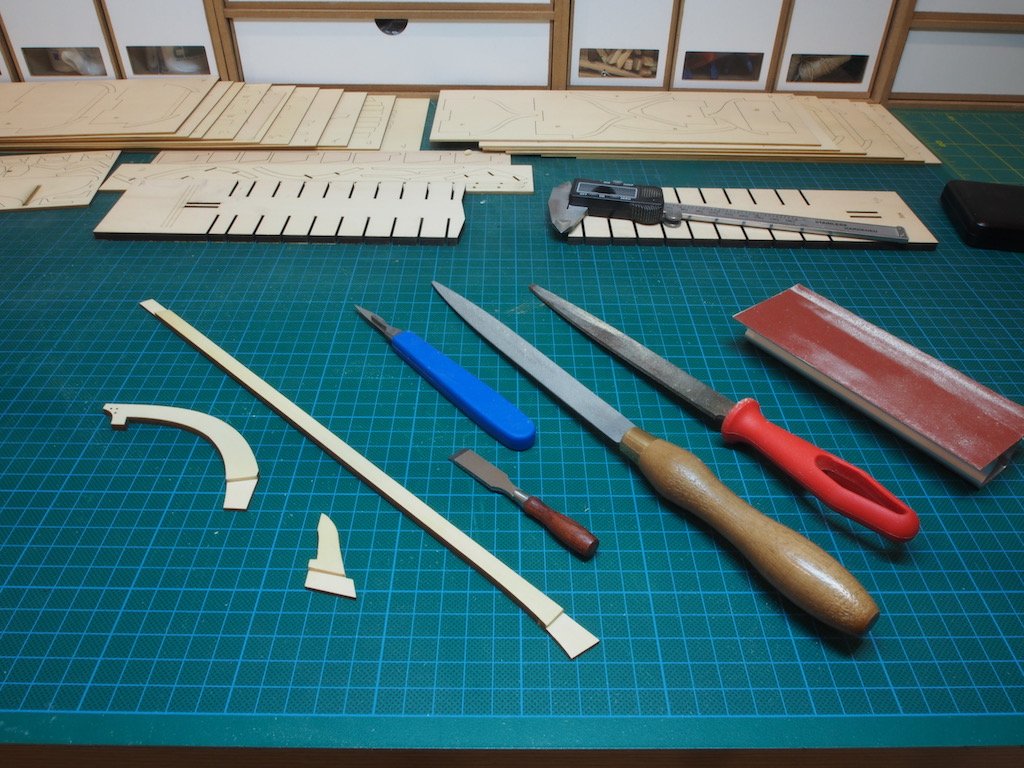
- 109 replies
-
- 11
-

-
- medway longboat
- Syren Ship Model Company
- (and 1 more)
-
Thanks very much for all the kind comments folks and for the likes. Popeye - my study is also my office, which is also my shipyard (one half is office, the other half shipyard) - and there is simply no room left in there for this model. You’re right though, I don’t think hanging it will be an option. I have however spied a couple of potential spaces in the house - will have to wait until SWMBO is not looking before trying them out though.......wish me luck! 😎
-
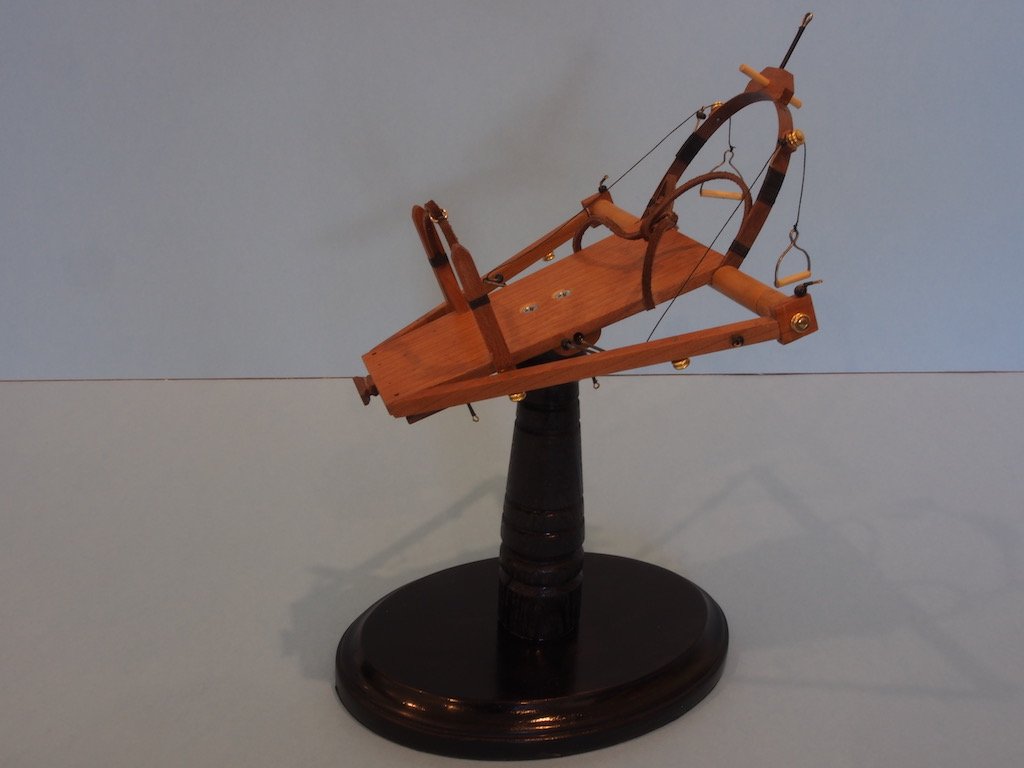
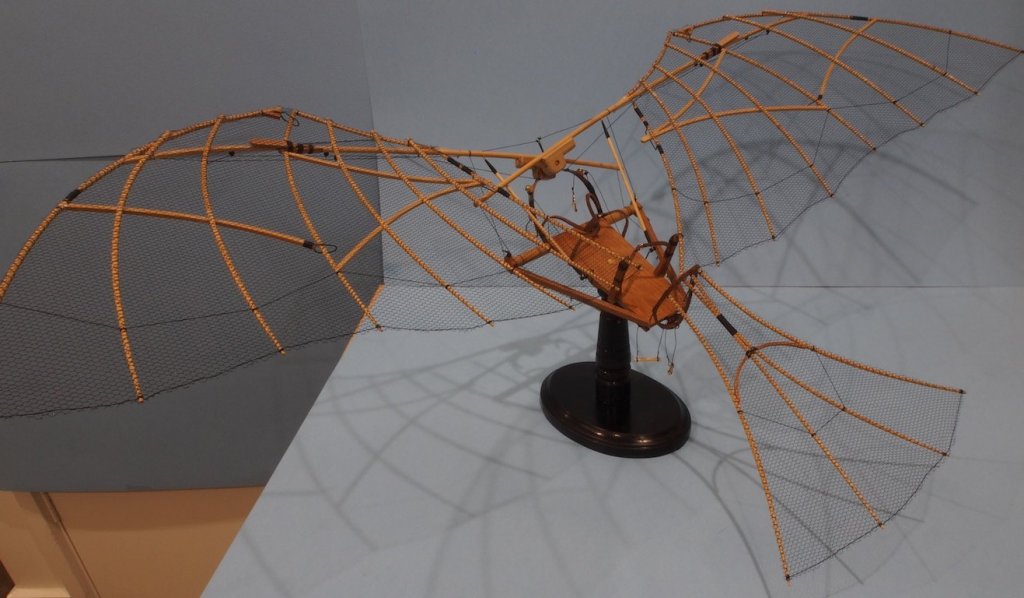
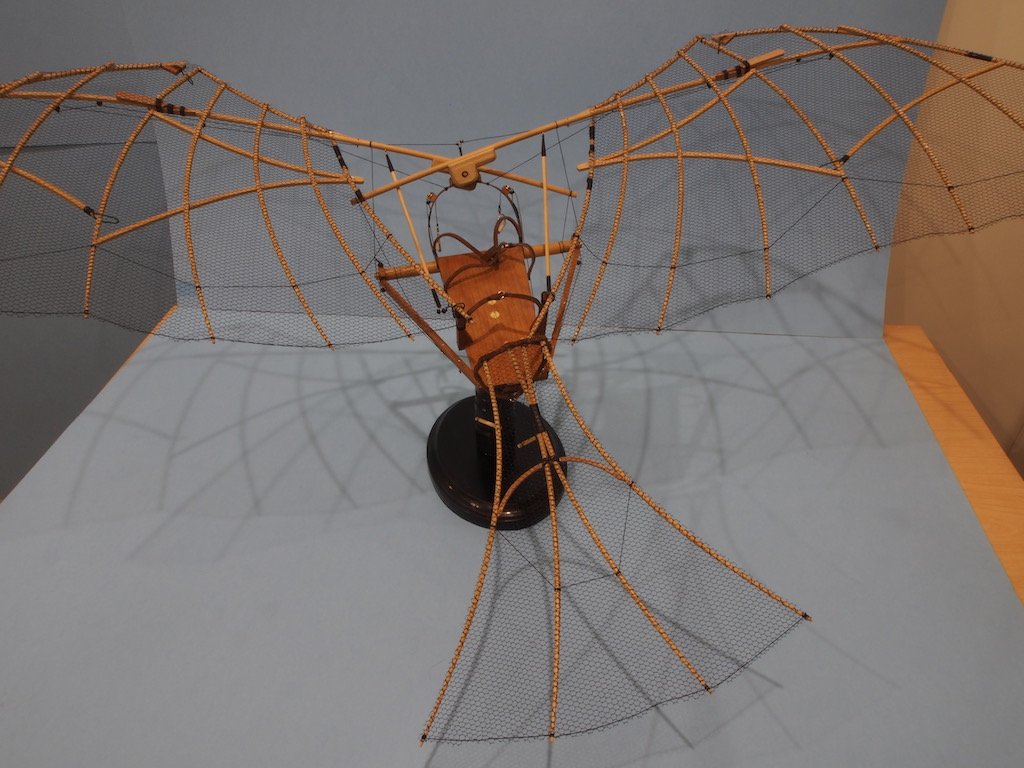
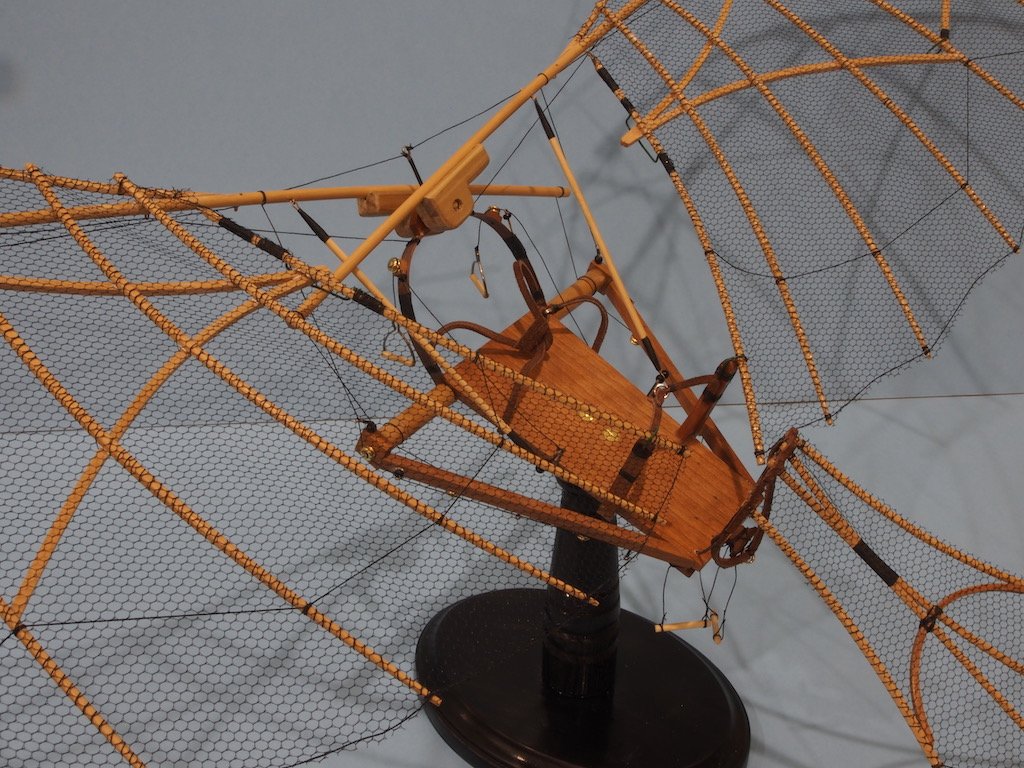
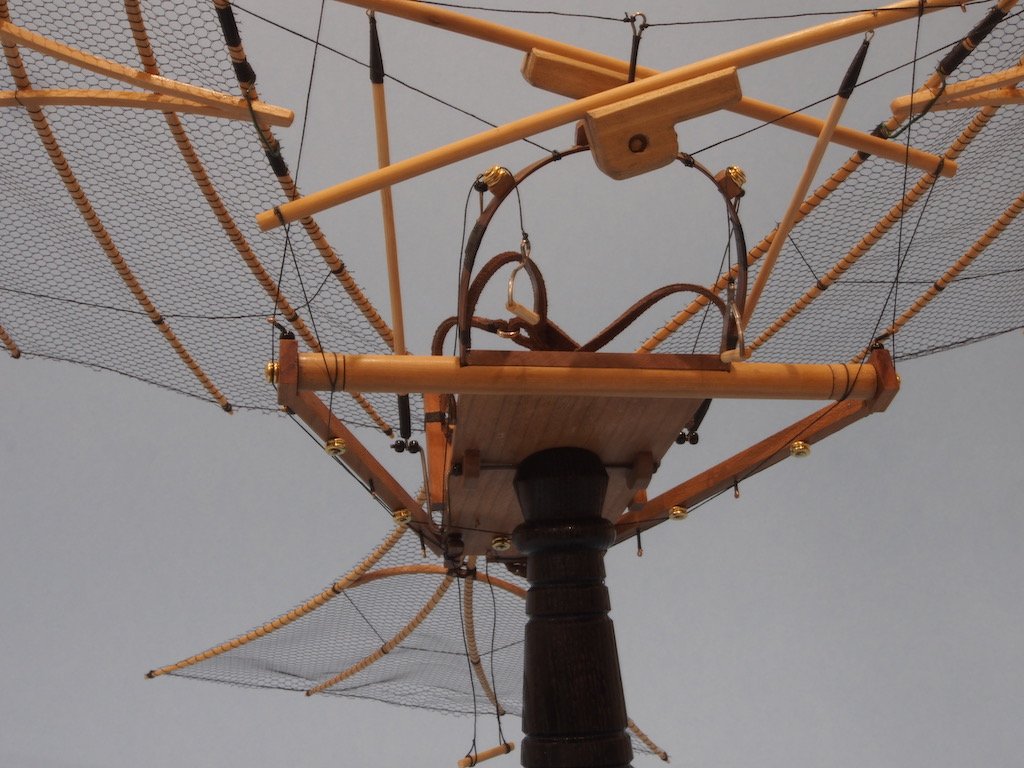
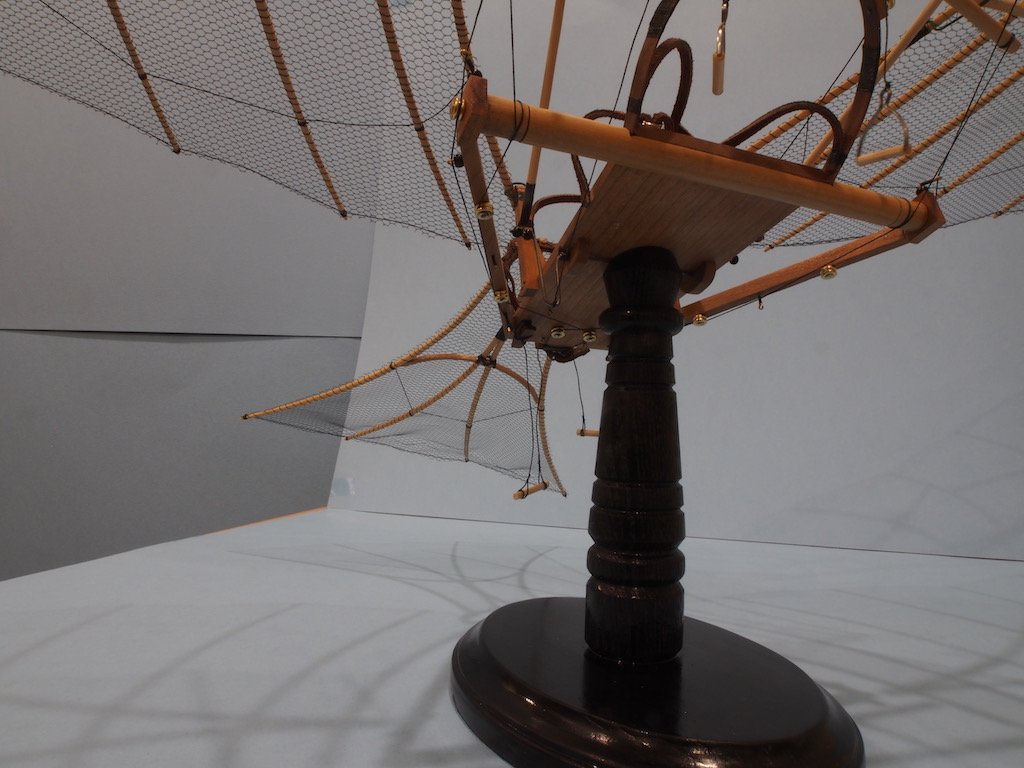
Thanks for all the likes folks. And for Popeye and Mark - I won't be adding a figure to this model, though I do appreciate your thoughts. The Base was a little too shiny after the varnish, so I knocked it down a little with some 0000 steel wool and furniture wax. Here is the completed stand: And here is the stand with the fuselage attached (note: I later replaced the steel phillips head screws with brass slotted screws, with slots aligned to the grain of the wood of course!): Then it was simply a case of following the instruction sequence for attaching the wings and the tail section, along with the rigging. The instructions for this phase were particularly poor but we got there in the end. It was very difficult to photograph the completed model because of the wing-span, but here are a few overall shots: And here are a few close-ups of various sections: Top View: Underneath: And another from underneath: Posting these last couple of photos showed me that one of the rigging lines had parted company with its pulley - that has now been rectified. That completes the construction of the Da Vinci Flying Machine. One year and eight months in the making – would have been a lot less if procrastination and other priorities hadn’t interfered! For those who may be curious, the wing-span is 102 cm / 40 inches. Now I can turn my attention to the next project(s).... I will be starting on Chuck's Medway Longboat shortly, but I may also try to multi-task and start on one of my two Pocher car models. We'll have to see - there is still a bunch of 1:1 scale woodwork going on in the "big" workshop! Thanks to all who have followed along with this build, for your support and encouragement. I hope you have enjoyed watching as much as I have enjoyed building this kit.

- 68 replies
-
- 23
-
-

-
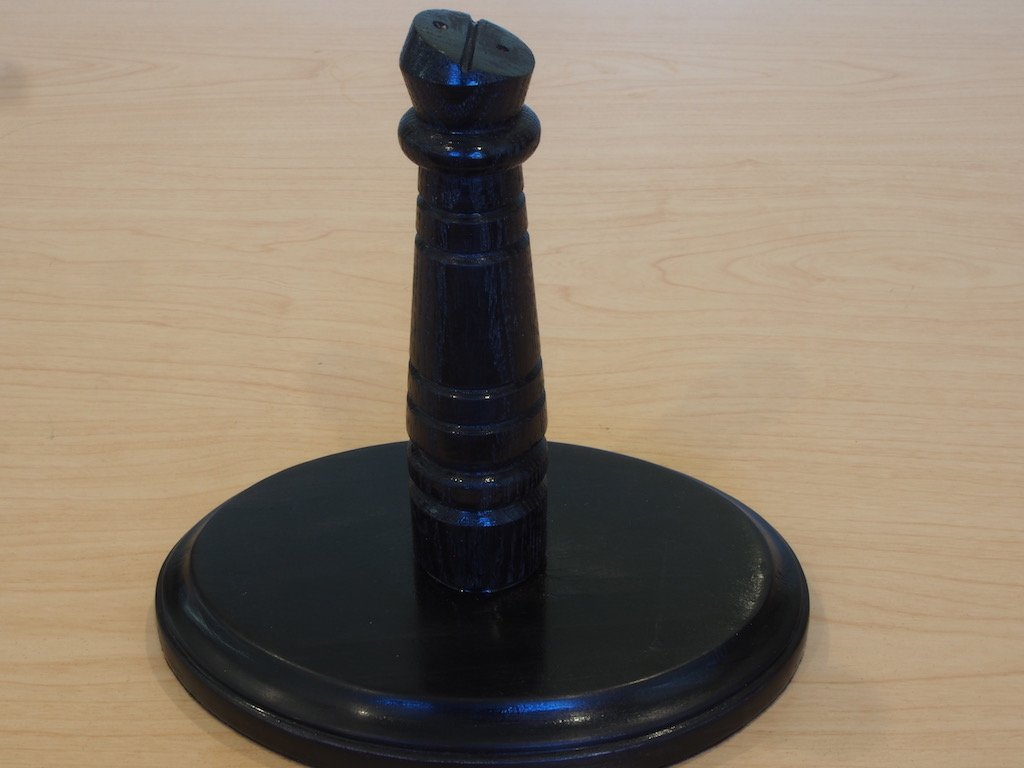
Well, I had thought that over the Christmas holiday period I would be able to finish this model, but....... The model has lain dormant for quite some time as I contemplated fixing the mesh to the wings. The instructions give two options – simply glue the mesh to the struts using CA glue, or for added realism, sew them onto the struts. It was the latter part that added to the delay. Not only was it a mind-numbing task to contemplate, but the actual doing of it was a lot like the task of completing the ratlines on a model ship. So, it seemed that many other priorities in the workshop and around the house managed to make their way ahead of this task. I finally decided to bite the bullet, put on a talking book and set to. In the end, after months of procrastination, it only took about three days per wing, plus another day for the tail assembly. The task was aided by the use of a curved upholstery needle but remained a slow and tedious process nevertheless. Now I know why talking books were invented! Here is the result: Prior to final assembly, the stand needs to be temporarily completed to aid in the assembly process (it can be removed later if a ‘flying’ display is desired). The parts for the stand are pre-shaped and required only the forming of a bevel on the top part of the mount, some pilot holes for fixing the fuselage, a final sand, and then staining and varnishing. The instructions recommend a gloss black finish to provide contrast for the model, so I chose a black spirit-based stain (two coats), with a clear gloss varnish over the top. I'll post some photos of that once the varnish dries and then I can do the "final" assembly. The only remaining problem will be what to do with it once it's completed. It may end up hanging from the ceiling in my study/office/workshop.

- 68 replies
-
- 16
-
-
Great to see the start of another of your builds Danny. I’m in “for the duration”. 😊
-
Great to see the wedding photos Vivian. Thanks for sharing with your MSW family. 😊 ...oh, and your ship build is looking great too!
-
I count myself very fortunate in this regard Pat. She’s also just given approval-in-principle for major capital expenditure for proper dust collection in the “big” workshop. All I have to mention is “safety” and approval is forthcoming. Sorry for the highjack Alan - and now we return you to normal programming....
-
That’s why I was allowed to buy a SawStop Tablesaw. That’s one purchase I didn’t even have to try to convince SWMBO was worth the investment - just showed her the video and she “ordered” me to buy one!!!!
-
Nicely done Mark. Must get easier from here - if they’re smaller, there’s less wood; ergo, must be easier!😉
-
Similar in some ways to pear in terms of workability, but somewhat less expensive is cherry.
-
Nicely done, despite the challenges of the kit Danny. I see your next model is staying with card - any plans to move back to wood anytime soon?
-
Ouch! So sorry to hear that Jeff. Not so sure the child would have been unscathed in my house!!!! Seriously though, glad that no harm came to the little darling.
-
David, It may seem to be a tedious process (and it is), but it is well worth the extra effort to do the additional coats and progressively finer wet sanding/polishing. You will end up with a mirror smooth finish that also will have a ‘depth’ to it.
- 49 replies
-
- 3
-
-
- dumas
- Chris-Craft
- (and 2 more)
-
Actually Vossie, I’d say your build looks as flash as a rat with a gold tooth!
- 714 replies
-
- 4
-
-
- lady nelson
- victory models
- (and 1 more)
-
Magnificent!
-
By the way Vivian, where are the wedding photos? You know what they say, if there’s no photos it didn’t happen! Just sayin’.........😉😁😁😁
-
Glad to hear the painting tip worked out for you. Wish I could take credit for it, but I picked it up from someone else here on the forum. Your paint job looks excellent.
- 49 replies
-
- 2
-
-
- dumas
- Chris-Craft
- (and 2 more)
-
Great to see you back Vivian, and as others have said, congratulations on your marriage. I wish you many happy years together.
-
Chris, You can’t go better than the Byrnes saw and many of us Aussies have the privilege of owning one. You just have to be prepared to pay the exorbitant postage fees, which are beyond Jim’s control. At the time I bought mine, the postage added about 50% to the cost of the saw. Nowadays, you’ll also have to be prepared to pay GST as well.... It hurts, but it’s worth every penny! As the saying goes, “quality is remembered long after price is forgotten”.
-
Creating Brass Blister Detail
gjdale replied to P_Budzik's topic in Metal Work, Soldering and Metal Fittings
Thanks for another excellent video Paul. You have a real knack for explaining and demonstrating techniques - I always learn something from watching these. Thank you for sharing your knowledge and expertise. -
I look forward to following your progress on this one Kevin.
- 273 replies
-
- 2
-
-
- panart
- amerigo vespucci
- (and 1 more)
-
Okay - just made it in time for a front row seat!
-
Looking good David. If you’re worried about paint getting under the edge of your masking tape, try sealing the “wet” edge of the tape with a coat of clear varnish first.
- 49 replies
-
- 3
-
-
- dumas
- Chris-Craft
- (and 2 more)


