FriedClams
-
Posts
1,368 -
Joined
-
Last visited
Content Type
Profiles
Forums
Gallery
Events
Everything posted by FriedClams
-
 I don't know Keith, that .001" difference between them is going to stick out like a sore thumb. Future viewers are going to stand back and say "I love this model, but it's such a shame that one cabin wall is so much longer than the other". Just kidding of course. Another example of the exacting and elegant precision that is your hallmark. Gary
 -
Just catching up on your work Siggi - wonderful modeling as always. Your cannon and carriages are excellent. It is easy to make one item well, but extremely difficult to make dozens of them identical to each other and each one precisely and flawlessly made. Very nice. Gary
-
A very interesting vessel Roger and quite a daunting project. I’m going to pull up a chair and get comfortable. I’m looking forward to this. Gary
-
I agree with Mark on the lantern - it looks like it has always been there. Extremely nice color matching once again Keith, and your anchors look terrific as well. It would take an eagles‘ eye to detect that any restoration has been done. Gary
-
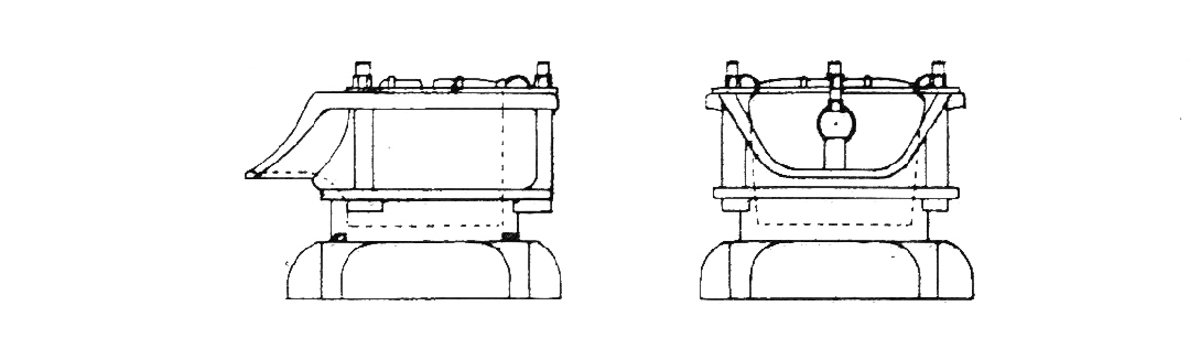
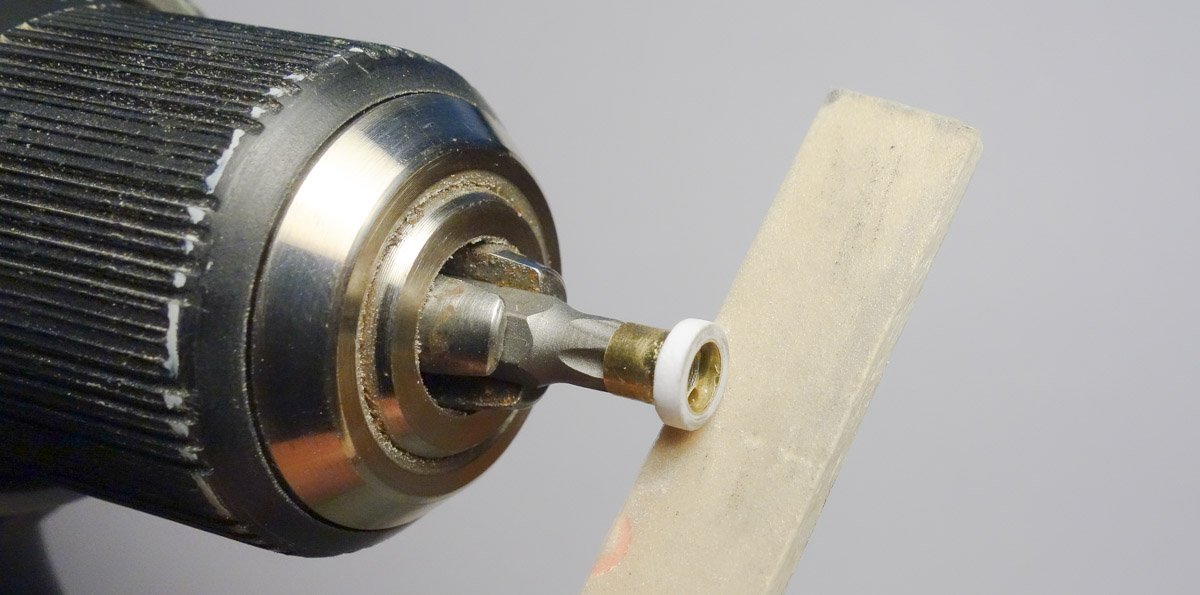
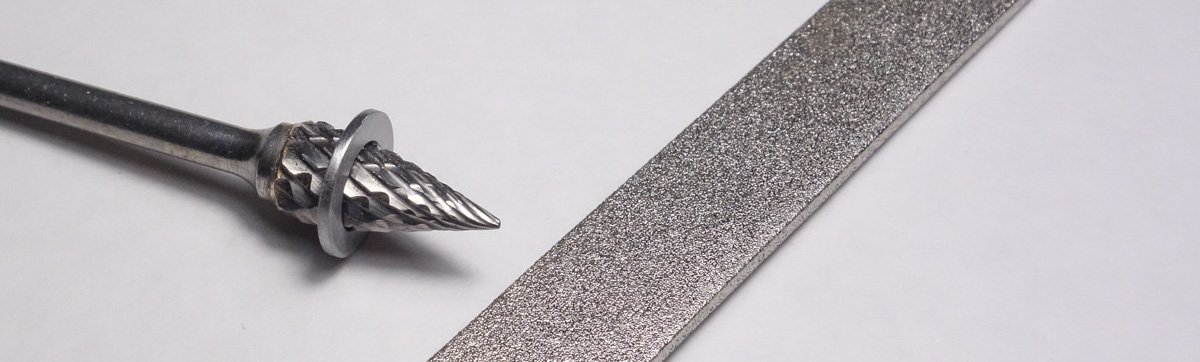
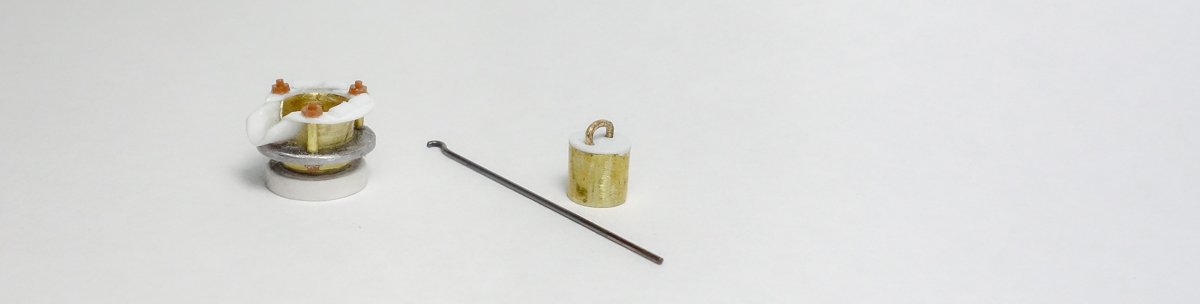
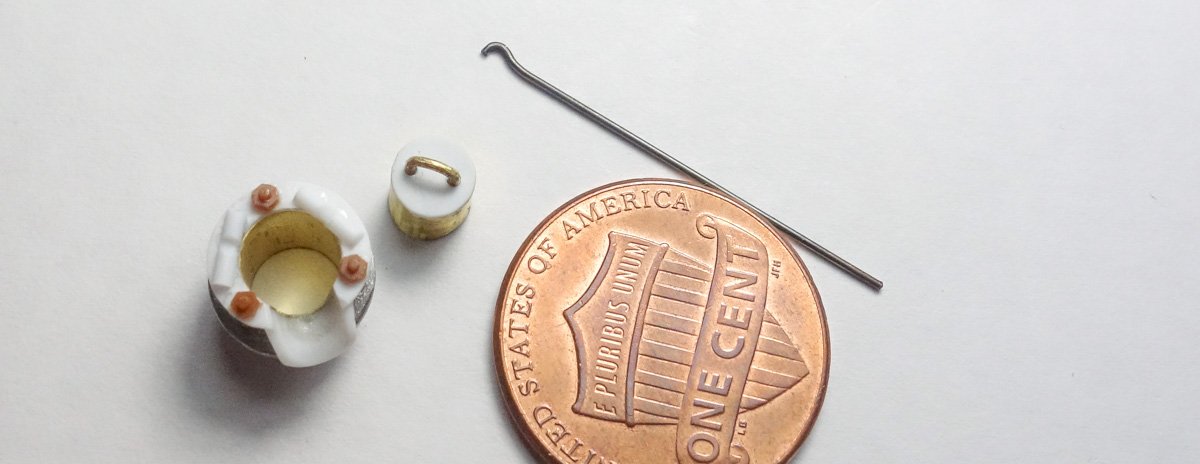
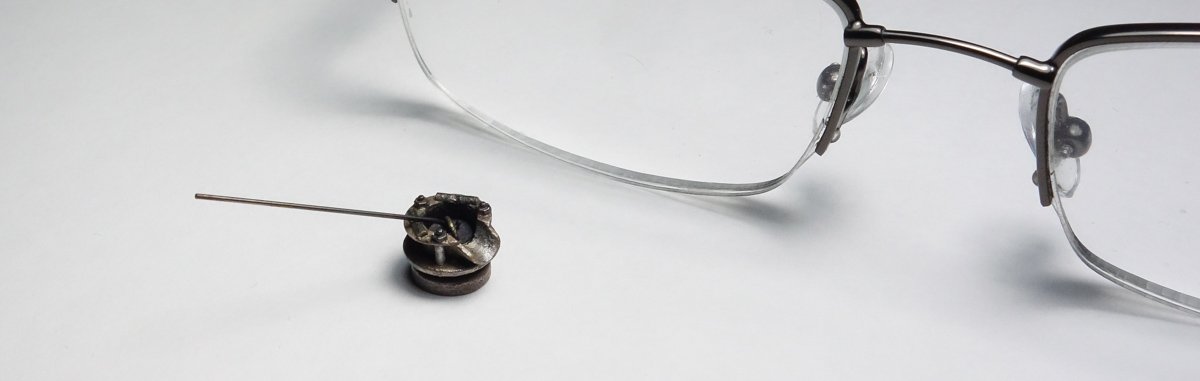
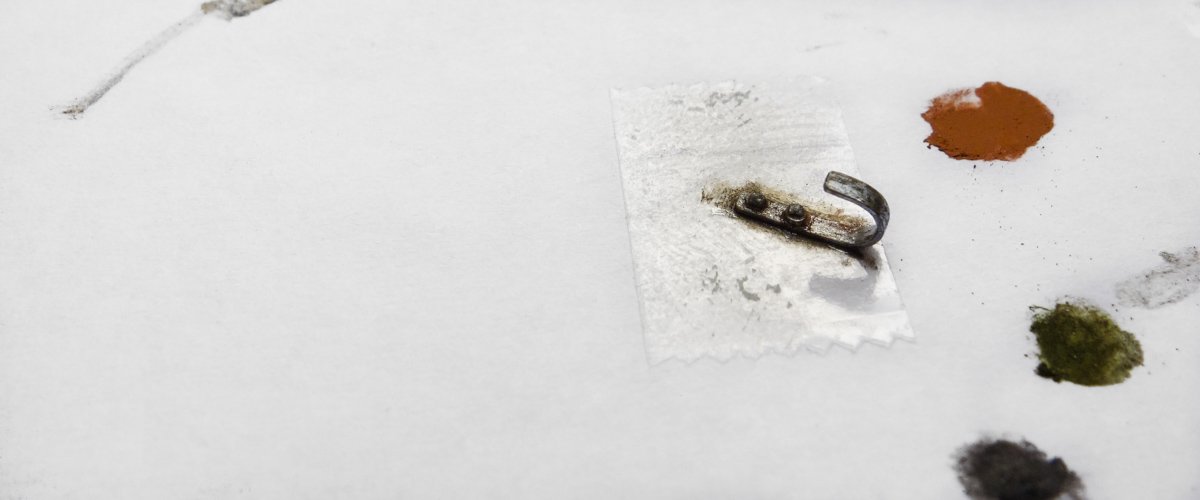
You're probably right Vaddoc, though I usually think of a crance iron in association with a bowsprit. Thanks for the nice comment. Sounds like the two of you had a good time Roger. There are a lot of good eats down there – Merrill's and The Black Whale on the wharves, and Moby Dick Brewing and the Whalers Tavern in the historic district are a few of my favorites. Hope they all survive this darned virus. Hi Tim. It is my intention to be there. It is good to think something in my log might be useful to you in your own modeling. Thanks for the great comment Tim. And thanks to everyone looking in and for the "likes". Bilge Pump The Edson model #2 pump is being used as a prototype (more-or-less) for this model. I used it as a general guide for the overall dimensions and construction. However, the Edson #2 can be operated from three positions whereas mine will be operable from only two. This construction is a real hodgepodge of brass, paper, styrene, steel and plastic because I'm using whatever I have on hand. It is 9/32” (7.14mm) wide by 1/4” (6.35mm) tall. I begin with the brass center throat and the base which is wrapped paper. Once I have enough wraps of paper giving me the base width needed, I saturate it with very thin CA (like water) which effectively turns it into a piece of plastic. I then jam it onto a drywall bit and spin it in a drill to get it round and smooth. I use a drill motor instead of a Dremel because I can run the drill at very low RPM. The lower pump flange is made from a steel flat washer. The washer is used simply because it was the exact thickness I needed. The center is drilled out to size and then pushed onto a tapered burr and placed into the drill chuck. The outer diameter is then reduced to size with a diamond grit file. The washer is epoxied on and the spout opening is filed out. The upper flange and spout are made from styrene. Holes are drilled for the connecting rods. Brass wire is inserted for the connecting rods and injection molded nut/bolts are glued on top and nut heads on the bottom. The simplified inner pump thingy is a slide fit brass tube topped with styrene and bent wire. The handle is brass wire. The handle on a real pump is a more complicated item consisting of a rod that screws into a cast socket with a hook and fulcrum seats – but I'm just not going there. The image below shows two small pieces of half round styrene which are placed on the upper flange and serve as the fulcrum point for the pump handle. It was painted a base mixture of Testors “steel” and “rust” enamel. There is also some silver and black to help accentuate details. A few metal looking pigments and pencil graphite were used for highlighting. These pumps were positioned in a number of different places on deck and I chose between the winch and pilothouse for this model. Thanks for stopping by. Gary


- 424 replies
-
- 22
-

-
Nice to see an update on La Belle Poule Mark. Look forward to seeing some planks being hung. Gary
-
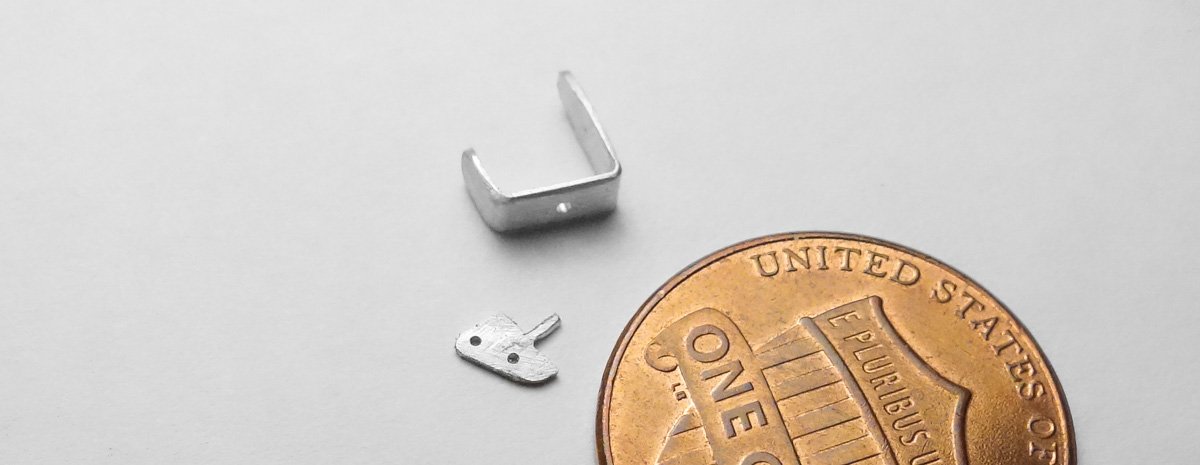
The image of the parts laid out on the one cent piece says it all. Spectacular tiny details! Amazing work Wefalck. Gary
-
What a great old model and an interesting project Keith. It is dripping with character and charm. I like your light-handed approach to its restoration. I think it would be so tempting to over restore it and in the process destroy its historical value. Nice subtle work on fixing the cabin tear and blending the colors back in. This is going to be fun to follow. Gary
-
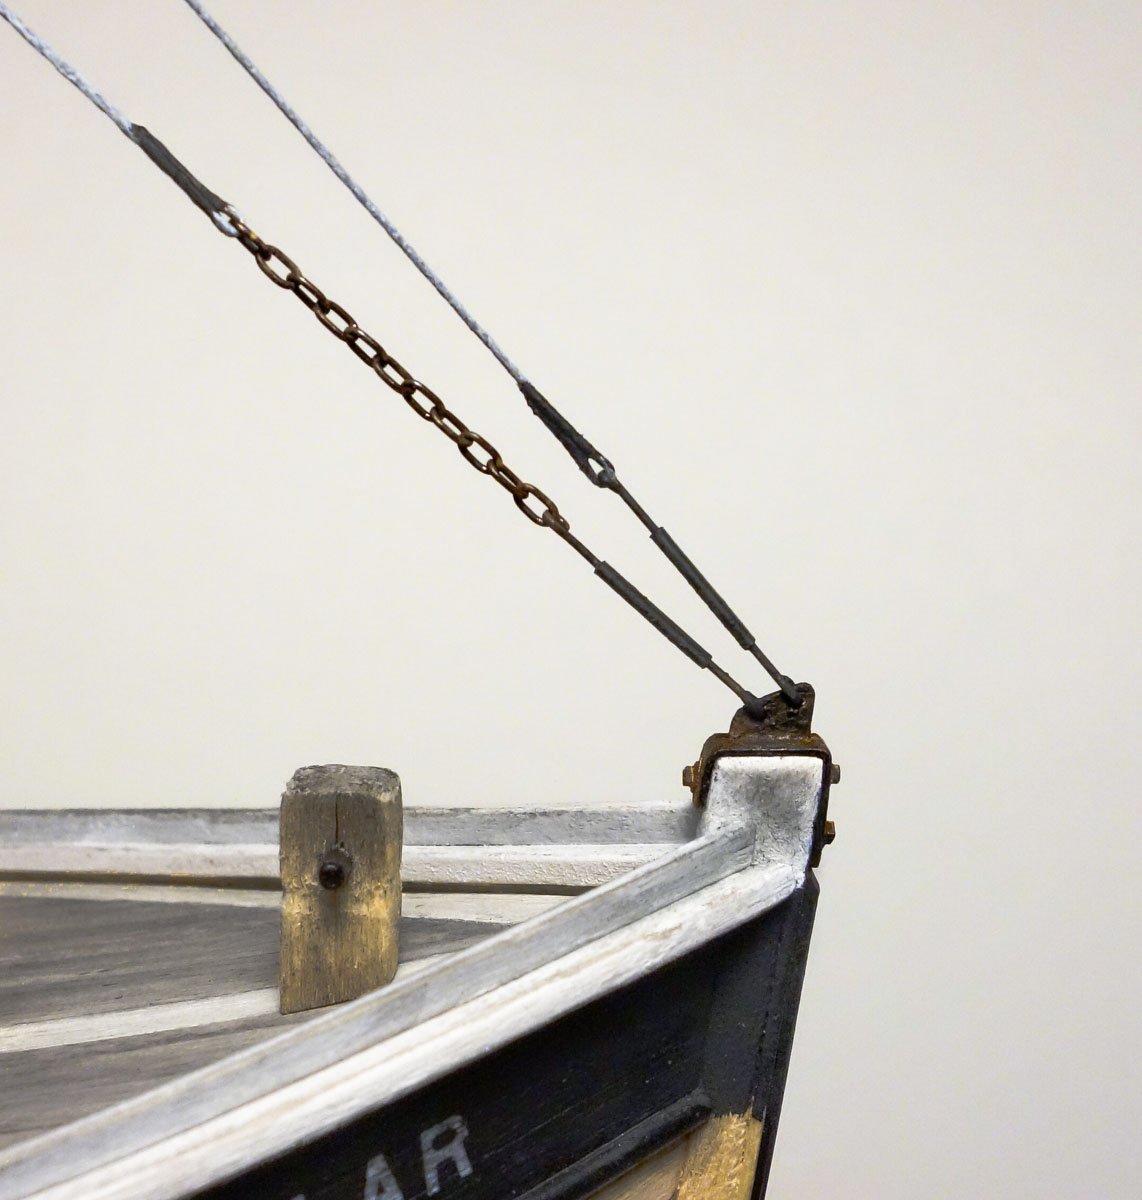
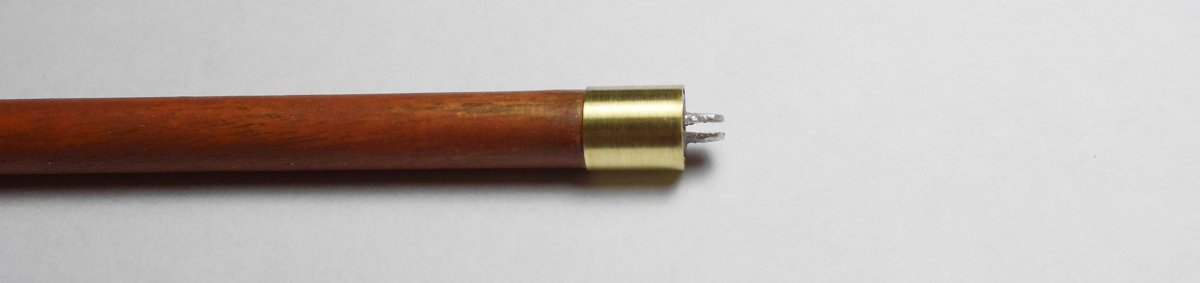
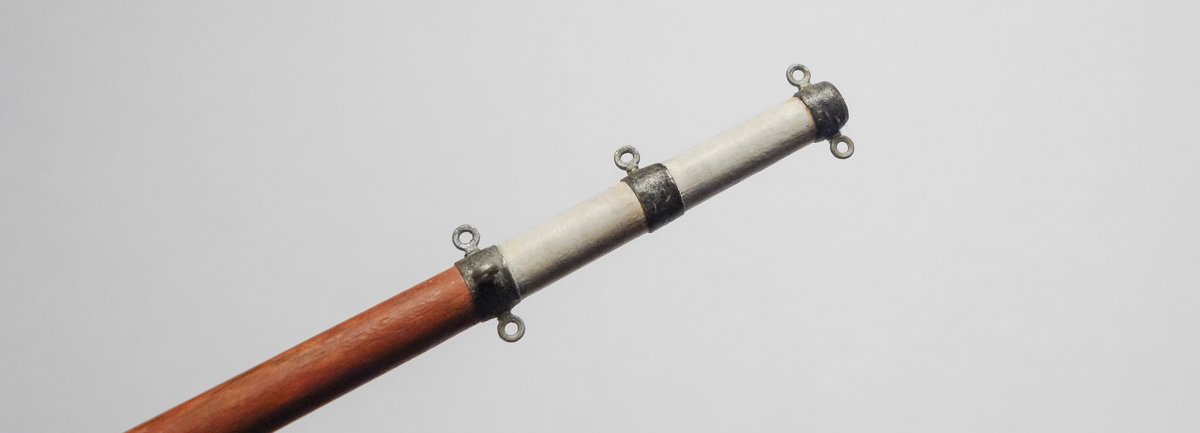
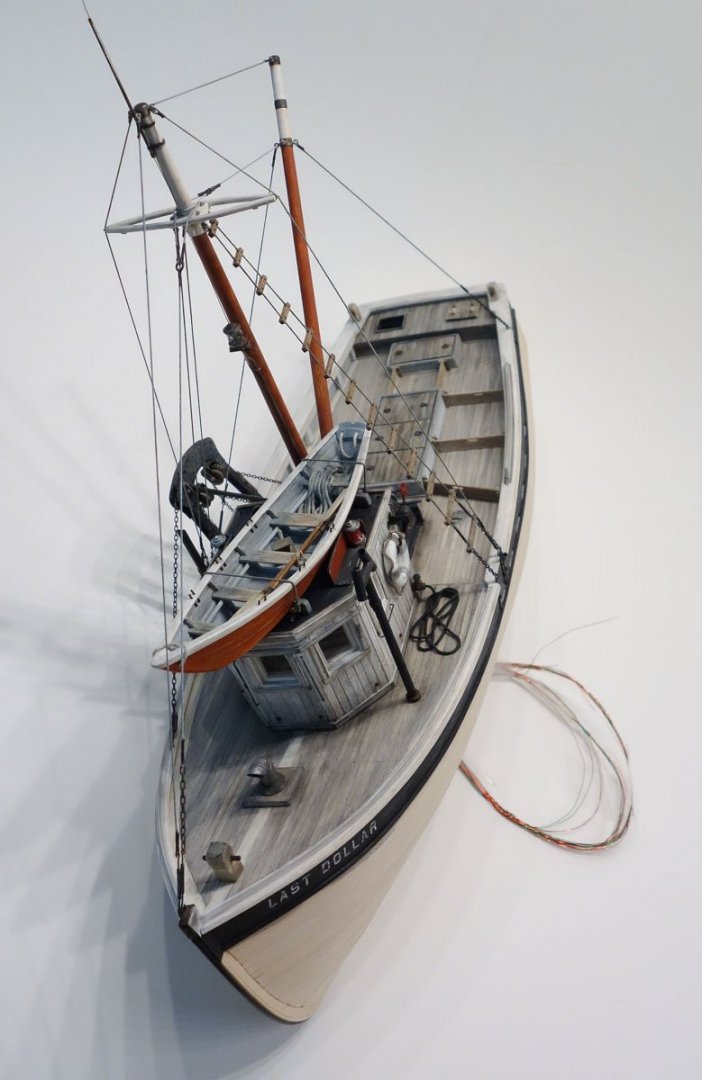
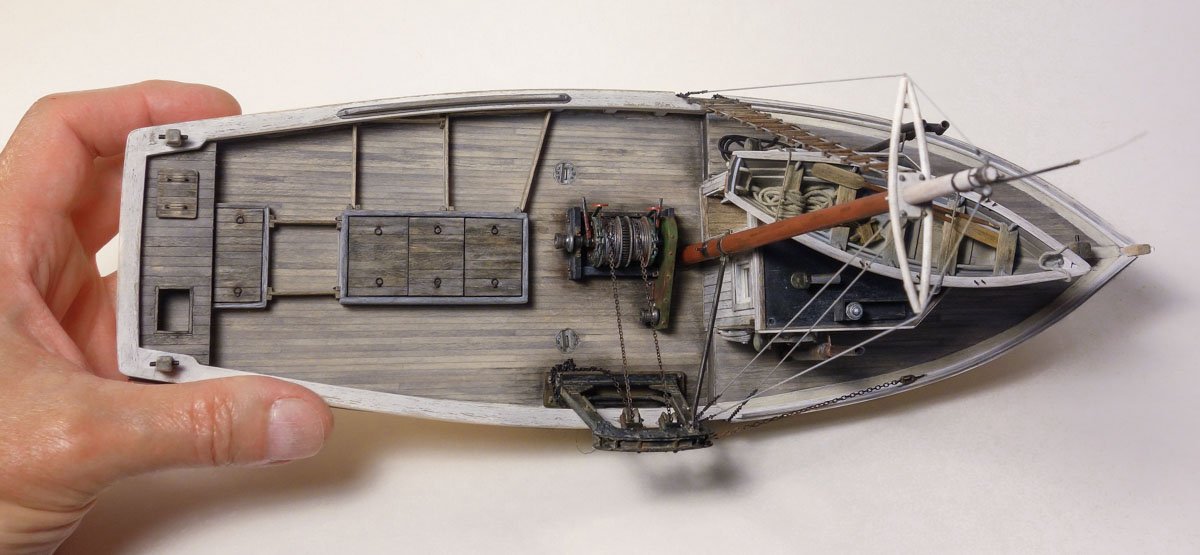
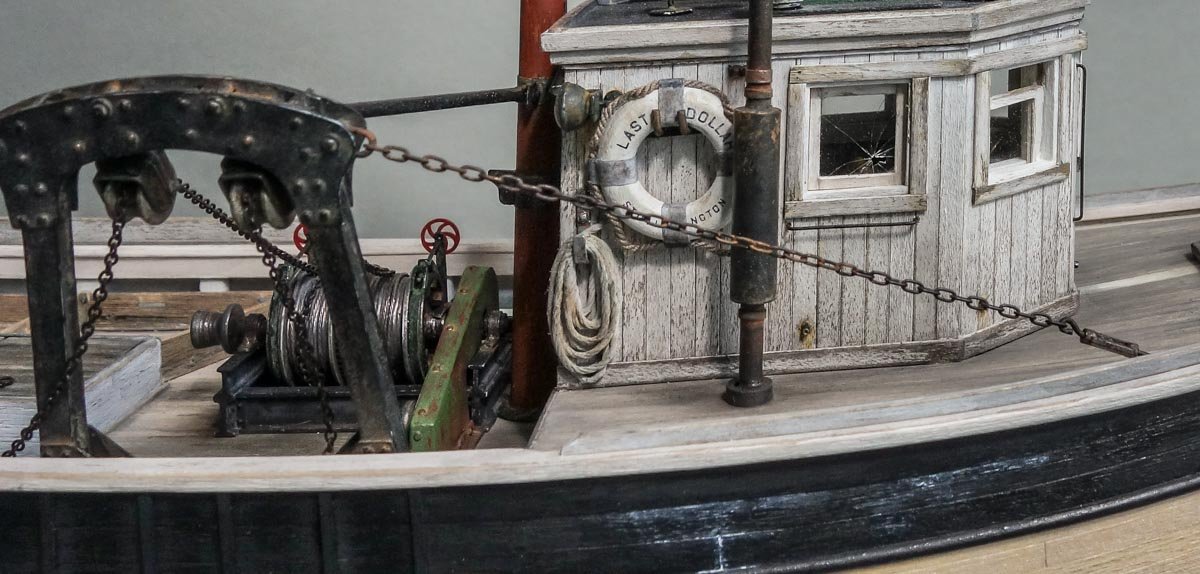
Hello folks. Earlier in the week, I noticed that the title of my log had been edited to say “FINISHED” and also a tag had been added to indicate the same. I don't know how long it had been like that or how it got that way, but the model isn't done and I've since deleted FINSHED from the title. Not a big deal and probably no one even noticed. So just to let you know - you are not rid of me yet. And thanks to everyone for the “likes” and all the wonderful comments. It's great to share this hobby with fellow modelers. Thanks Joe. I too have an admiration for working boats. I was born in New Bedford, Mass in 54 and my parents' house was about a mile from the harbor. As a young boy the wharves were an irresistible attraction. I loved the sights and sounds of the place and it felt exotic and a little dangerous. Fishing boats of many types and sizes crowded the piers, from offshore Eastern-rig and scallop draggers to stern trawlers and onshore boats. Many of the local fisherman were Portuguese and they were a hard working, tough and no nonsense group of men. Mostly they were good-natured and quick with a smile, but occasionally someone would give me the stink eye and tell me to get lost – which I would do without hesitation. And that summer smell of humid salt air and fresh fish mixed together with a tinge of diesel. I haven't lived in New Bedford for decades and today there are restaurants, shops and pubs down at the waterfront, but the place retains its authentic feel and remains the No.1 fishing port in the U.S. based on the value of its landings. Long live working waterfronts everywhere. I apologize for typing out-loud. Thanks again. Hello Wefalck. In that photo, I'm holding the model with the bow pointed slightly downward so the view is somewhat foreshortened, but yes it is rather small - 11.25” (28.5 cm) LOA. Thanks Thanks for visiting and the comment gsdpic. Not done yet but getting closer. I still have the prop and rudder, a bilge pump, an anchor, the hull coloring of course, some kind of base stand or mini diorama and . . . I better get going. Boom and Stays Here is a short update on the dragger. The boom and the remainder of the stays/rigging have been placed on the boat. The boom was cut and profiled earlier when the mast was made up, so all that needed to be done was installing the banding, eyes and the base collar where it attaches to the mast. First the eye bands and collar. The bands are bottle neck foil and the base is brass and tin. Injection molded eyes are painted and inserted into the boom. A bolt head is added to the base collar and then colored. The stem bracket and plate that receives the mast stays are made up of two pieces of tin. These are then glued onto the stem, bolts holes drilled, placed and colored. What is the proper name for this piece of hardware? Two additional stays supporting the boom are run down to chainplates. The port side runs aft, and the starboard stay attaches to a chainplate just forward of the gallows. Not the easiest thing to show, but they are visible in the image below leading off the lower set of eyes on the boom. Slings are used for the stays at the spreader rather than attaching to eyes. Thanks for stopping by. Gary


- 424 replies
-
- 23
-
-
Good to see an update on the Providence Ken. The decking turned out real nice and I like the rich honey color of the wood/poly combination. Looking sharp and clean. Gary
- 238 replies
-
- 2
-
-
- sloop
- providence
- (and 1 more)
-
Wonderful work Johann - inspirational. Gary
-
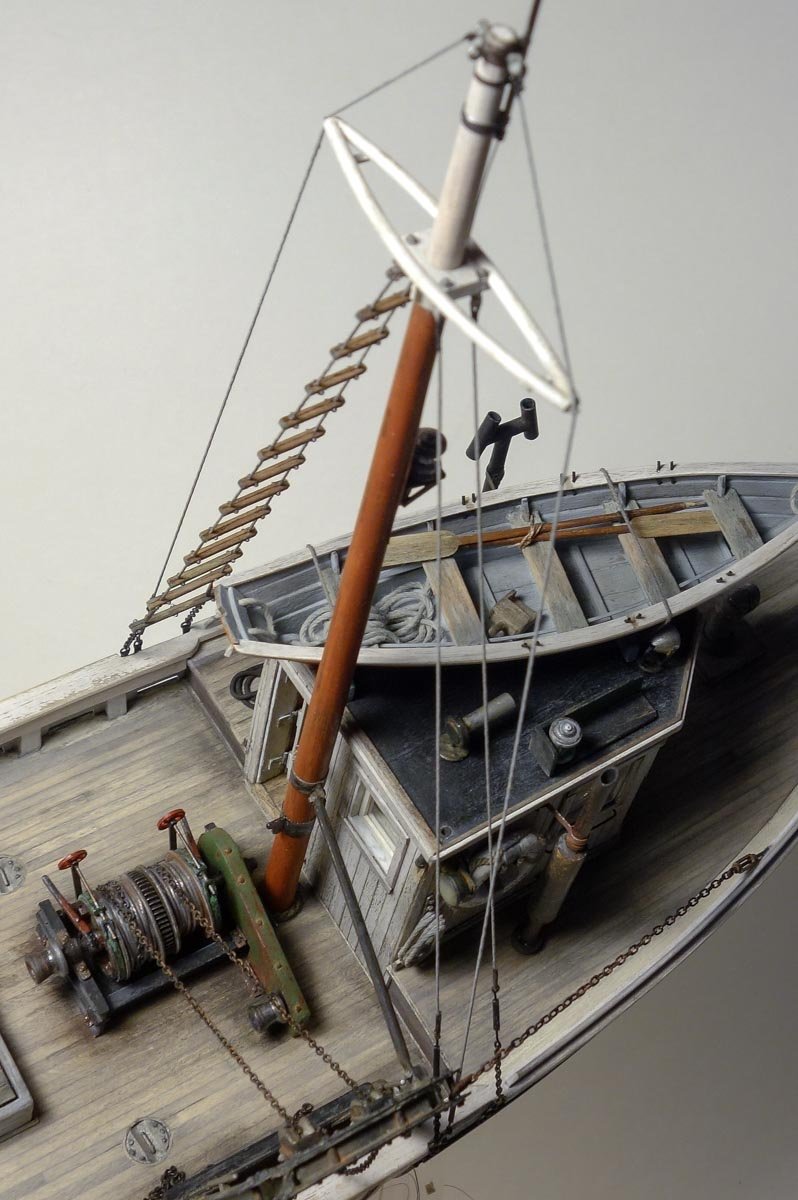
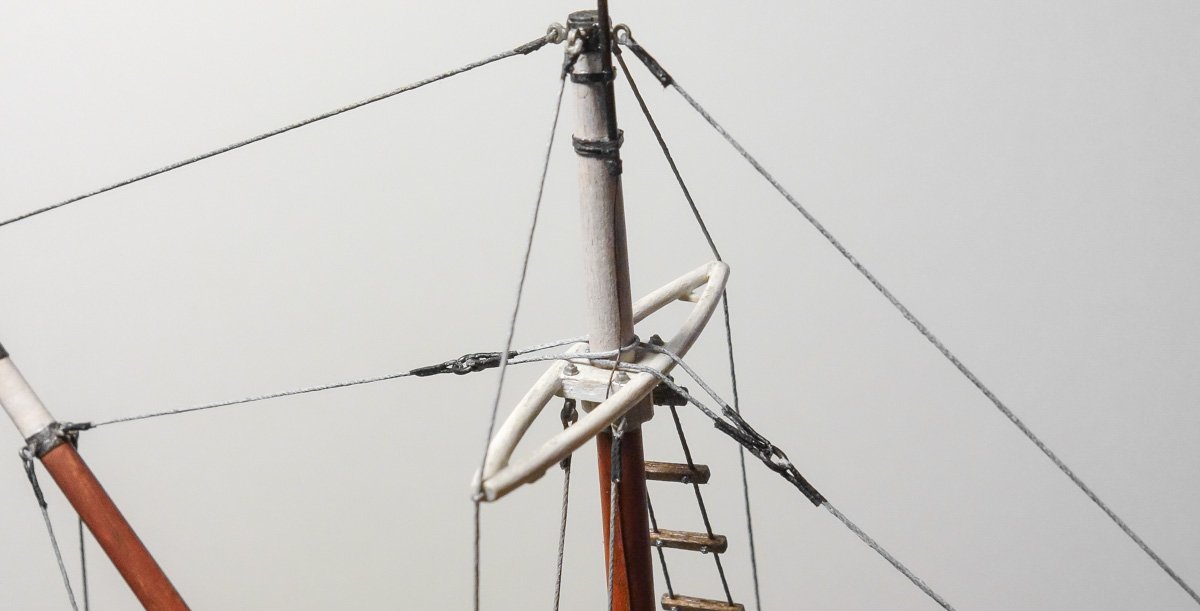
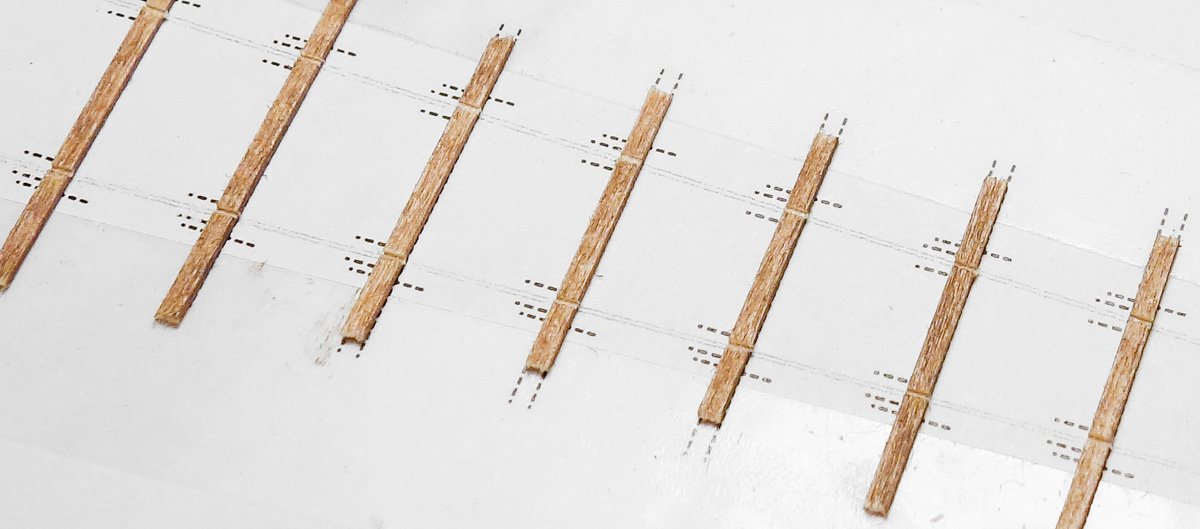
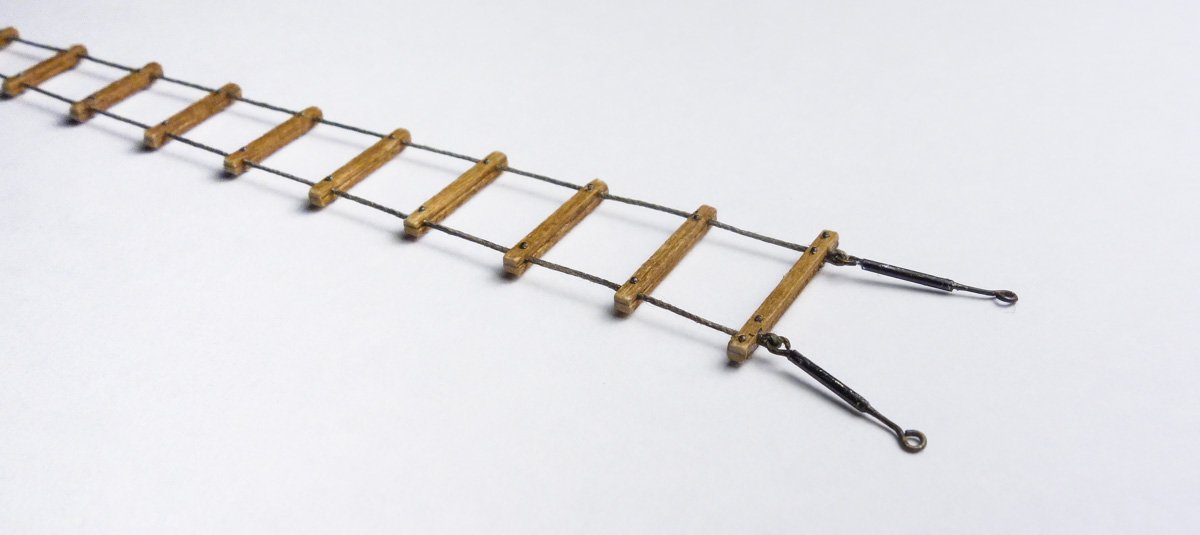
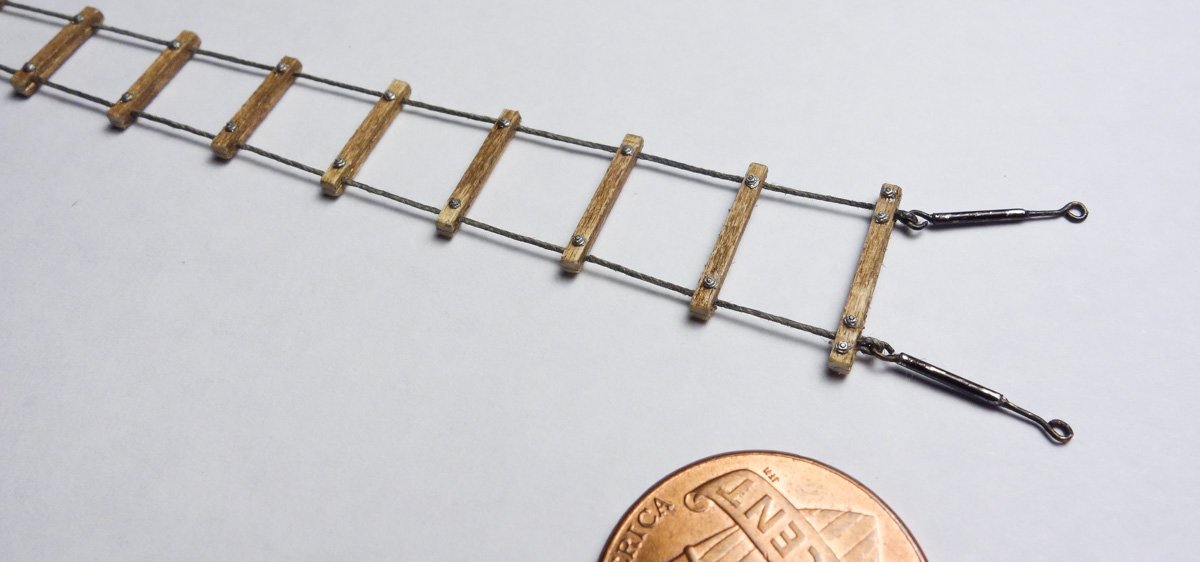
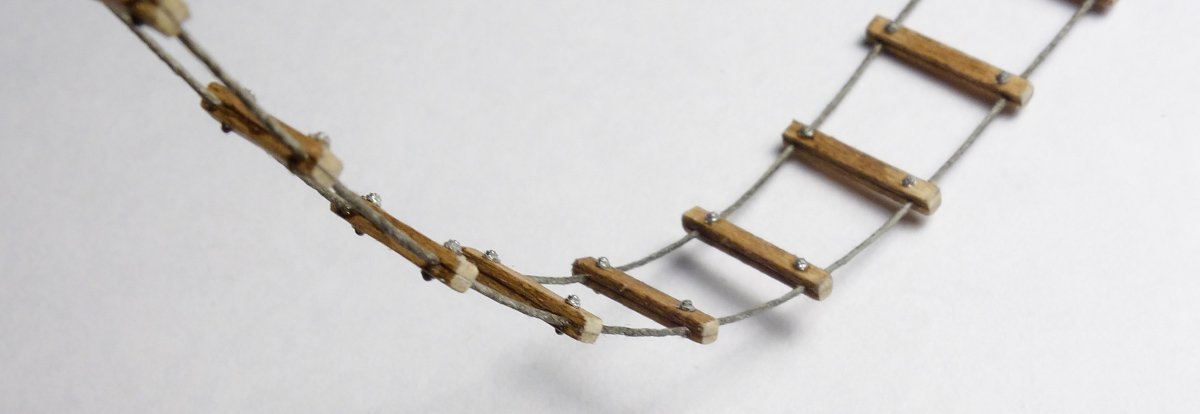
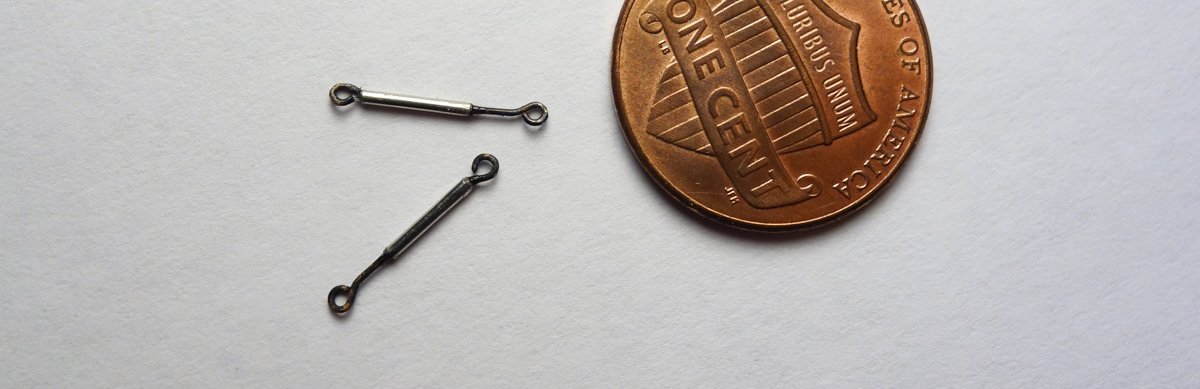
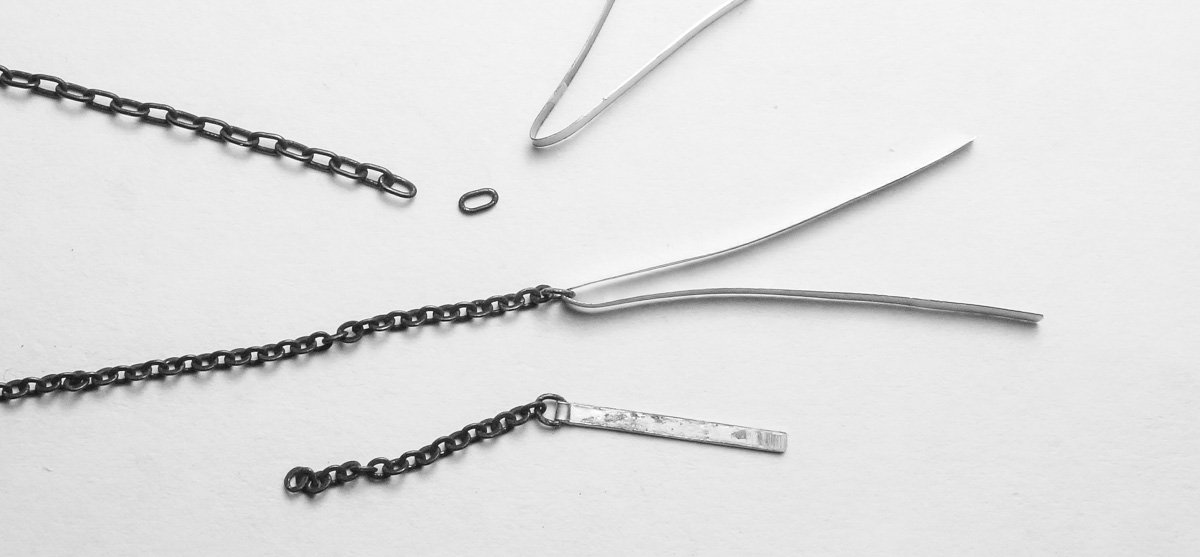
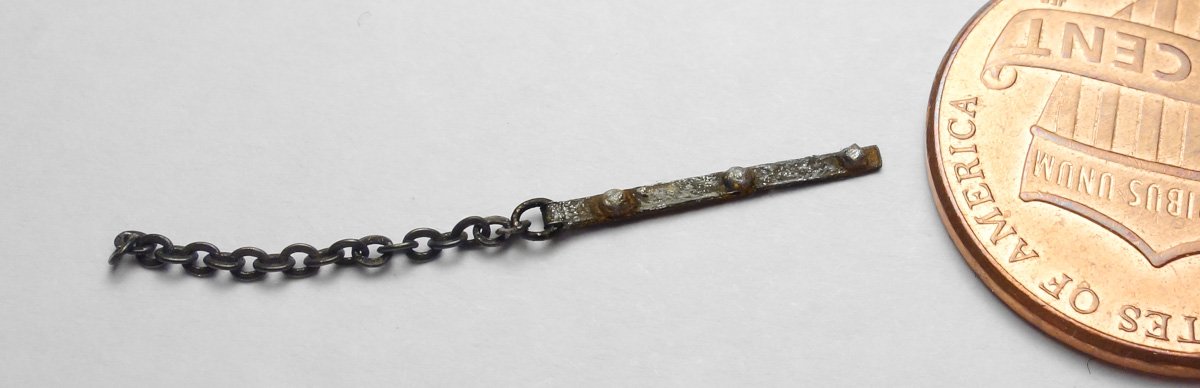
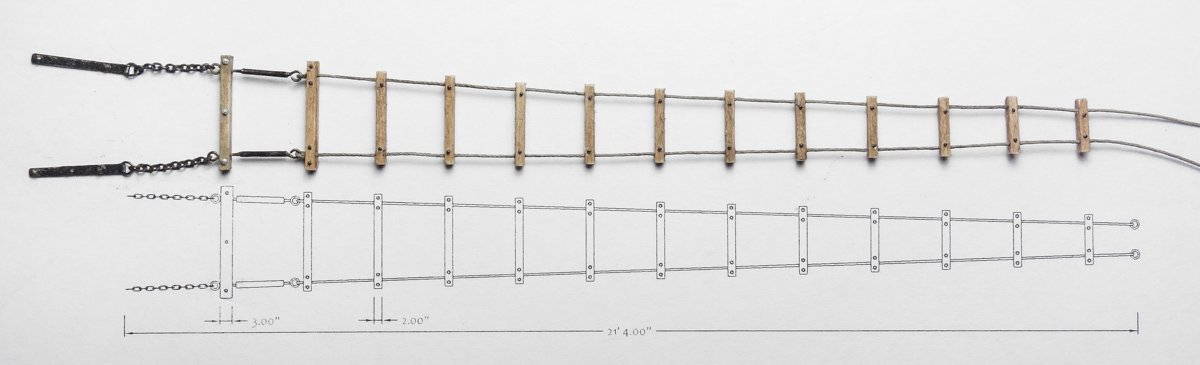
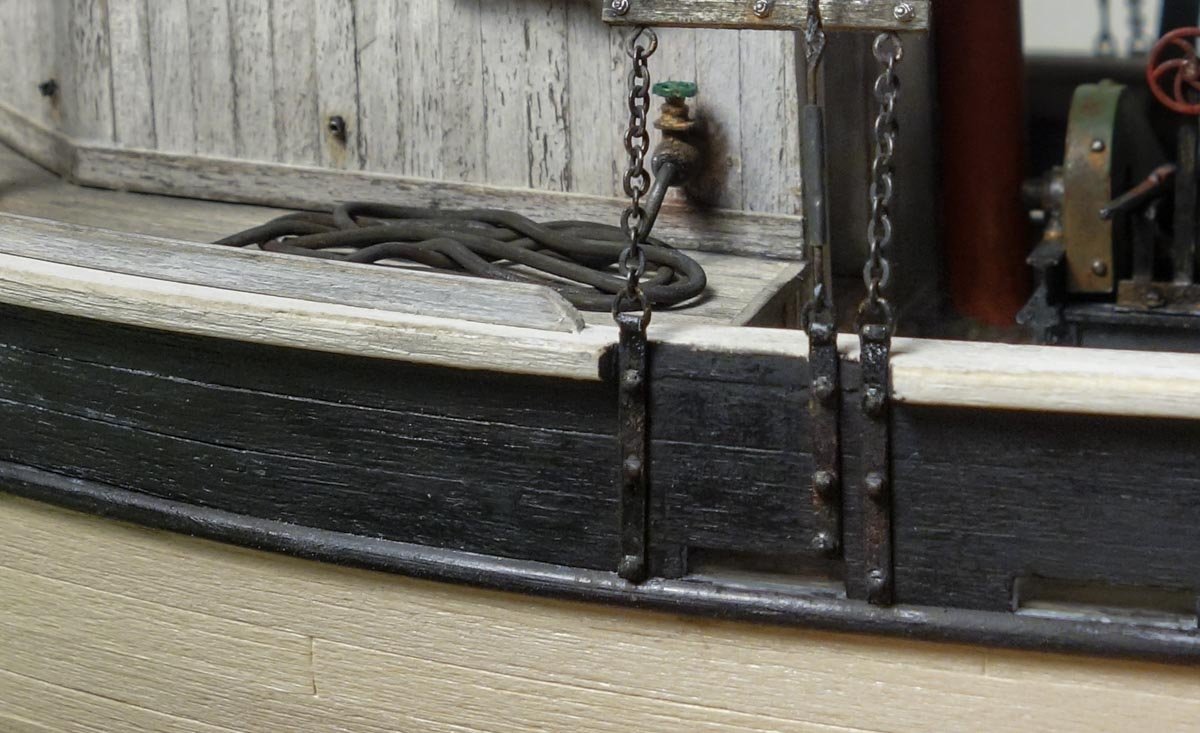
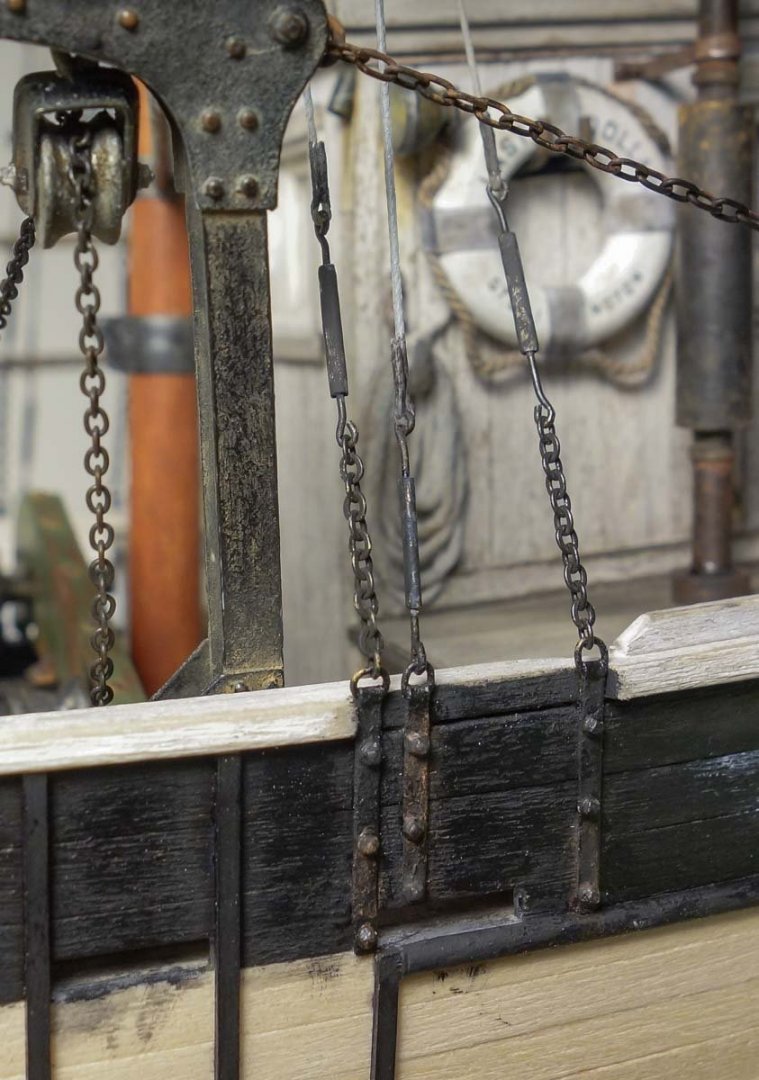
Thank you Jean-Paul, Keith B, Ekis, Wefalck, Keith A, John and Michael for your wonderful comments and generous appraisal of my work. I truly appreciate it. And thanks to all for hitting the like button and to those following along quietly. Ratlines and Other Stuff The stays and shrouds on the real fishing boats were made-up of wire rope – 1/2” and 3/4” stainless cable mostly. So I wanted to reproduce this in scale using 7 strand stainless fishing leader, but the wire thwarted my every attempt. To be honest, it chewed me up and spit me out like a piece of gristle. I had satisfactory results putting the shrouds together, but I just couldn't tension the cables properly on the boat. I've used beading wire in the past on larger scale models (1:24) for boiler stack guy wires and the like, but never on a mast at 1:48. Many years ago I heard about a modeler who used a below deck spring mechanism that somehow connected to selected cables and kept the rigging taut even with changes in humidity. Clever solution, urban legend or straight-up nonsense? I don't know, but I'm always amazed how creative people can be. In the end, I used miniature rope soaked in gray paint and a little PVA to keep it from frizzing. These boats typically had a single ratline on the port side, so I began by drawing up a construction template. Basswood rungs that scale to 1” x 2” are stuck to the template with double-sided tape. A razor saw is used in cutting notches to receive the “cable”. A second set of wood rungs are cut in the same way. These are glued to the first set making a two-piece rung with the cables sandwiched between them. Holes for carriage bolts are drilled and the injection-molded bolts are glued in with the rounded heads face outward. The nut/washers go on the backside. The turnbuckles are made from .035” stainless tubing sleeved over brass wire. The scale length of the buckles are about 1'9”. The chainplates with connected chain are made from two different sizes of chain and narrow strips of aluminum can sidewall. The larger chain shown in the image below is 21 LPI and used only for the rings that connect chain to plate. Once the individual links are separated, they are squeezed into a “D” shape and the straight section of the ring is split open. A length of 27 LPI chain is worked onto the ring and the aluminum strip is slipped through, folded in half and epoxied together. The split in the ring is hidden under the aluminum fold. It's more difficult to explain than to actually do. Injection-molded bolt/washers are added along with some paint and pigment. Chain and plates are attached to the lower end of the ratline assembly. A lower rung has been added and it clamps across the turnbuckles. I have seen instances where this lowest rung is nothing more that a piece of rebar worked through links in the chain or eyes on the turnbuckles. The stays and shrouds are made up. The center bolt/washer on the chainplate shown below is missing. The bolts have an 1/8” long shank and I've decided to pin the center of each chainplate to the hull. This will add a little extra shear strength beyond the glue alone. The port ratline and center stay chainplates are attached to the hull and pinned. And then the starboard side. All the “cables” were then tied off to eye bolts on the mast. This took considerable time and involved some shameful mumbling. The center stay cables run through eye bolts on the ends of the spreader. Thanks so much for swinging through. Stay safe. Gary


- 424 replies
-
- 27
-
-
Exceptionally beautiful work Jean-Paul ! Your care and precision in building this model shows in every photo and every angle of the boat. Very fine workmanship. Gary
-
It's good to see you back at the modeling bench Michael. This is a great project and I hope you don't mind another head looking over your shoulder. I've always enjoyed watching your problem solving and approach to part creation. Looking forward to more updates. You're off to a great start - sweet joinery on the wagon by the way. Gary
-
Nice work Kevin ! An interesting and beautiful open boat. Gary
- 72 replies
-
- 2
-
-
- fishing boat
- artisanal fishing boat
- (and 1 more)
-
Great progress Ekis! I really like the communal oven with the smoke stained bricks. Nice detailing everywhere. Such a fun build to follow. Gary
-
Wonderful work Keith! I love the below deck interior work and the care and precision you put into it. And the image of your grandchild is really sweet. I agree with Roger - who knows what technological advancements the future will bring. Maybe a drone the size of a pea will fly down for a look around in a decade or two. Gary
-
Beautiful work Vaddoc, she looks amazing! Congratulations! I look forward to the final photo shoot. Gary
-
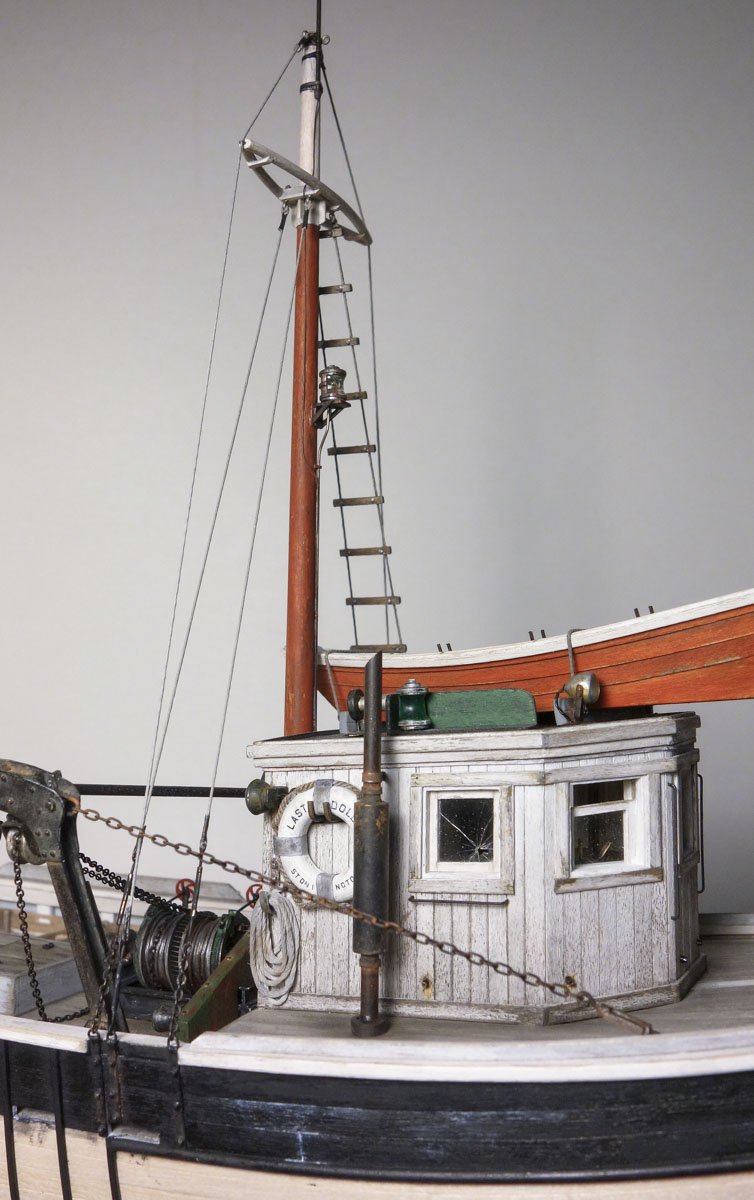
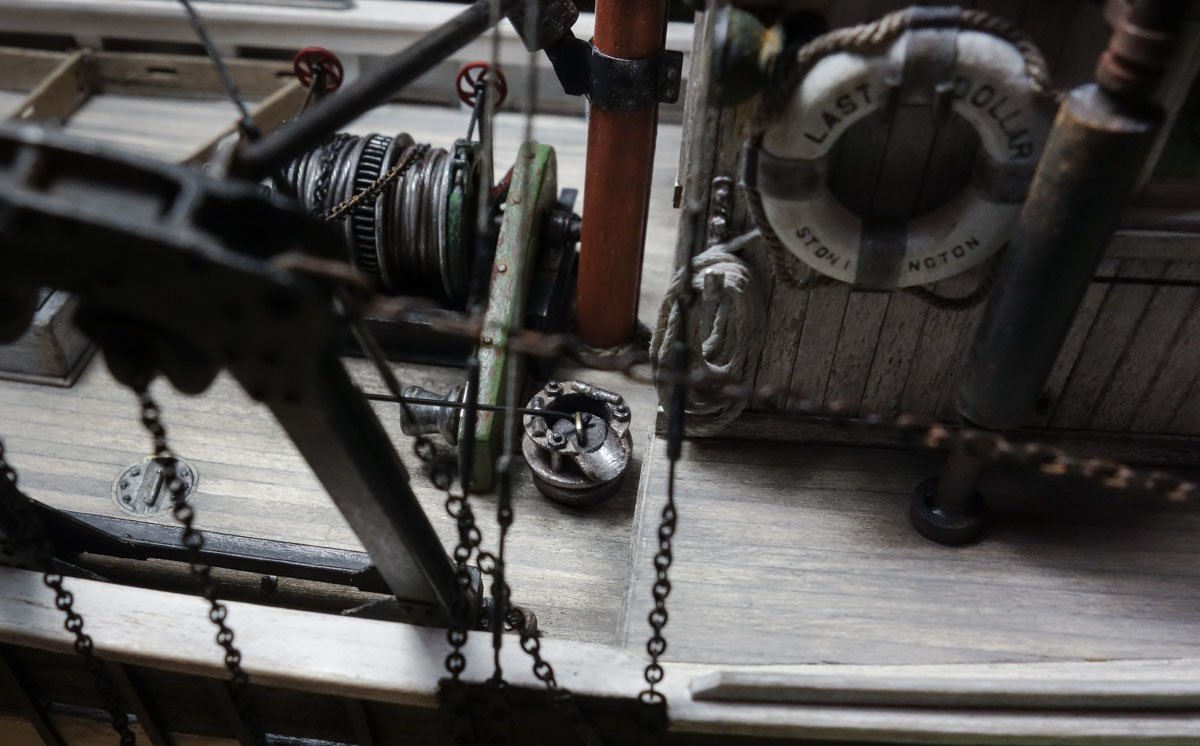
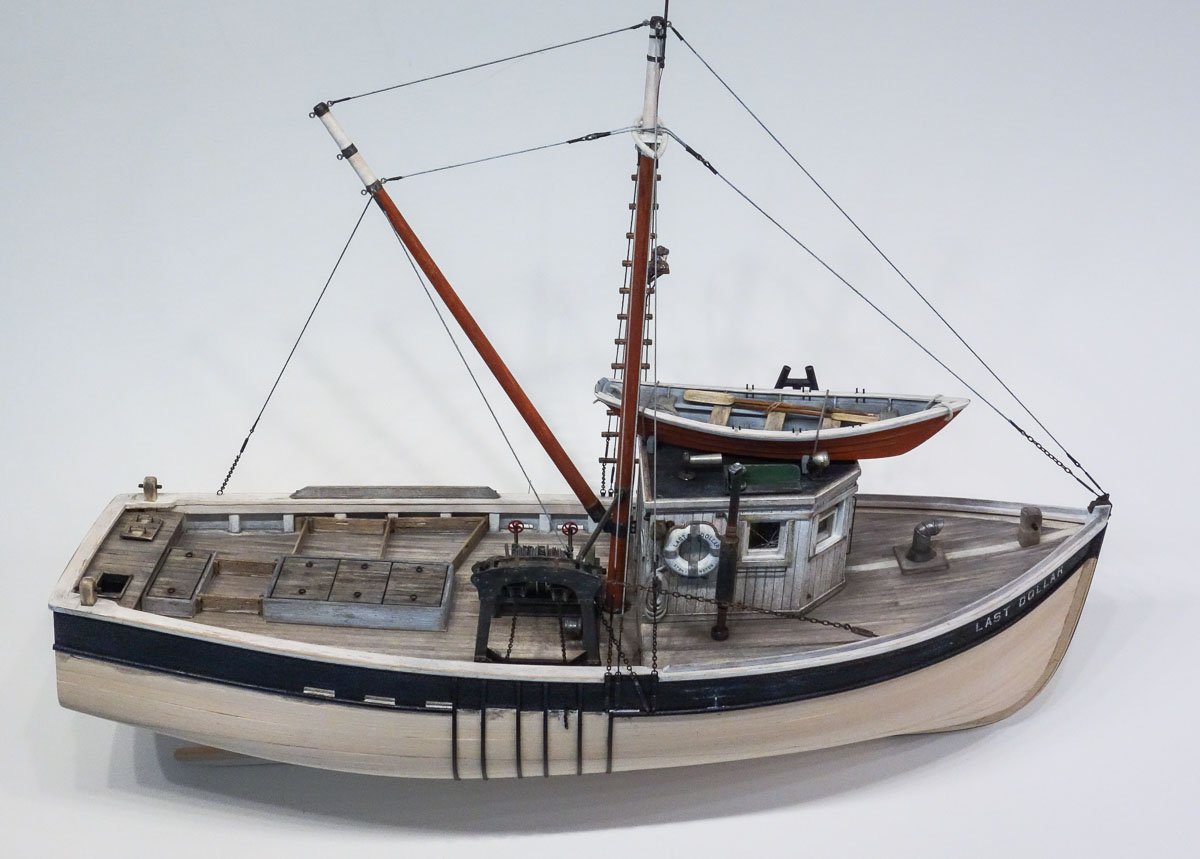
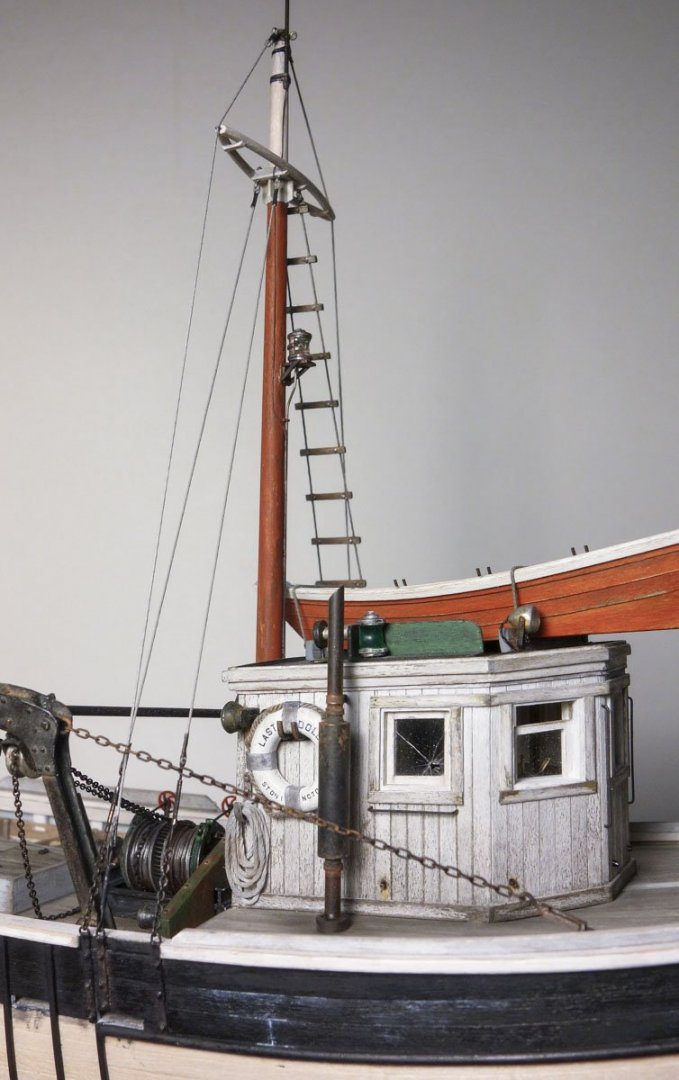
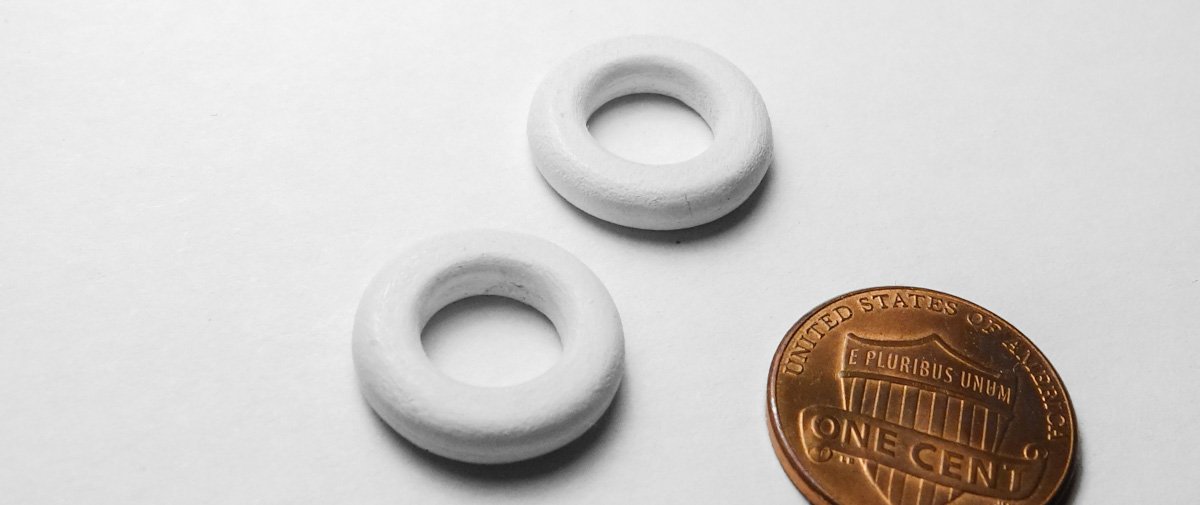
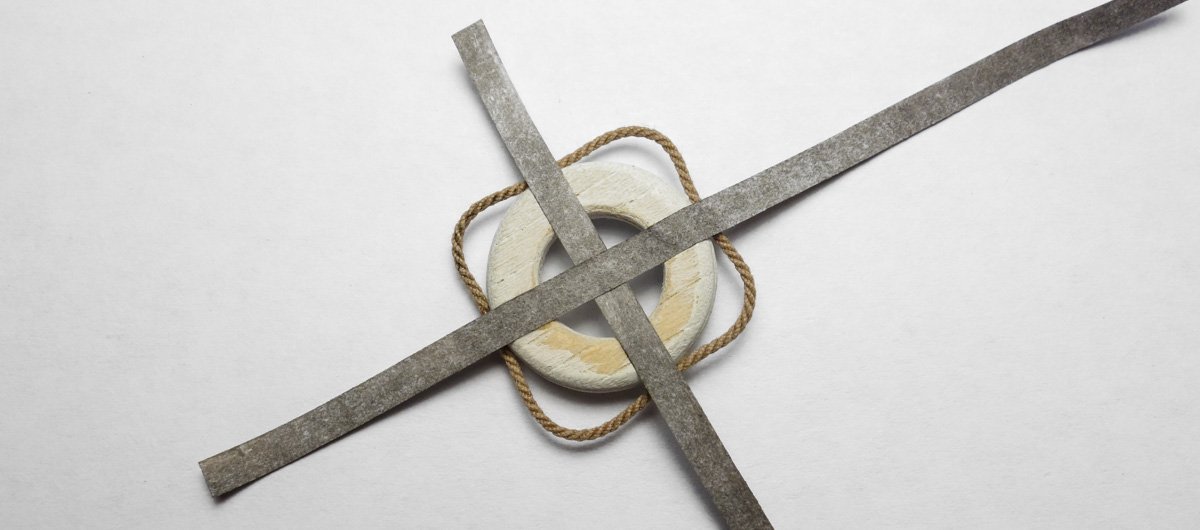
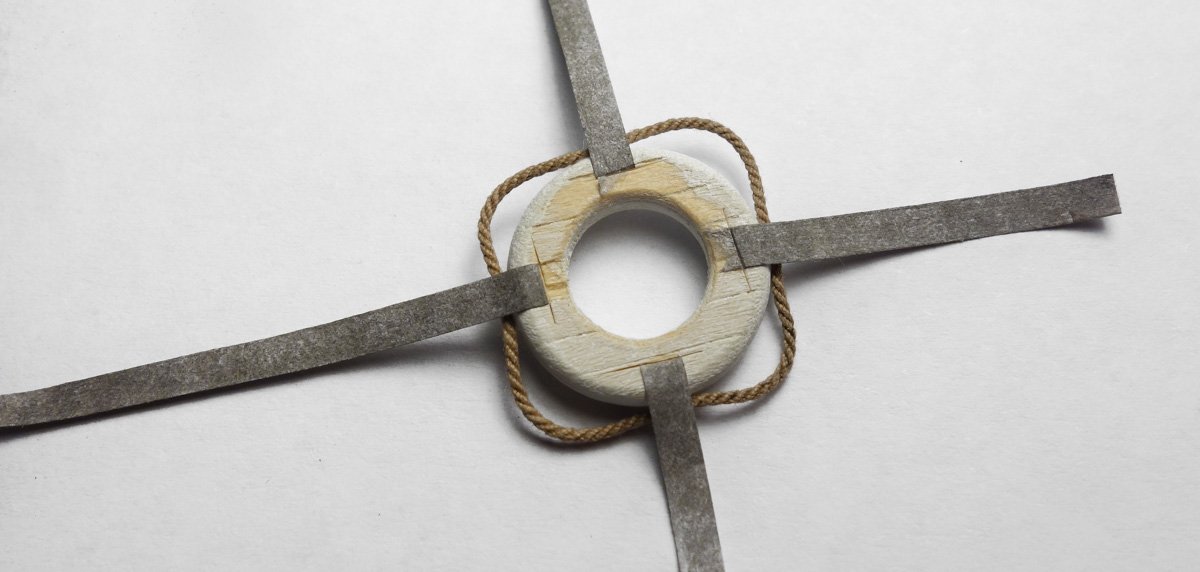
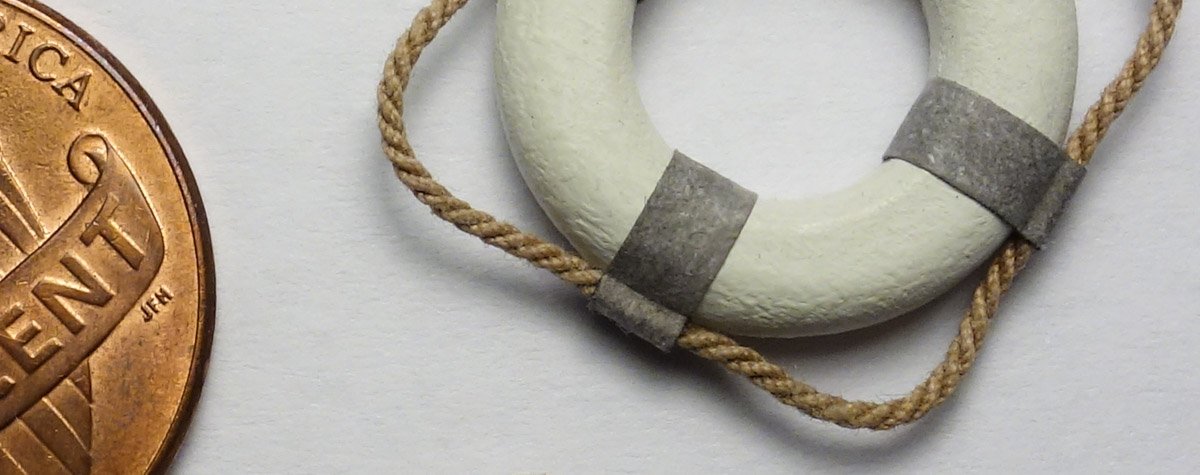
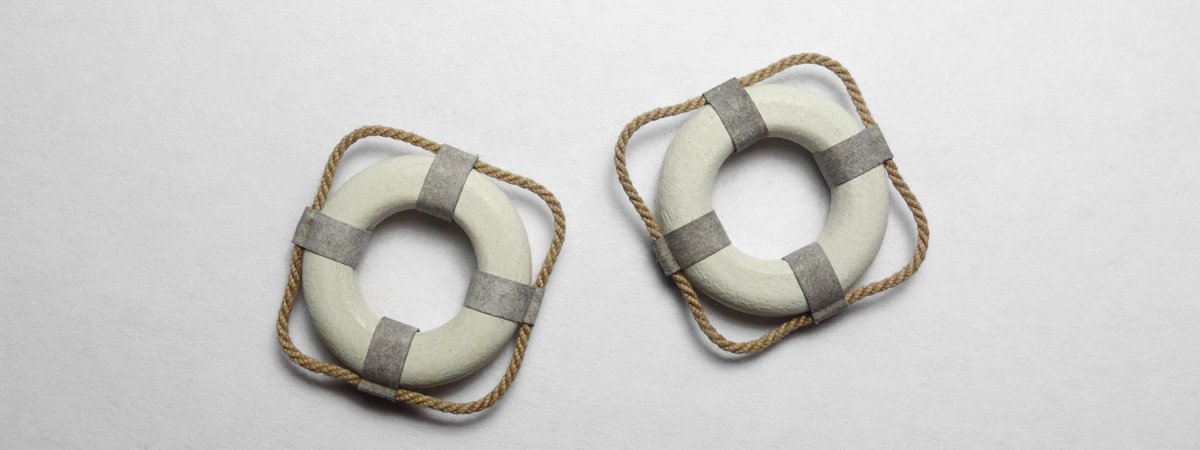
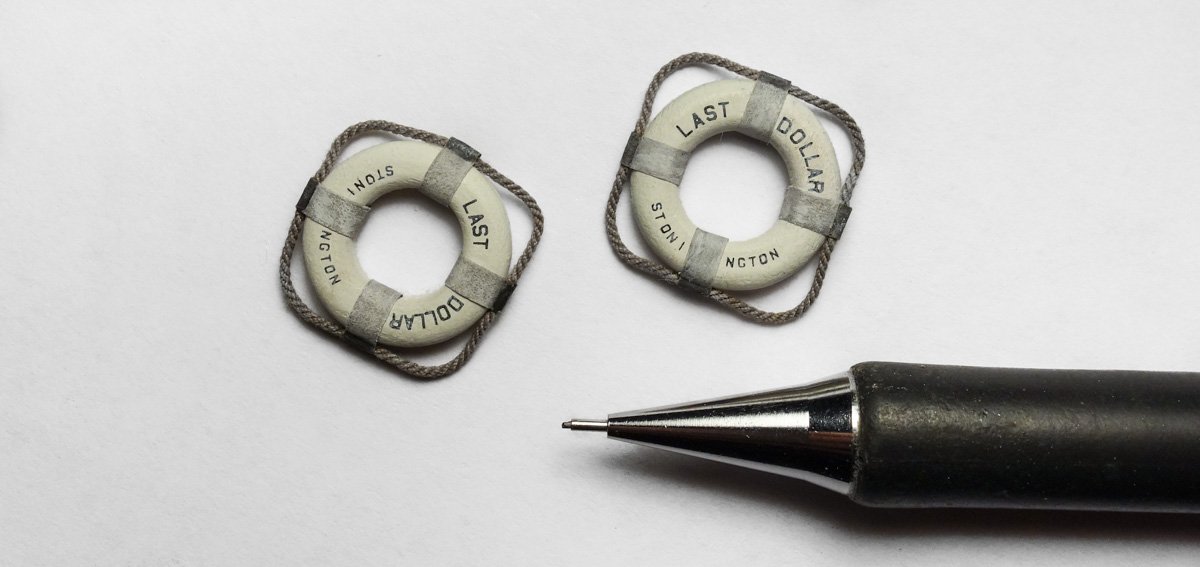
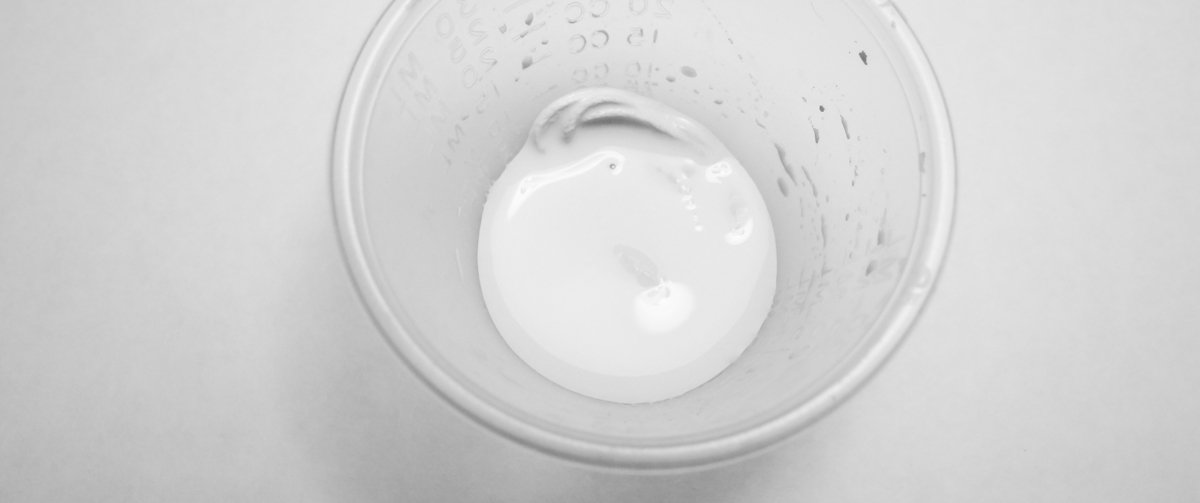
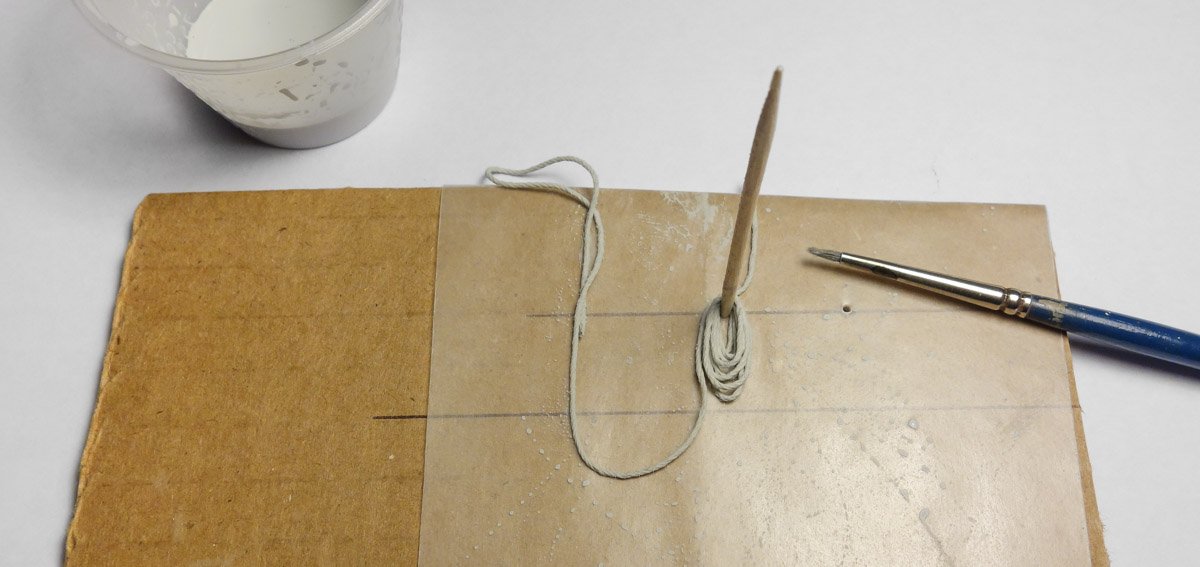
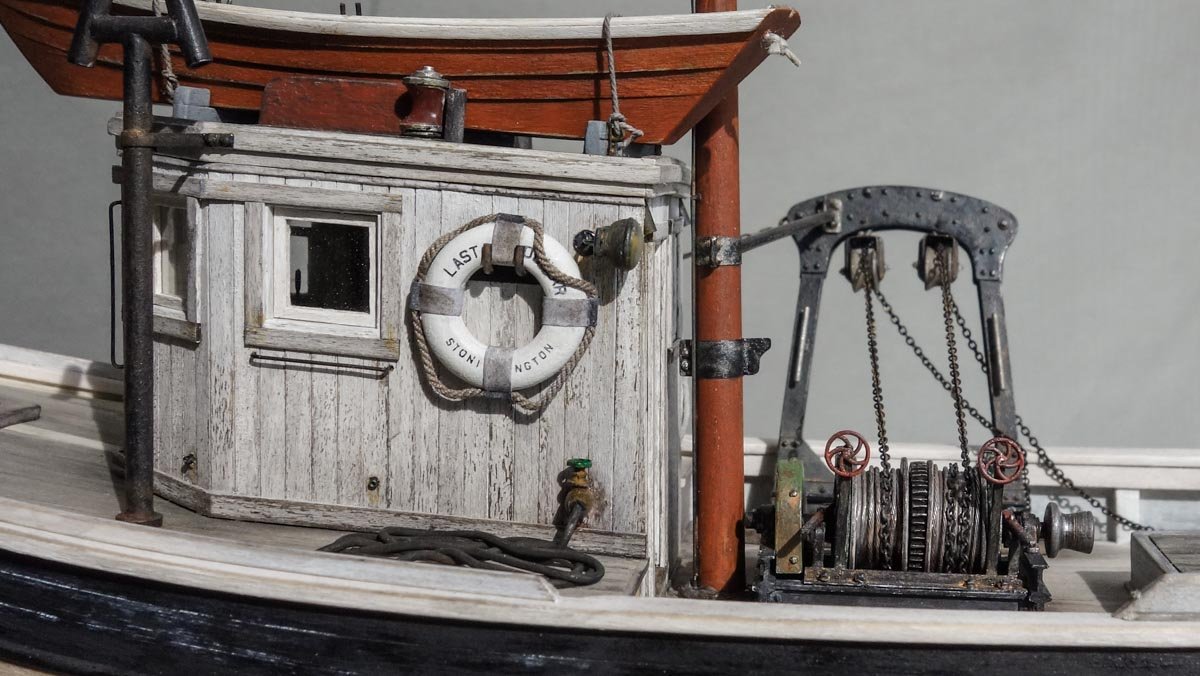
Hello and thanks to all for the kind comments. And thank you for the likes. Hello HH and thanks for your interest in my build. You could well be correct about that rail as I think that is a reasonable theory. I sure as heck don't know. Life Rings I’ve been dragging my feet on this build lately and the urge is building to get moving and start knocking this model out. I'm not going to rush because it's the process of modeling that I enjoy. But it isn't getting done by just thinking about it. Life rings are pretty straightforward to make. But sometimes the simplest objects can be the most difficult to believably model. Going through all the images and drawings I have of New England fishing boats, it seems the most common size ring in this era is 30”. I don't know when bright orange/red became the dominant color for life rings, but they weren't that common 100 years ago, at least anecdotally. So I'm going with off-white rings for this boat. I begin by gluing two layers of basswood together that produce the thickness needed for the rings. The grain is oriented like plywood at 90 degrees to each other for greater stability. A compass defines the discs and they are roughly cut out leaving plenty of extra material around the perimeter. The centers are drilled to fit a Dremel saw arbor and placed into the chuck of a portable drill and shaped with diamond grit files. Obviously, I don't have a lath and if you don't either and want to try this, know that your portable drill must be kept immovable and the file held firmly in order to shape the part into something close to a circle. If you allow the file to wobble, you are making a lobe for a camshaft and not a ring. Once removed from the arbor, I hand twist a tapered machinists' file into the center to open it up. Then some 600 grit paper followed by white acrylic. Miniature rope that scales to 1.25” is glued on at the 4 quadrants. Strips of paper representing the grab line retention beckets are colored with ink and alcohol and glued to the rear of the rings. The beckets are cut, wrapped around the ring and glued. As they were wrapped, a touch of CA was placed on the rope and the paper was pinched tightly around it. Dry transfer lettering is applied. The small letters are 1/32” and the larger is 3/64”. Ink and alcohol is applied to the rope to gray it down a bit and then a touch of pigment powder is scrubbed on overall to pull everything together. Brackets are made up from blackened brass and styrene. Epoxy holds them together. A throw/retrieve line will be added to one of the life rings. This throw line is a smaller diameter than the grab line on the ring and is intentionally being modeled to look dissimilar and therefore separate from the ring itself. I place a length of string that scales to 3/4” diameter into a mixture of wet-water, acrylic paint and PVA glue. I've used this process before on this model and additional information can be found at post #137 on page #5. A mock-up of the available space on the model is made and the string is wrapped around a toothpick which serves as a place holder for a bracket. There's a lot of PVA in this mix so waxed paper is needed to keep the string from adhering to the cardboard. Once I'm happy with the look of the thing, more solution is liberally applied. This will dry hard as a rock. A sliver of tin is fashioned into a throw rope holder. Injection molded nut/washers are glued on and color applied. And everything is glued to the wheelhouse. Thanks for stopping by. Stay well. Gary


- 424 replies
-
- 28
-
-
Very interesting boat Kevin. The bottom photo in your last post shows how large it really is - surprisingly so. I like the anchor, it is unique and ingenious. This is a nice open boat model celebrating your local fishing heritage. Your doing a great job and I look forward to seeing the model in her final paint. Gary
- 72 replies
-
- 1
-
-
- fishing boat
- artisanal fishing boat
- (and 1 more)
-
Wonderful progress Kevin - really sweet work. Nice technique for building the lifeboats and your videos are great. Gary
-
Good grief - everything so tiny, fragile and detailed. Splendid work Wefalck. It's always a pleasure (and education) catching up on your build. Gary
-
You made a beautiful job of her Kevin - congratulations. Great detail and atmosphere. She drips of the sea. Very nicely done. Gary
- 337 replies
-
- 3
-
-
- finished
- mountfleet models
- (and 1 more)
-
Just catching up on your log Kees. Beautiful work as always - every element and detail. I followed your previous F/V builds and have always admired your modeling skills. I am especially impressed by your work in styrene as it is among some of the best I have seen. The mechanism atop the capstan is another example of that high level of work. Very nicely done and completely convincing. Are you using something like Milliput for the inner and outer curvature of the "cast iron" components? Are you cutting/fabricating your own gears? Superb work Kees - keep it coming. Gary
- 193 replies
-
- 1
-
-
- wilhelmina vii
- fishing
- (and 1 more)
-
I so enjoy watching your process and problem solving in producing individual parts. Thanks for sharing that process with us. Wonderful work Keith, she is looking great. Gary