BANYAN
-
Posts
5,964 -
Joined
-
Last visited
Content Type
Profiles
Forums
Gallery
Events
Everything posted by BANYAN
-
 Stunning detail on the rigging Ed; I have to keep reminding myself this is 1:72. cheers Pat
- 3,618 replies
-
- 2
-

-
- young america
- clipper
- (and 1 more)
-
An extra rum issue for the dockyard lads Dave; the rigging looks great - very nice job. cheers Pat
-
Nice work Greg; this build is particularly well detailed and weathered - love the realistic look of the ventilation intake stacks etc. A very nice addition to your miniature fleet (I know, still a bit to be done) cheers Pat
- 405 replies
-
- 6
-
-
- tamiya
- king george v
- (and 2 more)
-
Slow but high quality progress Ed; I very much enjoy seeing your masterful work - it continues to keep me enthused with my build (which at the moment is more like a chore than fun but i will work through it :)) cheers Pat
- 3,618 replies
-
- 2
-
-
- young america
- clipper
- (and 1 more)
-
Nice to see an update John, but not to hear of the health news. Best wishes for a full recovery and speedy return to the slipway. cheers Pat
-
Very nice job on those davits Dan, they look terrific. cheers Pat
- 287 replies
-
- 2
-
-
- michelangelo
- ocean liner
- (and 1 more)
-
Looks good UV; both the model and the workshop. Must be good to finally be able to work with everything 'to hand' again? cheers Pat
- 786 replies
-
- 1
-
-
- Royal Louis
- Finished
- (and 1 more)
-
Nice work mate - I hope you get over the infection soon. I had been wondering why we had not seen an update for a while. cheers Pat
-
HMCSS Victoria 1855 by BANYAN - 1:72
BANYAN replied to BANYAN's topic in - Build logs for subjects built 1851 - 1900
Thanks Dave; slowly but surely I am being a little distracted making toys for my granddaughter at the moment which has slowed progress . cheers Pat- 1,021 replies
-
- 4
-
-
- gun dispatch vessel
- victoria
- (and 2 more)
-
Carl, it is a relatively simple concept - if you know you will be involved in a battle you fit the spur before sailing; otherwise it could stay off/inboard to improve ship-handling? No need to run to a nearby shore as you suggest, as they would know beforehand if there was likelihood of battle imminent. One-on-one battles, or to 'chase' another ship, would really only be for anti-piracy patrols or the like, and probably would result in the spur being fitted throughout the patrol. This is purely conjecture only. There may be some evidence to veto or support such a concept? Purely from the 'practical point of view' man-handling such a large (and heavy) chunk of iron-clad timber at those heights would not have been easy on a beach but may have been possible while alongside in their 'port'? Anything mentioned in the information you have Steven? cheers Pat
-
It seems we were responding at the same time Steven. your response to the anchor issue puts some of my thoughts to rest though. An iron anchor would still have had sufficient weight to assist, but it seems you have evidence these were stowed forward and the ships were beached stern first. Any discussion by the academics/researchers on whether the spur interfered with the anchor cable? Another thought, how easy/difficult was it to mount the spur. To assist ship handling etc, is it possible the spur was carried inboard and only fitted (while beached or the like) as required? An interesting discussion indeed. cheers Pat
-
Bit hard anchoring forward with the bows beached Carl If you want to stop the waves pushing the stern of a 'beached' boat around and beaching sideways, then the idea is to use a stern (kedge) anchor to keep her bows on the beach and stern to the sea. The cable of a forward anchor would probably also foul on the spur? Not much point anchoring these types of vessels out in a bay to overnight I would think (unless expecting a night action)? Back in those days, I think, they tended to stay near the coast, unless foraying from their base. More often than not they probably camped on a beach overnight. A kedge anchor would then be very useful, even if made of stone; the bows were probably made fast to the beach/coast with some type of 'sand/ground' anchor? The beauty of a double ended vessel is that it would lay to anchor from aft just as well as from forward? Anything in your research about this Steven? Food for more thought anyway Sorry to have hijacked your build log Steven. cheers Pat
-
Looks good Daniel. Where was the stone anchor stowed? (I am assuming stone and expect the usual consequence ) Might that have been aft and used as a counterweight. If they drove the bows onto the beach the an anchor aft would make sense? cheers Pat
-
HMCSS Victoria 1855 by BANYAN - 1:72
BANYAN replied to BANYAN's topic in - Build logs for subjects built 1851 - 1900
Thanks to all for the likes and for looking in, and kind comments Carl, John and Druxey; much appreciate the feedback and encouragement. Druxey, 4 turns if you include the in and out feed (or is that 3 total ). I haven't been able to determine if the 4 turns were 4 complete with or without feed lines - I have gone with 4 wraps of the cable. According to the patent description this is correct as being direct acting on the tiller using the slide mechanism of the Rapson design, this required much less effort and also resulted in 'positive' control of the wheel. I would appreciate any further feedback if anyone has better information. I will try to find that info and post again and perhaps a better 'interpretation' of the info could be made? The problem is that there is precious little information available about these types of equipment. the only model of a Rapson slide I have found is in the Dutch Rijksmuseum and it only shows the tiller with partial slide attached - no ropes / cable etc. cheers Pat- 1,021 replies
-
- 3
-
-
- gun dispatch vessel
- victoria
- (and 2 more)
-
Great work Daniel, very symmetrical layout on the framing. cheers Pat
-
Great work on the boats Danny, they look great. Could you fix the tiller by cutting off the squared extension and replace with some brass wire/rod of suitable scale? cheers Pat
-
HMCSS Victoria 1855 by BANYAN - 1:72
BANYAN replied to BANYAN's topic in - Build logs for subjects built 1851 - 1900
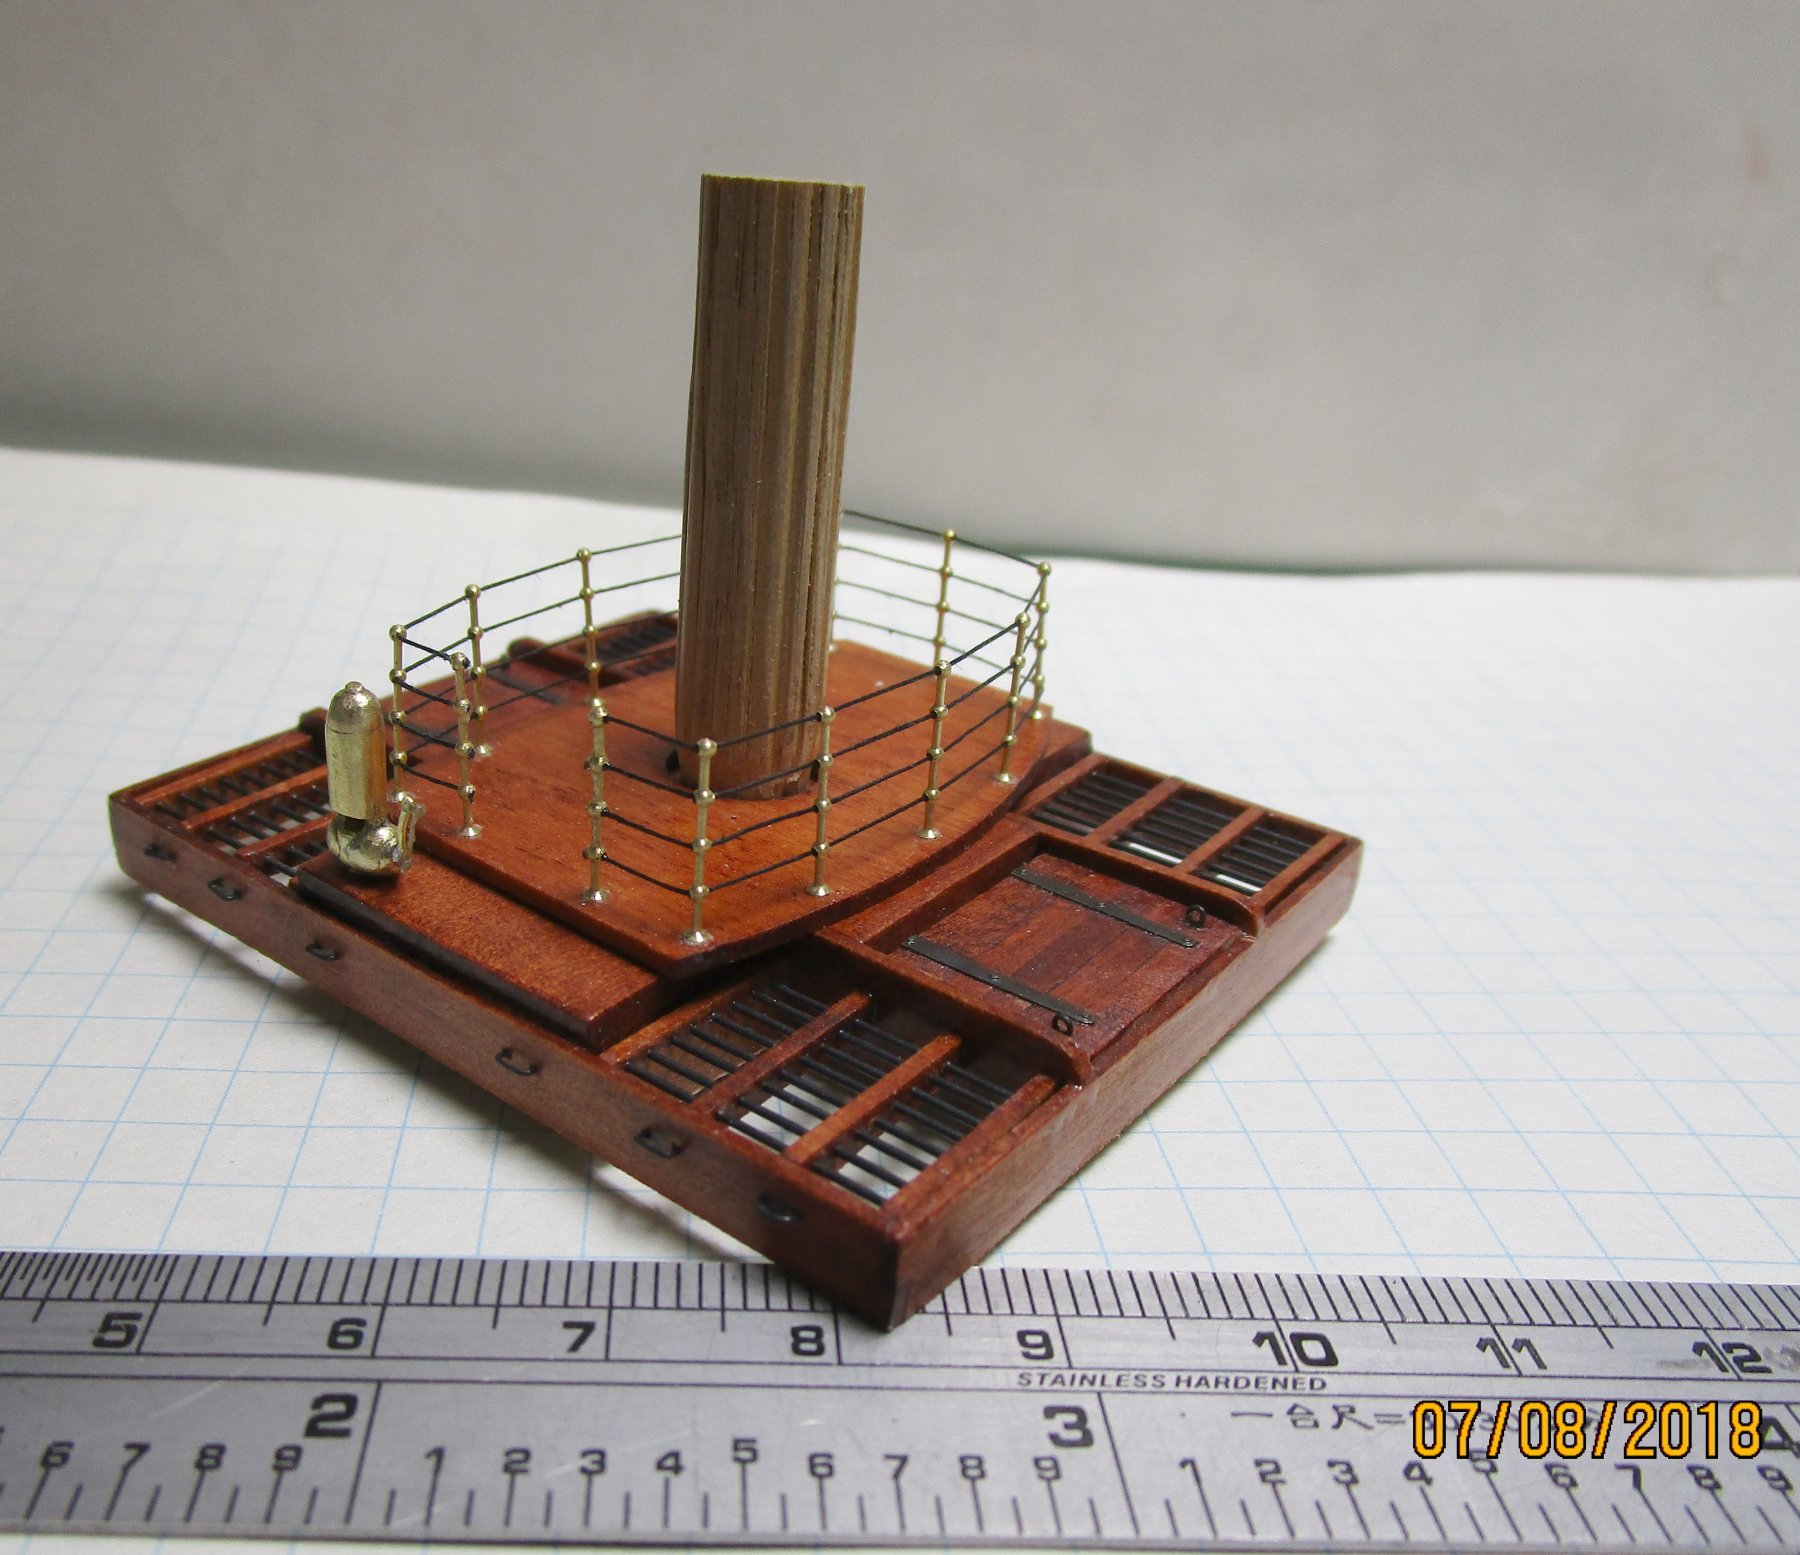
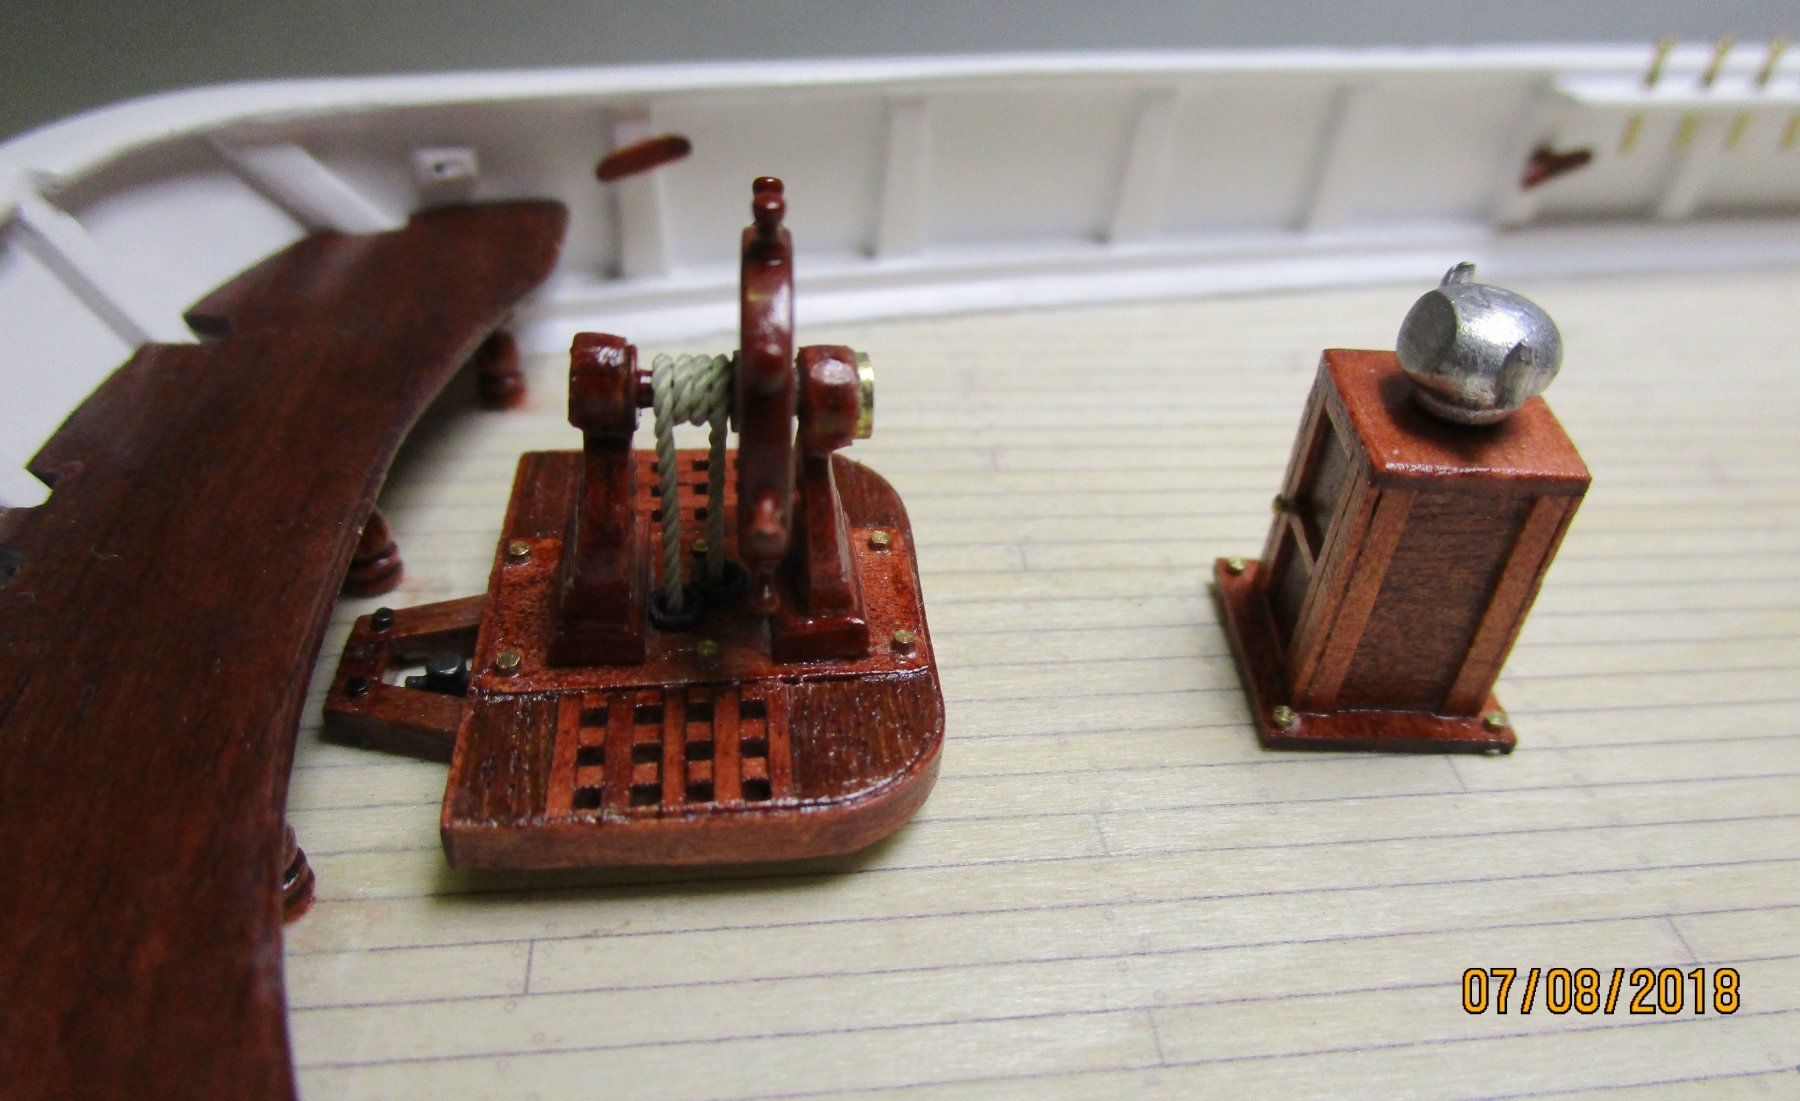
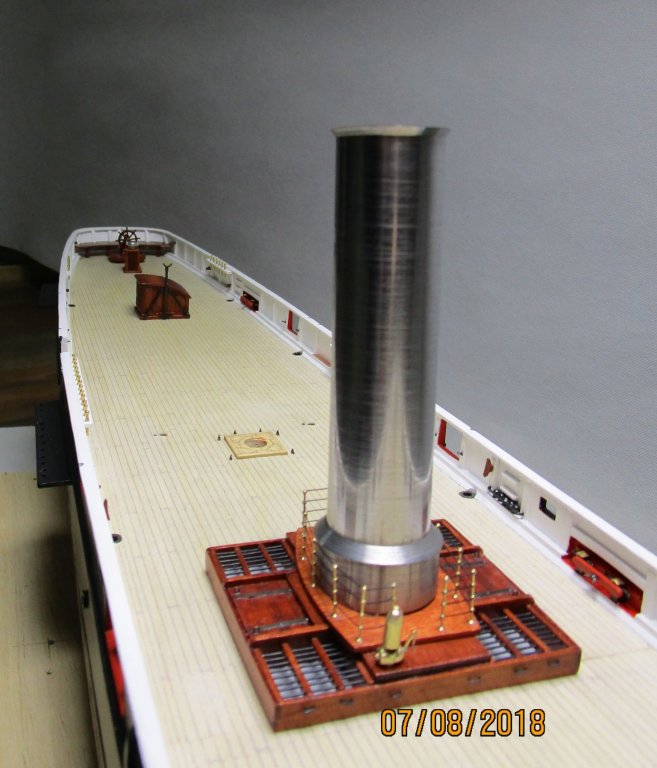
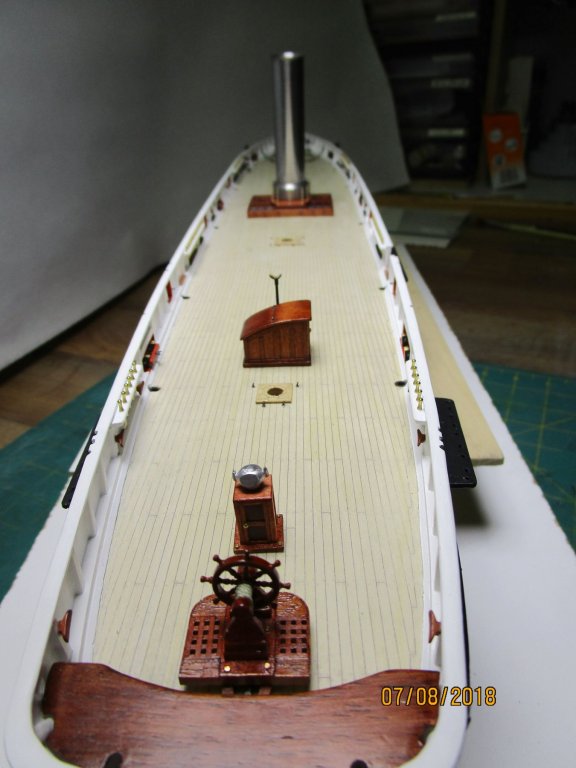
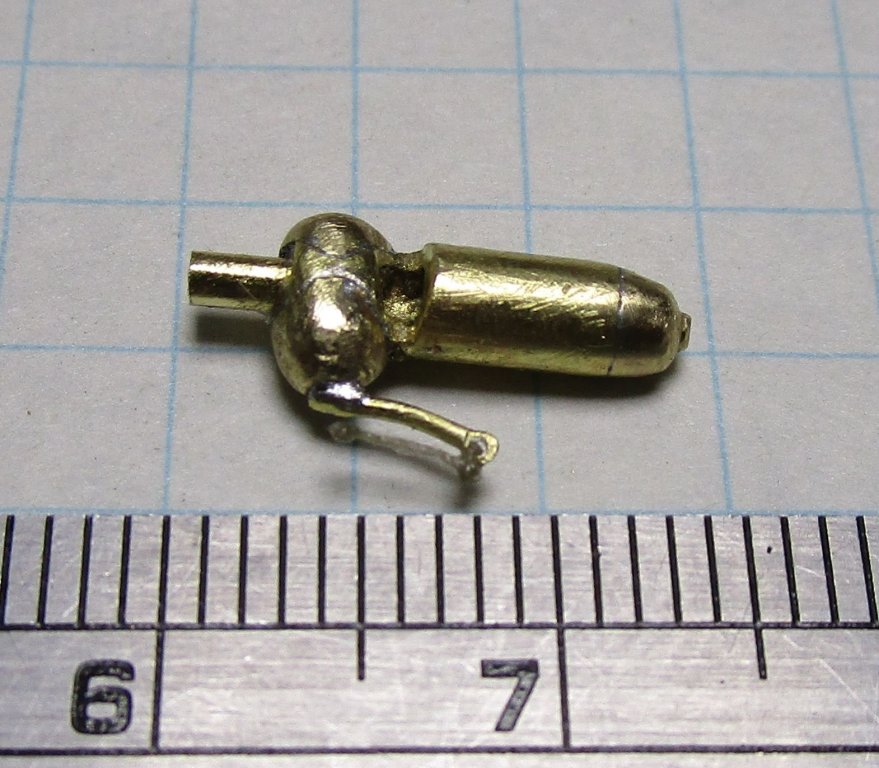
Hi folks, another update; not much but some progress. I am being slowed b research at the moment. The steering platform is now complete and fitted over an inverted 'A' Frame - the rapson slide (not shown) slides across under the platform between the legs of the frame at the position of the cable drum. The steering compass cabinet is complete but just dry fitted. The compass cover (pewter aftermarket part cut from its pedestal) is also only dry fitted. If we use this it will be painted brass. We are trying to make this by 'spinning' on a lathe to get the base form. The hammock platform around the funnel has now been completed. This is only 11mm high to give some idea of size so this is a 'close-up' which shows all the 'detail' not visible to the naked eye As best as I can determine, there was only an outer rail. the hammocks are stacked vertically and I assumed some are lashed to the rails for stability? An inner ring would not work due to space and access issues. When the original photo is zoomed right in, the stanchions and 4 rails are very clear. I have used black cotton in-lieu of wire for the rails as, at this scale it was impossible to keep the shape of the 0.4mm wire without deformation as I bent it around and through the stanchion holes. The stanchions are after-market. The companion has also been fitted in place. I have also made a steam whistle (a little early for a steam horn which did not appear for another decade or so (as best I can determine). This was made from a tube with a rounded solid upper plug, and a bit of rod rounded and shaped to accept the actuator handle at one end - this was drilled through to accept the whistle and is intended to represent the steam cock valve. The spigot at the base is a locating pin. The photo of the whistle itself shows the item before cleaning and some polishing - this will be left brass. The ruler in the photo is in mm. cheers Pat

- 1,021 replies
-
- 21
-
-
- gun dispatch vessel
- victoria
- (and 2 more)
-
Sounds like you have a good grip on the spur now Steven; enough to make a very good 'case/argument' for the iron sheathed spur. Look forward to seeing this fitted. cheers Pat
-
Ah, another form of a 'prayer wheel' (bent over using them as in saying prayers) - Interesting concept but all overtaken with calculators and the like these days
- 3,618 replies
-
- 3
-
-
- young america
- clipper
- (and 1 more)