HOLIDAY DONATION DRIVE - SUPPORT MSW - DO YOUR PART TO KEEP THIS GREAT FORUM GOING! (83 donations so far out of 49,000 members - C'mon guys!)
×


BANYAN
-
Posts
5,946 -
Joined
-
Last visited
Content Type
Profiles
Forums
Gallery
Events
Everything posted by BANYAN
-
 Doing better than me mate; I wouldn't even know where to start with these sorts of colours cheers Pat
 -
HMCSS Victoria 1855 by BANYAN - 1:72
BANYAN replied to BANYAN's topic in - Build logs for subjects built 1851 - 1900
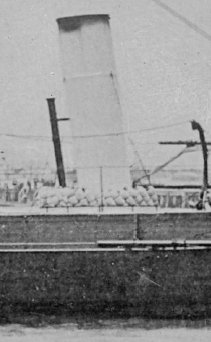
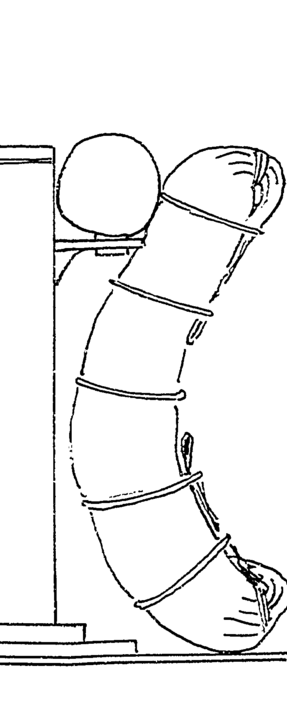
Hi all, another small update, I am being slowed with research at the moment but finding a little time to do a few small things such as making the hammocks for stowing around the funnel as shown in the photo. I posted a photo of the railings earlier; these are only 11mm high with the hammocks 22mm. I did these by rolling some washed drafting linen around a styrene rod (.8mm) then cutting them into lengths before attaching the marline hitch lashings. The rolled linen was soaked with a diluted fabric glue (water) solution and I originally had intentions of removing the rod. However, even with the stiffening from the solution it proved to keep these straight enough as shown in the photo so I left the rods in-situ. I have just noted i need to tidy up some of the rod end (to hide them a bit better). I also did try to add the clews and ring that would have been folded inwards (as shown below) but simply could not achieve it with my clclumsy fingers at this scale 🙂 As these faced in towards the funnel they would not have been seen anyway (well that is my poor excuse. cheers Pat
- 1,013 replies
-
- 16
-

-
- gun dispatch vessel
- victoria
- (and 2 more)
-
Stunning - very crisp and beautifully detailed work Amalio. cheers Pat

-
Very nice work Greg; you have really mastered the pre-shading etc which looks absolutely fabulous. cheers Pat
- 405 replies
-
- 5
-
-
- tamiya
- king george v
- (and 2 more)
-
That detail looks great Greg, you've done a excellent job on those guns. There is no harm in covering the boats with canvas, that is how they would have been at sea unless being used anyway cheers Pat
- 405 replies
-
- 5
-
-
- tamiya
- king george v
- (and 2 more)
-
Very nice effect Tecko, you're on the finishing stretch now despite the daunting task of painting cheers Pat
-
An interesting and enjoyable build to follow Dan; you can be justifiably proud of your efforts - she looks great! cheers Pat
- 287 replies
-
- 4
-
-
- michelangelo
- ocean liner
- (and 1 more)
-
If it helps there are a couple of Mermaid build logs that may assist directly, or the builder may be able to help. Examples: and cheers Pat
-
Agree with Michael, this will be an interesting subject and build. Very fortunate you were able to get a thoroughly researched set of plans and info. cheers Pat
- 219 replies
-
- 2
-
-
- smack
- cross-section
- (and 2 more)
-
Another example of your fine craftsmanship Ed. cheers Pat
- 3,618 replies
-
- 3
-
-
- young america
- clipper
- (and 1 more)
-
Nice work OC; you are making some very good progress with this very nice model cheers Pat
-
HMCSS Victoria 1855 by BANYAN - 1:72
BANYAN replied to BANYAN's topic in - Build logs for subjects built 1851 - 1900
Thanks for the head's up Steven. I can't say it is readily available these days but I have a little bit tucked away. look forward to seeing the restoration of your Royal Harry. cheers Pat- 1,013 replies
-
- 3
-
-
- gun dispatch vessel
- victoria
- (and 2 more)
-
Great to see you back at it Mark. You seem to have that 'death star' sorted now, that sheet looks very nicely cut. cheers Pat
-
Hi Tim, nice job on the build. Look forward to seeing it and yourself at the SMSV meeting. cheers Pat
- 115 replies
-
- 1
-
-
- Scottish Maid
- artesania latina
- (and 1 more)
-
HMCSS Victoria 1855 by BANYAN - 1:72
BANYAN replied to BANYAN's topic in - Build logs for subjects built 1851 - 1900
Thanks for looking in Denis; slow progress at the moment while I concentrate on further research and get the 3D printed parts underway. cheers Pat- 1,013 replies
-
- 3
-
-
- gun dispatch vessel
- victoria
- (and 2 more)
-
An hour or two per day has served you well Ed (no pun intended); the rigging looks great cheers Pat
- 3,618 replies
-
- 2
-
-
- young america
- clipper
- (and 1 more)
-
Nice work Jason; a real production line you have going there. Those canon ook great! cheers Pat
-
Glad you enjoyed your trip Rod; and thanks for posting pics. Mate your call on the masting and rigging - whatever 'floats your boat' so to speak. The main thing is do you like it displayed like that - if yes then go for it. it certainly is a different adaption of the 'stub mast' display. cheers Pat
- 108 replies
-
- 2
-
-
- endeavour
- caldercraft
- (and 1 more)
-
You have to be happy with that result Danny; great work and a very polished high quality job. cheers Pat
-
Nice work Eberhard; I know how difficult (for me at least ) turning acrylic can be - turned up very cleanly. cheers Pat
-
Your rope walk makes up some nice rope UV and those tops will look great when complete. cheers Pat