


yvesvidal
-
Posts
3,083 -
Joined
-
Last visited
Content Type
Profiles
Forums
Gallery
Events
Posts posted by yvesvidal
-
-
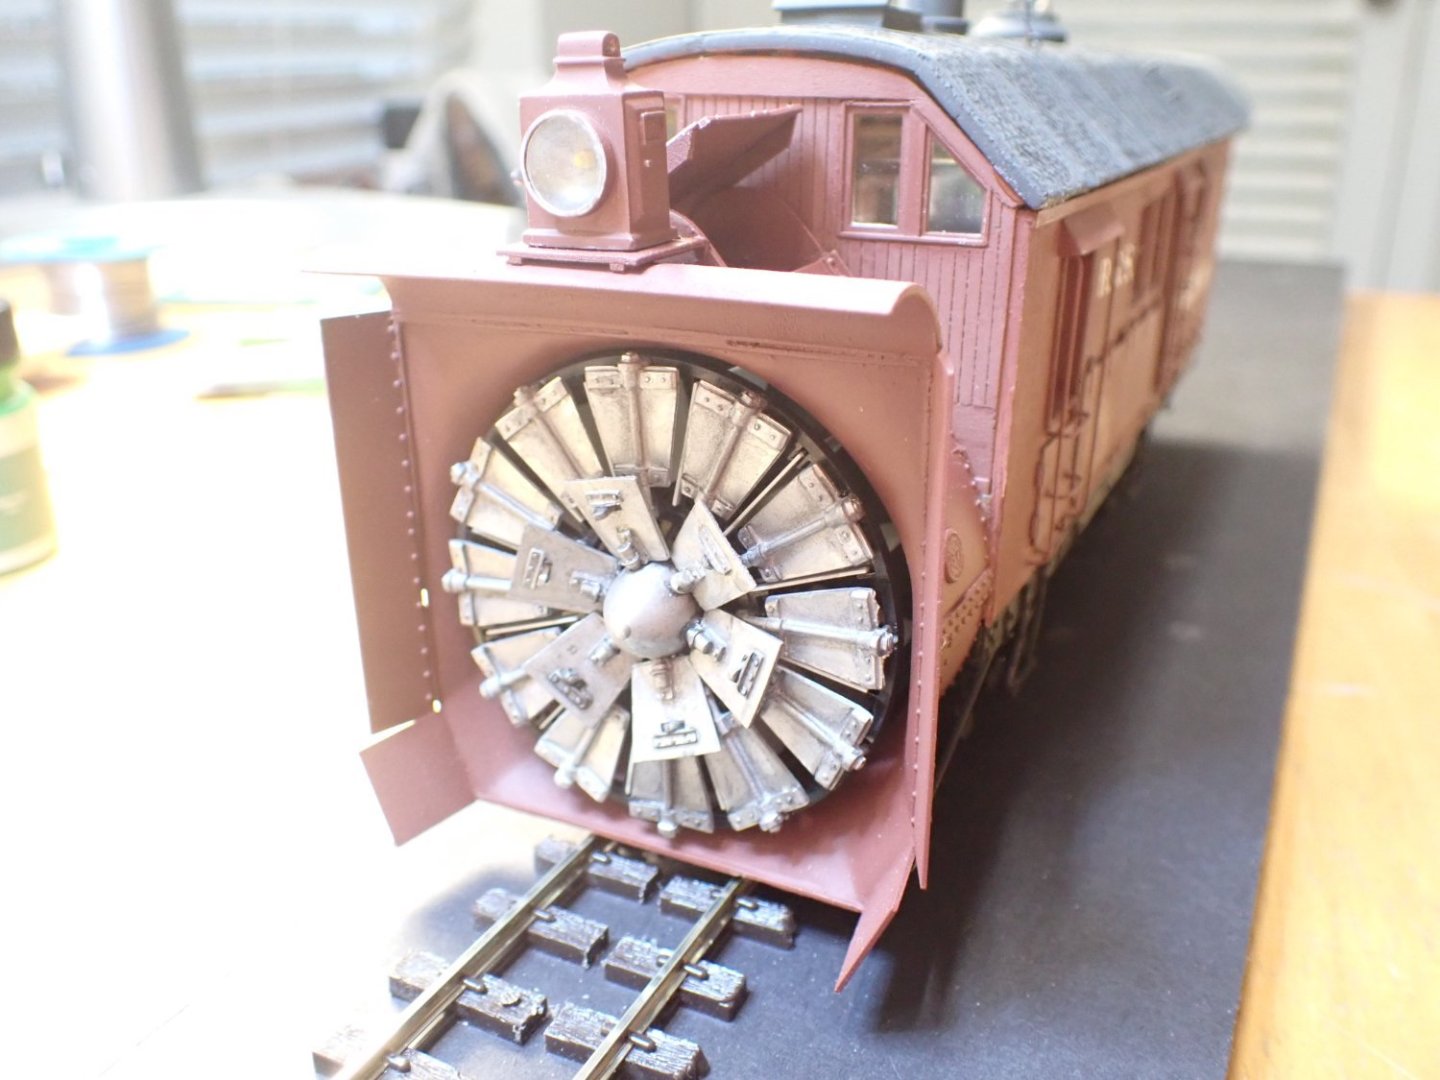
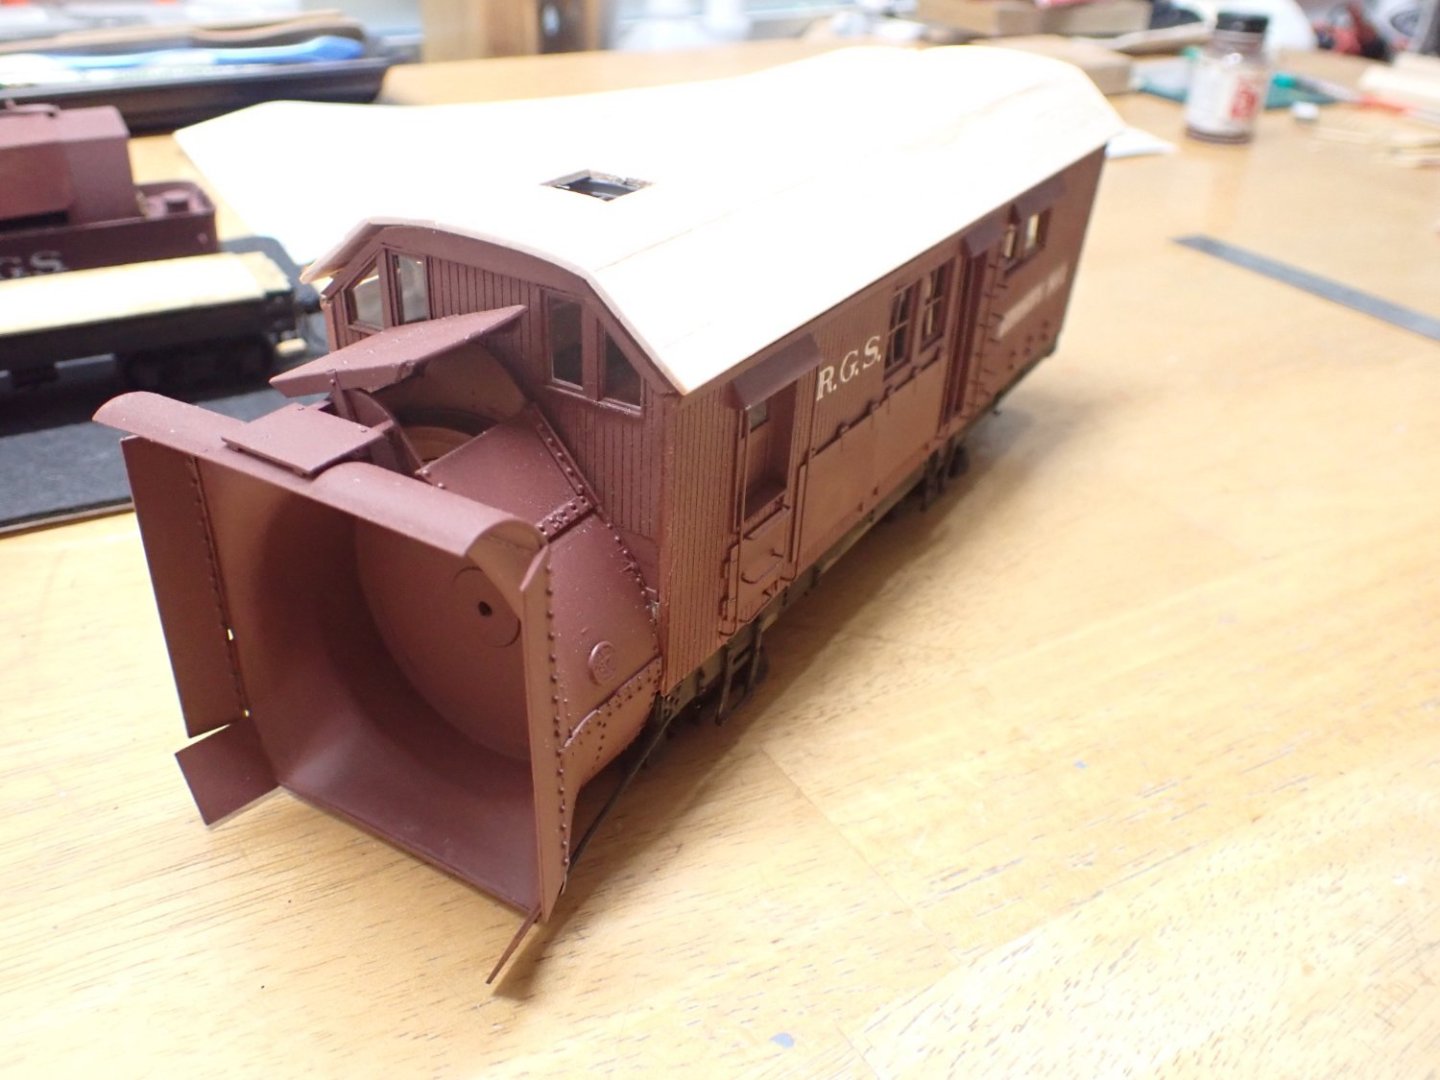
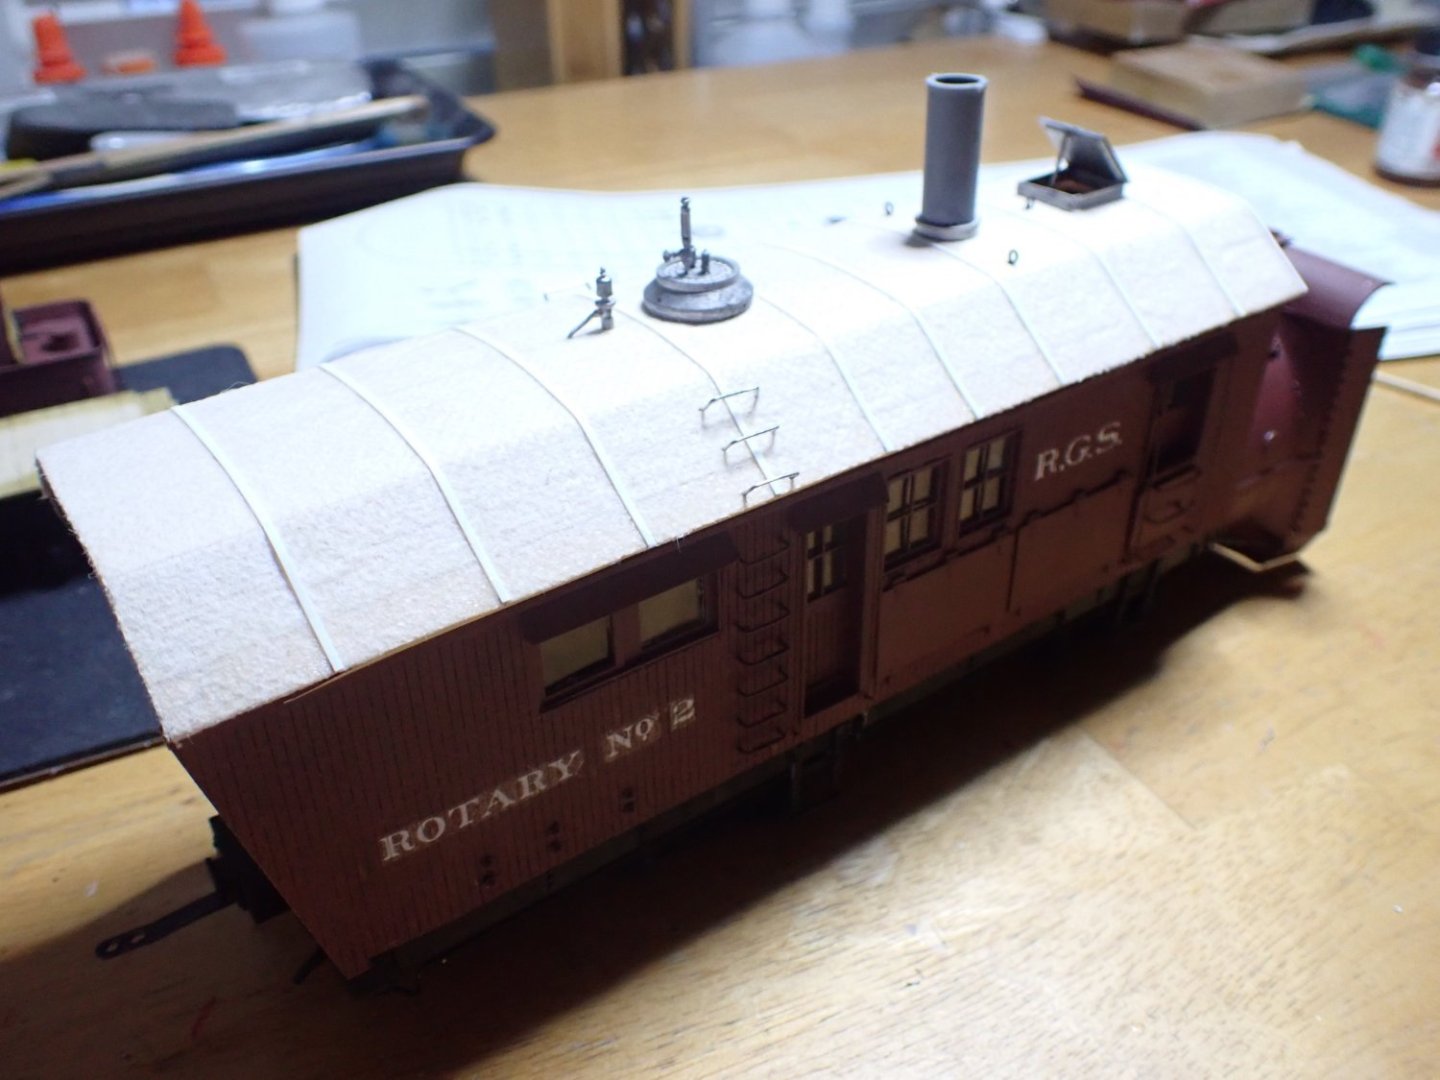
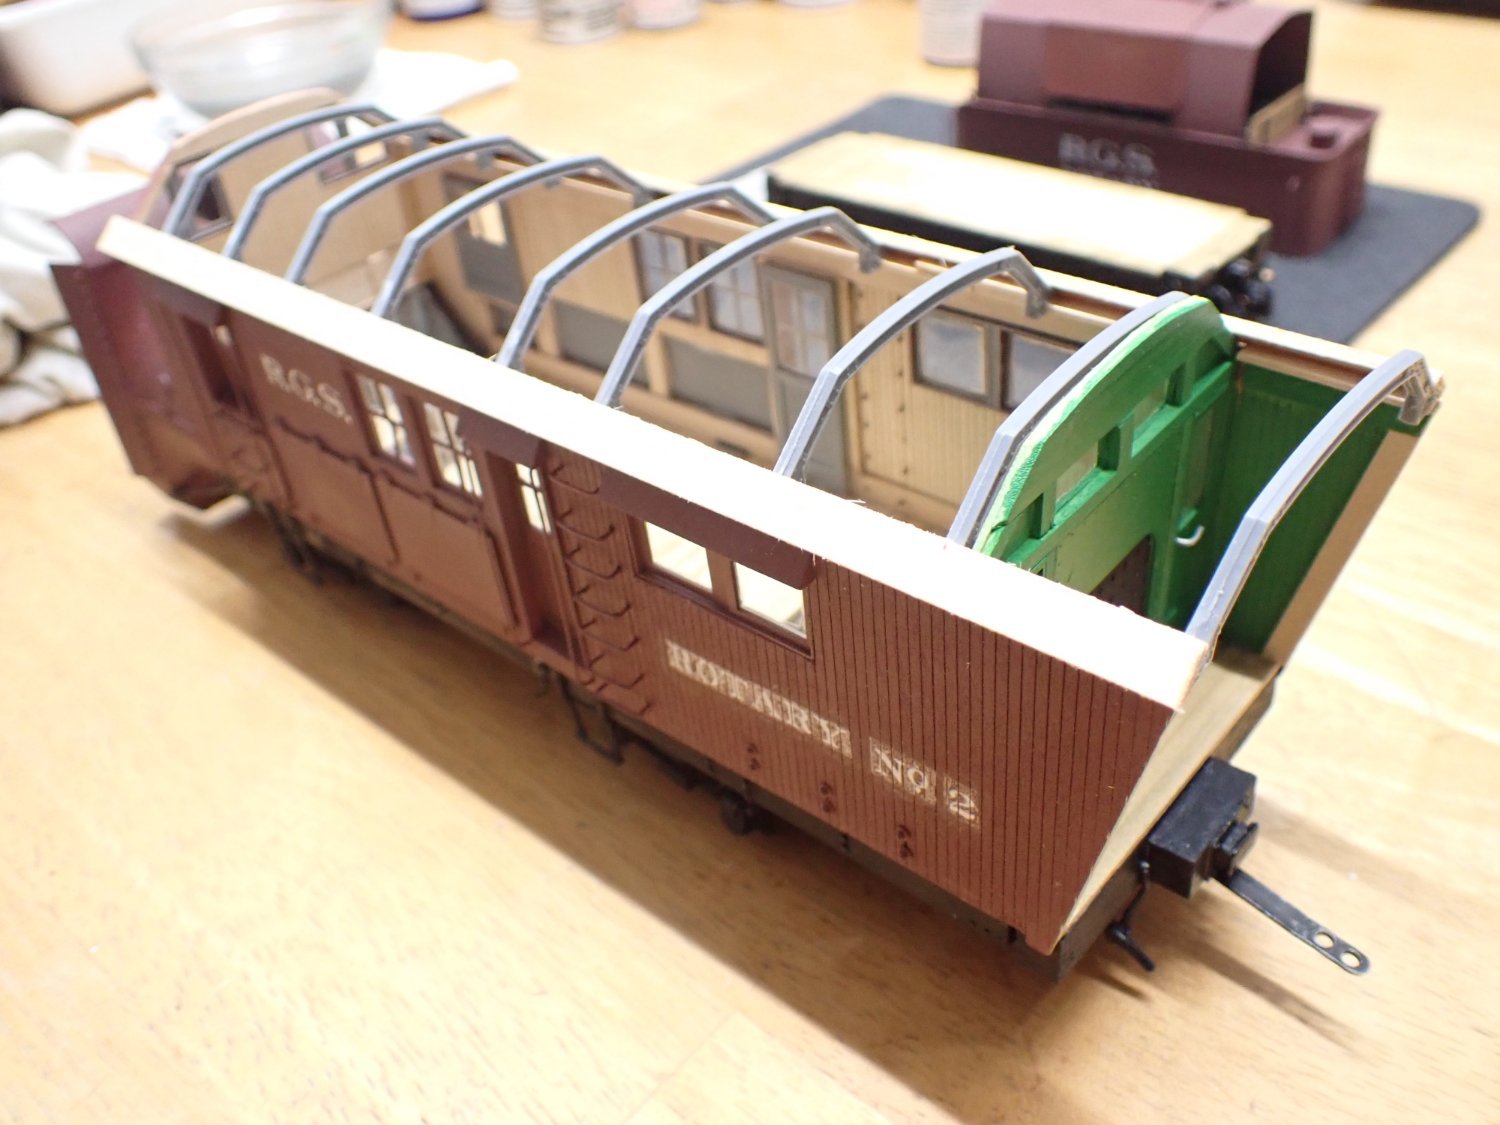
The snowplow is almost finished. I have to finalize the various lines (water, air) between the two units and build a piece of track to call it completely finished. The roof has been permanently glued to the chassis.
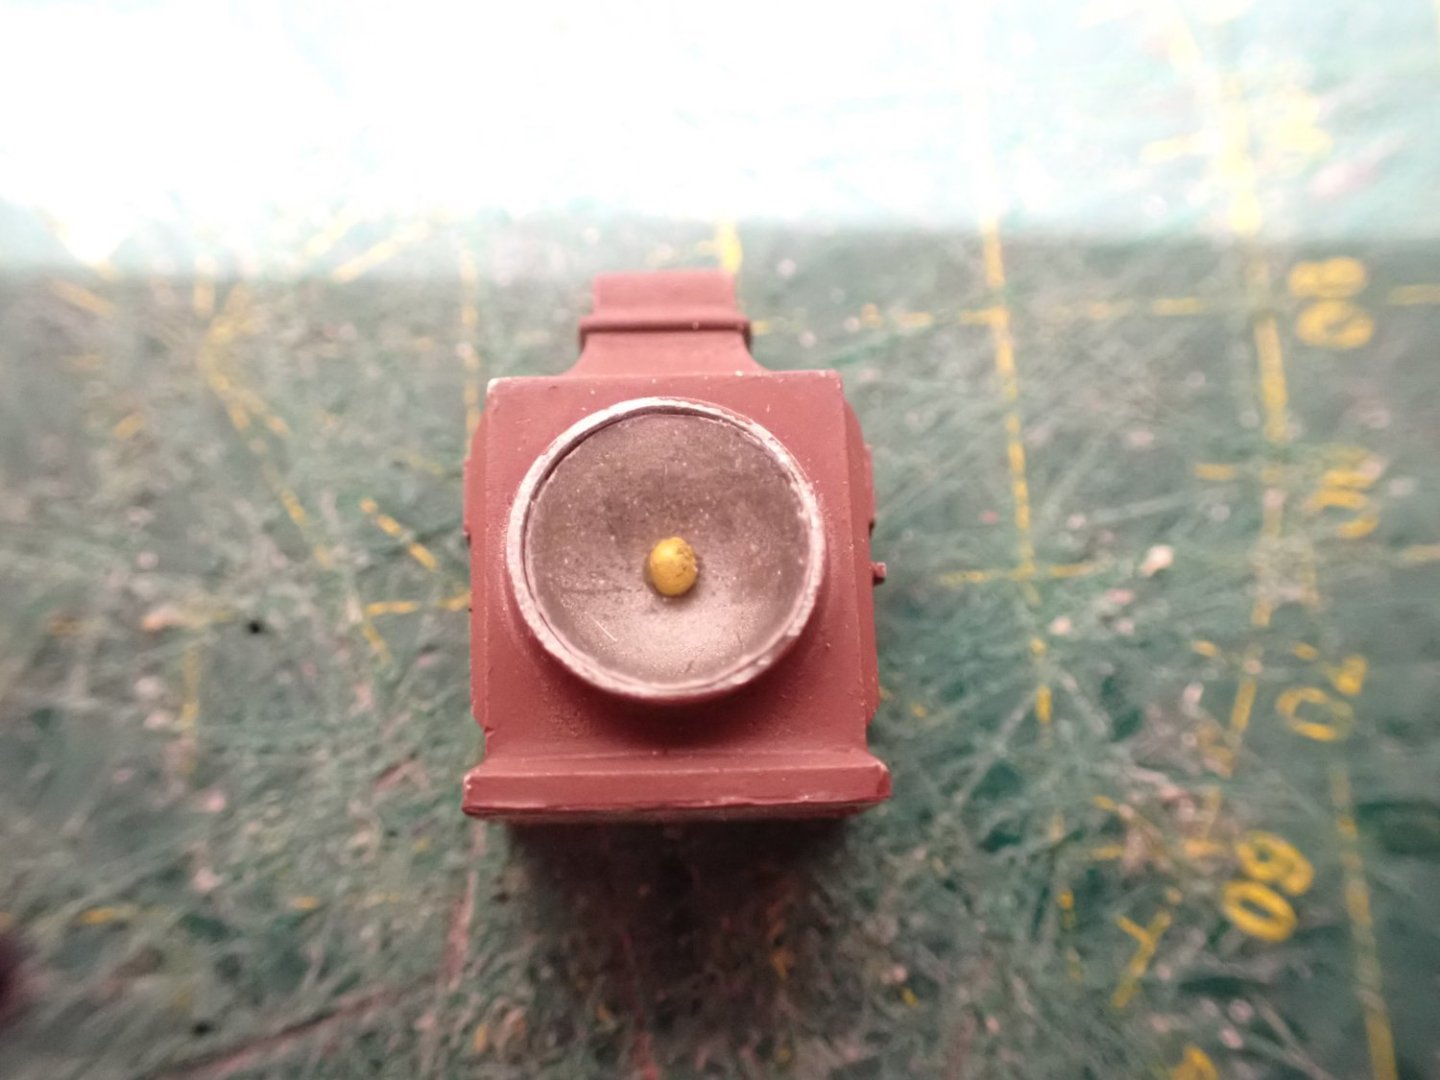
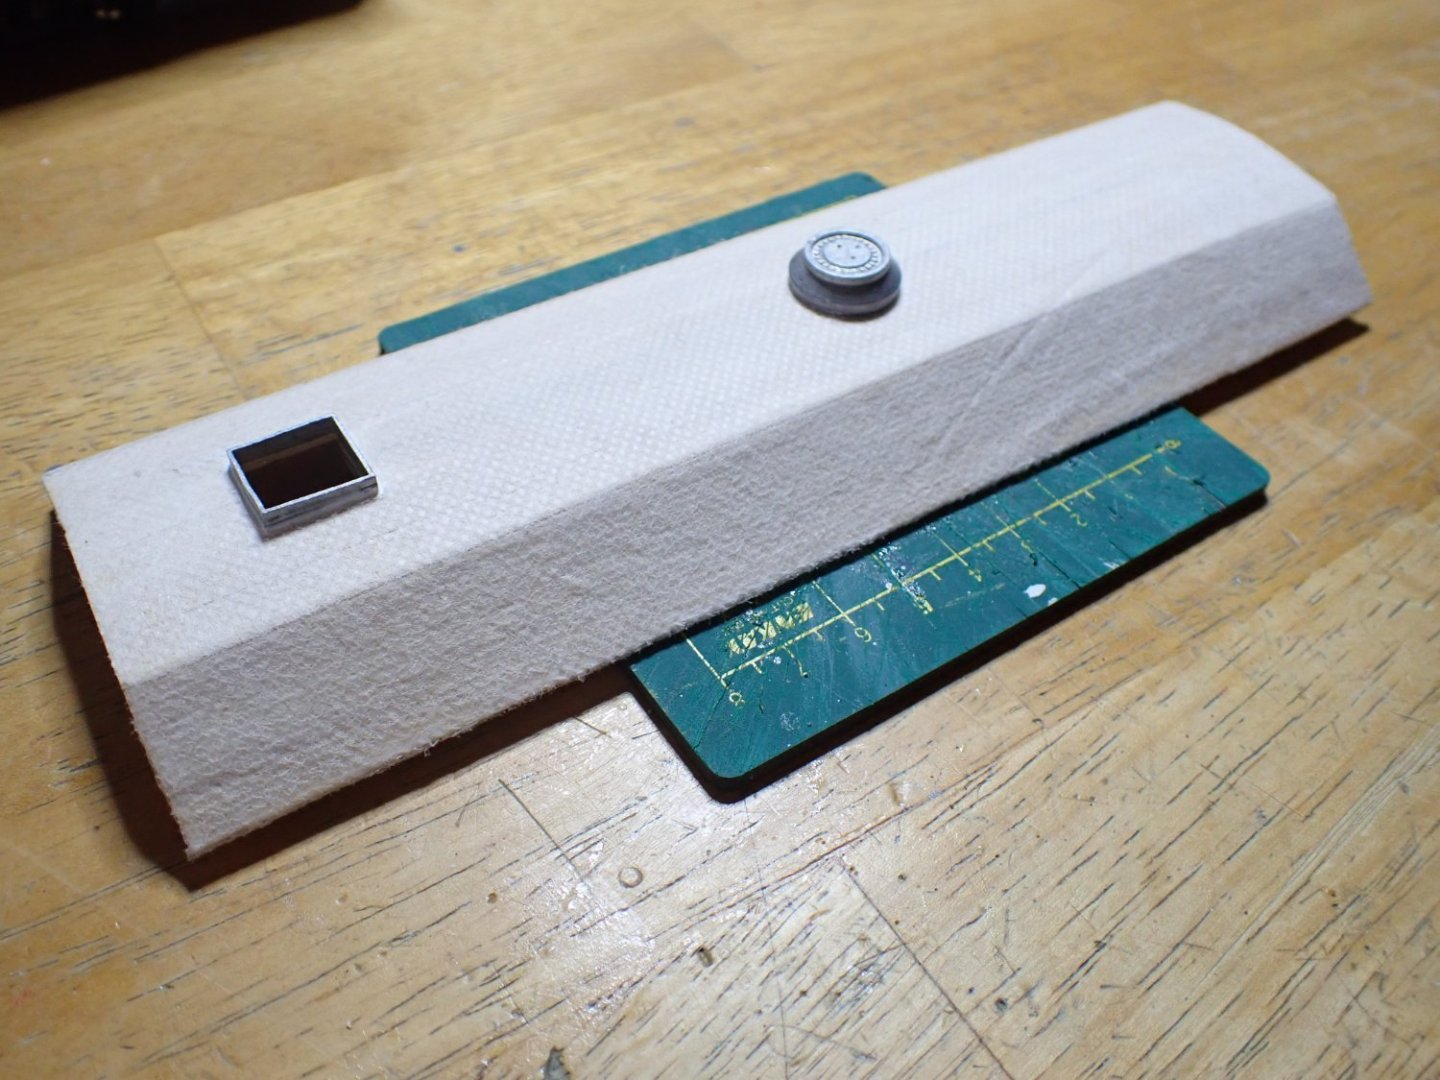
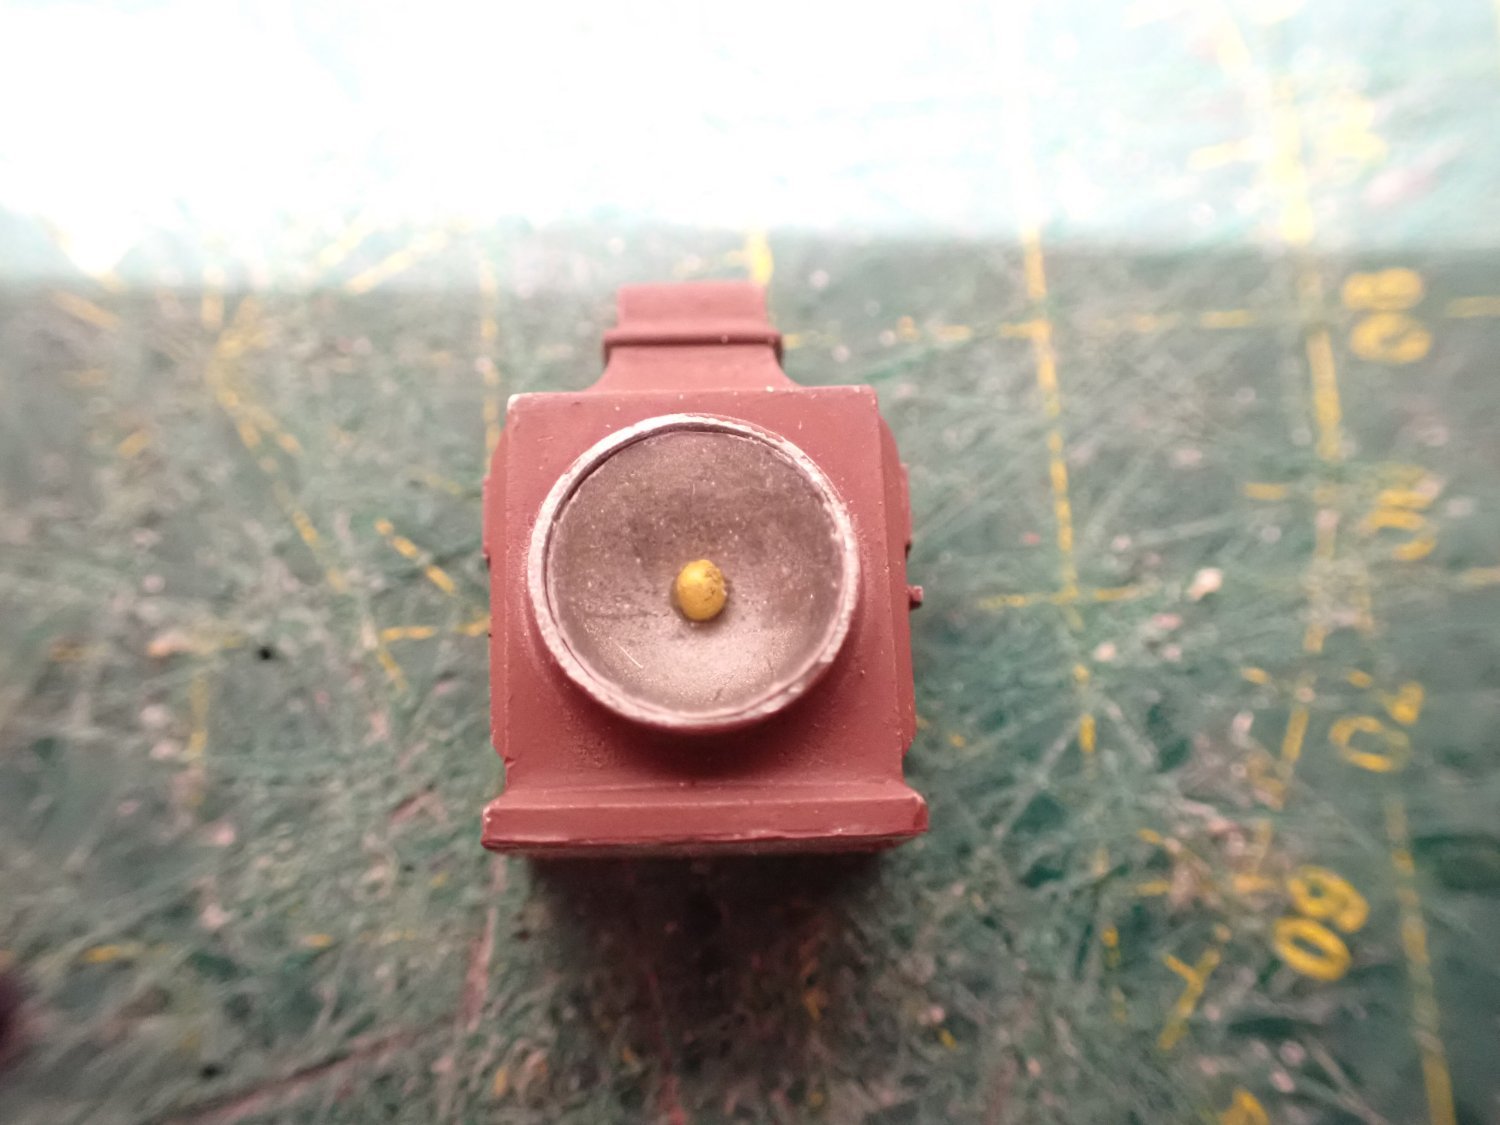
The headlight is made with the metal cast part, a piece of plexiglass cut and filed until it fits perfectly and a toothpick, rounded and painted to mimic a light bulb.
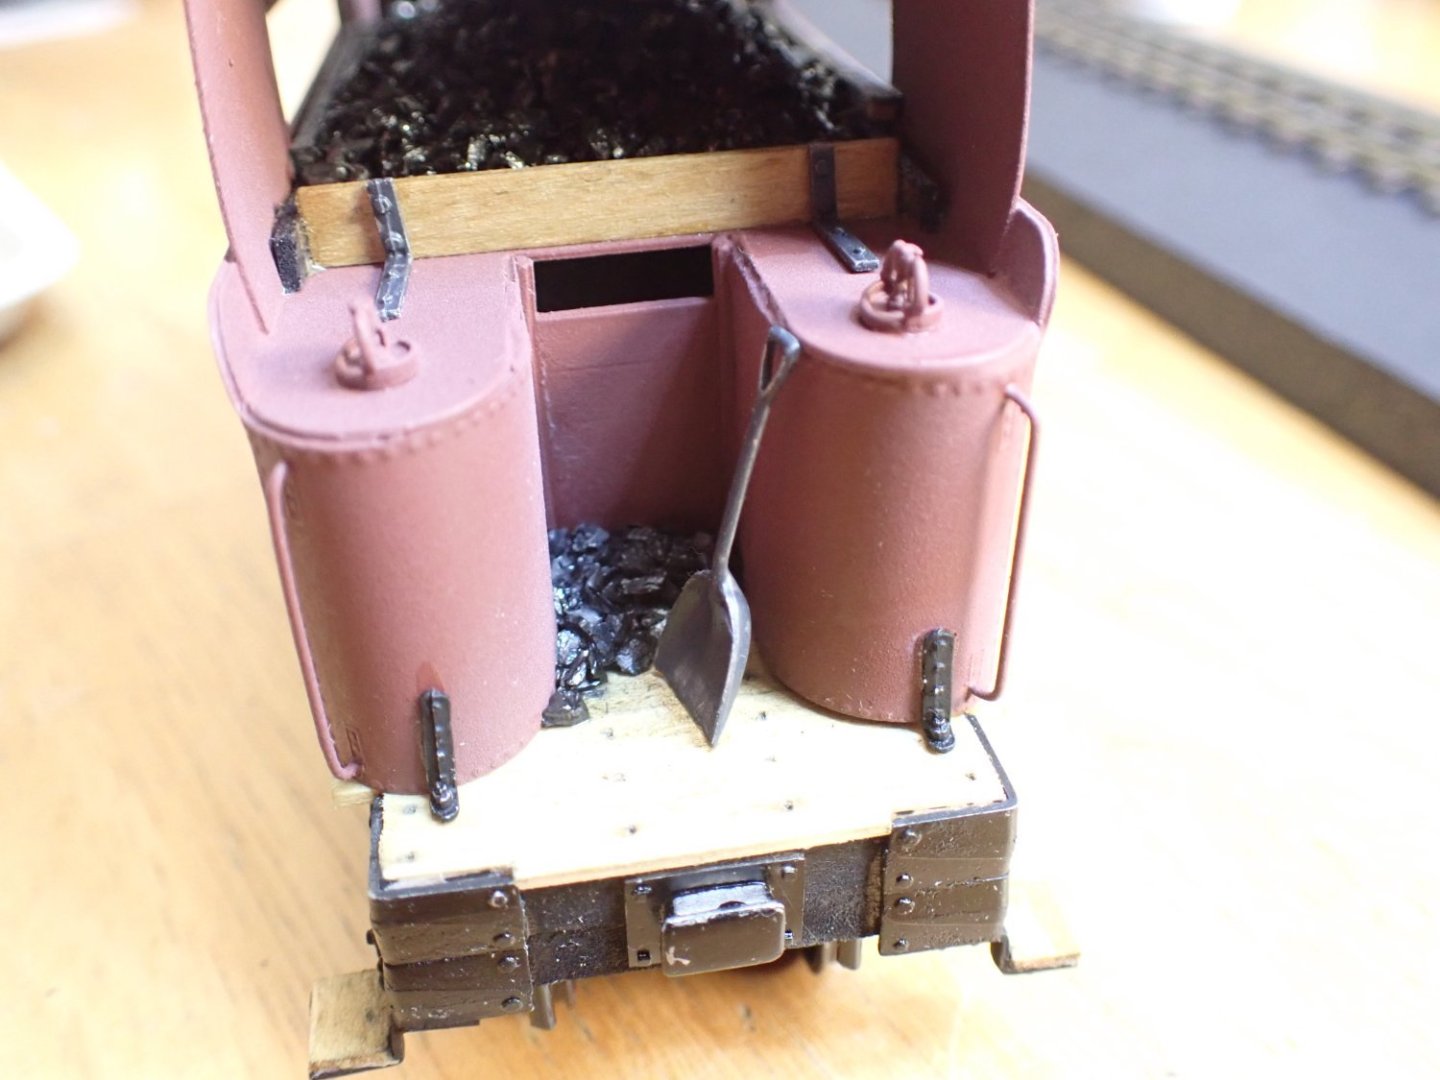
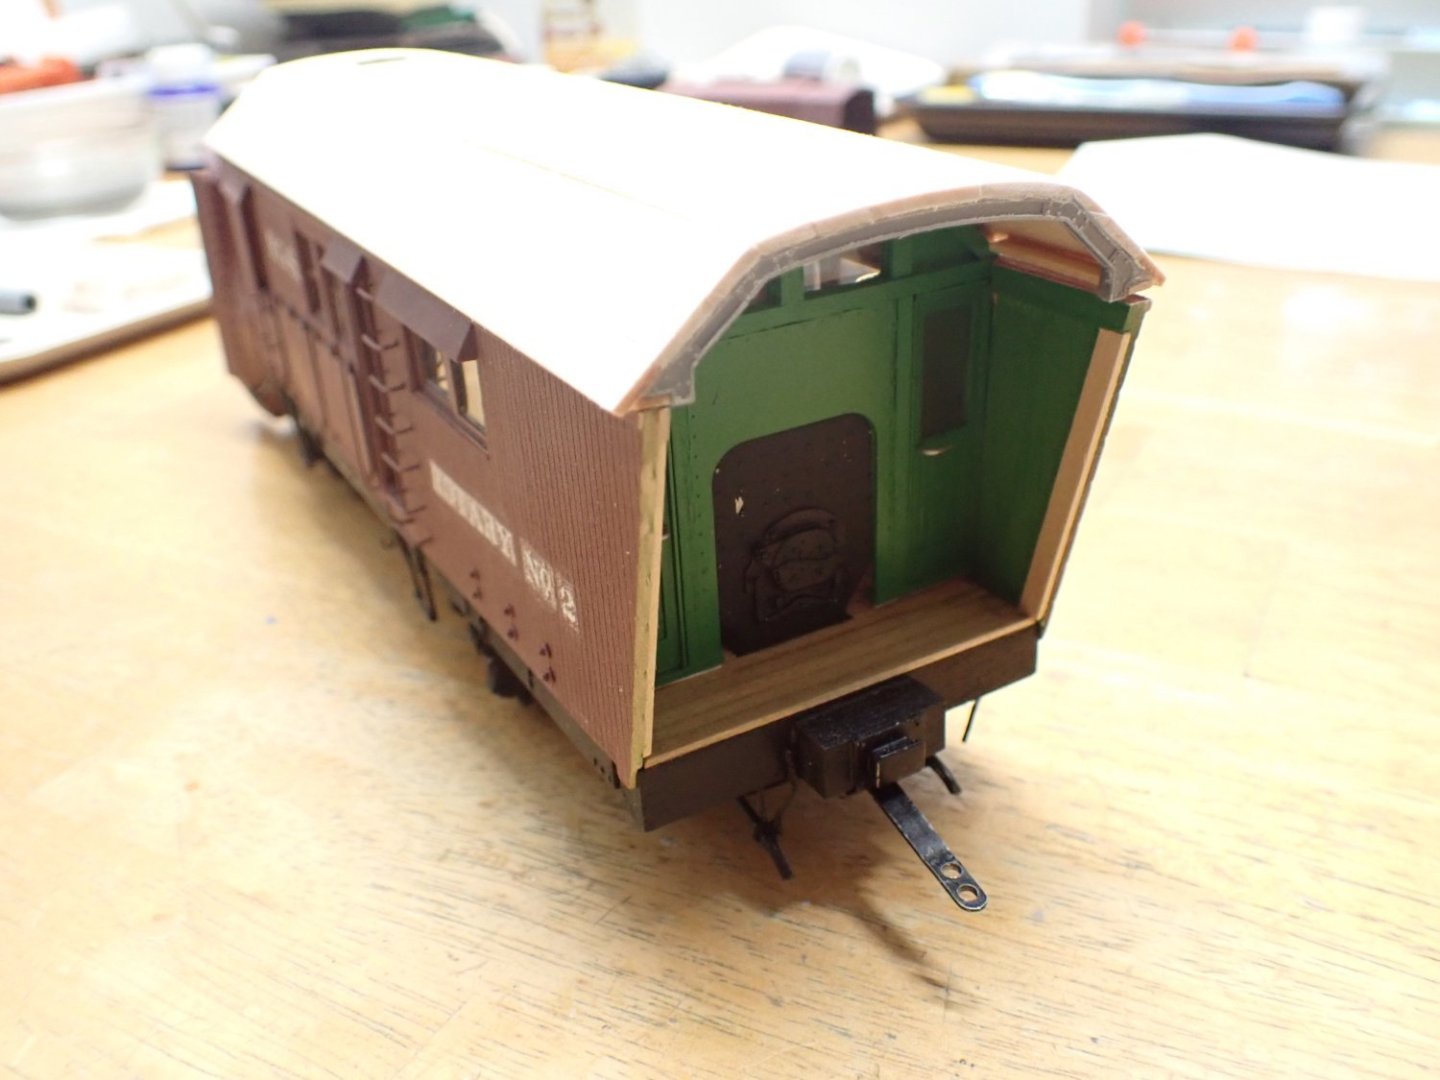
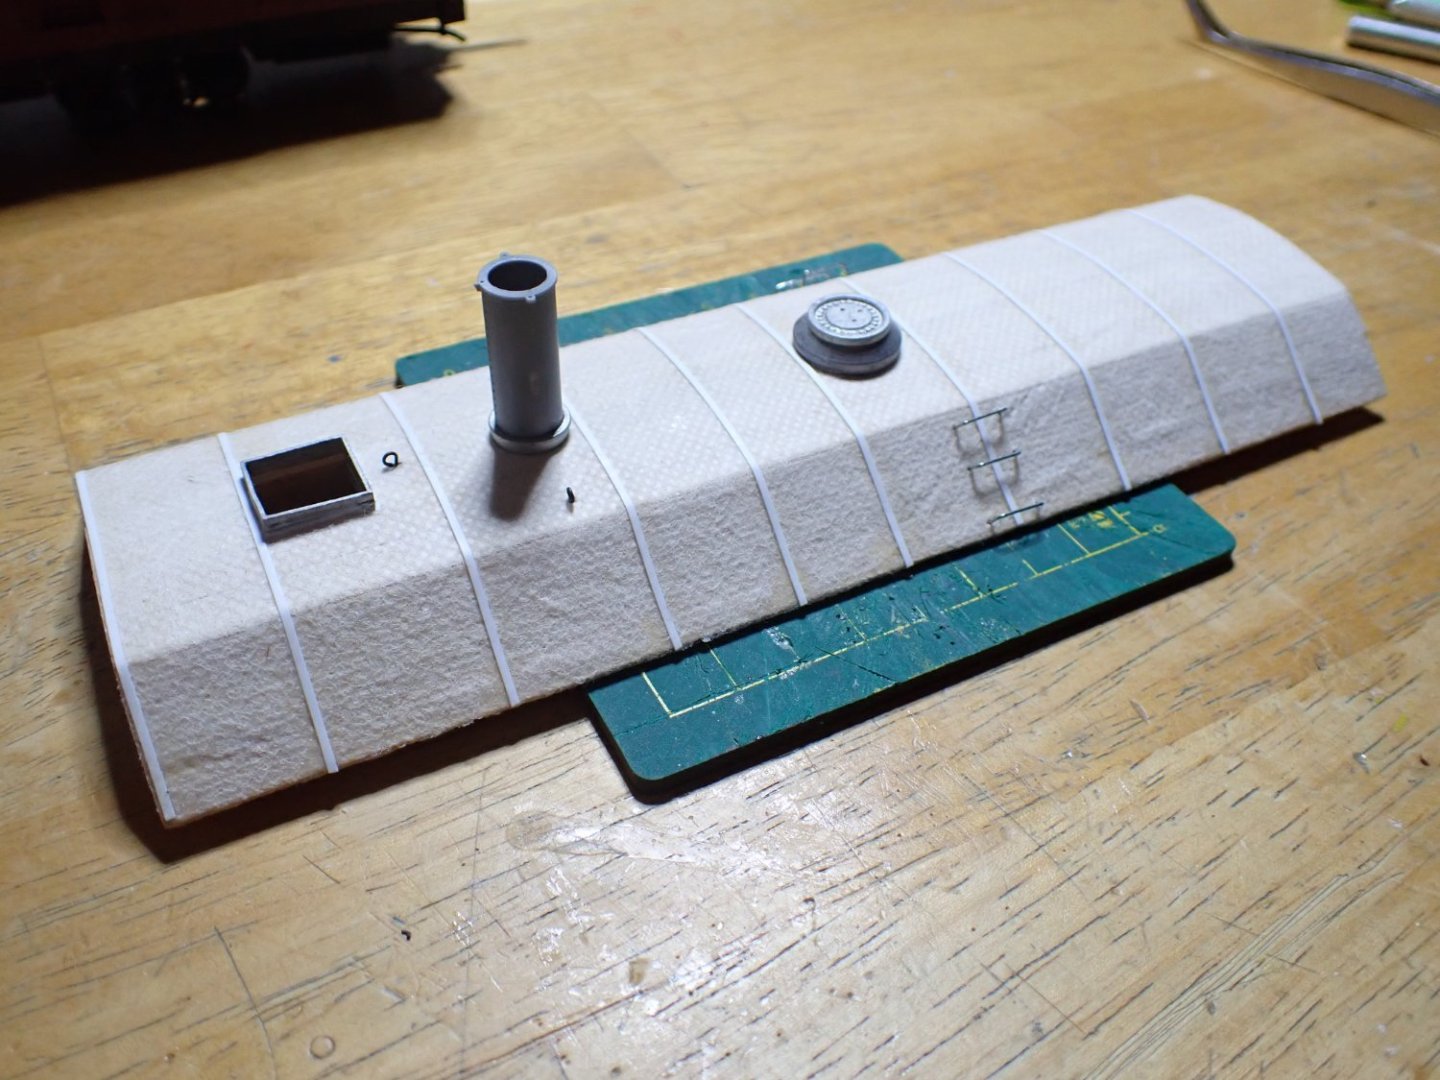
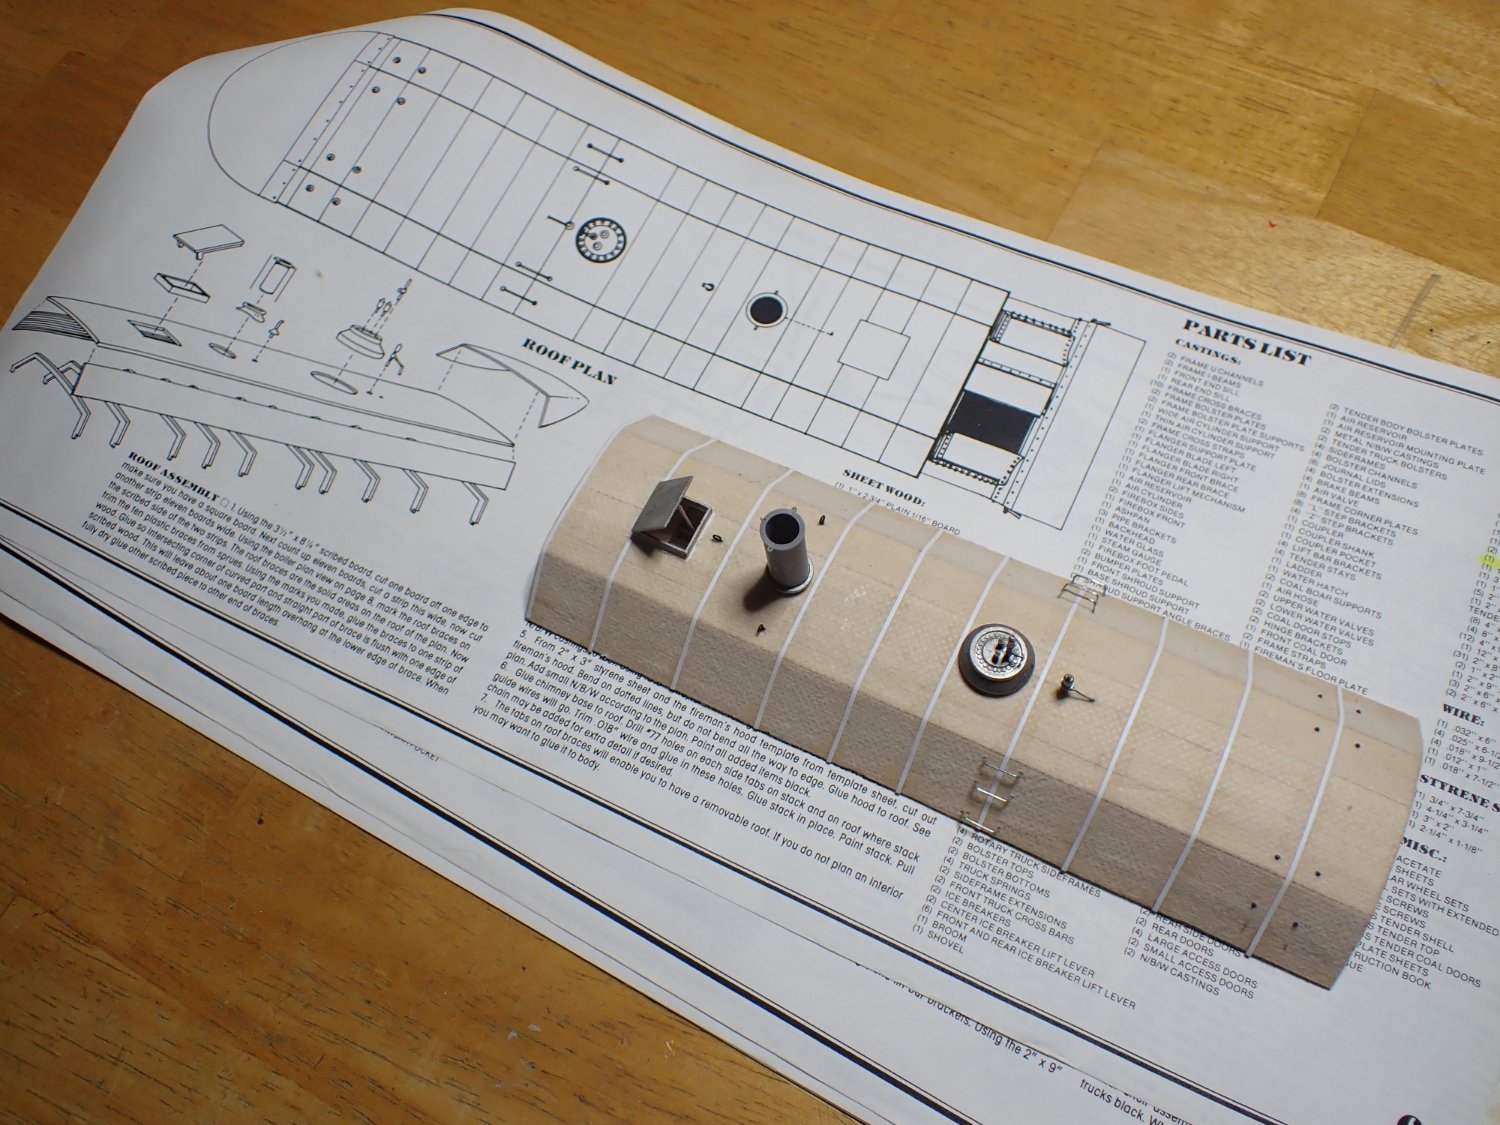
The tender is getting some extra details, as well:
Headlight installed:
Yves
-
14 hours ago, gsdpic said:
Looks great. That gloss finish is very nice. I've never used 2k clear....the extra cautions/extra recommended PPE for it scares me away so I just stick with the Tamiya X-22 for now.
The two major problems with 2K clear are:
1) The price - You have to plan for $25 a bottle. Then, you'd better have other projects to clear at the same time, as the can will last only a few days if conserved in the fridge.
2) The spraying: you really have to have a complete covering suit, goggles and a serious painting mask with dual canisters. Do not spray inside, if you can avoid it as while drying, the clear will vaporize and leave a small residue on your shelves and other horizontal surfaces.
Otherwise, it is a fantastic product that I have used on models and pinball playfields with a lot of success.
Yves
-
Magnificent. What a beautiful diorama with such a lovely and musical atmosphere.
Yves
-
-
-
-
Thank you Folks for all these recommendations and web sites. Yes, I know all of them and have ordered a lot of parts in the past.
Unfortunately, for this rotary, once you couple the tender, there is not much that can be seen in between. But I do appreciate your ideas and suggestions and my do it at a later time.
Yves
- John Ruy, mtaylor, Roger Pellett and 7 others
-
 10
10
-
-
On 11/4/2023 at 8:52 PM, RGL said:
So along with the Anatomy of the ship book I. A use teh old model as reference!
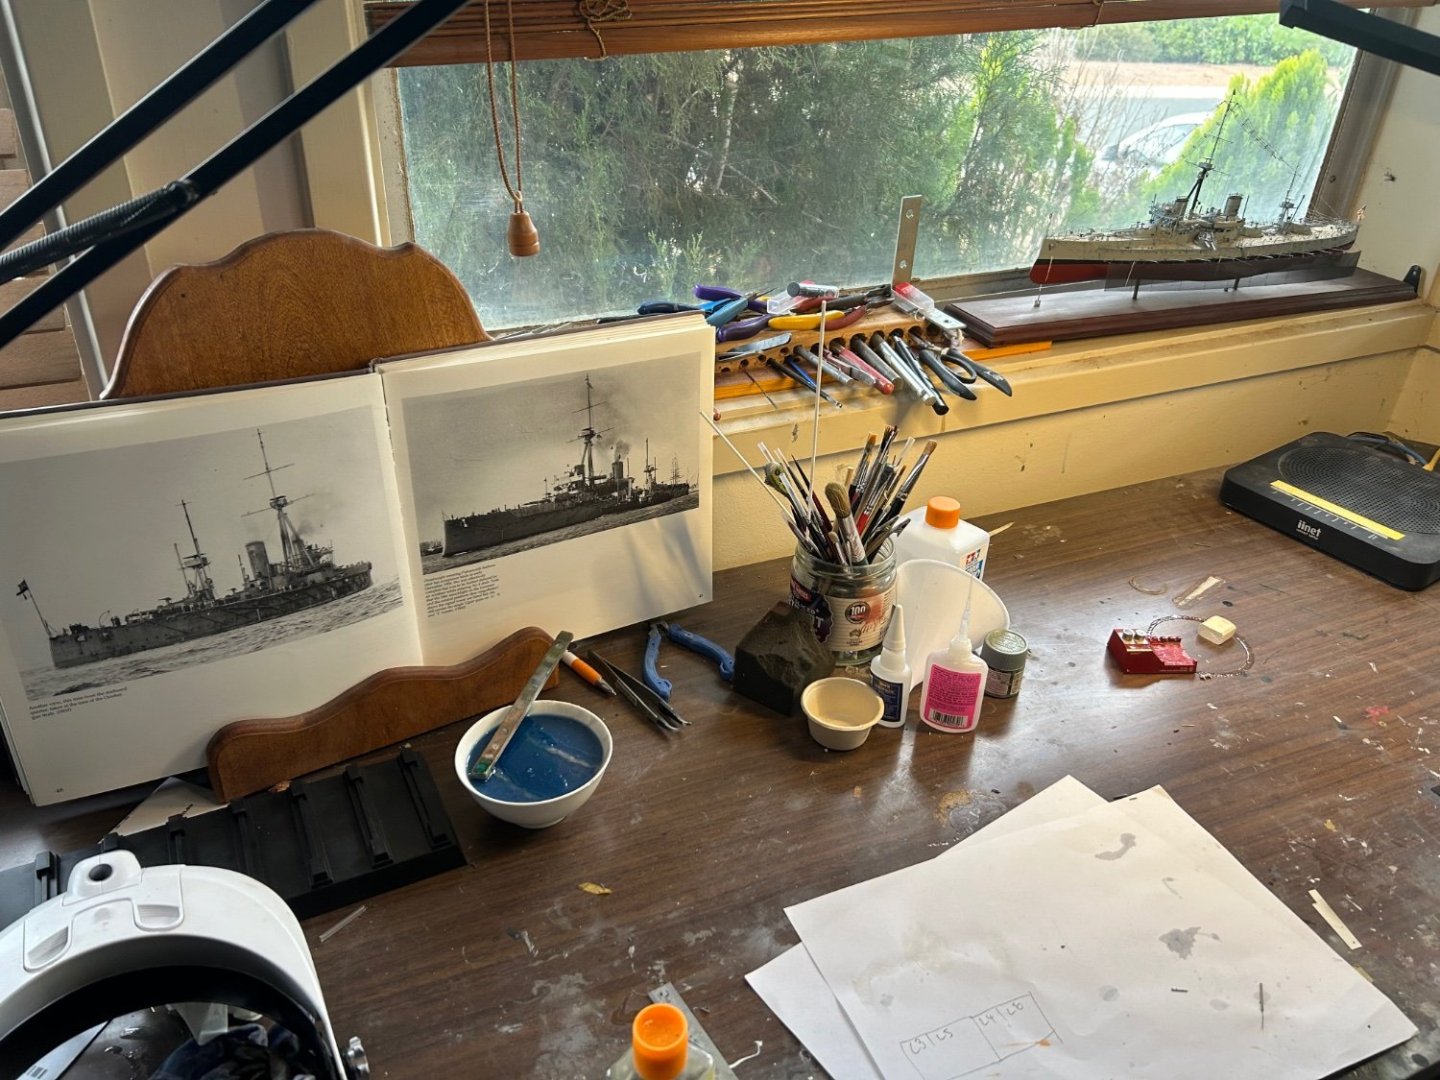
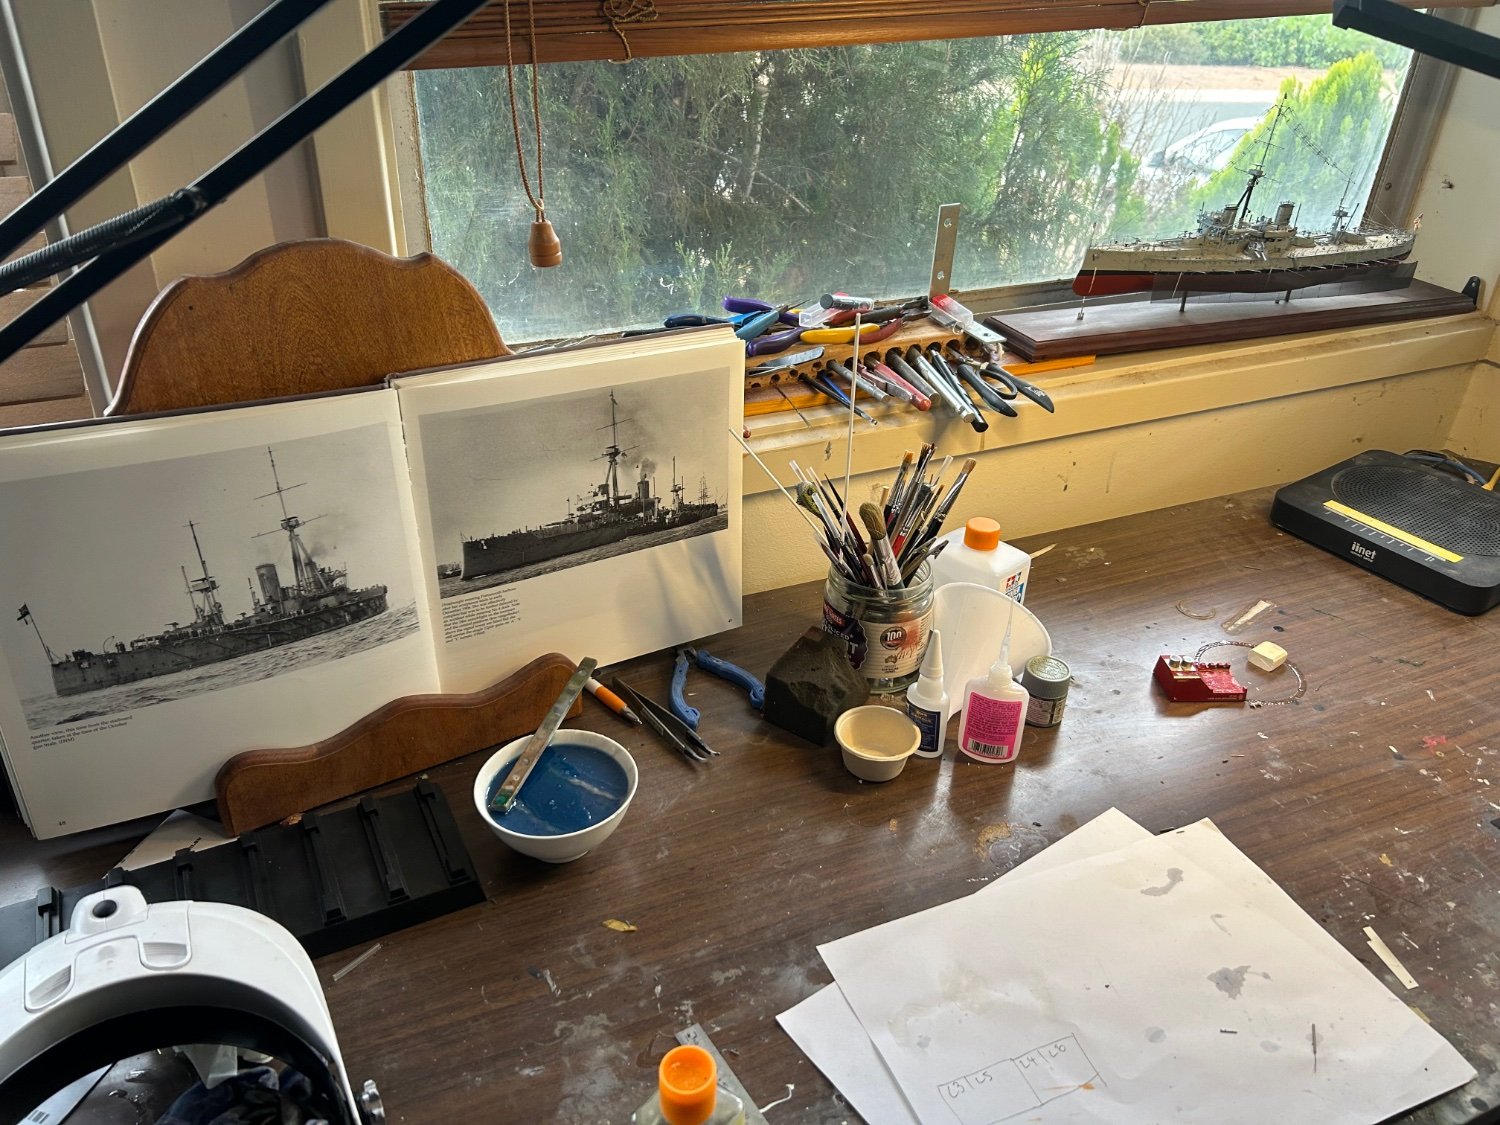
Nice, the desk has been cleaned.
Yves
- thibaultron, Canute, king derelict and 3 others
-
1
-
 5
5
-
Fantastic diorama, Dan.
Yves
- Canute, Keith Black, Jack12477 and 1 other
-
4
-
-
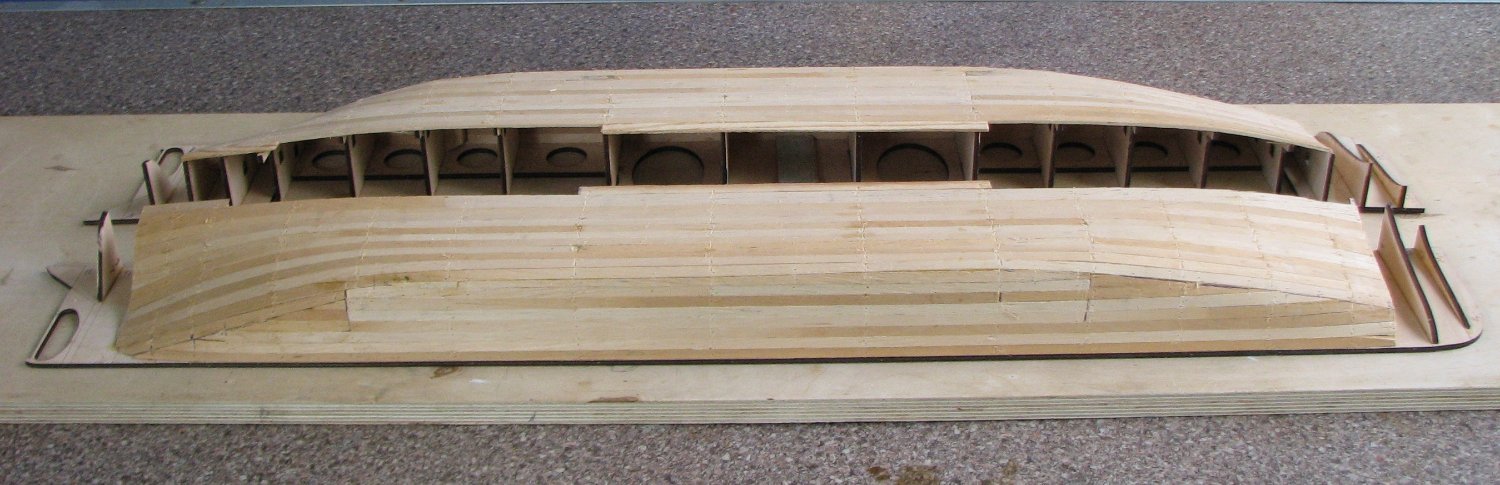
2 hours ago, Valeriy V said:
The photo shows the process of assembling the hull.
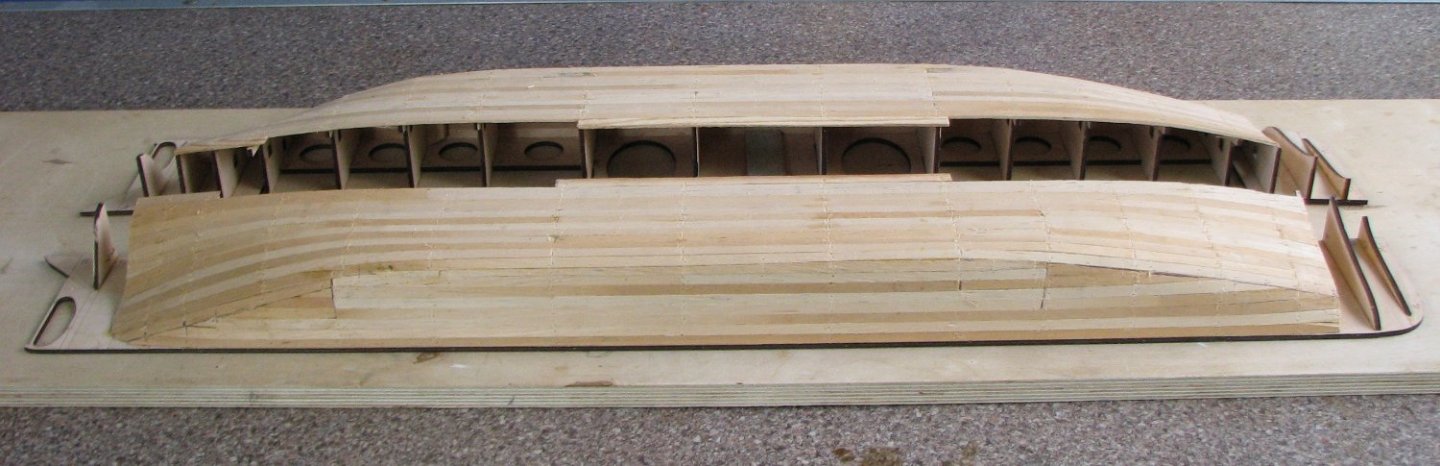
Process made famous by Billing Boats, who was the first commercial company to propose that way of building hulls.
You are making great progress.
Yves
- Ras Ambrioso, Valeriy V, Canute and 4 others
-
7
-
-
Such clean and precise work. A pleasure to watch. I really like that green for the hull...
Yves
- jpalmer1970, hof00, AJohnson and 1 other
-
4
-
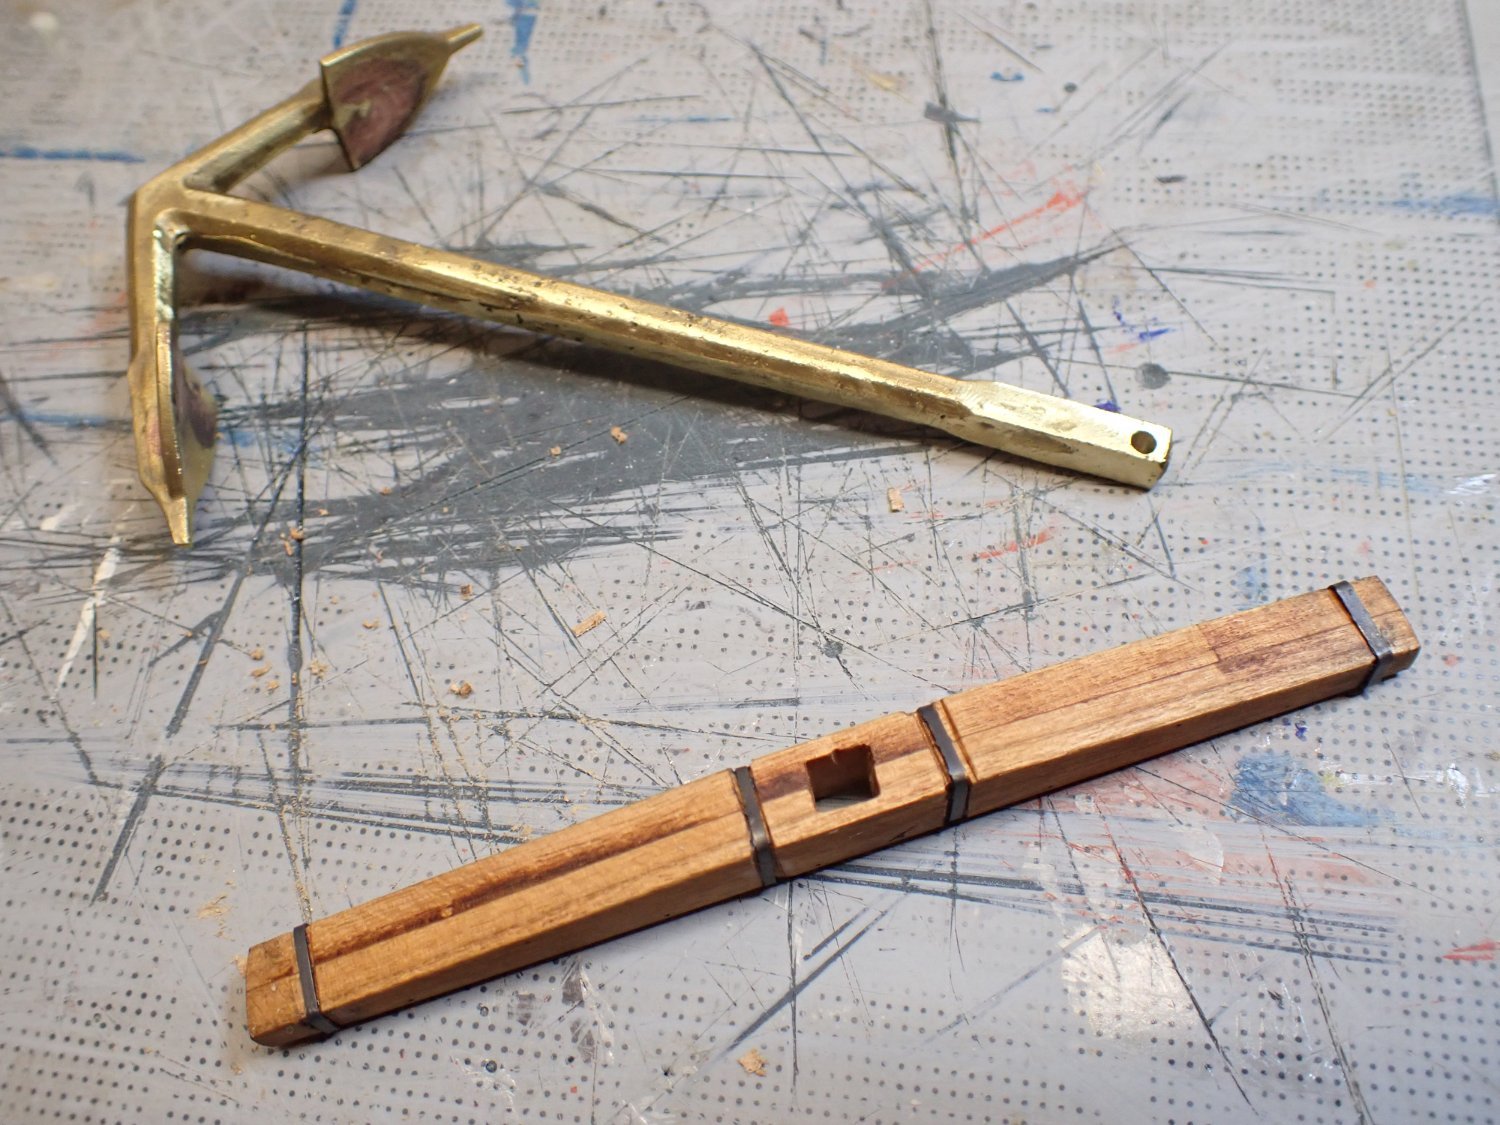
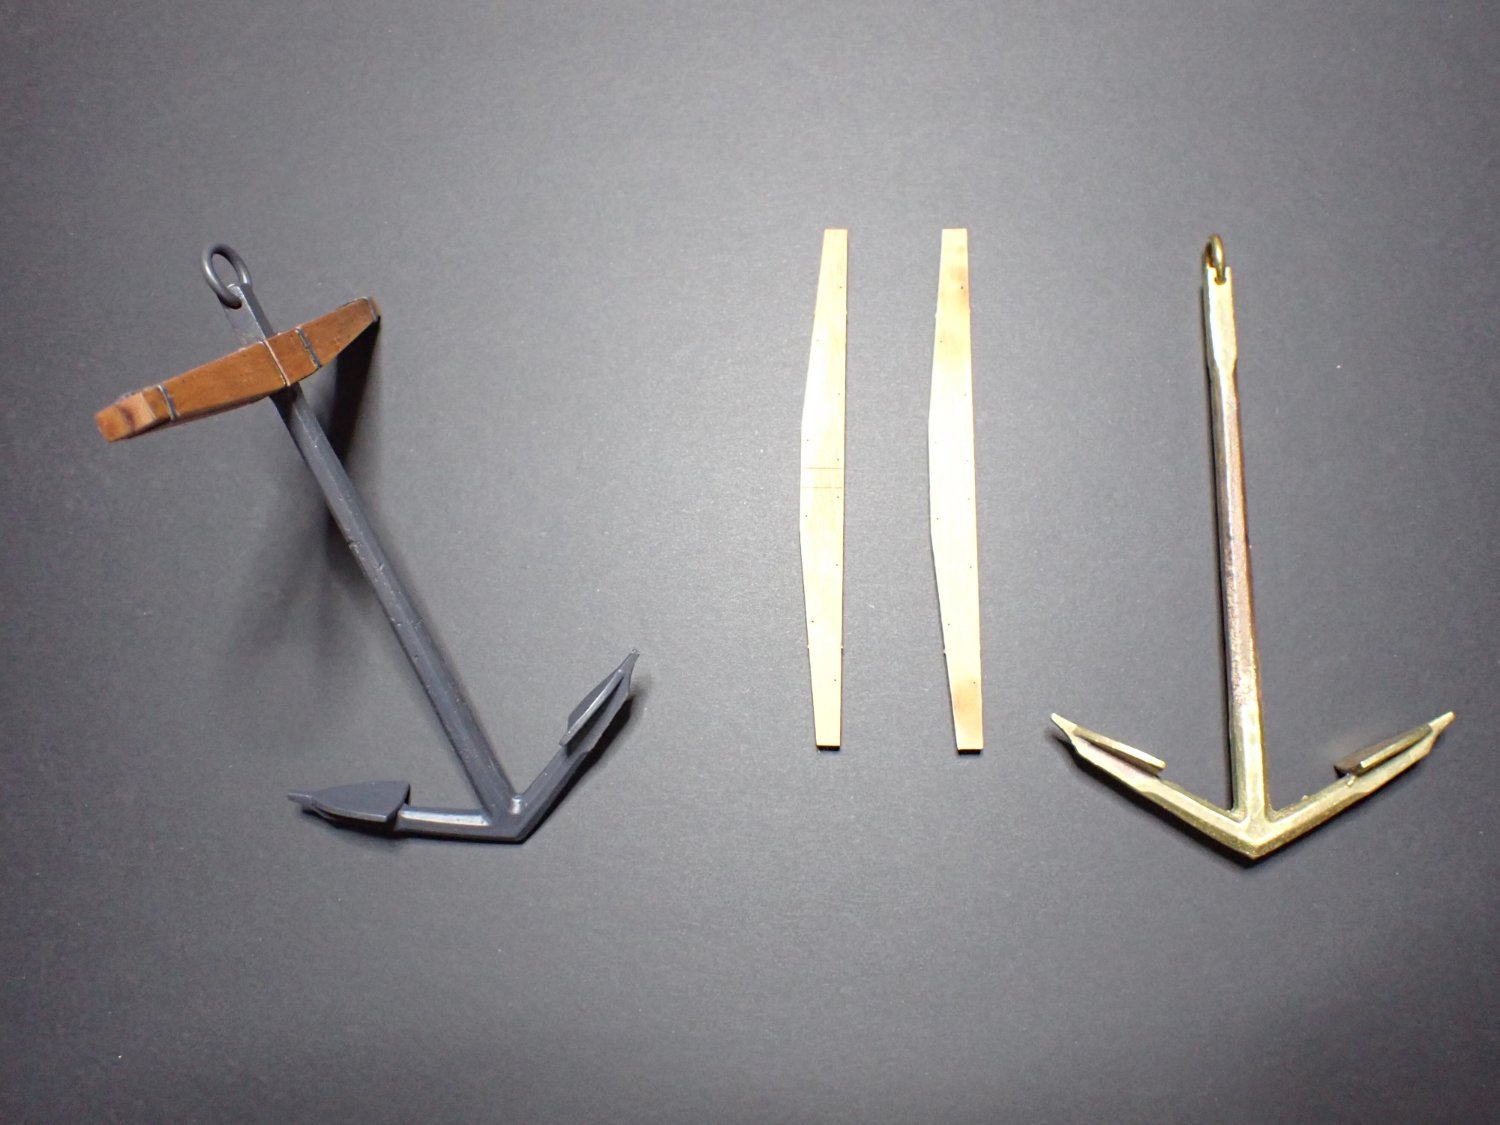
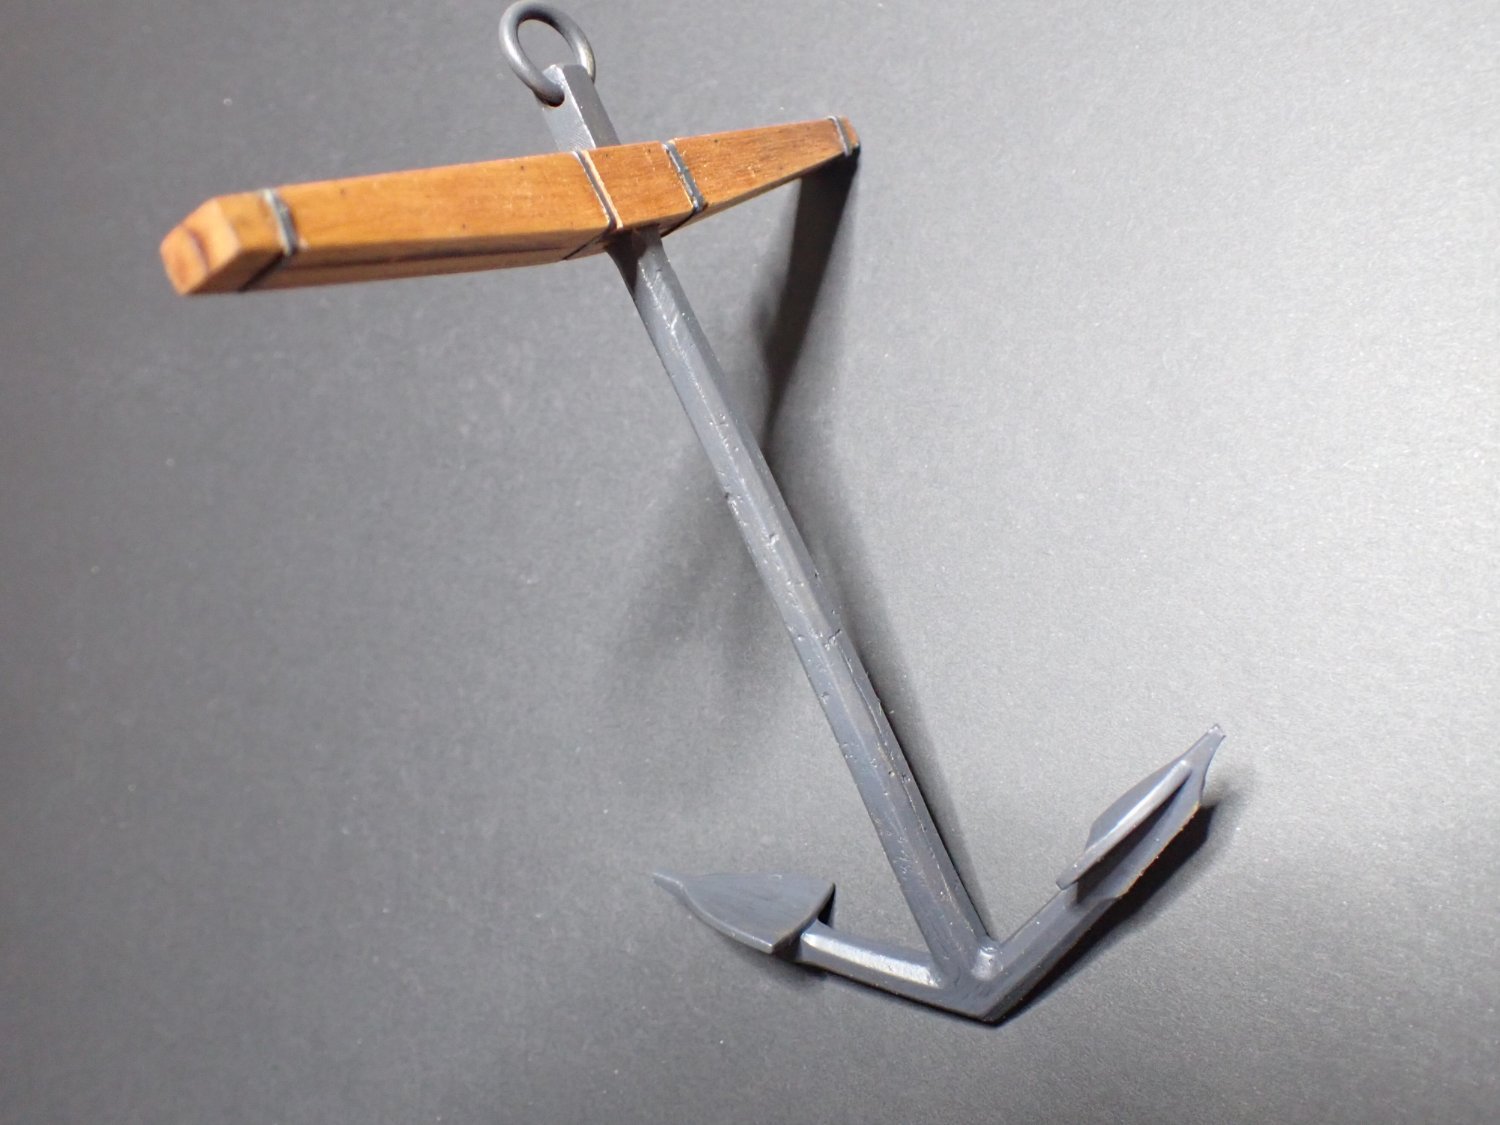
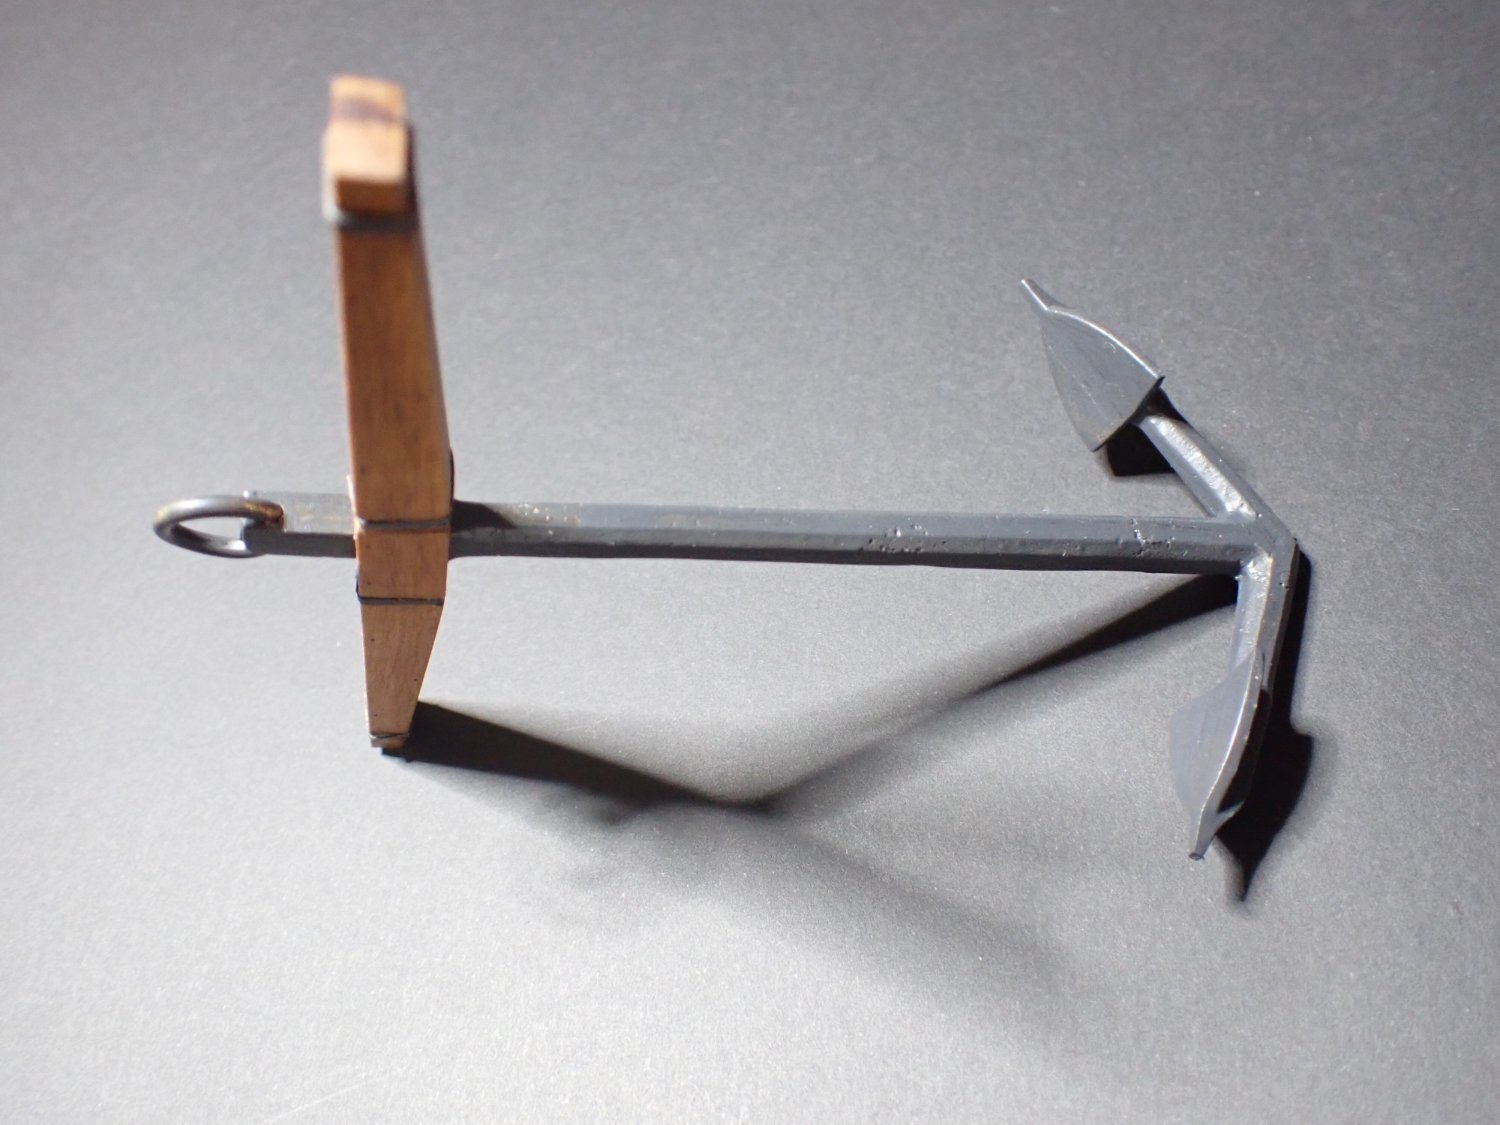
A few progress, although very slow: the anchors.....
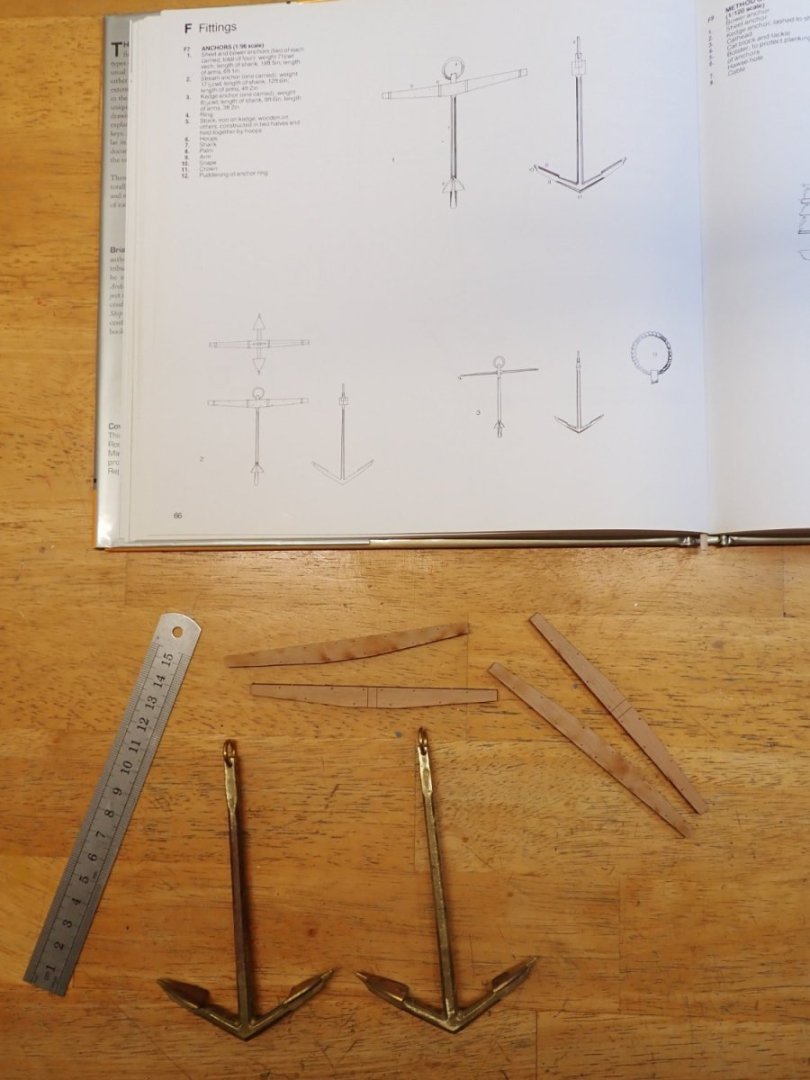
This set of anchors ia new set that was sent to me by Tom (from Caf Model). This set is slightly larger than the one provided with the original kit. Their size matches very closely what is offered in the Anatomy of the Ship book.
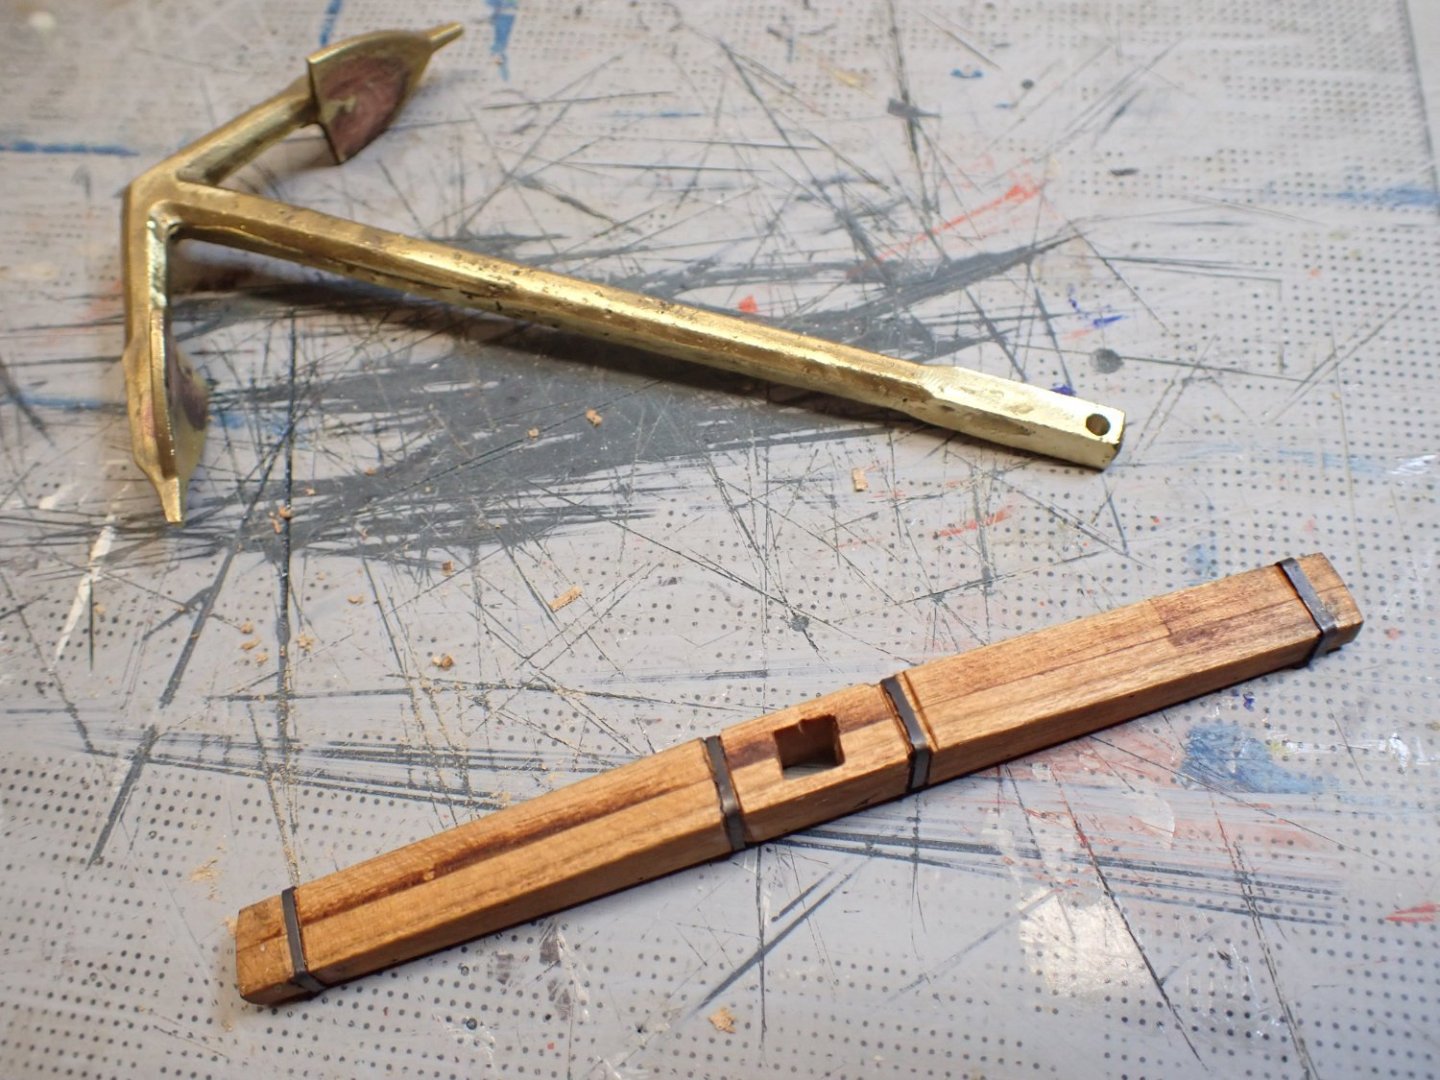
I am using small piece of left over PE, to build the iron bands (hoops) used to secure the two halves of the stock. The sherry wood stock is treated with my usual orange/olive oil and the hoops are chemically darkened and then painted. The anchor is also chemically blackened and later on painted using Model Shipways gun black acrylic paint.
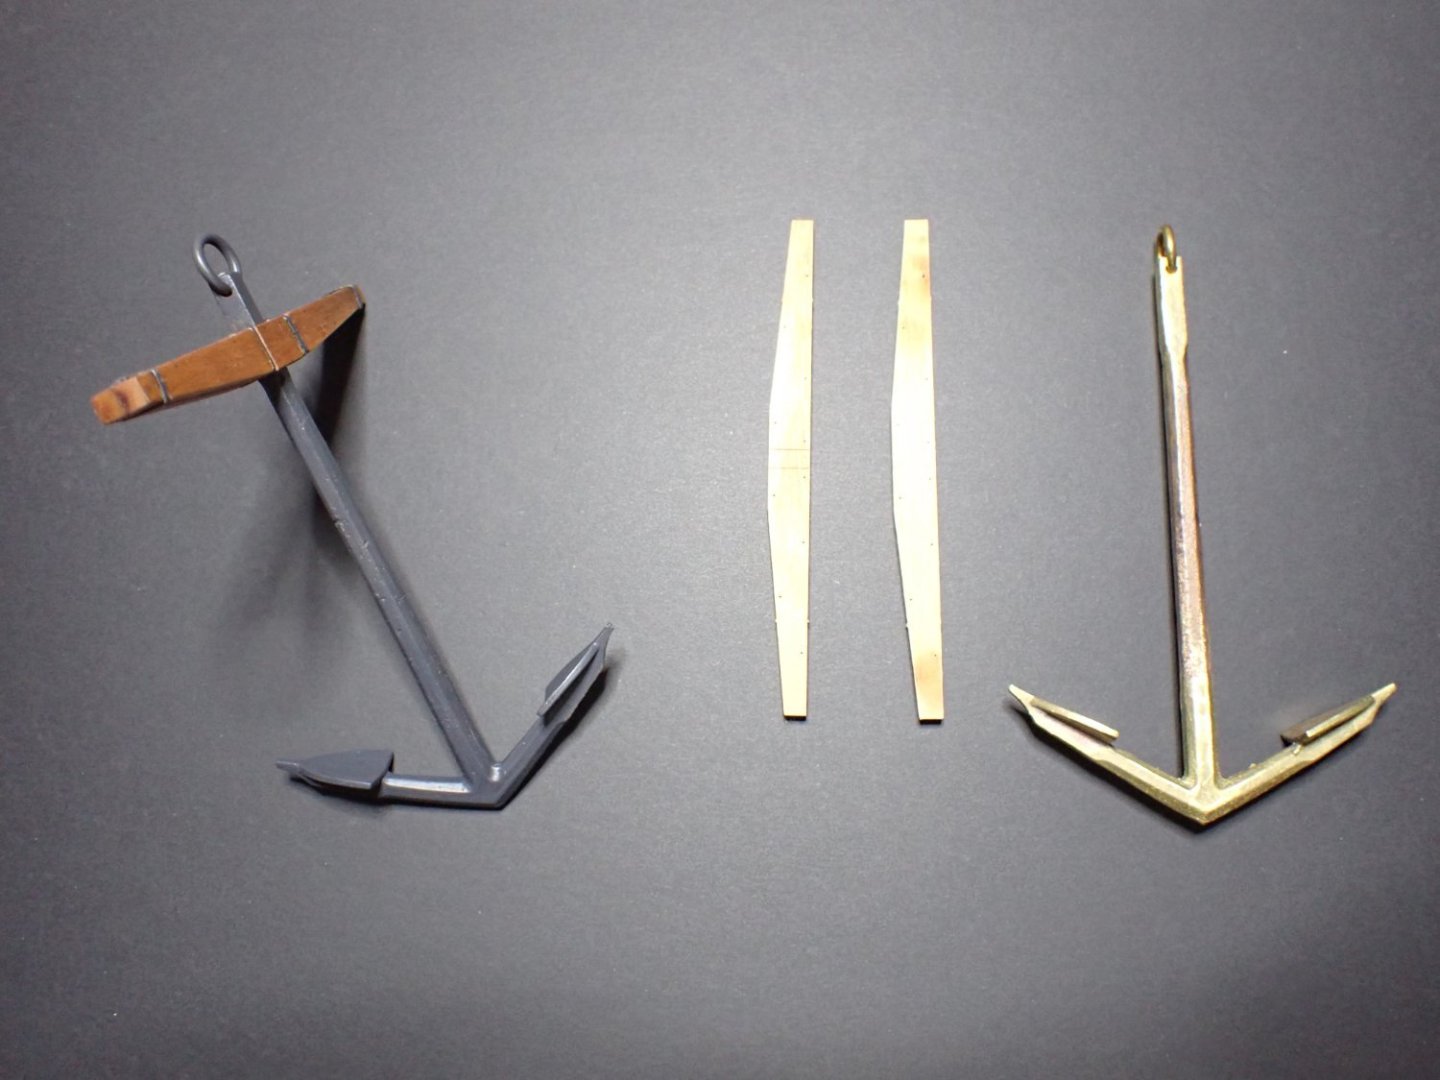
One down, one to go....
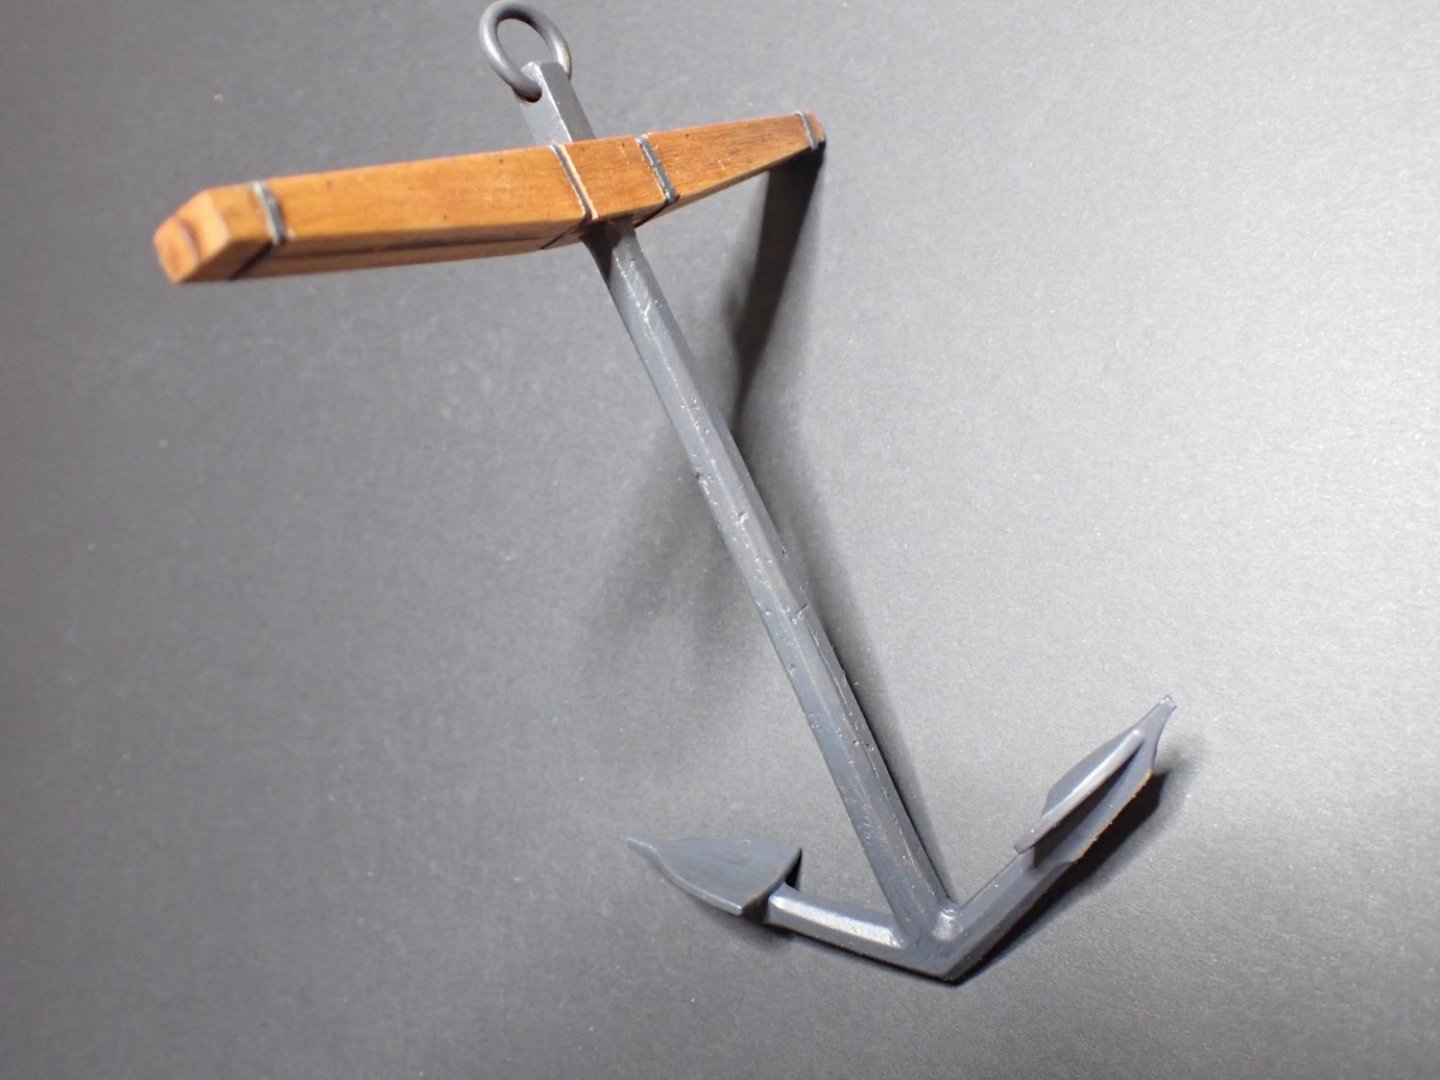
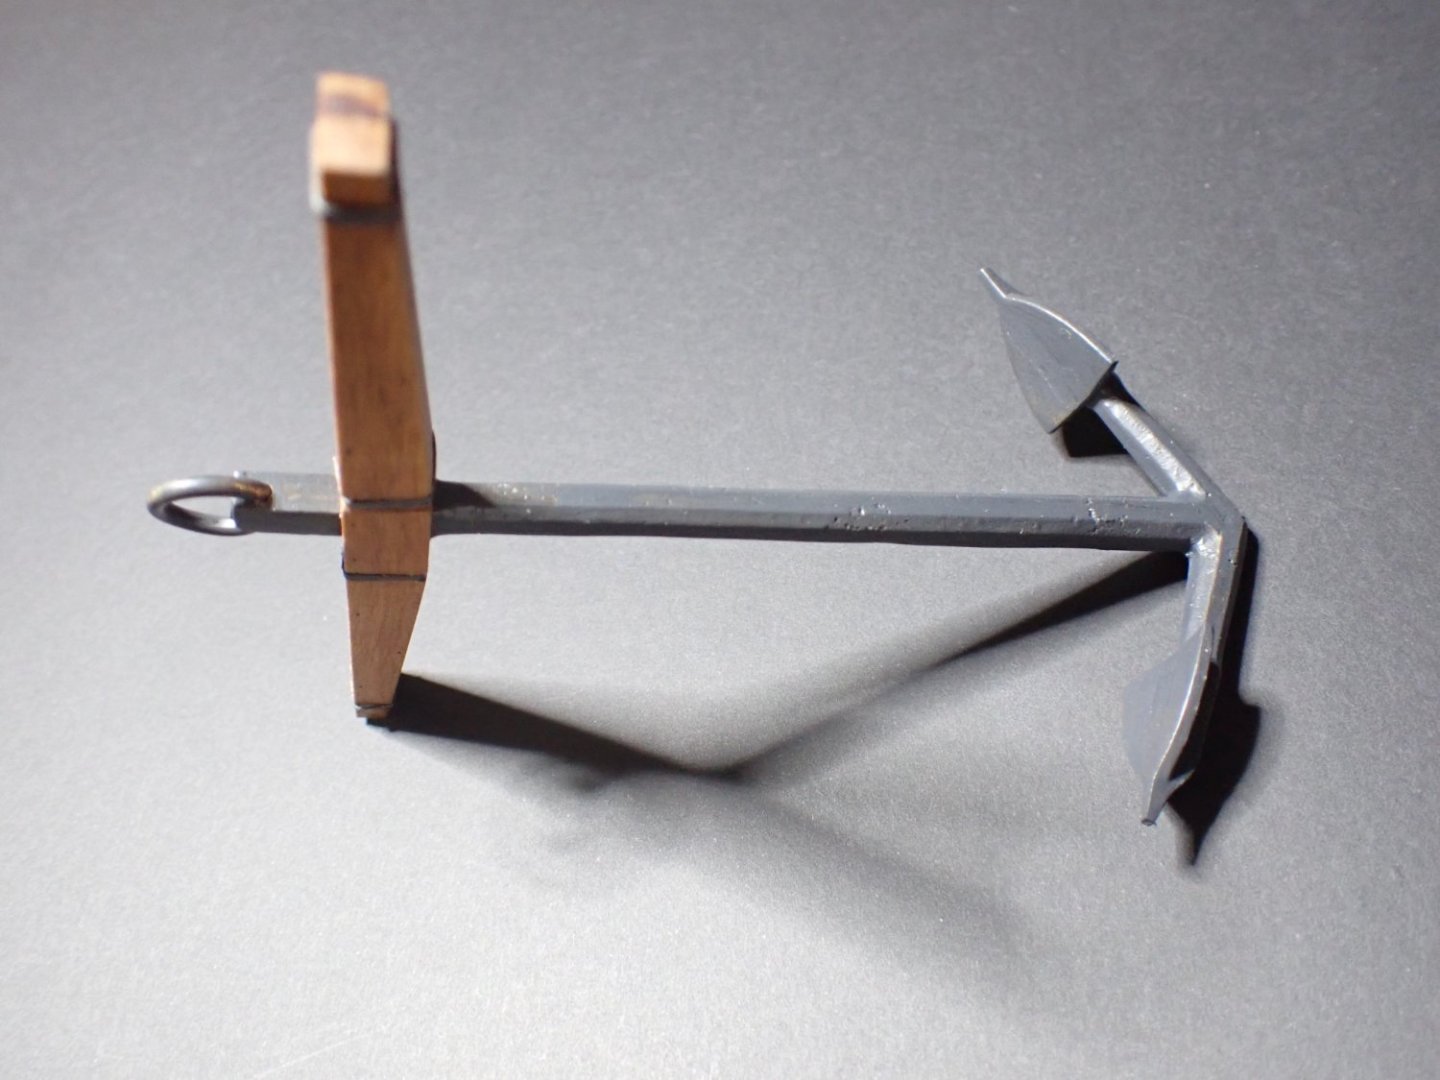
These anchors are massive and will take some thinking to attach them to the bow.
Yves
-
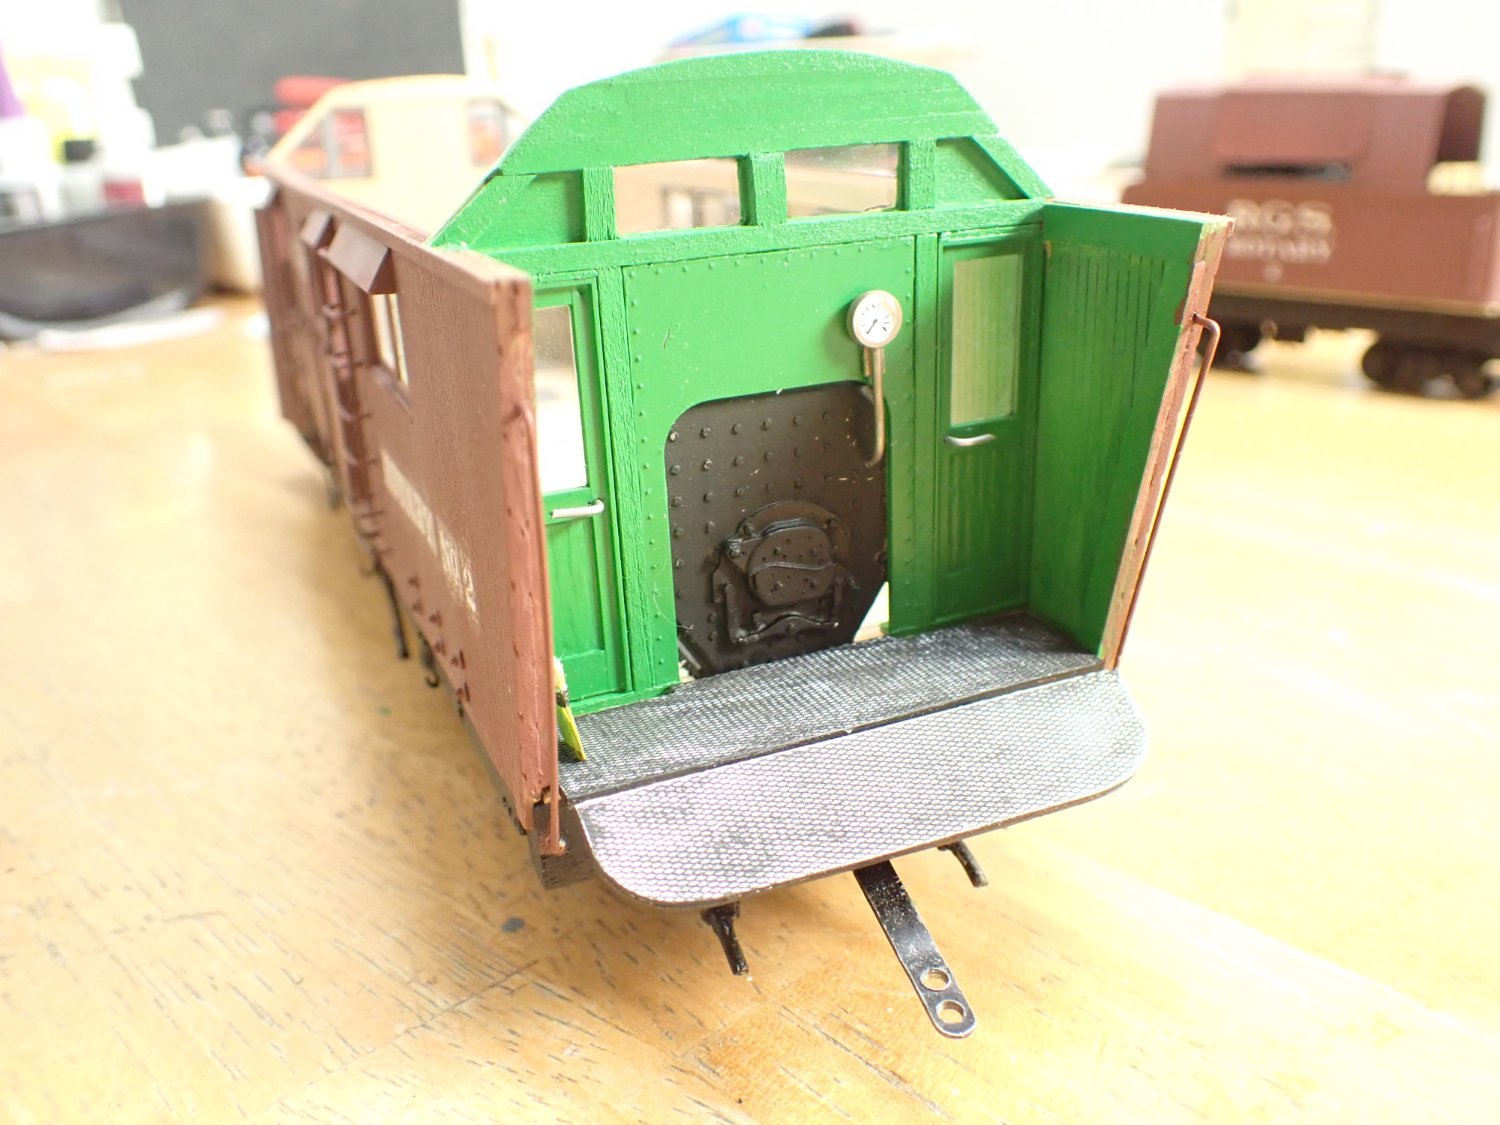
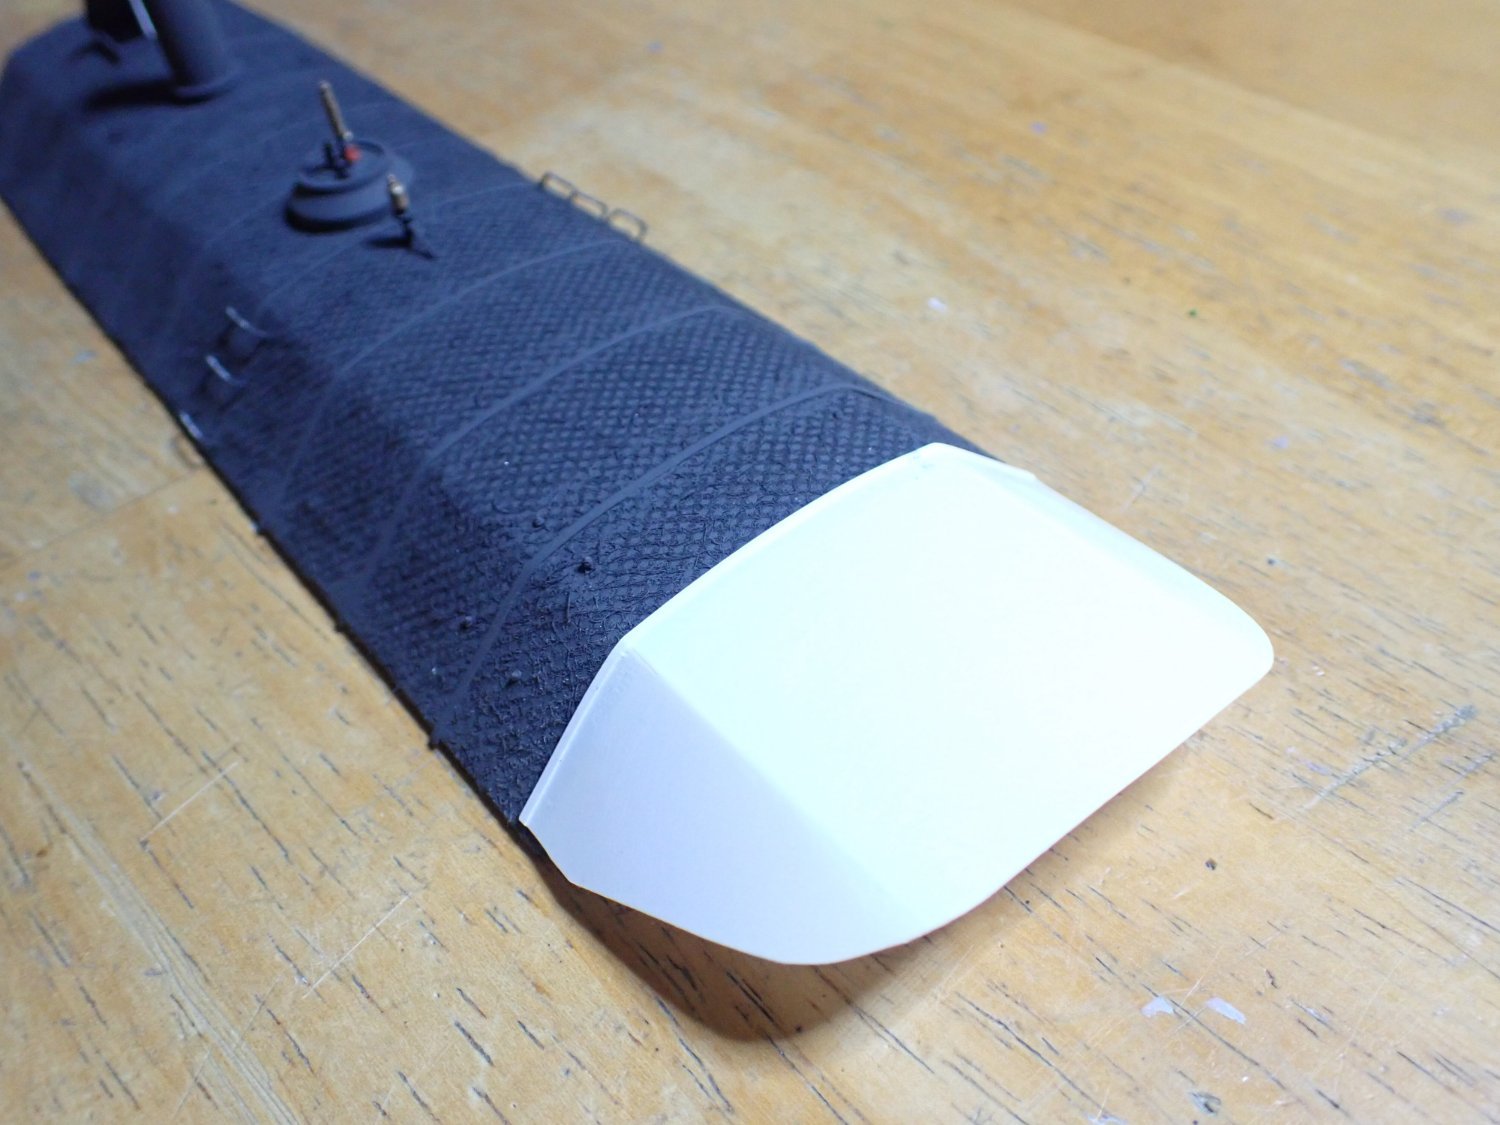
The roof is painted with the "stinking" Floquil Grime Black:

I am then fabricating the roof extension, used to protect the crew in charge of the furnace and boiler. This is done with a piece of plasticard of very small thickness, provided in the kit. A few rivets are used to attach it to the main roof:
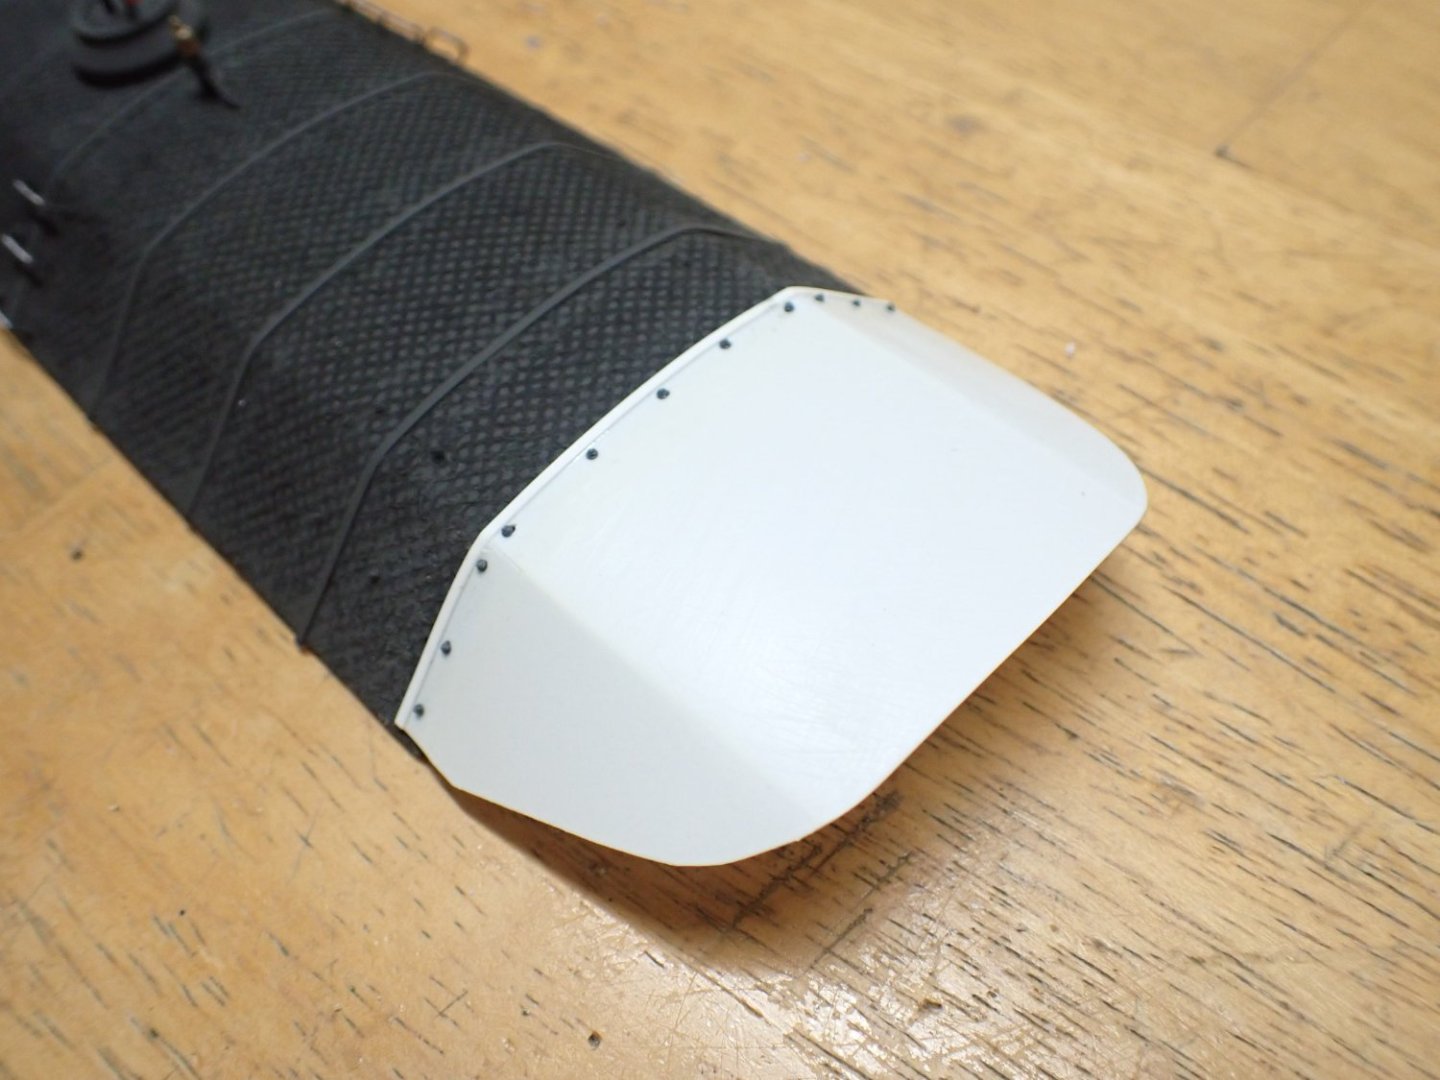
And the cover is also painted with the same "stinking" Floquil grime black:

The roof is now ready to be permanently glued to the snowplow. I still have a few things to do on the rear of the snowplow, before the final gluing.
Yves
-
Beautiful finish. I love the fact that you can see some wood through the paint. It makes the model so much more realistic.
Yves
-
Very interesting project as we are not having too many aircraft carriers on this forum. They are always welcome.
Yves
- mtaylor, king derelict, Canute and 2 others
-
5
-
Very interesting project. I like that you felt compelled to build a surface vessel to go with your nice collection of submarines.
That is exactly what happened to me, after spending close to 2 years on the large U-552 Boot from Trumpeter. And if you feel like 1/144 is kind of small for a Flower Class, you can always look at this build log:
I will be following your progress with a lot of interest.
Yves
- Canute, mtaylor, Baltic_submariner and 1 other
-
4
-
Excellent start for this complicated model.
There is a very good Build Log (in French) of that model on this site: https://www.laroyale-modelisme.net/t27110-croiseur-de-bataille-dkm-scharnhorst-trumpeter-1-200-de-dyphrologue
The amount of details that the modeler is adding turns the model into a museum piece. You may want to look at it for inspiration.
Yves
-
-
On 10/22/2023 at 5:00 PM, realworkingsailor said:
Andy, you finished a real marvel. I still remember one of my best friends some 45 years ago, as he tried to build that model (or a previous iteration of it). His did not complete in such a nice way.... but we were just kids playing and the glues, paints and putties were not what they are today. HUMBROL was dominating the market in Europe and that is all you had.
Yves
-
1 hour ago, realworkingsailor said:
The prototype would have been tar paper. I’ve seen many modellers replicate the effect using tissue paper (kleenex) using just black paint to adhere the tissue to the surface.
Great job on your build!
Andy
That is exactly how the kit instructions describe the gluing of the paper. I decided to go with something which has a little bit more grain....
Yves
-
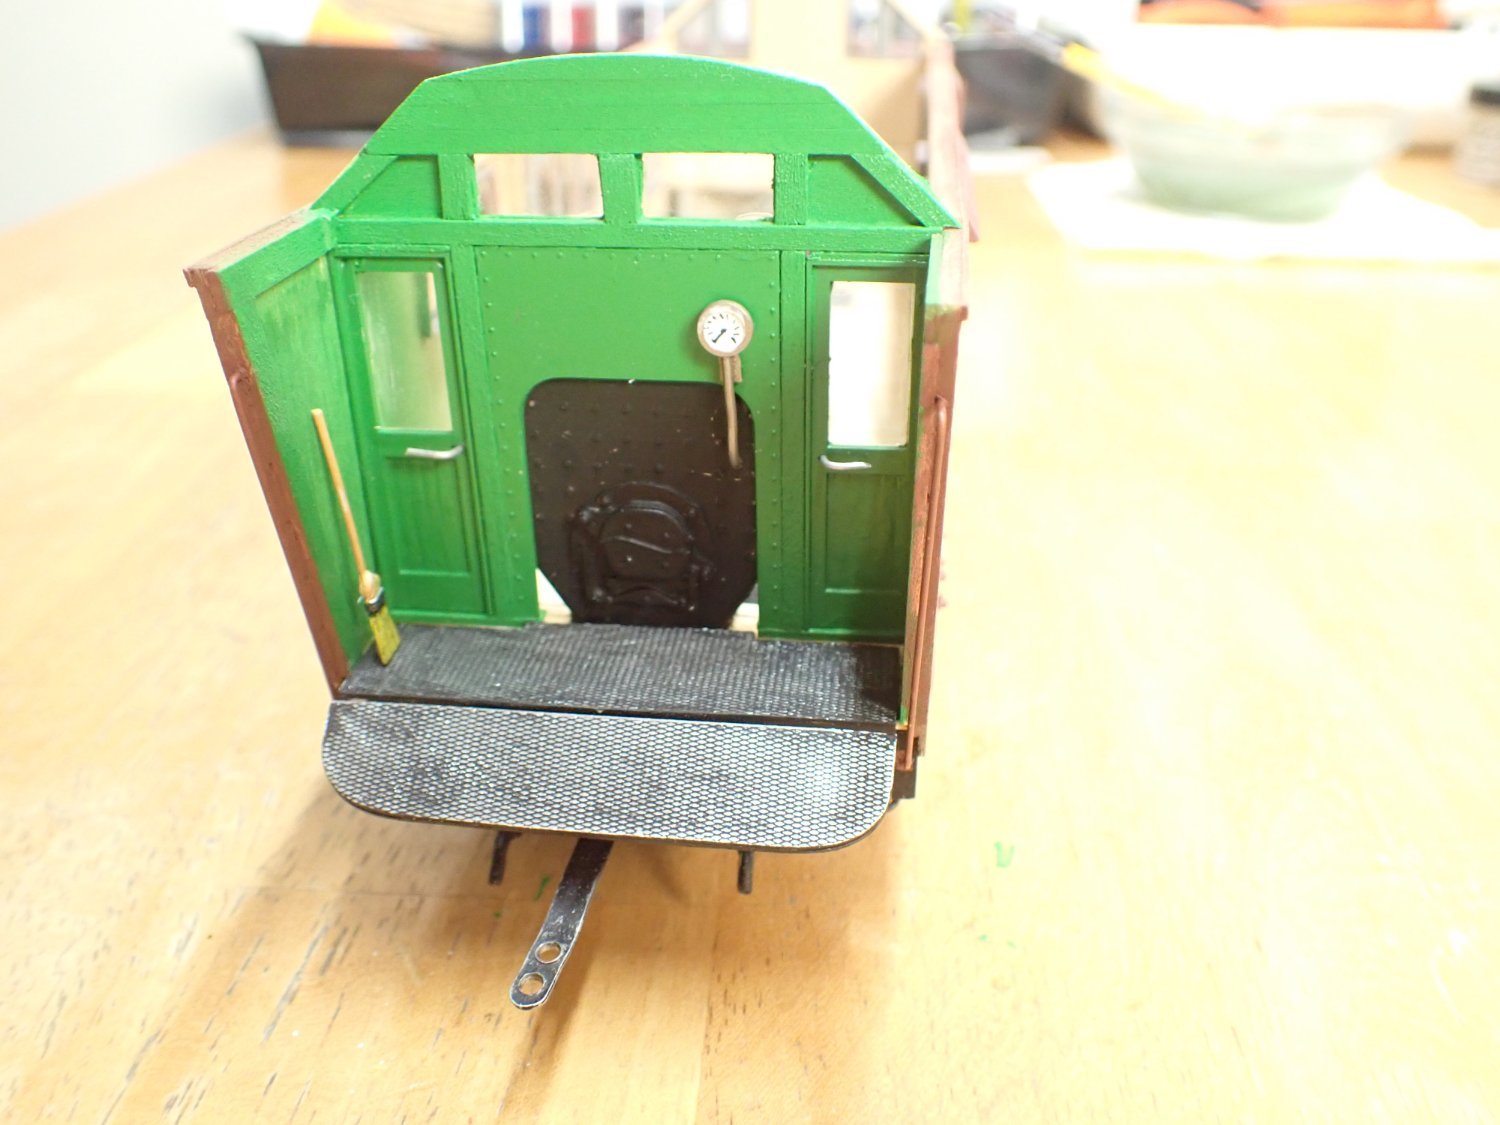
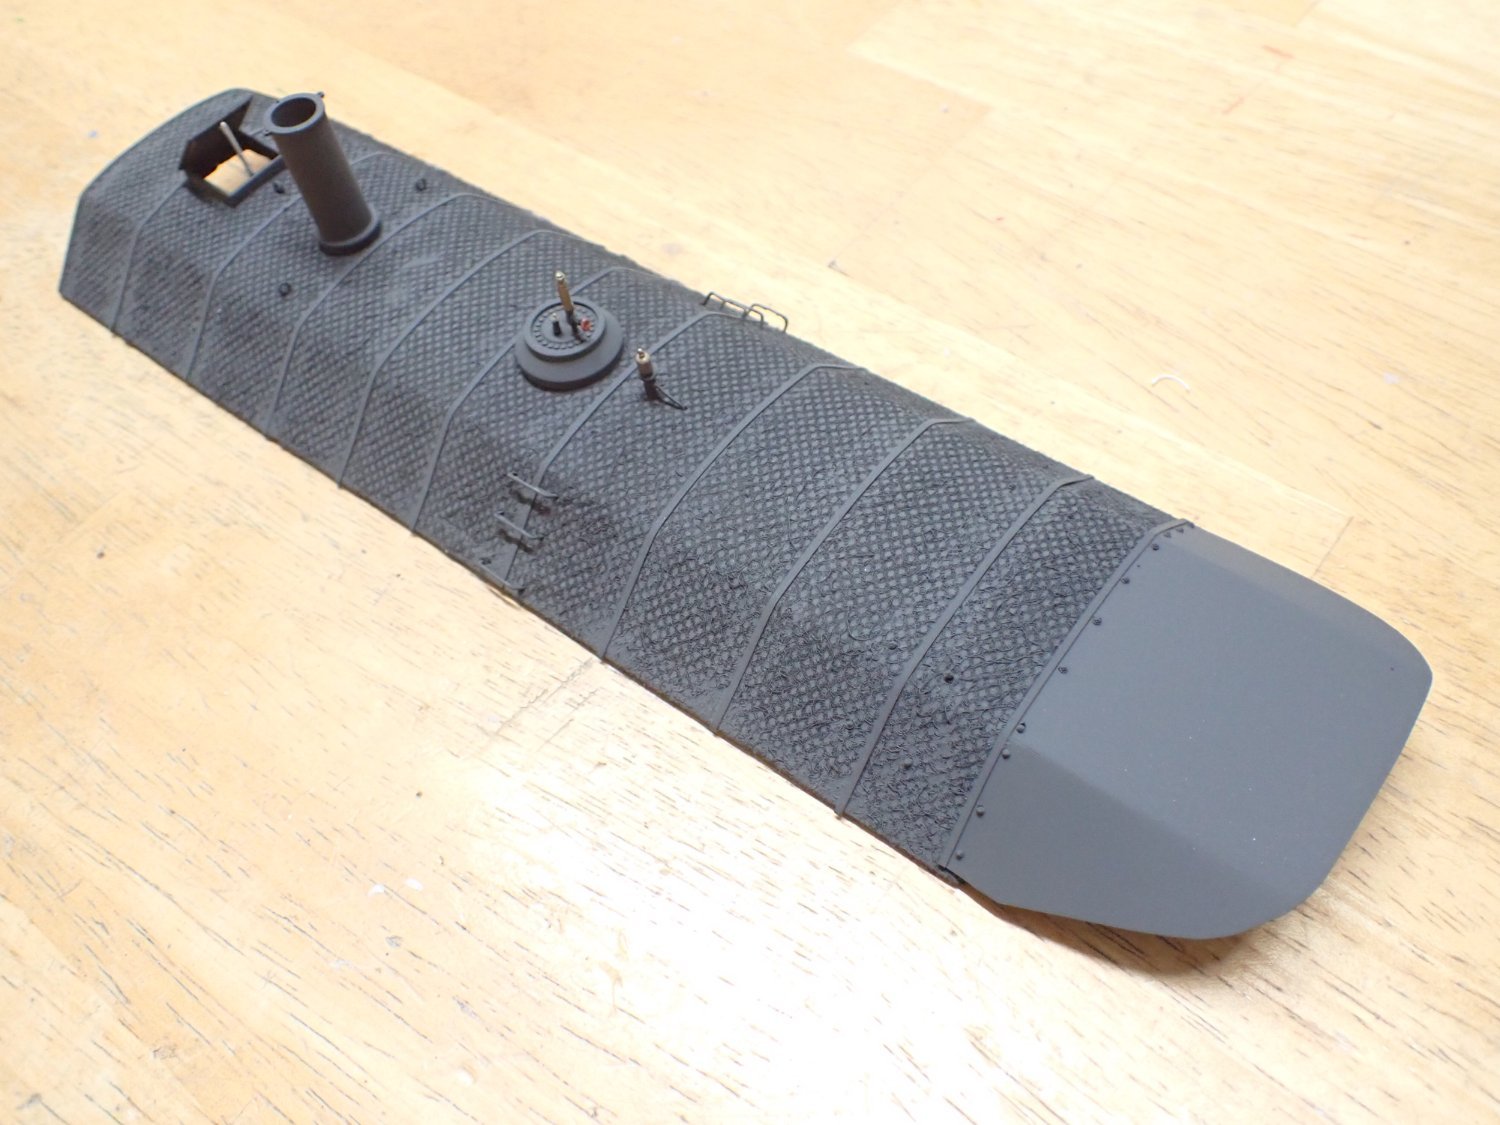
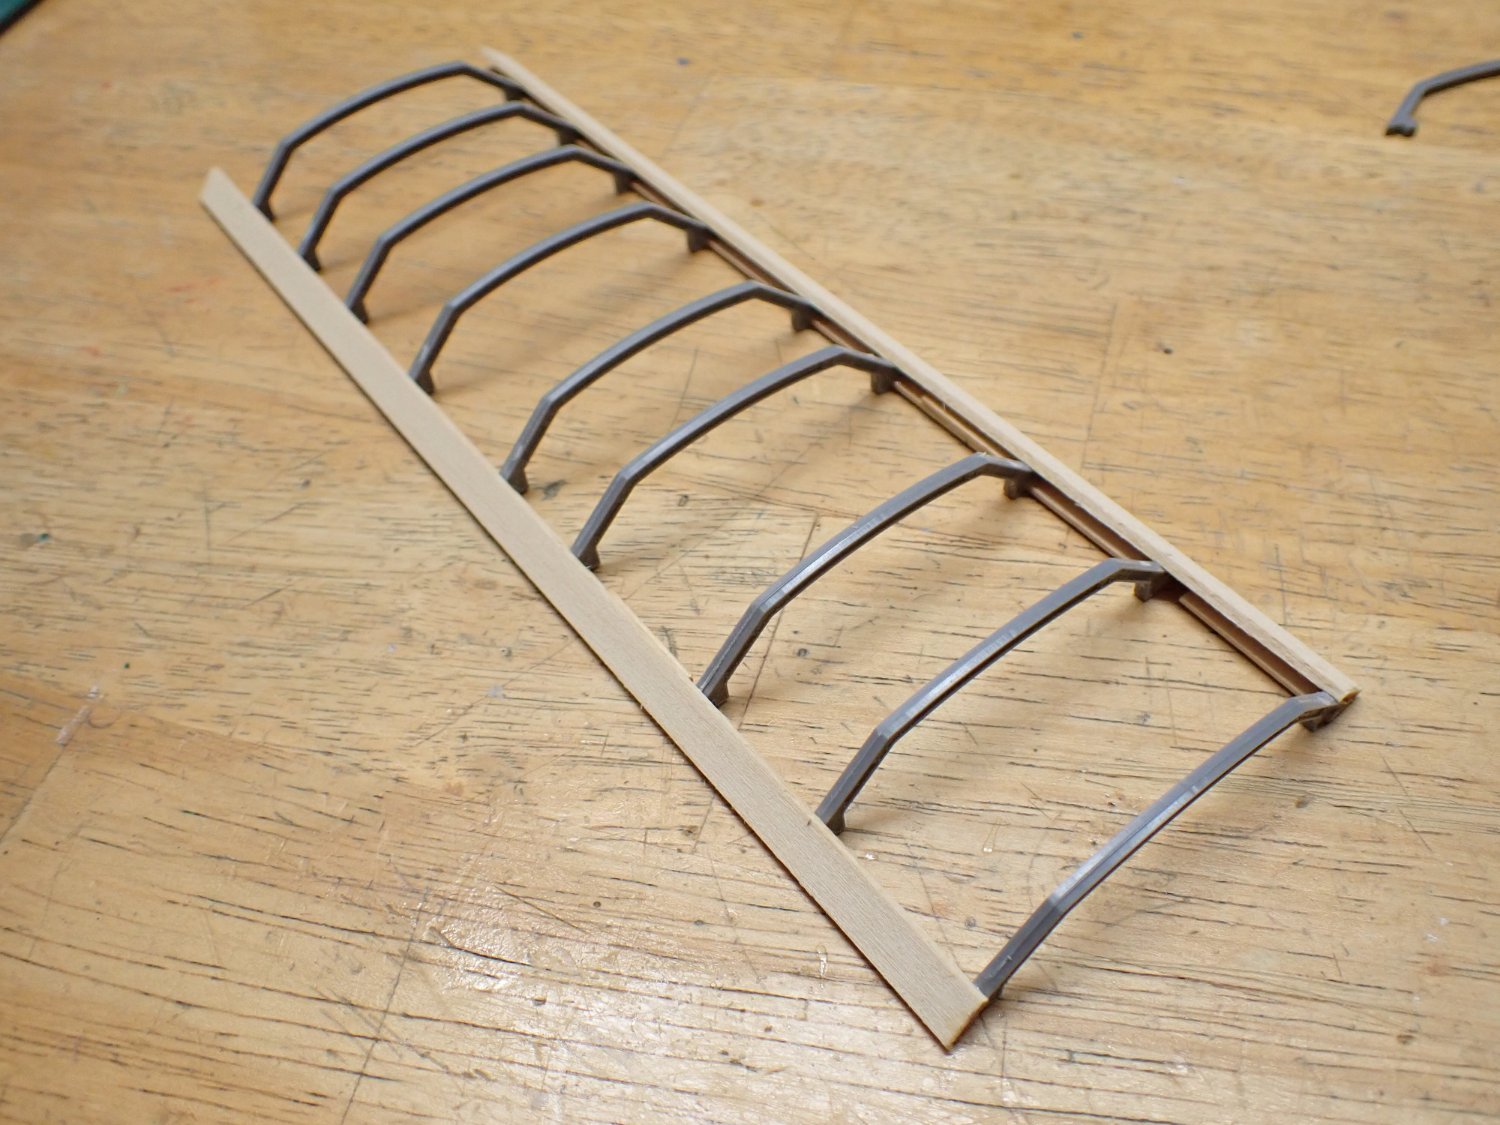
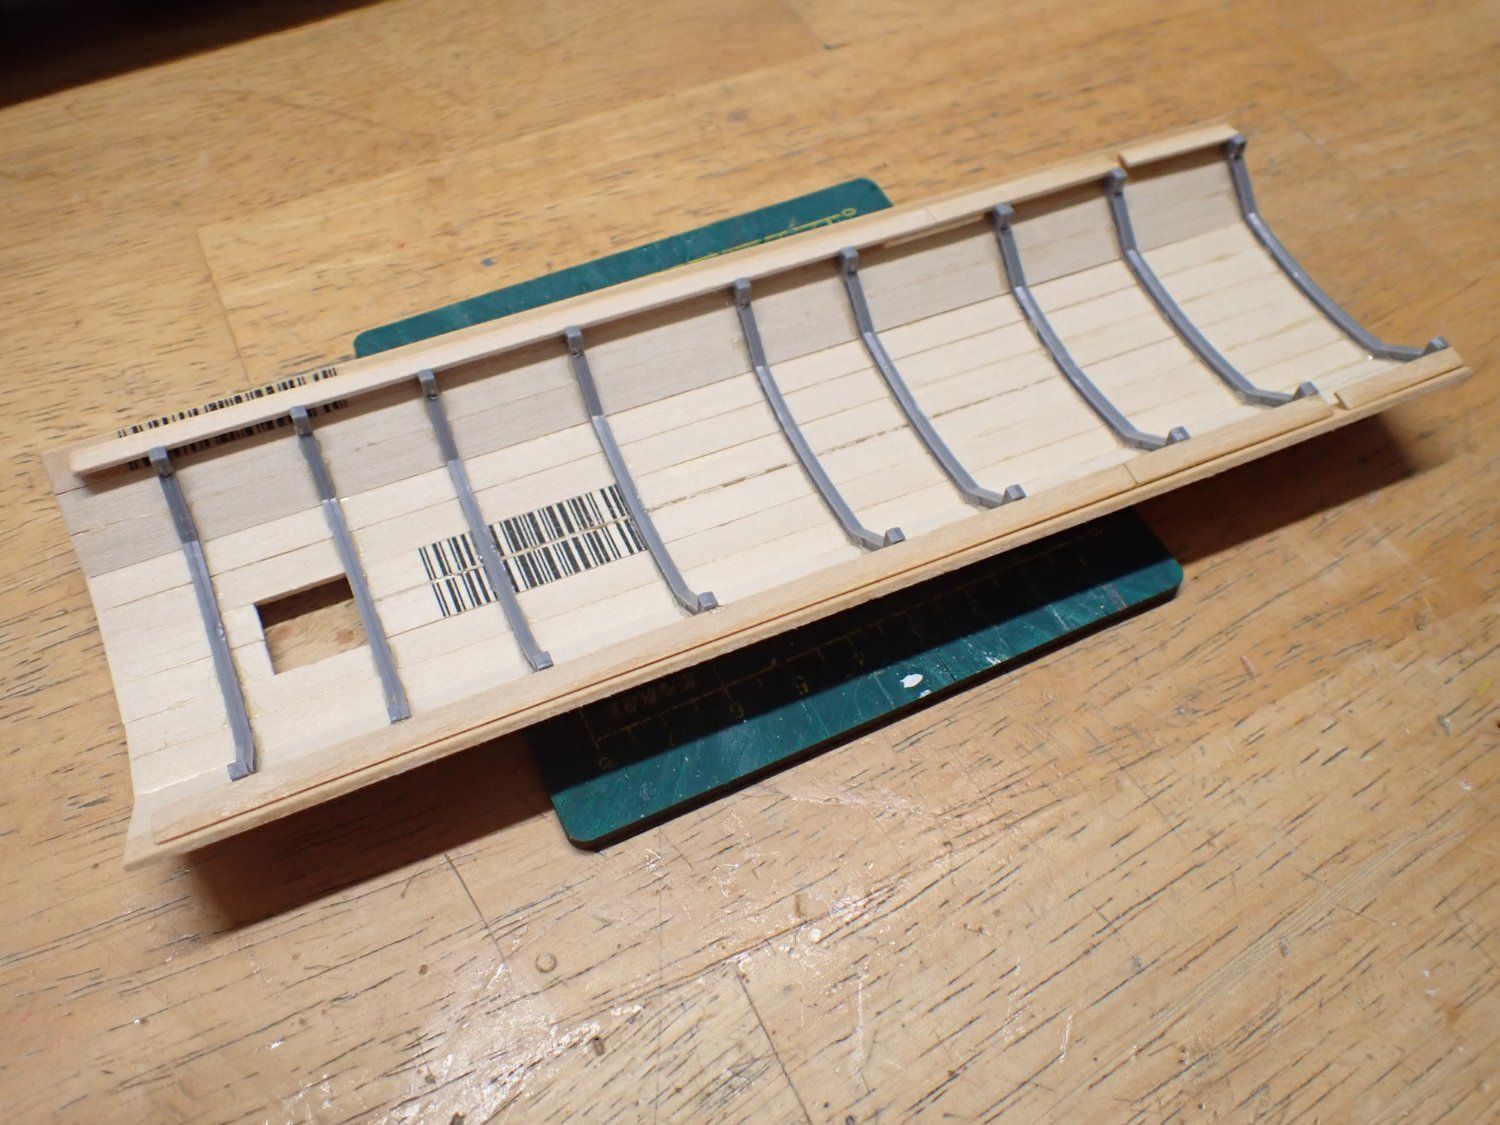
I think we are due for an update. I have been working on the roof of the rotary plow which is actually much more complicated than it seems:

Above is the final result before painting. It starts with two strips of wood and a few plastic frames:
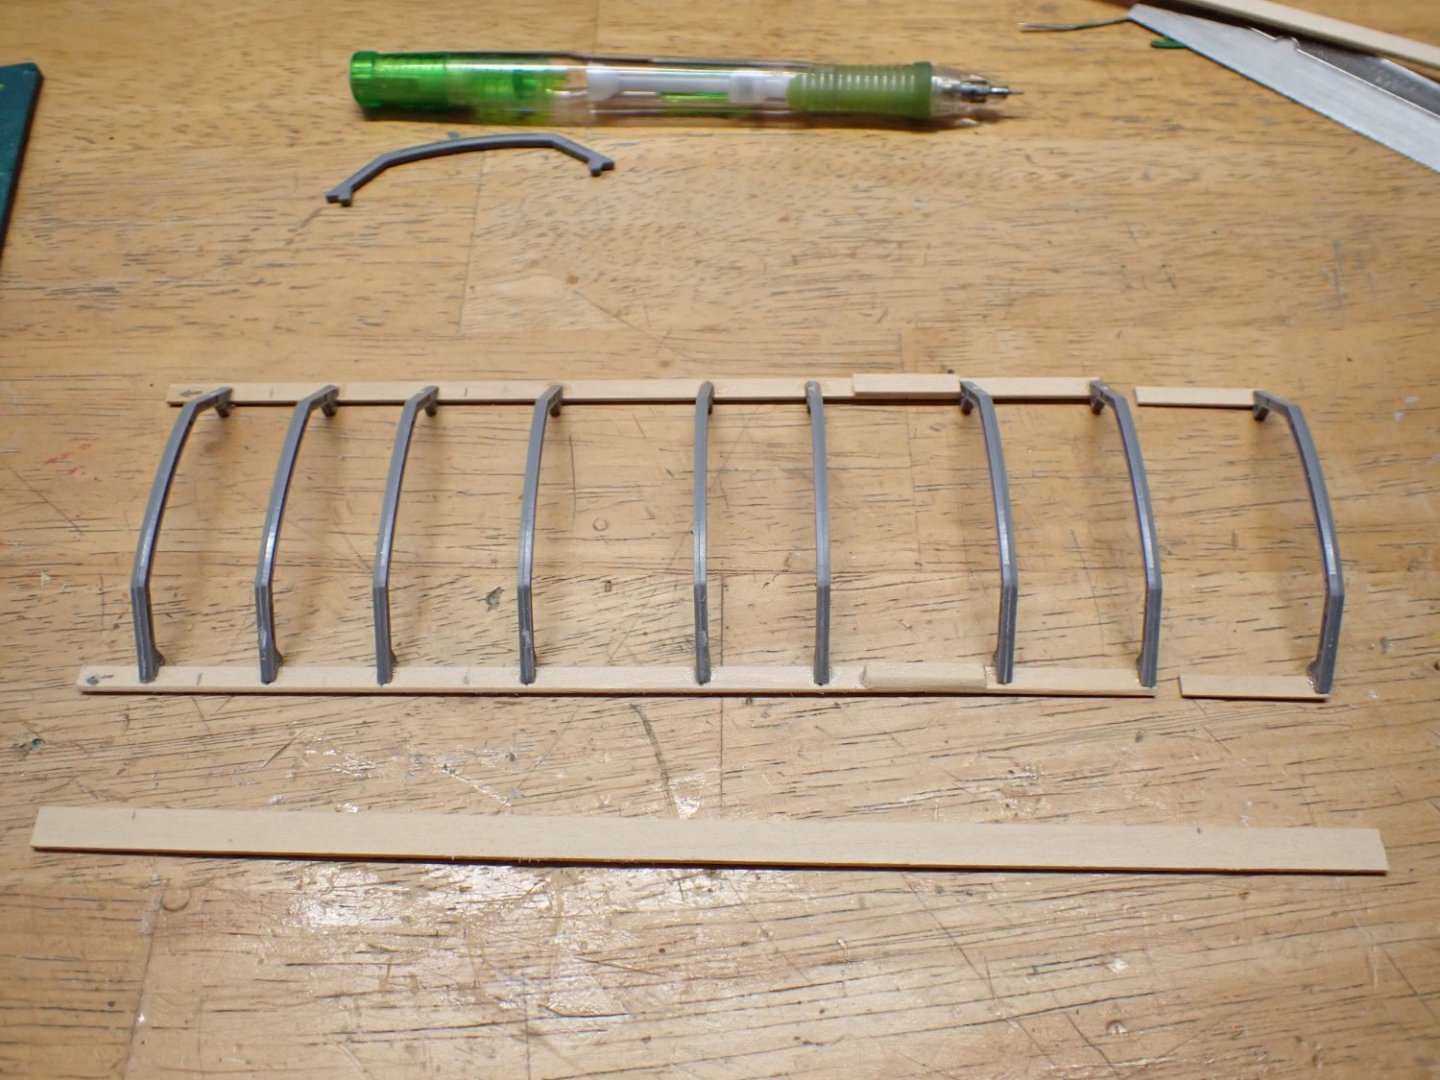
The cuts at the rear, are designed to accommodate the rear bulkhead. The original kit calls for a large scribbed sheet of wood that you have to cut. I decided instead, to go with a regular planking, treating it like a hull. Nobody on this forum will complain about that....
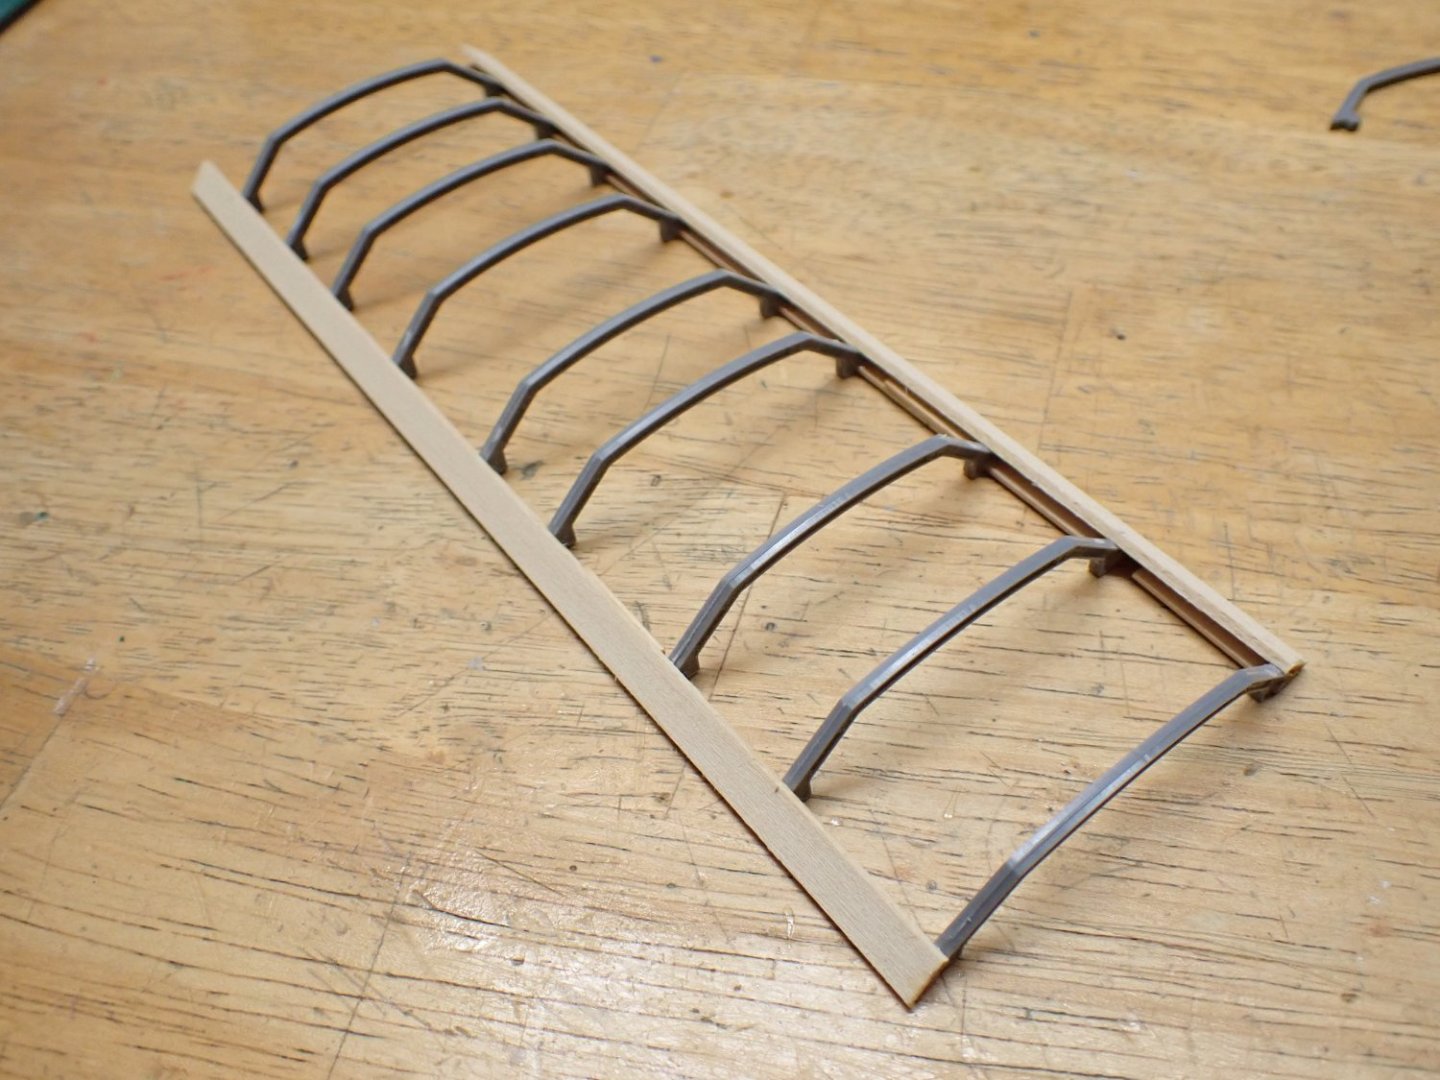

Planking is complete:
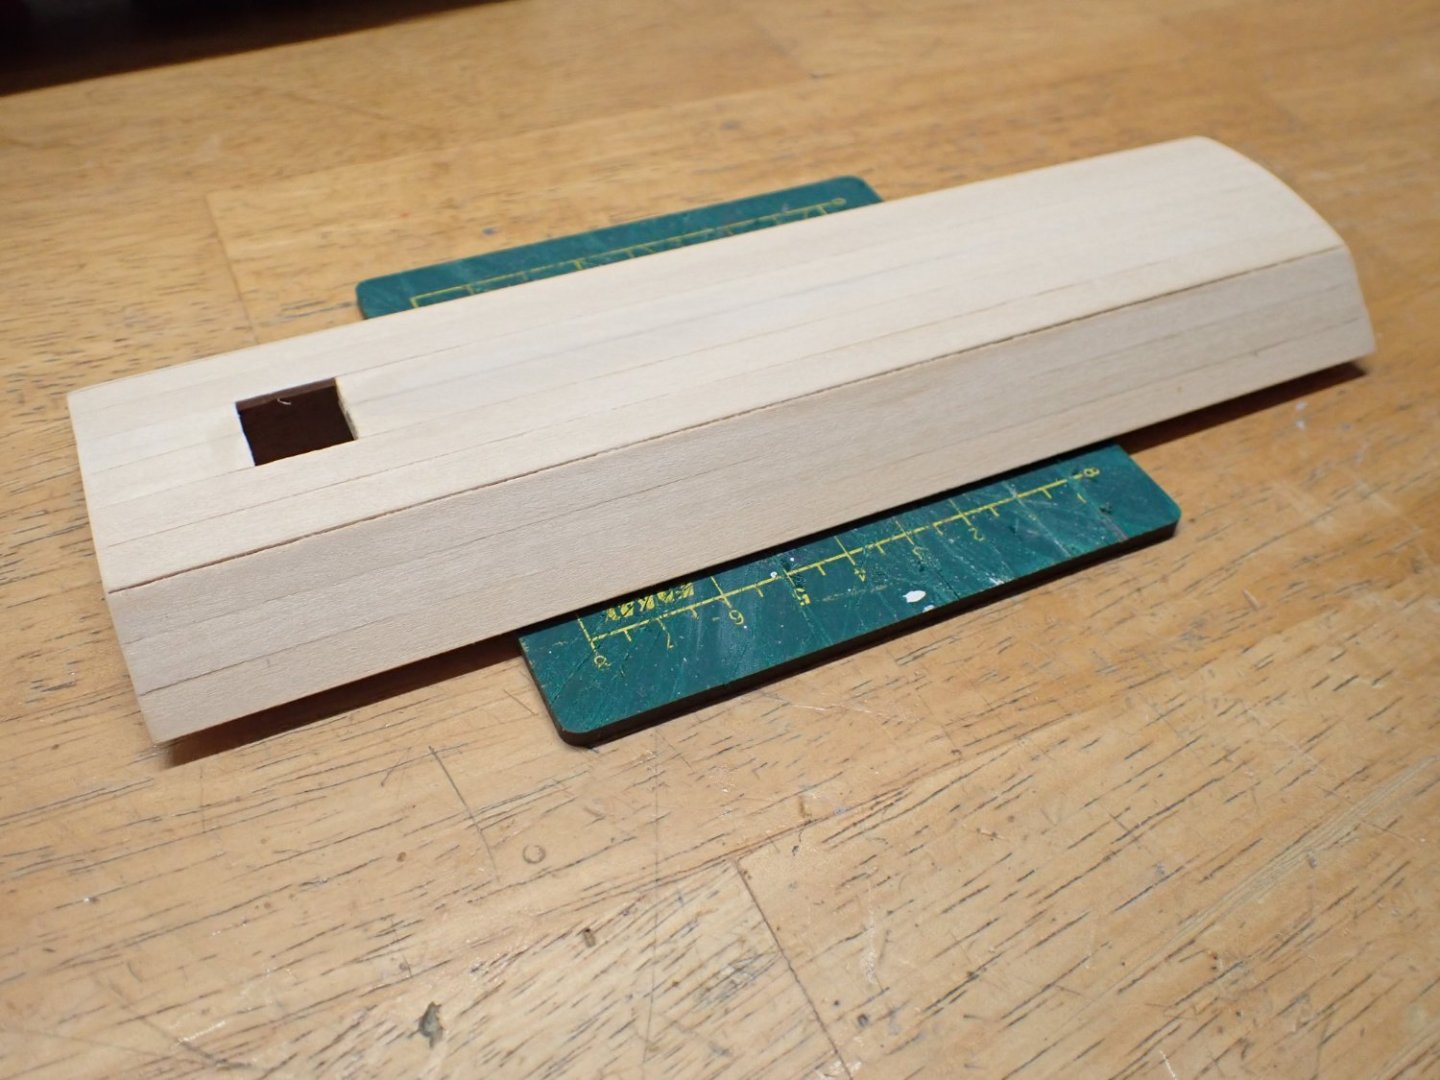

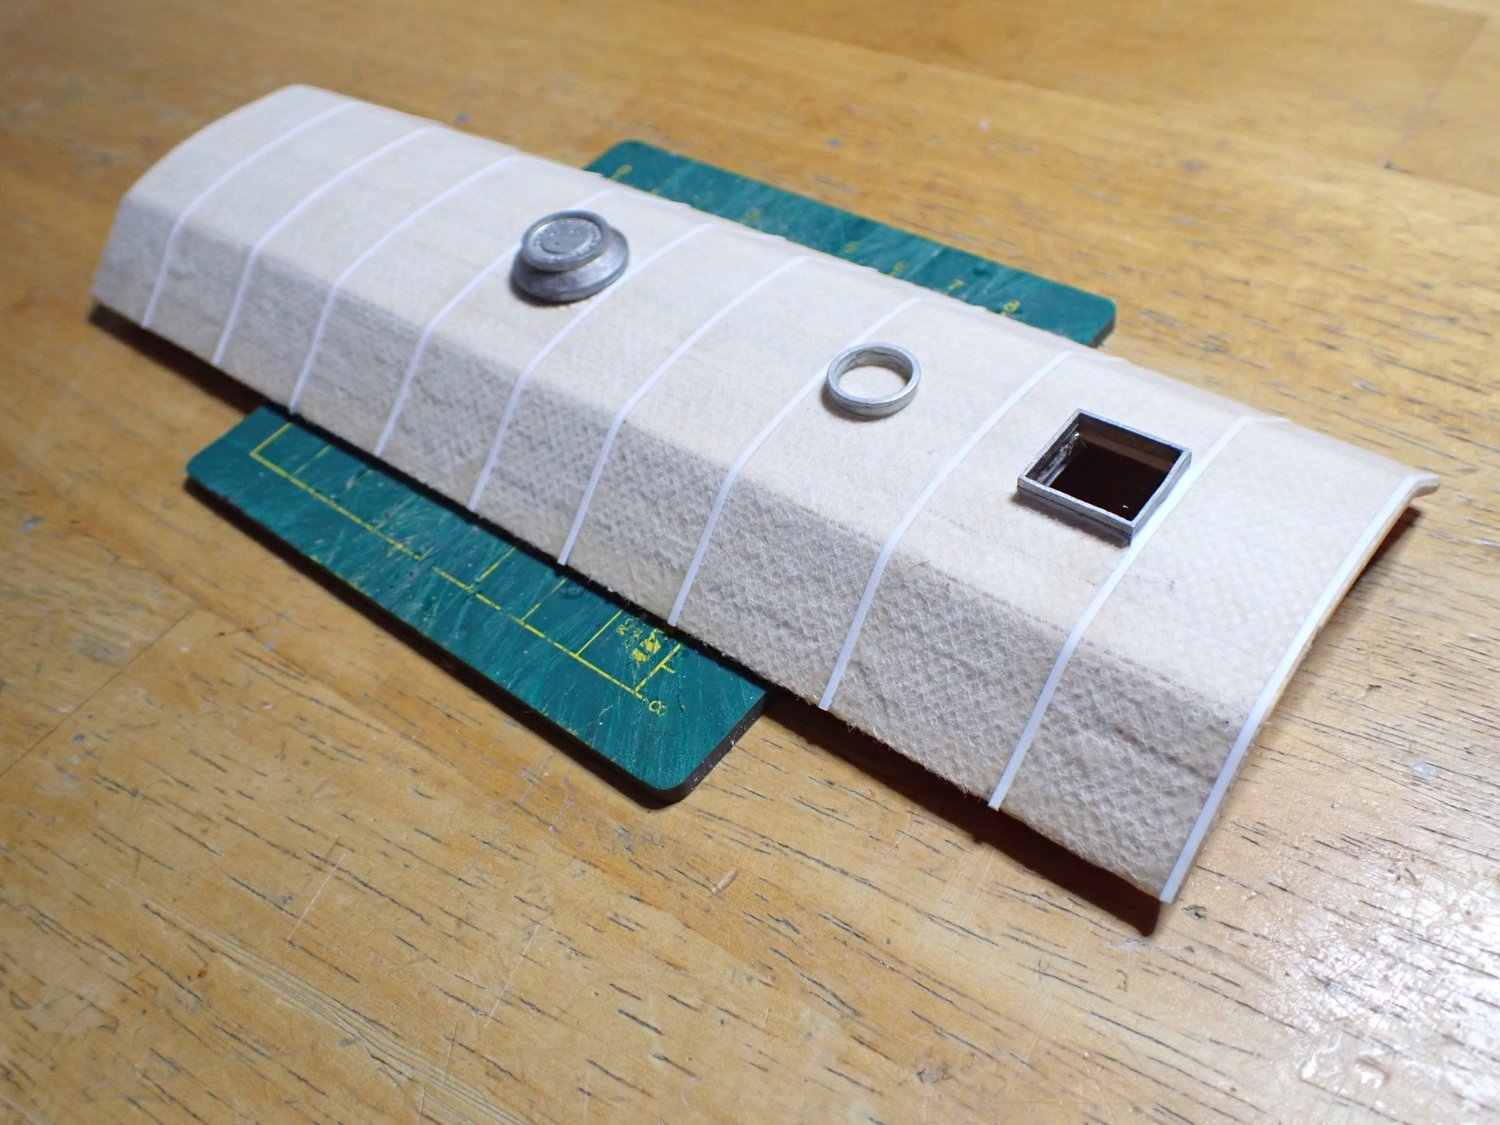
It fits very rather well. The roof will be permanently glued, since I have no intent to detail the interior. The next step is to glue some kind of fabric. That piece of fabric was missing from my kit and so I decided to use some kind of fabric used for delicate packaging: it is glued with PVA glue, diluted with water.
This is supposed to mimic the tar covered roof, used on this kind of Maintenance of the Way cars. Little by little, more details are added to the roof:
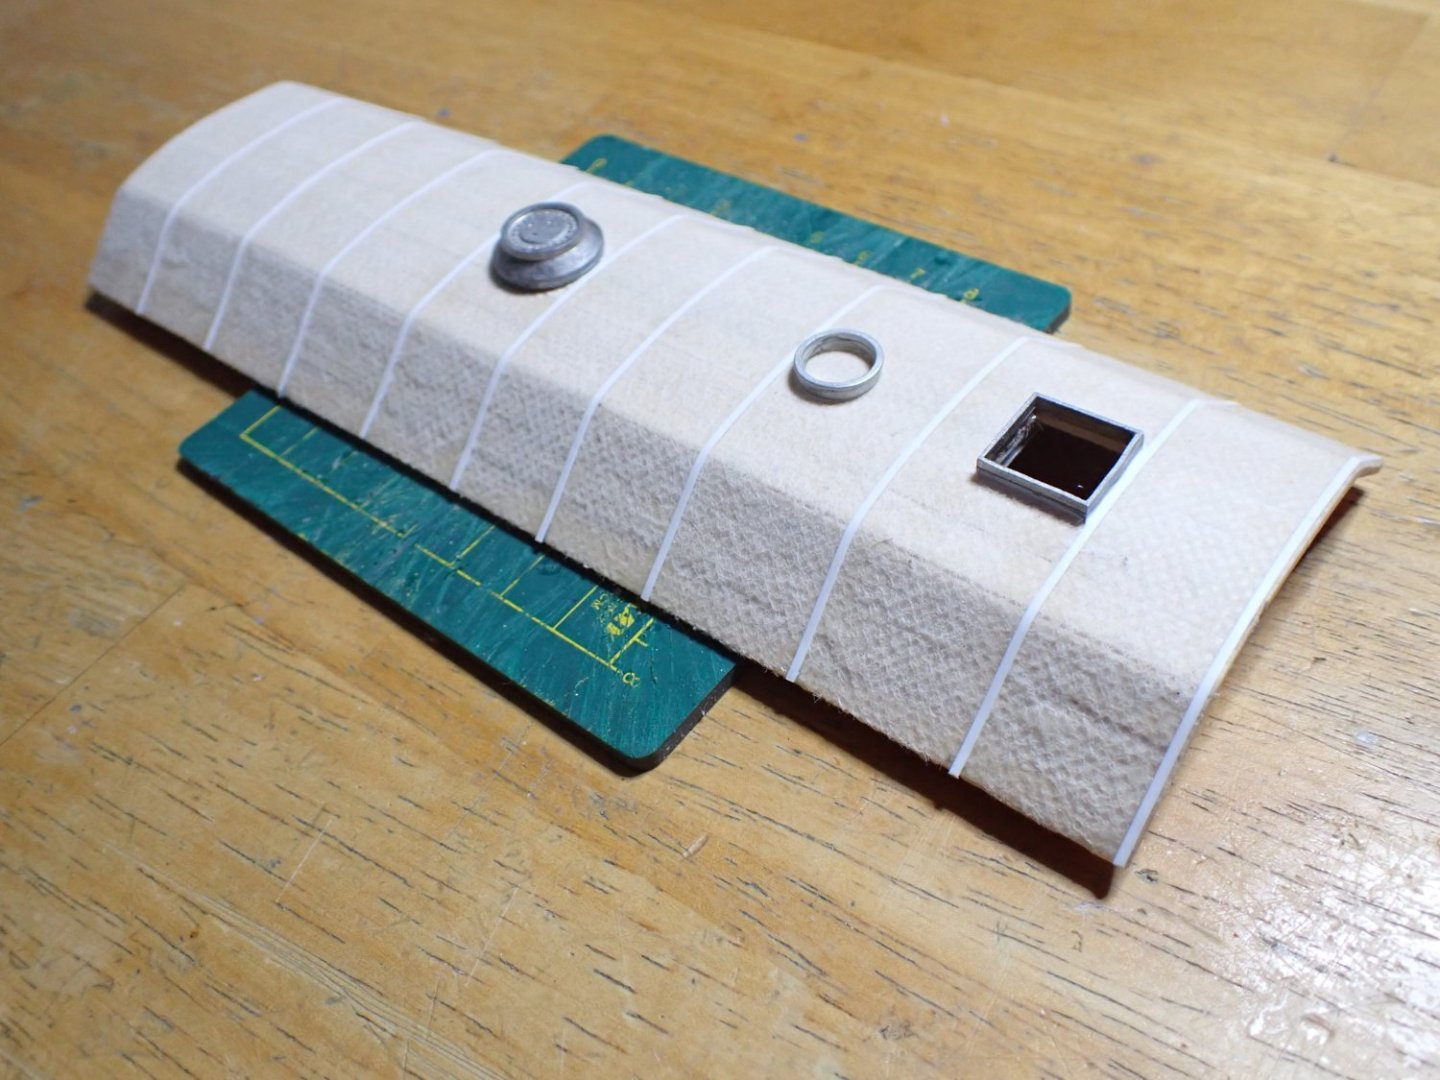
And it is now ready for paint:
Yves


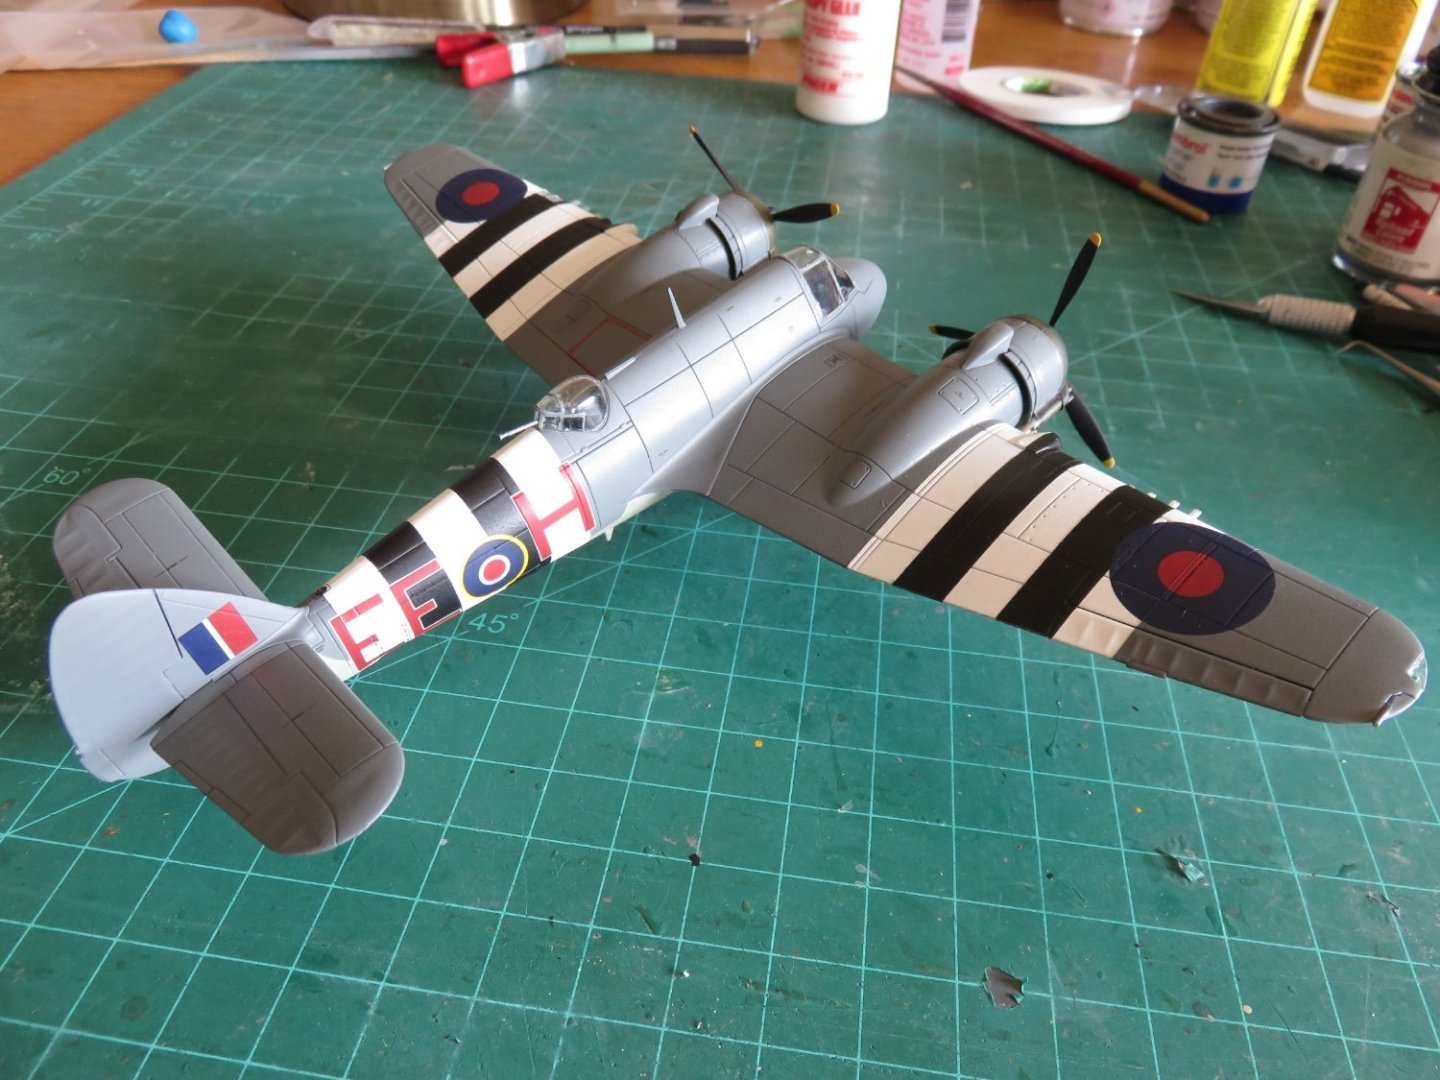
RGS Rotary Snowplow by yvesvidal - DURANGO PRESS - On3 - 1/48
in Non-ship/categorised builds
Posted
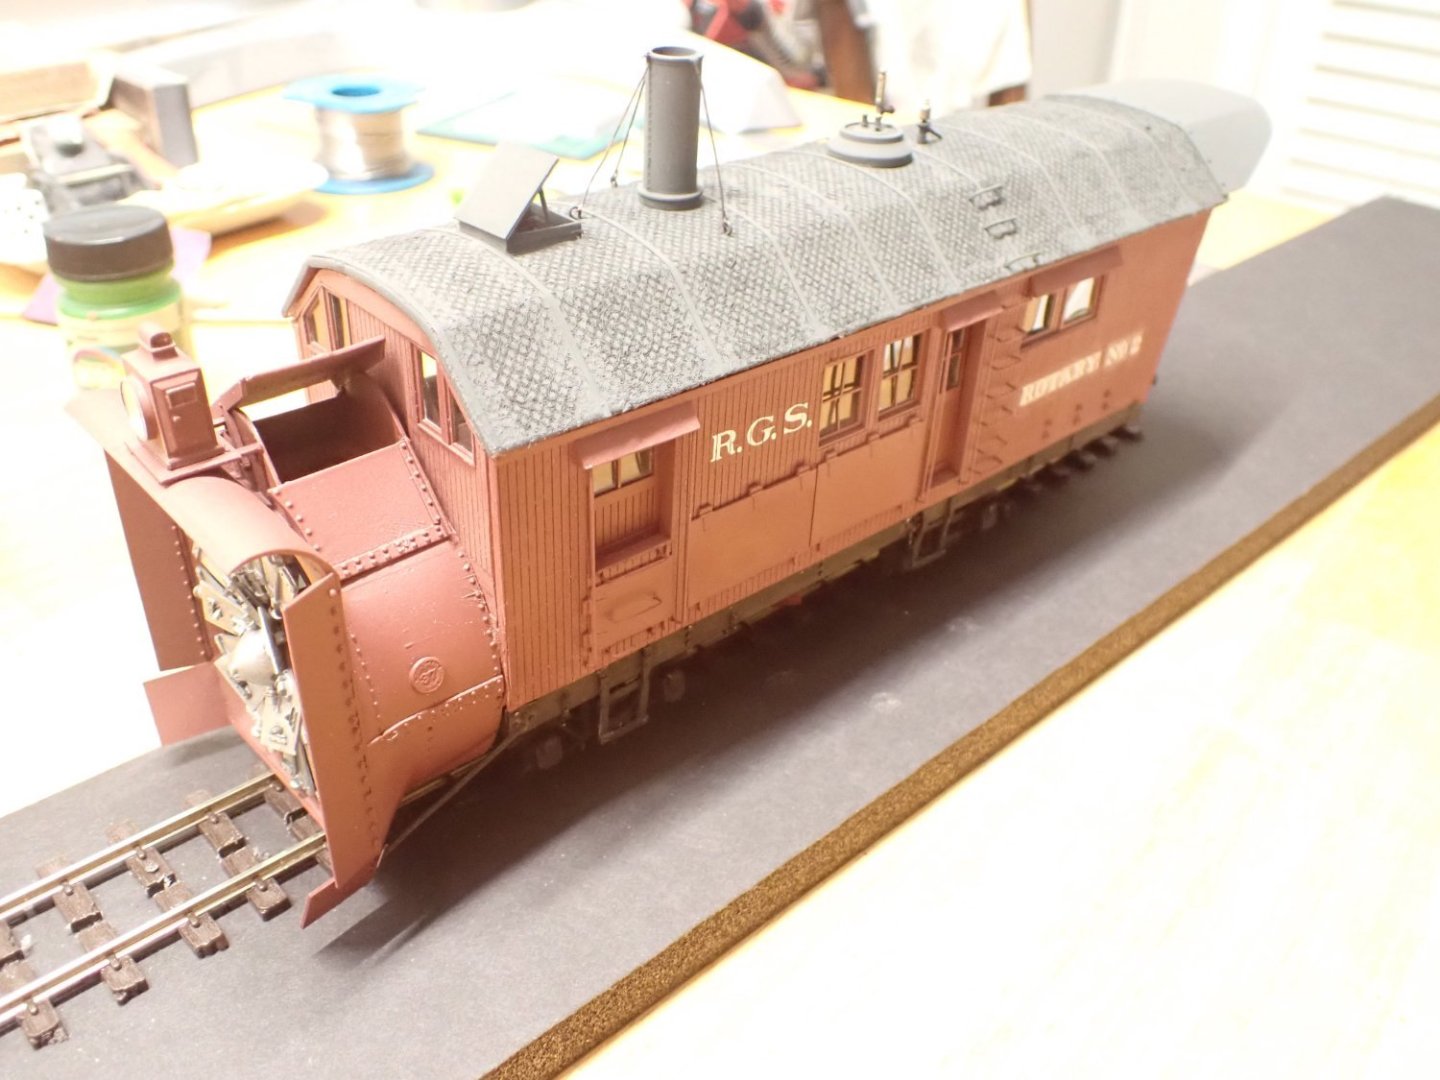
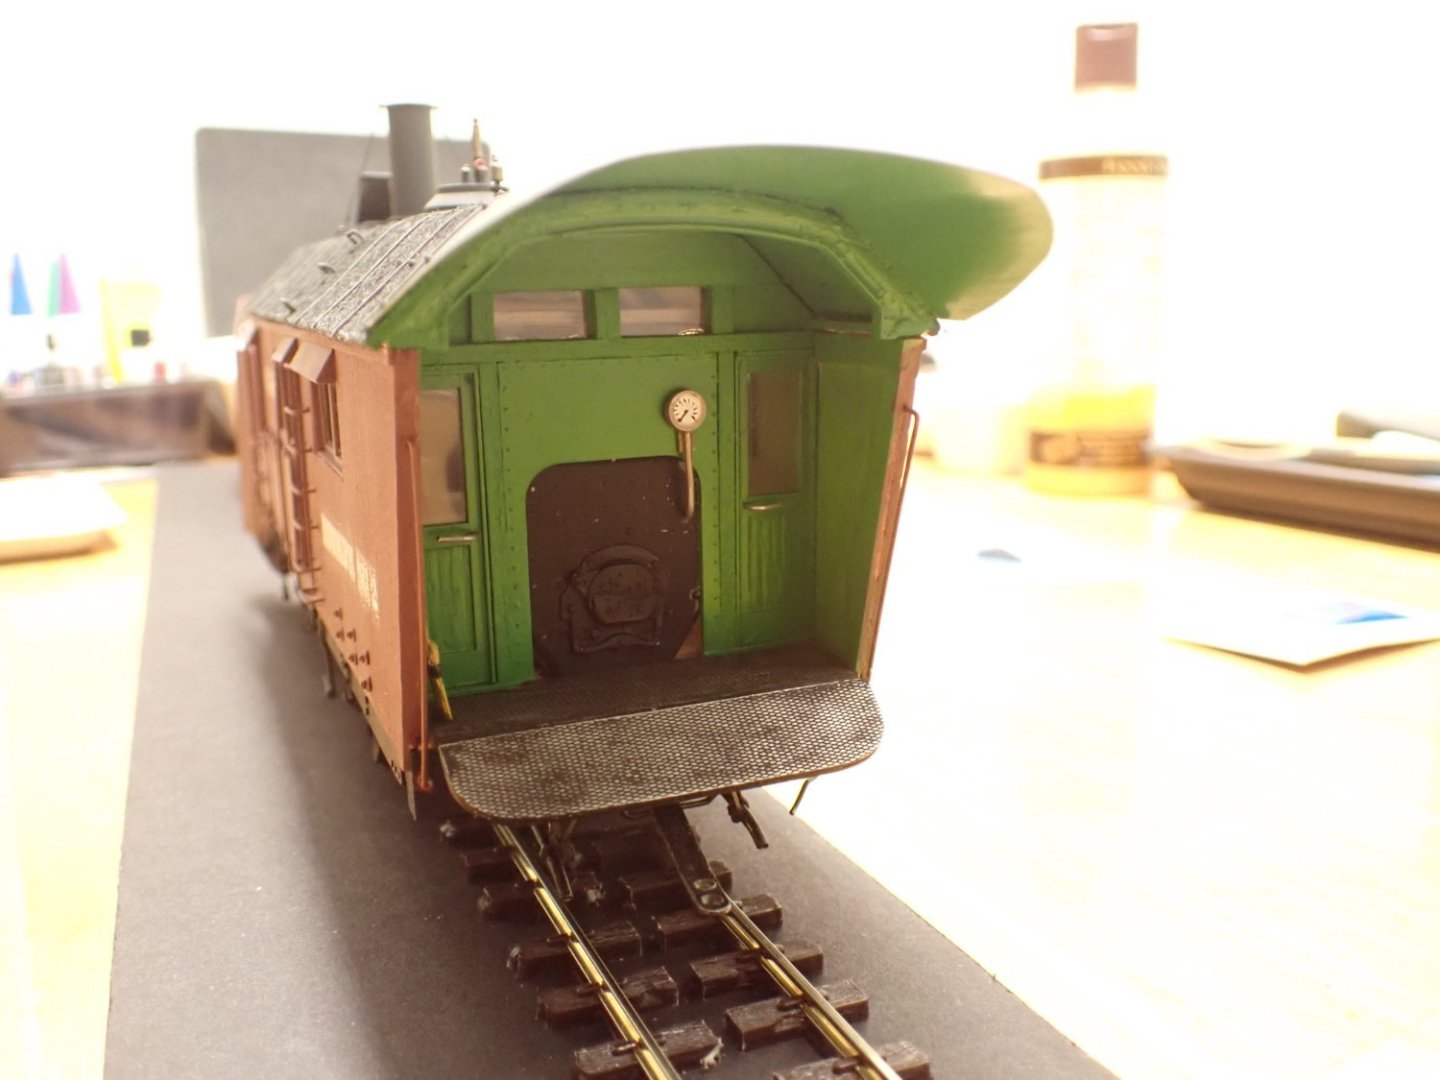
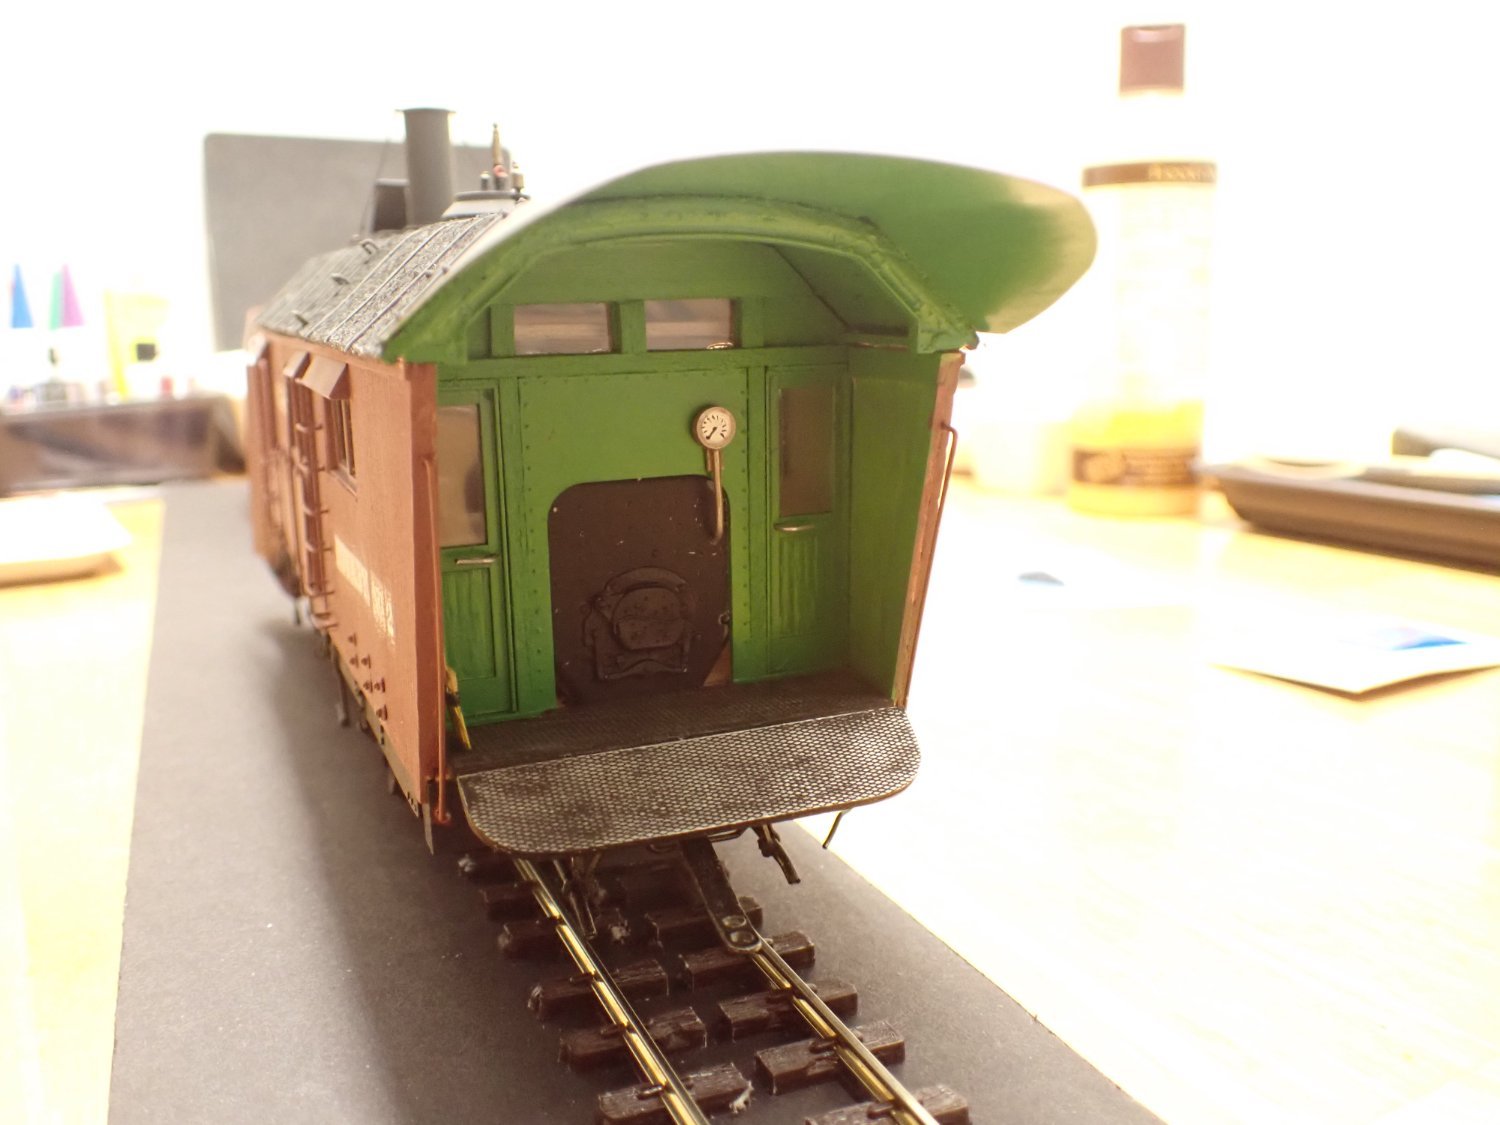
A few views of the beast:
The metal pieces above the rear truck, are used to re-rail the units. It is not uncommon for these snowplow and tender to derail when the ice is very hard, and that despite their mass.
And finally, the two units coupled together:
Again, this is a temporary pause in the project, as a piece of track must be built.
Yves