HOLIDAY DONATION DRIVE - SUPPORT MSW - DO YOUR PART TO KEEP THIS GREAT FORUM GOING! (Only 20 donations so far - C'mon guys!)
×


Jim Lad
-
Posts
9,490 -
Joined
-
Last visited
Content Type
Profiles
Forums
Gallery
Events
Everything posted by Jim Lad
-
 Nice to see you back at work, Danny! John
 -
Great to see that you're re-posting your build log here! John
-
That's looking absolutely first class, mate! John
-
Hey, Mobbsie - at least you drew one game!! John
-
Great progress, Popeye! John
-
You're right, Bob - it does almost look like matting. Very nice! John
-
She really looks beautiful, Remco (both the ship and the kitten) - just keep a close eye on Pebbles the part napper! John
- 1,215 replies
-
- 1
-

-
- sloop
- kingfisher
- (and 1 more)
-
Nicely done, Popeye! John
-
I thought you were only one-eyed when it came to football, mate! I hope the eye is OK. John
- 1,279 replies
-
- 1
-
-
- agamemnon
- caldercraft
- (and 1 more)
-
Your local brick yard has done you proud, Augie! John
- 2,191 replies
-
- 1
-
-
- confederacy
- Model Shipways
- (and 1 more)
-
Bob, you certainly put your eight hours to good use. She's looking 'ichiban'. John
-
Congratulations, Ollie - very well done, mate! She looks absolutely first class. John
- 803 replies
-
- 2
-
-
- colonial cutter
- modellers shipyard
- (and 1 more)
-
Bulkhead Fairing Questions
Jim Lad replied to Jon219's topic in Building, Framing, Planking and plating a ships hull and deck
If you're going to fully plank the hull then a shim, if needed, can be of virtually anything as it won't be seen. Whether or not a shim would need steaming or soaking would depend on the type of wood and thickness you need. Give it a go and see what happens. John -
Looking good, Popeye. Have you thought of painting the insides of the plastic boats with a wood coloured paint? Then when you have them fitted out they should look totally wood. John
-
Very interesting method of building (and adapting) boats, Popeye! John
-
Very nice cabinet work, Toni! John
-
Alister, Both these photos show ships in port. The following photo is of a ship at sea (Loch Tay 1869). John

- 803 replies
-
- 2
-
-
- colonial cutter
- modellers shipyard
- (and 1 more)
-
Sorry, Piet, but I don't see the fuse screwed into the nose of that shell for the deck gun! John
-
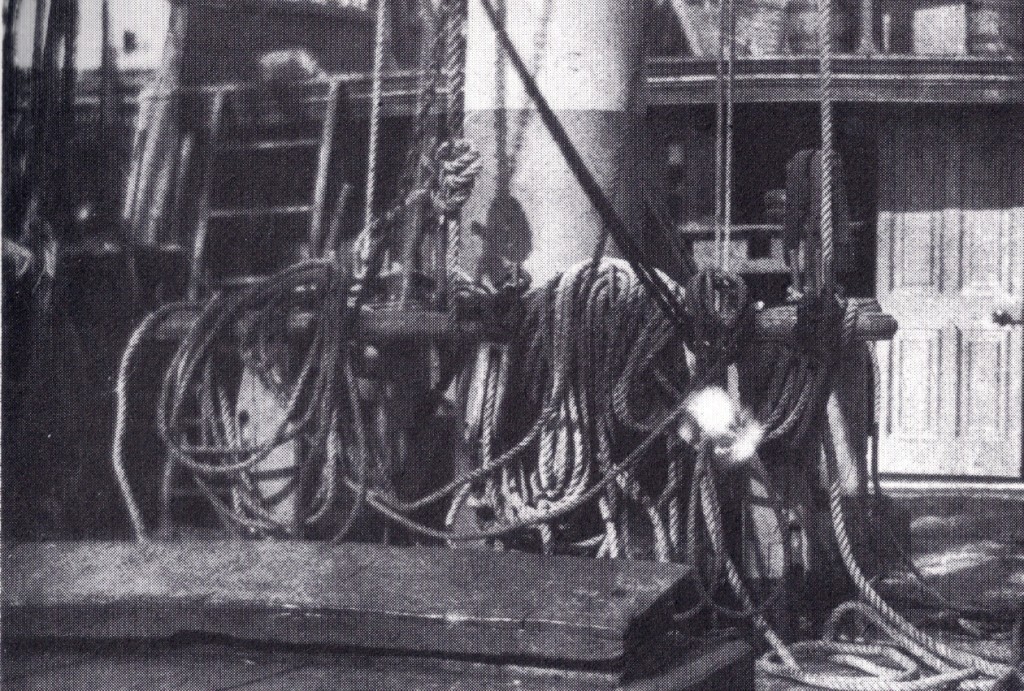
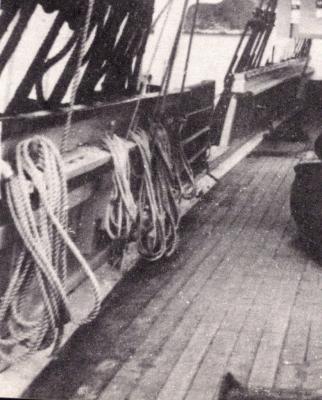
Ollie, I assume that the style of your coils is as per the kit instructions and indeed you will see a lot of models on the forum with coils made up exactly like that. You'll also see such coils on many modern replicas and restored ships, however the traditional method of make up coils was a simple coil dropped over the pin, as you will see in many contemporary photos of old sailing ships. The photos below date from the 1840's (first photo) and 1850's (second photo) and shown perhaps not in brilliant clarity, what I mean. John

- 803 replies
-
- 3
-
-
- colonial cutter
- modellers shipyard
- (and 1 more)
-
Ollie, your only problem now is that your next models have to be of a size to fit the other shelves. John
- 803 replies
-
- 2
-
-
- colonial cutter
- modellers shipyard
- (and 1 more)
-
Good to see that you've got such comprehensive instructions for building the boat, Popeye. If you're going to scratch build the boat (which looks like the case), could I suggest that you ditch all the kit parts and use some decent wood for all of it. John
-
Very nice, Augie. As for the stove base, simply order a couple of hundred very tiny bricks from your local brick yard! John
- 2,191 replies
-
- 3
-
-
- confederacy
- Model Shipways
- (and 1 more)
-
Harriet McGregor by Boccherini
Jim Lad replied to Boccherini's topic in - Build logs for subjects built 1851 - 1900
Very nice indeed, mate! John