
HOLIDAY DONATION DRIVE - SUPPORT MSW - DO YOUR PART TO KEEP THIS GREAT FORUM GOING!
×


popeye the sailor
-
Posts
16,007 -
Joined
-
Last visited
Content Type
Profiles
Forums
Gallery
Events
Everything posted by popeye the sailor
-
 coming along splendidly Rob
 -
......you really want to see me in a white jacket........don't you?!?!?!?!
- 453 replies
-
- 6
-

-
- thermopylae
- sergal
- (and 1 more)
-
for a first time doing a diorama with water, I'd say you did a fine job I've never done one either.....the only one I've done involved asphalt......we all know what colors are involved in that fantastic job on the Cerberus..........look'in forward to your next one
- 193 replies
-
- 4
-
-
- cerberus
- paper shipwright
- (and 1 more)
-
I do the same........square stock from Hobby Lobby, strip stock from Billing's sanding went well........look'in good
-
I was looking at images of the Capt Kidd kit online, the day I made that earlier post concerning the three kits. I think it's the same scale, but it is a lot more involved than the jolly Rogers.....probably more parts to the kit as well. I wanted to pick it up too, the day I went. the lower shrouds posed a problem for a little while.......thinking over just what to do about them. the lack of instruction is bothersome.......since it doesn't direct what is to go below the channels. I will have to scratch a solution for this, I'm sure......most likely with wire I did figure out how to thread the shrouds through the channels....half the battle. the channels have slots in them........why, I'm not certain....but I drilled holes at the innermost depth of the slots, and now I'm able to insert the tabs of the shrouds in them. this does pose a small problem for the gun port lids......they might get in the way. I wanted to add them before I did the masts, but now I'm thinking I should wait, so I can better situate the chains under the channels. should have more soon on this. I'm just as bad EJ.........I'm supposed to go back.......I need thinner and a few paints. I always wish I could come back with something to add to my trove

- 140 replies
-
- 9
-
-
- jolly roger
- lindberg
- (and 1 more)
-
really fine rigging Michael....I was looking at your earlier pictures....noticed the gammoning was gone. then I saw that you changed it over to the black thread.....looks much better she'll look good in sails
-
very good tutorial on Knife making.....the handles look great. I hope your sickness wasn't due to breathing in CA fumes....I've heard some folks don't handle it very well.
- 714 replies
-
- 4
-
-
- lady nelson
- victory models
- (and 1 more)
-
great looking model Mike....you did a very fine job of it
-
thanks J and Piet.........I'm glad you like it after a particularly nasty work week..........I hope to make more progress on her.
- 140 replies
-
- 4
-
-
- jolly roger
- lindberg
- (and 1 more)
-
happy Birthday my friend! I hope your day was good and spent the way you wanted to
")
-
thanks Patrick.......and all who hit the like button I've come to the conclusion that there is no such thing as a quick build.......I have been duped again this bit of a weathering exercise, works well for this model. I don't do much of it. the riddle of the chain plate/ channel assembly has been solved.......but not in the way that I like.......they could have done better. I'll tell ya about it when I resume. I appreciate the kind word
- 140 replies
-
- 3
-
-
- jolly roger
- lindberg
- (and 1 more)
-
kinda reminds me of the remake of the movie "Pan". though most might not see it, I enjoy some of the younger movies....especially since I have grand kids there was a great fight scene between Capt. Cook, pan and his entourage, and some of the neverland cast. they are some cool pictures vossie........but I think it best to keep the build on a more moderate tone
- 453 replies
-
- 4
-
-
- thermopylae
- sergal
- (and 1 more)
-
every kit that I did has the plasti-thread ratlines {it's the best way to describe them}. I used them.......I might even have some around somewhere. for thread, they supply four spools....two sizes of black thread and two tan thread.......the anchor rope is separate. never like how the ratlines were to be installed.
-
keep pouring.......two more fingers ought to do it you got a tall task ahead of you.....surely there is a second planking on the horizon. once you get it where you want it, a little filler should set the stage I recall a couple of my 'sanding parties'...........out in the garage with a twelve pack I tried one time to get my younger son involved........he didn't take the bait I look forward in seeing what you come up with
-
owmy ears were .....on fire......a little while ago.....what's going on! you pitt experiment is most likely dead on.......there's probably alters the hue, especially when it hits paper. I have a bottle too and I use it to rejuvenate the pen when it starts to get dry. there was a conversation {I think on Dan vadas's card model log} about the pen. I only use it for simulated calking anyways. brushes......fuzzier ones will hold more paint. in some applications you do have to worry about the sponge ones {some of the boutique applicators} as they also harbor air bubbles for a short time. be careful not to get bubbly paint love the knife handles....they look ergonomically adaptable i'm an x-actor kind of guy........but you be careful! the first one was a warning shot over the bow.........I don't want to hear you cut someth'in off!
- 714 replies
-
- 2
-
-
- lady nelson
- victory models
- (and 1 more)
-
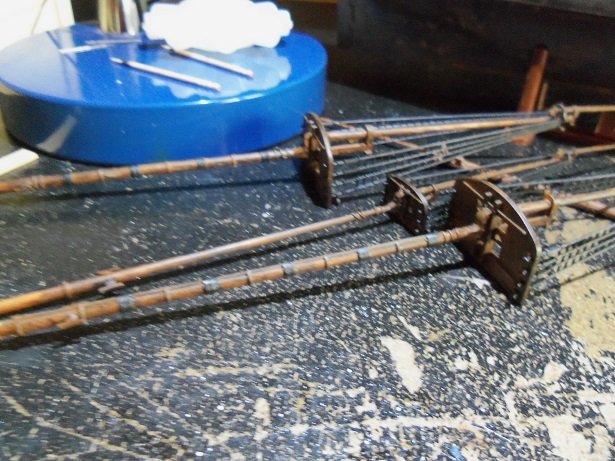
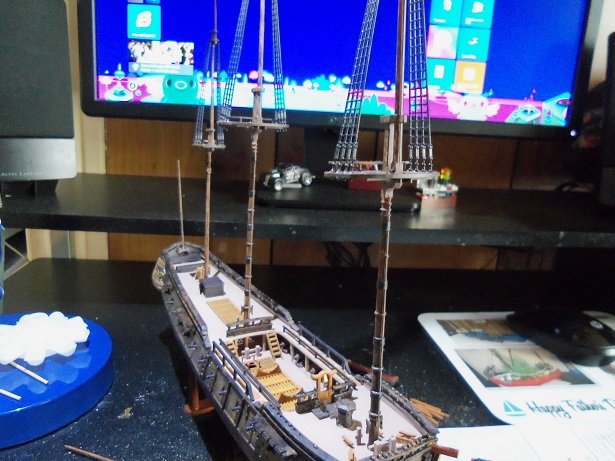
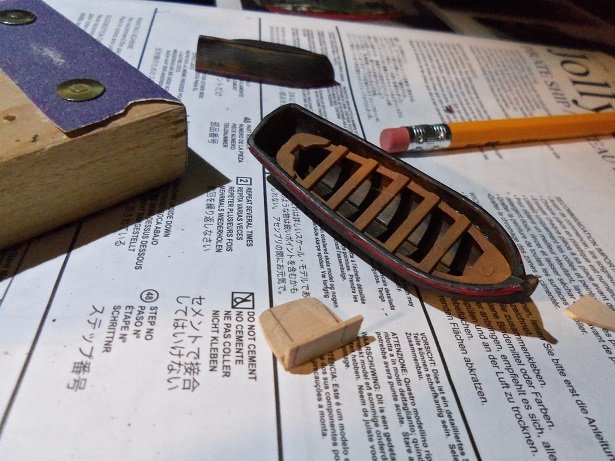
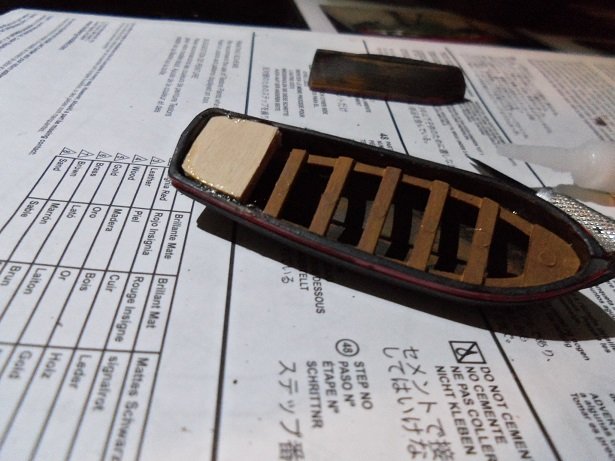
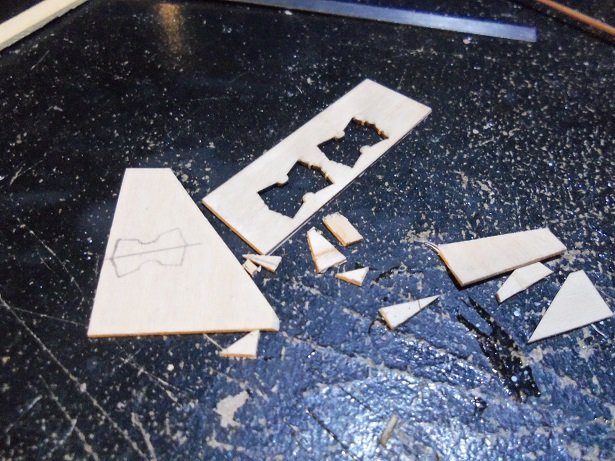
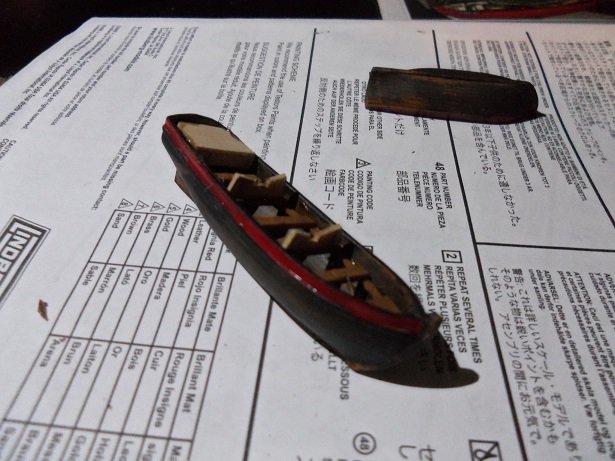
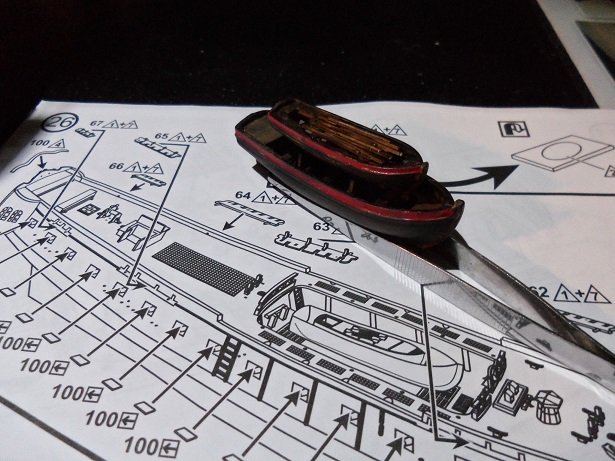
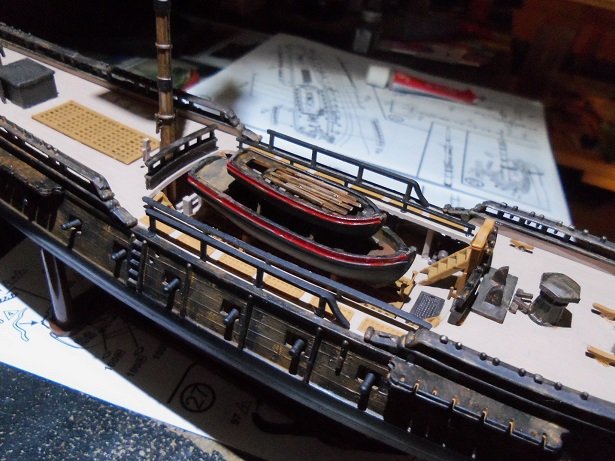
I went full circle........now I'm back here I was playing 'round today in my meager spare parts bin of plastic, and I came across the thwarts for a small boat.....darned if I remember where it came from. I'm going to use it in the larger ship's boat. this means that I will have to make a pair of chocks for the smaller boat. I'll have a couple pictures of what I did a bit later. today, I started off by adding the fore railings. they wouldn't line up like the other railings, and would have looked off, but I cut off the tabs and positioned them like the others. it looks much better for it. the masts were touched up from having the third step added to them. the woolings were painted and the flat black wash was done. all of the masts and the bow spirit are done now. they are dry fitted at the moment. before I cement them in, I need to get all the gun port lids done. .......really don't want to have 'er on her side with the masts in place.....might be asking for trouble. the boat is coming along.......has to make a special sanding stick.....1/16 wide. I just too a piece of square stock and glued some sandpaper on it....trimmed the edges. now I'm waiting for paint to dry.......>look at watch<........yup, dry'in as we speak........>look at watch<...........wait a minute! I'm not wearing a watch! anyway.......I'm using the supplied shrouds.......I was just reading the next step. put the ship's wheel in place........If I was to do that now, how would I cement the rope, that I wrapped 'round the wheel spool? that's already done......since I like to read ahead I'm looking for the numbers for the lower shrouds......and they are not here! there is no text about them anywhere. I think I can figure them out though......I'm a good guesser another mystery here is when these shrouds are in place........there is nothing under the channels. the holes are there.......but there are no parts that cement to them. I will have to figure this out too. well......I think it's been an hour now........the boats are in place on the model. the thwart was painted earlier.....it was then sized to fit inside. the only problem is, it's a little too short and doesn't reach the transom. what I made is this raised seat for the transom. when dry, it will be trimmed to fit. I like to keep certain parts of the parts panels that I don't want to save. some of the wood from them, will be used to make extra detail for the model. I have many of these templates, since it beats having to draw them out {my laziness kick'in in}. I forget where I got 'em, but these are chocks for some ship's boat. I trace them and cut them out......that's why I needed to make a special sanding stick.......to clean up the keel slot. after they were cut out....not very easy......glad I made two tracings, they were cemented in place on the boat. they will be sanded some more and then painted the color of the thwarts. all cleaned up and painted.......the paint is dry........it got a flat black wash. when that was dry, the smaller boat was cemented in place, and the oars were cemented on top of the smaller boat. they were given the flat black wash to kill any glue marks {god I love that stuff!}. how the boats are supposed to be assembled is pictured below it. I think it looks much better. here is the assembly in place on the model. ...and that's it. to think......I wasn't going to do anything with them. it was darn good luck I found that part.......the reason why I don't throw anything away


- 140 replies
-
- 11
-
-
- jolly roger
- lindberg
- (and 1 more)
-
look'in really sweet so far! when all those parts come together......are those sandbags falling off?
-
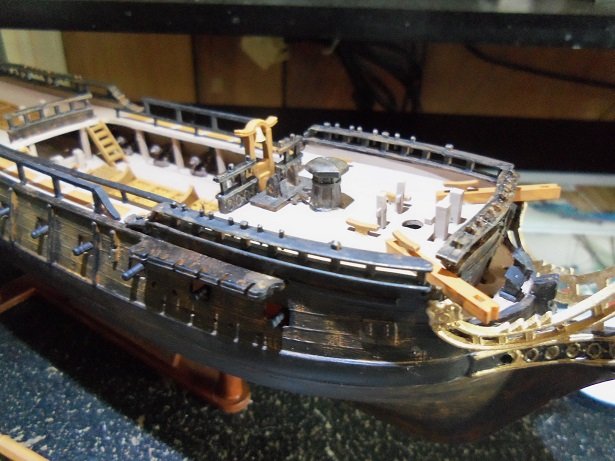
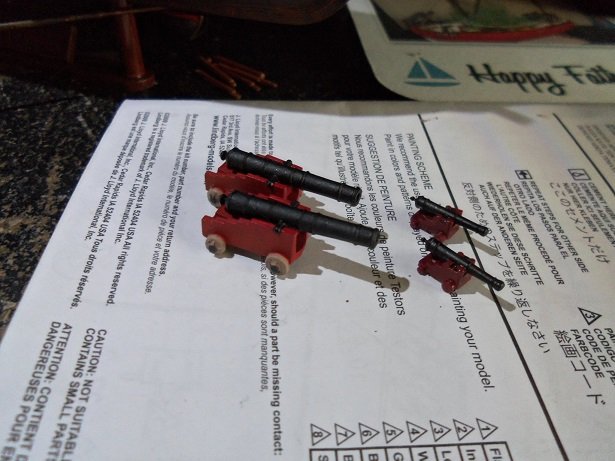
thanks Greg and Patrick to see what they instruct you to do in regards to the railings, as opposed to what I did, is night and day. the look alone is more realistic. it was a bit more work, but I'm very happy how they came out..especially the stern railings. there's a little more to go, before I start on the masts....the main tree is assembled thanks so much for the good word ! I dunno Greg.......I still think the A.G. came out better I think it better I go with the cannons I have Sam. just for fun, I finished out two of the cannon from the United States {I'm closing off the bridal ports, so I won't need them anyway}. when I got done with them, I saw that it was too laughable to show them on the deck....the darn things can easily shoot over the bulwarks! here they are in contrast to each other....... 1:96 as opposed to 1:130 is too wide a margin. the intention of the joke was there....it was the execution that fizzled
- 453 replies
-
- 10
-
-
- thermopylae
- sergal
- (and 1 more)
-
Sjors is in France no matter........I laughed when I read John's post. as for the cannons.....they most likely were no bigger than a nine pounder...perhaps even a smaller caliber. the therm is 1:124......the Jolly is 1:130.......a guess that they aren't too far off. I just thought of something....hang on......I'll be right back icky mae!
- 453 replies
-
- 4
-
-
- thermopylae
- sergal
- (and 1 more)
-
well......no. I'm sure that if it was needed, a spirit sail would be used. but for the most part, they relied on the studding sails to give them more speed. exclude the running rigging for the sail and you should be good. stay lines are OK....if I'm correct, they will be attached to the hull using a dead eye and lanyards. below deck gun ports......create boxes framed around the outer lip....cut the squared holes and install them as an insert {might save you some time}. for the spar deck guns...if you can remove the cannons, you'll have a better time of it. framing them before you trim out the ports is a sound idea....might deter cracking....just keep a mind of the inner bulwarks {one can be seen in an earlier picture....did they do that?!?!?!} . keep the blade sharp
-
hi Daniel!....just looked in here......surprised to see the genie has come out of the bottle?!?!?! oh....I know.......your generosity is well known to me, need not say more I looked at images of this vessel.......I only saw one or two pictures with a spirit sail.....and a few with just the yard. I may be wrong, but this vessel has some similarities to the Connie, and she had the yard. you could follow that direction and still be in the ballpark. she also had the martingale too...that will suffice as more than enough detail for the bow I agree about the job being cut out for you.......the gun ports look to be the biggest problem. if time is the issue, and what others have done looks OK......then leave it as is. repairs or revisions can be very time consuming. I will follow you on your journey I see you Jolly Rogers in there what is that super looking hull against the wall? a Cutty?
-
nice bit of progress....coming along really well. just bookmarked the site....they have some cool look'in models