
HOLIDAY DONATION DRIVE - SUPPORT MSW - DO YOUR PART TO KEEP THIS GREAT FORUM GOING!
×


popeye the sailor
-
Posts
16,007 -
Joined
-
Last visited
Content Type
Profiles
Forums
Gallery
Events
Everything posted by popeye the sailor
-
 very true.........I'm so spoiled with the larger kits........it's nice not to have need to use the smaller lines on the ruler {I have one now that's frying my eggs}. carriages look good......I like that effect you've done to them. structures look sweet too
- 258 replies
-
- 2
-

-
- harriet lane
- model shipways
- (and 1 more)
-
the structure looks sweet! nice attention to detail in the windows. very nice work Bob
-
thanks to all of the kind comments and those who hit the like button the past couple of weeks had me with the brakes on.........it feels good to be back at the table I didn't get much done today either......spent the day trying to catch up on all the logs I follow {I'm almost caught up now}. I thought I had the right size beads........stinks that I was wrong. it holds me back till I can get the correct size. no matter........there are other things thanks Michael.........just a newbie idea....I think it was back in 2010. as a matter of fact, I was looking through the Cux file, to see how I connected the buoy line, when I saw this picture: it also orients the bar and end caps better, as seen here. I never really gave it much thought, concerning the flat sections of the end caps........rub bars, in the event that it scraped along the hull. I don't even have those oval rings any more.....just some big ones, that I may never use. I'm glad I didn't toss the tool out hey there Tom..........are you situated in the blizzard zone? we had heard that parts of Mass was under a blizzard warning. I tried to clear some of the snow........but the wind was blow'in so bad....I said the heck with it! we have well over 12 inches here.......and the drifts are worse! the picture above show them unpainted.....when these two that I'm making now are painted, they will look even better. thanks for the good word and look'in in thanks Pat! Yea I know.......I say it myself "any progress is good progress." I just glad I have a habit of keeping all of the instruction sheets. not that I couldn't remember how I made them.......but they made the task easier. thanks for the good word my friend
-
Yes sir........I do. I saw these while searching images on the net........I saved copies there are a couple of other pictures, along with those two....I have them as well. thanks for posting them.......I like the looks of the construction too. here again though........the fore castle deck is not the same as the kit deck. it lends more toward the Cutty. if I were to clone another hull, outside of the decorations........I could come up with a pretty good Cutty Sark!
- 453 replies
-
- 7
-
-
- thermopylae
- sergal
- (and 1 more)
-
I wish I could help Jerry..........my only experience with shipping / moving {if you plan on using UPS, that is} met with minor damage, because some yahoo let it get caught on the belt. I usually move my boats by car, boxed up with styro-protection. I don't want to even think of moving now.........several wood models and about a dozen or so plastic we're going to one day soon {I just know it}.......... so where ya mov'in........some place warm {as if Florida wasn't good enough}
-
bulwark posts can always be added later. basically, their only purpose, other than to supply a post, is to aide the planking as it went around the stern. you did fine
-
you should be ready now my, you've sure had your share of problems..........way too much progress for me to comment on. .....like those bulwark panels....I hardly use them.......I've had my fun with them in the past. I simply plank everything with the planking direction your going to go by.....I see little trouble.
- 714 replies
-
- 3
-
-
- lady nelson
- victory models
- (and 1 more)
-
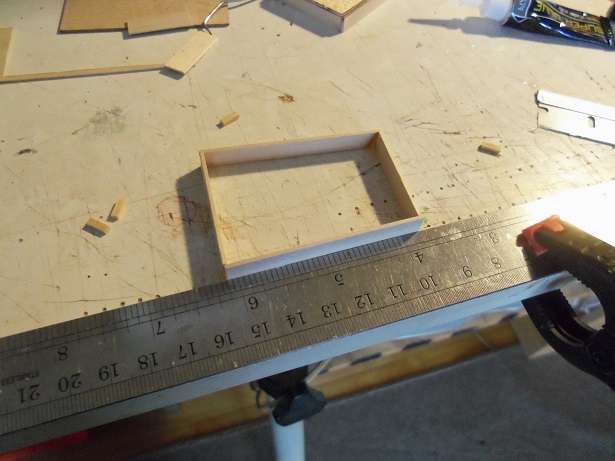
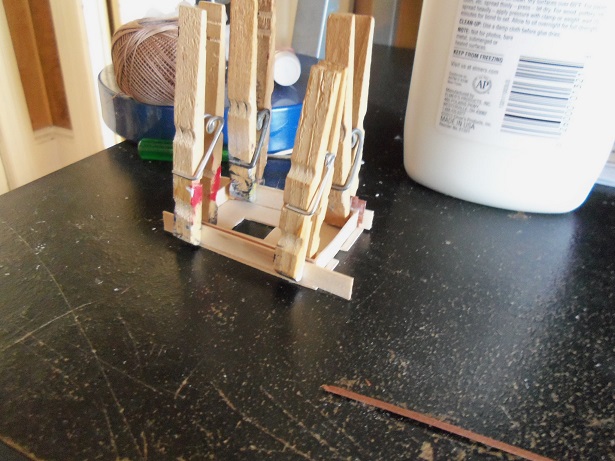
I did a bit more work on this build. the Hume model showed a more rectangular galley. I've also been wrestling with the idea of second planking the outside of the hull. the one con that keeps me from doing it, is the idea that it would make the hull look thick around the bow and stern. I do have to adjust the height of the stern though, and bring down the additions I glued there, to even out the aft bulwarks. I used the drywall sander.......but I think it needs to be finished off with a wooden block covered with sandpaper........the sander has that rubber backing behind the sandpaper, and I'm not getting a flat look. it needs more........ cutting the parts to make up another galley structure, I cut the aft wall, so it was almost as wide as the front wall. apparently, I don't think it was enough. since it does get away from the rounded look of the Cutty galley {the kit designed galley structure}, I might be on to something. I cut out the galley parts from the metal sheet. noting that they are smaller than the sides of the structure, I'm taking 0.5 x 2, 0.5 x 1, and 0.5 x 0.5 mm mahogany strip stock, and bordering it around the metal plate, casing them in....as it were. I'm using the extra strips I had cut of the 1/32nd flat stock, clamped in place, to keep anything from lifting. I've done both side walls so far............I'm doing the aft wall now......and then I'll get to the front wall, where I'll also have to attach a companionway. hope I have more for you folks soon.

- 453 replies
-
- 11
-
-
- thermopylae
- sergal
- (and 1 more)
-
excellent progress Sean..........she's looking great!
- 2,191 replies
-
- 4
-
-
- confederacy
- Model Shipways
- (and 1 more)
-
very nice progress J.........I see you do well with smaller scale.
- 258 replies
-
- 1
-
-
- harriet lane
- model shipways
- (and 1 more)
-
cementing balsa in layers creates nothing more that balsa plywood.......I'm sure it is a lot stronger than a preshaped block. from what I see Doug, the stern came out pretty good. I noticed that the two stern parts weren't there {I believe they are called part #13 in my production of the kit}. I installed them later in the build, so I could add the beams that go lengthwise to the bow. this model, as well as the Mary Ann model, has a very pronounce rump. great job so far.........she looks real good
-
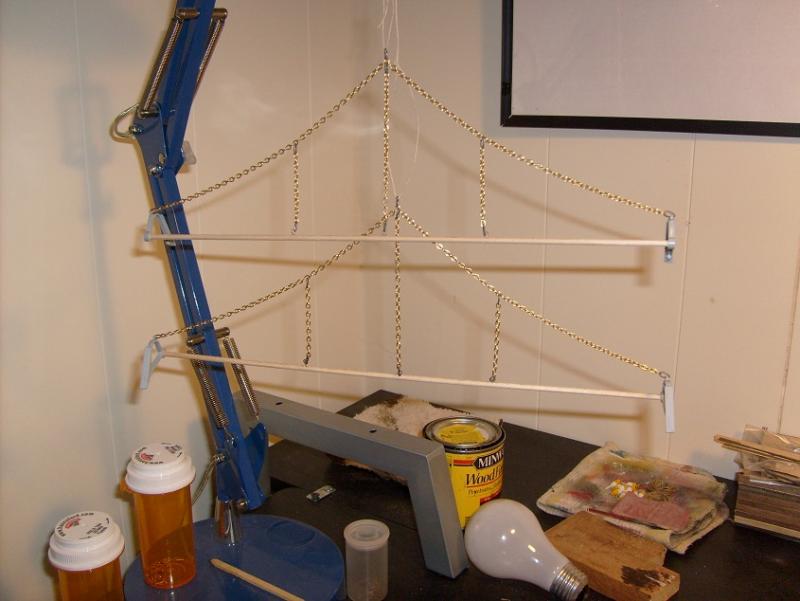
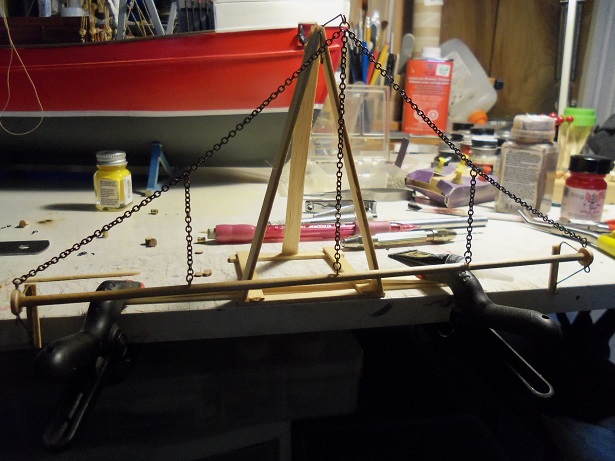
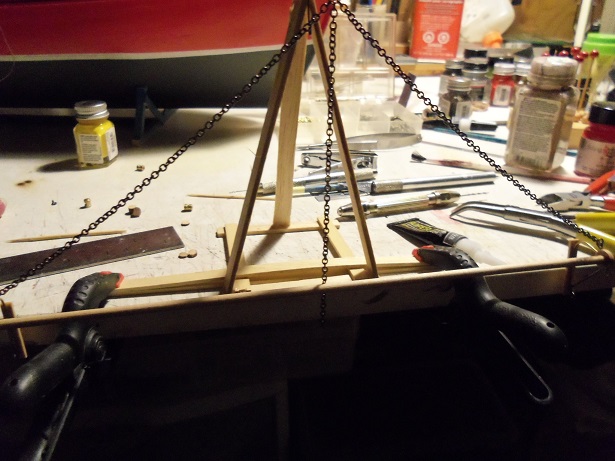
I wish I had more progress to show, but I move and swing too much. I also later found out that the beads I bought are the wrong size......further going through my inventory again........fruitless. so, I will have to bring one with me, to insure that I have the right ones. to used the ones I got, they would be too out of scale. that won't happen today......we're in the grips of a heavy snow storm {and I just got done picking up from a smaller one the other day}. I did get the first rig completed........paint is the next step. I also changed the arrangement of the center lift ring.........using a slightly larger one as well. it gives better detail of how the chains are tied together. so now, it's the other rig's turn........I made sure to do the same with it's center lift ring. not pictured here, is the drilling of the three eye bolt holes in the bar, and filling them with an eye bolt. these will set a while to dry.....something I learned while assembling the first one. from here.......I decided to get into a mental battle with another build. this feeble bit of progress was a refreshing return to the table

- 747 replies
-
- 11
-
-
just in my inventory alone, I have several shades of red.......I do share in your frustration at times great job on the railings...they look real good! good luck at the doctors.........I hope it's nothing serious.
- 749 replies
-
- 5
-
-
- albertic
- ocean liner
- (and 2 more)
-
guns and the paint work looks great Greg. you've made some serious progress since I last looked in.
-
thanks Bill.........my two cents.........for the scale of the model, and how much scratch building you'll need to do, it might be best to find a good set of plans and go completely mad I suppose this kit makes a reasonably nice model, out of the box, but so far I have found a few things that need tweaking. welcome.......good to have another following along thanks Carl. I'm doing much better.........good enough to do a little sanding and cut some parts to make another galley. the galley construction in the kit, looks more like the Cutty. I contacted Aberdeen Maritime museum.......not too much help there I'm afraid. they did send me some pictures, but I haven't had a look at them yet. I'll do some more digging around, but it looks like I'll be drawing ideas from Cyril's model. I can safely say the rigging dilemma has been pretty much taken care of........with what I have now, I'm confident that I can get it close to what it should be. I should have some sort of update on this build soon thanks for every one looking in.
- 453 replies
-
- 8
-
-
- thermopylae
- sergal
- (and 1 more)
-
there are a few thing you can get away with though. Jack's right about the paint, but I've found on most flat enamel surfaces, the decal can be a bit finicky and not adhere properly. I've heard folks using floor finishing products with good results. flat lacquers works well too. I hardly use the decal setting solutions with these decals. the bonder makes the existing film more elastic, so they lay down fairly well. have you experimented with the importing part of the program. go online and look at images......I did shamrocks. I saved them to my computer and imported them into the decal maker...very nice I've even embossed images on sailcloth.....depending on the type of cloth, it works quite well. guiding the cloth through the printer can be tricky.
- 165 replies
-
- 6
-
-
- cape cod catboat
- Finished
- (and 1 more)
-
thanks Patrick and Pat for the well wish, as well as those who looked in. I'm doing much better........although I didn't get to the table, as I would have liked. I did yesterday though....even implemented my idea with the center lift ring, which looks much better. now, instead of seeing a ring with chain crowded at the bottom, you see clear connection points. I hope to have an update soon thanks all for following along!
-
good to see you've started a new build.....I enjoy your work glad that I'm early on this one. great start!
- 420 replies
-
- 2
-
-
- captain roy
- lugger
- (and 2 more)
-
railings came out quite well .....even the outer wall super!
- 749 replies
-
- 2
-
-
- albertic
- ocean liner
- (and 2 more)
-
masts look really good.......the tape banding works very well. I believe they call them woolings.
- 1,208 replies
-
- 5
-
-
- great republic
- clipper
- (and 1 more)
