


popeye the sailor
-
Posts
16,007 -
Joined
-
Last visited
Content Type
Profiles
Forums
Gallery
Events
Everything posted by popeye the sailor
-
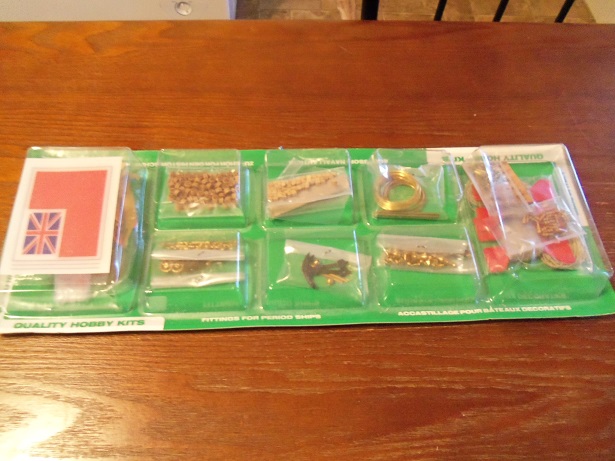
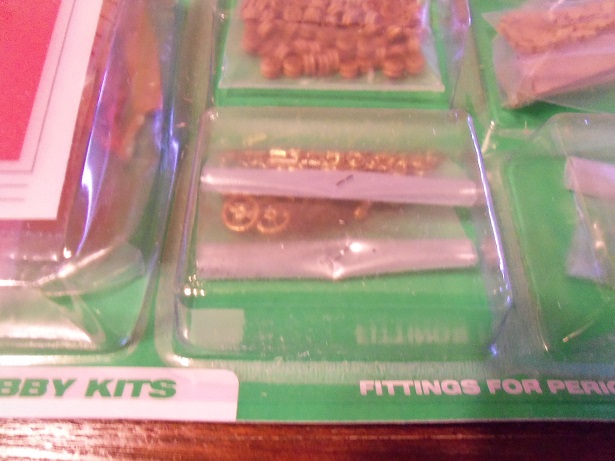
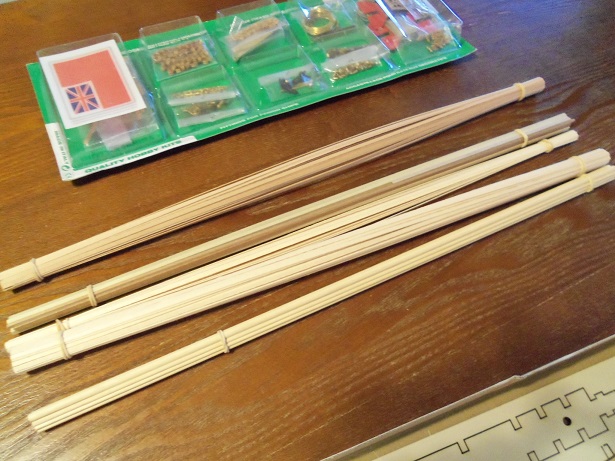
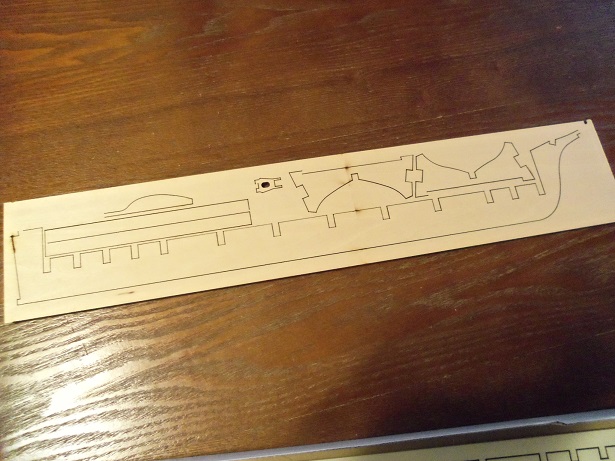
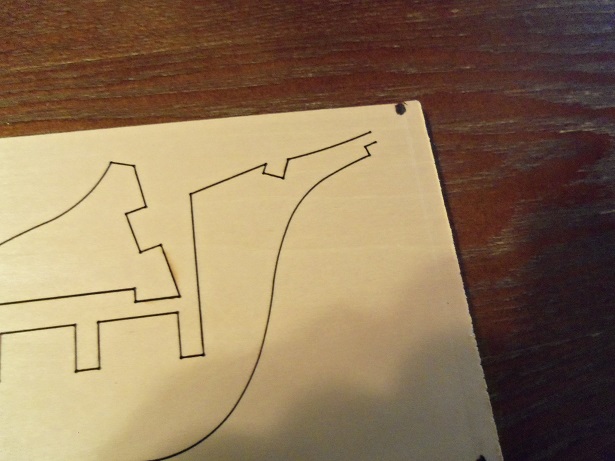
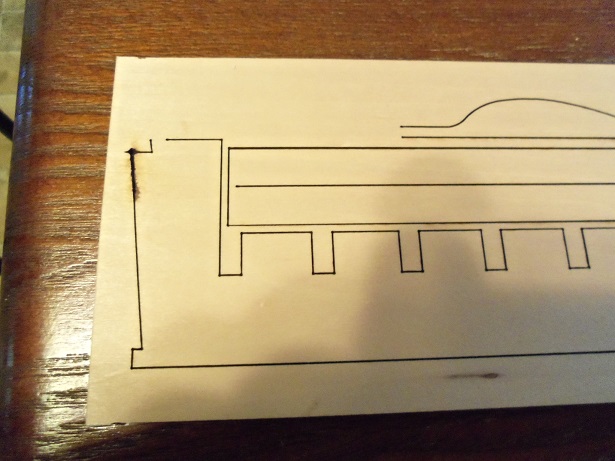
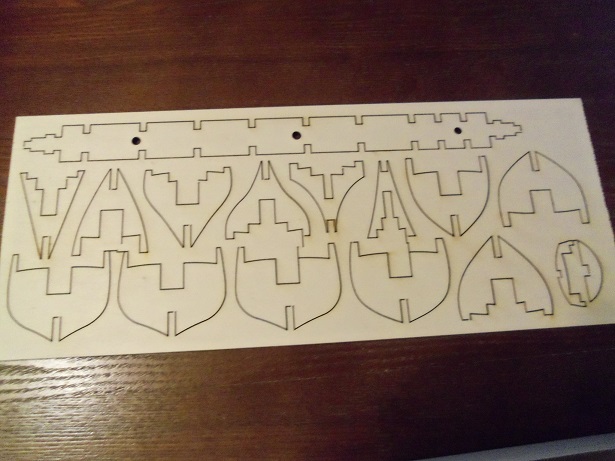
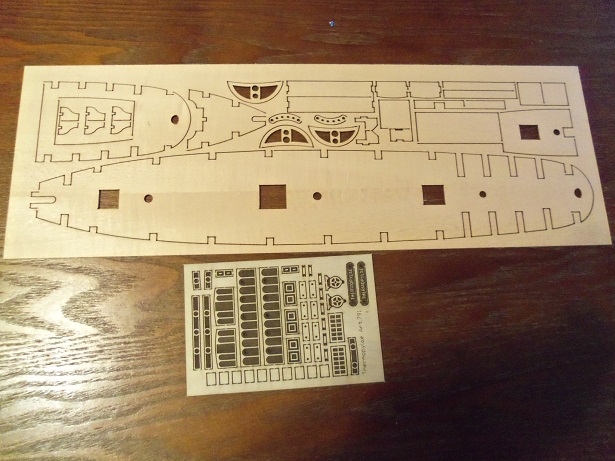
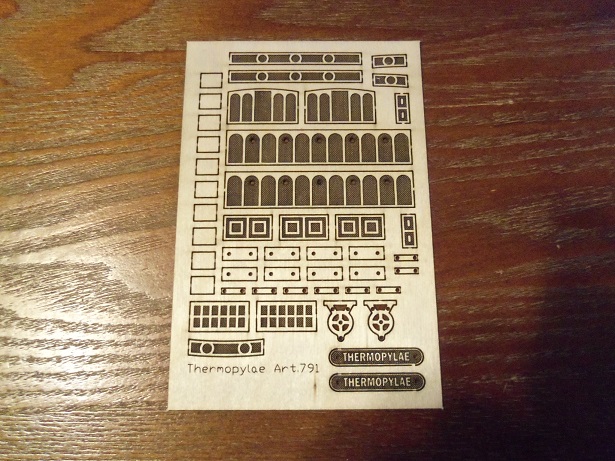
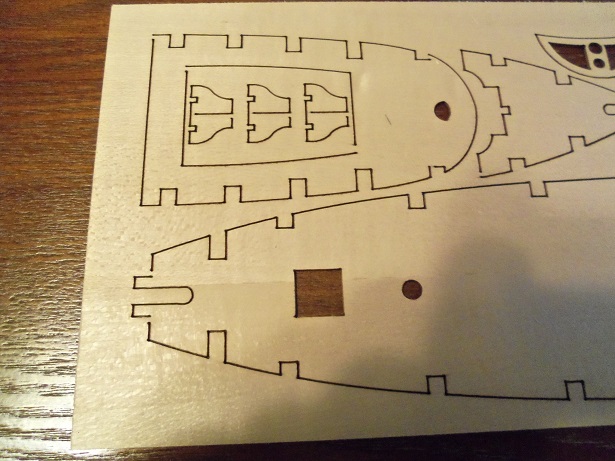
 I've mentioned this kit a few times........gotten last Christmas from my admiral. I wanted to bide my time and complete a few of the projects I have going, before starting it. the admiral would ask me about it every once in a while......I'd tell her my reason....and for a while, it was good. I think my logic has worn thin. the time left in the closet was good though.....I was able to find that there is a second version of this kit, which contains some photo etch. looking around for it, following tips from other folks, I was able to locate it. the photo etch mimics a wood sheet contained in the kit. I found it at Cornwall model boats....I ordered two of the photo etch and one of the wood sheet. sadly, I only got one of each......I got the last of the photo etch. I will reorder it at a later date.......I won't try and scare you with what I have planned for this kit....icky mae 1:124 is a small scale for this ship.....to me it is anyway.......it will be quite compact, and not as much detail, as would be seen in a larger kit. of course I don't believe that....quite a few folks here have proven that theory is only limited to those who don't want to. there is one build of this model listed here on the site, but it took a hit with the last crash, losing all of it's pictures......unless the gent comes and fixes it, I'm on my own. the fittings for this model are very small.......lots of tiny parts. as I saw with the other build, there are some thing I will be changing.......railings, for instance will be a focal point. wood strips.......got'em.......looks like a lot of smaller sizes here'e where the kit starts to get dicey.......their laser cutting methods lead lots to be desired. normally, you have the small etch points, which have to be cut, in order to pop the part out. with this one, the laser cuts are not complete, with large tabs that need to be cut {or finished}. the bulkhead sheet is even worse........the laser cutting doesn't go all the way through. I didn't take a photo of the back side......{you'll see later}. it's a really nice kit.....too bad there is a lack of quality. the thinner sheets though are better......they still have the unfinished cuts, but the cuts are much better. the smaller sheet is what the photo etch is copied from. lastly......the order I got from Cornwall Boats this photo etch seems to be thicker than what I have seen with other builds {not my own}......this will be the first time I attempt etch of any kind. we'll see how this plays out.....I like the looks of it. I was hoping that there would be more parts for the windlass and winches, but some of the parts were done on another sheet and not included here. again......we'll have to see how this plays out
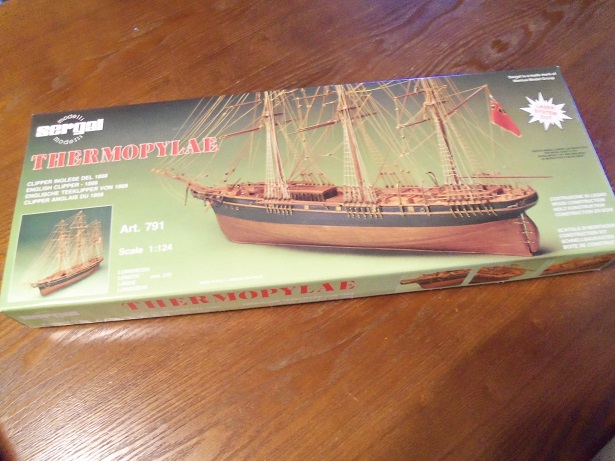

- 453 replies
-
- 27
-

-
- thermopylae
- sergal
- (and 1 more)
-
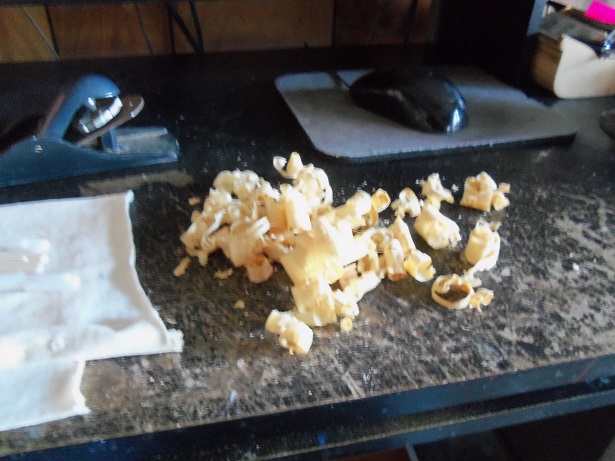
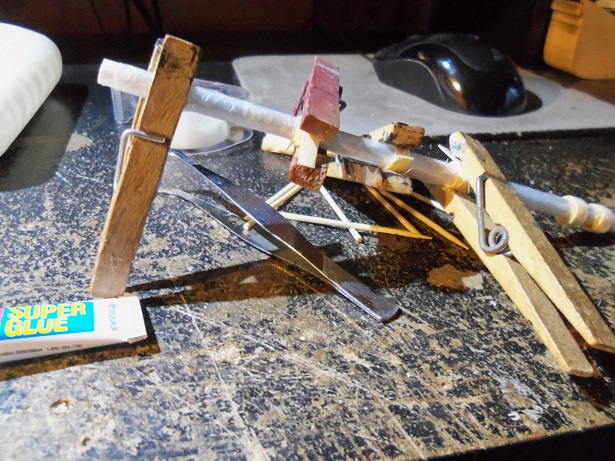
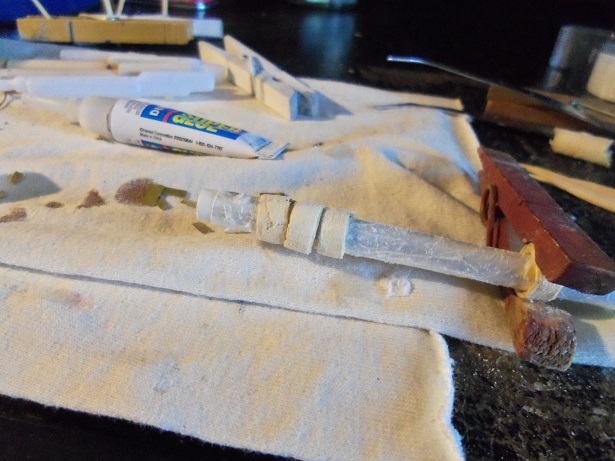
having some free time now to play.........and now armed with this new information, I took the opportunity to give it a try. I have apiece of pine board in the closet, that I used for a build board for the Spitfire MK 1. going out to the garage, I got the only plane that I have.....cheap, but it does the job. I ended up making quite a mess at my desk........but I was victorious! the mast for the Flattie is 1/4 diameter. I settled on using the plastruct plastic tubing, I had bought for some project or another, for the jig. I covered it with several wraps of plastic wrap {cling wrap}. I got chased out of the kitchen by the admiral..........she says I invade every area of the house with my crazy rantings......get out!!!!! back at my desk, the last bit of prep was done..........my tray, with equal parts white glue and water. {I really got to get a new desk}.....the admiral says she's gonna get me a metal one {so much for Feng shui}.....anyway, I'm not sure, but I think the problem here is that this pine board is too old and dry........I think it was part of the board that was the slip for the Nordkap {and that was back in 2009}. it's been in the closet ever since then....sheltered and heated {there are pipes in there}. they were very brittle, and with too much manipulation, they began to shred. I ended up with one slightly viable example. undeterred by this, I set off on another method I had seen. I have quite a bit of 0.5 x 4 mm blonde strip stock, acquired from a friend, a while ago. I cut some up and snuck back into the kitchen to give it a good soak. I played with the shavings, until they had soaked long enough to use. I started with the diluted white glue......but it soon turned full strength, when frustration set in. I managed to get this far, by this time. once dry, I did some sanding. there were some loose spots that the sandpaper picked up on.......and I'd add glue and let'em set for a while longer. what I have looks like this now........more to be done before I try to cut them up. not being without a plan B.........I also have in the works, the method I had mentioned earlier. I have some brown shipping paper..........I cut a strip, and using a second plastic round tubing, it was rolled up with some white glue. I didn't have to paint the entire surface with the glue........just squirt some on, and let the rolling action spread it for me here it is dry and ready to cut up. if it's too thick, I can roll some more. since I used white glue, I didn't have to try and protect it from sticking to the tube. it should pop right out. I do like the shaving idea.......I had a though towards getting a fresh board and try again. if I go to Home Depot.......I then thought I could take a stroll by the saw.......maybe they'll have some shavings the idea isn't dead John........it's too cool of an idea not to be all of these methods have been shown and done here on the site. just do a walkabout

-
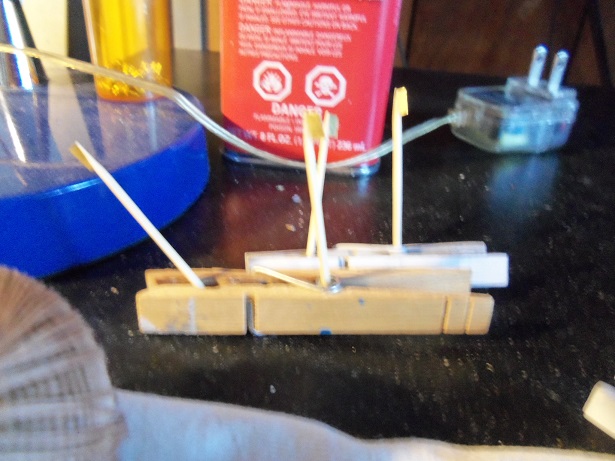
it's been a busy couple of weeks.........glad to be on some sort of 'even keel' again I have done some modeling though, in between the hustle and bustle..............one bit in particular.....you're gonna think I've gone stark raving mad {I am......but that's besides the point}. the Syborn is still on the table; I've vowed for it not to leave, unless it's finished. the other table is a mess.......but I'll leave that for the other story. yesterday, what started out as a procrastination from the mass production I was about to undertake, was put into action. a picture I showed earlier, was the beginning of it. the next step was to create the gaffs for the rack I started to shape. I will have more very soon........but this is the only picture I have at the moment. little bits of brass glued on the tips of tooth picks.....rather crude, but effective. my fingers have lost the sense of touch, since being coated with CA.........this process is just as aggravating as I thought it would be. either the piece is crooked, or it lays down to one side or the other.......I have to keep propping it back to where I want the brass to position. now I have to shape....and then paint them. it will be a process........but I will proceed, and eventually succeed be back in a bit.........thanks again to all who are looking in
- 747 replies
-
- 10
-
-
outer hull {bulwark} walls.......yea, they can be a pain. really stiff and hard to deal with ya did good though! if your referring to bulwark posts....sure, you can do them now.......it won't interfere with the hull planking {except for the drying time}. I've not planked the inner bulwarks.......from the looks of this vessel, it might be a bugger trimming out all those scuppers. without knowing what the plans say or look like, it's hard to tell you what's a good thing to do. I see you've 'banded' the hull. some folks will do that when planking the hull, to mark off a quadrant of the hull. they will work their way to the line and remove it to fill in the next one. done correctly, you will achieve a nice looking planking job. I tend to let the plank tell me what to do. working the plank line so it's fairly straight, i'll work downward until you see the planks want to ride over one another..........this means you want to taper the plank {but only to 1/2 of the plank's width}. start from where it begins to encroach the preceding plank, and trim the excess off until it fits, with no gaps in between. there are tutorials on how to correctly plank a hull. I'm no expert. your doing a good job so far.......just plan your planking, and you'll be fine. you may want to look at scale planking, rather than whole strip.......there are many ways to accomplish it.
-
mighty fine progress Tom......congratz on the milestone! she's looking splendid
-
glad to see your sticking with it OC..........your doing a great job so far. hopefully, Santa will bring you a spanking new image duplicator under the tree
-
congratz Frank on a fine looking model! really nice craftsmanship.....very well done!
- 649 replies
-
- 5
-
-
- dunbrody
- famine ship
- (and 2 more)
-
congratz Russ on the completion of this wonderful build. I think it came out super fine! it will be a fine edition on any mantle
-
it all came out in the end John.....and that's what counts your rigging looks excellent!
- 745 replies
-
- 2
-
-
- francis pritt
- mission ship
- (and 1 more)
-
I work with the same wood Bob.......whatever I can get. I have some of the dark mahogany from past kits. I also have annegre wood, the reddish wood I do decking with......from past kits and I order it from Billing.cabin structure looks great.....seating set up nicely!
-
very well done John...........never knew what a baggy winkle was. rigging really dress's 'er up!
- 745 replies
-
- 1
-
-
- francis pritt
- mission ship
- (and 1 more)
-
shavings! so, that's the secret I thought you made them from sawdust. I'll have to get to work with my plane and make shavings! I'll definitely give it a try beaver shavings?!?!?! thanks for sharing your method. thanks Russ.......this is a smaller lower level kit. the admiral saw it and liked the looks of it. it had been in the closet for a couple years. I started to mess with it.......and the next thing ya know hope to get more done soon. I'm glad you like it
-
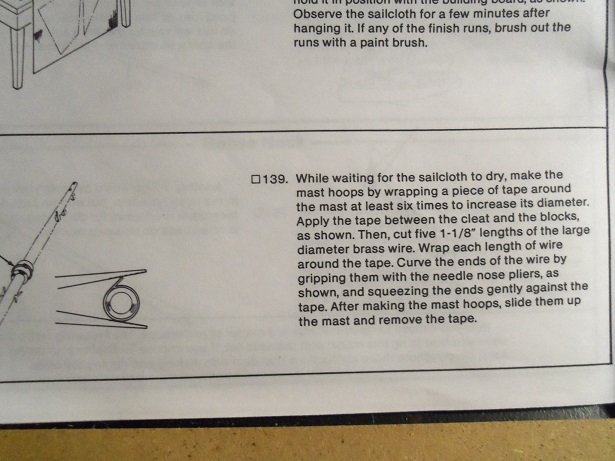
hello Jpam, welcome to MSW I sincerely hope your enjoying yourself here! I agree......interesting how these boats were built. I built my version of a Gundalow a couple of years back. it was interesting, the tools that Billy used to create the keel. I got interrupted somewhere in the middle though......but no fear, I have a you tube account.......it will be added to my watch list, so I can watch it again later........if not here at my leisure thanks for look'in in and the good word.....I hope to get back on it soon! hello John, thanks for the good word........glad to have you look'in in. here is what they want me to do.......I hope you can read the directions . of course, I'm not going to do this. did you make them for one of your builds? I'd love to see how you made them.....sounds interesting. I have some brown parcel paper.......I was going to wrap some around a slightly larger dowel bathed in diluted white glue........cut it up when it was dry. I'm open to any method......let me know looks like I'll be doing reef lines again......I do'em worse than catfish whiskers thanks again!
-
hello Russ........and thank you as well! I've got some other bits I wanna throw in there.......gonna call for some mass production. I'll be happy to sit down with it again {what am I saying, I usually stand }........I hope to get the mast cemented finally into place, as well as the boom winch, and get some more rigging on her thanks again for look'in in and the good word! I still want to show how to make convincing buoys........I showed it earlier with the Nordkap and the Cux........but the info was lost in the big crash. it would be cool to put it back out there for everyone to try buoys go good with rope coils ......like cookies and milk!
-
hello Lawrence.......thanks for the good word I bought the pulleys from Billing USA........they would do well for sheave pulleys, especially the 4 mm. they are small enough....don't remember if they came any smaller. unfortunately, I haven't had much time to go further with the trawler. I hope to have an update soon. thanks again for look'in in.......I know you've been pretty busy yourself. your Bounty looks sweet!
-
sorry to hear that Mark.......I hope it won't set you back too badly. she's looking really good
-
looks great to me Rob........nice match of the roof to the deck
- 1,208 replies
-
- 2
-
-
- great republic
- clipper
- (and 1 more)
-
nicely done Kees! the way you have the fore deck situated looks good.
- 434 replies
-
- 4
-
-
- pelikaan
- beamtrawler
- (and 2 more)
-
this must be the static model........I have the instructions for both of the Billing's offerings. I did a scratch build, modifying a hull that I had cloned from the Billing's Boulogne Etaples kit. I used the instructions to build it...turned out to be a real neat build the boat used in the movie 'the Perfect Storm', is actually called the 'Lady Grace'.......even the 'Hannah Borden' is not the actual vessel. one of these future builds, I'd like to attempt the actual ship, but so far, I only have a couple of photos. Billing does put out a nice kit......I'm sure you will enjoy it. I'm a big Billing's fan
-
super detail in your little boats Tom.........they look absolutely great!
- 1,354 replies
-
- 1
-
-
- constitution
- model shipways
- (and 1 more)
-
now that's a coincidence........I have the Guillow's Fokker Dr 1! these past couple of weeks, it's been a little hectic around here, so I've been doing small sub projects. the Guillow's kit offers some plastic machine guns and I'm not happy with the way they are coming out, so I'm making a pair out of wood. it's going to be a static model anyway......no way I'd test my mettle by trying to fly it. I built a spitfire MK 1.......my first one in many years. I also dabble still with plastic......cars and planes mostly. so there's nothing wrong with being multi-faceted, in my view. it keeps the mind open to new things. some techniques can easily be applied to other mediums. Again, I think you did a super job with this build.....congratz on a wonderful model
- 84 replies
-
- 2
-
-
- hanse kogge
- dusek
- (and 1 more)
-
will there be another project on the horizon?
-
I was wondering the same thing............I knew you'd show us sooner or later great job!
- 2,625 replies
-
- 5
-
-
- kaiser wilhelm der grosse
- passenger steamer
- (and 1 more)
-
she looks great Jerry.........you overcame your problems and she was built none the less! my hat's off to you my friend.......congratz on a wonderful build!