


popeye the sailor
-
Posts
16,007 -
Joined
-
Last visited
Content Type
Profiles
Forums
Gallery
Events
Everything posted by popeye the sailor
-
 sweet job on the structures....hard to get the moldings right to get the right look but you've made a huge jump forward......the build is looking a lot better for it. ...and yes, that is a sweet size for a ship like this. there is so much more that can be added to the build. if your going to paint brass rod or wire......try this. use steel wool, or fine sandpaper on it before you paint. most metal rod or wire, has a coating on it, or it is polished giving nothing for the paint to cling on to. this will rough up the surface of the rod {or wire}, so it will have a better surface to stick to. primer first if need be.
- 525 replies
-
- 2
-

-
- cutty sark
- mantua
- (and 2 more)
-
congrats Pete.......saw her in the gallery you've done a super job on her
- 77 replies
-
- 2
-
-
- alerion
- herreshoff
- (and 1 more)
-
hull framing looks real good Nils........nice
- 2,625 replies
-
- 1
-
-
- kaiser wilhelm der grosse
- passenger steamer
- (and 1 more)
-
she came out absolutely beautiful Doris......you add so much in your builds. you really show just how vast, the imagination can be
- 883 replies
-
- 1
-
-
- royal caroline
- ship of the line
- (and 1 more)
-
I didn't think they worked......at this scale it's a tough feat. I know Michael made some for his Maria, some time ago.
-
she looks superb Bob! I did notice the cleats......were they tough to make at this scale? sails look very nice....super job on rigging her too!
-
I would say ...both {either way. if not a lot of wind was desired, the sails would have been reefed. I say leave them up as well
- 119 replies
-
- 1
-
-
- la reale de france
- heller
- (and 1 more)
-
deck looks great John.......she's looking really good!
- 745 replies
-
- 1
-
-
- francis pritt
- mission ship
- (and 1 more)
-
when purchasing a piece of equipment such as this, one does tend to wonder if it will pay for itself. I hope that things get better and easier for you, before your patience runs out.
-
forget 'bout it...........and play!
-
hi there Pete...........saw this wonderful log on the right hand side of the forum page..... she's looking very good ......I really like the colors you've chosen and the way you edged the sheer and cockpit! very nice work!
- 77 replies
-
- 1
-
-
- alerion
- herreshoff
- (and 1 more)
-
sorry to hear that KP. I haven't seen a revell kit with a sail configuration like that...........but the 80-5897 kit of the La Reale, REALLY does show it! whether you keep it as is, or change it around......it will still be a very nice build. I wish you luck in getting the parts
- 119 replies
-
- 1
-
-
- la reale de france
- heller
- (and 1 more)
-
it happens........damn those gremlins! you caught it when you did. you'll make a full recovery
- 525 replies
-
- 2
-
-
- cutty sark
- mantua
- (and 2 more)
-
hey Dave.....good to see your back! I think Revell shows them knotted and cemented in place through holes in the hull. you went above and beyond to make them look functional
- 601 replies
-
- 2
-
-
- constitution
- revell
- (and 1 more)
-
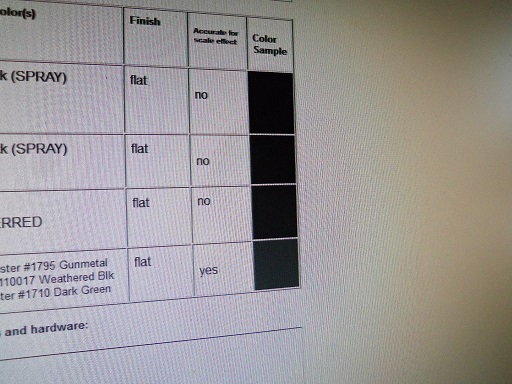
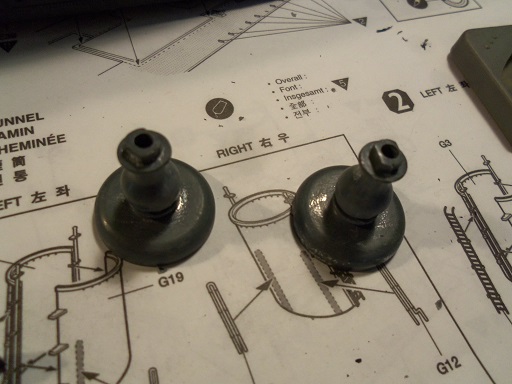
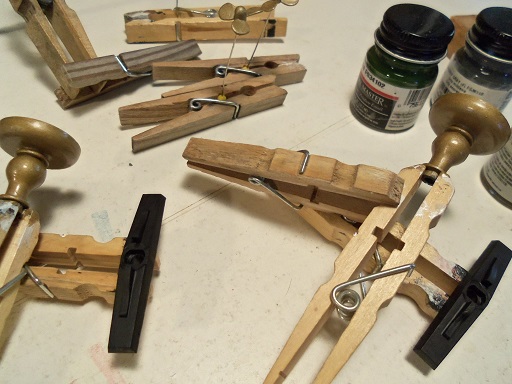
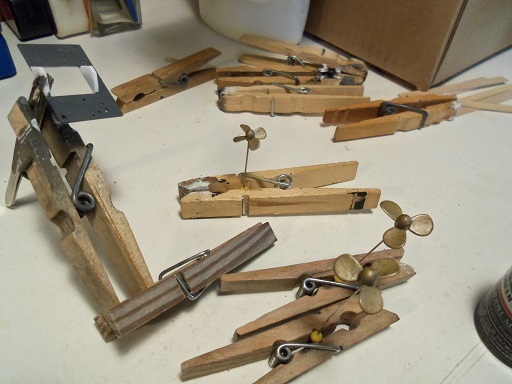
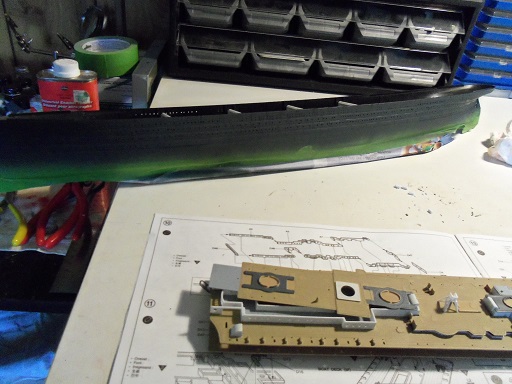
today......it was the upper hull that got focused on. I need to mix a special black, according to the TRMA site I had noticed that there was raised lettering where the name should be. I trimmed it off and sanded the area the final hole was drilled through the pedestals. they are ready to paint. I didn't want to use Testor's gold for them.......it would be too shiny. I decided on the Billing's gold paint. after they were dry, gave them a coat of dull coat. the props were painted with it as well. I'll later give them some green patina....perhaps a touch of flat black. now......I wanna warn you...the next two pictures will scare you {they did me}. I had mixed light gray and a touch of med green to what was left of the flat black I had on the table......until I had what matched the last example on the chart. I took these with normal light,,,,I think the camera adjusted it as well. I thought I had painted it with battleship gray.....or something! it had time to cure when I put on the overhead crane light for these next photos. I felt better about it when I saw them I did a little bit more to the cranes.........work in progress


- 573 replies
-
- 15
-
-
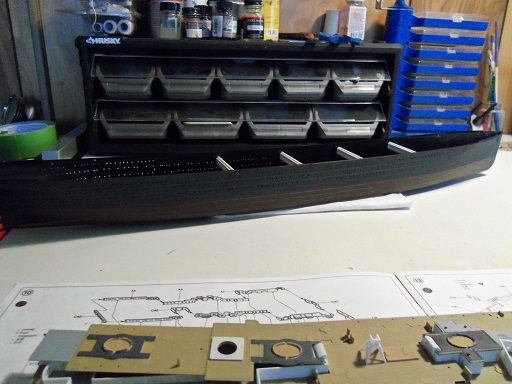
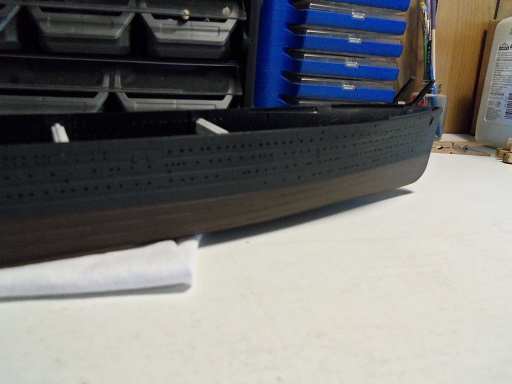
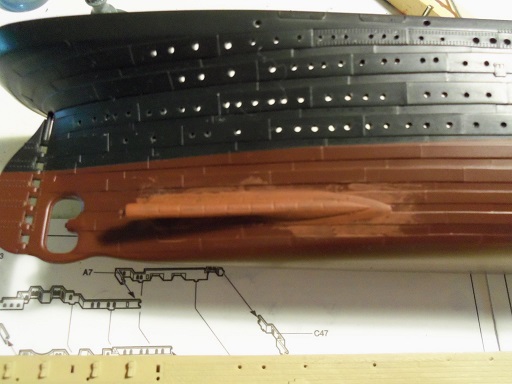
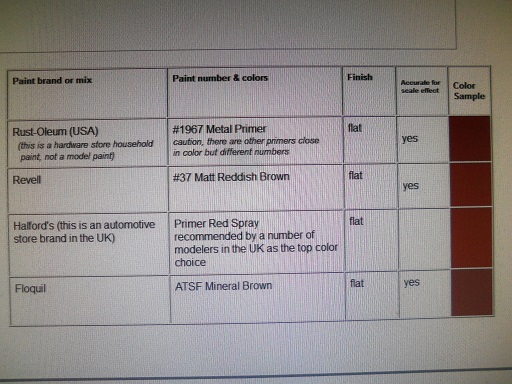
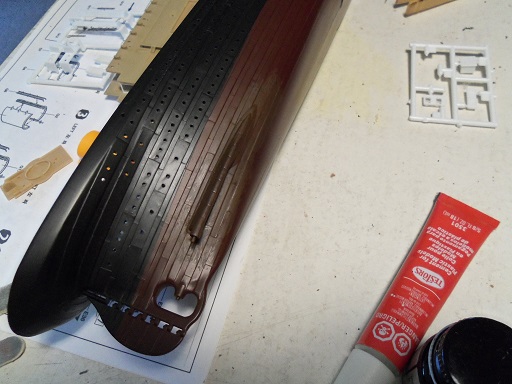
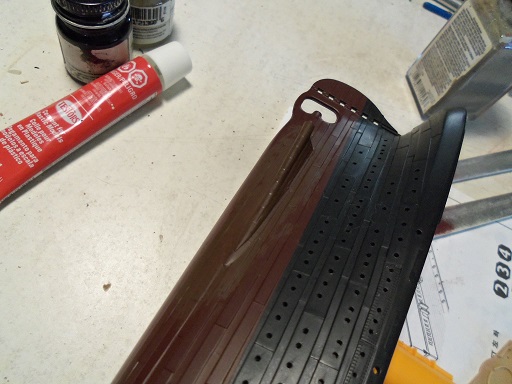
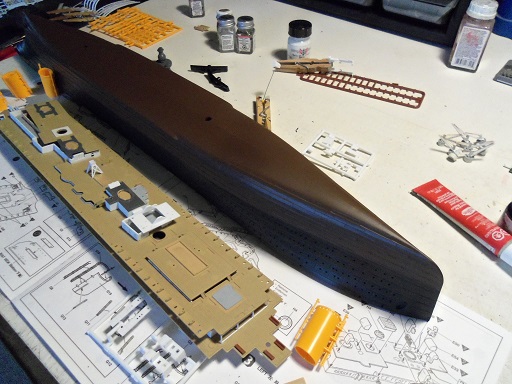
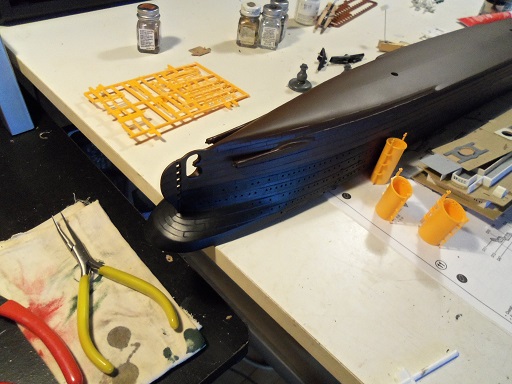
Tuesday, I began work with the bottom paint. I kept my fingers crossed I was right about the spray primer. it wasn't........I did a review of the color chart on the TRMA site. it seemed a lot redder and flatter, than the rustoleum example. I added some light brown to it, and fiddled with the paint I had decanted into a 1/4 oz bottle....I knew where I'd be going with this. especially when I saw how this paint looked, after I had touched up one of the screw tunnels. I lost some of the red tint, but I got closer to the rustoleum......and the Floquil examples. the only thing to do now, is touch up the other tunnel, and paint the entire bottom.
- 573 replies
-
- 14
-
-
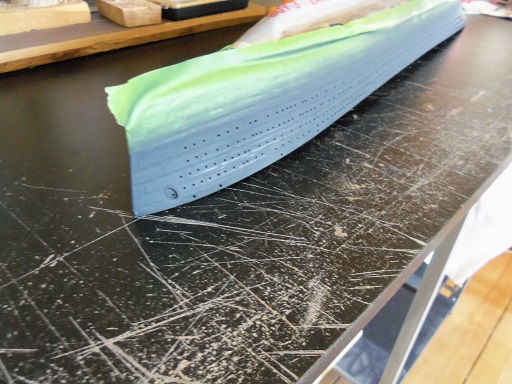
two different size drill bits took care of the first row, along the bulwark.......the other three to four rows was the third size. I probably should have mentioned it earlier. thanks for the good word gents!
-
nice progress Nils very nice set up at the stern as well. props are very close....really like the way they look
- 2,625 replies
-
- 1
-
-
- kaiser wilhelm der grosse
- passenger steamer
- (and 1 more)
-
no, I won't be doing that Mark.........although, do you know what I'd end up with? a really long table candle thanks for the good words........I'm really enjoying the suggestions. they'd be neat to try, but I think the scale would stop me cold thanks for the likes as well.........update soon
-
Cutty Sark by NenadM
popeye the sailor replied to NenadM's topic in - Build logs for subjects built 1851 - 1900
remember the love.......joy.....and happy times Nenad. I join the roster, of all those who search for the right words to say, in your time of sadness. my condolences my friend, I wish for you comfort, solace, and peace.- 4,152 replies
-
- 9
-
-
- cutty sark
- tehnodidakta
- (and 1 more)
-
nice progress! it's slow {I use white glue, and CA for the tight spots}, but when your finished, you'll be glad you took the time! love the color!