popeye the sailor
-
Posts
16,007 -
Joined
-
Last visited
Content Type
Profiles
Forums
Gallery
Events
Everything posted by popeye the sailor
-
 set backs aren't cool.......but they gotta be dealt with do it with a smile!
 -
thanks Mark........it doesn't do to get angry. I'll just remember to use white glue the next time
- 956 replies
-
- 1
-

-
- andrea gail
- trawler
- (and 1 more)
-
thanks Michael, Augie, Sjors, and Nils I'm getting there.......got a long way to go though. thanks to those who hit the like button......glads to have you all following along!
-
thanks Bob.......it's the same one....I just gave it room to breathe glad to have you following along thanks to those who hit the like button!
-
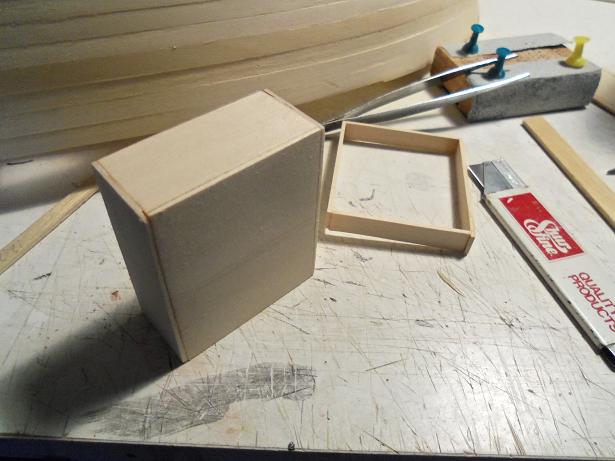
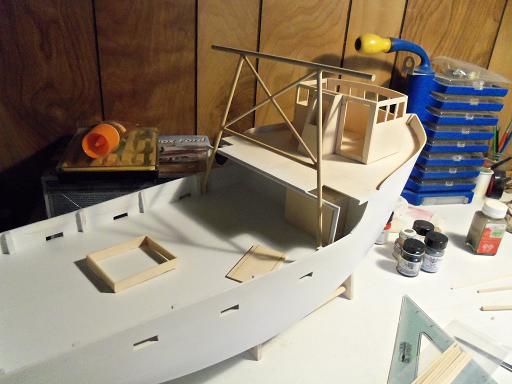
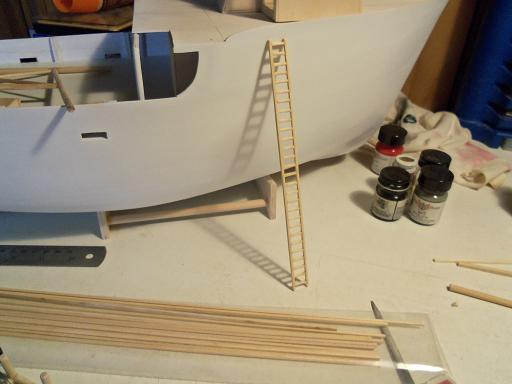
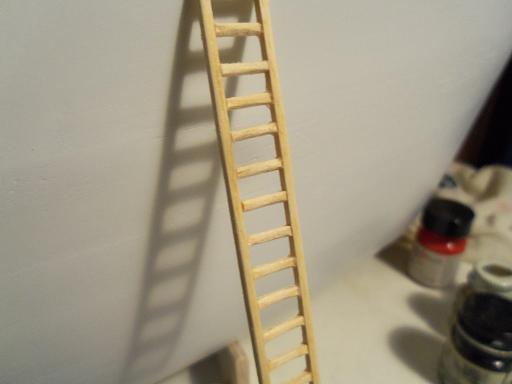
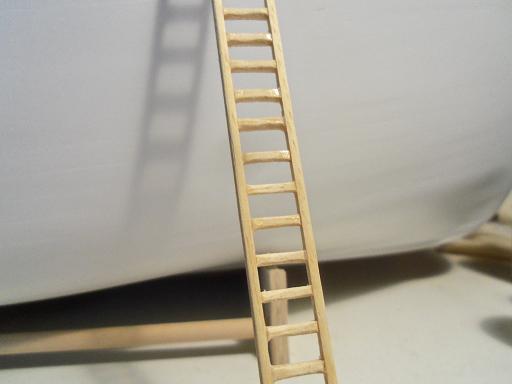
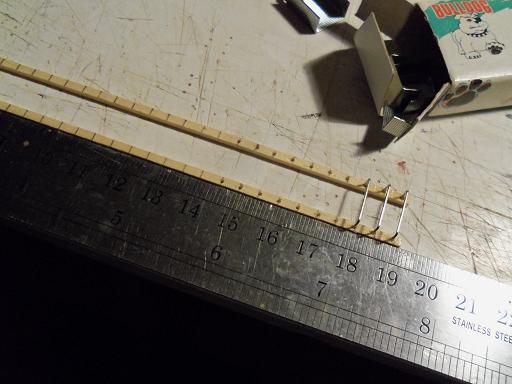
thank you Nils.........now I'll give something to really laugh about {go ahead.......I did } another sub assembly I decided to play with, are the ladders {we all know how much I love to play with ladders}. first off though........it's not in it's proper place, but I though I show you this photo of the assembly I just made.........I just like how it looks with some 1/16 square stock, I made the ladder that will go up the side to this part.......it leads to an upper platform. I sanded it and took the squareness away, but I'm not really happy with the rungs. their not as clean as I would like them to be. I then thought to make one like I did on the Nordkap, using staples. first starting with two equal length pieces of 1/16 square stock.......marking them in 5 mm segments. then drilling the holes and cementing in the staples when all was said and done.......it looked like this I like it.........but wasn't happy with the fact that some of the staples weren't all the same height.......as if the holes in the Formica {all around there} wasn't a dead give - a - way to what was to happen next. I had to keep in mind that I was using CA...........usually when I do some bone headed move like this, I use white glue.......much easier to pry off the table. the admiral saw me doing this earlier.......thought it was the coolest thing in the world.........she doesn't know about the outcome yet. she liked the wooden ladder and thought I was nutz for thinking it wasn't good enough. I think with a little tweaking on my method I think it would work . these are staples that fit in the mini staplers. of all the best laid plans..........this one was too good....NOT....to show you :D


- 956 replies
-
- 23
-
-
- andrea gail
- trawler
- (and 1 more)
-
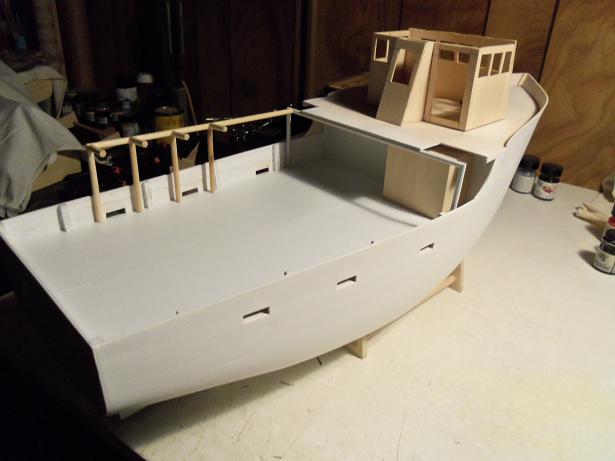
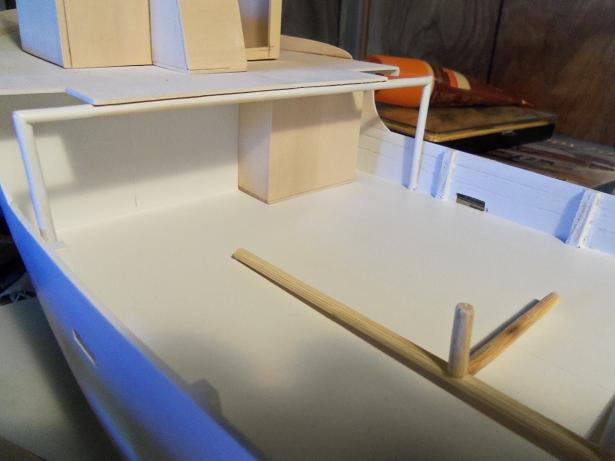
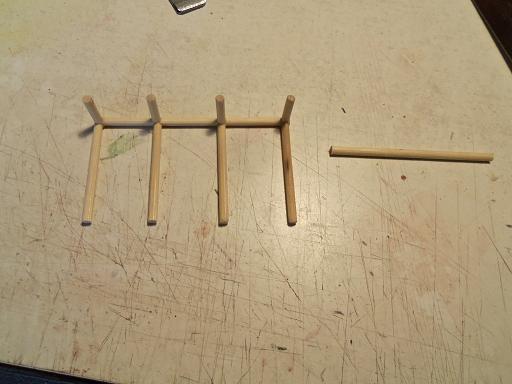
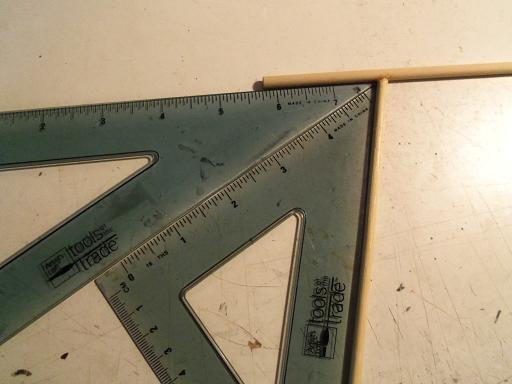
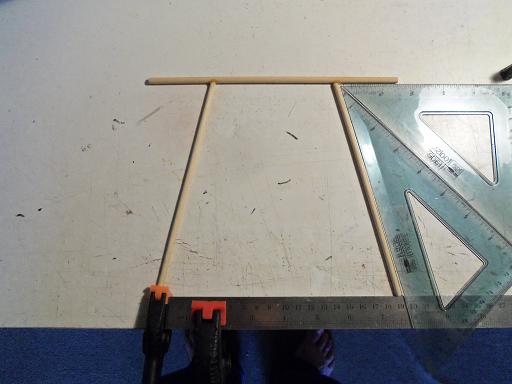
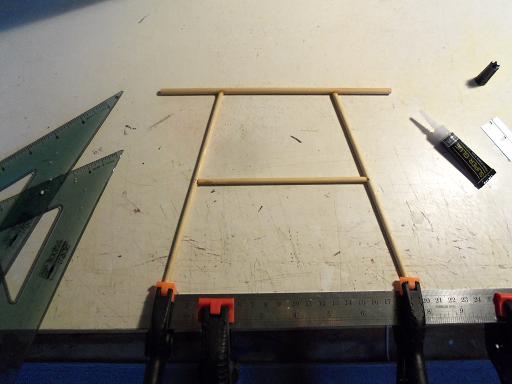
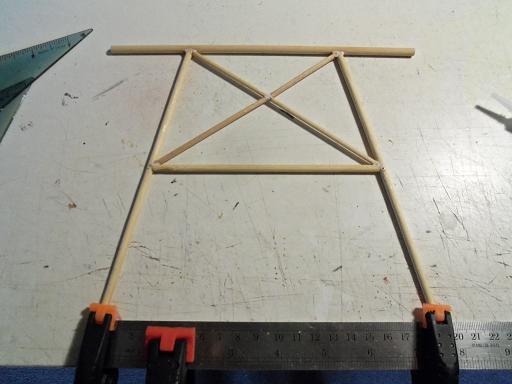
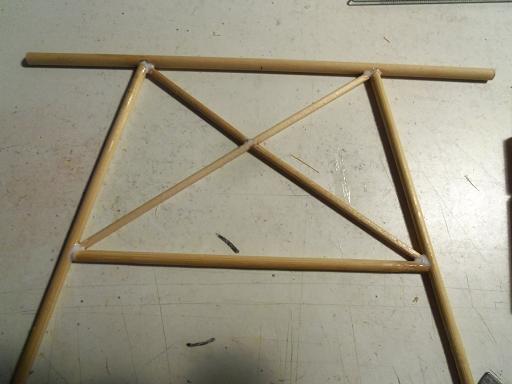
the rack.........nice......but it's wrong. I had assembled it relying on memory....look where it got me. there should be a few more pegs on the top......so I will add them. I didn't allow for the podium and a lower level, and set the racking back another 1/4 of an inch after all is assembled. to start the correction, the appendage needs to be cut off. I have to say one thing about this bamboo dowel.....it is a bit tough to get a clean cut, without causing slivered splinters. I'm having to repair them as I go along. more on this soon. I had cut a couple of lengths for the main part of the trawl rig. I wish I could show this in place, but it is not free standing, in it's present state. it's attachments are on the upper deck and the pilot house roof. in finding the measurements and angles....they are odd increments......too much for the sophisticated tools that I have, so I had to improvise. the top of this part is a larger dowel, drill indented, to accept the upright posts. compounding my angles, I was able to comply with the required increment of angle. the rule fixed to the table, gives the bottom of the uprights the spread it needs.......the magic number is 190 mm. the spreader bar is added.......set high enough so it will clear the roof of the pilot house. in the space above, supports were added, using smaller dowel. it was assembled with CA.....but later filled in with white glue to remedy the small craters and divots. I can add more later after I sand and see that it needs it. I did both sides. at the moment, I'm playing with these sub assemblies. the rub rails need to be added....and then maybe.....just maybe, the hull can get cleaned up enough for paint....whooooooHooooooo!
- 956 replies
-
- 17
-
-
- andrea gail
- trawler
- (and 1 more)
-
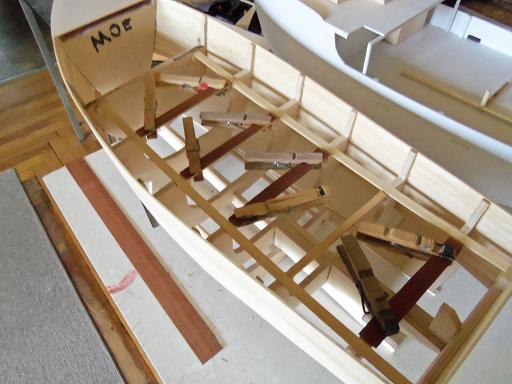
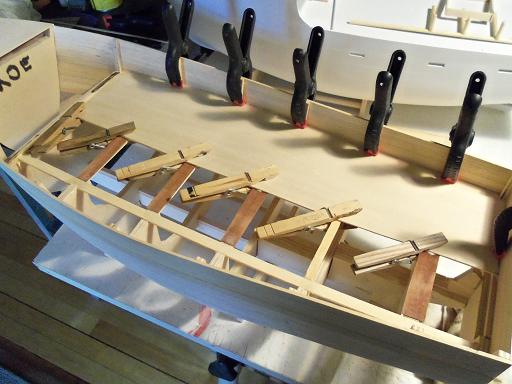
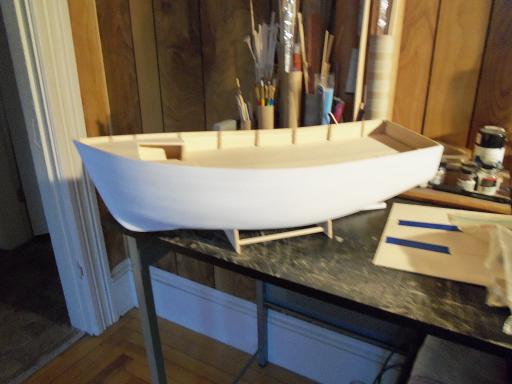
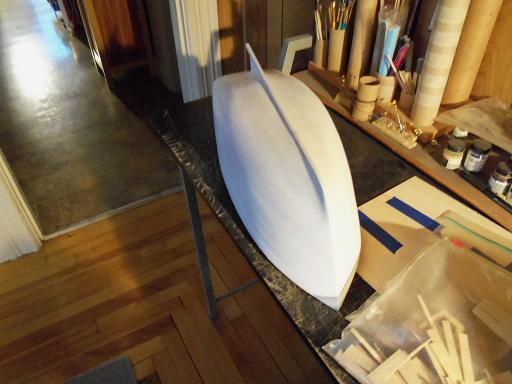
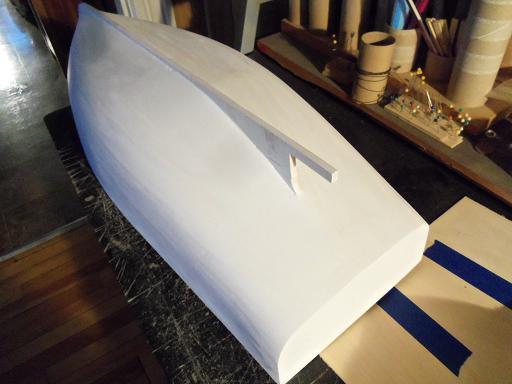
there's a bit of an update to be had here........this was done the other day I has used 2 mm strip stock for the deck beams........in making the tab slots on the ends, it meant that the beams would need to be shimmed, in order to bring them level with the rest of the deck framing. I have some mahogany thin strip that will do the task quite nicely. it's a bit wide....so I cut some down. I have one side trimmed to fit and cemented in place at the moment. I got carried away with other things. ....and as for the Jingle Belle. I'm happy to report that the hull finally made it out to the garage. it still needs some touch ups........but I gave it a coat of primer, to begin the sealing process. before I do more to the hull, I want to do the scuppers and rub rails. then I can sand and re-prime.
-
you used those pictures for the gallery..........Super! again........wonderful job.......I wish I could weather that well
-
Cutty Sark by NenadM
popeye the sailor replied to NenadM's topic in - Build logs for subjects built 1851 - 1900
everyone is fearful of the day when the build proceeds upward {and outward}. on ships of this nature......especially! if the work is complete on the outside of the hull, perhaps a cradle fastened to a large pine board, with a protective railing built around the bow, would ease your fears. then you could work from aft to bow, without too many mishaps. of course, sleeves would still need to be buttoned I'm not being funny.........if I were doing one of these ships, this is probably what I would do.......it would most likely happen to ME! -
very nice update David.....fittings look great. the looky down the deck is neat
-
simply a beautiful model Kees............your depth in the detail is just amazing. I tried like heck to see inside the pilot house....I can just imagine what you did in there I hope you used these pictures for the gallery.....they are stunning! congratz, my friend on a superb job! glad to meet you
-
great picture John.....will you be resuming your build here?
- 2,250 replies
-
- 1
-
-
- model shipways
- Charles W Morgan
- (and 1 more)
-
welcome back good friend!
-
looks great with all her masts.........to my knowledge, all mast should have the same rake {slant}. it irks me a little to see that most instructions do not give the increment. there are ships though, earlier period, that the fore mast has a different rake, depending on the country that sailed her.
-
looking super J!
-
thanks Piet.......I think it would be a good remedy for those who wish to build their favorite ship.......even if there is no kit available
-
Cutty Sark by NenadM
popeye the sailor replied to NenadM's topic in - Build logs for subjects built 1851 - 1900
we still have one home.......already went through the initial shock from the first one. I patted him on the back one day......looking over his room, I said......."my table would look good over there".........he knew I was kidding with him. truth be told, we will probably keep it as a bedroom when the time comes....for the grand kids....or should something happen. you've persevered....which brought you to this day. I'd say you folks did quite well congratz!- 4,152 replies
-
- 1
-
-
- cutty sark
- tehnodidakta
- (and 1 more)
-
really super job Nils........you have such an incredible way with those fittings {another kudos on the traveler}
-
Cutty Sark by NenadM
popeye the sailor replied to NenadM's topic in - Build logs for subjects built 1851 - 1900
didn't envy you with your coal situation .........I remember the day when we had to bring in the wood. the ring came out really nice! great job.........rudder assembly looks super! -
sorry to hear that Ed.........hope it's nothing serious and she feels better. I'll do my best to make it interesting...even funny to make her laugh hate it when one of my star followers is laid up. let her know I'm pulling for her and thanks for following along thanks as well everyone for the likes....I'll try my best for a quick update!
- 956 replies
-
- 5
-
-
- andrea gail
- trawler
- (and 1 more)
-
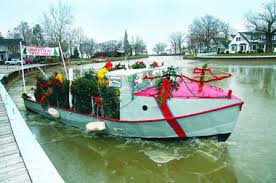
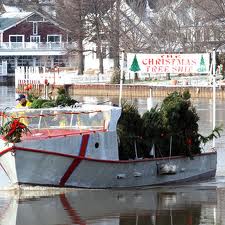
thanks Omega that is the plan........unfortunately, only the Christmas tree boat will have lighting. the hull is still open, and I will hold off on finishing the planking until then. I will have to show you some of the decorations I've found so far....I promise you.......there will be plenty of BLING!! while I am on the subject of the Christmas tree boat, I did a bit of research a while back. I had found that there was a play done under this premise.......I may have posted it a while back in the log. when I was doing the new log for the Andrea Gail....I happened onto something else. in creating these types of boats, I like to make them as believable as possible. the M&M boat was a bit different though......it was more of an 'admiral's whim' I'd like to think that somewhere in this country, Christmas tree are being delivered by boat. I found this 'you tube' video about a ship called the Rouse Simmons......check it out here are a couple of pictures.... I thought I had two.......copied the wrong one...........<darn> I also saw what looks like a converted lobster boat......mine is going to look quite different, but it's the general idea. it just makes me happy to know that I was right here is a picture that I think would look really cool as a desktop picture.....or even a 1000 piece puzzle! as for the Jingle Belle.......I'm sure that in some seaport regatta, a certain 'float' {literally} can be seen in the lineup, with carolers on board...singing that Christmas classic "Fruitcake ain't for everyone" just kidding..........don't know what the stigma is about fruitcake.......I like it, but only in small pieces over a long period of time seems to be the brunt of a lot of jokes........kinda like wedding cake. you know the tradition.........take the top and stick it in the freezer. on you first year anniversary, you take it out and eat it. we did it..........probably the reason why we're still married today.....won't do that again, I can tell you that!.EWWWWWWW! tasted like everything we ever had in that freezer! I digress......sorry. but it just shows how wide open this medium can be. you can model something that is probable.......you might not see it every day......or you can go out on a limb, and do something that is fantasy. you can take any basic hull construction, and see the comparison to other ships of that type. I hope you follow along .........you'll see what I'm going to do to these two


-
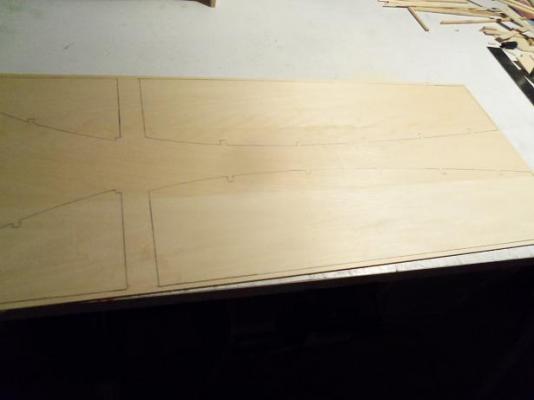
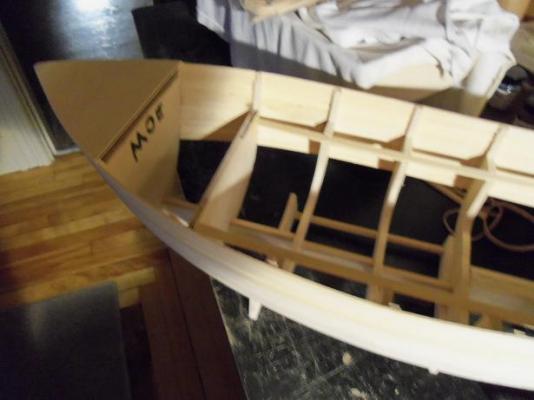
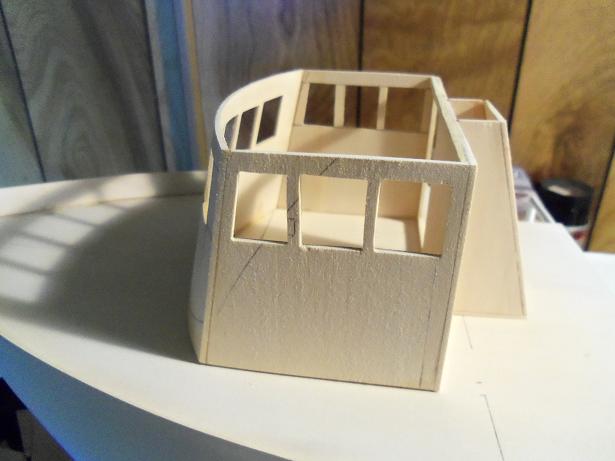
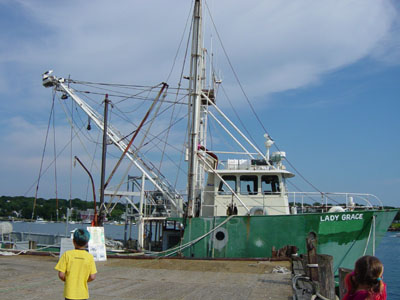
once upon an idea...........there was a concept to build three boats, all with a holiday theme. they were part of an experiment, to replicate hulls, using kit parts panels. in my opinion, it was a success....the M&M fun ship being a completed build, the trawler 'Syborn' well on it's way towards being the second ship to be completed. the 'Syborn' is unique to me, because it was an added experiment in making the hull longer by adding in copies of key ribs, stretching the hull. these two were created using the hull from the Billing's Mary Ann.......or even the Cux 87. when I assembled the hull for the Boulogne Etaples, I saw possibilities yet again.....and the three hulls were created from the parts panels from this kit. I originally had three themes for the subject of Christmas, but as time went on, one of the themes fell through. I was left with a hull without a theme in building these boats.......I at least want them to be somewhat logical {although the M&M boat was more of an 'admiral's whim' }. when I was making these hulls.......I had thoughts about the Andrea Gail. I looked her up in the Billings catalog.....the bones were there...it could be done. I kept her on the back burner.....I have projects started already...enough to keep me busy for a while. maybe later. months past............... it was during my two month hiatus, that the idea surfaced again. I had downloaded the instructions for the R/C version of the A.G. and thought I would look at them. I also found that there was also a static kit out there as well....smaller scale, but just as detailed. I thought about the Gundalow, and how a simple article I read, stopped me in my tracks. perhaps that is the same problem here......can't say for sure......but you know it's pretty chronic, if the admiral starts to take notice if you've been following the Holiday Harbor build, you've seen the modifications that needed to be done, to create the basic hull. I found an interesting article: Perfect Storm, The - THE ANDREA GAIL seeing the movie about the Andrea Gail during the time frame made me want to attempt this, all the more. I wish i had saved a copy of the search records.......they never found Capt. Tyne or his crew. ....and so......to where I am now. the hull and the pilot house has been created. the hull needs to have the external rails done, and soon the paint. I'm using the Billing's plans as sort of a practicum, so......if you see something that may not be exactly correct, it's just me keeping the copyright monster at bay {but it will be in the ballpark though}. here is the hull and where I am now I only had a chance to sand down the roof line of the pilot house so far....more needs to be done. the ice maker looked too deep to me.......I took about 1/4 of an inch from it, so that it would sit under the cut - a - way on the starboard side. lastly.......here is the boat that they used in the movie......you can see on the bow where they had changed the name.


- 956 replies
-
- 20
-
-
- andrea gail
- trawler
- (and 1 more)
-
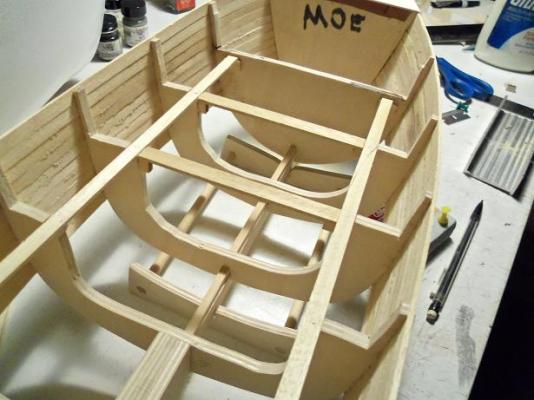
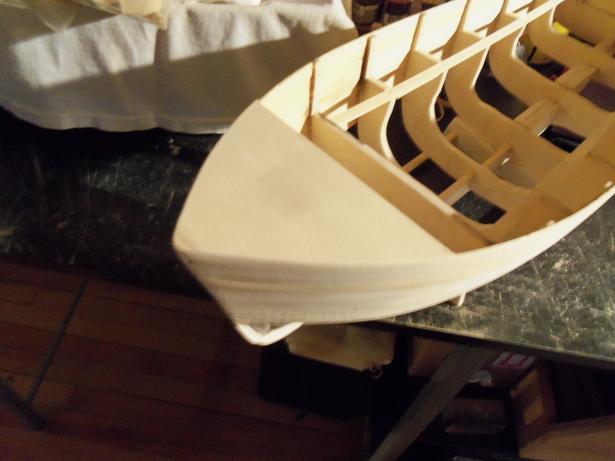
OK.......so to cut the confusion, I will be putting the Andrea Gail in her own log. this past week, I only got to do a few things......winter prep and duties calls here is what I've done on the subject at hand. if I am to do some lighting to the Christmas tree boat, the deck needs to be installed. a lot of what is to come needs to be removable, so the hull can be finished and painted. as was shown earlier, I found that I could not do the idea of full bulwarks......so the bow will have a bit of a fore deck.. it starts with the last printed sheet of flat stock........I had made three of these earlier. the bow was sanded a little to get the shape back for the deck beams......I had some 2mm strip stock. to fit them in place, slots were cut into the ends and cemented in place, with gussets for added support. they are not totally flush, so I will add a strip of flat stock {.5 mm} to level them up with the two that run lengthwise as for the Jingle Belle........I still need to get her out to the garage for sanding more to come..........