HOLIDAY DONATION DRIVE - SUPPORT MSW - DO YOUR PART TO KEEP THIS GREAT FORUM GOING! (Only 51 donations so far out of 49,000 members - C'mon guys!)
×


popeye the sailor
-
Posts
16,007 -
Joined
-
Last visited
Content Type
Profiles
Forums
Gallery
Events
Everything posted by popeye the sailor
-
 just keep that thing away from Samuel L. Jackson........He'll kill it!!!! :D :D
- 1,279 replies
-
- 5
-

-
- agamemnon
- caldercraft
- (and 1 more)
-
your doing a swell job with rigging.........making our 'masterpiece' a bit early in our modeling career, aren't we? wonderful progress Max!
-
very well done Kester......your rigging is very neat. hope what's going on isn't serious........it so good to see an update!
-
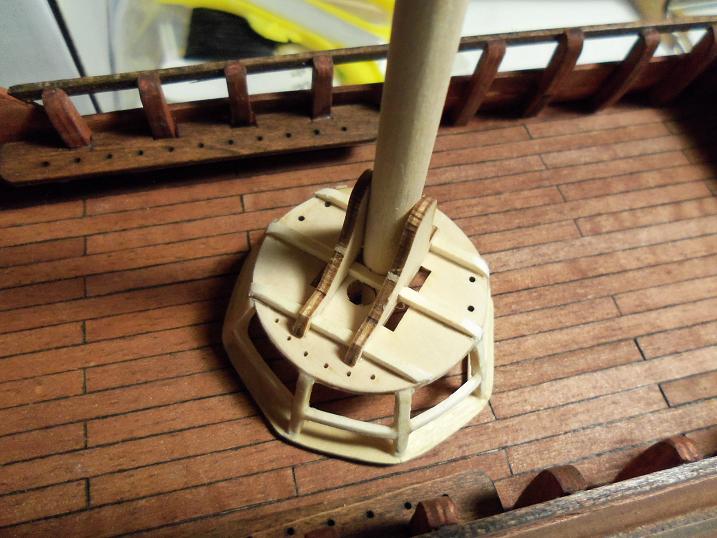
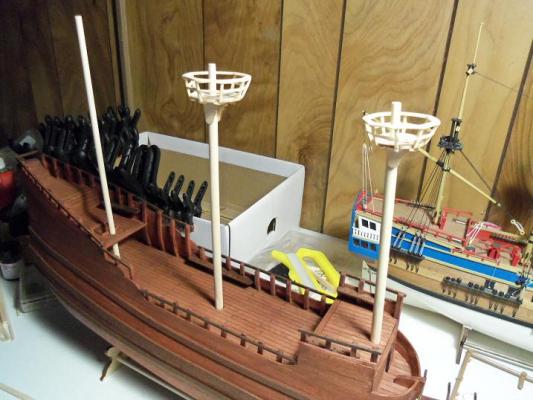
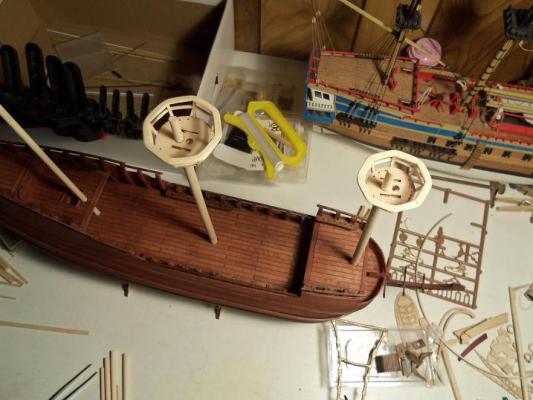
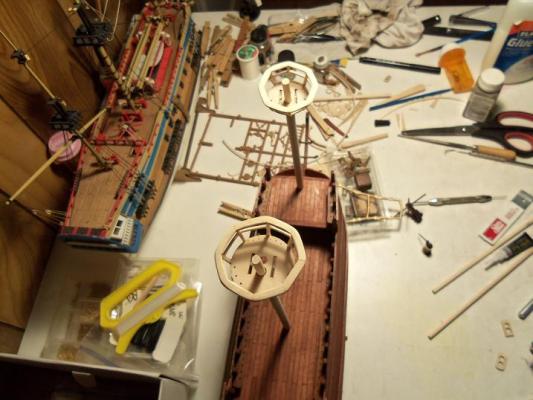
thanks Adam.......I actually did the rails separate, and put them on after. it worked out better that way {masking can be a real pain} thanks for the good word ! thanks Lawrence.....been a bit of a break though......our furnace decided to crap out {a s-l-o-w, agonizing death}. we had a new one installed today........out with the oil and in with the Natural gas. I hope it saves me money! thanks for the good word! thanks Frank.......there's a fine line between scratch and bash.....but I am having to scratch out a few parts. the crow's nests seemed to be the biggest problem.....a lot of the parts were missing in the kit. the main mast nest gave me some trouble, but I think I have it sorted out pretty well. now that the heat is back on....I assembled the fore and main mast. the second steps are just dry fitted at the moment, but I did that after I took these pictures. I hope to have more up soon. I'm not sure if I'm up to snuff with some of the other folks here, I favor chalking it up to "creative modeling" I hope no one get nose bleeds easily........we're going to up here is what the frame work under the nests looks like thanks for the good word Frank! I'm still playing catch up here on the site.........I hope to see your fine build in the list!

-
looks like you had a lot of fun........some very nice eye candy there thanks for sharing !
-
man......I love that finish........don't think you could get that any smoother lines are great and very nicely outfitted......wonderful job!
-
true......but you've found that it is doable, and more pleasing to the eye. are you thinking of redoing them? to experiment at this scale must be a lot of fun........aye Michael
-
rigging looks great Mobbsie! yepper!.....just the beginning!
- 1,279 replies
-
- 1
-
-
- agamemnon
- caldercraft
- (and 1 more)
-
oh...my, Augie! that looks so SWEET! well done!
-
looks awesome Patrick! what a nice addition to the build!
-
looking good.......and the fact that they work is even better. with the way your installing them......they might not look so out of scale. really nice stuff!
-
sorry to hear about that John..........good you caught it early
-
sounds logical........I can also agree that there is a time line for when a metal mast could be used. adds so much to the build as far as detail goes........much smoother finish too thanks for giving us the finer points!
- 222 replies
-
- 1
-
-
- gorch fock
- barque
- (and 2 more)
-
looks amazing Andy........to see them in there so level and flat....it just compliments the construction of the frame itself. NICE!
- 382 replies
-
- 2
-
-
- stadacona
- sylvan scale models
- (and 1 more)
-
great masting! you enjoy making them from brass......is there an advantage to it?
- 222 replies
-
- 1
-
-
- gorch fock
- barque
- (and 2 more)
-
she's looking great Max........little by little, the rigging is coming together! your really turning out a beautiful model!
-
yepper! yea, a reno like that can be scary........but when the dust clears, the outcome will make it all worth it.
-
that must be your formula for a fantastic build.........sail all summer, and then dry dock in the winter. whatever it is Gil.......you have it down-pat !
- 755 replies
-
- 1
-
-
- finished
- caldercraft
- (and 1 more)
-
hello J..........I had no idea you were here as well! doing a swell job........all too happy to follow along
-
Cutty Sark by NenadM
popeye the sailor replied to NenadM's topic in - Build logs for subjects built 1851 - 1900
that's the spirit! -
rib #8 may also need to be adjusted as well........but if you've done it as a gradual curve, it should work out OK
-
there shouldn't be that much curvature. what you can do is: rib #4 - the beam cemented flush with the top of the posts ribs #5-6-7 the beams can be cemented on the tops of the posts. sand the chamber for the water run off, and take down any high spots {rib #1 may need to have this done} there is a slight curve upward at the bow, so don't despair if you don't get it all. hope this helps out.
-
Cutty Sark by NenadM
popeye the sailor replied to NenadM's topic in - Build logs for subjects built 1851 - 1900
I commented on that earlier Nenad.........when you fit the deck out more......get the pin rails on, and get her looking busy, I really don't think it's going to show that badly. your doing a fantastic job! exactly........the next build will be better. you've had enough set-backs........time to see you smile!