HOLIDAY DONATION DRIVE - SUPPORT MSW - DO YOUR PART TO KEEP THIS GREAT FORUM GOING! (Only 20 donations so far - C'mon guys!)
×

md1400cs
-
Posts
2,839 -
Joined
-
Last visited
Content Type
Profiles
Forums
Gallery
Events
Everything posted by md1400cs
-
 Hi Buck, Nice to see that you are back, good luck with your house and other things going on.....Sail looks excellent Michael
- 515 replies
-
- 1
-

-
- artesania latina
- whaleboat
- (and 1 more)
-
JanV, Nice update. Stern section really coming along very nicely. Michael
-
ROYAL CAROLINE 1749 by Doris - 1:40 - CARD
md1400cs replied to DORIS's topic in - Build logs for subjects built 1501 - 1750
Doris, Astonishing talent. You are amazing - so creative. Those cannons are "ridiculous" Please, the idiom of this word, for us in the USA, is used in context when something is so outstanding that many words are needed, but we can't think of them so we just say "that's ridiculous" then add a few more words (:-) Michael- 883 replies
-
- 1
-
-
- royal caroline
- ship of the line
- (and 1 more)
-
JanV, Thanks for your very kind thoughts much appreciated. Michael
-
Ulises, Thanks so much for your very kind words. Actually I will be giving you the same compliment when I get to My rigging part - your work is so so excellent. Regards, Michael
-
Ulises, Very nice work. All looks excellent. Michael
-
Joachim, Thank you for the nice compliment, happy that it may be useful for you as well. Michael
-
Nigel, Well I'm so thrilled that you saw something in my approach. The synapses were responding to absolute frustration with my inability to actually make these silly little monsters; cannibalization seemed to be an approach. To think that for this moment in time the roles were reversed---thank you (:-) Michael
-
Actually it is a nice Art Deco-ish piece of art. Picasso would also aprove. I like your adaptation very much..fun... PS: I really like your model aircrafts, now those look to be air-worthy. Regards, Michael
-
Lawrence, Thanks. Your Victory is, of course, so much more involved than this little 16th ship. Michael
-
Frank, Very nice update. Your weather deck is looking very sharp indeed. Nice work detailing the kevels, and the rigging pulleys. Michael
-
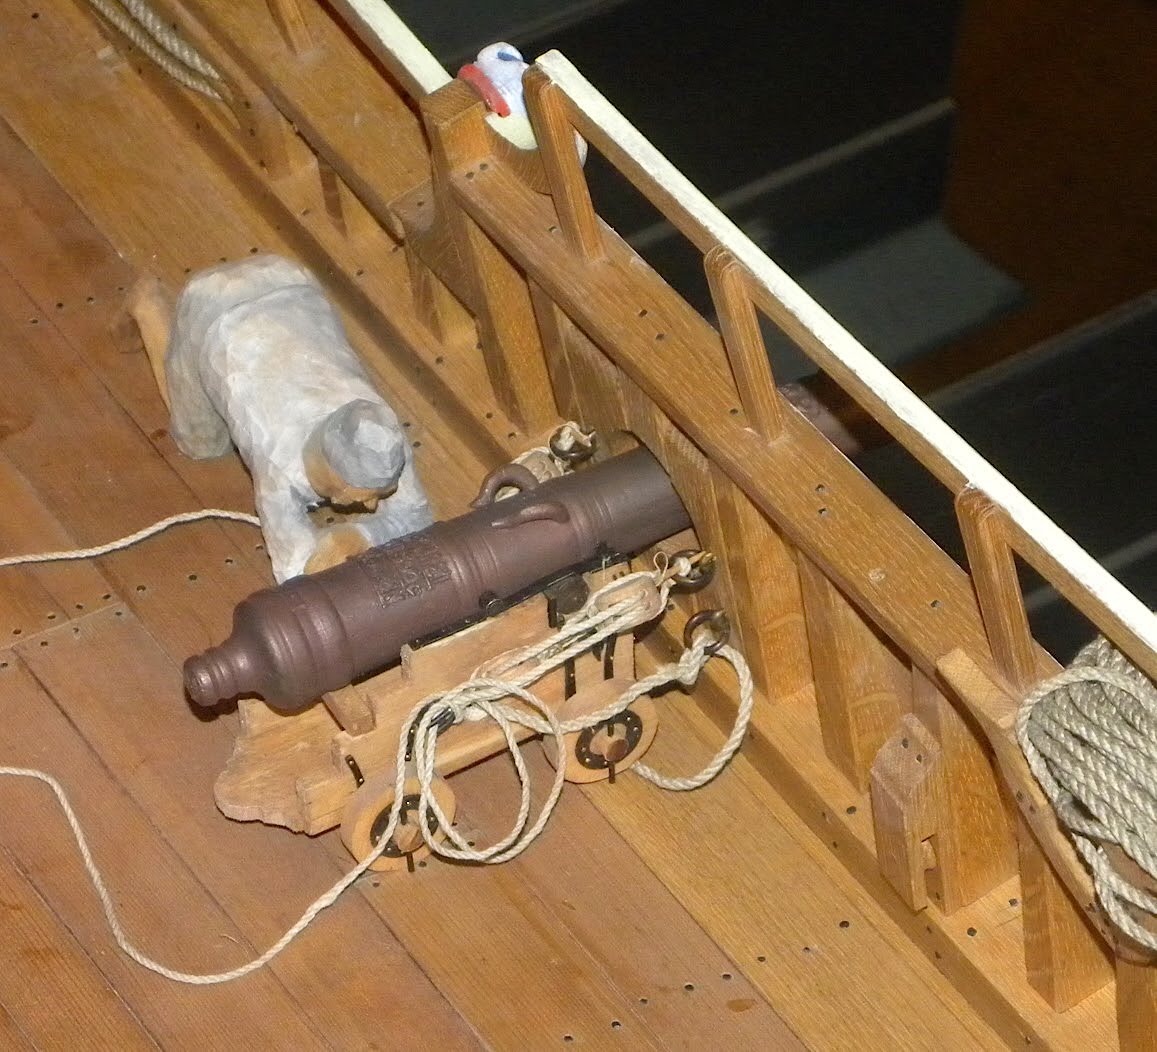
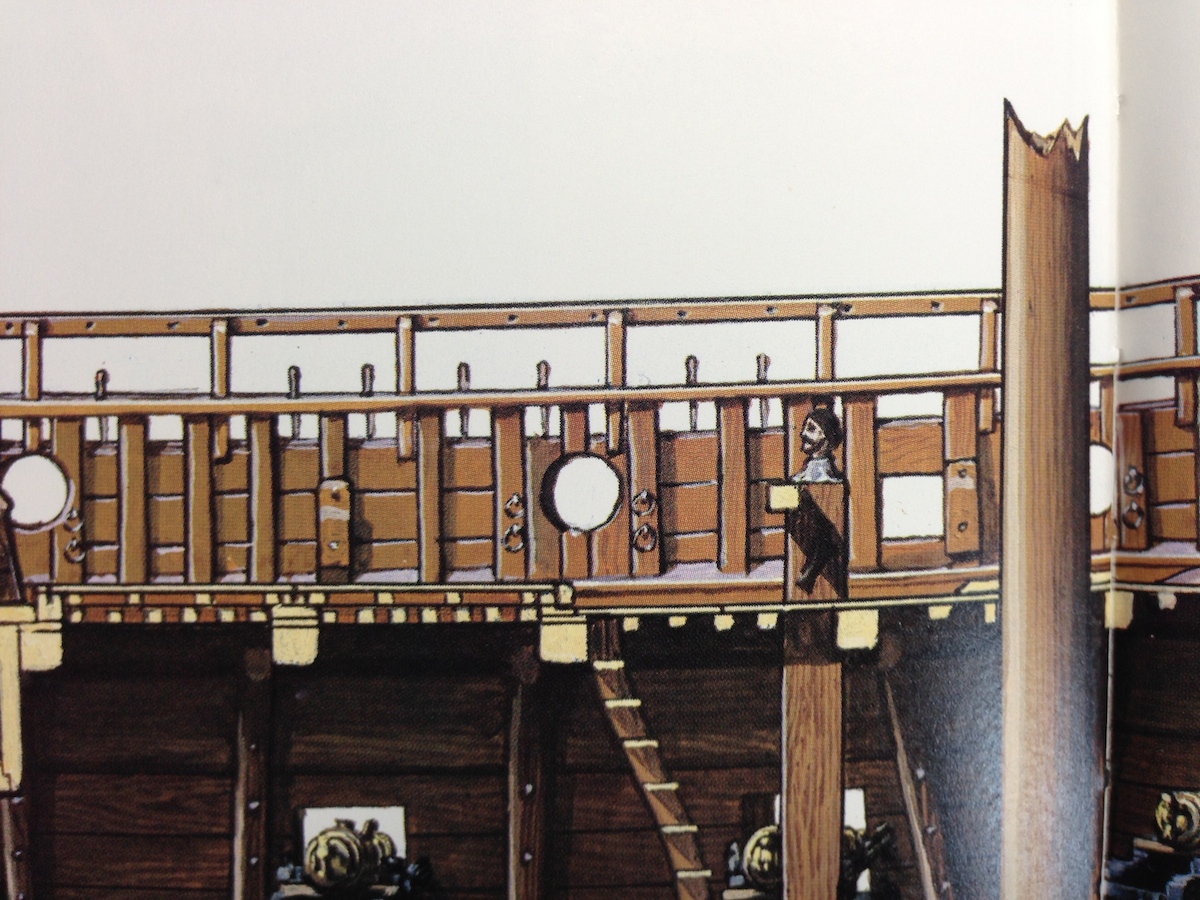
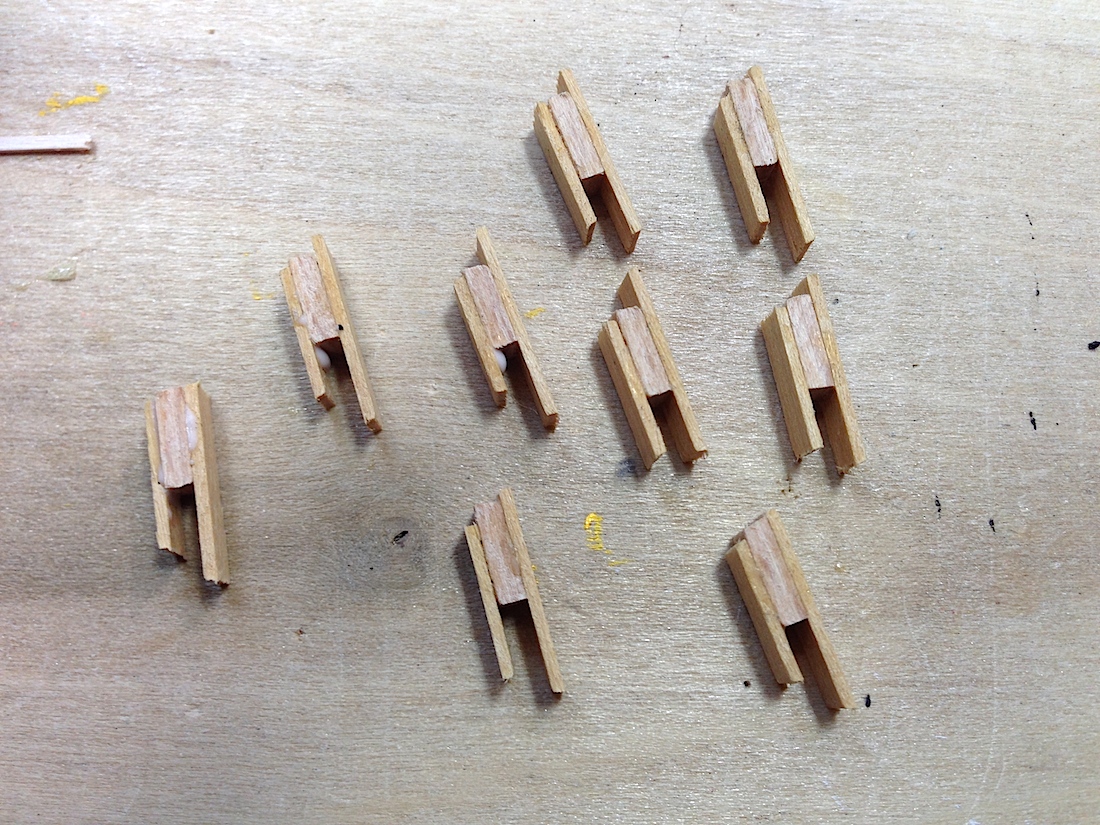
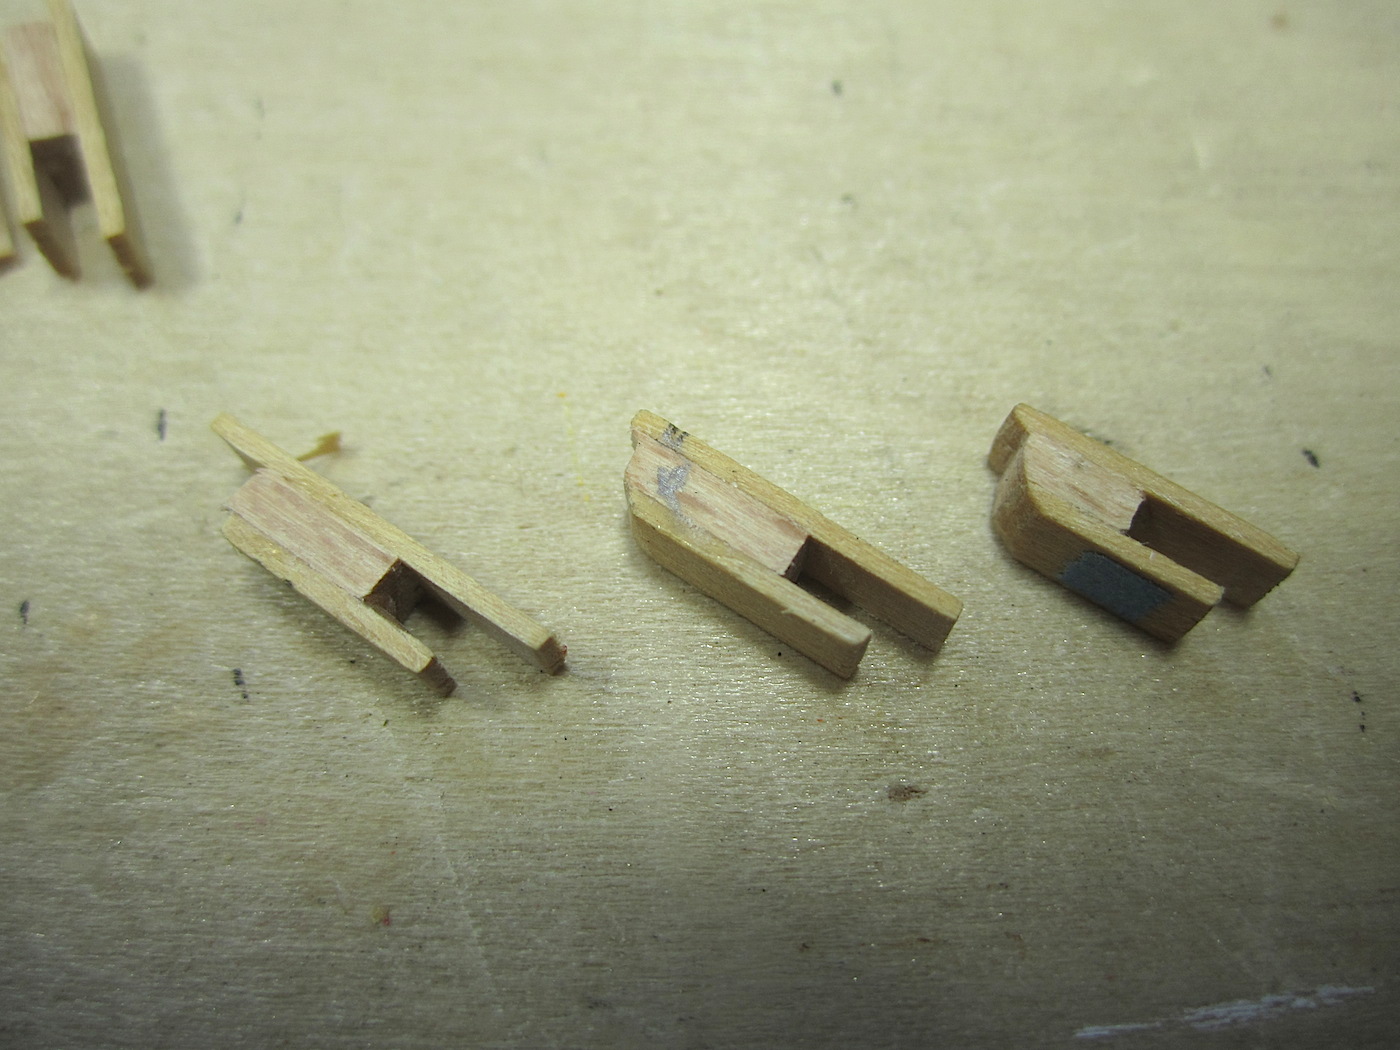
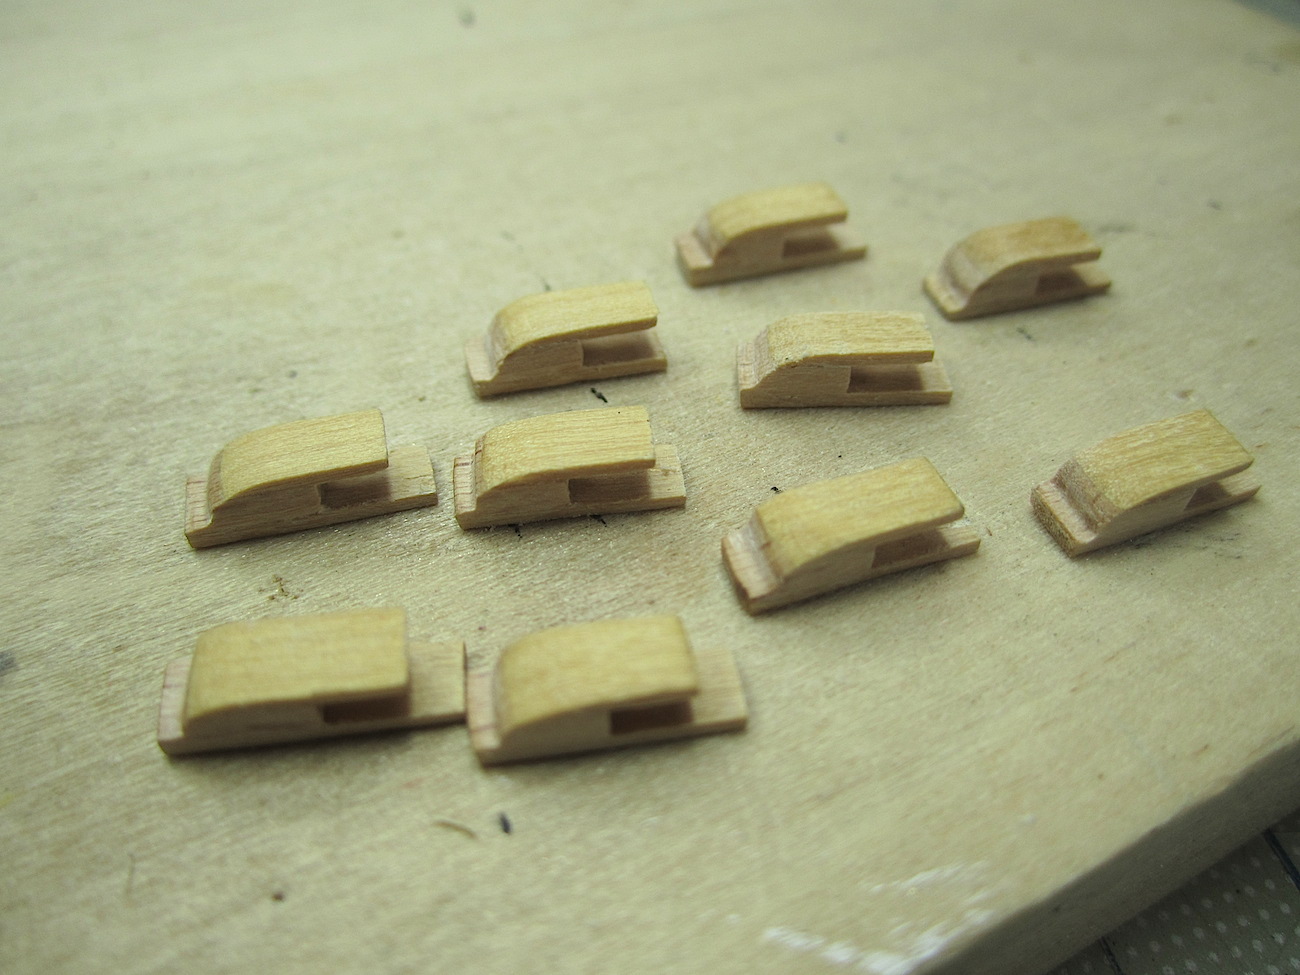
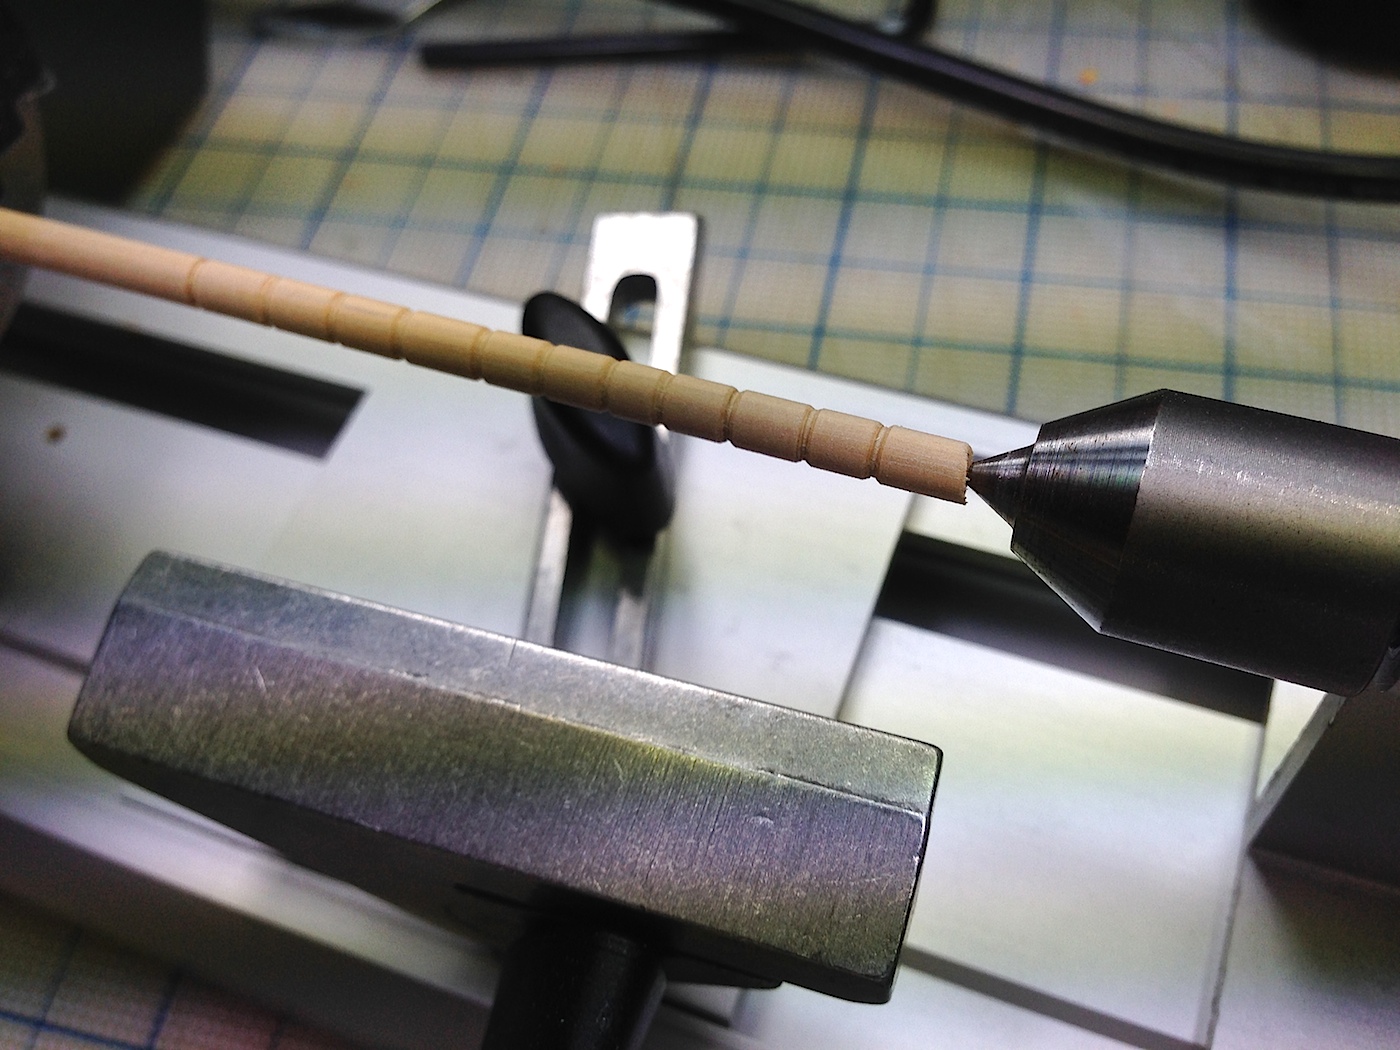
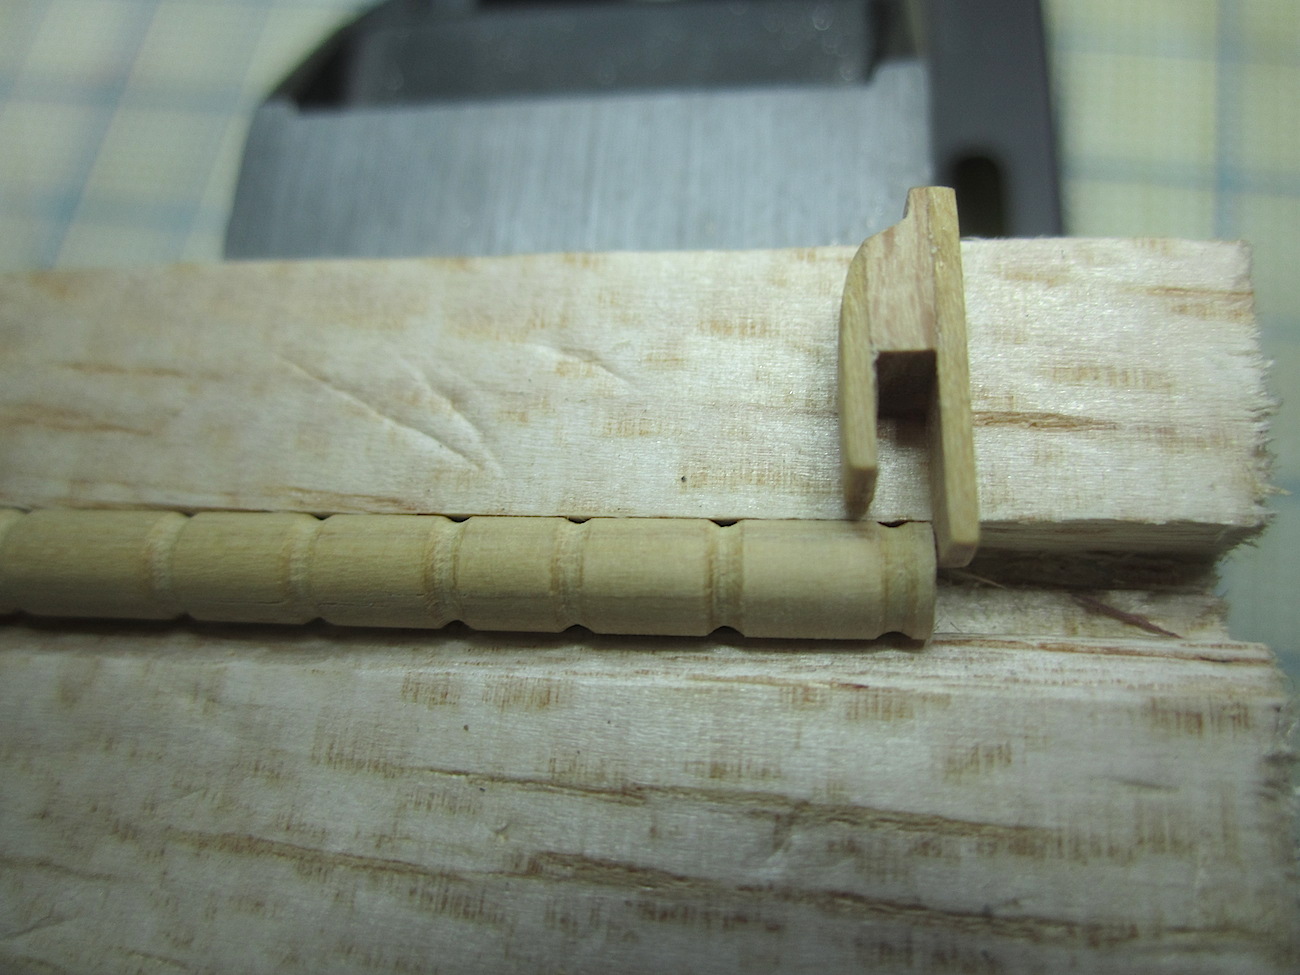
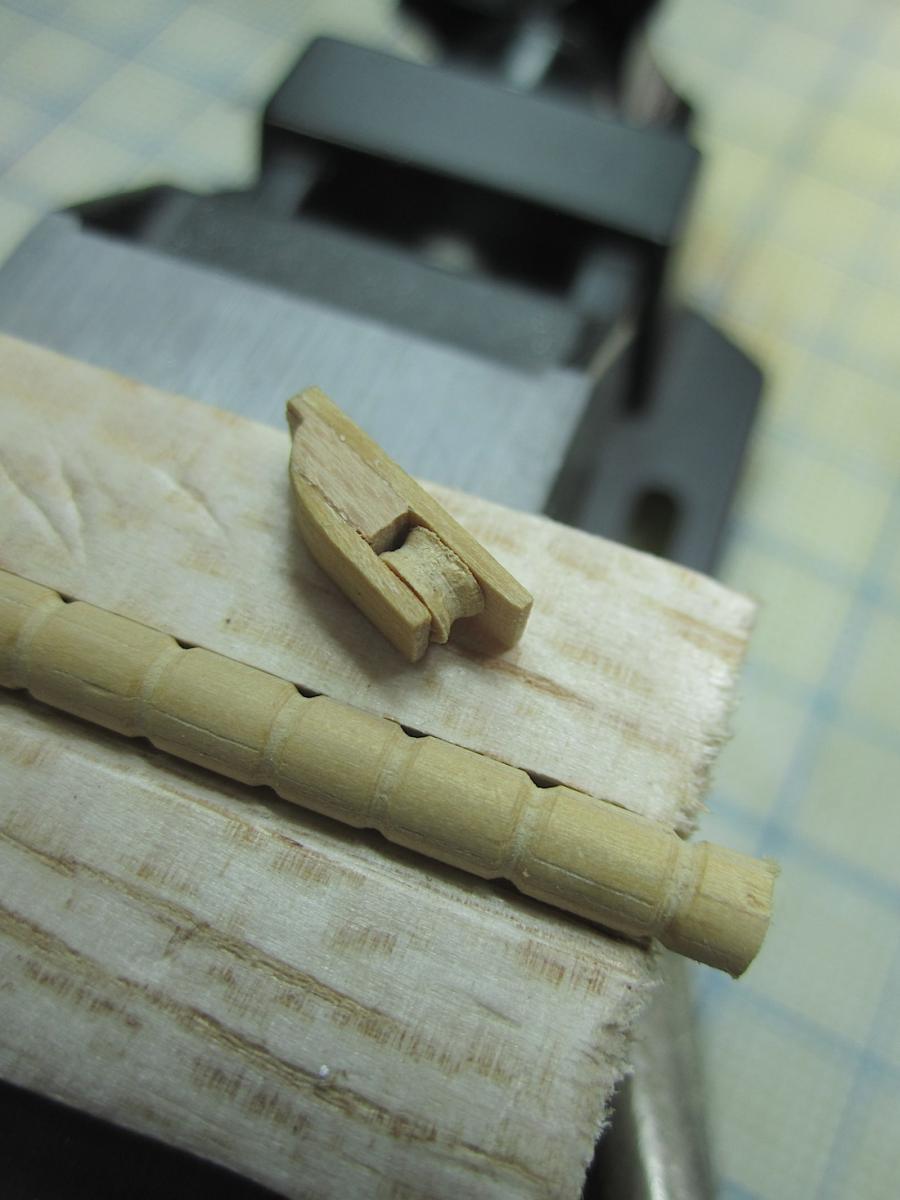
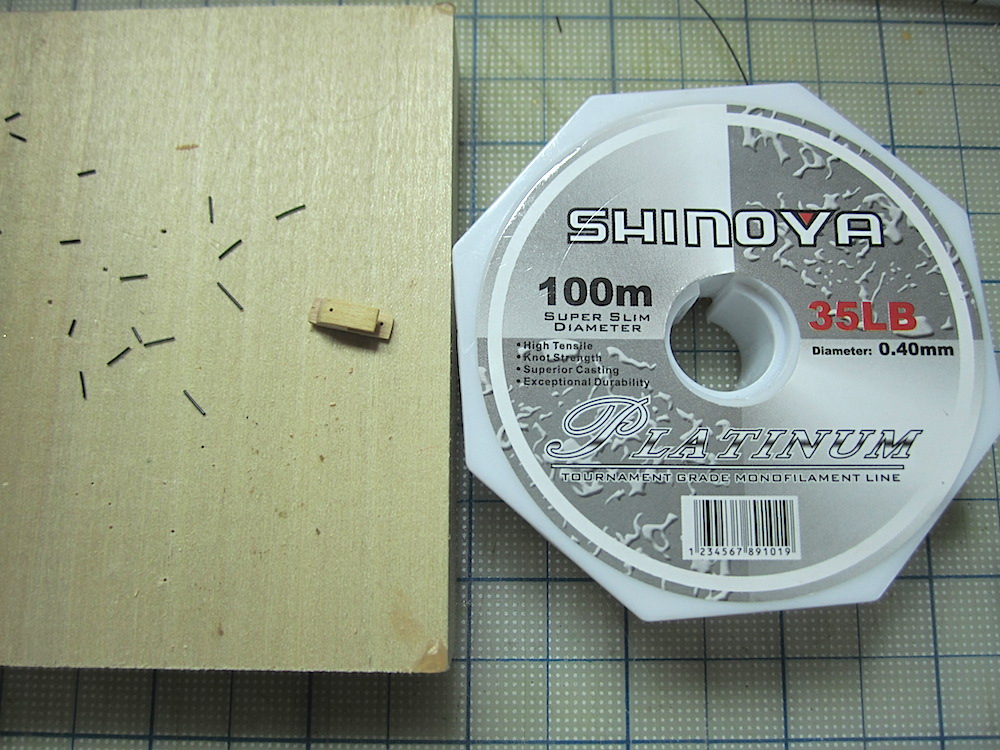
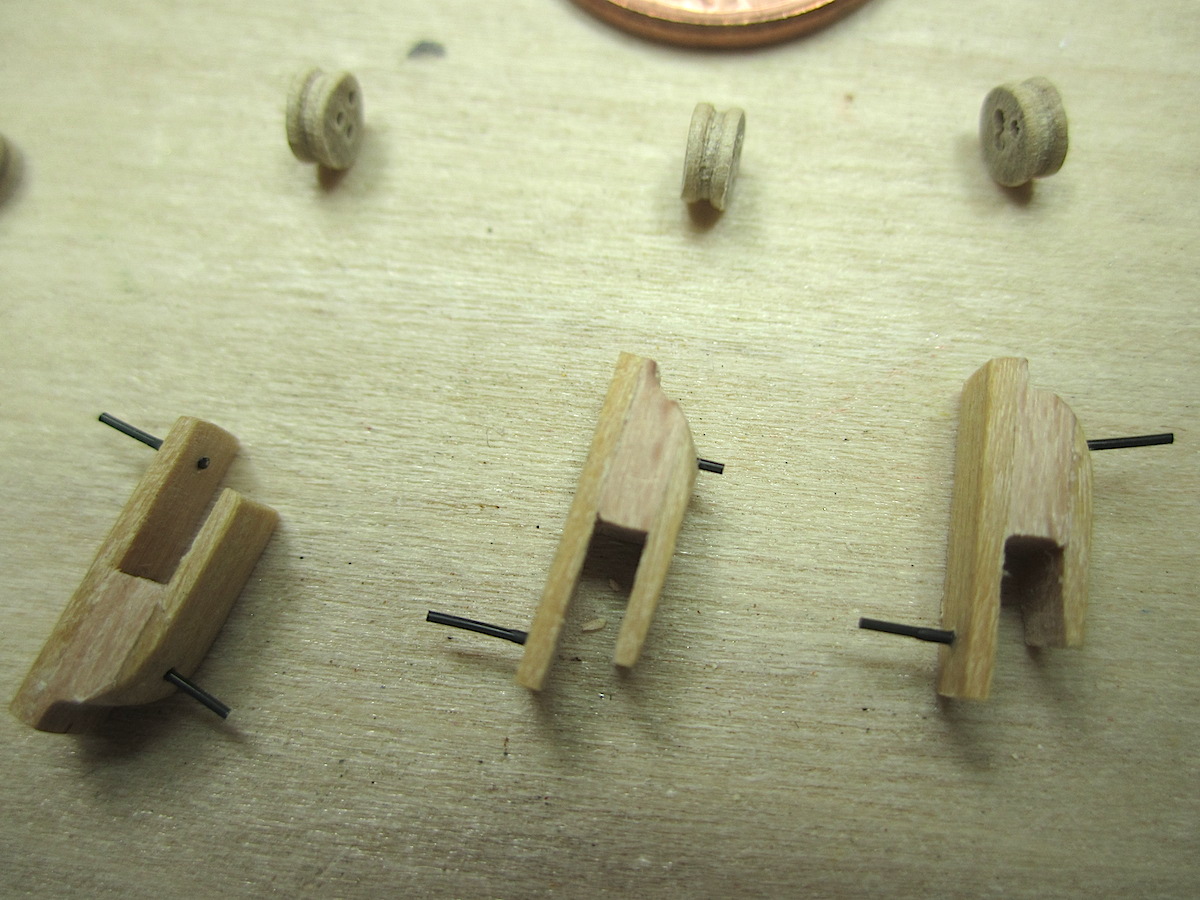
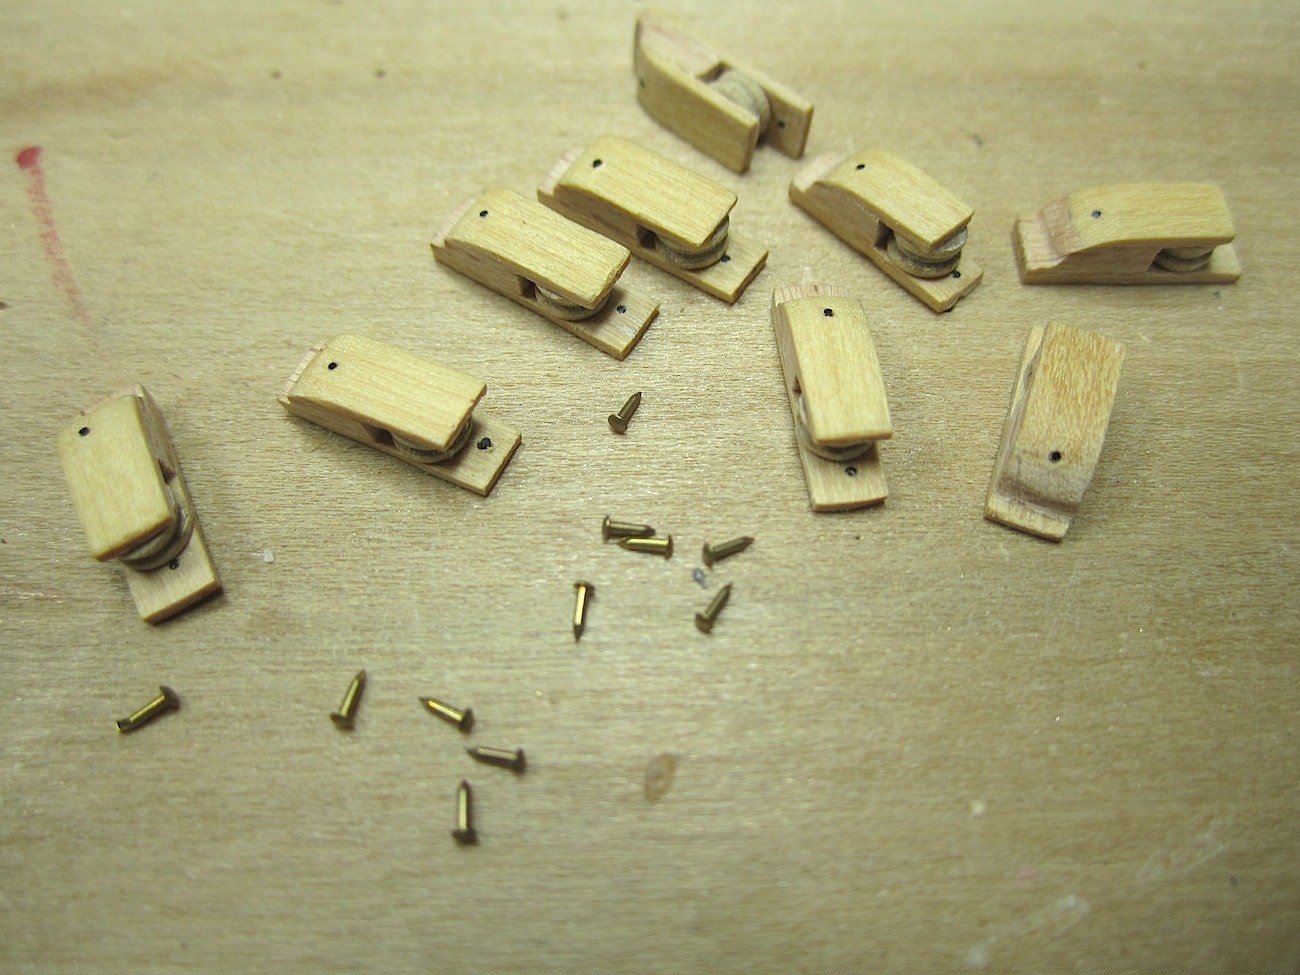
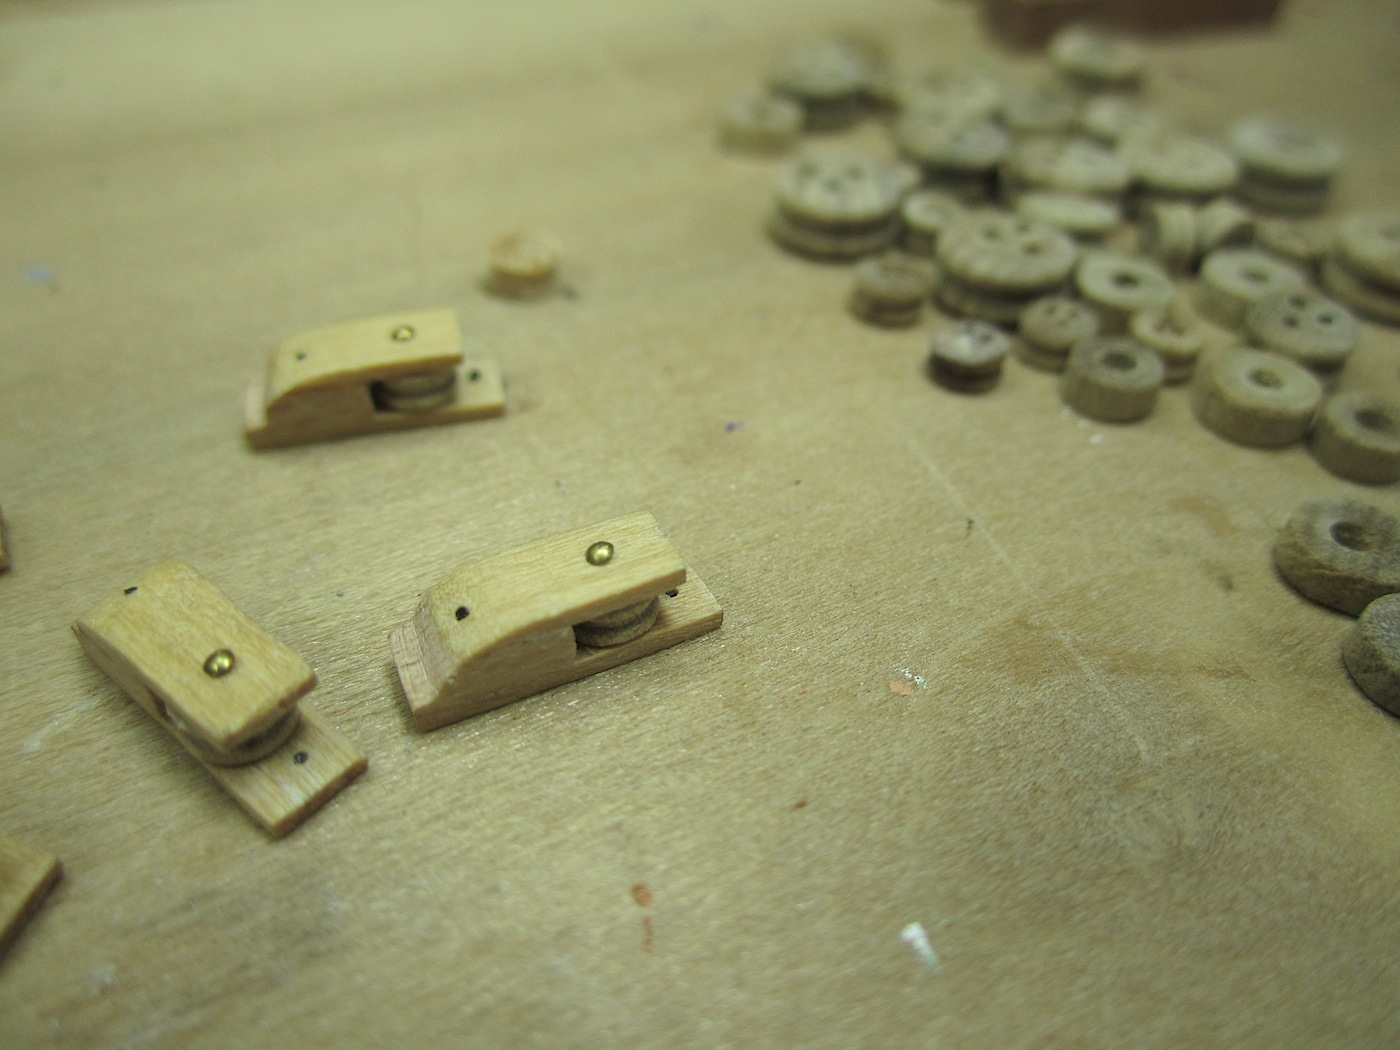
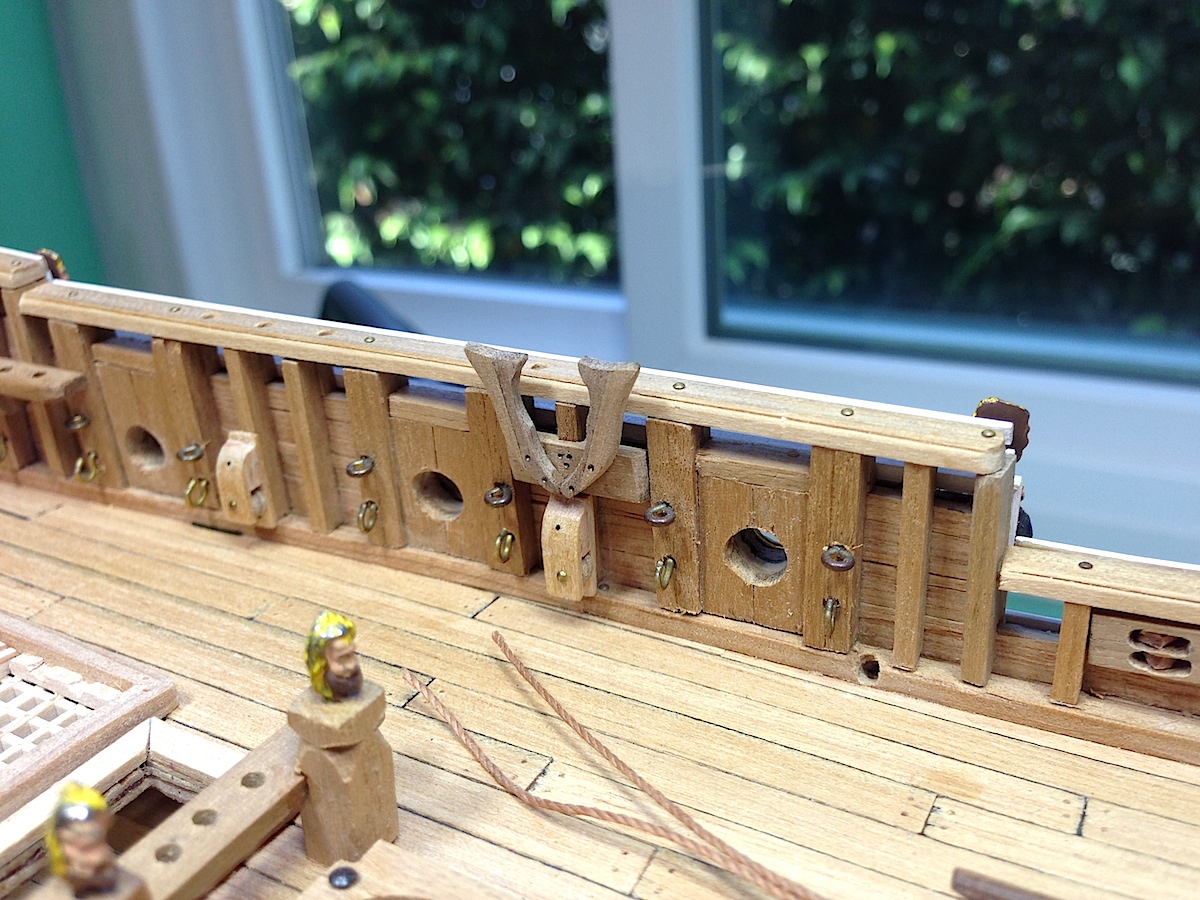
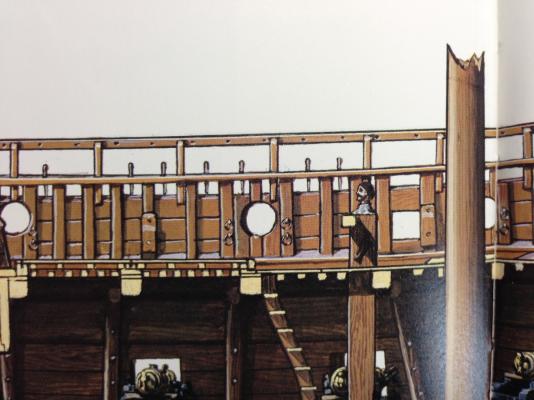
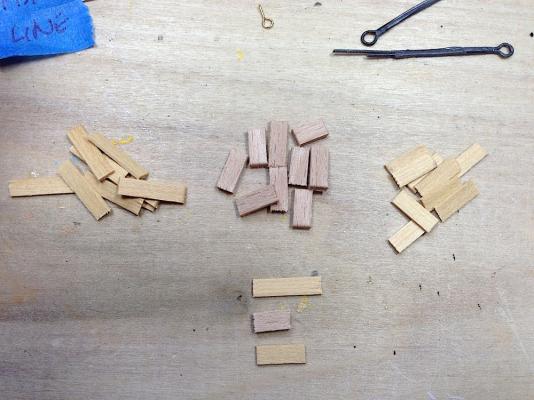
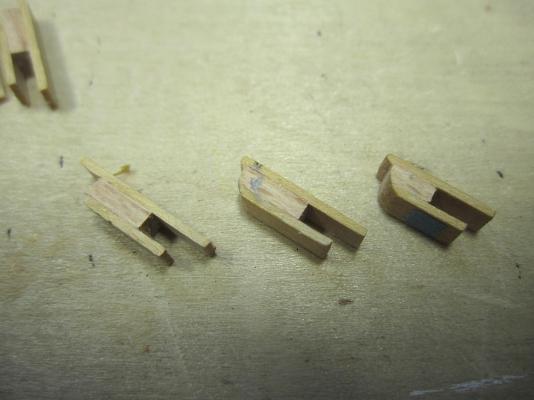
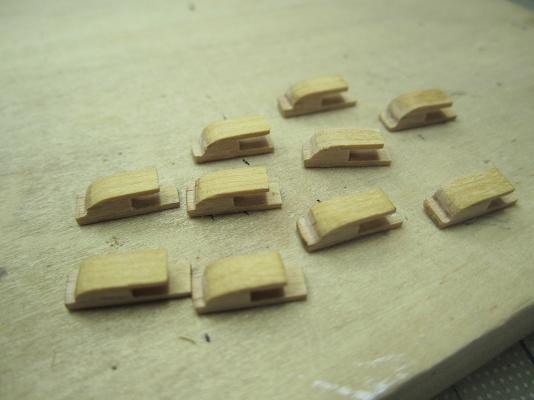
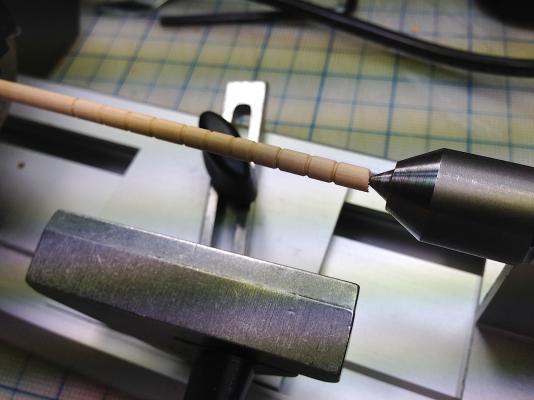
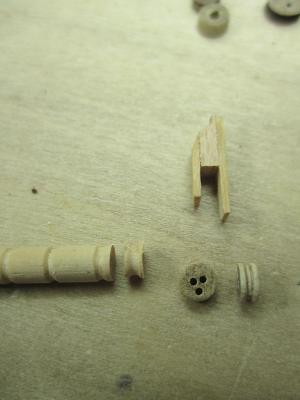
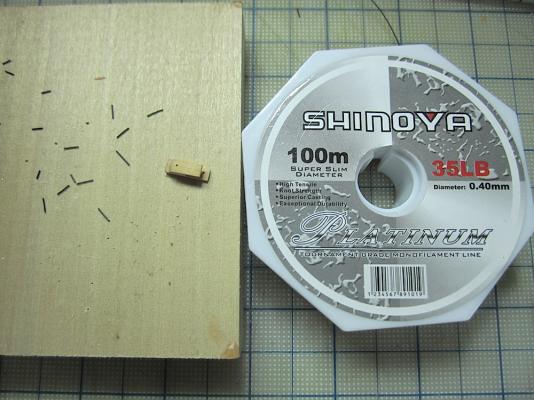
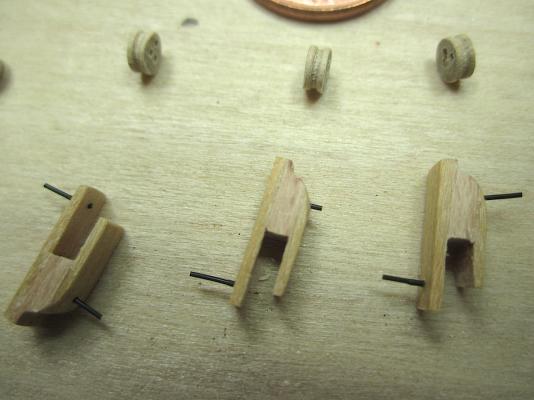
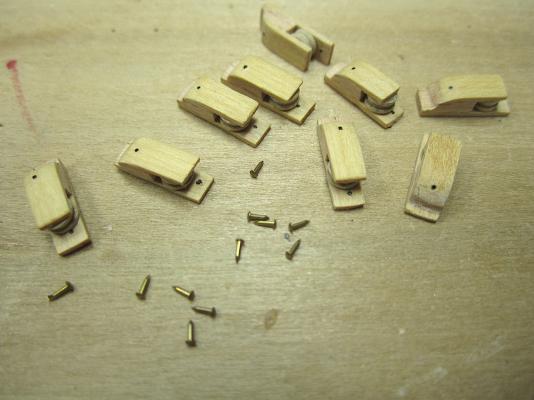
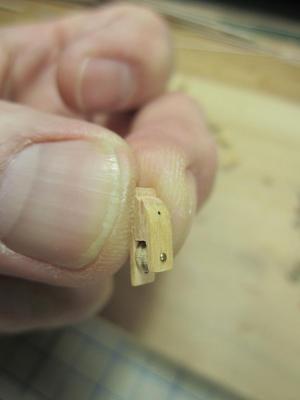
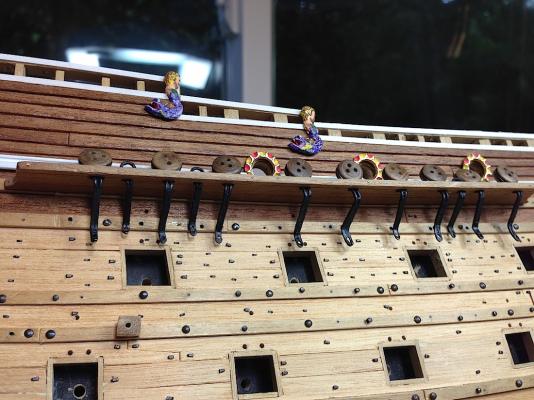
Hi Everyone, Well, I have an actual update that moves this build forward a tiny bit. These little bits were labor intensive, but I really enjoyed the challenge. This also required me to make needed pulleys for the first time. Both Nigel (for wood), and Joachim (for brass) had some excellent solutions for this. I tried Nigel's method, but his skill-set is working on 12 cylinders RR. I'm still at maybe the imported turbo four-cylinder stage. Nigel, I tried and failed, but thanks for your kind explanation, which I understood..... So, not to belabor this post, alternatively you can see my first attempts at using my Proxxon lathe to make pulleys. Early stages looked ok. Then came the part that I had to cut and trim the grooved dowel piece in order to slip the new pulleys into the new blocks I just built (used when the mast-tackles were hauled taut [Landström]). Hmmm no good - they looked weak. I then noticed that I had a loose cannon wheel lying about that was the same width as my dowel. Eureka, as a solution I used my Proxxon rotary tool to spin the carriage wheels in order to cut grooves; weak and inconsistent results again. Then another thought popped in. I could use small deadeyes that are so nicely pre-grooved and then just thin their sides a bit, and just slip then in; Voilà. Here are a few pics. of how this part of the weather deck got a detail upgrade. I'm content. Note that one of the pics. has a bunch of beached-out deadeyes, they will be re-born as future pulleys (:-) Again, thanks for dropping by it is always so appreciated. PS: A big thanks to one of the other builders who used the fishing line idea for his deck treenails. So sorry I forgot who it was. with apologies (:-( -- but I always remembered that brilliant idea. PS2: I will be removing those incorrect fife rails, and give my milling machine a go at it, now that I'm an expert with pulleys ha ha.....I hope that the pics load in order. Michael


-
Hi Nils, Just discovered your amazing build log. Beautiful !! I will enjoy following along. PS: Thank you for the large format pics. they allow for excellent views of your excellent skills. Michael
-
Joachim, Your bowsprit super detailing part by part is so excellent. With all of the little bits together it looks so awesome. Congrats a build to be very proud of-so beautiful. Along with the pleasure of following along, I am also learning a lot following your log Thanks... Michael
-
Von, Beautiful !!! thank you for re-posting your ship. Such an interesting subject. As you know very few examples of Viking ships are chosen as build projects. Your attention to small details are so nice to look at. Your planking is superb. This ship, along with the much much younger Vasa are open doors into past cultures, and human history. I will enjoy following along as well. Regards, Michael
-
Gil, I've been following, mostly silently as this ship is so above my artistic station, that being said the "fix" looks so much better. Now it won't irritate you any more. That peace of mind also has value (:-) Michael
-
Lars, That video is astonishing. It reinforces how super complicated this ship is to replicate as a model. These are so many intricate metal parts that needs to be also incorporated, which is mostly not an issue with 17th century and earlier ships. This adds so much to the complexity of your project. Yours and Joachim's make your builds even more astonishing in that you have both created amazing models with seemingly as much detail as this super beautiful 1/50th example in a much smaller scale. Big thumbs up to your beautiful work. Such artistry. Congratulations. I am enjoying so much following your build. Regards, Michael
-
Andre, We are at the same place, yes difficulties to get them correct looking is an issue. In my opinion your bottom right corner ones look the best. I would continue with those, since you asked. A very time consuming part of the build....and a part that is very visible as well, so I understand your more than one attempt to work out a solution. Good luck (:-) PS: Triangular would be the most accurate, but you will need soooo many in three different sizes hmmmm.. MIchael
-
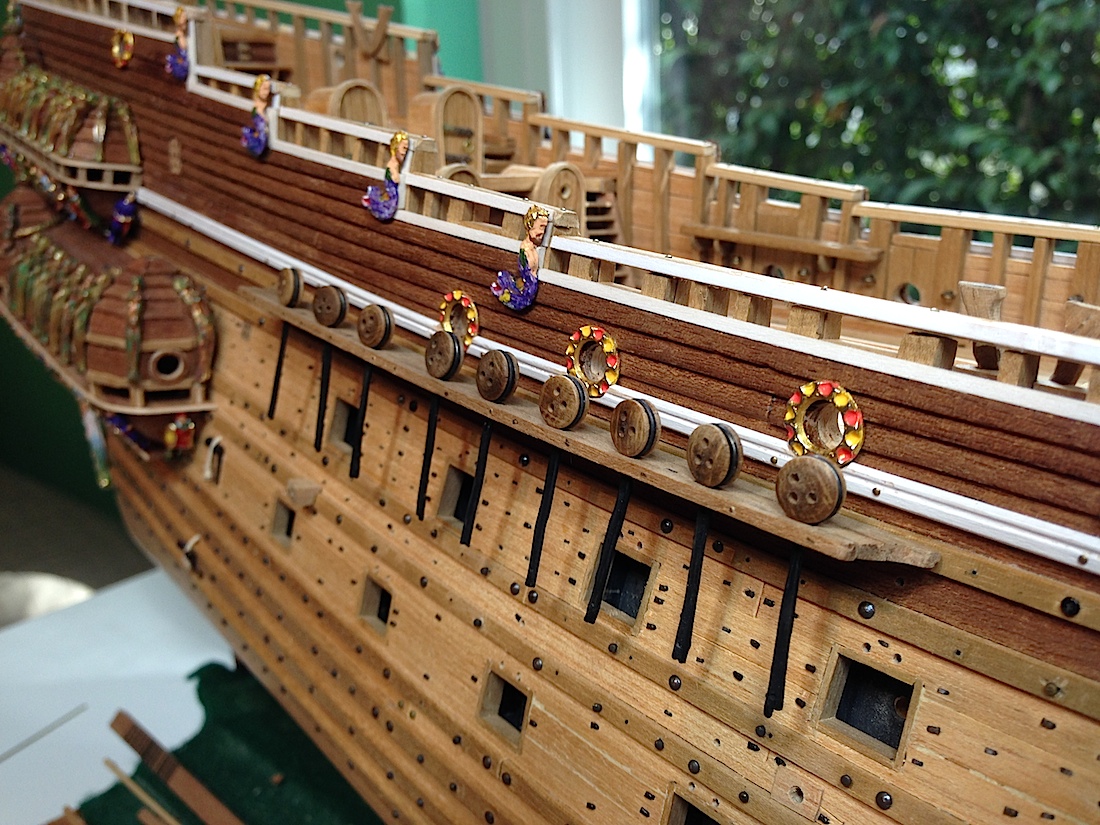
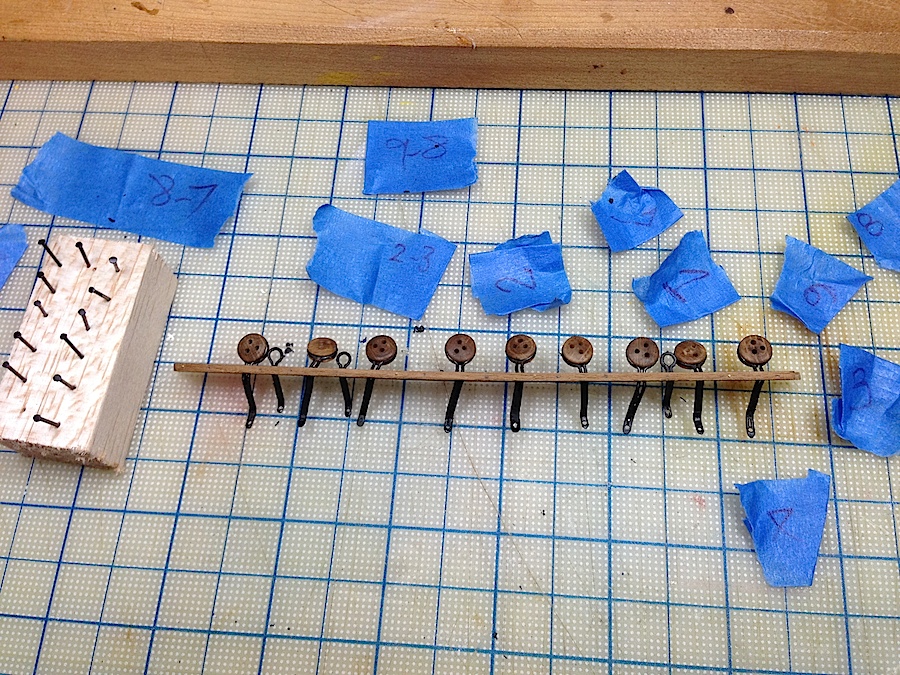
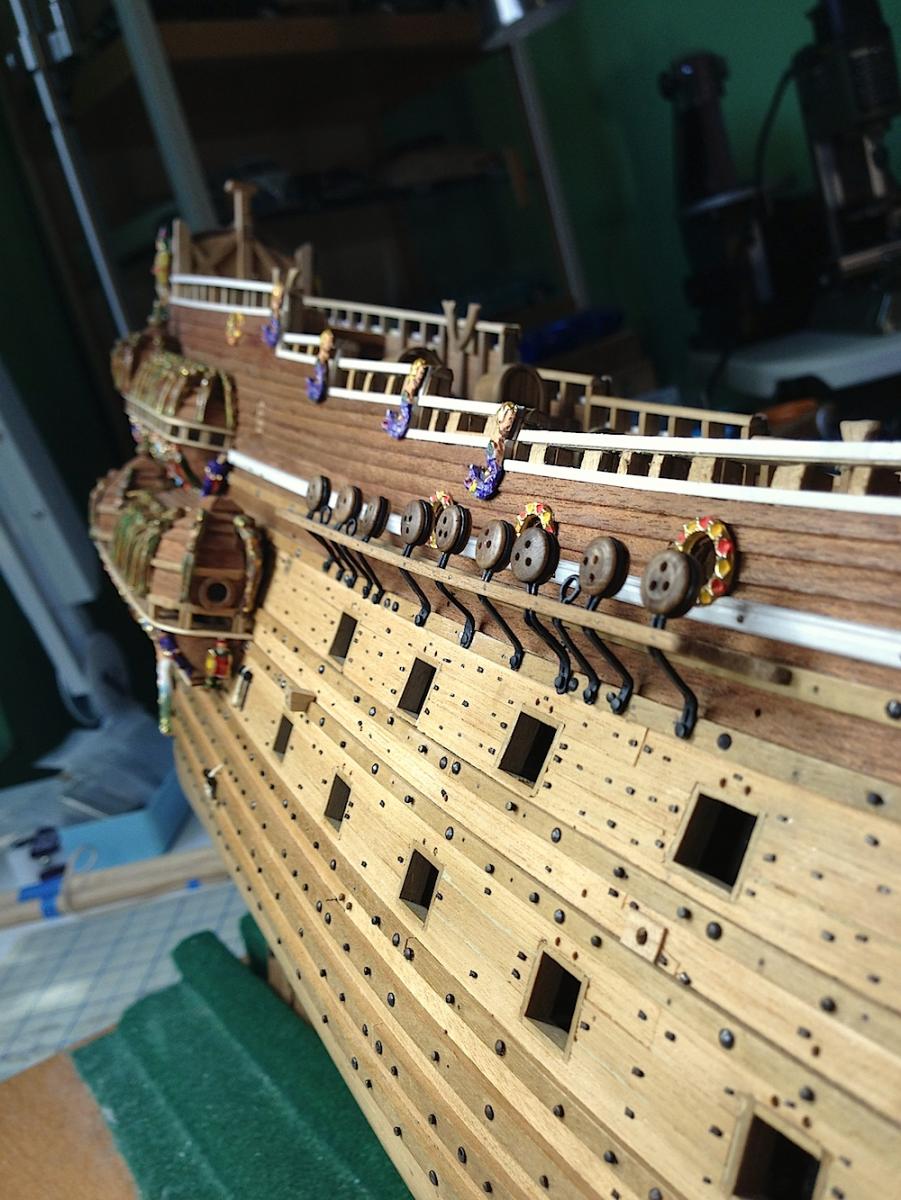
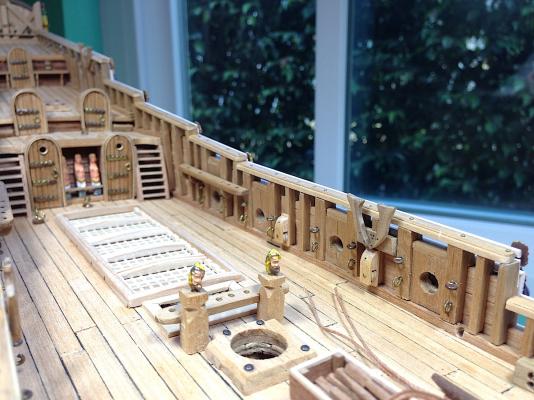
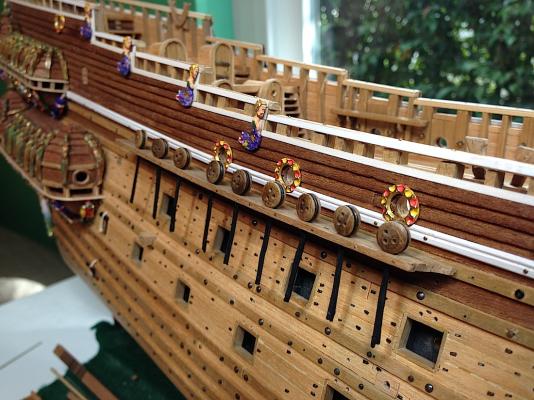
A minor update, but still slowly moving forward. Here are a few pics of the installed channel deadeyes for the main mast. Thanks to all of you who are so kind spending time on my log, clicking and of course offering your thoughts; much appreciated. As many other builders have said, close up photos are scary....I see all kinds of errors that I have made (:-) Regards, Michael


-
Vivian, Nice job.. And to think that people actually crossed the Atlantic in a tiny little boat like that. Hmmmm
-
ZyXuz, Beautiful work. So nice to follow along (:-) Michael
-
Hi everyone, I'm working on completing the stern deadeyes and I thought of Joachim, who was asking about J-B Weld. He is a link for their information in case others are interested as well. http://www.jbweld.com/products/product-family/epoxy-adhesives/ Cheers, Michael
-
Sherry, I was a bit behind on following your wonderful build. I saw the lastest photos and thought Whoa so beautiful. It then occurred to me that I must have missed something, so I back-pedaled and saw the "crash" Oh no!! That being said, had I not gone back a few pages Hmmmm. Your fix is invisible (:-) Beautiful work!! Now just be sure to avoid enemy cannon shots to the hull. -------------- You folks certainly have had a real winter north of us. Though our East coat has been blasted as well. In the West we are still waiting for a bit of rain. Regards, Michael
-
Vivian, Nice updates, I was a little behind on your build, now caught up. I especially like your detail work, anchors are great. The photos shot at deck level are brilliant and really show your excellent attention to details. OK now I'm caught up.... belo trabalho (means beautiful work) Regards, MIchael
- 188 replies
-
- 2
-
-
- latin caravel
- artesania latina
- (and 1 more)