mtaylor
-
Posts
26,273 -
Joined
-
Last visited
Content Type
Profiles
Forums
Gallery
Events
Everything posted by mtaylor
-
Joel, I think the fingernail polish remover might work. Whatever parts are cleaned by it should probably be washed and then pickled though. I've not tested this as I have pure acetone around the house for other purposes. John, They say to use it in a well-ventilated area as not only can they cause health problems, the fumes can be explosive. I use a fair amount of acetone and toluene and when I do, I'm either out in the garage with doors open or outside on the patio. Both make my head spin if I get a snoot full but I'm using them in heavy quantities for non-model purposes.
-
Shop-made filing-machine
mtaylor replied to wefalck's topic in Modeling tools and Workshop Equipment
Very precision work, Wefalck, and you it mastered. Wonderful machining. -
Waterlines and Wales
mtaylor replied to Cabbie's topic in Building, Framing, Planking and plating a ships hull and deck
Chris, Go to the Kit Build Logs and search on keyword: Endeavour. There's 7 logs it looks like for the AL version. One of them might have run into this problem and solved it. I've not done this ship so I'm no help. -
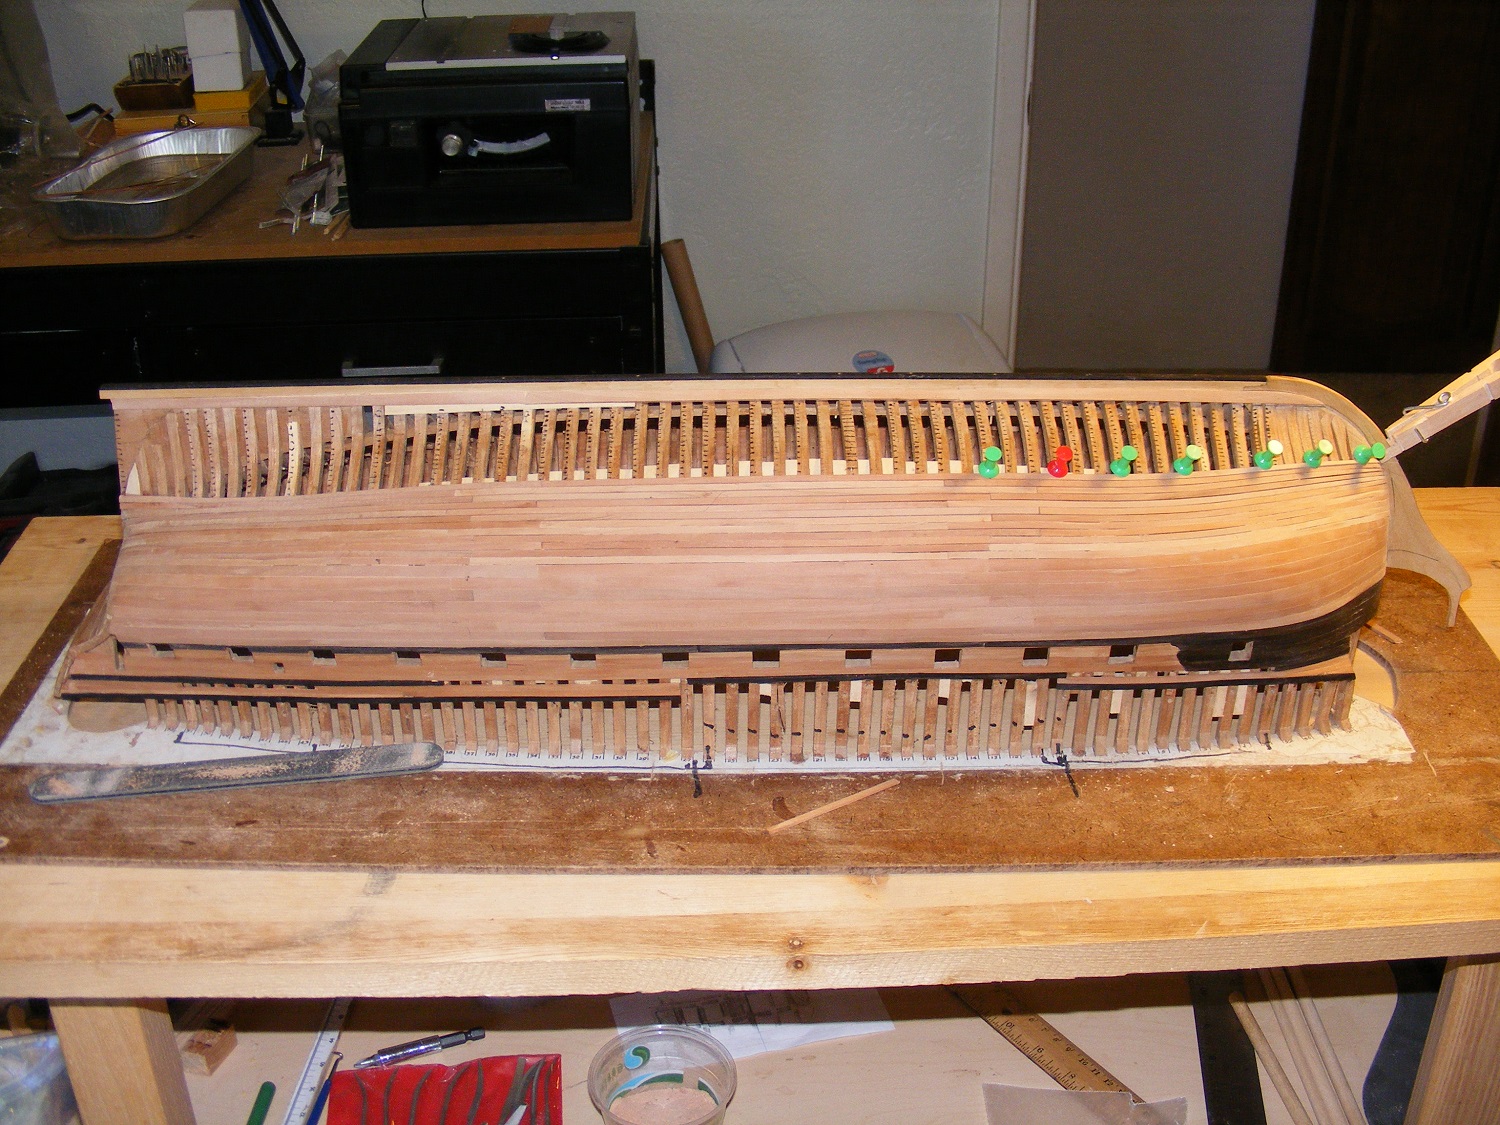
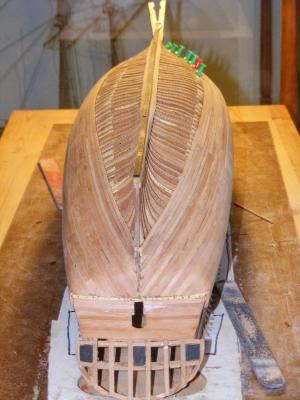
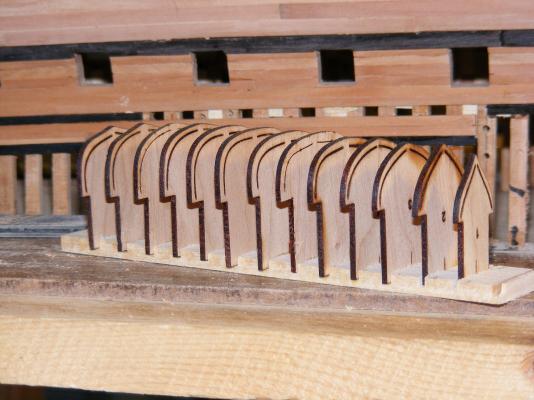
Thanks for the likes and comments. Short update time. I've laid 12 stakes of the 8" wide planks... 15 to go. Looks rough but I'm seeing light so what appears to be gaps is just mismatch in thickness and shadows... I hope. From the re-lining off I just finished a strake ago, I won't need a stealer at the stern. Looking at the French ship monographs I have, a short, wide plank can be added such that the strake is continuous. I've added one and probably won't need any more. From the dead flat, the strakes run from 8" to almost 4" and then back to 8" at the sternpost. On the bow side, the planks run from 8" at the dead flat and then eventually taper to 4". However, at least one drop plank is needed which will be put in in my next two strakes. I'm trying hard to keep scale on this even though it looks strange due to the scale (to my eye at least). First two pics show her in all her unsanded, rough looking planking. The third pic is my side project, the longboat. I needed a way to do this so thought, fiddled, thought, and then came up with a plan I think will work. I'm using a variation of Chuck's method. I did have to re-do this once already as for scale, the frames should be 2" (1/32") wide, but I kept breaking them and then realized there wasn't enough meat to hold the planks securely. So, I doubled the width of the frame. We'll see where this leads.... hopefully not the scrap bin. All in all, I'm pretty pleased. There's some things I need to think about for the next ship, like is scale planking better or worse than eye-appeal cause these planks are relatively tiny compared to the planks I've used in the past. Enough over-thinking for now... pressing on.

-
Joel, Fingernail polish remover is acetone with some perfume and a small amount of oil to prevent (ha ha ha) drying out the skin. There's a non-acetone polish remover but it apparently, according to the Admiral, doesn't work as well.
-
Dirty laundry or dirty bulkheads for the cabins... either way.. they need scrubbing.
-
Cutty Sark by NenadM
mtaylor replied to NenadM's topic in - Build logs for subjects built 1851 - 1900
Nenad,, What Patrick said. There's more important things then building models.- 4,152 replies
-
- 7
-

-
- cutty sark
- tehnodidakta
- (and 1 more)
-
I've read his thesis and it's good that he's fleshed it out with additional research. Fascinating topic.
-
It's great to see you back at the bench, Adam. Mayflower is looking great. As for the blood.. as long as it's nothing serious requiring stitches, that ok. I think every ship that's ever been built has DNA on it somewhere.
-
That's great news, Jeff... the good guys have one another one!!!!

-
I clicked "like" for support. I don't like the surgery thing.... Here's wishing a good outcome and full recovery.
-
Lathe - ZHOUYU Model Z20002
mtaylor replied to t5956ws's topic in Modeling tools and Workshop Equipment
To be honest... I'd say save your money on that machine. It's actually part of something they make called a 6-in-1 machine that I don't believe anyone has got to work right. Look at the machine Mario suggested or goto www.LittleMachineShop.com. There's a lot of good info on lathes there. I'm assuming that you want to turn both metal and wood, right? Metal lathes can turn metal but not the other way around. Excellent wood lathes can be had for a very reasonable prices. For a metal lathe, do research as these can be had for several hundred up to several thousand dollars, depending on what you'll doing. For a hobby machine, see the link I gave.... there's good advice and tutorials on using them. And be aware, that it's real easy to spend more than the price of the machine on good tooling and accessories. Disclaimer... I own the MM lathe. -
Beautiful and precise work, Alexandru.
-
Looks darn good, Hamilton. You've expanded your skill, had some fun.. what's so bad about that? If you do decide to do another SIB, what you learned on this one will help you with the next.
-
Great looking rudder. I like those little detail decorations on it also.
- 100 replies
-
- 3
-
-
- model shipways
- 18th century longboat
- (and 1 more)
-
The joy will not be the quality of the wood or the neatness of the paint. It'll be the joy in her eyes that "Dad made this for me". And so it will go and hopefully she'll pass it down to her daughter with "Granddad made this for me and now wants you to have it." and there will be two sets of eyes aglow. And don't short sell yourself.. it looks great.
-
Frégate d'18 par Sané , la Cornélie
mtaylor replied to JohnE's topic in CAD and 3D Modelling/Drafting Plans with Software
I've seen that and puzzled over it. Now that you explain it, John, it falls into place. -
Hi Cathead, Welcome back. Having lived around St. Louis, I can appreciate the problems with river channels. Was channel moved naturally much like the Mississippi being moved by an earthquake? The amount of moment just seems un-natural to me.
-
I see no cheating, only very nice work. We use the materials and tools that work for us as individuals. Lovely looking long boat, Christian.