mtaylor
-
Posts
25,820 -
Joined
-
Last visited
Content Type
Profiles
Forums
Gallery
Events
Everything posted by mtaylor
-
So who would have thought that for the last two days I've been running around in a short-sleeved shirt outside. It's been almost 70 degrees F. Now it's more normal, raining and In the 40's. Which means, the sawpits have been busy. Christian, use whatever is useful to you. Pat, thank you for the nice comment. Aldo.. I've missed seeing you around. I hope you're doing better. And thanks for the nice comment. George and everyone else, may Christmas be filled with love and warmth and the new year with good things and good times.
-
Wow! <picks jaw up from floor> Just wow!
-
Beautiful work and that table is just great. Have a wonderful Christmas and I hope it's a great 2015 for you.
-
Looks great, Mark. I had thought about doing frames for the whole ship that way, but it is a pain and time consuming.
- 172 replies
-
- 1
-

-
- druid
- sloop of war
- (and 2 more)
-
Fam, On the bending... apply heat. You can steam the planks, put them in hot water (boiling hot), or soak and use an electric plank bender or a curling iron. The thicker the wood, the more soaking and heating need to be applied.
-
Can i live without a BYRNES TABLE SAW
mtaylor replied to shihawk's topic in Modeling tools and Workshop Equipment
Dr. Per, That one is the top top top of the line... I opted for cheap.... but it seems to do the job: http://www.lowes.com/pd_549708-20097-5872511_0__?productId=50159057&Ntt=shop+vacuums&pl=1¤tURL=%3FNtt%3Dshop%2Bvacuums&facetInfo= -
Very well done, Magnus. Actually, correct that.... Amazing work.
-
Can i live without a BYRNES TABLE SAW
mtaylor replied to shihawk's topic in Modeling tools and Workshop Equipment
Use as few or as many as you want or have. My heaviest used power tools are the table saw and scroll saw, followed by the mill (doubles as a drill press) and lathe (minimal... guns, some round stock, etc.) Most important tool... a good shop vac for dust control and clean-up as my shop is in a spare bedroom. -
Proxxon FET replacement blades
mtaylor replied to Sambini's topic in Modeling tools and Workshop Equipment
Depends on the thickness of the wood. Have a look here... I know it's for the Byrnes saw, but the blade selection and tips are worth the read: http://www.hobbymillusa.com/byrnes-saw-operation.php If you know the diameter and the hole size, try Thurston: http://www.thurstonmfg.com/cut-off-saws.html- 1 reply
-
- 1
-
-
MicroLux Drum Thickness Sander
mtaylor replied to AntonyUK's topic in Modeling tools and Workshop Equipment
Anthony, I've got one it's not a bad tool. It won't do production work or take a large amount of material off on one pass but for what it does, it does it well. I've thicknessed ebony, boxwood, cherry, and am currently running swiss pear through it. Depending on the wood, one might need to swap out sanding drums for a different grit. Mine's NOT bolted down as I move it about from bench to storage to outside, etc. As long as the wood isn't forced through, I've no problem. It takes a bit of practice to find the feed rate. I'm currently re-thicknessing some 1/16" (about 2mm) strips down to 1/32" (about 1 mm) with minor issues such as if the piece slips out of my hand on the output side, it gets pulled back into the sander and destroyed pretty quickly. I have it set, run the strip through to take it down and flip the wood over and do it again to smooth out that side also. Bigger pieces of wood haven't been a problem. A few suggestions... you'll need a pair of snap ring pliers for changing drums and belts and order some extra belts. And by all means run a shop vac on the outlet port. These things do dump out a huge amount of sawdust. A good comparison is here: http://modelshipworld.com/index.php/topic/3393-thickness-sandersbyrnes-vs-micro-mart/ -
Charlie, ModelExpo used to but I'm not sure if they still do. You might also check Ages of Sail.
-
Thank you for the "likes" and comments even when I've done a bone-headed stunt like that. It keeps me honest and on my toes. Christian, The modified fence idea came from Grant and Danny and fences are just a bit of creative usage. So.. no... I stole all the ideas. Chuck, They go from the main wales up and there's one wide one for the garboard strake. Hopefully, I won't need a lot of sanding. I'll recheck the fairing after I'm done cutting as I've found one small area that needs a tweak in the fairing. I hope everyone has a great Holiday and in the meantime, I'll keep thicknessing and cutting for now.
-
A beautiful ship, Matija. You did her well. I love the details like painting/carving(?) on the tiller.
-
Looking super nice, Alan. Being on schedule is a big plus... Can't wait to see the final pictures.
-
What to do about the DUST
mtaylor replied to rcmdrvr's topic in Building, Framing, Planking and plating a ships hull and deck
You can try the fans. What someone (I think it's RustyJ's Winchelsea build) did was make a box with holes in it. The shop vac plugs into it and all sanding is done on top such that the sawdust is pulled into the box and then the vac. If your vac has an exit port that accepts a hose, run a hose out of the shop so the dust goes outside. Or, get a shop vac that uses a bag and a filter. I have one of those and work in the house. There's no dust going anywhere. I also set it up to suck up the dust if I'm doing massive sanding with frequent stops to vacuum up any that falls by the wayside the rest of the time. -
George, I don't have a Jim Saw...those are from MicroMark as I have their saw. Hmm.. I'm wondering if it would save the cost of blades to run them backwards? :D
-
Adriaan, Are these online prices or have you checked any local home improvement stores? I got mine at a home improvement/hardware store for <$200 US. Hitachi with a 16" table and it takes both types of blades. I would hope you have something similar over there in Oz. BTW, no matter what saw you get, you'll need to make a zero-clearance plug to replace whatever the saw comes with. The holes in the plug from factory are always huge.
-
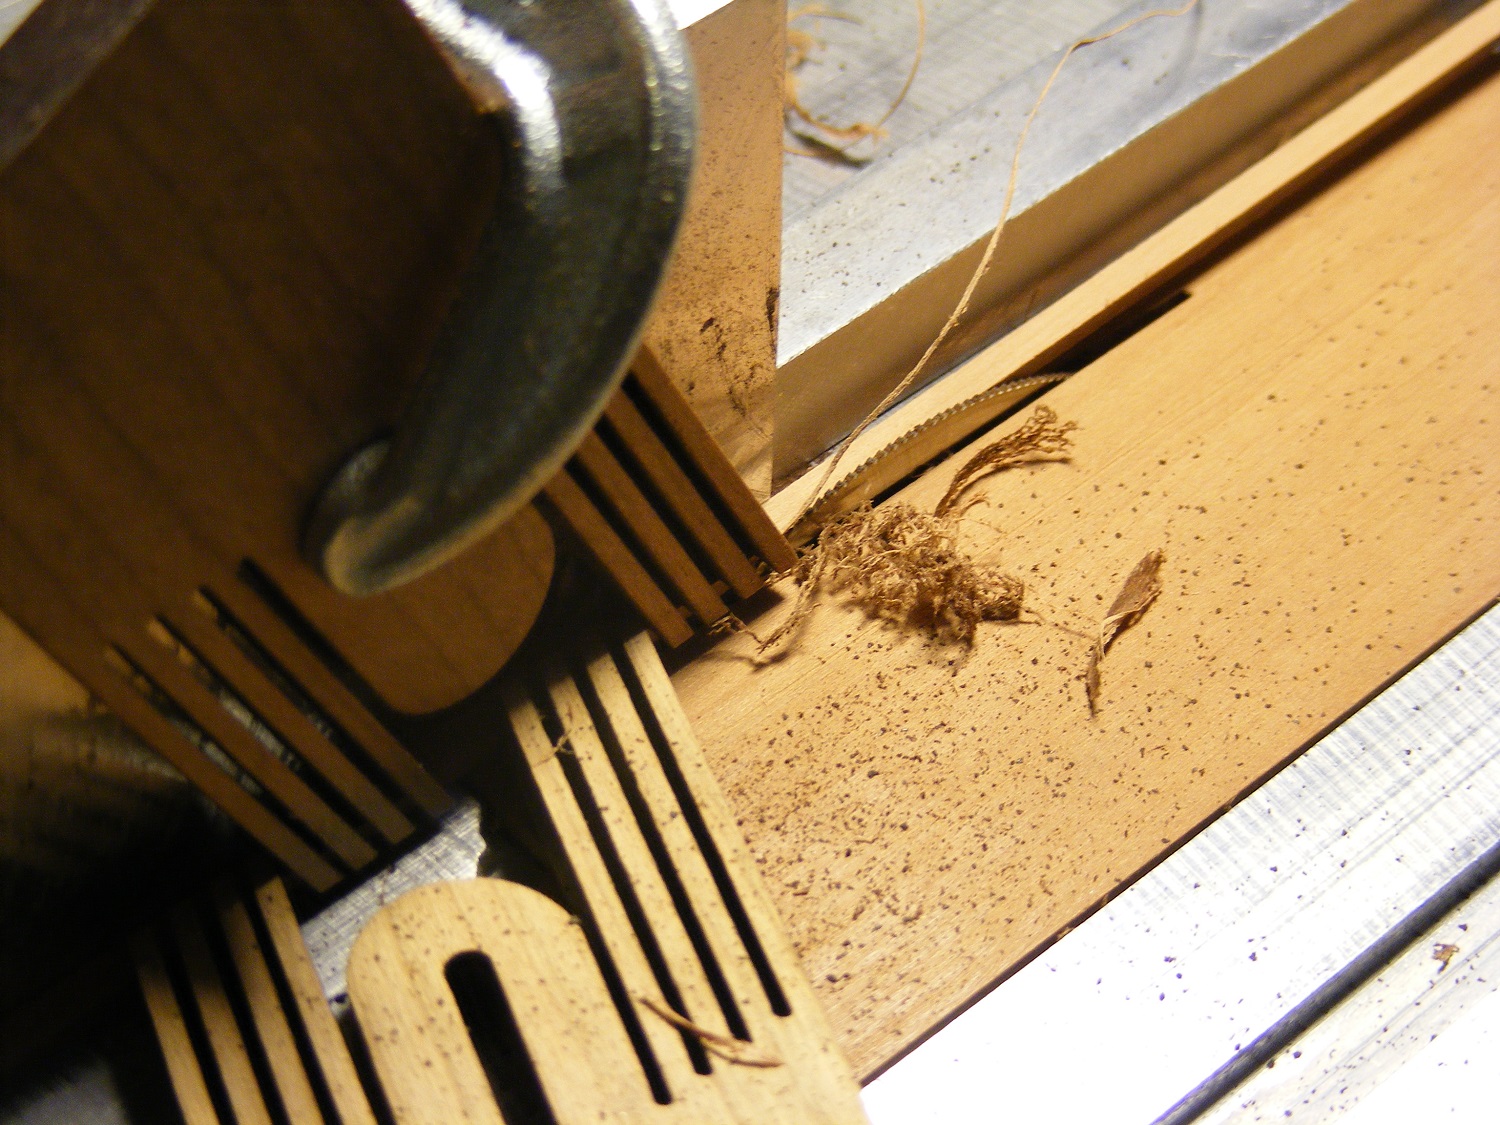
Thanks for the "likes and" comments. Just a break from building here while dimensioning my Swiss Pear supply for this. For hull planking, I'm need 4 sizes of wood: 1/32" X 1/8", 3/32" X 3/16", 1/16" X 1/8" and 1/16" X 3/16". I have an ample supply of planking wood that is +1/16" X +1/8" and +3/32 X +3/16" that I'm converting down. I've been testing out my technique on this and sorting things out. For the first batch of 1/32" X 1/8", what I'll be doing is running it through the thicknesser to get it down to 1/32" (dead on exact) and then running it thought the table saw with a 230T blade to get the exact 1/8" I want.. For those on metric, 1/32" is equal to about 1mm. I give the raw dimensions as "+" because they're all a tad oversize and the oversize seems to be inconsistent. I'm attaching two pics of the saw with the wood being run through it. You can see that very little wood is being removed and also how I'm keeping my big paws away from the blade. I hope to have planking underway pretty soon. In fact, maybe tomorrow, I'll take a break from dimensioning and do the counter. Hmmm... I need some ebony for the stern above the lights so I'll have to do that also. Overall view: Close up of blade area:


-
Matti, I'm glad to hear the meds are working and I'm also loving the progress on Wasan.
-
Lovely planking, Mike. The anchor stocks look super neat.
-
I'm always one clamp short, no matter how many I have.
-
Cutty Sark by NenadM
mtaylor replied to NenadM's topic in - Build logs for subjects built 1851 - 1900
What CaptainSteve said. I couldn't have said it better.- 4,151 replies
-
- 1
-
-
- cutty sark
- tehnodidakta
- (and 1 more)