


Kevin
-
Posts
6,532 -
Joined
-
Last visited
Content Type
Profiles
Forums
Gallery
Events
Posts posted by Kevin
-
-
She looks fantastic, Congratulations
- Keith Black, AJohnson, FriedClams and 4 others
-
 6
6
-
 1
1
-
-
2 hours ago, Blue Ensign said:
Cheers Guys,
The repair seems to have held, but work is now suspended for a week whilst I enjoy a week in Dorset. An opportune time for a break, in the better sense of the word, I think.
B.E.
enjoy the break, and glad the repair has held
- Blue Ensign and mtaylor
-
2
-
-
-
-
-
good evening everyone
Thank you for comments and likes
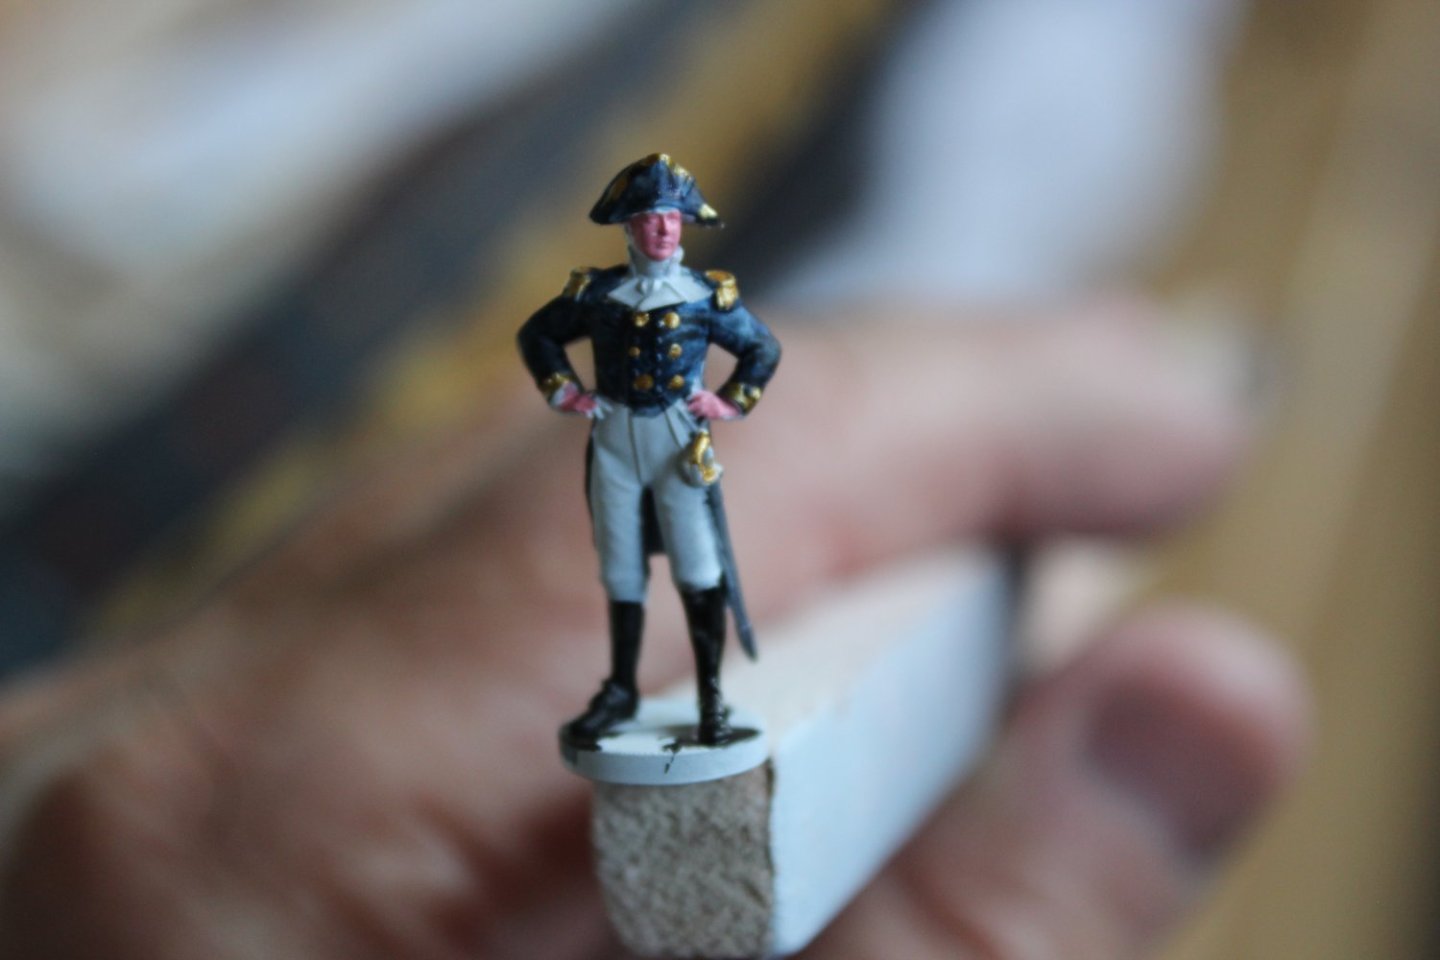
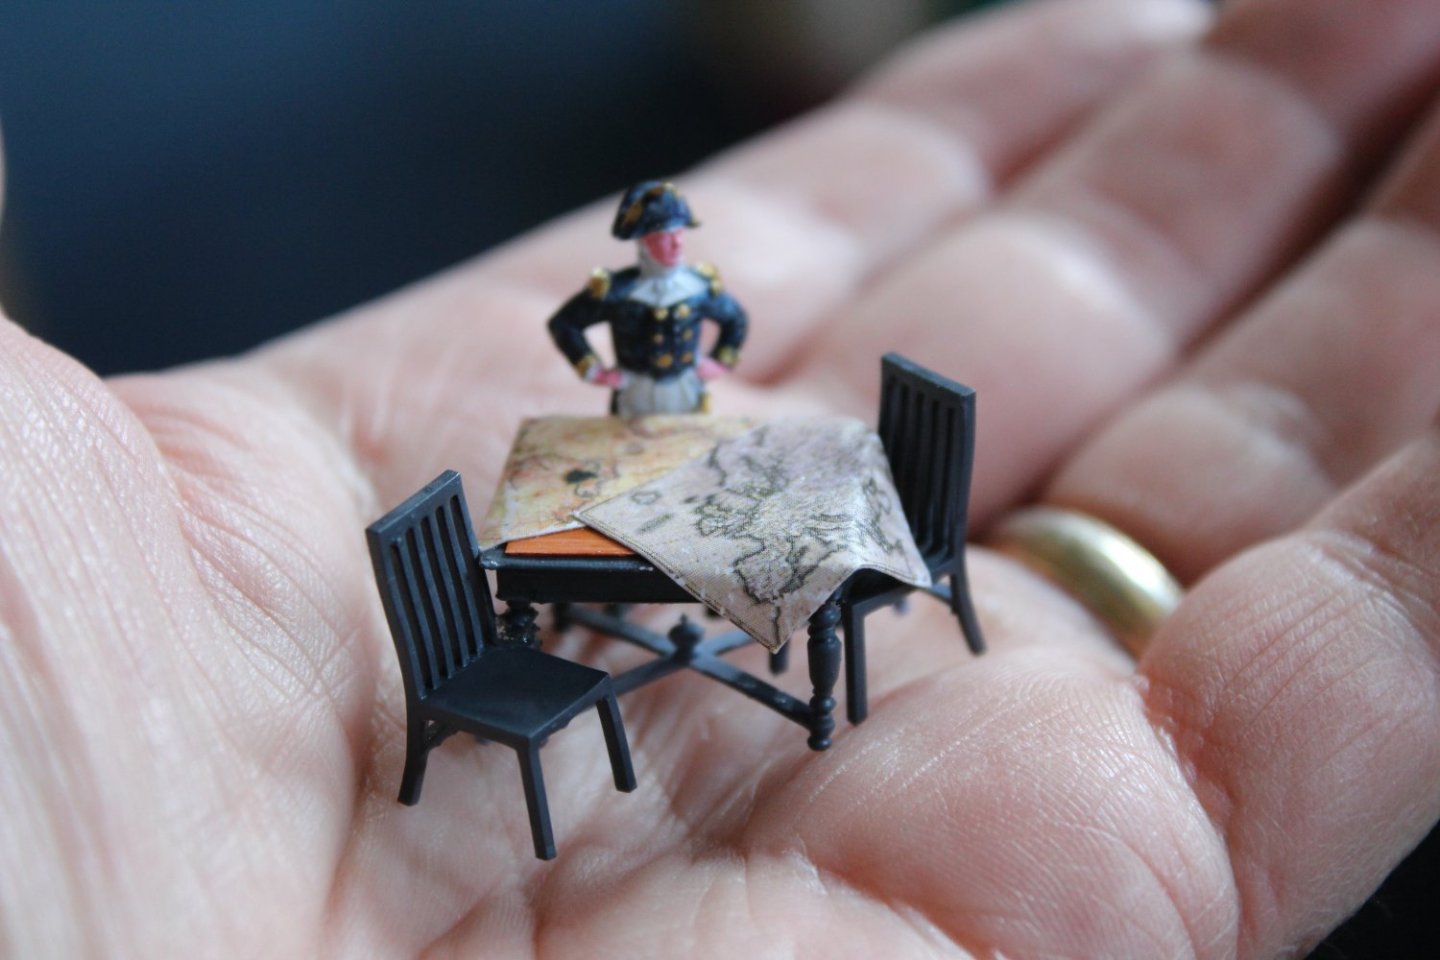
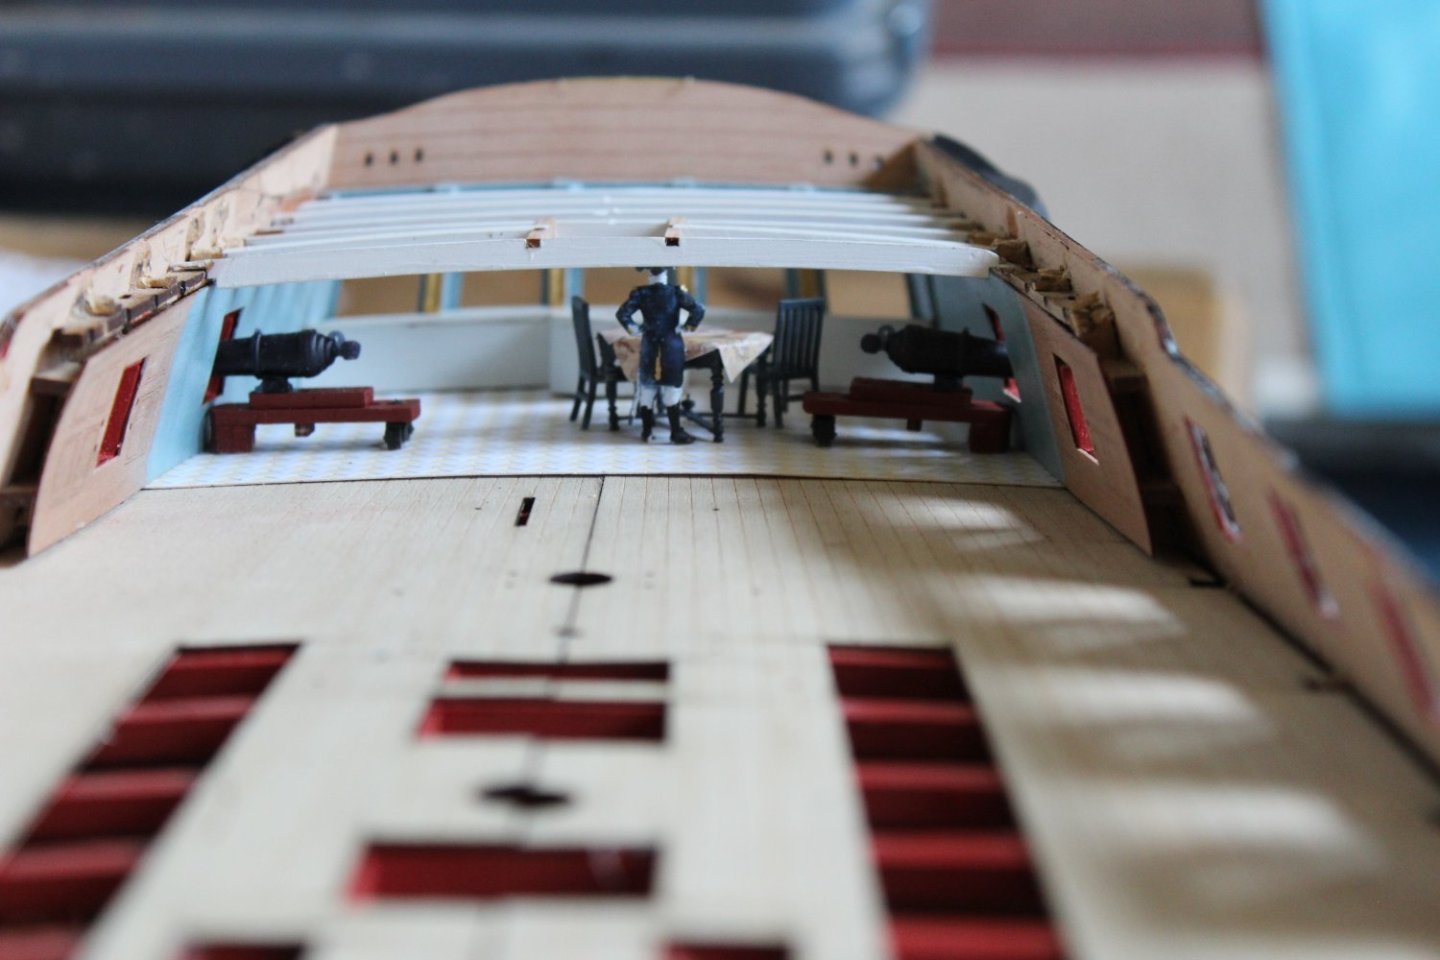
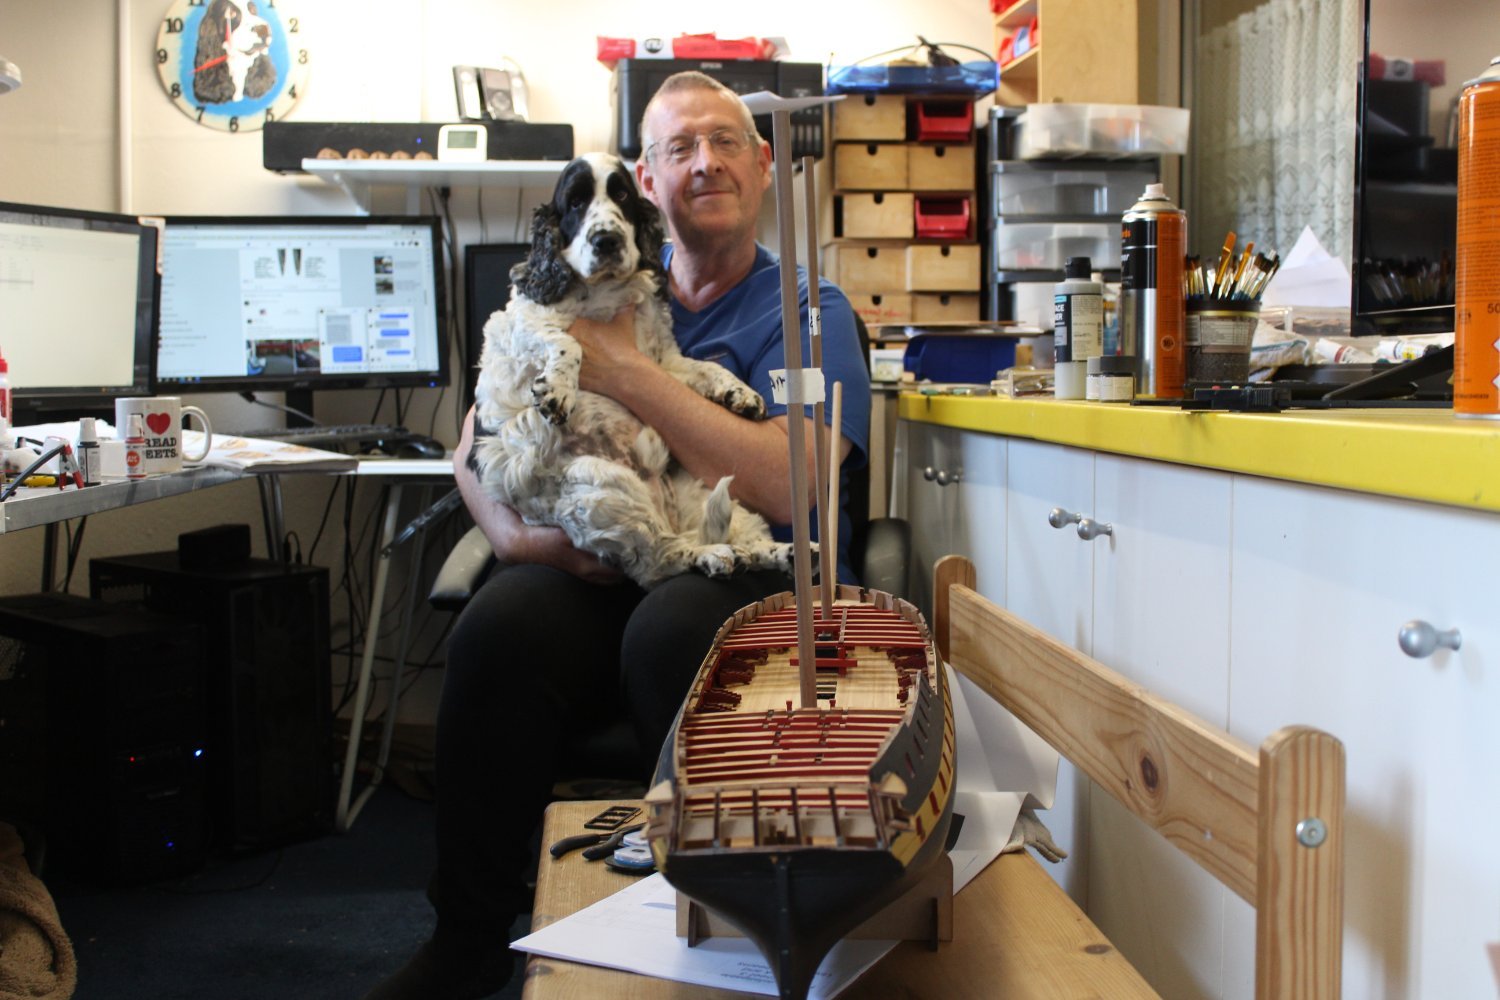
day 100-2
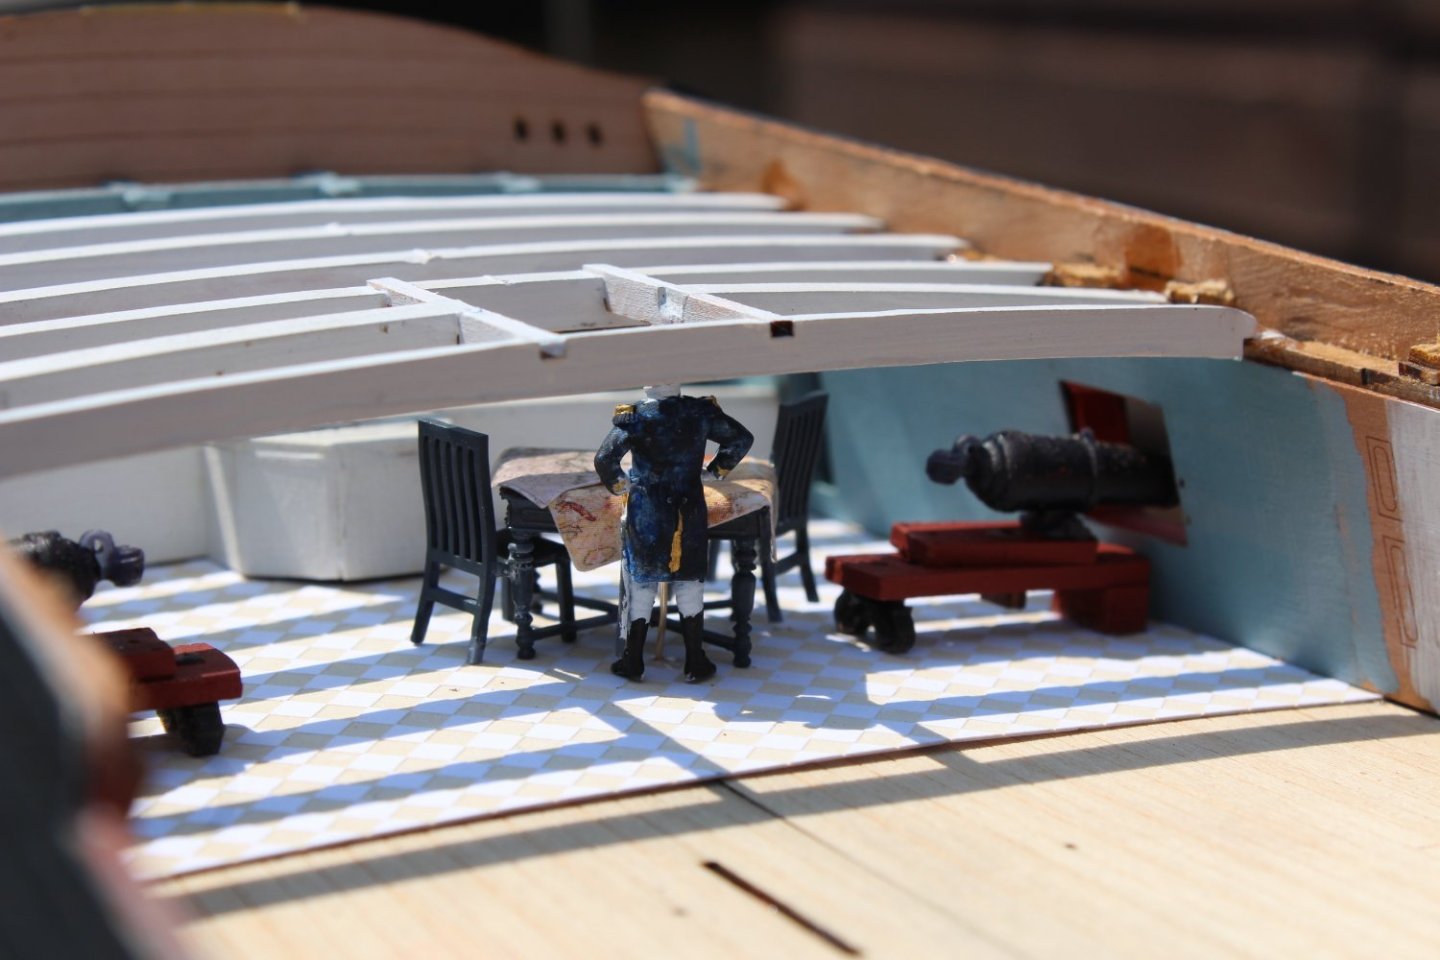
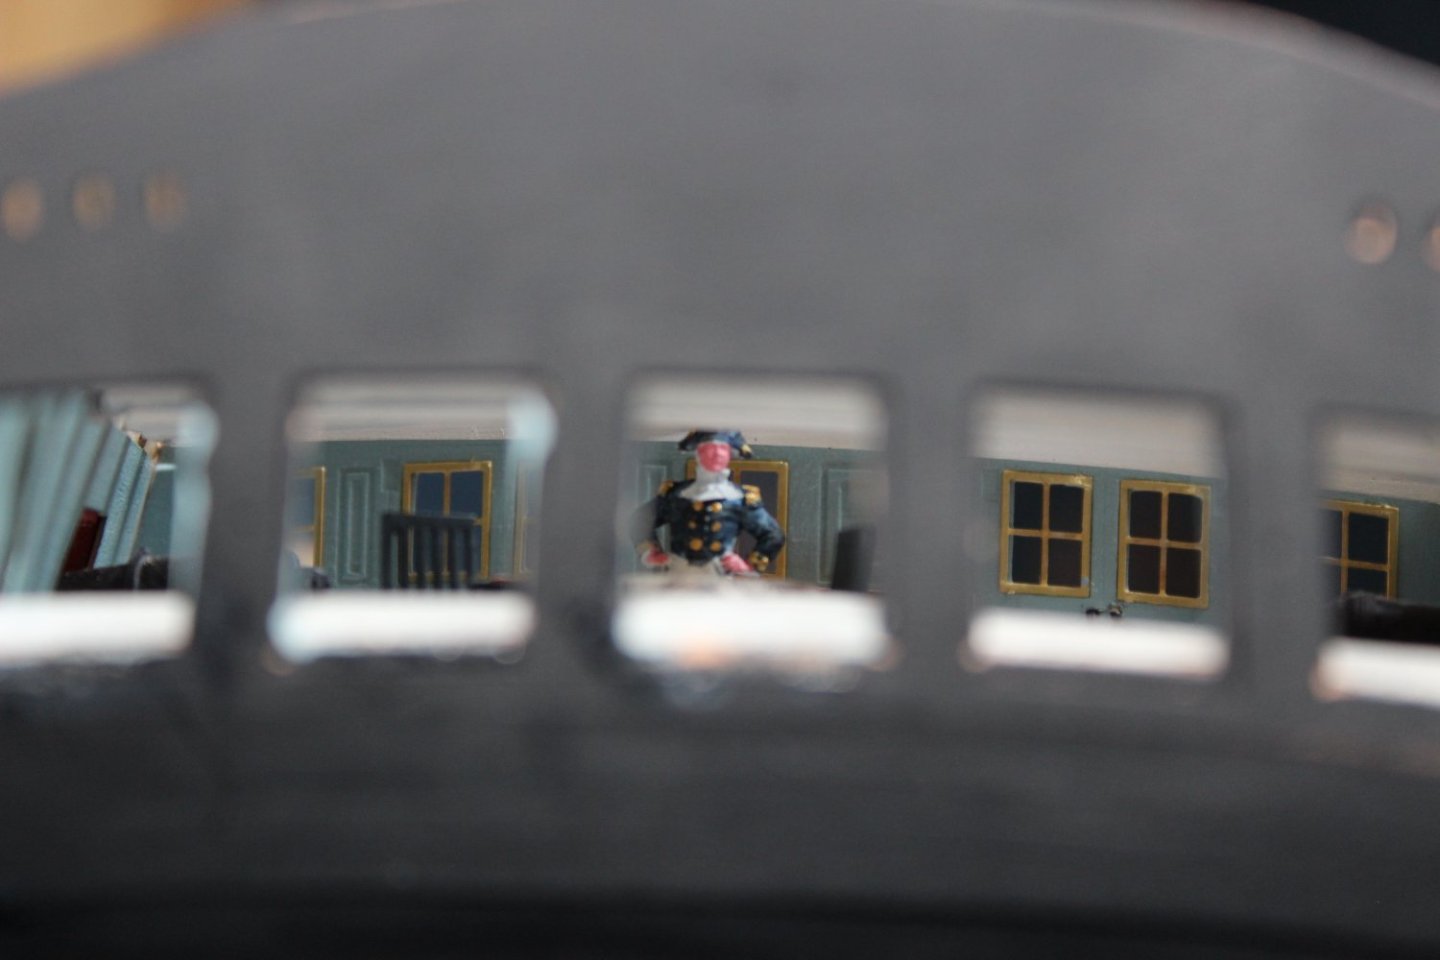
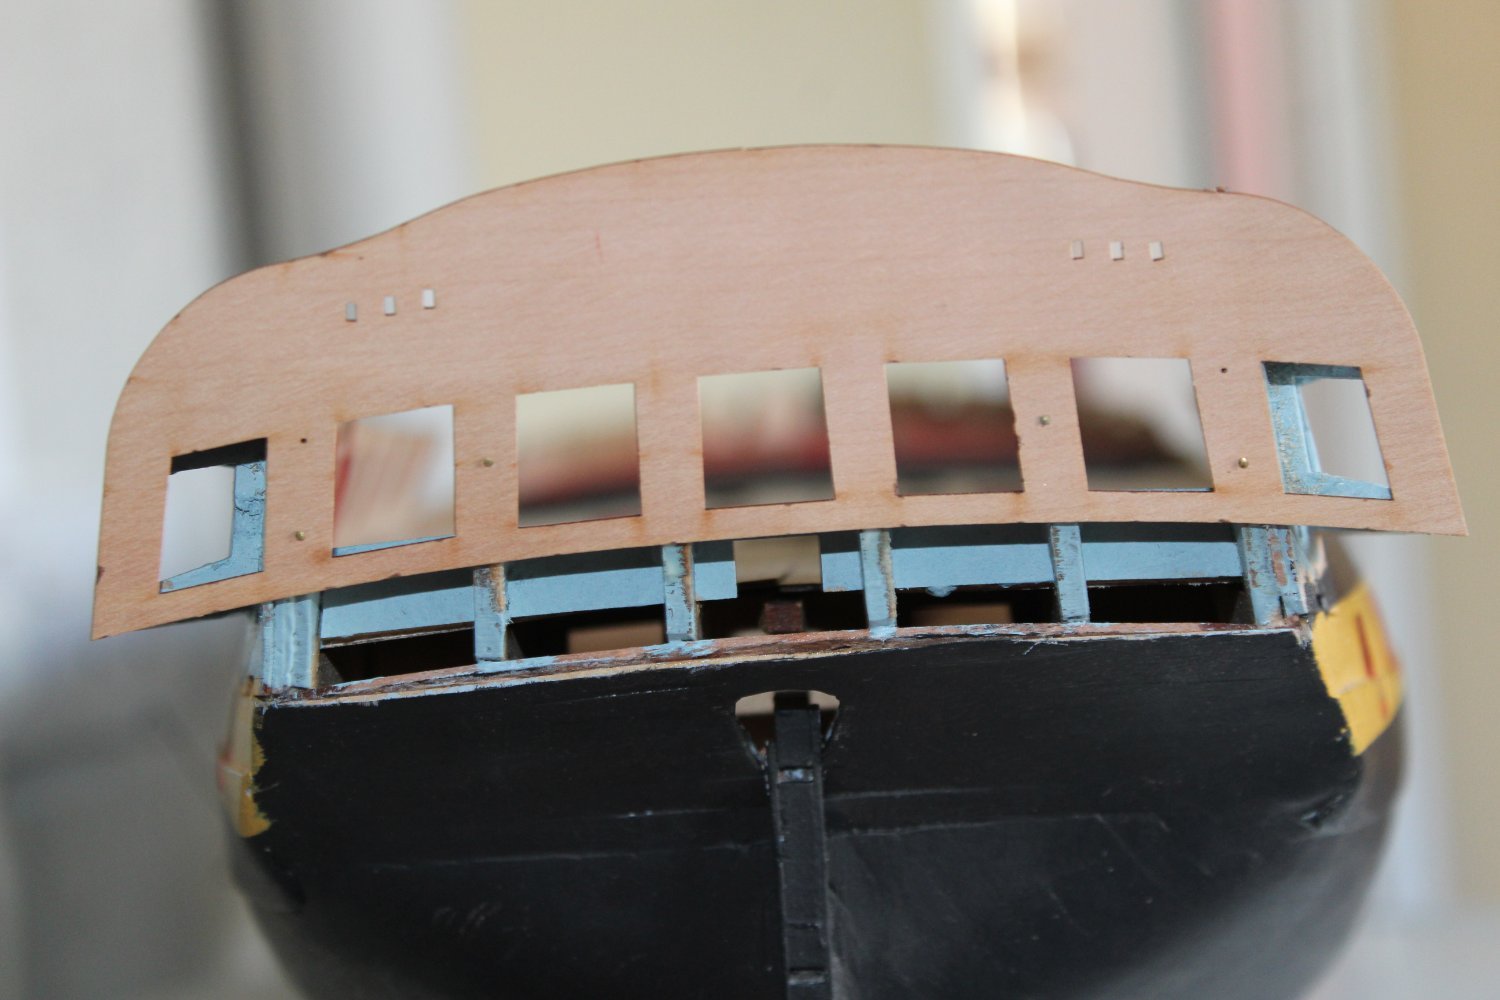
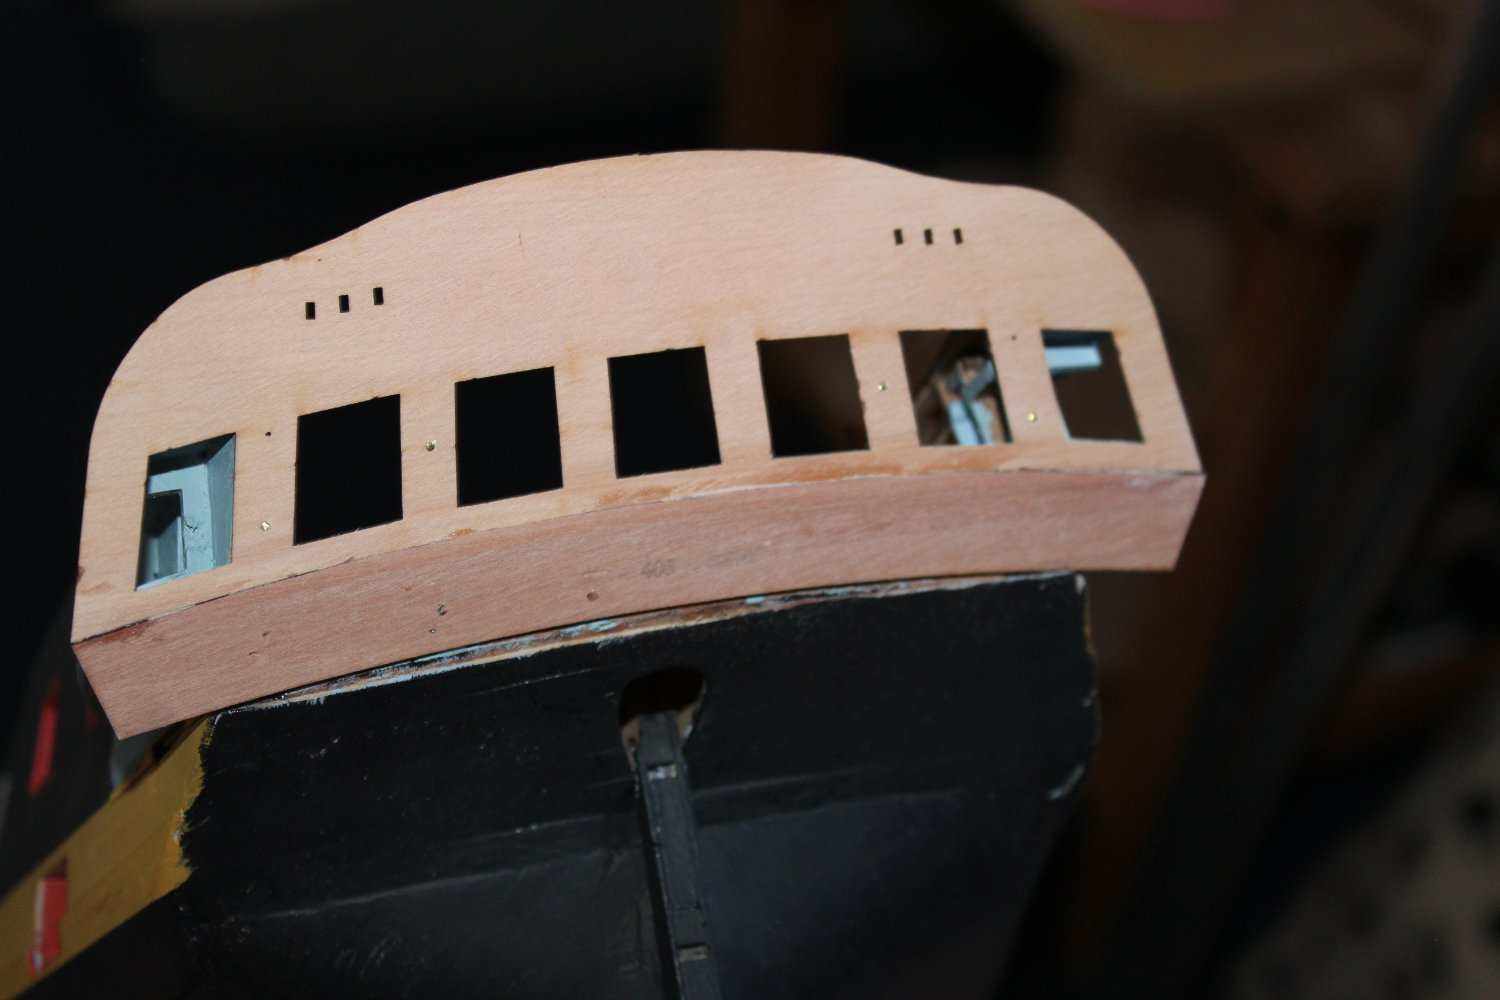
well the after cabin is nearly to be buttoned up, the painting of pellow is pants i know but it helps with the sense of scale, yes he has wellie boots and not shoes but he is looking at the charts for dryer lands to keep his feet dry
-
-
its been lovely to go through your log again, i love this build
- mort stoll, AJohnson, mtaylor and 1 other
-
4
-
-
hello and welcome
- JeffT, mtaylor, JacquesCousteau and 1 other
-
4
-
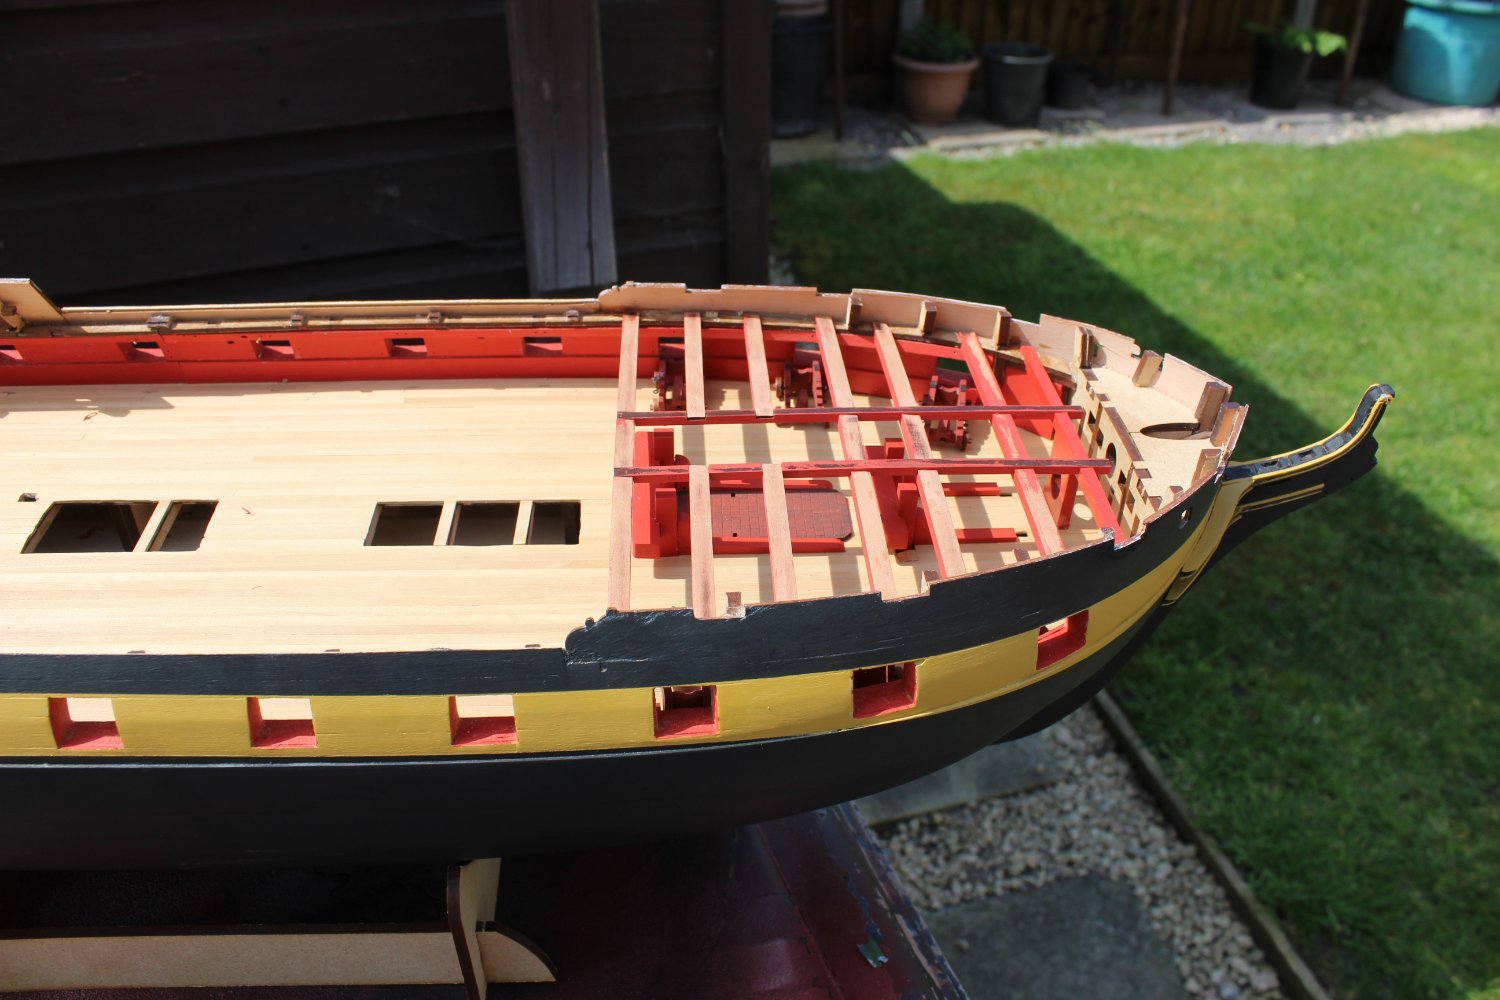
good morning everyone
thank you for comments and likes
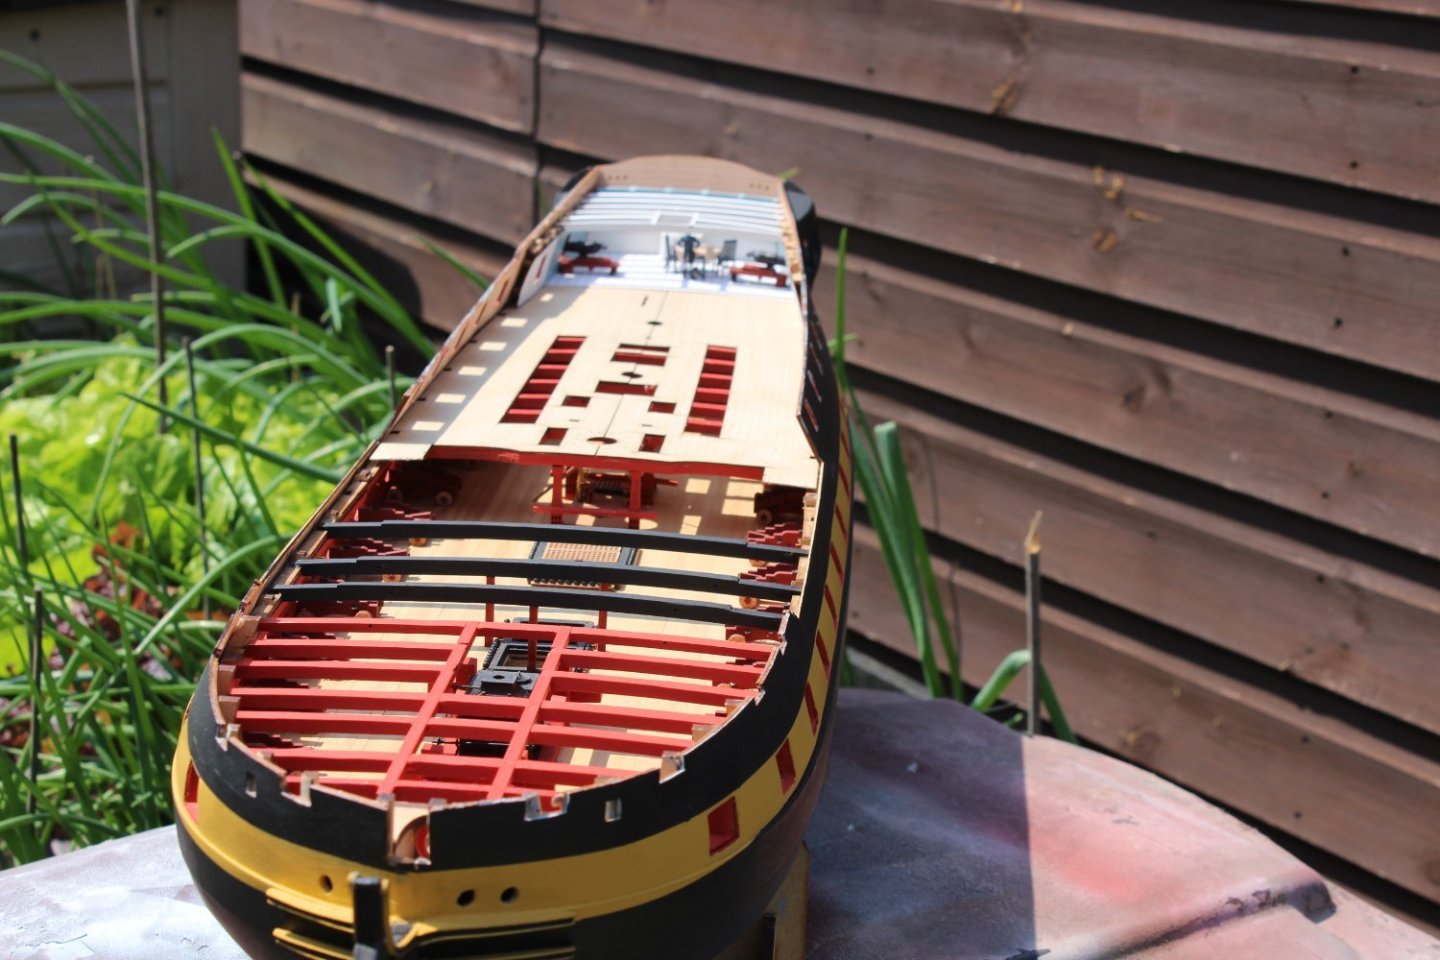
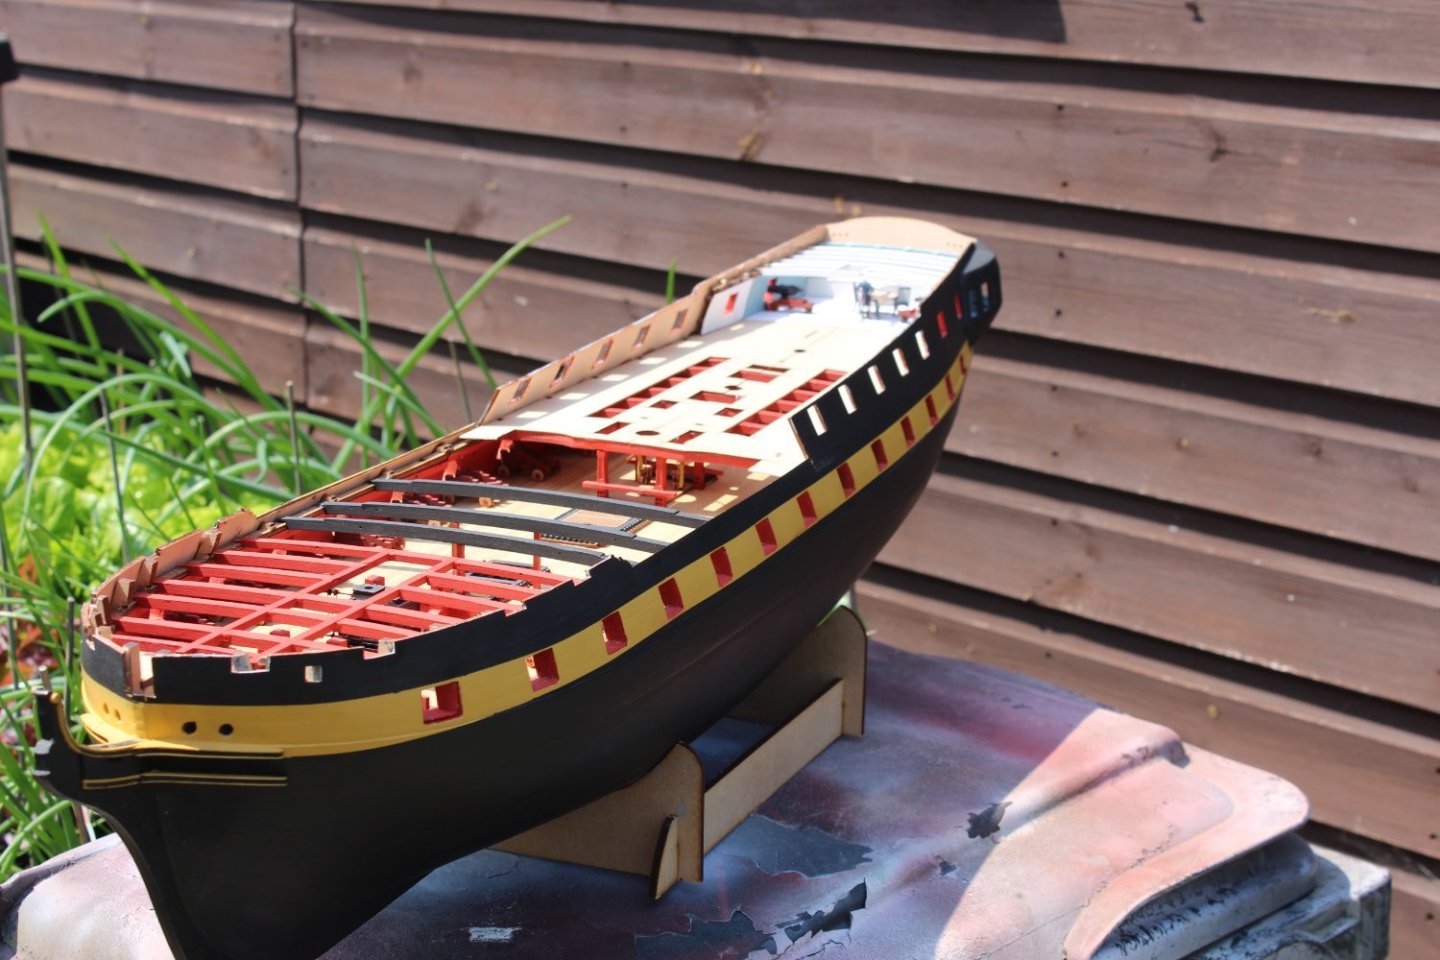
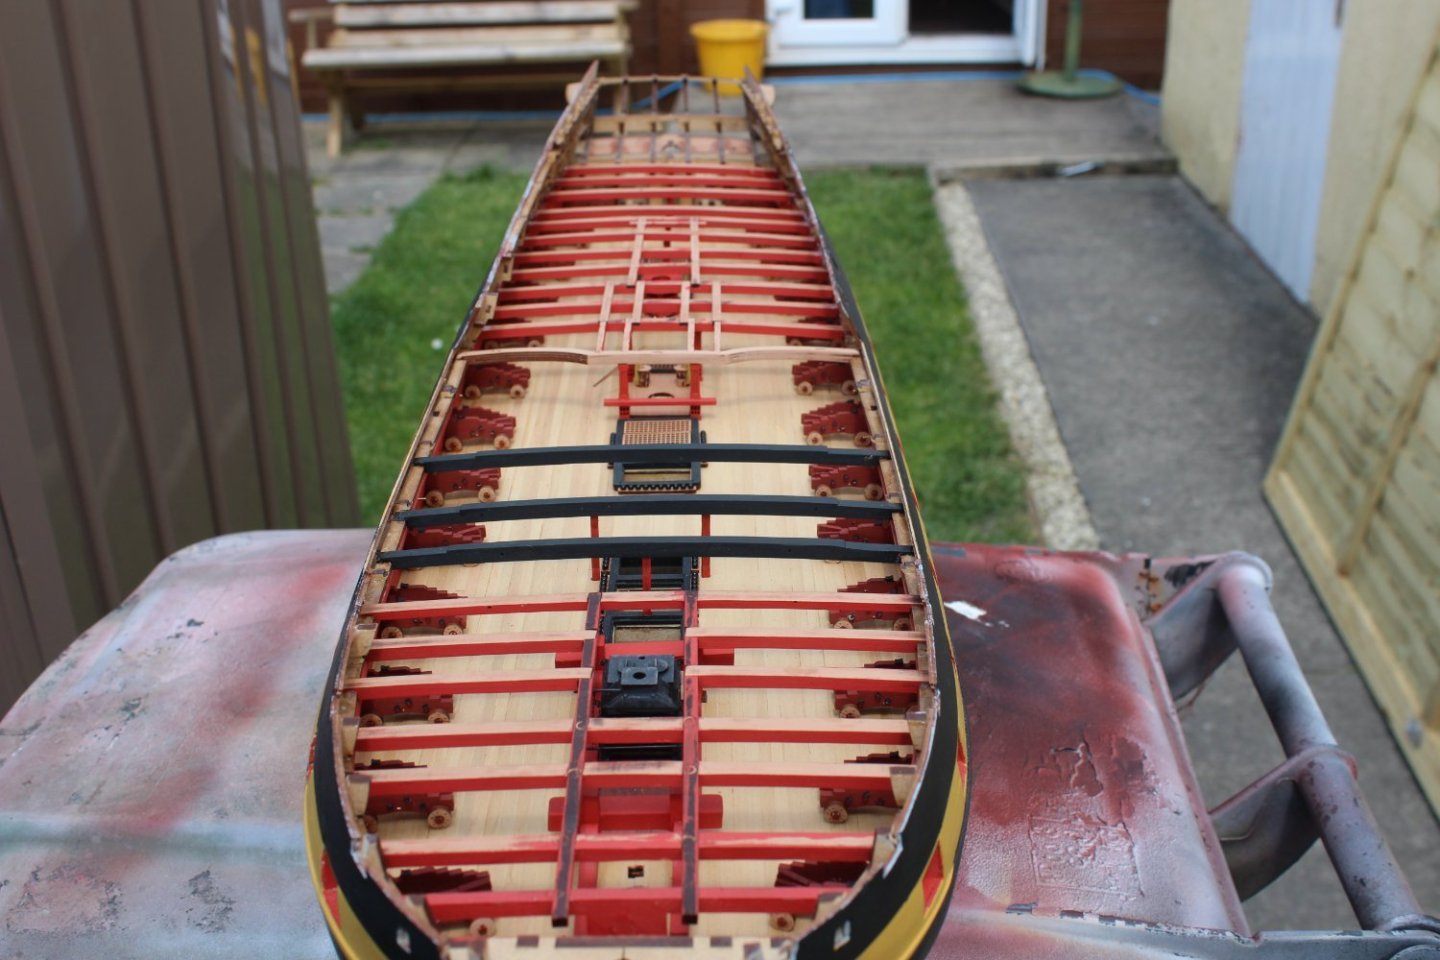
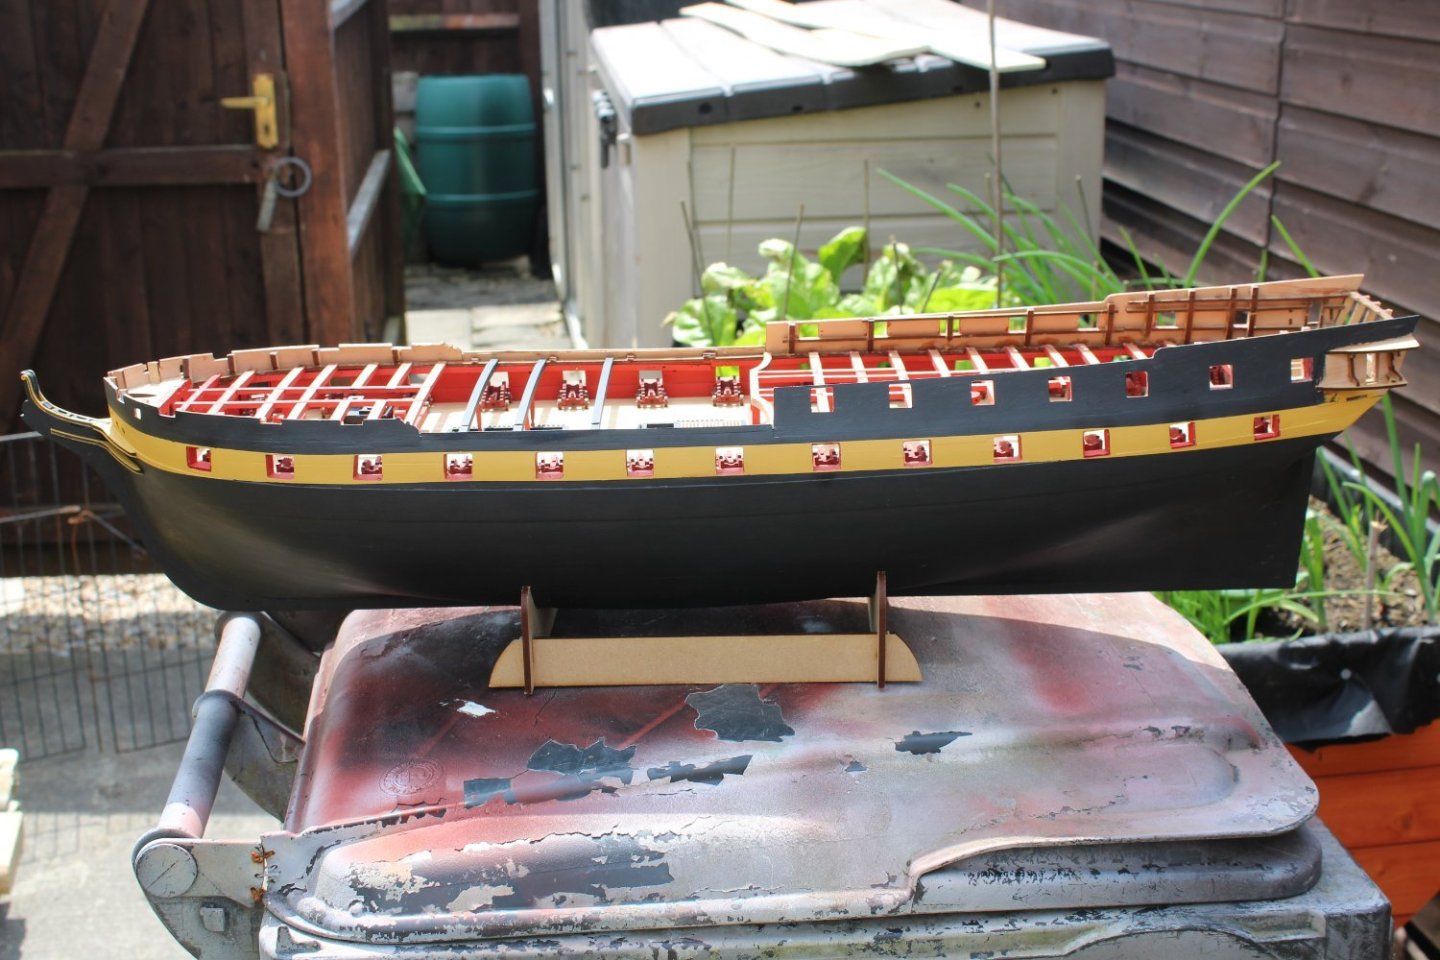
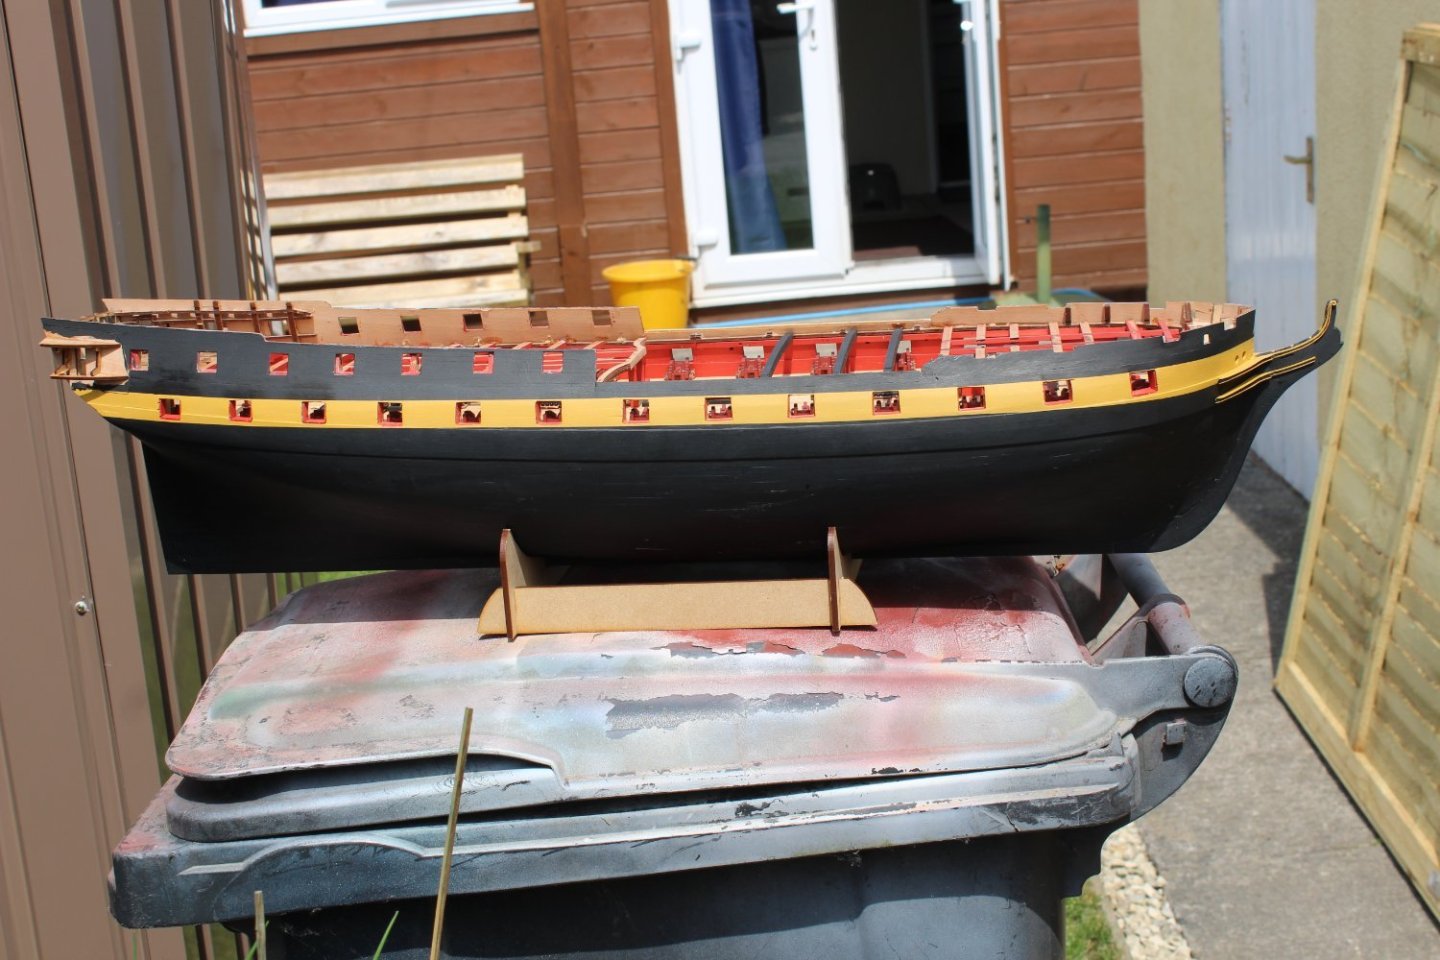
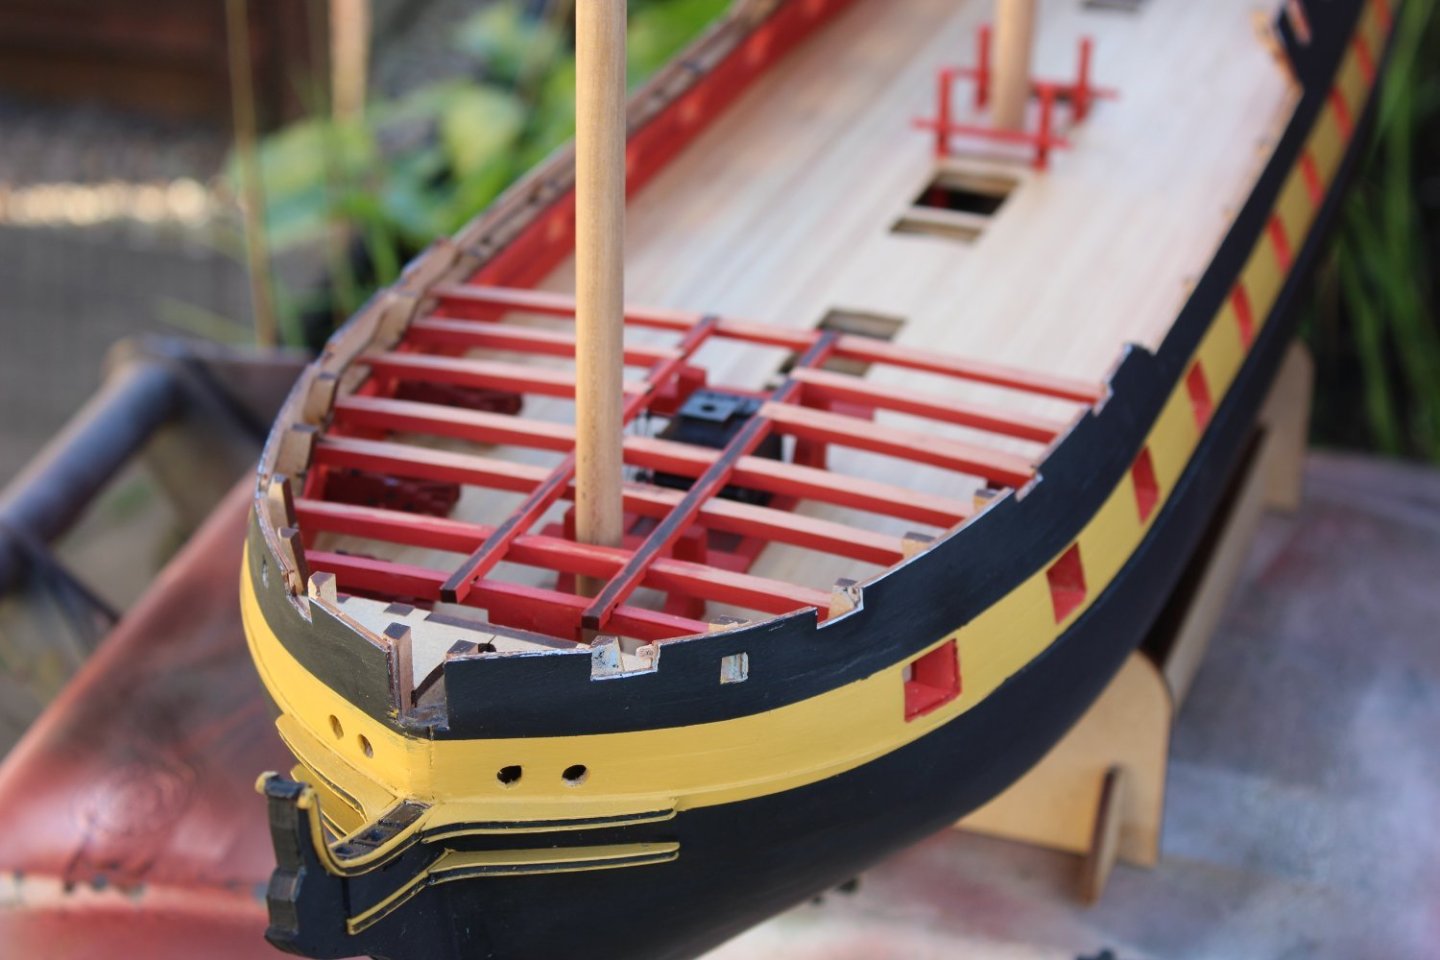
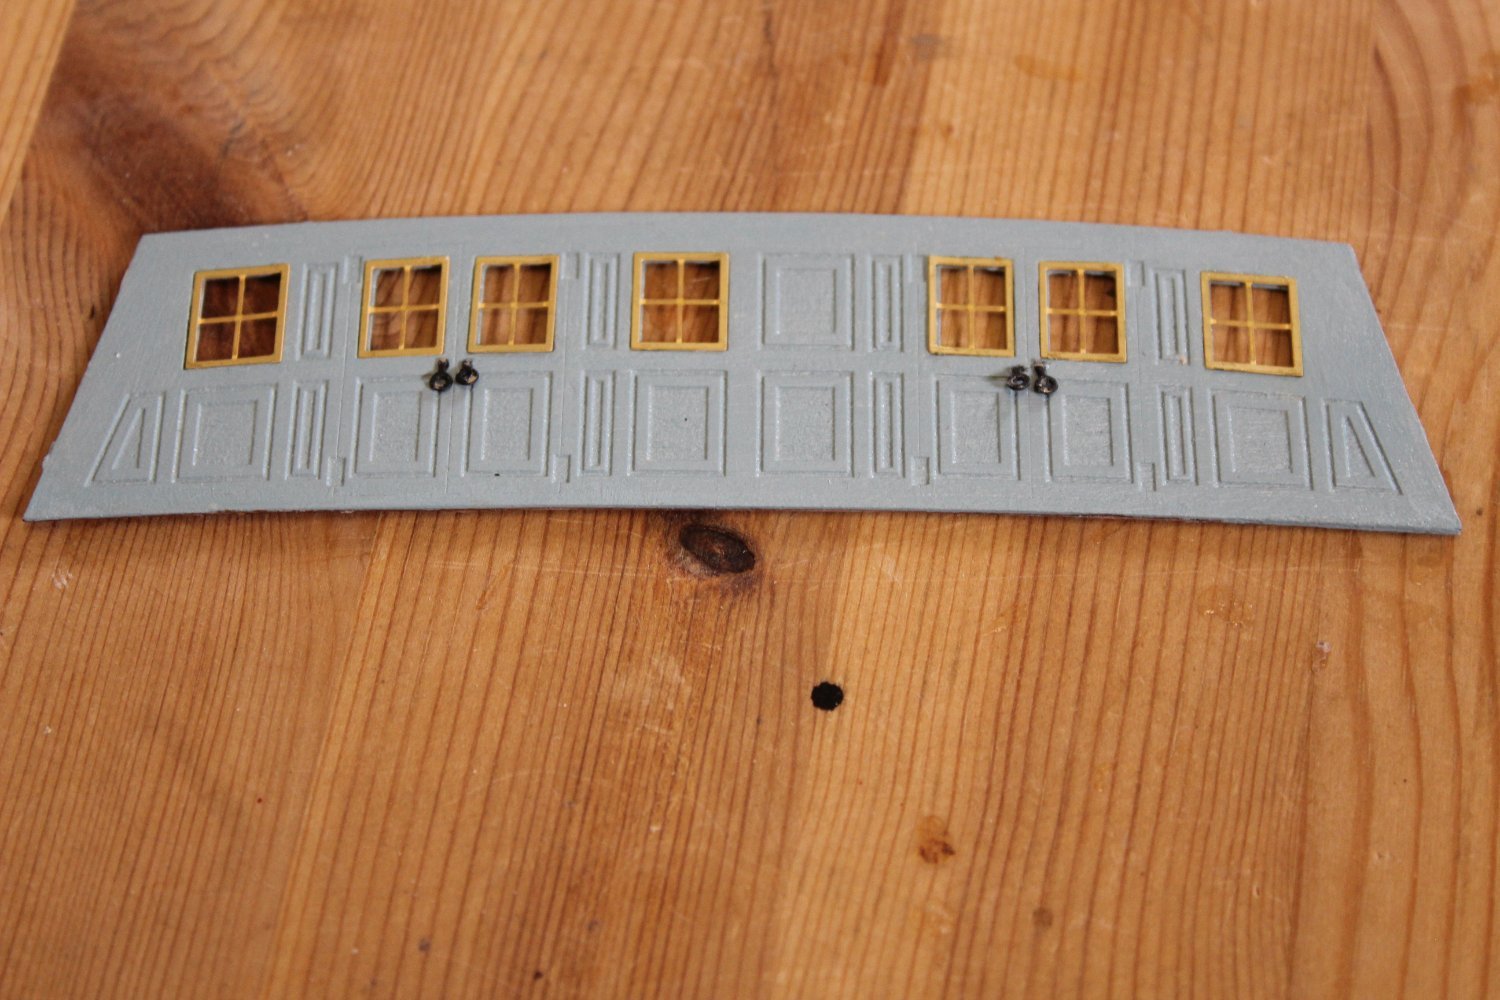
day 95-2 test fitting, cabin and 1/4 galleries
after completing the knees the deck went down without any issues at all, the original bulkhead spacers did their job in ensuring everything stayed in place, i decided to repaint the deck beams in red all over rather than keeping the tops naked

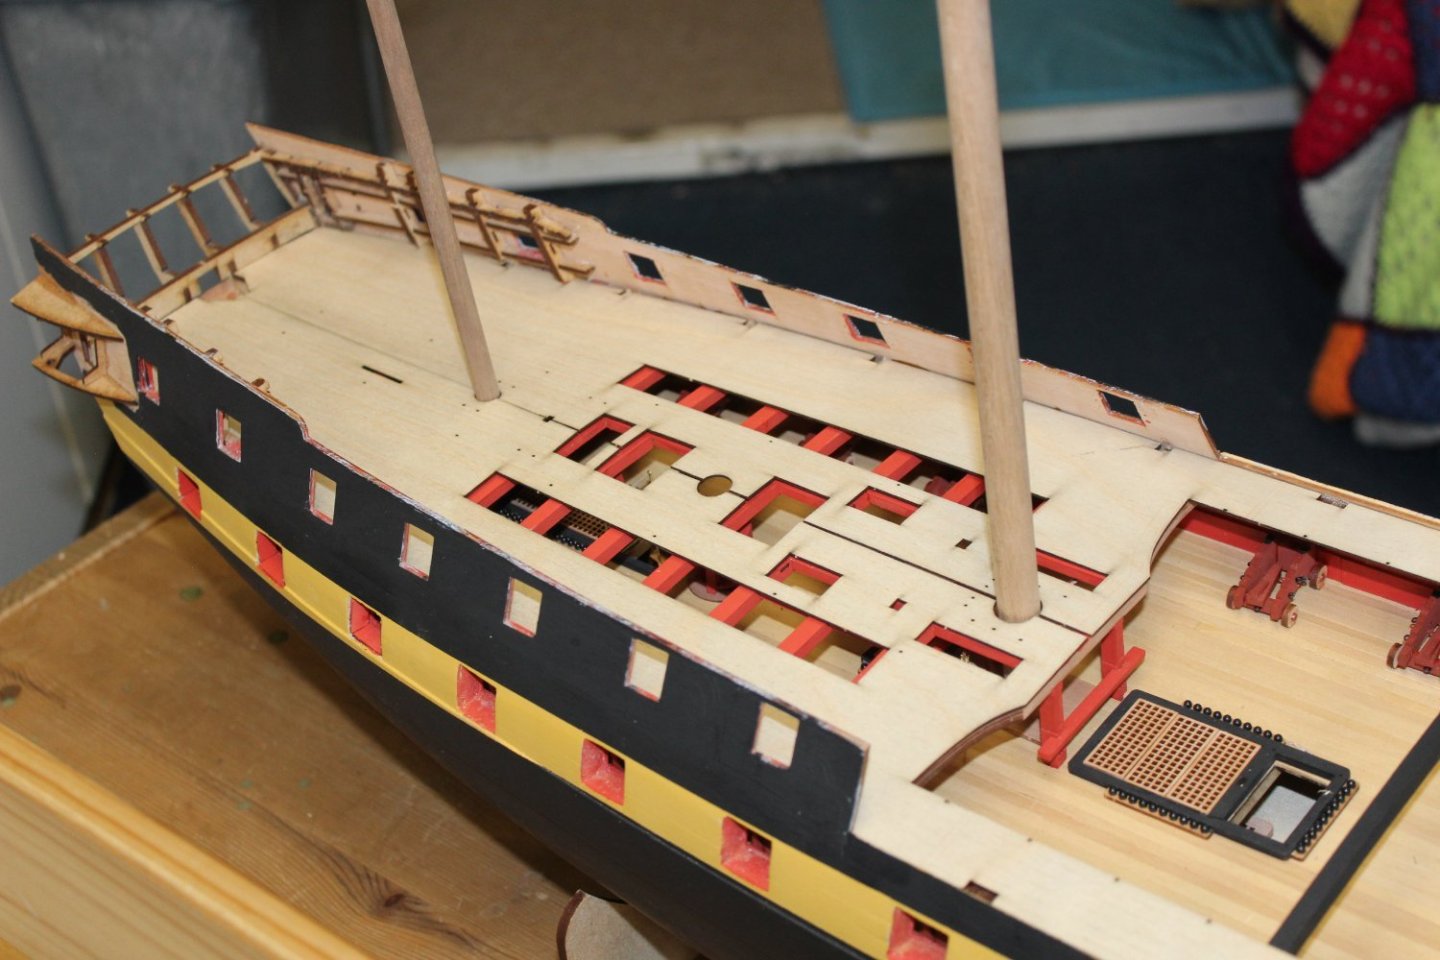
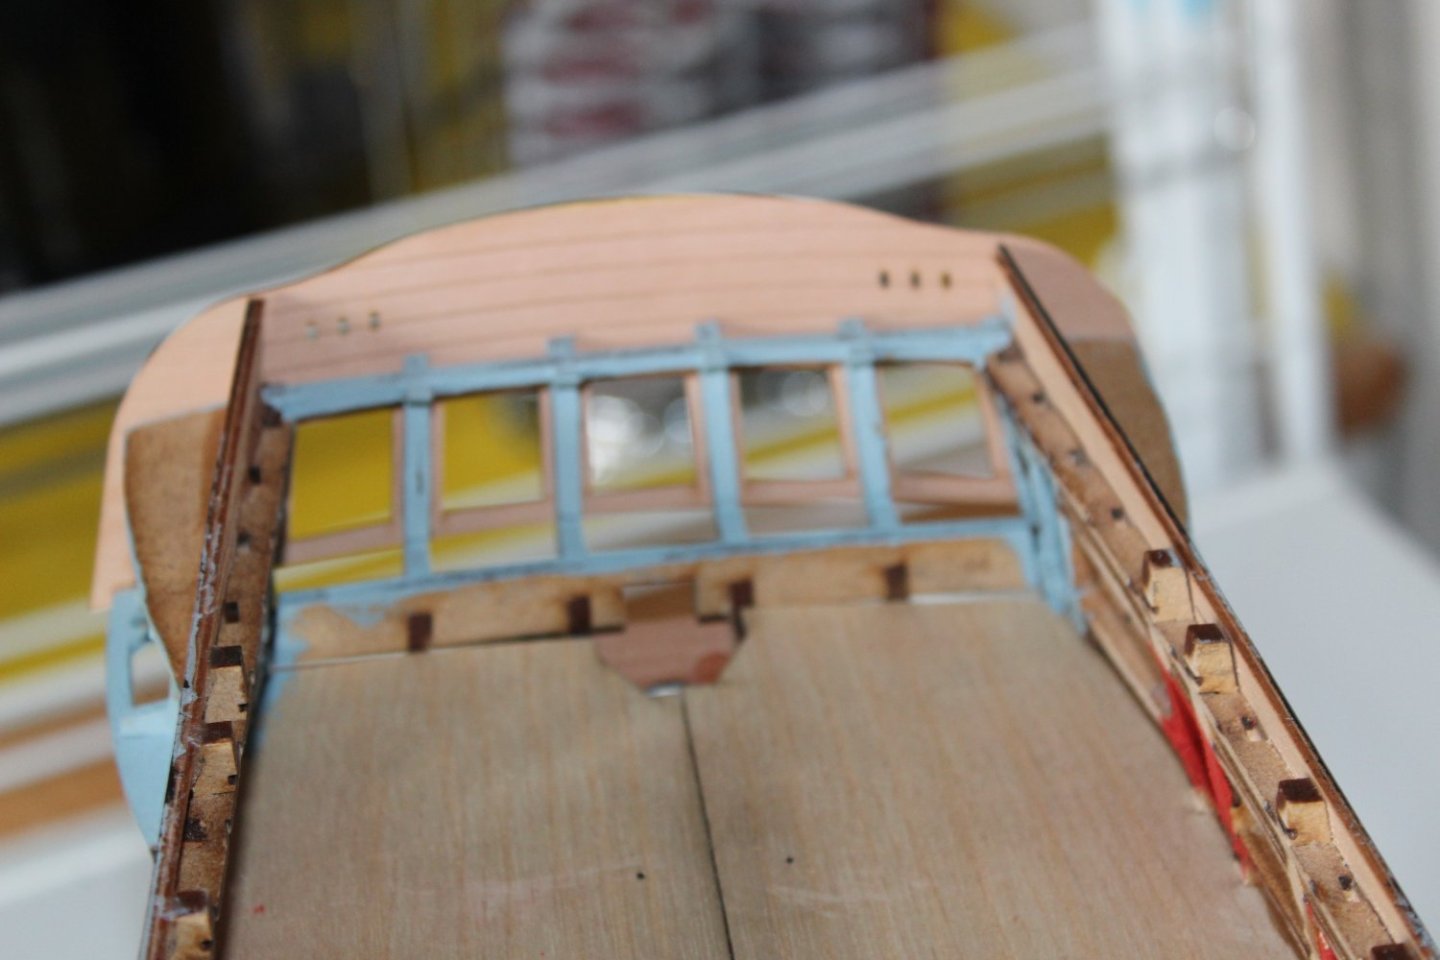
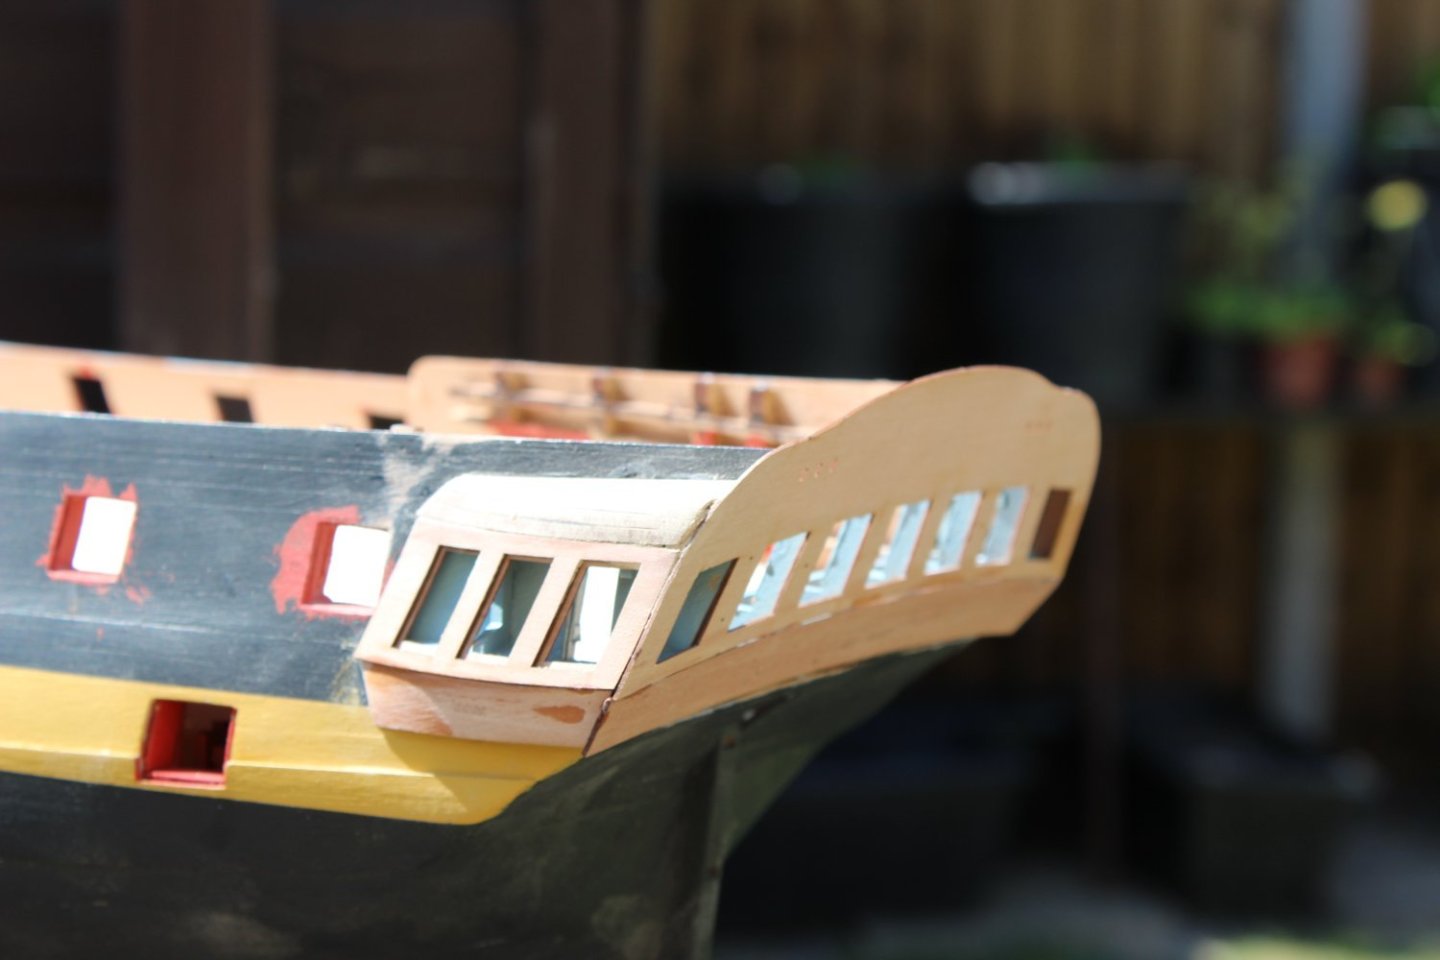
cabin
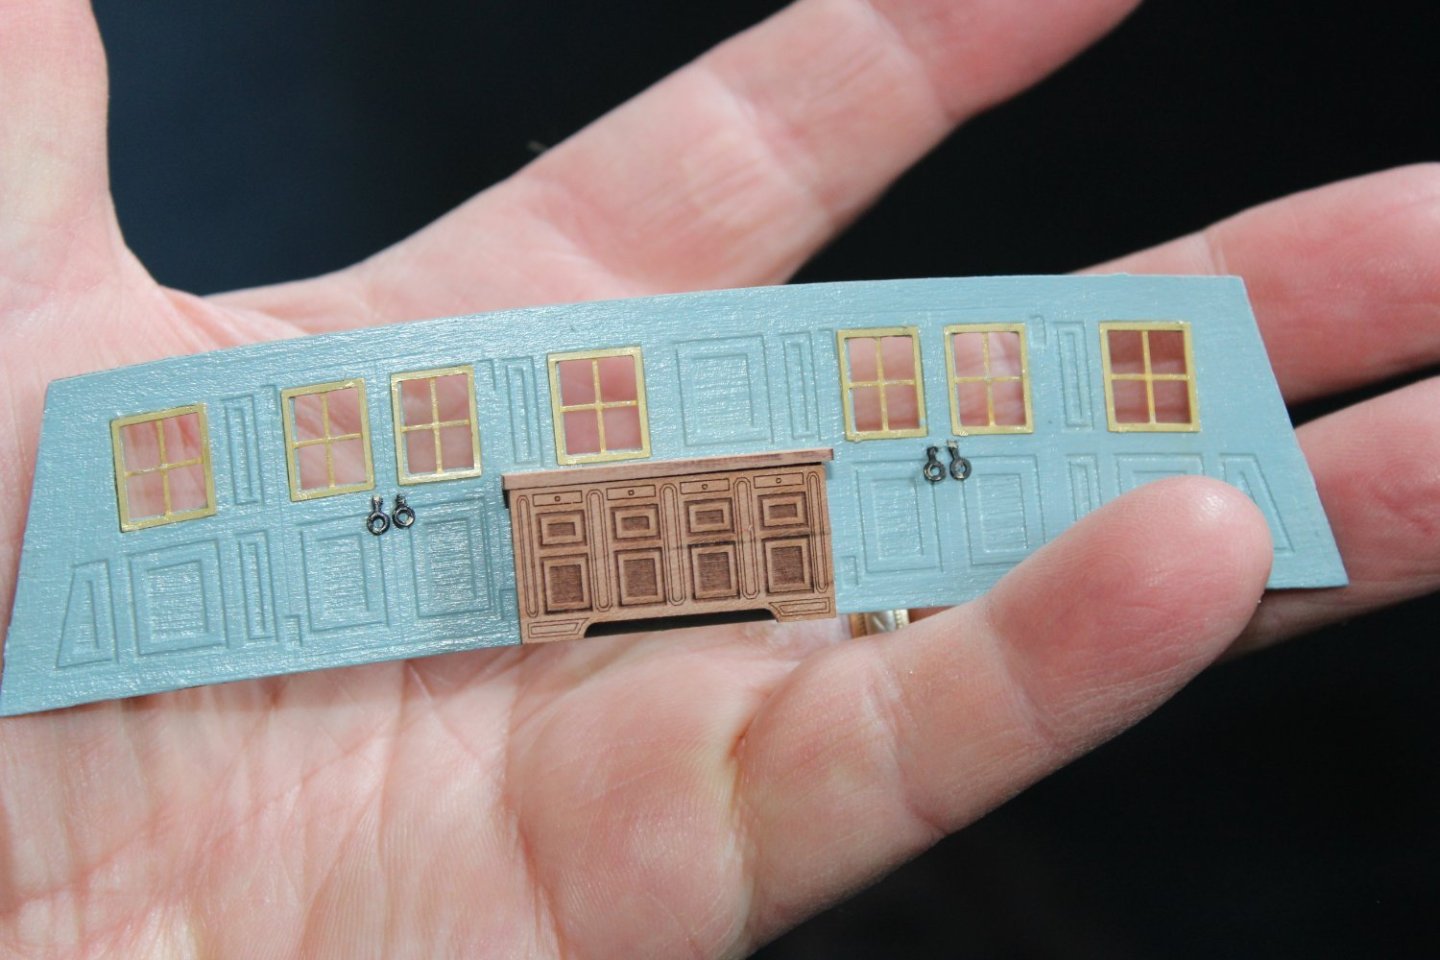
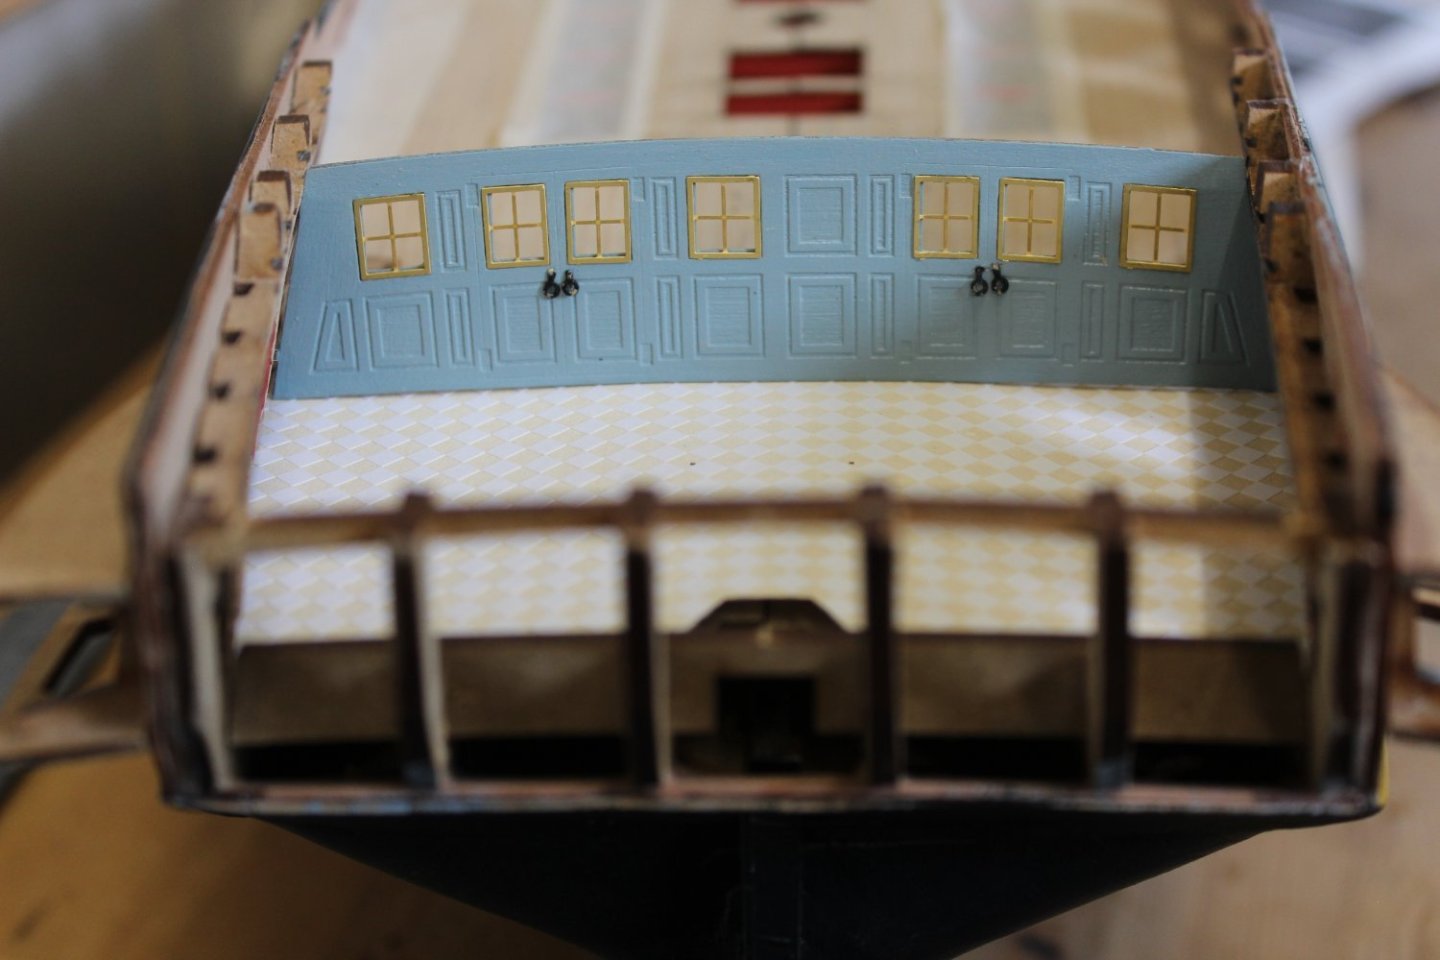
not much to say about this, the test fitting is just a slight trimming the ensure the cabin bulkheads fit, the paint in the cabin is AK Air AK11817 RLM65 (1938) and AK11002 off-white, i have kept the window PE without paint

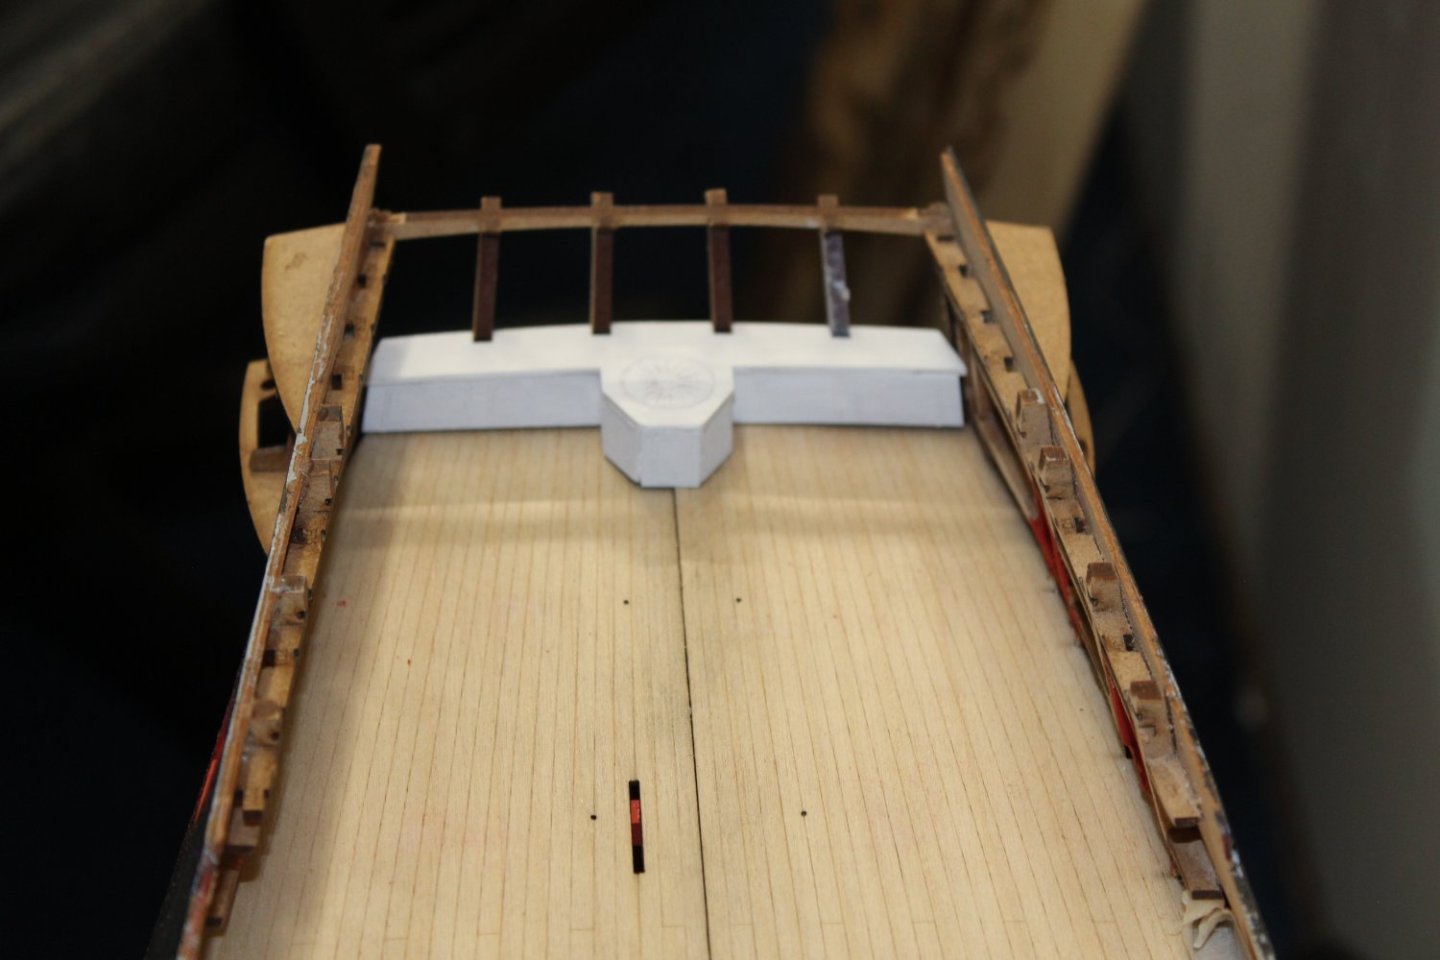
the rudder post box, i decided to do in white, and run a ink pen around the compass markings
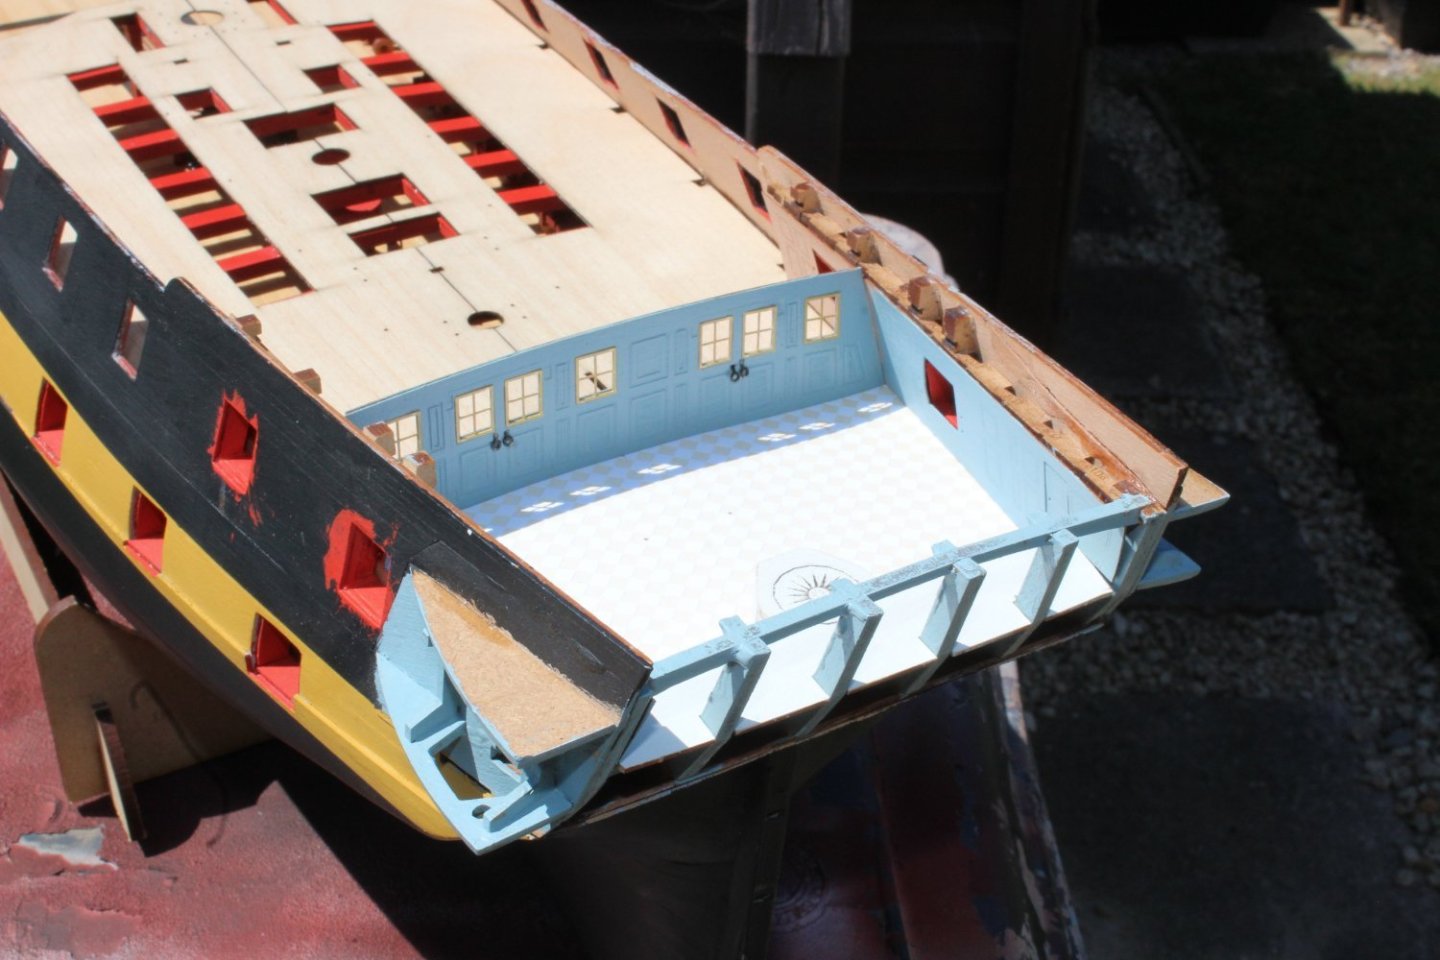
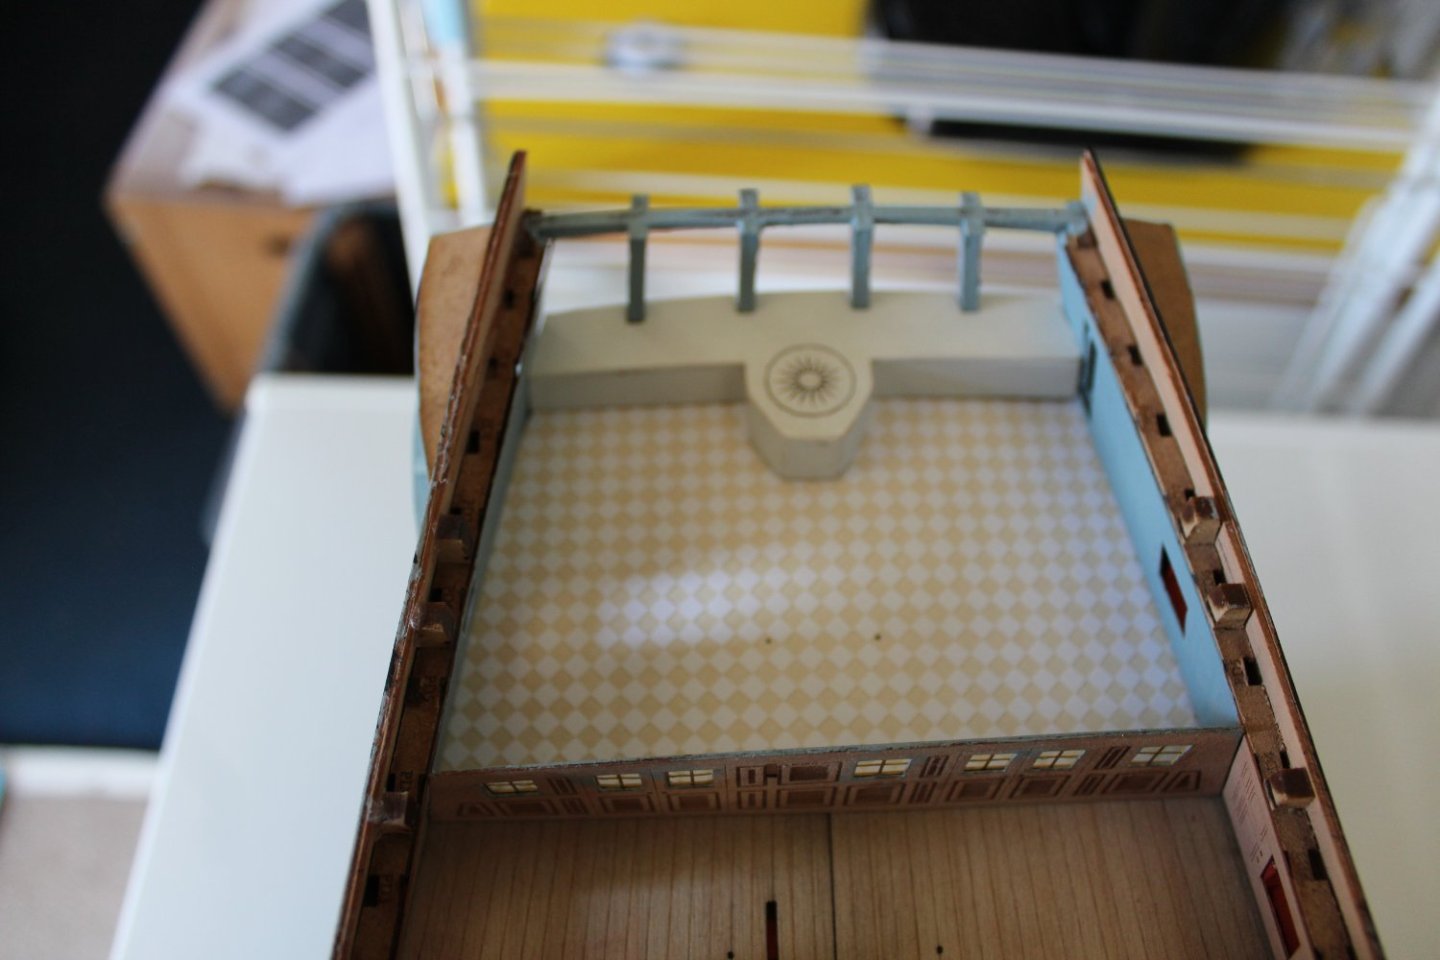
1/4 galleries,
i thought this would cause me some agro, but so far without any issues, hopefully thsi will all come together over this weekend


-
-
-
32 minutes ago, Blue Ensign said:
Looking very smart Kevin,👍
B.E.
ty, i am following how you plan yr 2nd planking
17 minutes ago, Glenn-UK said:Your Indy is really looking nice. I'm currently taking an enforced break from my Indy due to a reoccurance of a prolapse in my lower back (a slipped disc). I liked your boxwood planked gundeck so I am pondering weather to follow suit or to fit the laser etched part.
which ever you choose, it will turn out very nice, hope you are not in to much pain
-
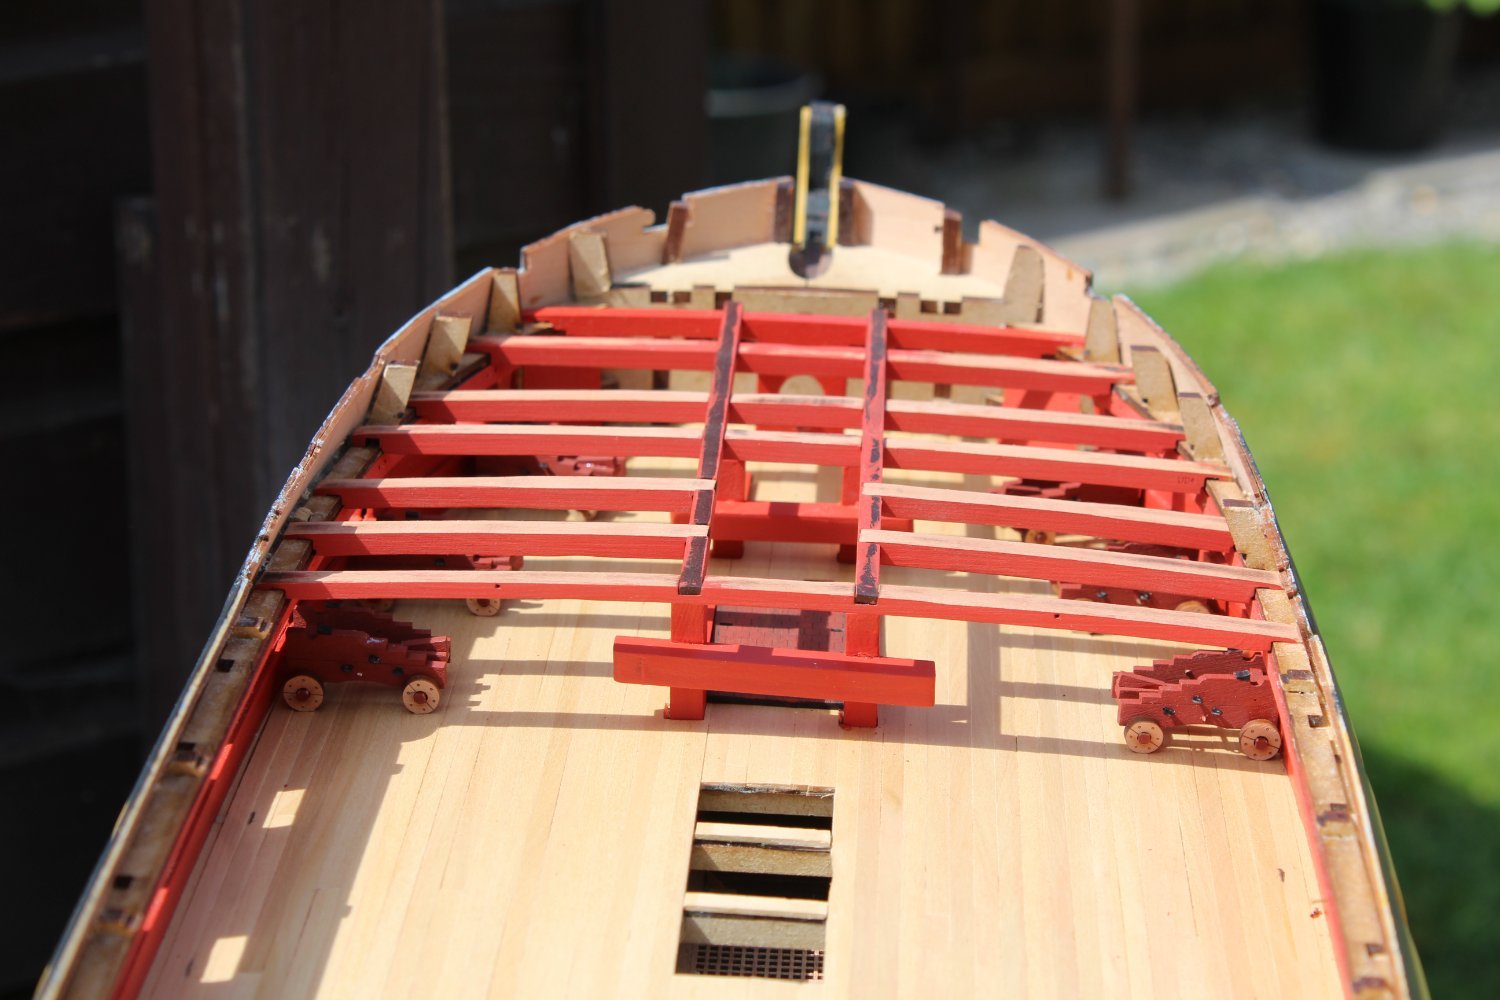
good evening everyone
thank you for comments and likes
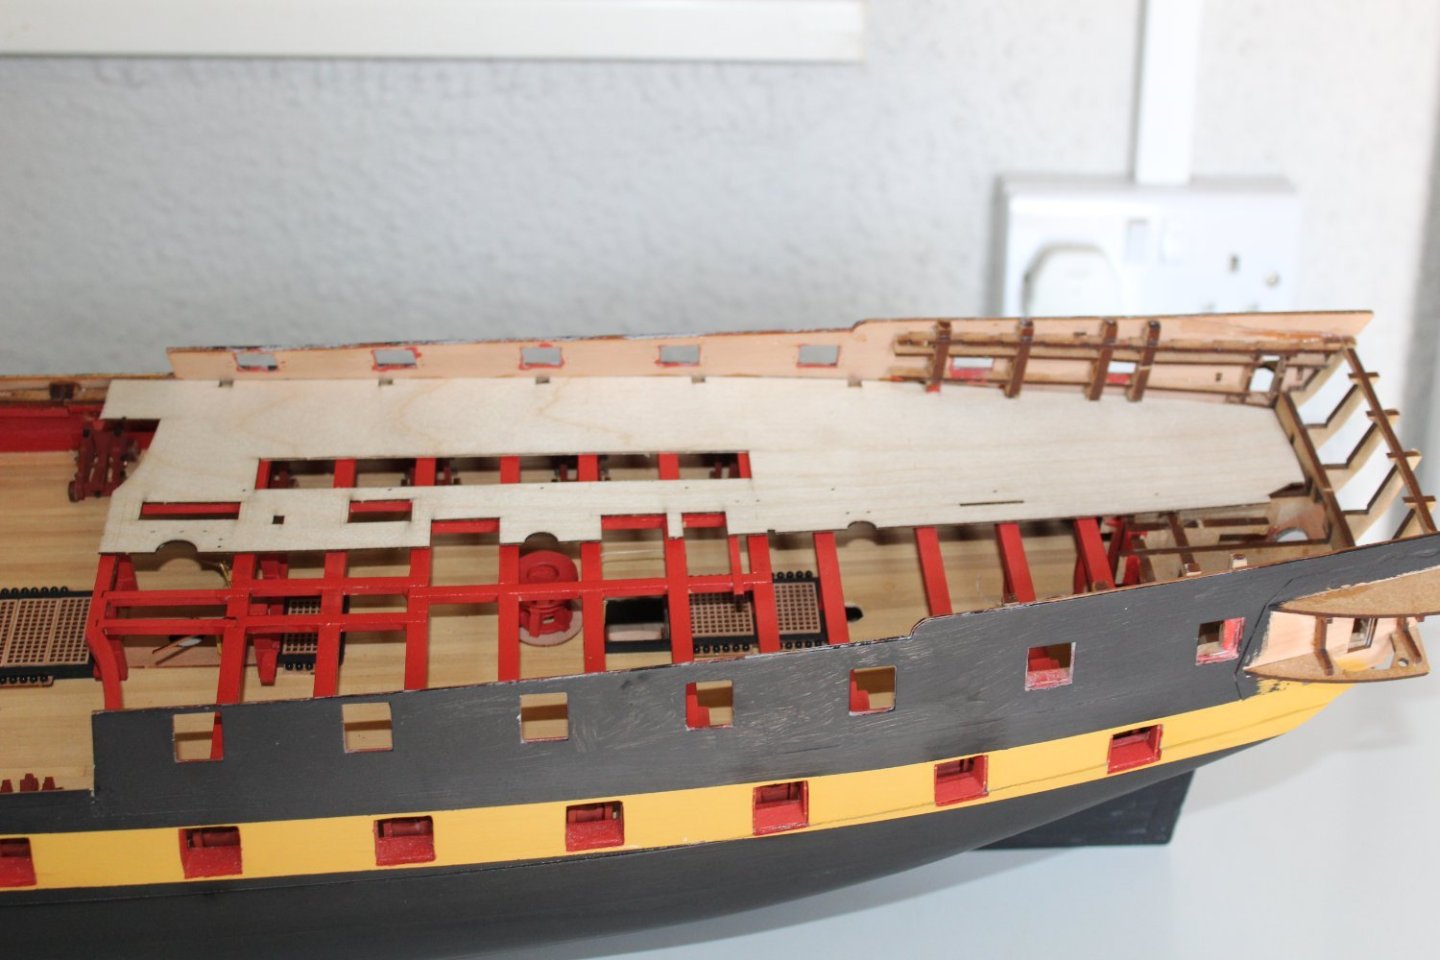
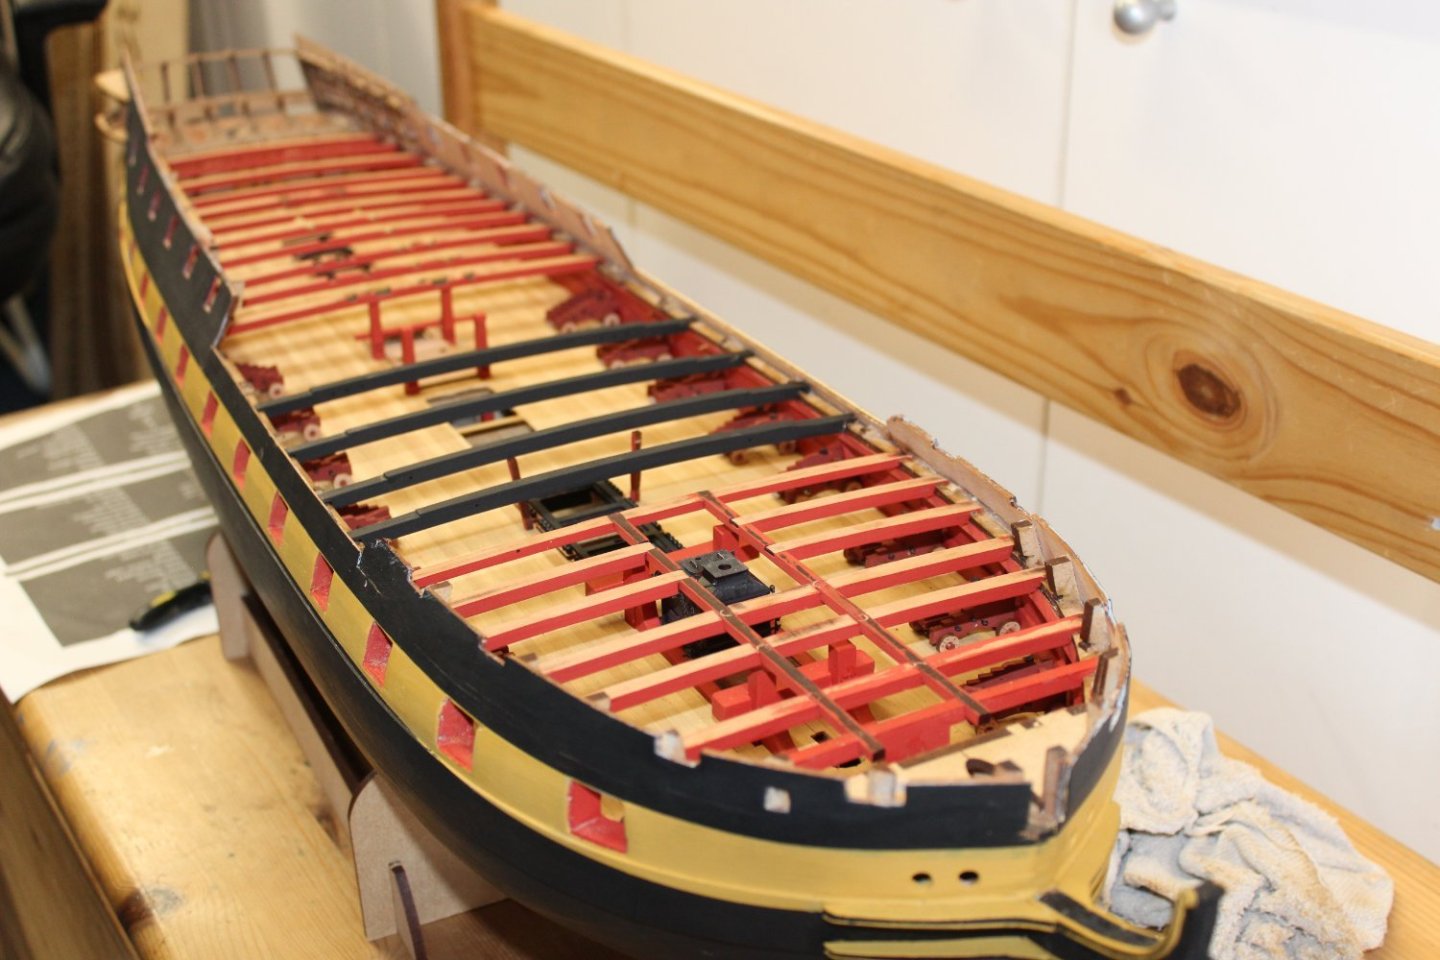
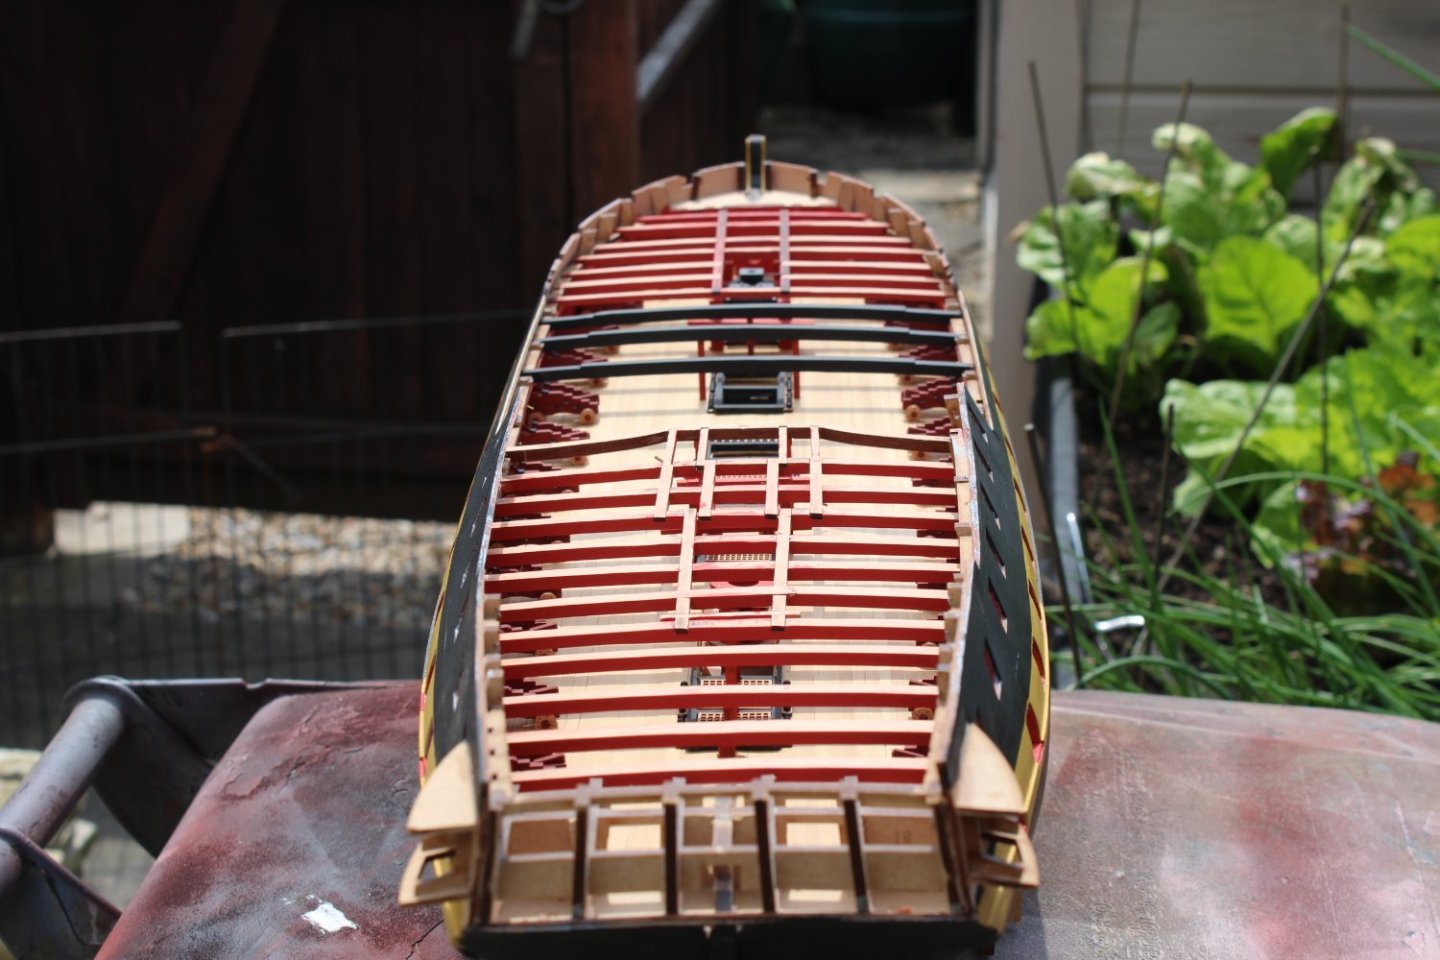
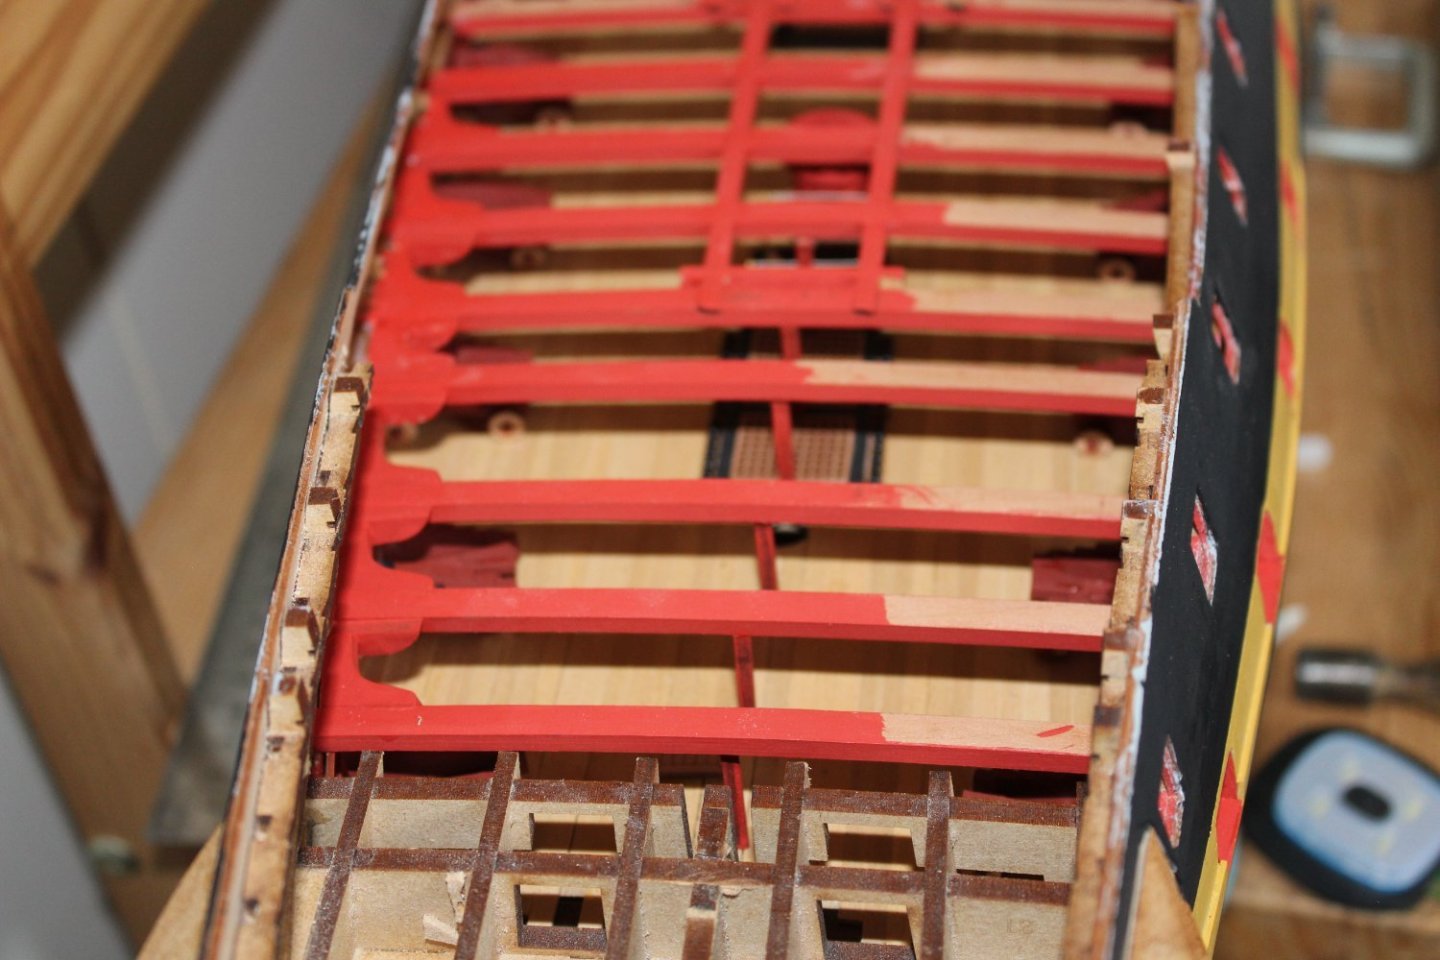
day 90-2
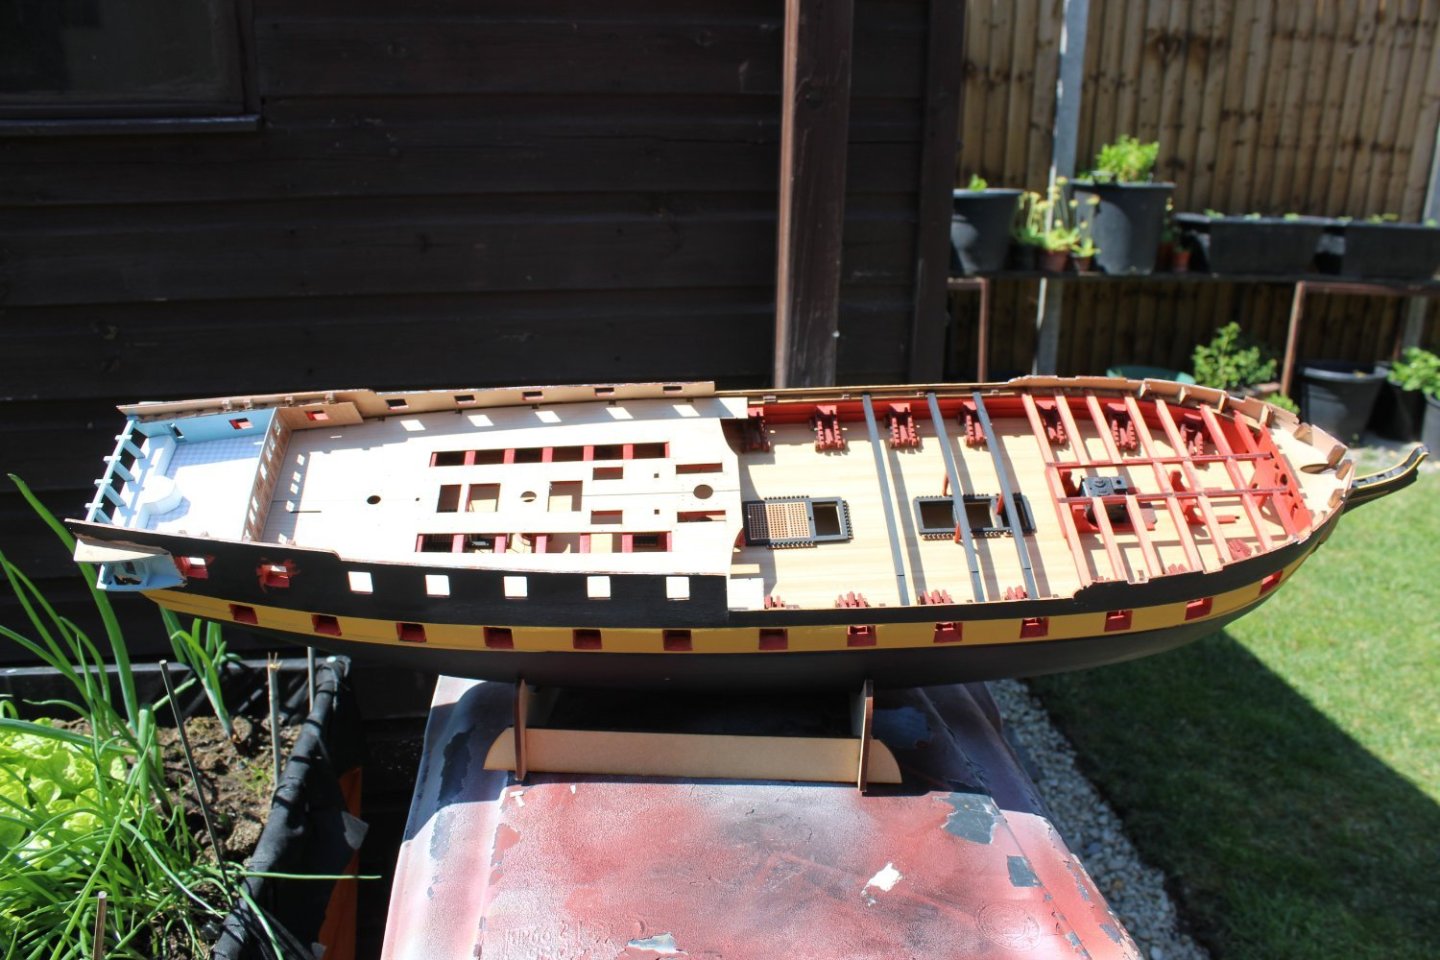
a bit of progress since my last update
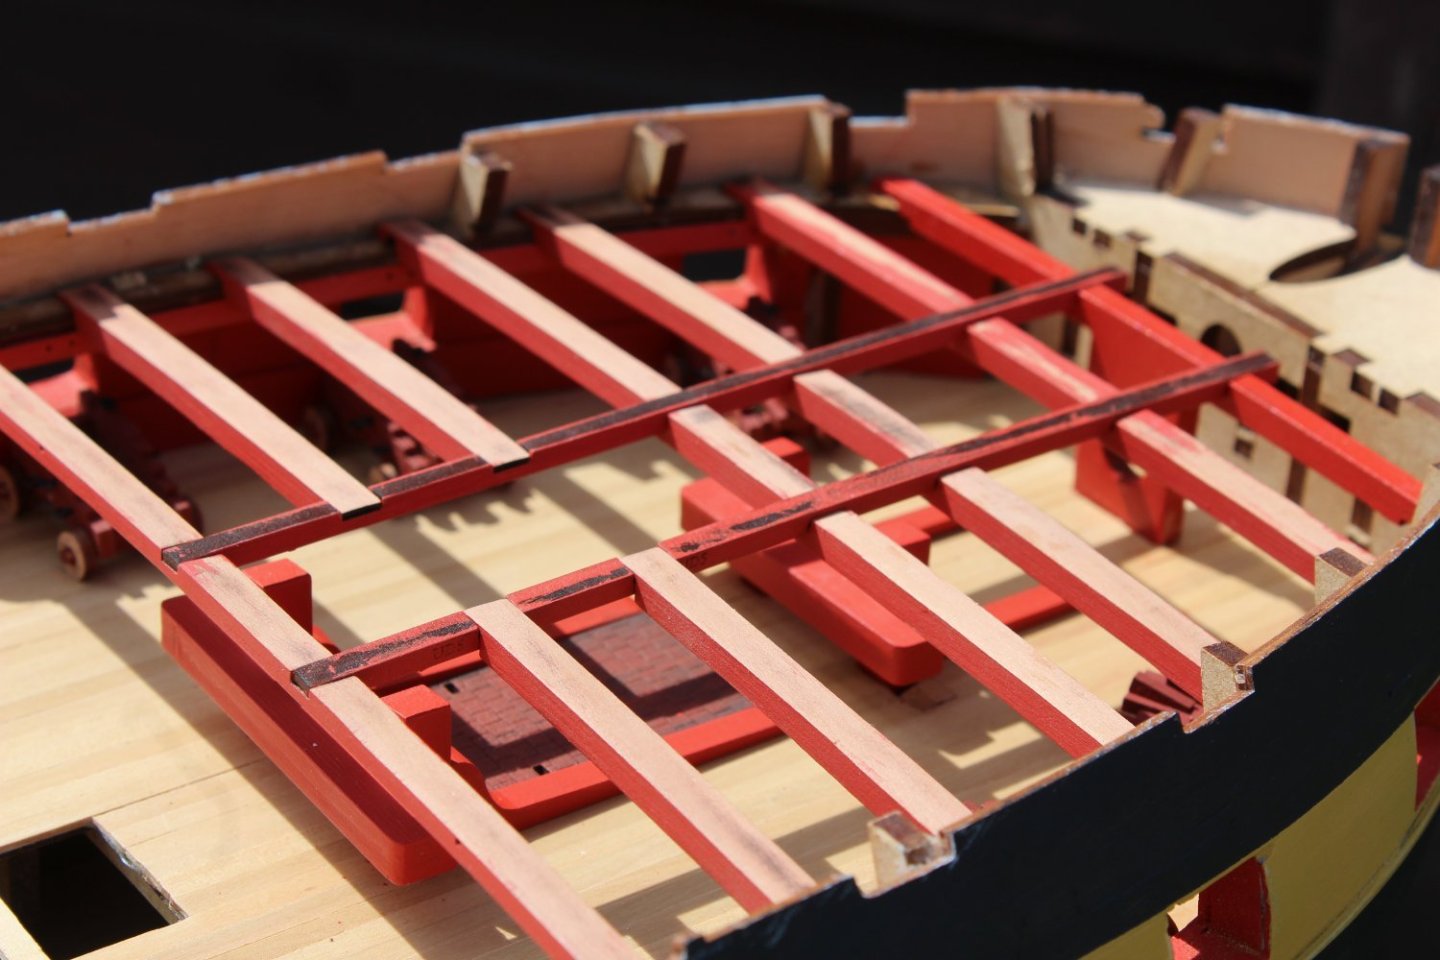
we now have a full gundeck, cannon allowance
hatches, with cannon balls are made up and fitted
all the deck beams are in
i may have a couple of beam supports to place into position
although these will never be seen, i am at present putting in hanging and lodging knees,


-
-
-
Sorry i have only just found your log, great start
- mtaylor, Knocklouder and Mr Whippy
-
3
-
-
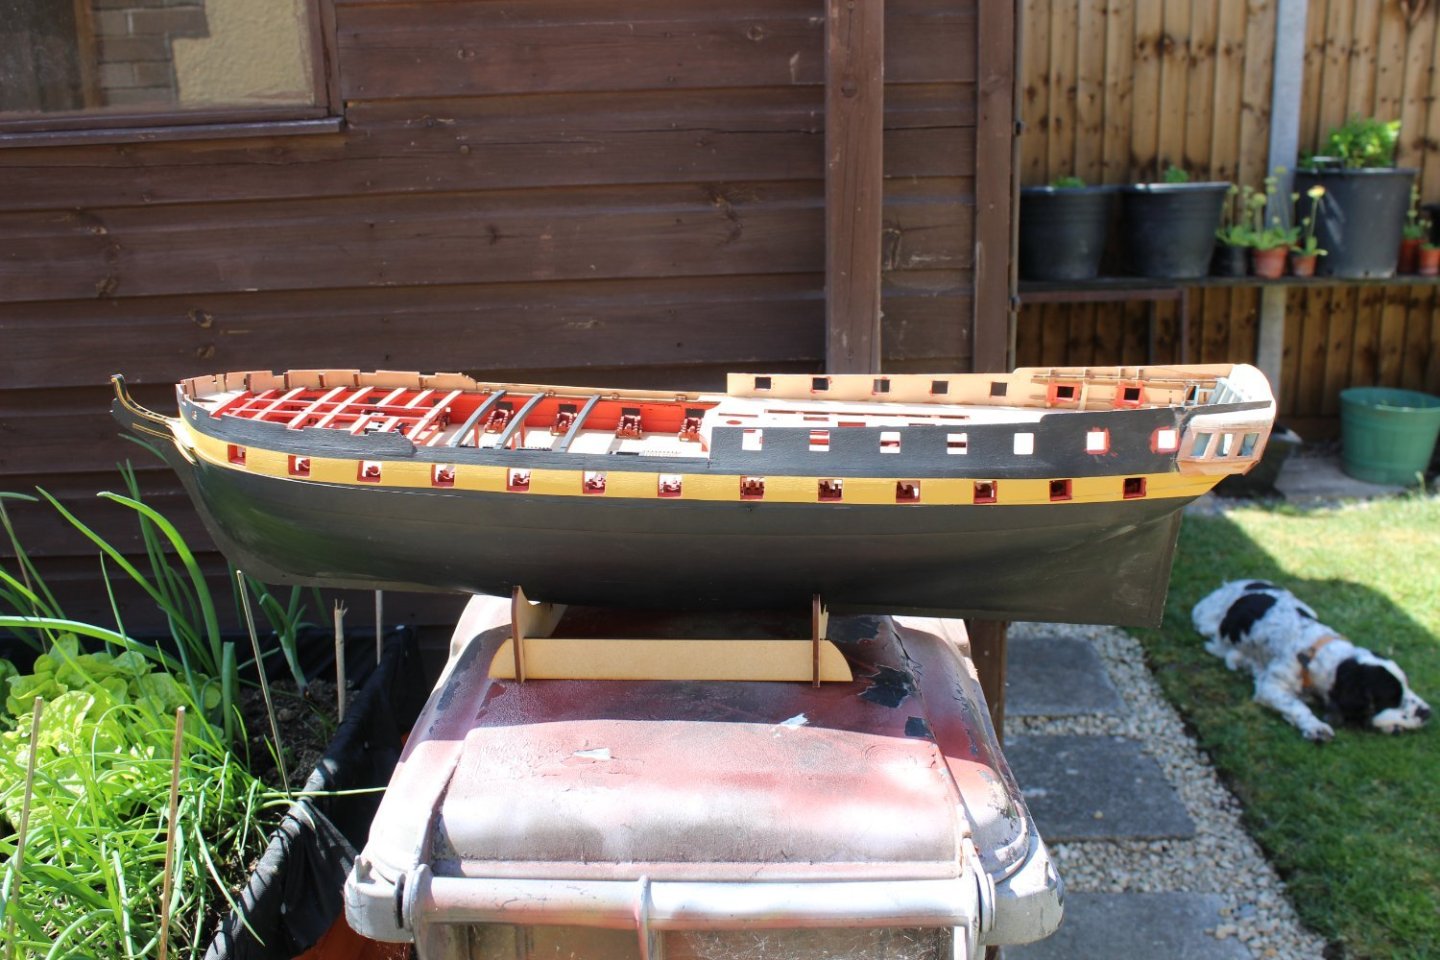
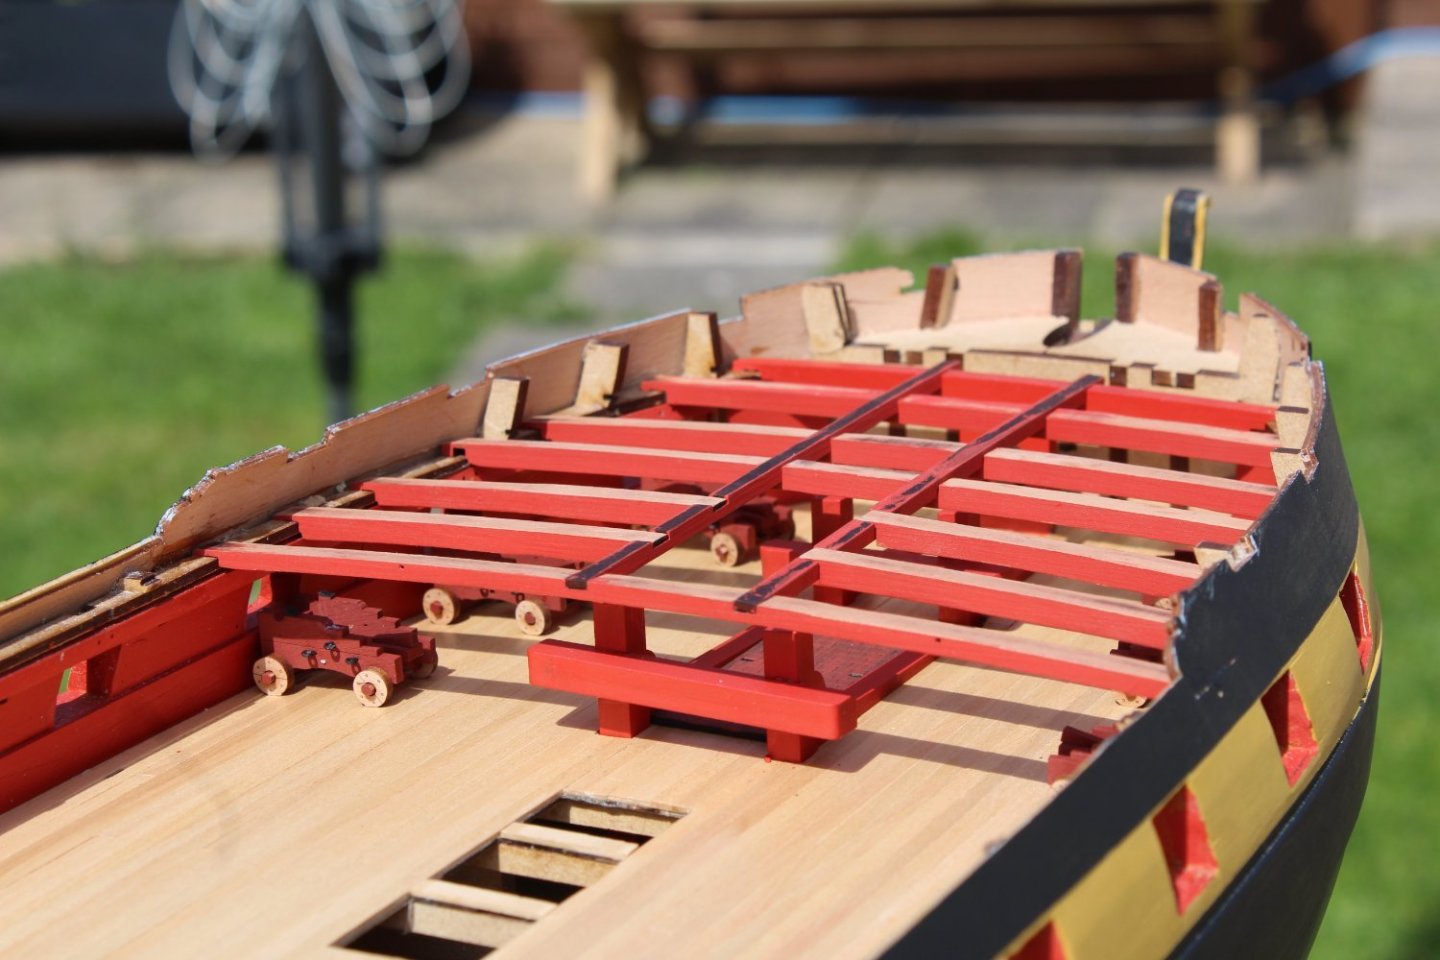
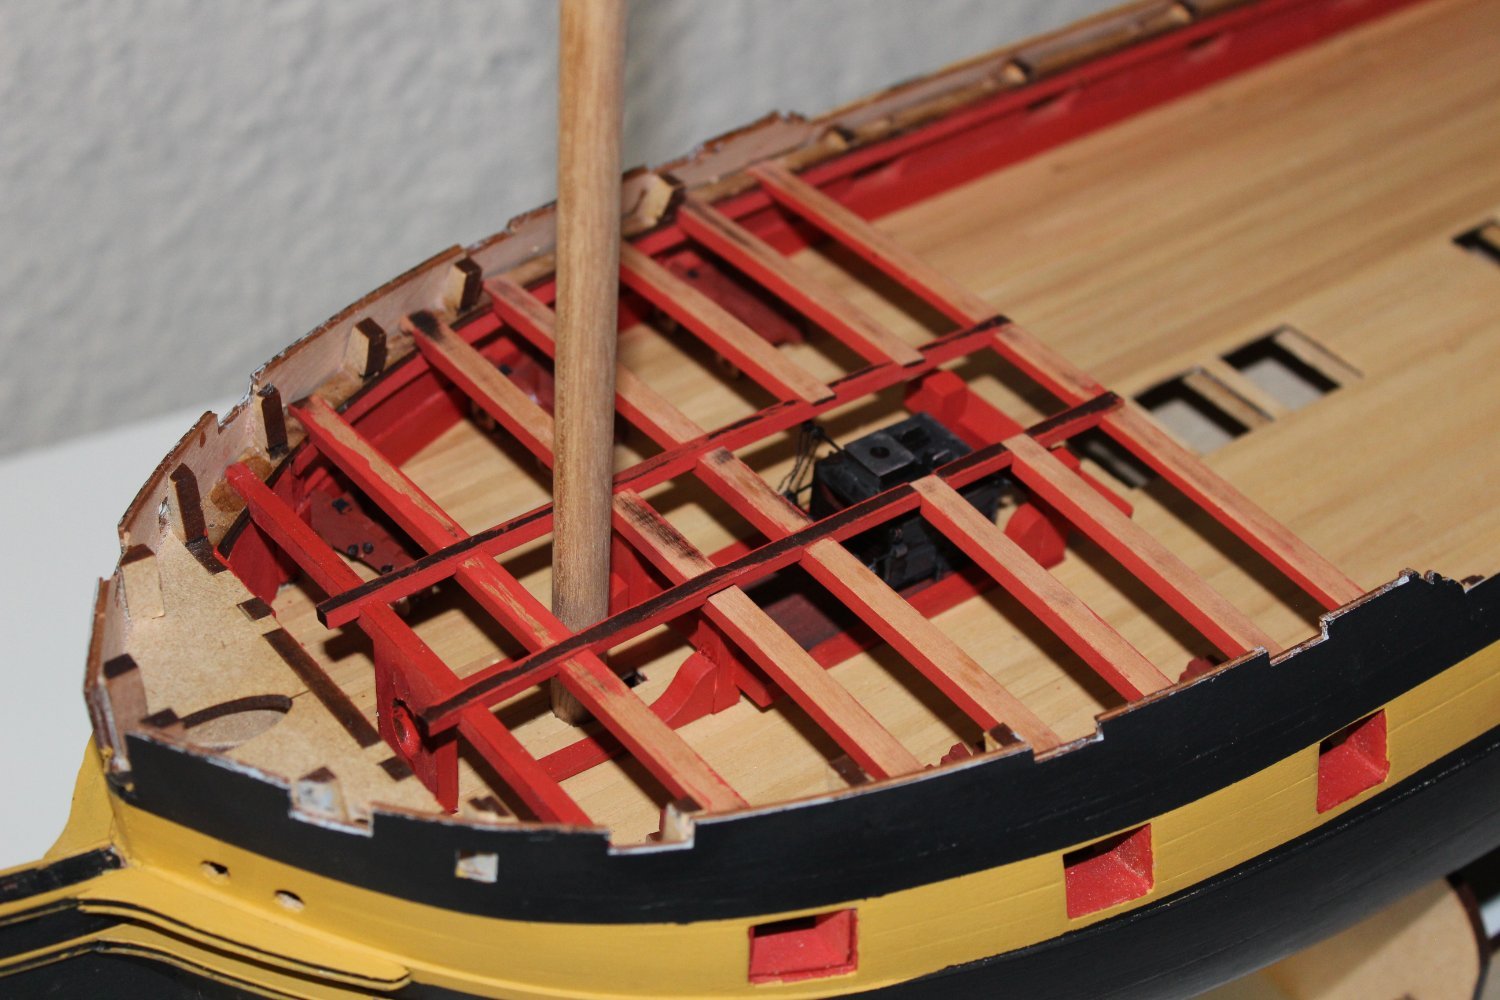
good evening everyone
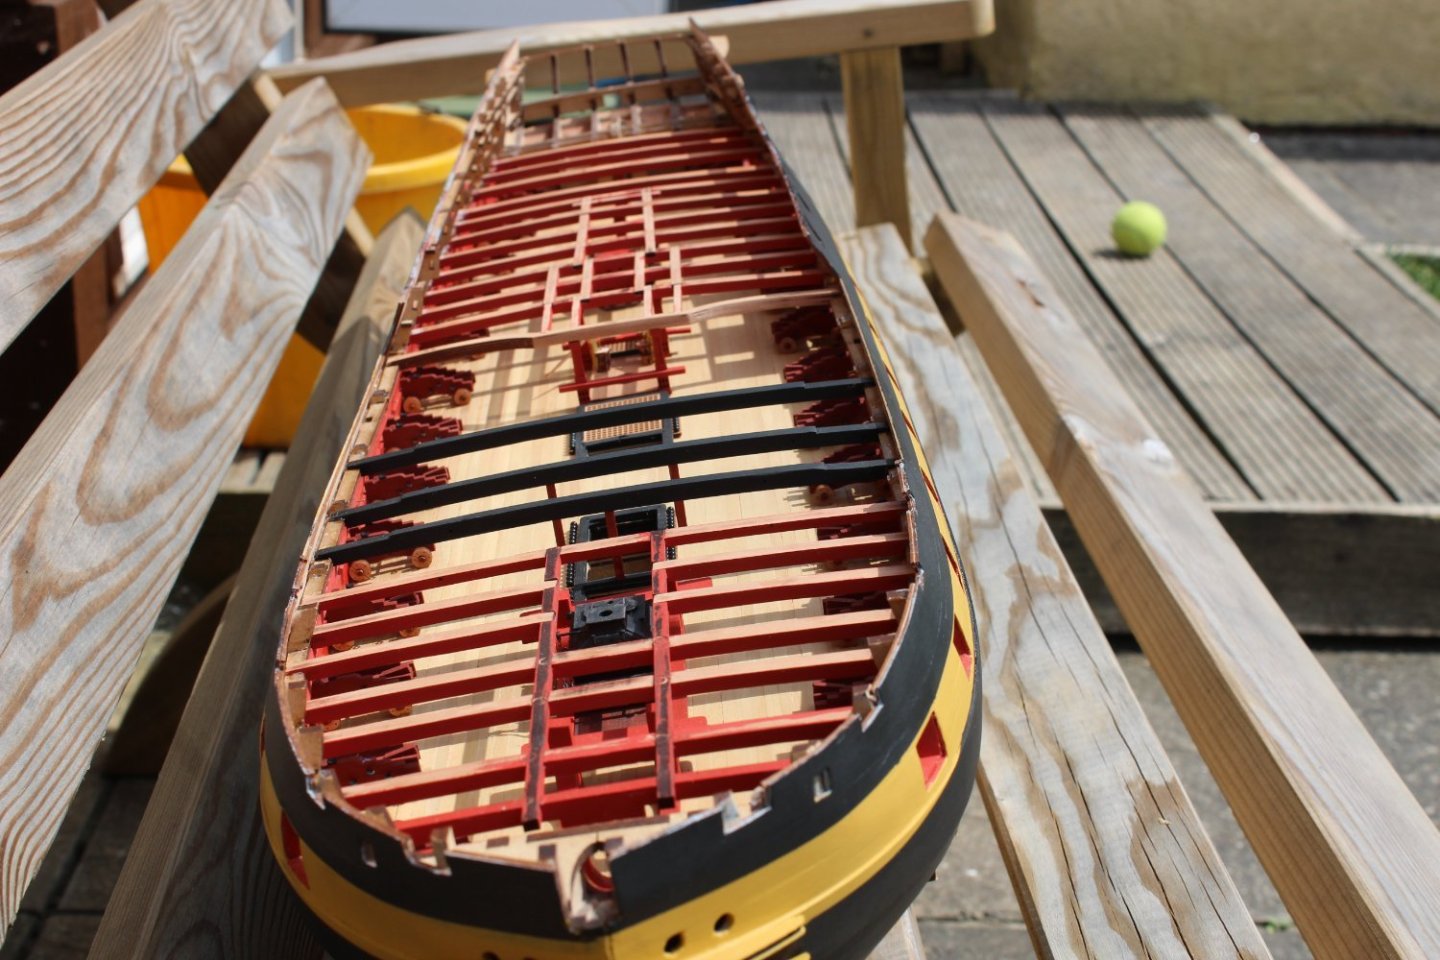
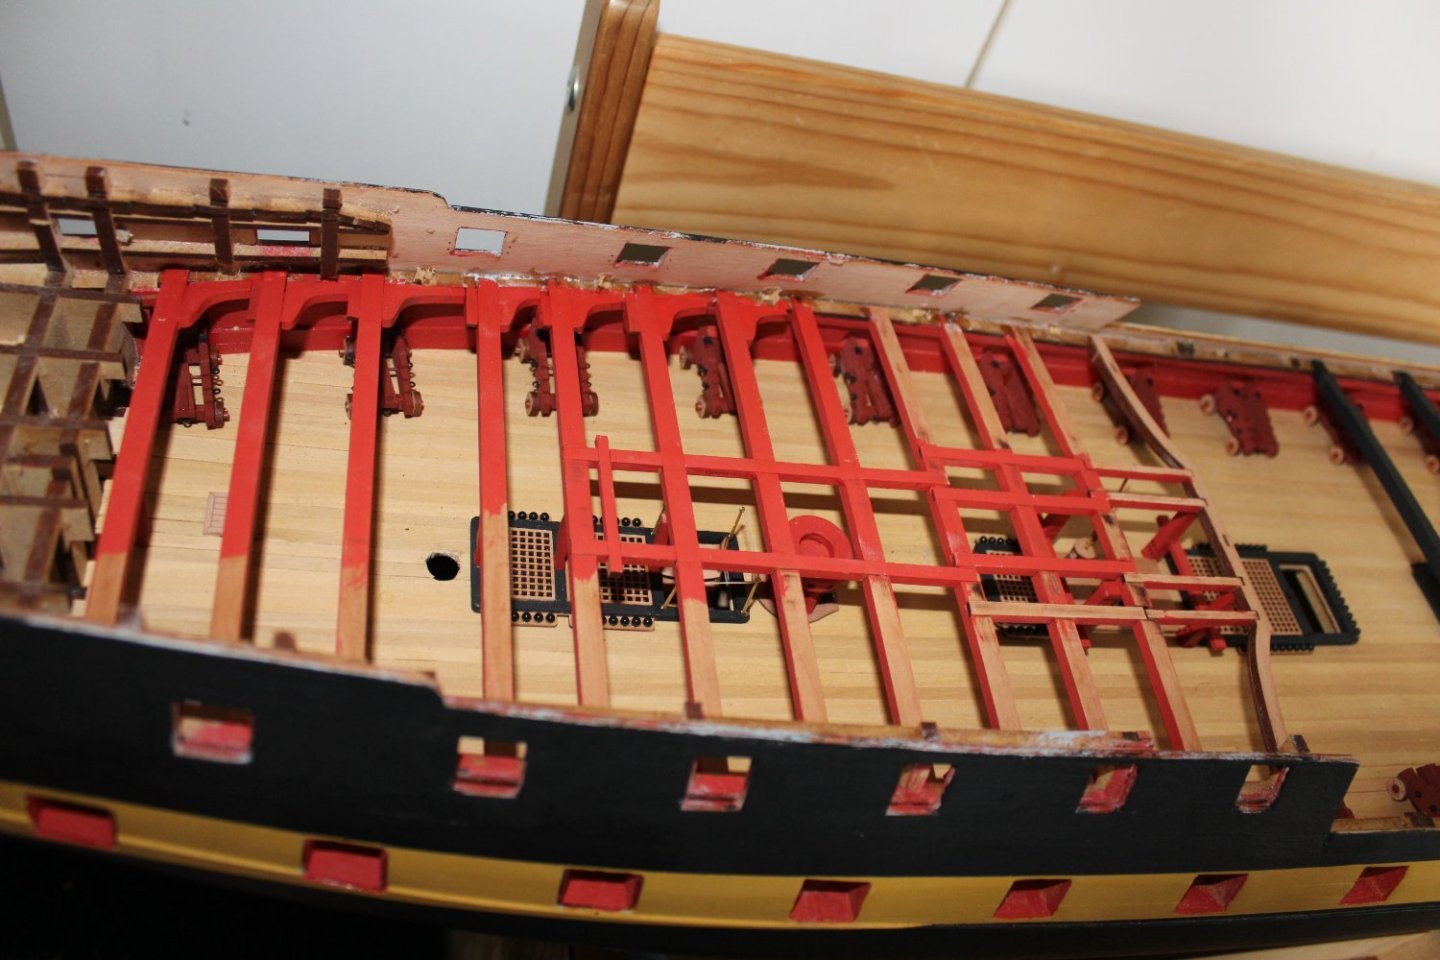
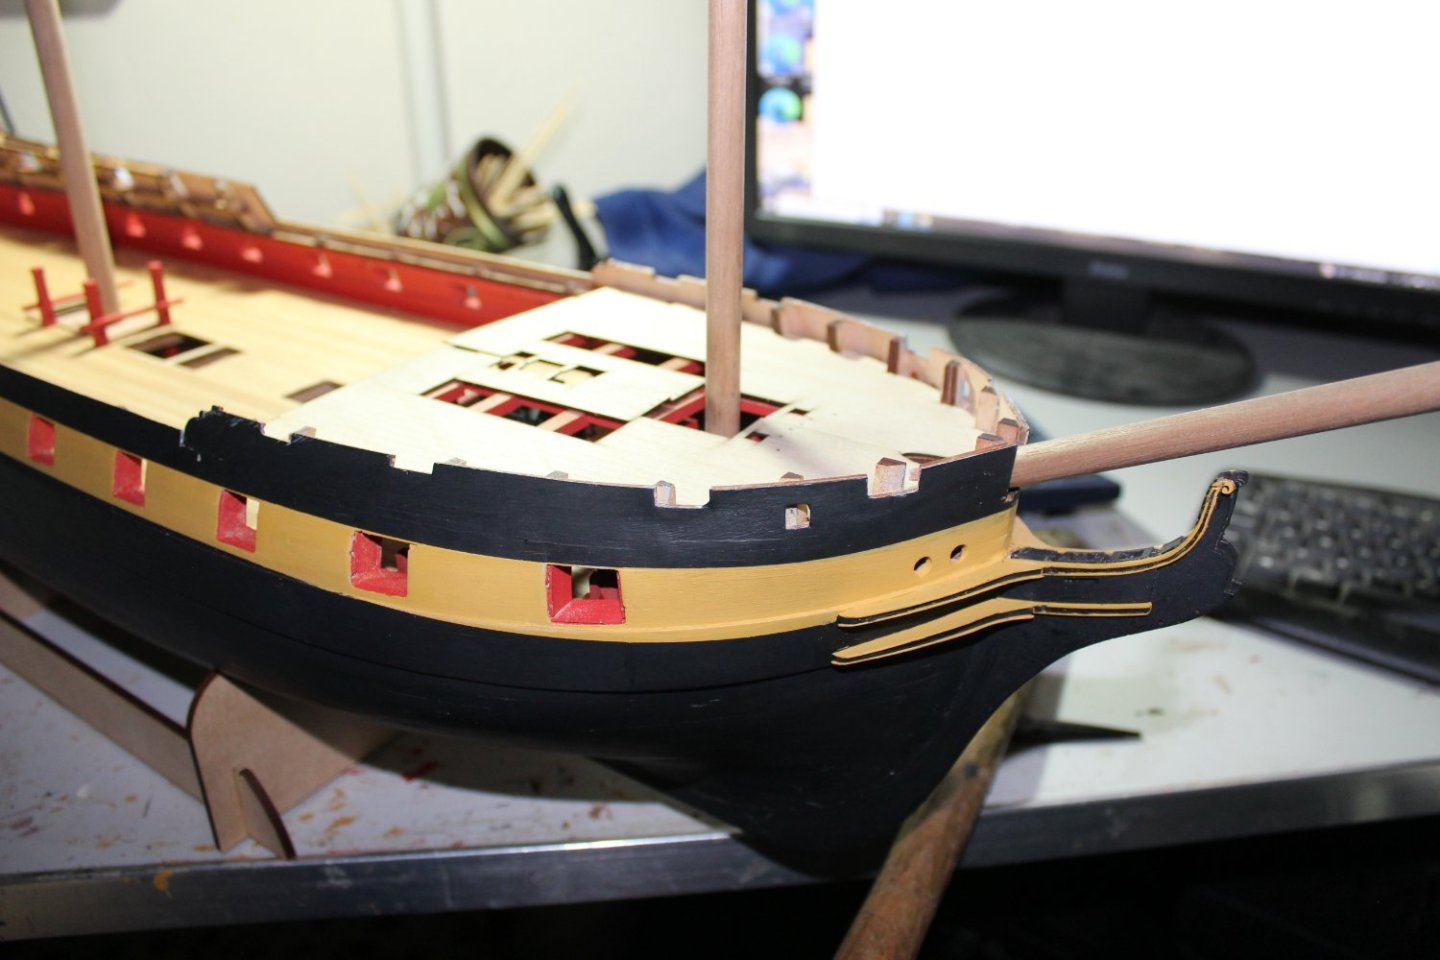
day 83-2
keeping to the instructions has seen this build progress quite fast, other builds i would have made bits, put them away and it would all come together as some time in the distant future, perhaps returning to it after i get bored, like on some of my larger builds
cannon carriages, are the thing that is stopping even faster progress, plus gardening and Assassins creed odyssey but its not a race, it is however, the most enjoyable build i have ever done, everyhting does exactly what its meant to do, perfect fits, and great quality materials
mast Dowling in the ensure decks line up
the deck beams fwd are fully fixed and the fwd deck has been test fitted the after deck beams are still in the process of making sure they fit


- Knocklouder, Canute, chris watton and 22 others
-
23
-
 2
2
-
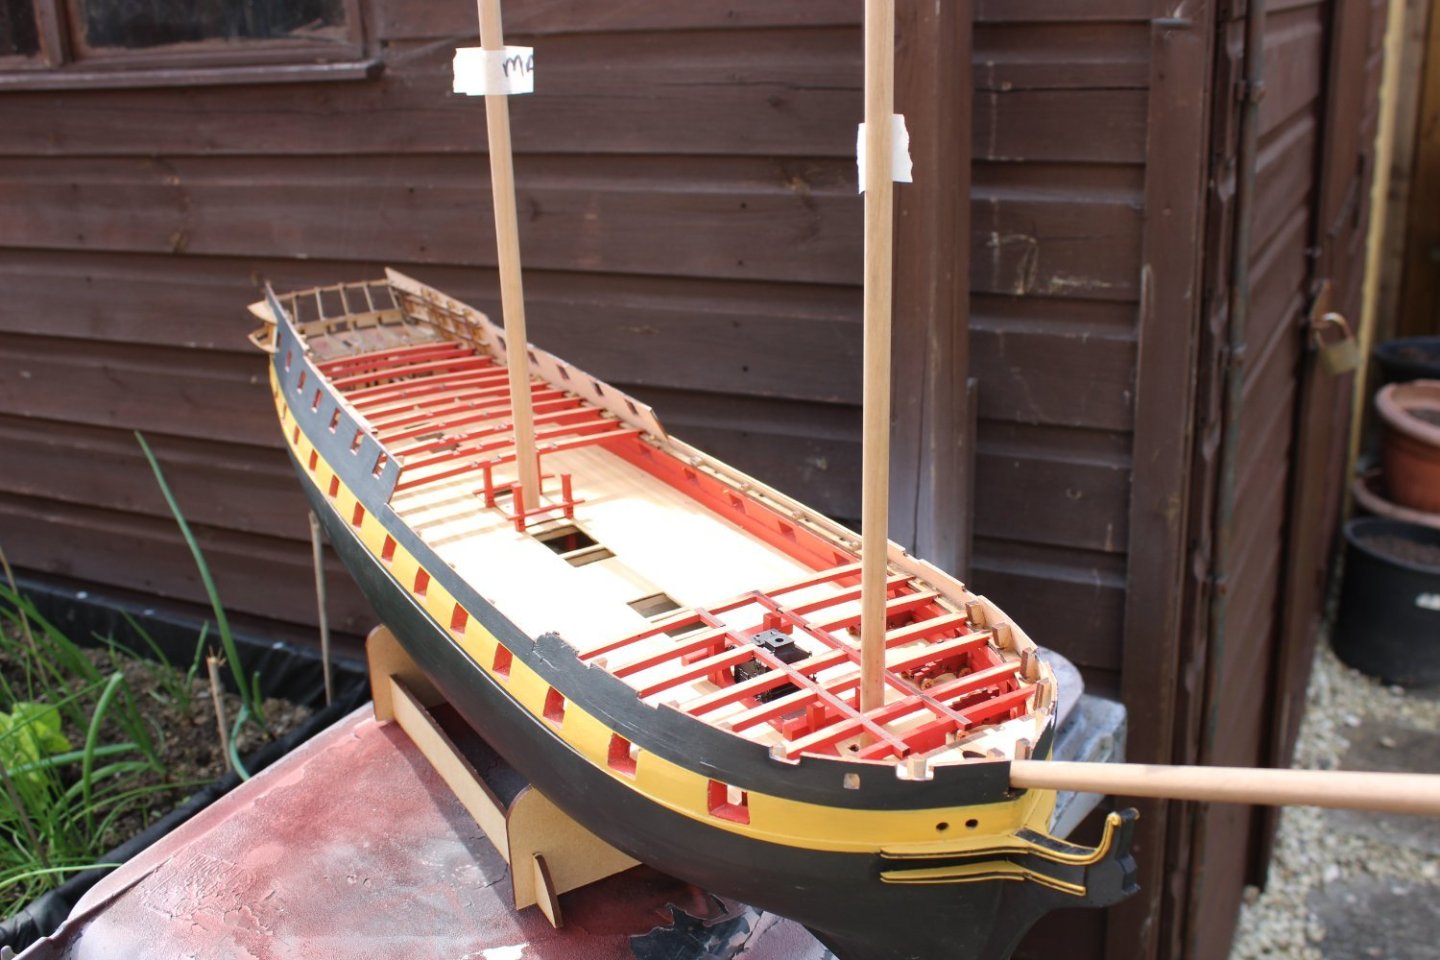
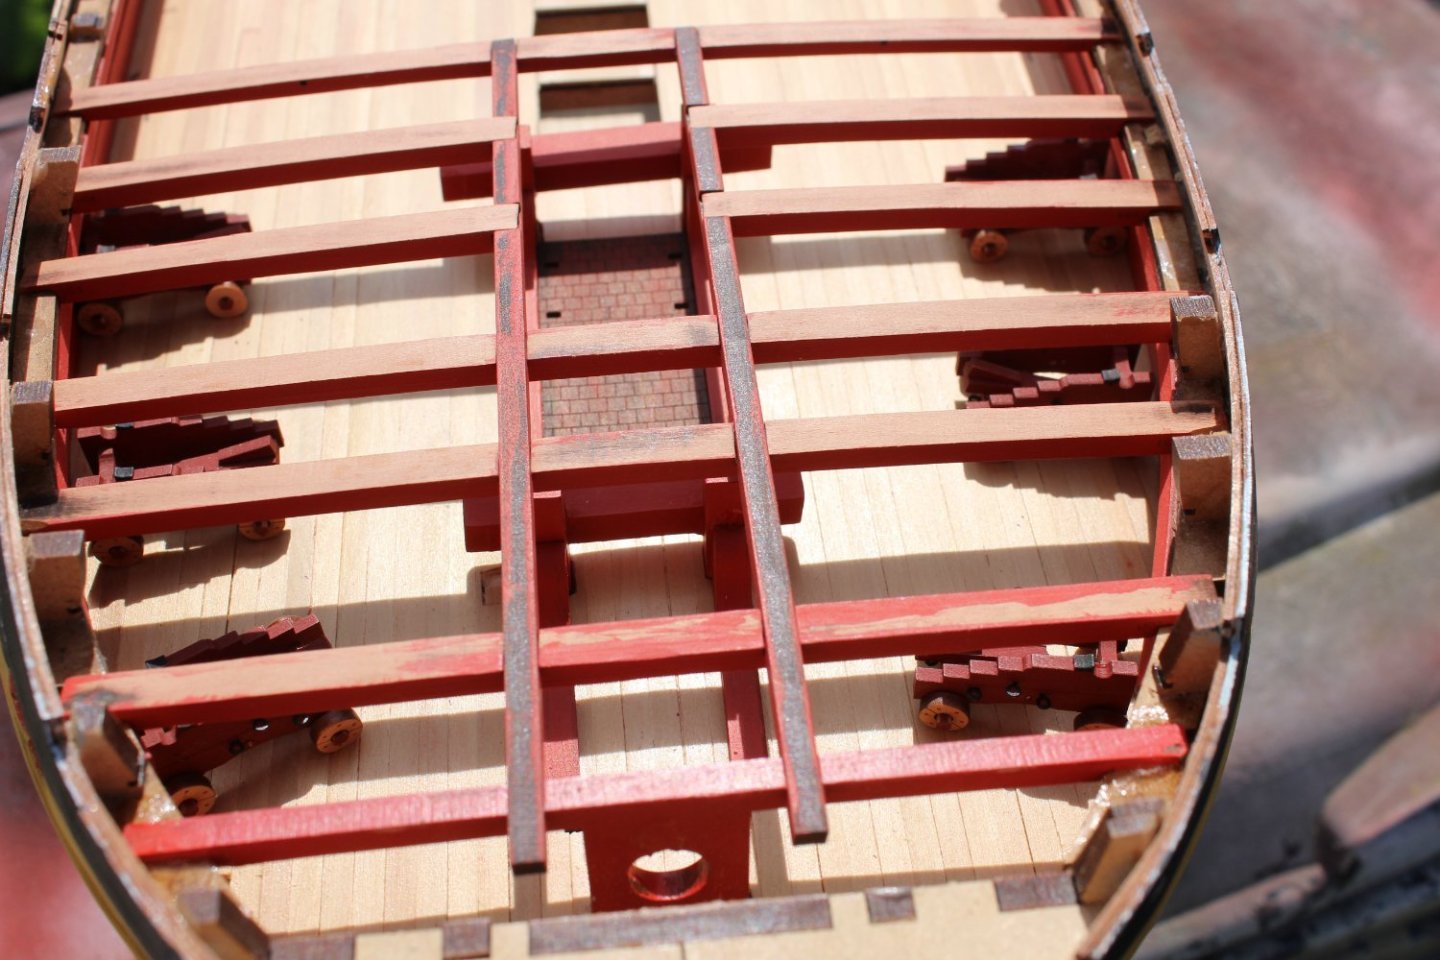
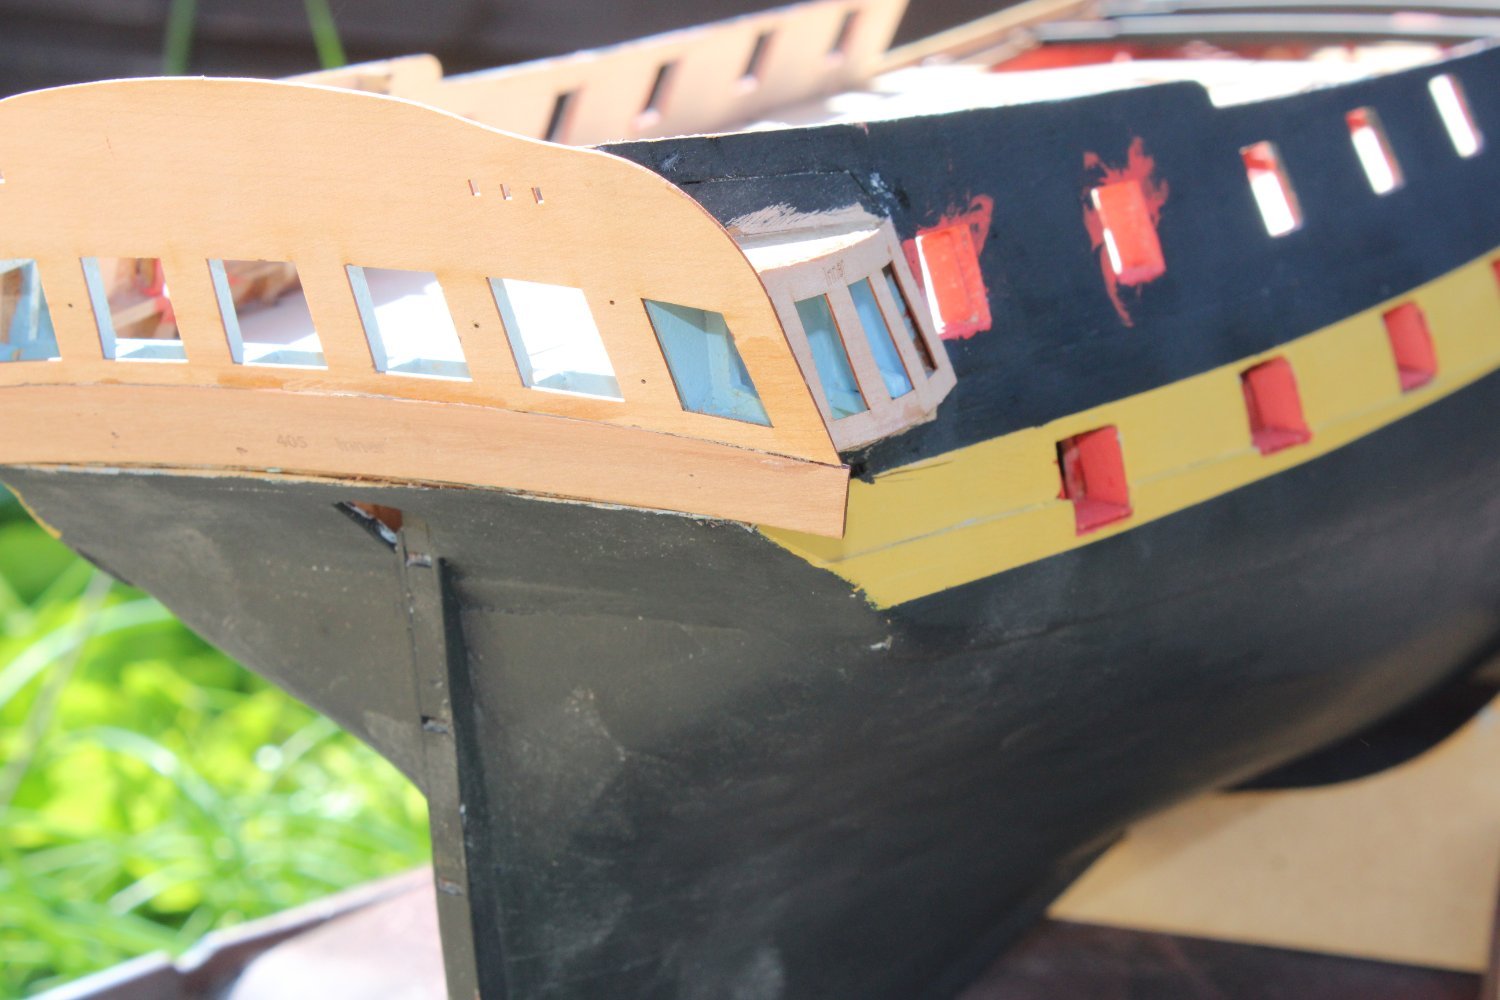
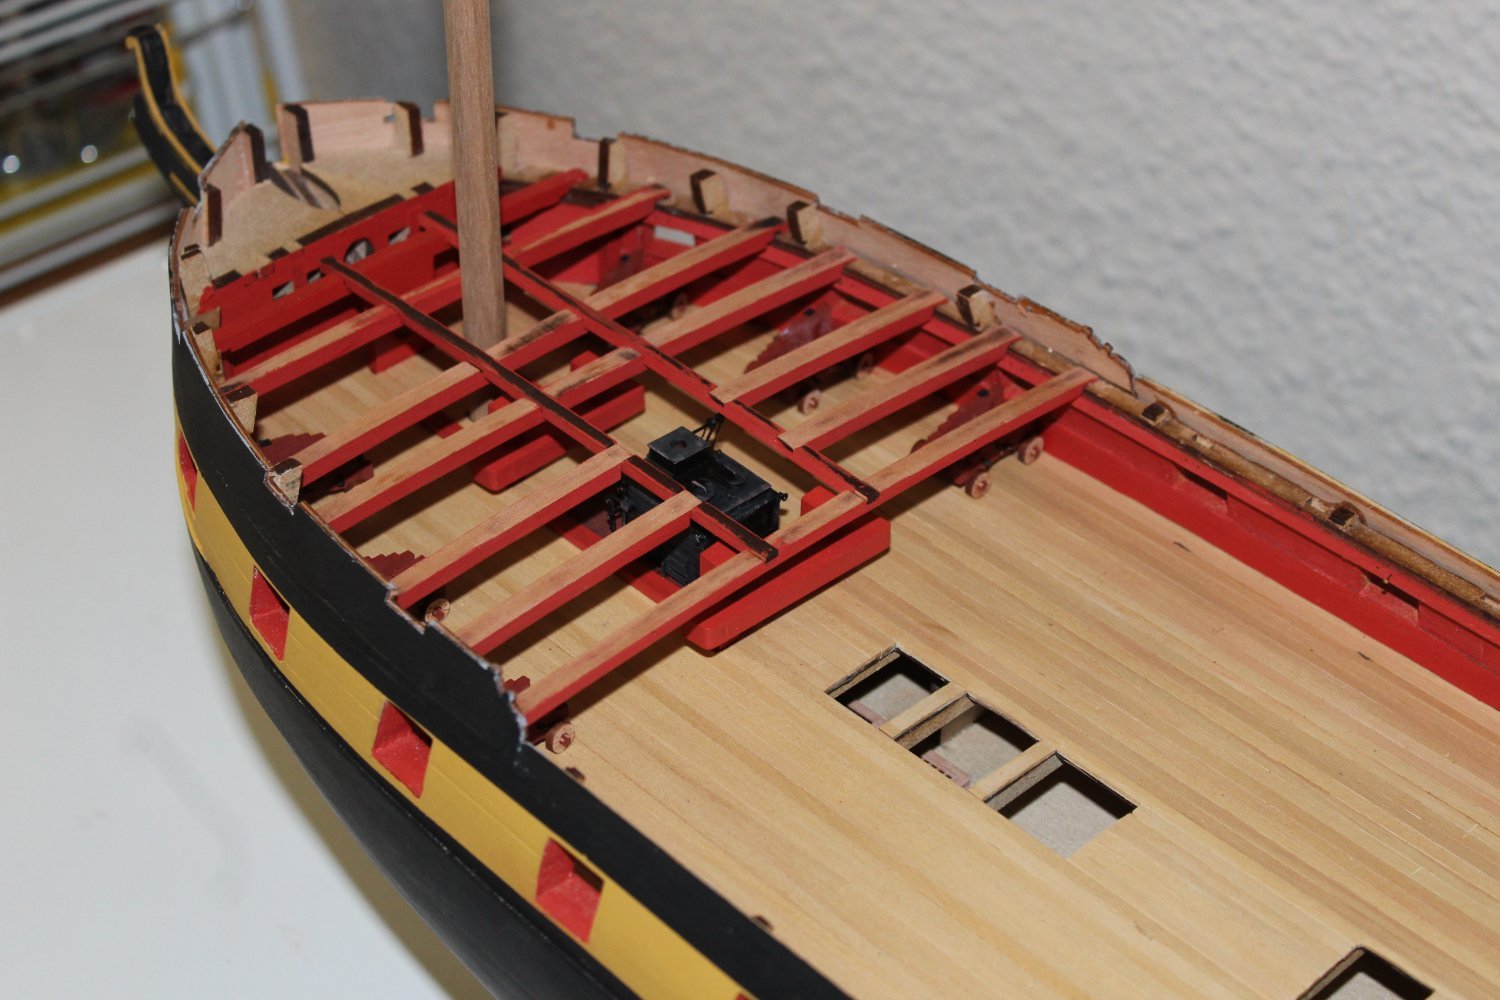
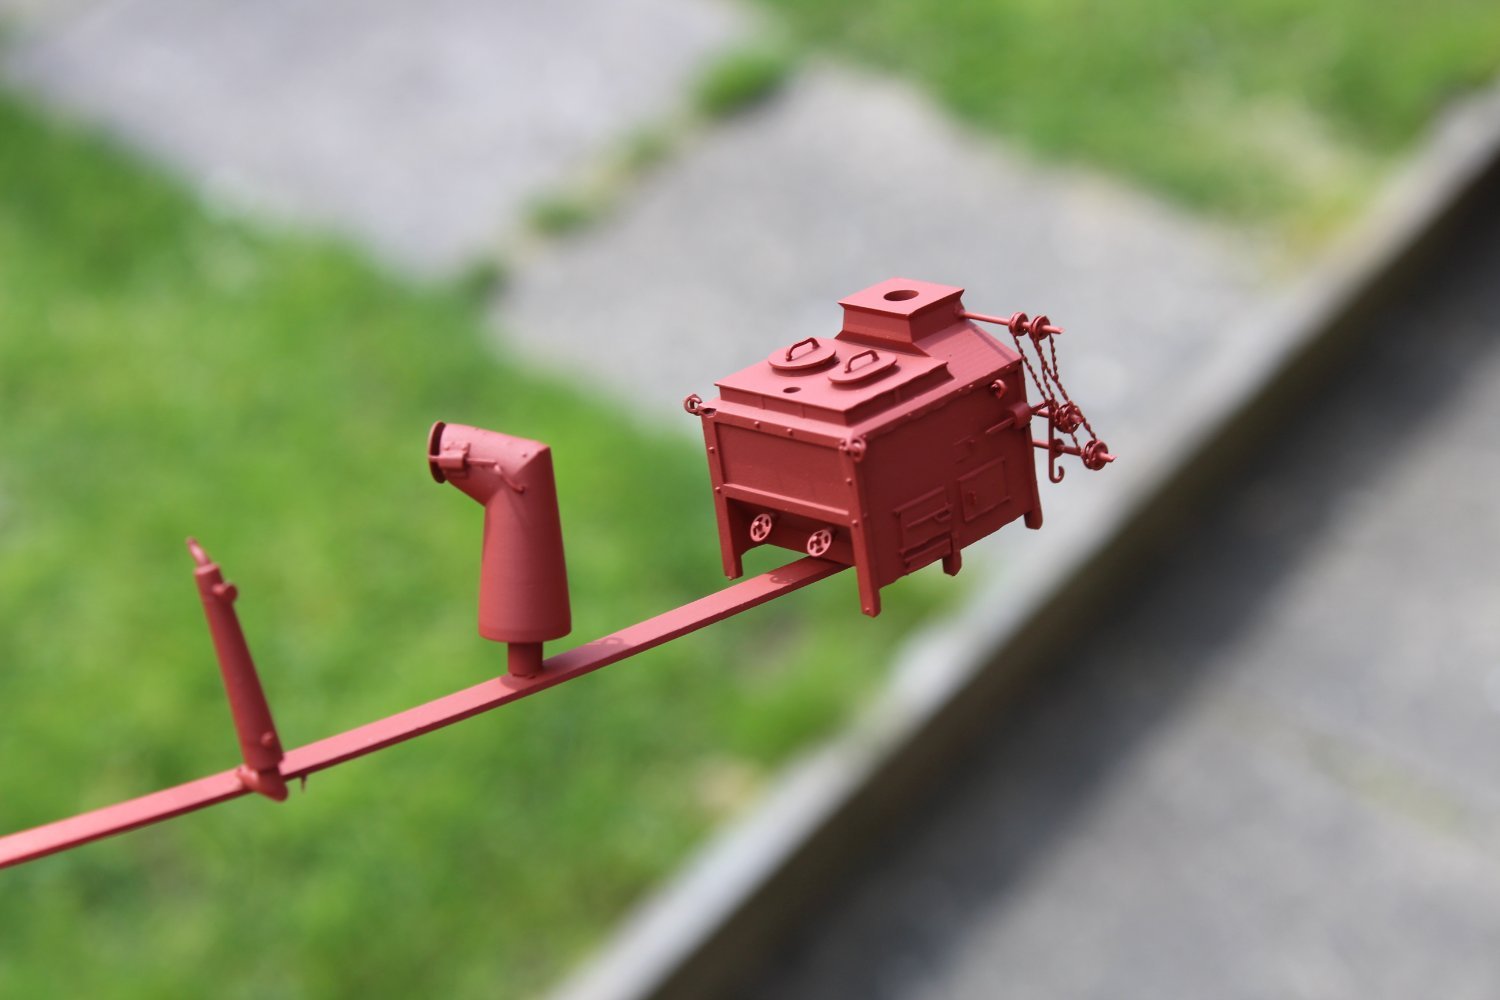
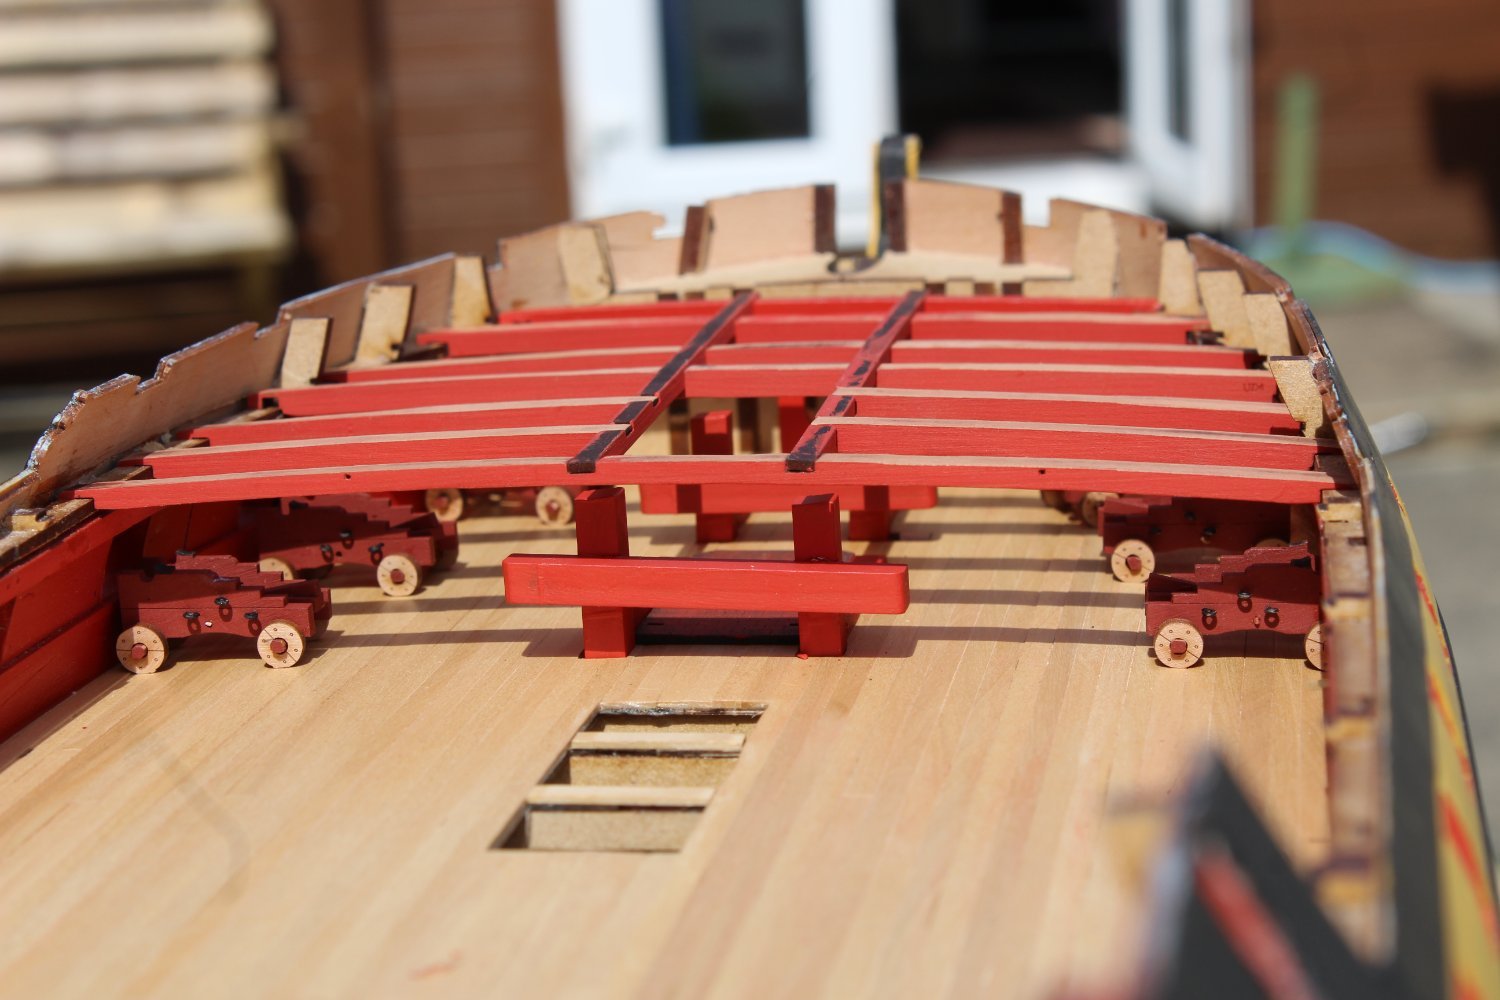
good evening everyone
thank you for comment and likes
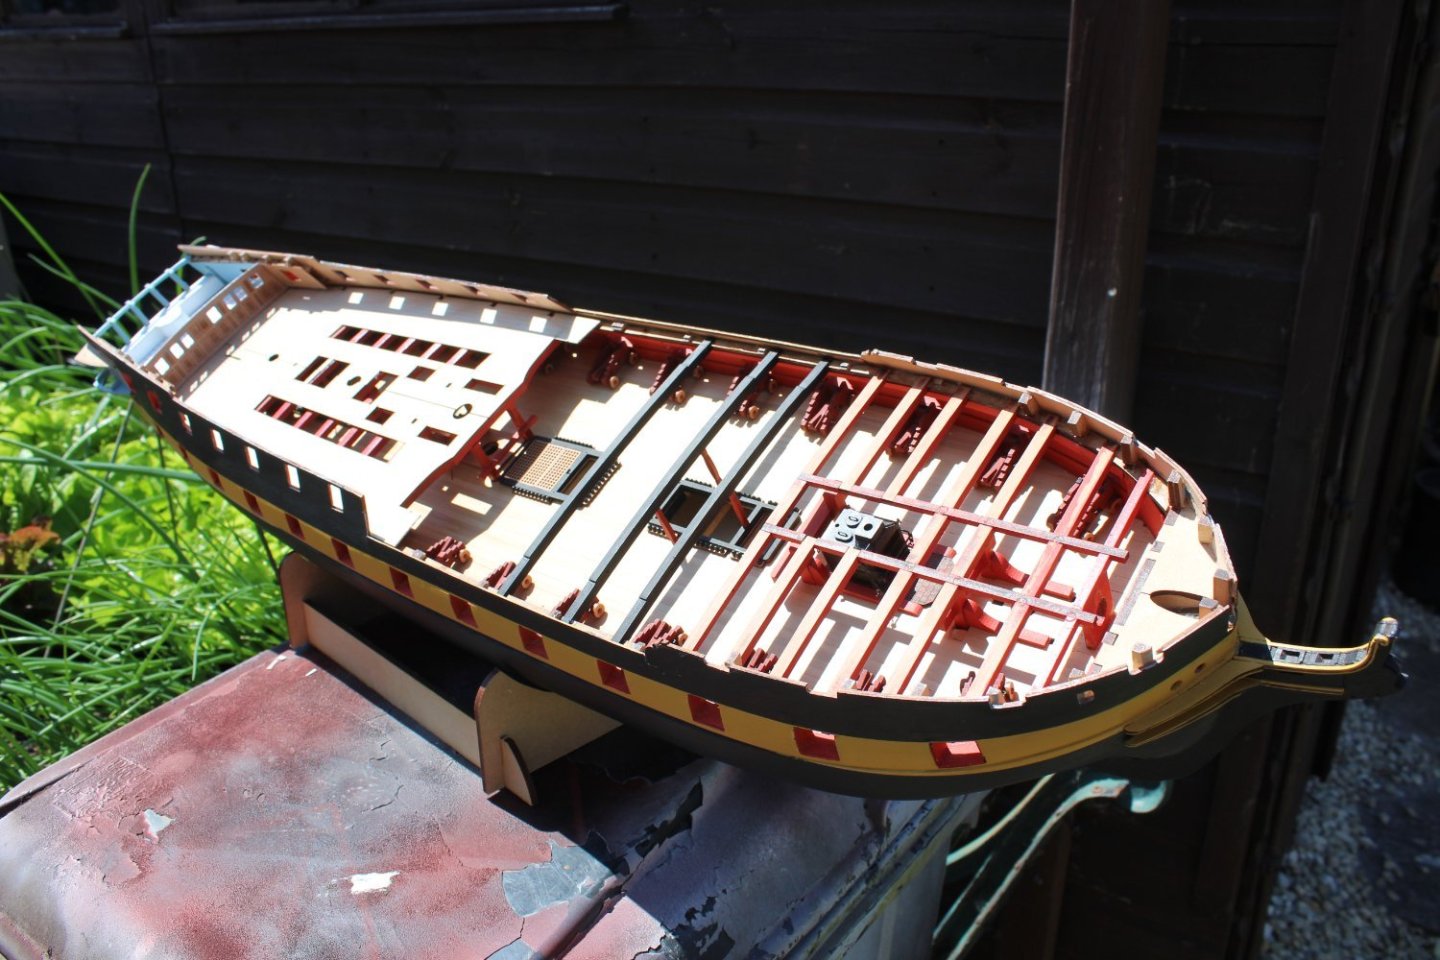
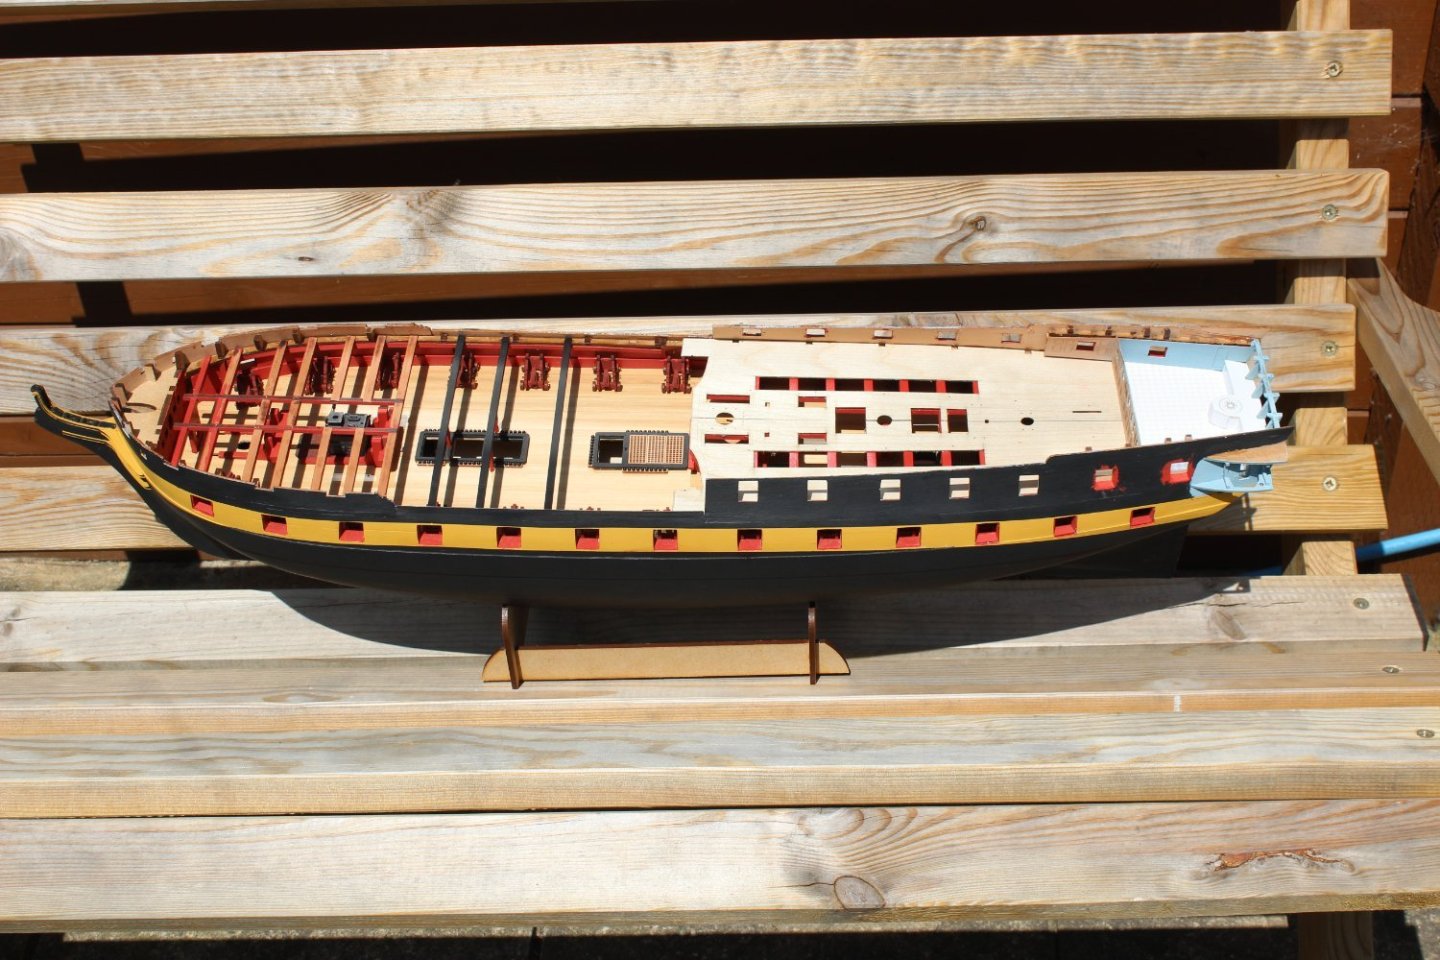
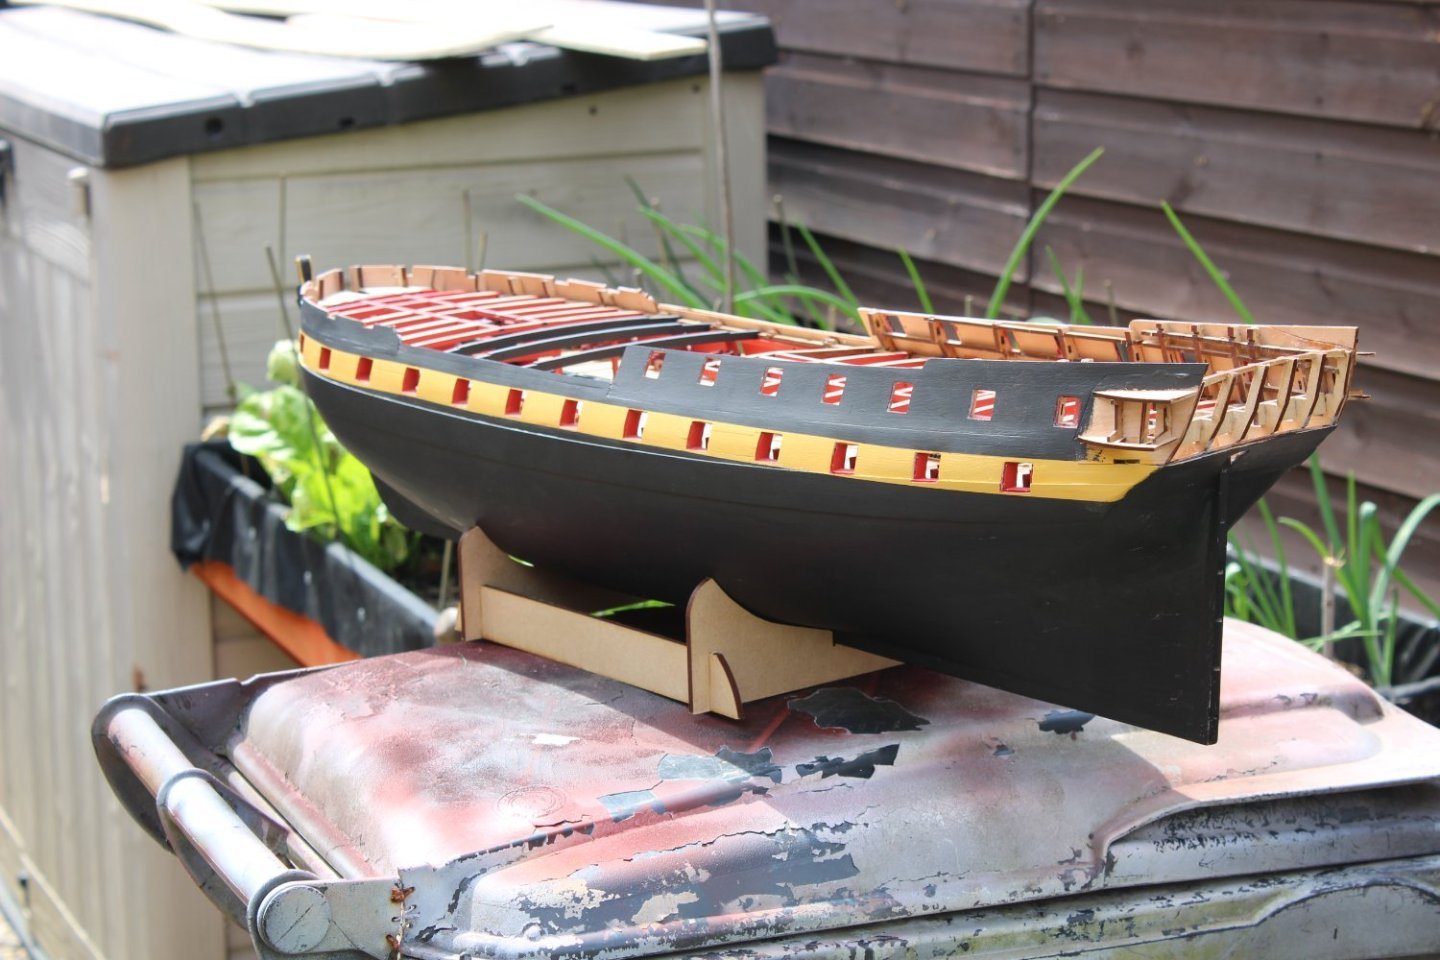
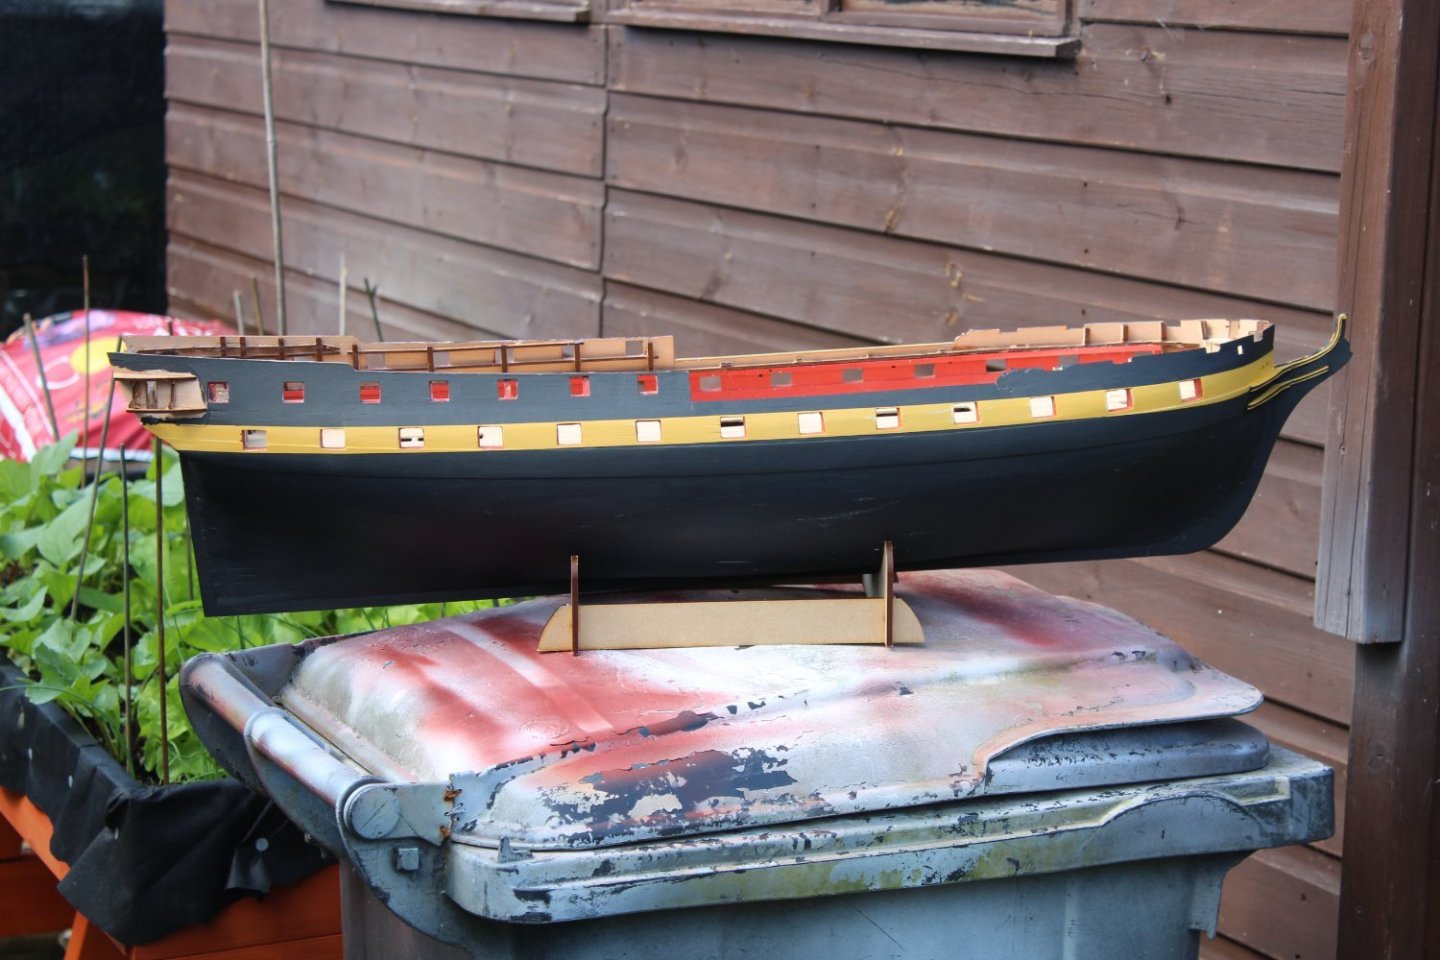
day 79-2
i have now put another couple of coats on the yellow banding and repainted the gunports linings

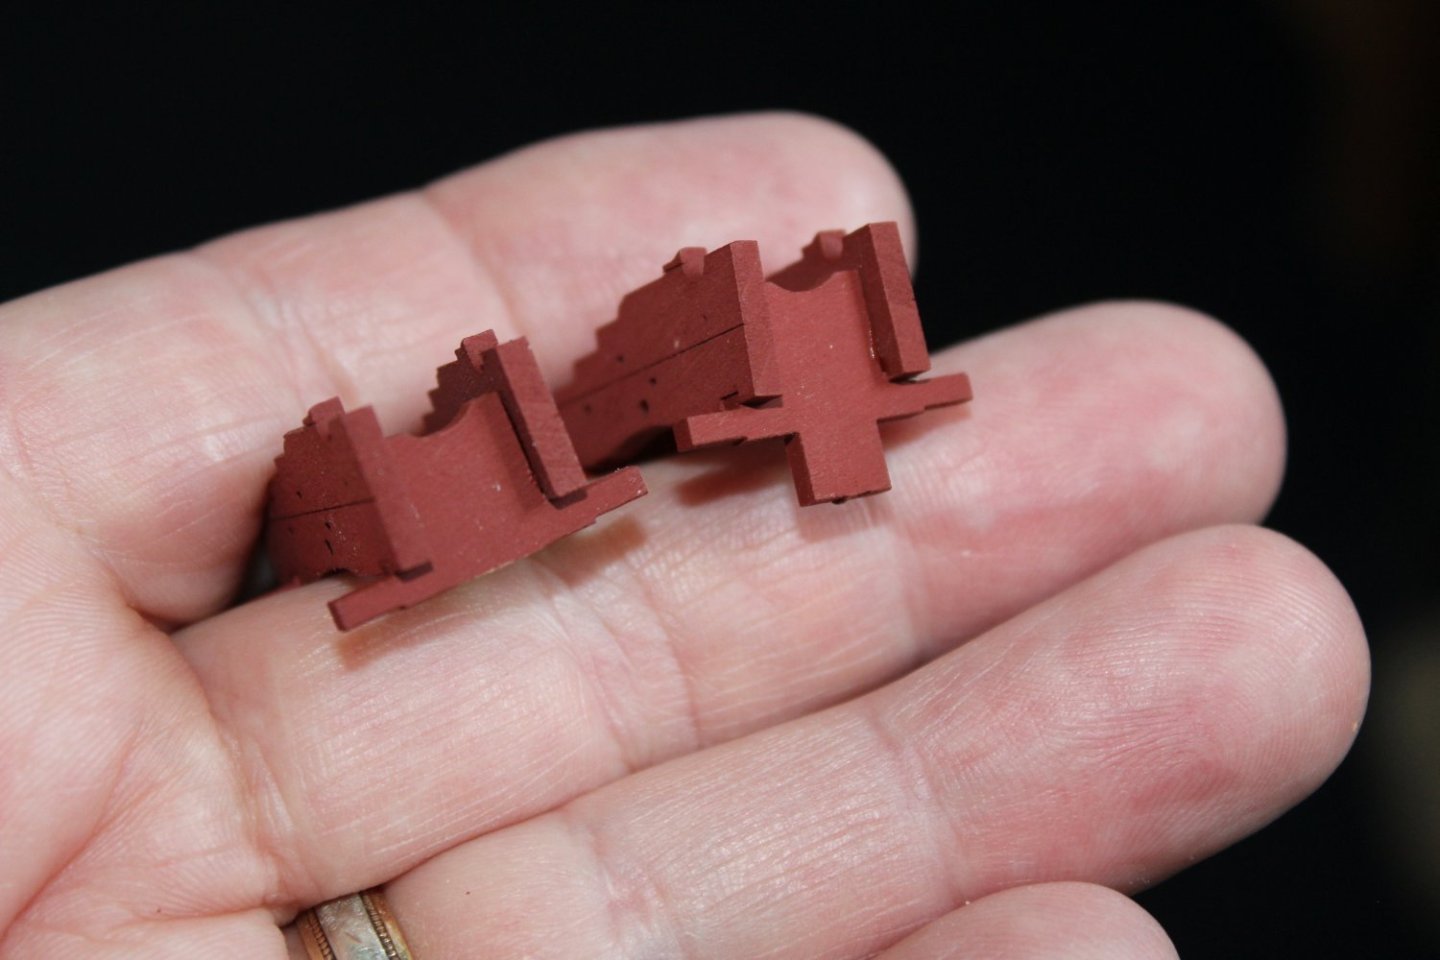
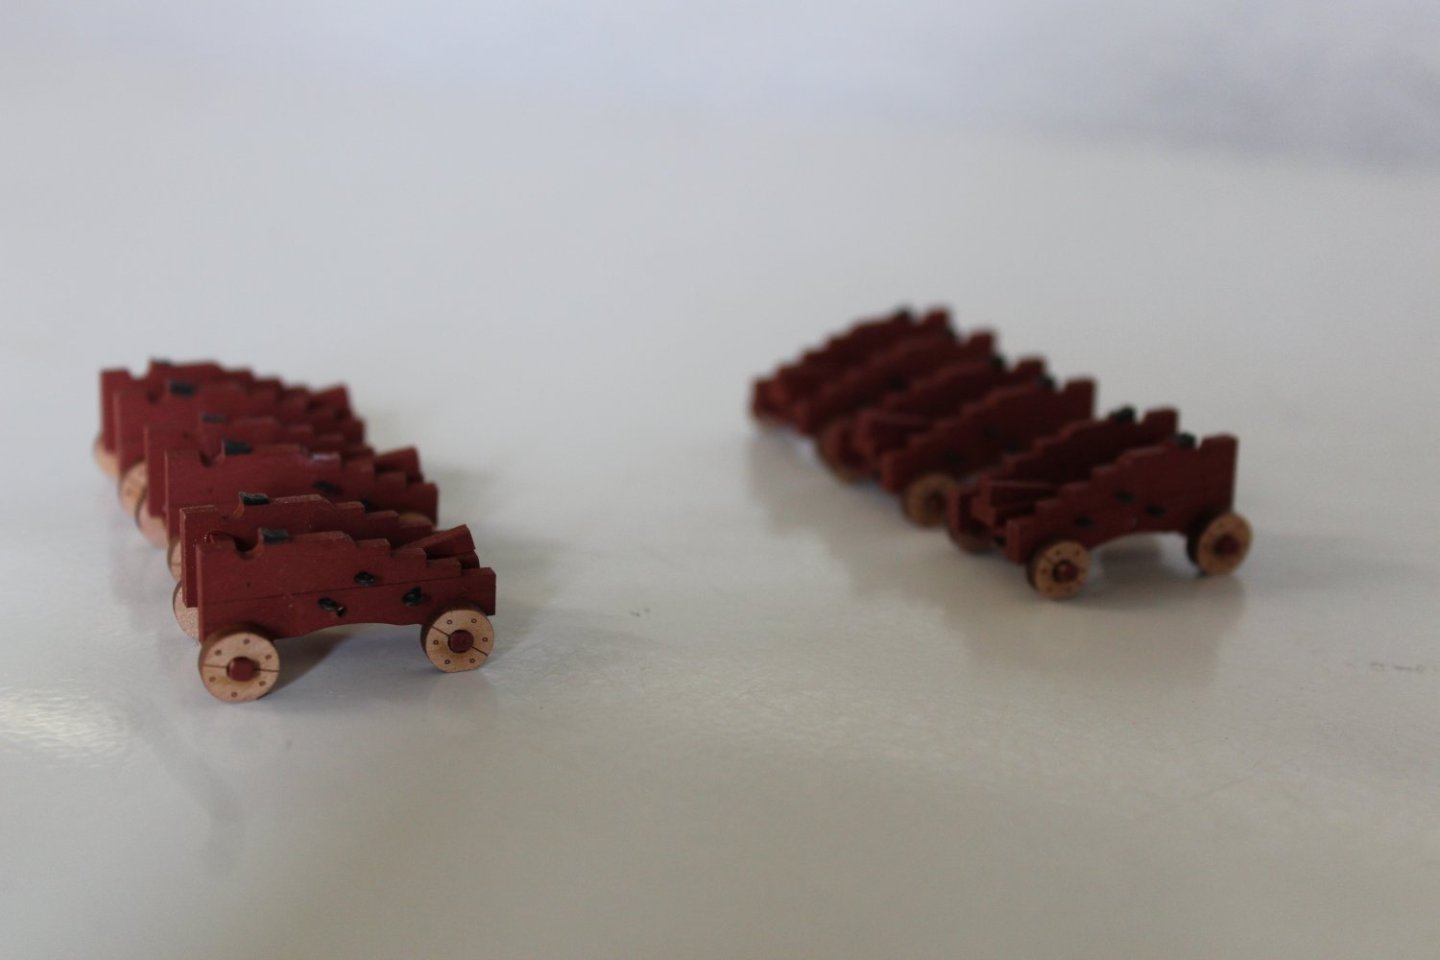
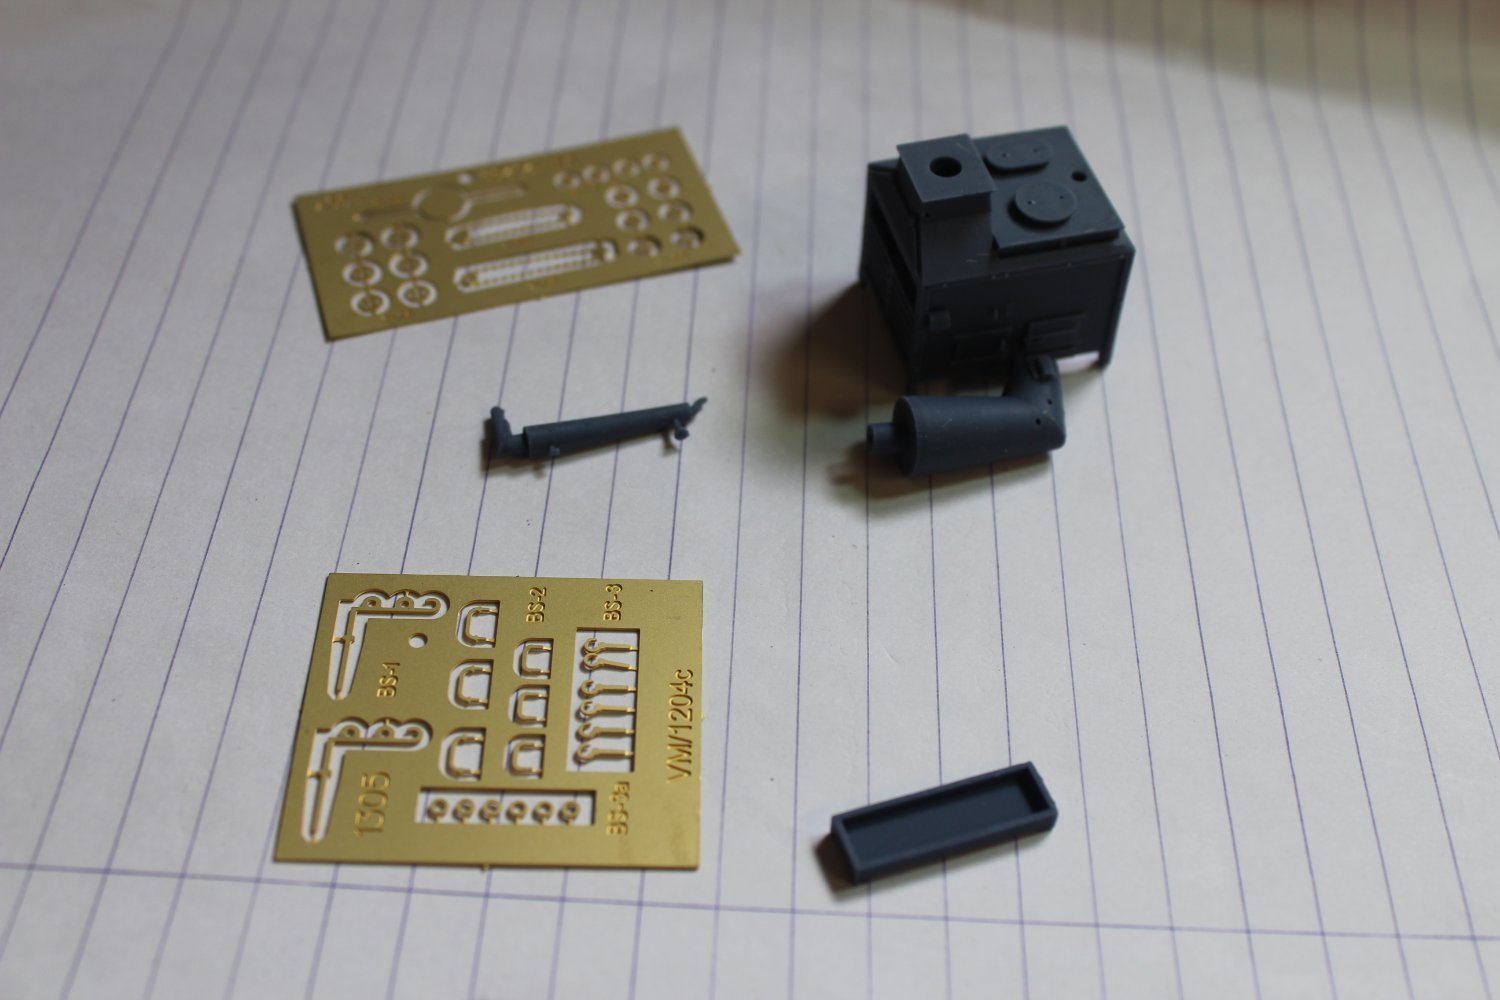
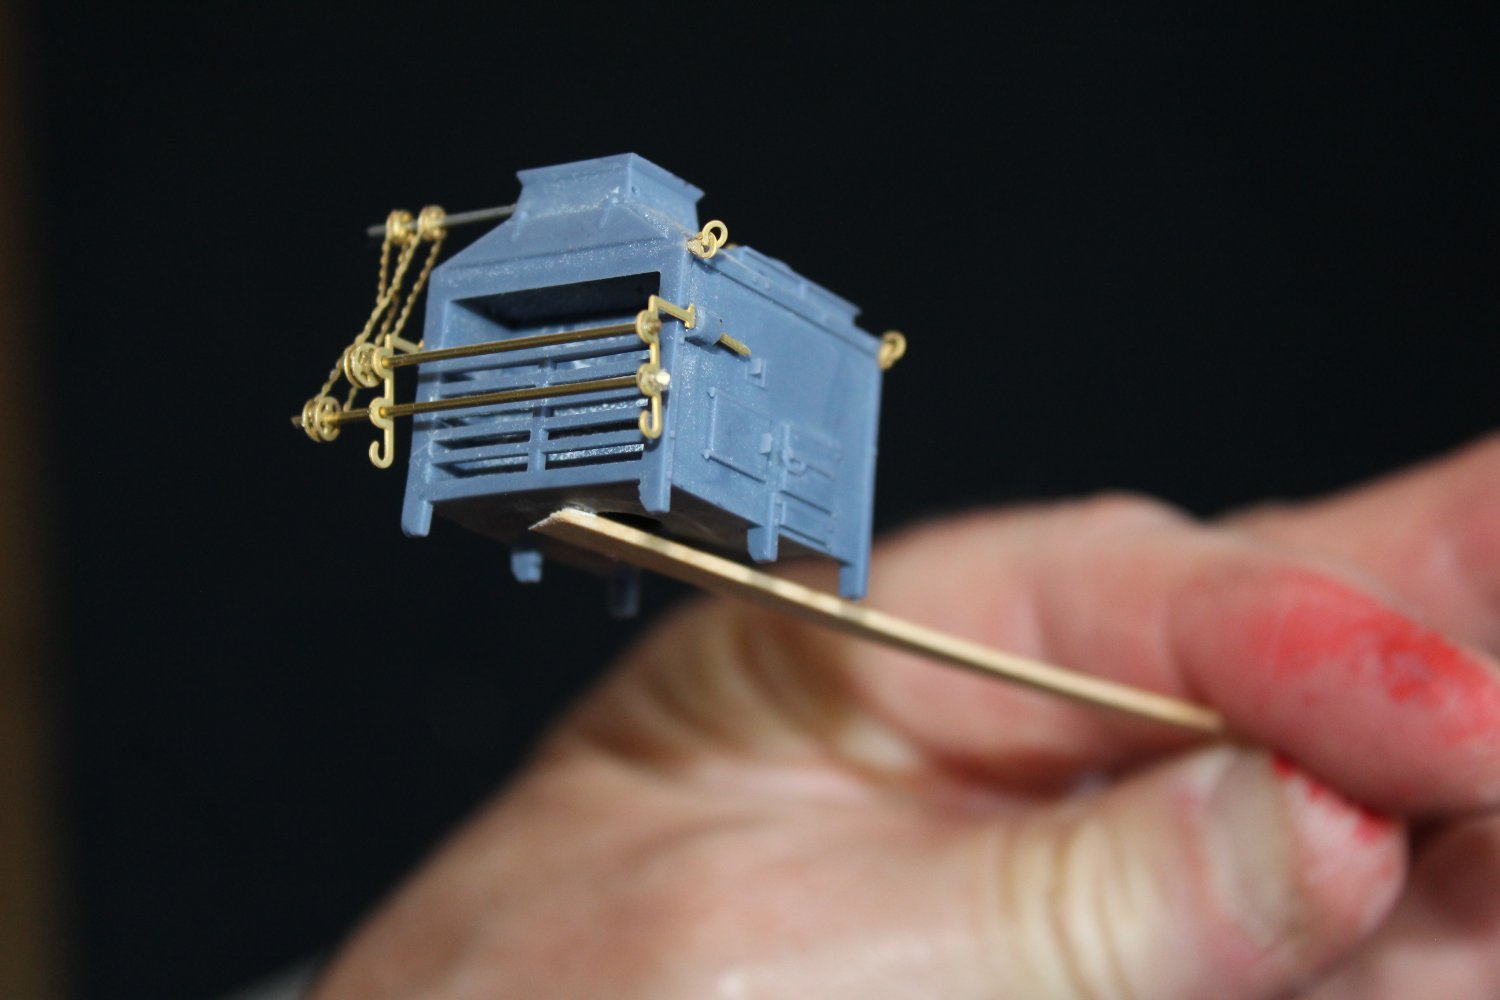
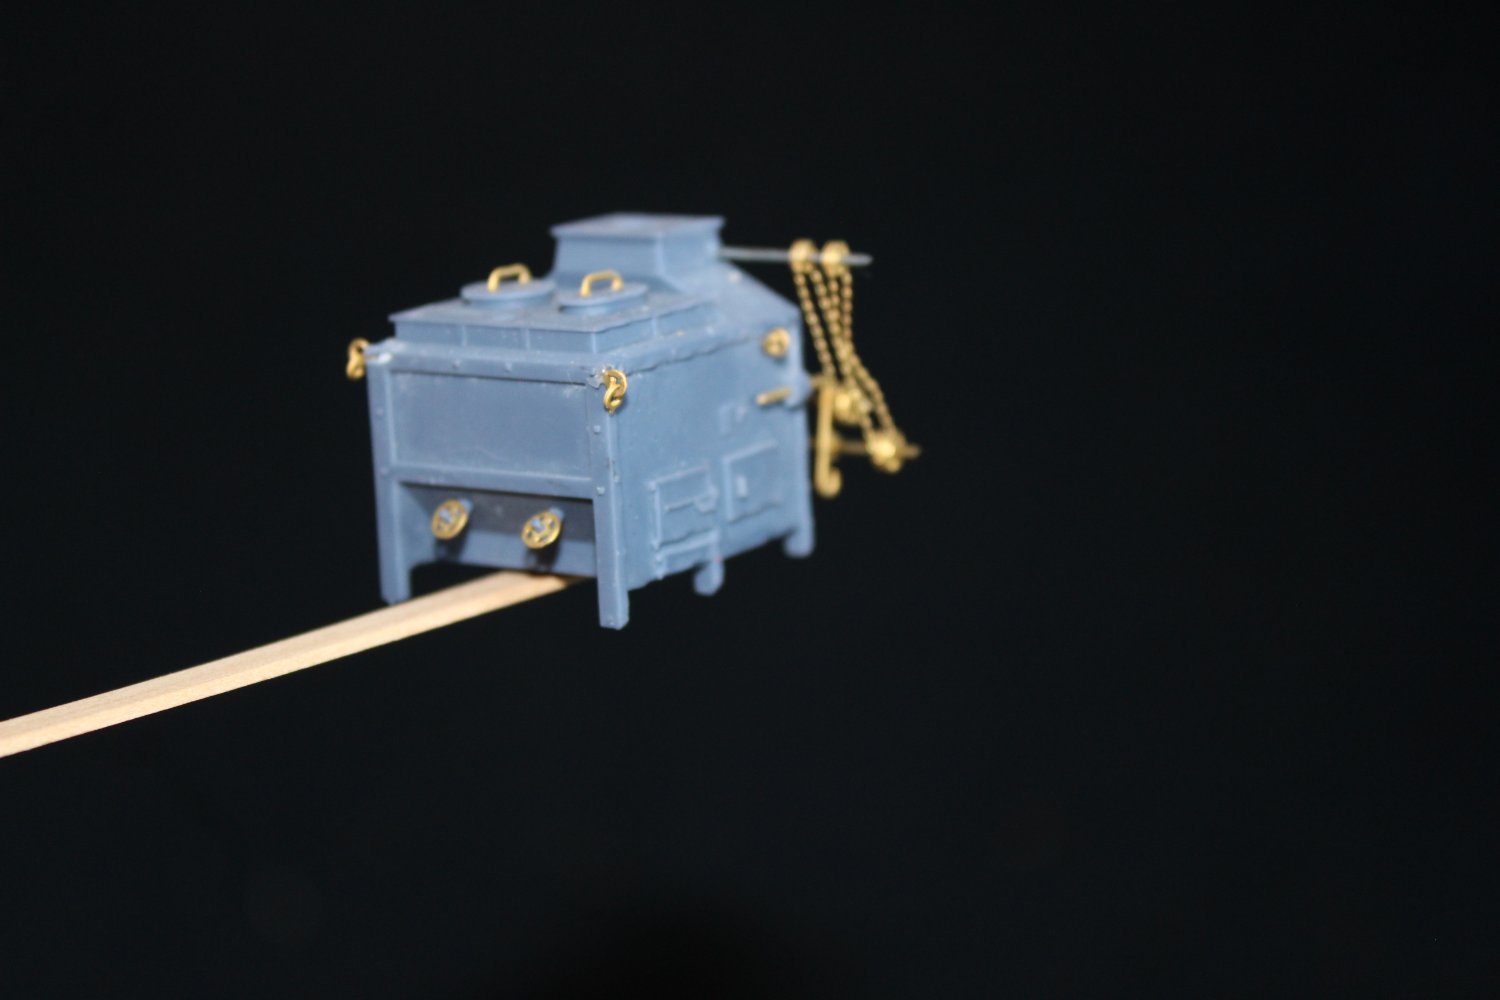
all the gun carriages have been made up, but only six have been fully completed with wheels and metal fittings the tabs that enable accurate fitting onto the deck were removed as the boxwood deck was to hard to get a decent slot, so the wheels have now been sanded slightly to enable a good 4 point contact to the deck and will be held in place with PVA
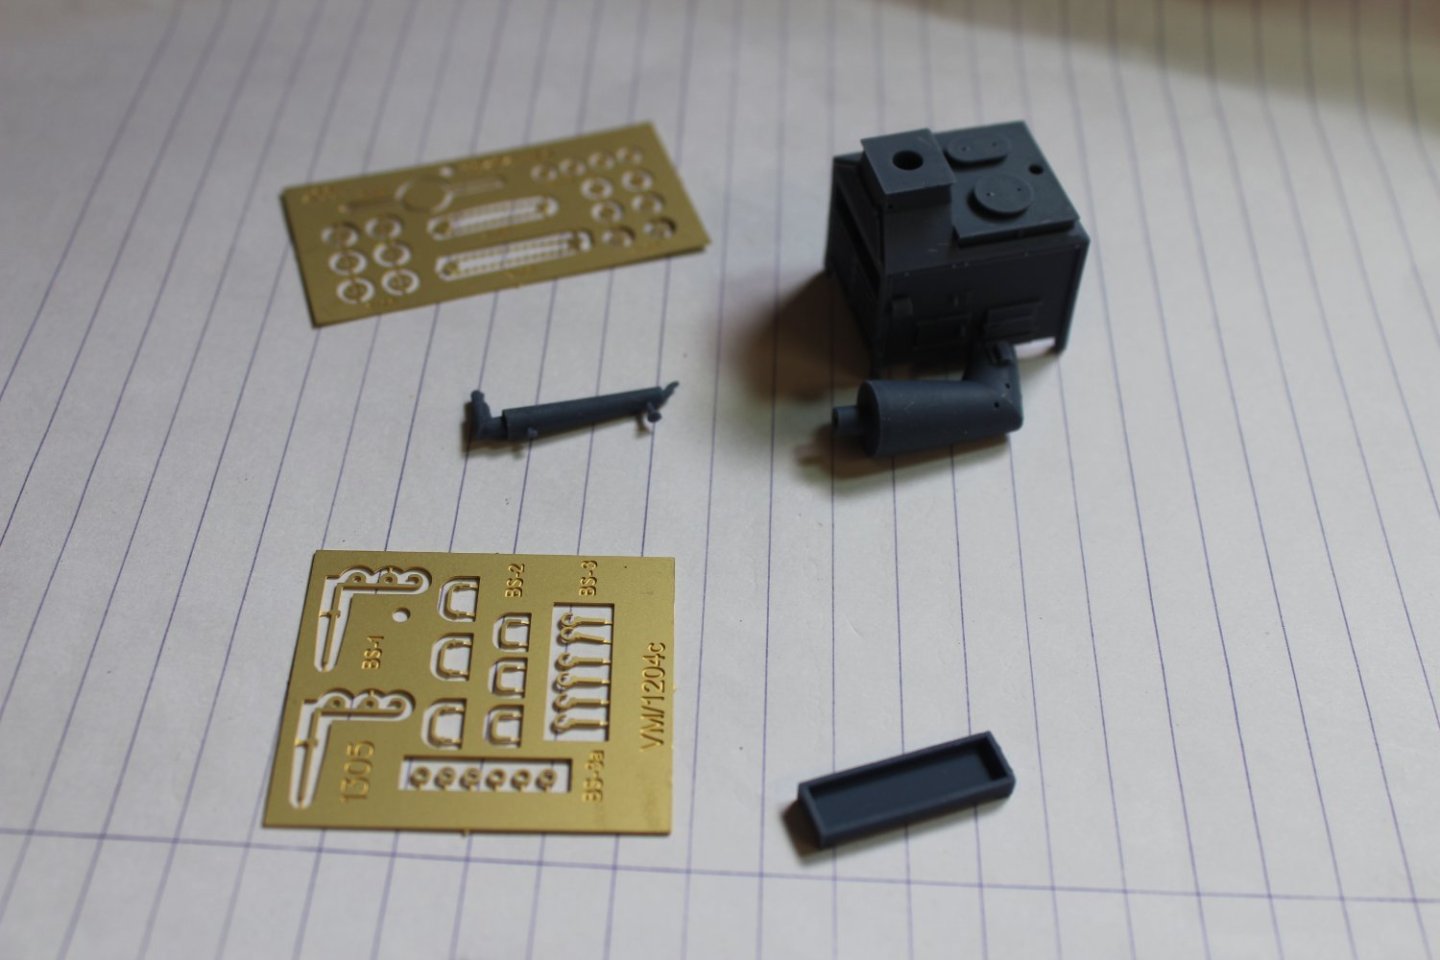
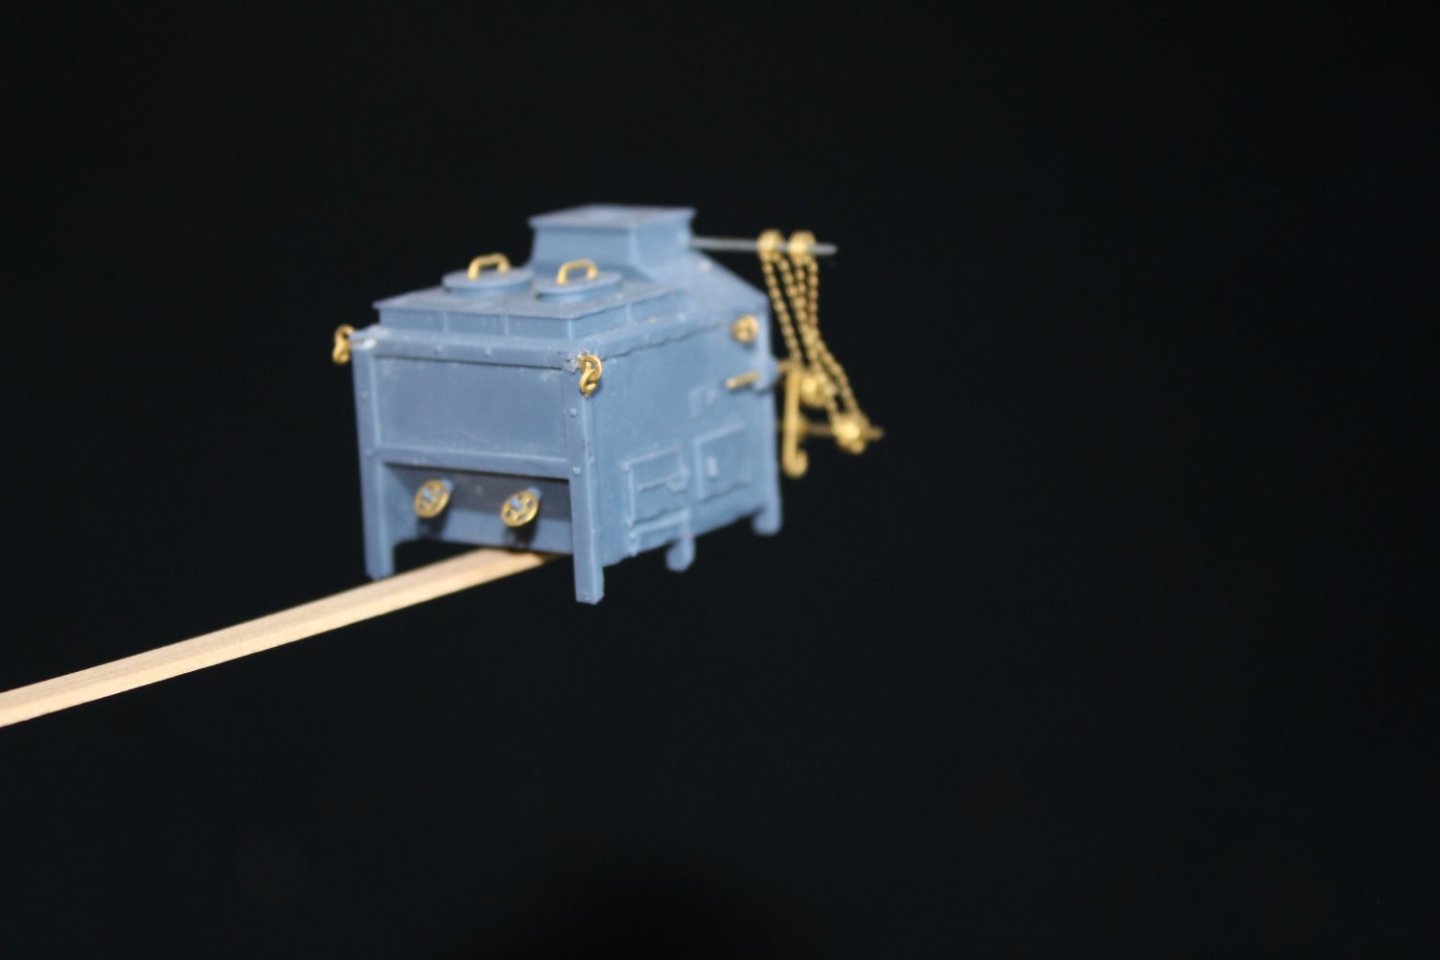
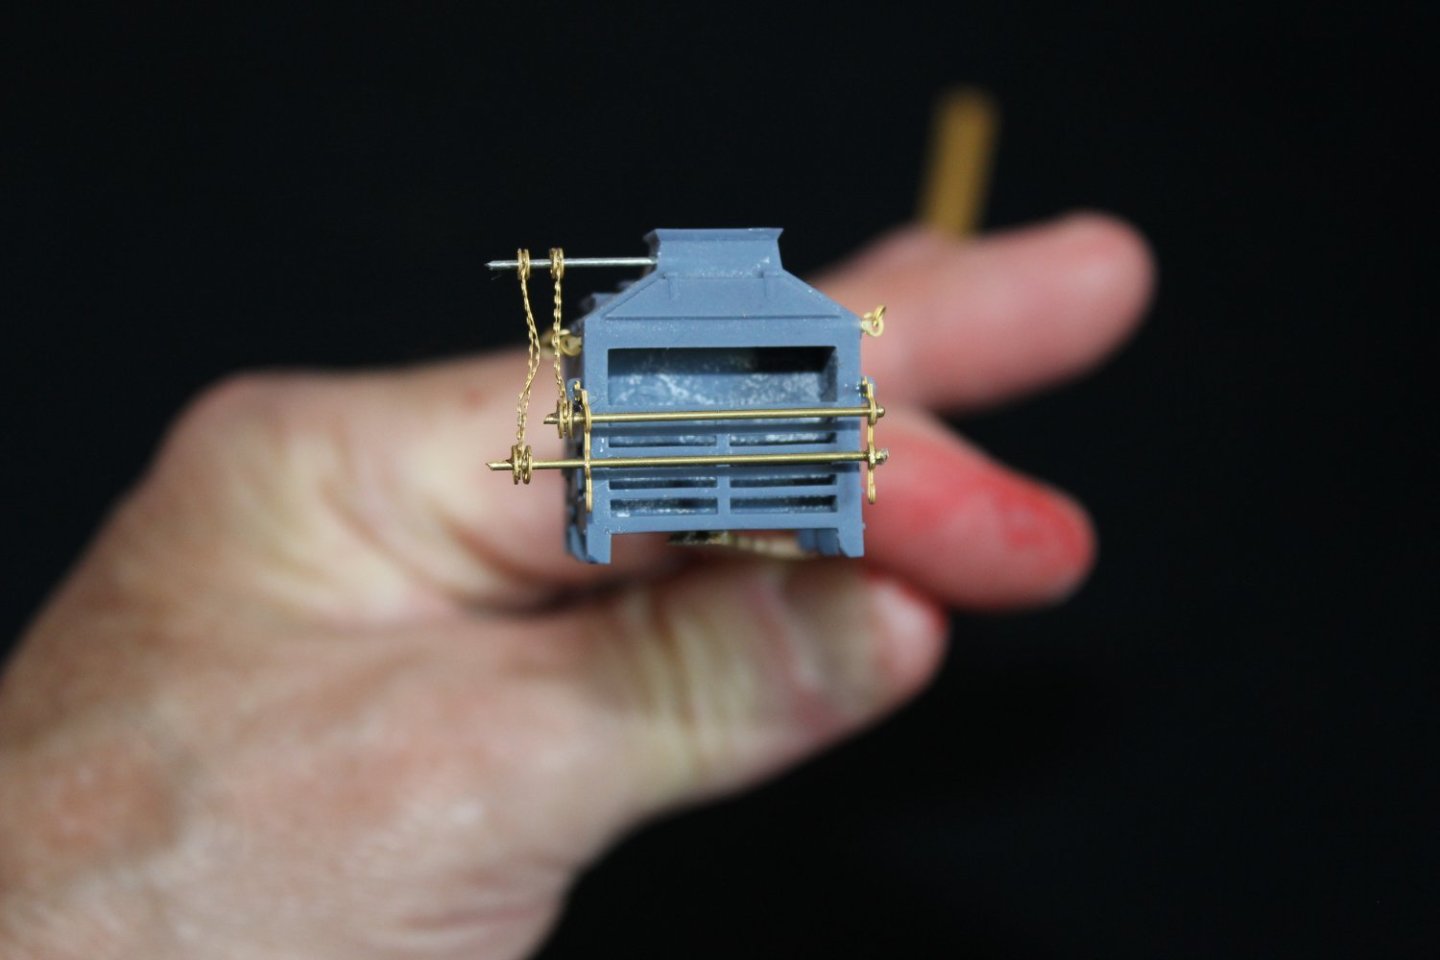
the ships oven is a lovely piece of resin and Photo etch, primed and black painted


forward deck beams, sanded to remove the char, and painted on the forward and after sides only, as some of these will be exposed, on test fitted they just dropped into place
nothing is fixed, but a few shots of how she is today


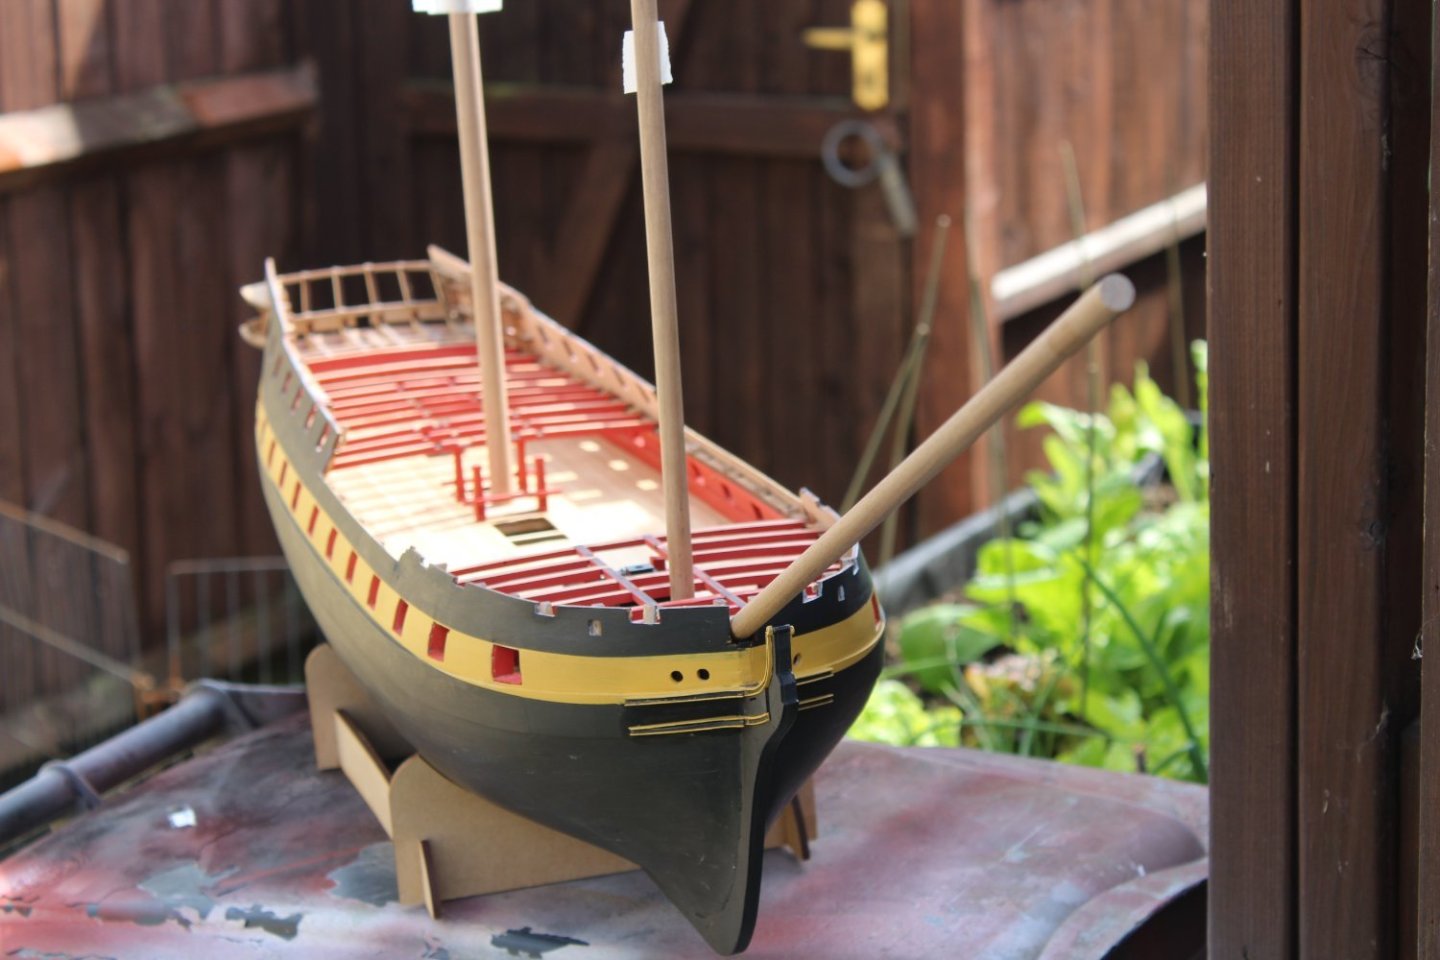
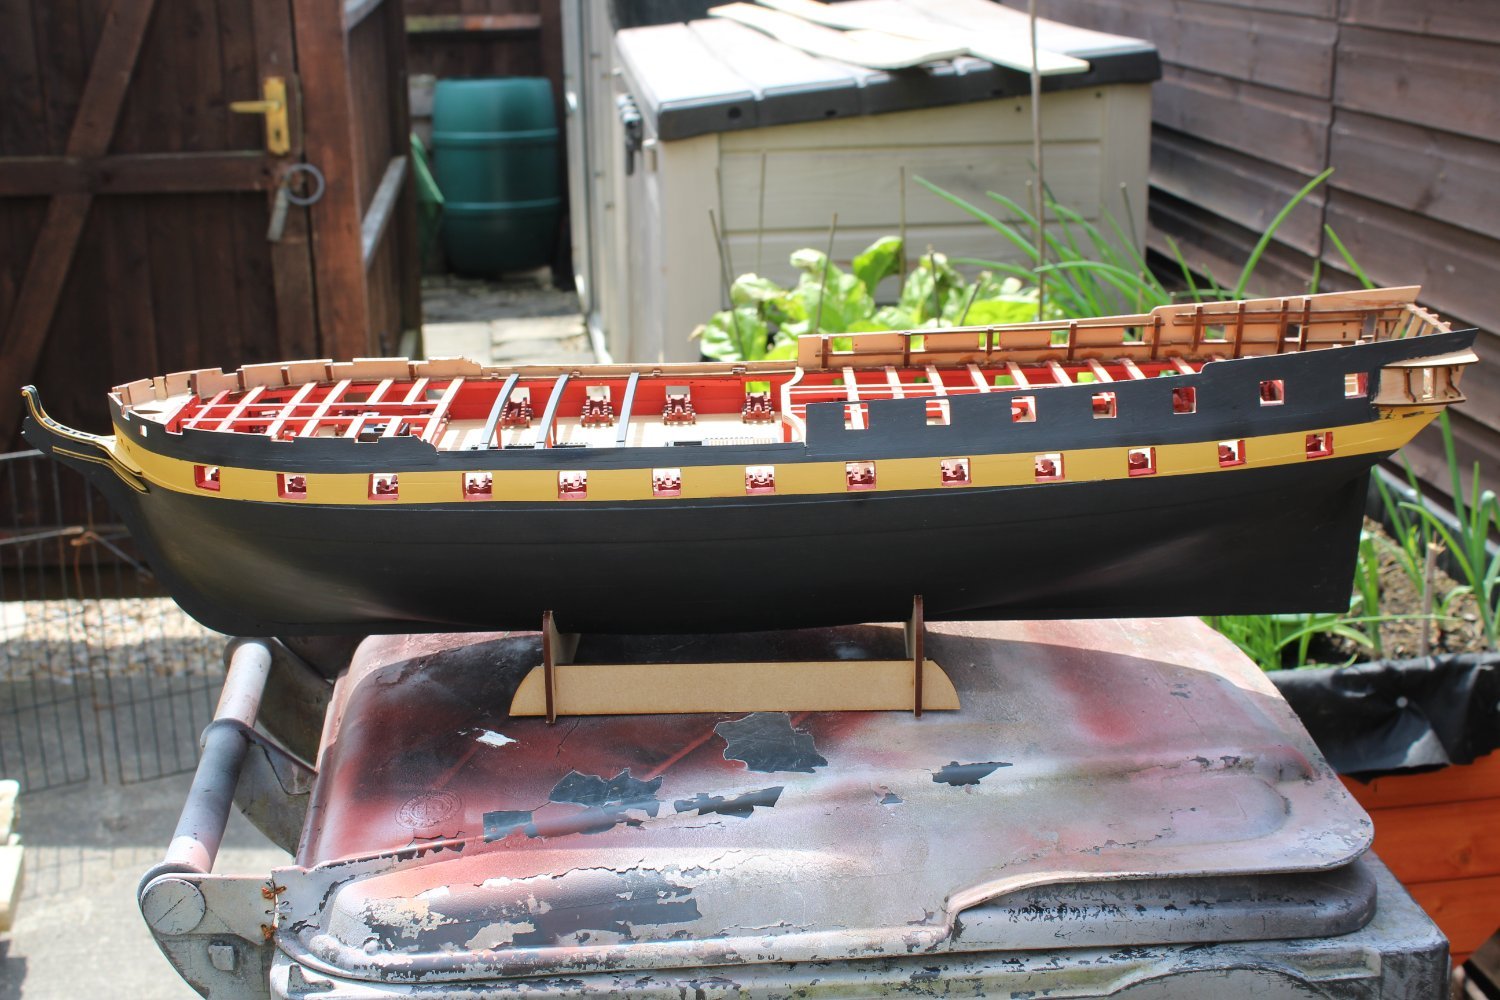
-
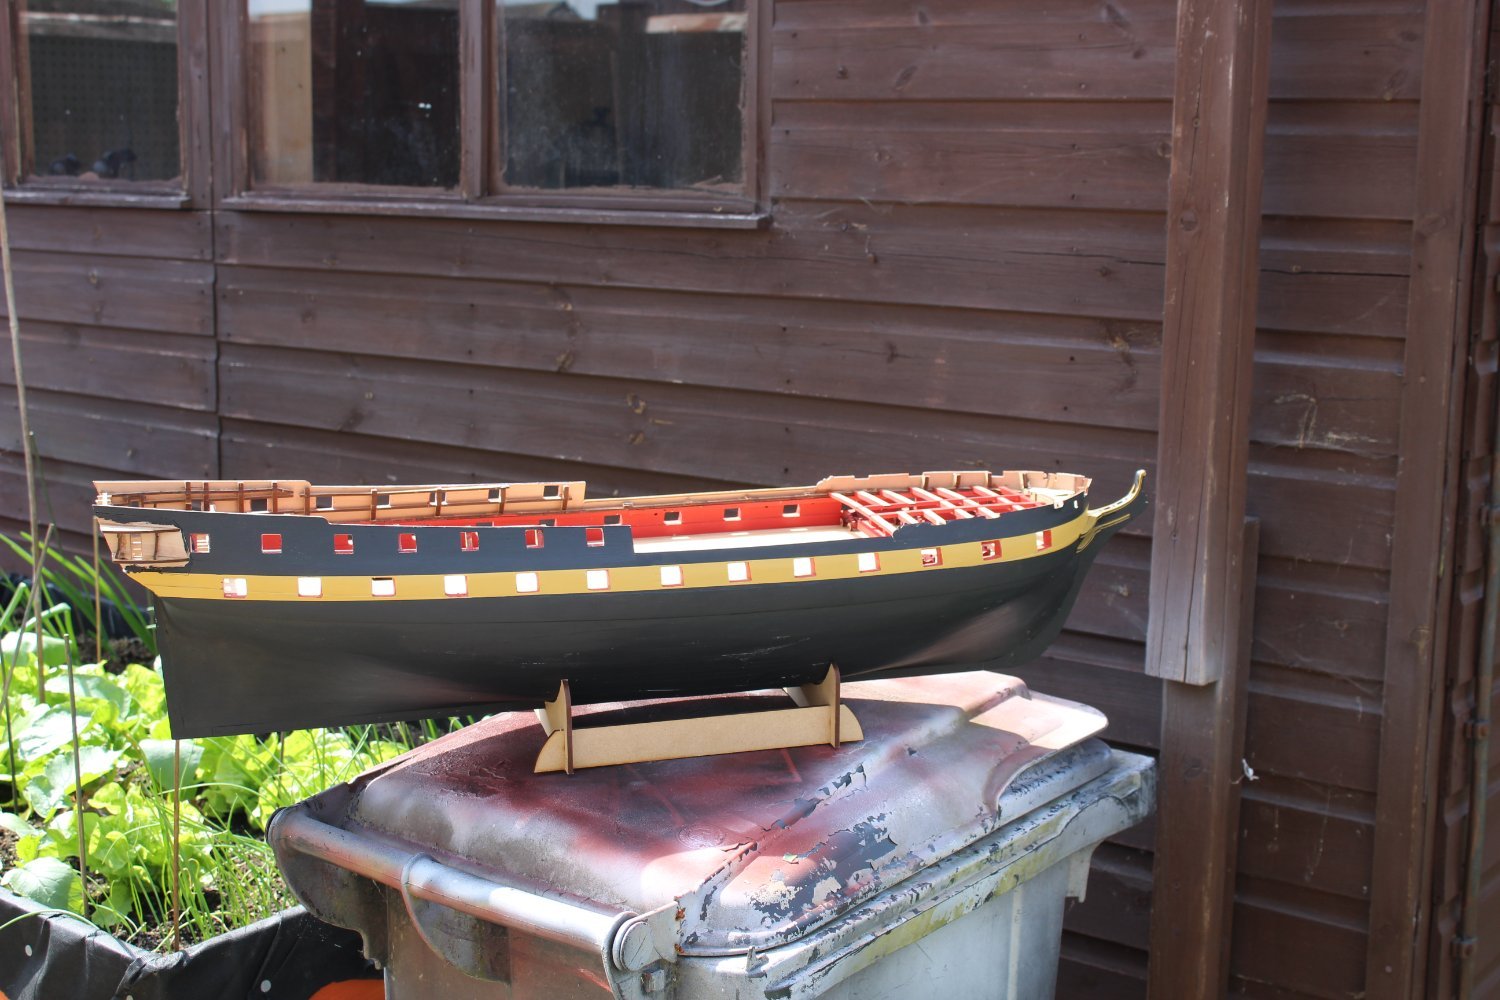
2nd side banded, and quite even


HMS Indefatigable 1794 by Kevin - Vanguard Models - 1:64 - Feb 2023
in - Kit build logs for subjects built from 1751 - 1800
Posted · Edited by Kevin
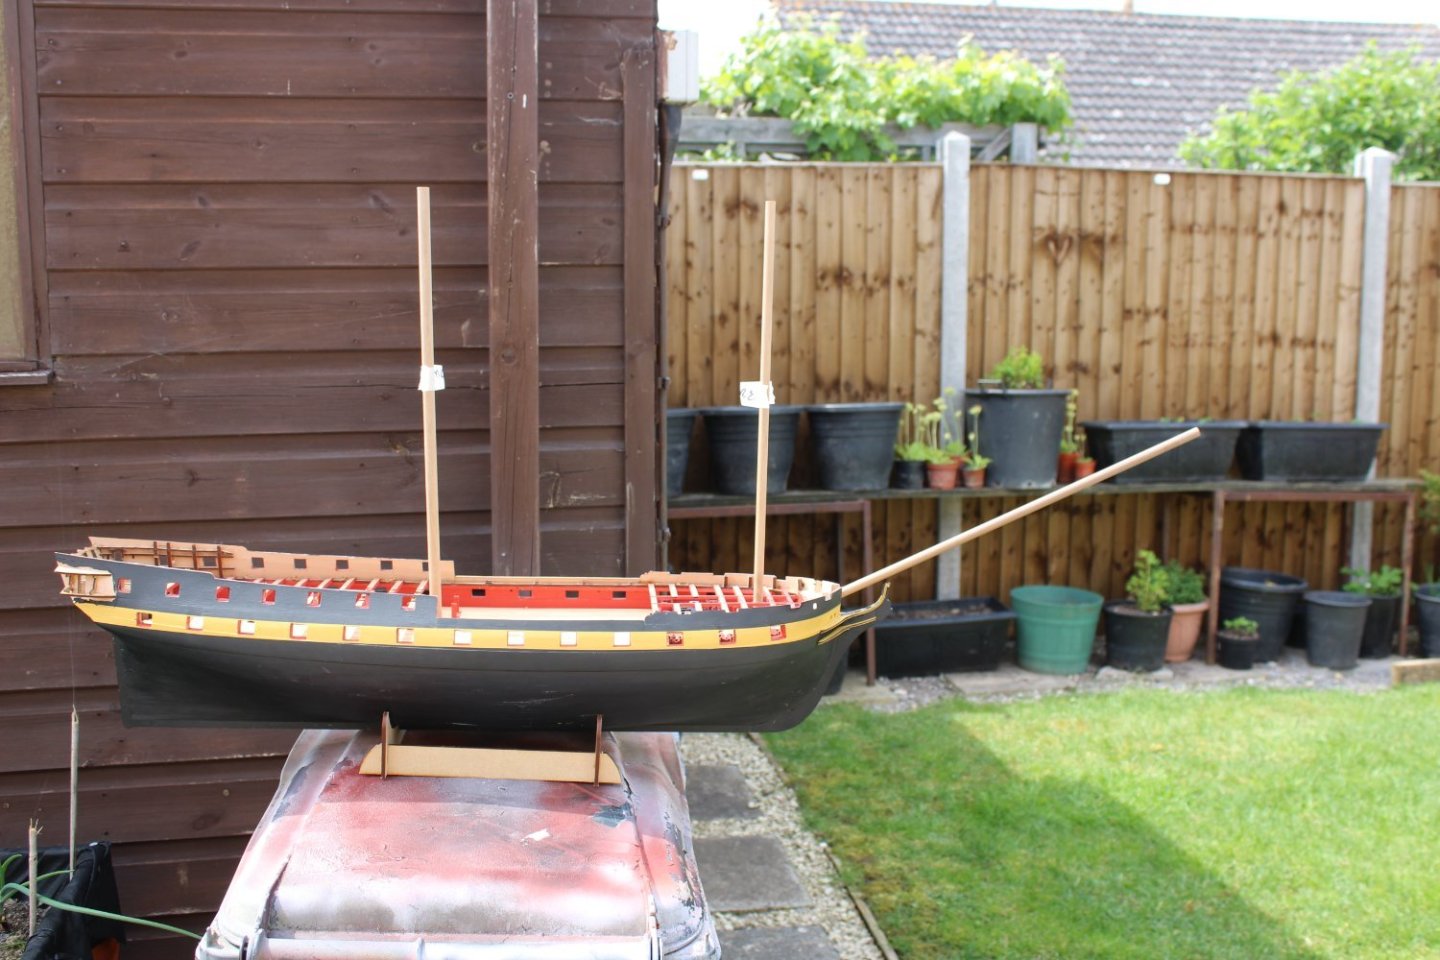
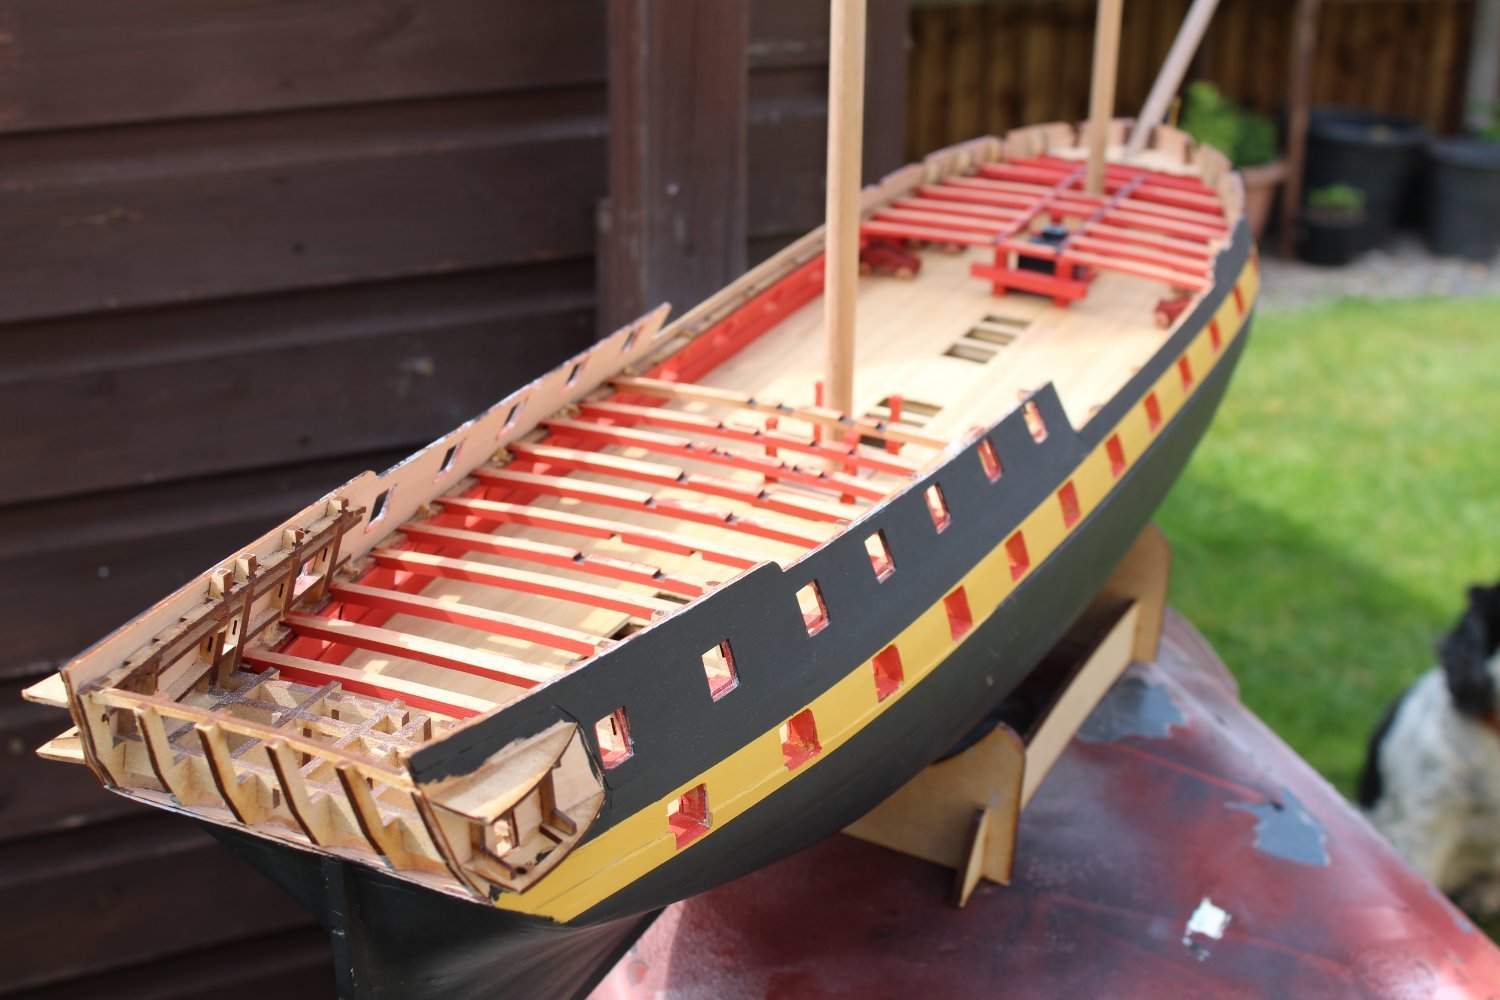
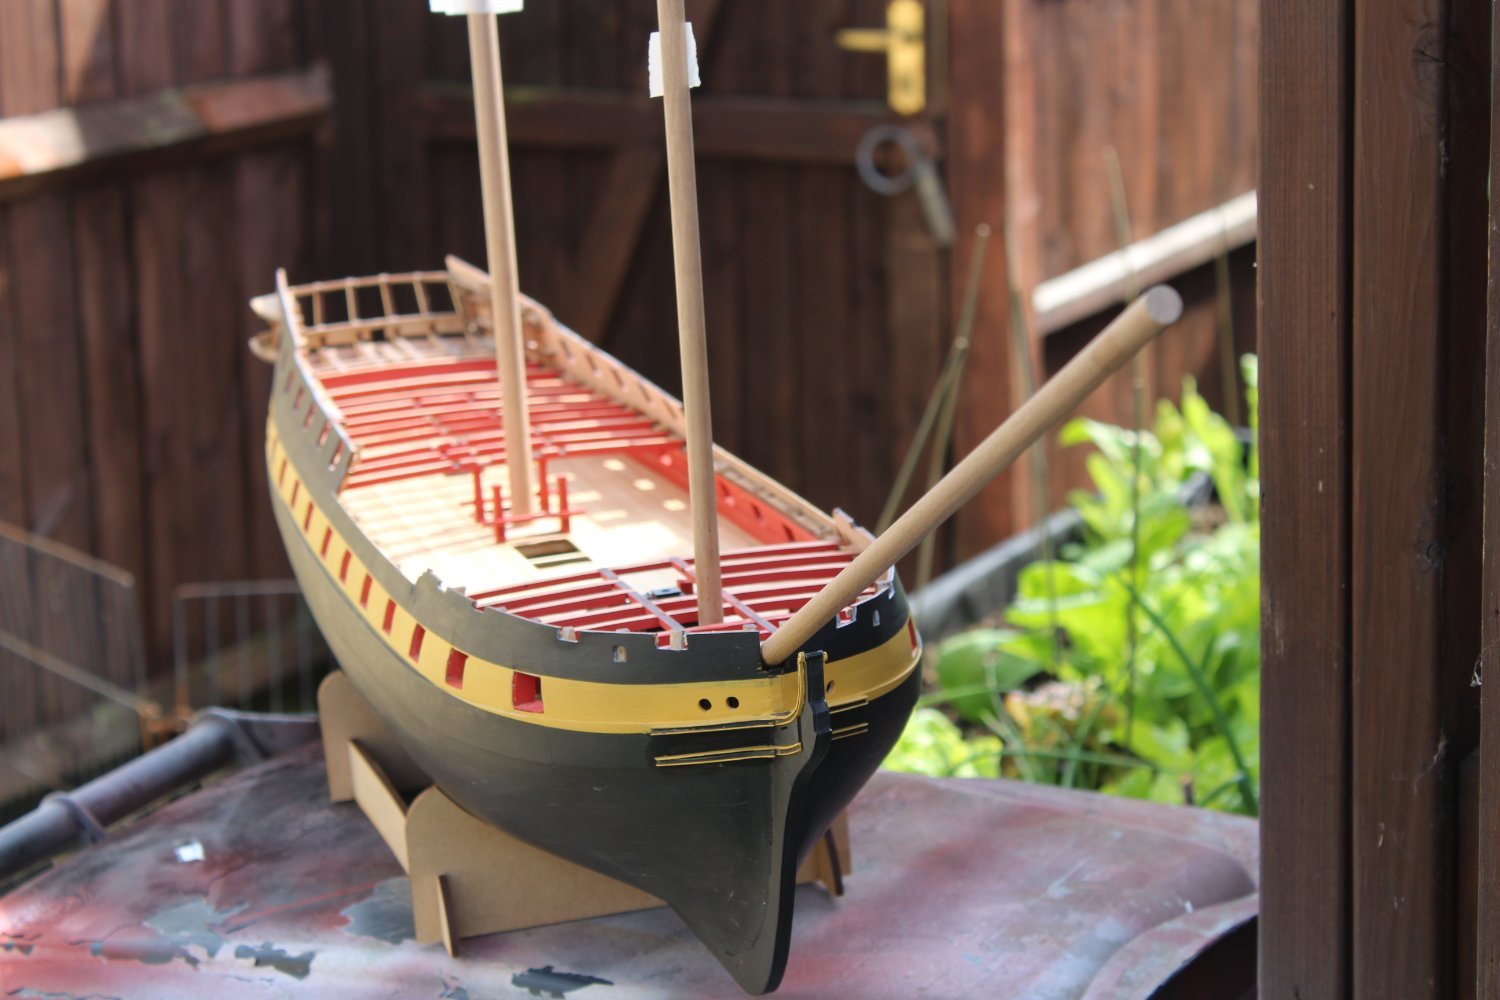
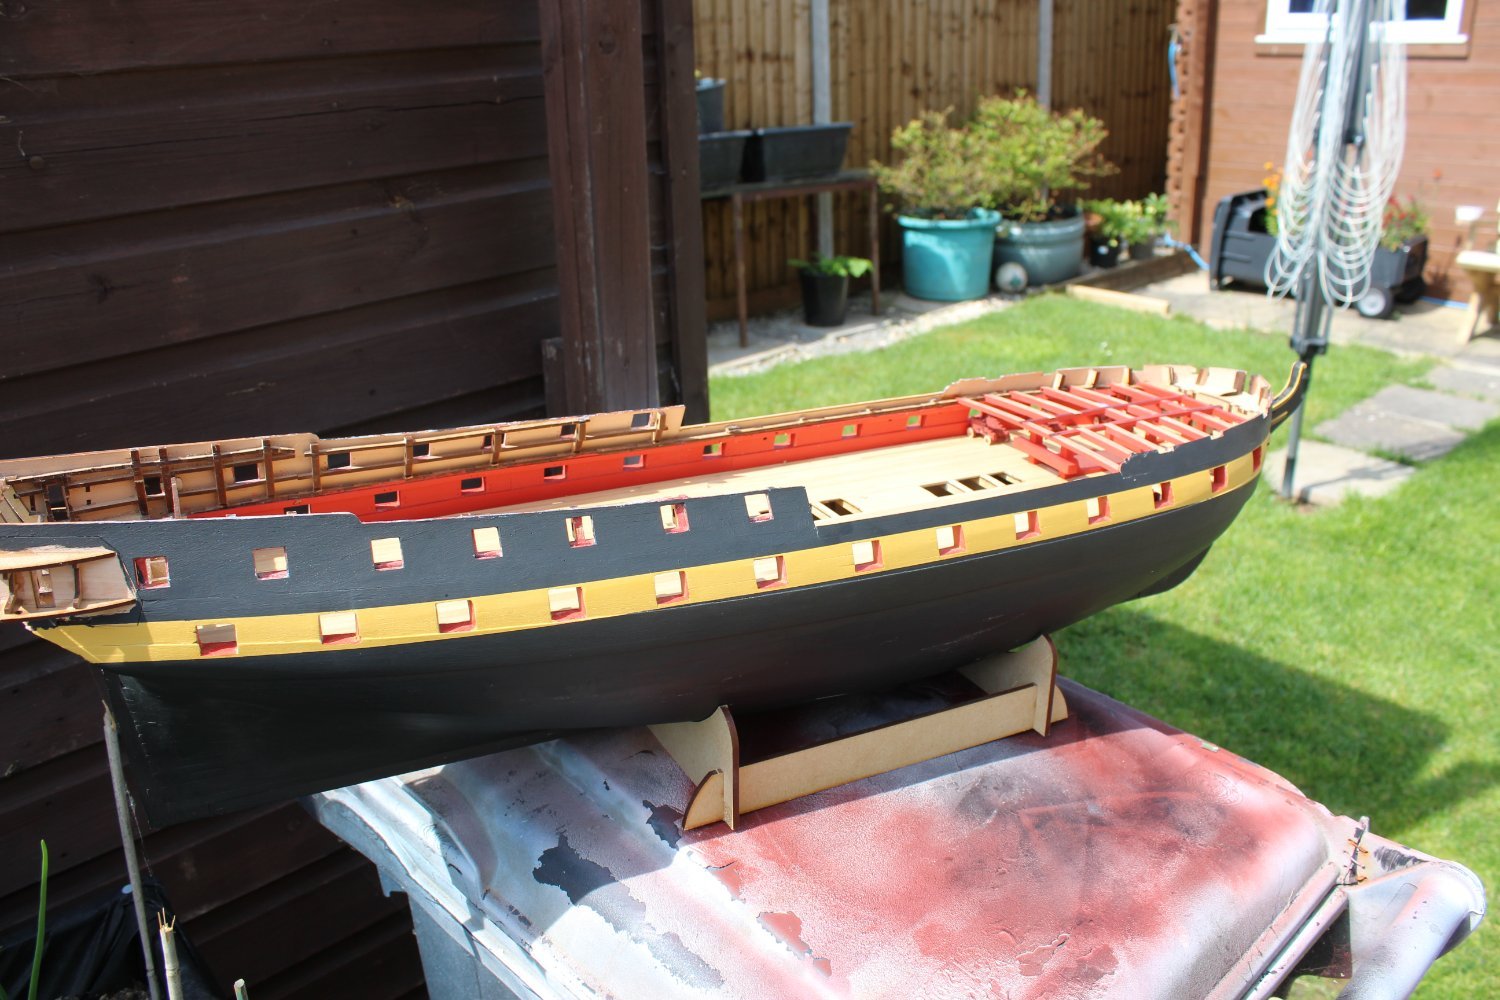
good evening everyone
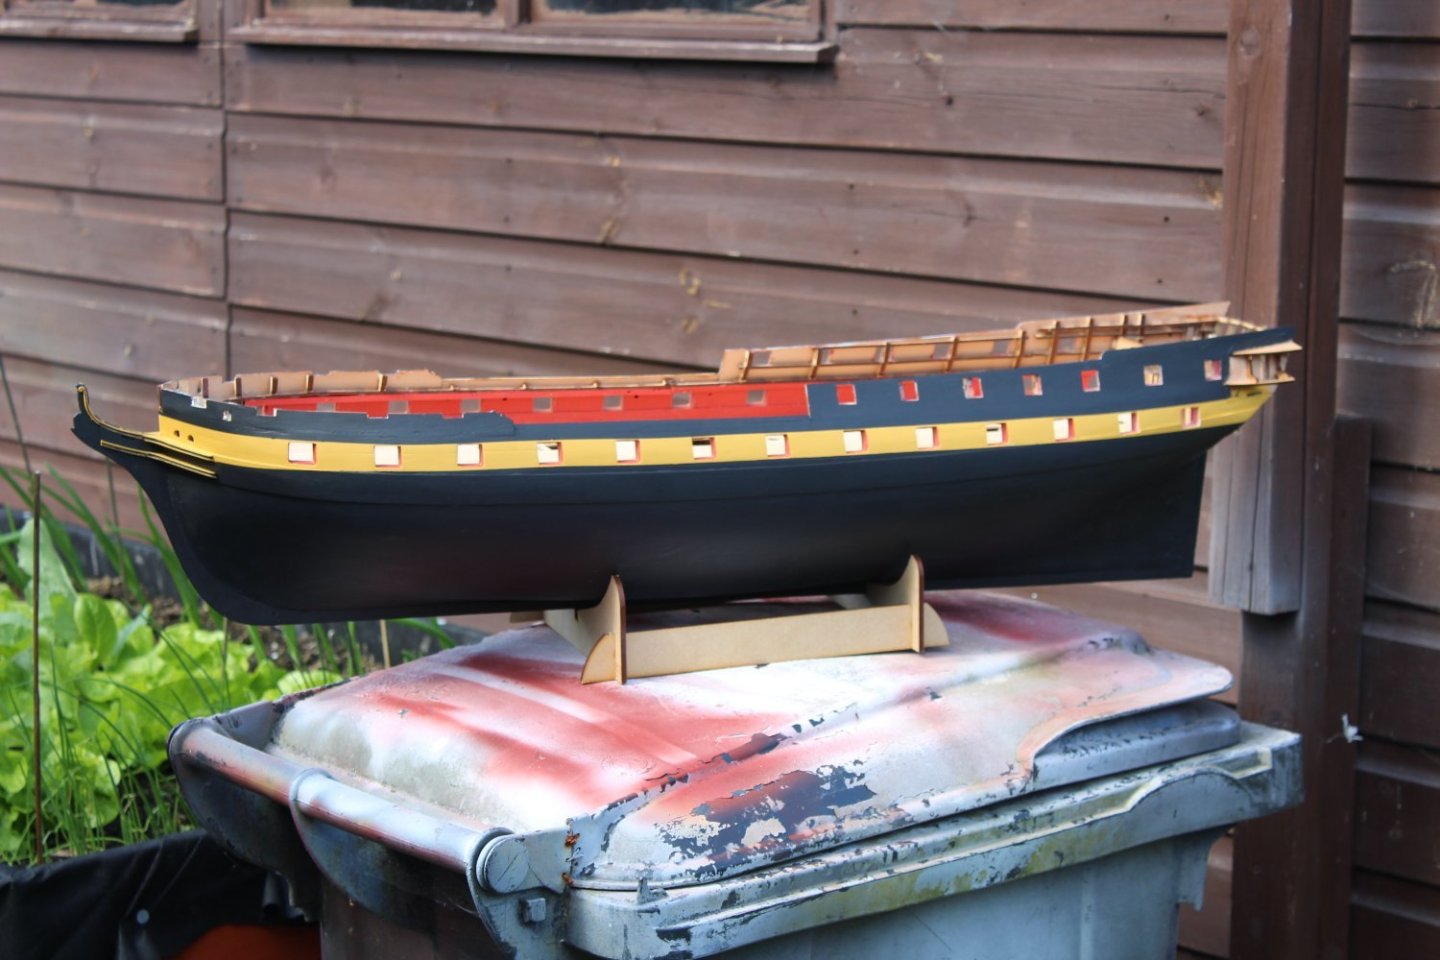
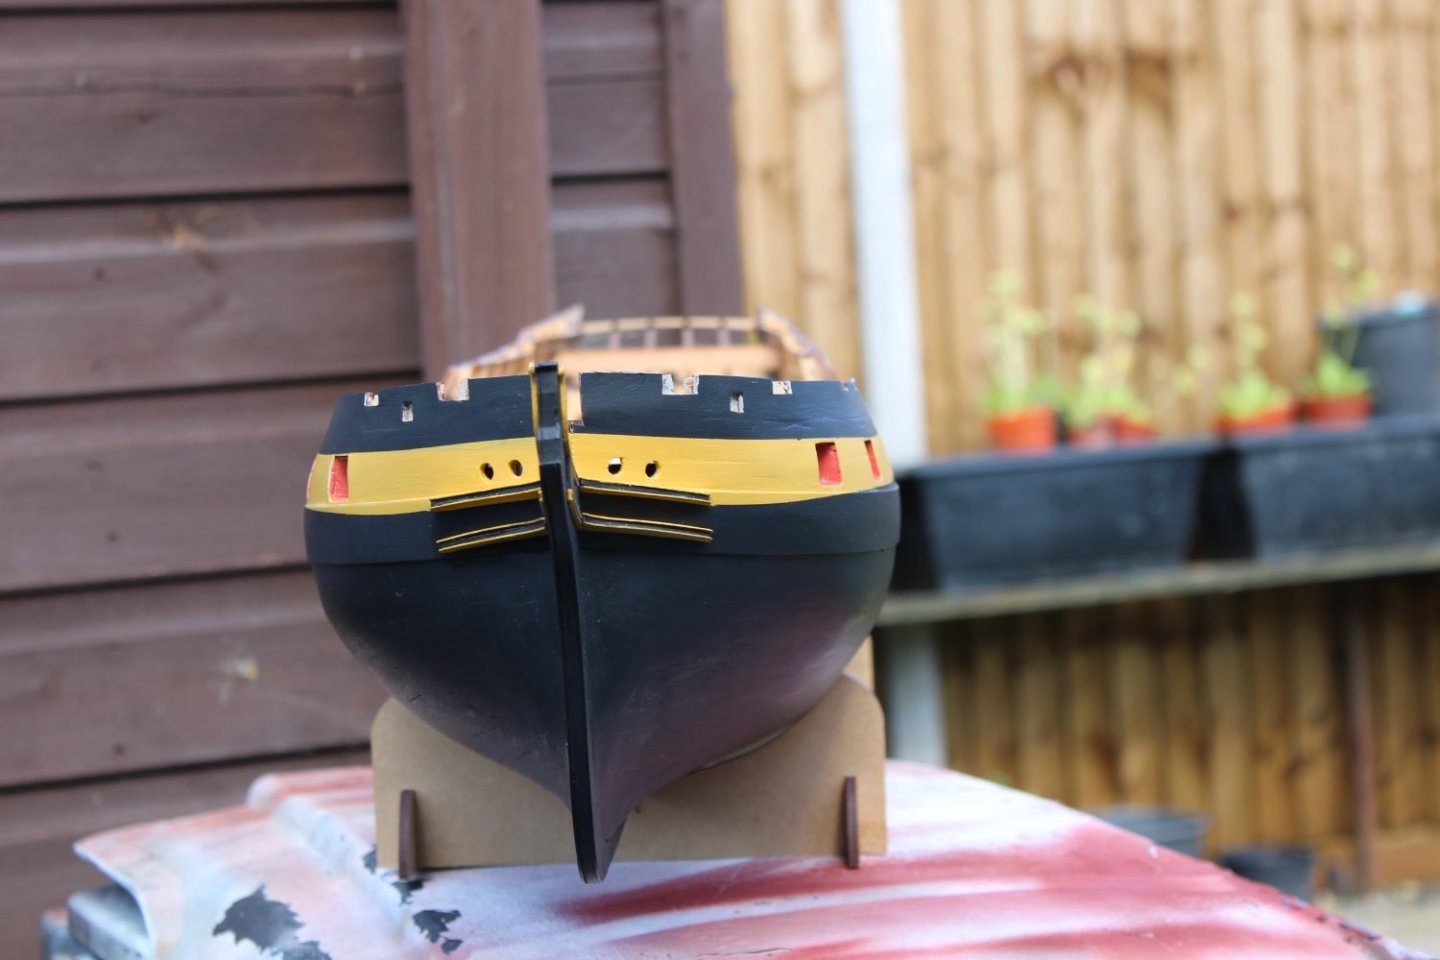
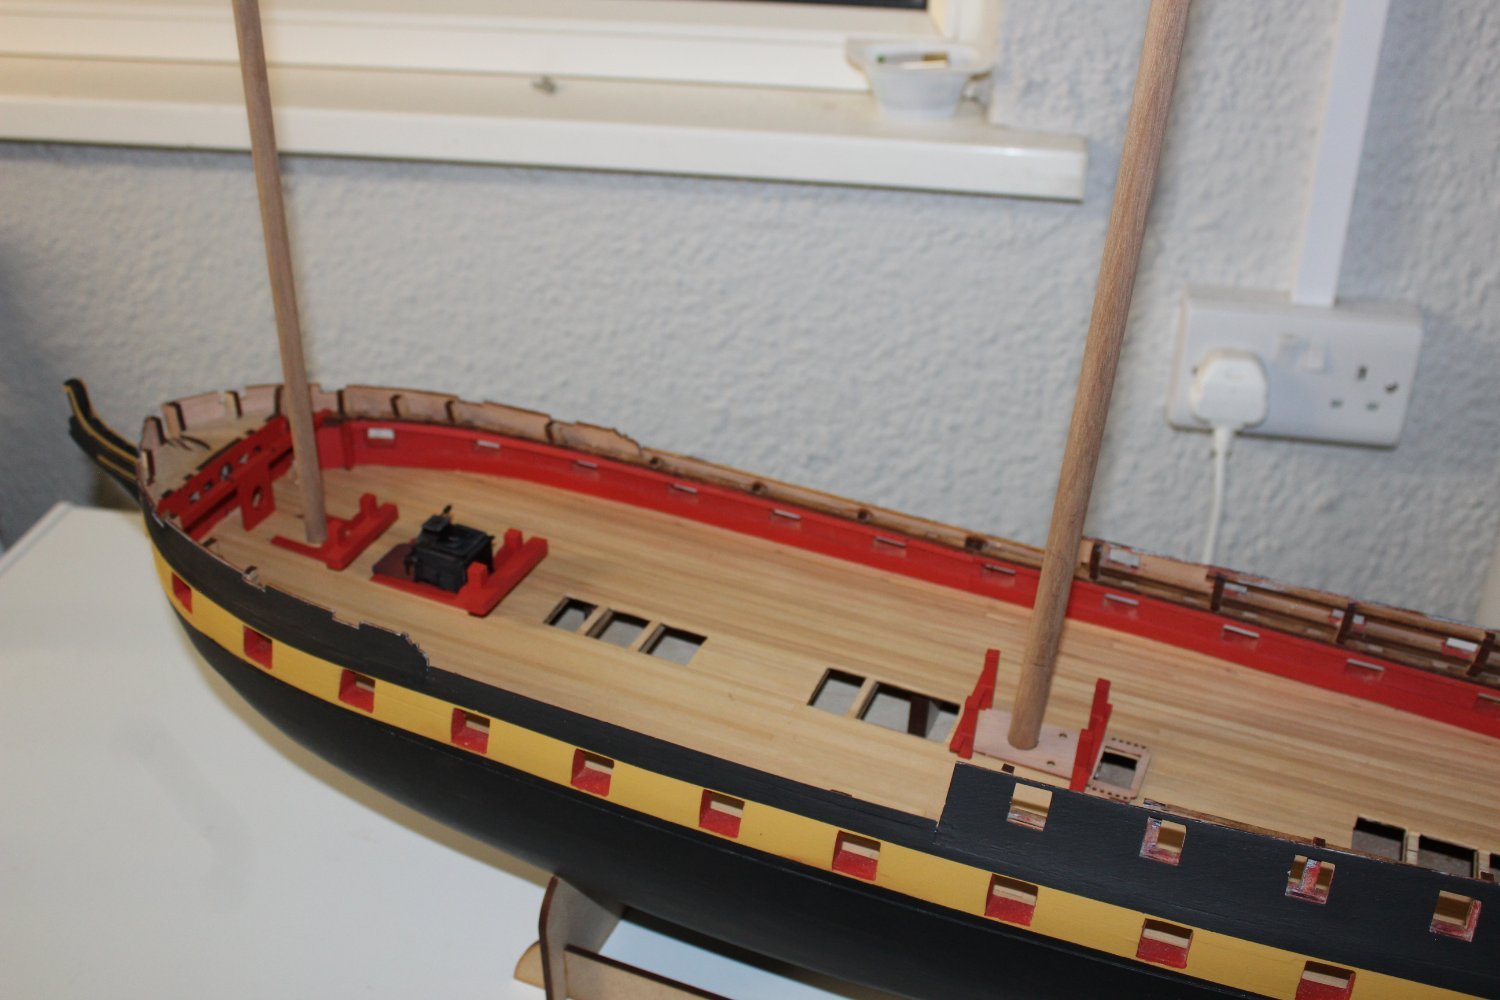
day 112-2
in the past week the progress on indy slowed down a bit, but the big garden work is coming to an end, just two ton of gravel to move (well 1800 KG)
the planking is nearly complete, still more tidying, sanding filling and varnish required, but it looks quite tidy now, the poop and some of the gratings were placed for the photo