


JOUFF
-
Posts
98 -
Joined
-
Last visited
Content Type
Profiles
Forums
Gallery
Events
Posts posted by JOUFF
-
-
-
-
Hello Doris,
I discover your subject and I admire !
If you allow me, I have one or two questions about your sculpture technique.
Page 20 on the Czech forum, you are writing this :
"The modeling of the decoration began by making the first of many caryatids to decorate the posts between the rear galleries and the mirror windows, and the statue is a lot of black, so I'll have to shift the macro lens to focus it in. It's done with details in the face and various elements , which are visible on the elements of the Riksäpplet decoration from which I draw these figures.
... / ...
On the exam, I have cured the first three caryatids after molding in the oven and placed them on the columns of the left gallery - it is only temporary, the karyatides will be 100% matched to the height and tilt of the posts. So far they have no patina. The camera does not completely render all the details thanks to the glare, but the husband, when he was looking at it, just remarked that I was a maniac .....: D "
I would like to learn more about how you are modeling : what software, accuracy, informations ... Also, for the realization you are talking about "molding in the oven" : can you detail ? Did you make a subject about the process as a whole : from the starting point of a subject to achieve until the final result ?But maybe you're explaining somewhere : language barrier will not help me ...
Thank you in advance for your answer and congratulations on your great work!
Patrick -
On 6/23/2018 at 11:57 PM, mtaylor said:
Al,
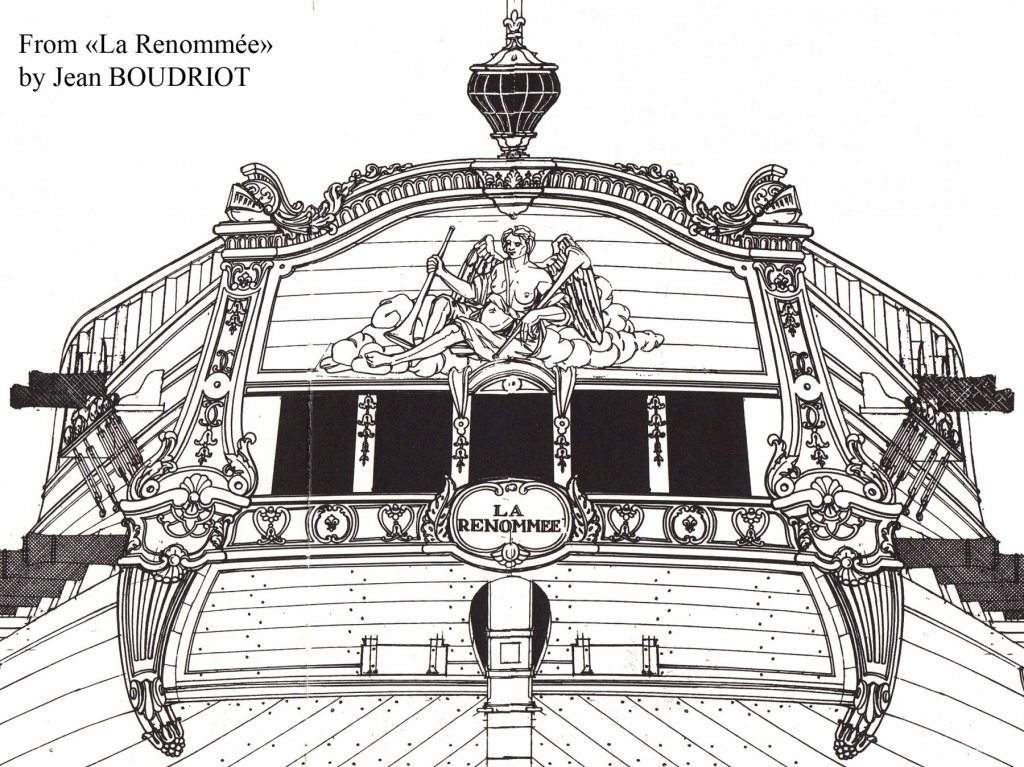
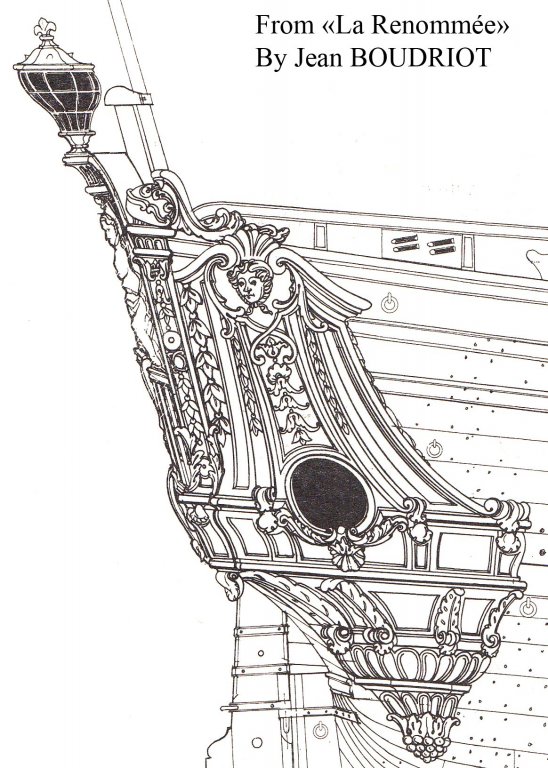
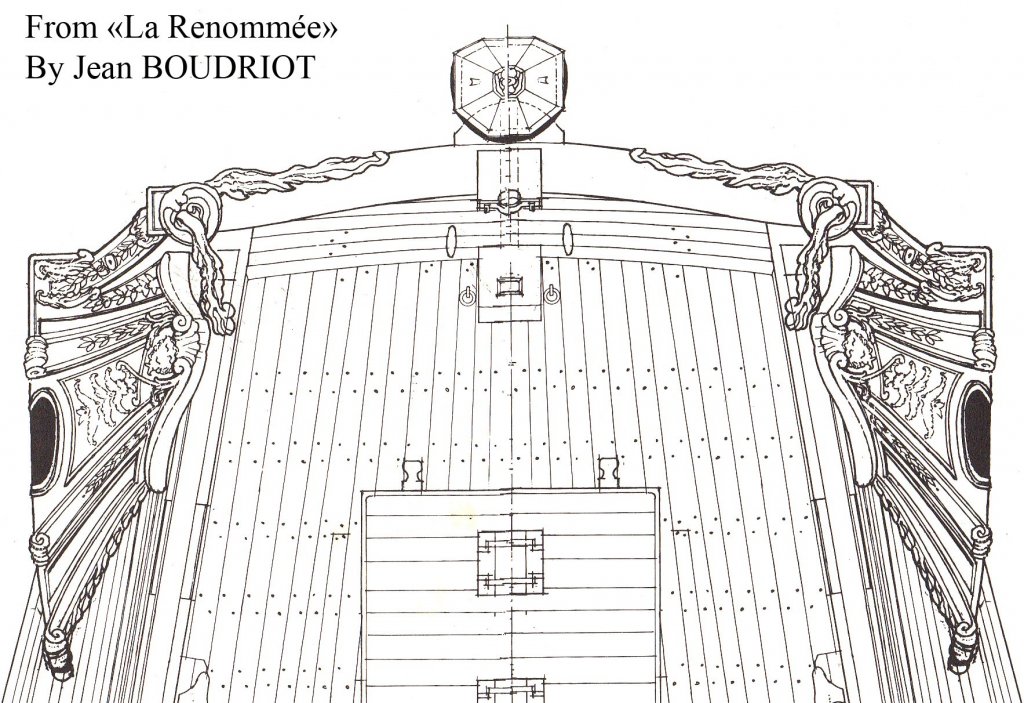
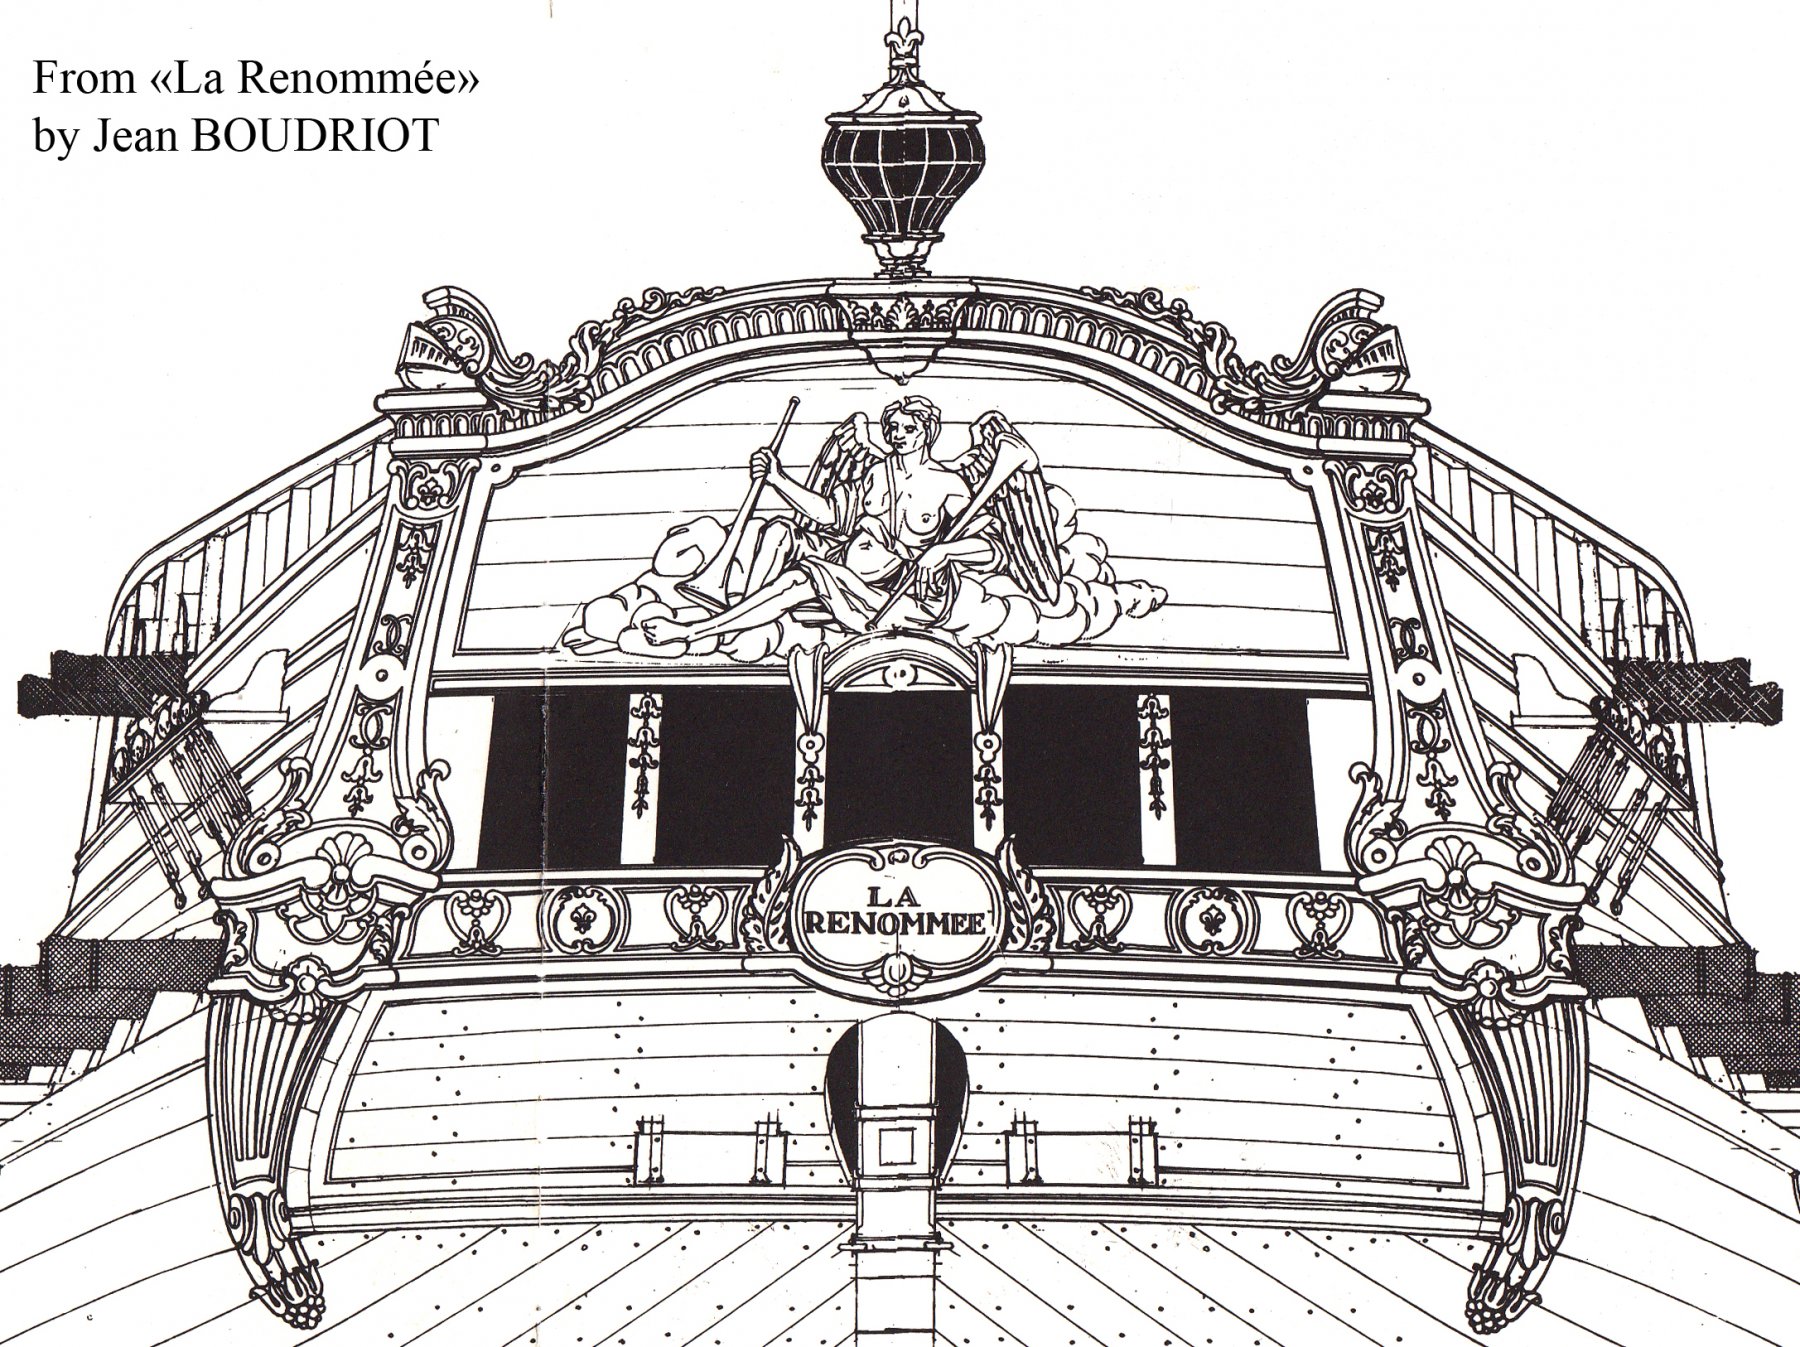
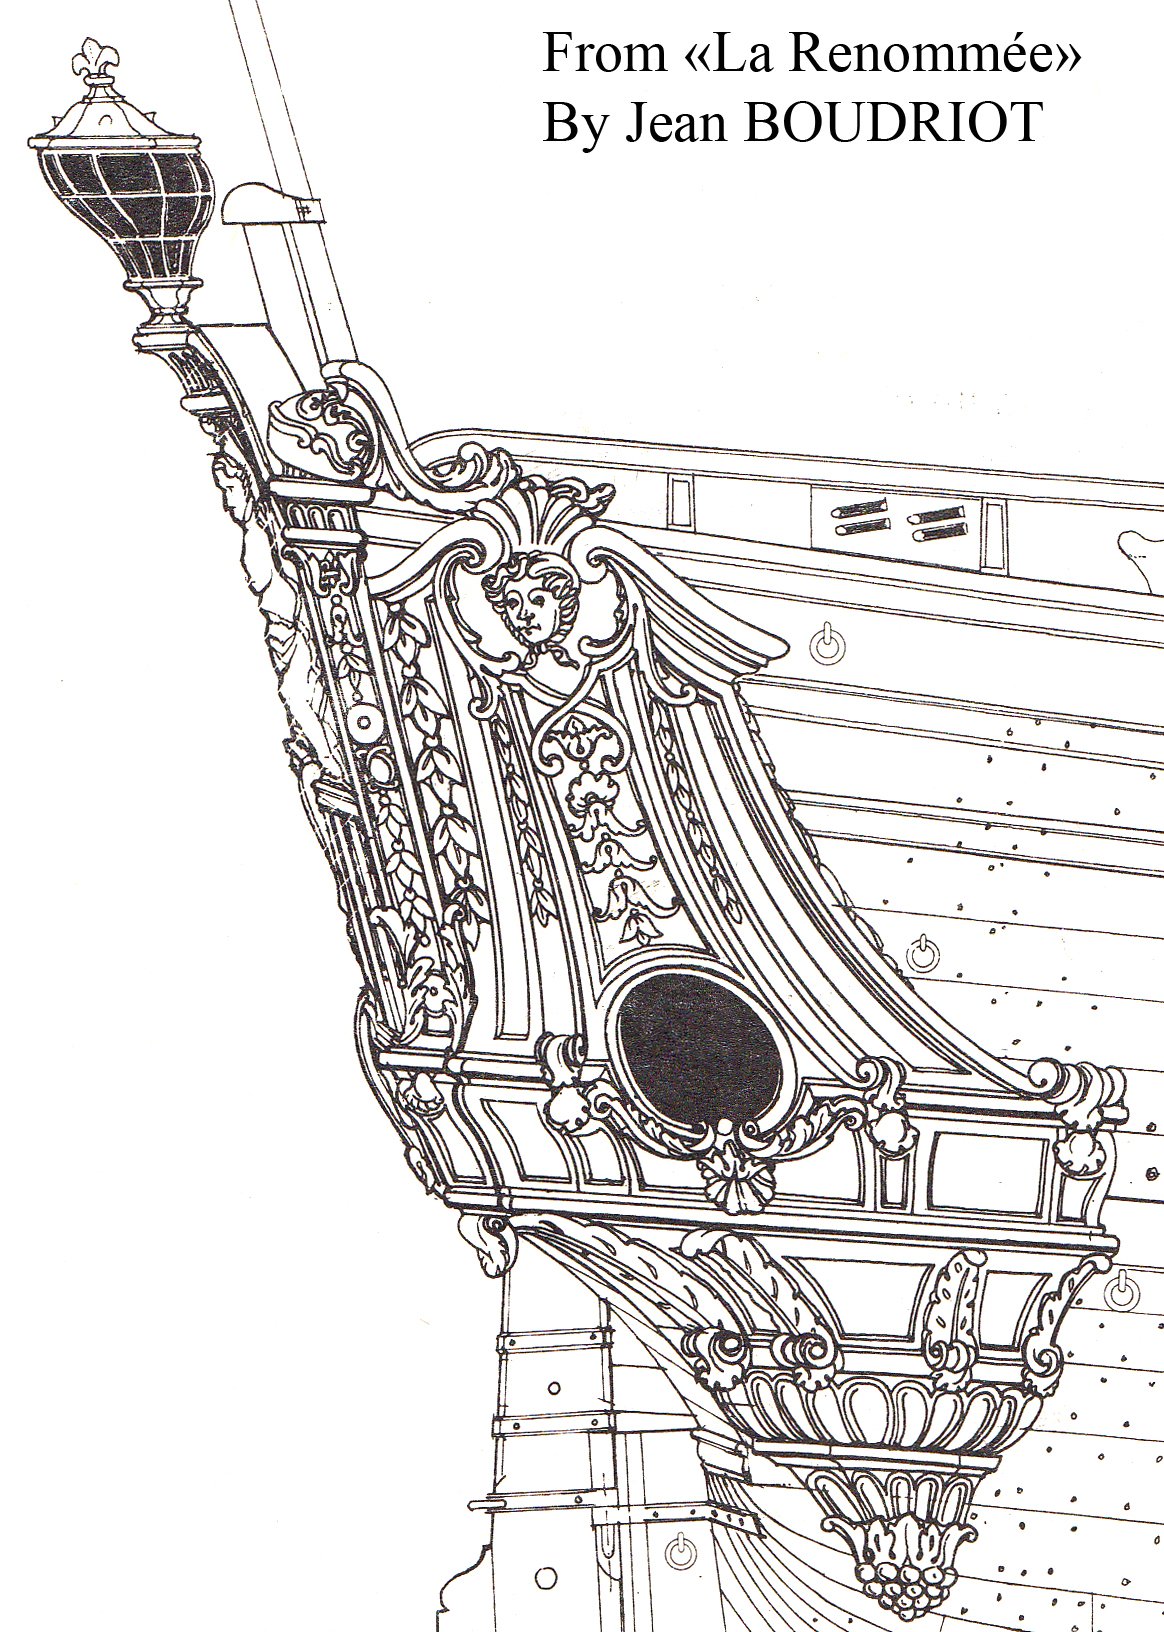
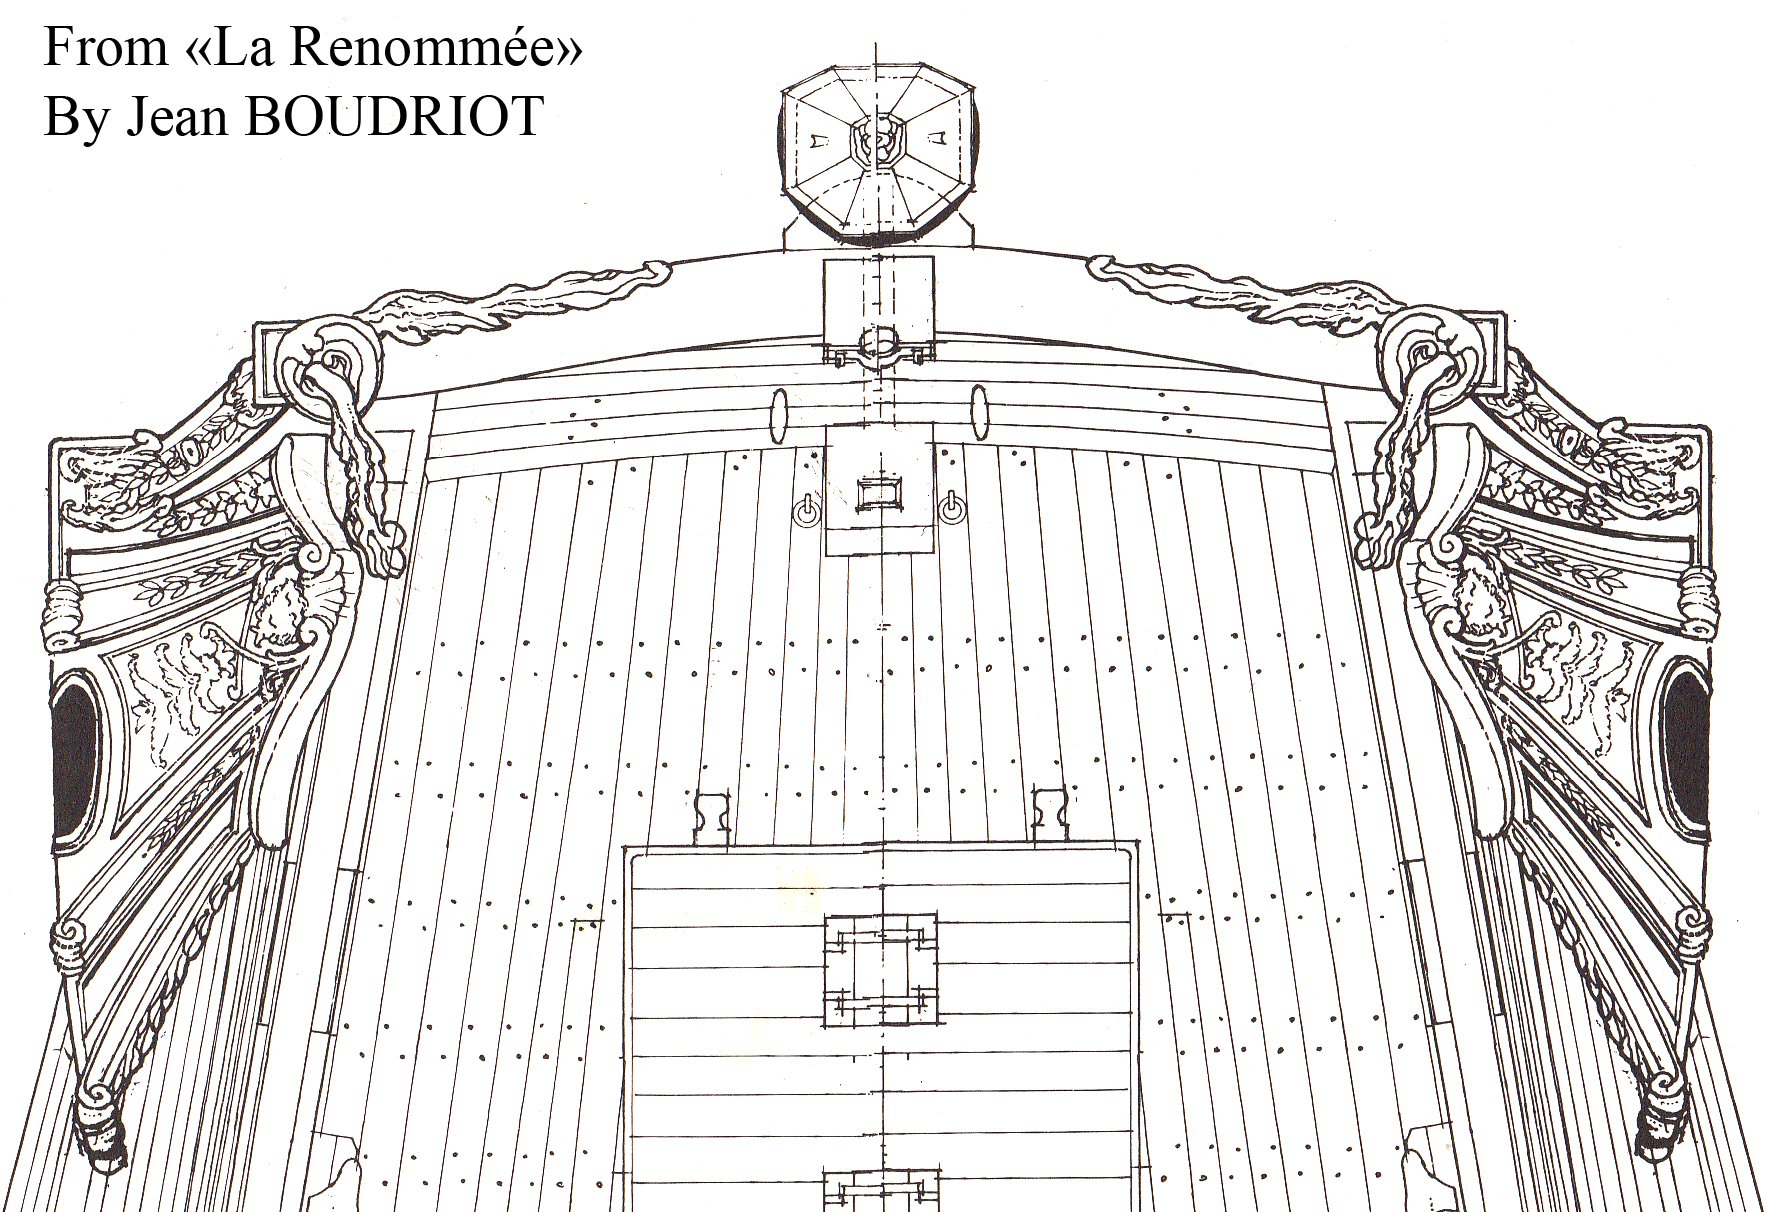
That's one of my references. I located the original plans (some but not all) but not the re-build plans. As built, Le Renommee would be close. Very ornate. So far, the only ones that exist are the NMM that I can find. I'll give my searching another few days and then go with what I think the carvings were.
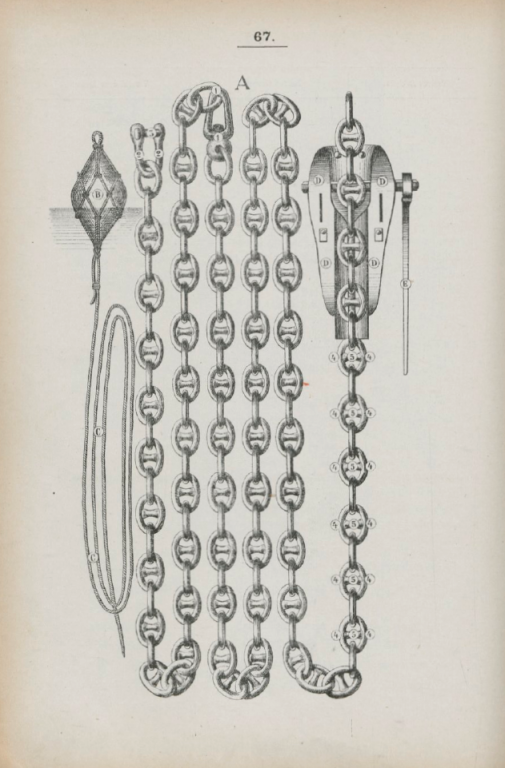
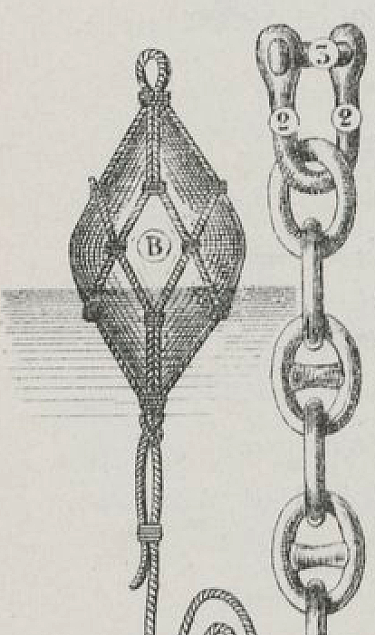
Hi Mark,
If this can help ...
Patrick
- Jeronimo, Beef Wellington, DORIS and 13 others
-
 16
16
-
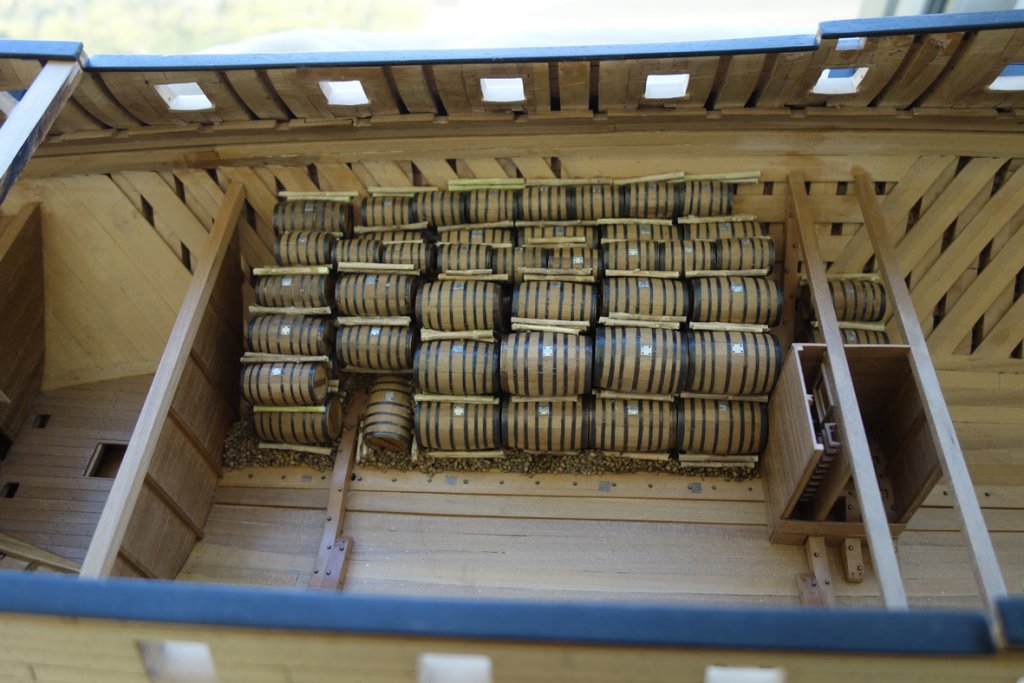
Hello everyone and thank you !
After some modifications, here is the definitive version for this part of the hold.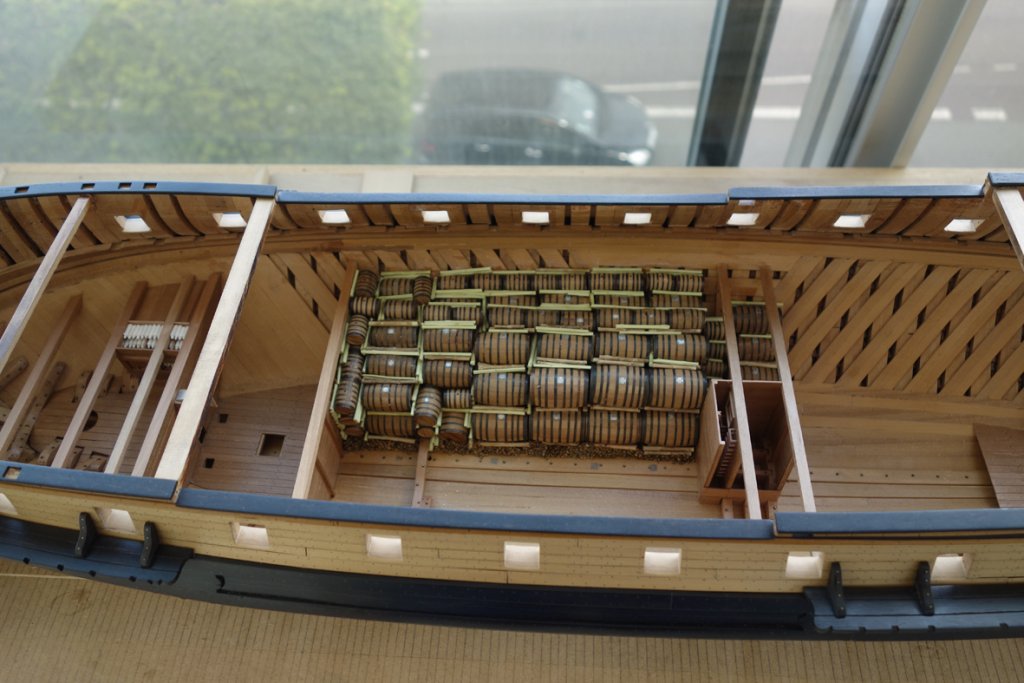
Have a nice day !
Patrick
- mtaylor, KARAVOKIRIS, Siggi52 and 22 others
-
25
-
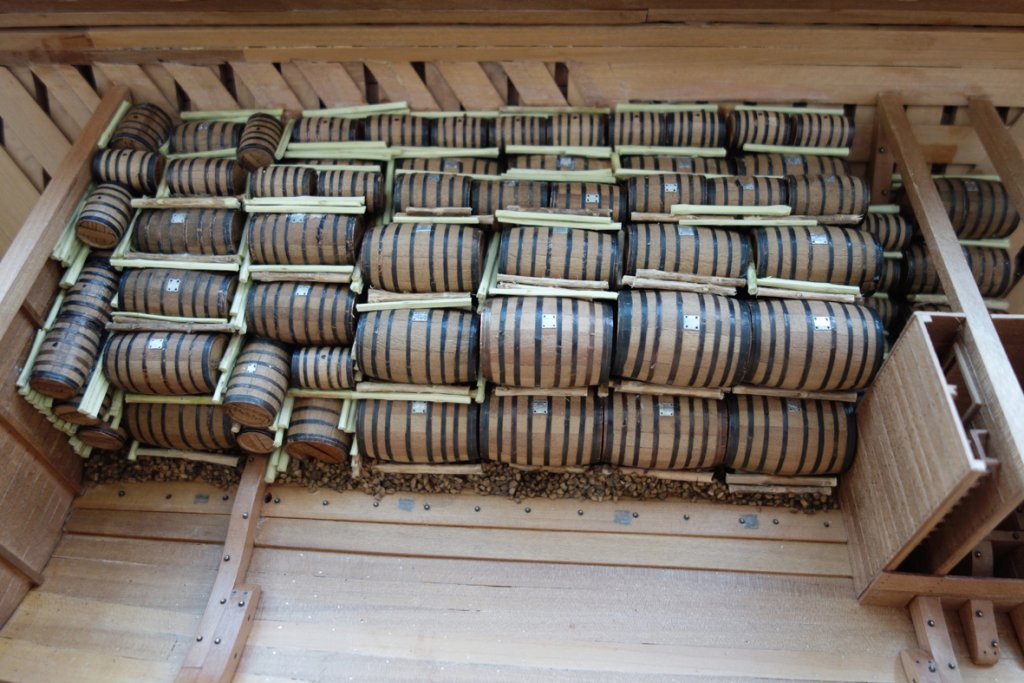
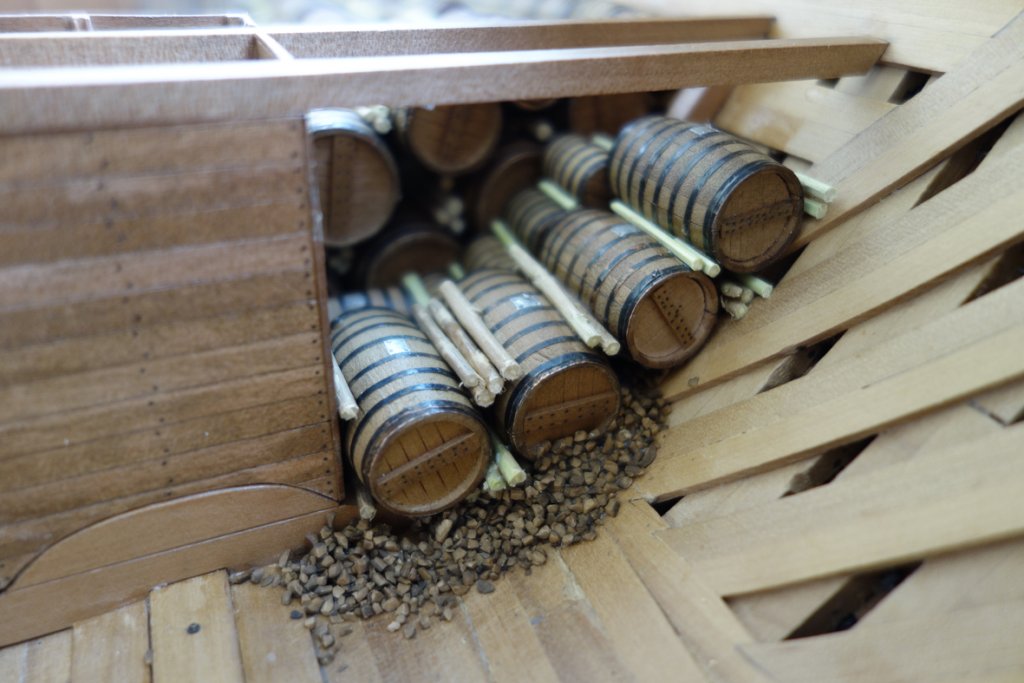
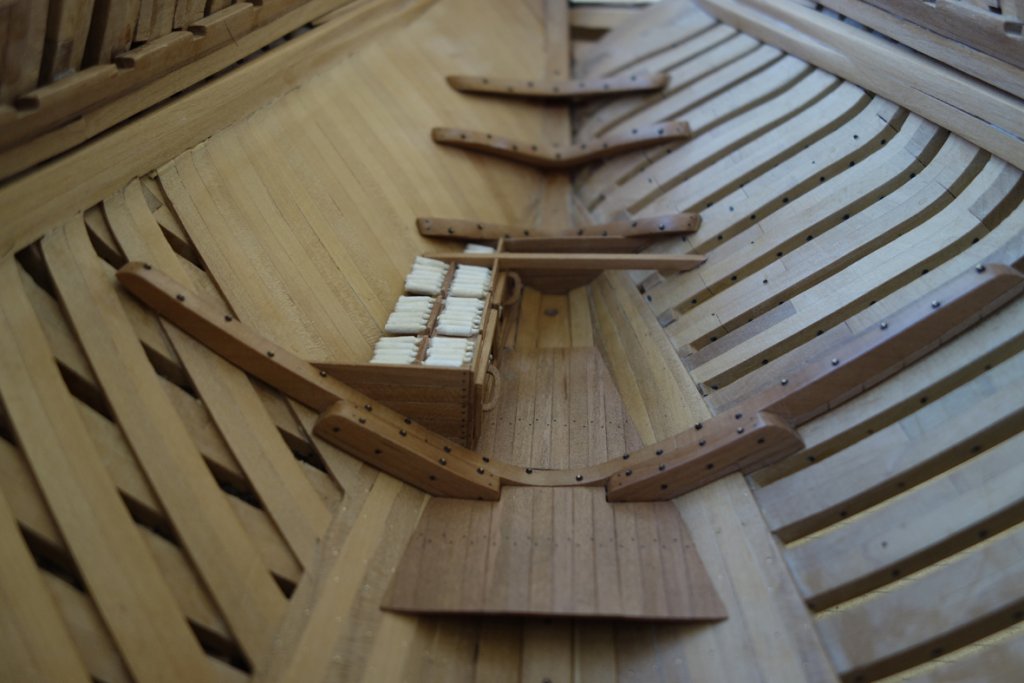
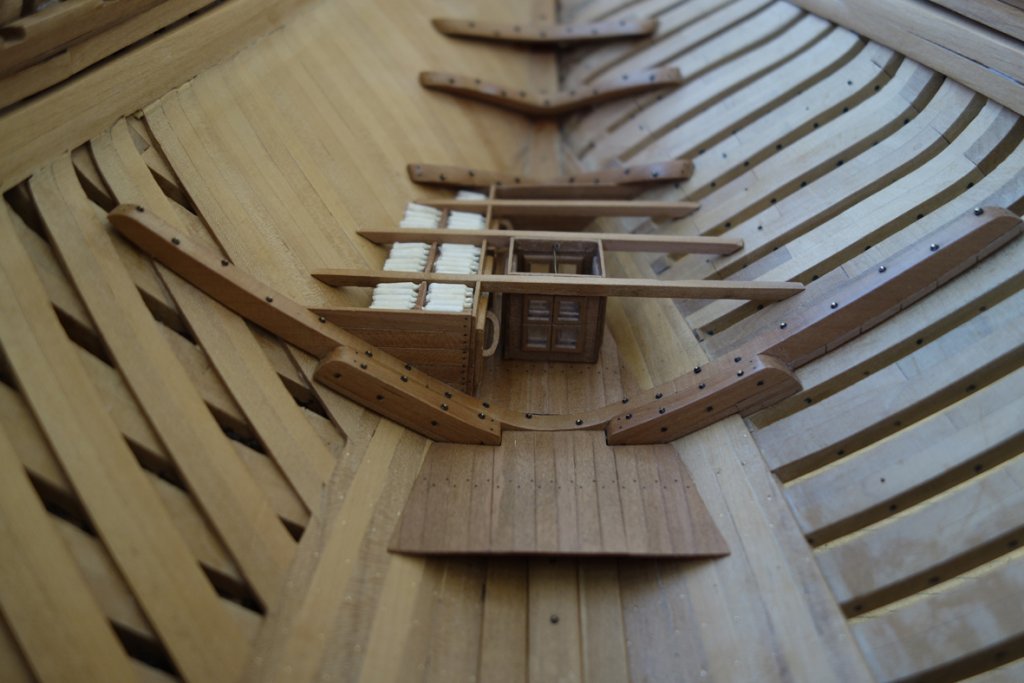
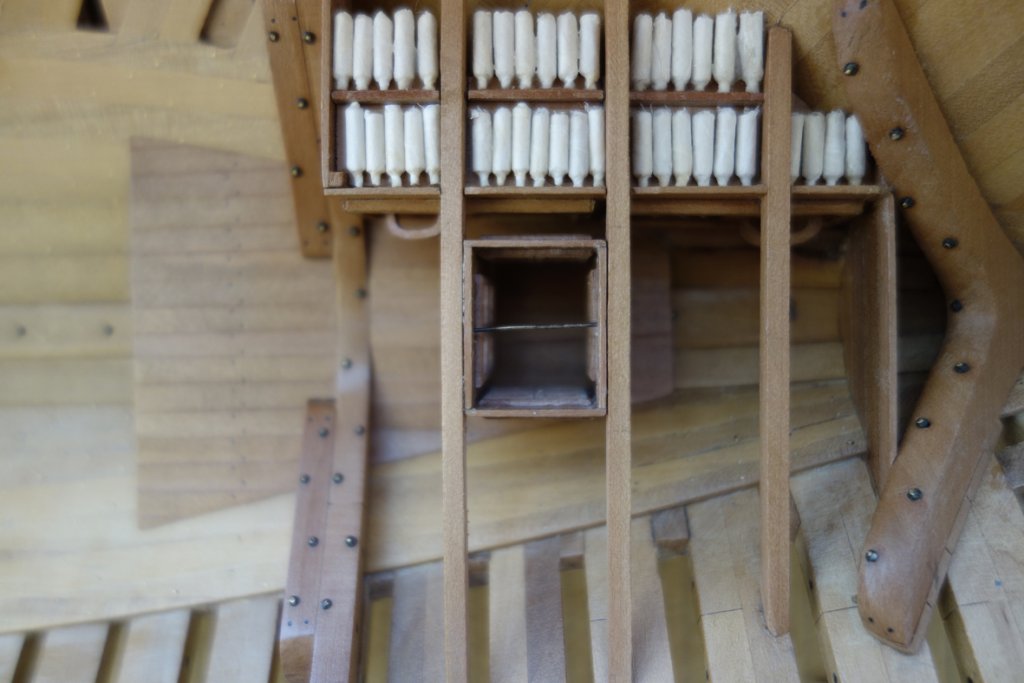
Hello gentlemen !
I continued with the creation of tin plates protecting the bungs of certain barrels: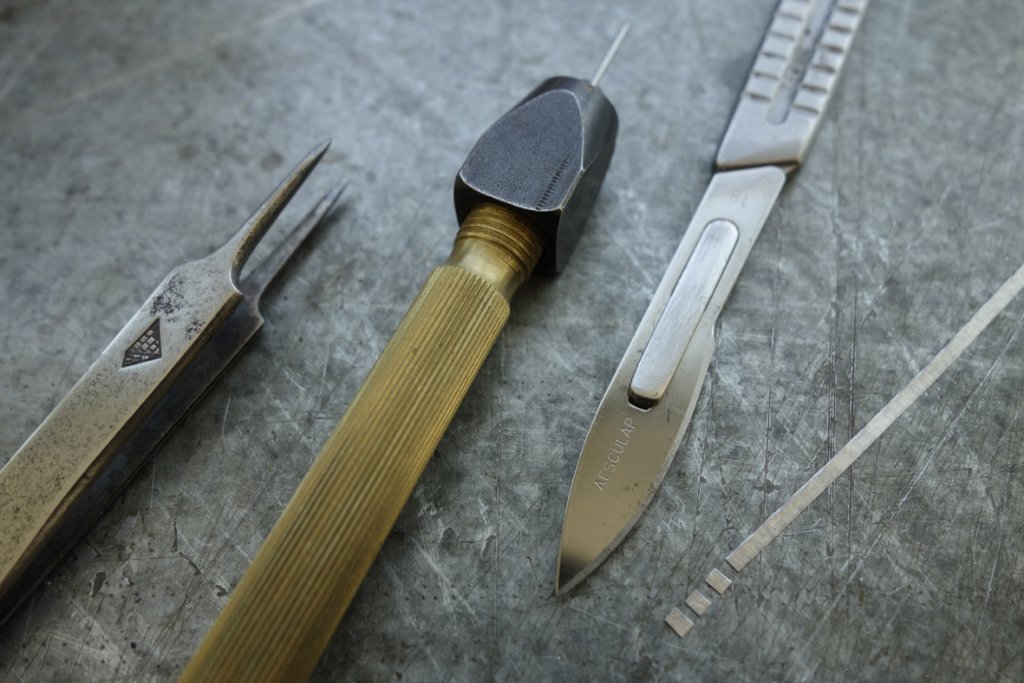

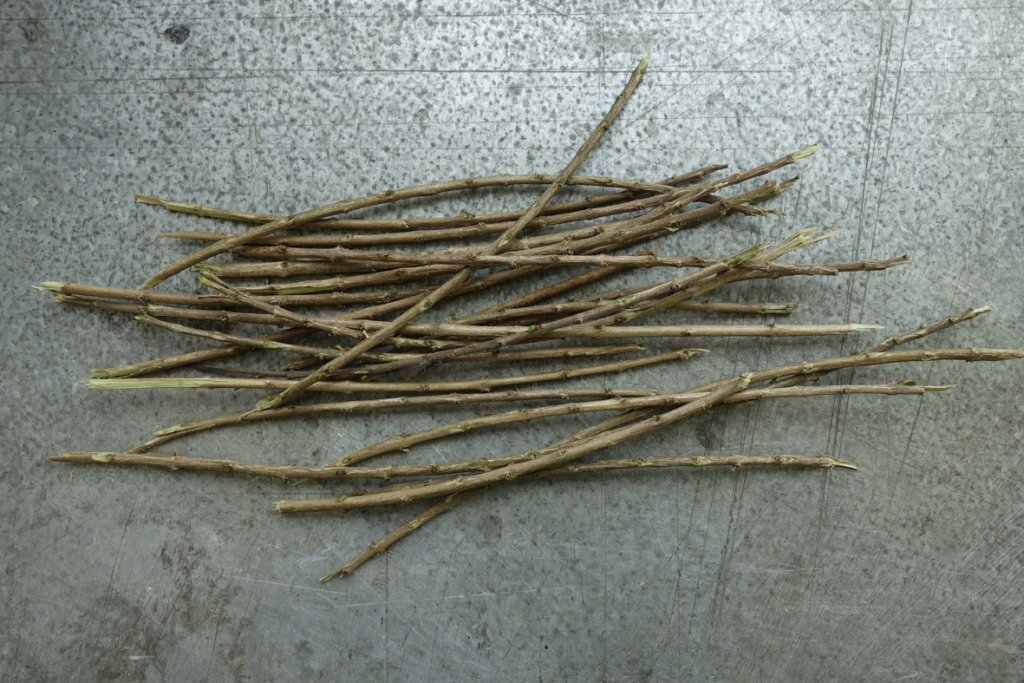
I picked up a few twigs to make the logs:
Finally, I positioned all this small world at the bottom of the hold :
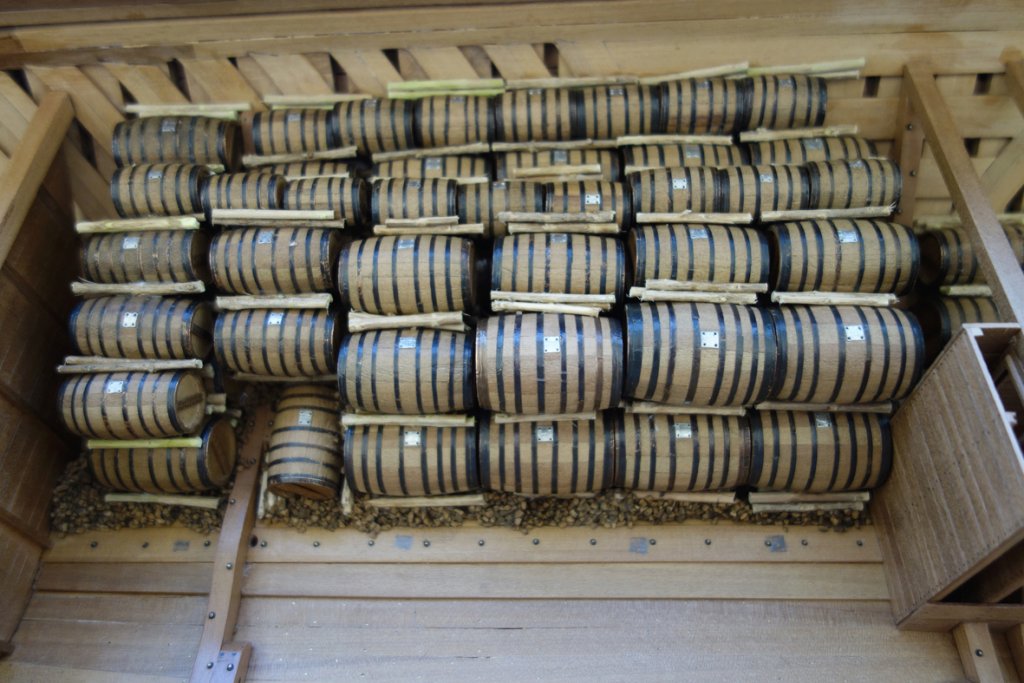
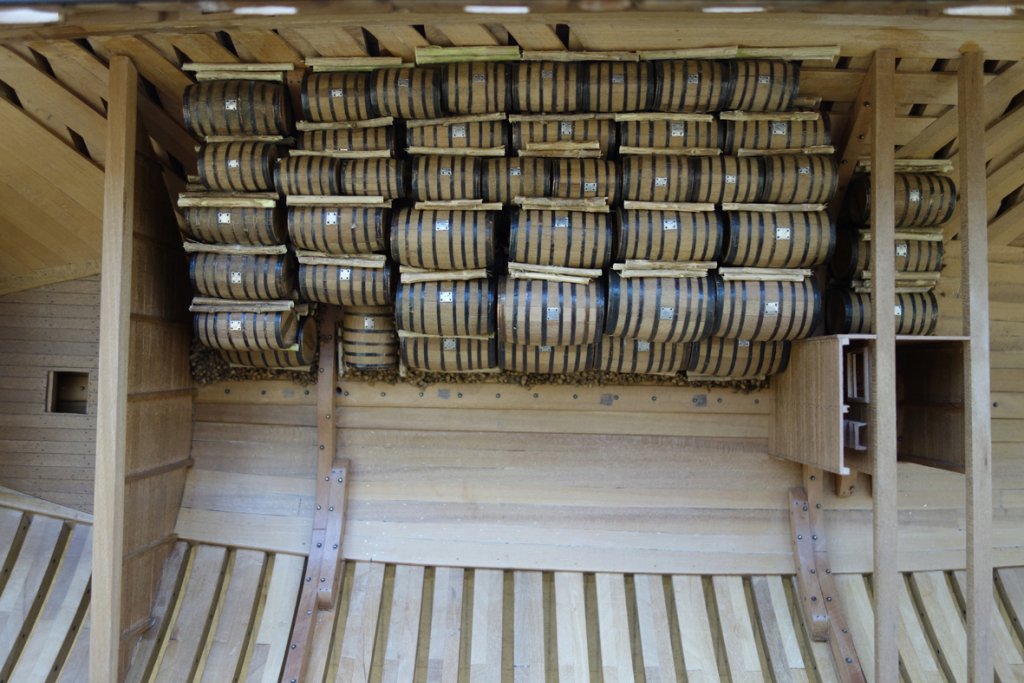
My little companion stands guard :
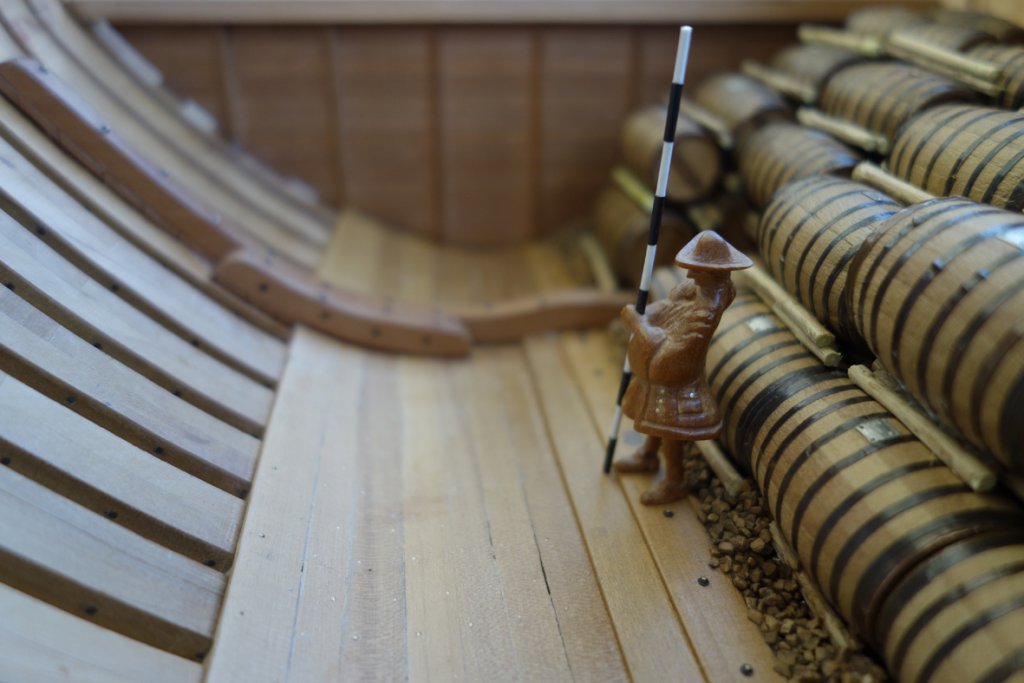

Here for the moment, the following in a few times.
Good day to you all !
Patrick -
Hello Johann,
Here's what I found ... Sorry, I have nothing else to offer you. If it can help you ...
Good luck and congratulations for your remarkable work!
Patrick
- cog, Captain Poison, tadheus and 9 others
-
12
-
-
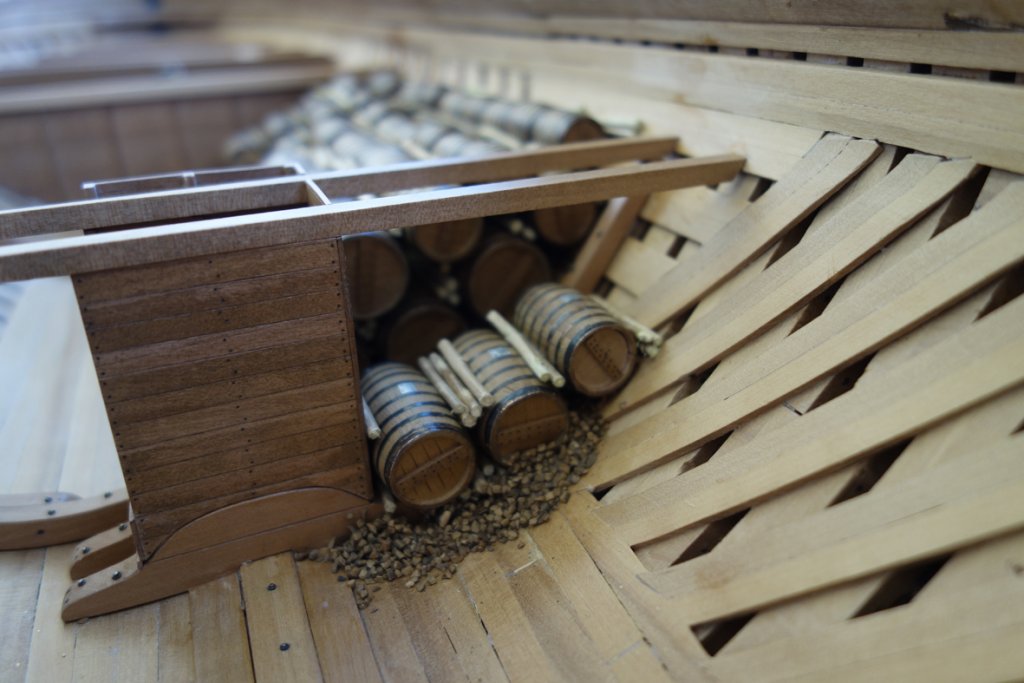
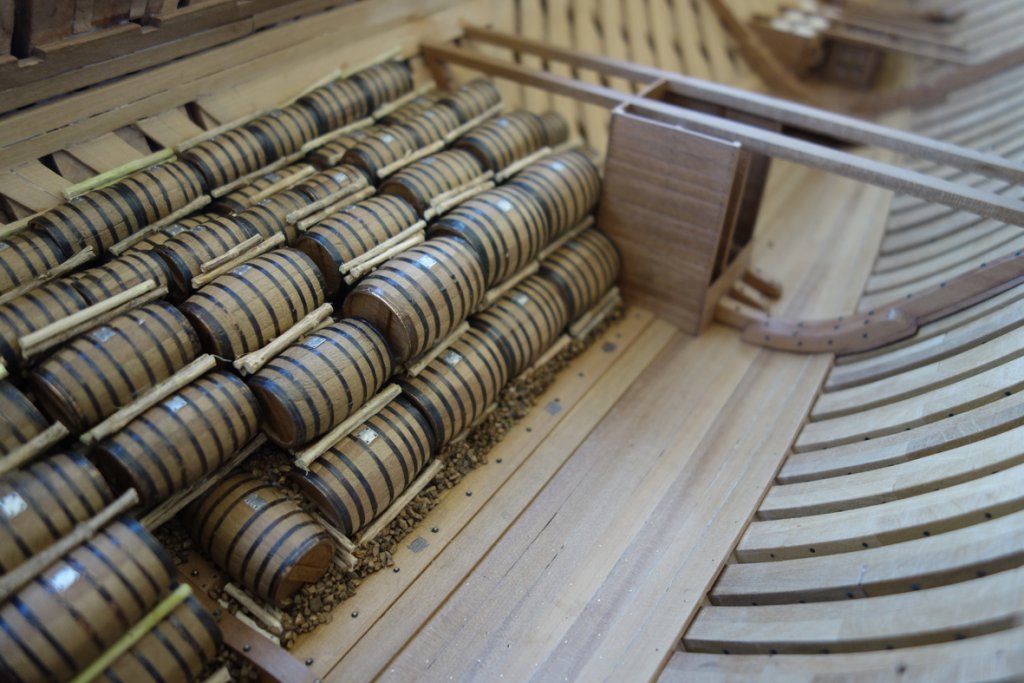
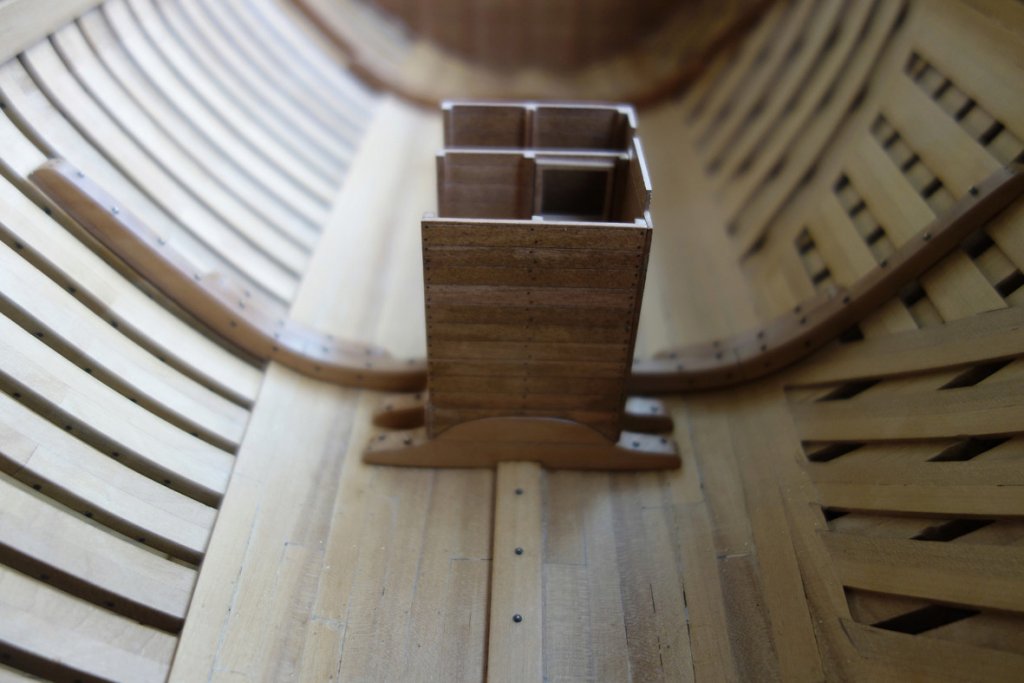
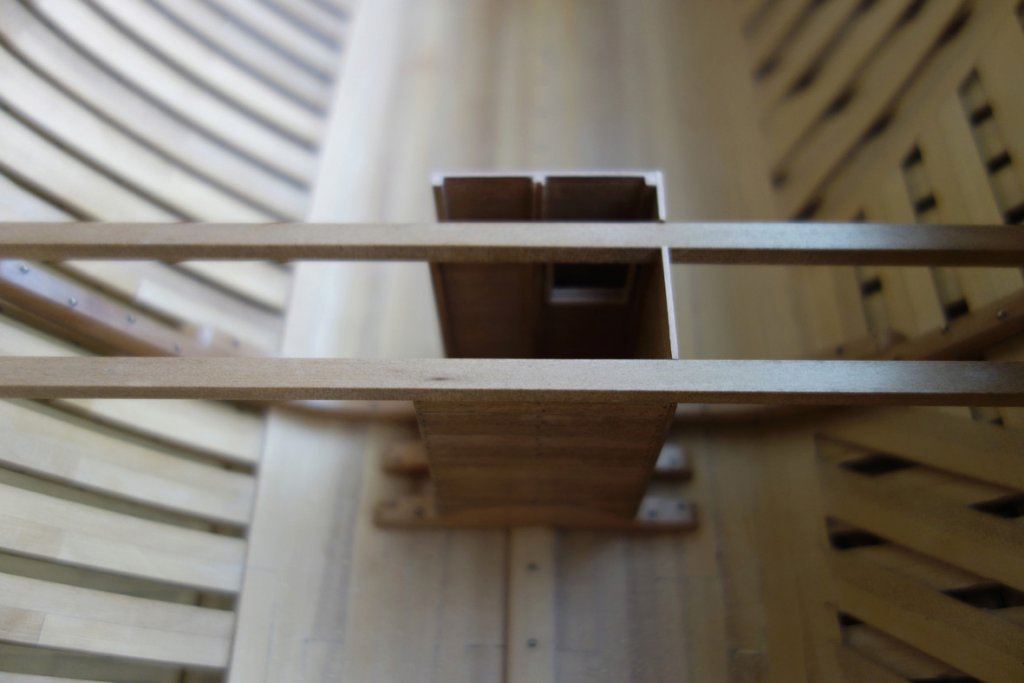
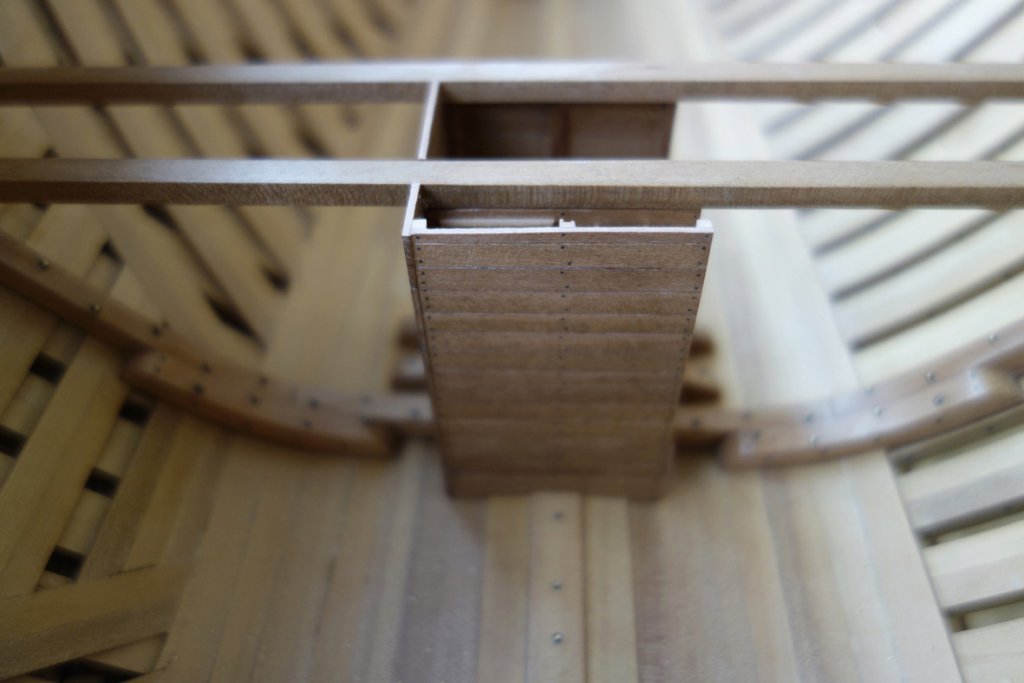
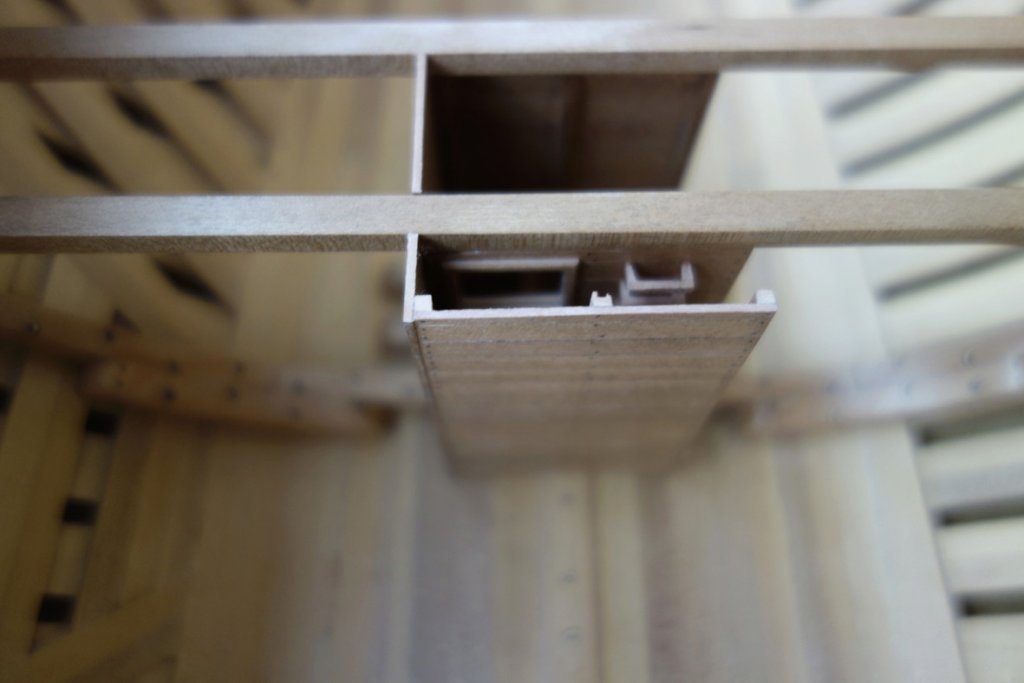
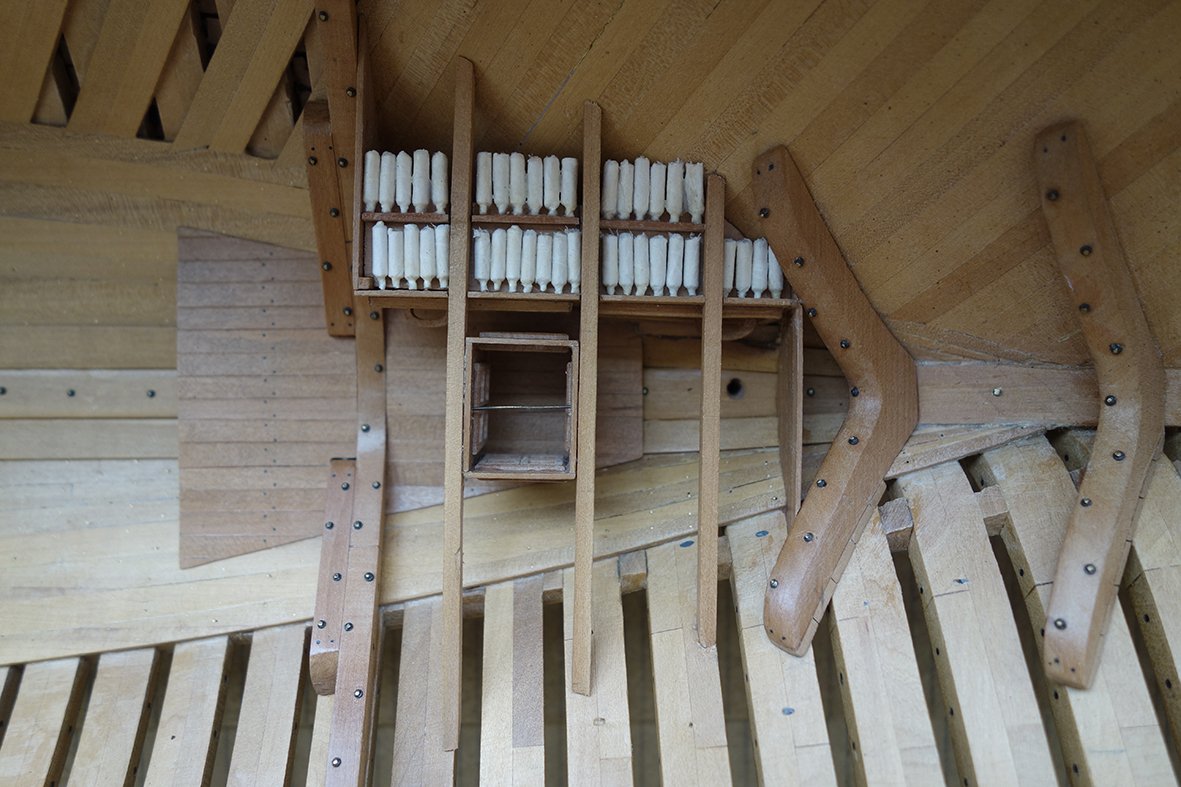
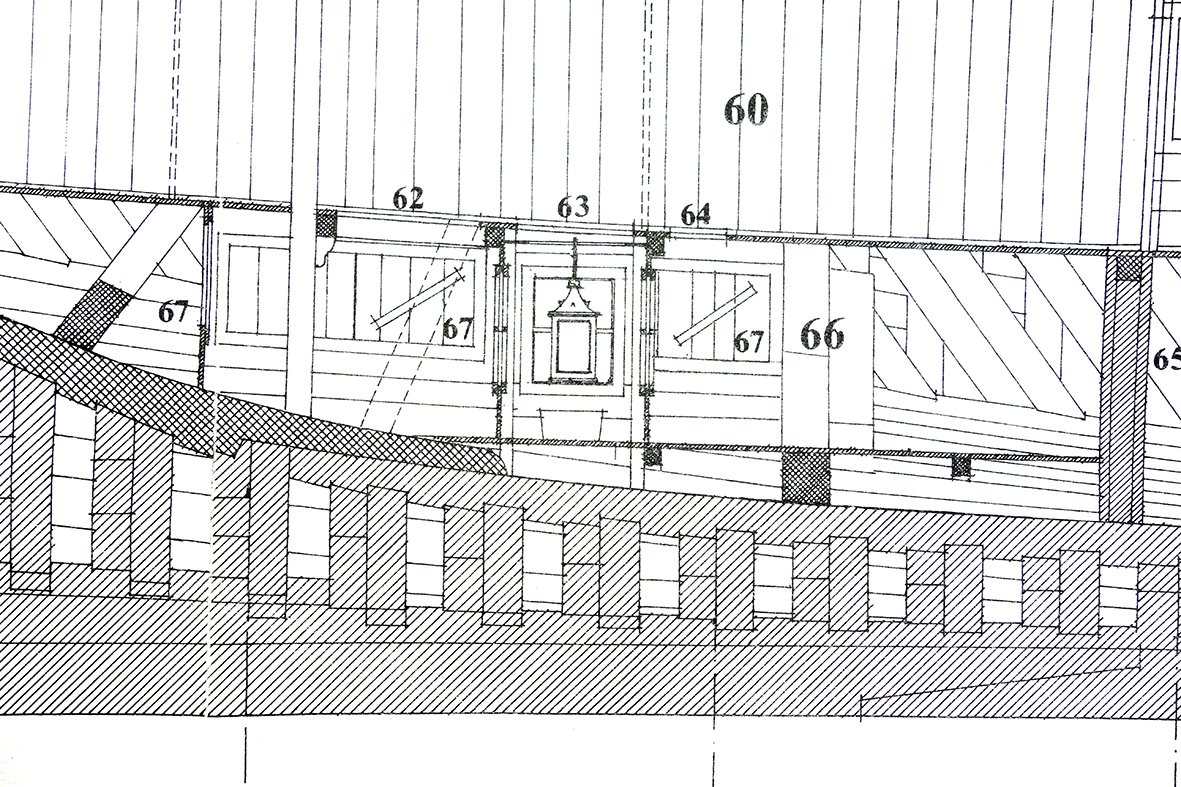
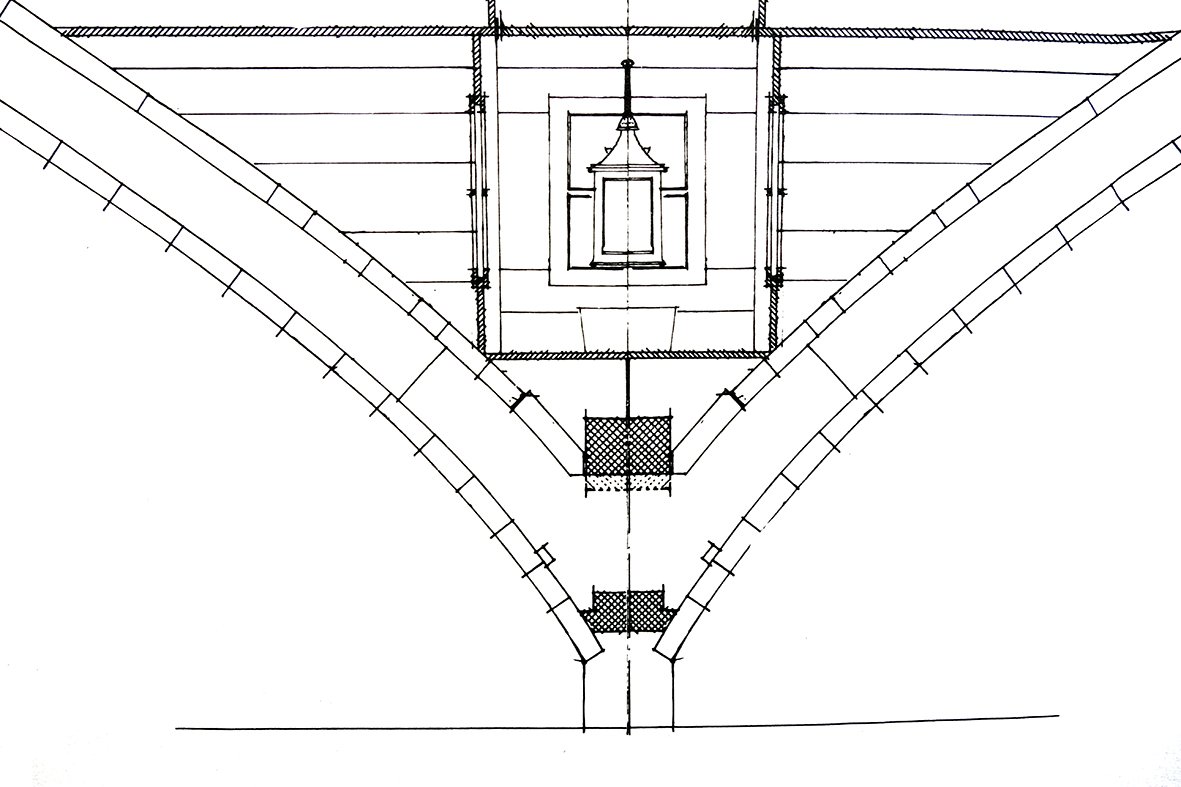
Hello gentlemen and thank you for your encouragement !
Continuing work in the bottom of the hull ...
This remark, from another forum :
QuoteHello
Nice work, watch out for the rear bunker the cross section is wrong, you have to reduce the housing of the lantern.
Good luck for the future.
Patrick [/ quote]
is quite accurate: if we stick strictly to the cross-sectional plan, it does not work. So I 'managed' with some difficulty to bring all this !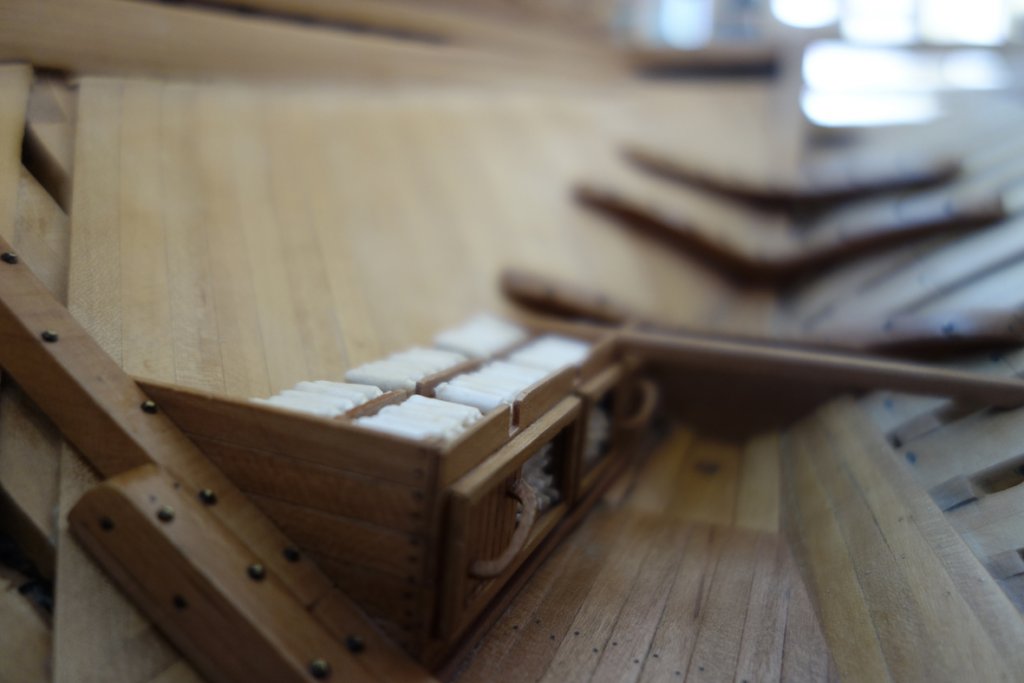
The local of the lantern is not yet glued ...
It suits me, despite the small difficulty compared to the plan! That it serves the following modellers ...
Patrick -
Hello gentlemen !
Following the mistake I made by positioning a black join - not to simulate a caulking - but to show that the barrels were composed of several pieces, I decided to start all over again.
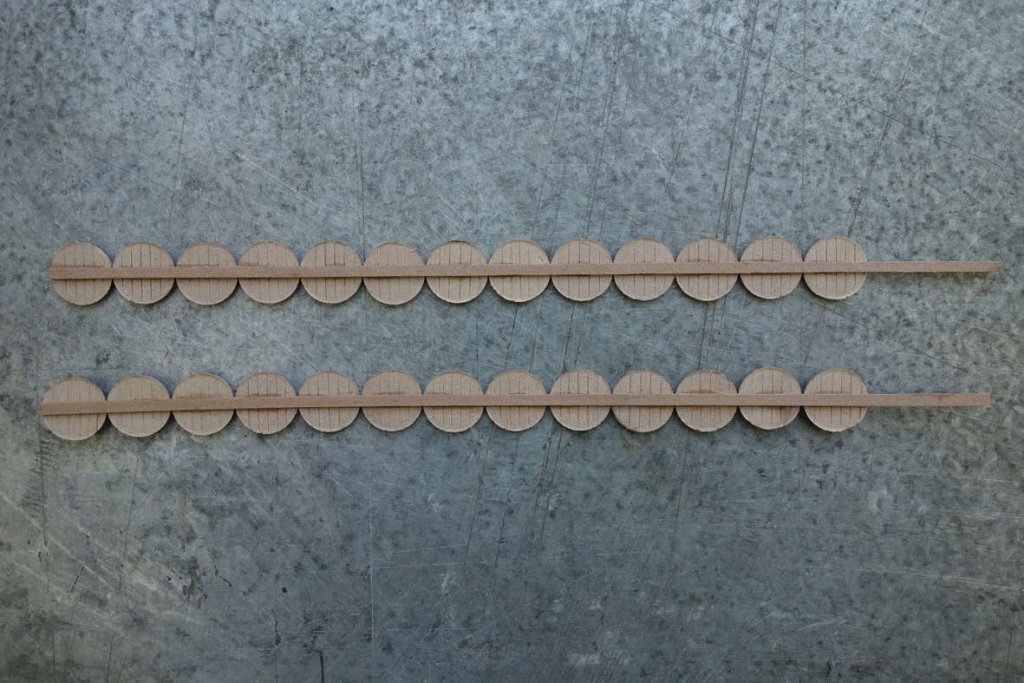
So I trimmed my chopsticks, without the join this time :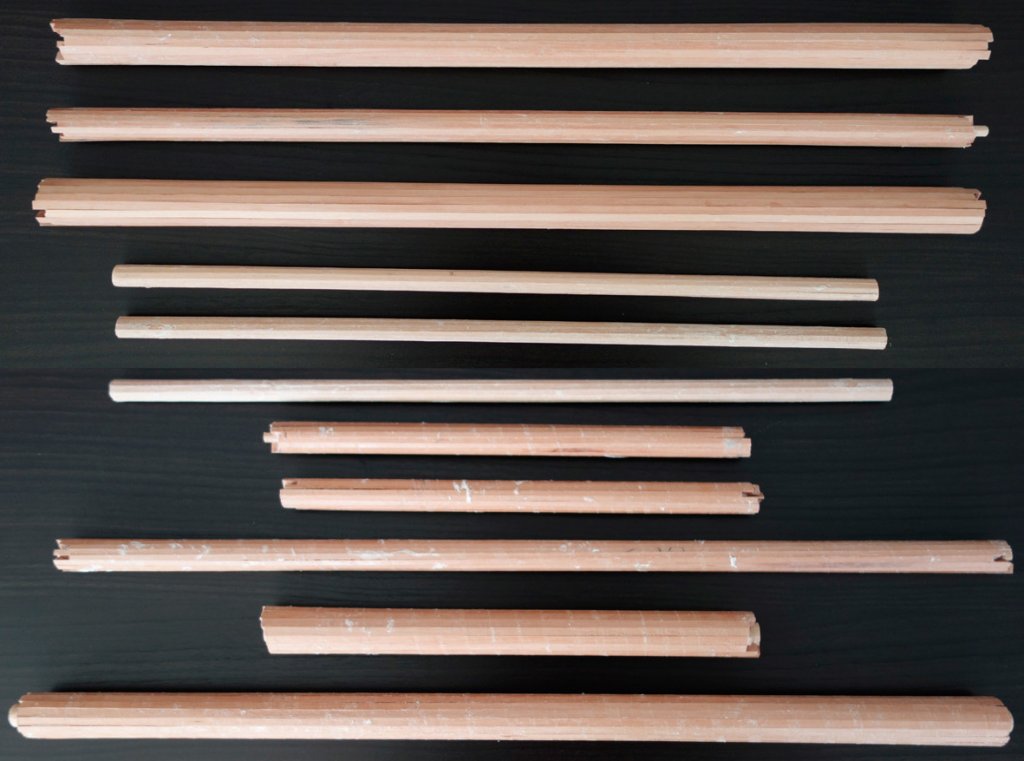
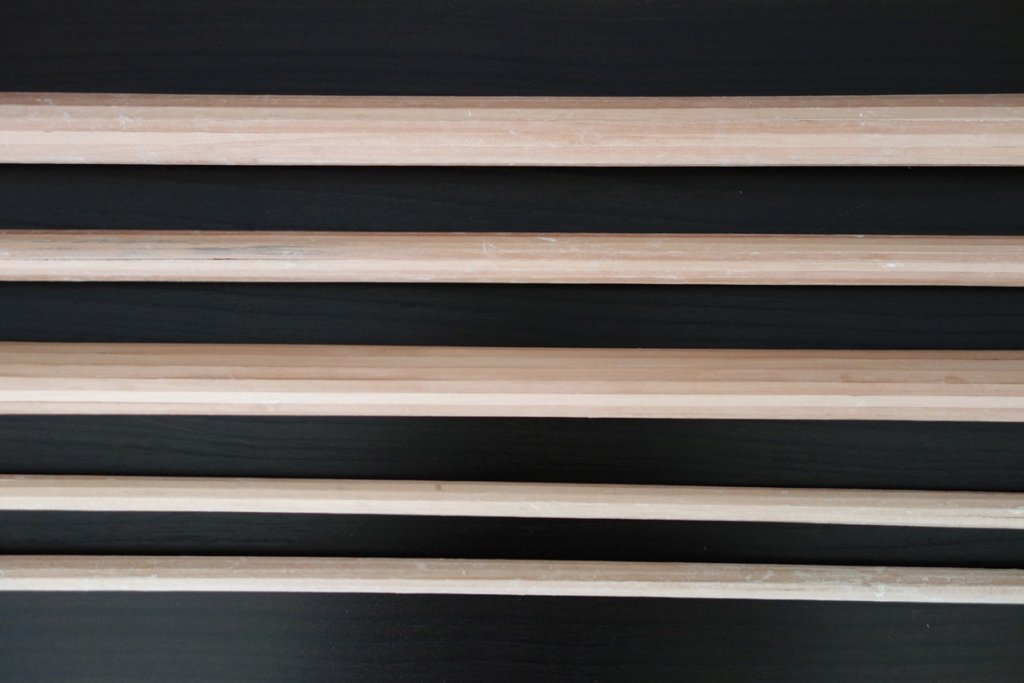
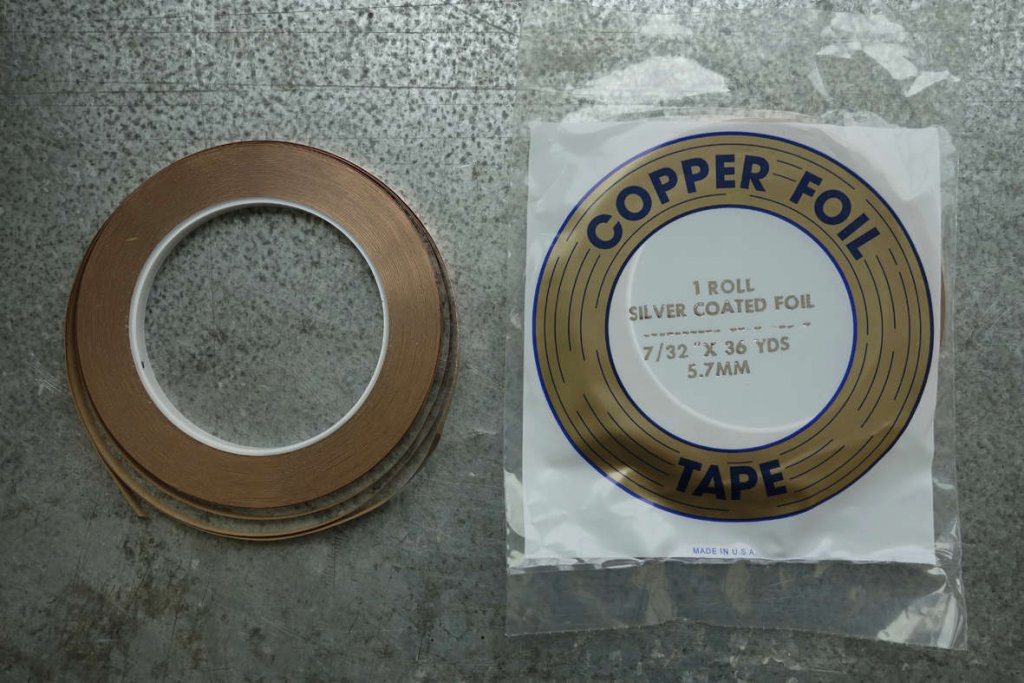
Then I ordered copper roll (Petr - my new Czech friend - advised me) :
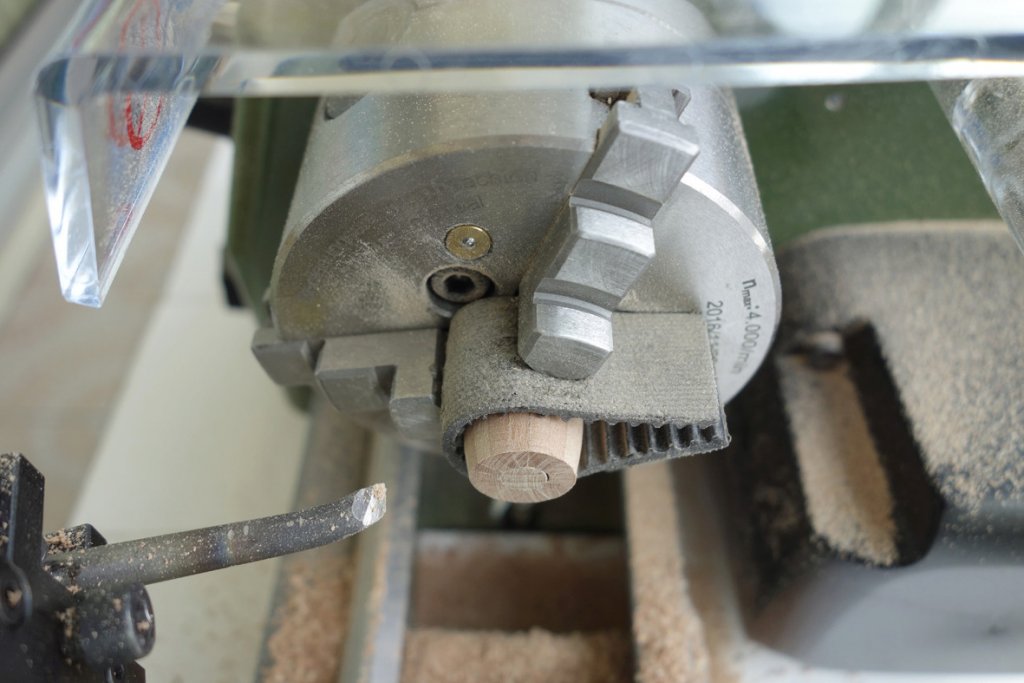
Back on the lathe, still using a rubber band allowing me to machine both sides of the barrels without damaging them :
Vérification :
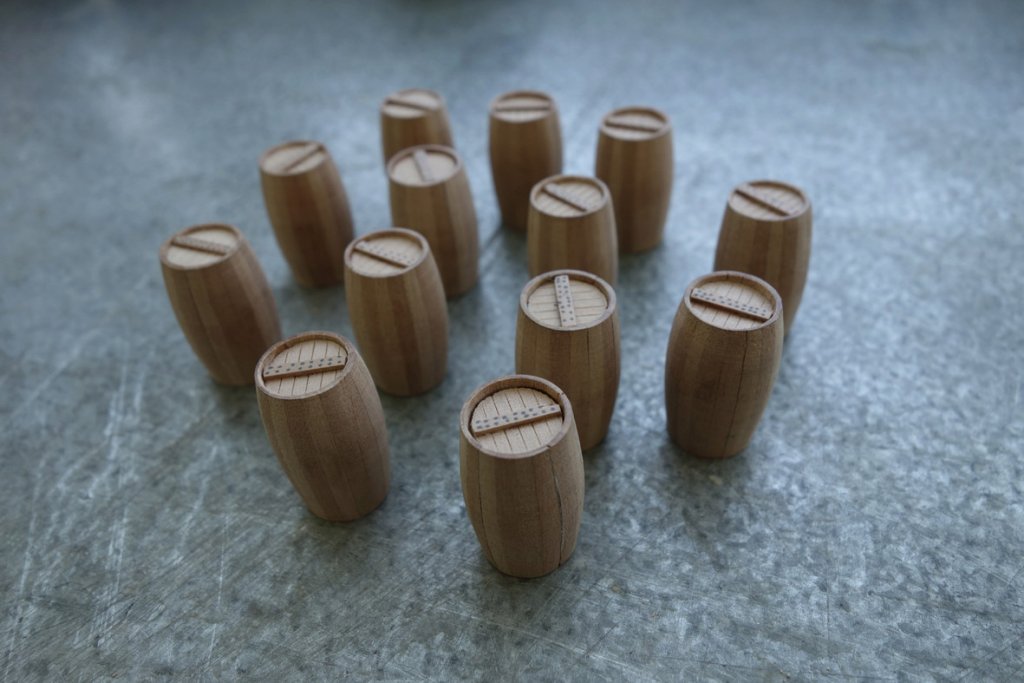
Then the result on a serie :
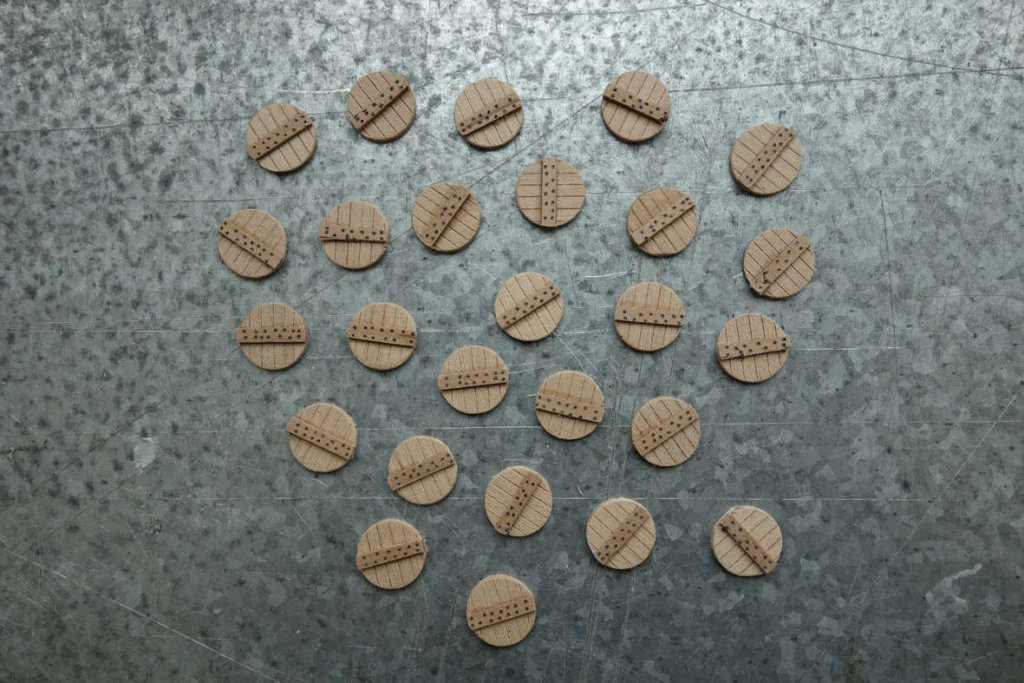
The lids :
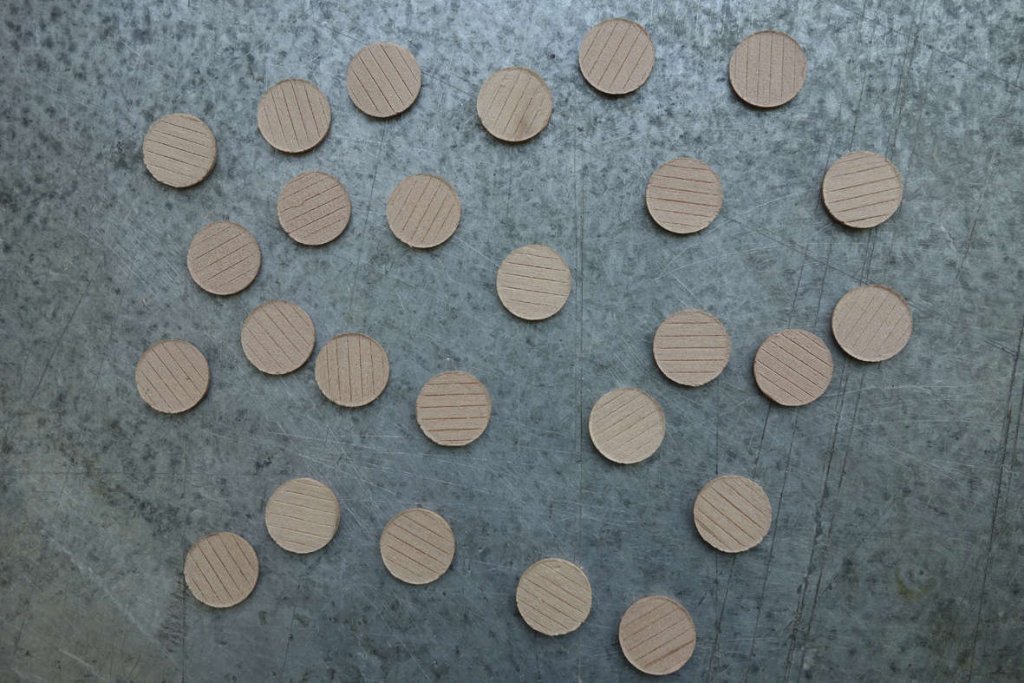
For the continuation of the work on these lids, here in pictures, how I proceeded, for those that it could interest :
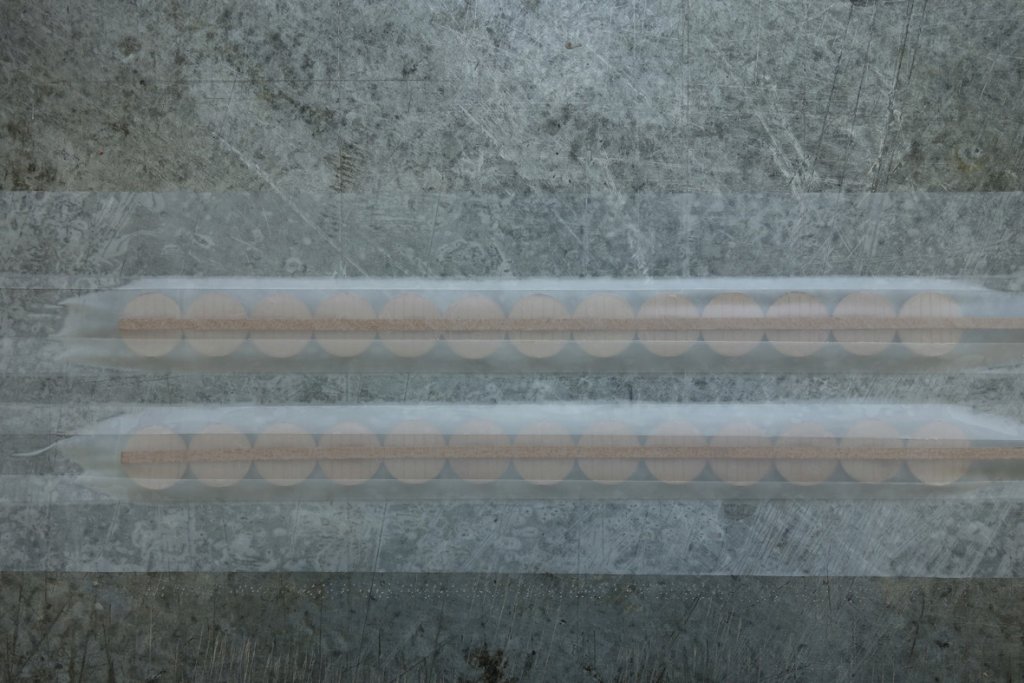

Then comes the work of copper. I use gloves so as not to 'grease' and I cut small strips corresponding to the size of barrels :
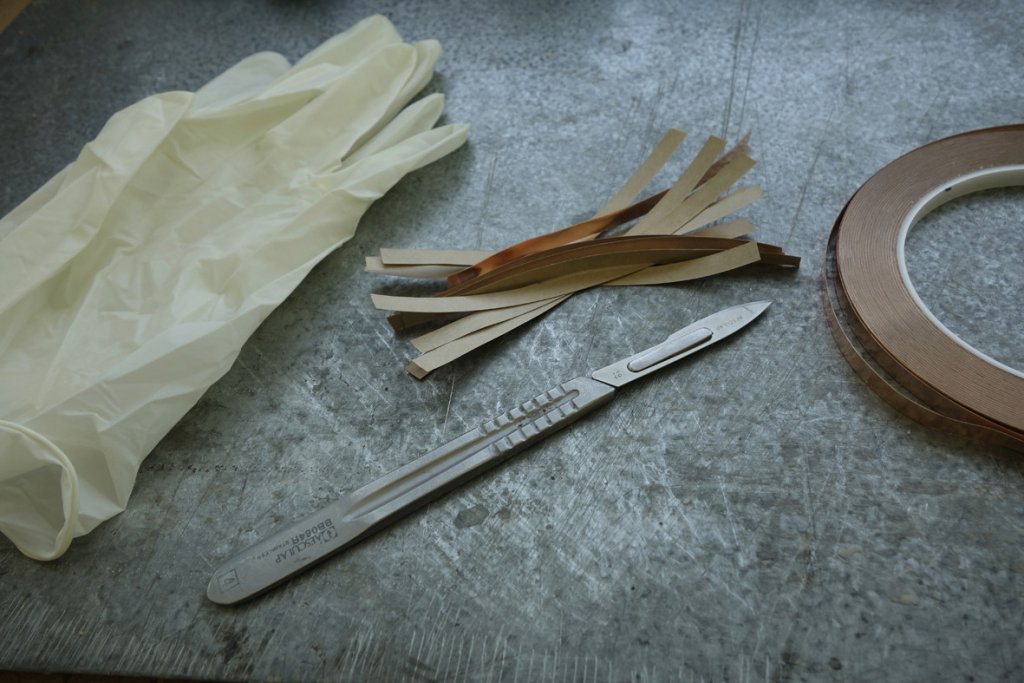
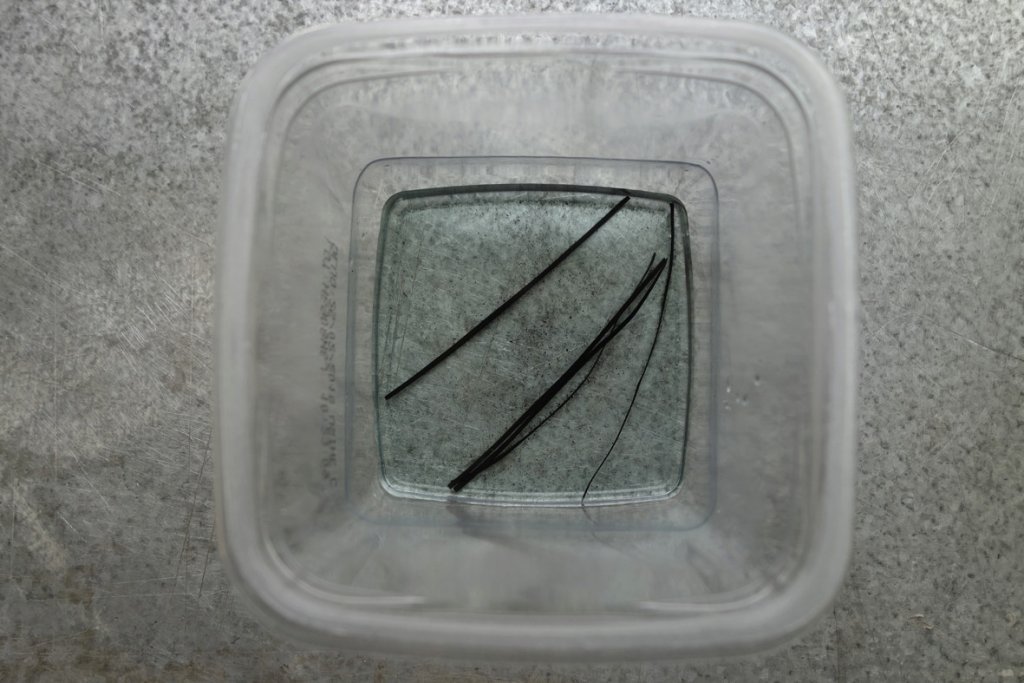
The advantage of this copper roll is that it can be immersed in a liquid without altering the self-adhesive part :
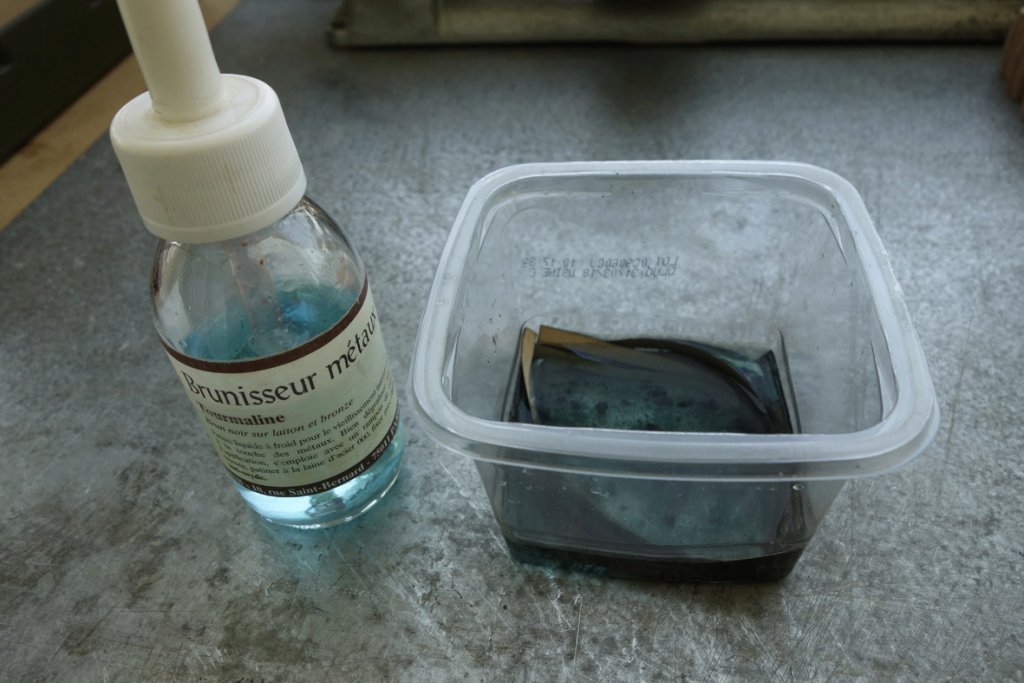
For rinsing, I followed Petr's advice : "Bicarbonate de soude" dissolved in distilled water :
After drying, the copper strips are cut into thin lengths using a ruler and a scalpel, then it is patience :
Nothing complicated, but it's quite long.
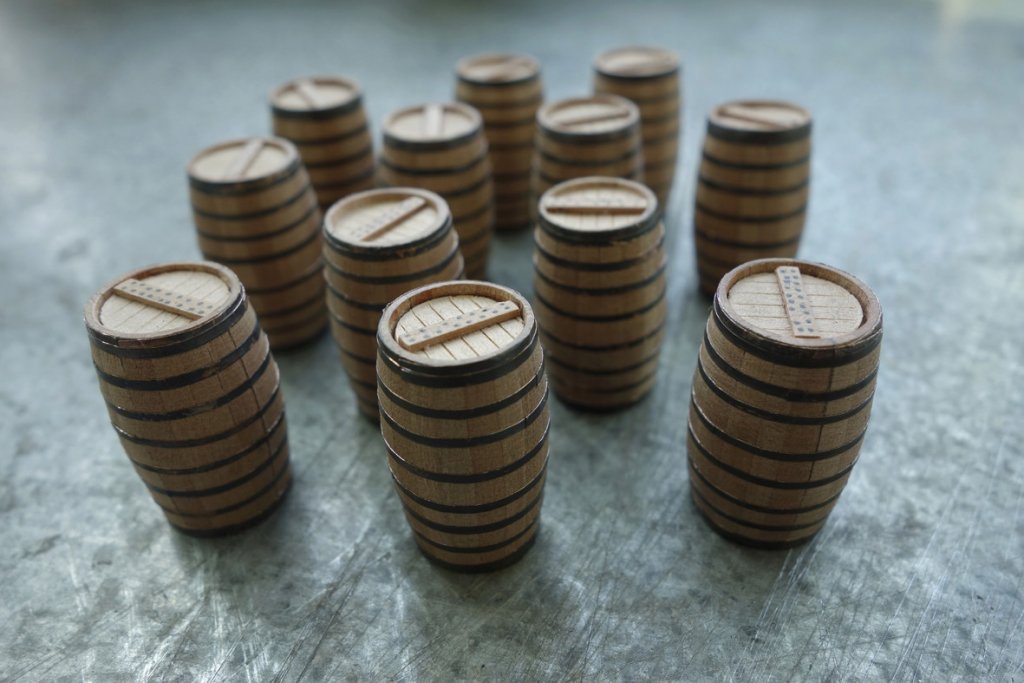
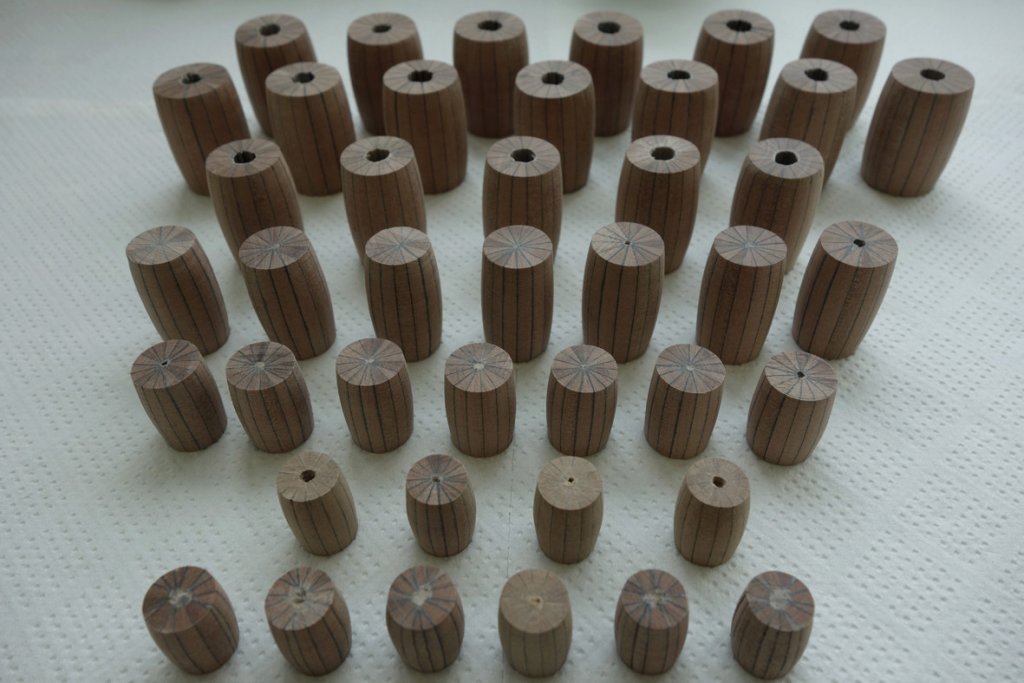
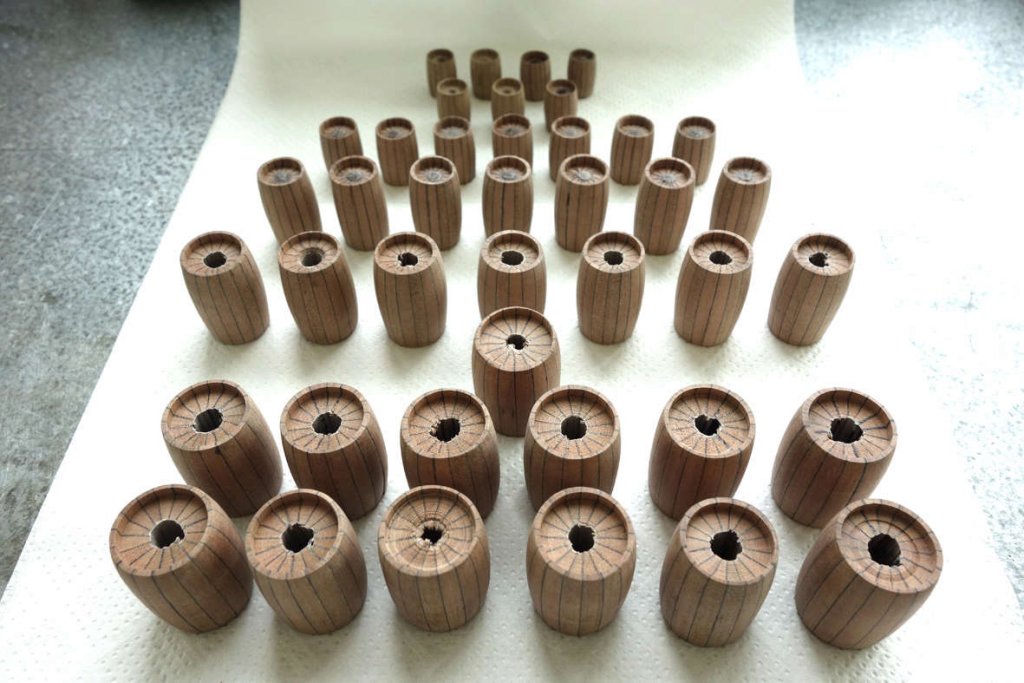
In the end, I declined 6 series of barrels :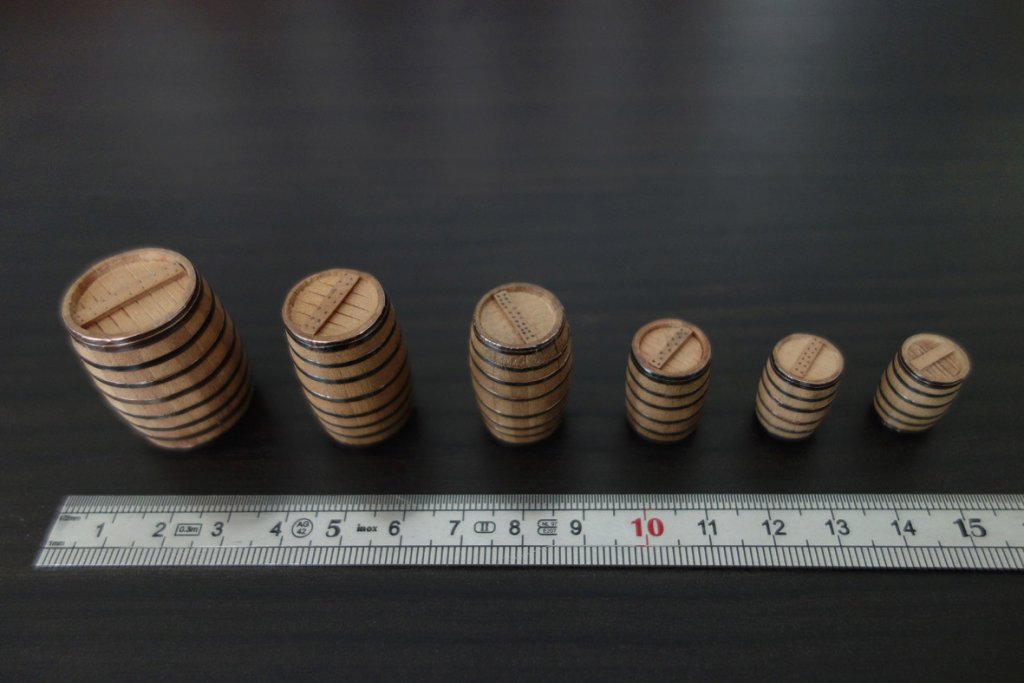
To obtain 88 barrels :
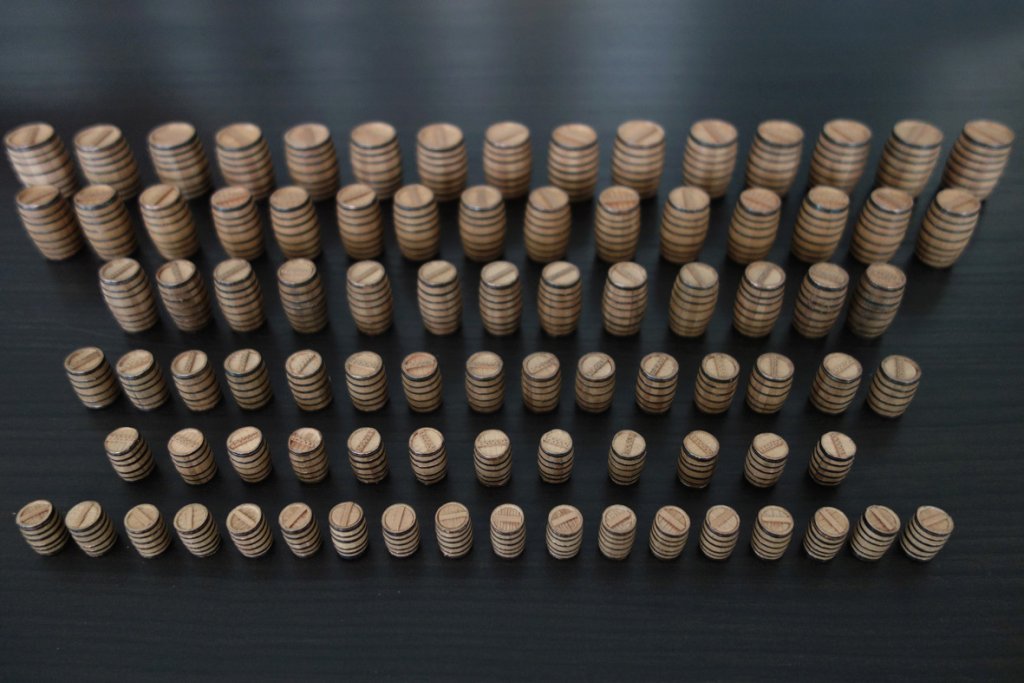
No more black joints, so it is more in line with reality, but we see less separations between the boards ... Question of choice !
They were the most "big" barrels. There will be others thereafter, but not for the moment : I'm starting to saturate!
See you later !
Patrick- matiz, davyboy, GrantGoodale and 41 others
-
44
-
-
Hi Johann !
Thank you for the appreciation !
Warning : I made a mistake by simulating a black seal ,according to Gérard DELACROIX : there was no caulking on the barrels ... It is not very serious, but I prefer to warn you !
Patrick- mtaylor and paulsutcliffe
-
2
-
Salut Chris !
One side will be open but simply between the frames : I will not make a "hole" in the hull. Similarly, the opposite side of the decks will be open at each level. I intend to illuminate the interior with micro-leds that I ordered ... That's where I am of my reflection ...
Have a nice day my friend !
Patrick -
Thank You very much Carl !
Patrick
- mtaylor and paulsutcliffe
-
2
-
Hello gentlemen!
Thank you very much !
A small activity "annex" to change a little: the barrels.
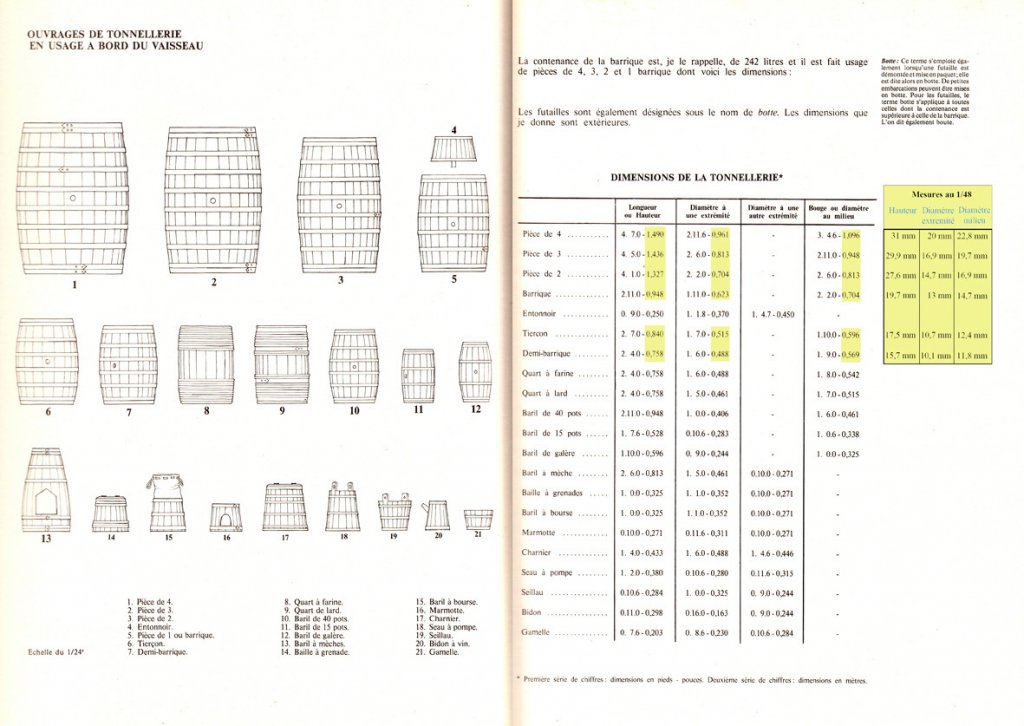
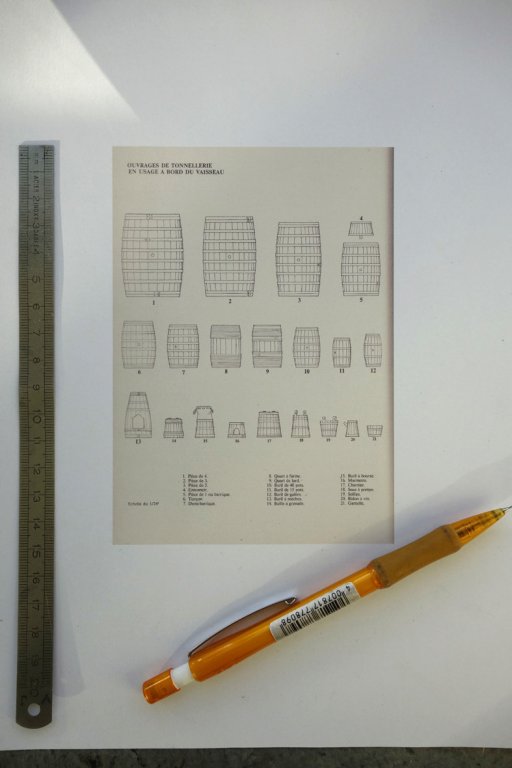
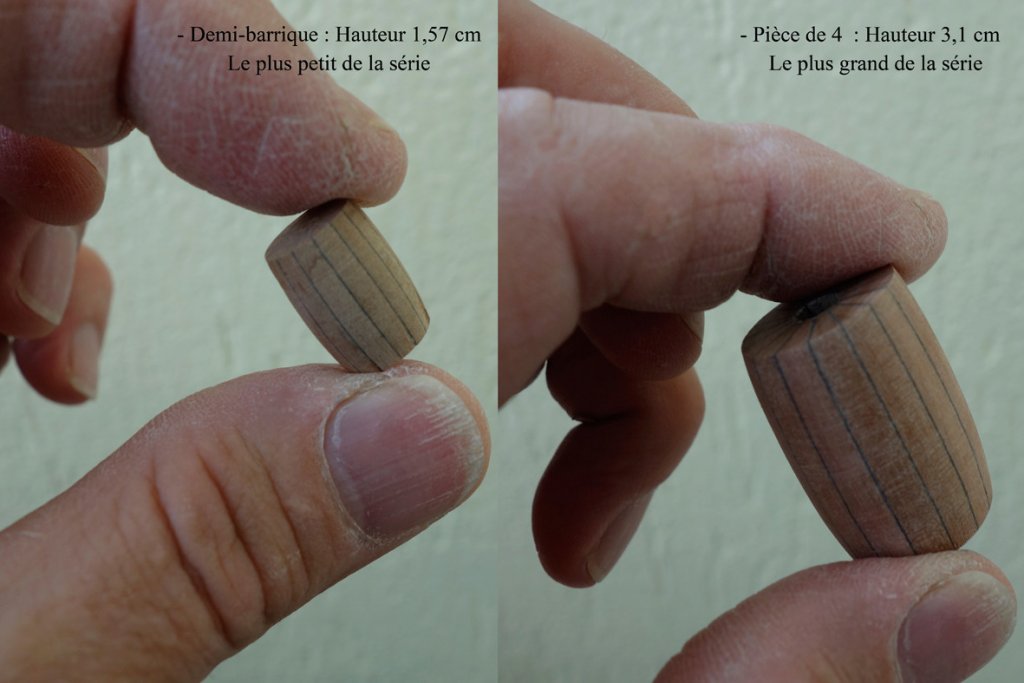
I am planning to include some of them in the boat. I based myself on this page of the "Vaisseau de 74 canons" of Jean BOUDRIOT, I will try to realize the models for which I calculated the measurements at 1:48
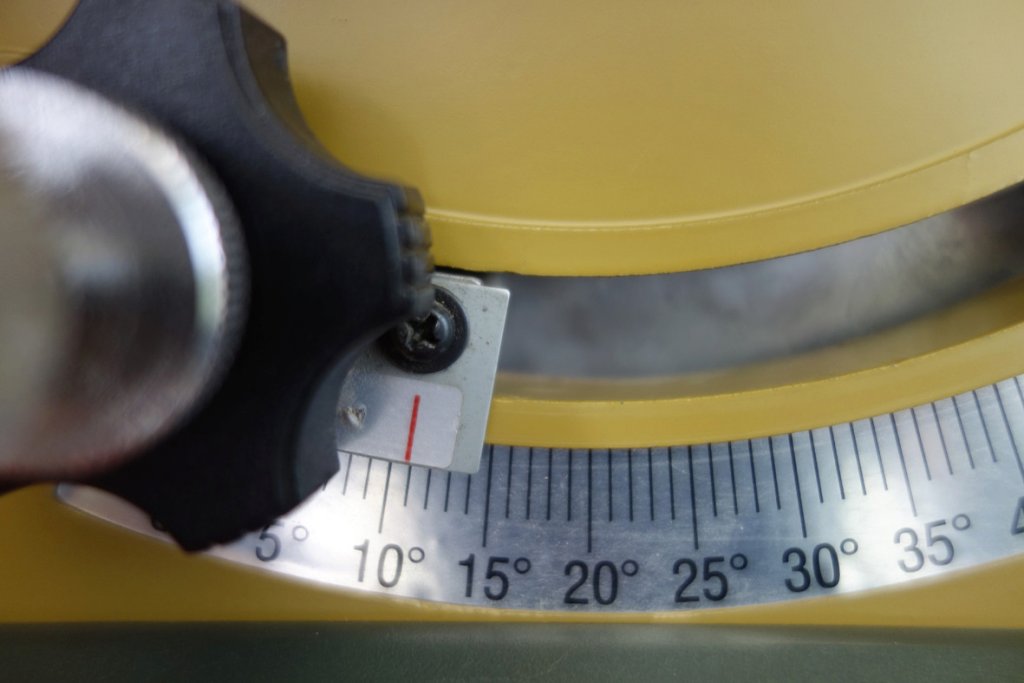
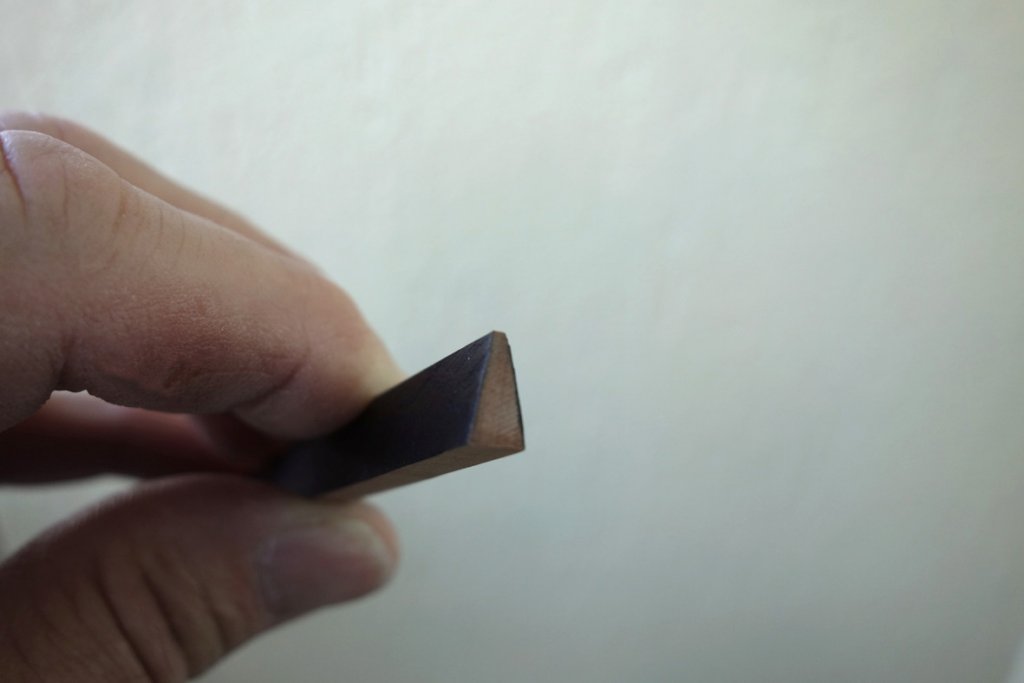
I set my circular saw on an inclination of the blade of 11 °:

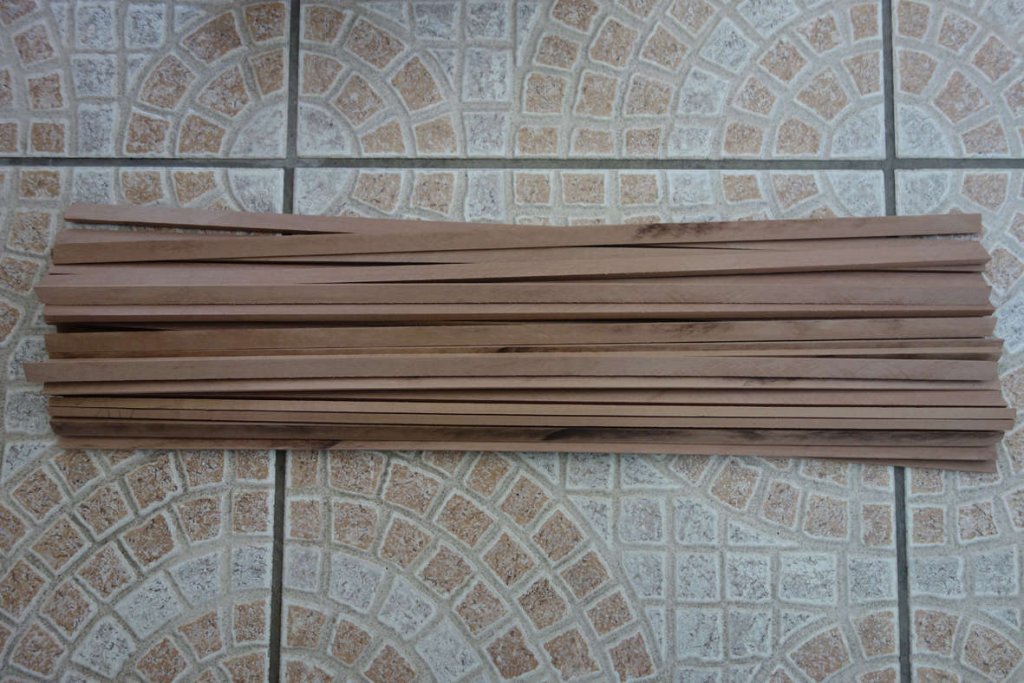
I then debit my pear sticks. These are 1cm in height:
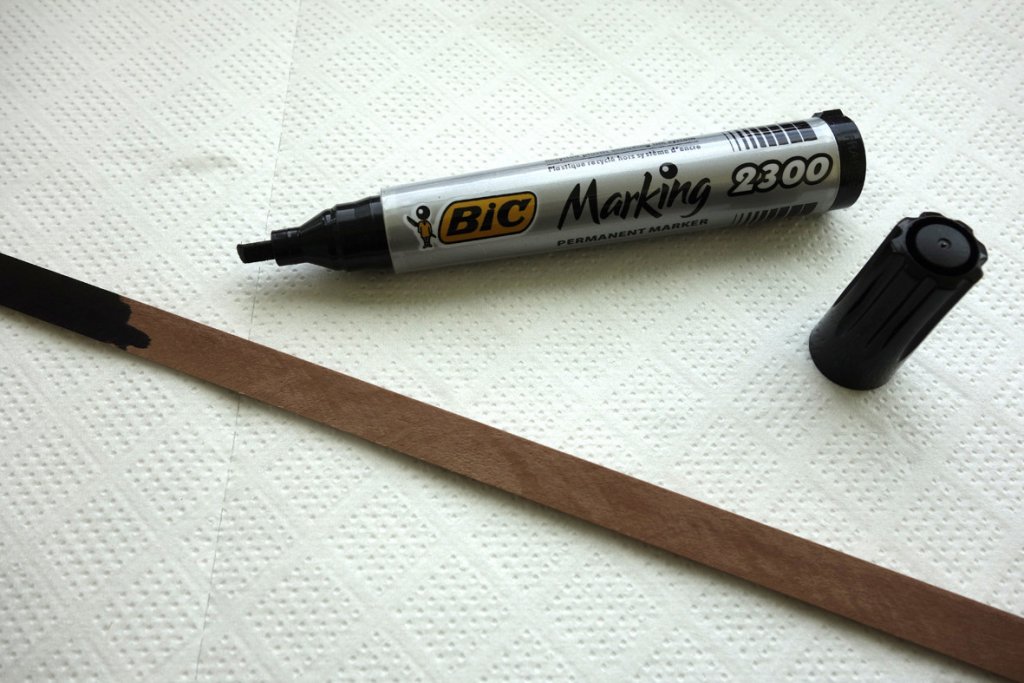
Then, each stick is passed in black felt on 2 sides:
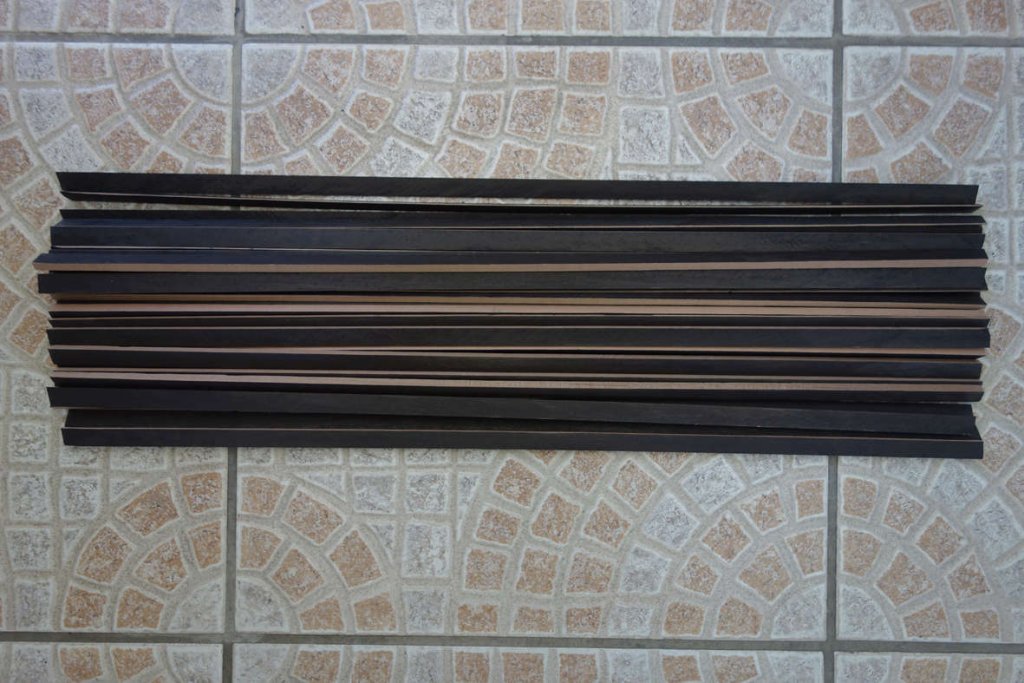
The sticks are then glued together at the rate of 16:
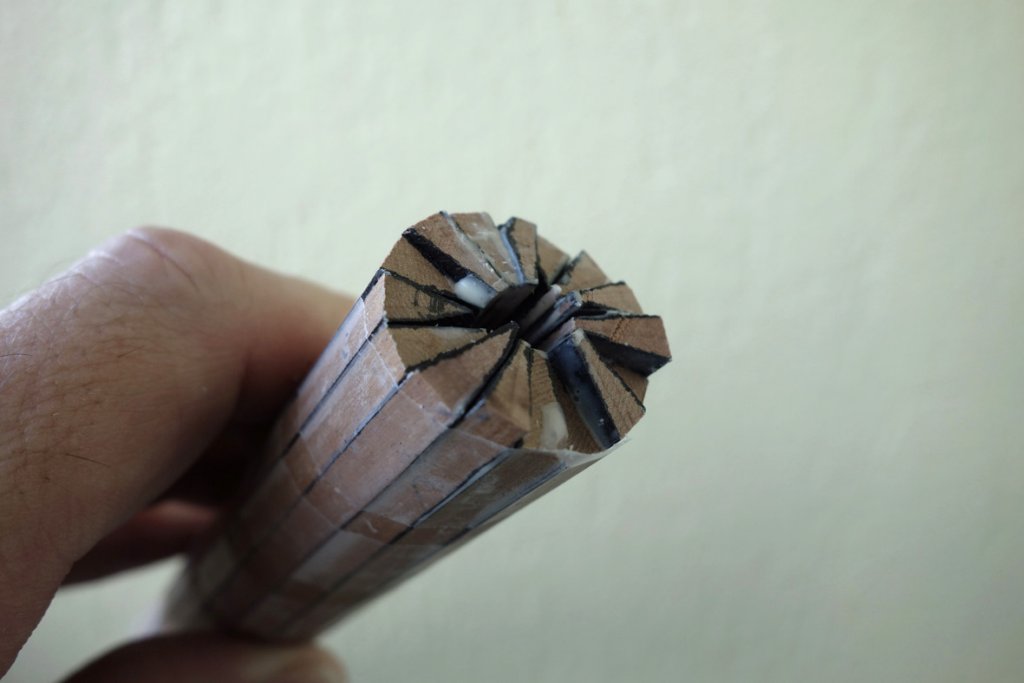
Adhesive is used to tighten the glue drying time:
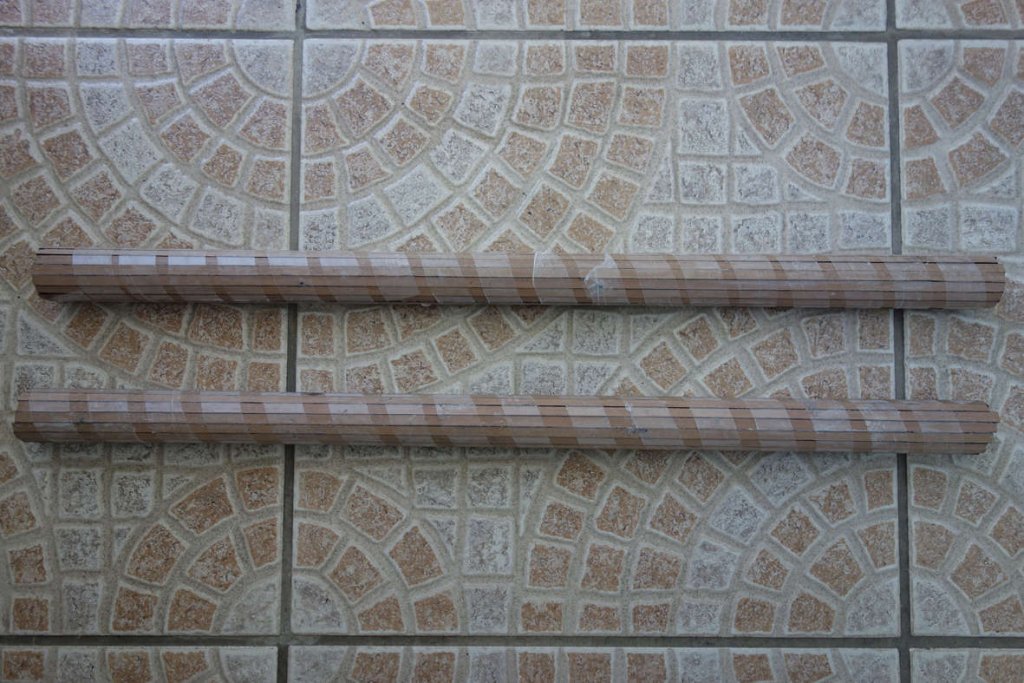
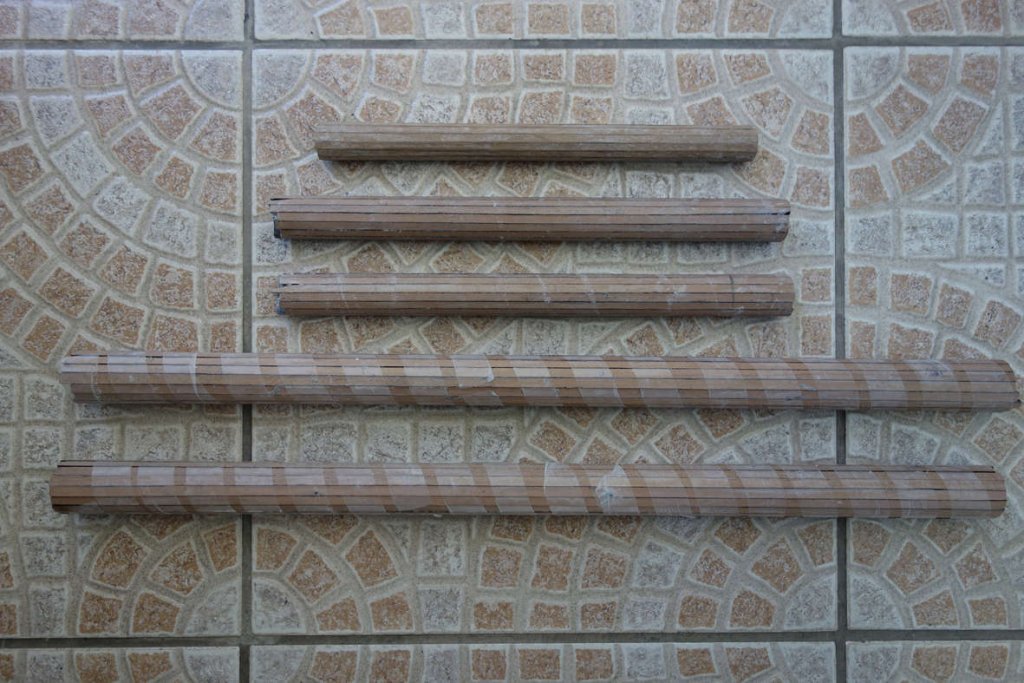
I thus constitute myself several games of different diameters - function of the future barrels:
For the rest of the steps, I print J.BOUDRIOT's page with a reduction coefficient of 50% so as to get my barrels at 1/48 (the page representing them at 1/24):
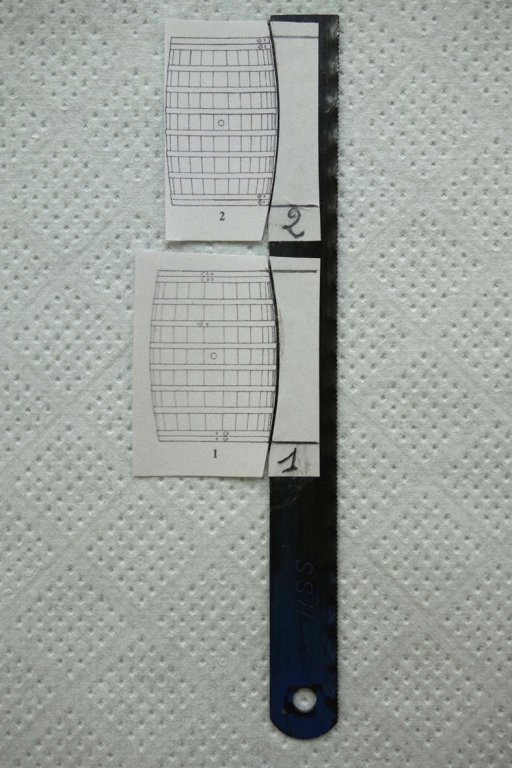
The next step is to make tools to turn the barrels. On an old saw blade, I stick my templates:
I then shape them, first the general form:
Then I create a "cutting edge":
Result:
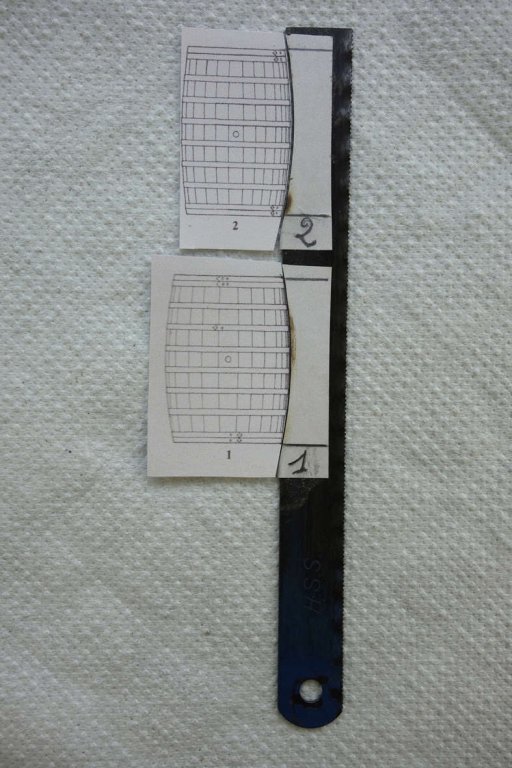

I then cut them to the right length:

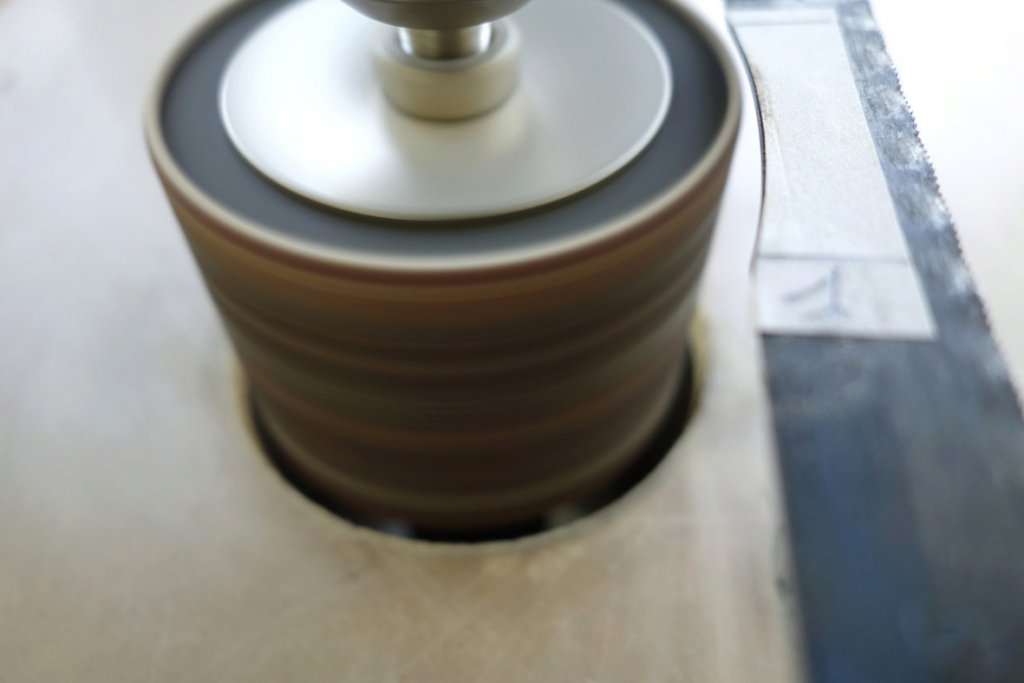
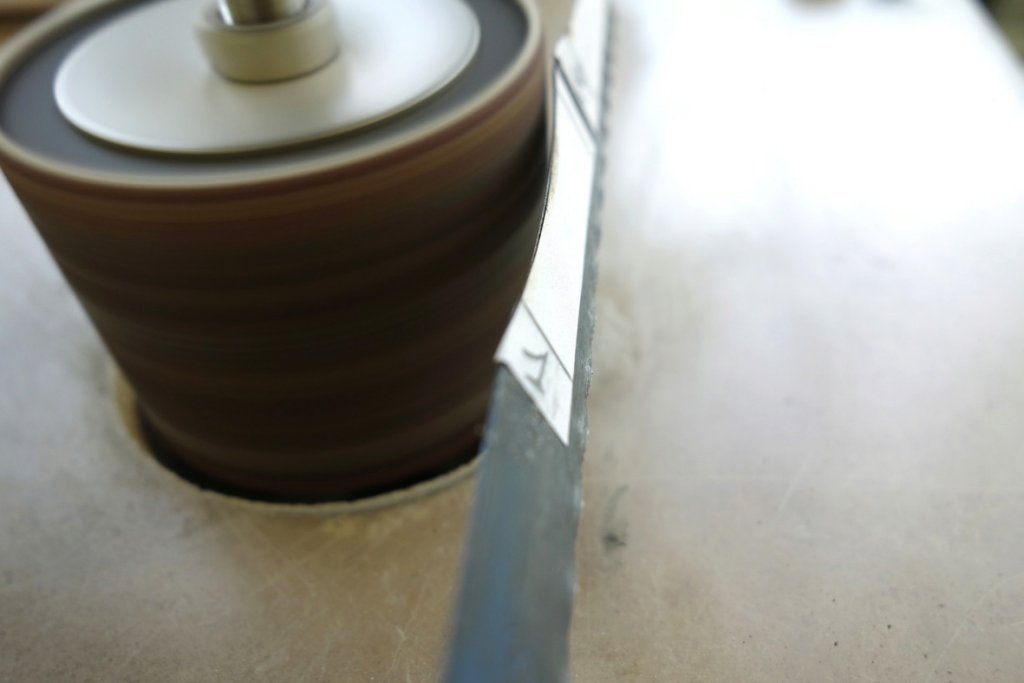
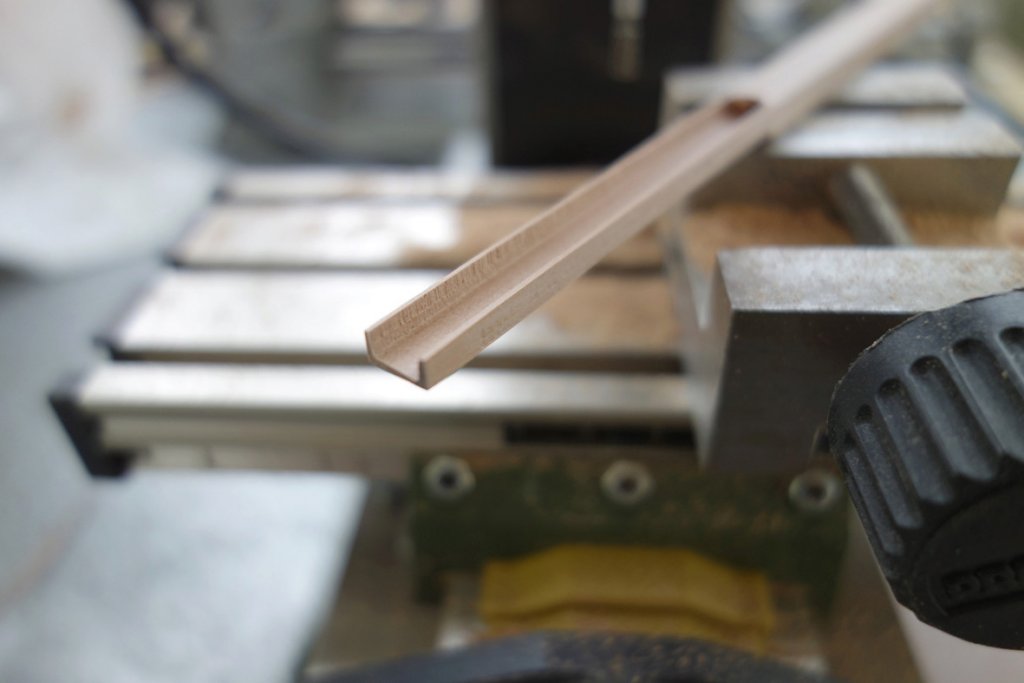
I first "mark" the form on the lathe:
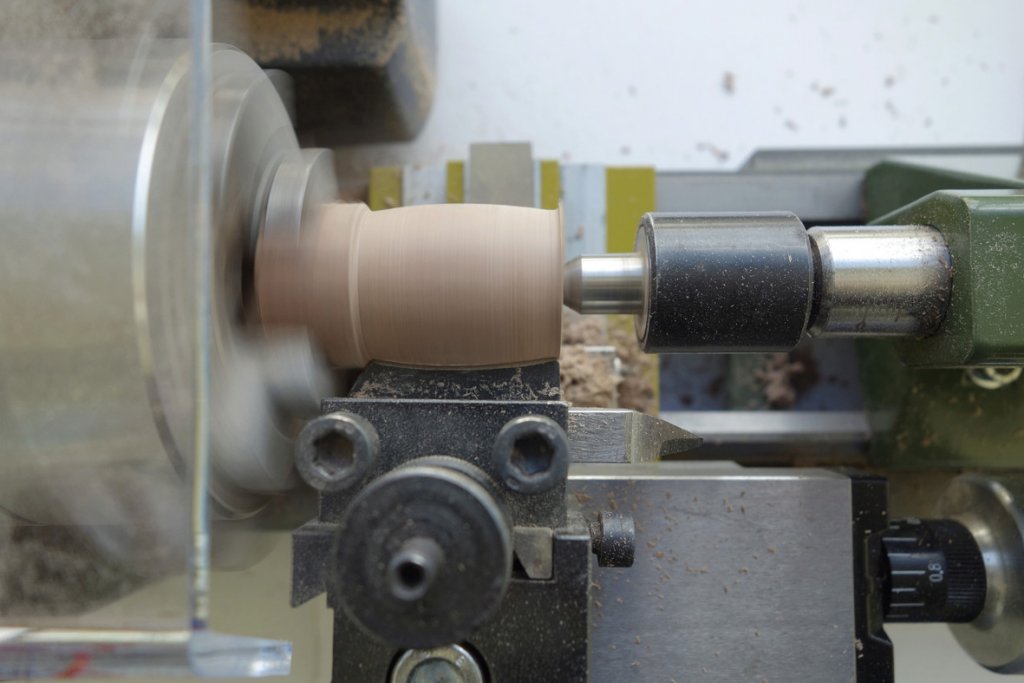
Then I continue with the chisel to rough:
Then I finish with the tool:
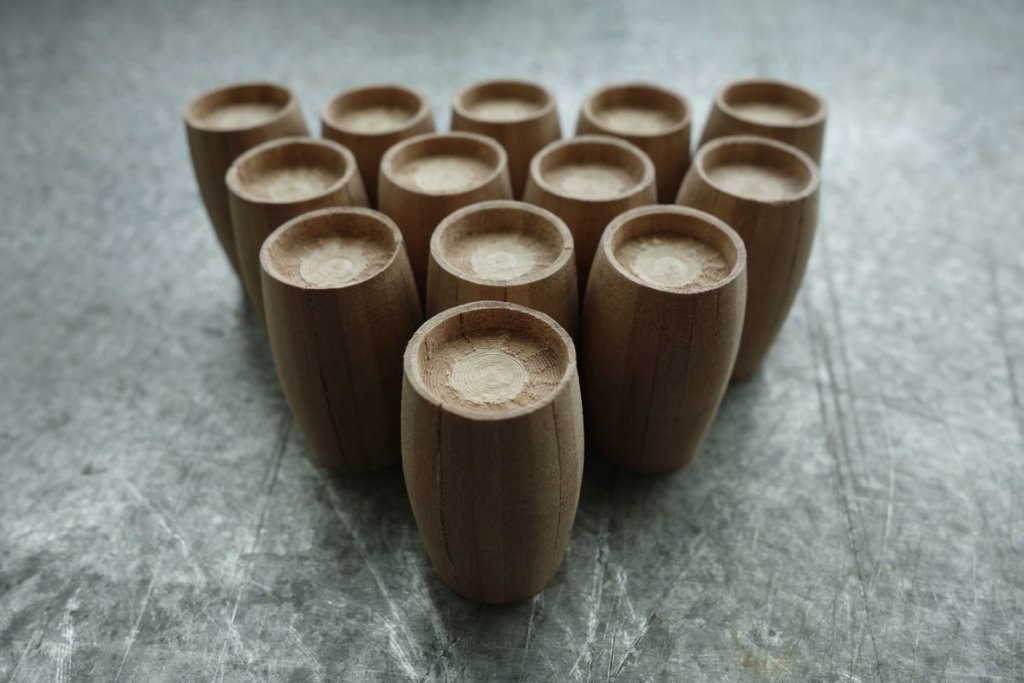
I realized a little more than 40 barrels without major problem, except that it is quite long:
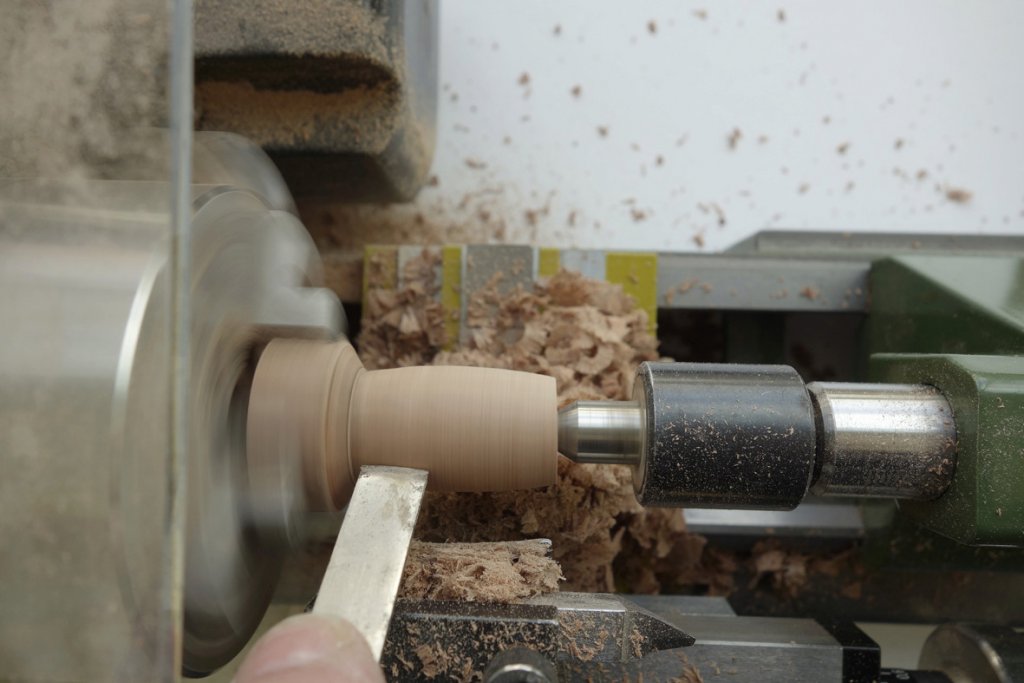
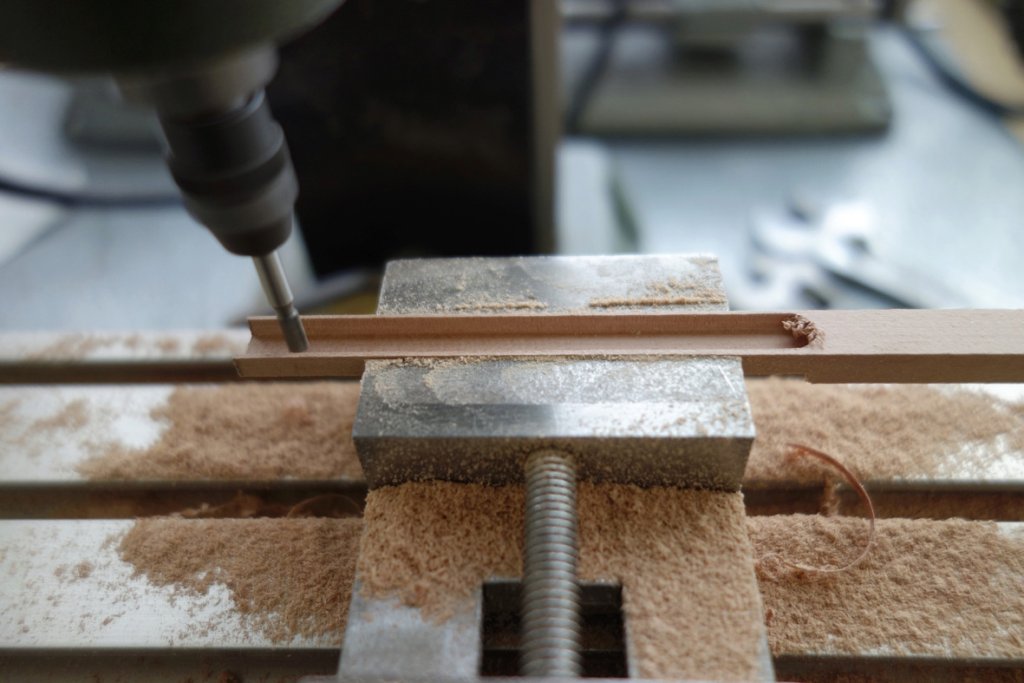
To dig the ends, I could use a mill for small barrels, but it's not terrible: it vibrates:
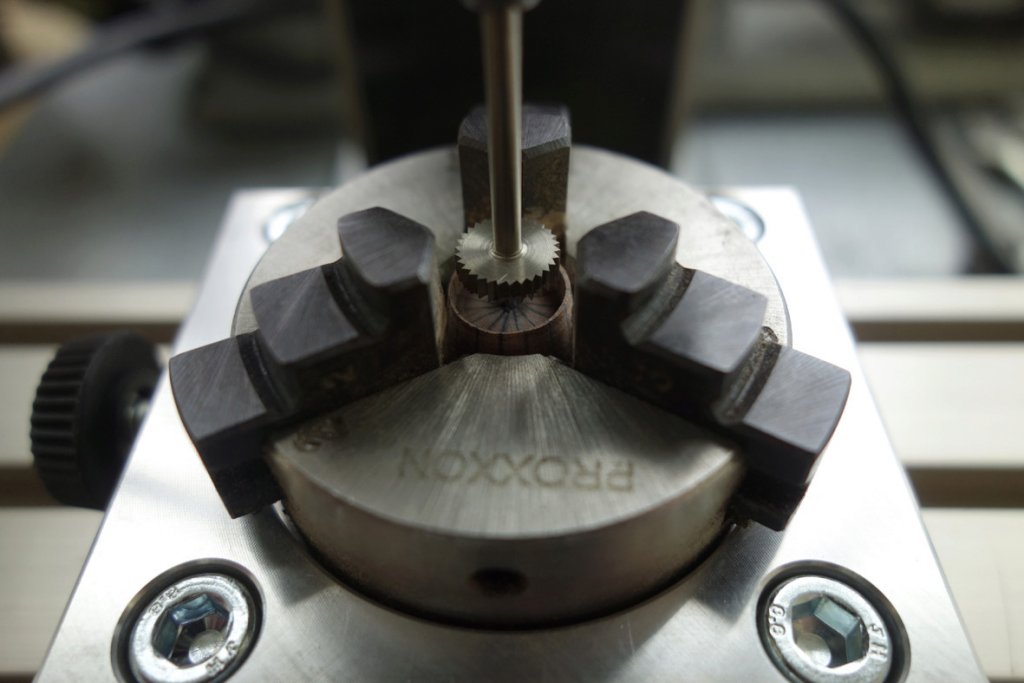
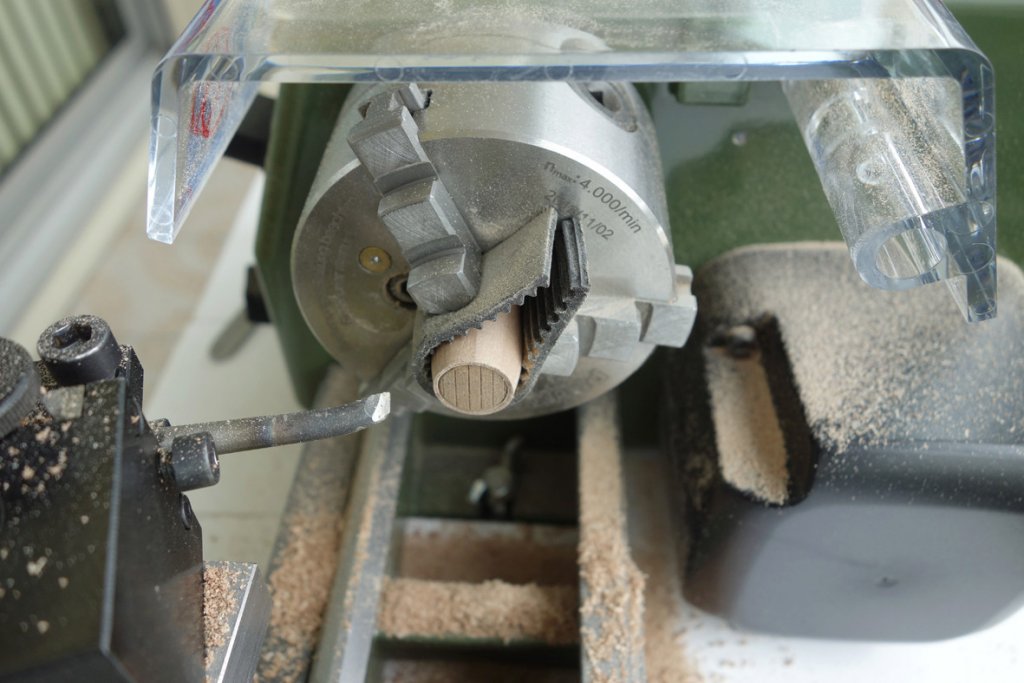
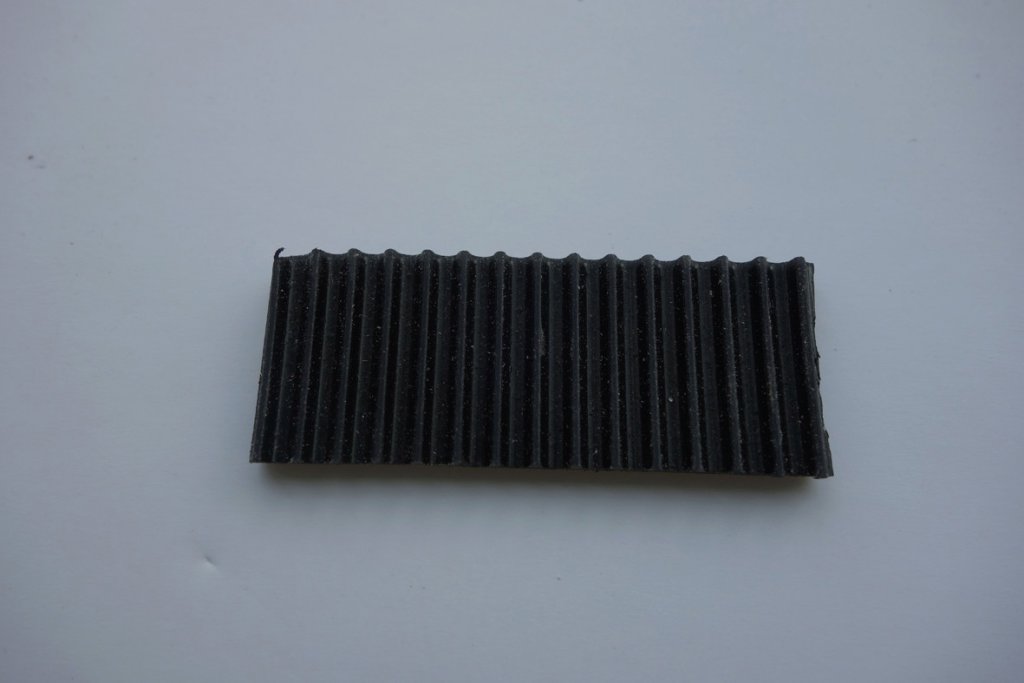
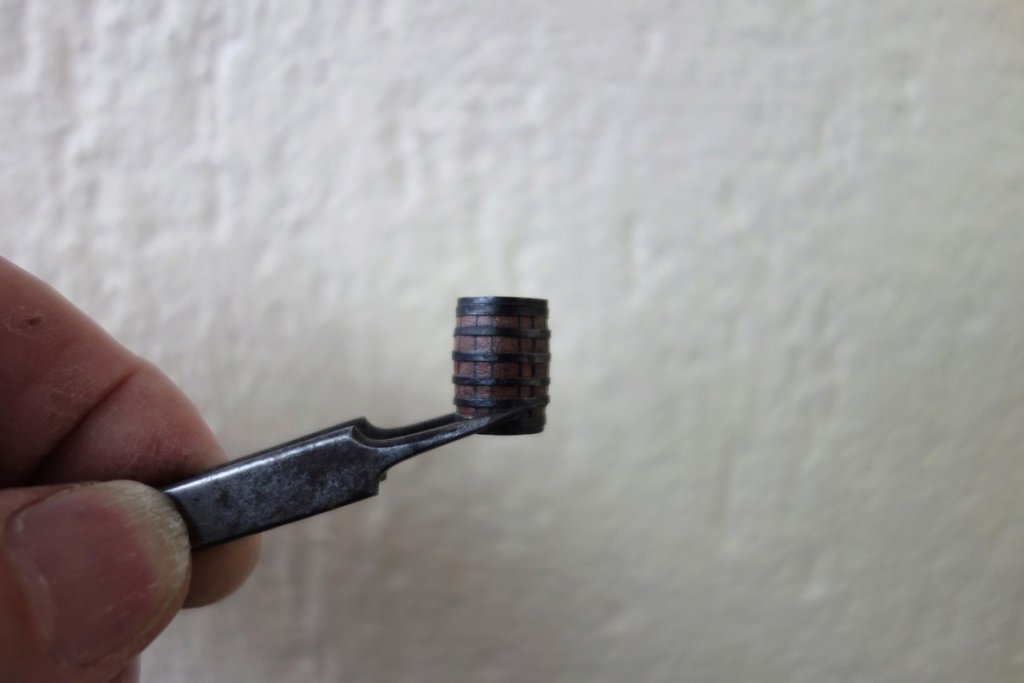
So I decided to continue with the lathe, anyway I would not have the mill needed for larger diameters. The problem was to find a way not to "mark" the barrels with the jaws of the lathe ... The solution: rubber "toothed" like this one:
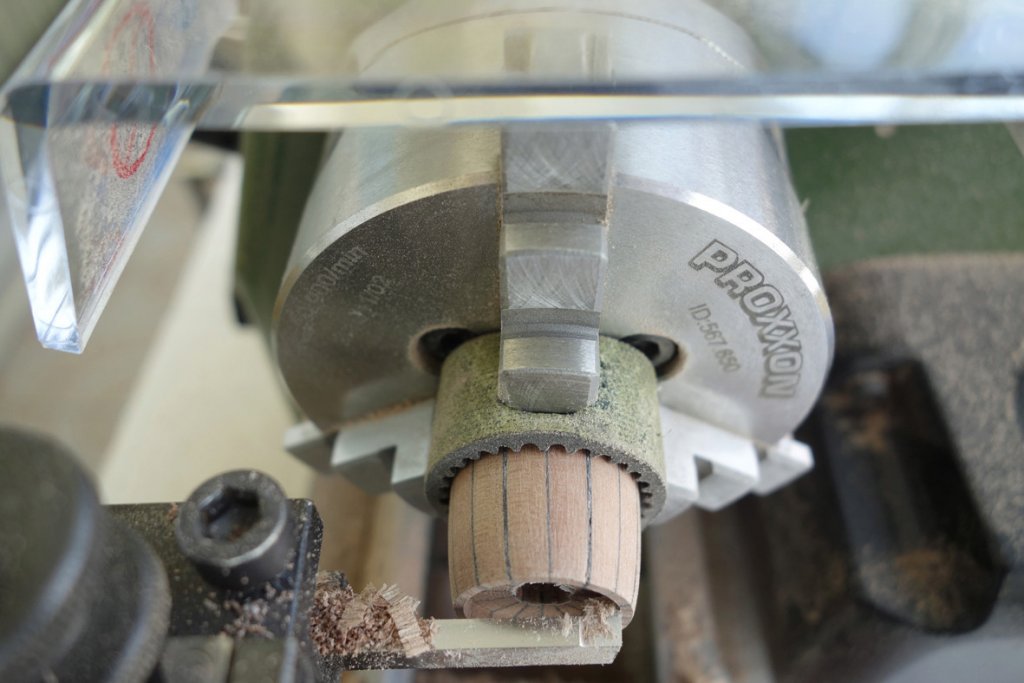
It works very well, all of which is to center the barrel:
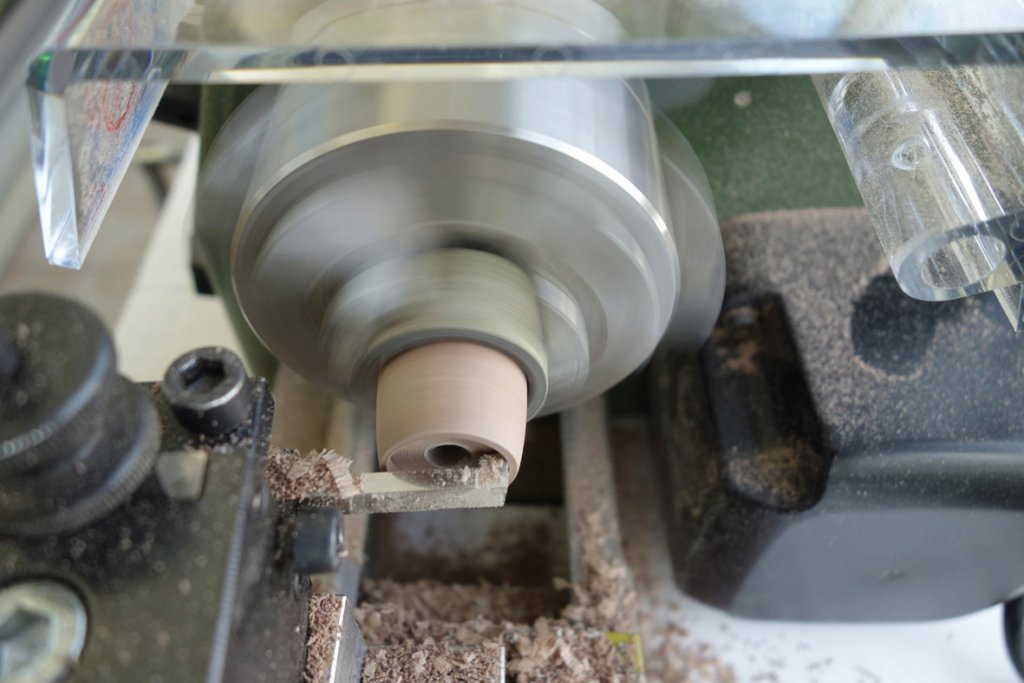
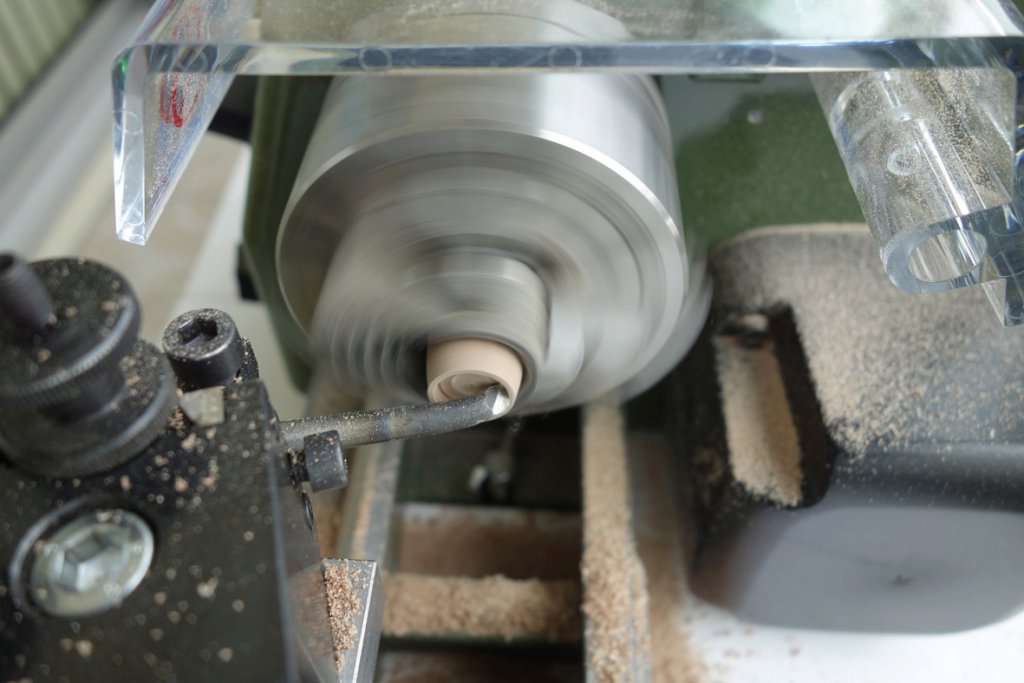
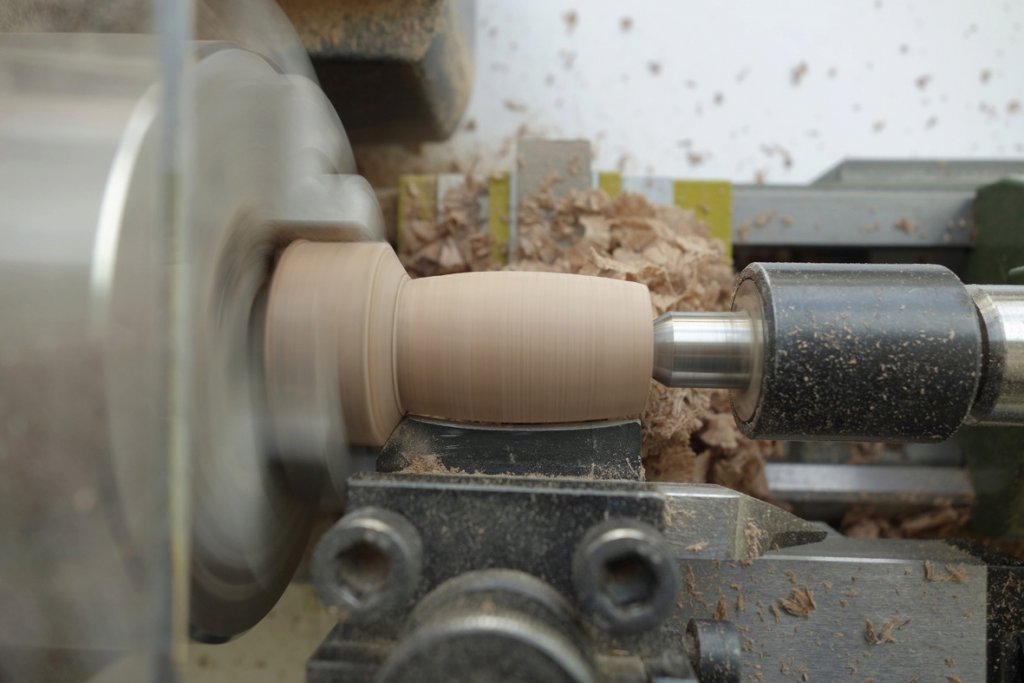
I shot at 2000 RPM:

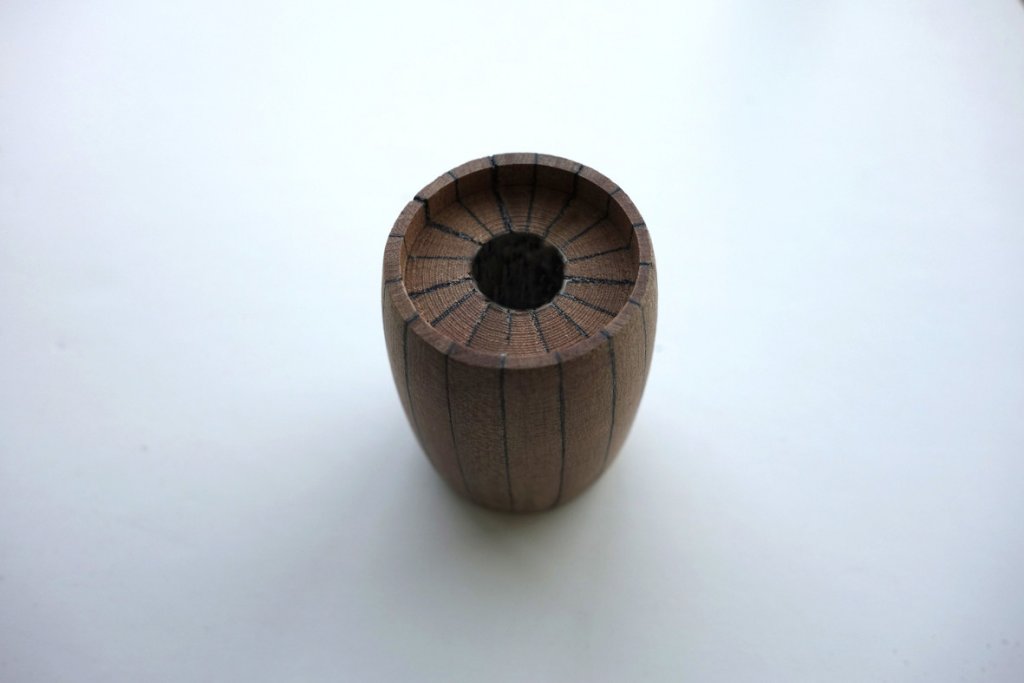
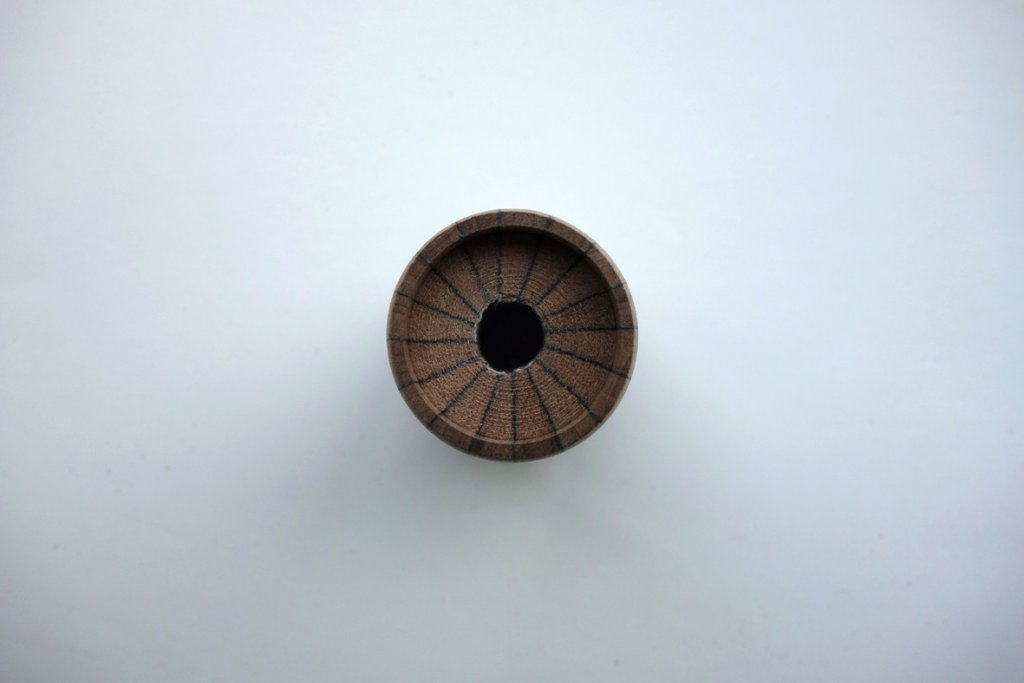
No problem for very small barrels:
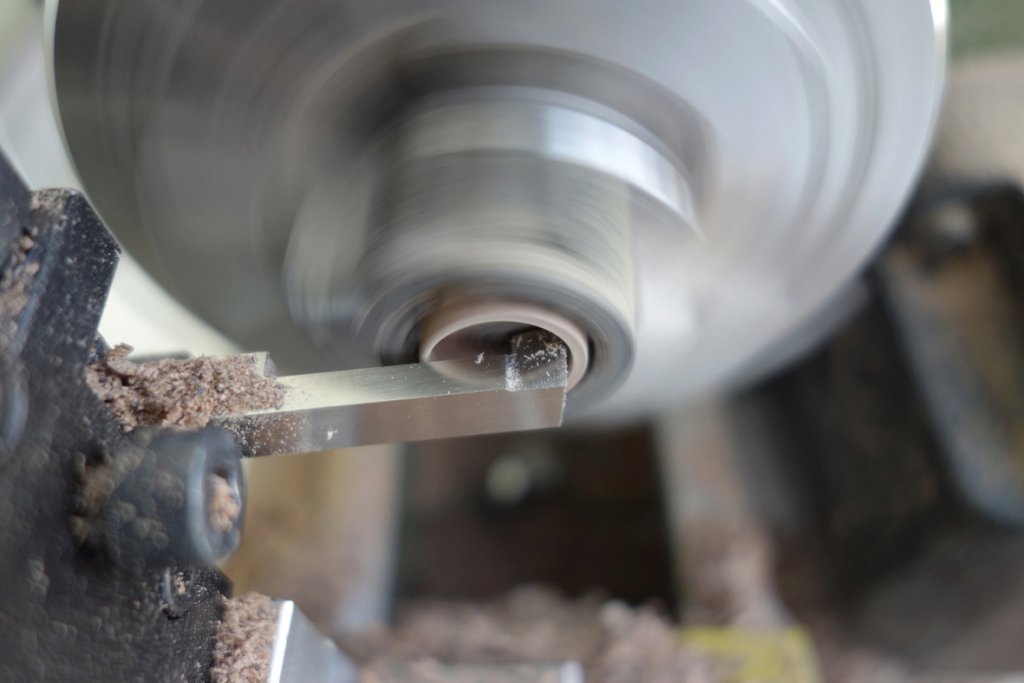
All barrels have been treated on both sides:
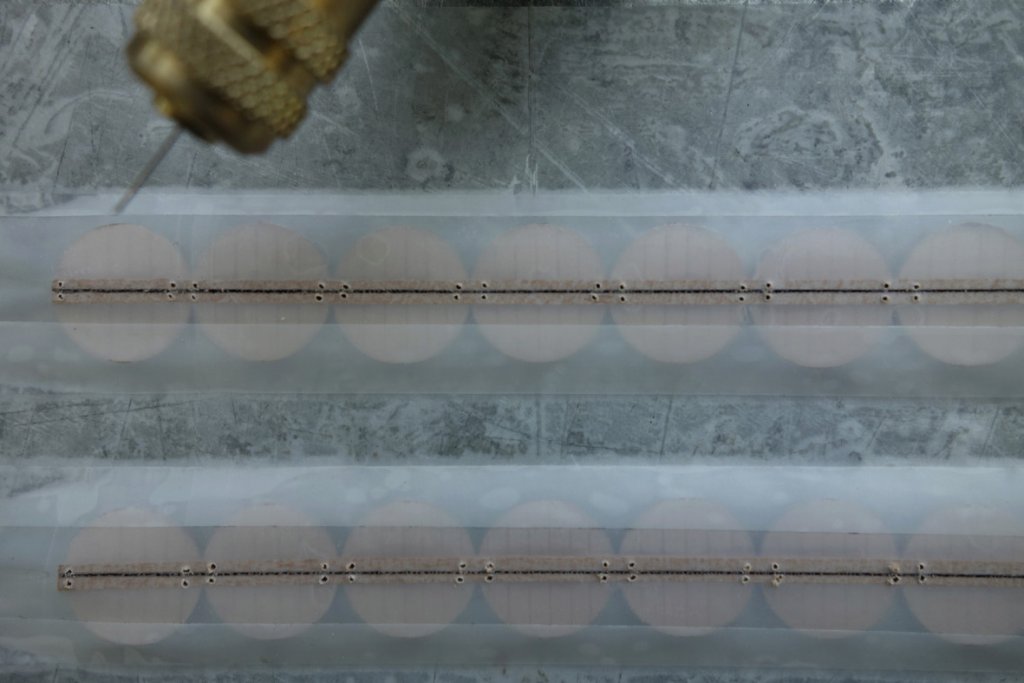
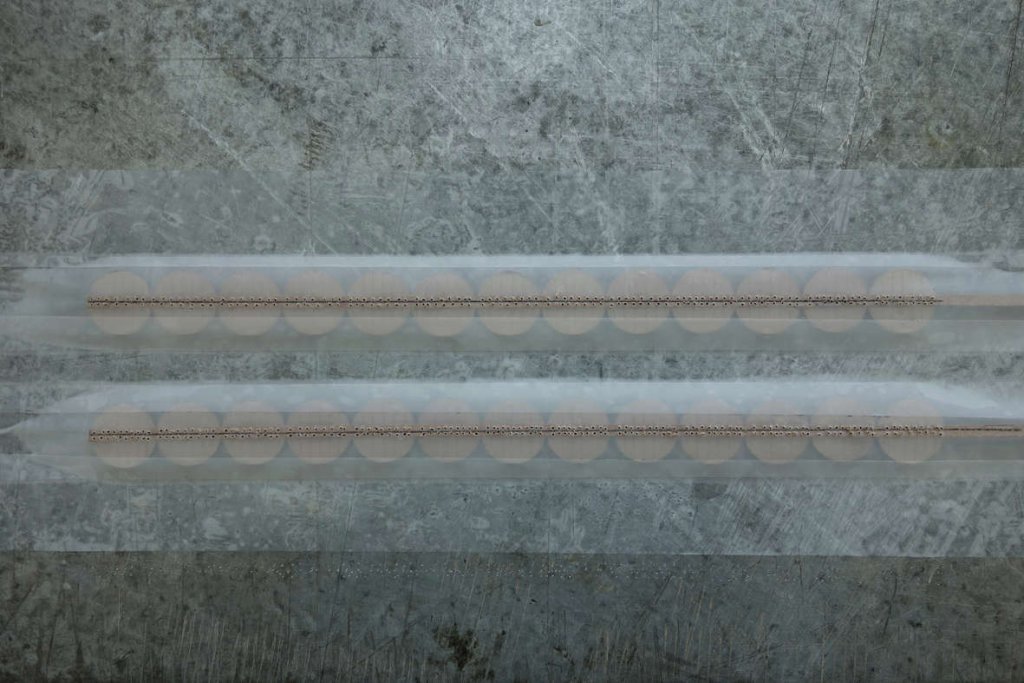
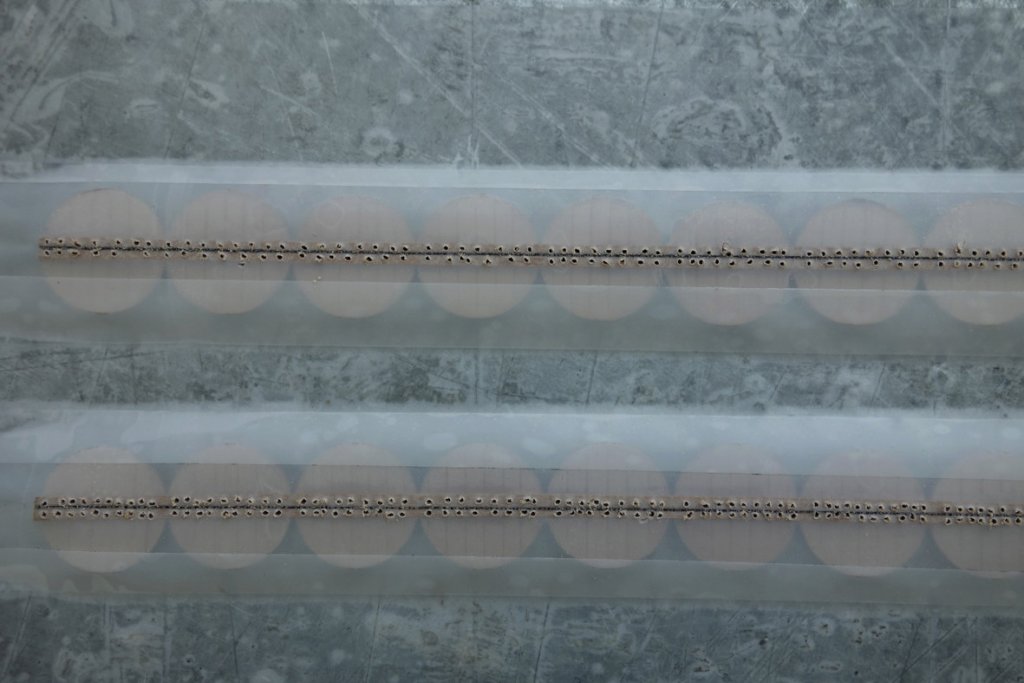
For the rest, I used "punch" ? on striated pear with a point. With a little work of adjustment, my diameters were sufficient for all barrels:
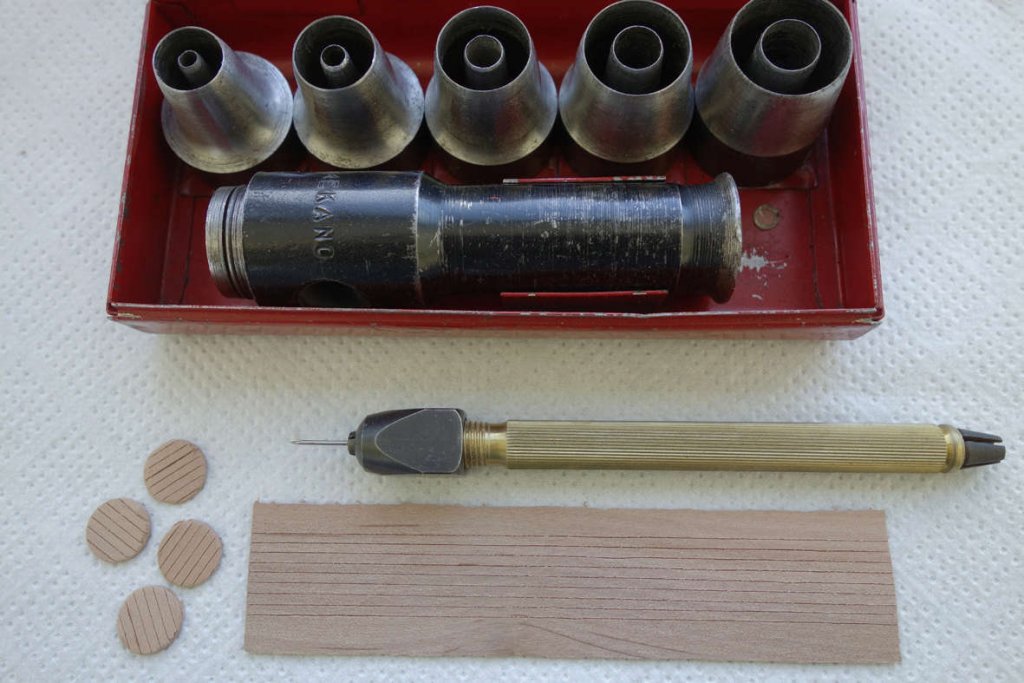
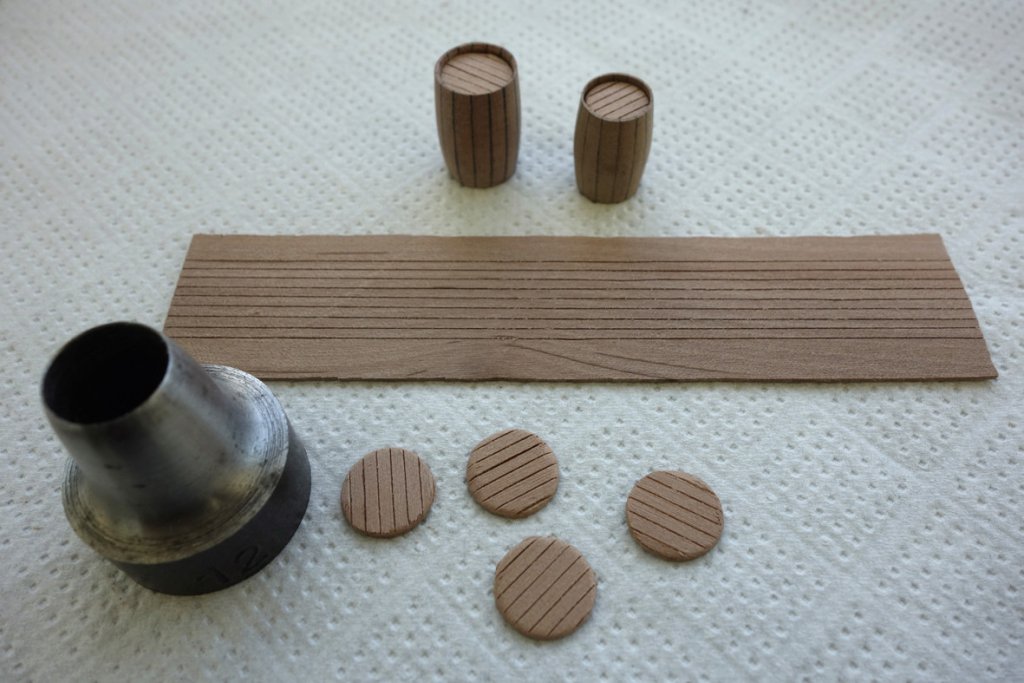
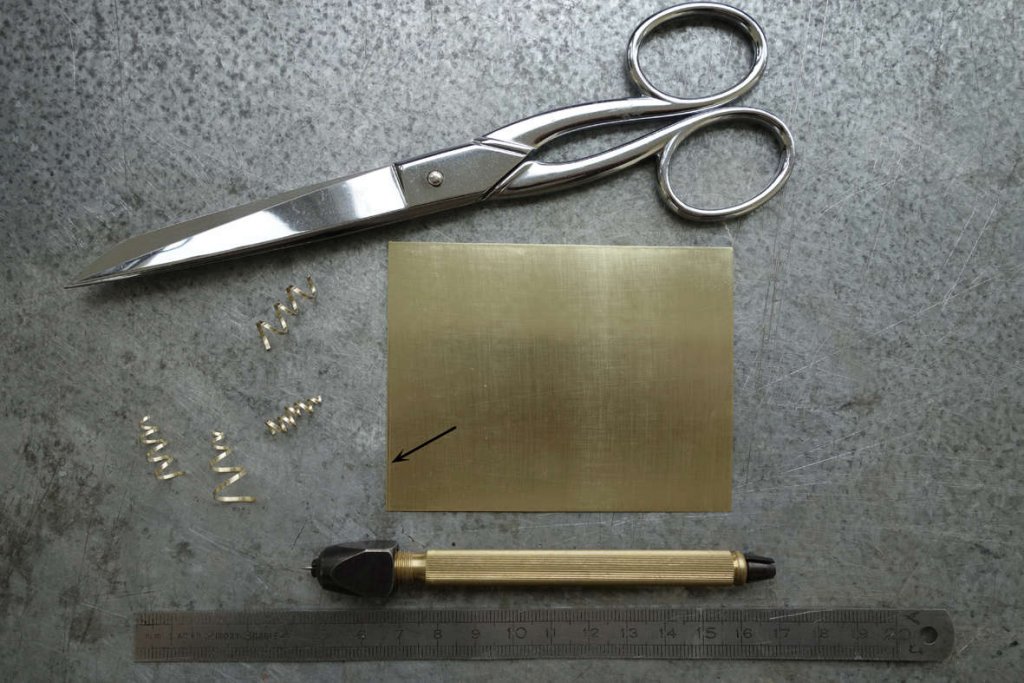
For strapping, I will use this:
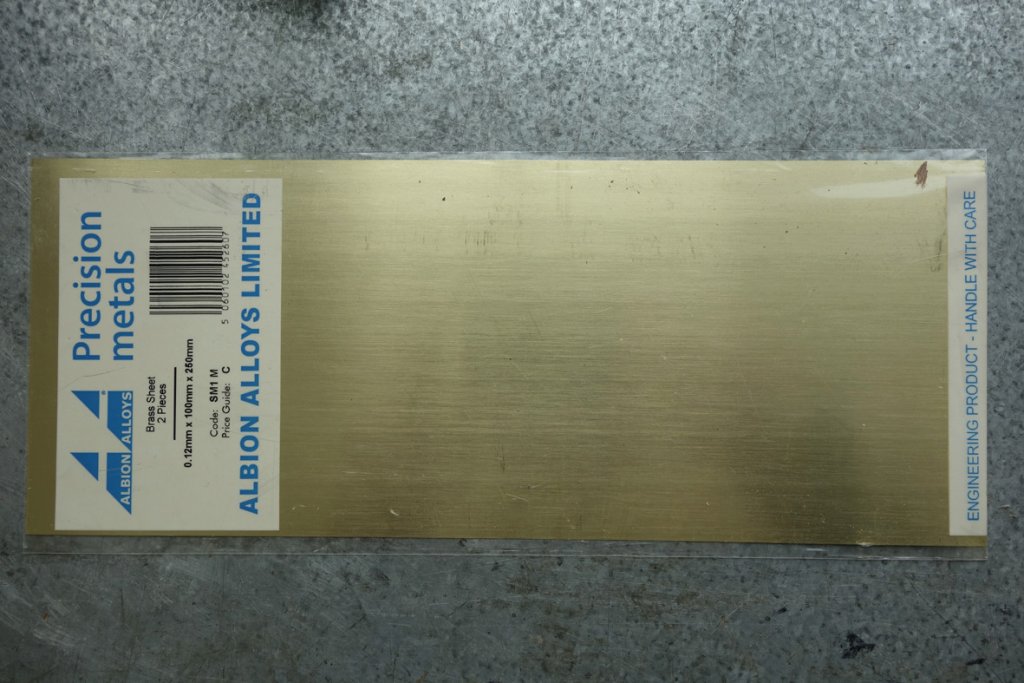
that I will mark at first at the tip and cut with scissors: considering the small thickness it works, but it is long:
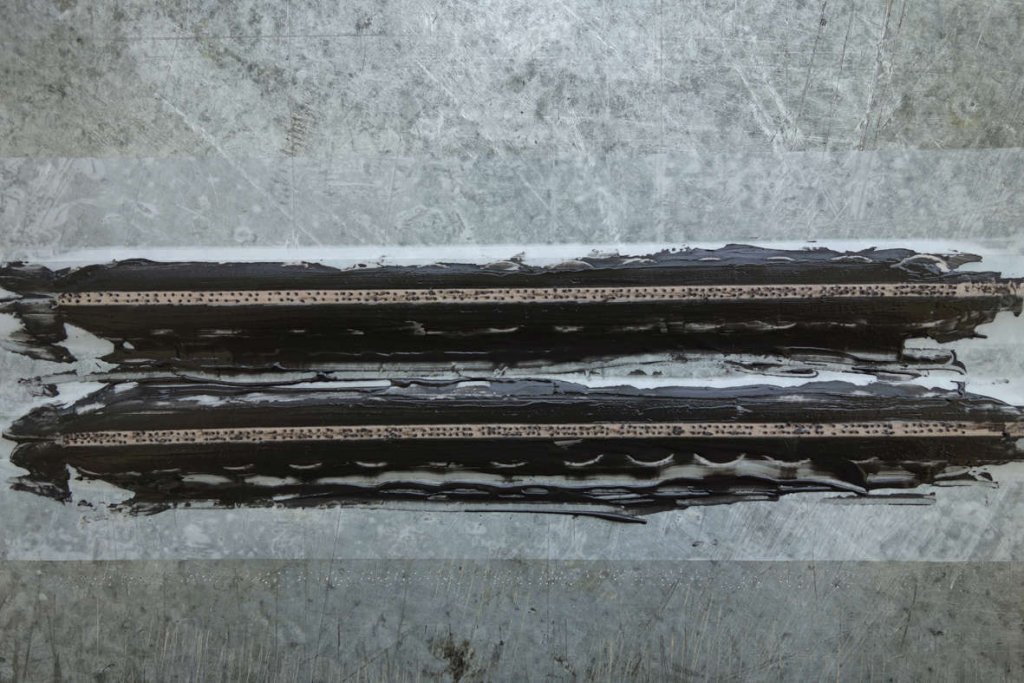
Burnishing:
Finally, pose: it's long and delicate! I started with the smallest model to see:
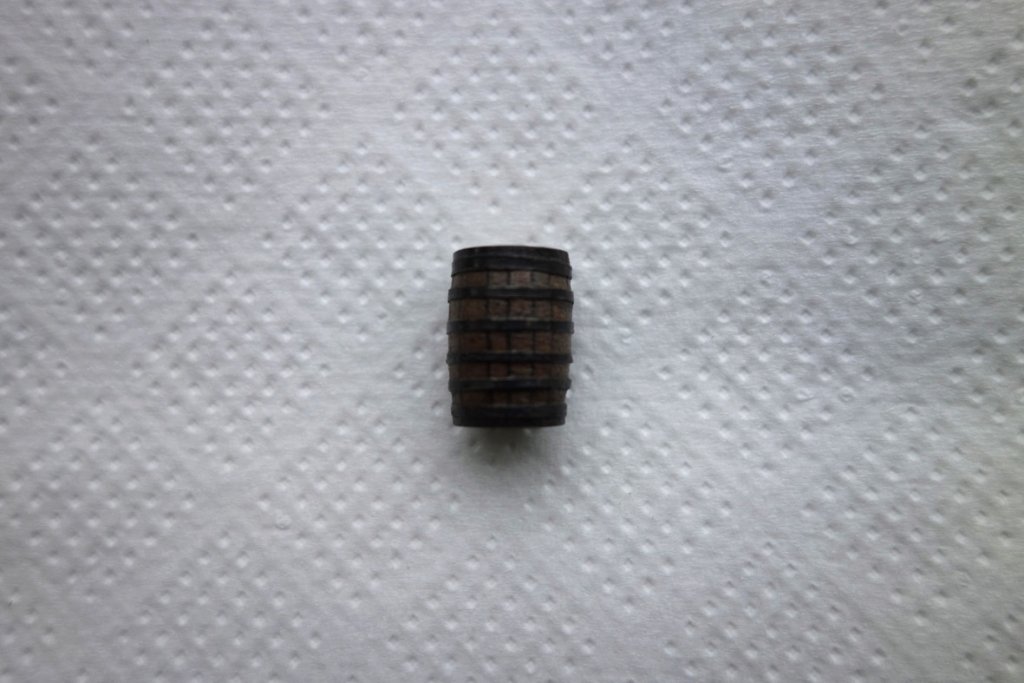
I'm not unhappy with the result, but there are still more than 40 to do ... I'll have to be very patient!
Especially since there is still work on each barrel: bungs etc ...
See you !
Patrick- herask, John Cheevers, Tigersteve and 19 others
-
22
-
Hello gentlemen and thank you for the comments and "likes" !
The work continues ... Some pictures :


See you next time !
Patrick
- marktiedens, dvm27, tlevine and 22 others
-
25
-
Beautiful work Johann ! Are the "Etched Parts" made by you ?
Patrick
- mtaylor, EJ_L and paulsutcliffe
-
3
-
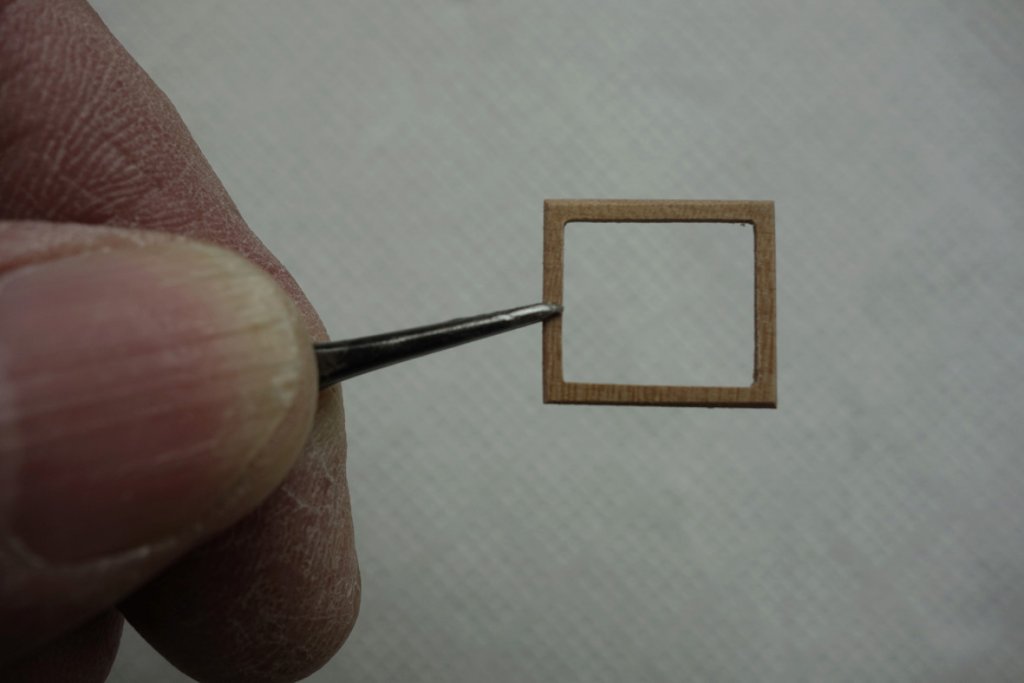
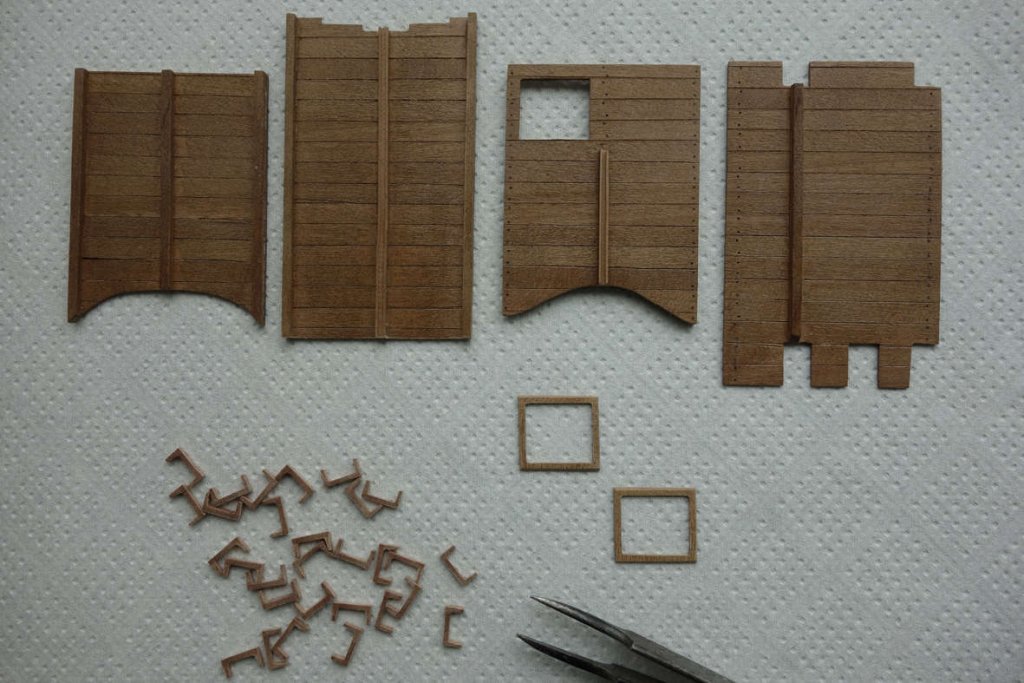
Hello gentlemen and thank you !
Contrary to what I said, I did not go back to working on La Renommée but I continued on the plate ...
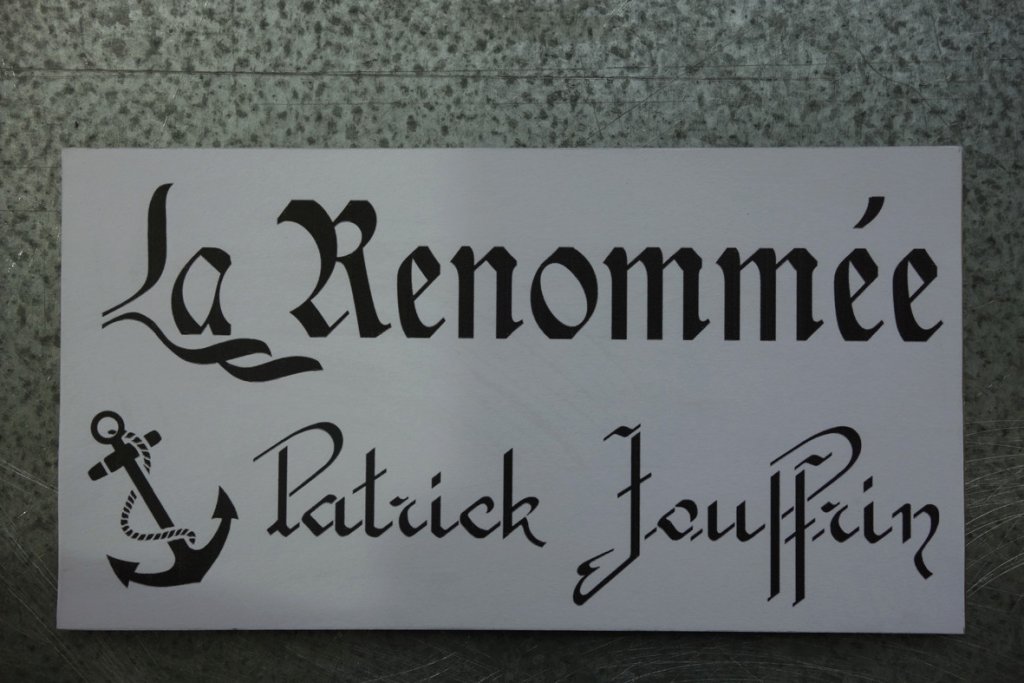
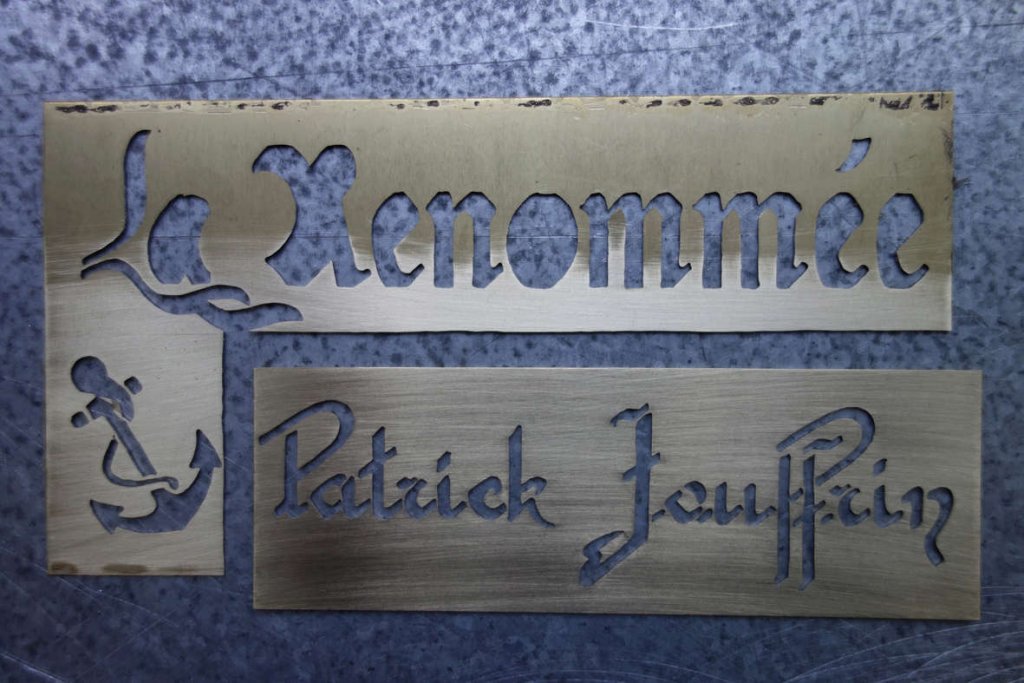
I was not entirely satisfied : the drawing seemed a little bland, banal in its design. So I decided to redo with a more worked drawing, but the problem is that it complicates a lot of cutting ! Even judge yourself :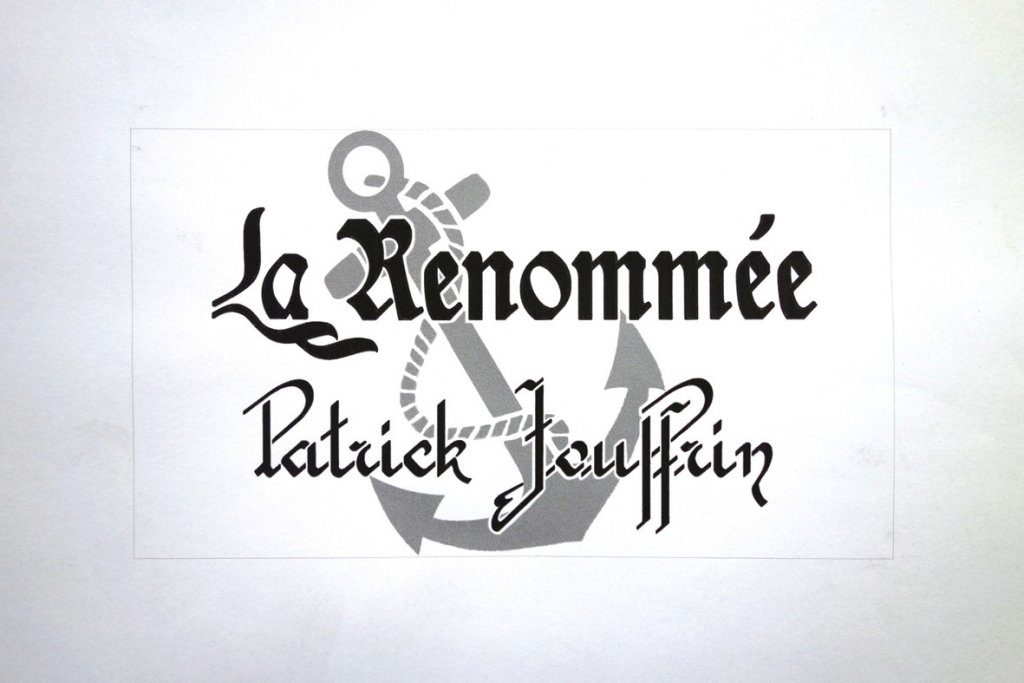
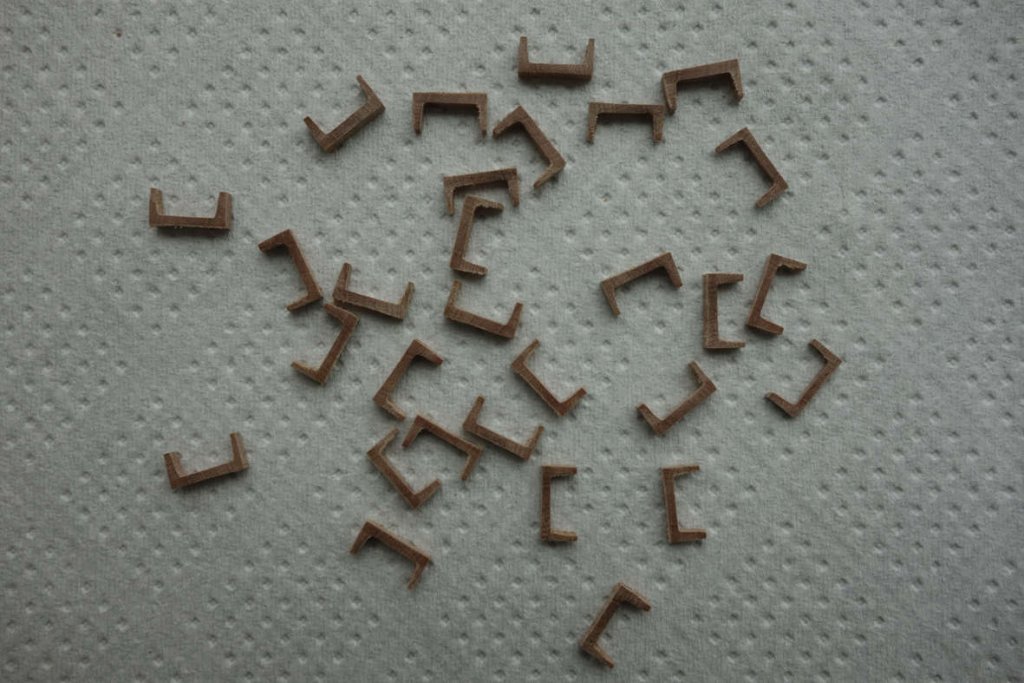
After studying the feasibility, I relaunched. I will not explain again : I did as the previous time. I simply tape the ebony plate and pear to tape to protect the wood because the cuts will be very "delicate" for some. I took about sixteen hours to cut everything, but I broke less blades: only ten. Here are all my little pieces :

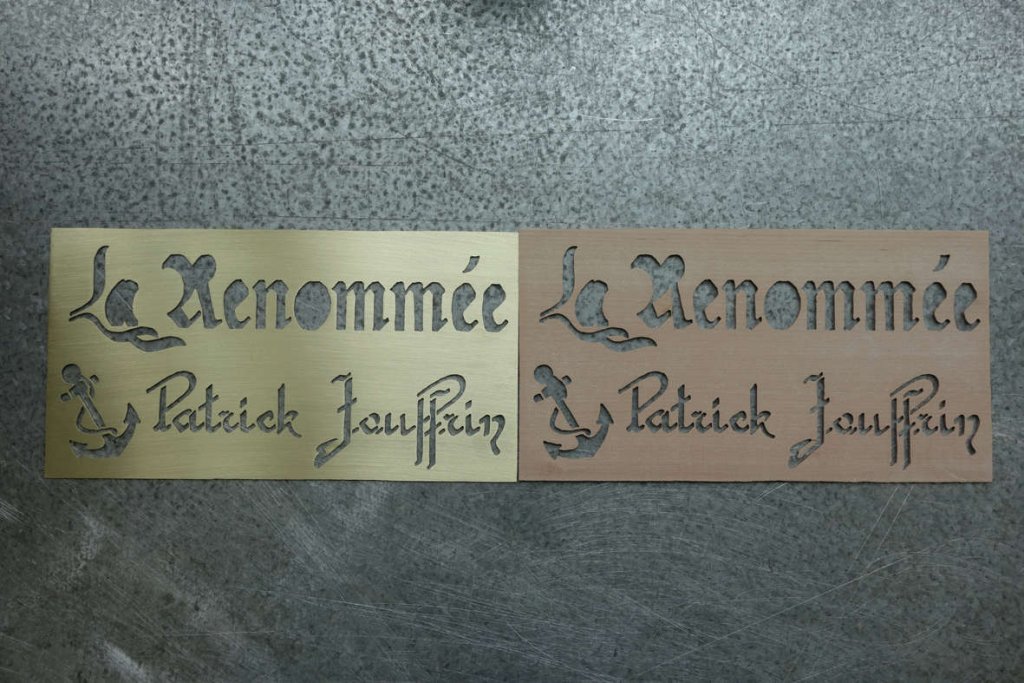
And here are the two plates that I will be able to exploit (the ebony plate will not be) :
A view a little closer where you can see that in places the cuts are at most what I can do :
Finally, after five to six hours of assembly and sanding, the final result on the pear plate :
I find it much better than the previous one and it's her that I'll keep for the showcase ... in 20 years ! (Is not it Chris !)
Will remain to make a small brass frame, but it will be for later, when I know how to braze ...
See you later !
Patrick
-
Thank You very much Messieurs !
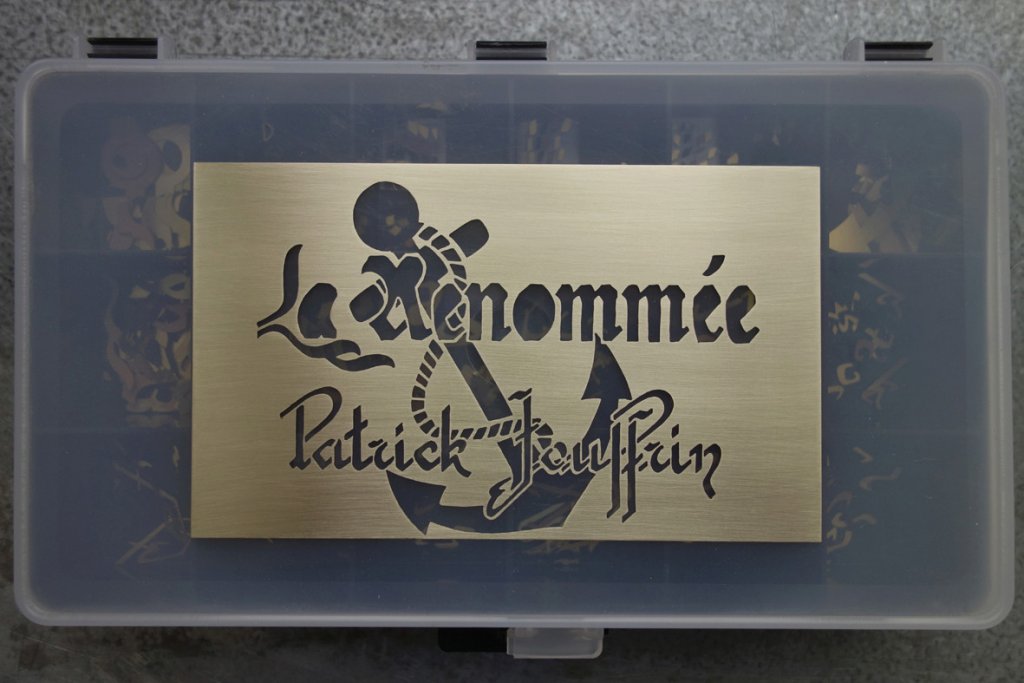
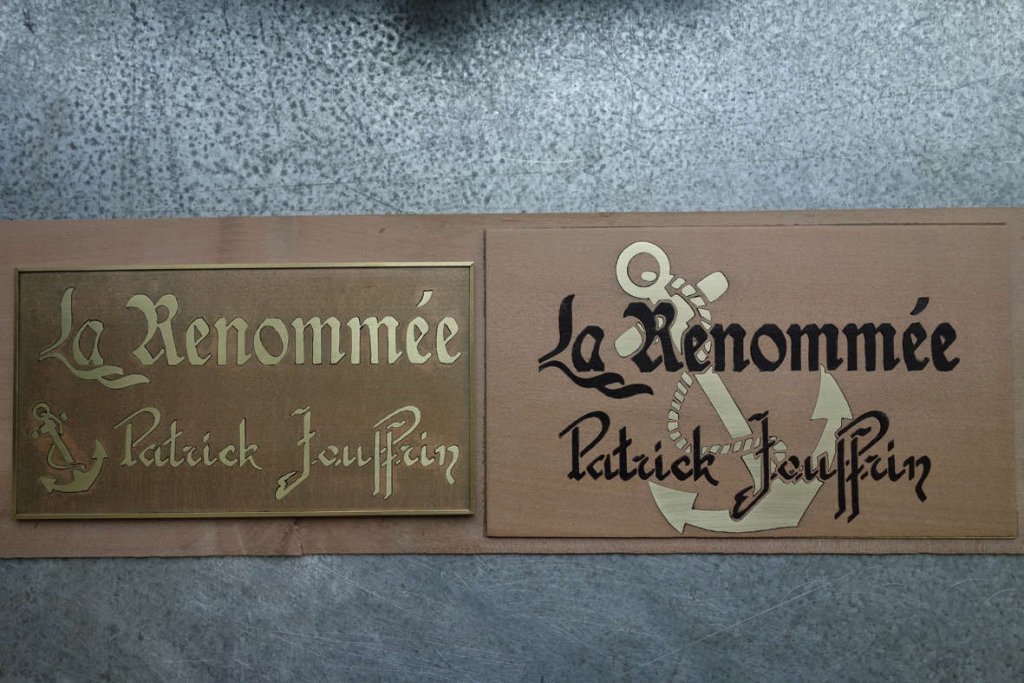
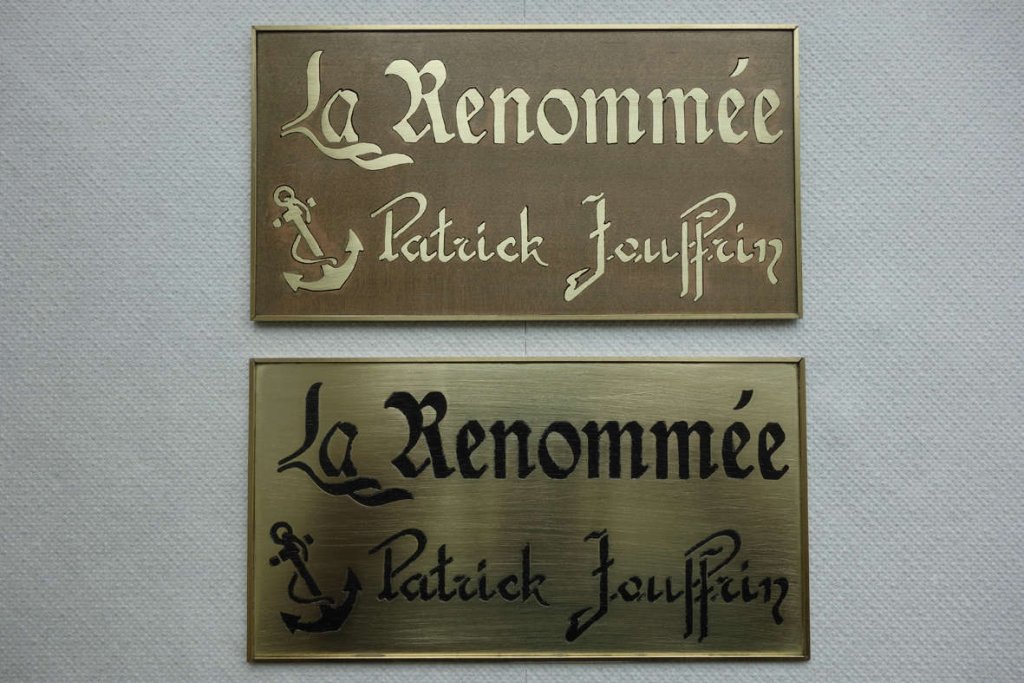
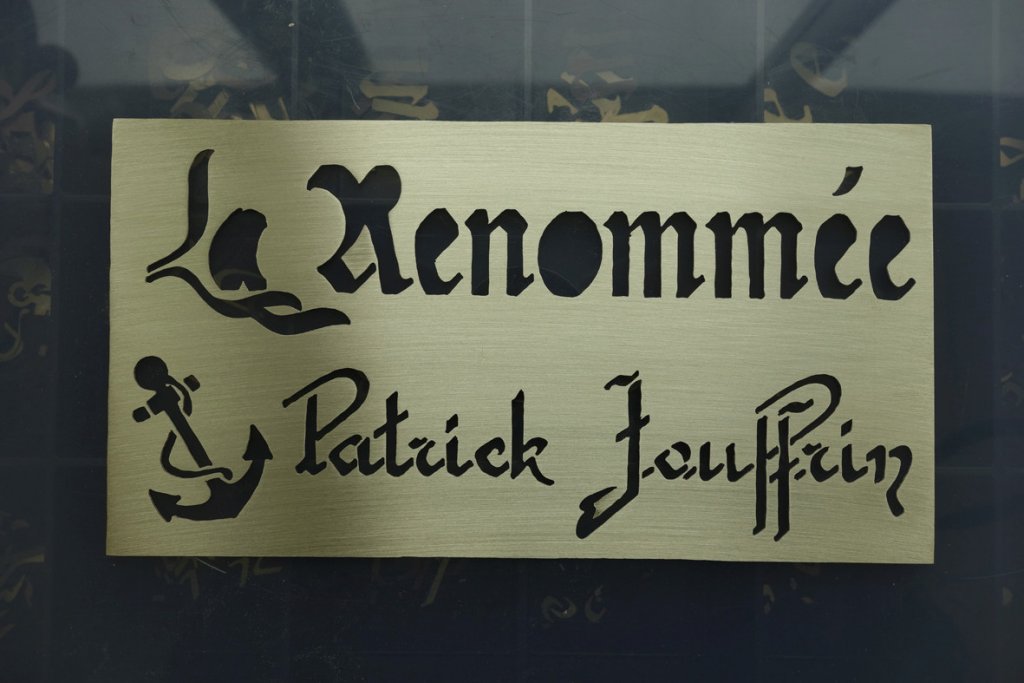
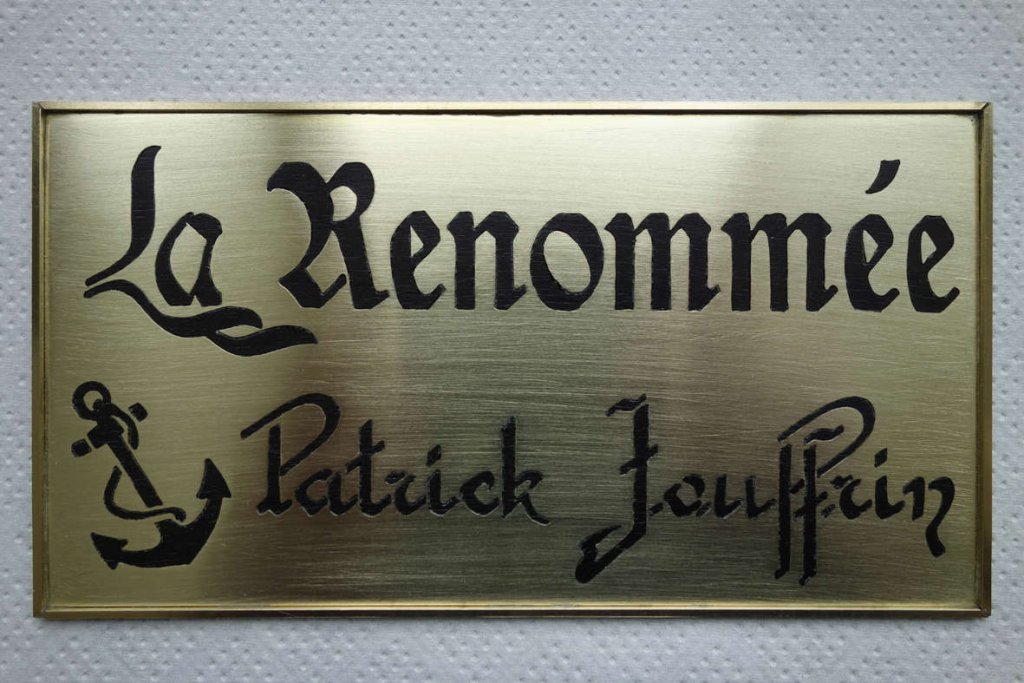
To conclude this subject, here is as promised the version "Pear and Brass" of my little plate. I like too :
So, it's over with this little project. I'm going back to the ship !
See you next time !
Patrick
- Mike Y, paulsutcliffe, CaptMorgan and 13 others
-
16
-
Hi Gentlemen !
Here is a project in the project.
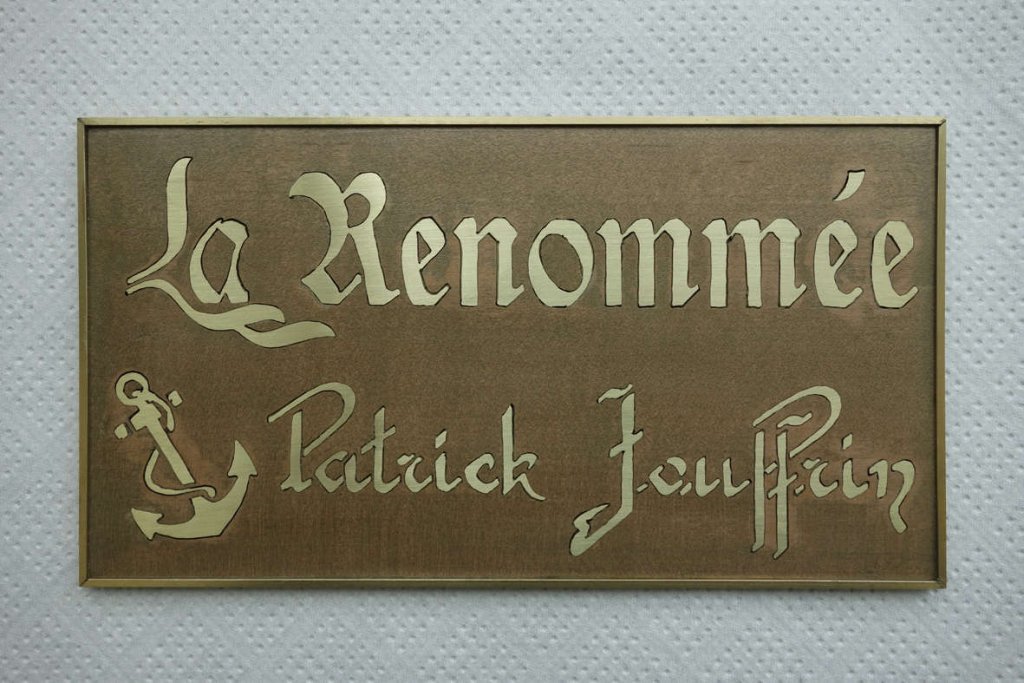
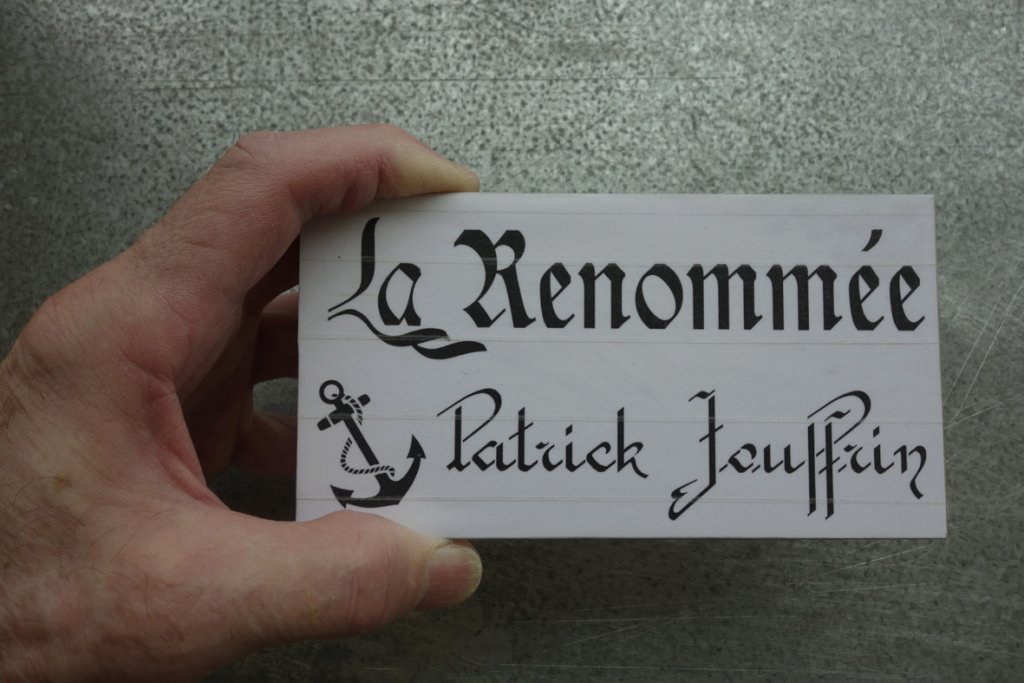
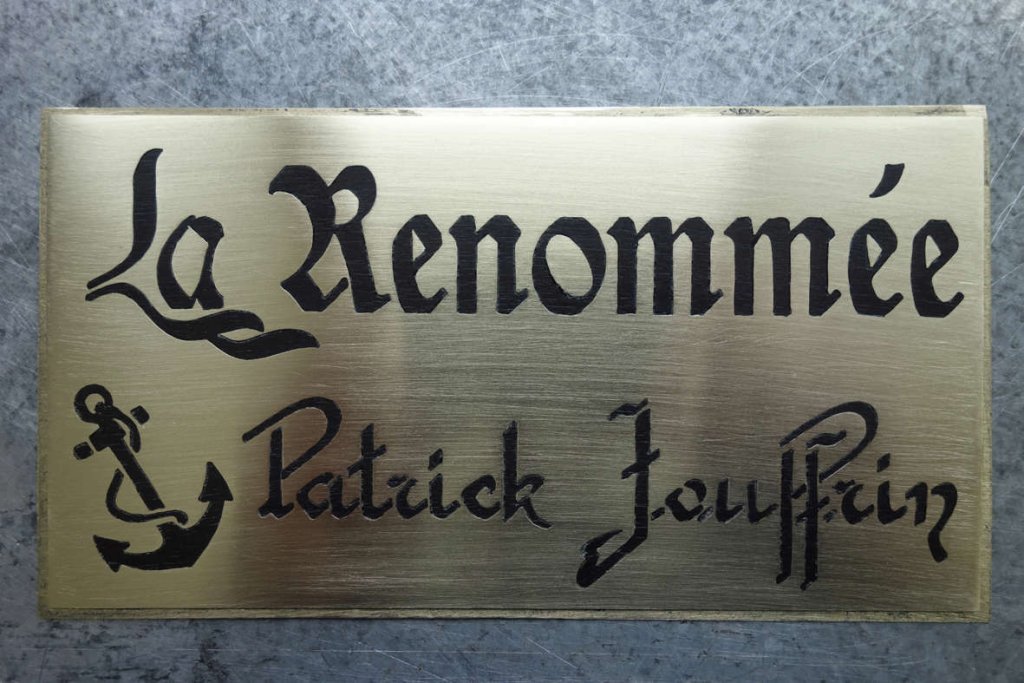
To vary the pleasures a little, I think to make a small plate with the name of the ship and ... mine! I explain all that to you ...
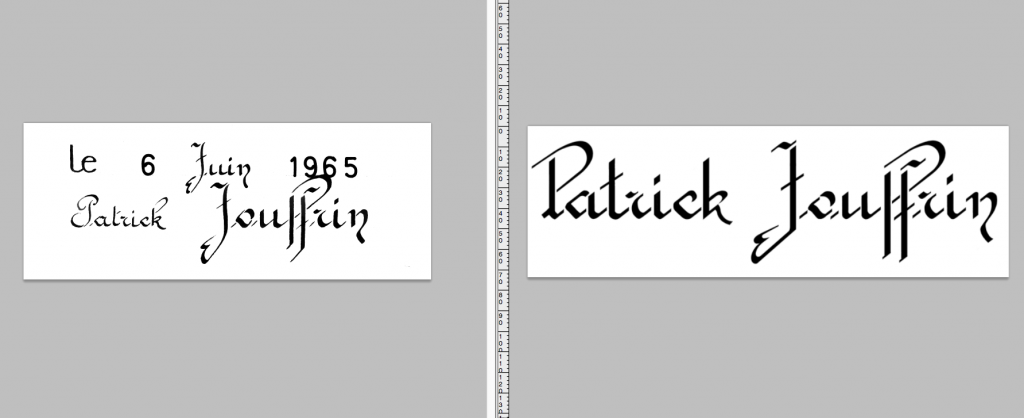
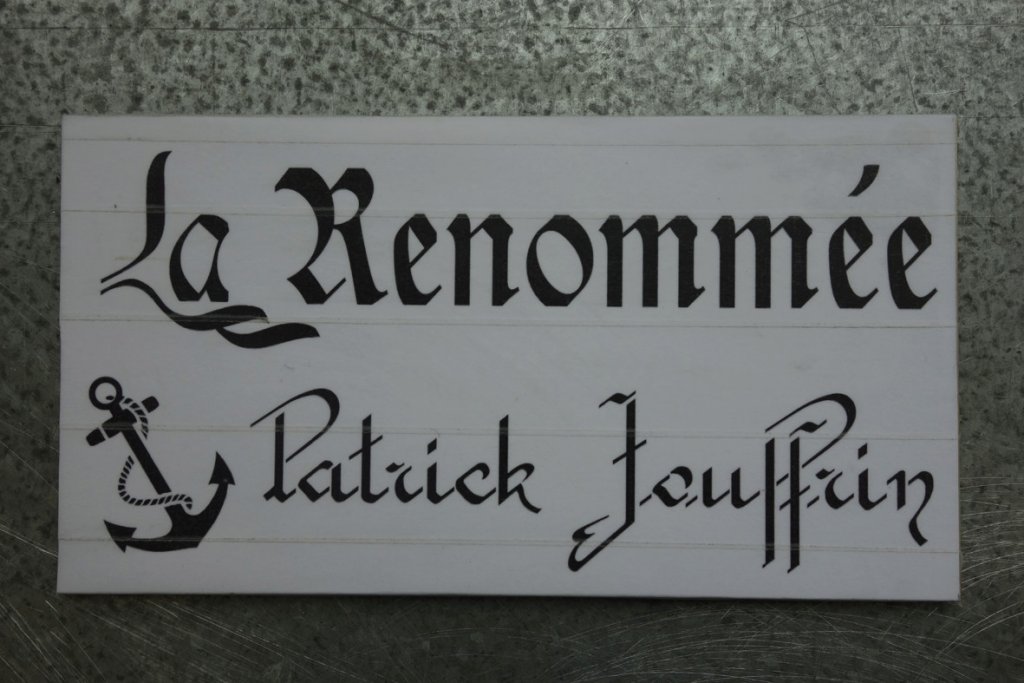
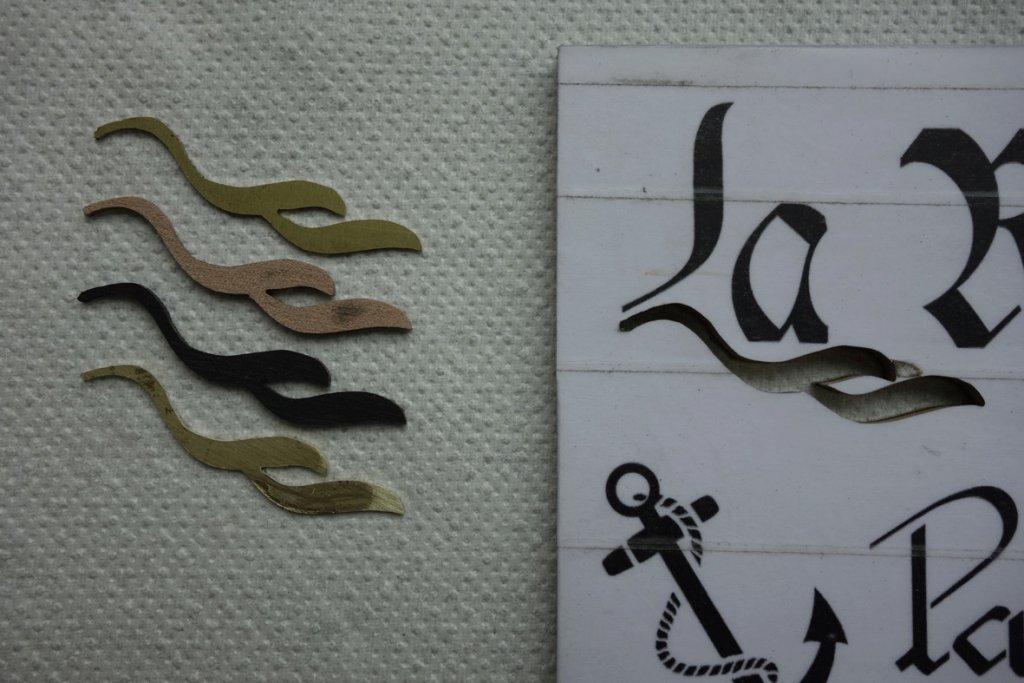
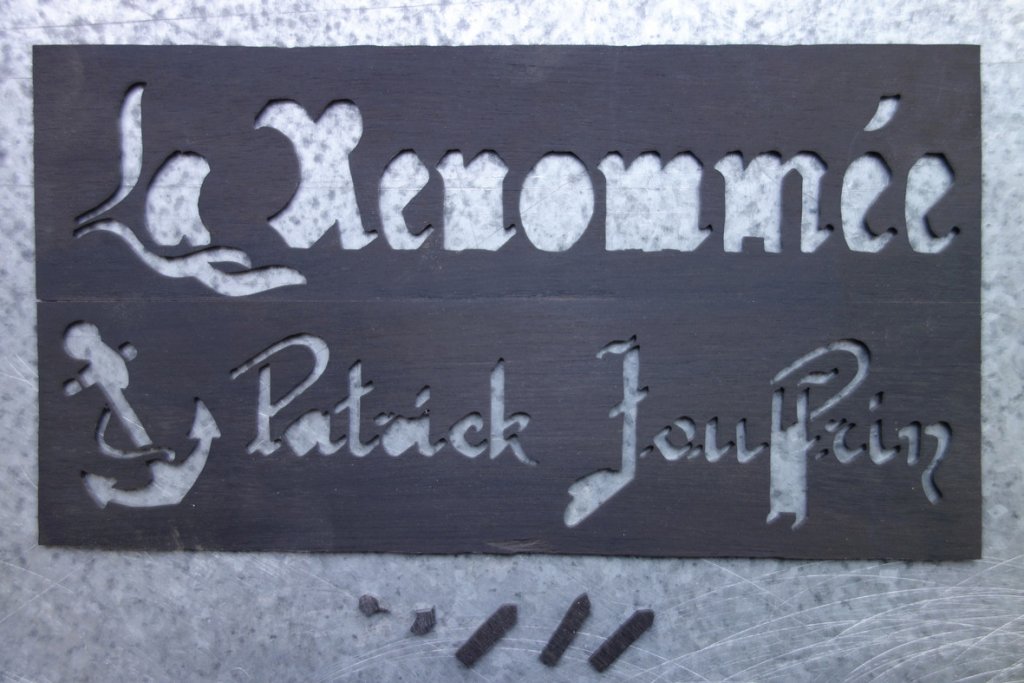
Many years ago, I had graduated where my name was written in a very nice way, especially with both "f". I always "flashed" on this writing so I was inspired to rework with the computer and use it. Here is a "screen" view with left the extract that interests me and my version right:
It remains to finalize the project with the name of the ship, a small anchor to decorate and here is my future plate:
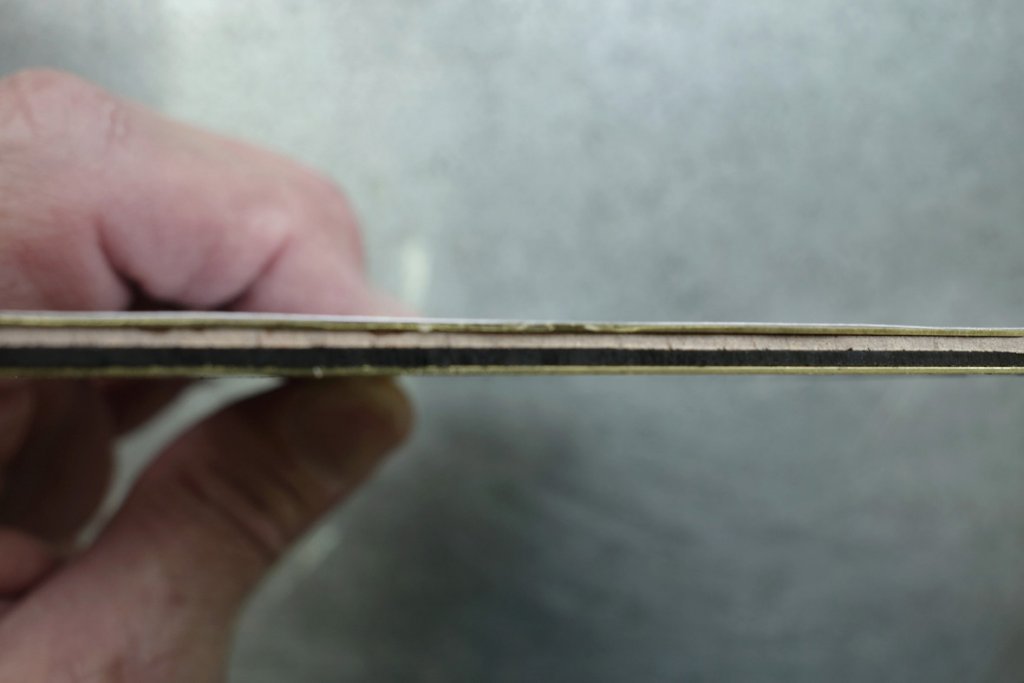
I will try to achieve it inlaid fashion. For that, as it looks like at Ecole Boulle, I make a "package" with a pear tree (1mm), an ebony plate (1mm) surrounded by two brass plate (0.5mm). All these plates are glued together slightly on the periphery (on 1mm). Brass should prevent wood, especially ebony, from bursting during sawing:
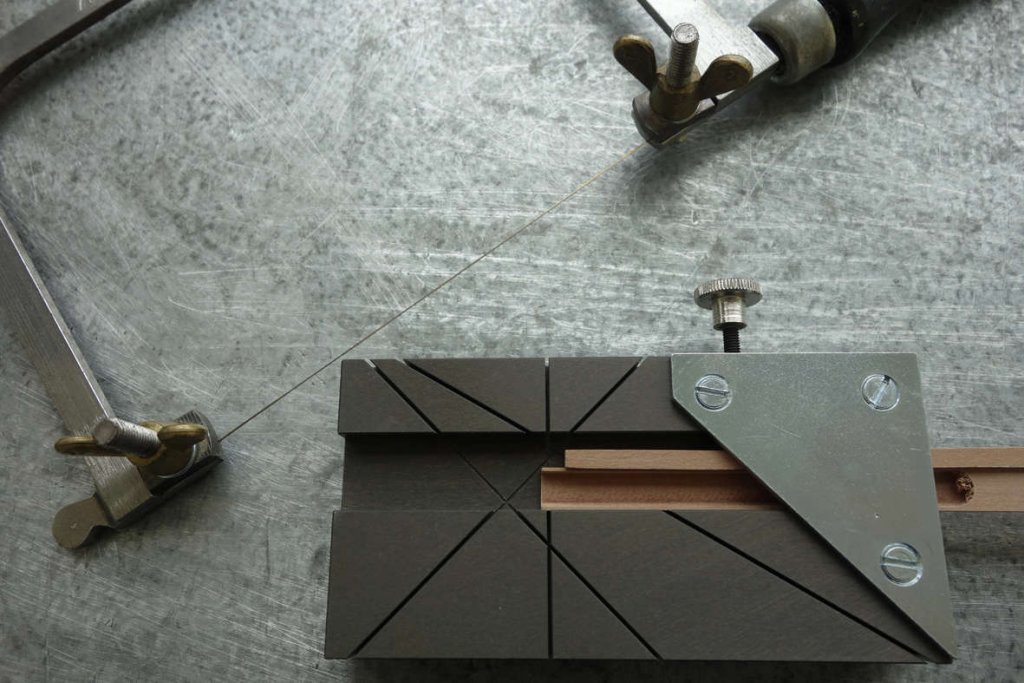
I cover my drawing with strips of tape to preserve it, always when sawing:
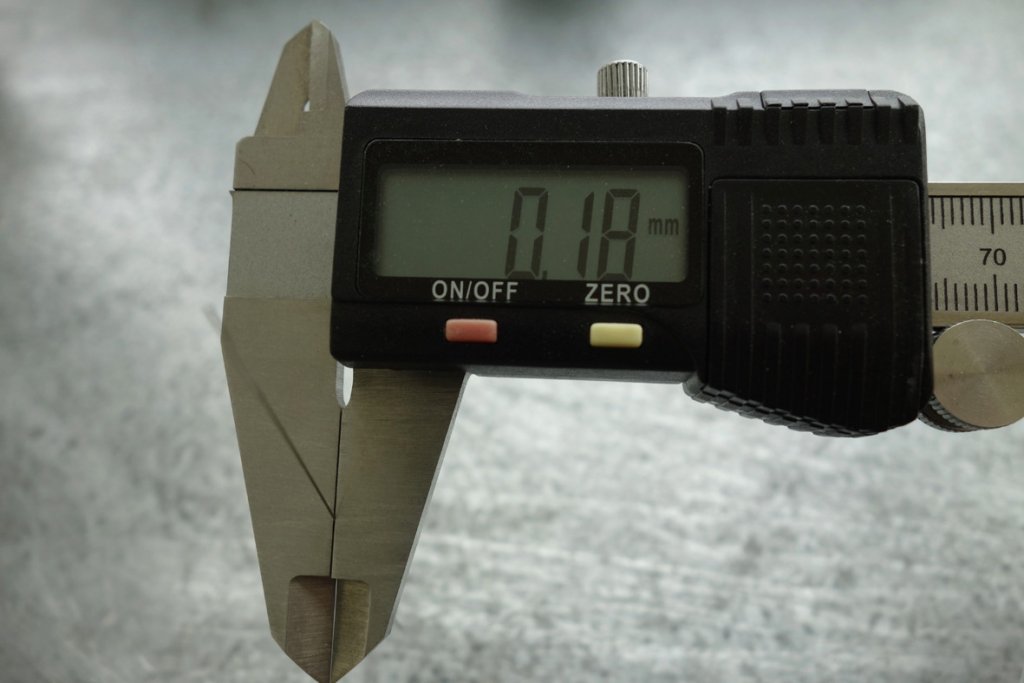
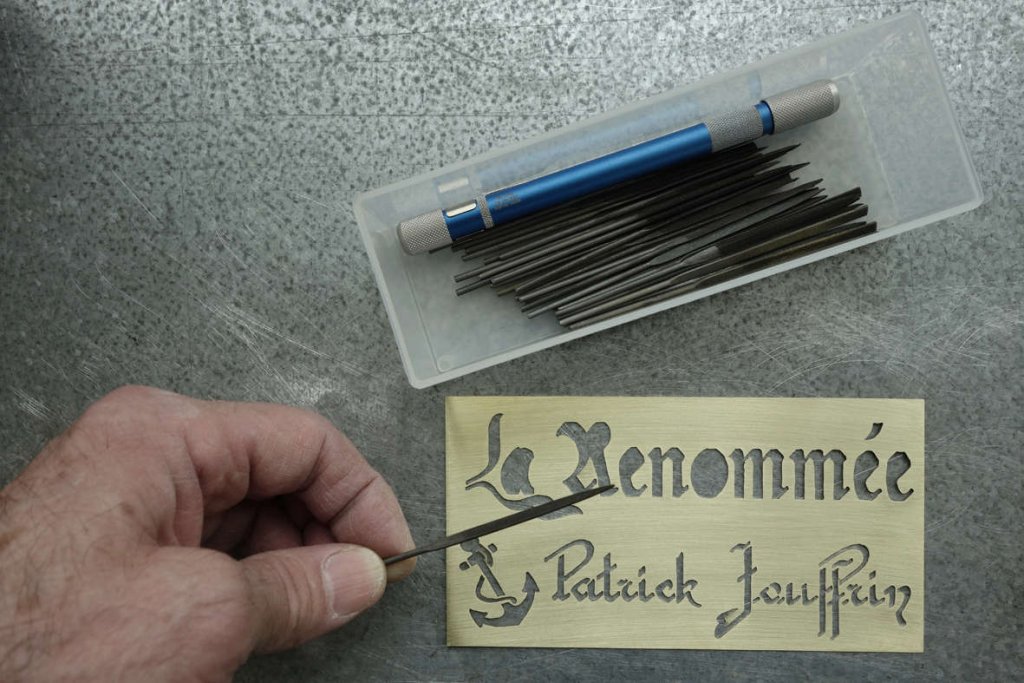
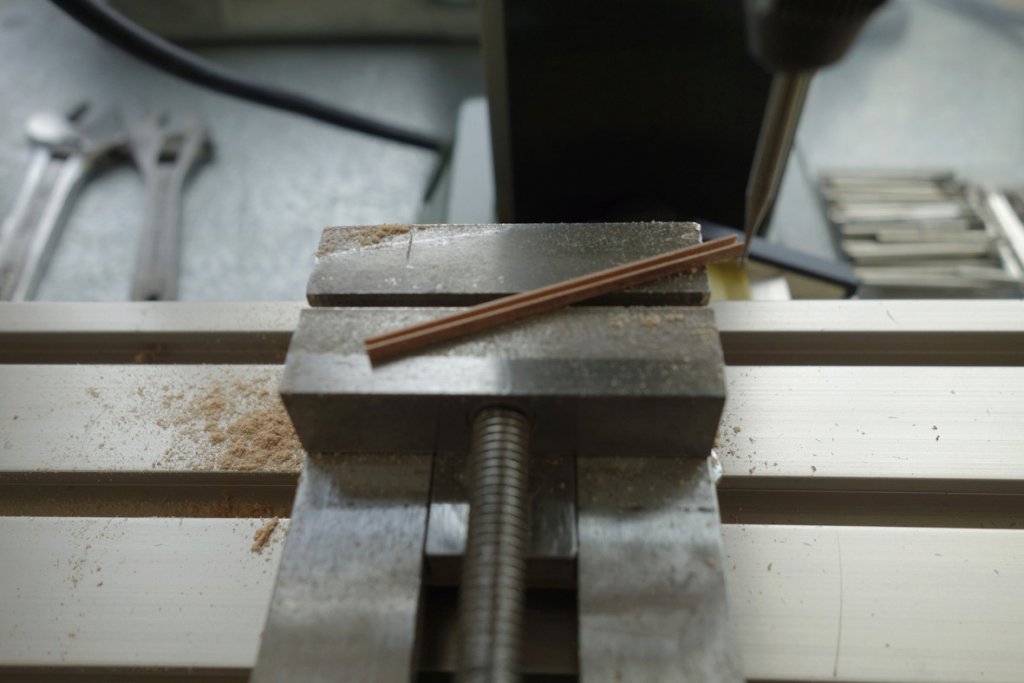
I'm going to saw everything by hand: I had a PROXXON saw but I quickly got rid of it because I "feel" things better by using my hands, even if it is not as fast. The "Bocfil" will be equipped with super-thin blade, both in blade thickness and in cutting thickness:
I was going to forget: the plate will be 15cm x 8cm:
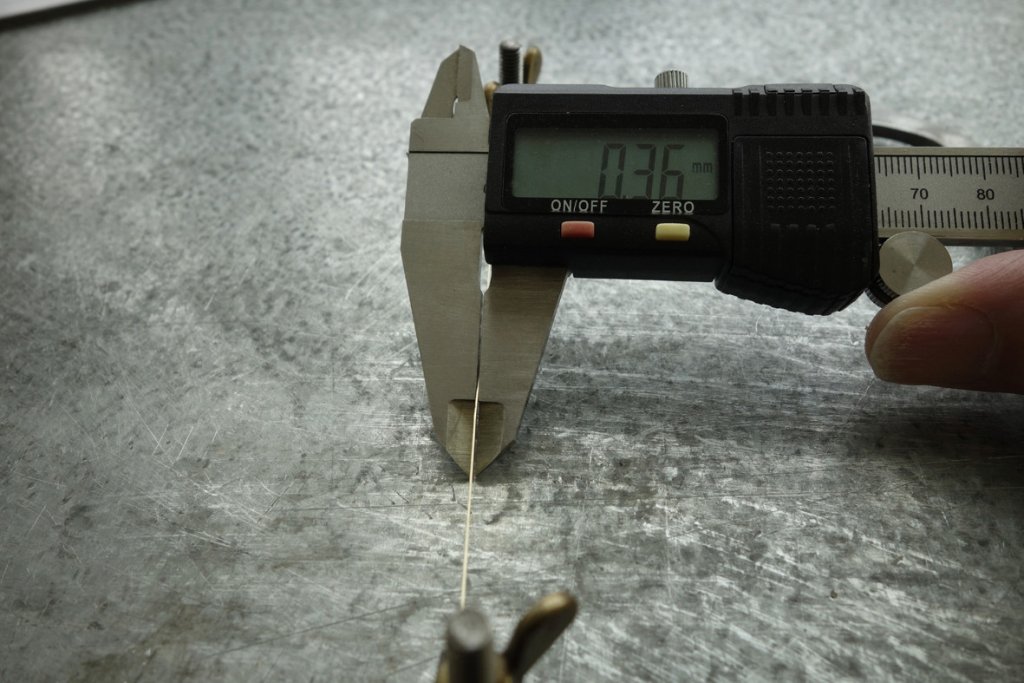
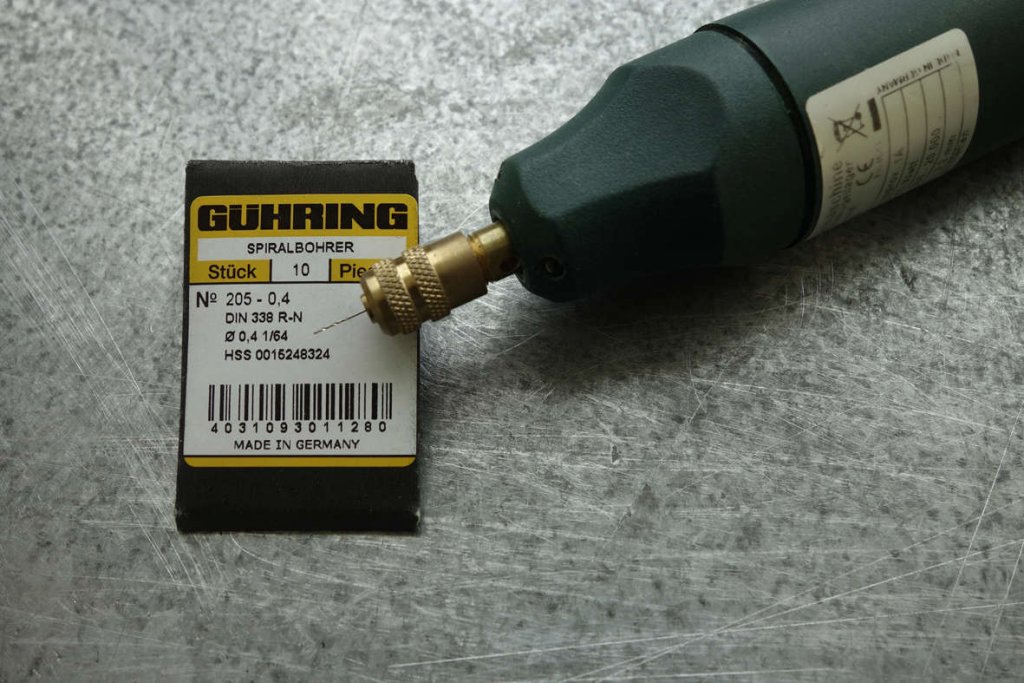
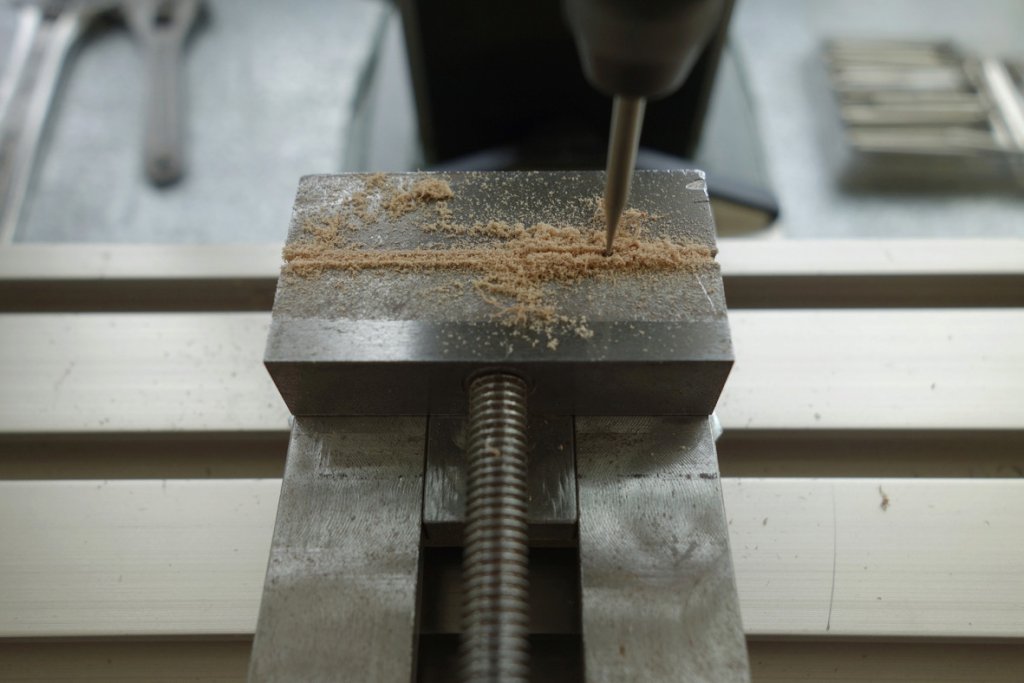
To introduce the blade, I have to drill 0.4mm, below it does not pass:
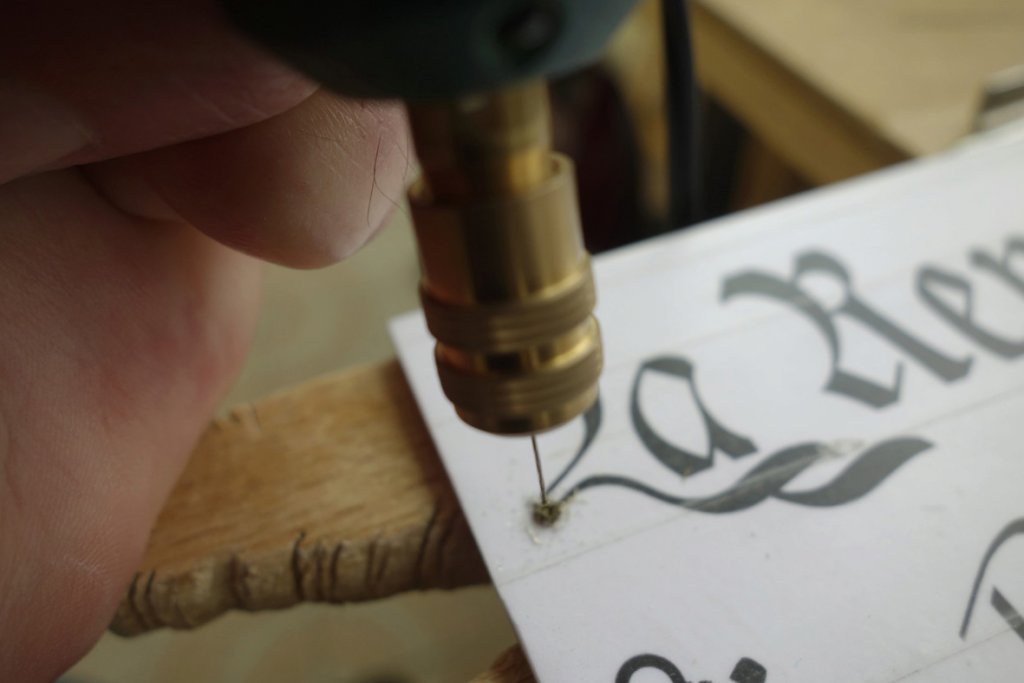
And here we go, here are my very first pieces:
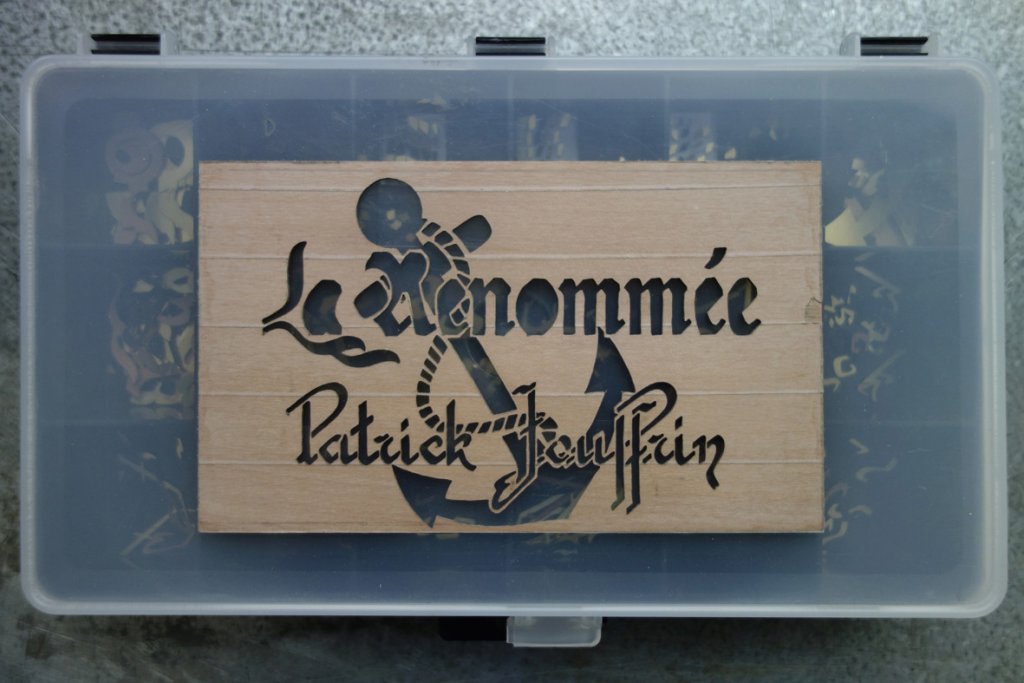
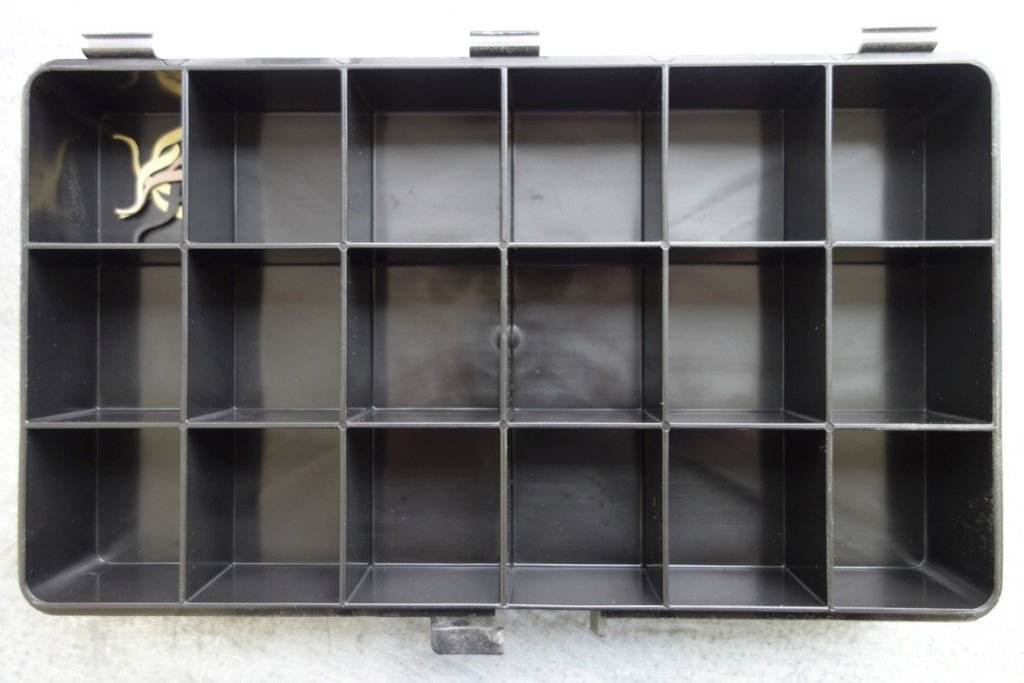
As there will be a lot, and very small, I requisitioned a box to arrange everything as you go, just to find me and not to lose anything:
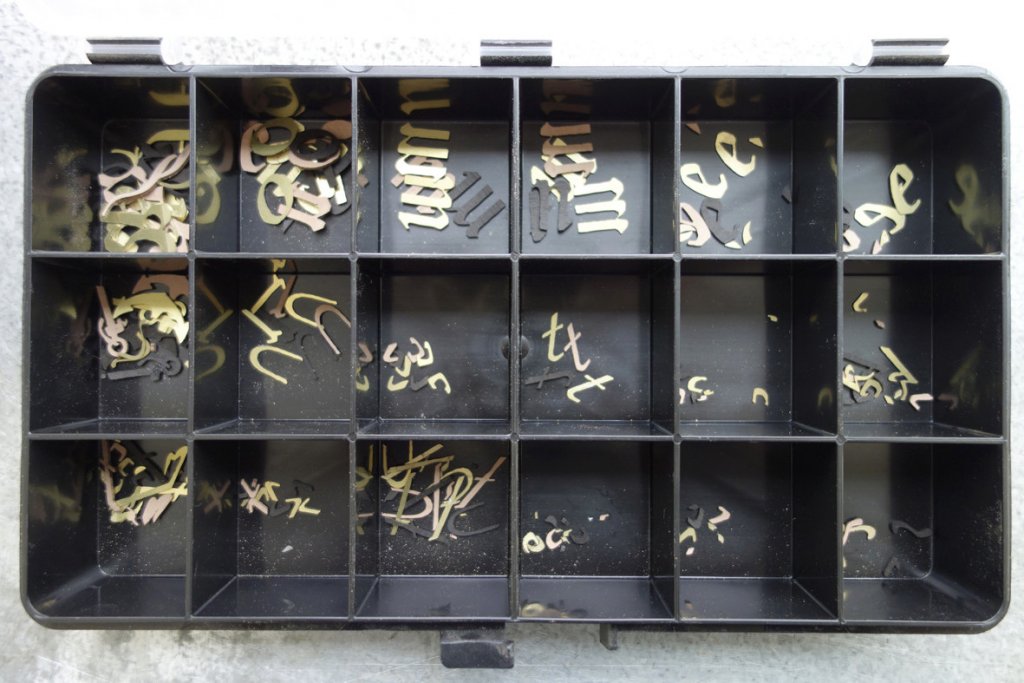
It advances, slowly certainly, but surely:
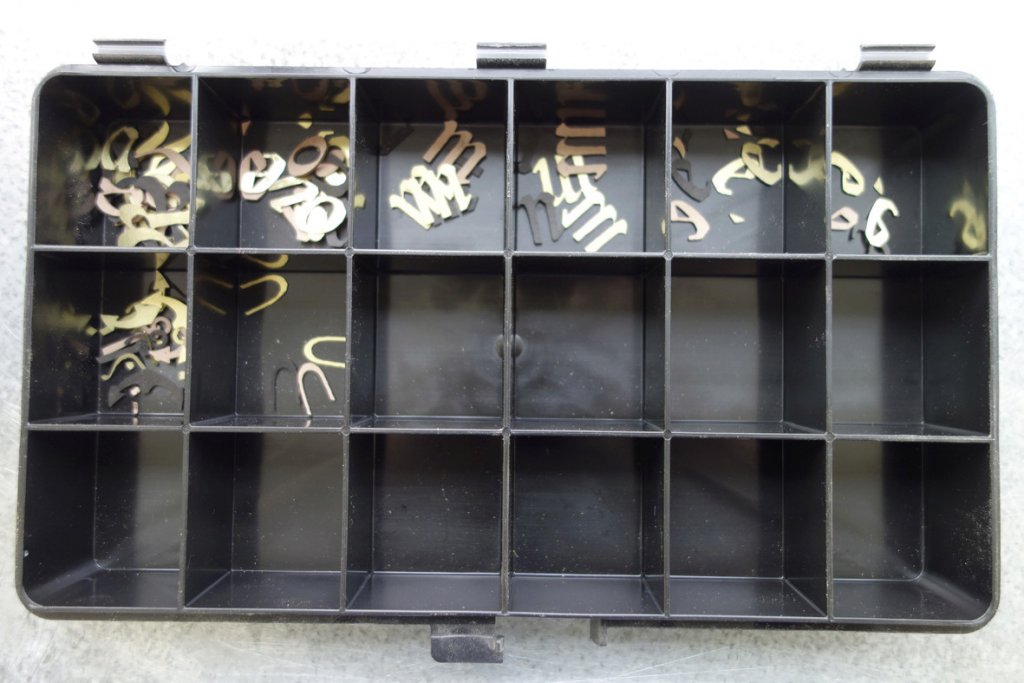
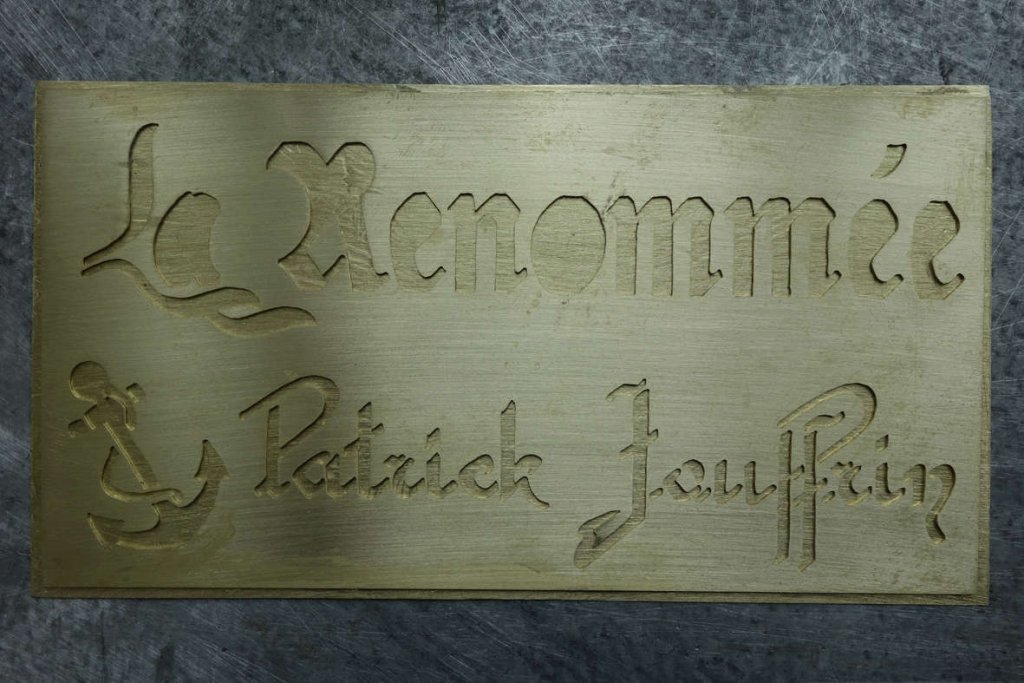
After about thirteen hours of work, spread over two days, about 25 broken blades, here are all the pieces cut and arranged:
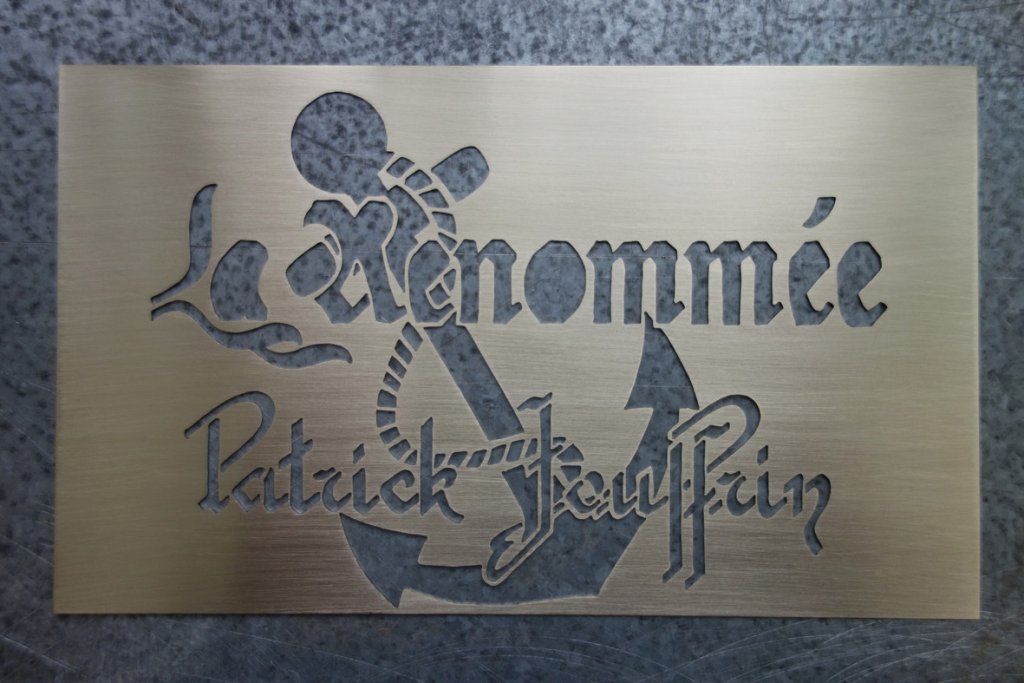
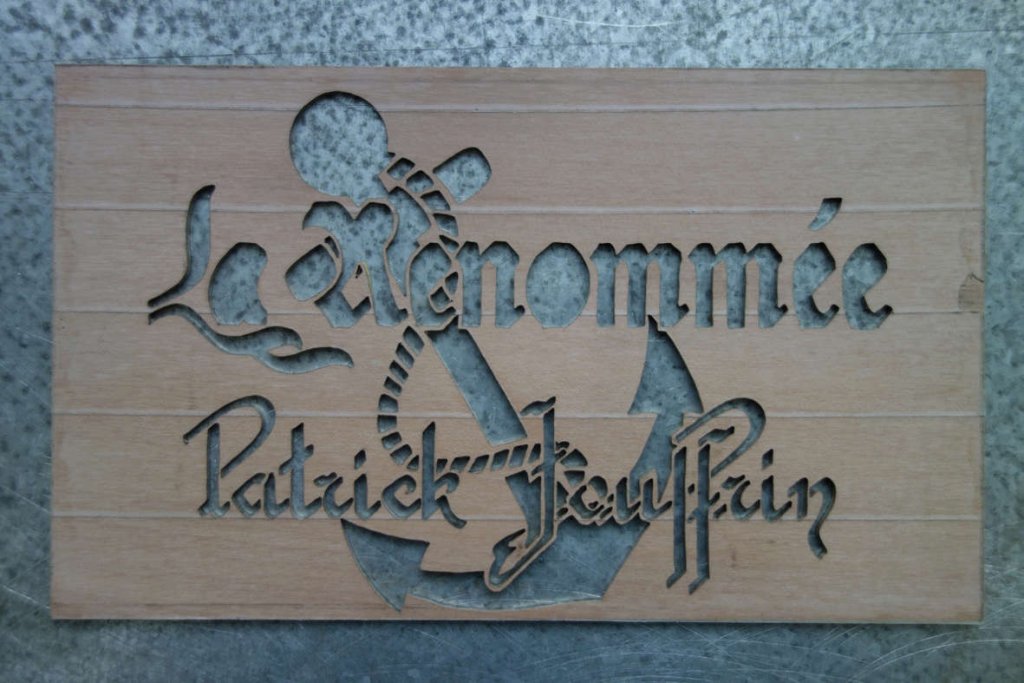
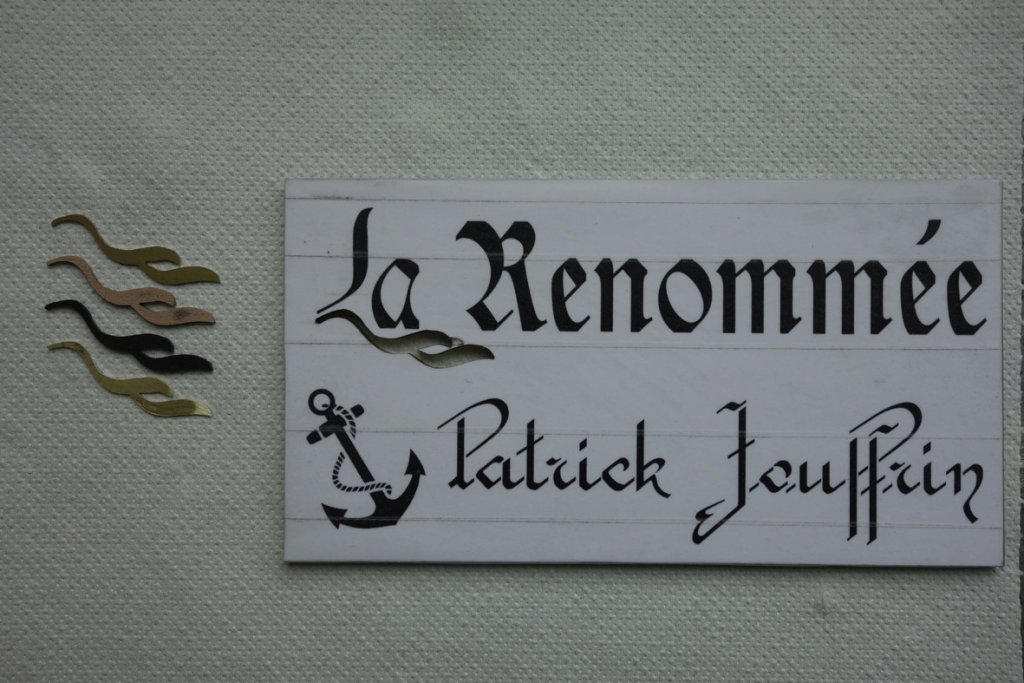
I can dismantle the "package". In the end, I will be able to make two plates. One in pear tree (with brass lettering):
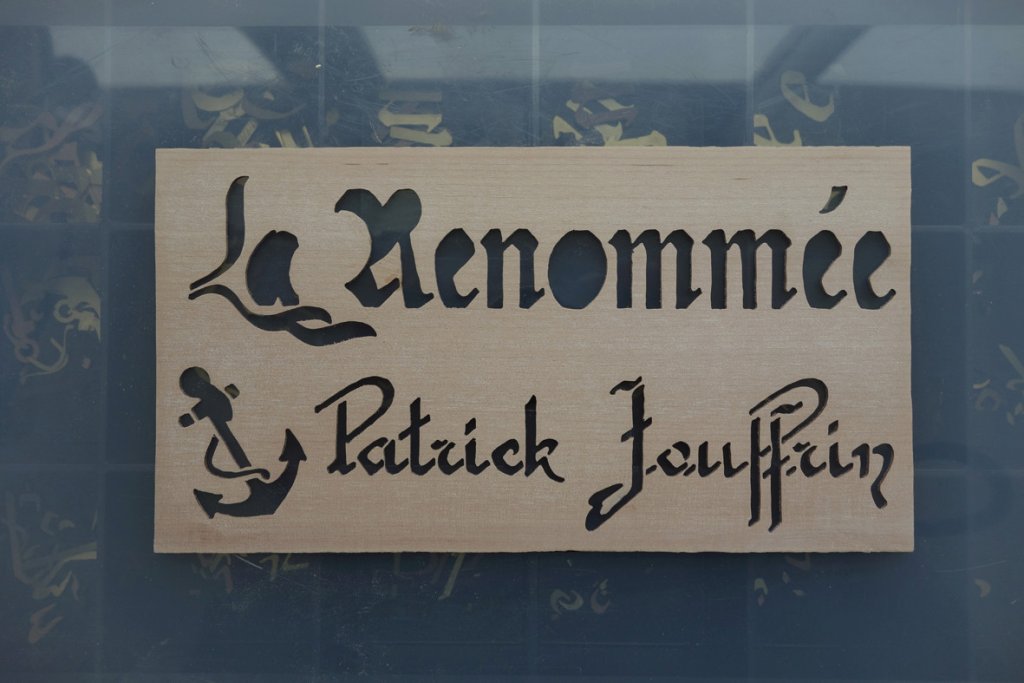
and one in brass (with an ebony lettering):
With the second brass plate I will make a small plaque to my name, as it is:
The ebony plate is unusable: it broke out in several places:
Before continuing, I rectify some small defects on the brass plate. Really almost insignificantly:
I stick my brass plate on a support - brass - also (Super-glue "GEL"):
It remains for me to stick my ebony pieces. I use Super-glue "UNIVERSAL" this time: it insinuates itself better in the interstices:

Taking advantage that the glue is not dry yet (we have a few seconds), I sprinkle ebony dust that I had put aside: it will fill any small interstices remaining. I know, it's not very pretty but ... patience:
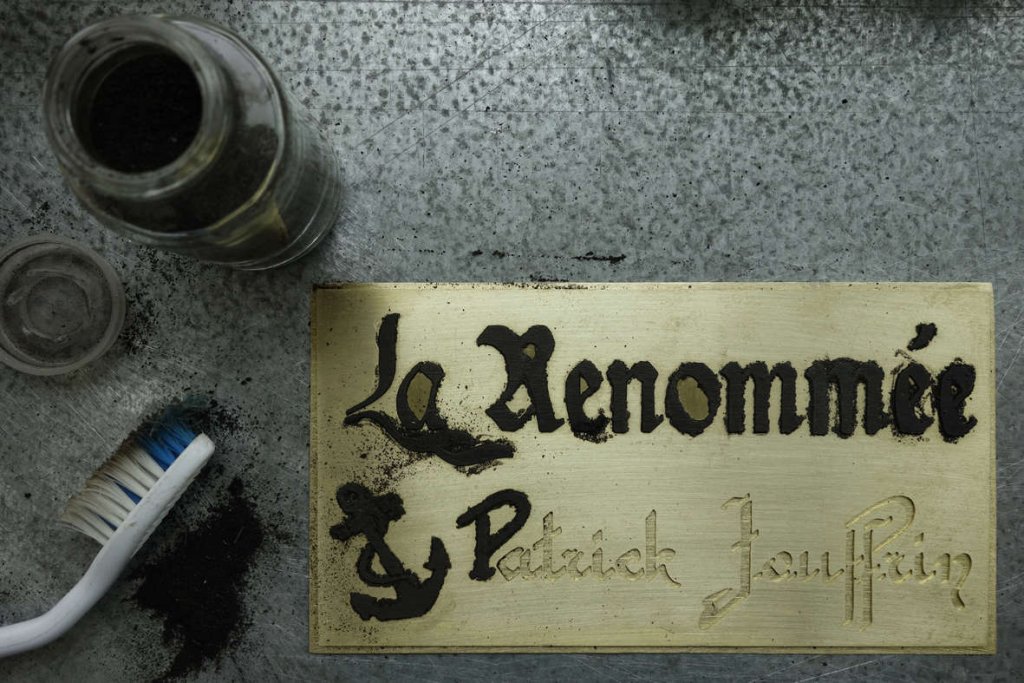
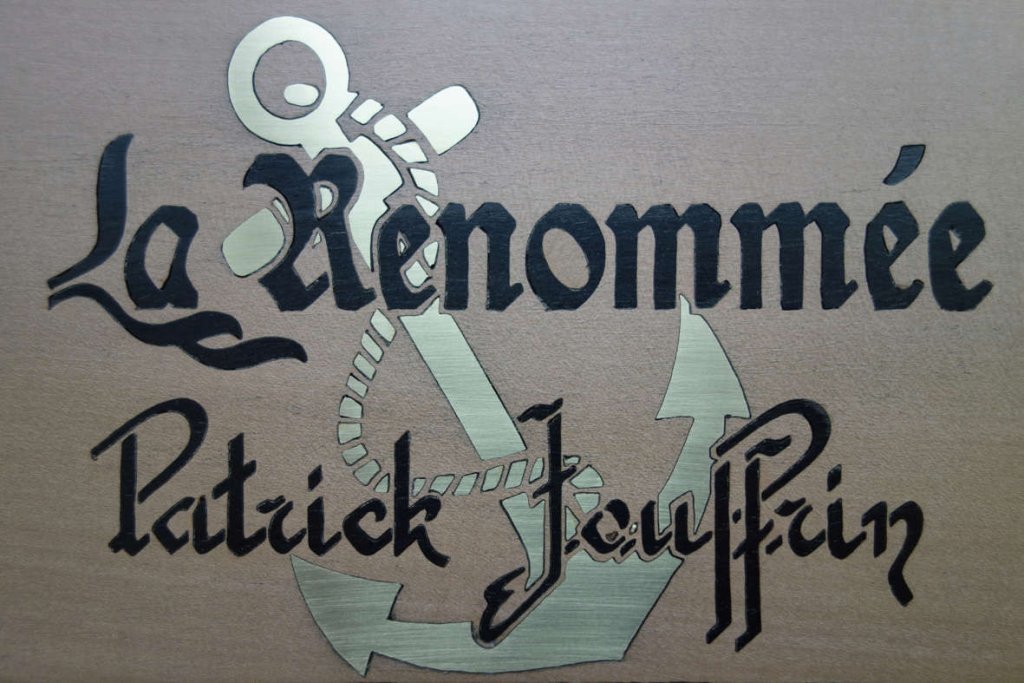
Four hours later, it's over: the pieces are glued, the whole plate is sanded, a little "Polish" and here is the result:
To complete it all, a small border with a brass profile:
Voila, I hope that my cut "Jouffrin laser" you liked!
I will continue with the second plate - in pear and brass. Photos as soon as it's over ...
Patrick -
Thank You Chris !
Have a nice day !
Patrick
- ward, mtaylor and paulsutcliffe
-
3
-
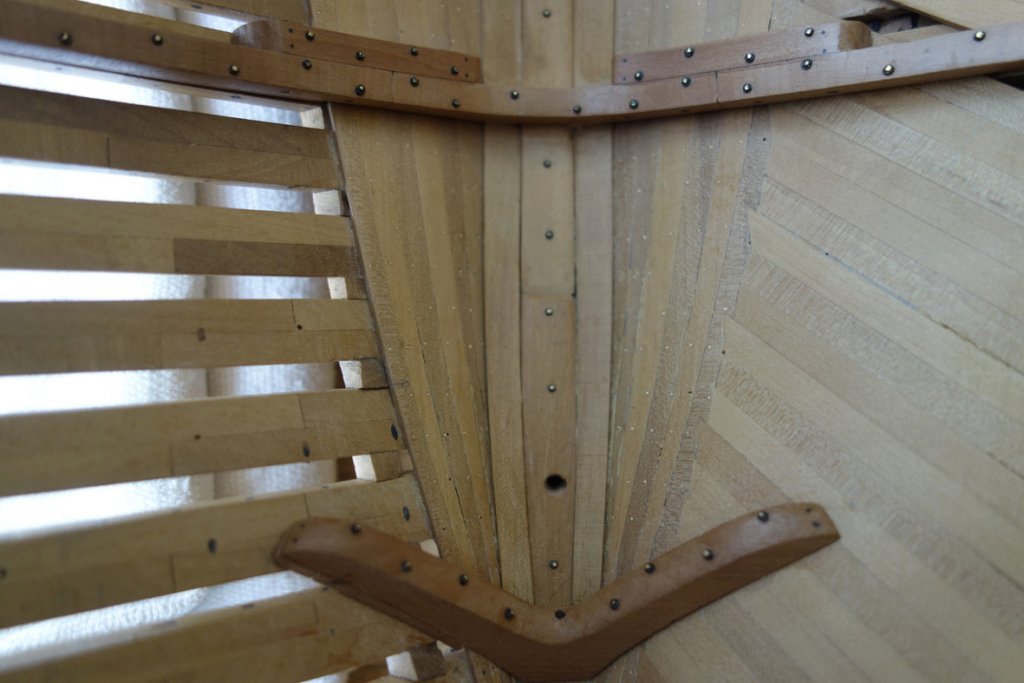
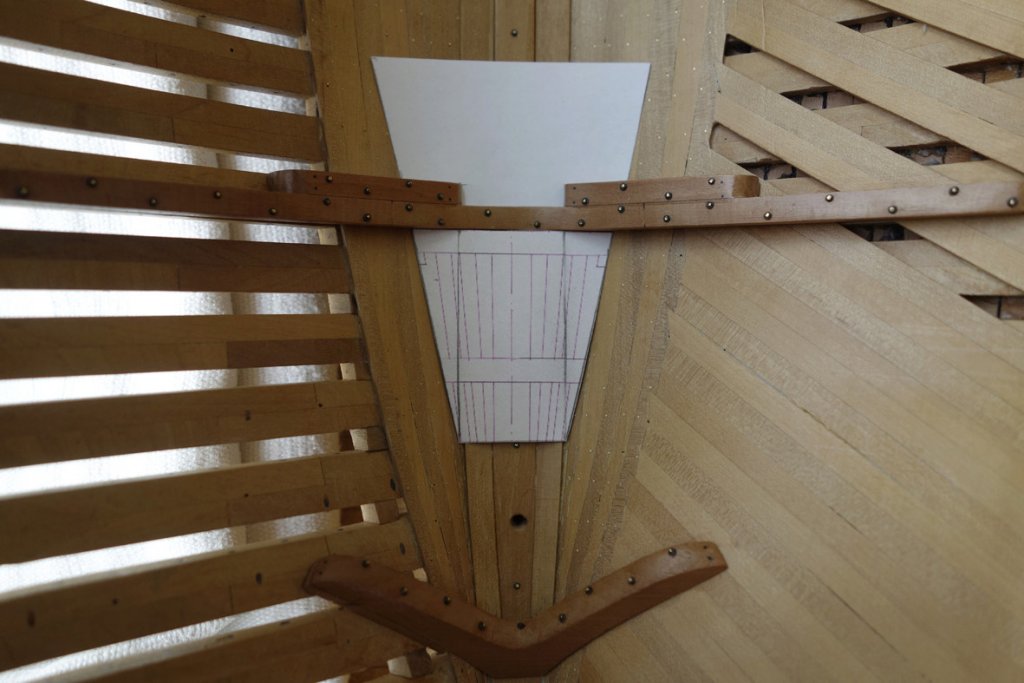
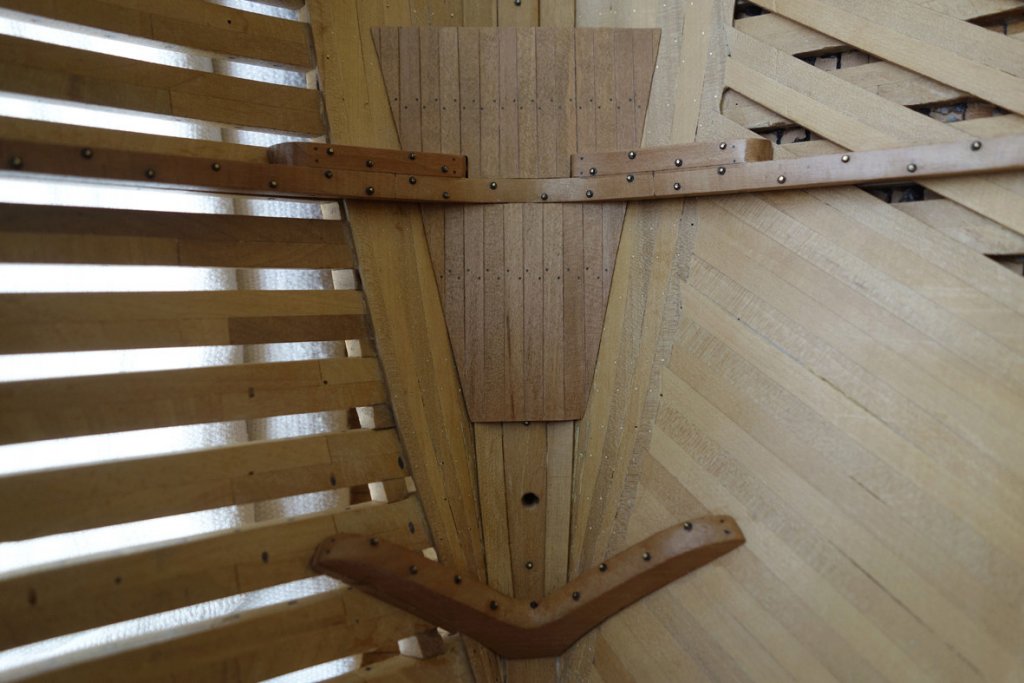
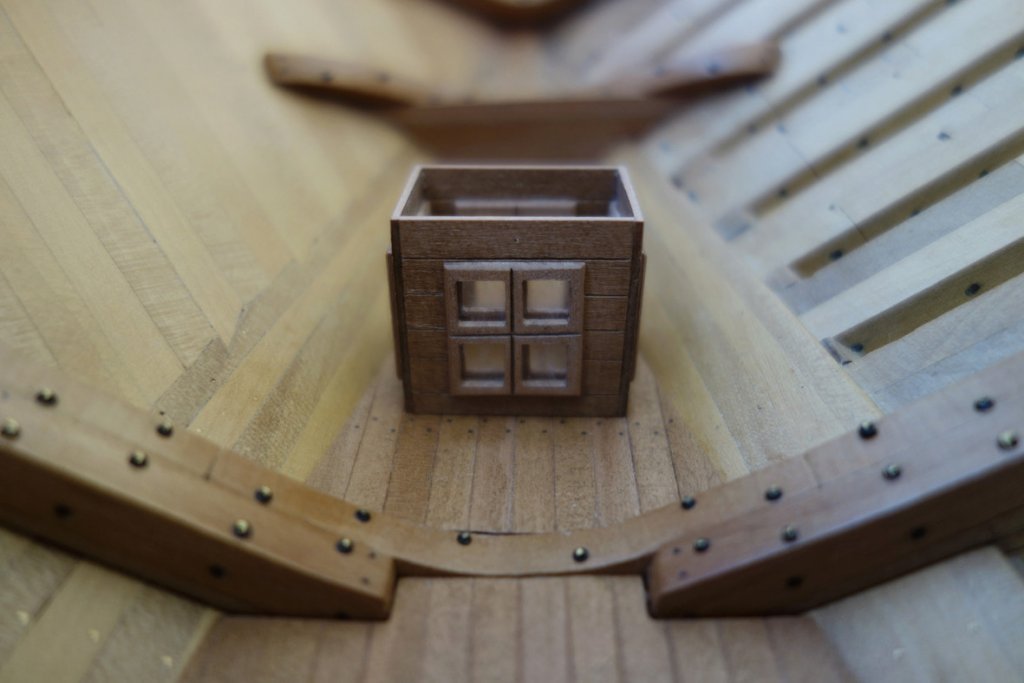
Hi Gentlemen !
Some news of La Renommée ... still in the bottom of the hull, central part ..
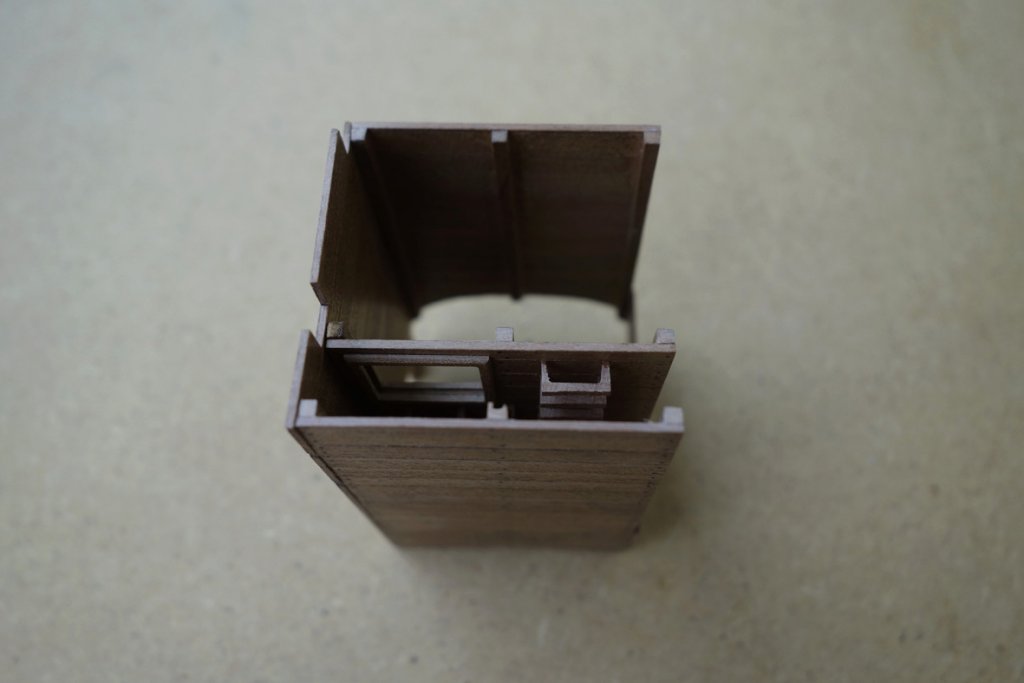
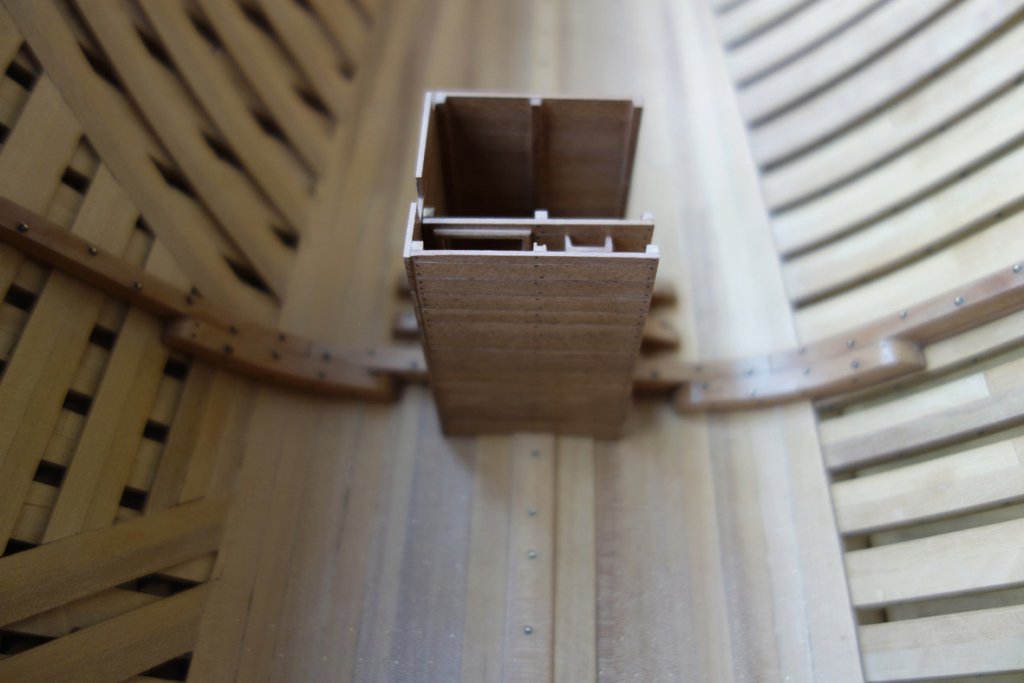
See you later !
Patrick
- Captain Poison, tlevine, Dubz and 19 others
-
22
-
-
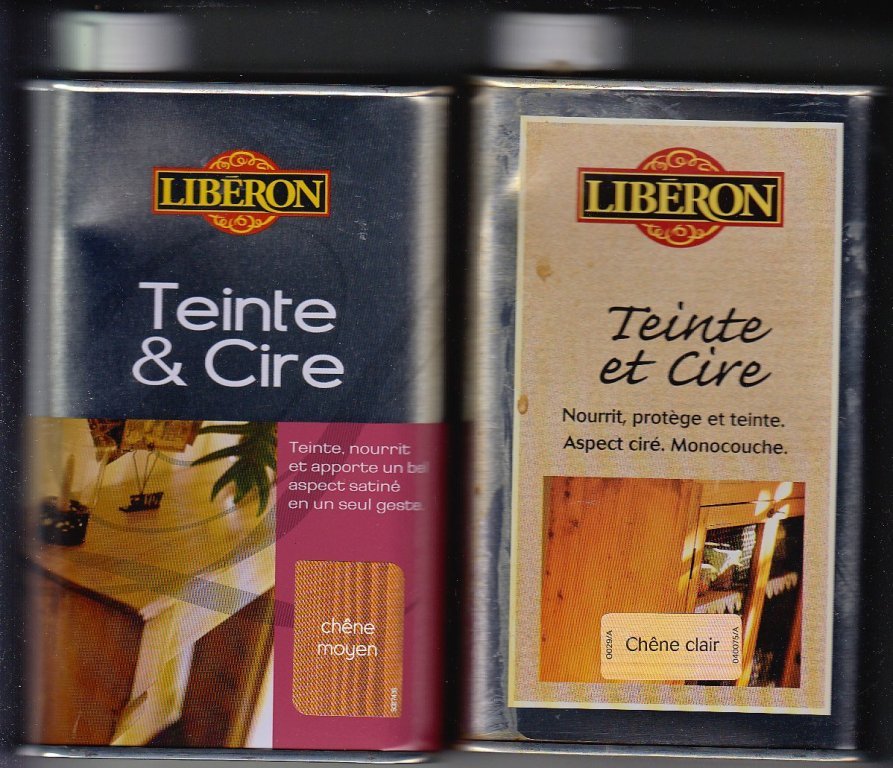
I use these products (whith the brush) : "Tinted wax" (medium) finish (left) and clear (right).
- aviaamator, harvey1847, mtaylor and 1 other
-
4

La Renommée by JOUFF - 1/48 - French Frigate - by Patrick JOUFFRIN
in - Build logs for subjects built 1501 - 1750
Posted
Hello gentlemen, Thank You !
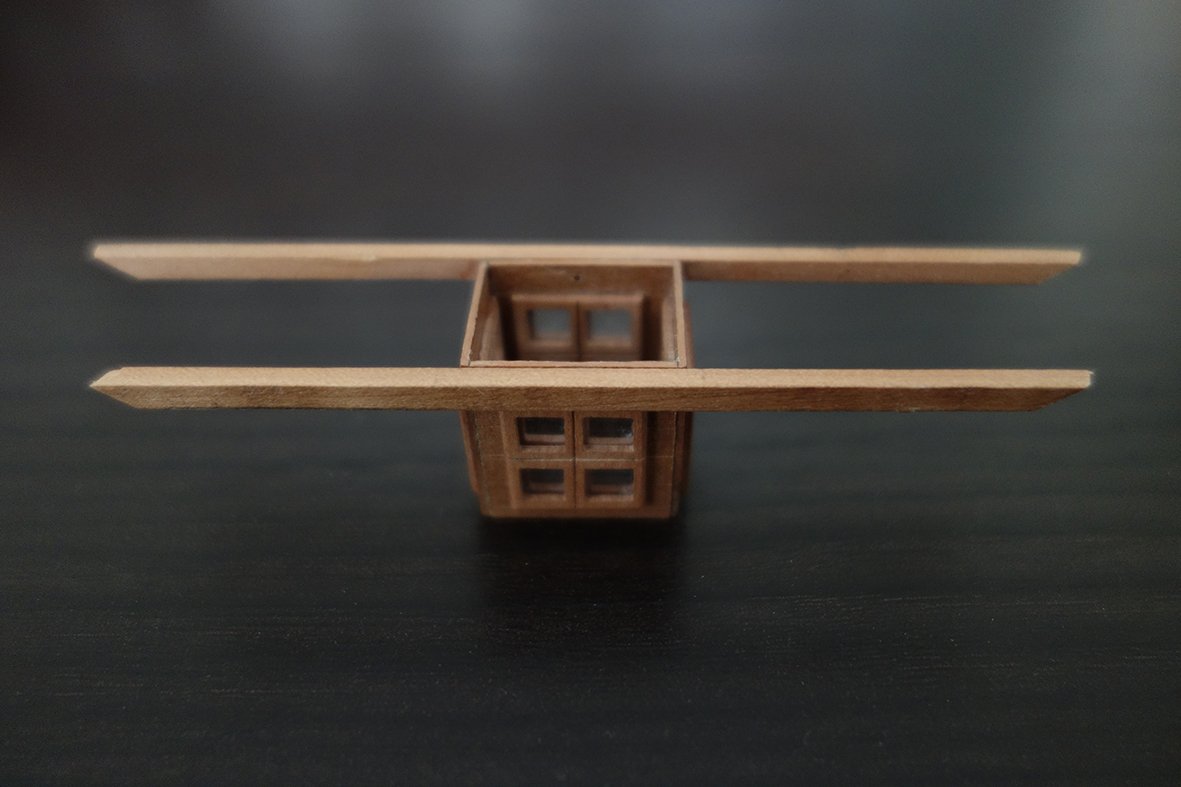
The lantern, following the development of the pieces until I see how to braze them ...
That’s all for today !
Patrick