Search the Community
Showing results for tags 'Bounty'.
-
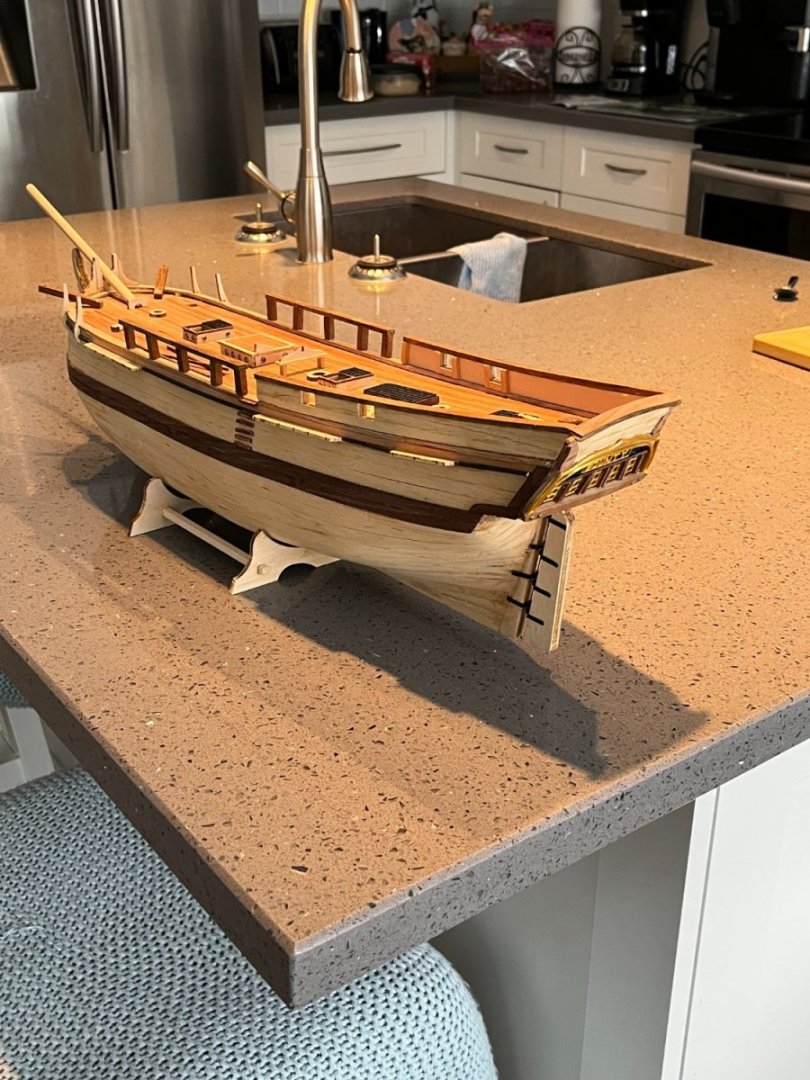
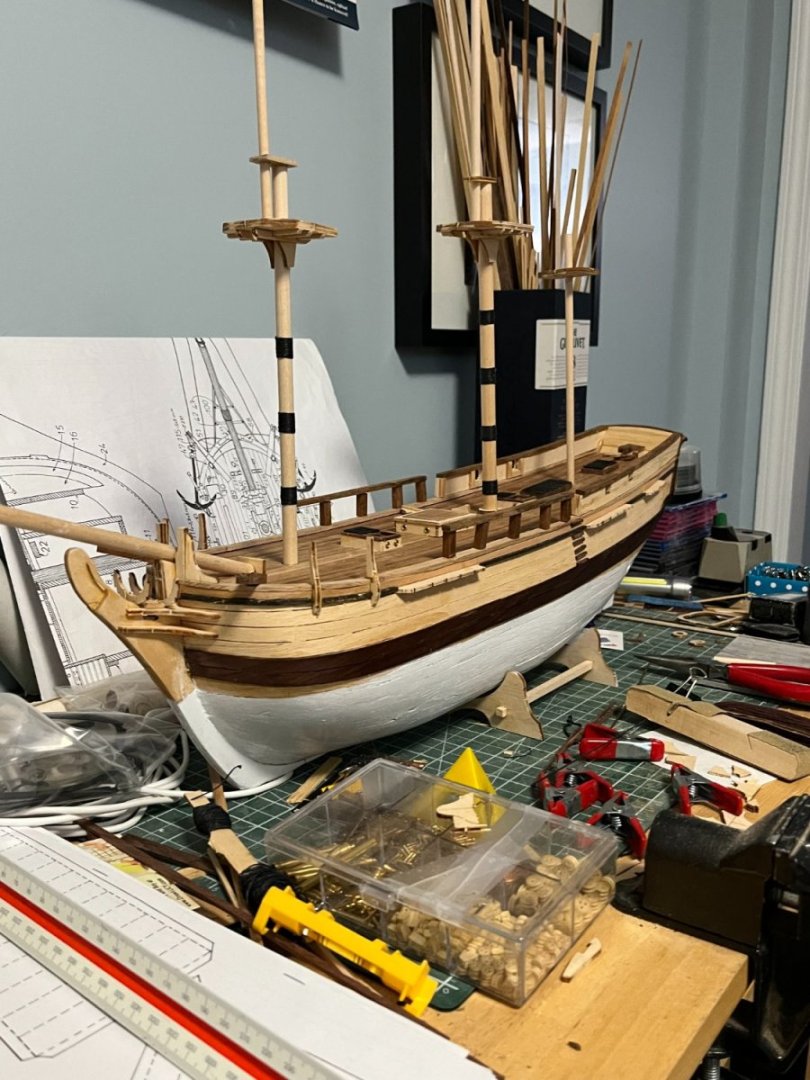
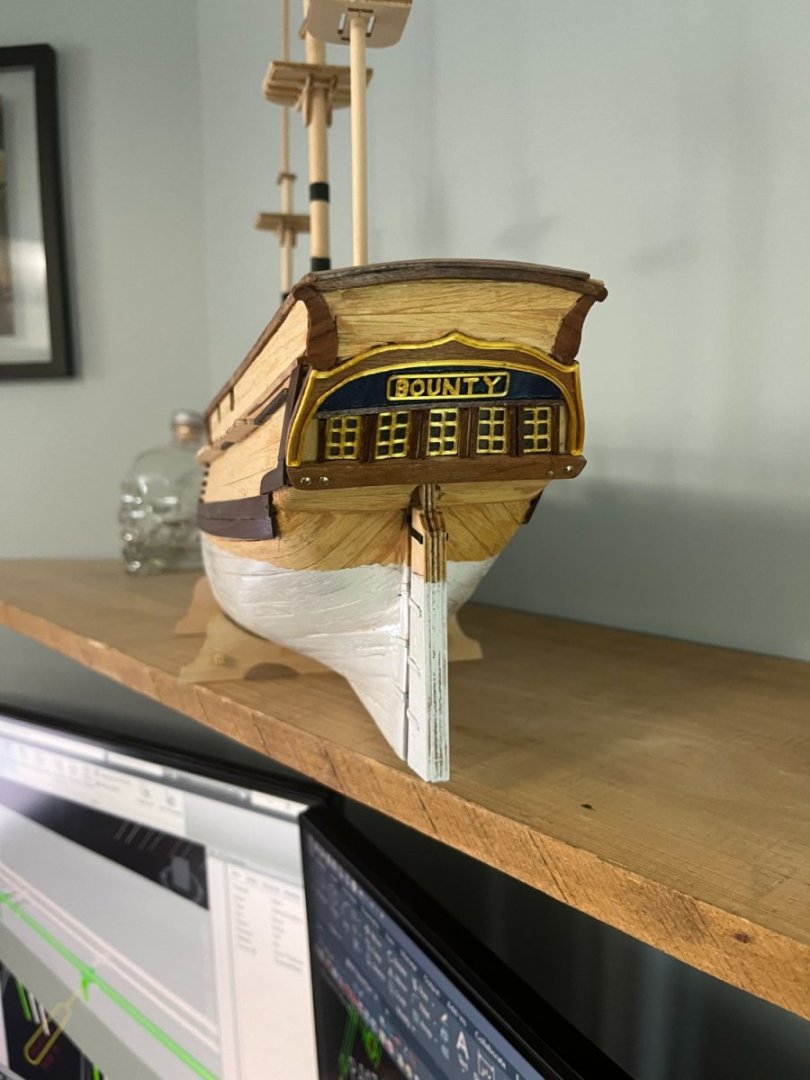
 A gift from my wife - I started this one a couple of years ago, I've added a little bit of new technology by printing out some of the parts with a 3D printer. Almost done the hull then off to the rigging. Most kits do not come with the fancy gold trim so I modeled my own and printed them up. Like they say - good from far - far from good. I still have lots to learn but I'm having a good time.
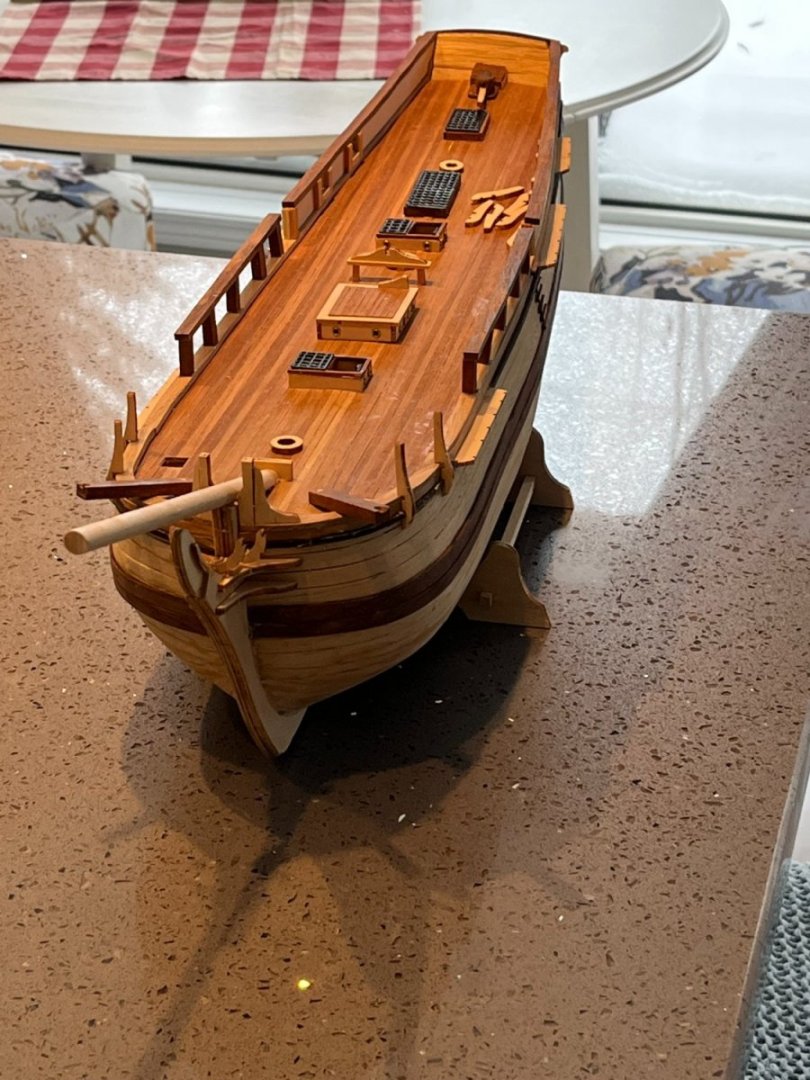
-
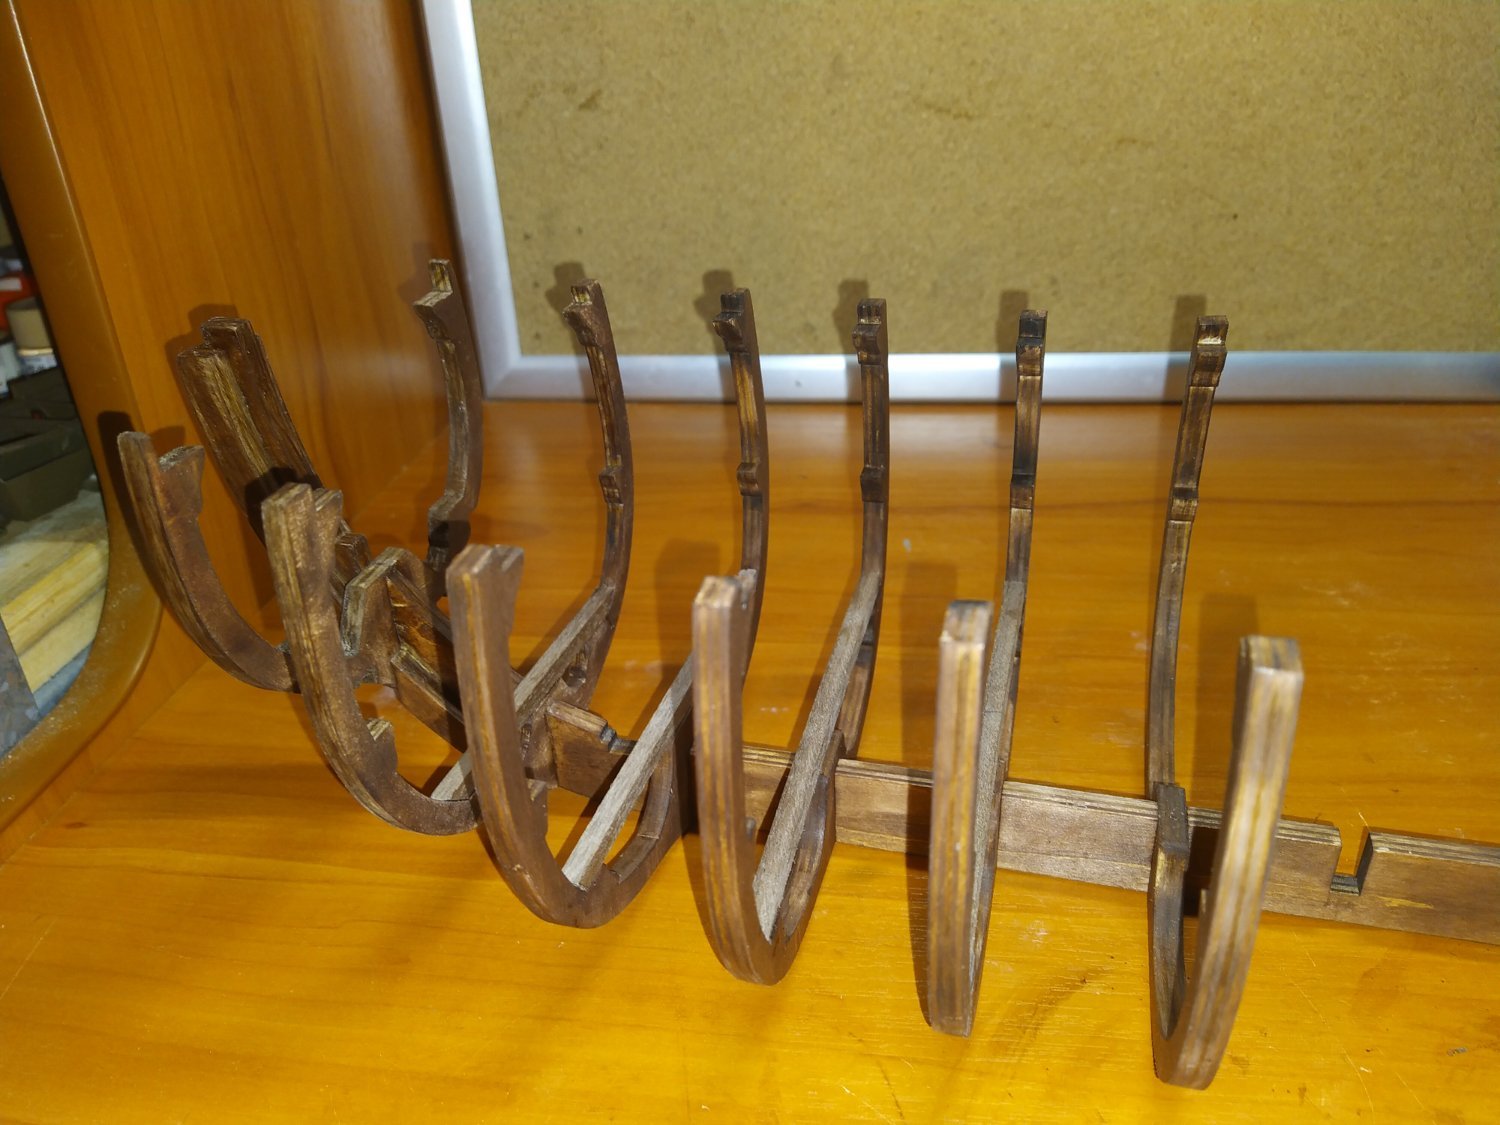
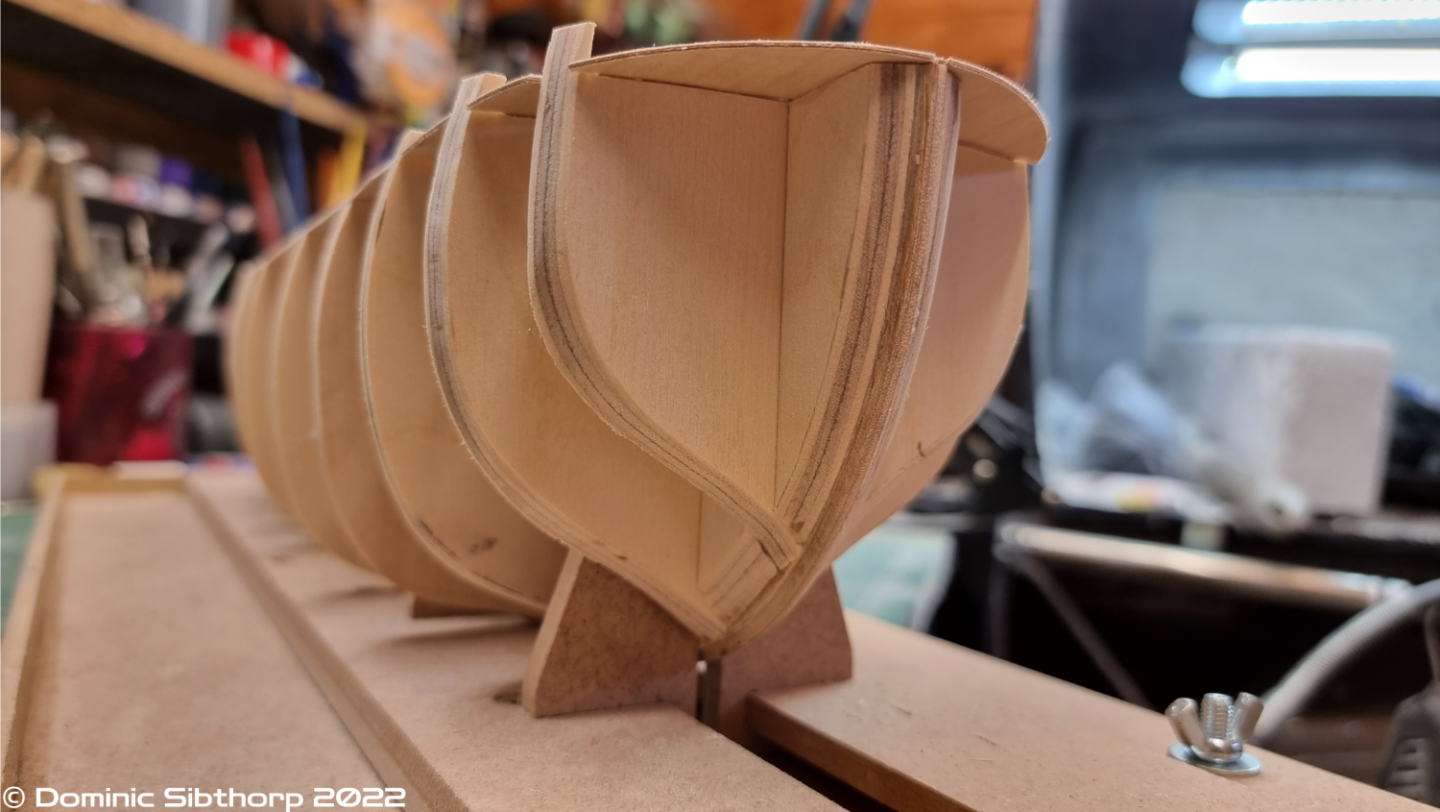
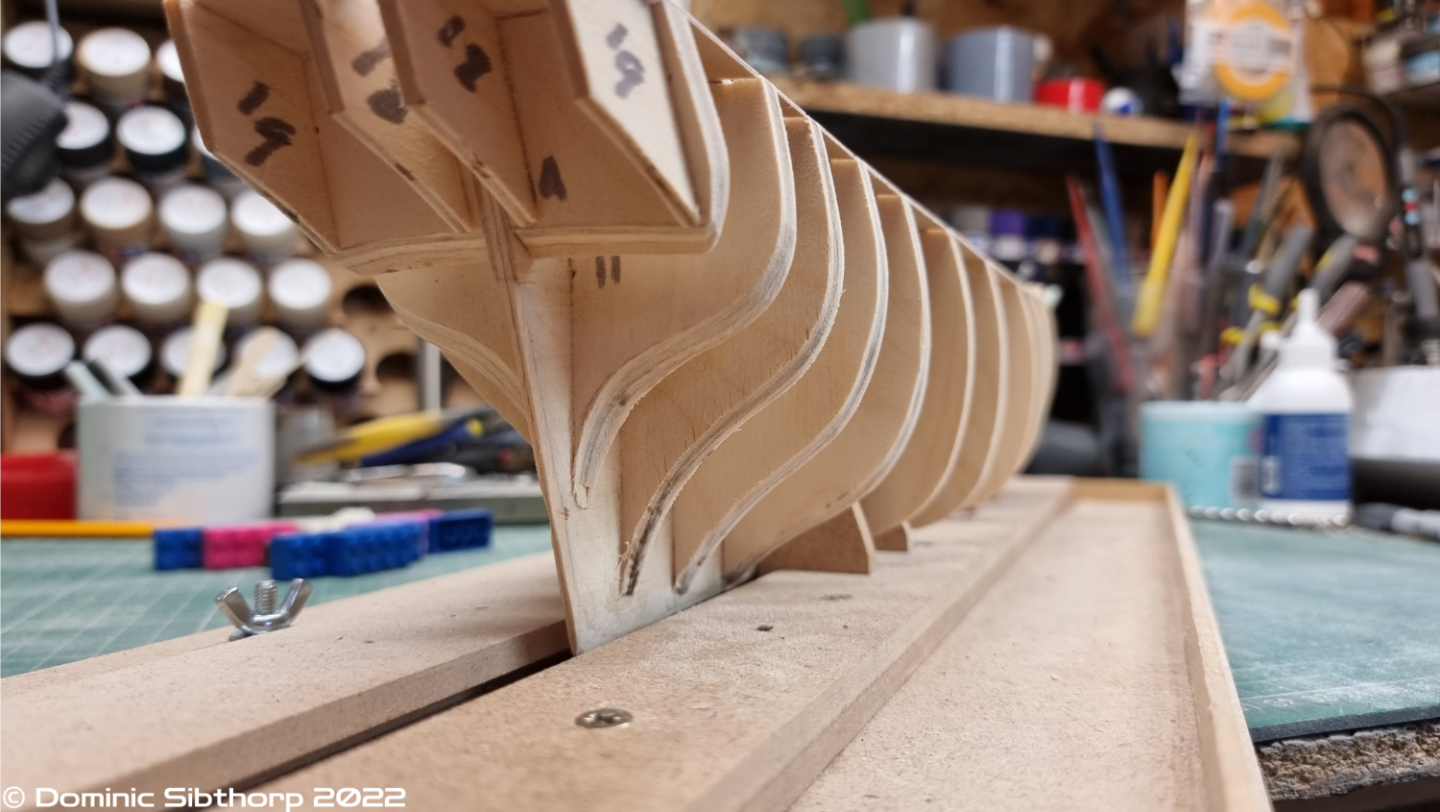
 Yes yes, yet another Bounty Launch. This will be the third being built at the moment. Allan's at 1:48 https://modelshipworld.com/topic/33539-23-foot-launch-by-allanyed-bounty-late-18th-century/ Tim's at 1:24 https://modelshipworld.com/topic/33565-hms-bounty-launch-by-oakheart-scale-124-%E2%80%93-18th-century-based-on-drawings-from-national-maritime-museum/ And this one at 1:16. As far as I can see these are the first scratch built Bounty Launches on this forum excluding those built for Bounty models. Allan has been asking lots of questions in preparation for his build which has driven much research and given us some facts to work from. https://modelshipworld.com/topic/33217-bountys-ships-boat-details/?do=findComment&comment=945945 We have settled on building based on ZAZ7361 with some minor tweaks: https://modelshipworld.com/topic/33217-bountys-ships-boat-details/?do=findComment&comment=947122 https://modelshipworld.com/topic/33217-bountys-ships-boat-details/?do=findComment&comment=948363 We have each done our own drawings and I have now reached the stage where I can start building in earnest. I have made a few pieces but wanted the jig designed before starting this log. We shall see how it goes.
-
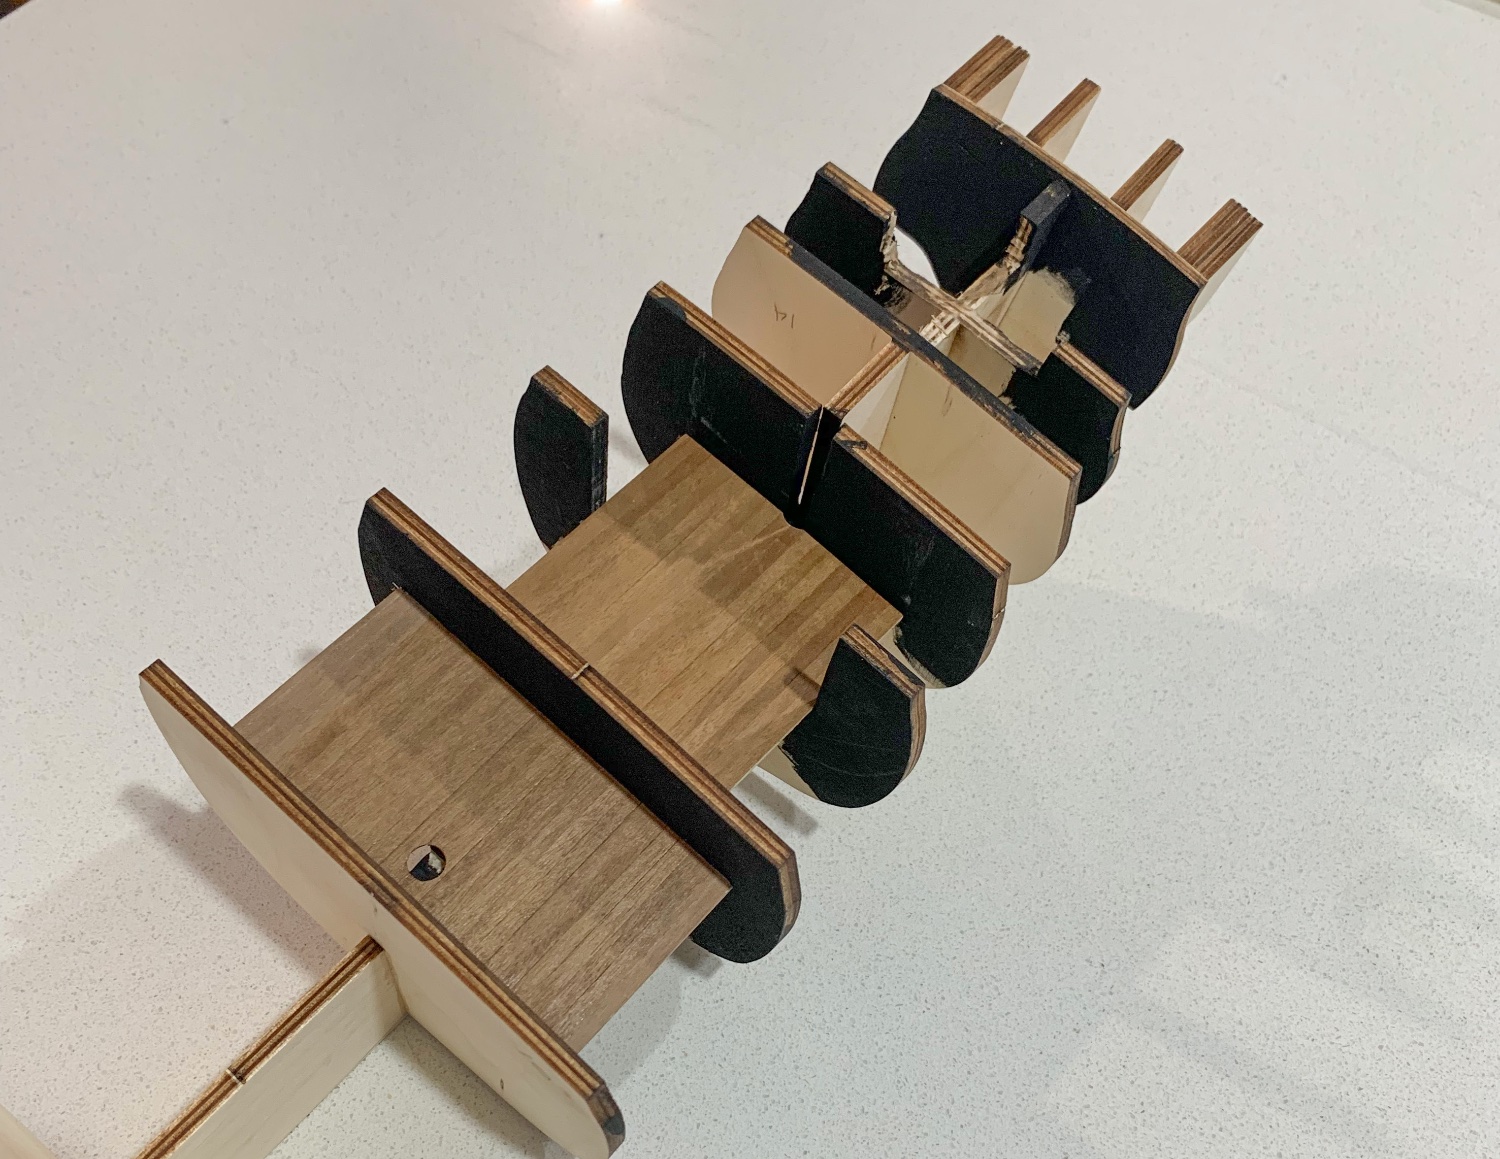
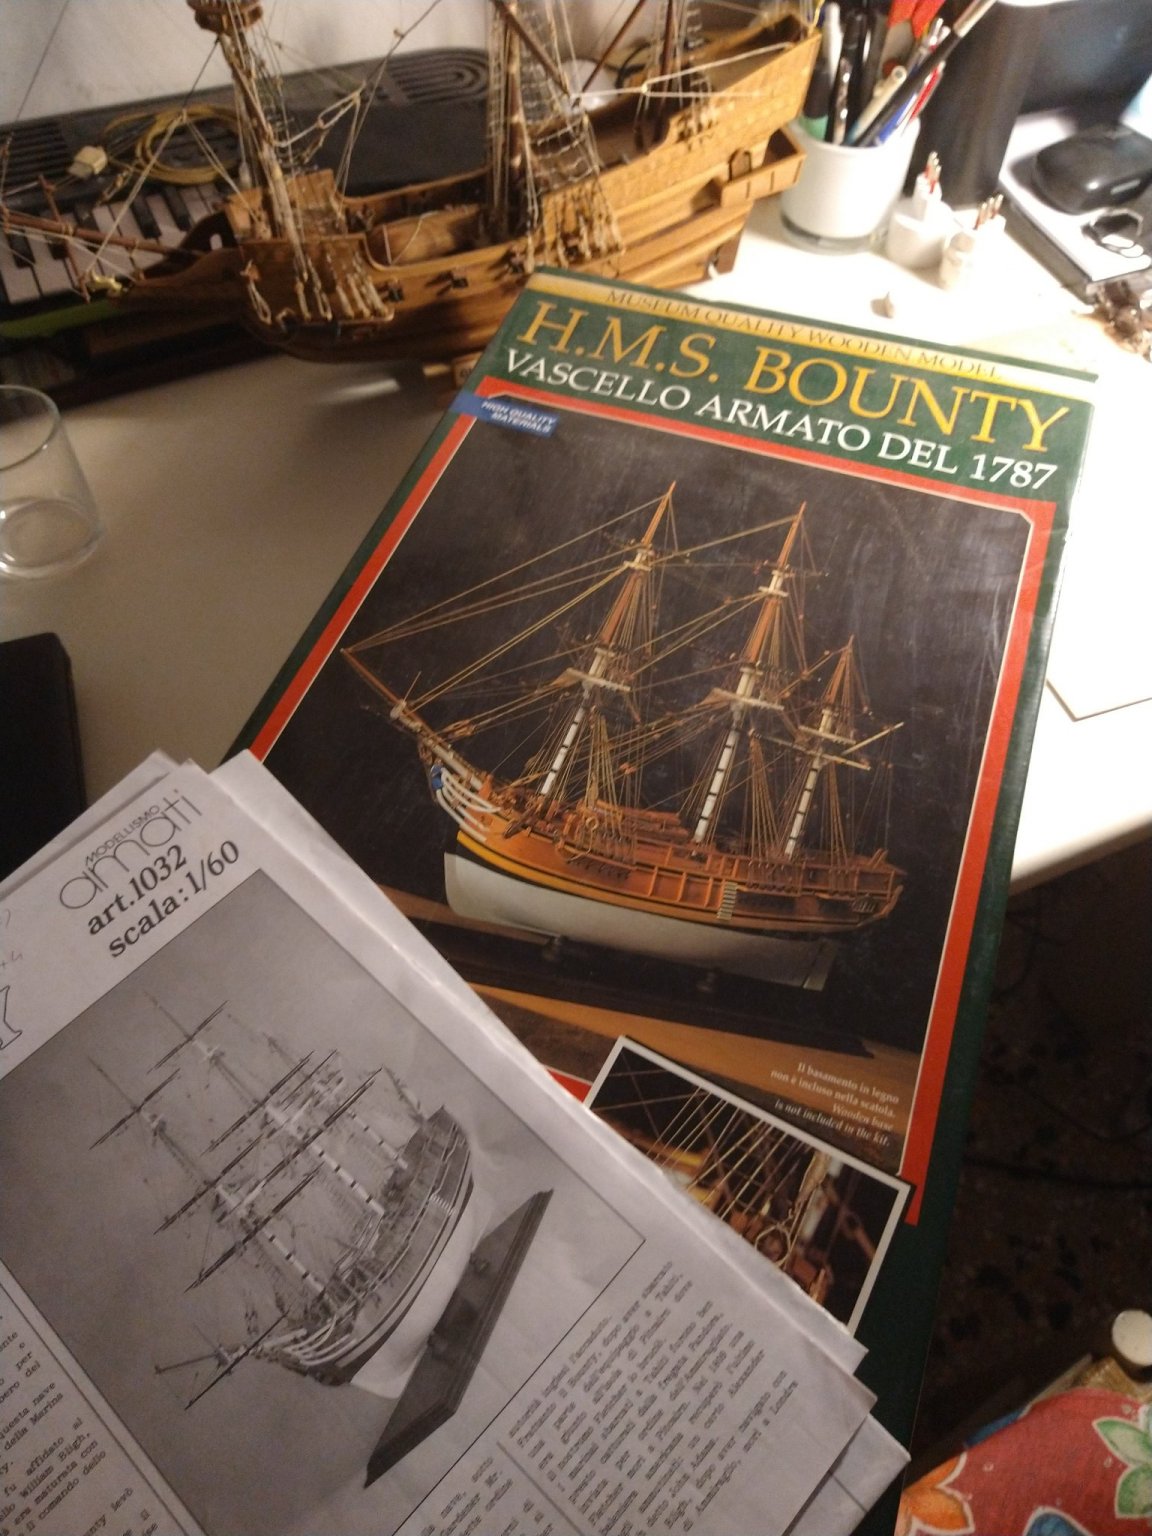
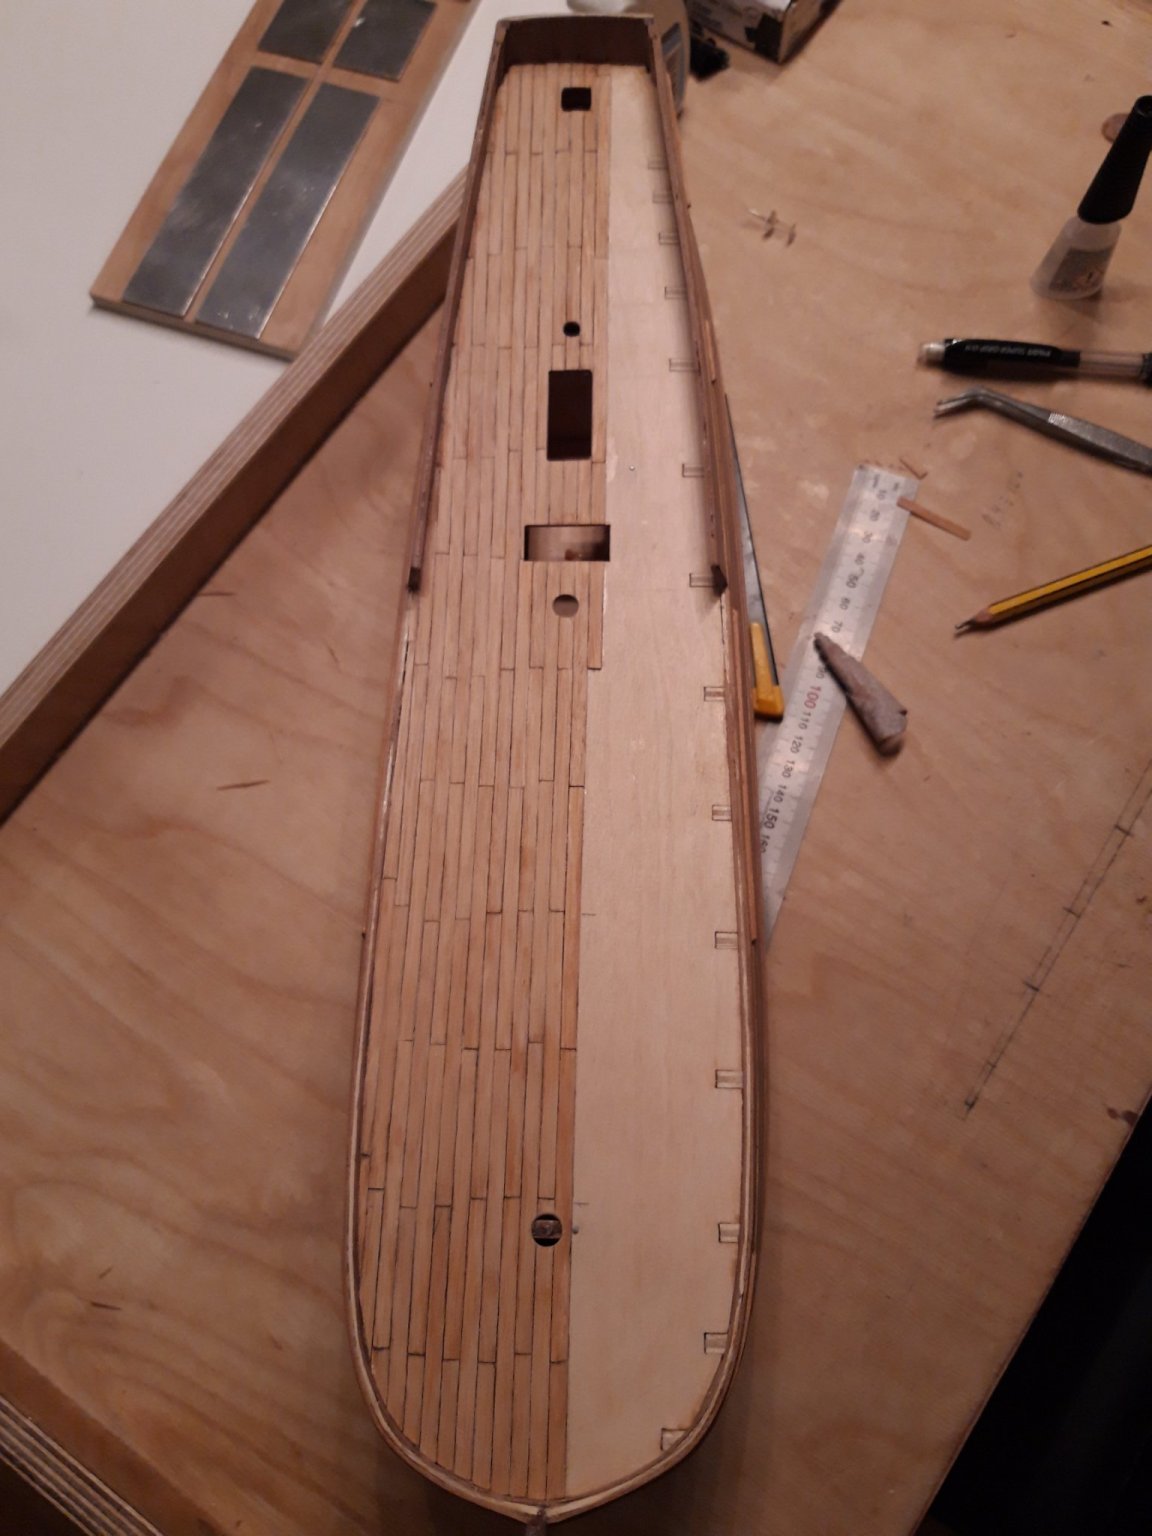
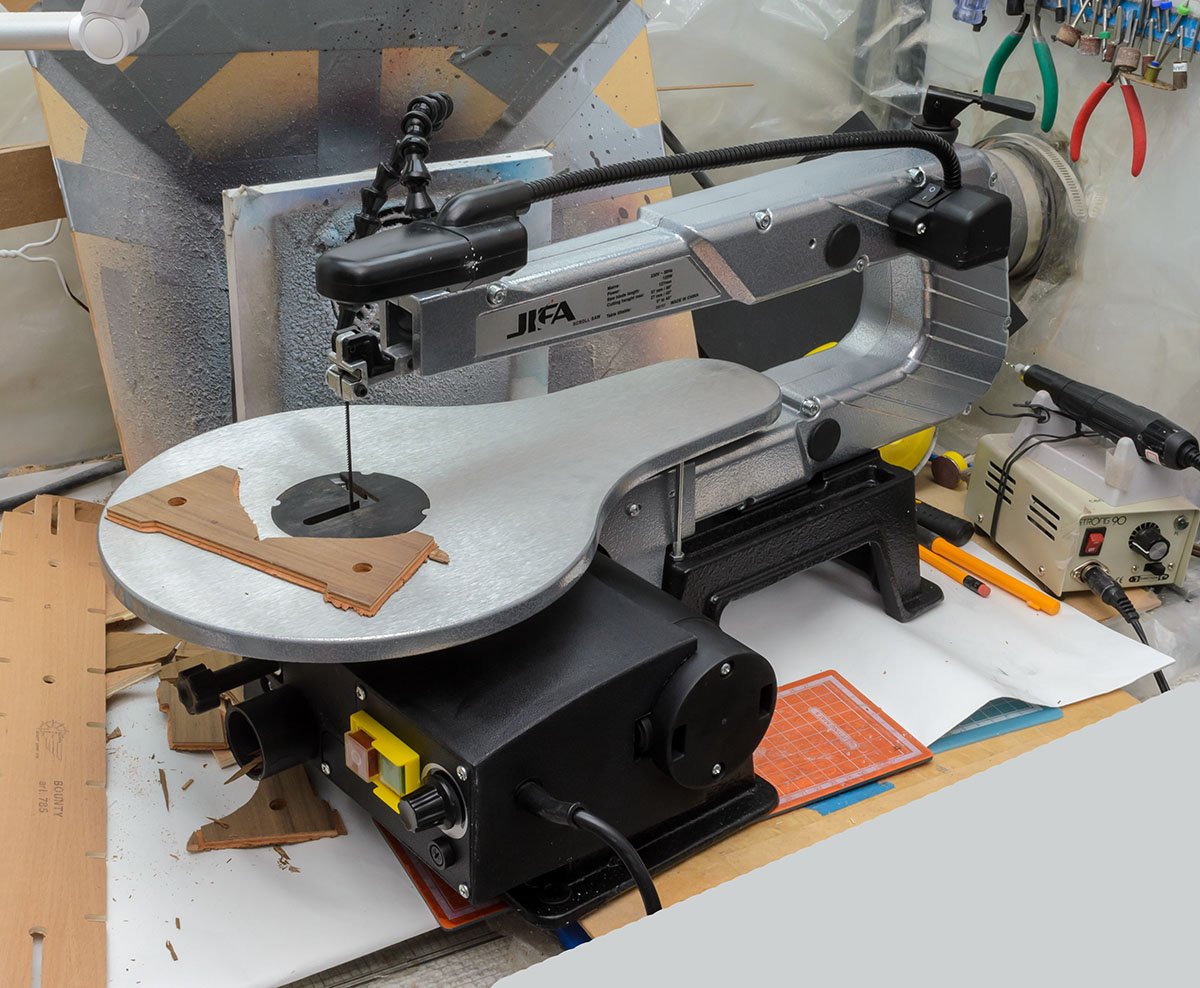
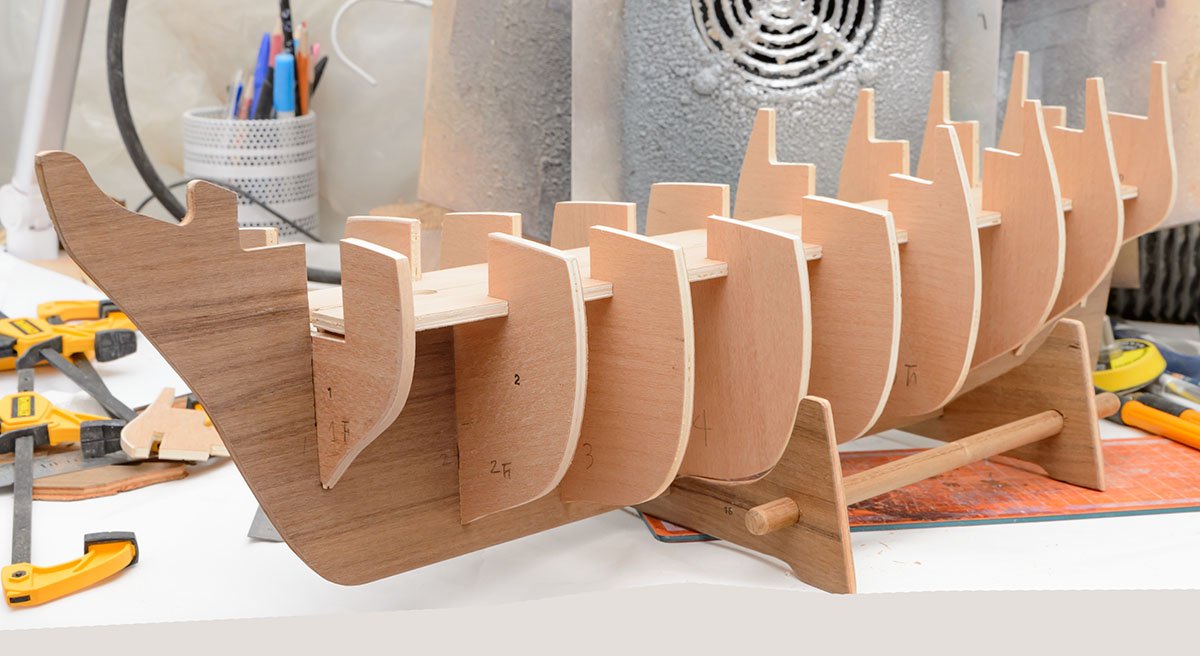
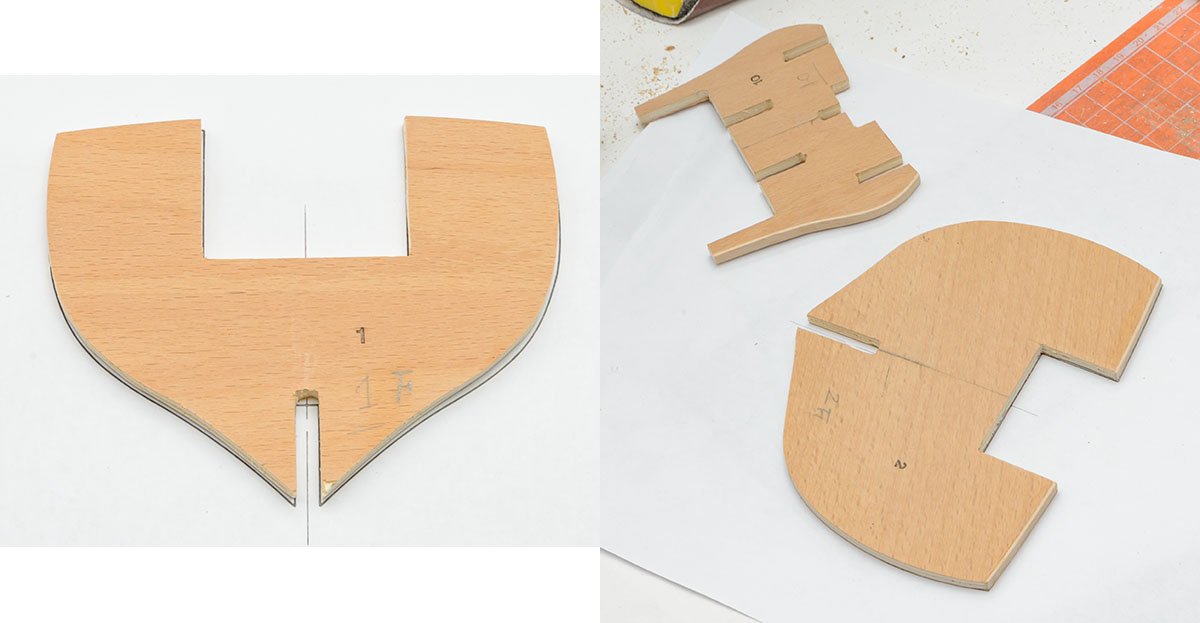
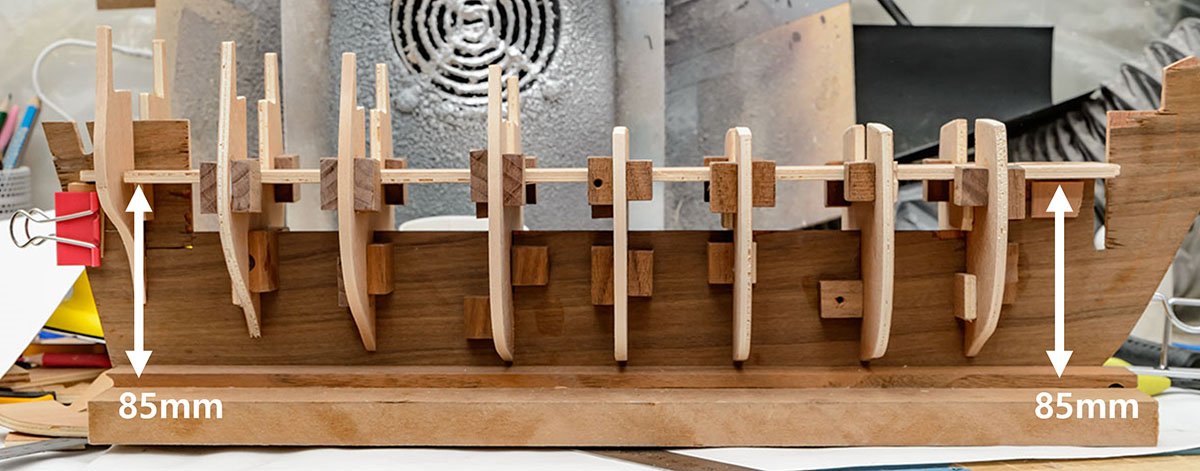
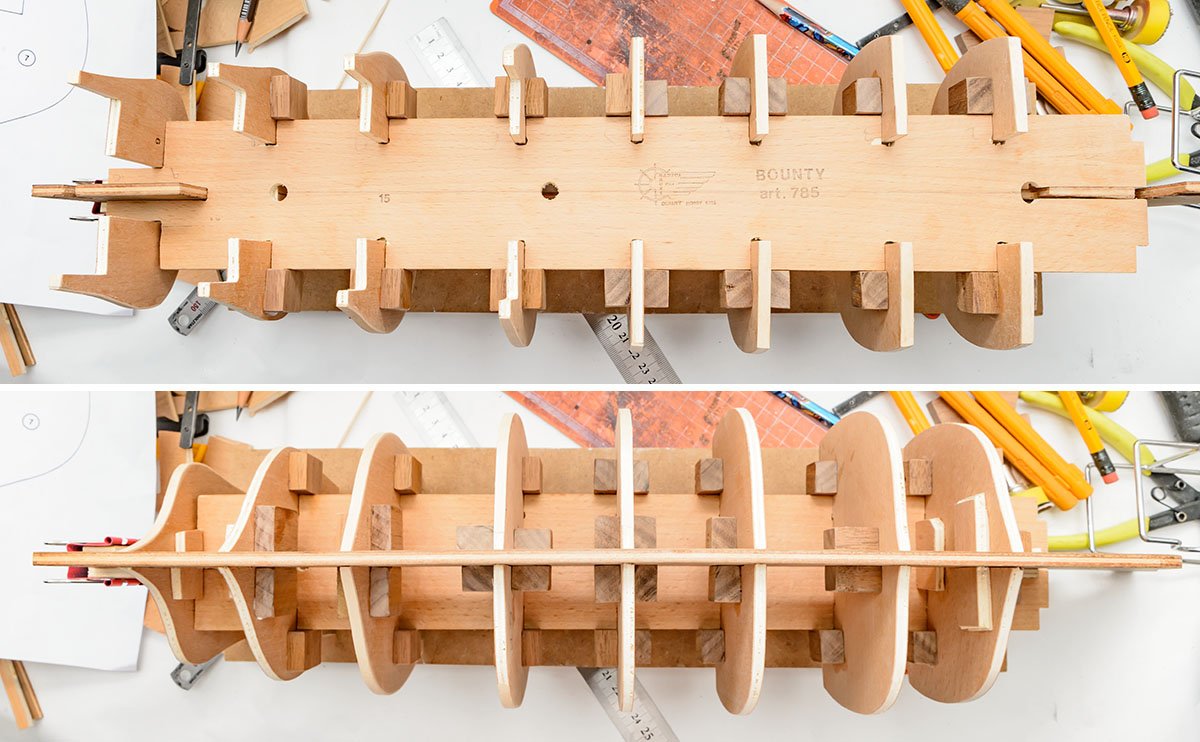
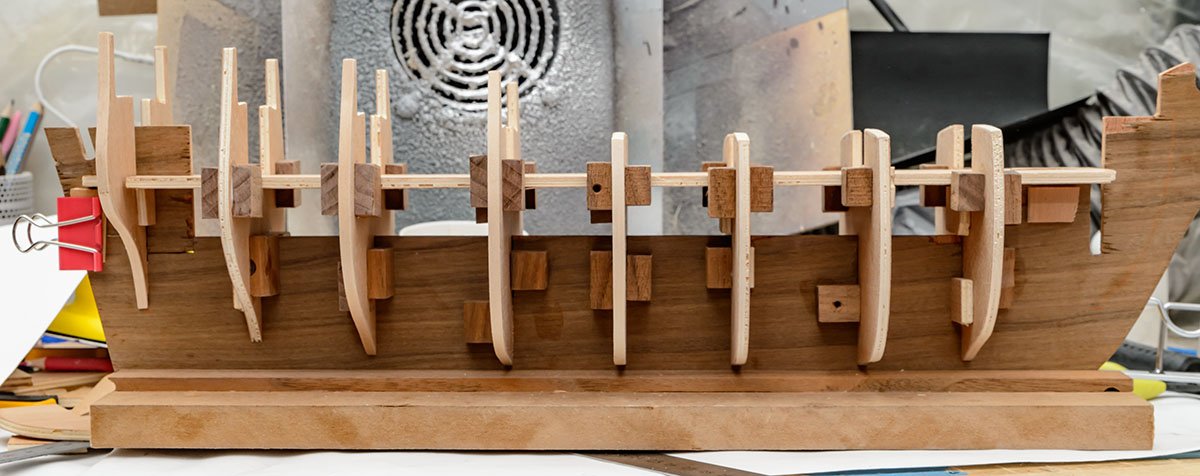
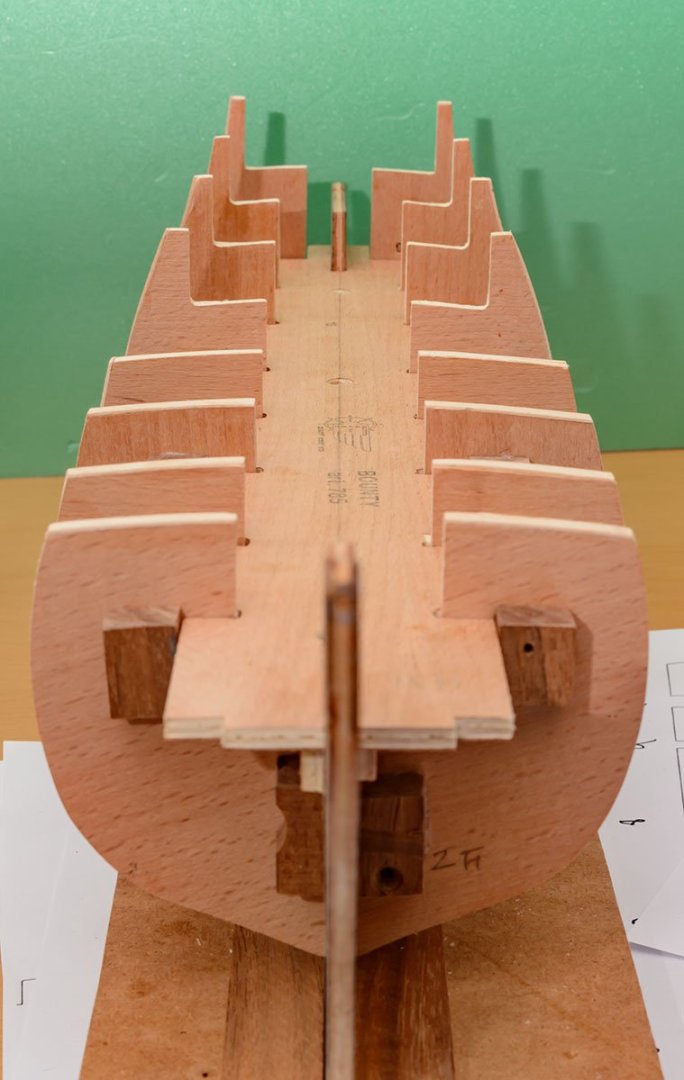
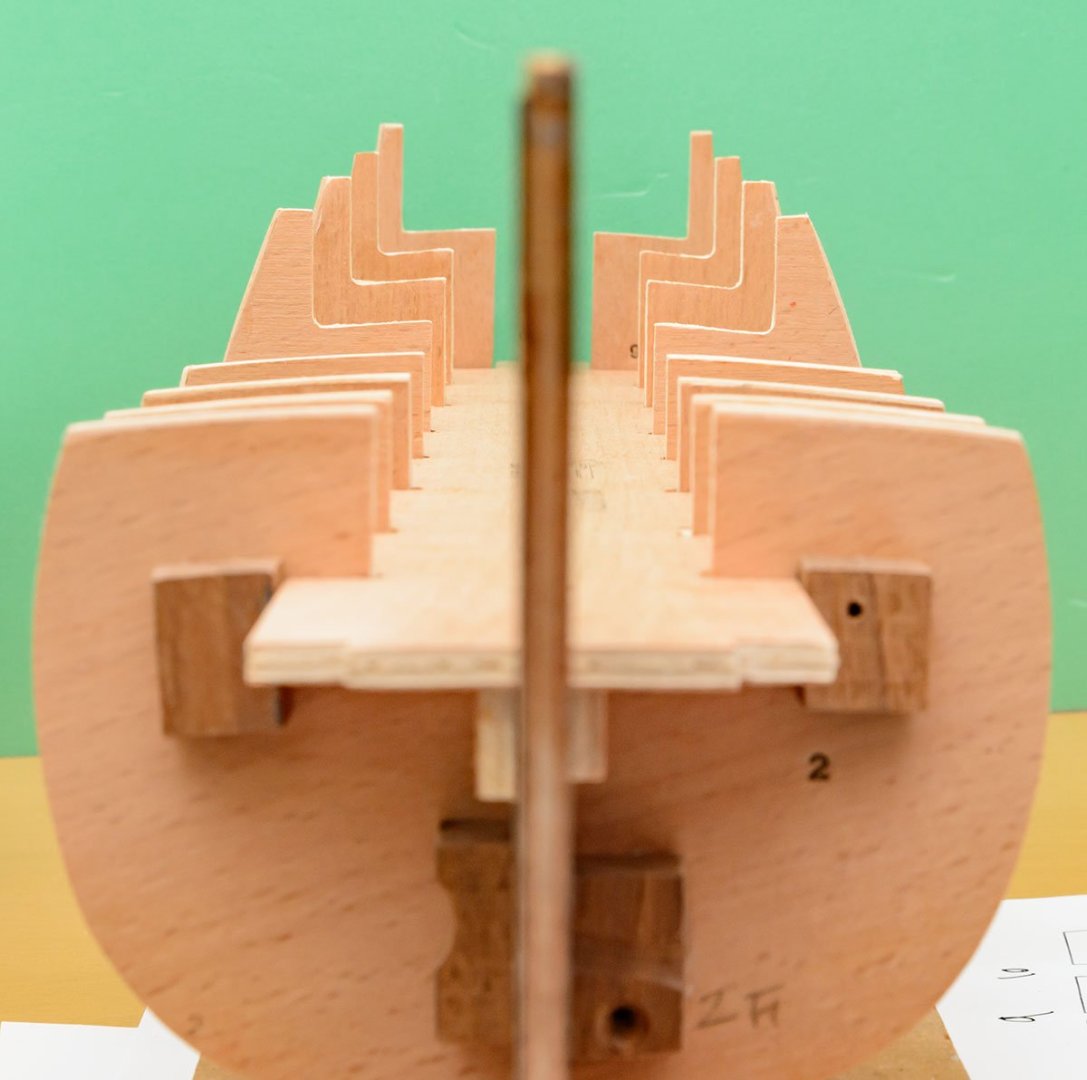
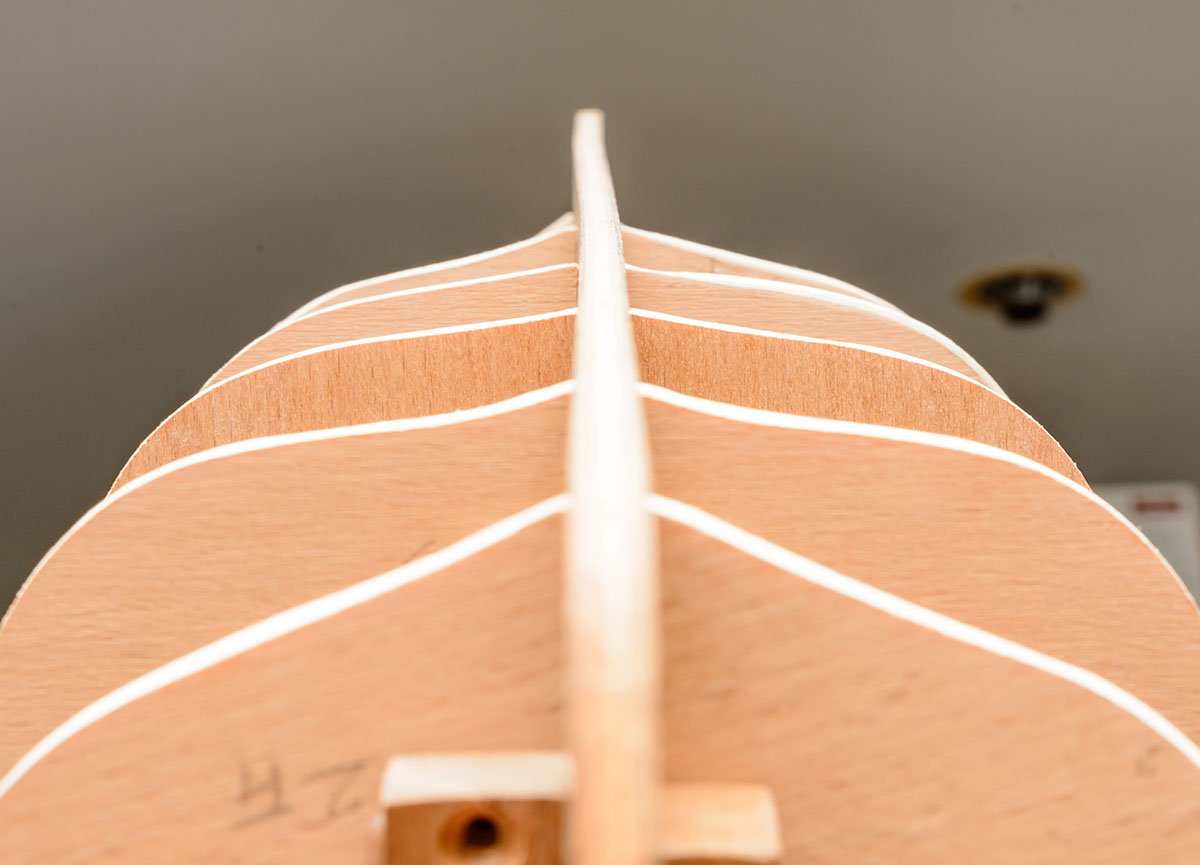
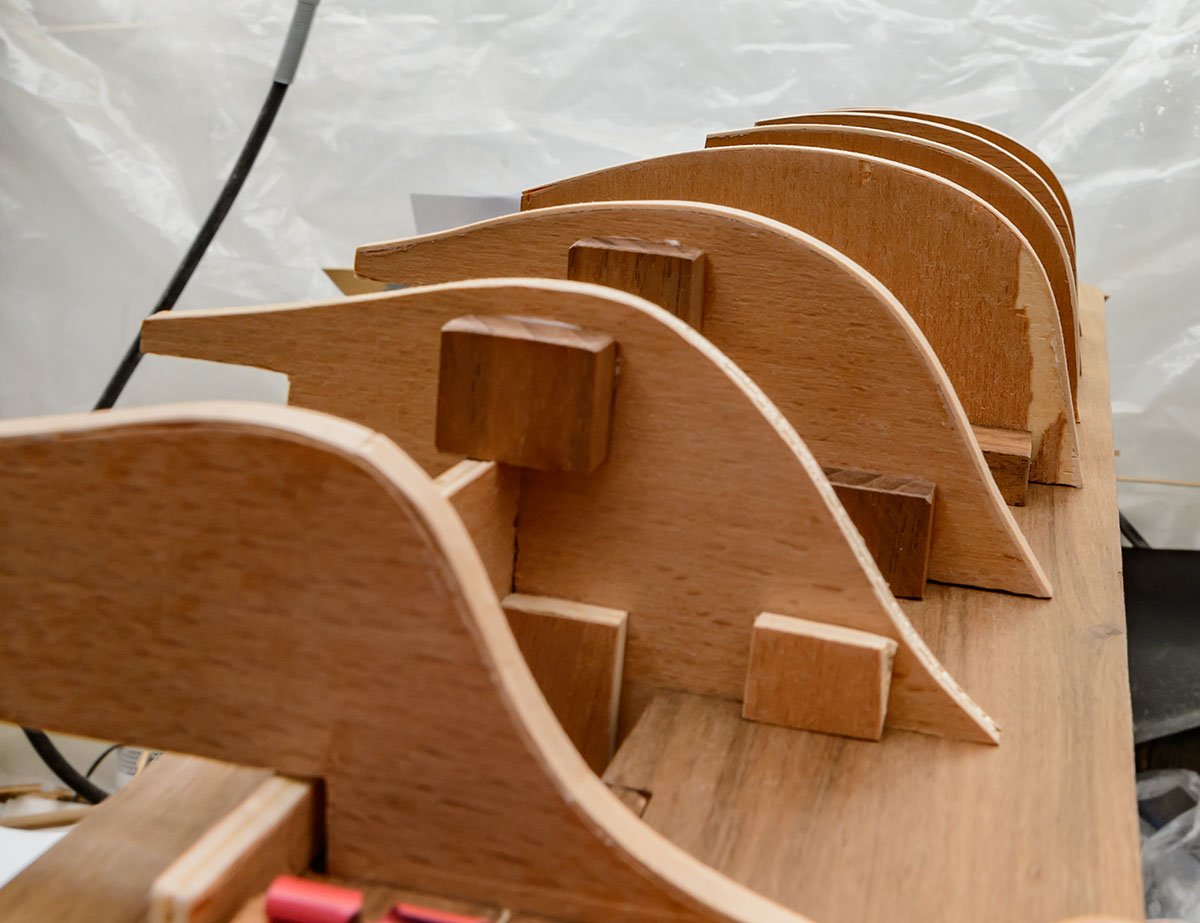
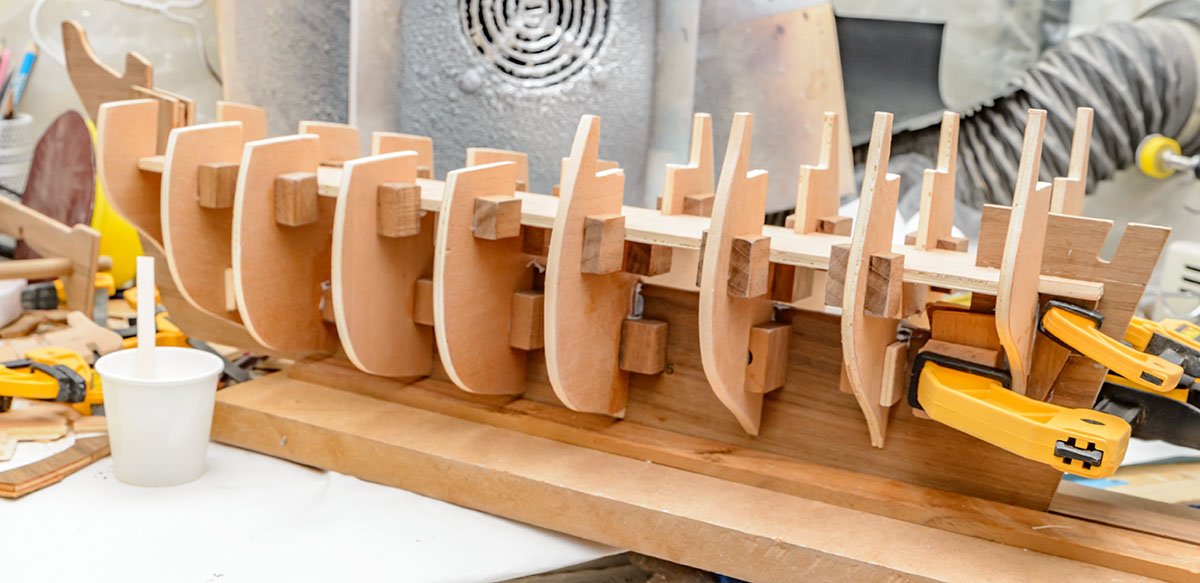
 Hello, This kit is my last project of the year. This is one of the under $100 kits I purchased on Ebay a few years ago. According to the plans, the kit was designed in 1973, and parts weren't cut by laser. It led me to sawing hell, and made me buy a scroll saw ASAP. I really respect senior wooden ship modelers who didn't use any machines in the 1970s. The experience was so horrible that I won't buy any classic kits again... Not all the problems are solved yet. every part is incorrect due to inaccurate CNC cutting. The center line and mast holes of the decks aren't exceptions. Some sections are difficult to assemble, and most parts, including the frames, don't have specific guidelines, such as distance from the lower keel. They would be enough reason for a member who was a new builder to give up the recent laser cut version of this kit. I didn't stop becaused I knew how to deal with it. I fixed every frame using part plans. I set some guidelines, which weren't in the plan or instructions of the kit. By the way, I guess the proper height of the lower deck may be 85.7mm (or 3.375 inches). I purchased the Amati Bounty 1/60 plan a year ago for scratch build. The Amati's plan is much better than Mantua's in every respects, and gives all the hints for planking that weren't in this kit. In addition, Amati's plan is more similar to the AOTS reference book. If you are newcomer who wants to build a Bounty, I highly recommend Amati kits. There have been some more improvements since the last project. I expanded my workshop to measure and check every aspect of the ship. When I measured planks on the old workbench, I had to carry the ship and measure it by hand. I added a broad table. Now I can measure every height and position of each plank. Finally, I attached walnut blocks to every frame. The frames are not glued until I set them in the proper position, and the walnut blocks forced the frames to the last position I set when I checked and assembled the frames hundreds times. This is it. All the frames are almost perfectly fitted and symmetical. Each frame has an error of less than 0.50mm. This is my best result ever. The keel was bent before I started, but it was stretched as I set each frame properly. At least the paper plans didn't lie. The error of the keel is also less than 0.50mm, which can be easily removed by sanding. With satisfying results, I glued the frames. I'm ready for hull fairing. 😎


-
 Well its time for a new build now that ENDEAVOUR is ostensibly complete. My next choice of kit still had to have an Australian flavour so I chose the BOUNTY. Choosing which BOUNTY to buld came down to what I could afford and what was available. I considered the Artesania version but was not keen paying for a single sided planking and open side with interior. I also stumbled upon a sale for Amarti BOUNTY's through Premier Models in the UK so I ordered one and it arrived safe and sound. I was surprised on opening the box at the difference in quality between the Artesania and Amarti kits. The Amarti materials appear and feel much better quality and the use of timber rather than ply for the keel, stem and stern posts, channels etc means one don't have t find a way to mask exposed ply ends. The ply stock itself also appears better quality with far les tear-our/delamination that the artesania material did. I also like the Amarti rigging (blocks, deadheyes, hearts, and parrels parts as these too are timber and not laser cut ply. I also like the Amarti threads even though I would prefer scale rope but it appears that this build may be a commission and will be an out of the box build. So lets get to work: FRAMING: Thank heavens for DAVOSHIPMODELLER on YouTube. He has a playlist for the construction of the Amarti BOUNTY and the identification of kit issues starts at the pre-framing stage. The first big is the location of the Mizzen and the implication that notching the false keel has with the location of Frame 13. The most effective solution is to notch out Fame 13 and then adjust the length of the Mizzen mast down the track. The other main issue is the shape of the false keel stem support and the reinforcing parts on either side. They do not match the plan nor the shape of the laser cut timber stem. Best to fix now before any assembly take place. Other changes made also follow the DAVOSHIPMODLLER experience including cutting out sections in the frames between Frame 11 and 13 and also Frame 14 and 16 to permit planked decks to be installed should one wish to have open hatched on the main deck.
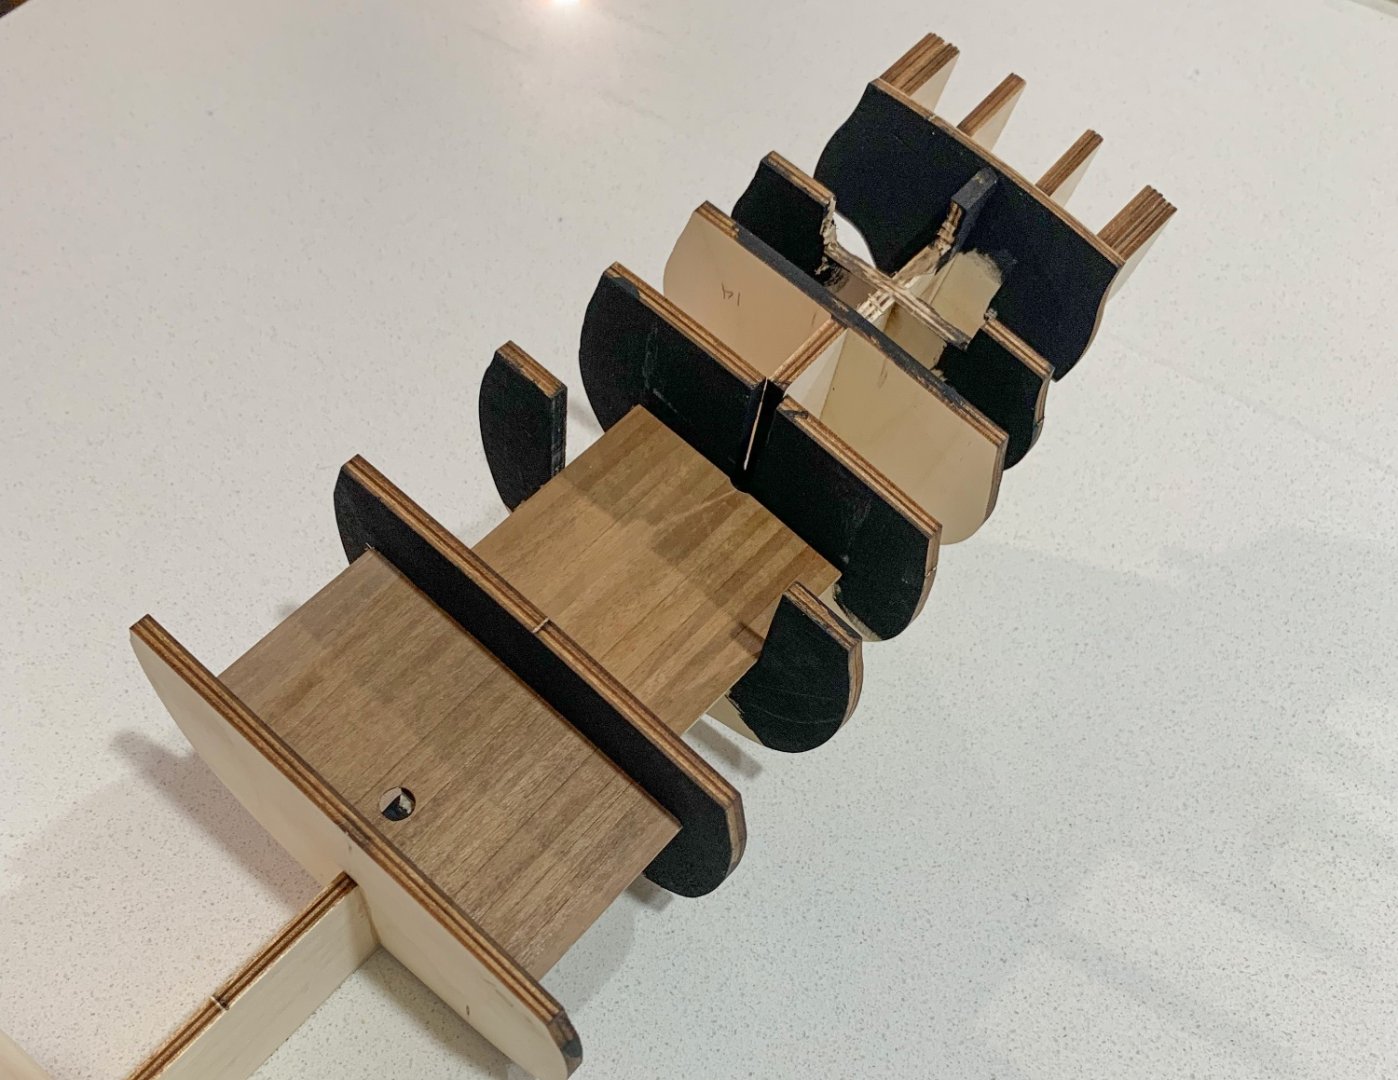
-
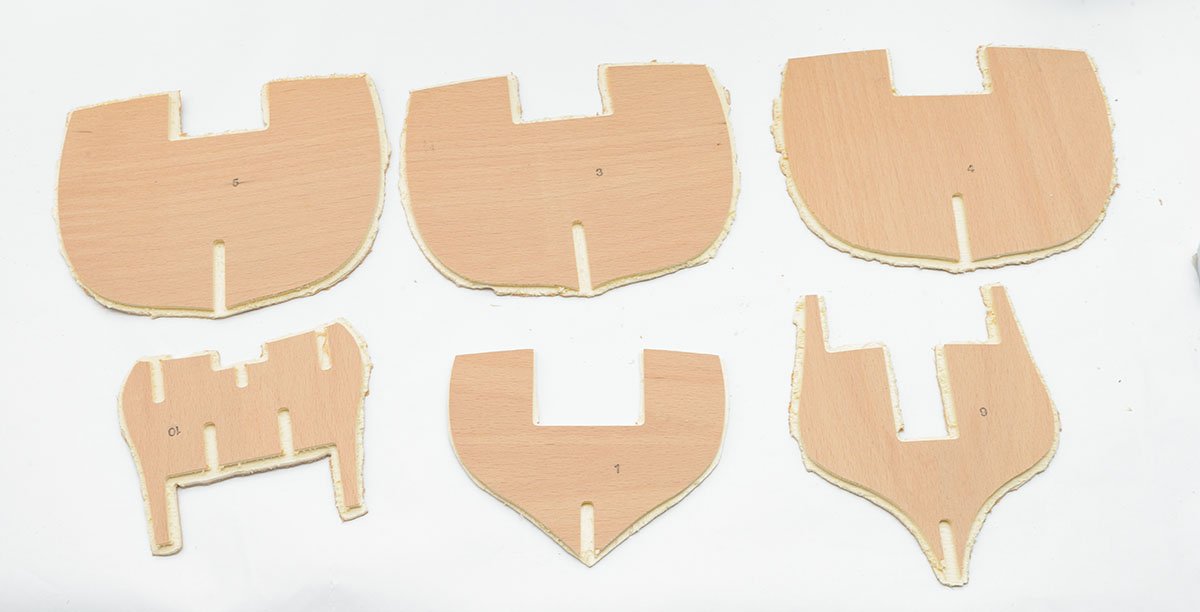
 Well I've been looking around and it would seem theres lots here in the know. I got a screaming deal on the model mentioned above. It was the one I really wanted. I cut out and sanded all the tits off the pieces and labelled each set in it's own clear bag. Got all set and I want to (would love to) hear from those in the know if there's a frame assembly glue that you all have had great success with? I think I'm good to start. Made jig to hold spine straight, and would love to hear. Mainly bout glue, BUT. If there's anything else that would start me off with more success. THANK YOU ALL SO VERY MUCH
 -
 Step/Photo 1 of this build
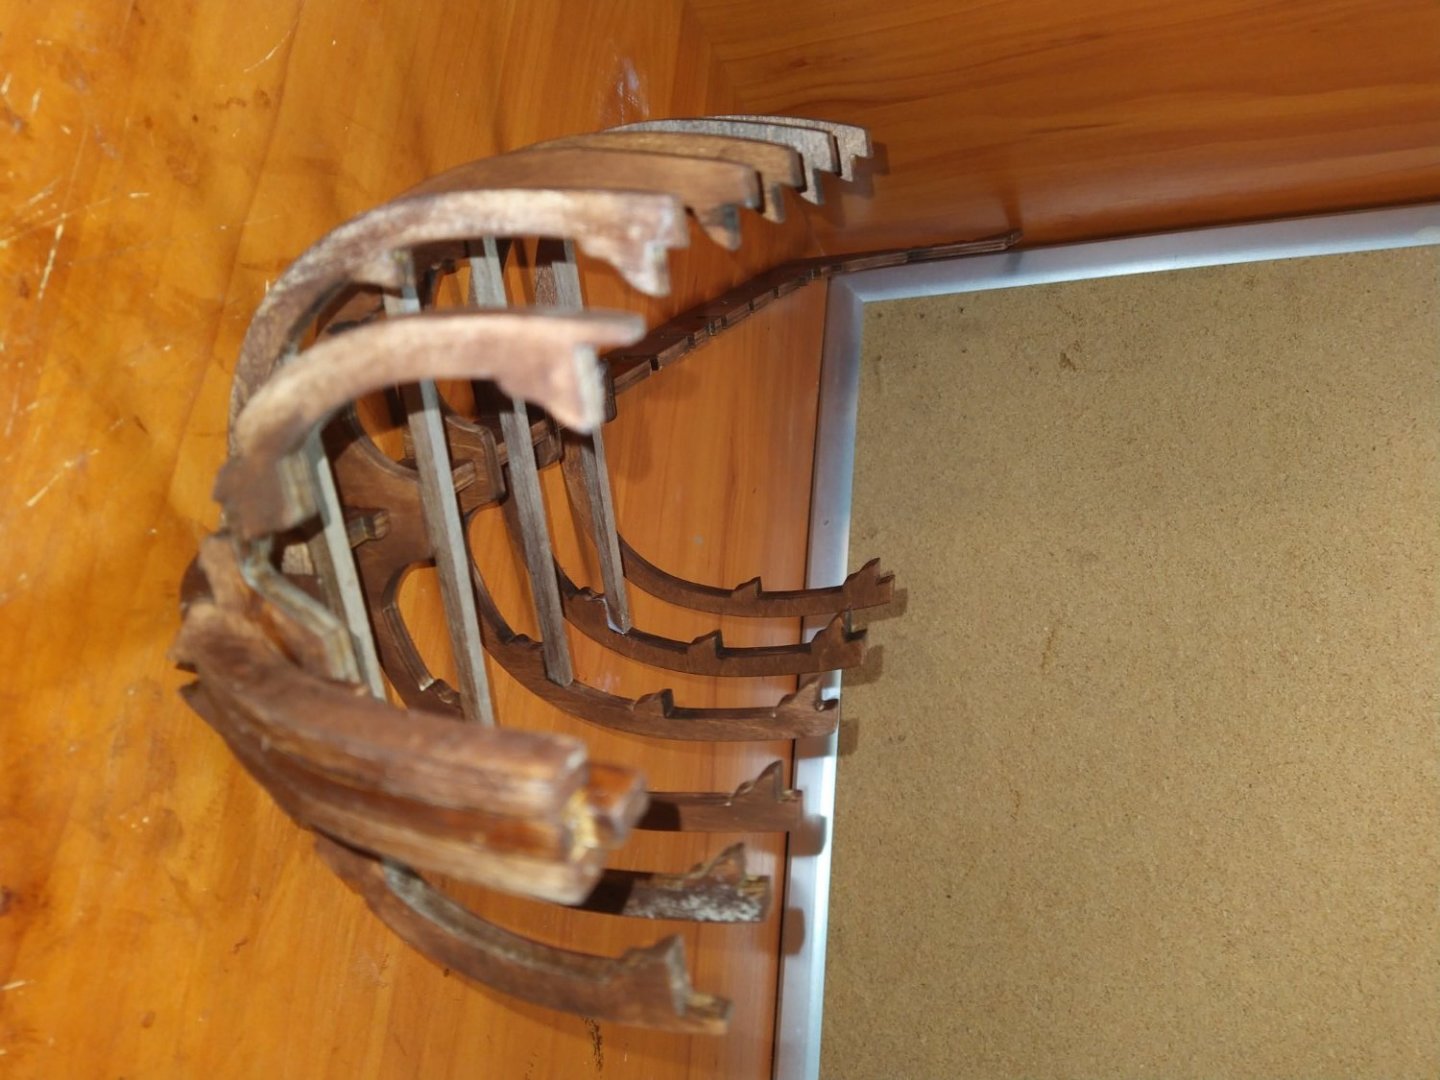
-
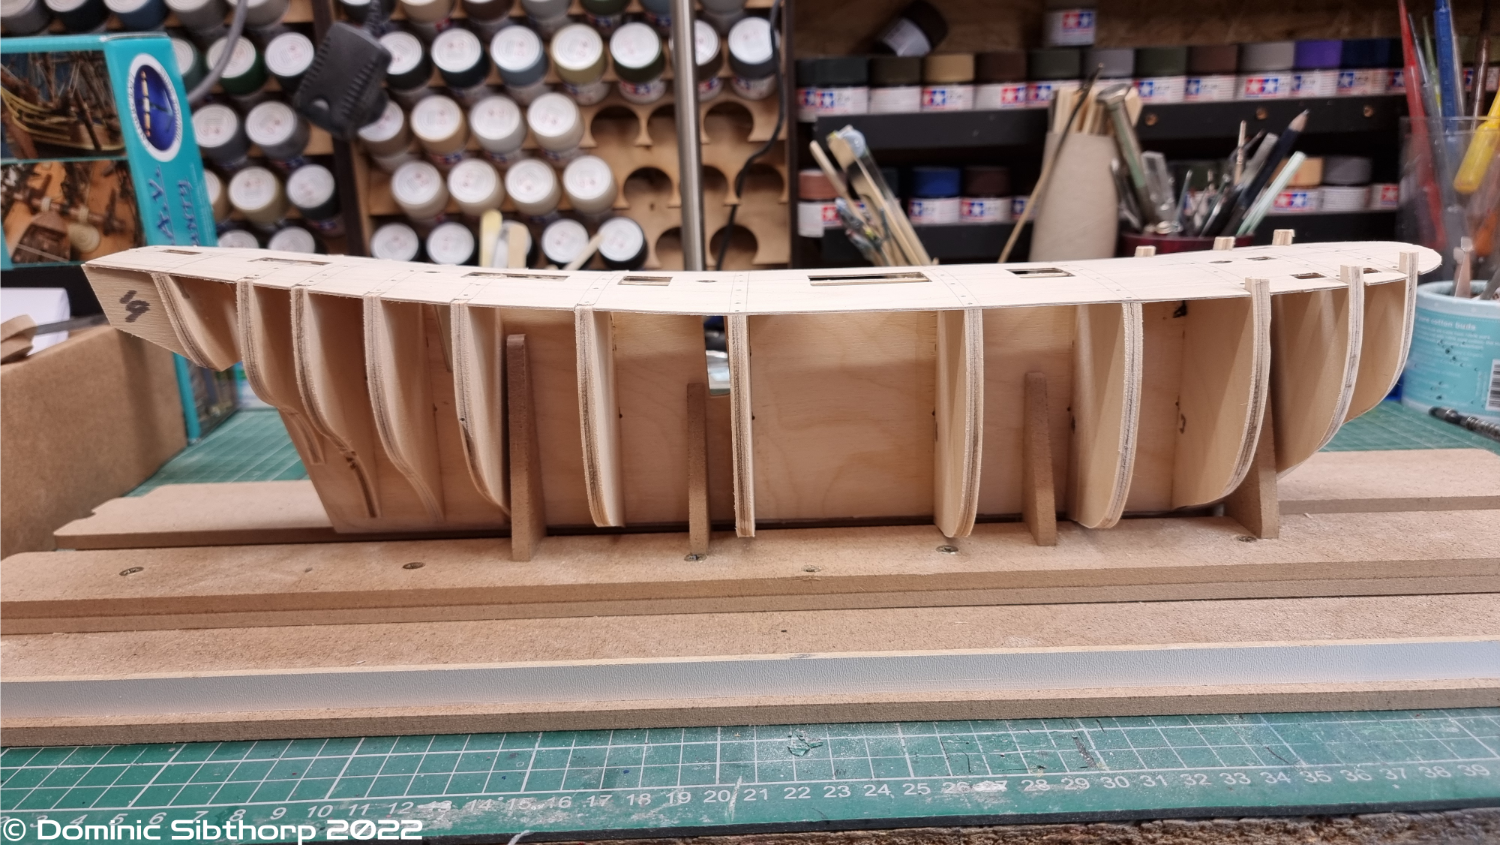
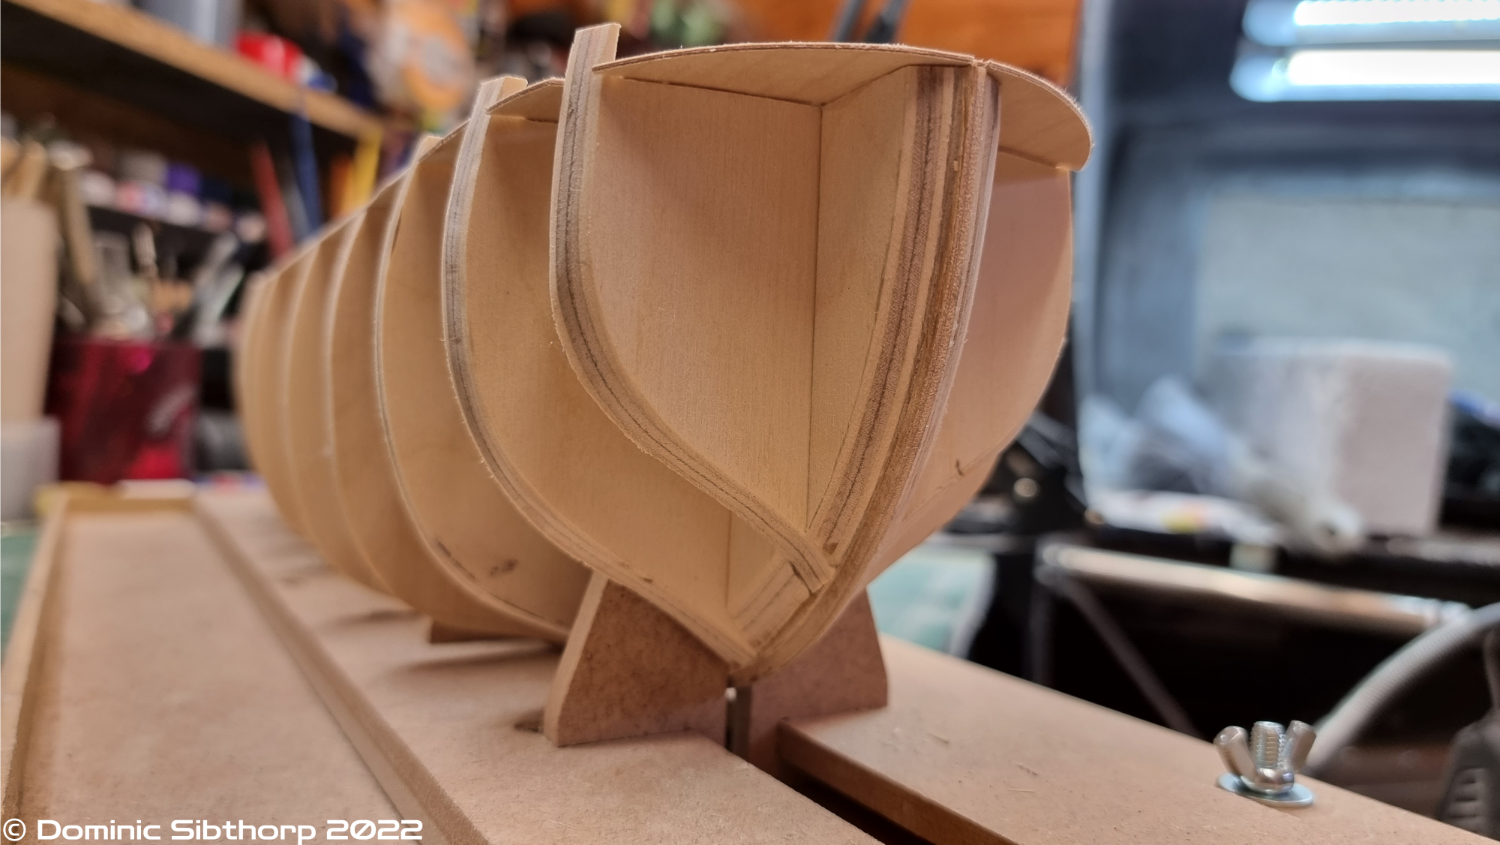
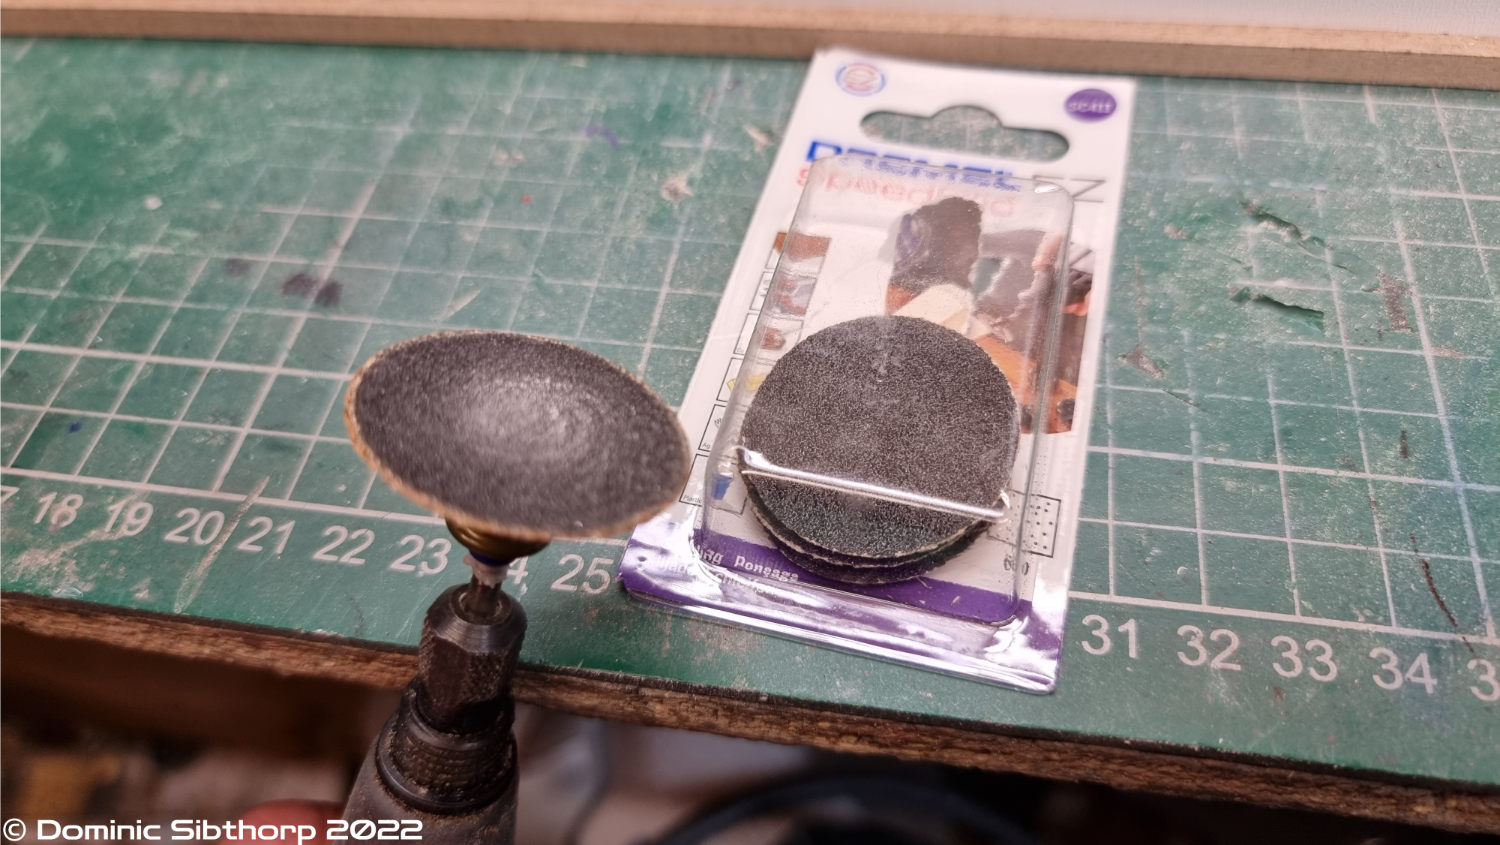
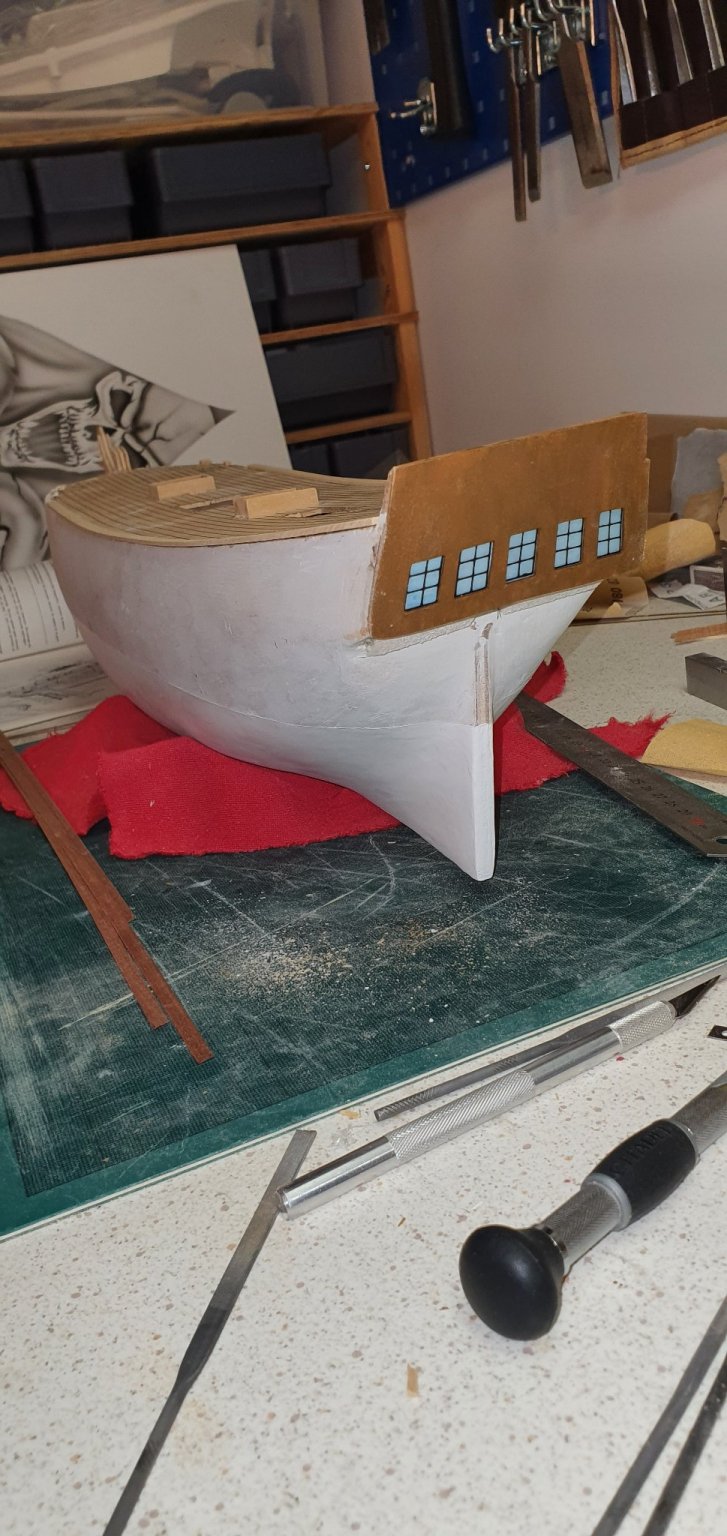
 Greetings folks. It's been a while since I last battled with timber, I got lost in plastic, but I decided I wanted to return to wood. Having learned new skills and improved on existing ones, I felt I could probably do a better job than my previous efforts. And to start with, I wanted to right a wrong on the last ship I completed, HMAV Bounty. On the last one there were a number of errors, most glaringly was the main rubbing strake. It sweeps too low, way too low, at the bow, and it's annoyed me for years. Plus I enjoyed the kit last time, it was a good quality kit with only one minor issue: the length of the centre section of the keel is a few mm too short. Wasn't a problem last time as I coppered the hull as per the kit, I am not planning on doing that this time as it is subject to a lot of doubt as to whether she received that upgrade before leaving Portsmouth (or was it Plymouth?) for the last time. I also invested in some new tools that I didn't have before, and a proper slipway rather than a home made one. Following the general consensus on here I was directed to the Model Shipways one, which I have to say is pretty good. My only gripe with it is it's designed for ships that have the keel already attached, so at the moment it isn't easy to get it to sit level, but that's not an issue at this stage anyway. I also wanted to try a better method of the hard sanding work, using my Dremel and the sanding discs attachement ezclic thingy, and I have to say it makes that job soooo much easier. Anyway, so far I have got the keel/bulkheads assembled, false deck fitted and the majority of the fairing done on the bulkheads. Time to soak some planks and work on the bit I hate the most, planking the hull... Thanks for stopping by...


-
 I'm afraid...
-
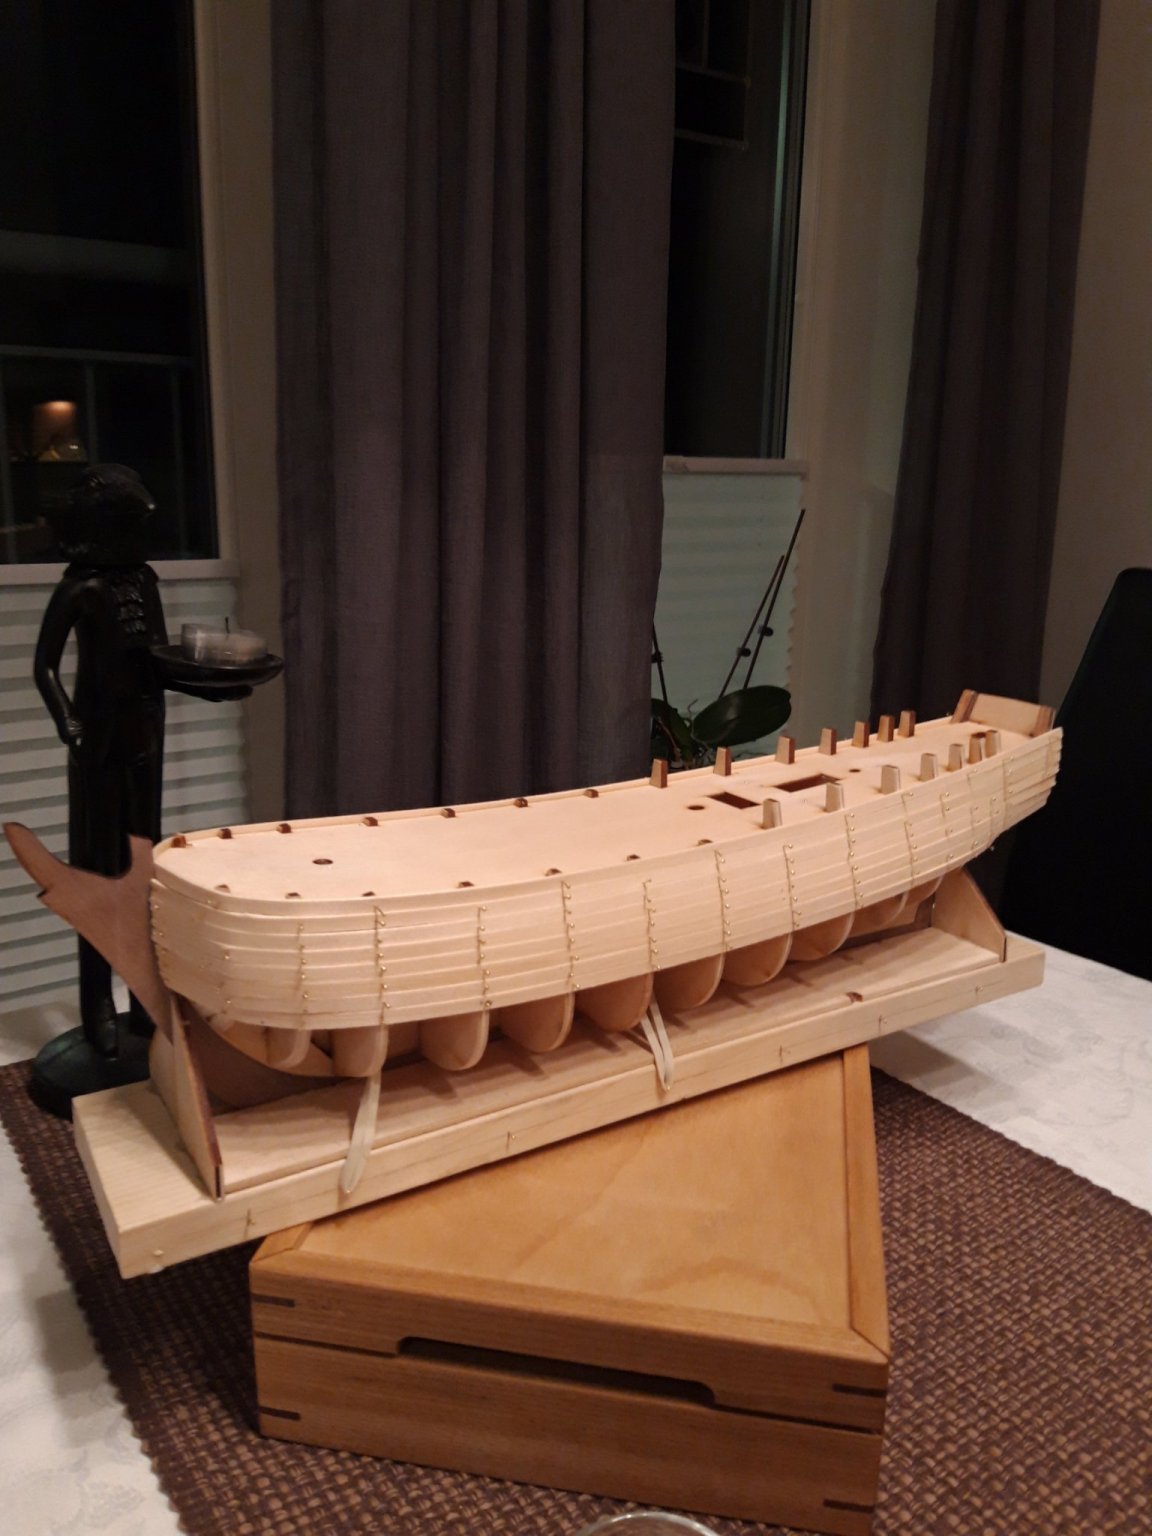
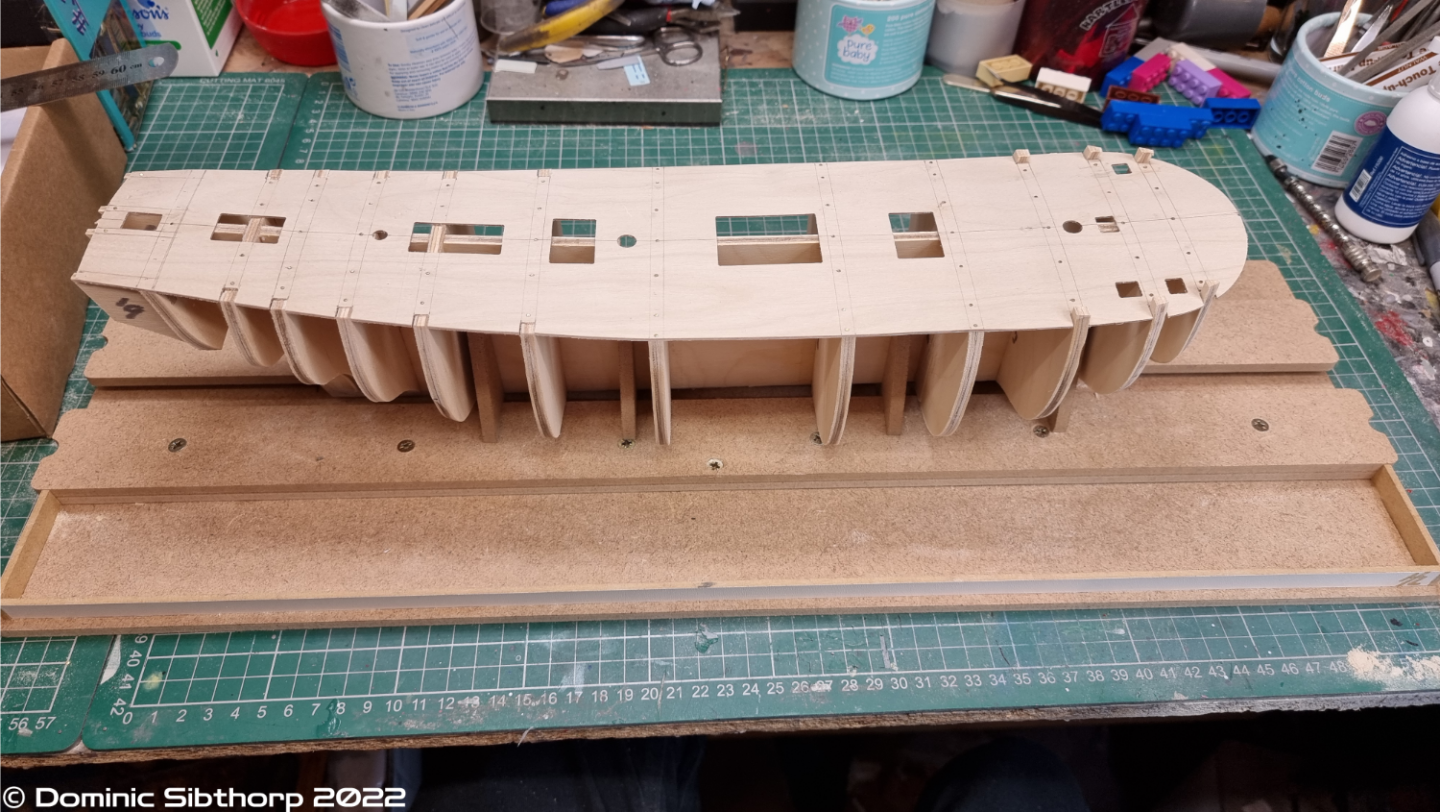
 A sucker for punishment, I decided to give myself something to do while waiting for the glue to dry on the planks of HMS Endeavour. The bulkheads and sub-decks are in place.
-
My name is Benjamin, 45yo, married, 2 kids (8 and 5 yo), 1 dog, living near to Garmisch-Partenkirchen, patent officer at the german patent office. I´m a novice of shipbuilding. In the youth I made plastic models, mainly jets and helicopters. Some years ago I got the HMS Bounty from Constructo as birthday present. With big enthusiasm I started the frame and then life (job, kids, wife) was steeling time. The frame and the box with the parts moved from one corner to the next... But now I´m willing to restart building the ship. Hoping not to run out of time again. At the moment I´m starting to arrange a proper workplace, collect tools and materials, search for informations of the ship and howto´s. The buildlogs of the MSW-members (espacialy the logs of Steve 12345 and leginseel) helps a lot, to get informations, where I need to pay special attention. When I´m ready to (re)start I will also start a buildlog, to prevent other novice like me, to do the same mistakes. I appreciate, my model won´t win a price, but if I stay the course and finish the ship, I will have learned a lot and the (hopefully) next ship will look better.
-
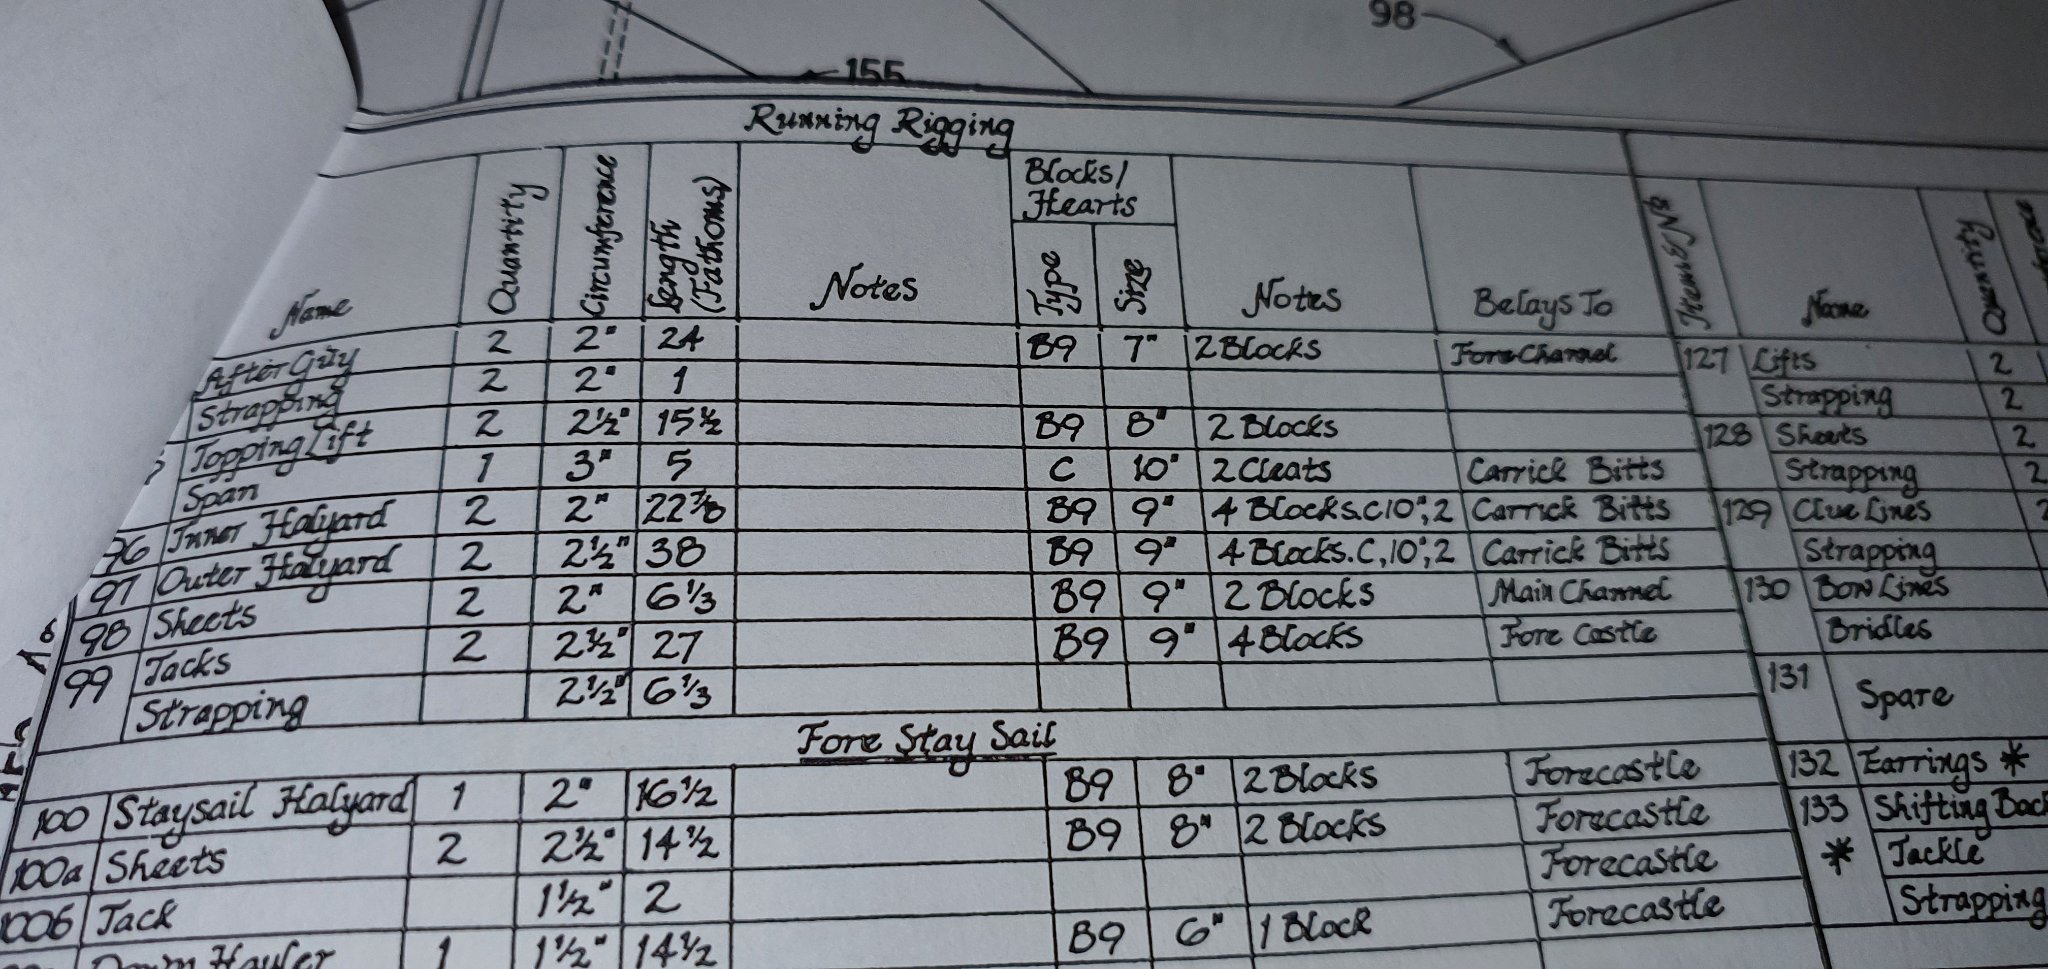
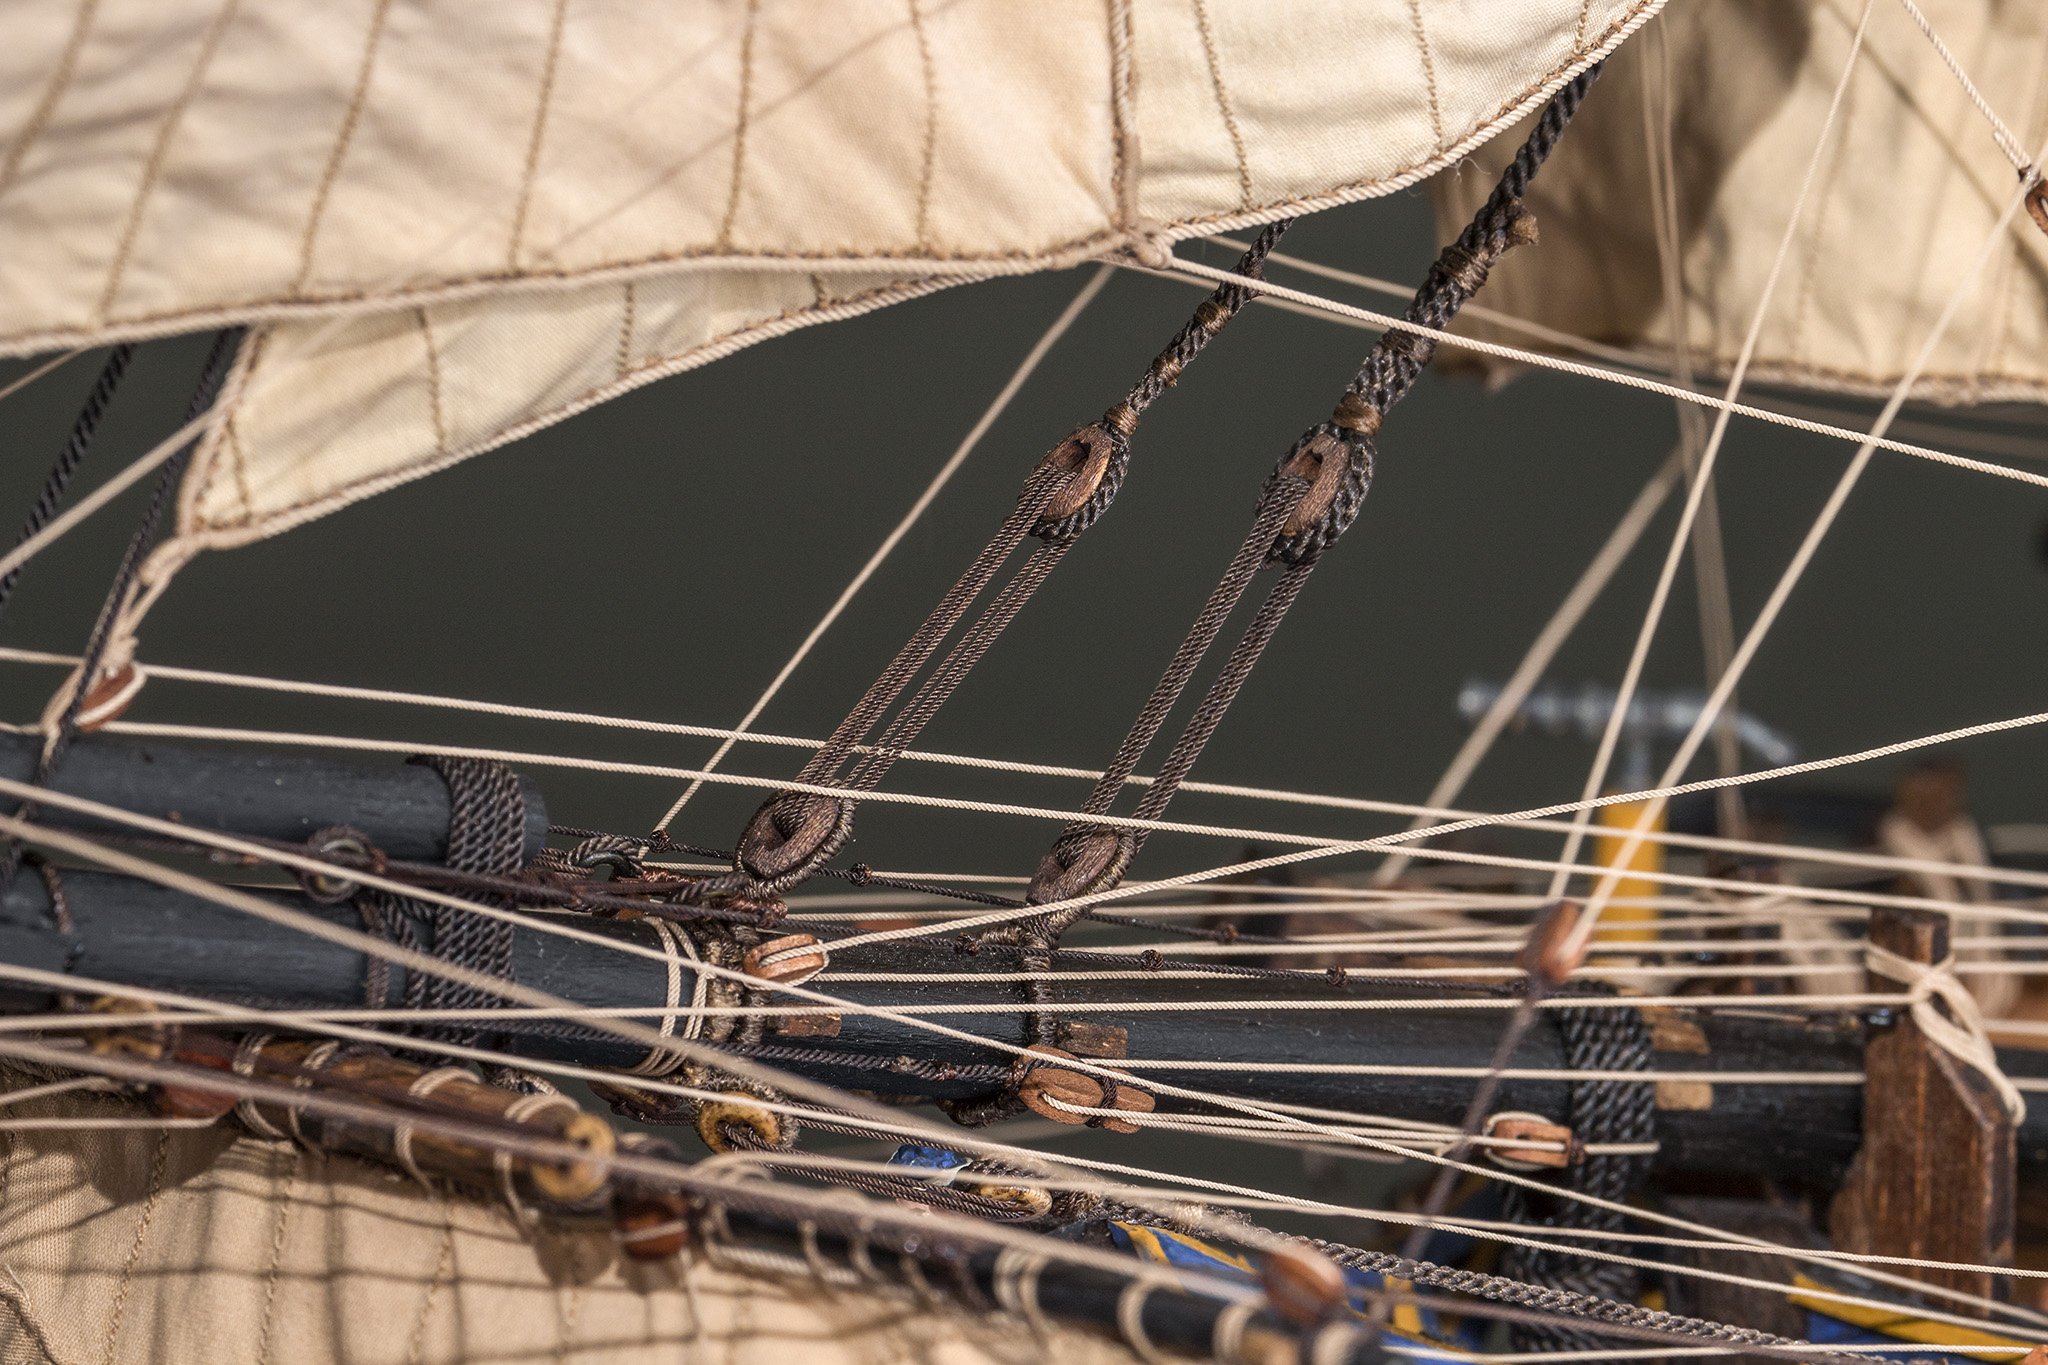
 I bough the book The Armed Transport Bounty which has a lot of good detail for building the Bounty including a table over all rope sizes and blocks. In the table there are detail describing block size and type, but it is confusing to understand which type of block to use. In the beginning I thought H=heart (as you have picture of) and B=blocks, but then there was C, D? Also thought B9=9" block, but that was not correct. Hope someone with more understanding of ship building could explain how this works and what it means, so that I can try to build my Bounty as accurate as practical possible.
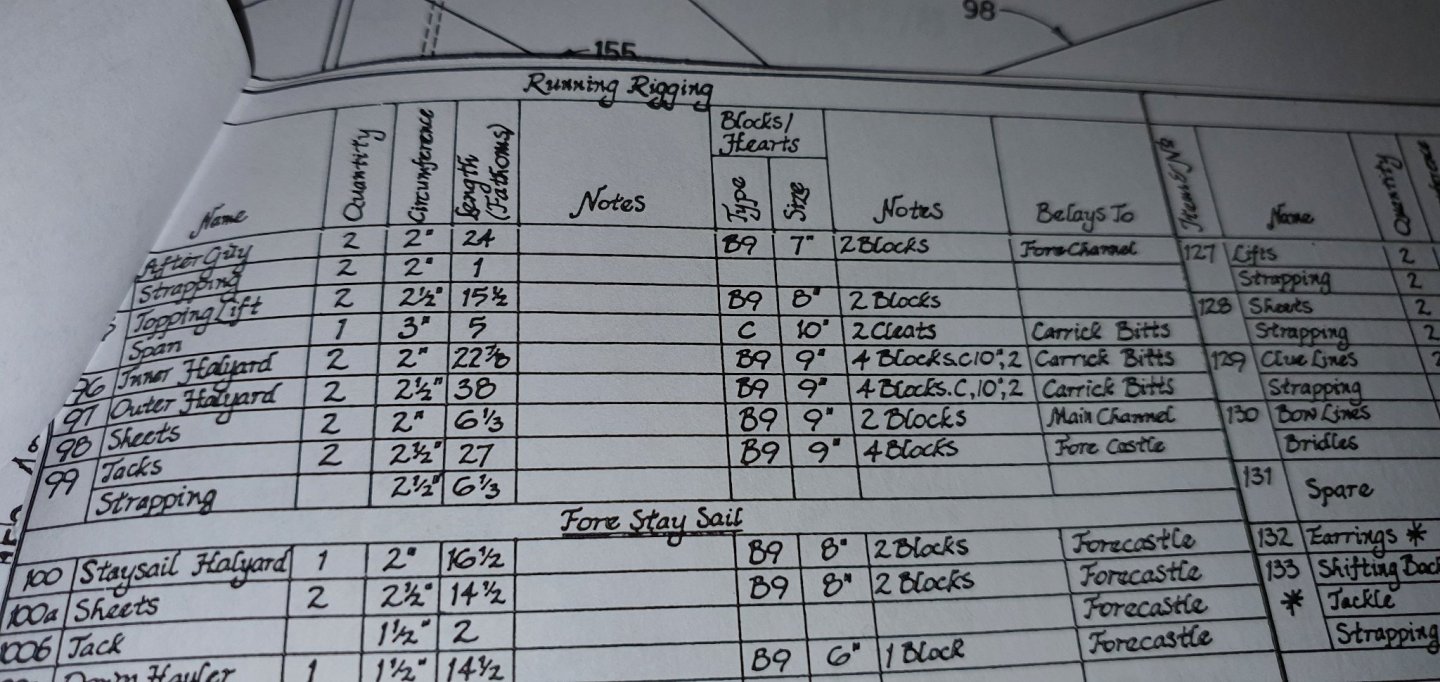
-
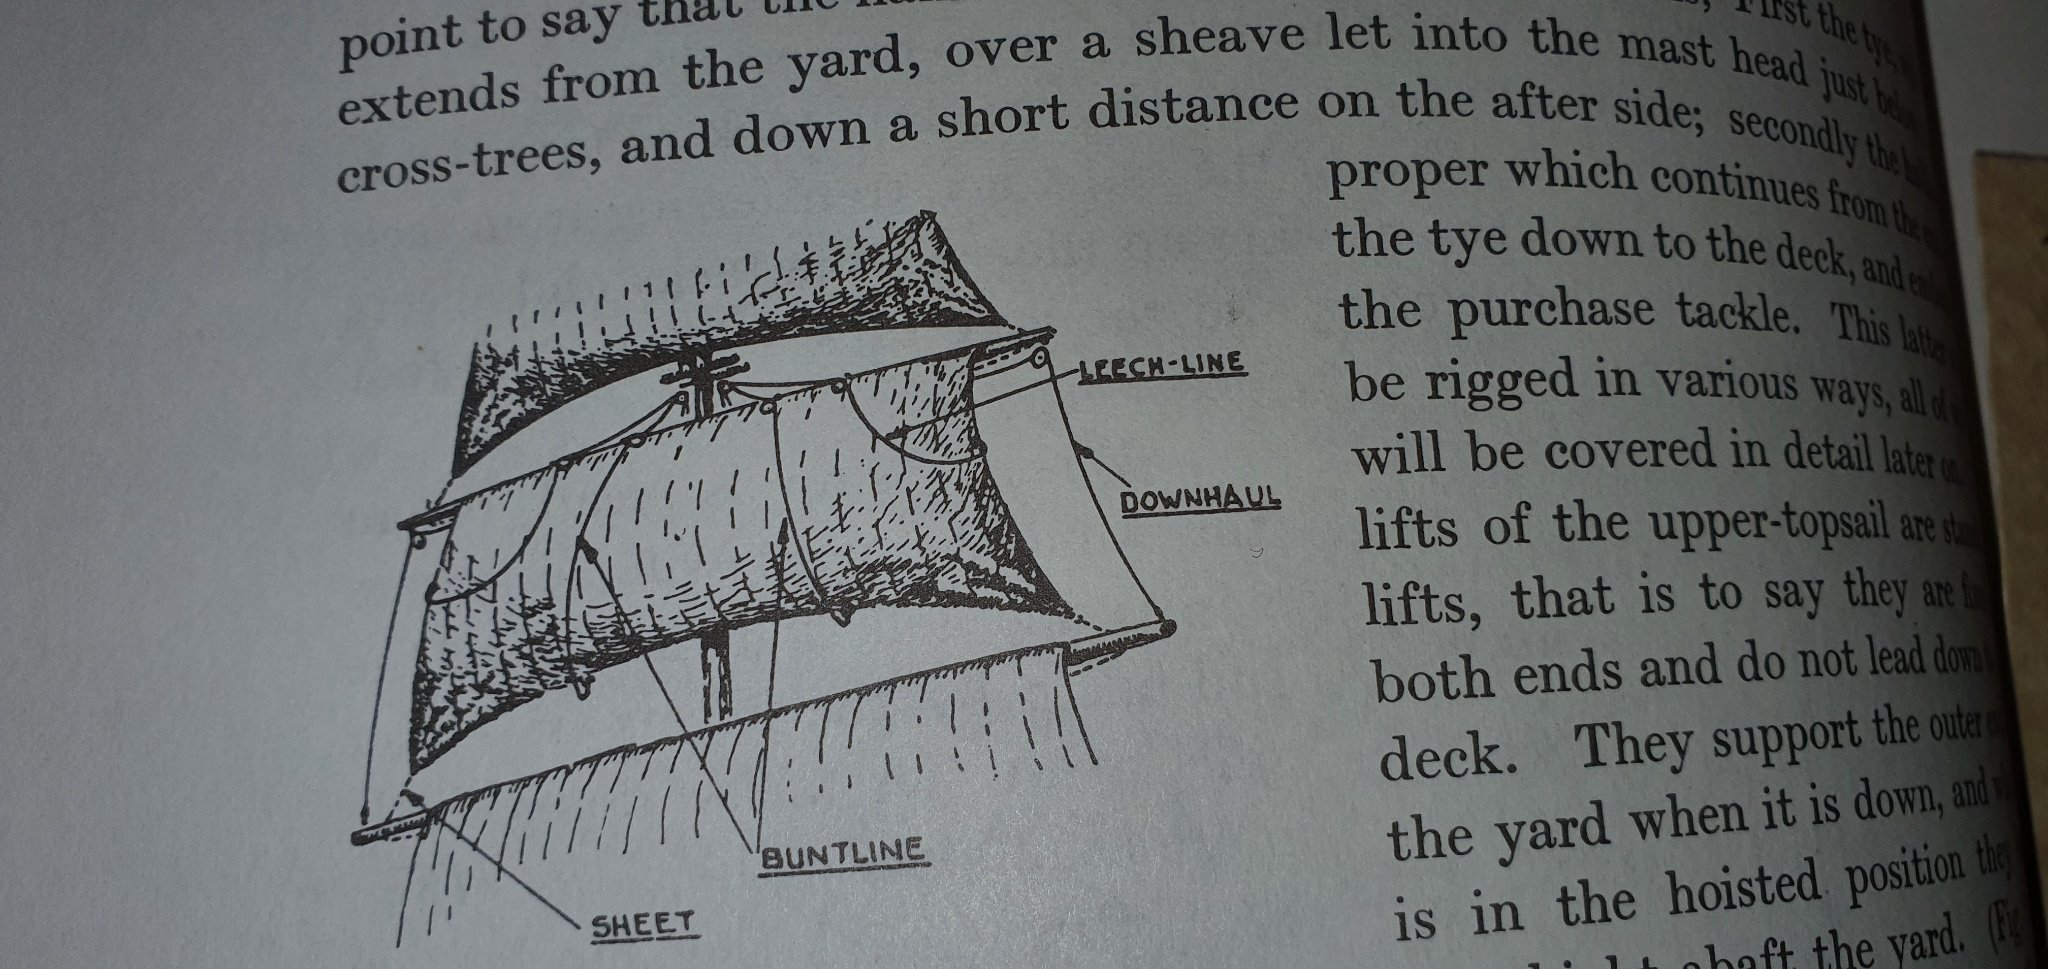
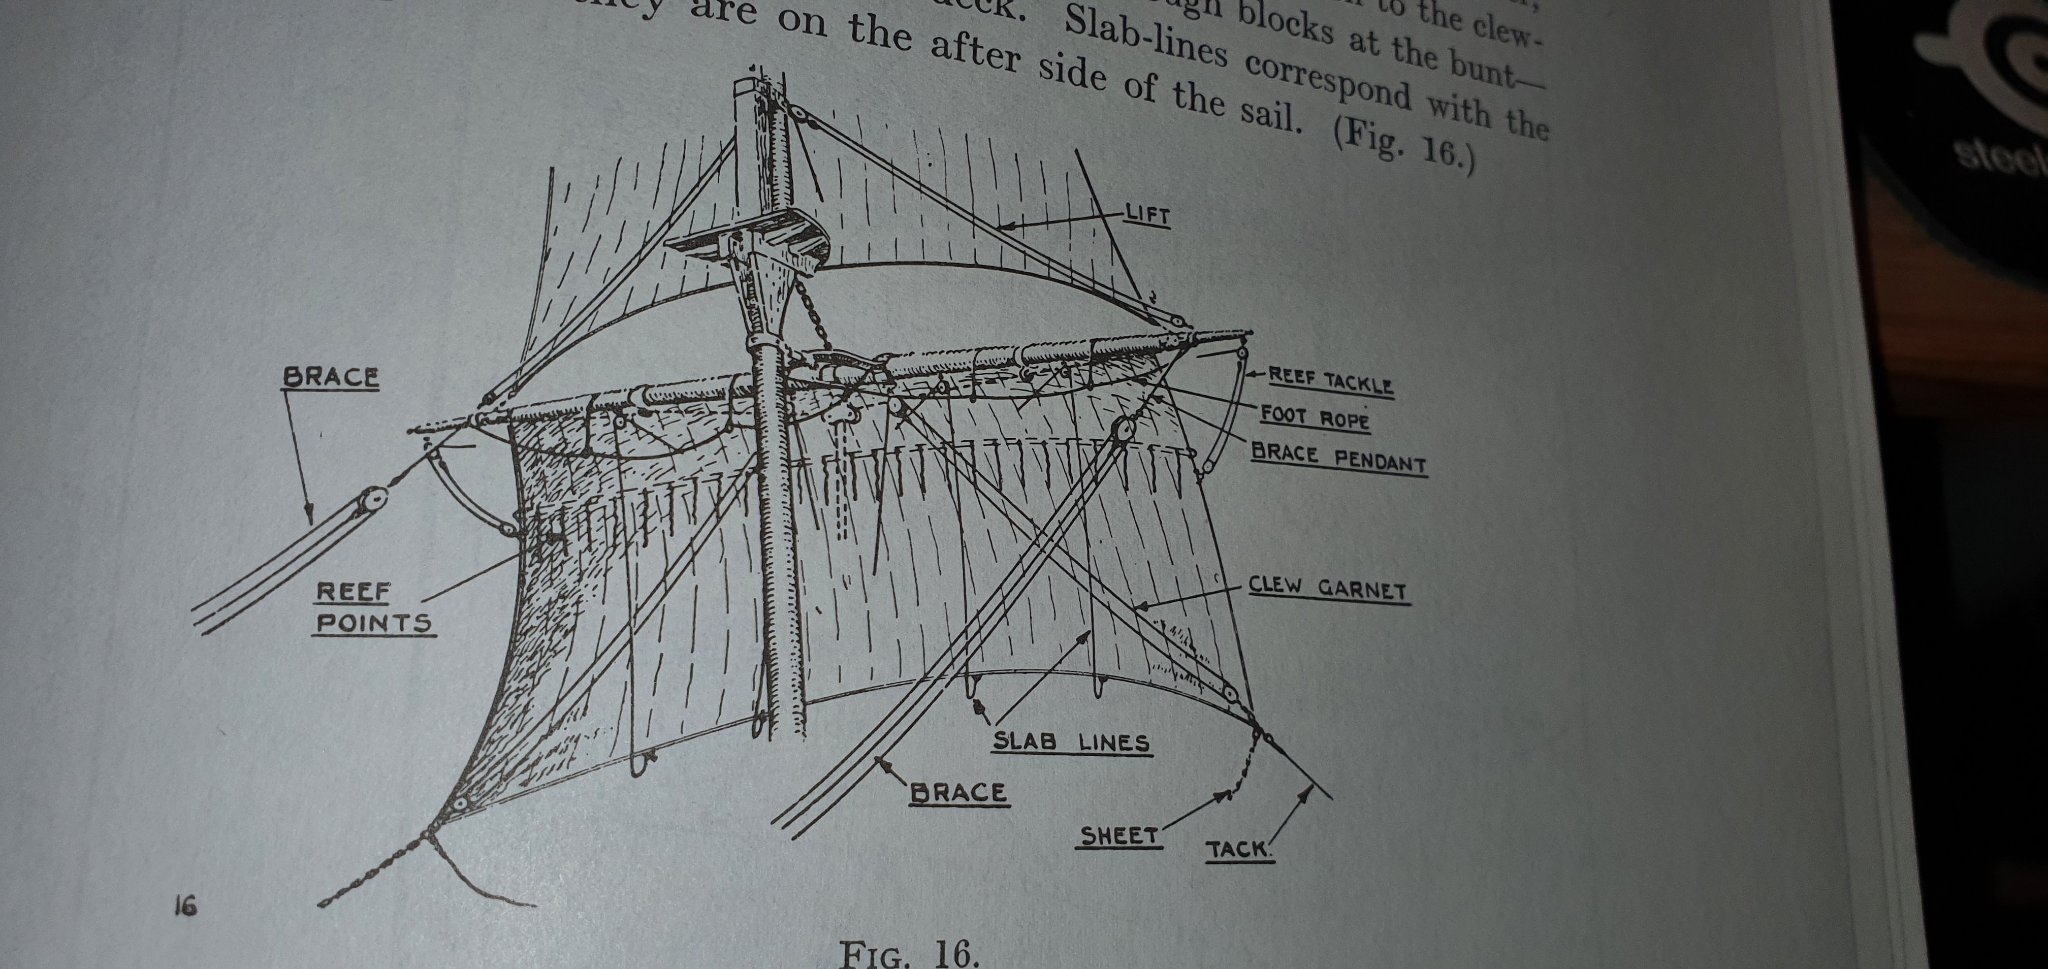
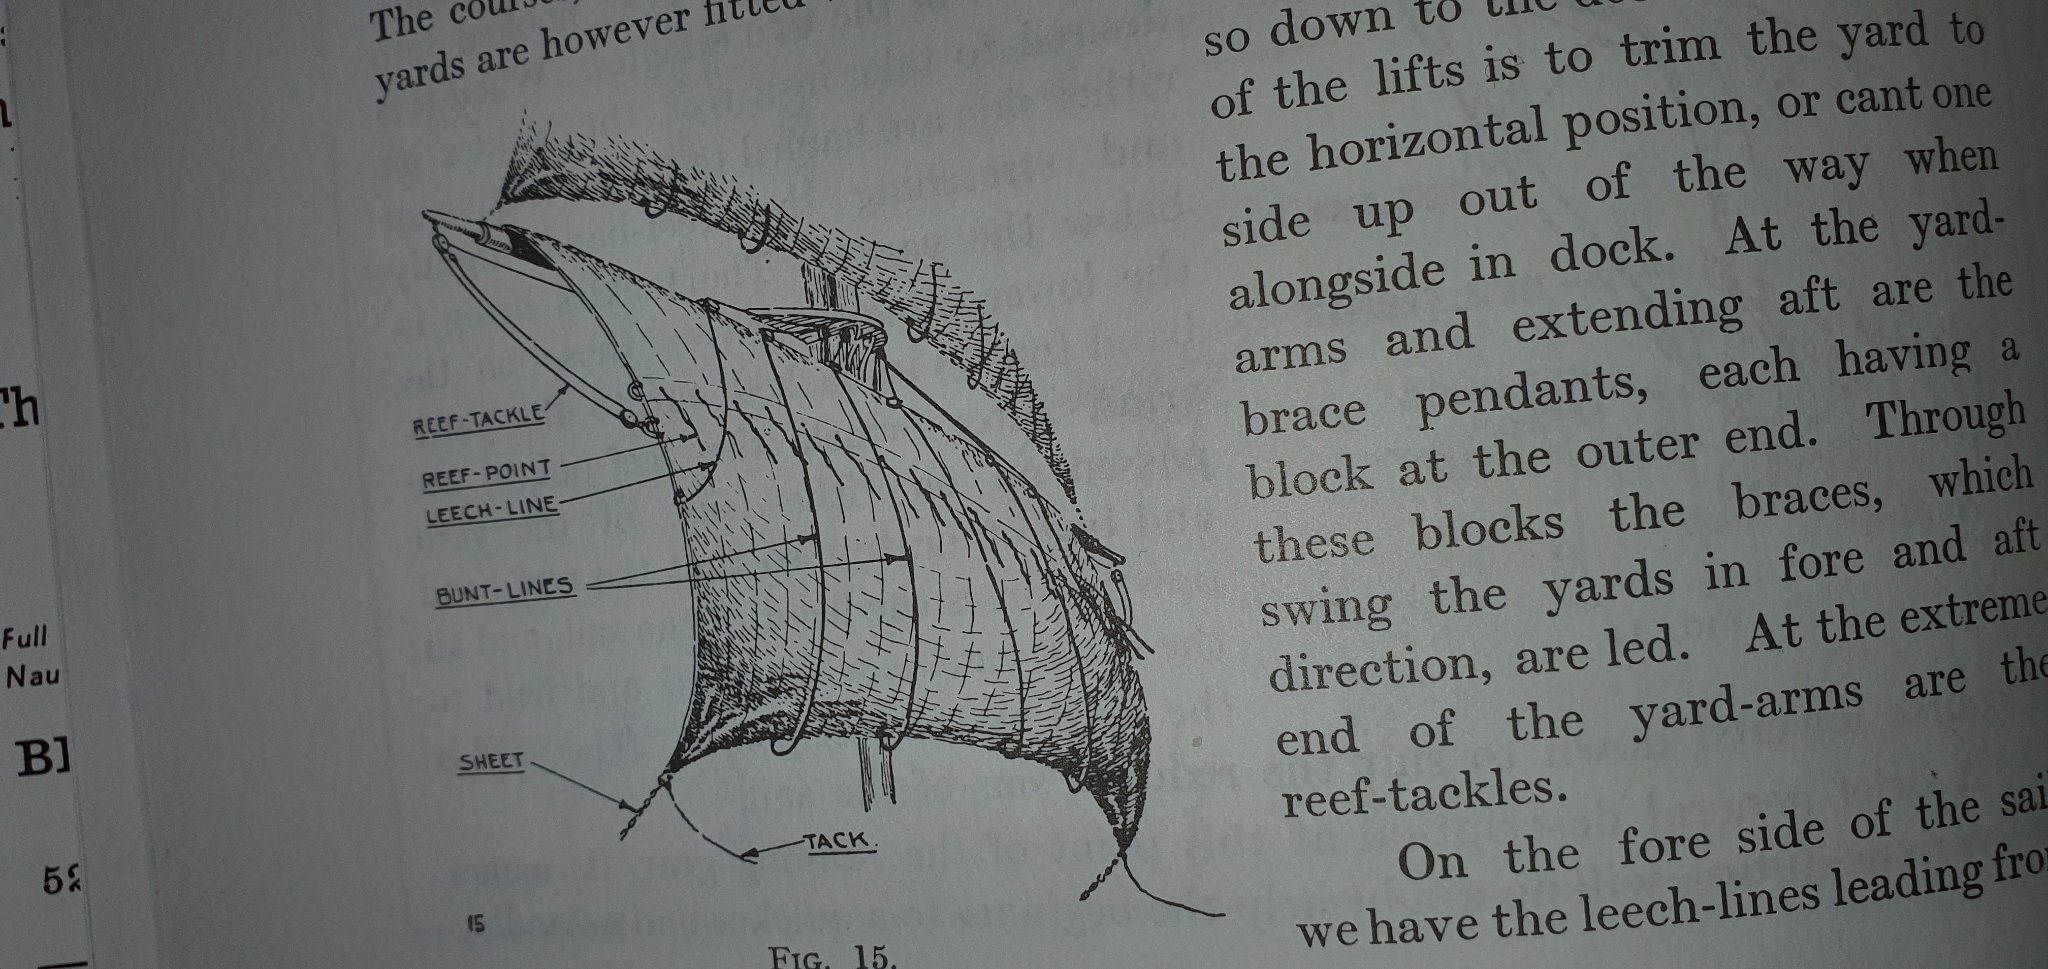
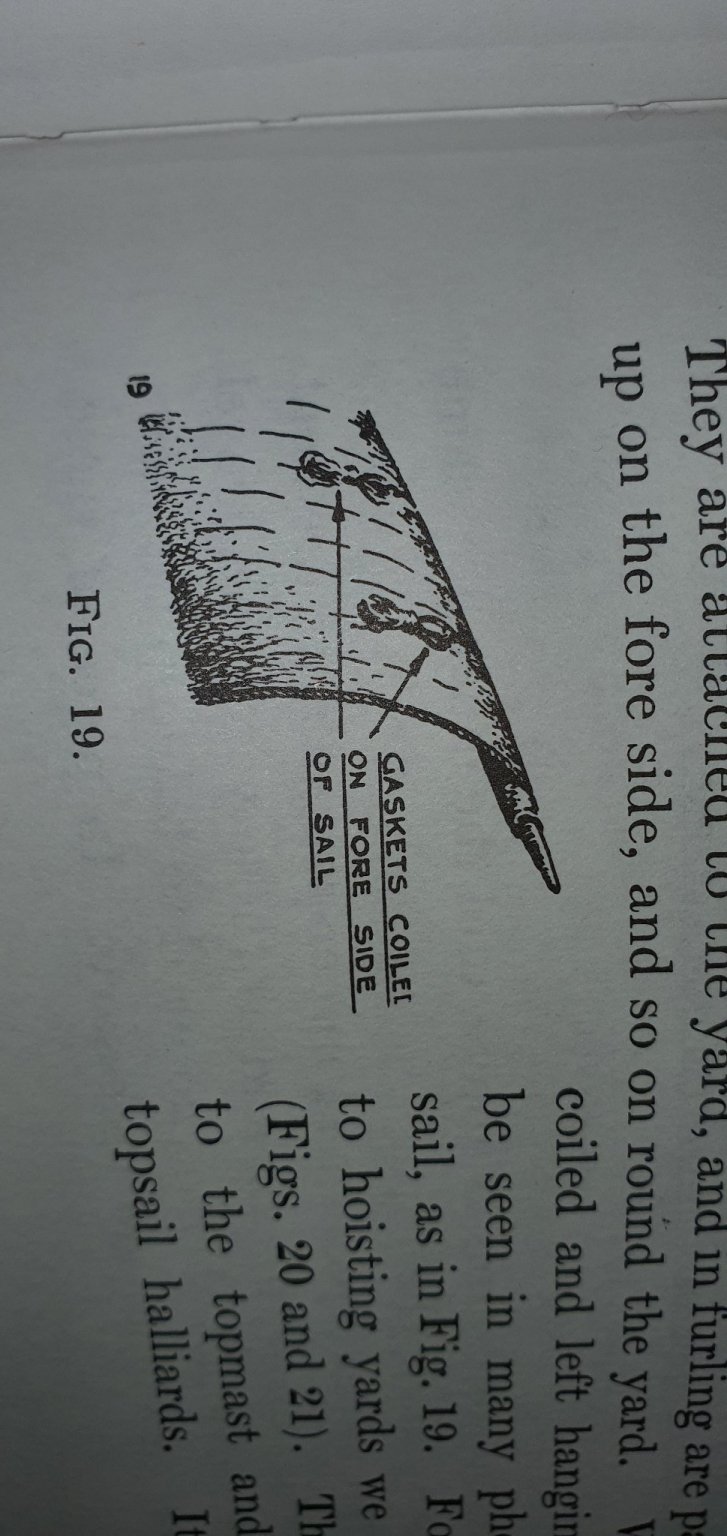
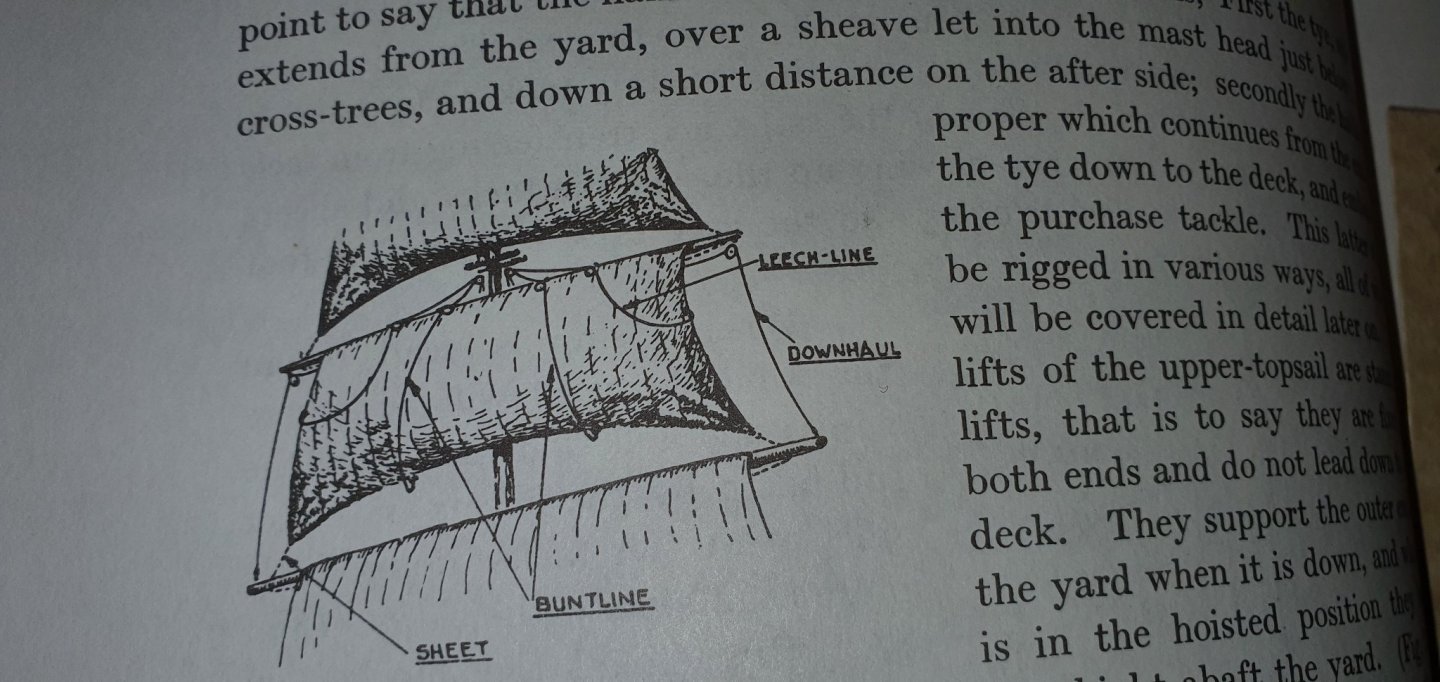
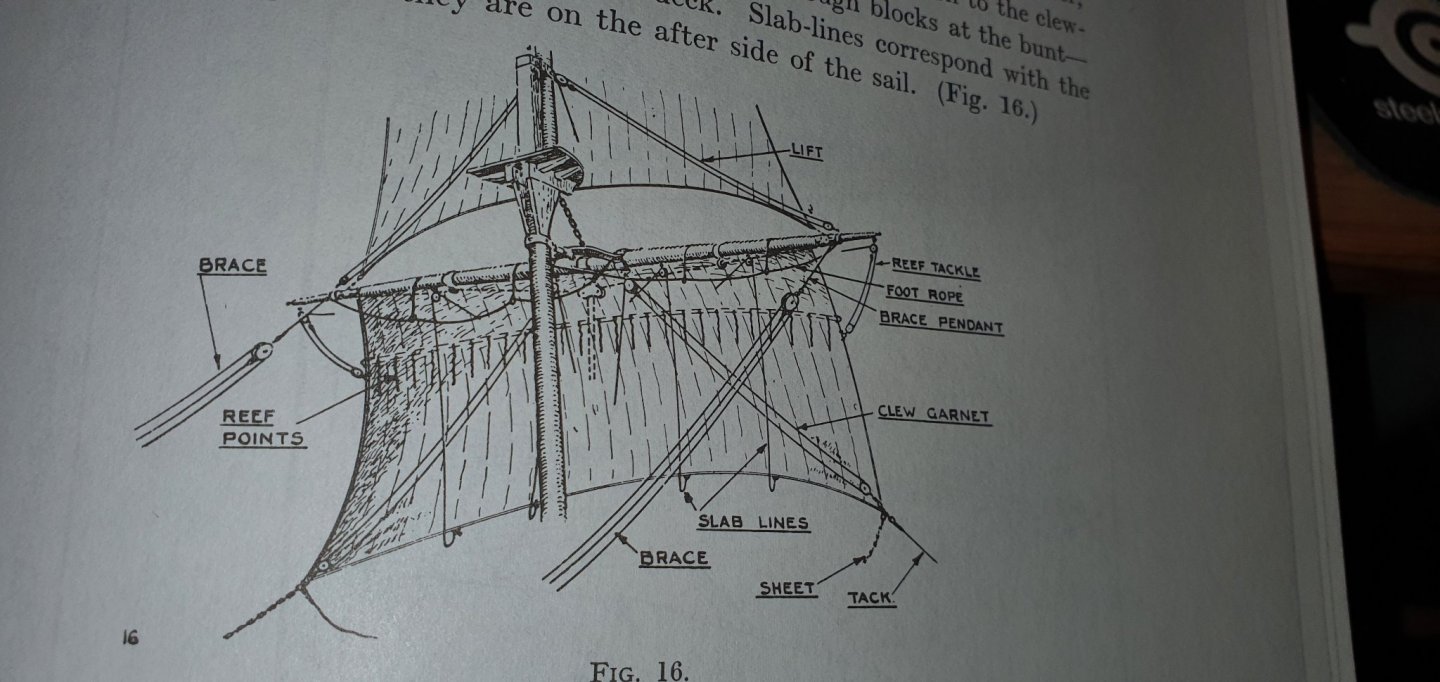
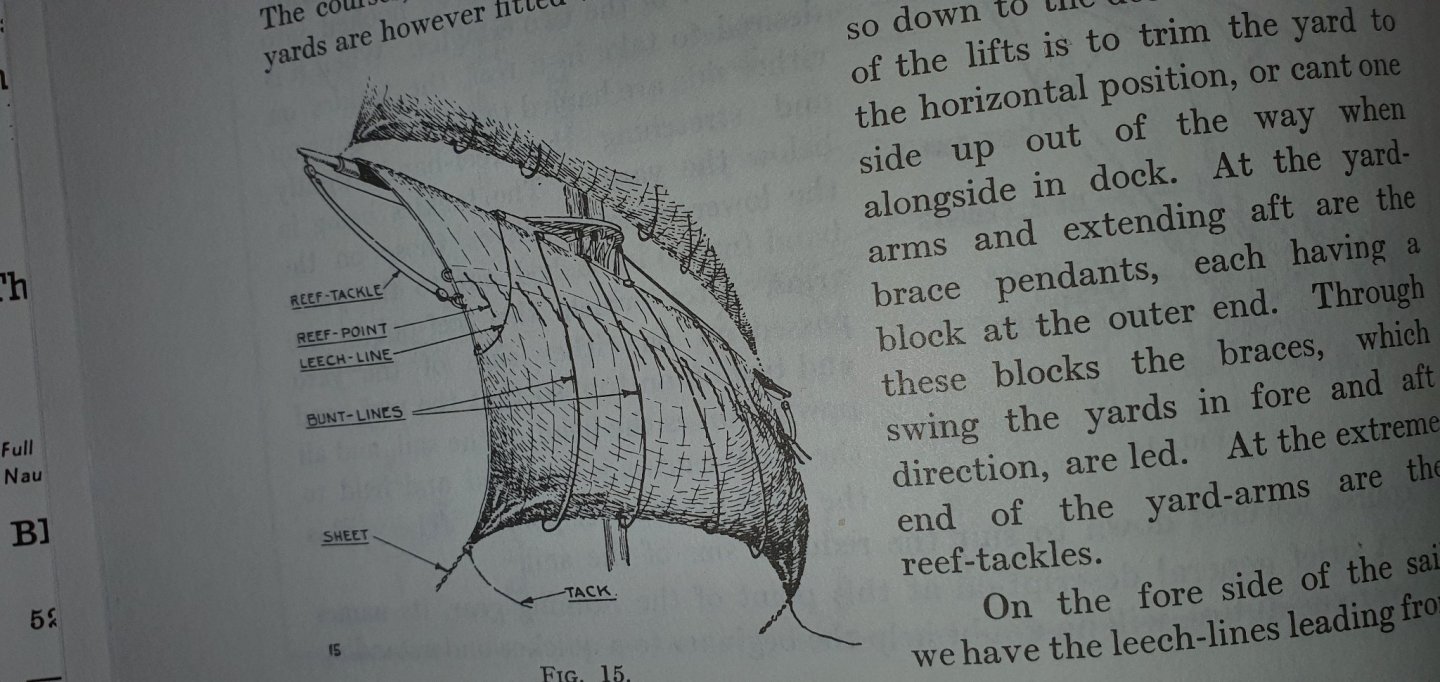
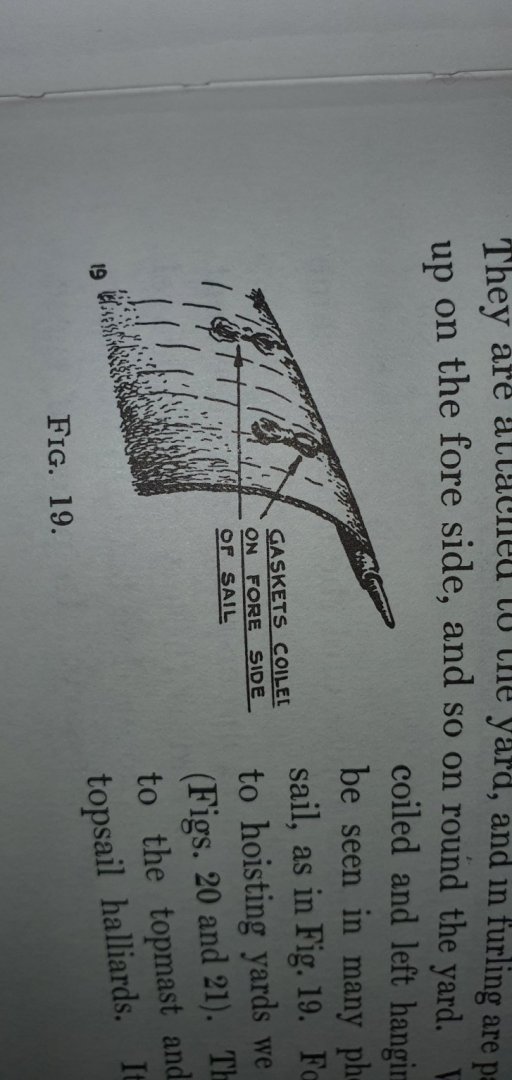
I'm guessing that I'm in the position as many other modelers in here, I'm new and the model kit instruction is not very good. So, I've bought a couple of books trying to learn standard rigging and sail for ships to due my rigging on the Bounty. My questions are: 1. Is Slab lines and Bunt lines the same lines just for and back of the sail? On the drawings it look like it. 2. For my both Reef points and Gaskets are doing the same job, tieing the sail together, correct?
-
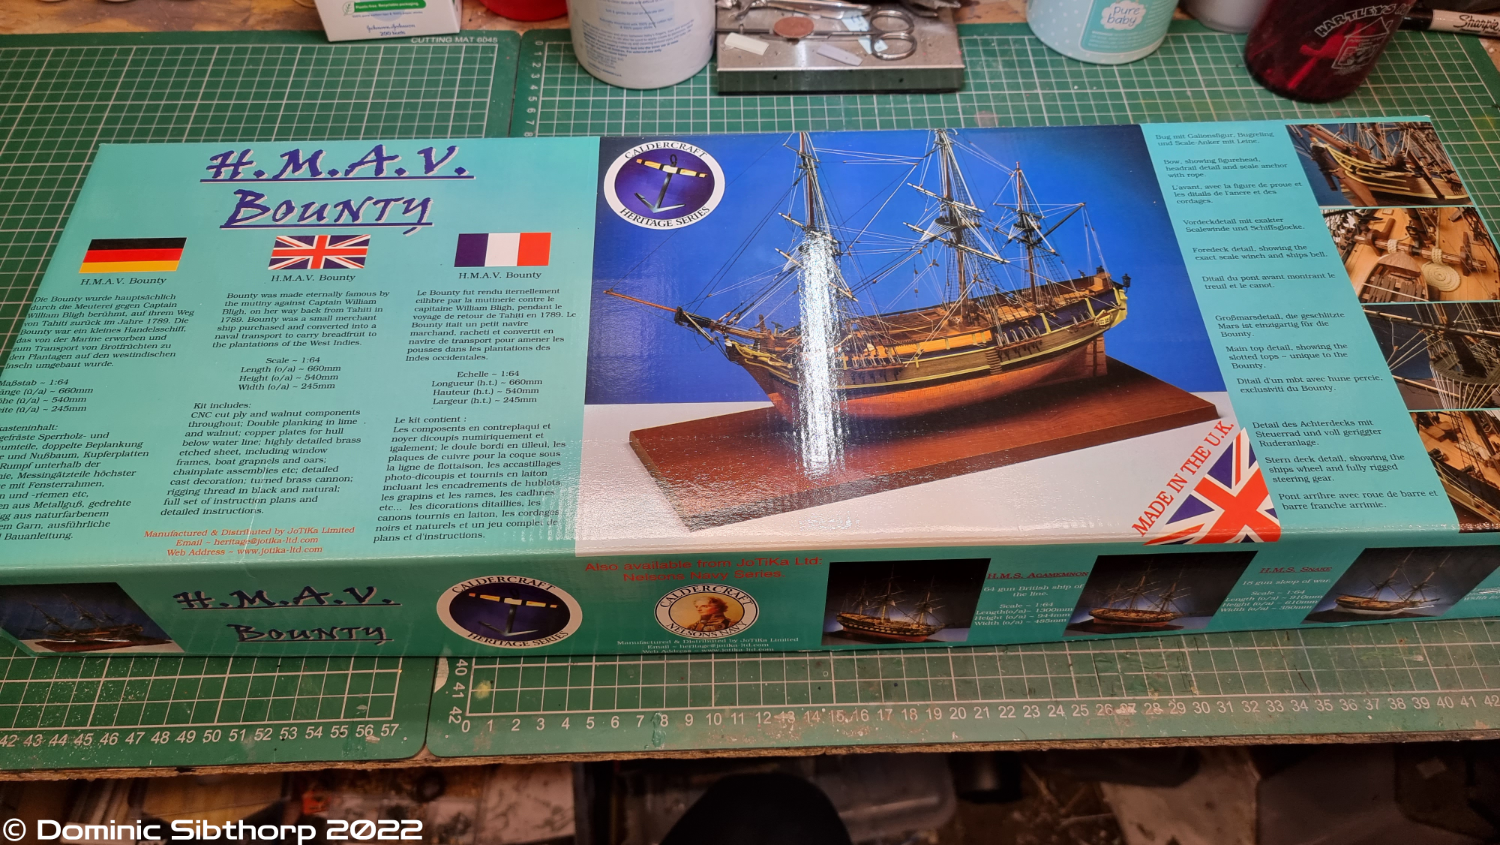
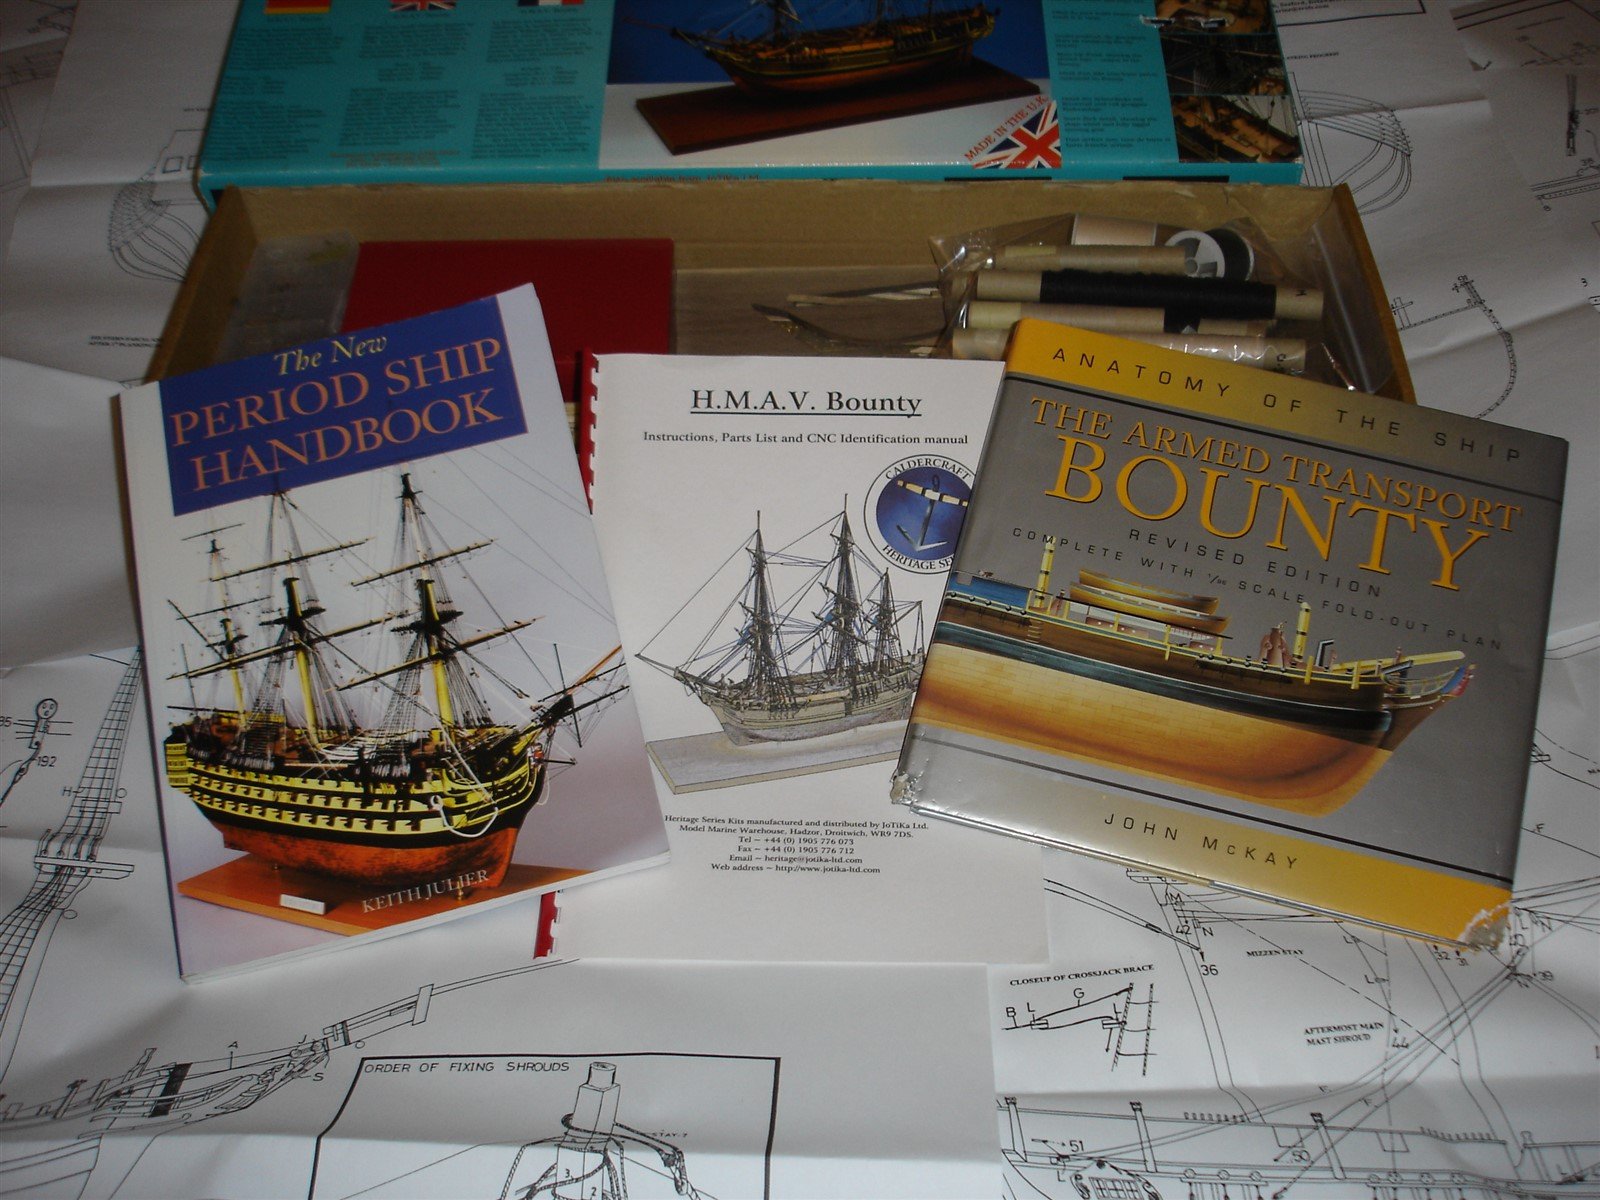
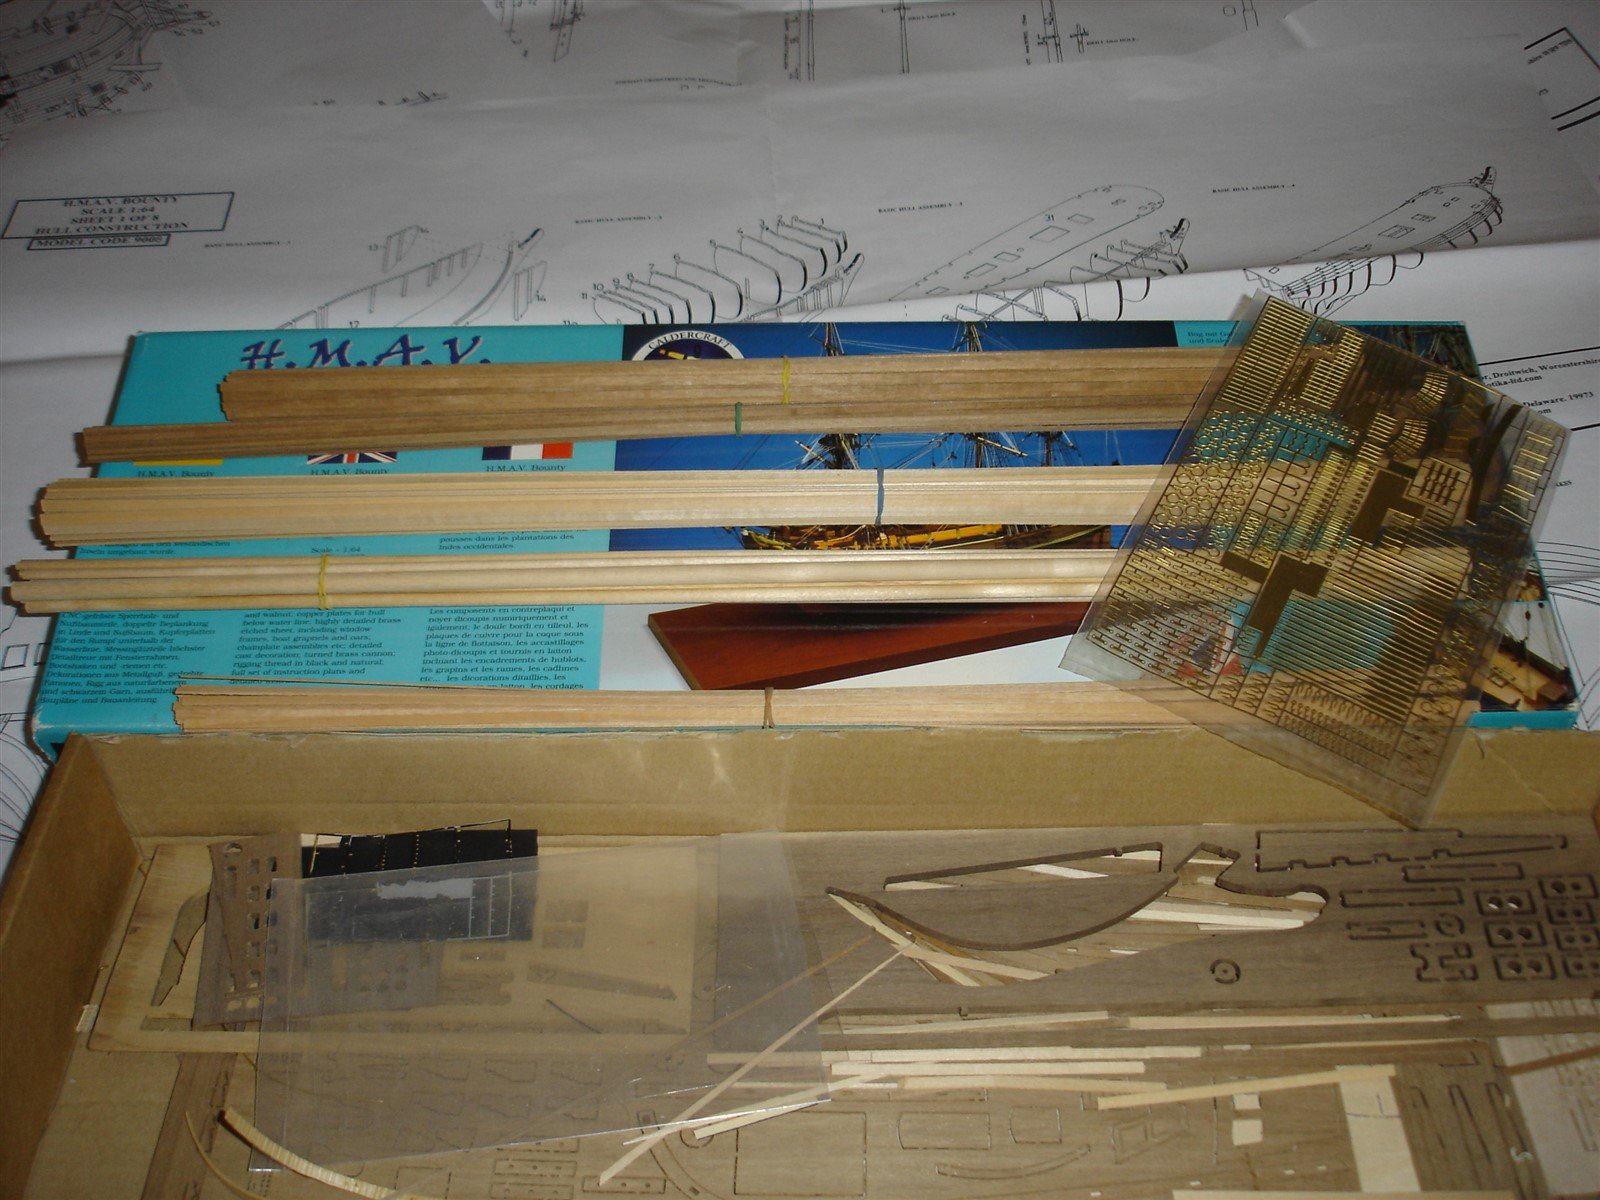
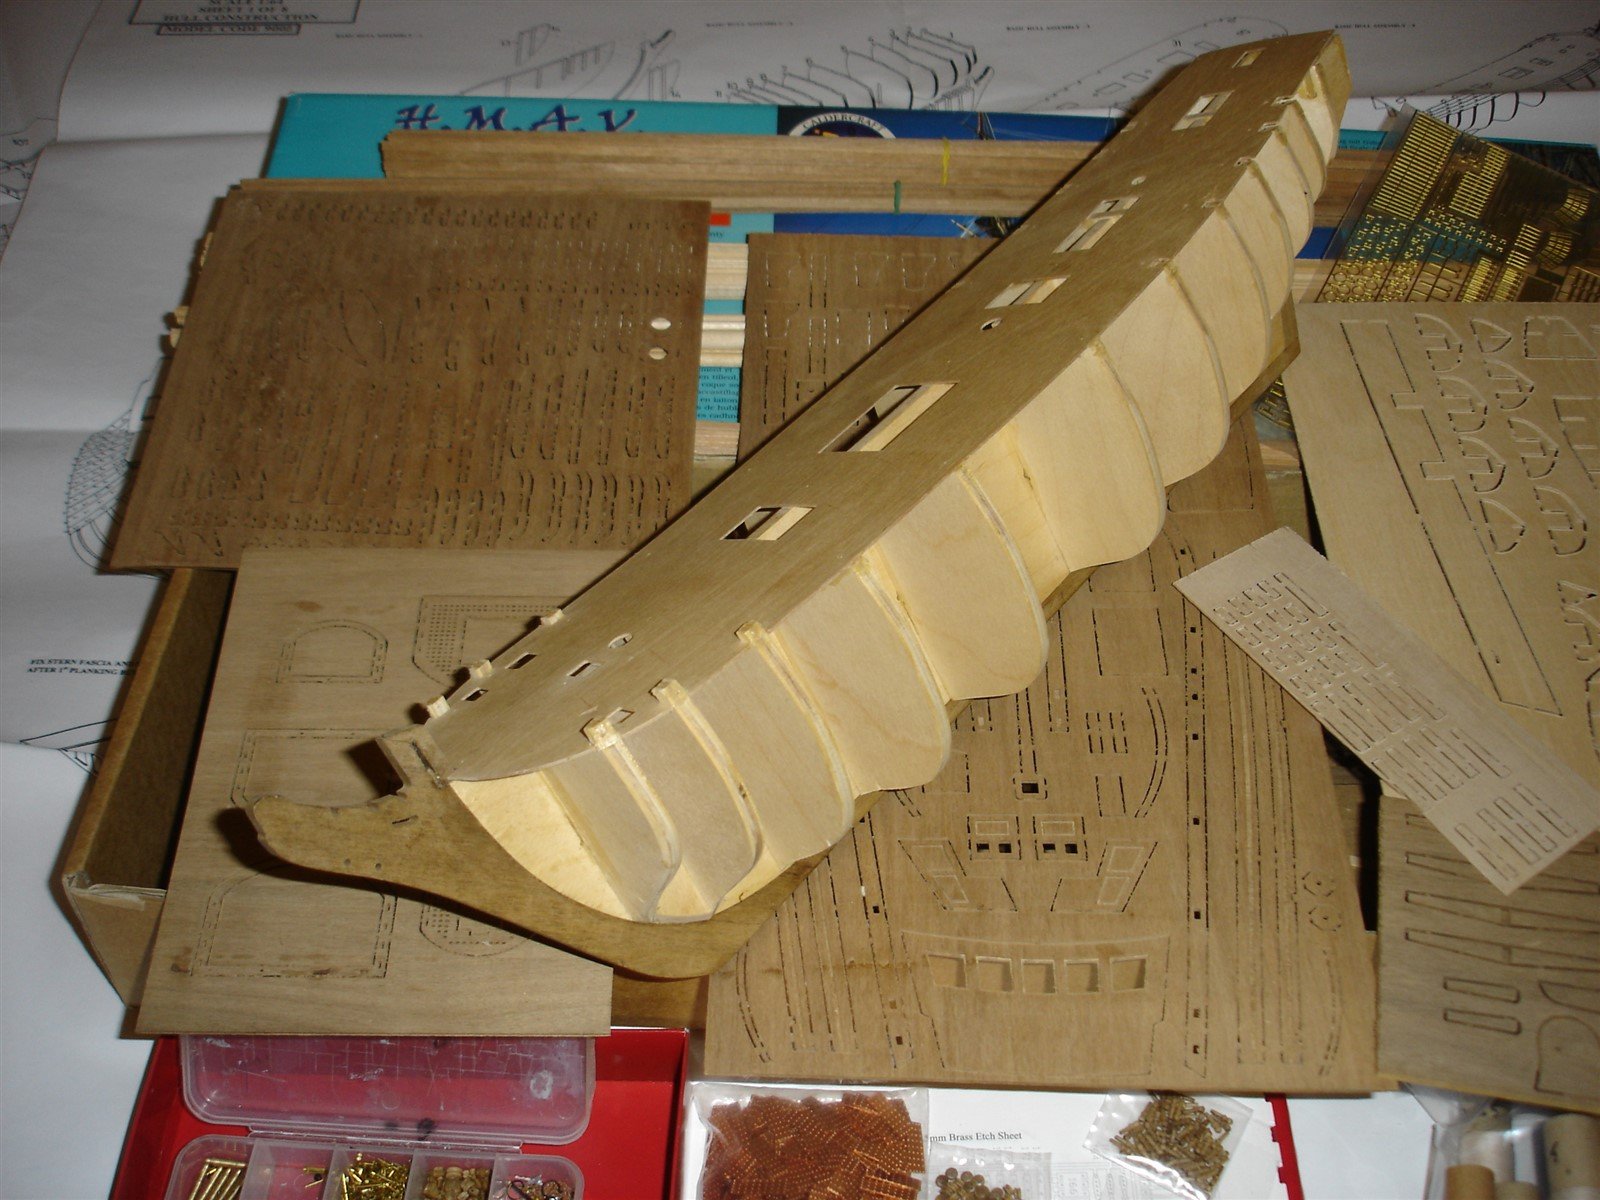
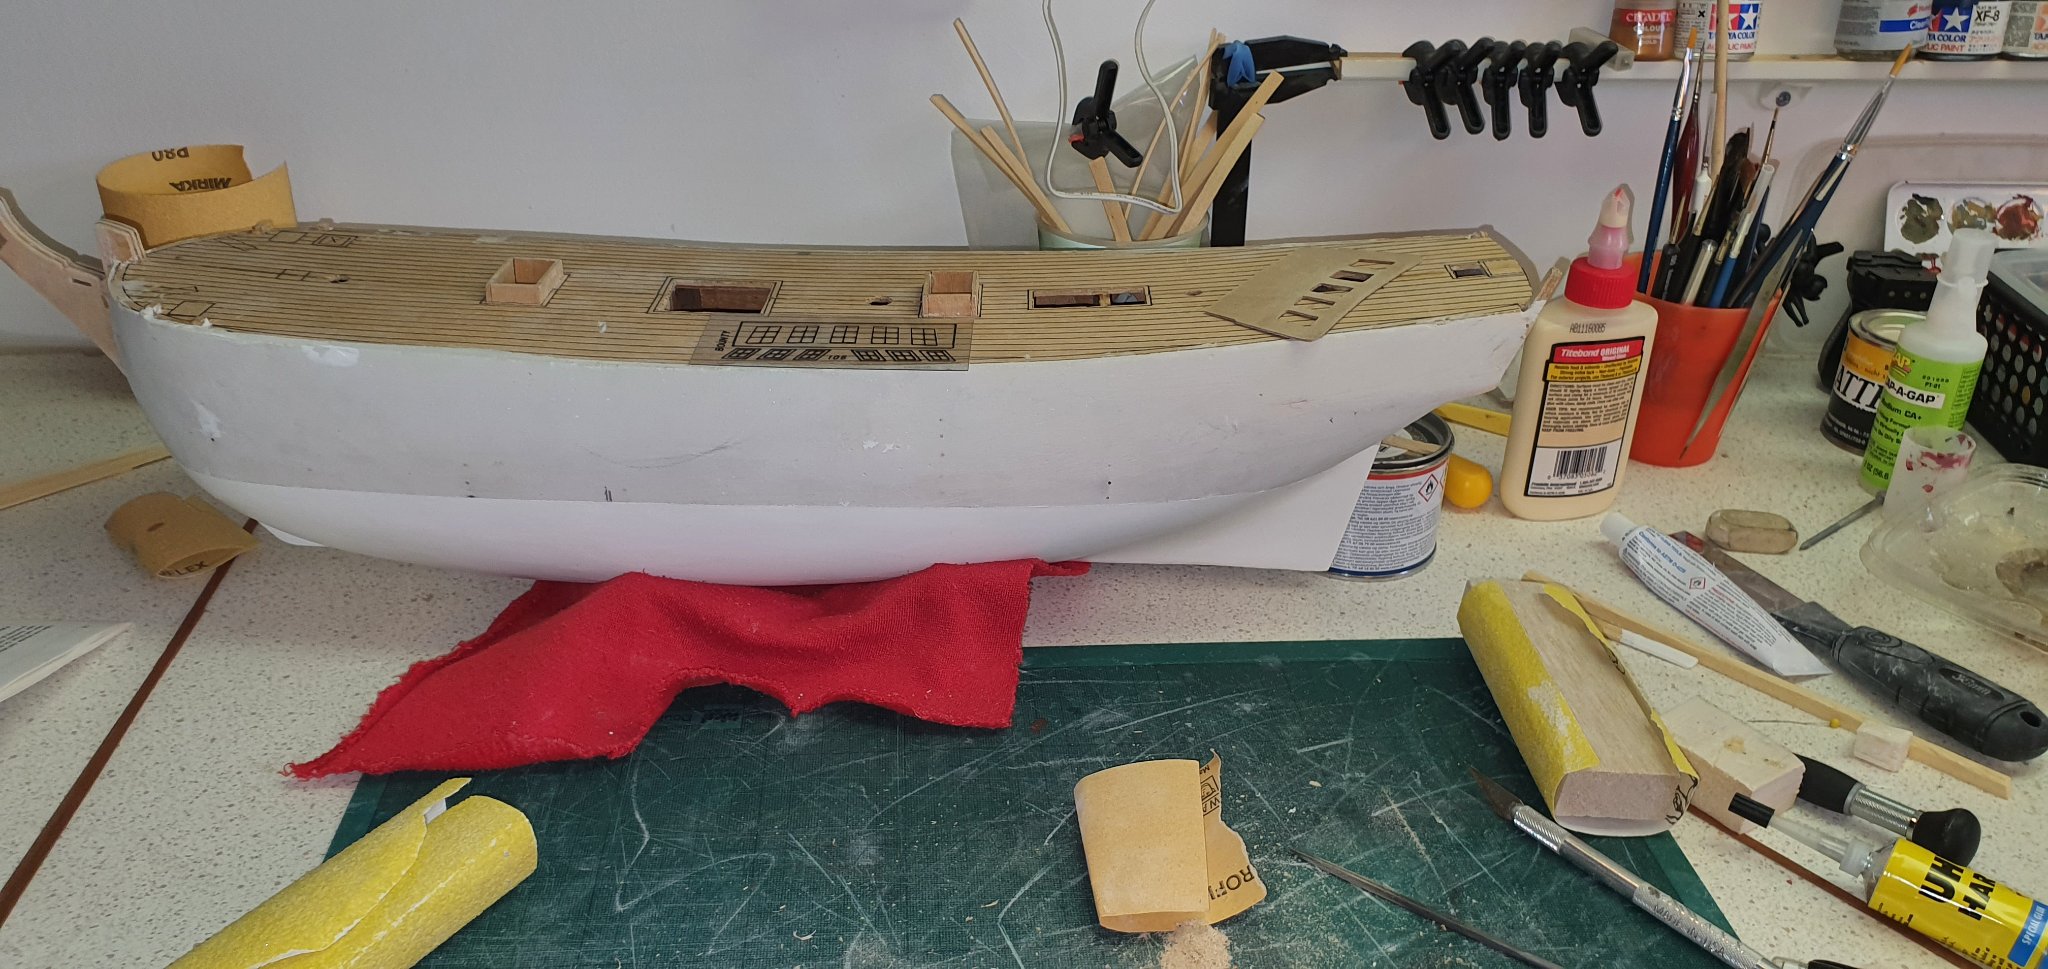
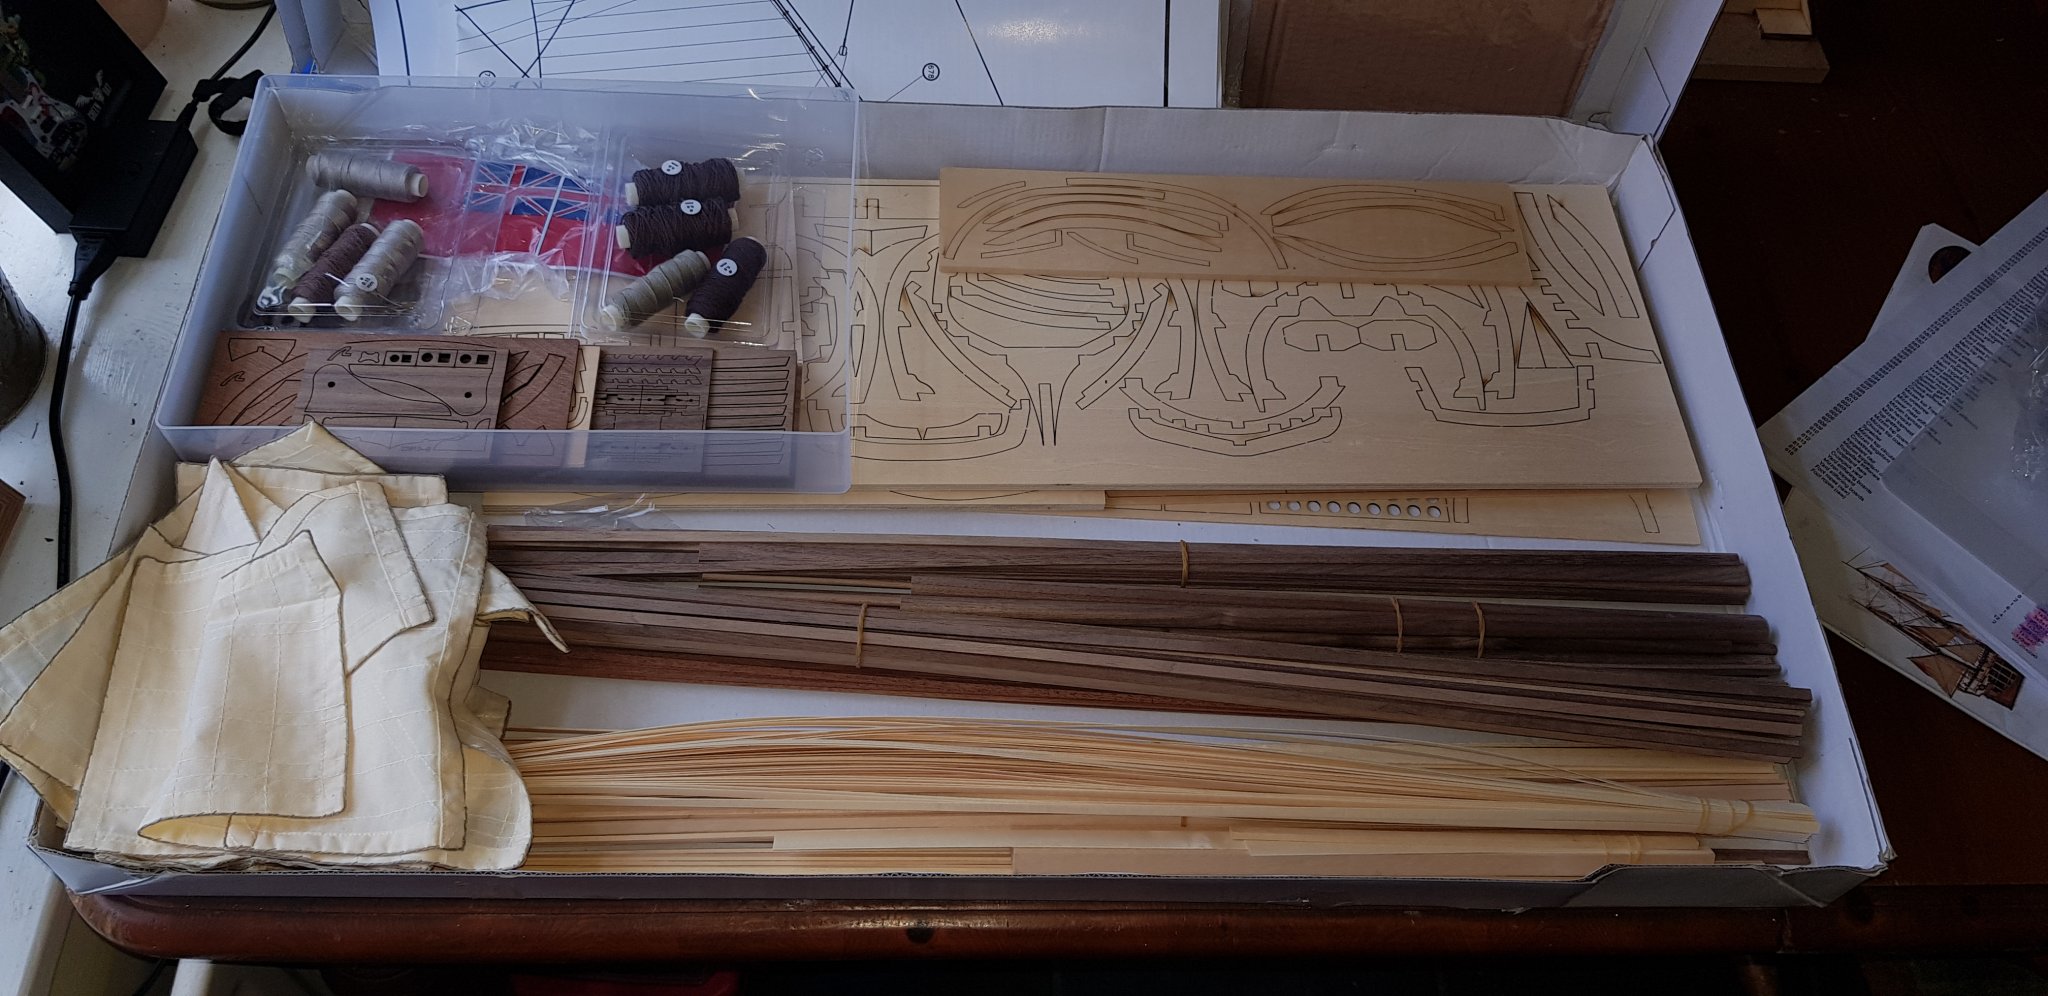
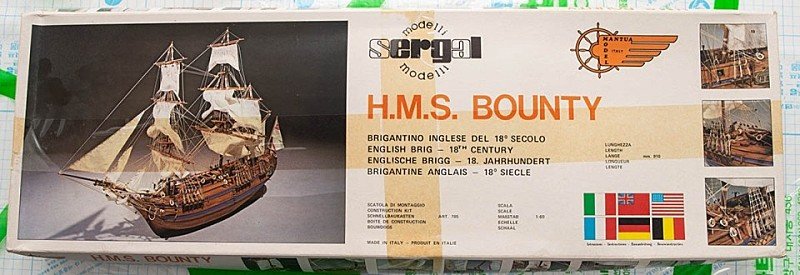
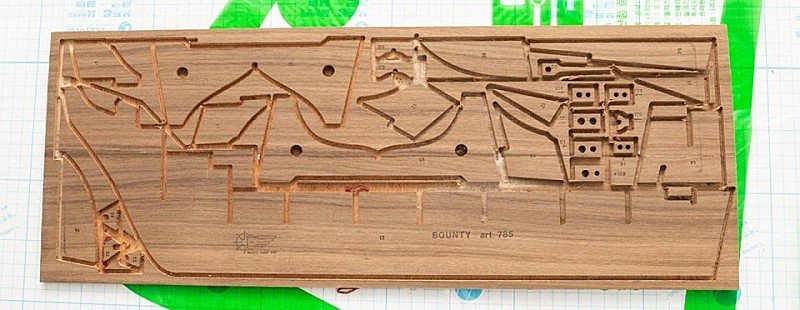
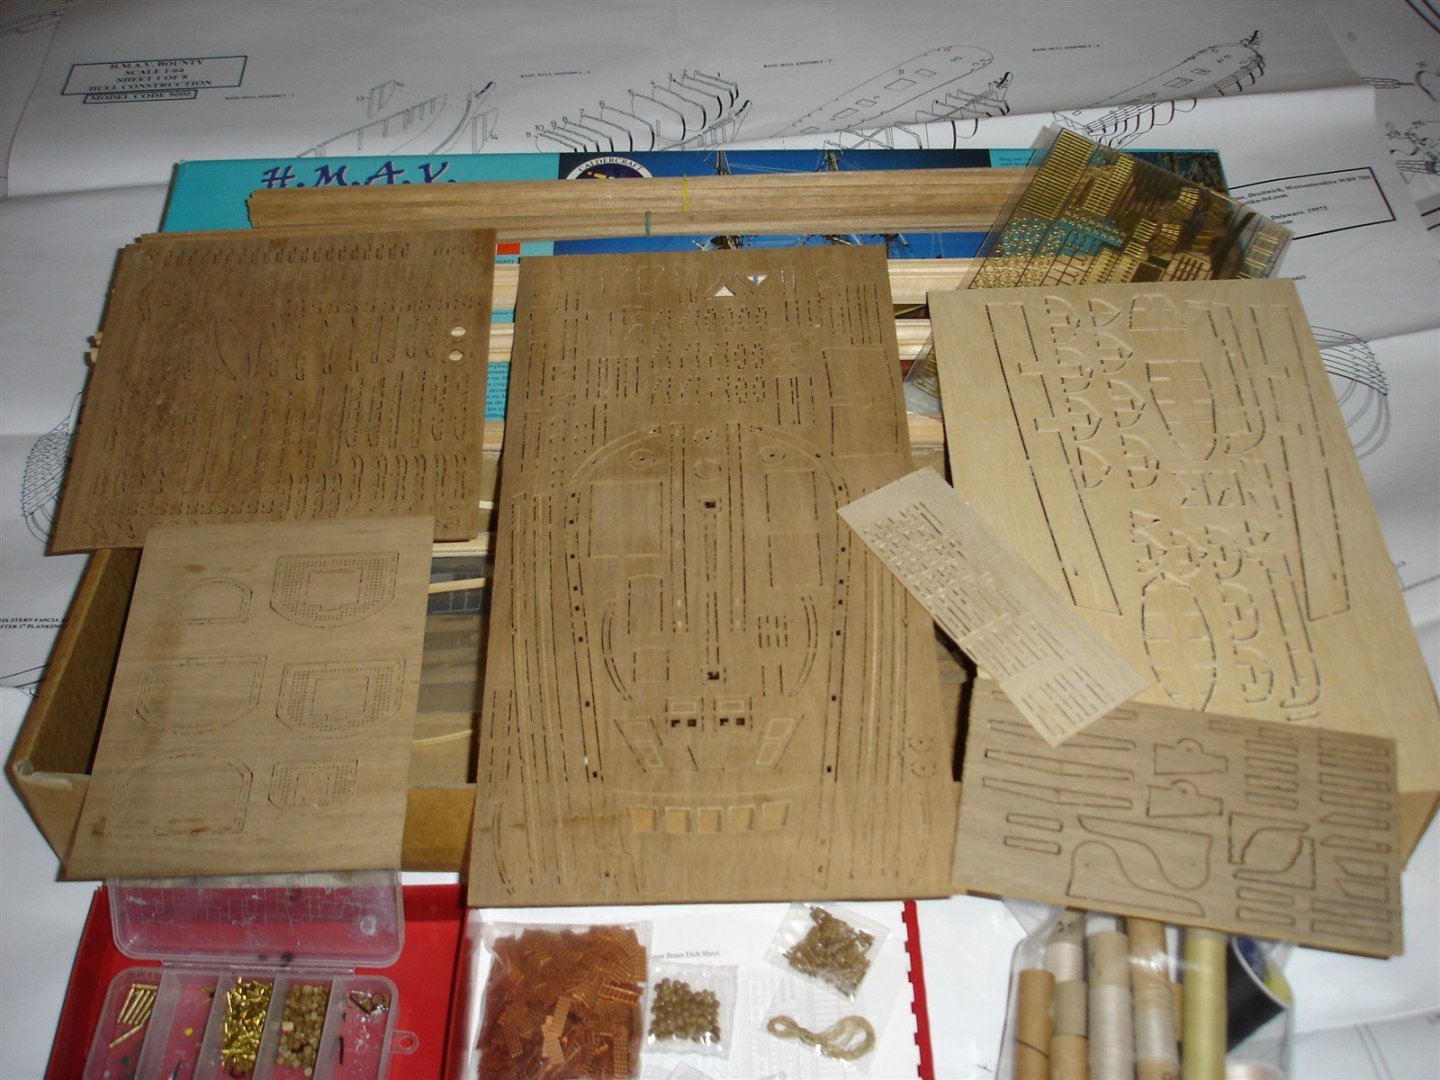
 Hi All, This is a relaunch of a build log after a “minor” pause of about 10 years! In 2010 flushed with the experience of building Calderscraft’s H.M.Cutter Sherbourne, I felt back then I could tackle something bigger and came across this kit on eBay, started by someone else and abandoned – and no I didn’t pause to think why! So Here we are in 2021 and I have dusted the old kit off and restarted it, making I think reasonable progress, but also relearning the problems and issues I had with the kit that caused me to lose heart in 2011. I have built one other model since, Caldercraft's H.M.S. Orestes (Mars) so I have learnt something along the way, but happily rediscovered MSW to help me this time! As there has been so many years in between I will just post a selection of the old photos I took back then, to give you a flavour of where I got to, then I will update with where I am now. So here is what I bought back in 2010 full of excitement!
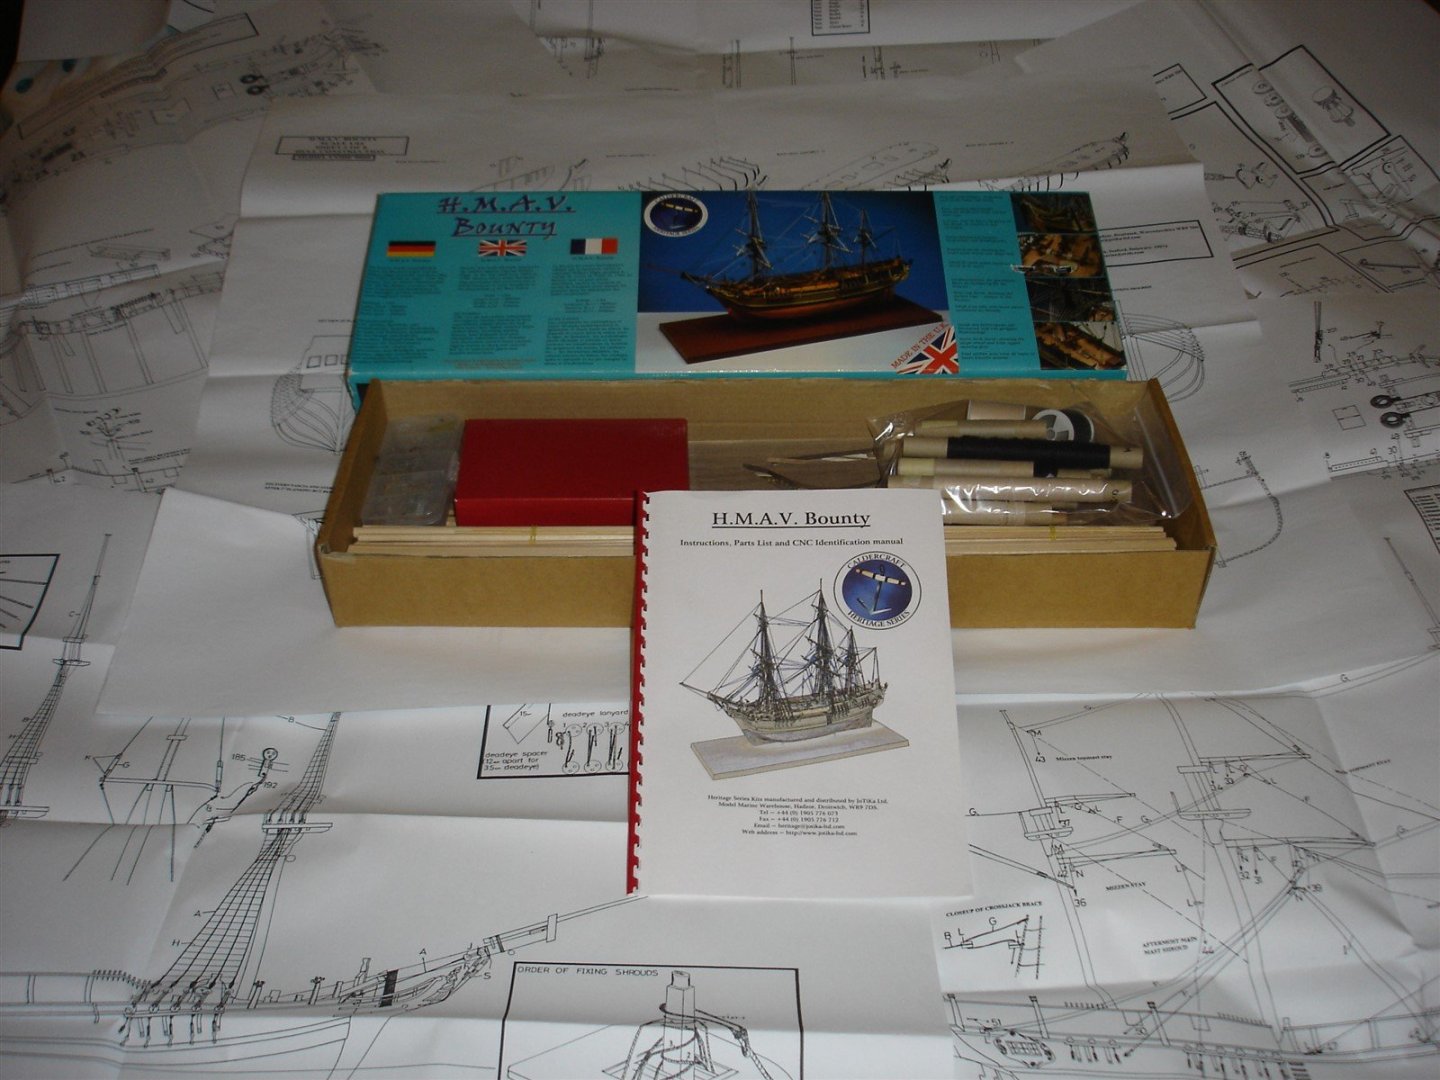


-
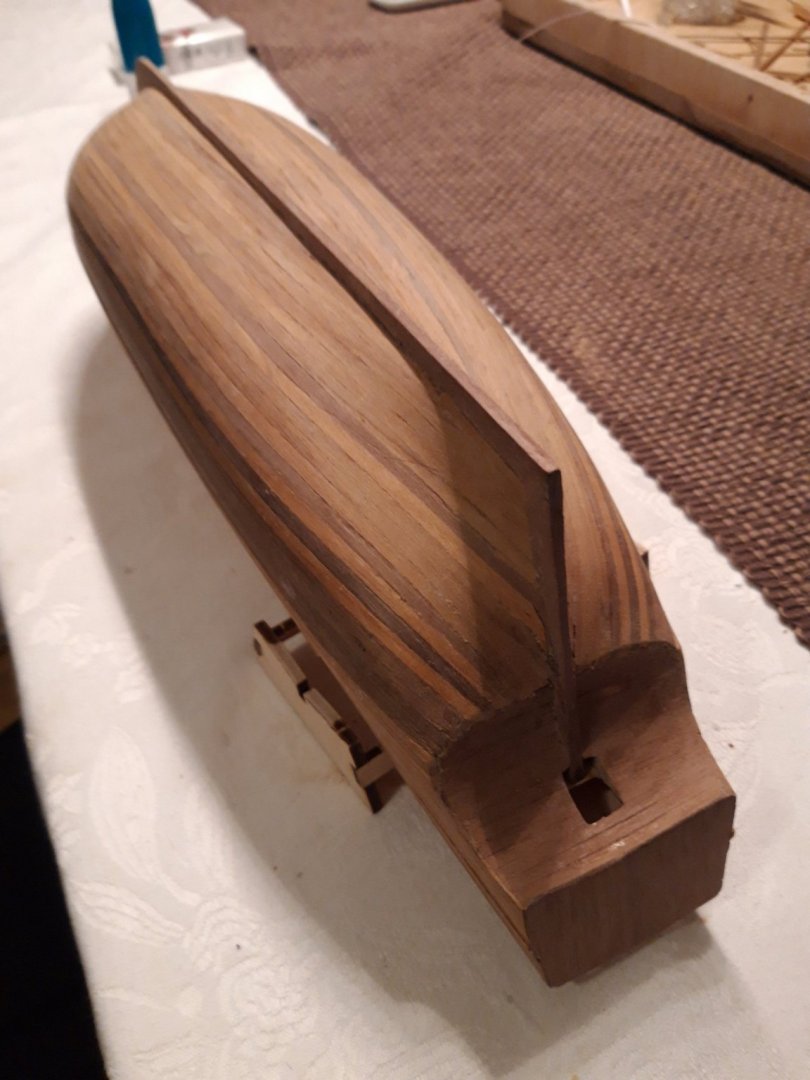
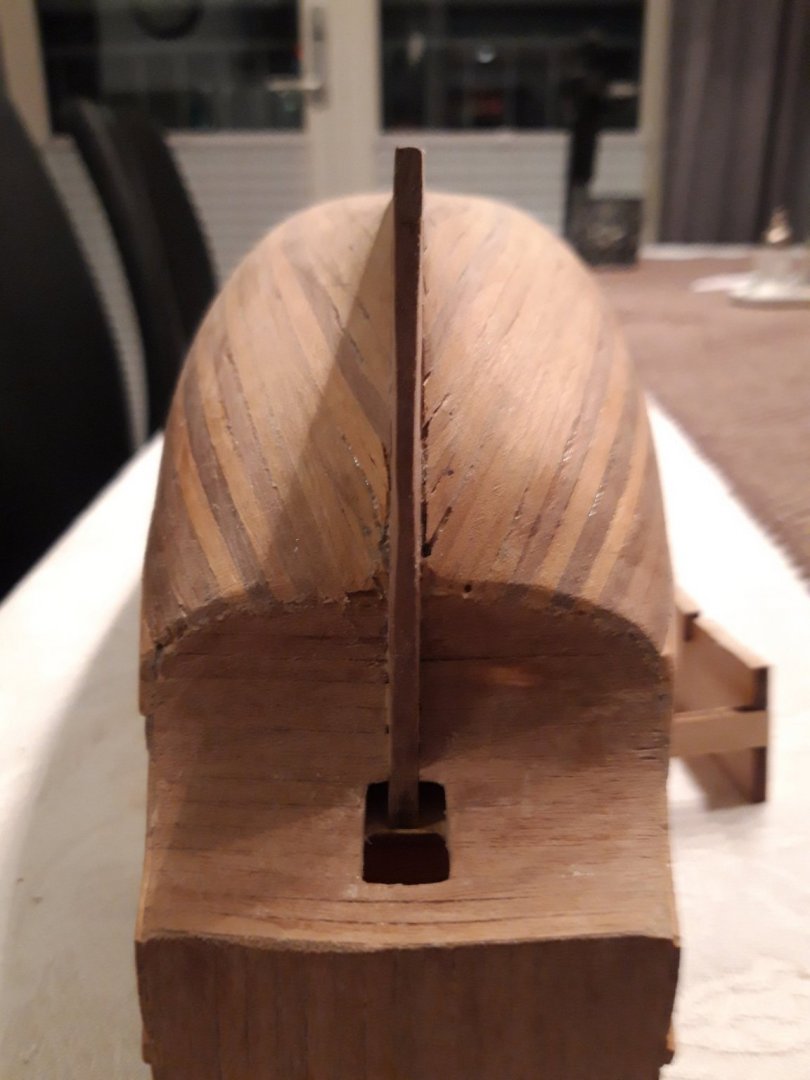
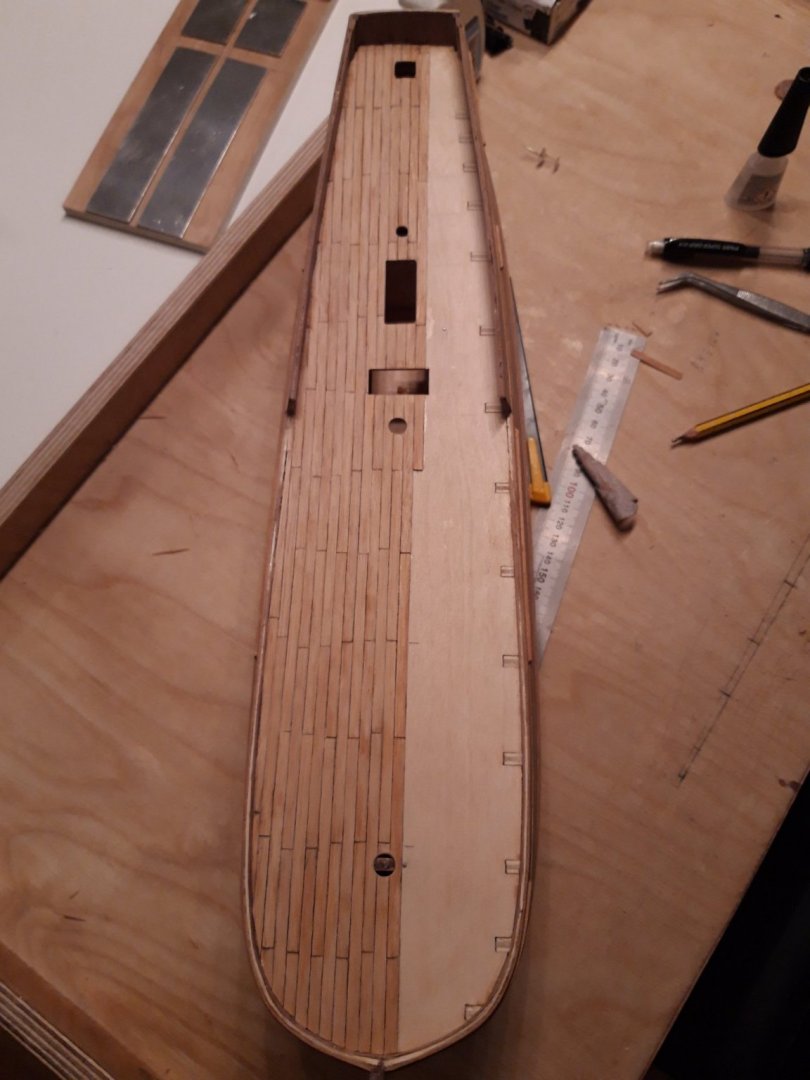
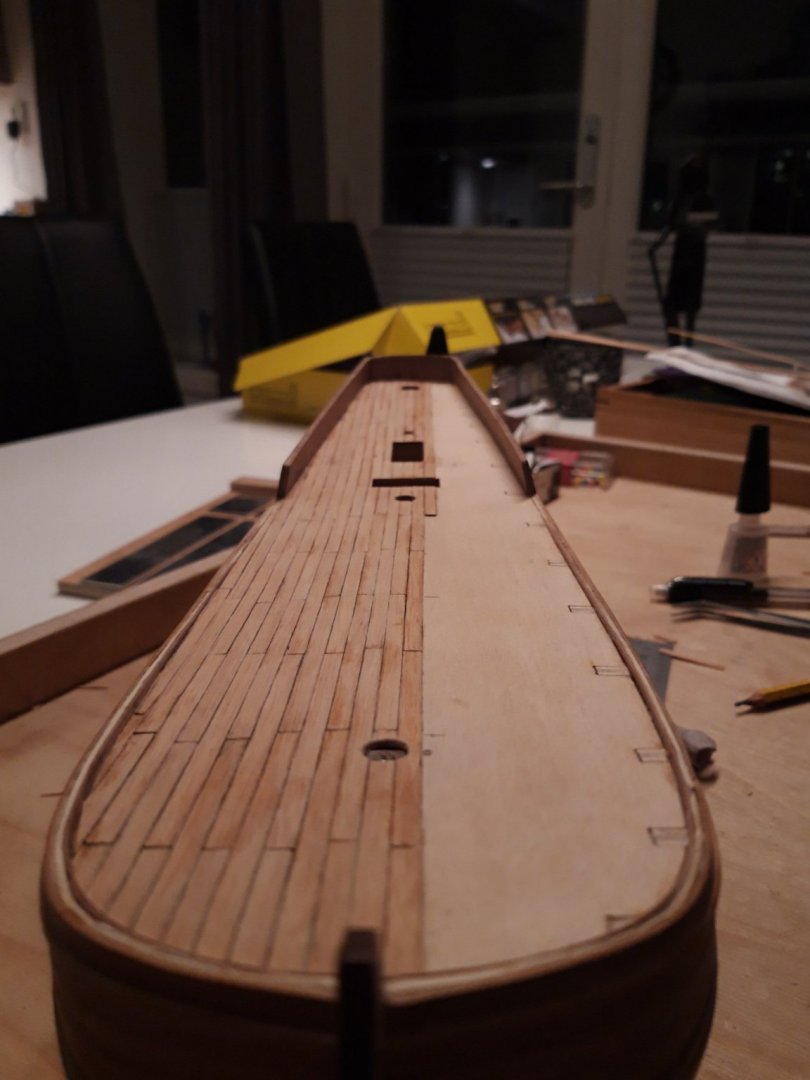
Hi All, I'm staring a log to show my progress and to get feed back. The model was bought approx. 25 years ago (getting to old for remembering details that far back) at a local bobby shop. I had some model experience before but only plastic, but it look cool and I had high expectations for doing the build in a ferally short time. But the reality came pretty fast. It turn out to be a hell of a lot bigger project that I thought. The instruction was very limited to say the least, only 11 pages with drawings and instruction (in 4 languages). It also turned out that several of the structure was bent. What I've should was return the model and get a beginner model. Well that did not happen. I started building the hull and planking and got frustrated and set it aside for 25 years. Know I'm 25 years older, gotten some more experience and more patience. And want to finish my ship and learn more about ship building. So this is status so far. And here you see one of my challenges, the frame is twisted. So I need to do some visual cheating but compansating on one side to make it look even. Right now I'm waiting for some more planking to finish the hull. I see from other logs that my drawing is quit different in many ways. So will do some more comparing to see if I can pick up some useful tips. I order the Masting and Rigging the Clipper Ship and Ocean Carrier and The Armed Transport Bounty (used, they are to expensive new) to help me out with getting through this build. That was before I came across this forum, where there is a ton of information and experienced people.


-
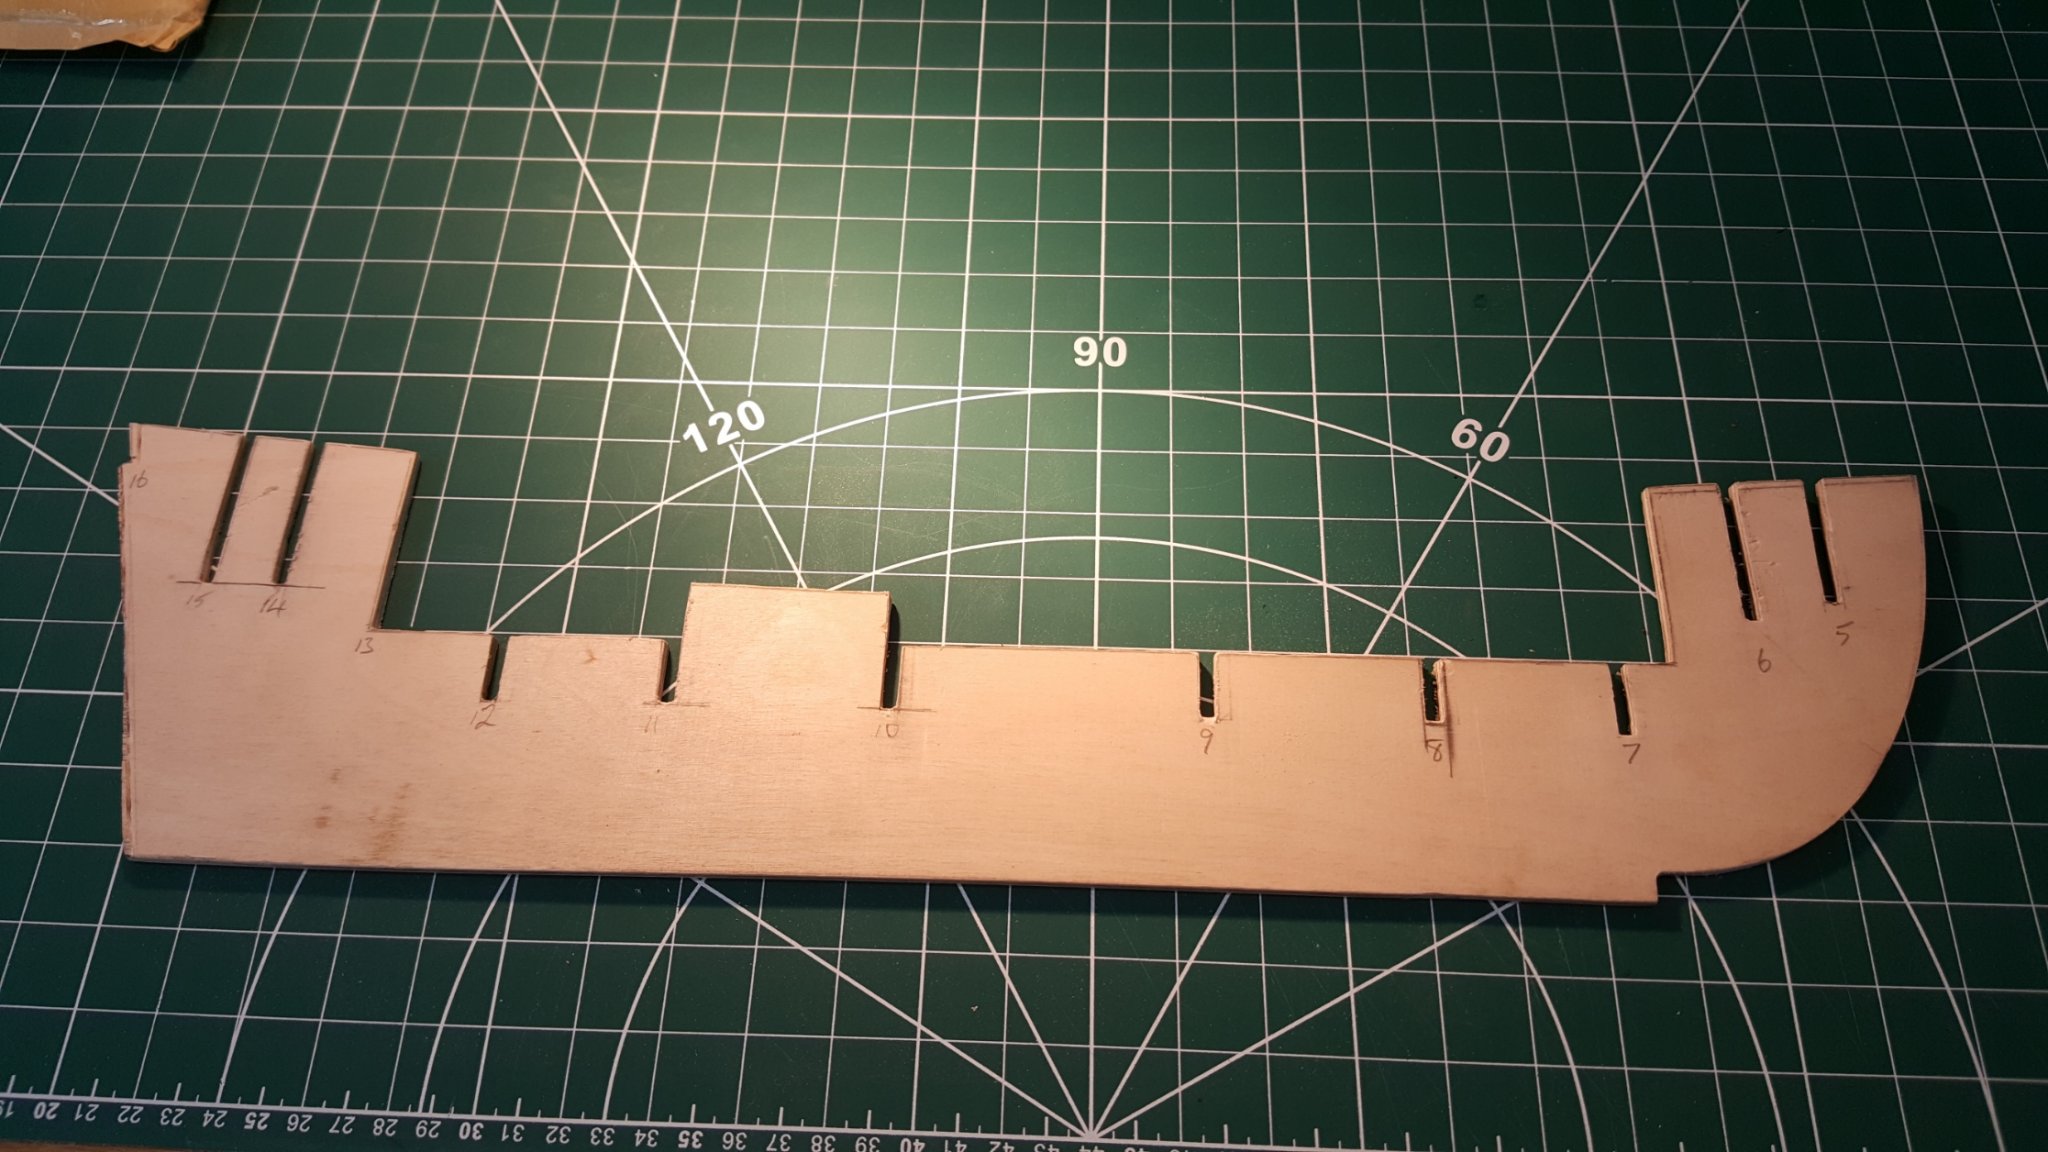
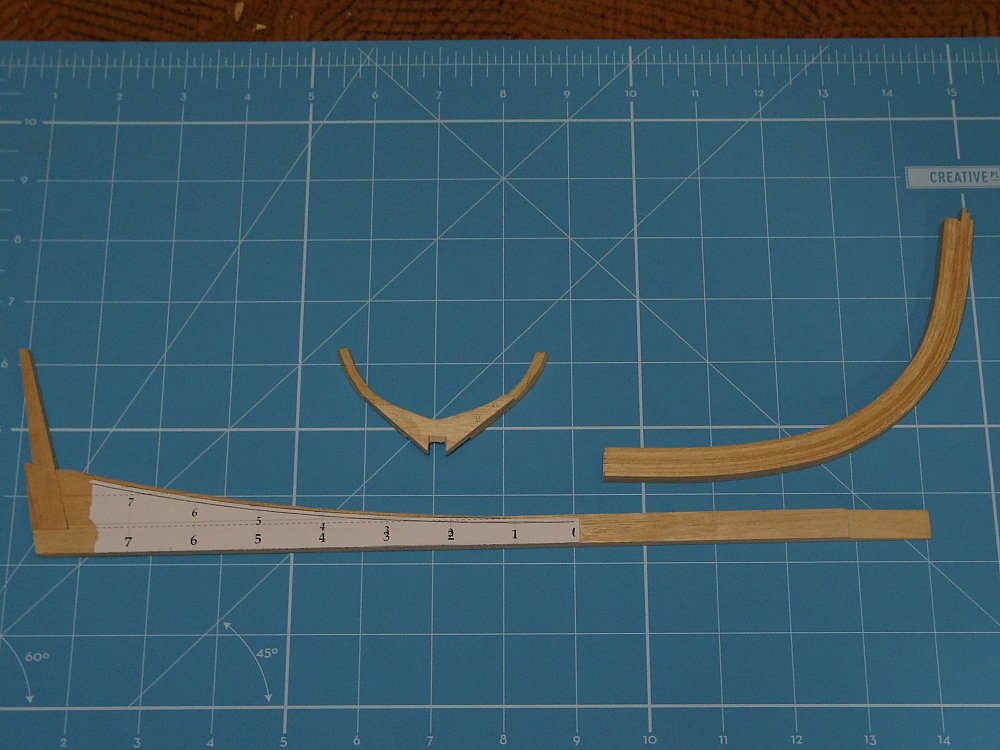
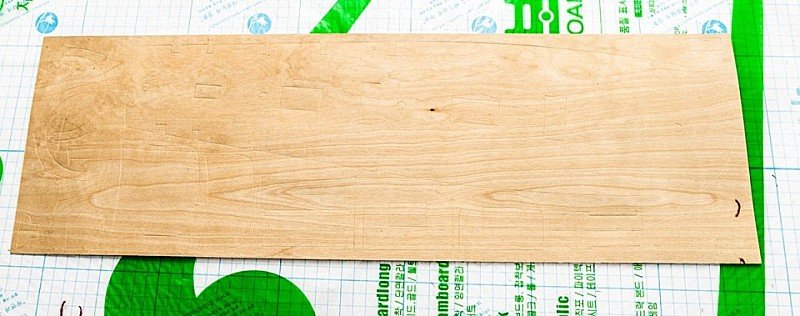
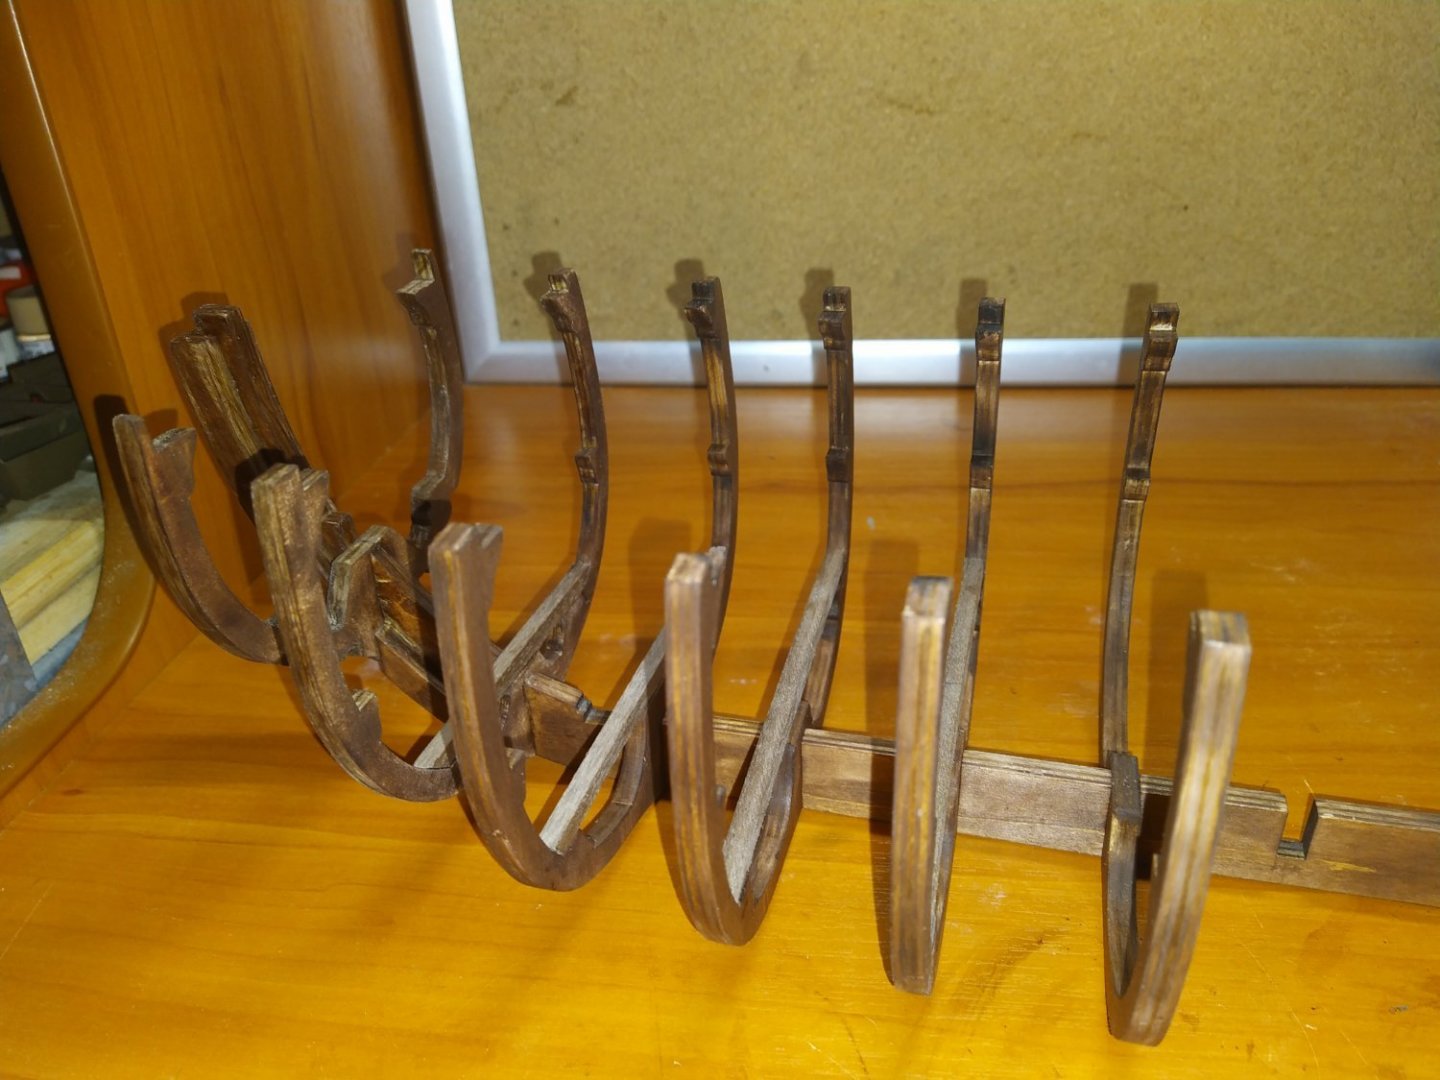
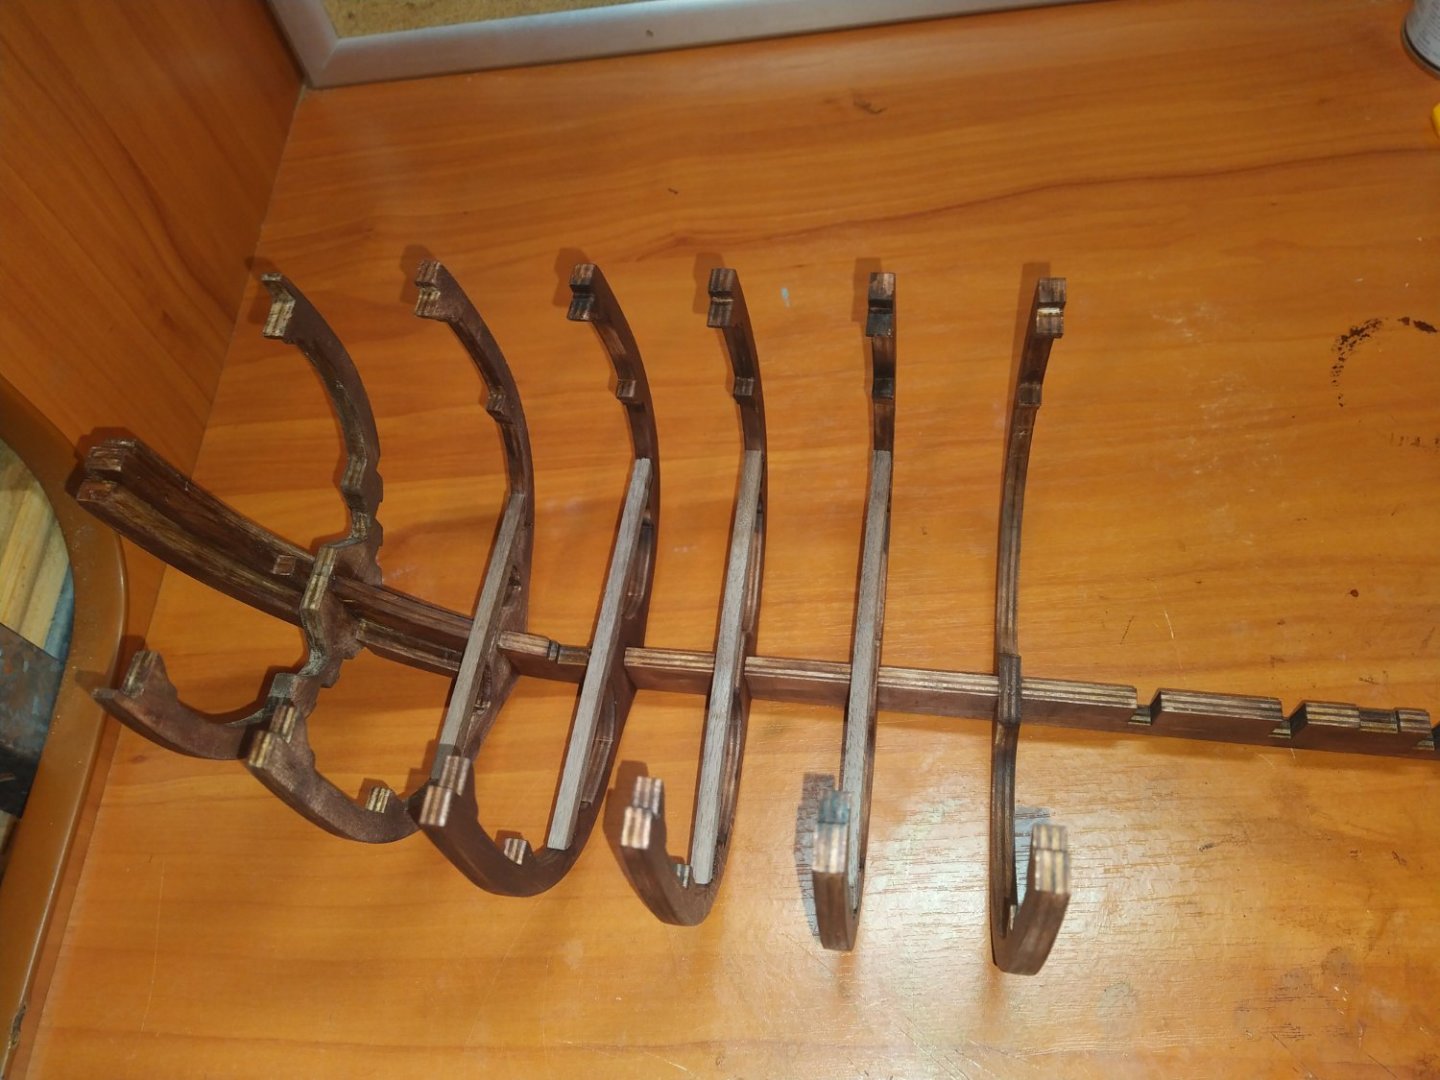
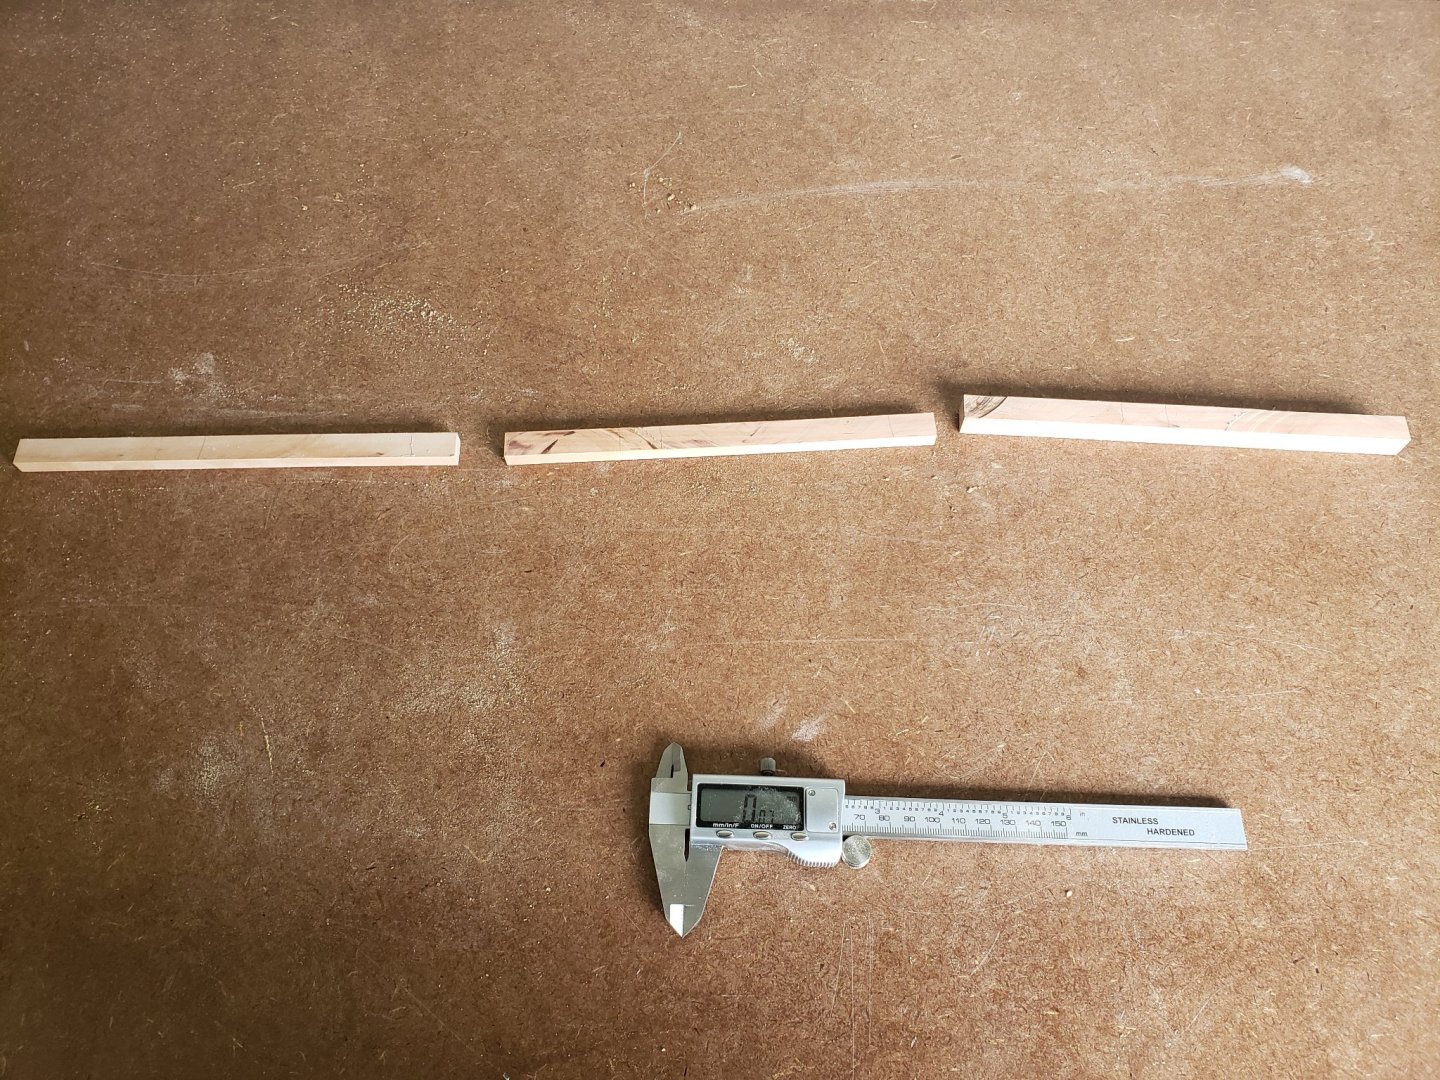
I spent a lot of time thinking about the measurements for the keel, but nothing really prepared me for the first rough cuts. These are going to be the keel.
-
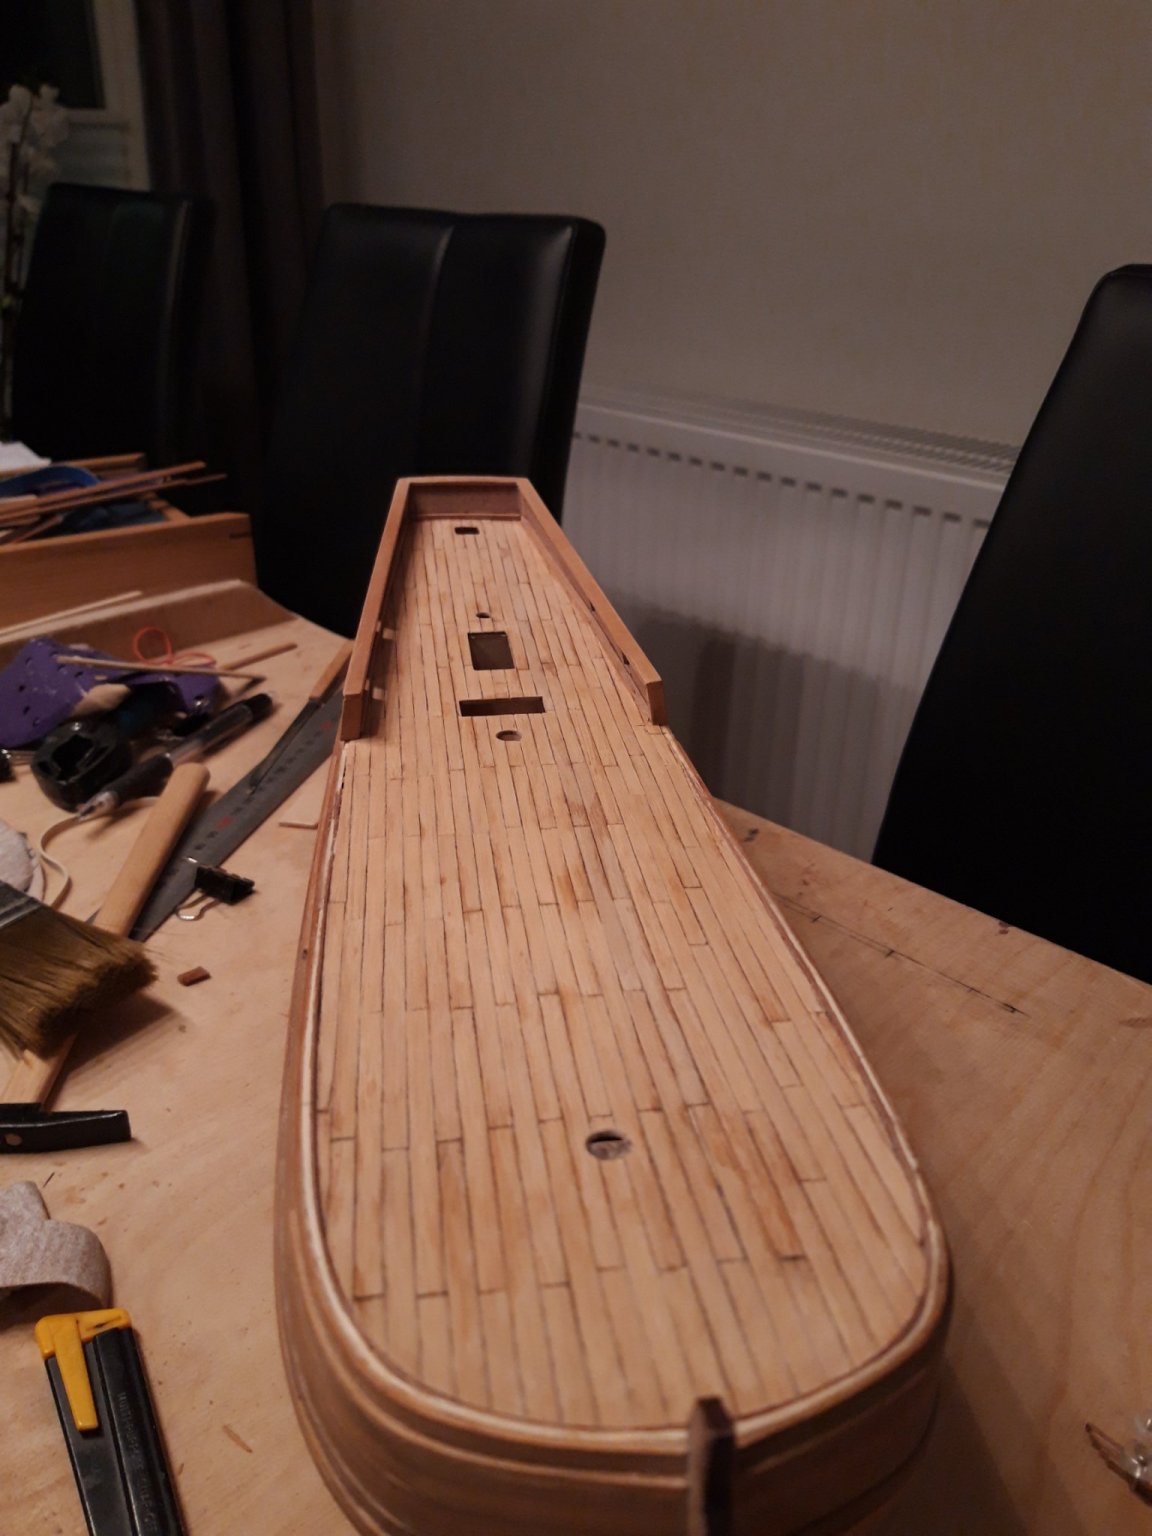
 Hello all. I am still relatively new to buillding models and have just completed my first model which was fairly straight forward. However I think I have really upped my game with this one hopefully I haven,t bit off more than I can chew. The reason I picked this one is that Amati have 17 videos on how to assemble on Youtube. I have checked that everything is in the box, although it only gives a list but not how many of each,however it all appears to be there. I have already come across a few issues which were explained in the first video mainly with assembly of the keel , frames, false deck support pieces and false deck. The only problem so far which has caused some thought which although pointed out in the video which was the hole in the false deck for the mizzen mast lines up with one of the bulkheads. Unfortunately the guy on the video does not mention a solution to this problem. Fortunately I believe i have found a way . I will try and post a couple of photos which show how I have done this. I am of coarse assuming that the hole in the deck is accurate.
 -
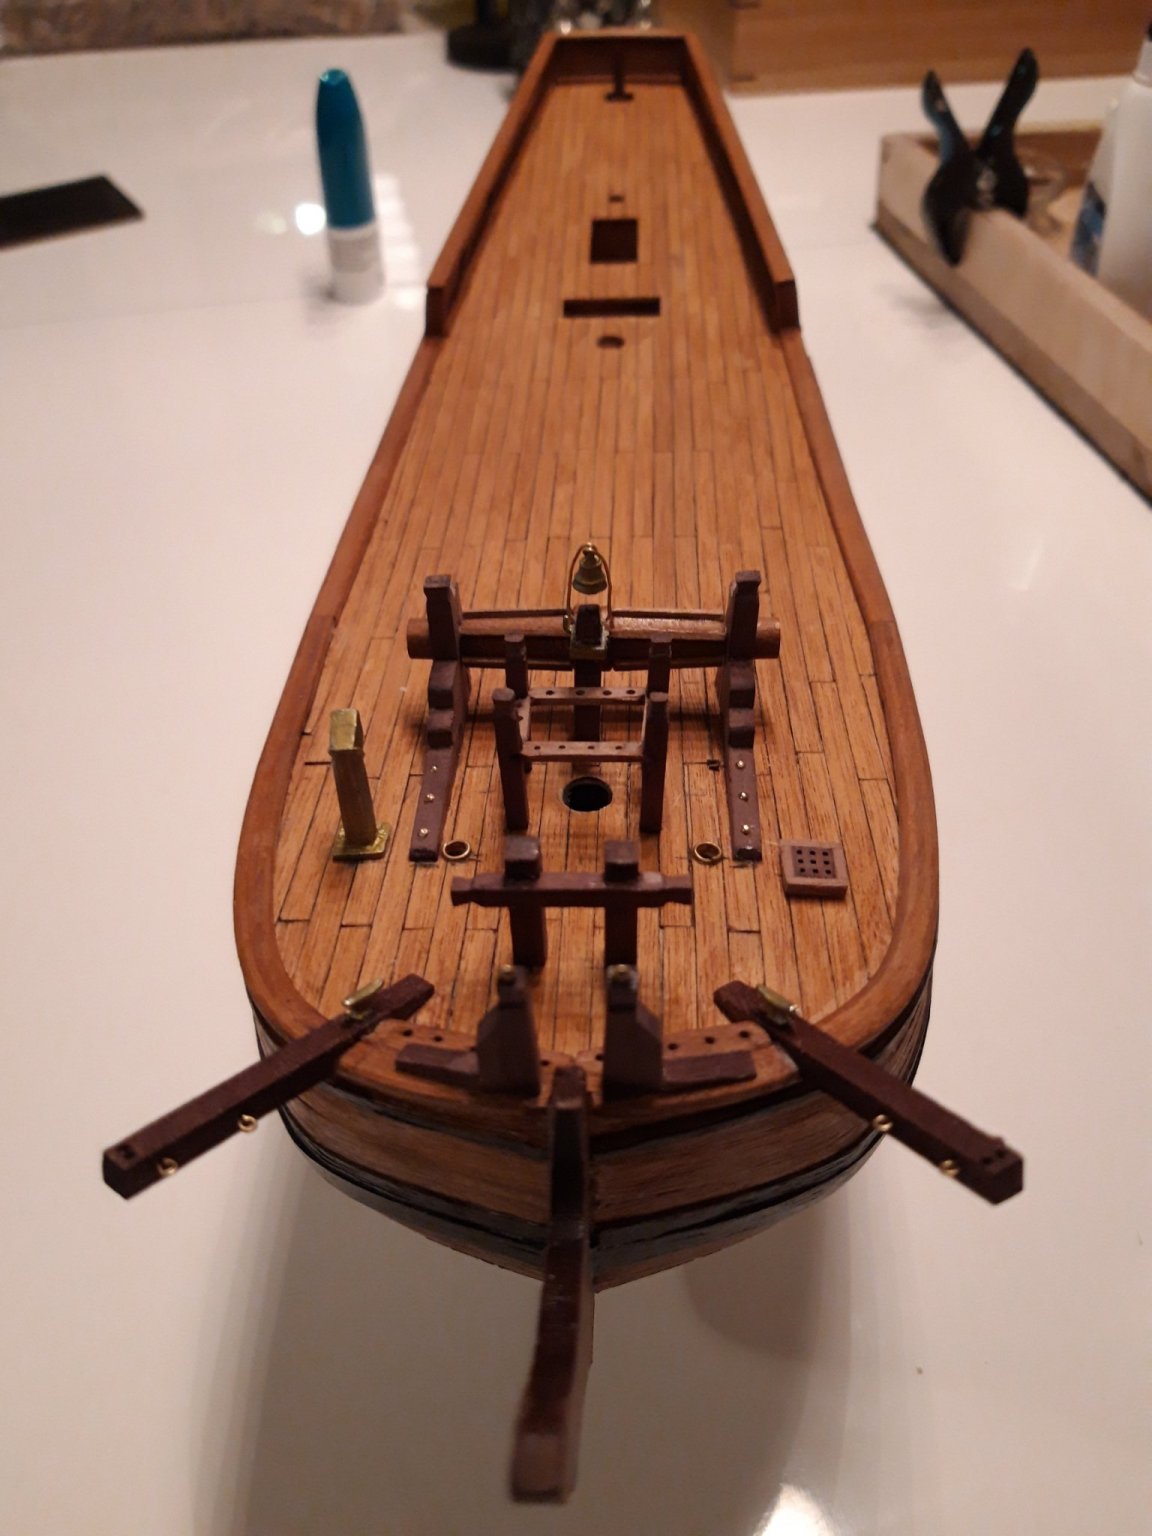
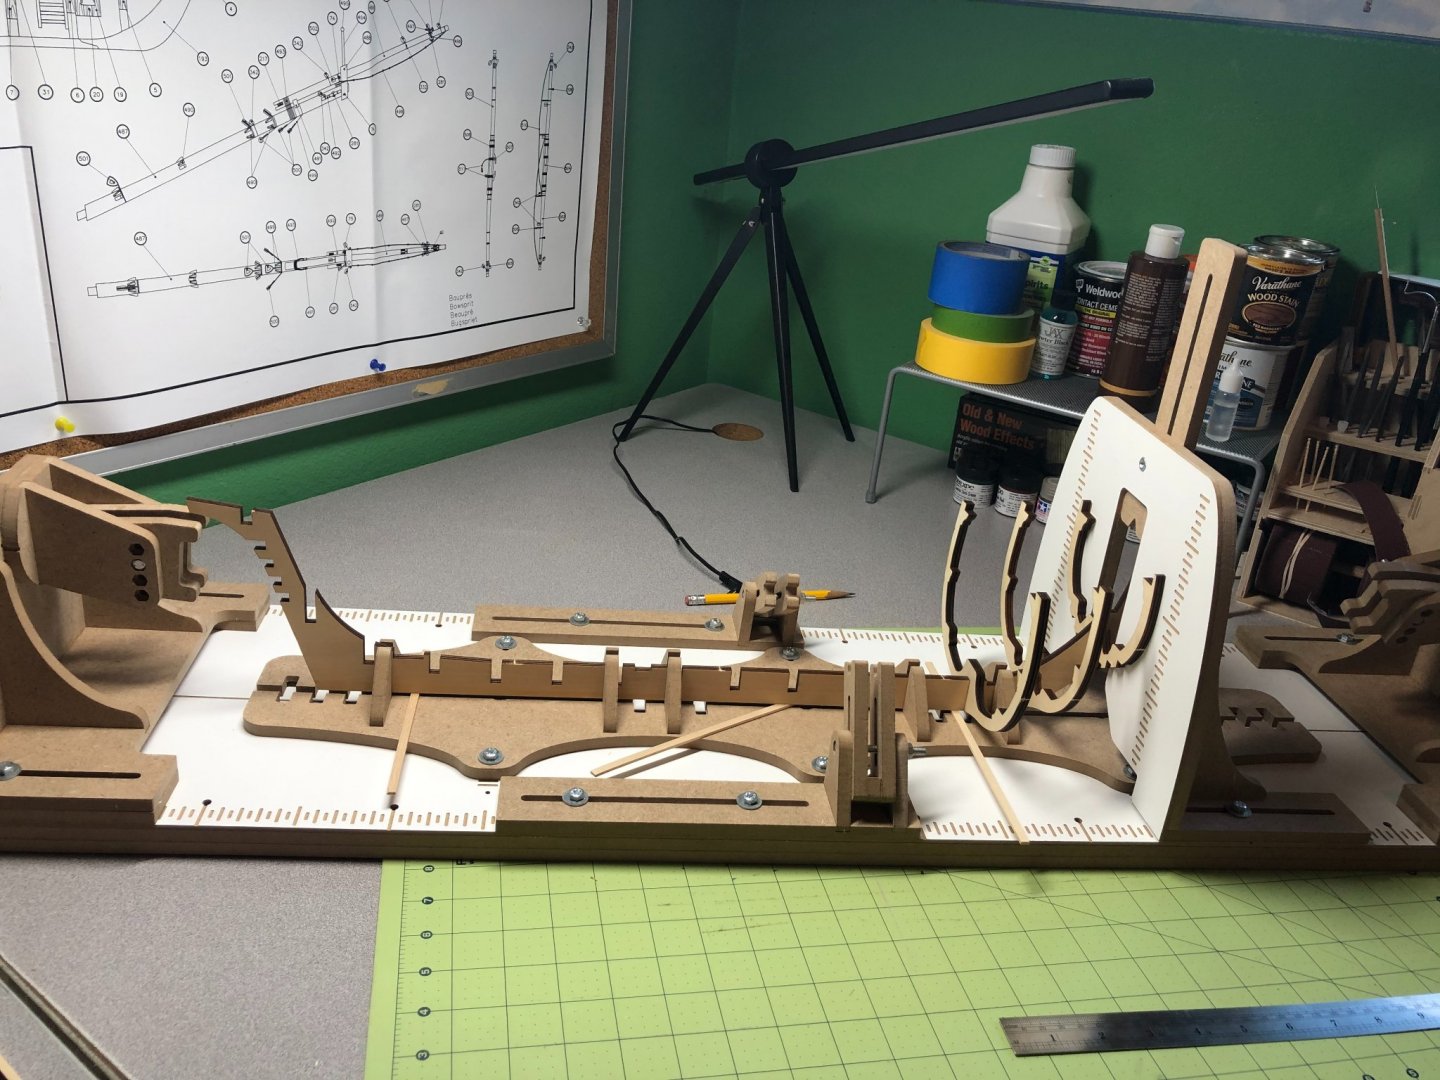
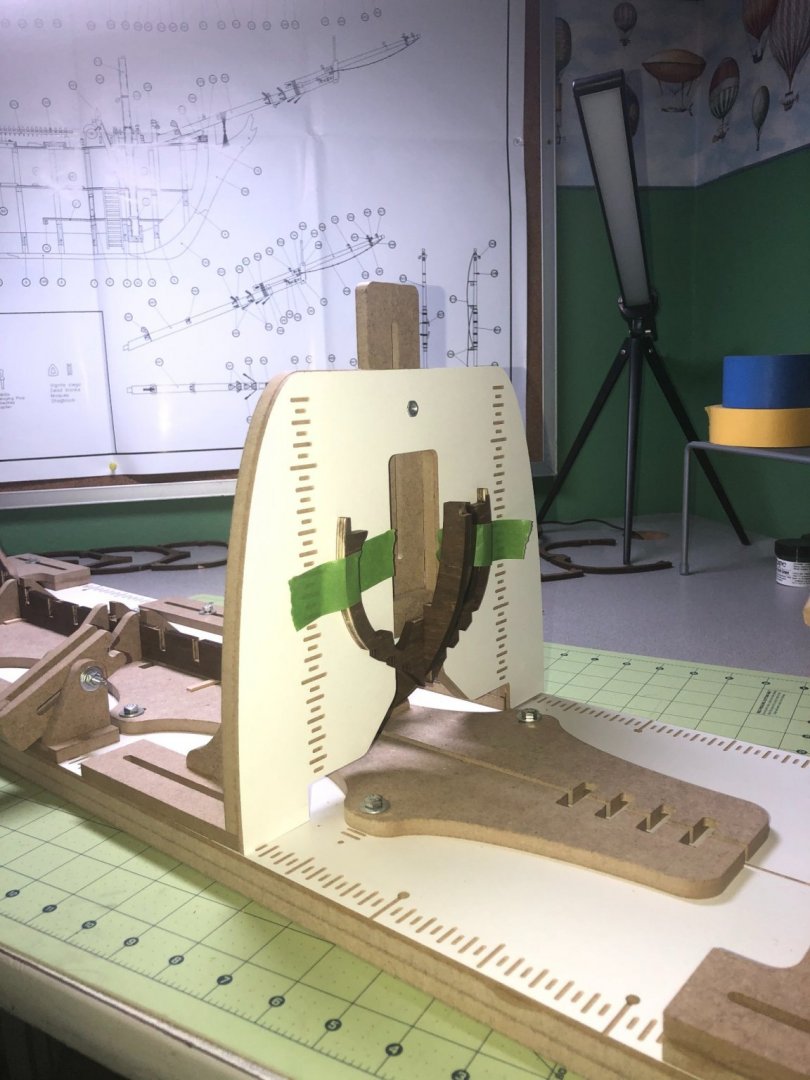
 I'll start by saying, I wasn't planning on doing a build log... There are a 15 logs for the same model on MSW already. However, at last check, only one was to completion. The other logs offer a lot of help and information but only as far as they go! So, even though I started the model 3 months ago, I did take pictures along the way and any details I may have left out can easily be found on the other logs. I pledge to keep this log running to the models completion, however long that takes. This is my 4th model and I continue to learn new techniques and ideas. I think that will never stop. There are so many masters on this forum! I hope, someday, to be as capable as them. I am attempting to keep this model as historically accurate as I can based on the plans and the book "The anatomy of a ship : The armed transport Bounty". Additionally, I will be aging or weathering the ship as I build it to give it that "realistic" look. This is the first time I've tried this method and as you'll see it has been challenging but also a lot of fun! Before I start, I'd like to thank several builders that have inspired and unknowingly helped me to this point. Many are still on my favorites list and all have build logs that you may want to reference too: Captain Al Cobr Grendel Rcmdvr Thomaslambo Tim Moore Trig There are probably a couple more that I missed... Okay, lets get started! I didn't bother taking pictures of the box, unpacking and indexing the parts. I'm sure there are plenty of those out there! I found the contents to be of very good quality and I was not missing any parts or components. The scale drawings and picture book are very detailed. The instruction book is probably a bit sparse if you are new to modeling. The picture book helps fill in some of the gaps but frankly, without some of the build logs, it would be very difficult in places. The first few steps are pretty straight forward: 1. Cut out the keel and frames 2. Sand the little tags off and remove the charred layer for better glue adhesion. 3. I chose to stain the frames and keel with a walnut stain, taking care to keep stain away from the areas to be glues. It took two coats to get to the color I wanted. The picture below was taken with just one coat. I purchased (prior to starting this model) a model ship building slip: It has been a great tool for holding the model and I expect to use it throughout the build. Look at the above log for more details... worth every penny! It is extremely important that the keel is kept straight and that each frame is installed plumb and level to the keel. This CANNOT BE STRESSED ENOUGH!! If any of these are off, you'll struggle with it throughout the build. A word of caution... Make sure the table or bench is level too... If it isn't, make note of the difference and ensure that the identical difference is transferred to your model as you build it. As you can see in the pictures above the building slip has an attachment to help keep the frames at 90 degrees to the keel and the frames were leveled using a small level resting on the top of the frames before gluing and taping into place. Each frame was allowed to dry several hours before the next frames was added. More to come later today or tomorrow.
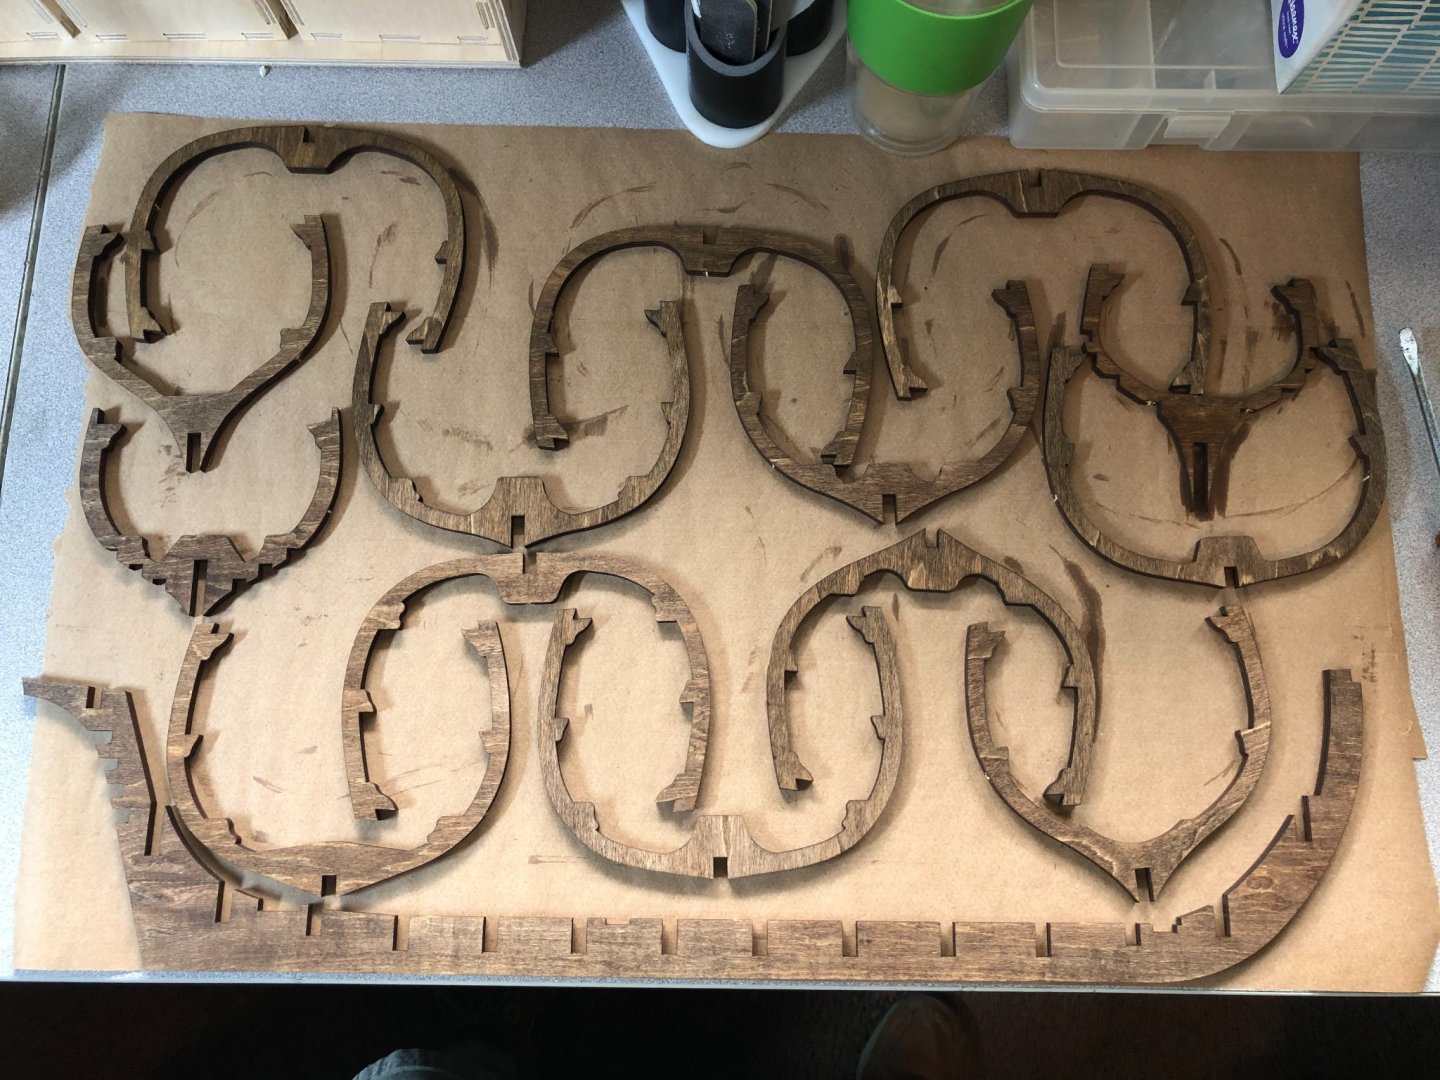
-
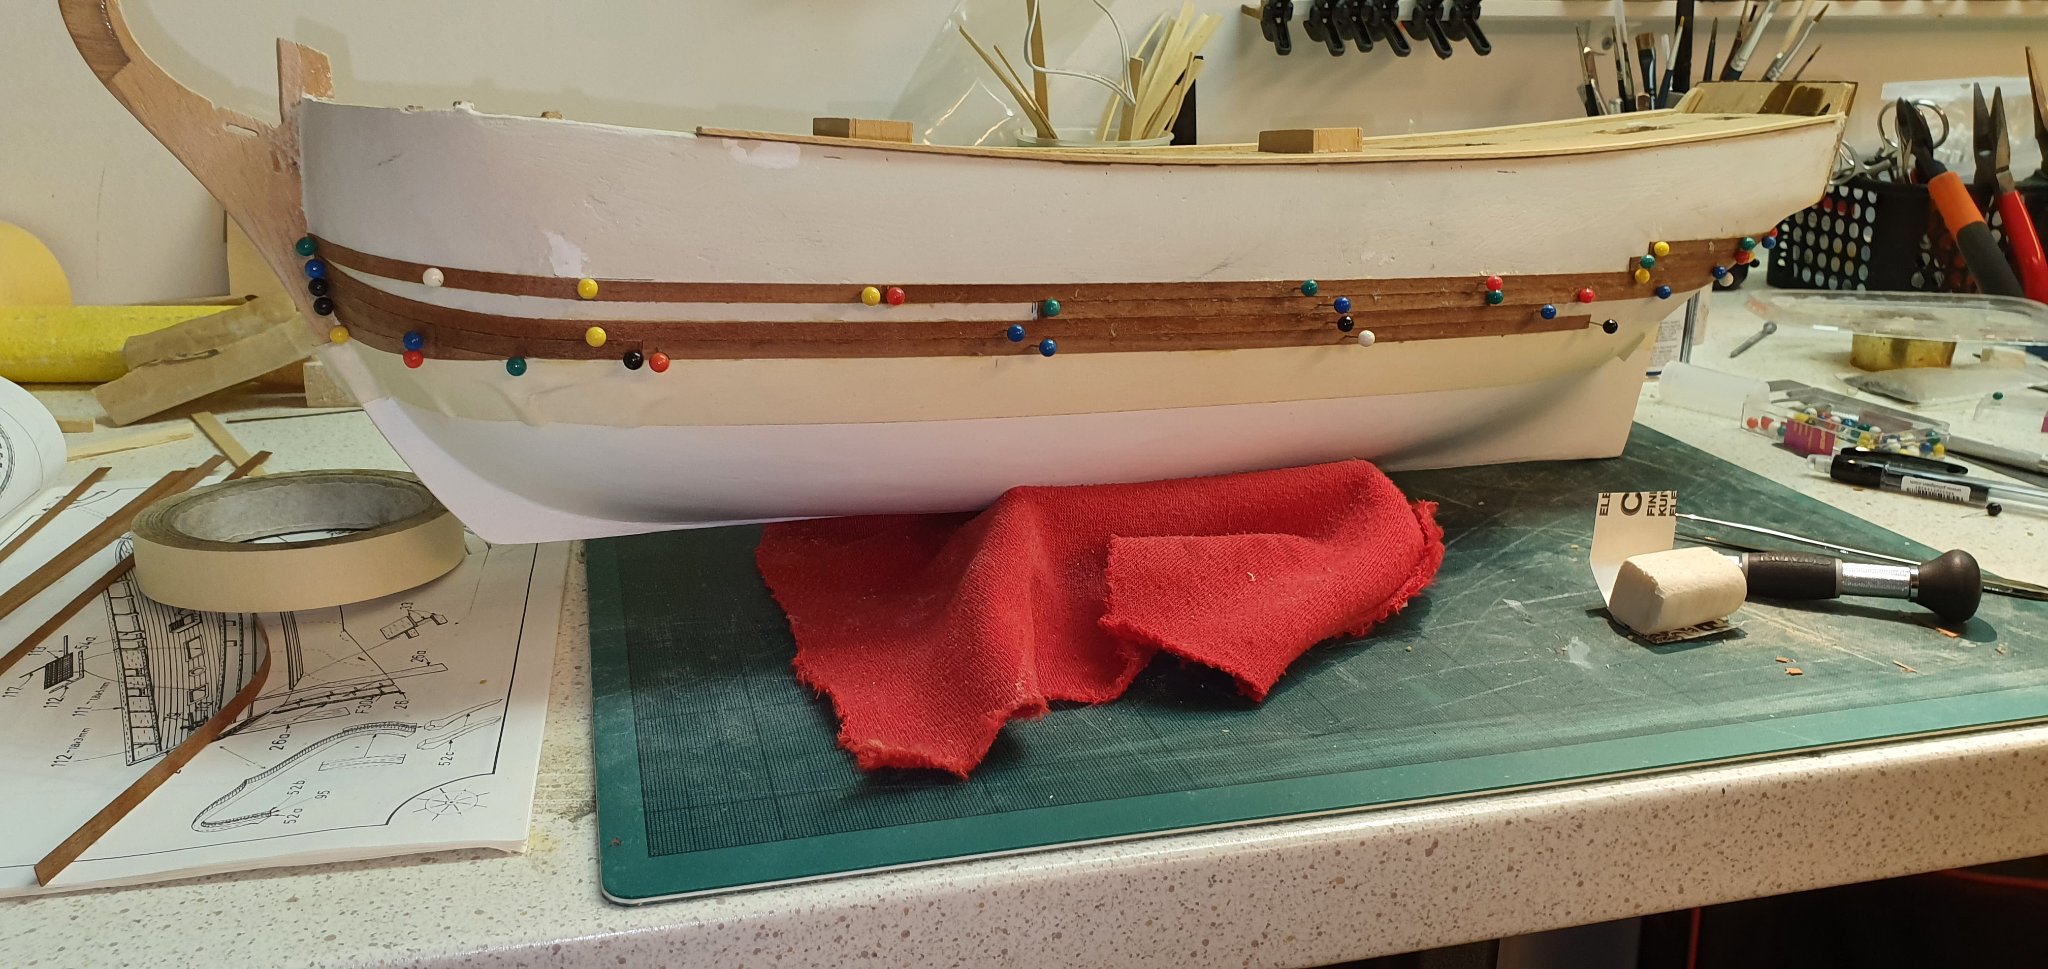
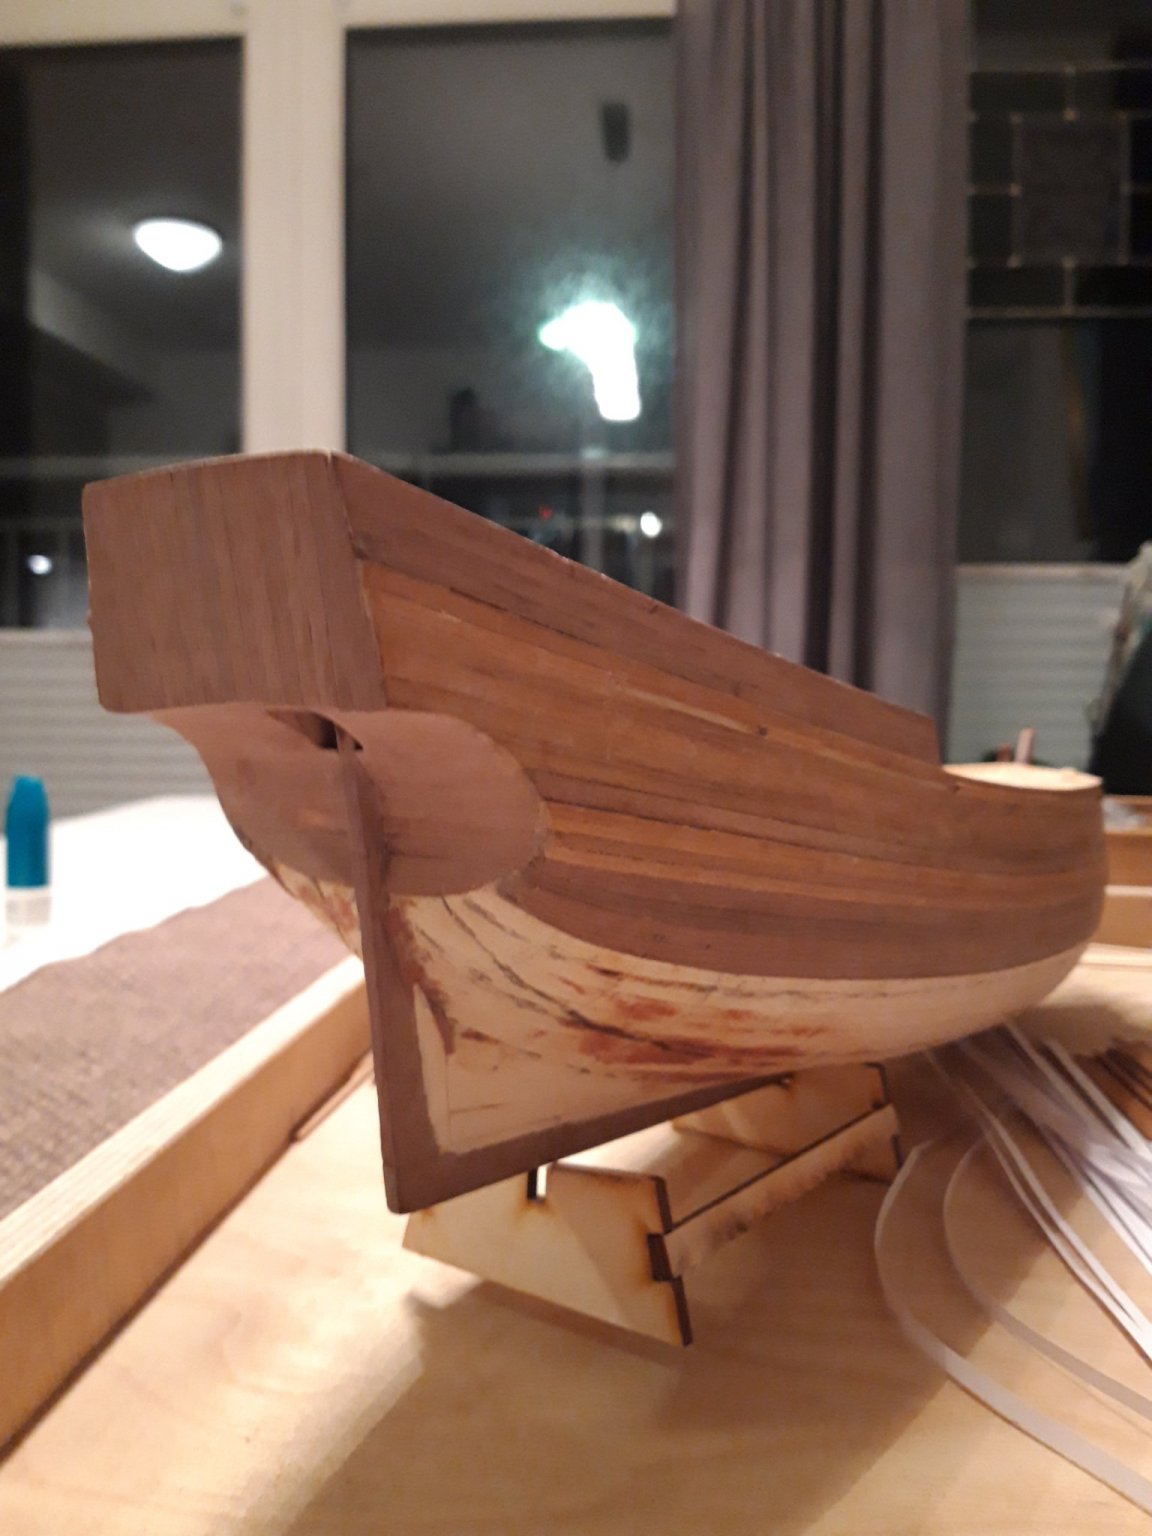
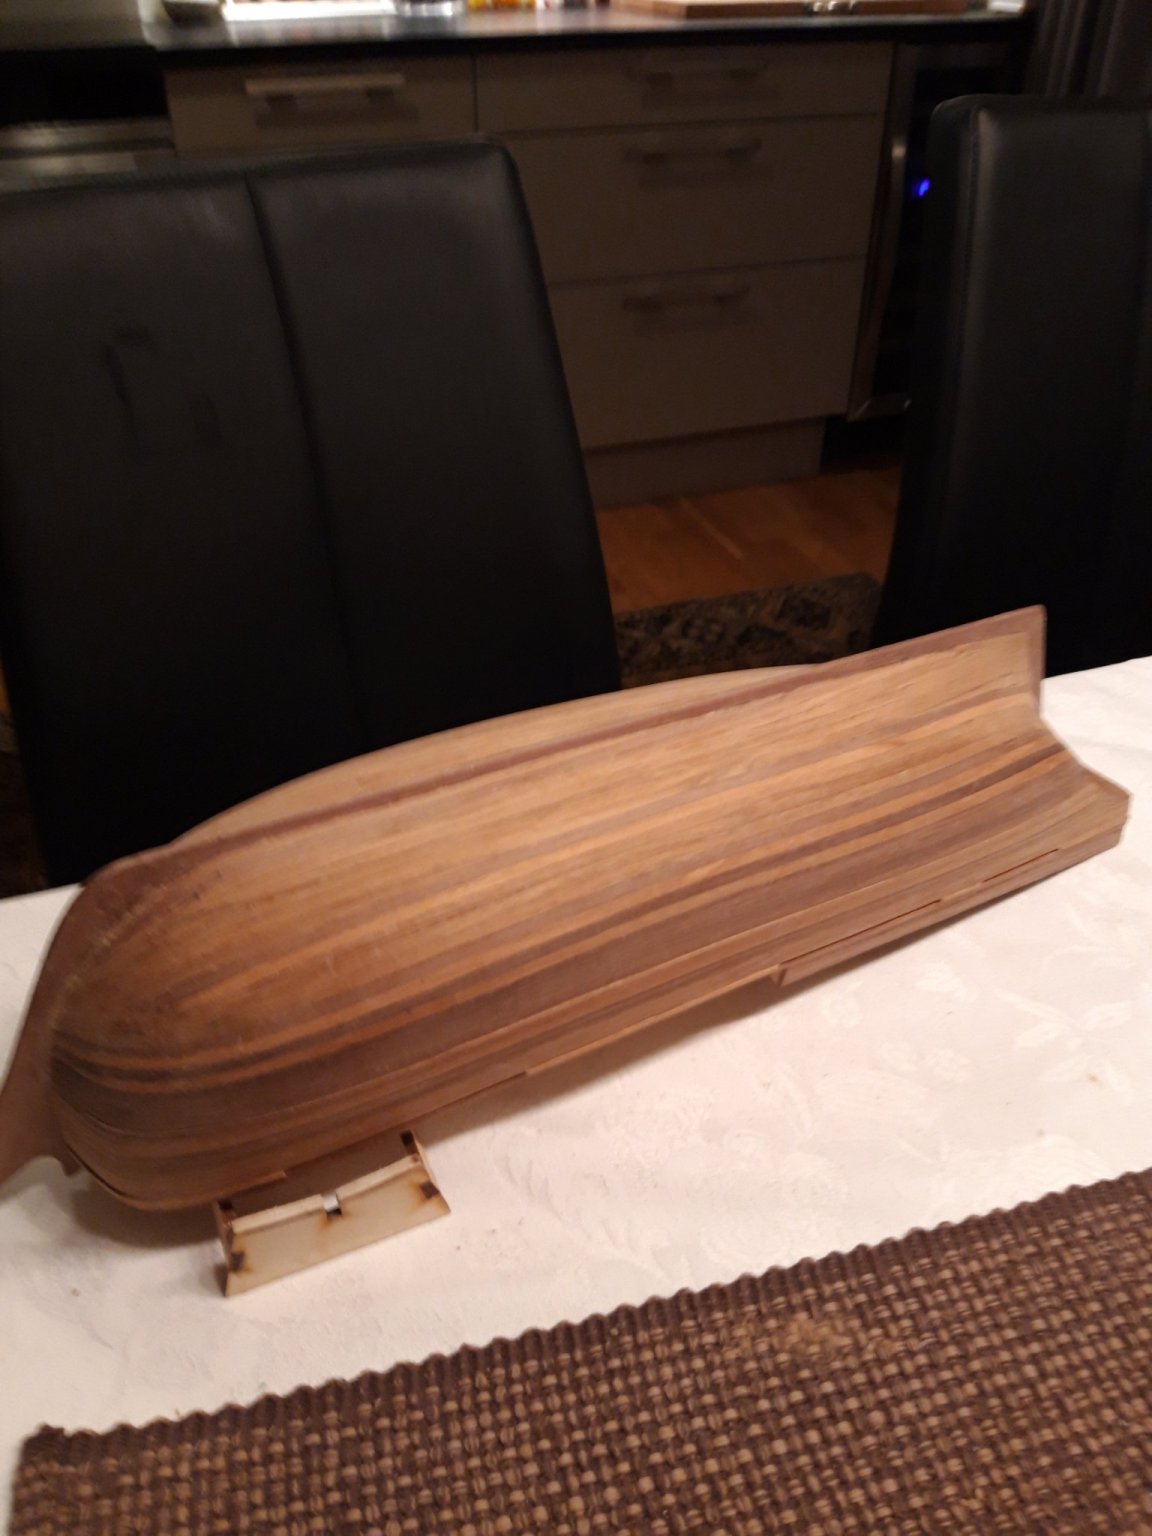
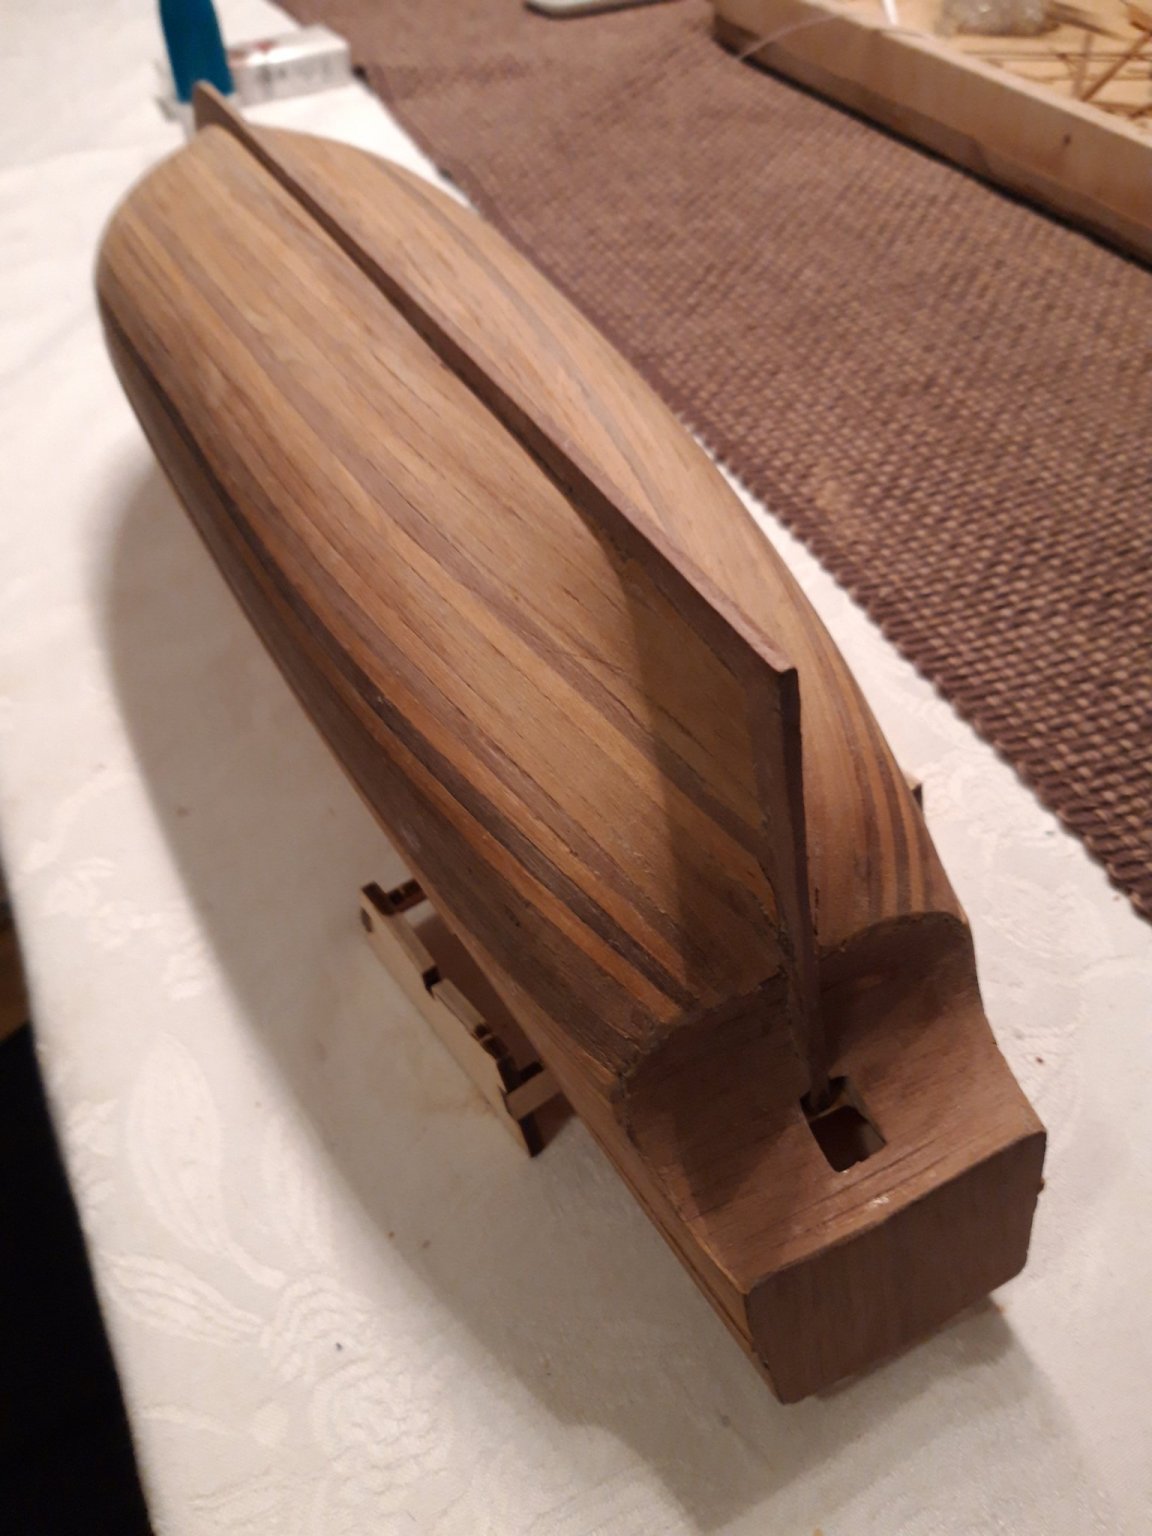
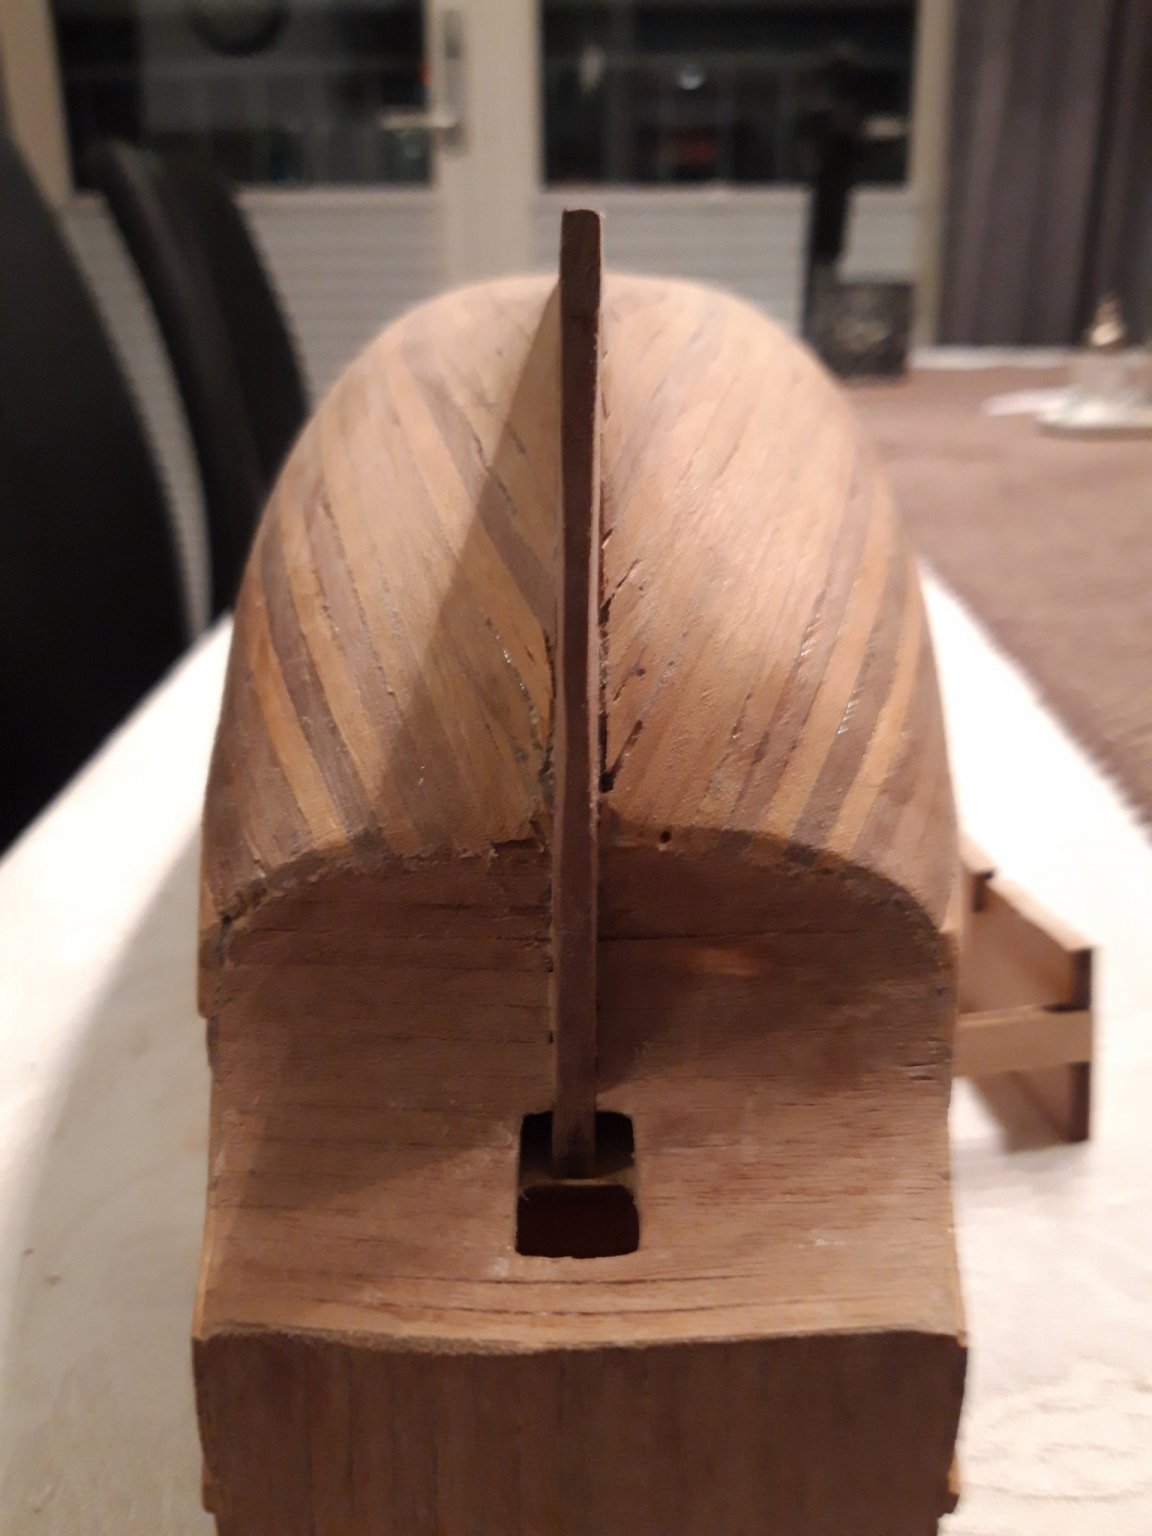
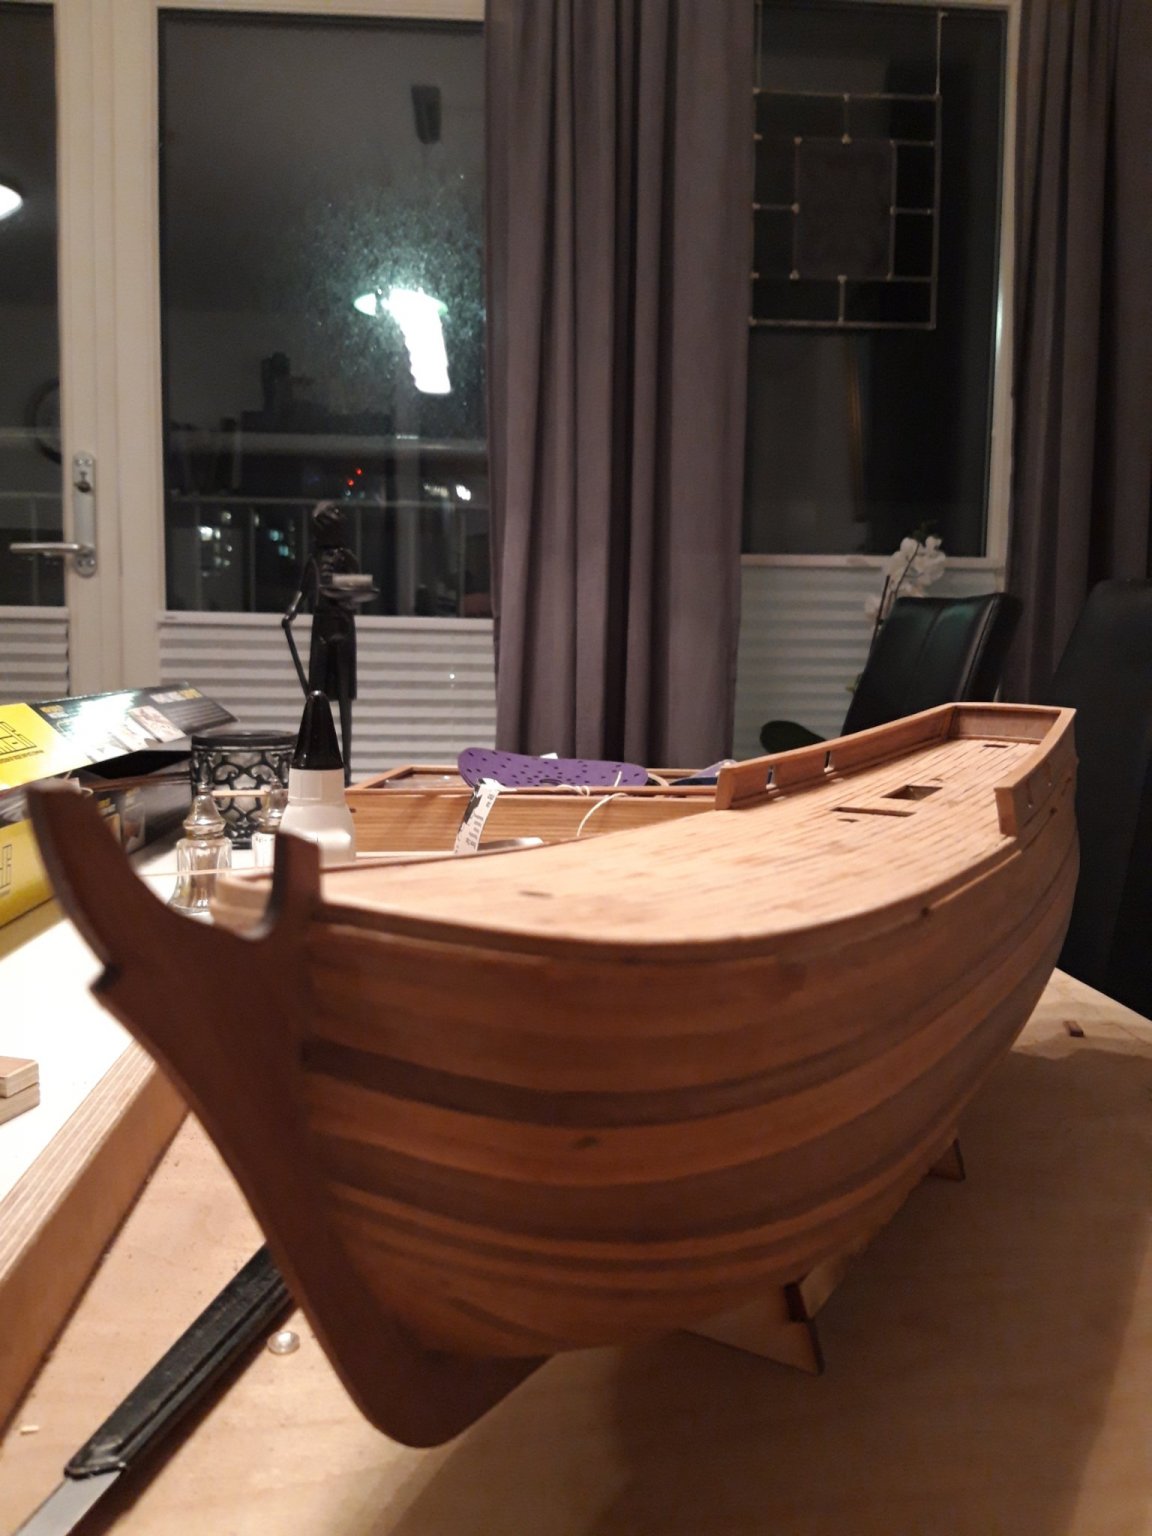
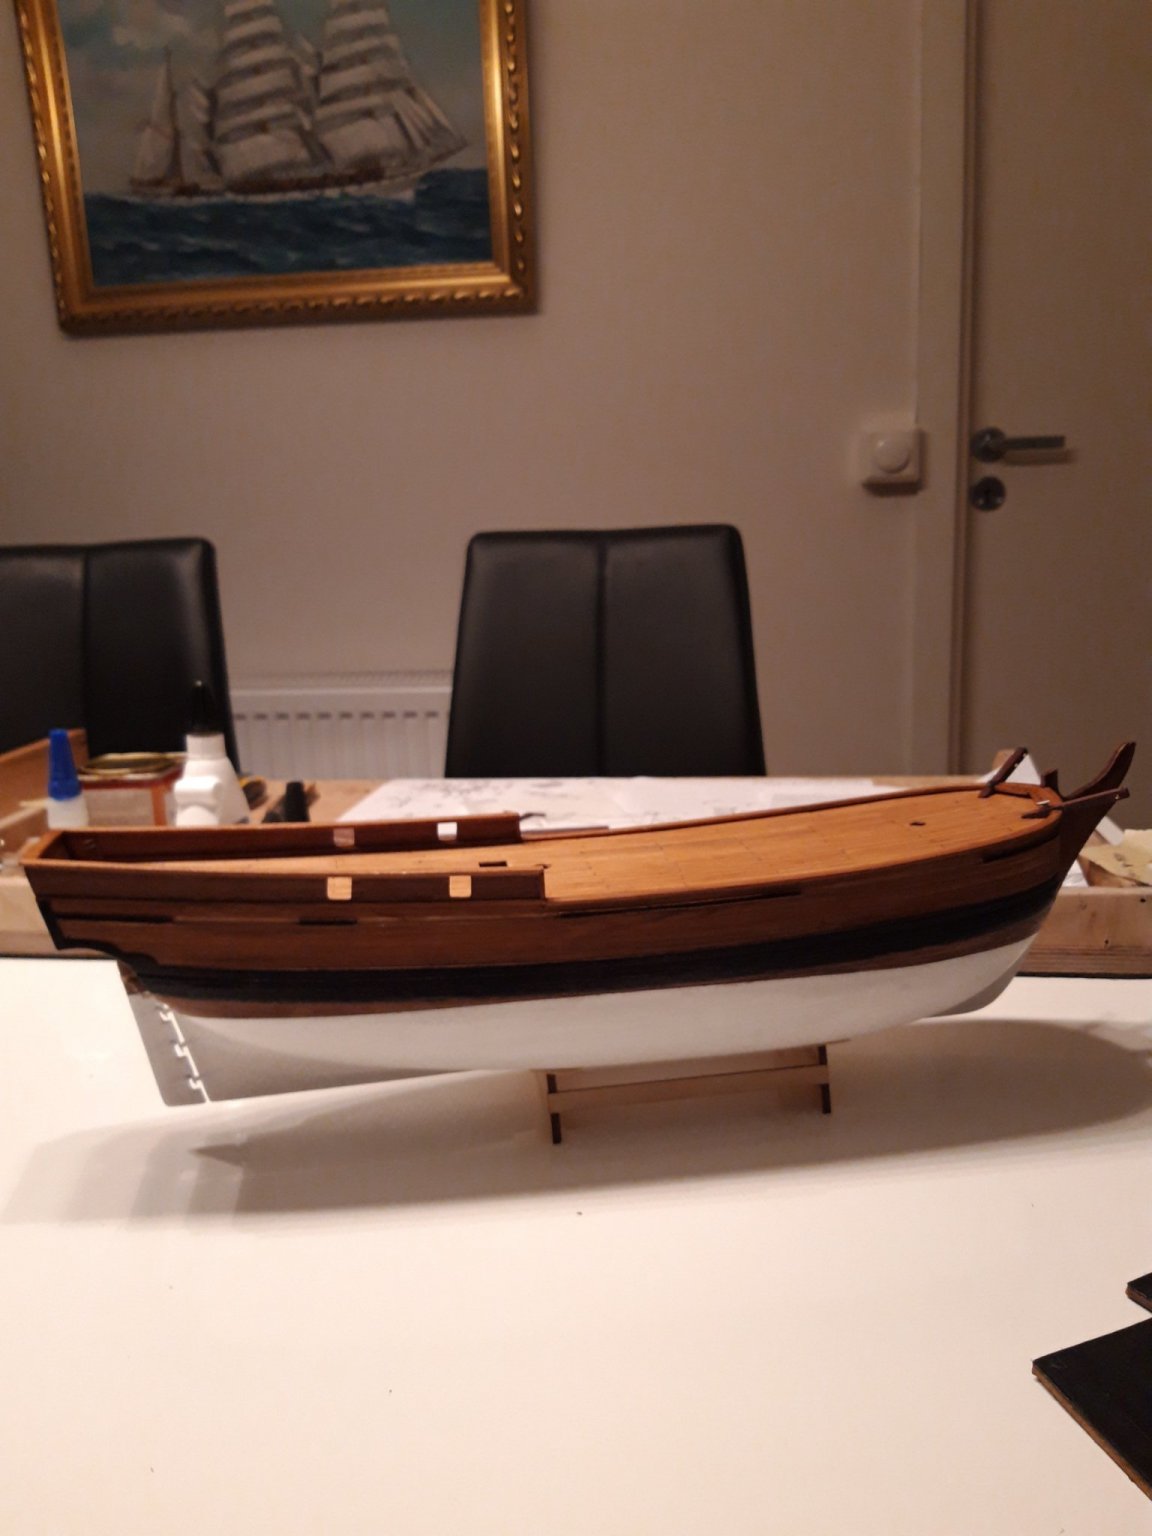
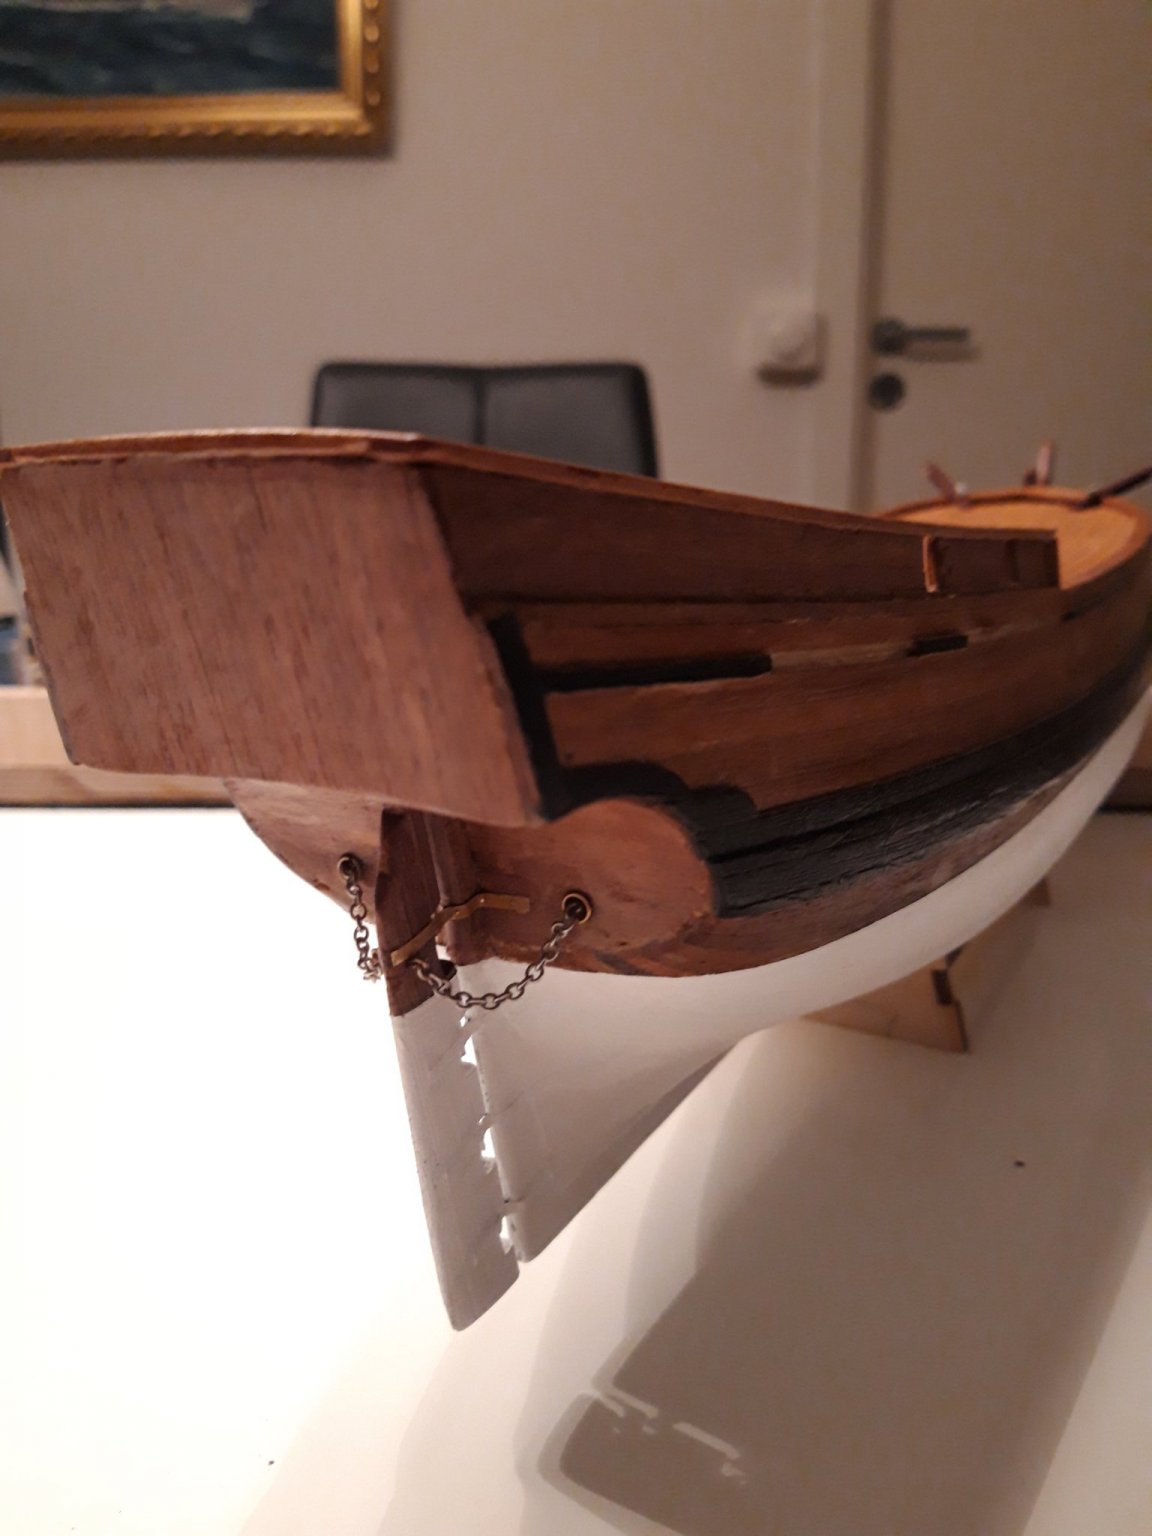
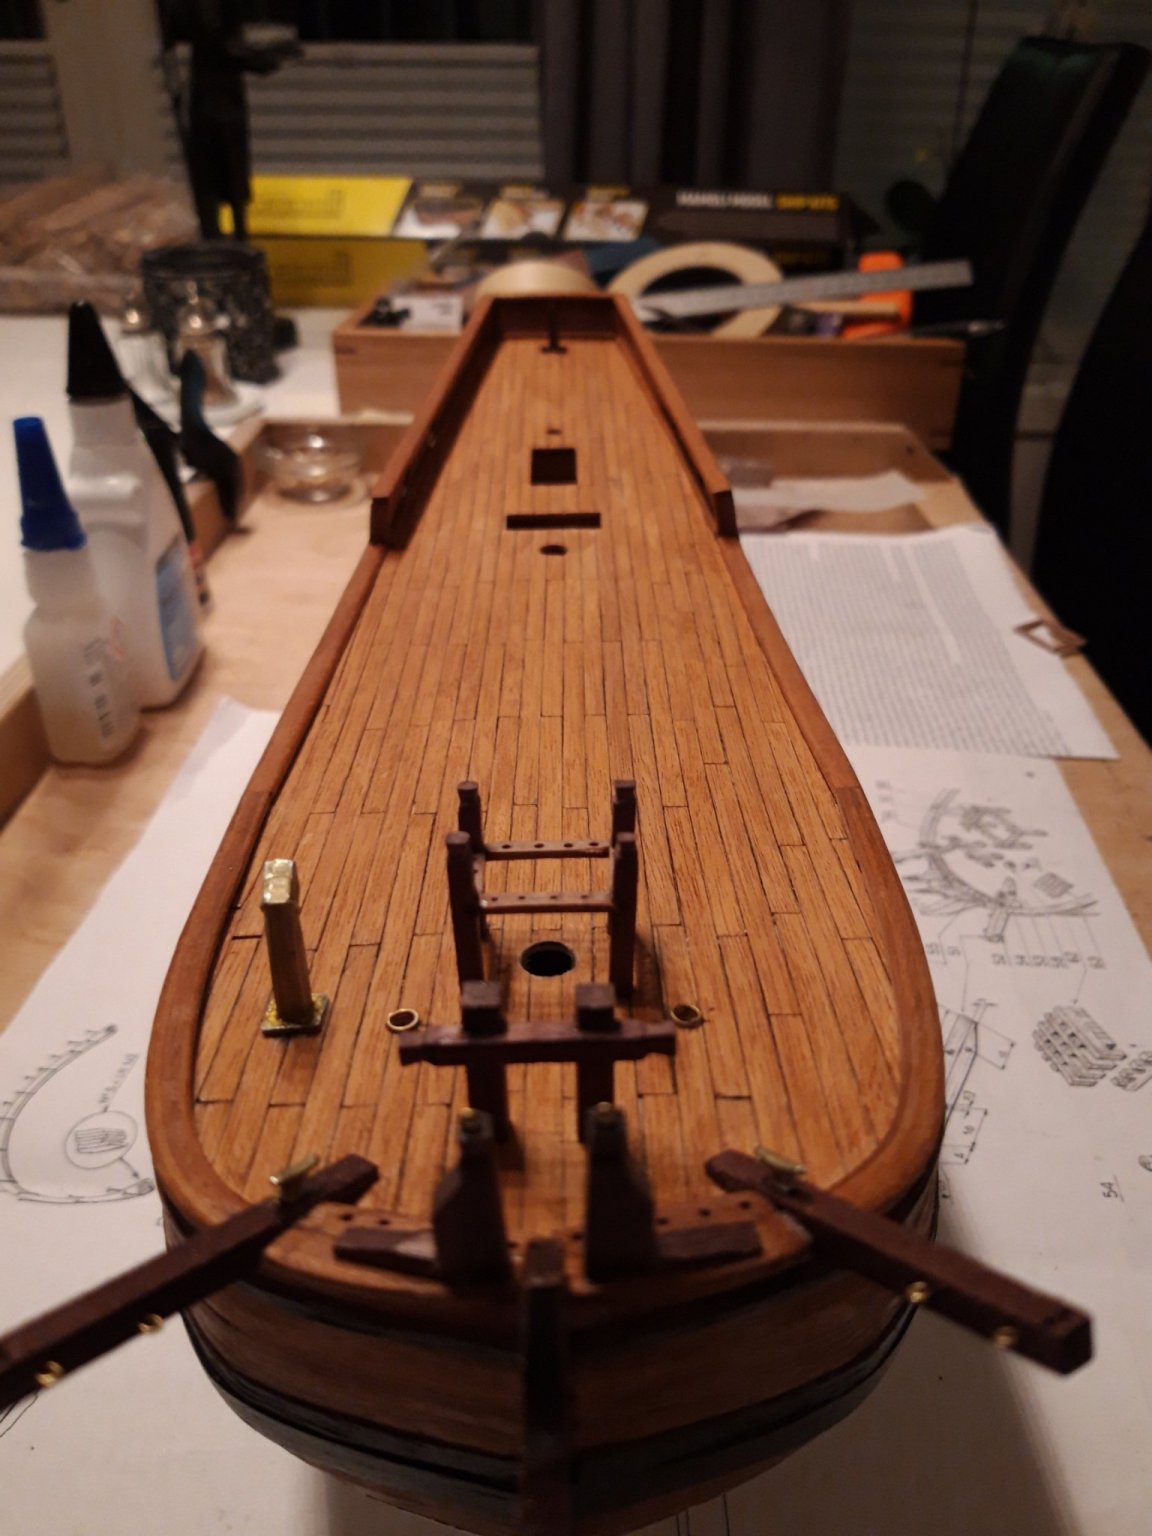
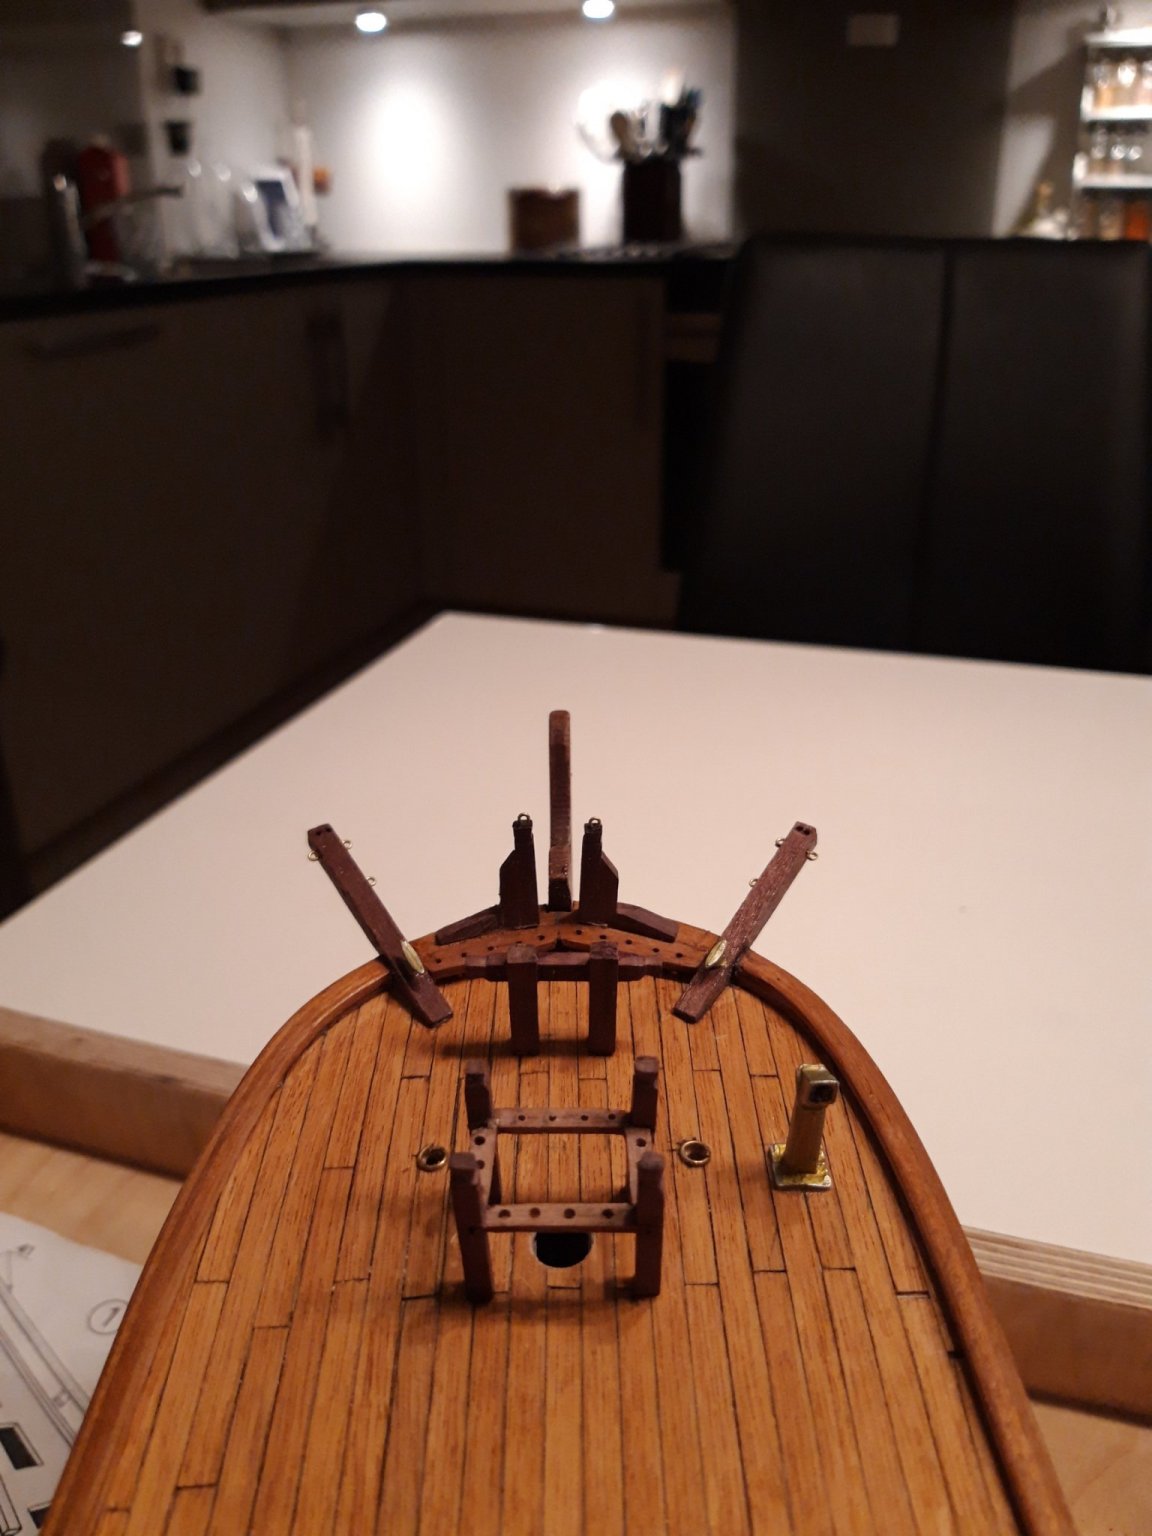
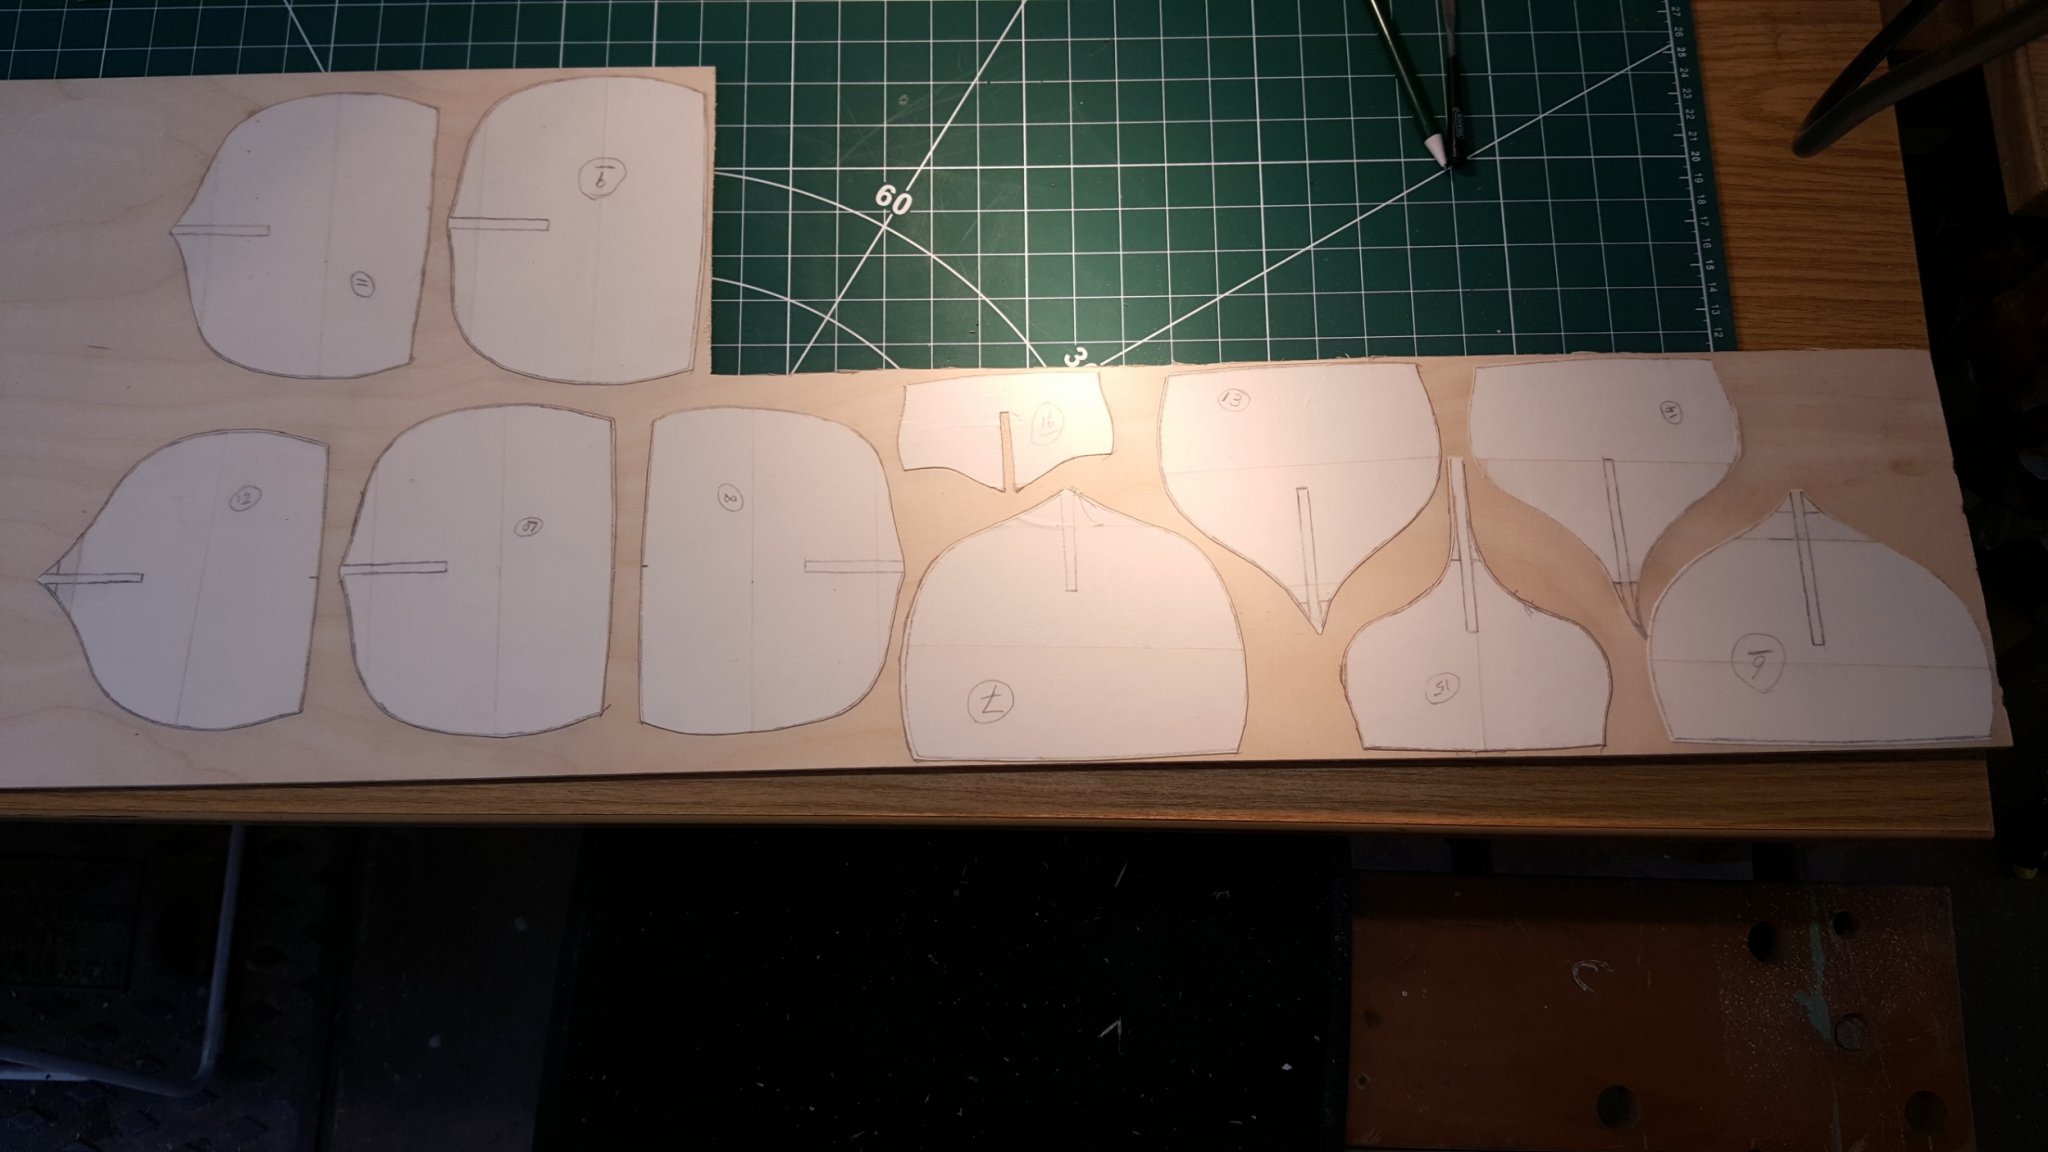
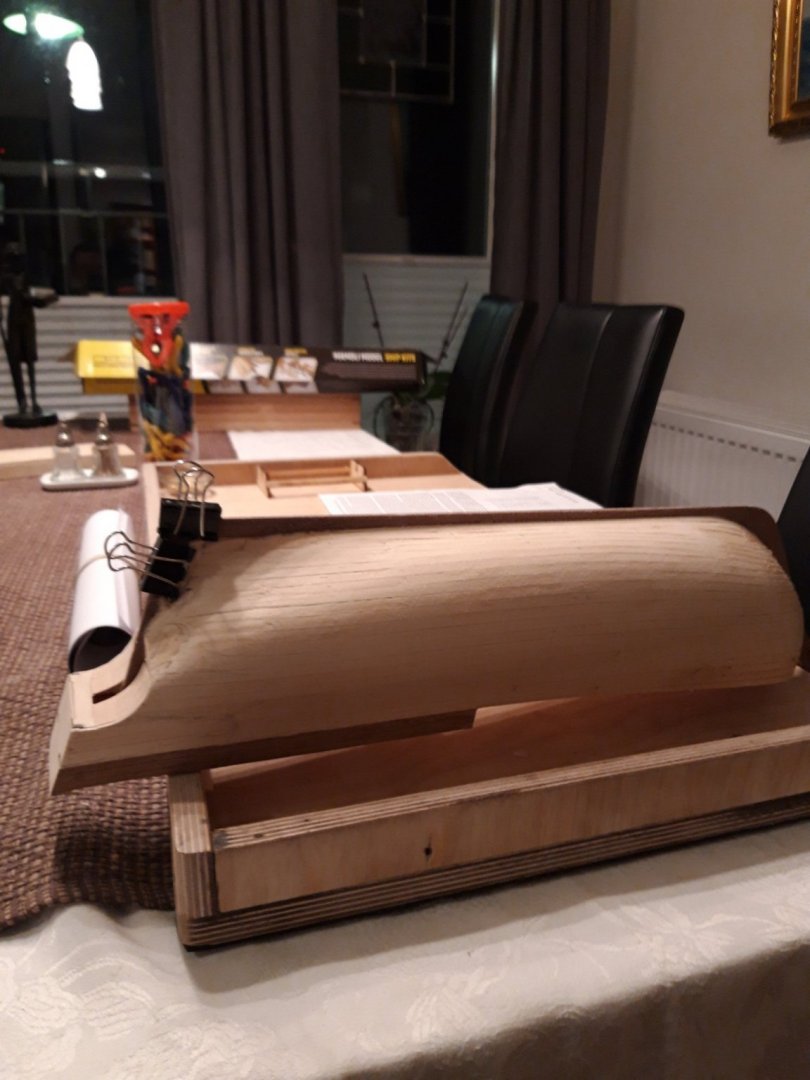
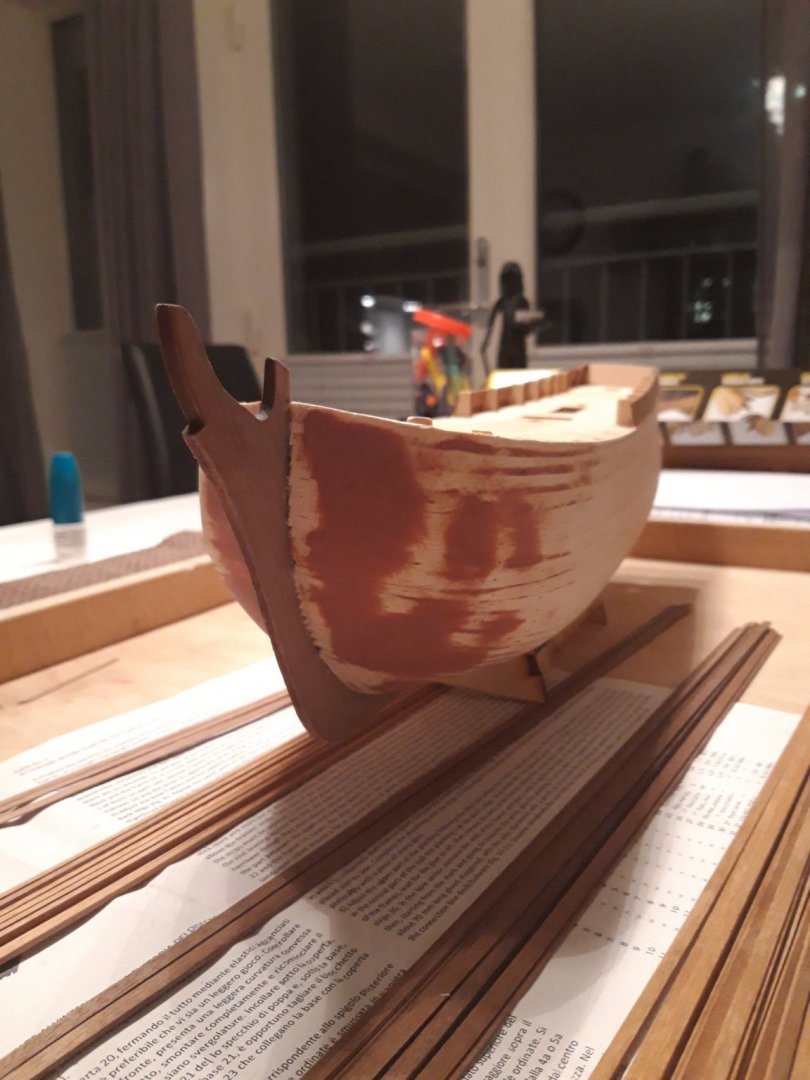
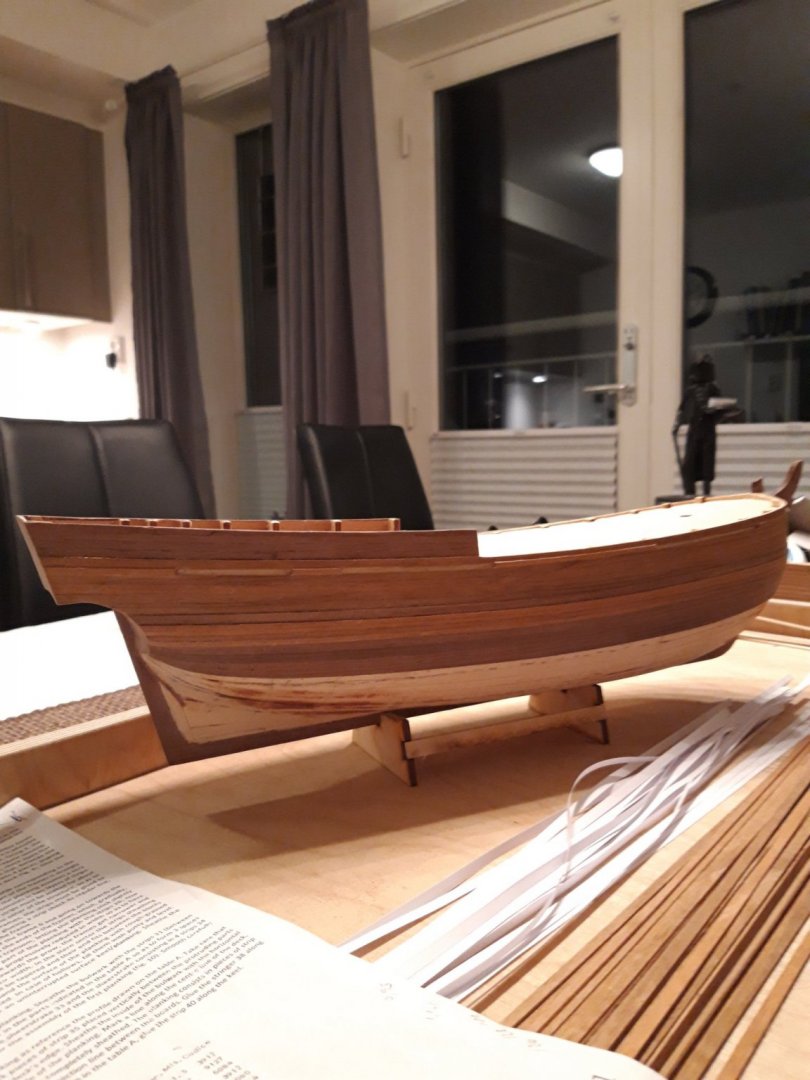
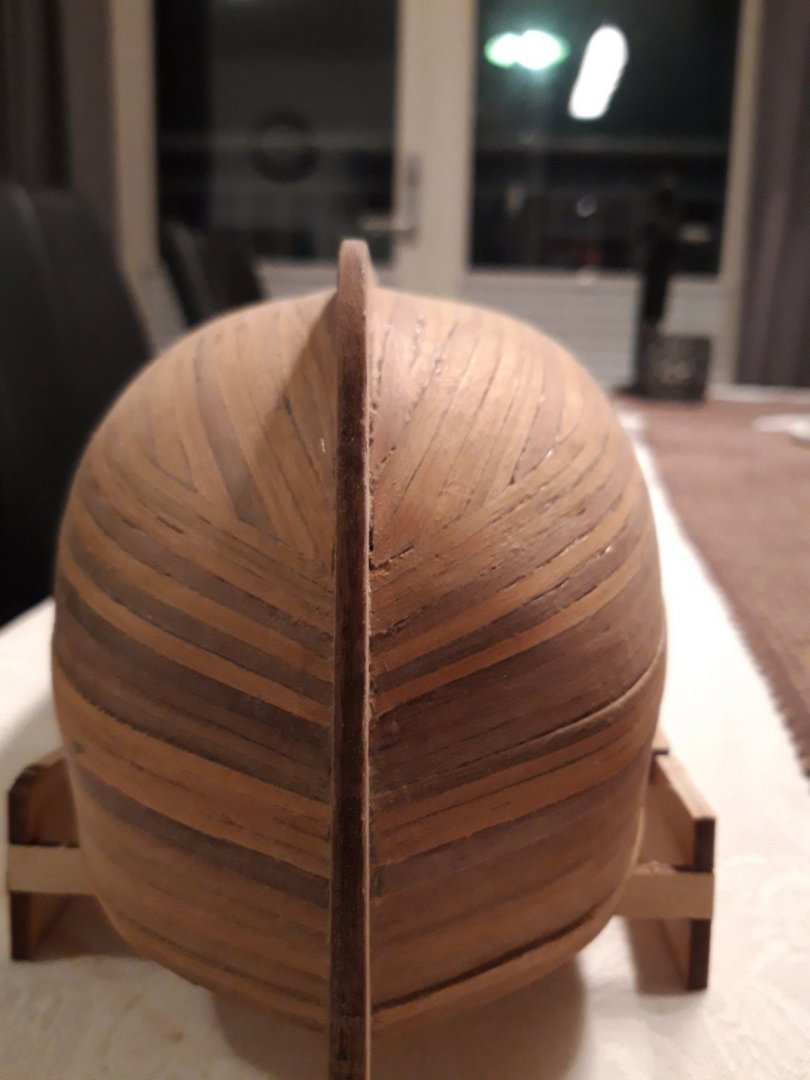
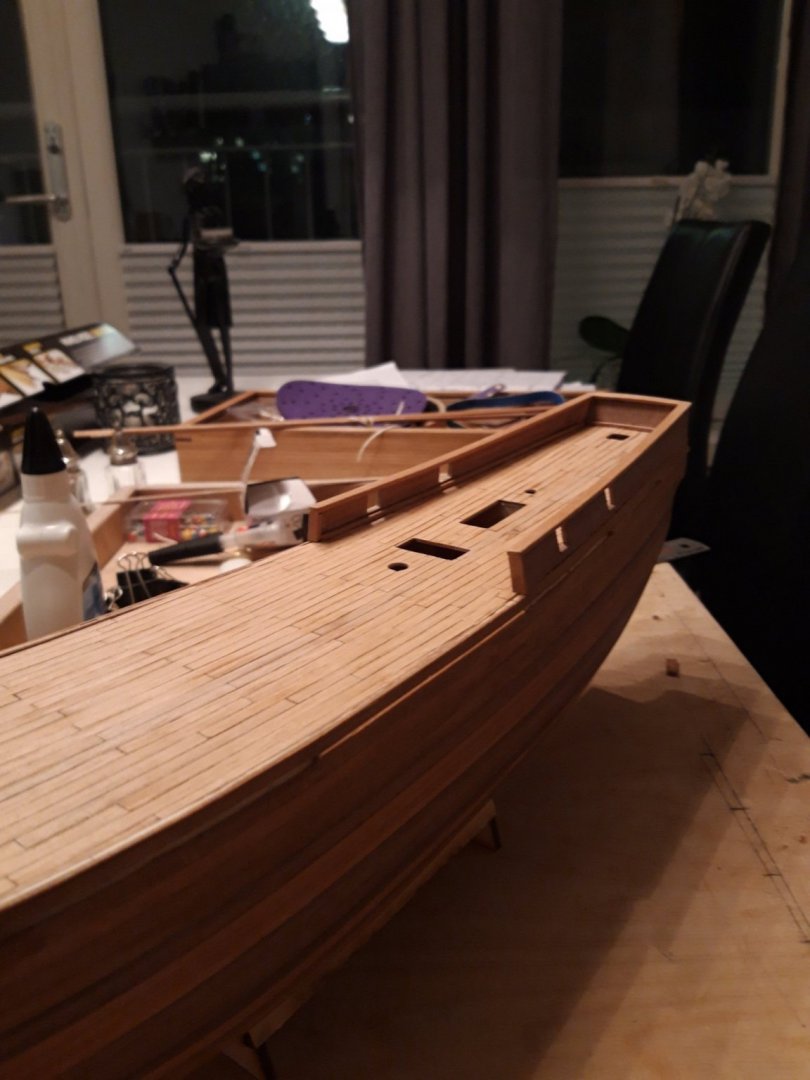
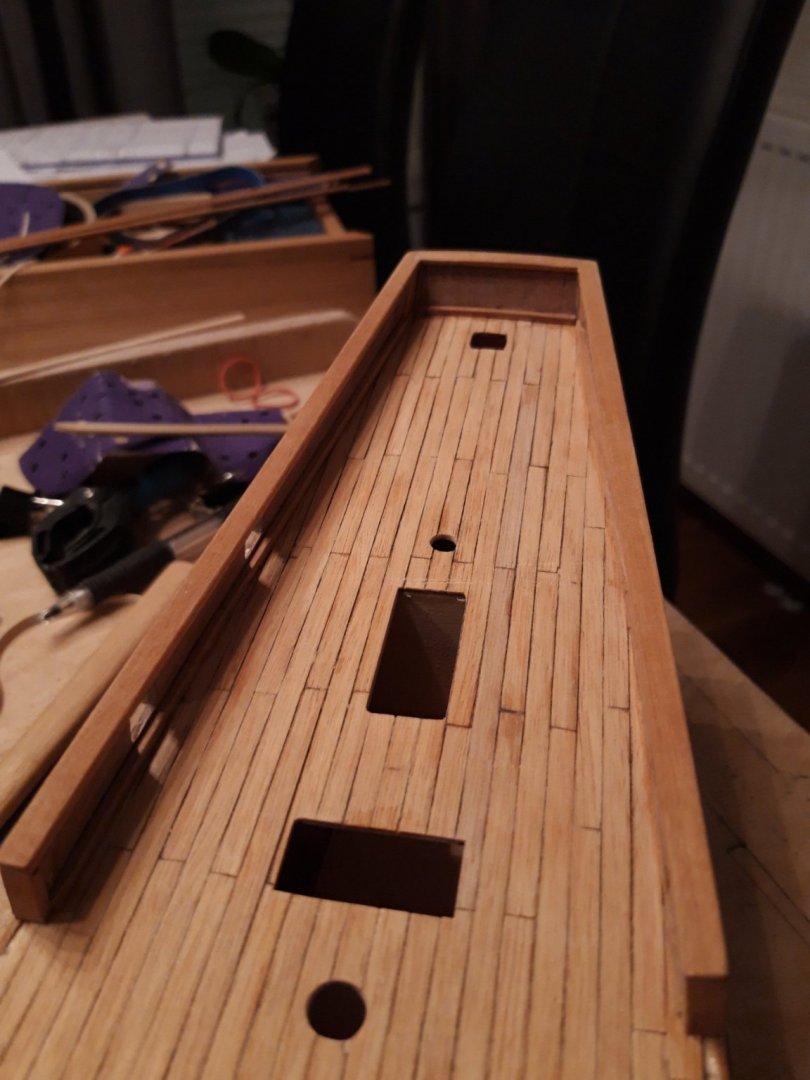
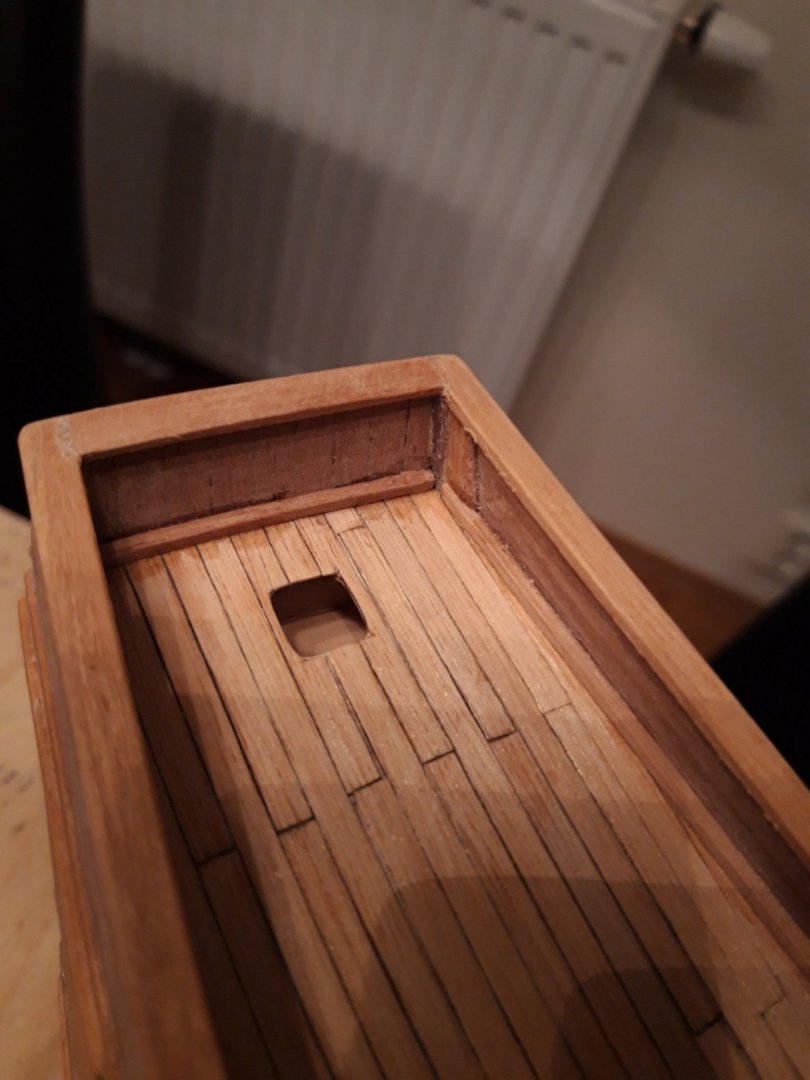
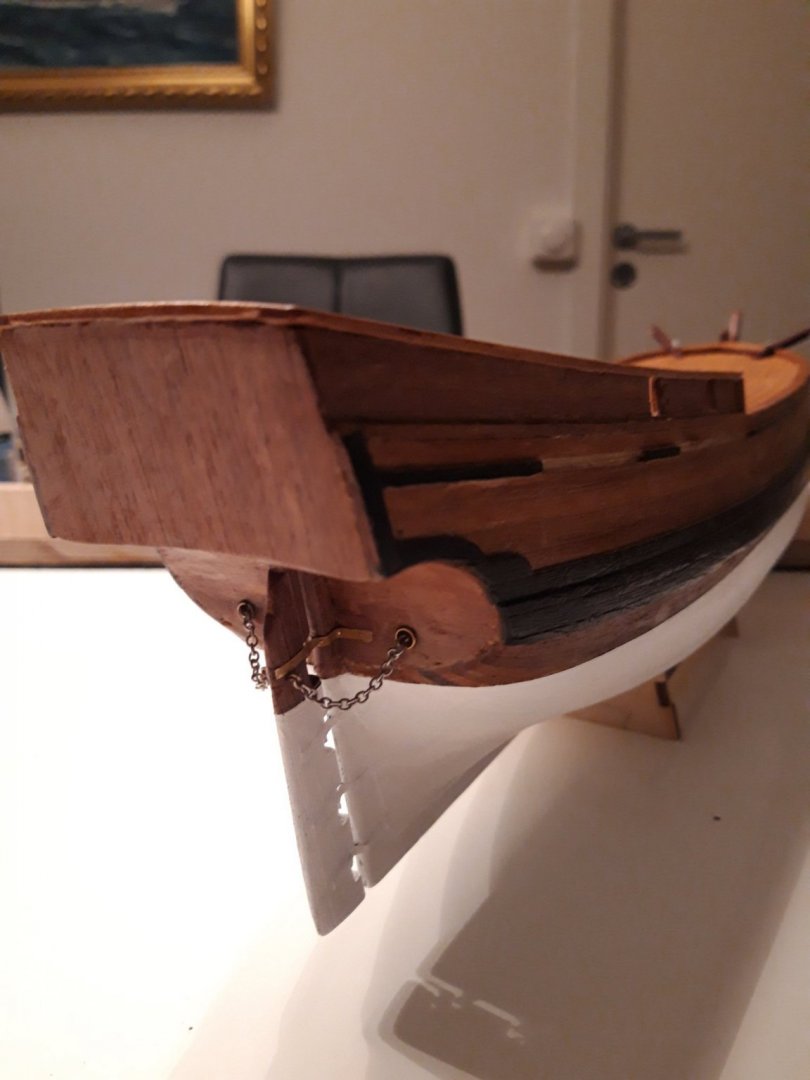
 Hello! I am new in this forum and this is my first wooden boat model i am building. I am just finish the first planking and in to the number 2 planking using mahogany strips. I find this part of the building not so easy do to the shape of the hull and the sokening of strips and the shaping of the strips. But i will make som paperstrips to use as templates to see how the the trips are going to be trimed to fit the shape of the hull. I will post som more pictures later on. Regards B. Brekke


-
 Hi all First build log but second build having just finished building the HMS Revenge by Ocre. Was a fairly basic model but I feel I learnt quite a lot doing it. Have purchased the AL Bounty kit after seeing a few of the build logs on here and quite liked the idea of the open side and the amount of detail you could put in it. It was a toss up between the Bounty and Caldercraft's Mary Rose but, in the end, the Bounty won. I'm going to be making quite a few additions to the interior as had been done in other logs as I feel it adds more to the model. I'm also going to have a go at adding some internal lighting to the ship as what's the point of the interior detail if you can't see it? I'm also planning on putting a bit of paint on the exterior to brighten it up a bit (just a little blue and yellow) After opening the box, spending a few hours reading the instructions and typing the part list up onto a spreadsheet to make identification and searching easier, I noticed that there's a number of pieces missing: 8mm brass rings, 0.6x6 basswood, 1x8 basswood and cloth for the bales plus there not being enough 0.6 x 3 basswod, 1 x 10 basswood, 1 x basswood, 3 x 5 basswod and ø6 dowells. As I was ordering more material to make additional cabins and features, I just re-ordered what was missing. I purchased the Billings boats slip to use for the bounty but have found it's no good for this model as the frames go right down to the bottom of the false keel. I've made my own version using a shelf, some angle brackets and some blocks of wood. Hopefully it gets the frames in a perfect position. One thing I could do with advice on is what is single planking and double planking? The bounty model is single planked but the Revenge model I made had 1 layer of basswood/lime planks and then you covered it with 0.6mm strips over the top. I really liked the finish this gave the model in the end and would like to do the same thing for the bounty (plus it hides the pin heads). Is this what is referred to as double planking and would anyone advise against it on the AL Bounty? Edit - have learnt this is called a veneer. No idea if it's the "done thing thing" or not, but I'm going to do it anyway. The Revenge took me a month and half to complete but I'm planning on spending a lot more time (I know it's going to take months/year(s)) on the Bounty to get it "perfect". I've made a start cutting the pieces out of the kit and have started the sanding/staining/varnish process as I like the walnut finish on the frames and false keel. Any tips and advice would be greatly appreciated. Will keep you all updated and thanks for reading!

-
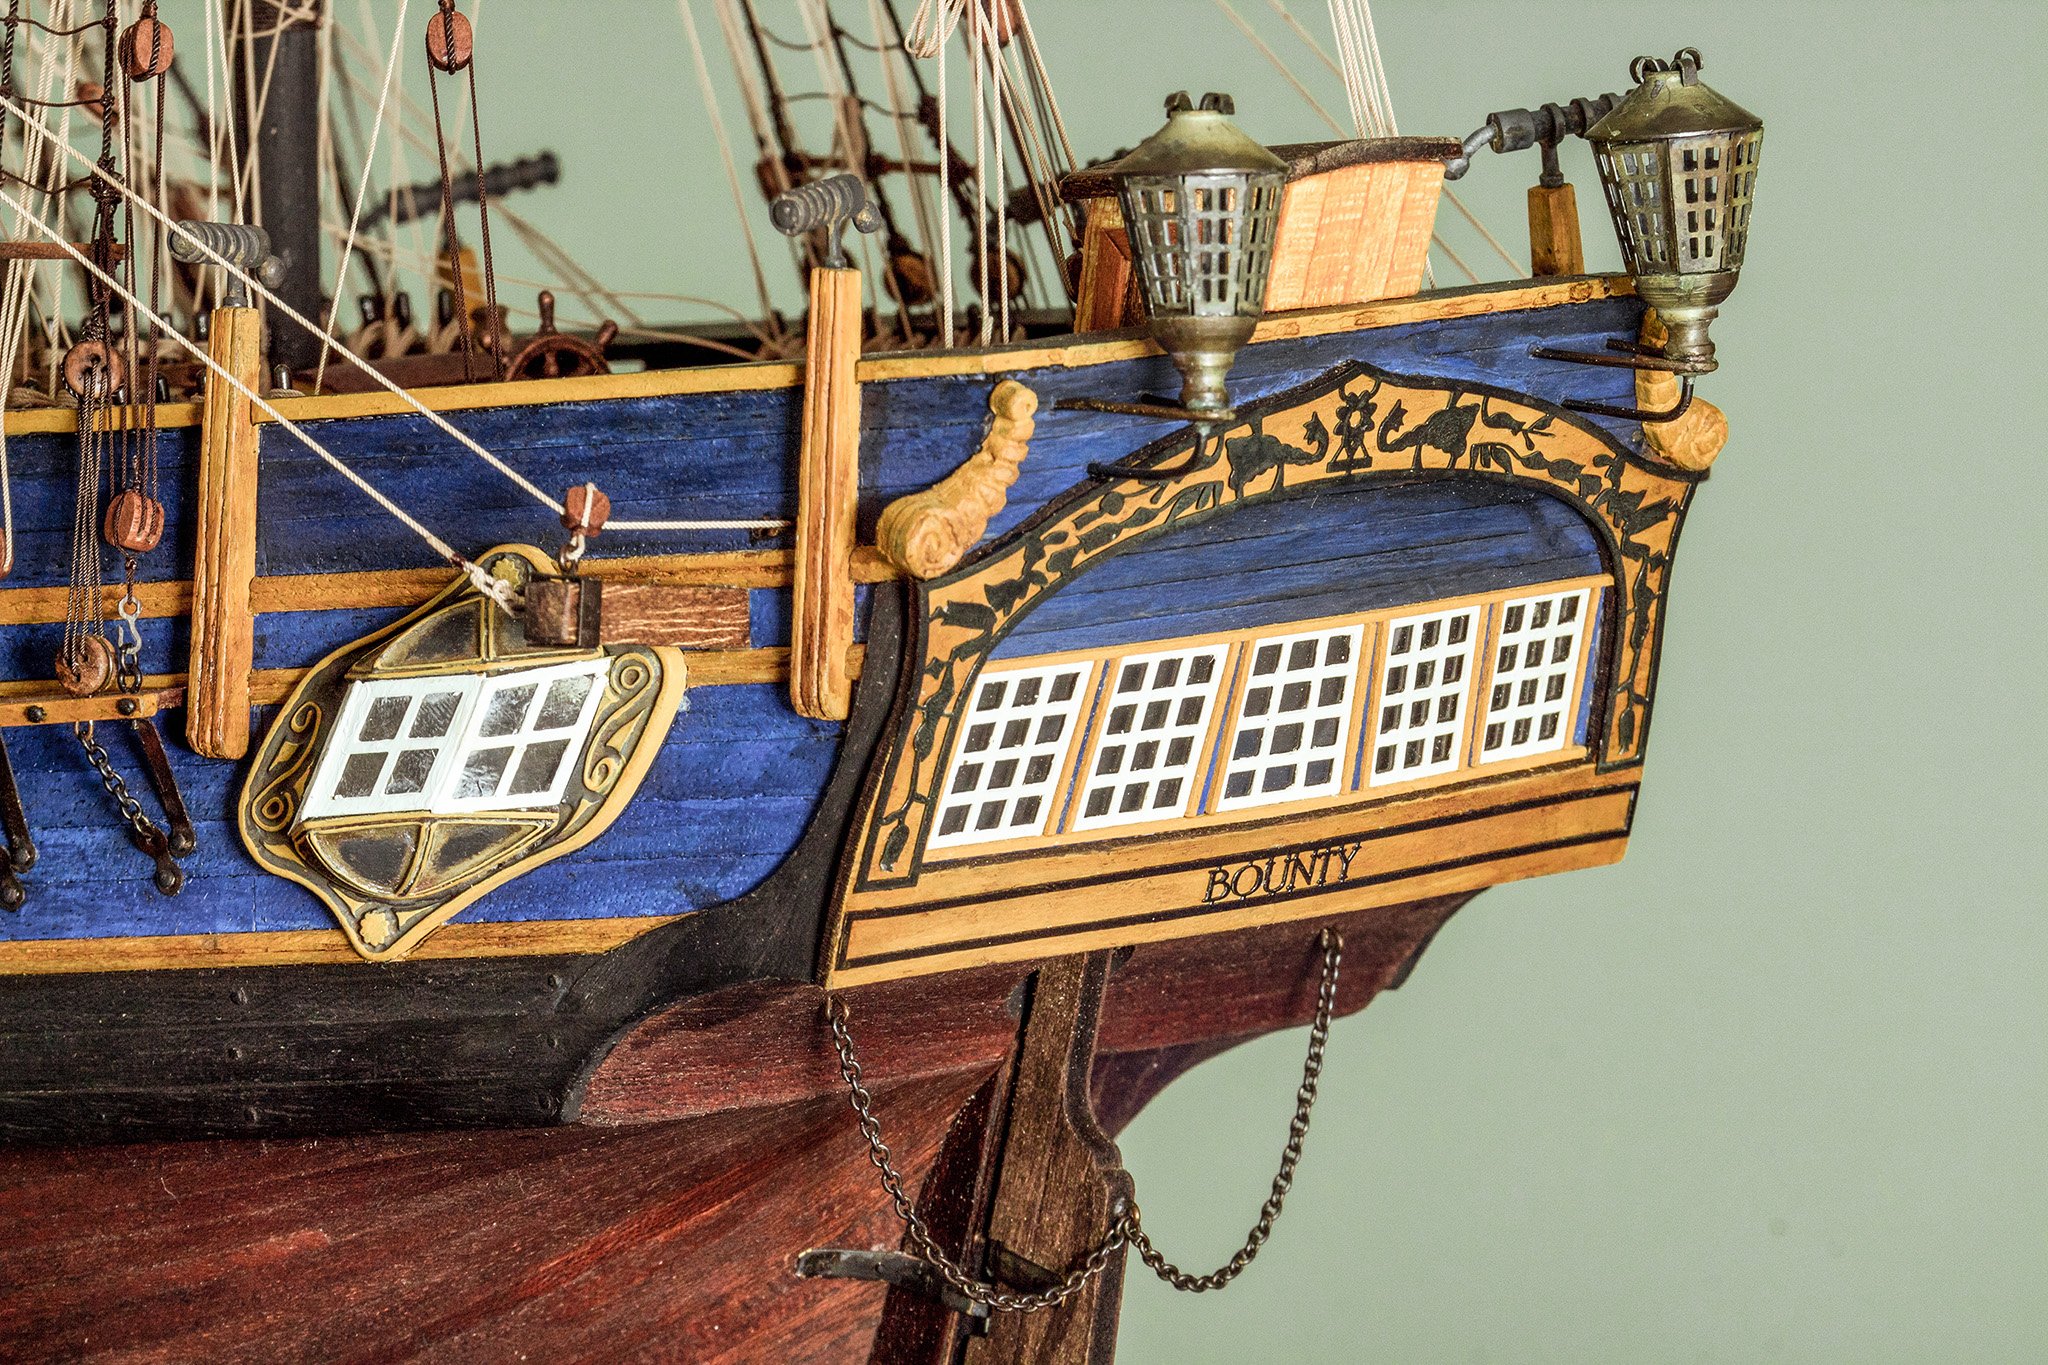
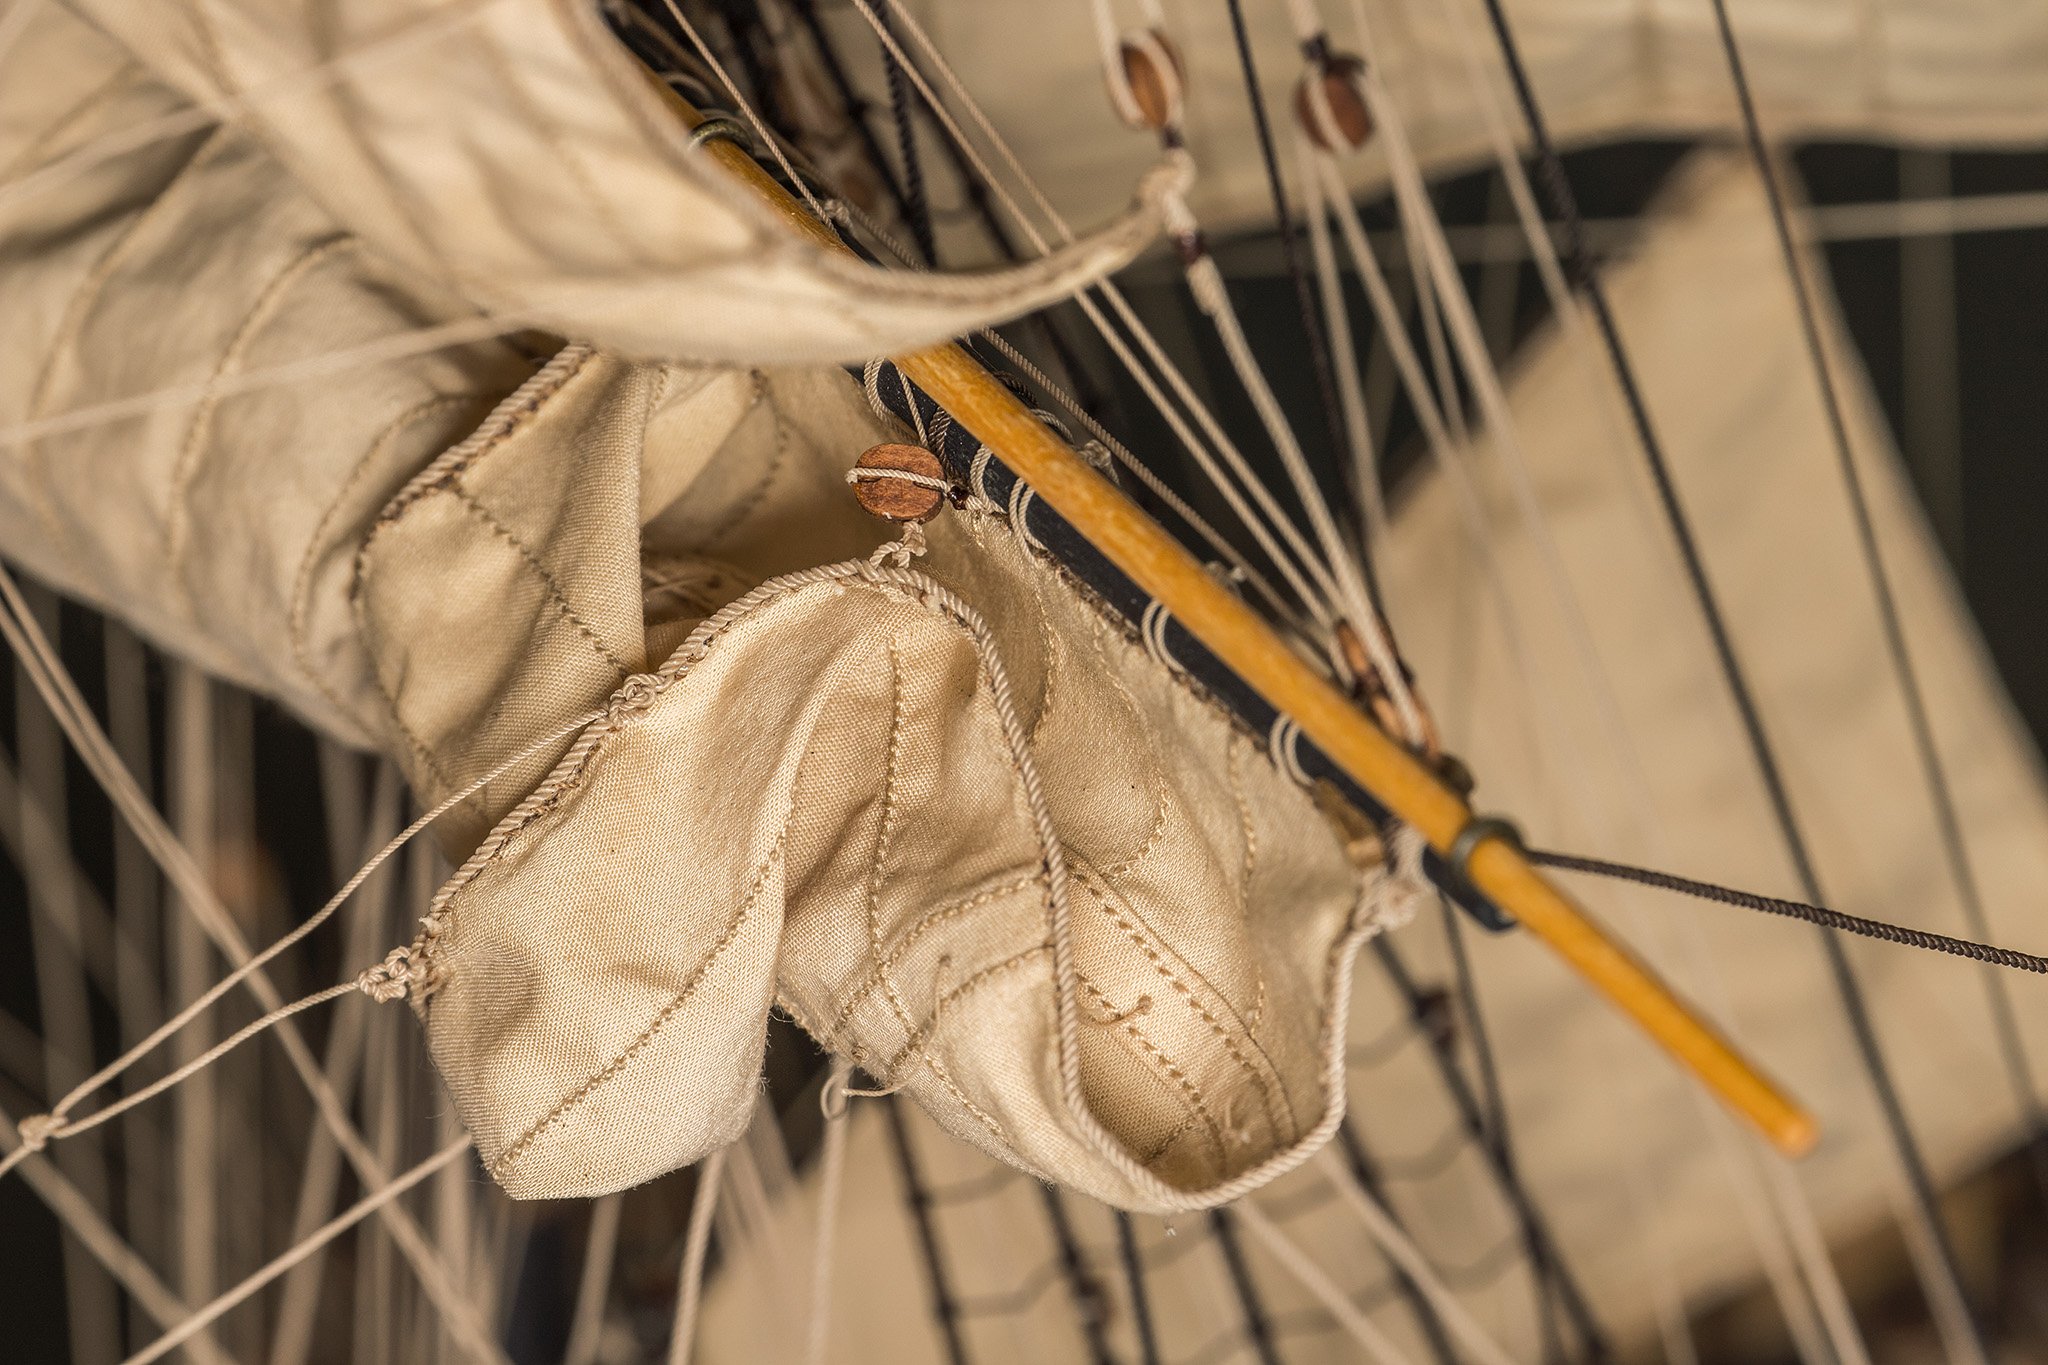
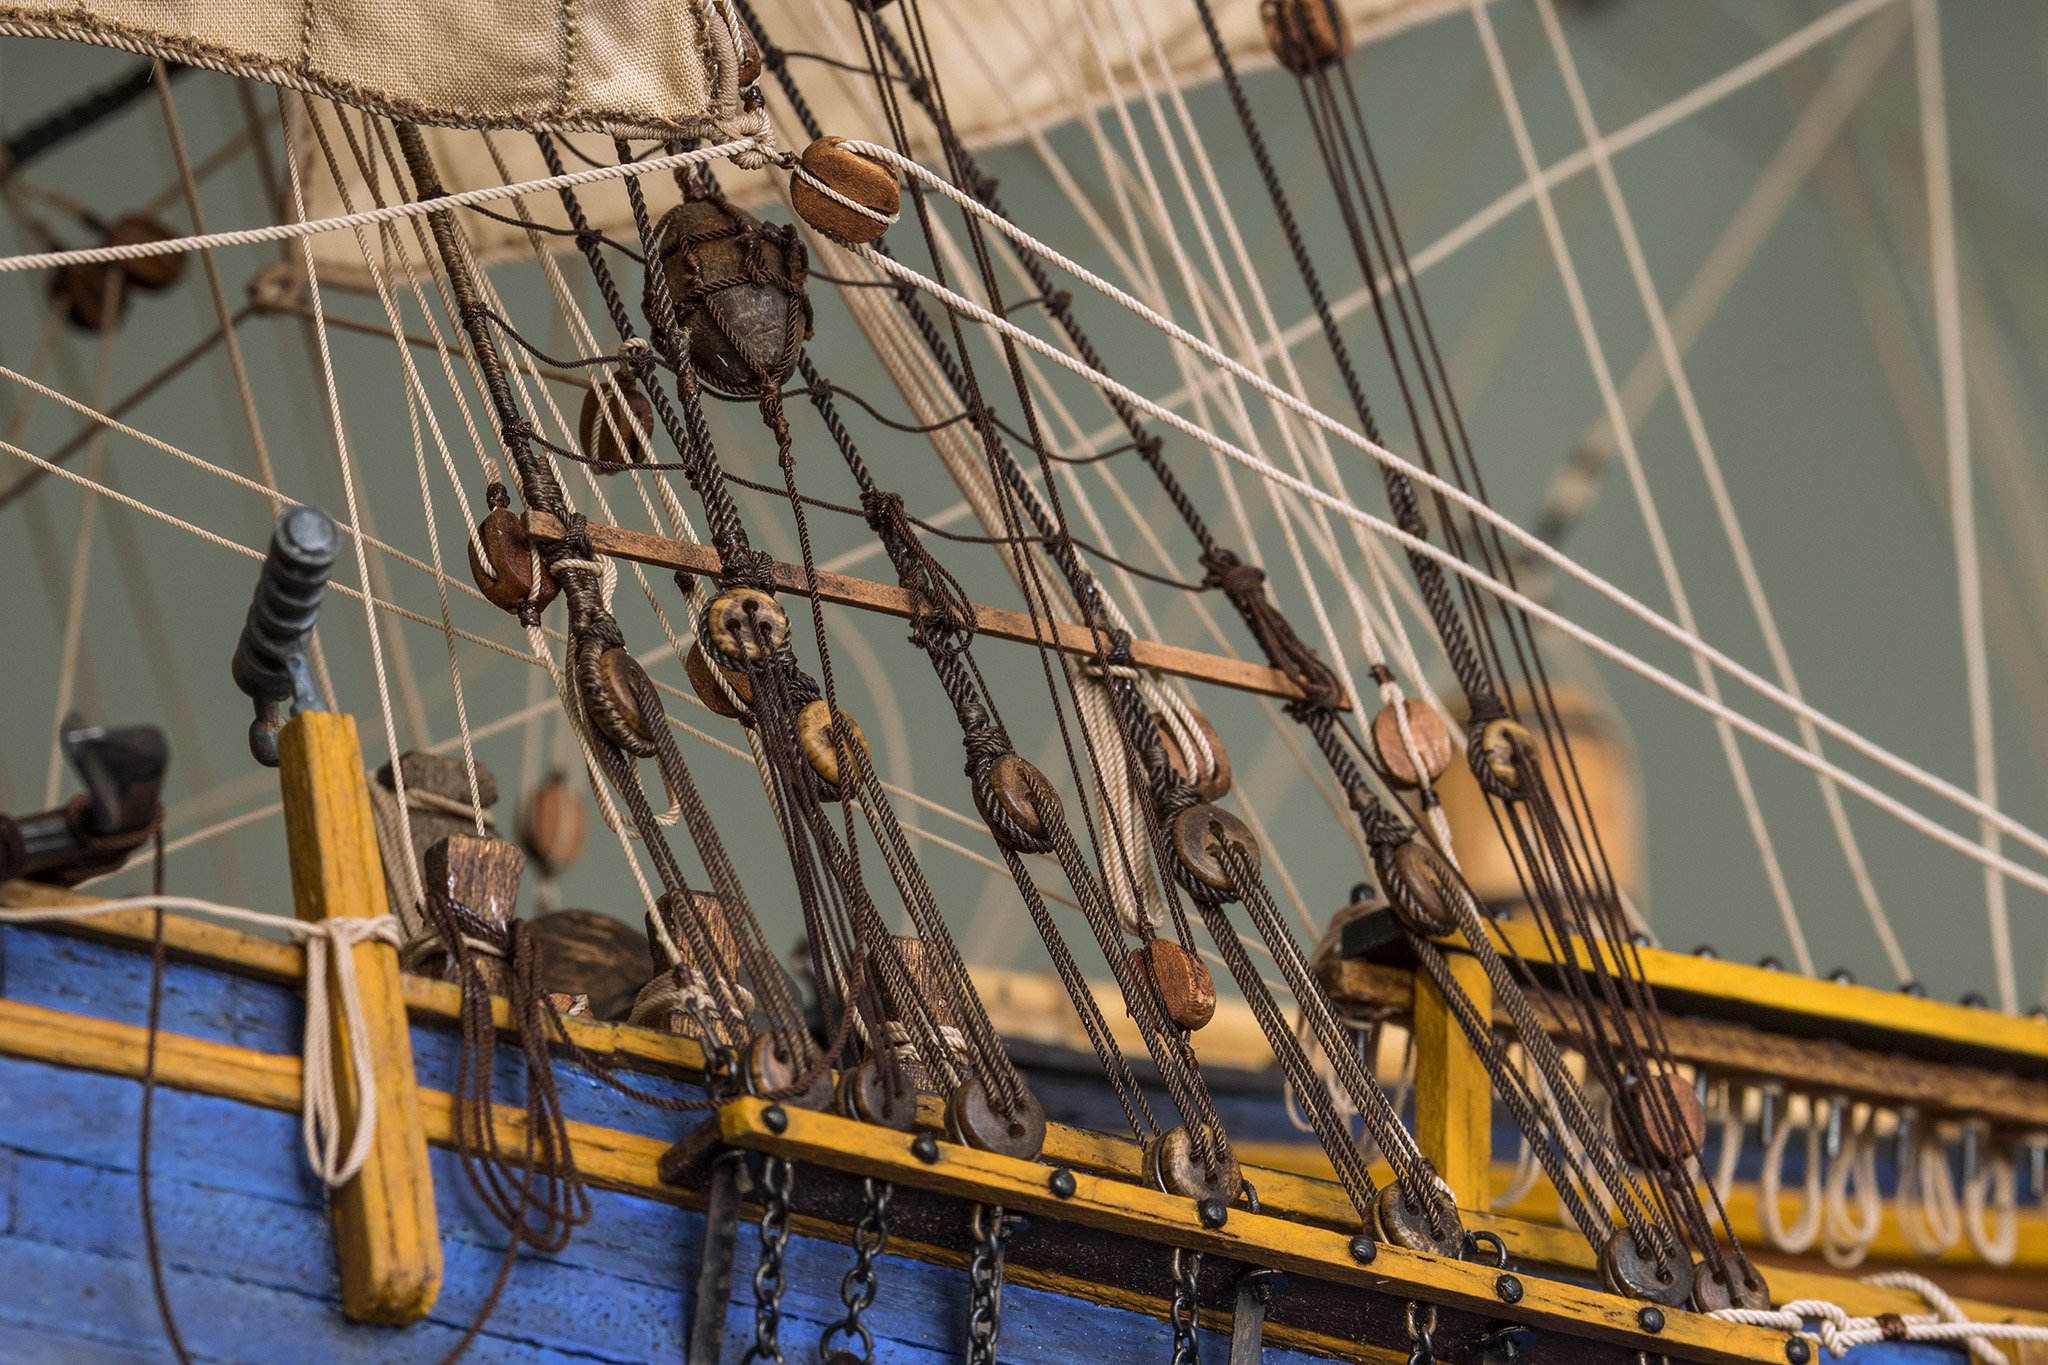
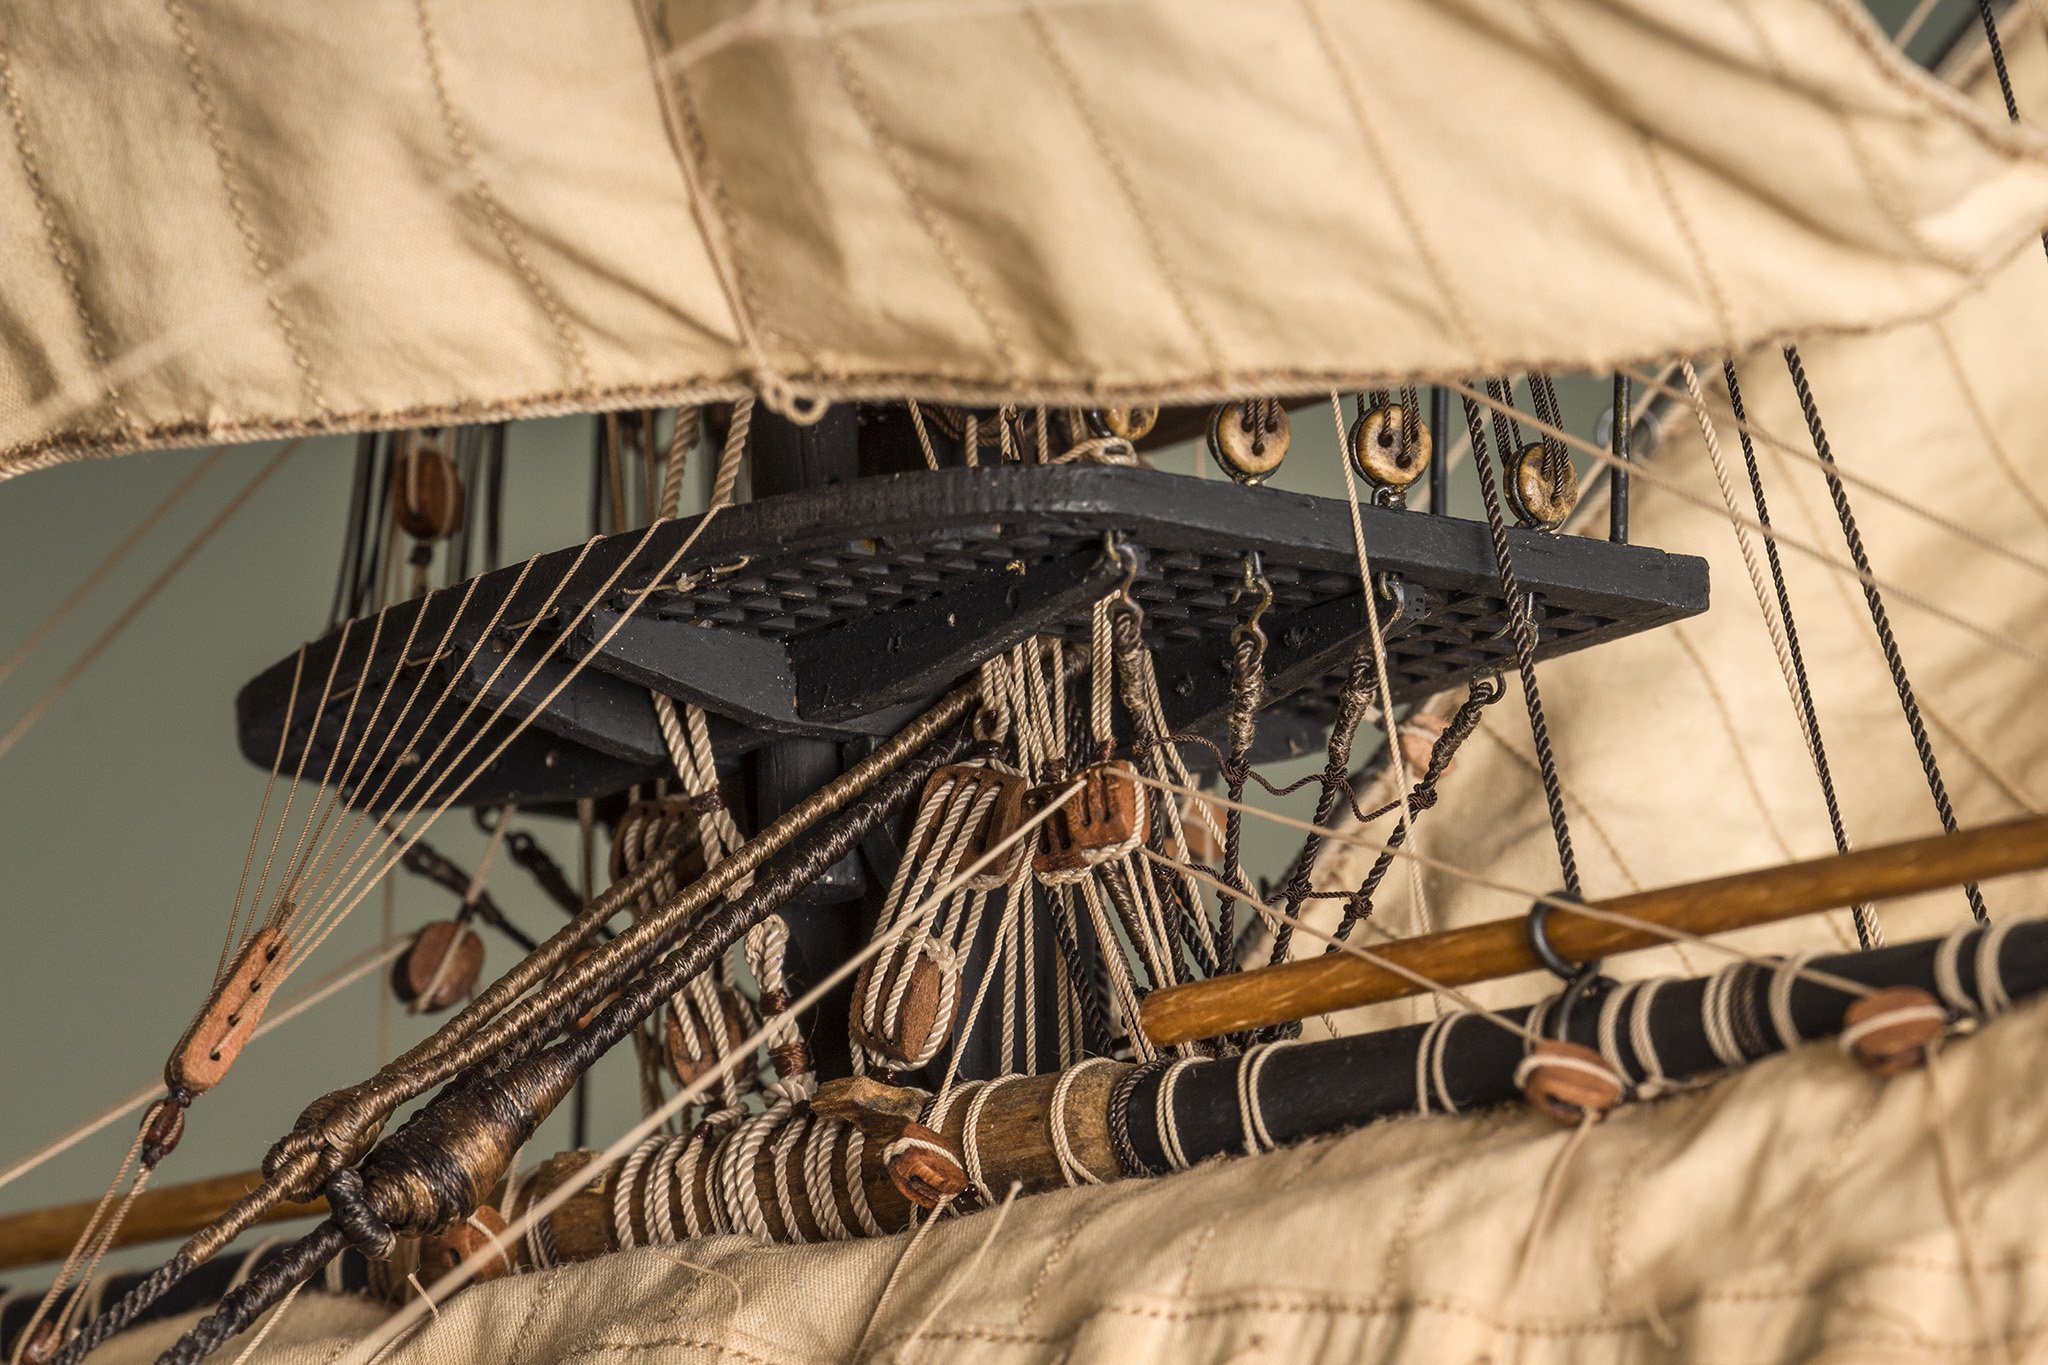
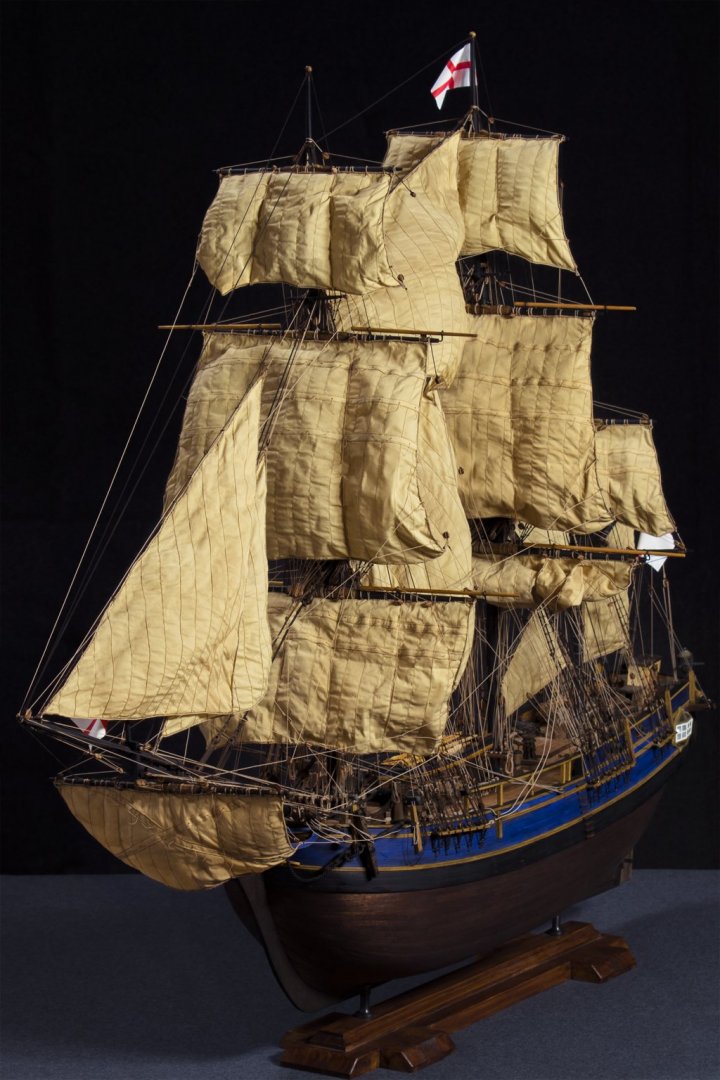
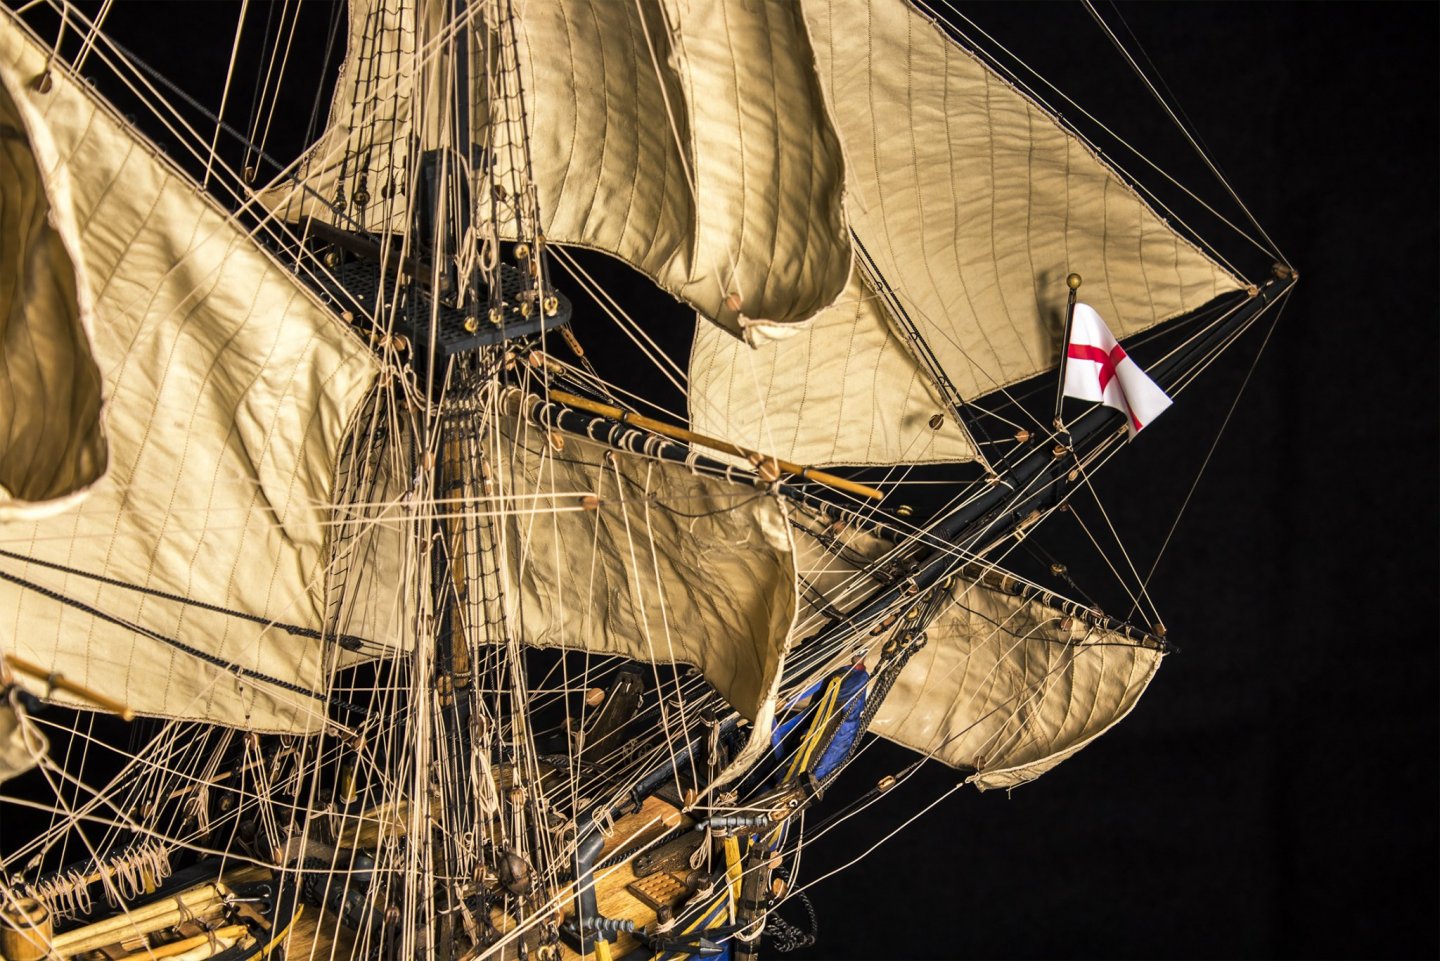
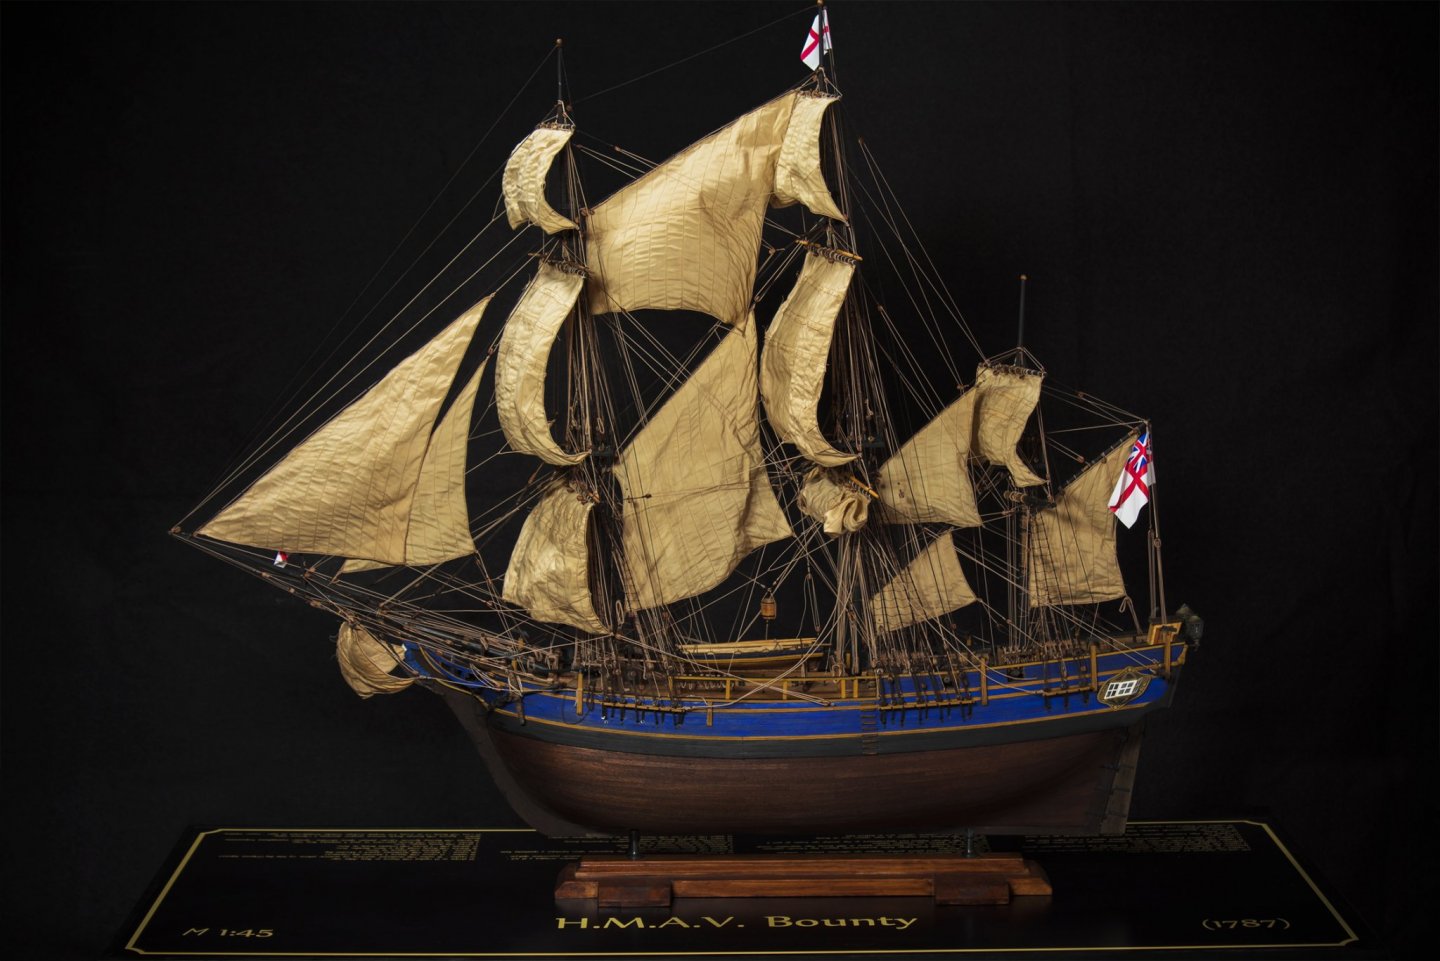
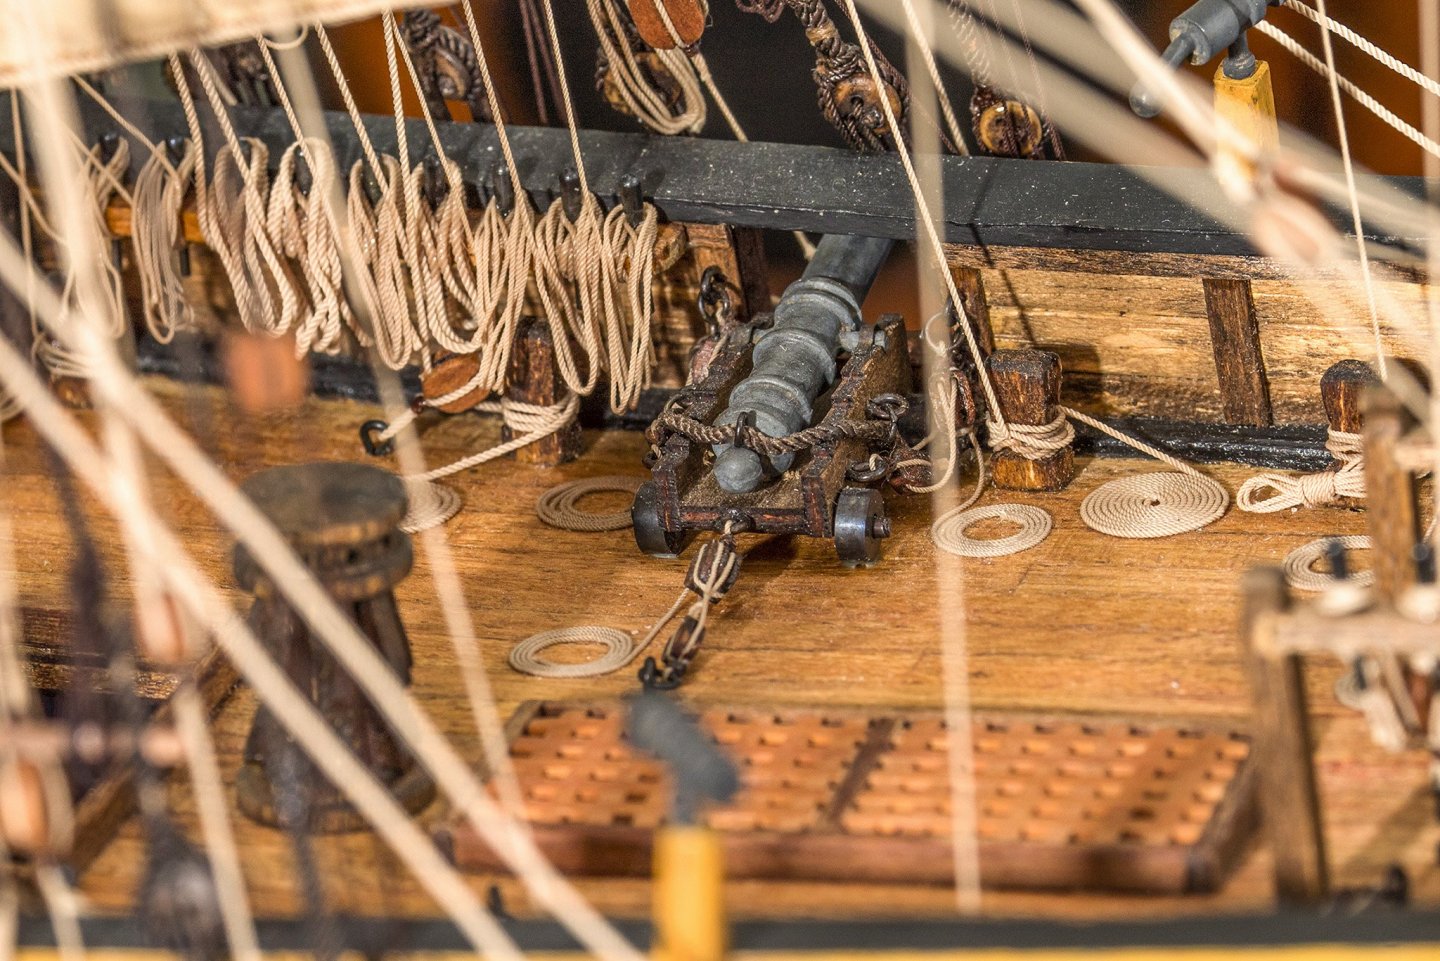
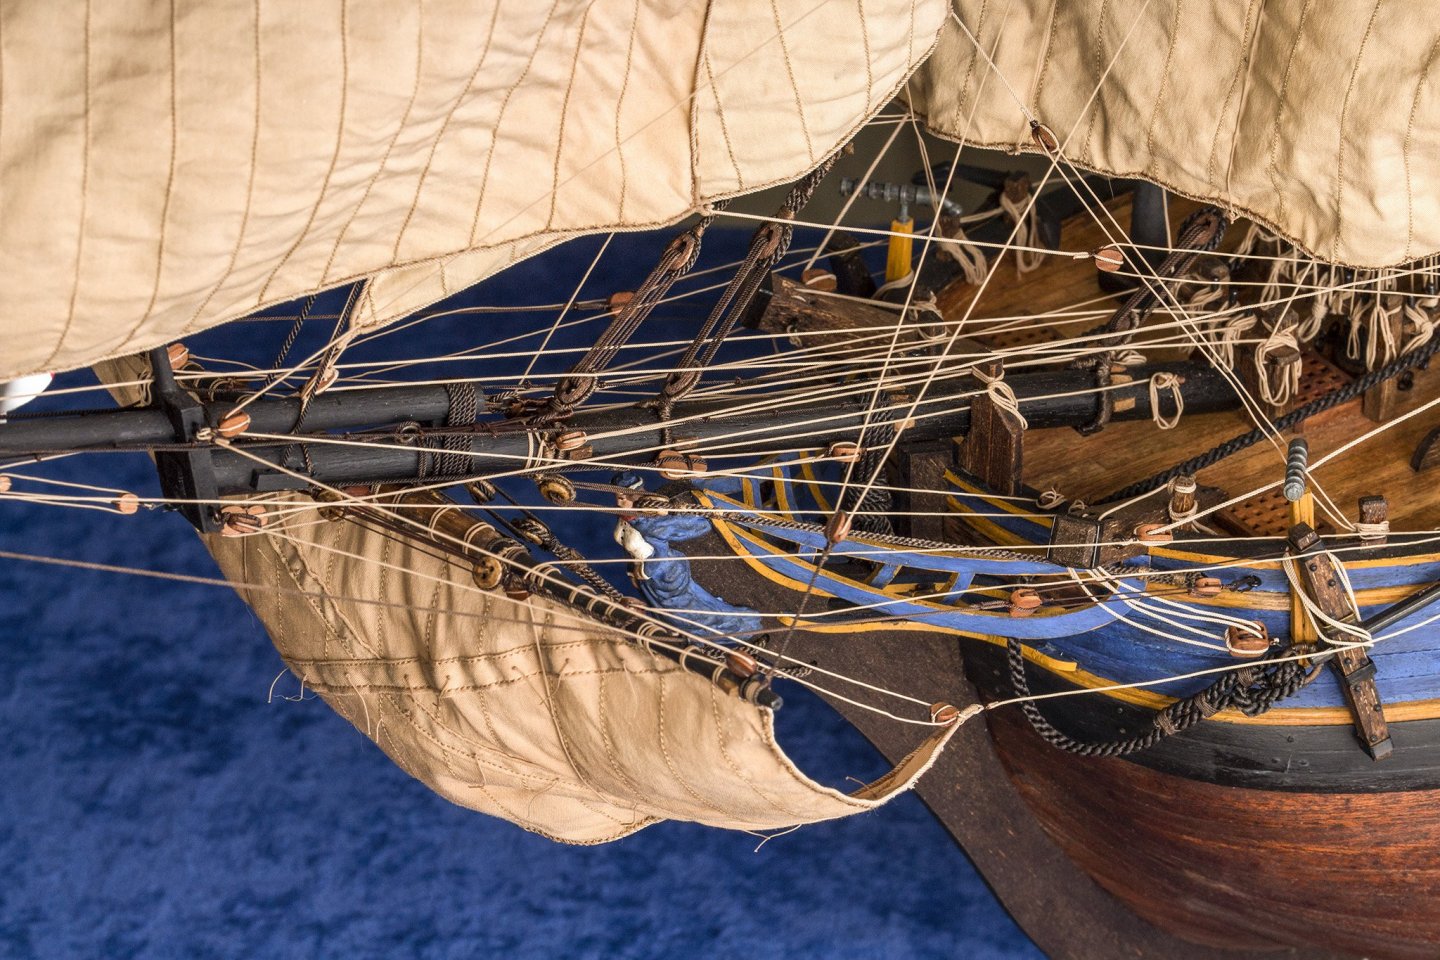
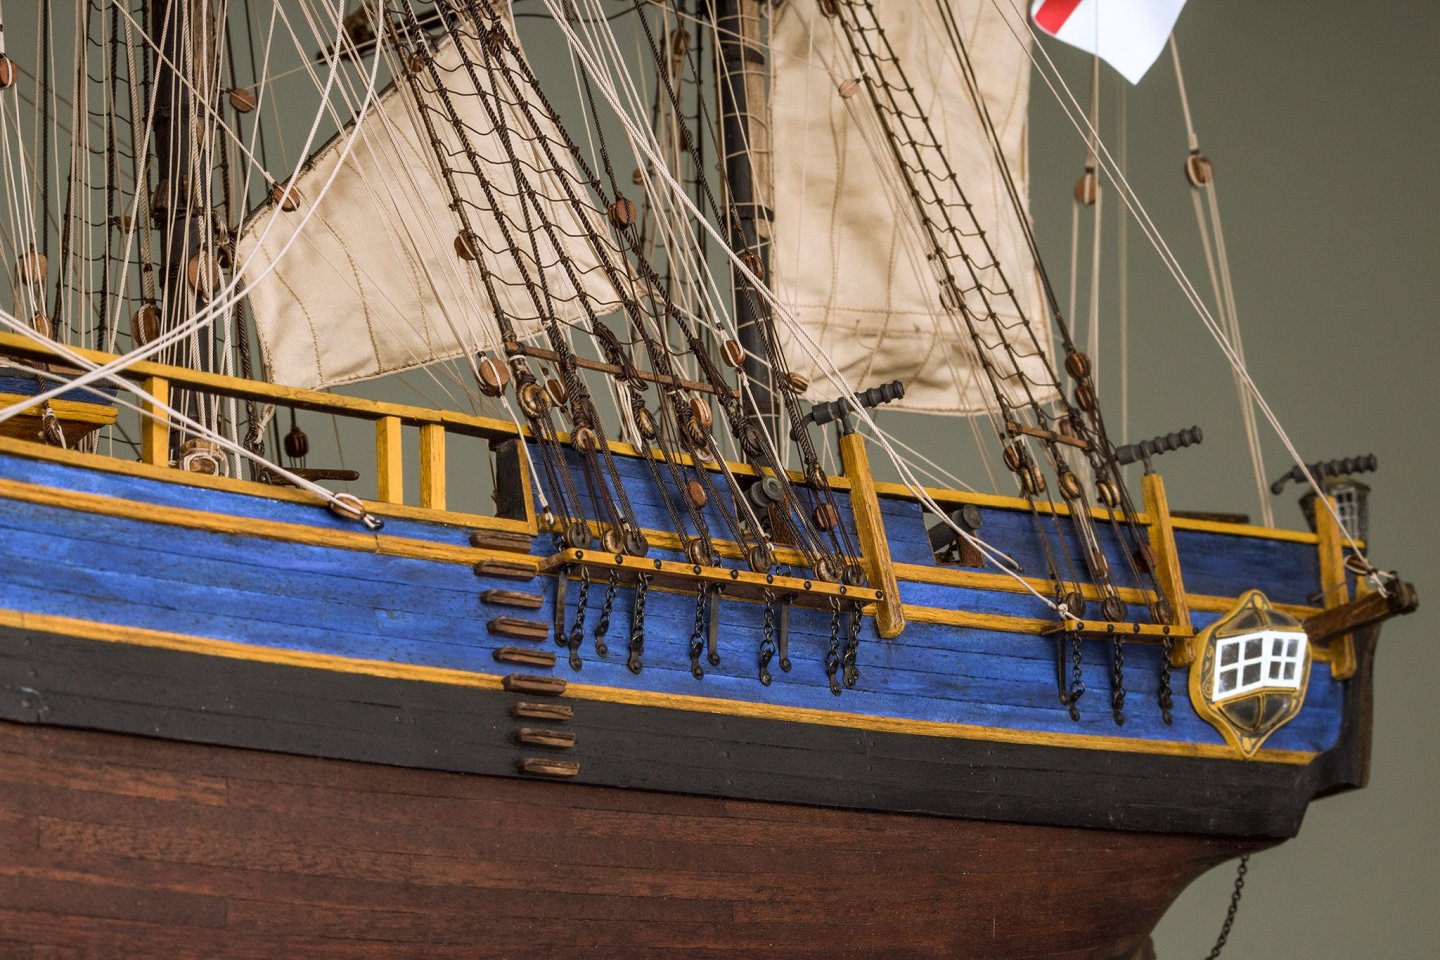
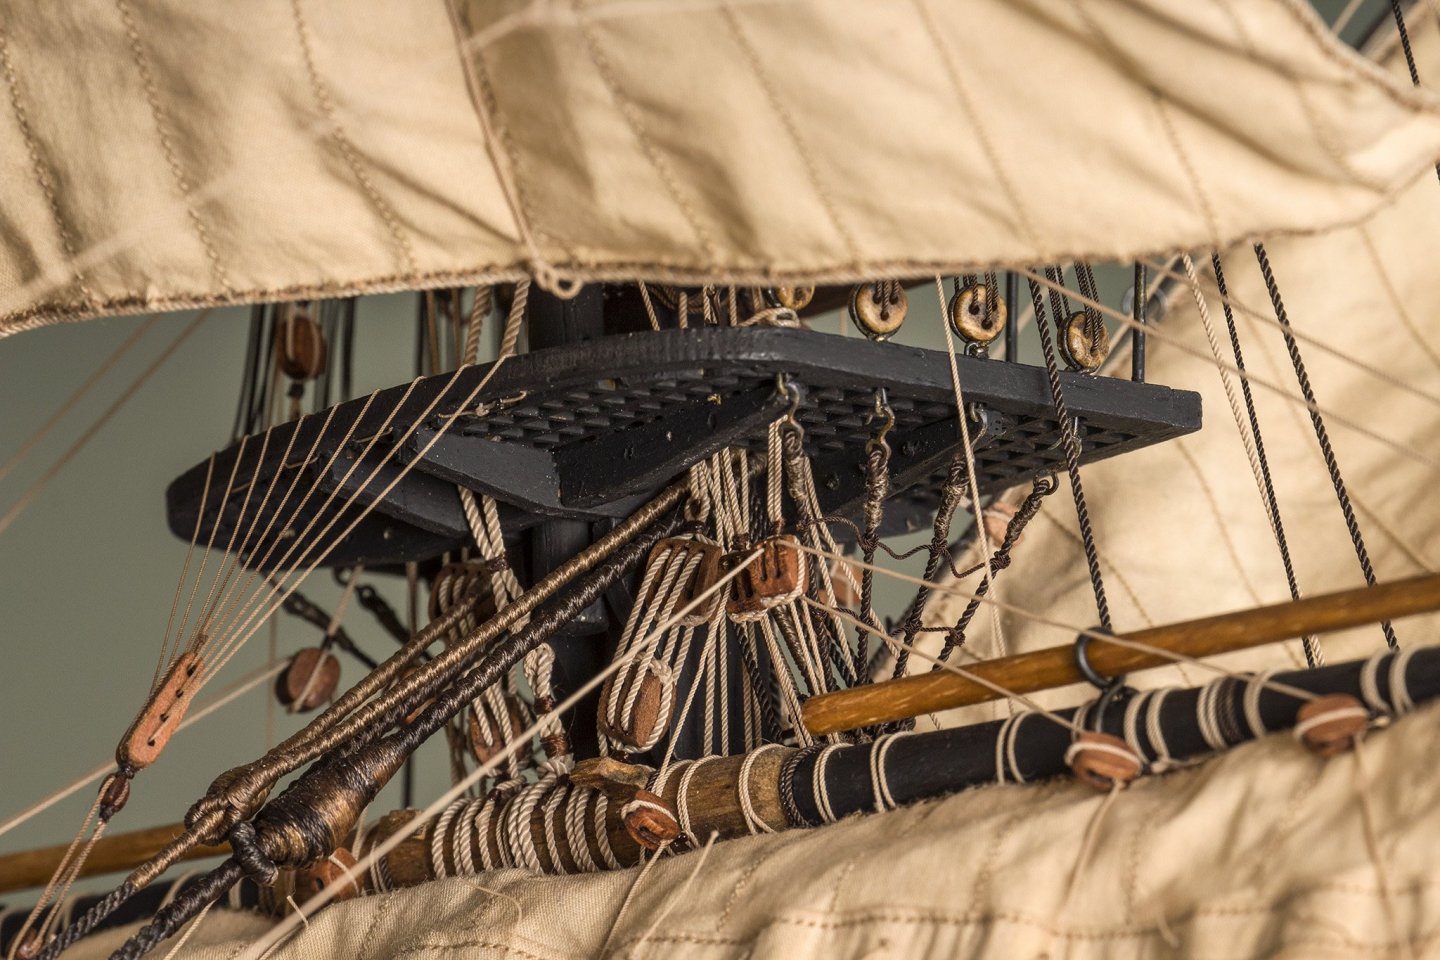
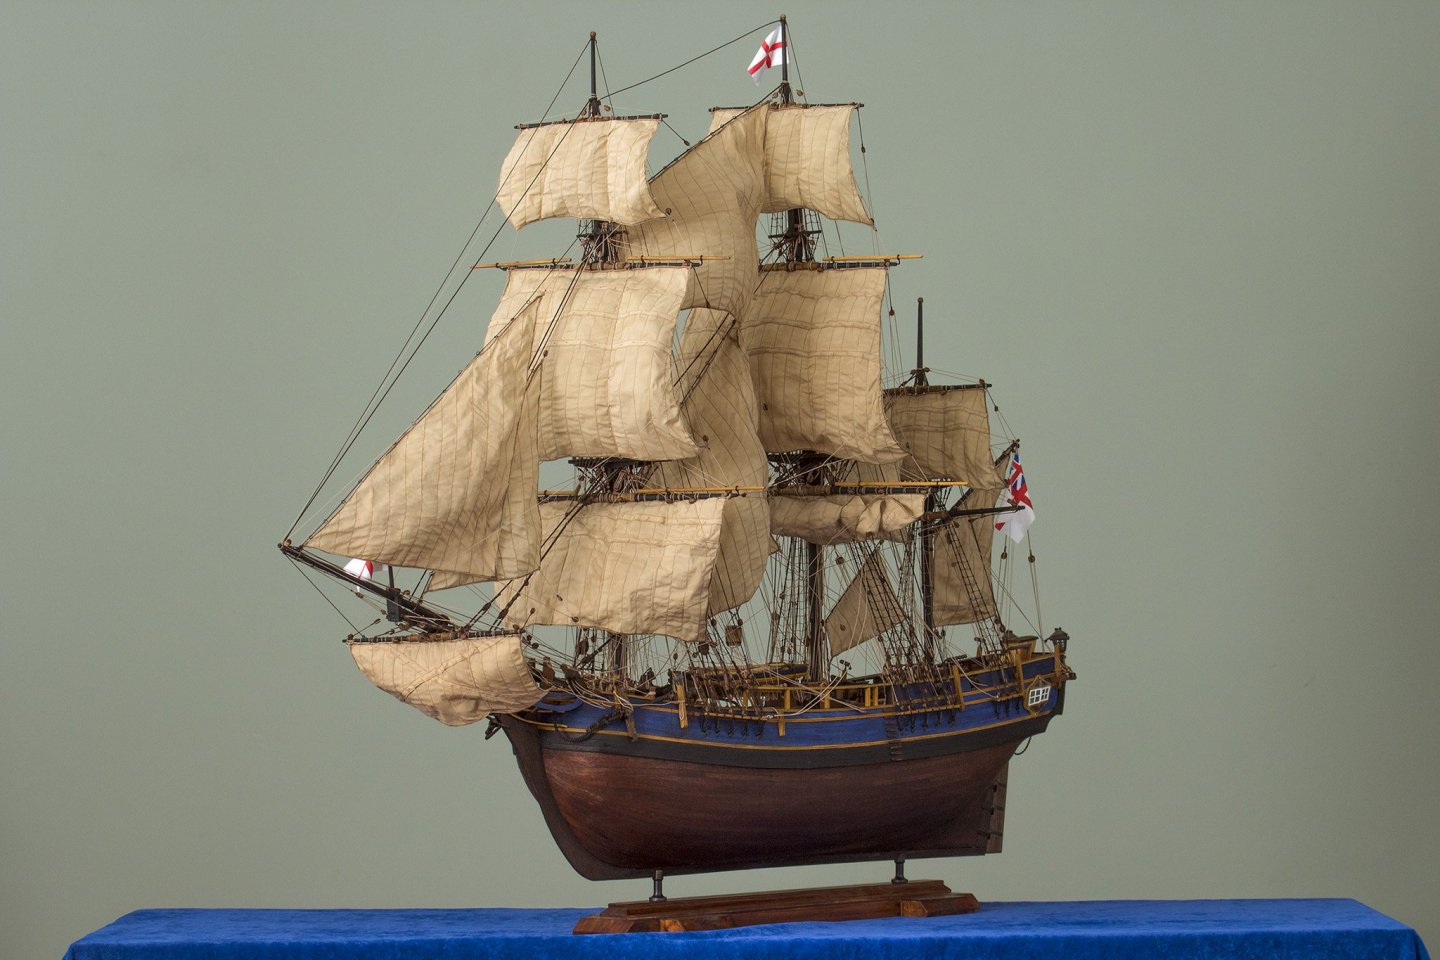
 A scale model of Captain Bligh's BOUNTY, Eaglemoss' collections...


-
Click on the tags in the title above (shown in black) for an instant list of all the build logs for that kit subject.
-
Click on the tags in the title above (shown in black) for an instant list of all the build logs for that kit subject.
-
 Click on the tags in the title above (shown in black) for an instant list of all the build logs for that kit subject.
 -
 How many hours did your build take? And how experienced were you when starting said build? Hey guys, I am an absolute amatuer (don't even own tools) and have ordered the Billing Bounty as my first build in 20 years (since I was a kid). WHY you ask?.. Because it was on sale & my gf wants a nice authentic looking ship to go in her living room, and it's all about the aesthetics of the display piece for her. Not the love of seafaring or anything like that. So higher quality models it is! But a pre-built ship of this caliber would cost around AUD$1000 (way over her budget of $300), and the cheaper model kits seem to look not as refined/detailed or large. I'm very interested in how long it took all you guys, as my gf doesn't want to be waiting around for it too long. As daunting as this build looks, I do have a lot of free time over the next month or two & my housemates will no doubt develop envy (hopefully this build allows for some teamwork?). Plus there are heaps of awesome build logs I've discovered in here to help me out too (especially Steve). It won't be shipped out to me for another week, so I am still able to cancel the order if anybody has a better suggestion?
 -
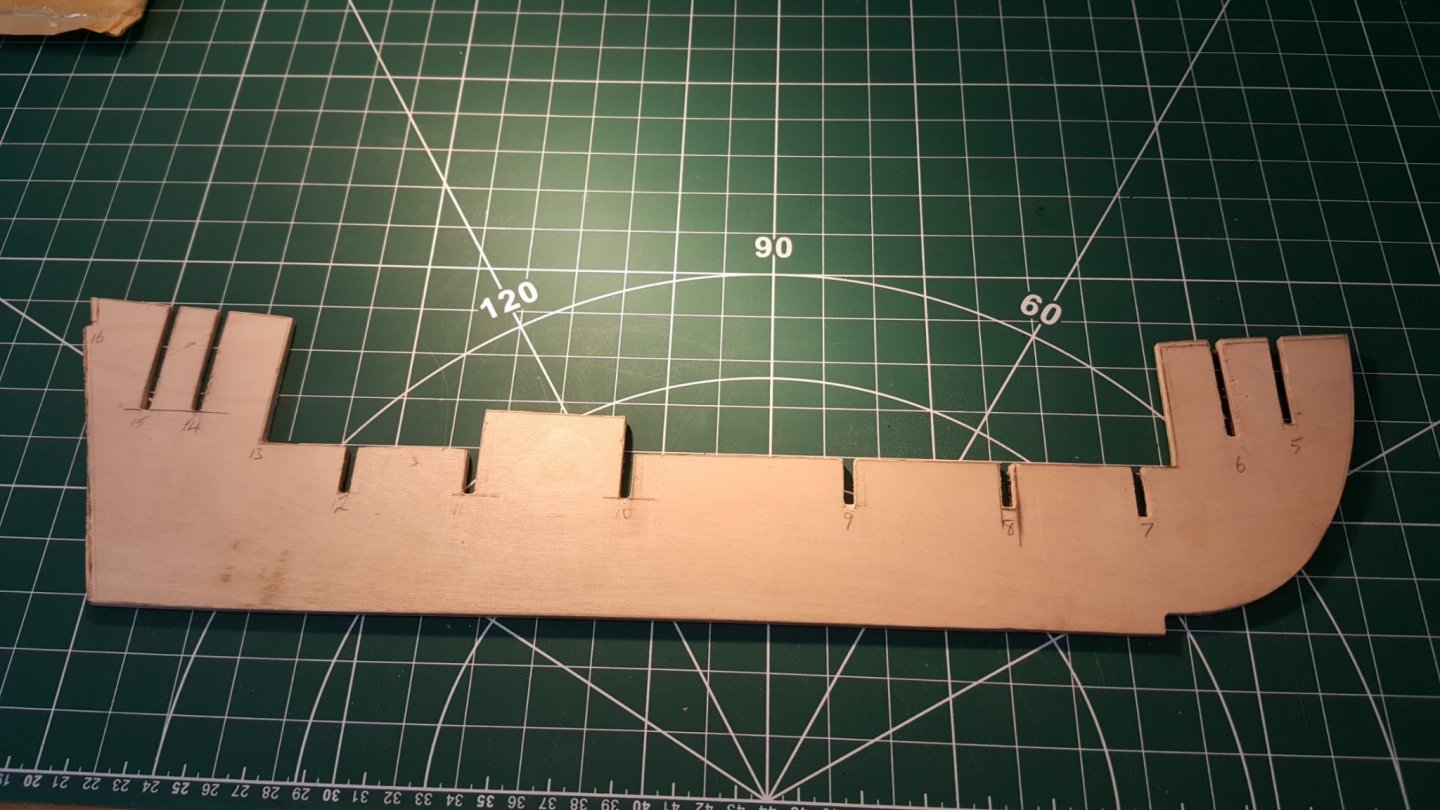
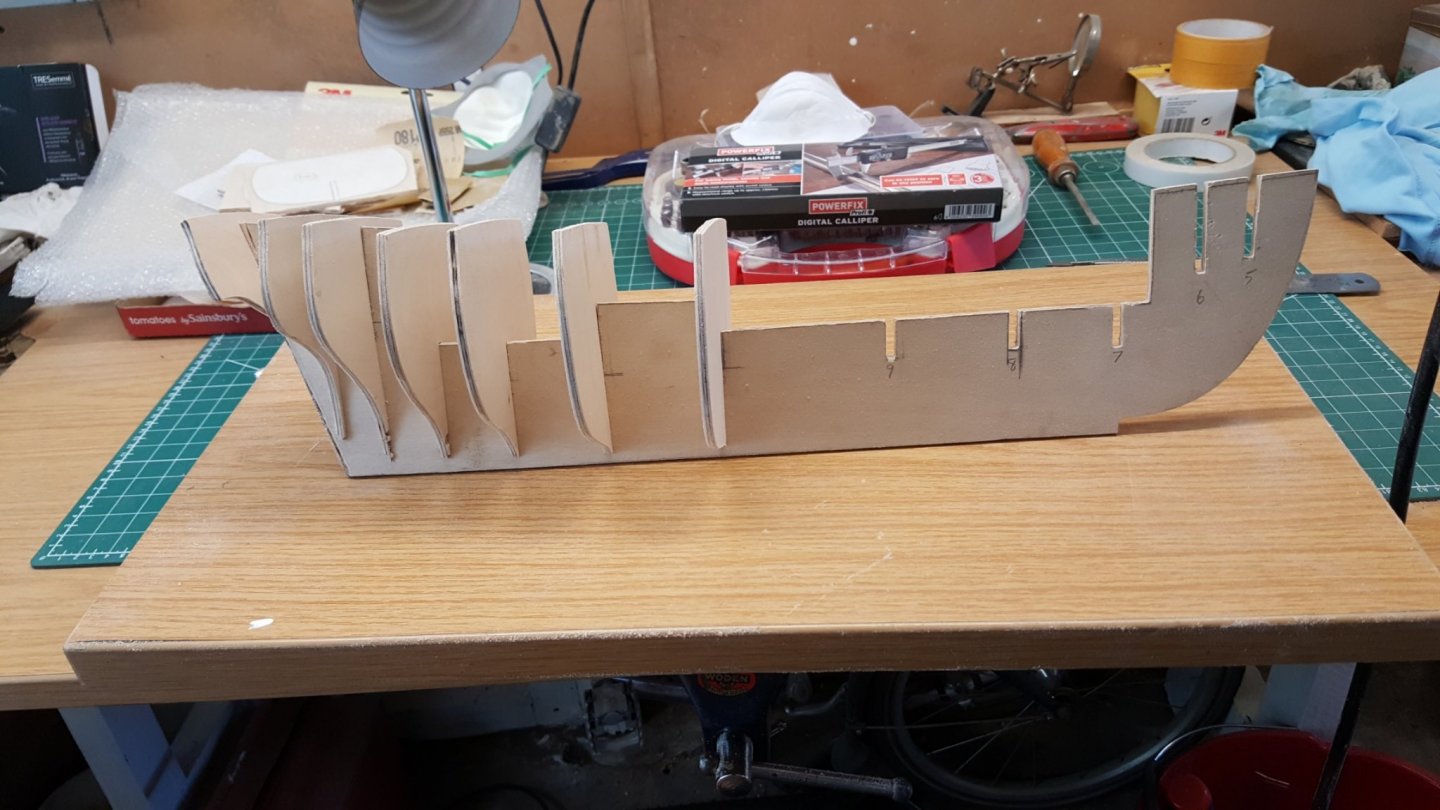
ok so here is my first attempt at a build log. I have made the false keel in the process of making the bulwarks ATM it is taking me sometime as this is my first scratch build so going slowly. I am not in a hurry as am retired. looking ahead I went online and purchased some pins and small screws am thinking of trying to make some planking screws. included some pictures need to take some more as I have nearly finished making the bulkheads just one more to do. then adjusting so that they fit square.