Louie da fly
-
Posts
7,991 -
Joined
-
Last visited
Content Type
Profiles
Forums
Gallery
Events
Everything posted by Louie da fly
-
Welcome to MSW, German. There are a quite a number of people here also making models similar to yours. Make sure you start a build log for your Graf Spee - even though it's already under way. It's a great way to get help and advice from others who have already been there and found solutions to the inevitable problems that crop up. And some have the most amazing research resources on ships of the type you are building. (Also, we like to see pretty pictures! )
-
 What he said. Just what i would have said if Gary hadn't beaten me to it. Beautifully sensitive repair, keeping so faithfully to the original character of the model.
 -
Beautiful work on patching the hole. It is completely invisible now (at least as far as i can see from the photo), with nothing even to show where it had been.
-
Looking forward to see this all come together in the real world!
-
That's a nice looking piece of timber, PJ. And I see you have the pizza oven and pogo stick ready for when you need snacks and exercise . . .
-
I was just worried it might be a thole-dethtroying process - and in fact two tholes were dethtroyed . . .
-
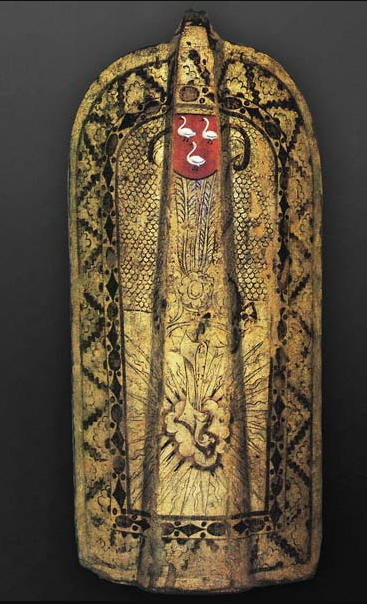
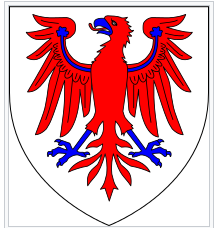
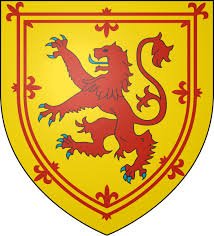
It's possible, Rodolfo. To me it looks like the shields have a central vertical ridge or "fold" I would say they are a type of tall shield known as a pavise. The blue shields certainly have 3 fleurs de lis each, but there's really not enough detail to know if the red shields have lions on them. I would be a bit surprised if they did, because Boucicaut was very much a Frenchman, and the lions were an English symbol. Boucicaut's own coat of arms doesn't fit the bill either, as it is as shown below. So I really don't know. As far as your own vessel is concerned, though, whether or not it carried heraldic shields would depend on how important the ship (and its owner) was.
-
Making good progress!
-
Hi Jenmack, Probably the best thing would be to put this question up on the "Masting, Rigging and Sails" section. You'll have more specific answers and it won't get lost among answers to Avnips' posts. I take it the Fregata is an already existing model that you father wants to repair? You might also try using the search function at the top of the page and search for "restoration" or "restoring", and then see what advice has been given on other, similar projects. Good luck with it!
- 8 replies
-
- 2
-

-
- santa maria
- restoration by a novice
- (and 4 more)
-
Welcome, Alexander. Make sure you start a build log. It's a great way to get help and encouragement.
-
Welcome back, Dave. If you're in Melbourne it's a bad time to be out and about - and a good time to stay home and make models. What's your next planned build?
-
Aha! As Terry Pratchett would say "A pune, or play on words". (And a particularly dreadful one - I love it!) I'm afraid so. I'm just glad I noticed it when I did. Thanks everyone for all the likes - I haven't acknowledged them for awhile.
-
Hi Keith, I'd agreee with Boxbuilds that she represents an English ship - the cross of St George (red cross on a white field) over and over again on sails, flags and shields. The other shields seem to be generic - simple designs that would be easy to paint - usually dividing the shield into two parts horizontally (called in heraldic terminology per fess) or vertically (per pale), or with a simple vertical bar (argent, a pale azure = white field,with a blue vertical bar), plus a couple with a lion standing up in threatening position (rampant) on a white field (argent, a lion rampant gules). If the field behind the lion had been gold/yellow and there'd been a double red border with fleurs de lis, it would have been the Scottish royal coat of arms As it is, it's nothing in particular. Another point I'd make is that it was presumably made for the English (or at least English-speaking) market. The name-plate says Germany, not Deutschland. Its shape is reminiscent of a lot of contemporary pictures of carracks, where the lines were exaggerated, with the stem and sternposts leaning inward far too much Yes, it's a decorator model, but it's rather cute and has its own charm, and as you say, its age now makes it a historical item in its own right. You're doing a nice job of restoring her. Keepup the good work.
-
Looking forward to seeing the build log for your next build, Mike!
-
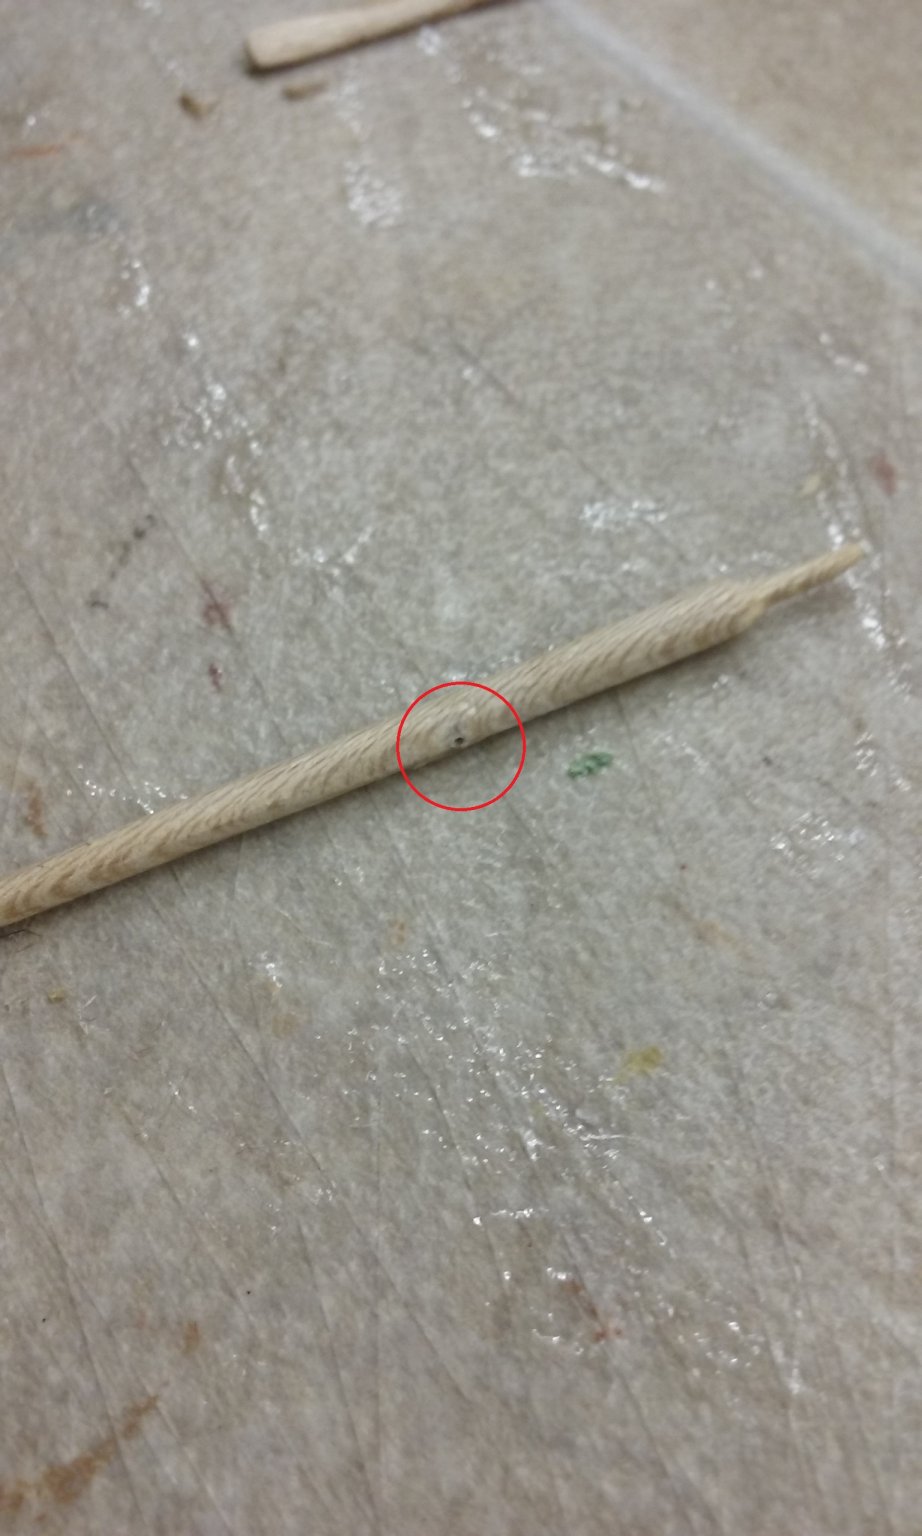
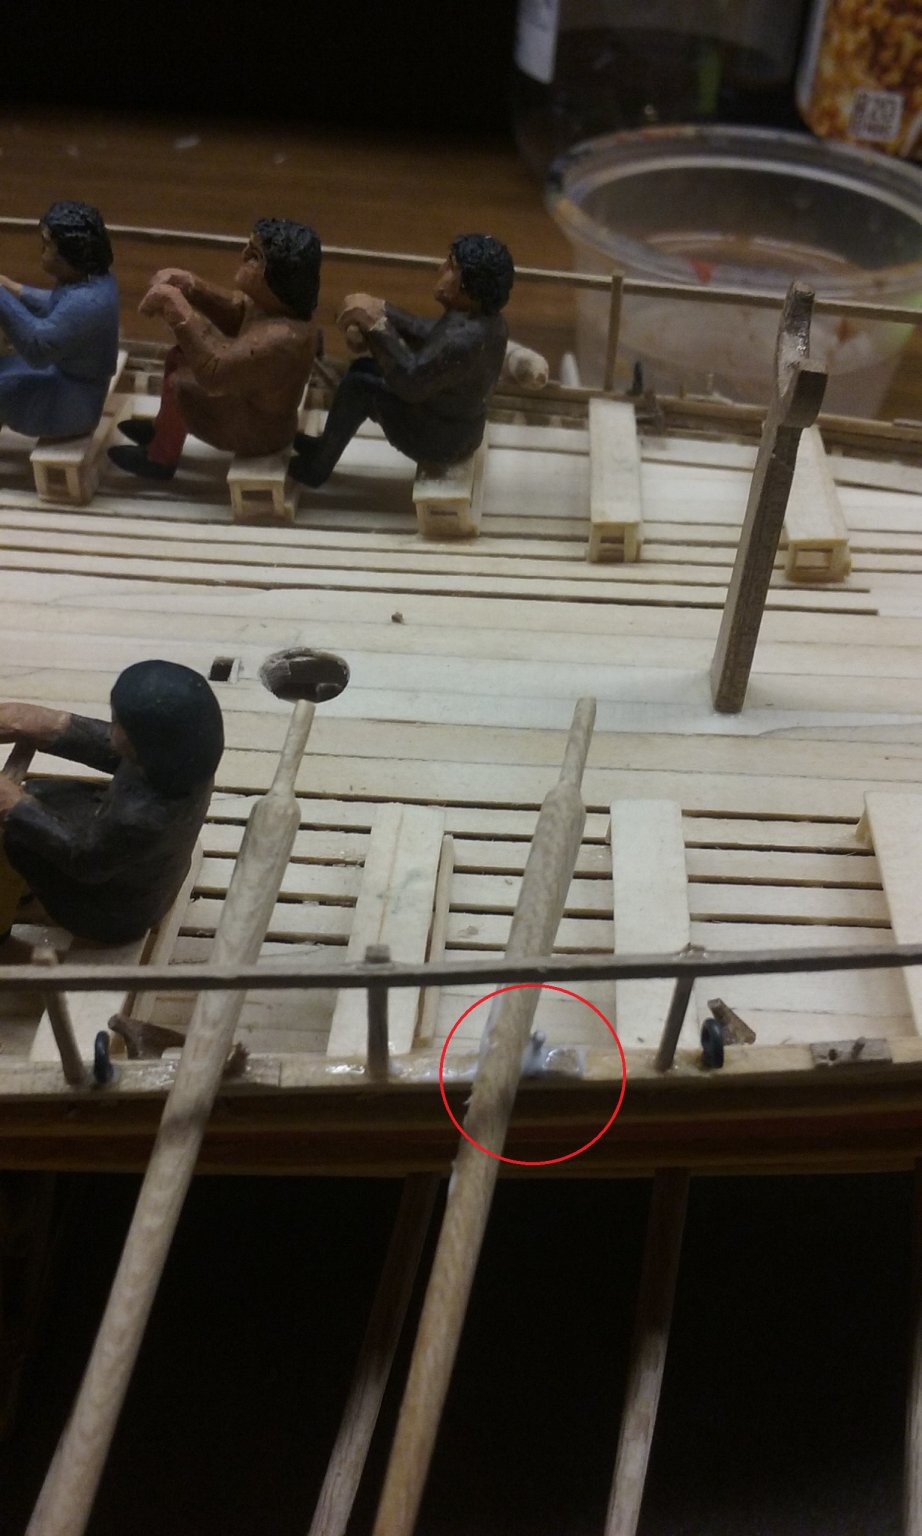
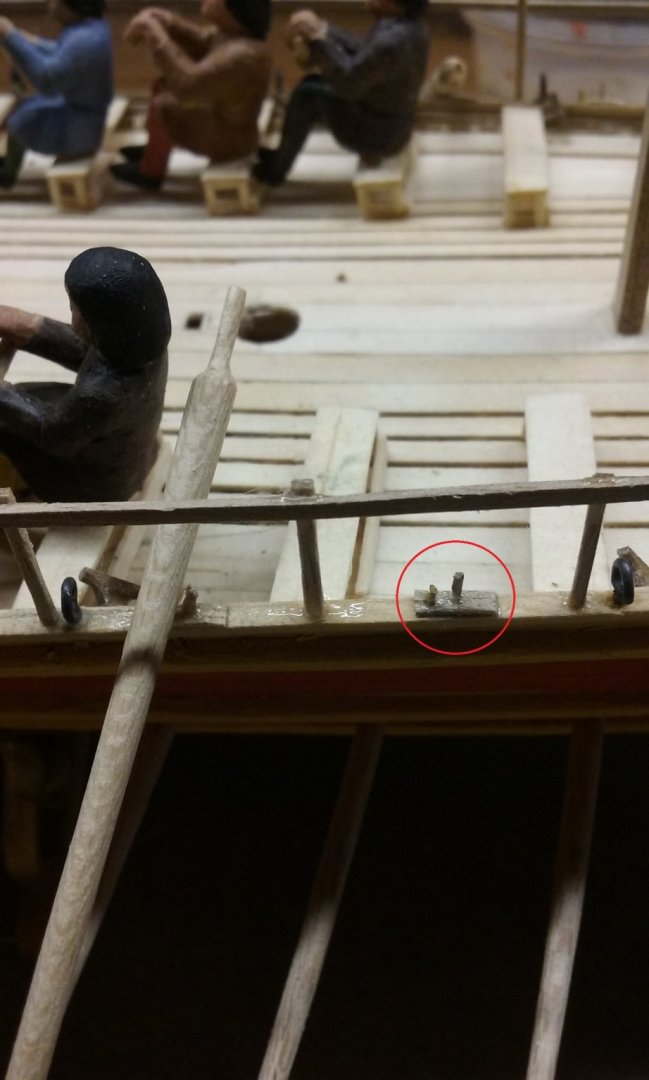
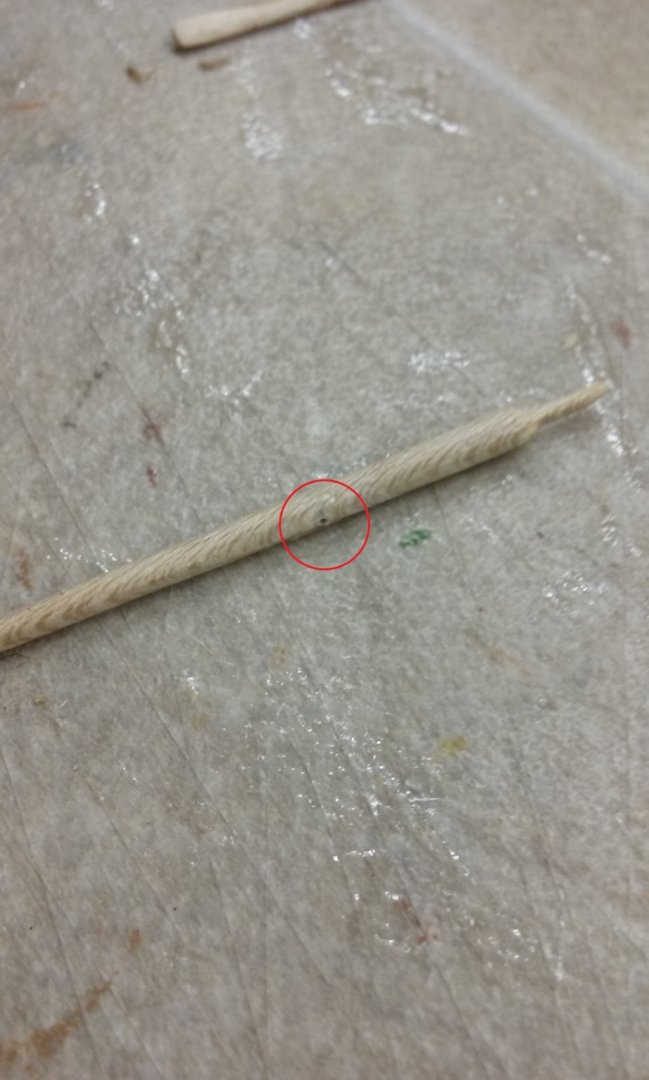
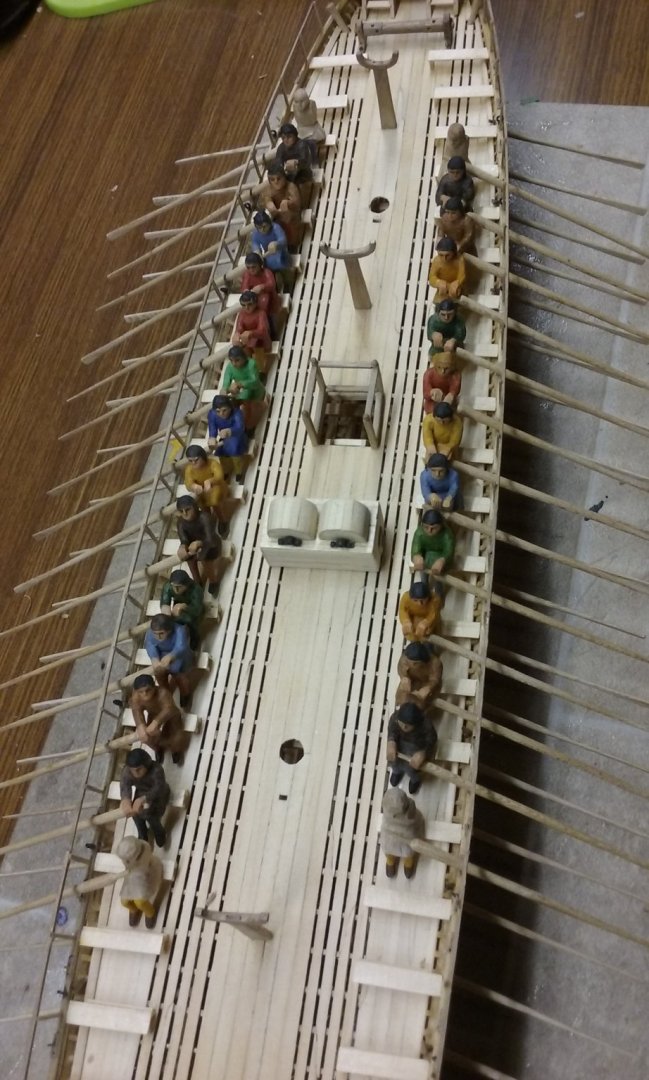
Oops! Made a mistake. The oars are notionally kept in place by a rope wrapped around the oar and the thole, but in fact are glued in place and held with a little brass pin next to the thole, glued into the gunwale and a hole in the oar: The tall one on the right is the thole. Which is all very well, except when I put the hole in the oar over the thole. Doesn't sound like much of a mistake, but it moves the oar about a millimetre and a half (about two to three inches at full scale) towards the oarsman, which affects the length of his arms (they're already as short as I can in conscience make them). So I had to remove two of the most recent batch of oars (which meant the wooden tholes broke off, of course), make new tholes and re-drill the holes for them and put the new ones in place. And then put the oars back, but this time in the correct position. The glue is a bit messy, but that is mostly invisible when it's dry and covered with the rope around the thole, and it adds to the firmness of the joint. Oh well, relatively easy to fix, and I'm glad I spotted it now rather than later .

-
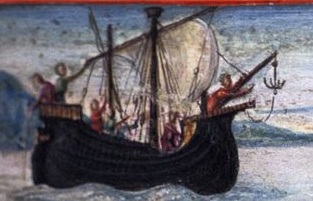
Thanks, Rodolfo. I've had the same problem with not recording the sources of pictures I've copied. It's a difficult lesson to learn, and I've several times had to do a frantic search to find where a picture came from. Nowadays I also try to remember to record the internet address of the place I got it from. There's some very interesting details in this one, such as the alternating shields on the sides of the ships - every second shield is blue with three gold fleurs de lis (denoting the French royalty), and the others are red but I can't make out what the symbols on it are.
-
Another four complete, and another four begun. The benches are starting to fill up . . .
-
You're right, Rodolfo. All the contemporary pictures from this time show a triangular forecastle, not a trapezium (called a trapezoid in the U.S.). Even the picture on the box your kit came in shows a triangle! And so does the original model, the Mataro ship. You've done a nice job making sure everything is square and accurate. In your post you show three contemporary manuscript pictures of ships. I already know the first two, but can you tell me where the third one comes from and what it is? I've never seen it before.
-
I'd say you were on the right track. It's by no means unknown for kits to need a fair bit of tweaking before they work properly. You seem to have done everything necessary to ensure the fault didn't lie with what you'd done yourself, so it seems to lie with the kit. I think adjusting the slots looks like your best option. In the long run, the false deck has to be square to the hull, and adjusting the slots (which as you mention, won't be seen anyway) is the way to go.
-
Nice work on the Revenge, and I can see you're already well into the Bounty.
-
Prynhawn da pawb - (Good afternoon all) from Wales!
Louie da fly replied to SweepHall's topic in New member Introductions
Welcome to MSW, SweepHall. Looking forward to seeing your Bounty under way. Interesting name you've chosen. Does it have a special significance? -
Good choice! Welcome to MSW. I'm looking forward to seeing your build log.