HOLIDAY DONATION DRIVE - SUPPORT MSW - DO YOUR PART TO KEEP THIS GREAT FORUM GOING! (Only 24 donations so far out of 49,000 members - C'mon guys!)
×


michael mott
-
Posts
5,198 -
Joined
-
Last visited
Content Type
Profiles
Forums
Gallery
Events
Everything posted by michael mott
-
 Hi John, yes I will need to add a sheave at the bottom of the topmast for the heelrope. so the topmast can be housed. Michael
 -
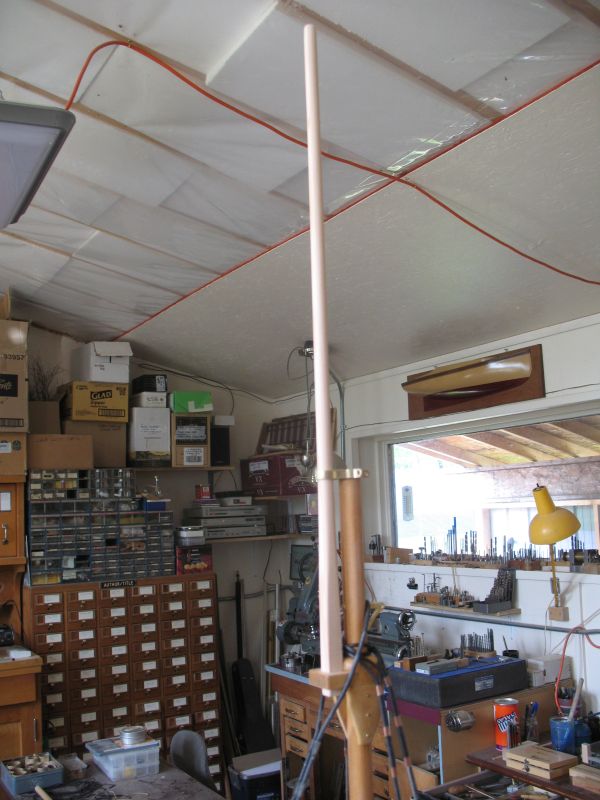
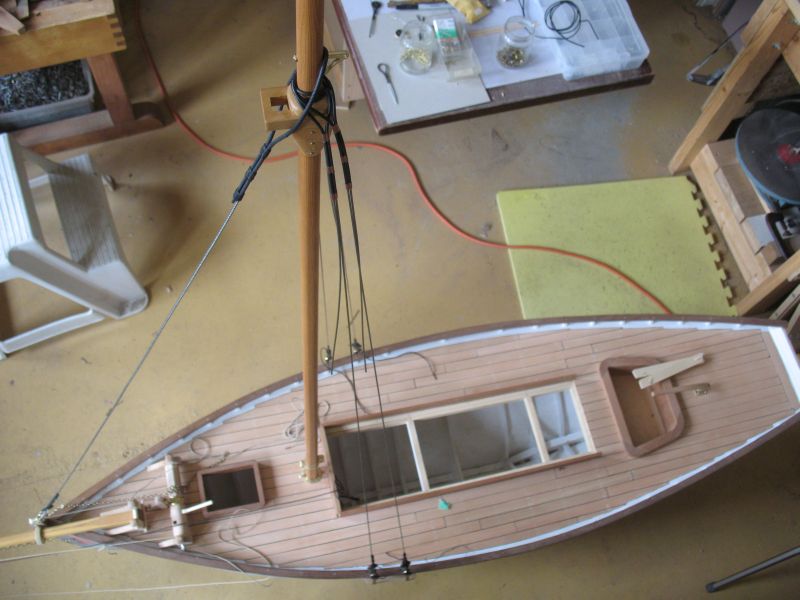
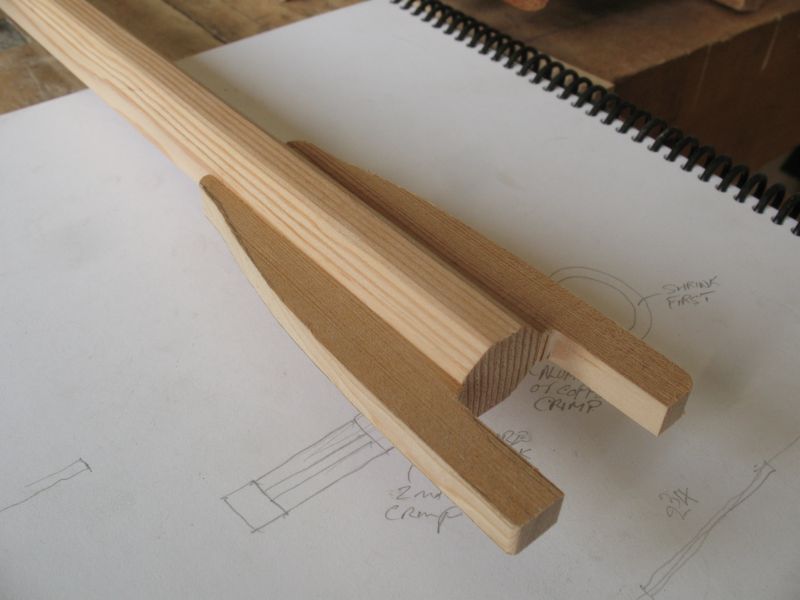
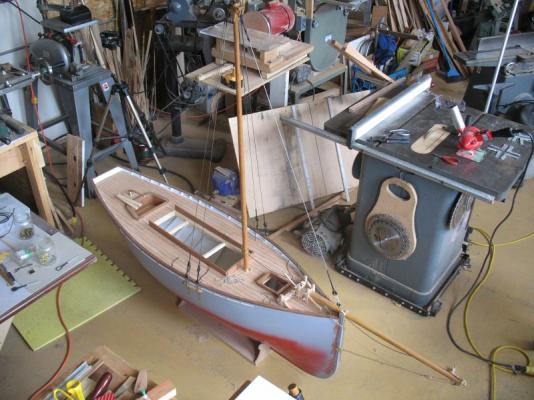
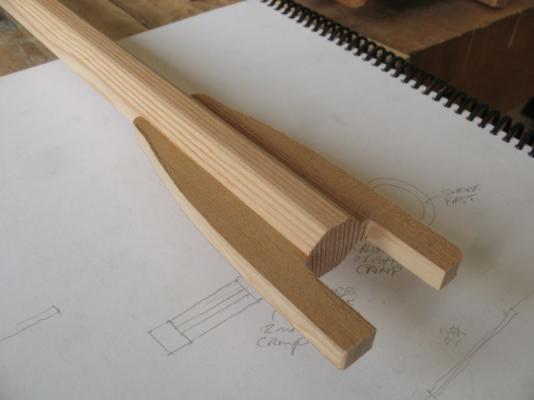
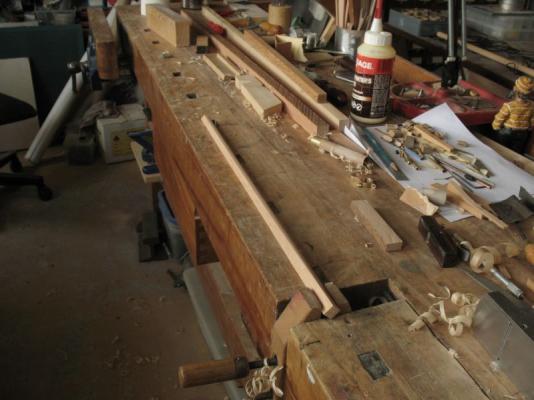
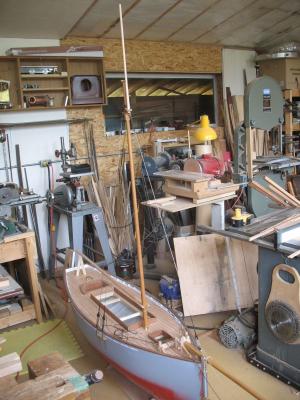
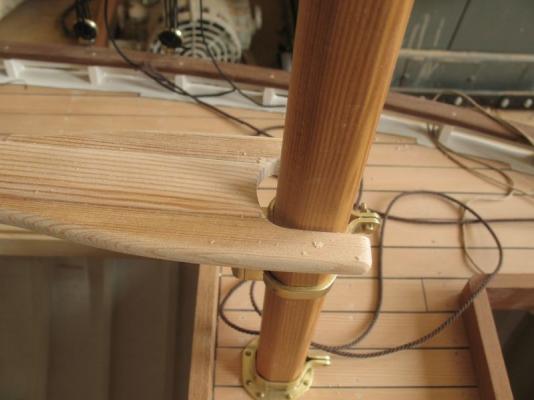
John, Mark, Carlos, thank your for checking in and your kind words. Today I put the boat on the floor so I could work at the top of the shrouds I chose to fix them in a similar manner to the lower ends. by dropping the model to the floor I could stand and the bolster was at 65 inches above the floor and the top of the topmast was 84 inches. I set all the deadeyes first then wrapped the shrouds around the mast and added some tension as I threaded the crimps and shrink I began with the forward starboard the forward port then hooked on the forestay which I made from 3/32 it was a lot tougher to work with than the 1/16th, then continued with the rear starboard then rear port shrouds. I will do the seizing tomorrow to give my fingers a rest. Time for the new boom, first the jaws were glued on then given a rough shaping. I will add some leather when the fixings are completed on the jaws. the wood is clear fir. The brass goose neck will be removed and a platform fitted for the gaff boom then a smaller mast started with a square section of clear fir and shaped down so that it could be slid up through the yoke, now I need to make the Fid and metal plate. thats it for now. Michael


-
There certainly are a lot of complex details in your build Paul. Michael
-
Good to see that you can find some time to continue the build. Moving is always a messy business. the deadeye looks fine. Michael
-
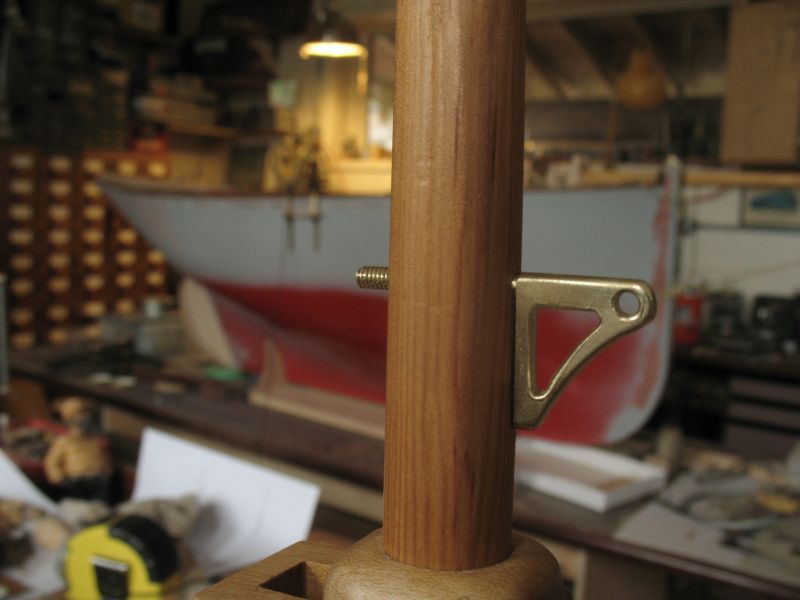
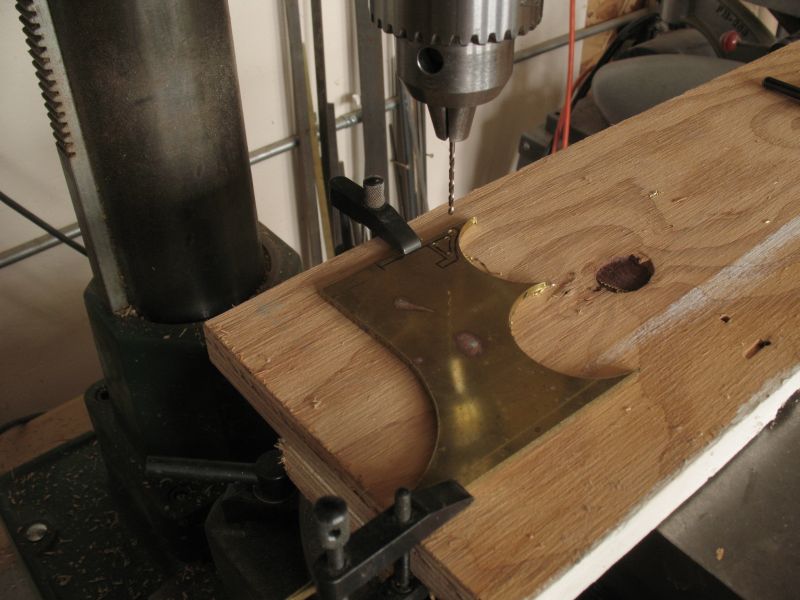
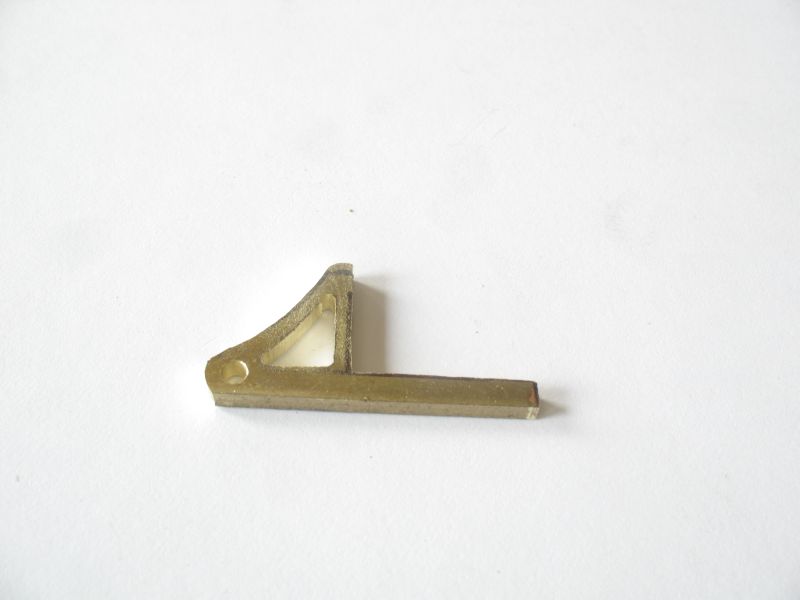
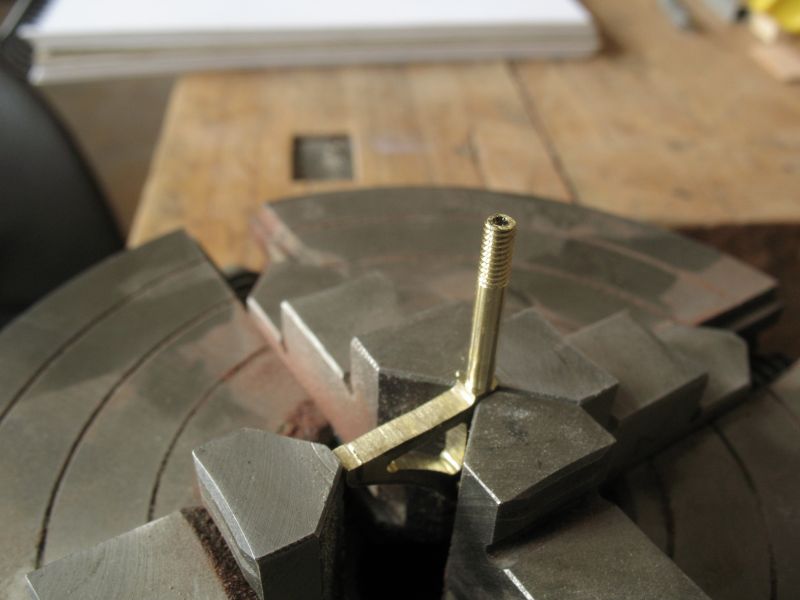
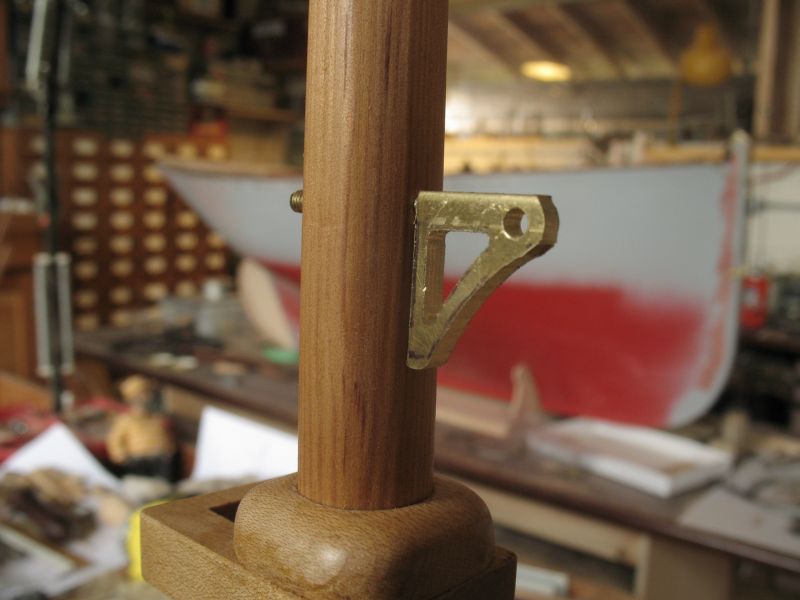
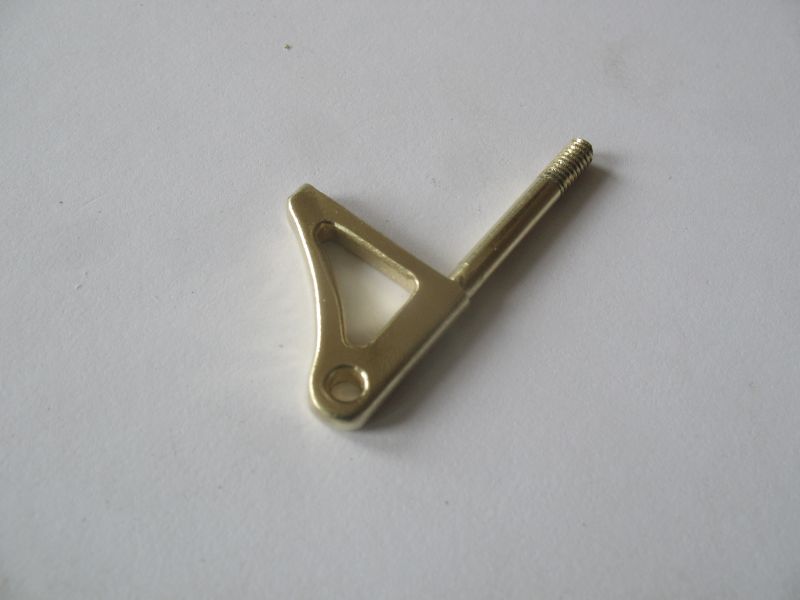
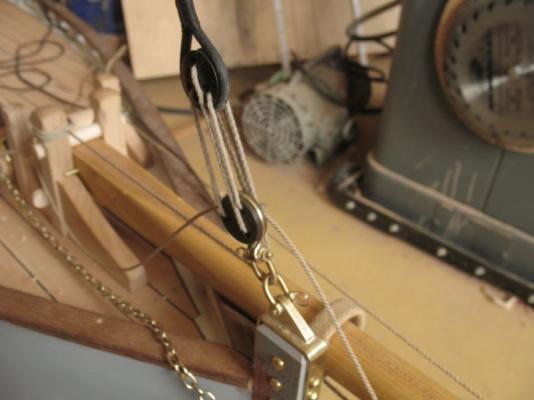
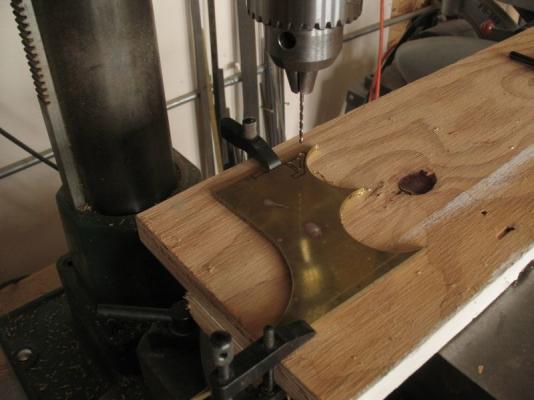
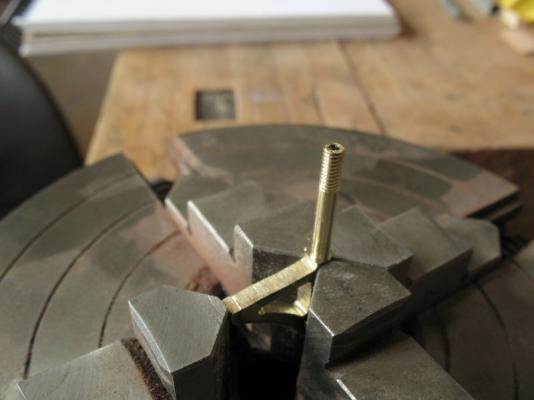
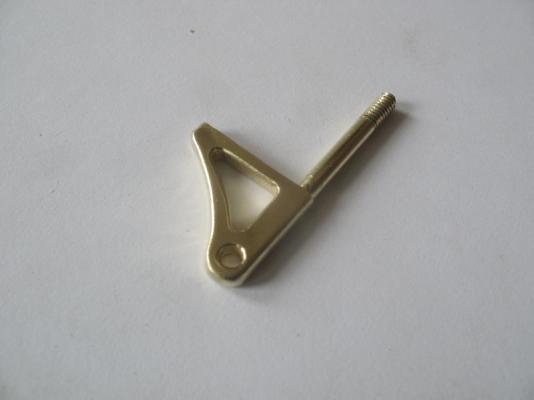
Daniel thanks for the kind words. Druxey, thanks yes it feels good to finally have solved this one. Bob thanks, it was a bit more difficult to work with than I anticipated. John thanks again for all your encouragement and critical support. Today I finished seizing the other three shrouds, and I realized that I did not want the forstaye to lay on top of the shrouds. there are some great drawings in the book "The Gaff Rig" by John Leather ISBN 0 229 97489 9 published by Adlard Coles Limited. That show some different variations on Cranes for raising the Gaff, some with a seat for the forestay. so this was today's project after finishing up all the seizings on the shrouds. I needed to make the crane so that I could determine the new length of the forestay. I did a scribble on some 1/8th inch thick brass sheet and drilled a few holes. Then I used the jewelers saw to fret out the shape The long section was then turned in the lathe while held in the four jaw chuck and threaded 5x40 I test fitted it to the mast. next was the toughest part filing it to the soft shapes, and a final buffing on the wire wheel, which gives the brass a sort of "cast" look. And a shot of it on the mast. I will drill and add a 1/16th pin in the lower end to prevent it from rotating and also file a seat for the forestay before it is locked onto the mast. Michael


-
Looking good Daniel I think making Cannons that small would send me over the brink. Michael
-
Gripos-kaiki by Giorgos - FINISHED
michael mott replied to Giorgos's topic in - Build logs for subjects built 1851 - 1900
Giorgos this boat has very beautiful lines, your skill is apparent! a fine build. Michael -
Nice start Elmir. Michael
-
Daniel the model is looking really great, will it actually see the wet stuff? Michael
-
Andy don't give away too many company secrets. Michael
-
Looks like a good solution. Michael
-
Qwerty I thought I was mad, but you Sir are insane. It is a pity that you did not include the mast and spars though. Michael
-
Looks like you are having way too much fun Daniel! Michael
-
John, we need tools to do the job, right? sorry I spelled it wrong. Sherry thanks this afternoon my thumbs are sore from cutting and squeezing all sorts of bits. Mark, thanks for the compliment, regarding the ebony I already had a short bit of ebony dowel from another project so it was quick. Germanus thanks for your observations, on this one I have to agree with John the difference between steel rope and fibre rope determines the method. so to round out the day after a fair bit of finger work I am ready to do more seizing. I will tackle that tomorrow it is time for a Michael
-
Antony just checking for the first time, the build look very well done, I am looking forward to seeing the mast in place. Michael
-
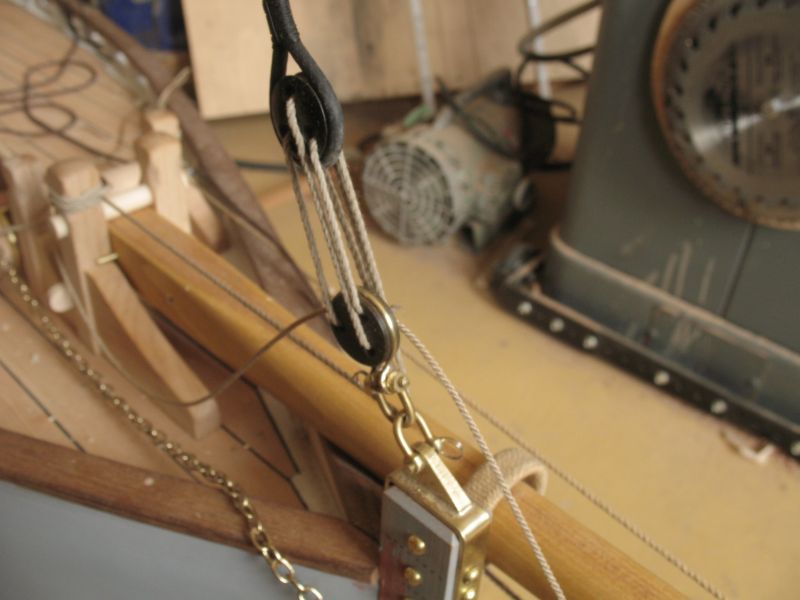
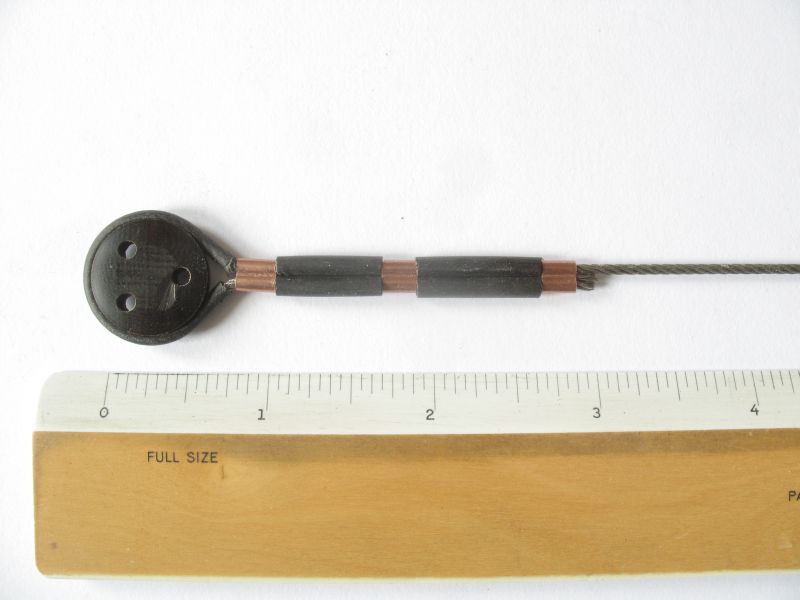
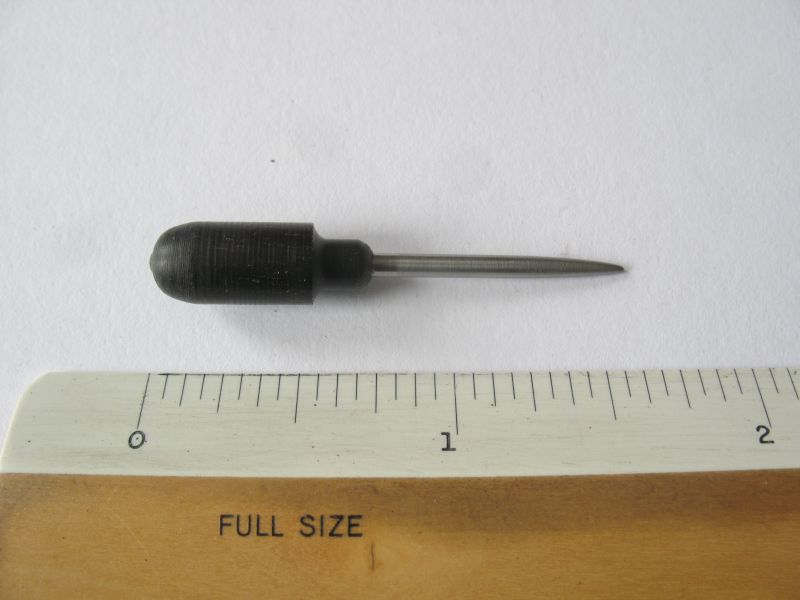
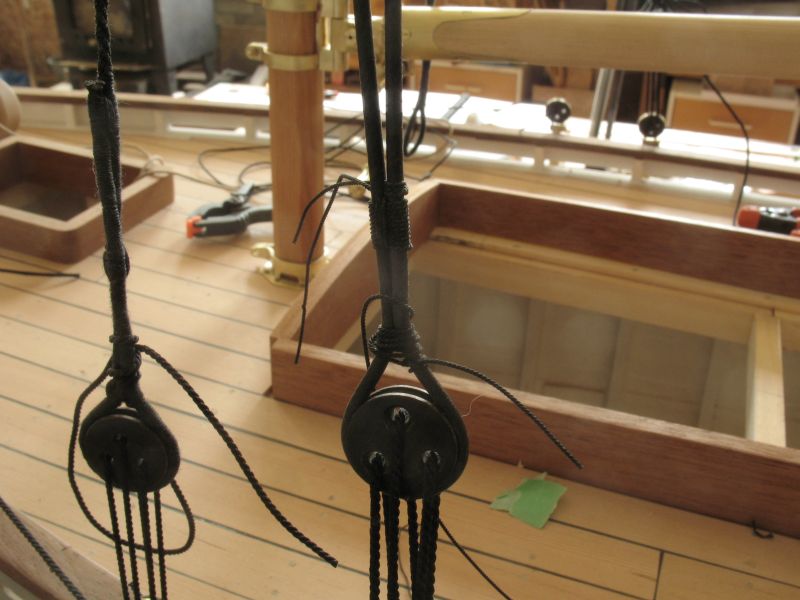
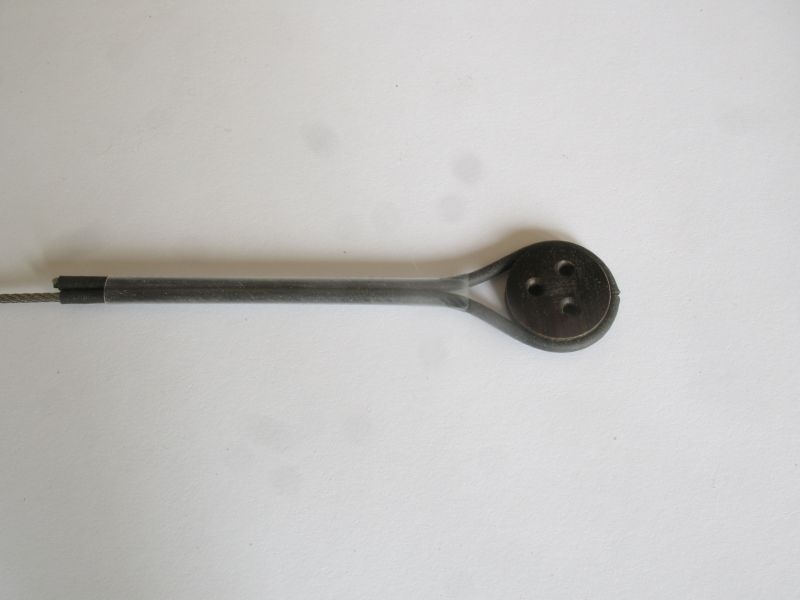
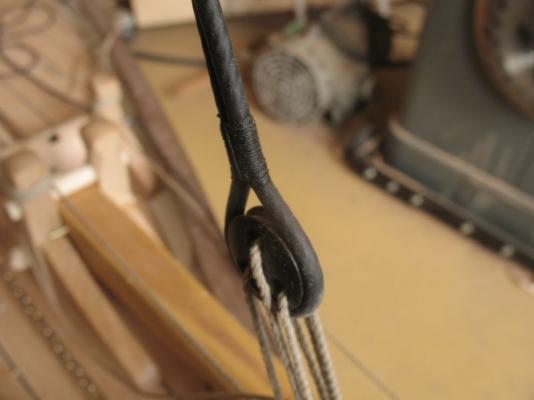
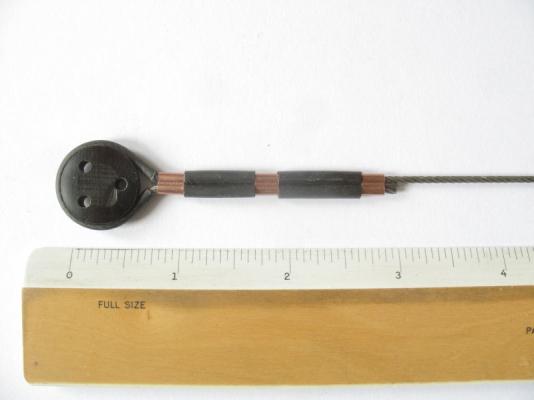
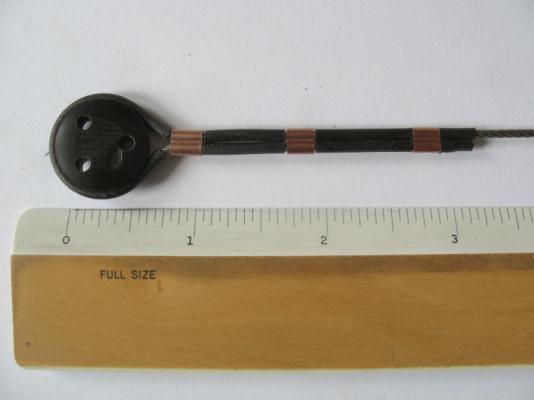
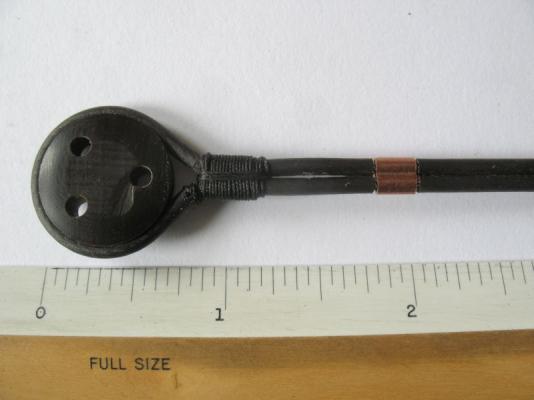
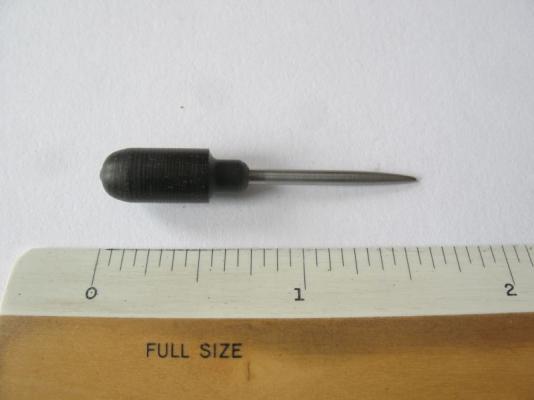
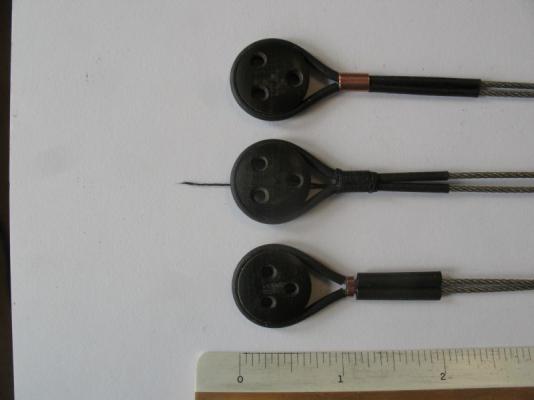
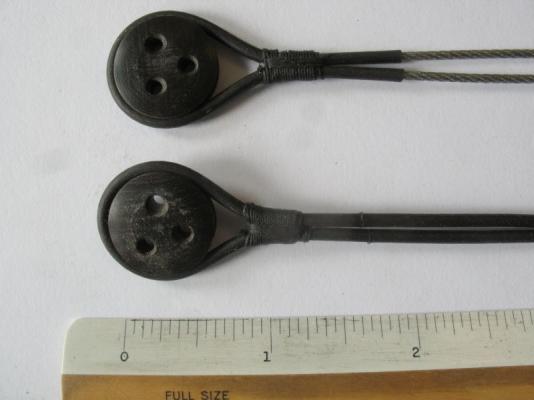
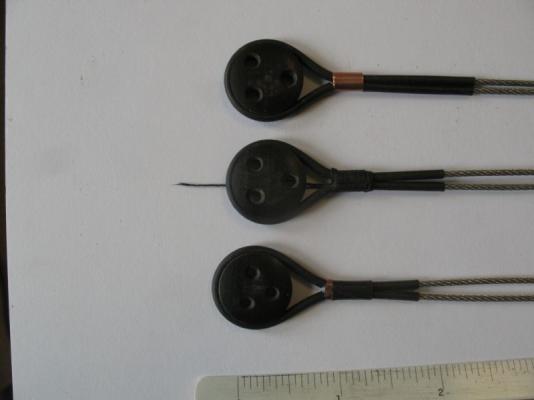
John, Bob, thanks for your observations. Today I felt like I was finally getting somewhere. the shrink was first cut to just the length around the deadeye, then a copper clamp was added then a couple more lengths of shrink and the next copper clamp and on to the top. I added a short piece to cover the end and let it protrude about 3/32nds. The copper was crimped in the centre between the cables, with a pair of pincers that have had the edges honed to not cut, this also added just a slight relief between them, which helped with the shrink. The shrink was then shrunk down and the first seizing was added to the end closest to the deadeye. In order to make threading the nylon thread a little easier I made a small Marlin spike, and so that I would not loose it among the pins and needles I added a scrap of ebony as a handle, it also helps to hold it. The spike worked well I am happy to report. I think this is the way forward I am pleased with the results only three more to do. Michael
-
Hi Mario Neat build the multi coloured clamps were making my eyes spin. Michael
-
One of my all time favorites, along with Cosby's "That Doggie in the window" So how long do you think you can keep the bench clean. We could do a bookie on this and take bets Michael
-
Sherry thanks for your kind comment. however it is still nagging me that the space next to the dead eye is a little too large Popeye, thanks sometimes i feel a bit like a dog with a bone, and just keep digging. Druxey, funny you should mention that, the same thought crossed my mind after I had finished up...... the journey continues. Michael
-
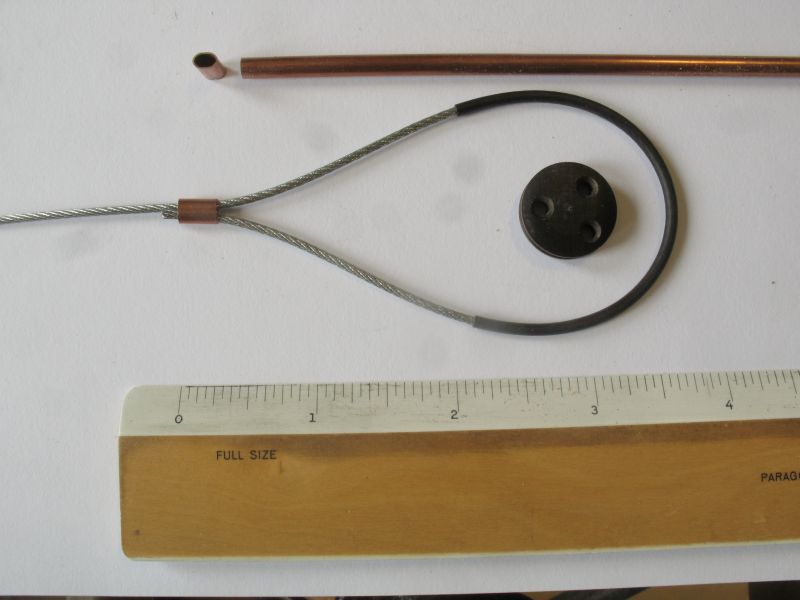
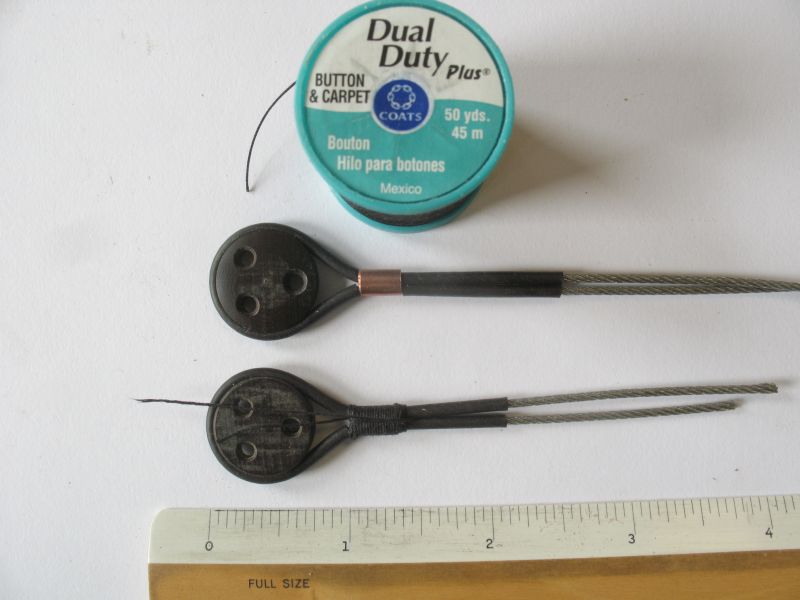
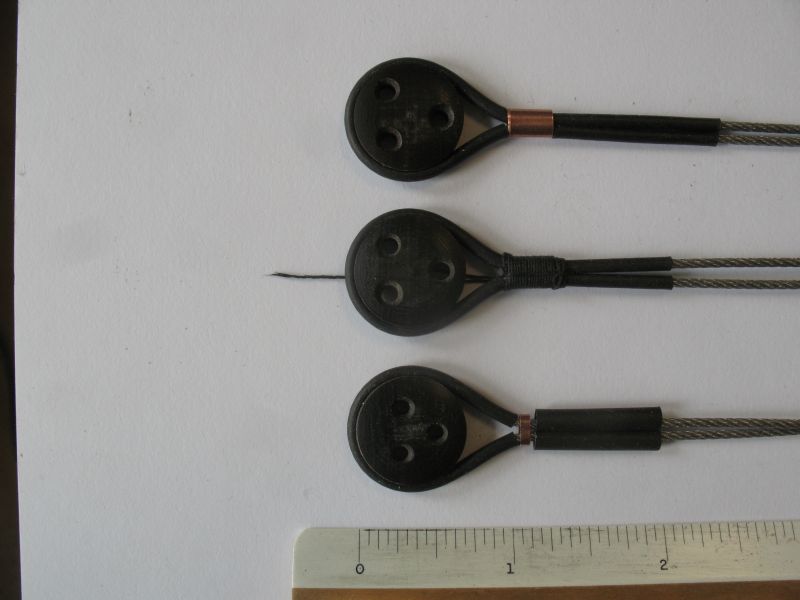
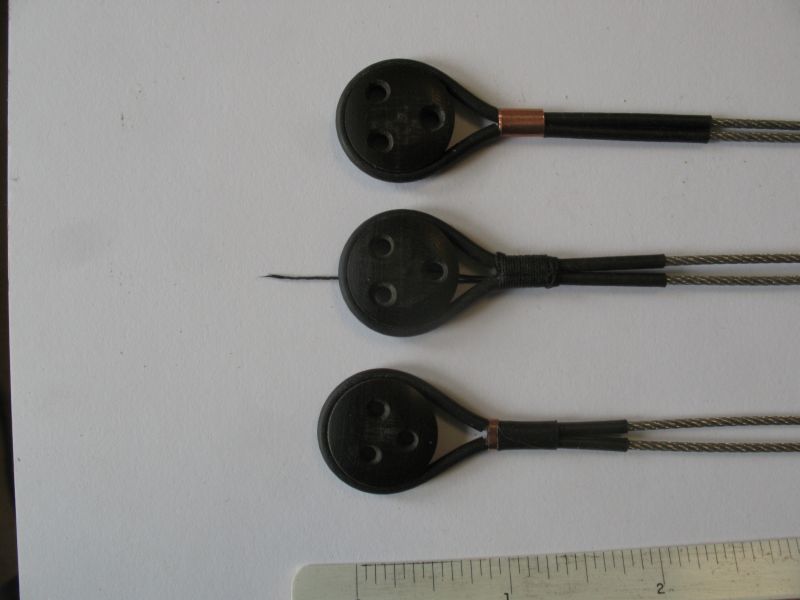
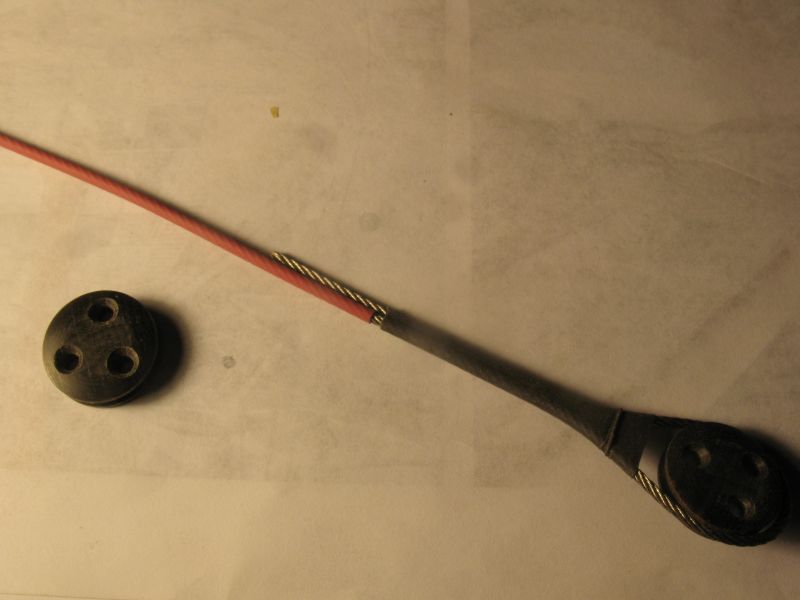
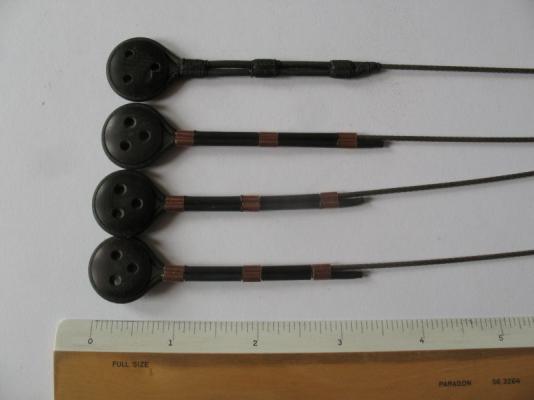
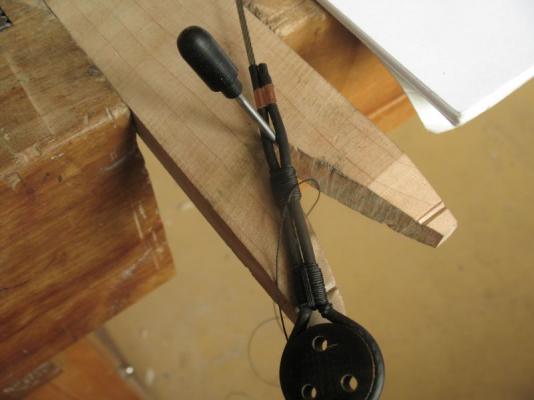
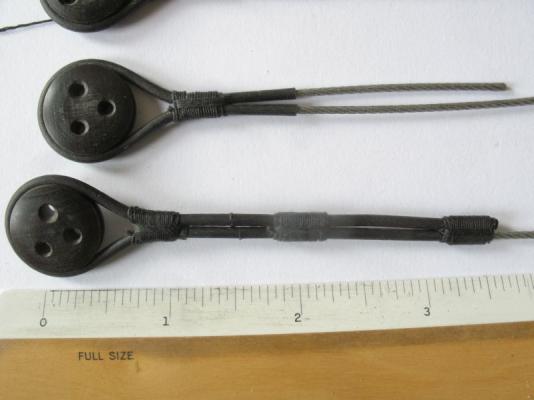
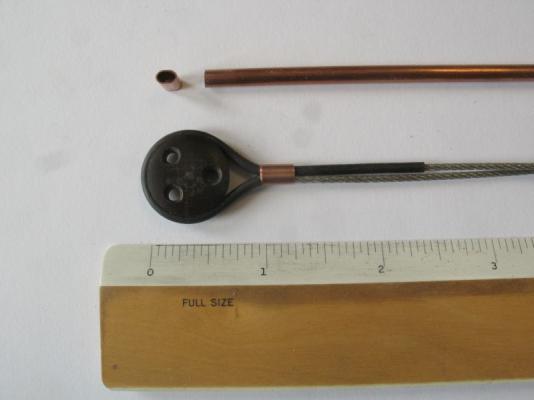
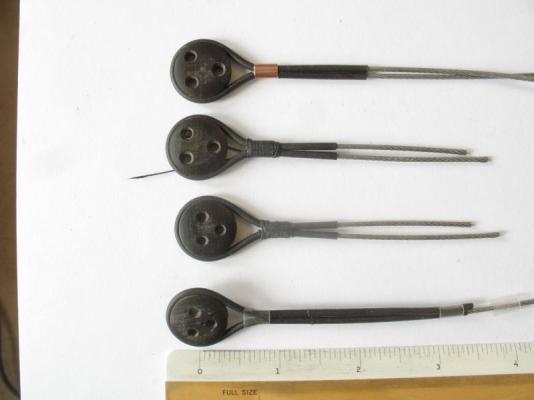
Things are moving along. I did a few more tests today. The first test was to use a short piece of copper tube that had been squashed to an oval as a way to hold the stiffer wire. The heat shrink I purchased was at Home depot in packets that included 8 pieces of 3/32 it was likely more expensive that a full length at a electronic store in the city of Edmonton but the extras cost of gas to drive the next 25 miles plus the hassle didn't warrant it. The copper tube was not quite large enough to capture two sections of wire with the heat shrink covering. I added a short piece to create an even length. The seizing was done with the coats button and carpet thread but the shrink was so tight that I snapped the thread trying to add the vertical wraps as you can see in the lower shroud test. I did a third test with a very narrow ring of copper with the intention of putting some heat shrink over the top of it and the two narrow parts it would not go over the copper though. Back to the clear straw which I cut into short lengths of about 1/4 inch, this was to be covered with the thread leaving the straw under. I did the seizing at the end closest to the dead eye and left the tail open in order to do the vertical wrapping. The progression up the length of the tail worked out well enough. I think this might be a good solution. Michael


-
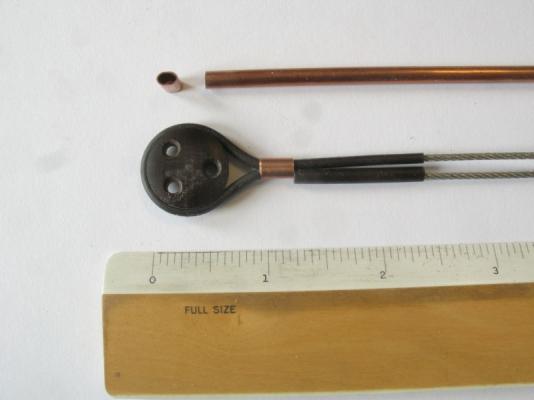
Good morning all. Druxey that is an interesting Idea. The first experiment where i did use the heat shrink over the two parts I noticed that the shrink wrap would not shrink down any further it seemed to have stretched out in some way that even if the cables were brought back together next to the dead eye the wrap would not shrink down again, this is why I thought about the straw. The straw seemed to be a good form of a clamp. One of the other ideas I had while doing this was to use a short piece of copper tube and use it as a crimp similar to the aluminum ones that you can purchase to crimp cables. I like the idea if being able to wrap the seizings over something that is holding the cables so that the tension is already being held, this will enable the seizings to be wrapped carefully to get the best visual appearance. Today I will try a few tests to see which of these methods will work the best. John, being that I am using stainless aircraft cable I would have thought that moisture would not be a major issue, any metallurgists out there who could shed some light on this? Mark, I am going to see how much the heat shrink closes up on an open end my bigger worry is a snag on a sheet or cloth on an exposed wire strand. Antony, thank you for stopping by and for your kind thoughts. I see you are from Devon My sister lives in Crediton. Last time I was in England visiting my brothers and sister, we traveled over to St Ives, and Lynton and Lynmouth. We also spent a lovely day at Torquay. all great places to see traditional craft. Michael

-
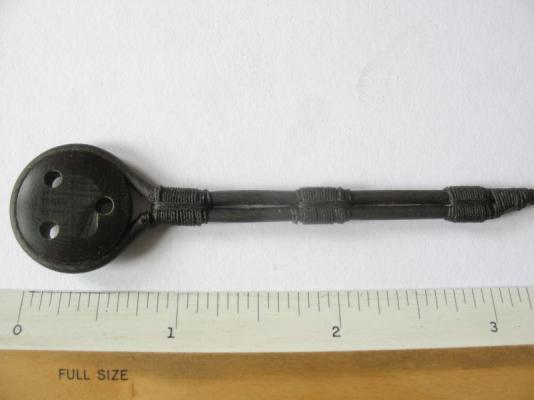
Druxey, thanks for the reference, it does feel a bit like going down the "Wrabbit Whole" I am doing a couple of experiments with the aircraft cable to get the best looking results. the clear plastic is in fact a clear plastic drinking straw By slipping this over the the "served ends" I can work with some line to make the first seizing then slip the straw to do the next one and so on I think that it might work in order to do the serving well to avoid this, as you can see the seizing closest to the dead eye is a mess The heat shrink has some definite possibilities, the trick will be finding a way to make the whole set up look right. So another journey along the shrouds begins. I'll report the findings.... after the hockey game! Micheal

-
John not sure I'm up to doing rat lines, the work you are doing looks great. Michael
-
Mark thanks for the link, I watched the video it was a bit like watching someone with turettes reciting Shakespeare. ( I don't have much luck with videos out here in the boonies) but I think I got the gist of what was happening! Michael
-
So yer done now on this build, Congratulations on a fine bit of work. Now get on with the other 35 builds that you are workin' on Great stuff Sir! Michael