


AntonyUK
-
Posts
1,168 -
Joined
-
Last visited
Content Type
Profiles
Forums
Gallery
Events
Posts posted by AntonyUK
-
-
Hi.
I also have purchased a 3D Printer (Elegoo Mars pro. )
I have used the printer for Model making components (Not ship).
Hero Forge is by far the best Figurine shop I have seen. So many choices of kit. clothing. posture. and the list is endless.
With the Figurine's available I will be putting some on my Ships as well. And being scalable they will adapt to any model I build.
Regards Antony.
- Gabek, Old Collingwood, Egilman and 3 others
-
 6
6
-
Hi and thank you all for your reply's.
This model was built for the Plymouth Education and resource people.
They will use it as a display Hopefully for the Mayflower 400/401 as I think this years celebrations have been put back a year.
Its been a Fun build all the way through. And had a lot of help with obtaining plans and books relating to the build.
Its been a interesting concept build a cross section of this type. The wife thinks I should do a cross section at the same scale with all the timbers in place.. No mast.
Regards Antony.
- mtaylor, Louie da fly, Fernando E and 1 other
-
4
-
Hi.
Hi Robert. Did not check the post since October.
Its been a while but she's all finished and turned out as I expected.


Just a little tidying of the edges and clean the dust off and she's ready to go.
Been a interesting build with Help from a lot of people from all over the globe.
Thanks for looking in.
Regards Antony.
-
Hi David.
Thank you for your kind words.
I like building the unusual ships. Its somewhat more challenging when there is little known about the ship.
Must post a update next week... Have been working on the Mayflower but not Posting... BAD me....
Regards Antony.
- drobinson02199, mtaylor, Fernando E and 1 other
-
4
-
Hi.
Welcome to MSW.
Your build is looking good and will give you a nice little model when completed.
Like Mark said.. Dry fit everything. Then check it again.
Slowly using sand paper on a block that span's the minimum of 4 ribs. And checking with a plank to get the angles correct.
Do not press to hard on the block or it will damage the ribs/Bulkheads. Like I said Slowly but surely.
Have a look at the link below...If it works.
Fairing the hull and other bits
Regards Antony.
-
Hi.
Thanks for the likes and comments.
Sea Hoss.. Kind of name I like
")
Hi Nils. How are you doing ?? I like the new family member Casper. Has he started picking up bits of wood and running with them ?? .. HE will.
Building a Half Model has its challenge's. As you can imagine.

Thanks again for looking in.
Regards Antony.
- mtaylor and Mirabell61
-
2
-
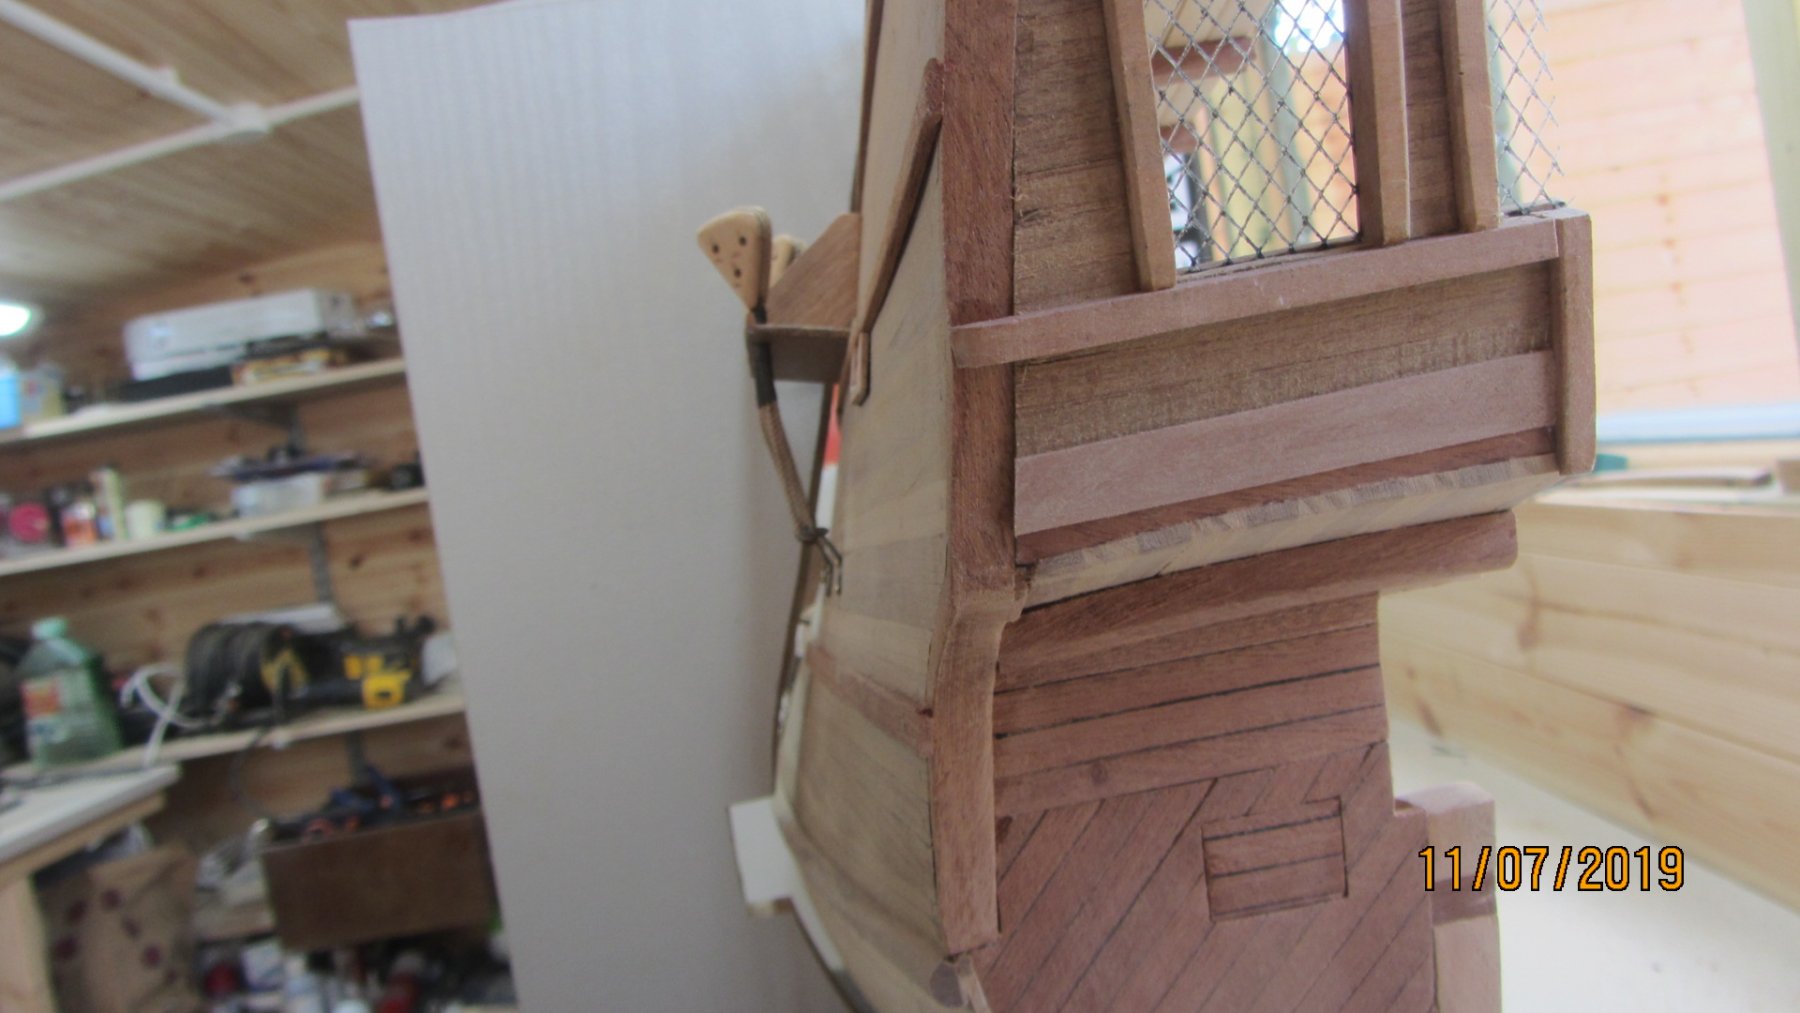
Hi.
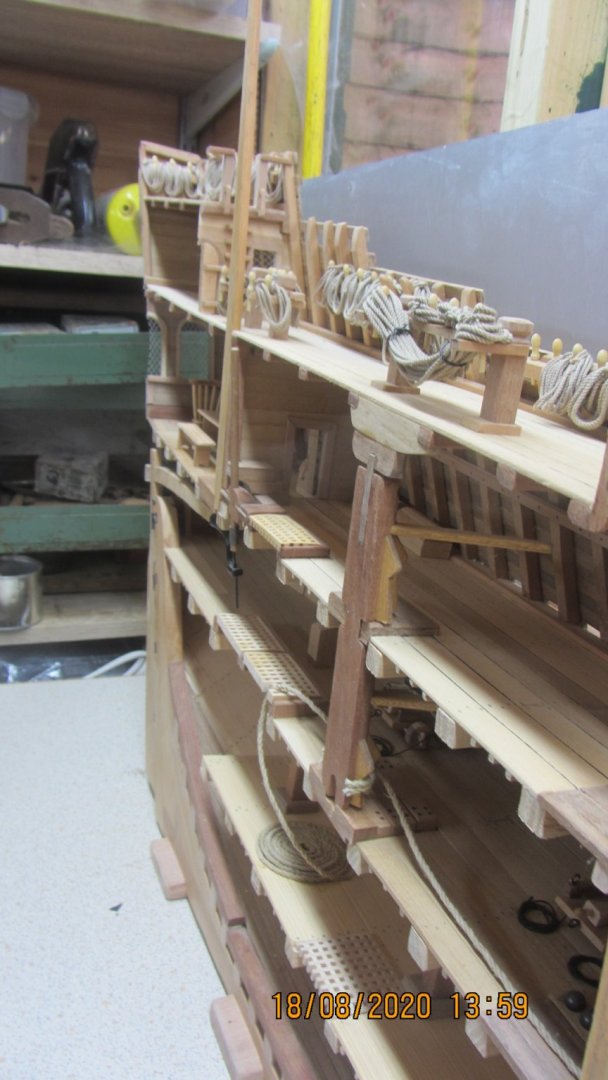
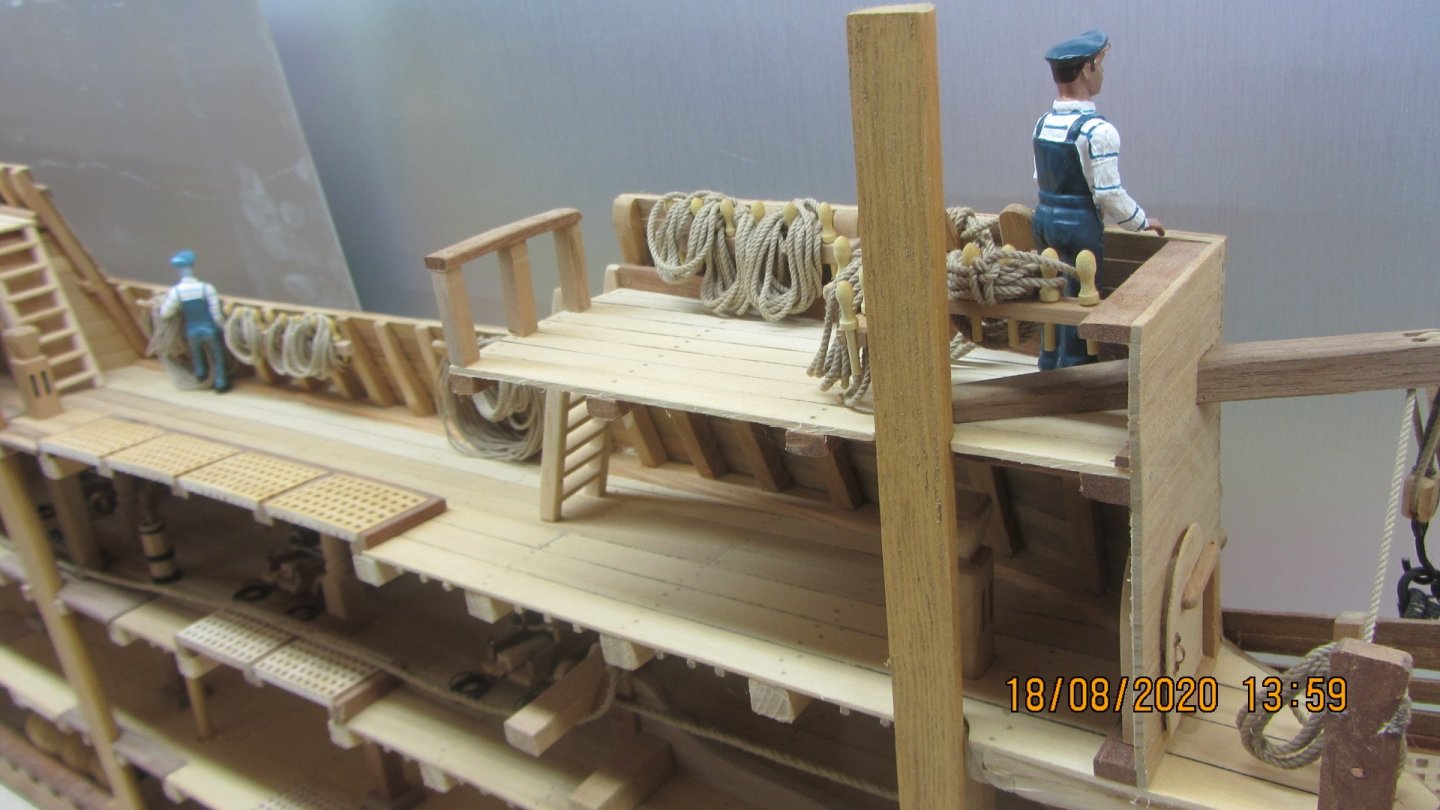
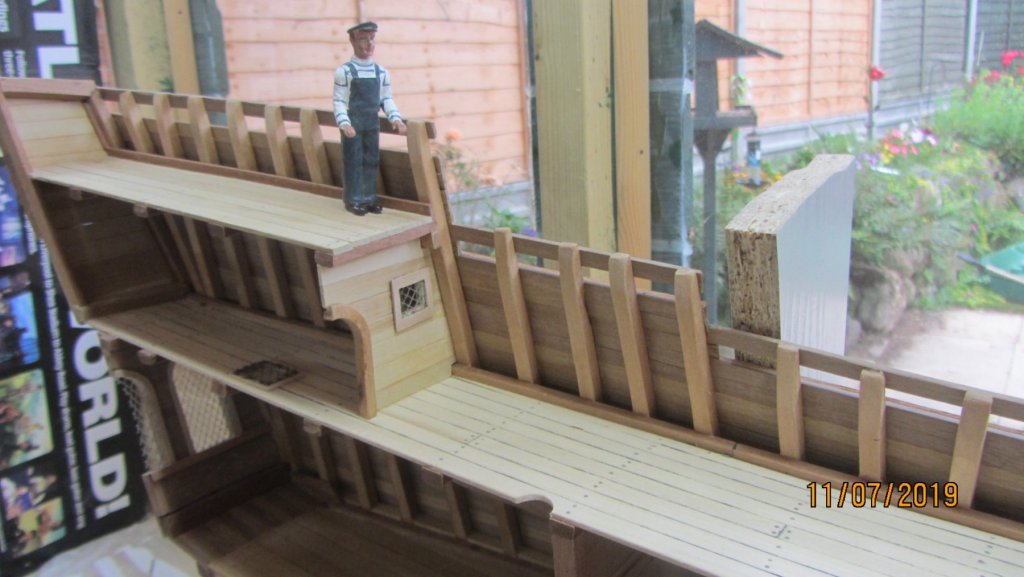
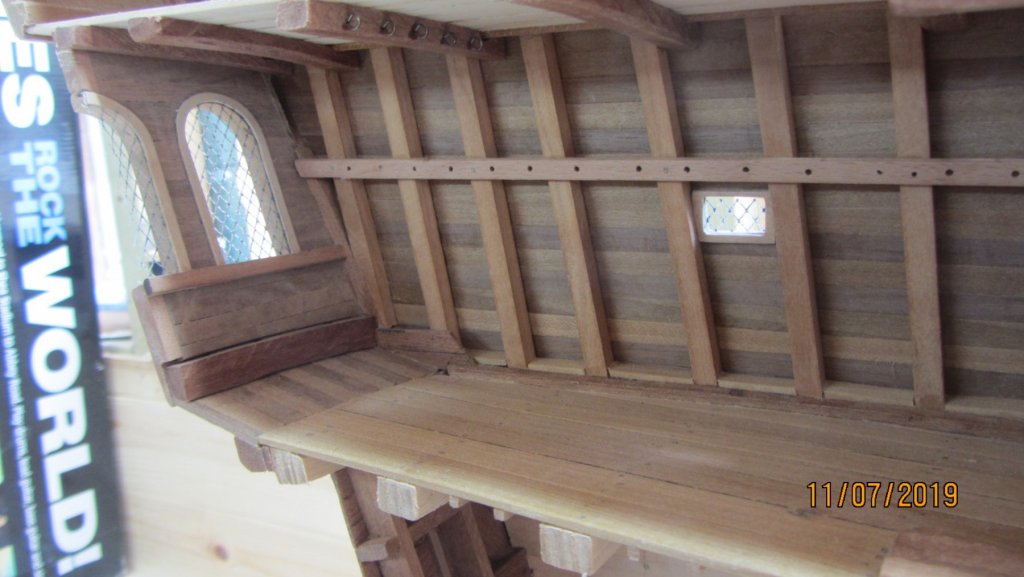
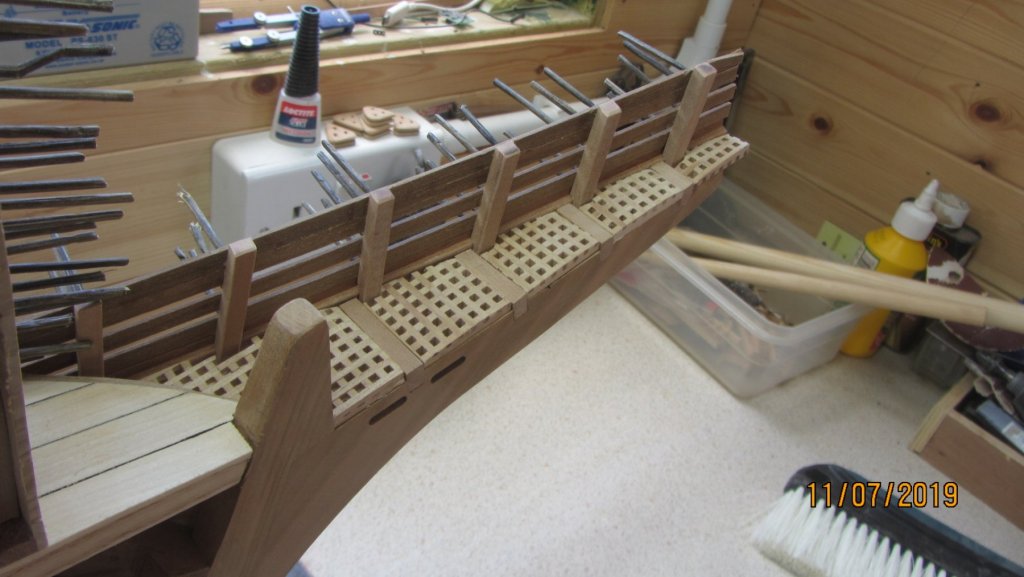
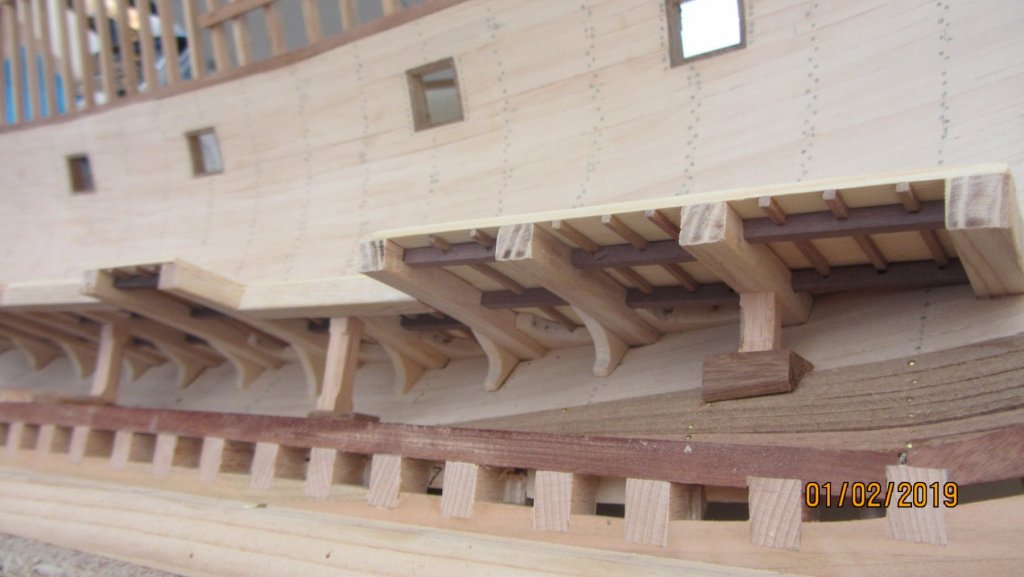
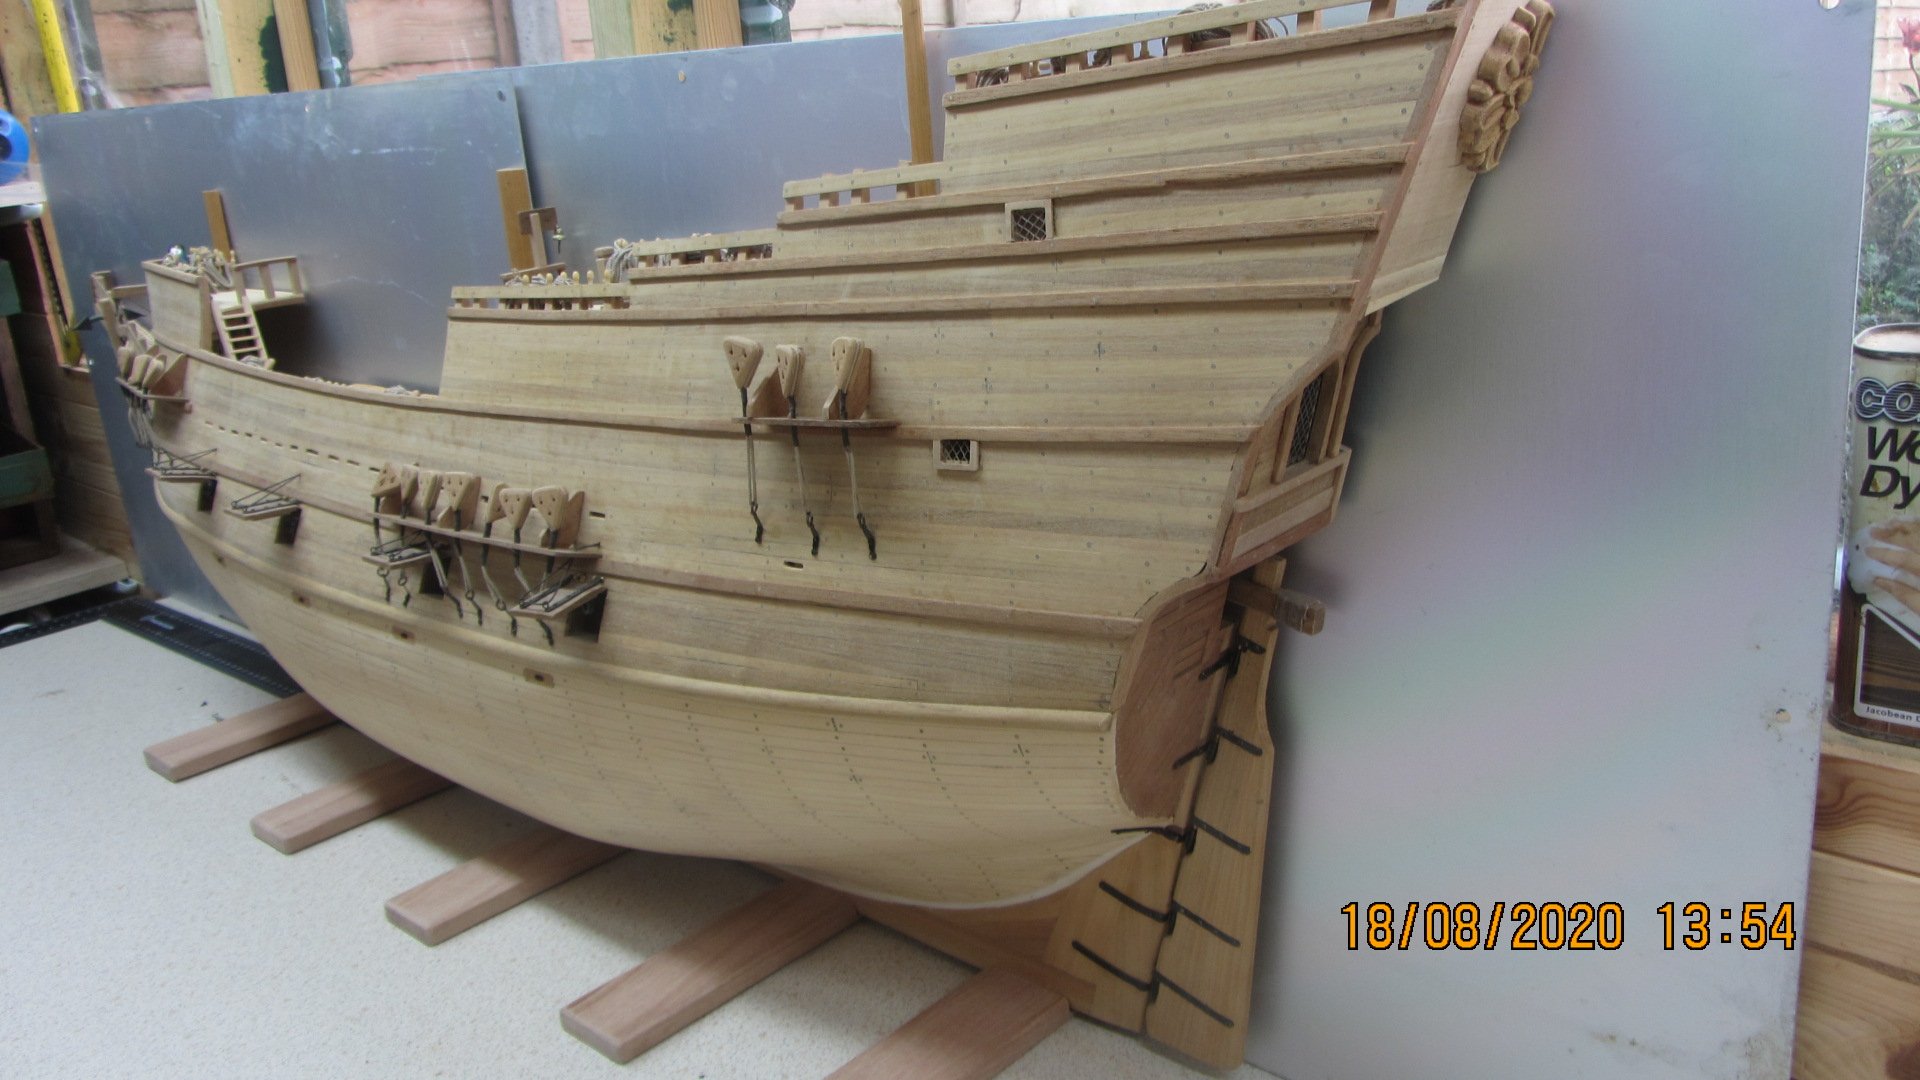
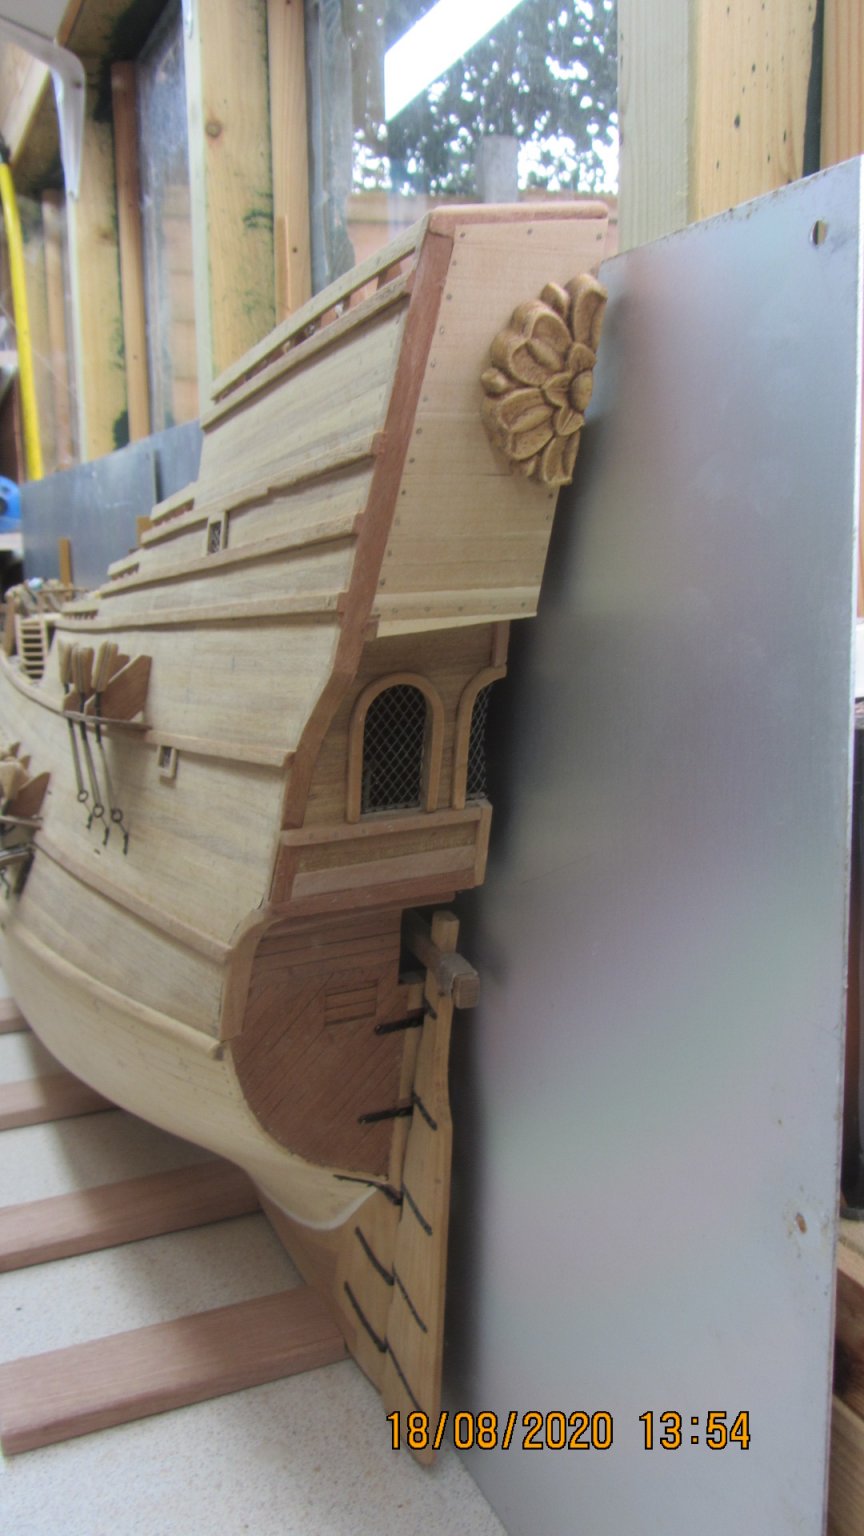
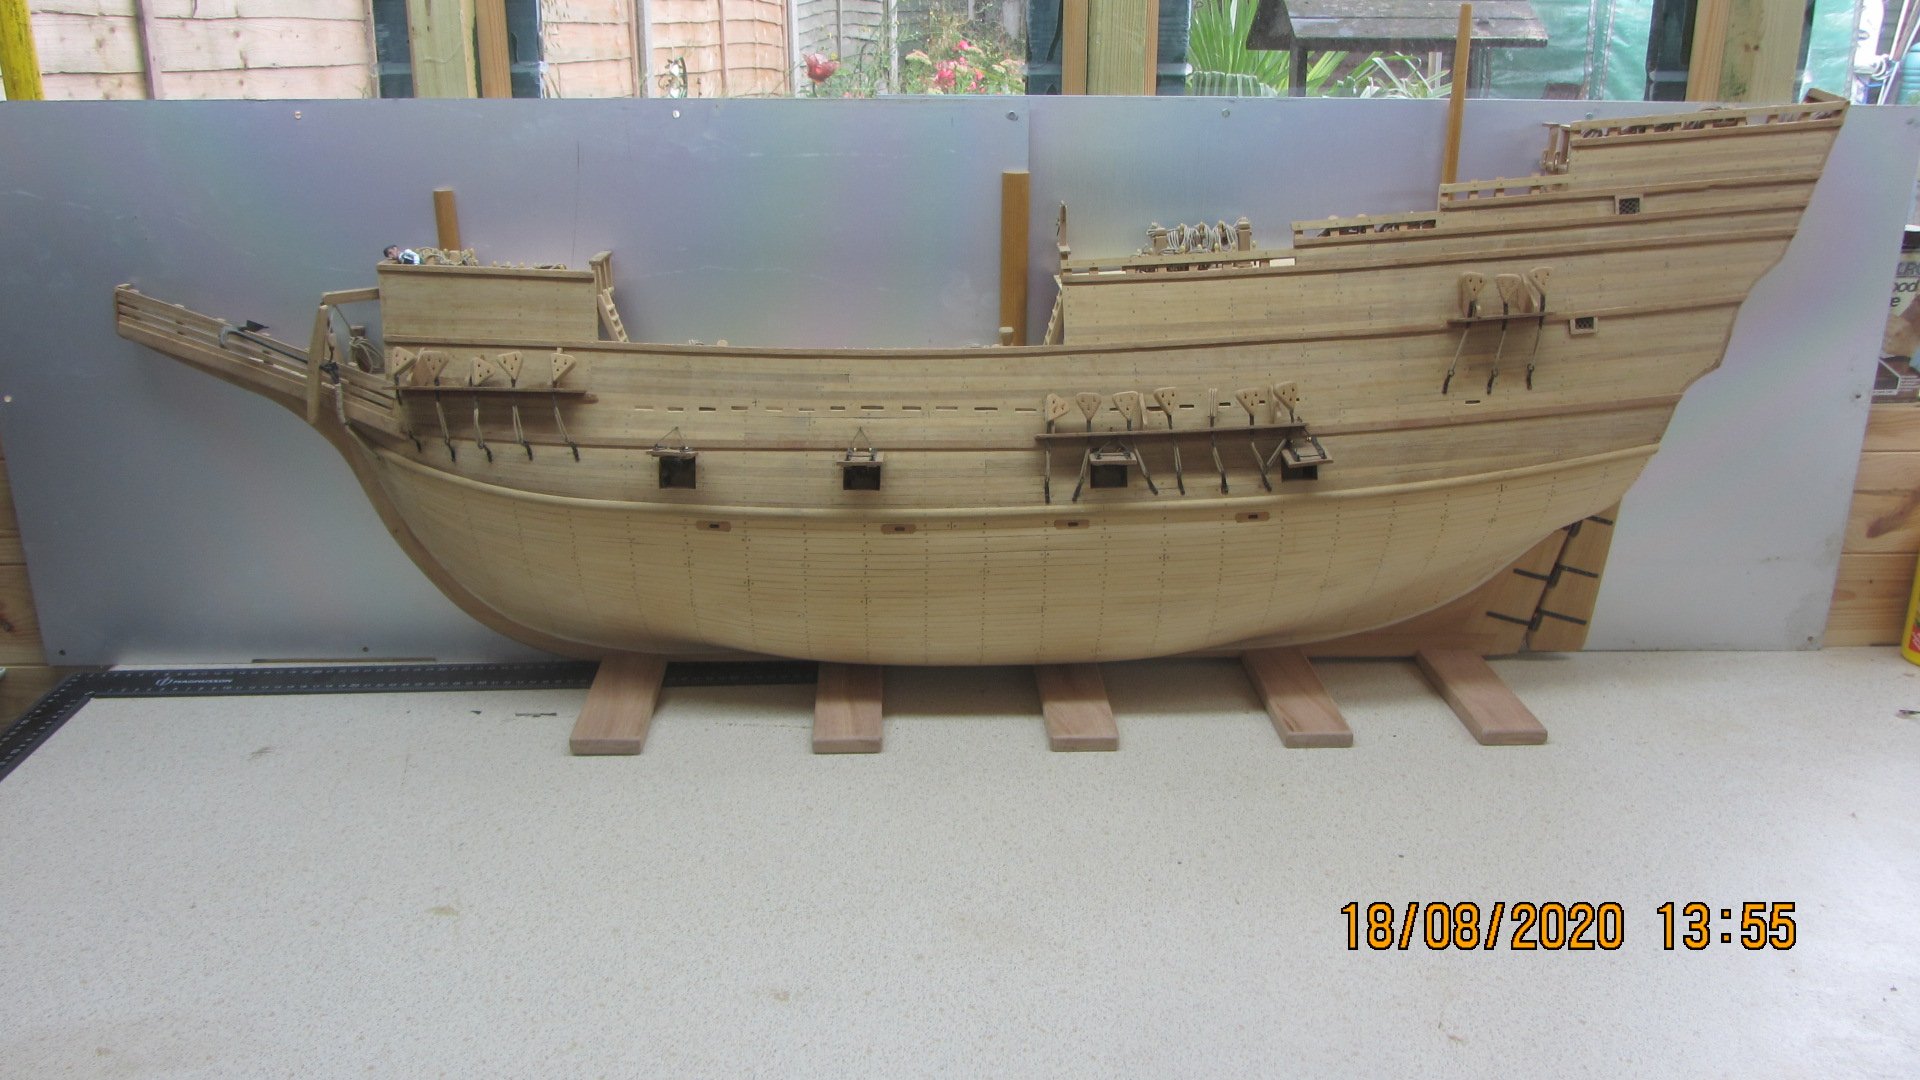
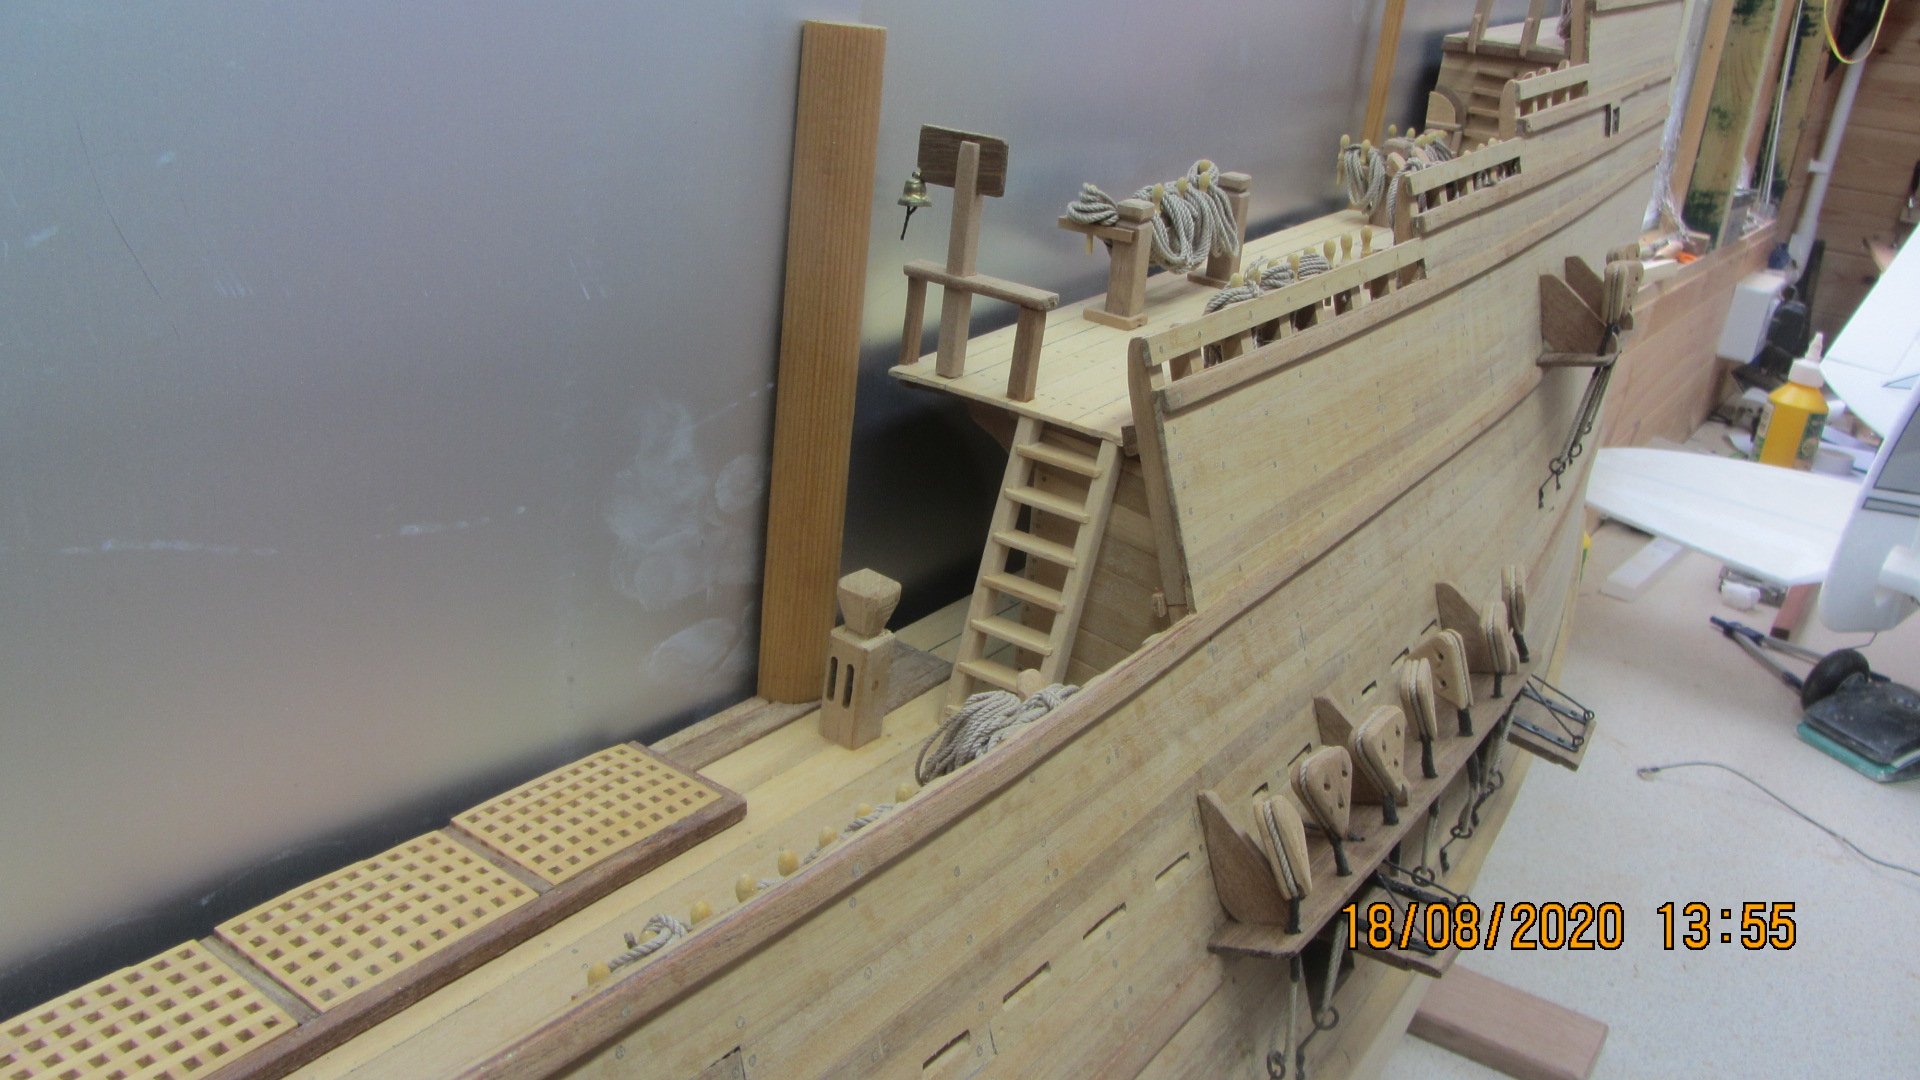
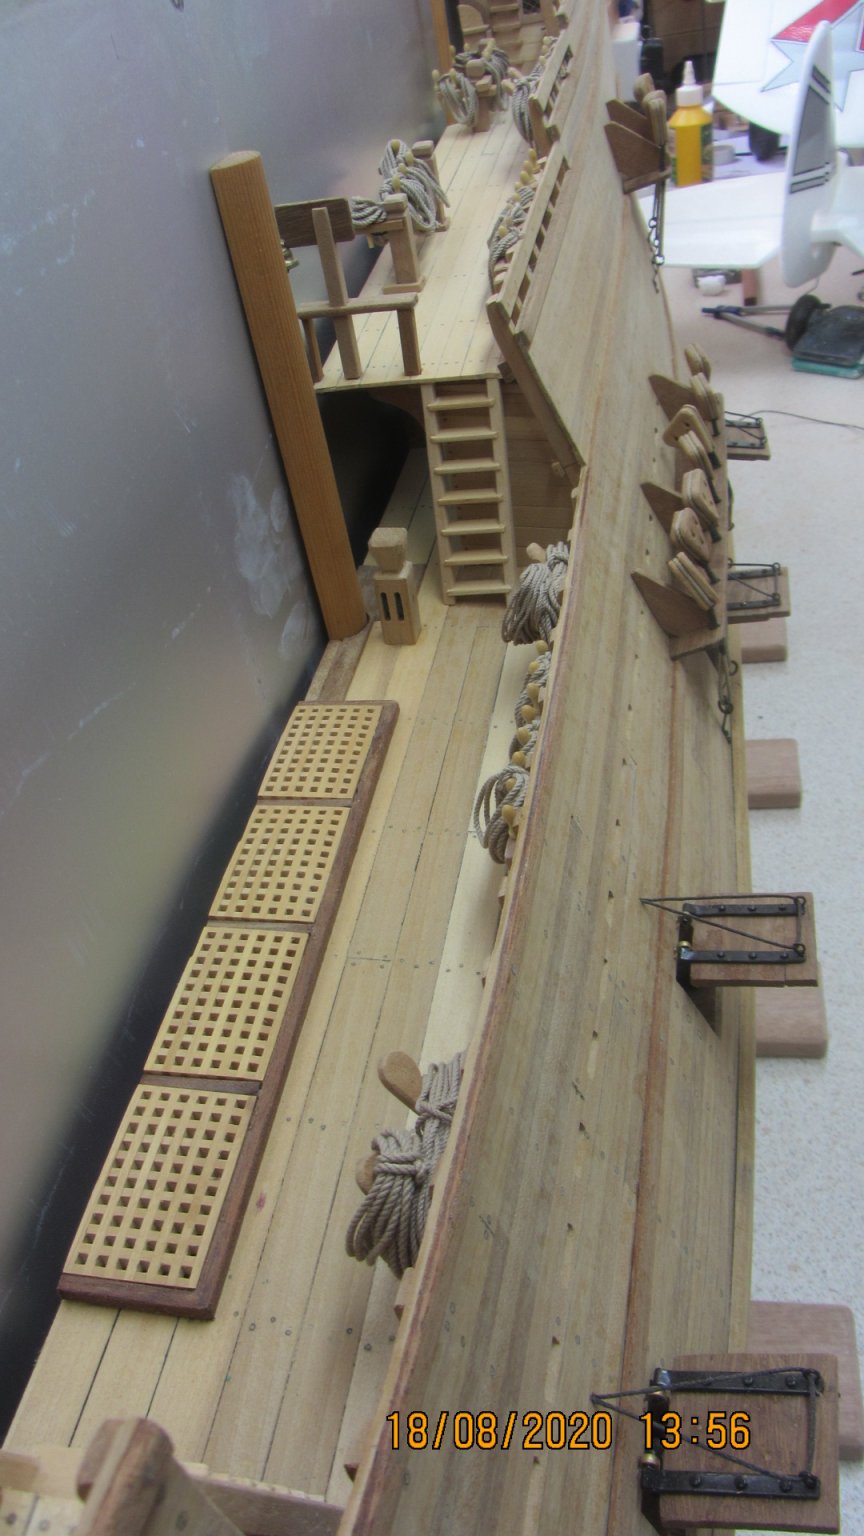
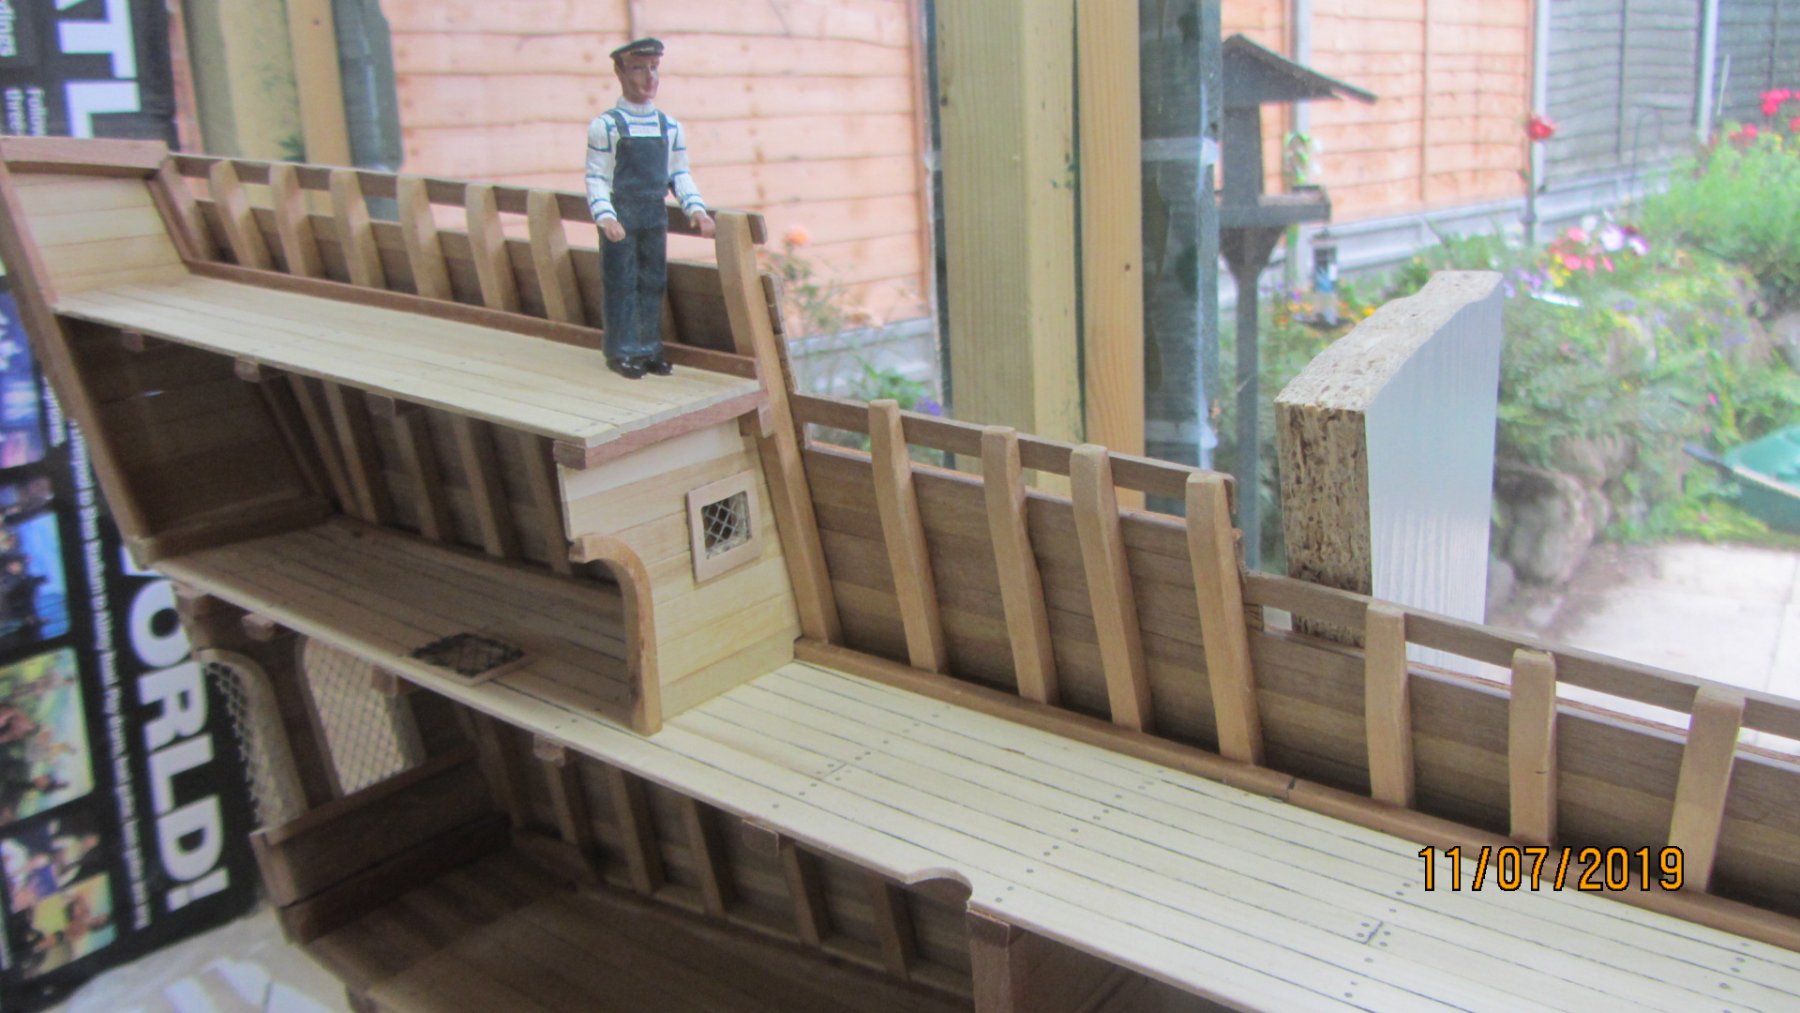
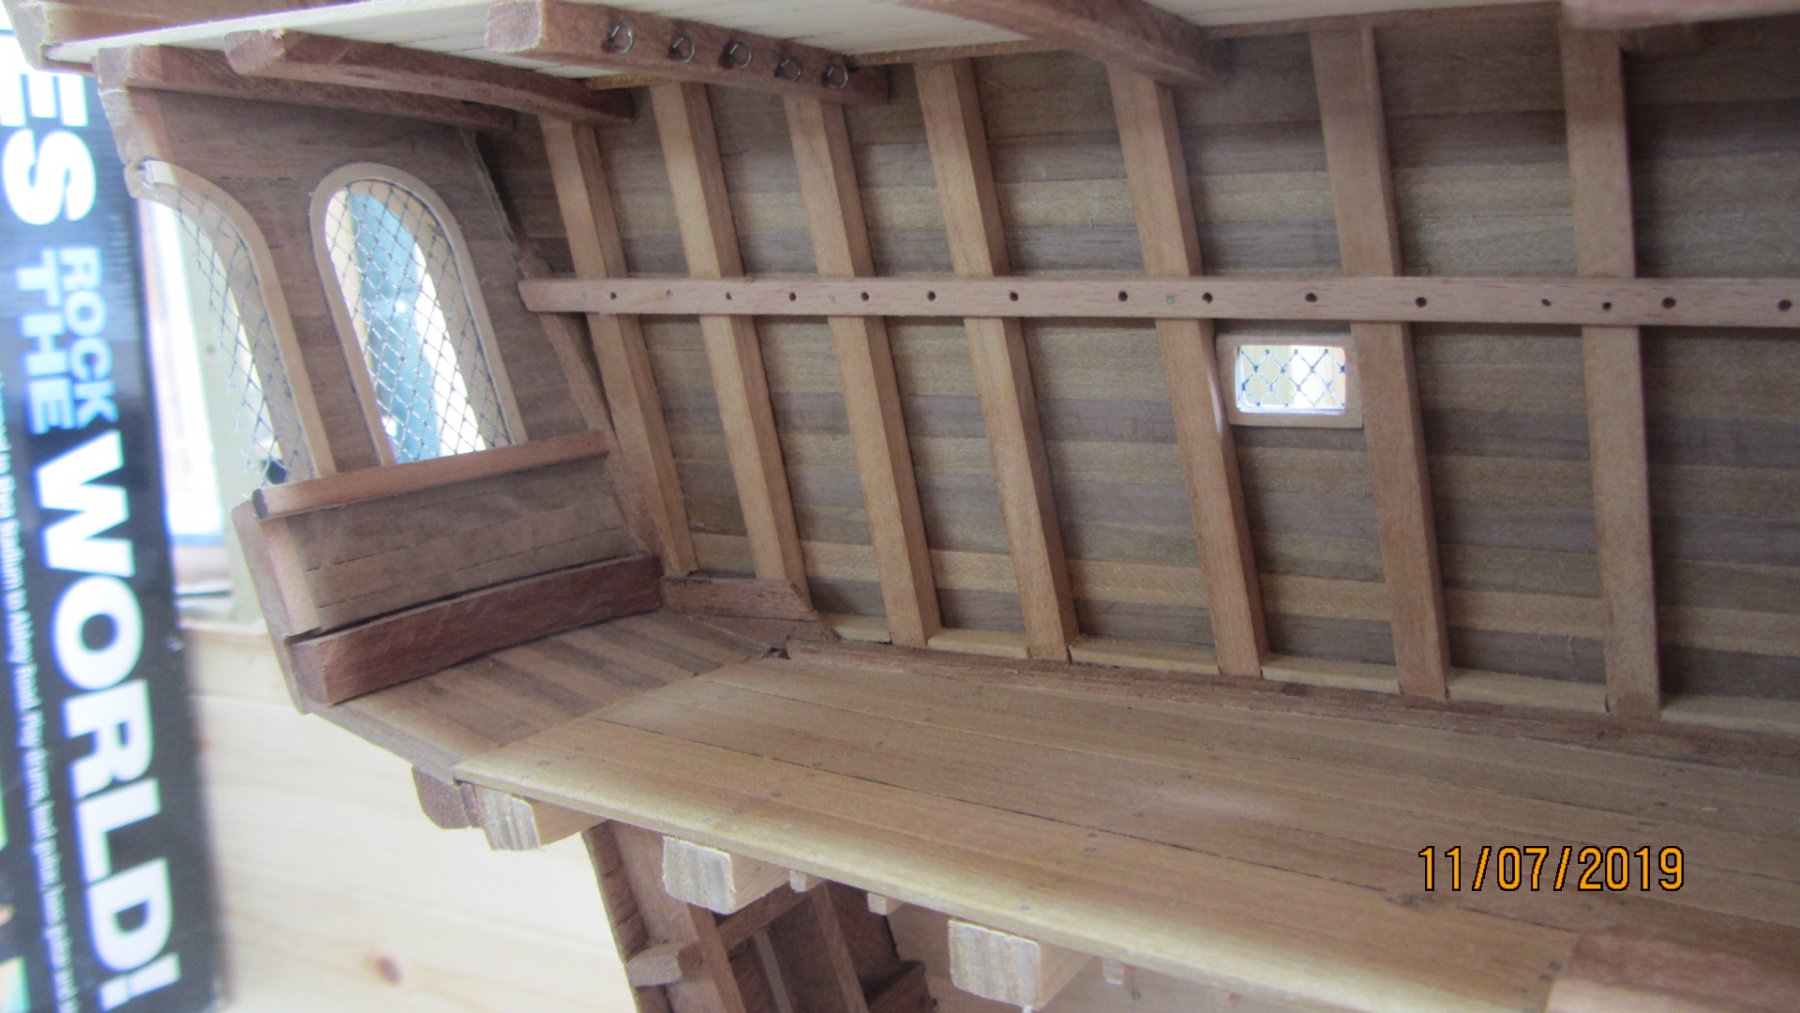
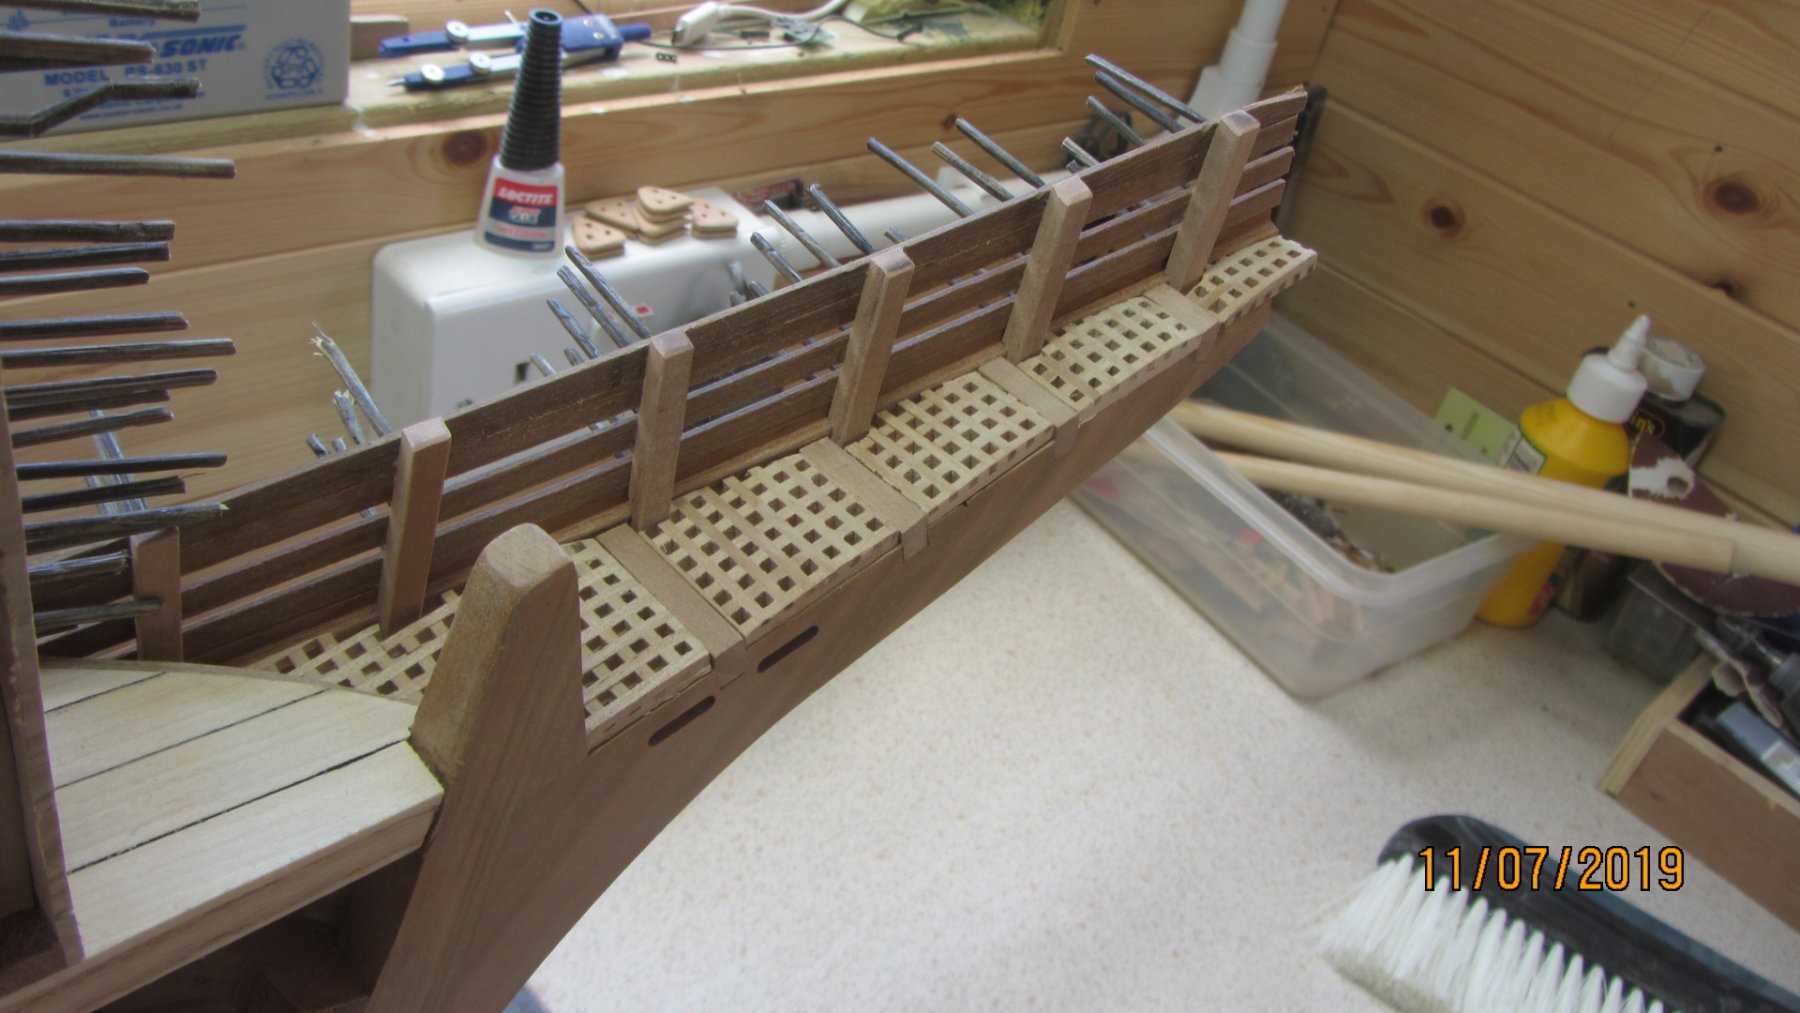
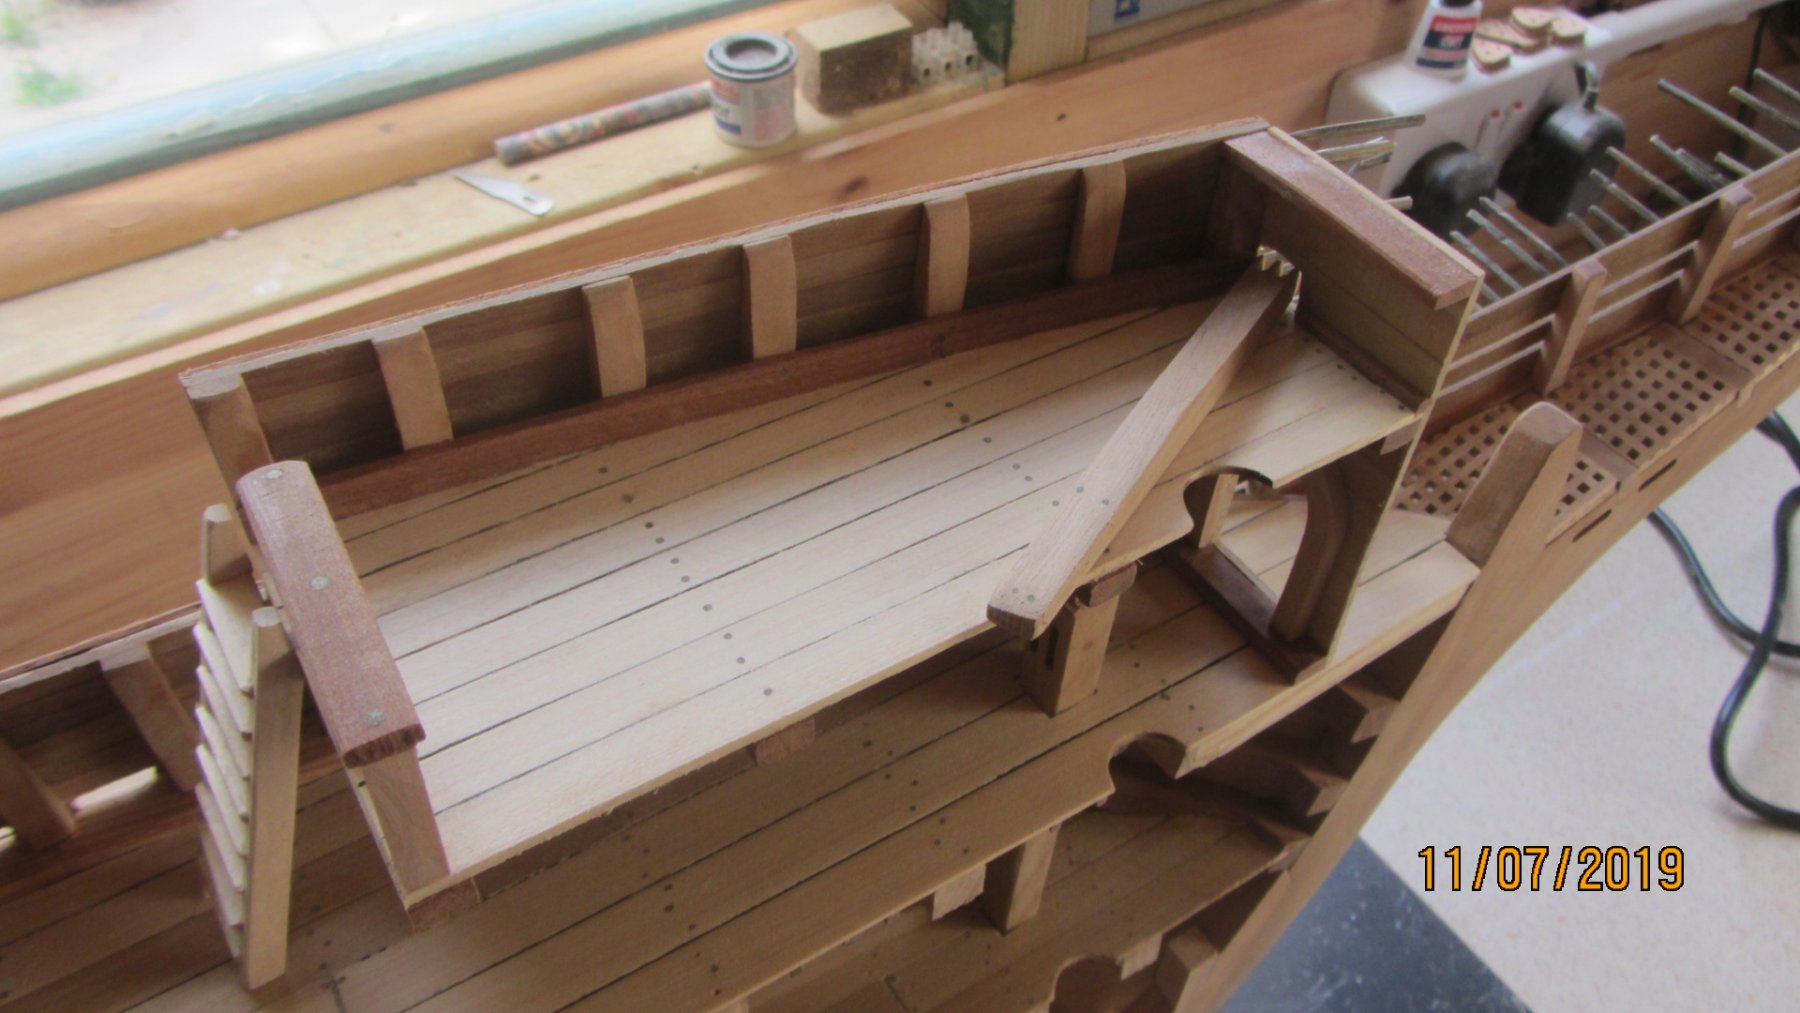
Another update on the build.
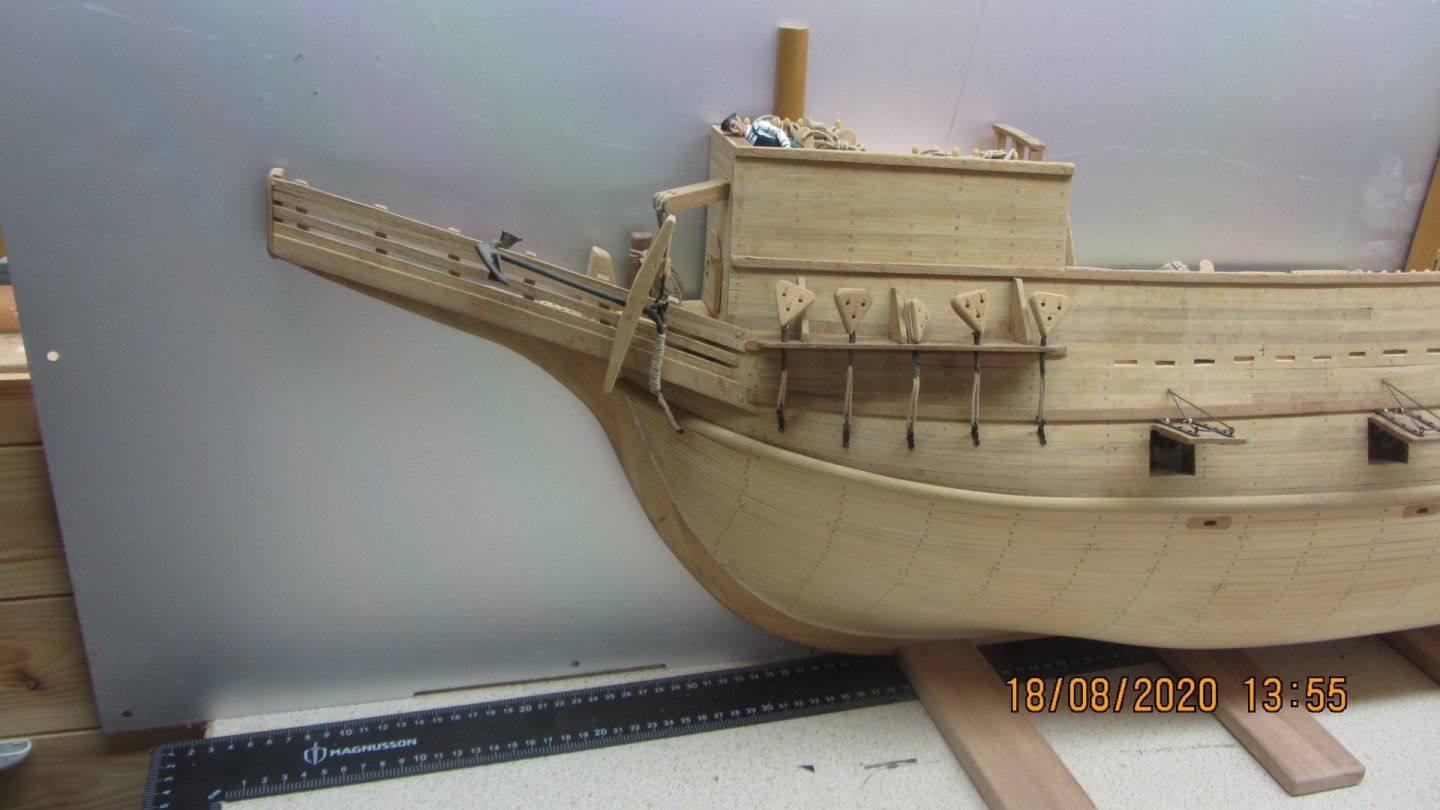
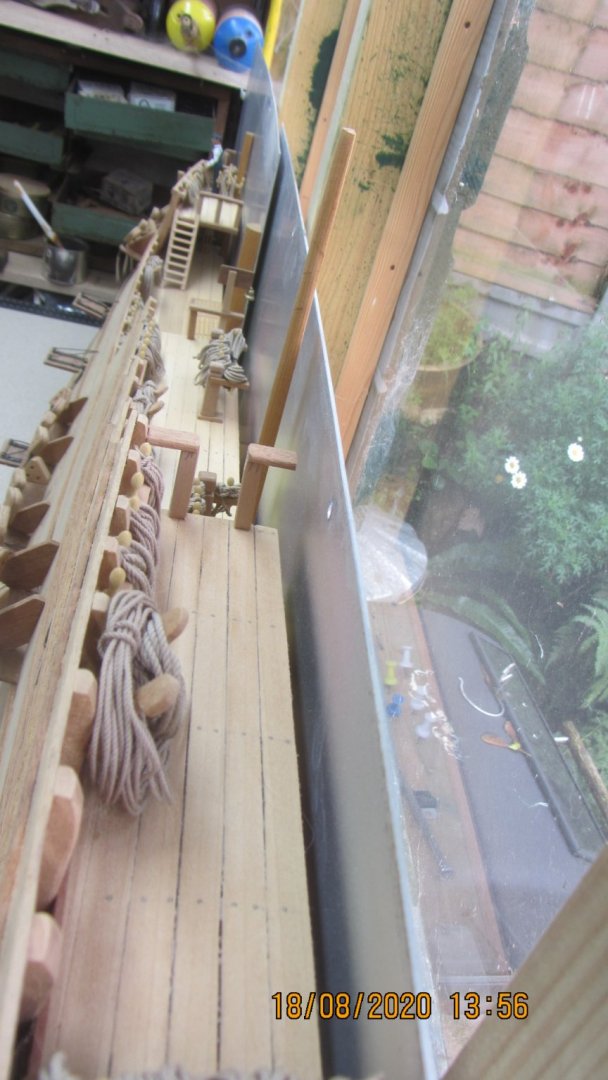
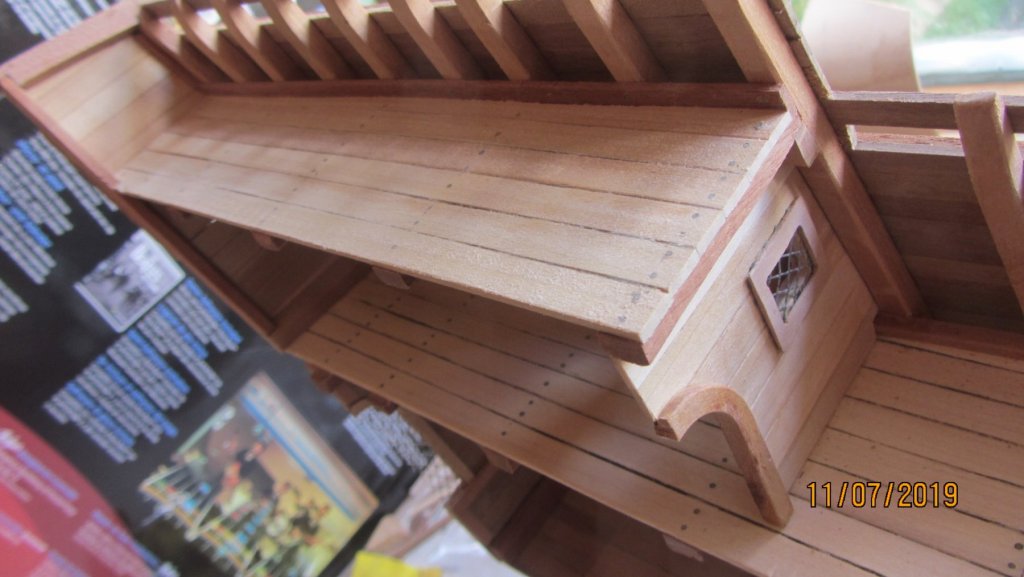
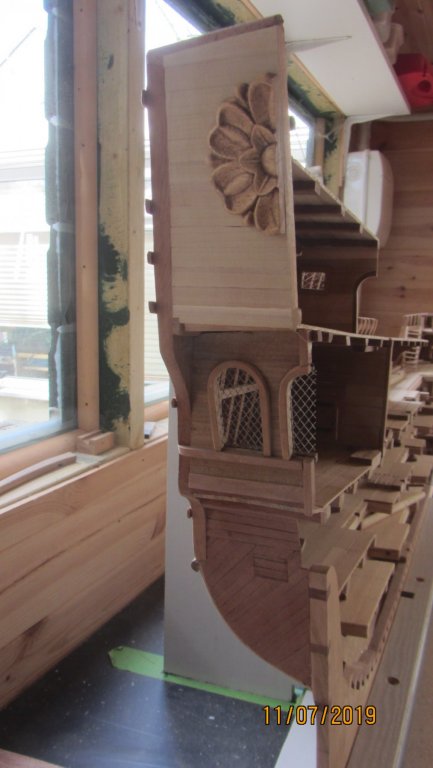
The stern section. The Tudor Rose is a wood carving from E-Bay.. More timbers to be added to this area later on.
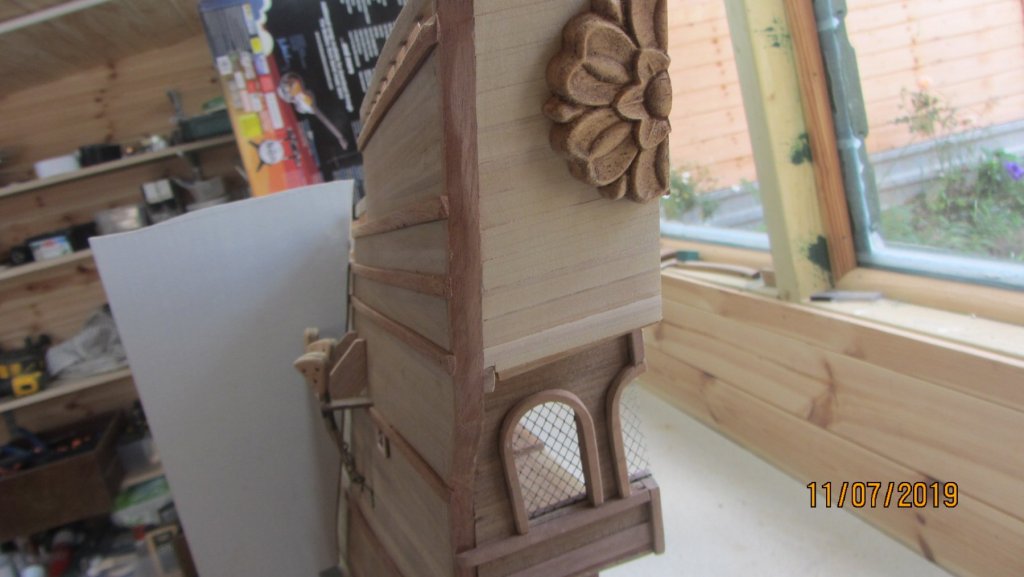


The Beak area. as you can see in progress at the moment.
Ladders are not glued yet as I have more work to do in the deck first.

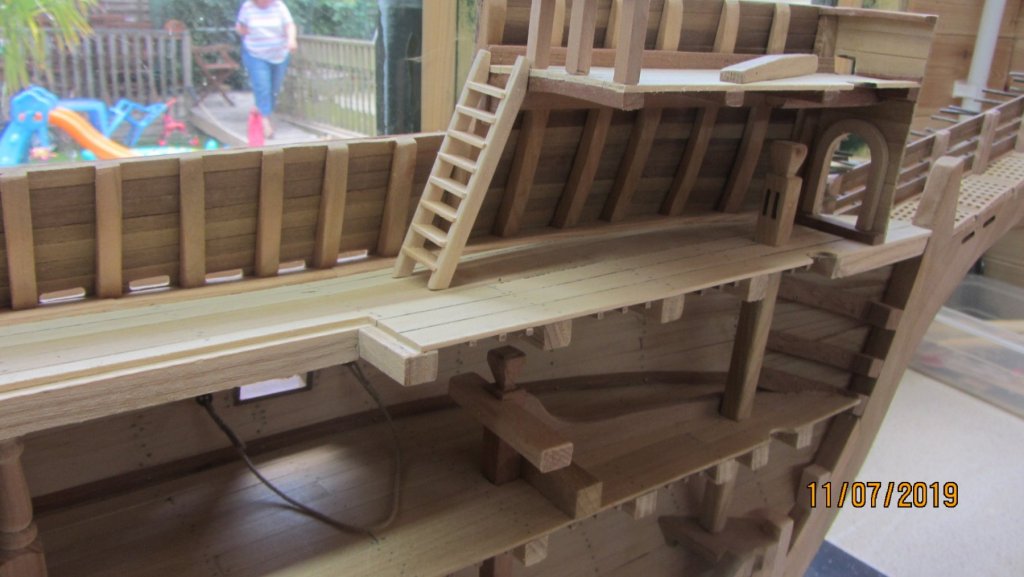
Not 16 century and a tad small... OK he is 5' 1" high.. Easy solved.

Not a lot to say.. Sorry but that's me.
Regards Antony.
- GrandpaPhil, Siggi52, Chuck and 13 others
-
16
-
Hi Nils.
Just catching up on MSW and I come across your build.
As per normal you are making a excellent job of the build.. and I love the clinker hull. (Note to self....You gotta try this one day).
Regards Antony.
- Keith Black, mtaylor, Martin W and 2 others
-
5
-
Hi.
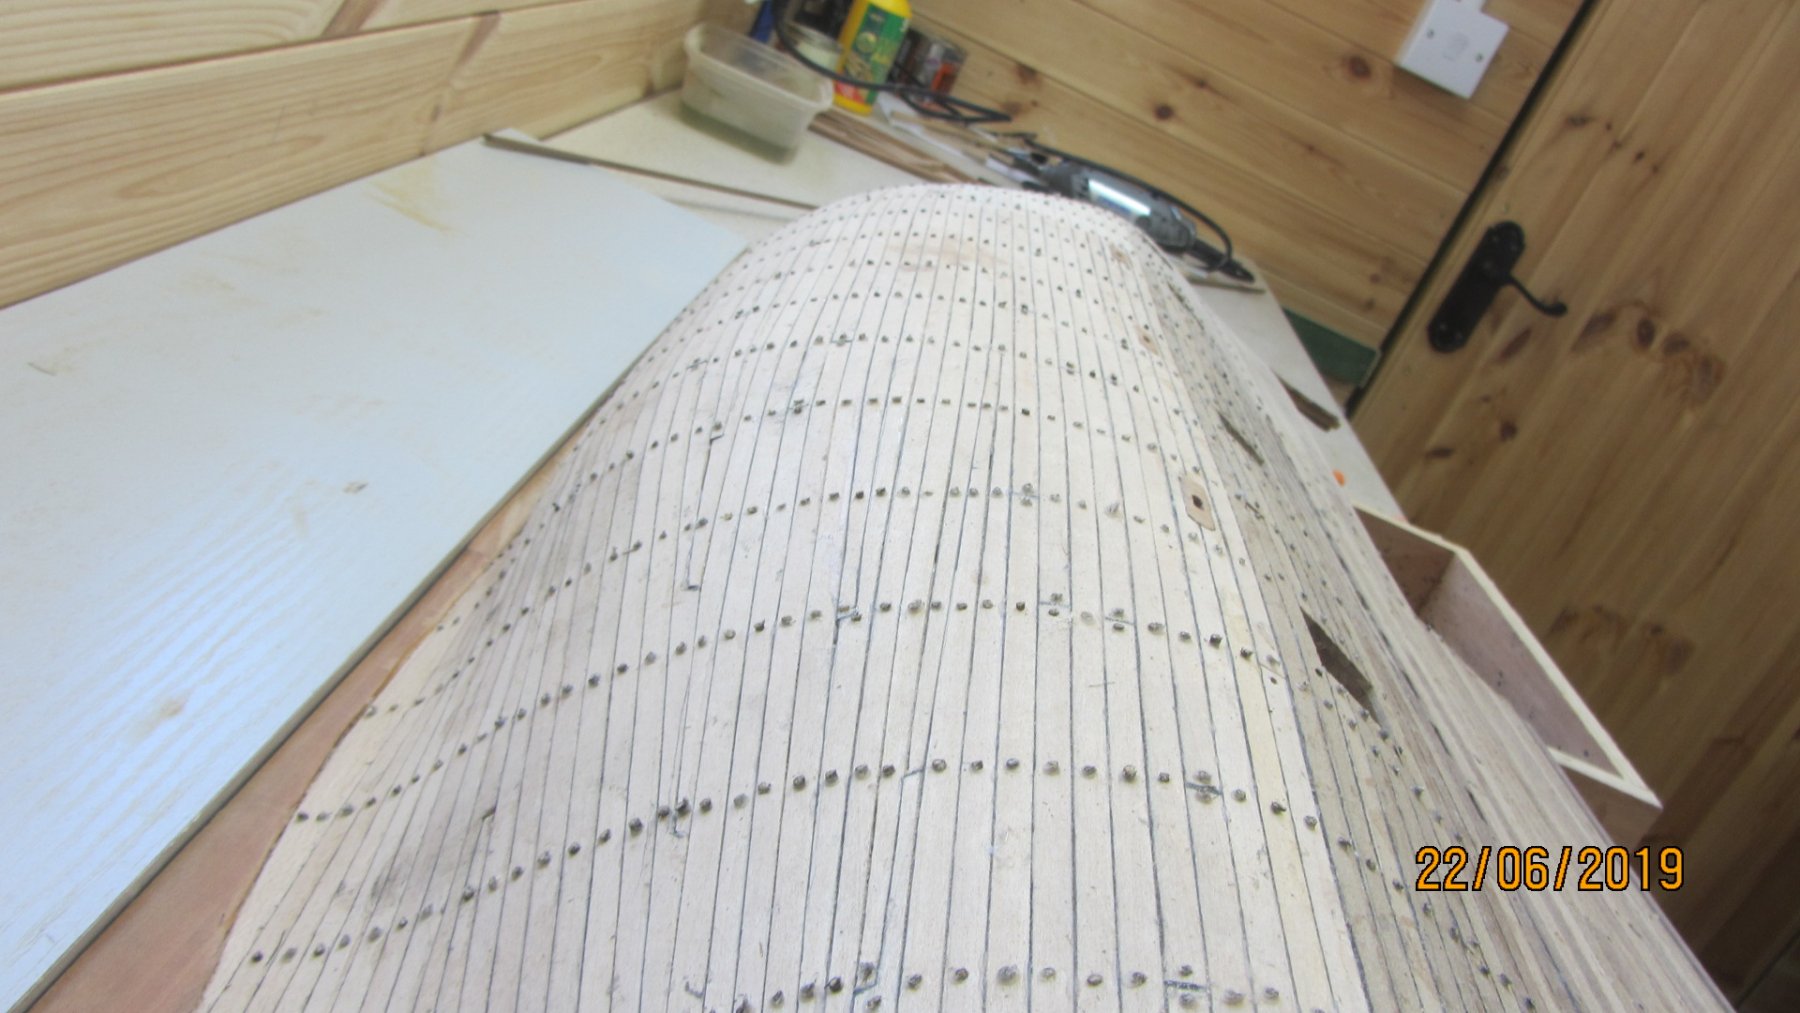
Another update. Lots of work done this time.
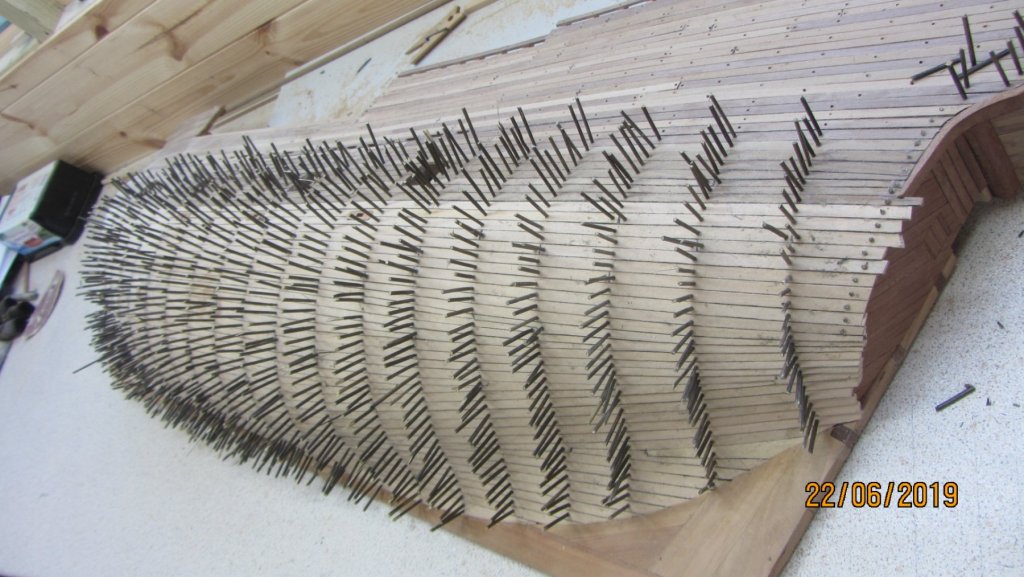
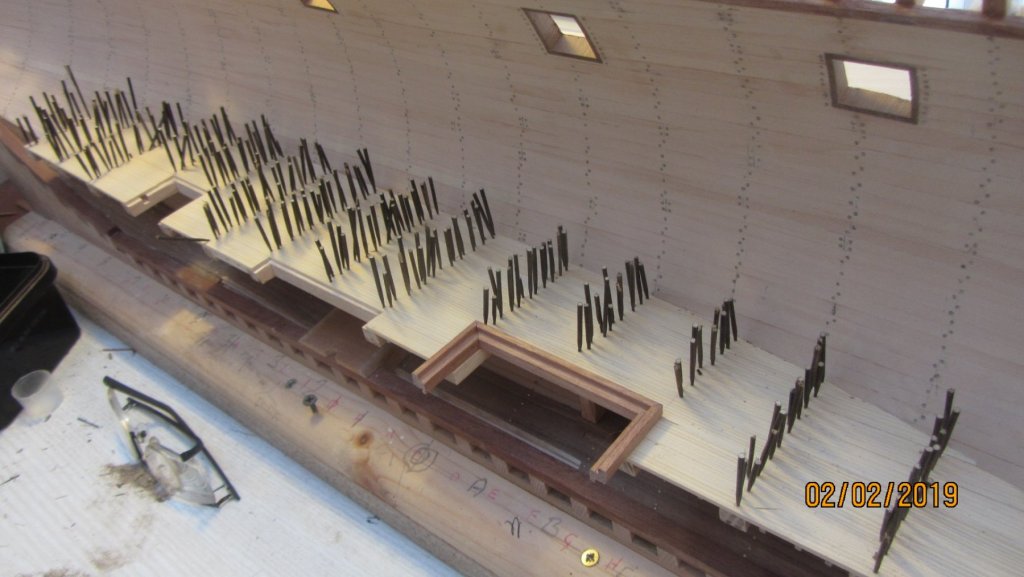
The hedgehog. There is nothing more to be said about that picture.
Treenails in but not cleaned up at this stage.
Again treenails are in but not sanded at this stage.

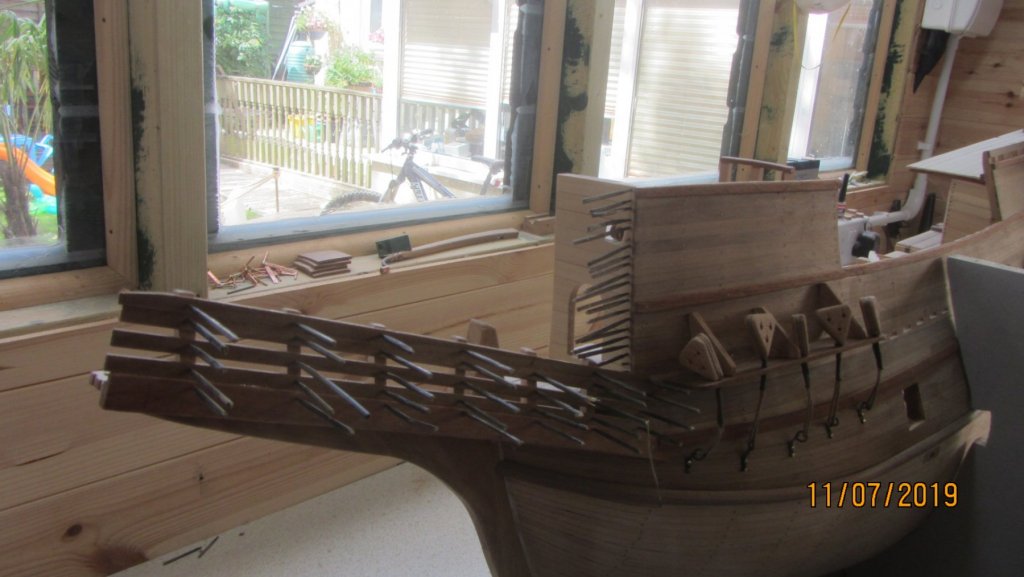
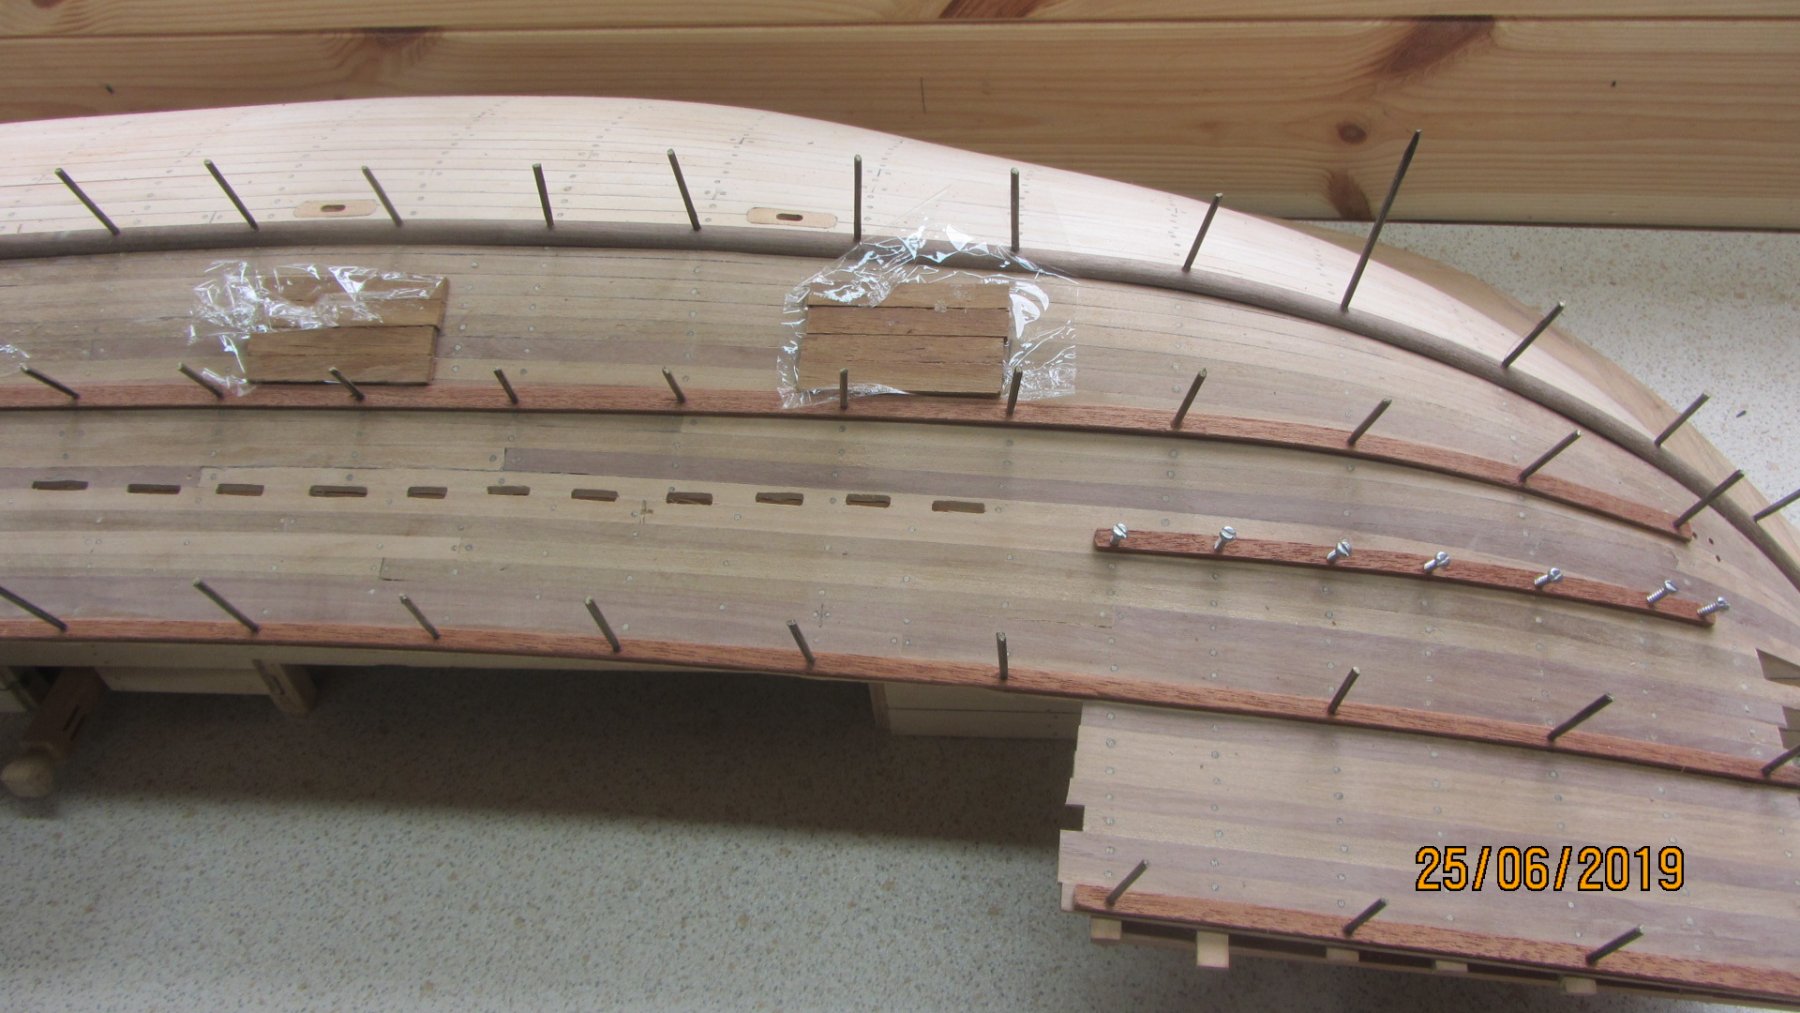
Started on the beak. And timbers onto the side of the ship.
Gunports laid on top of the planking. With cling film to stop excess glue getting onto the ship. The get the correct curvature doing it this way. And they are way oversized at the moment.

Started on the upper transom (Not shown the pictures as it is drying at this time.)

All going well and will start constructing the rest of the decks next week.
Thanks for the likes. And comments.
Regards Antony.
- FriedClams, Mirabell61, Valeriy V and 11 others
-
14
-
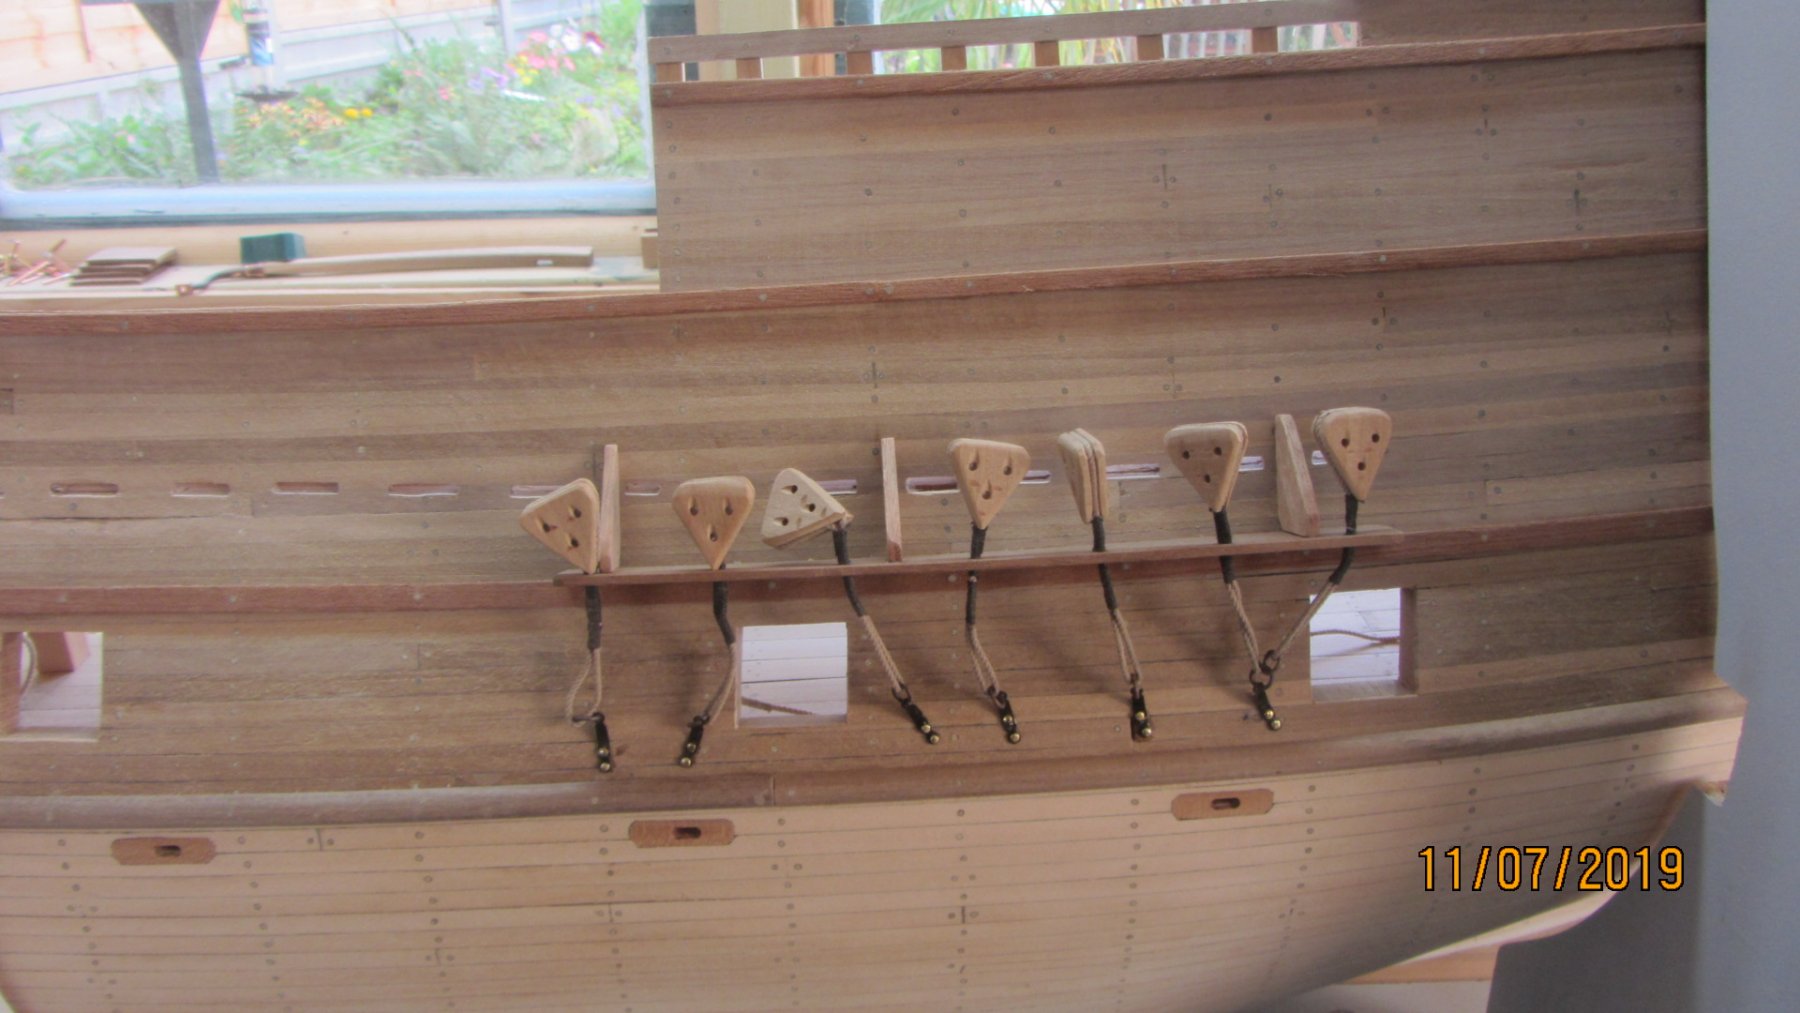
Hi.
The photos as promised..
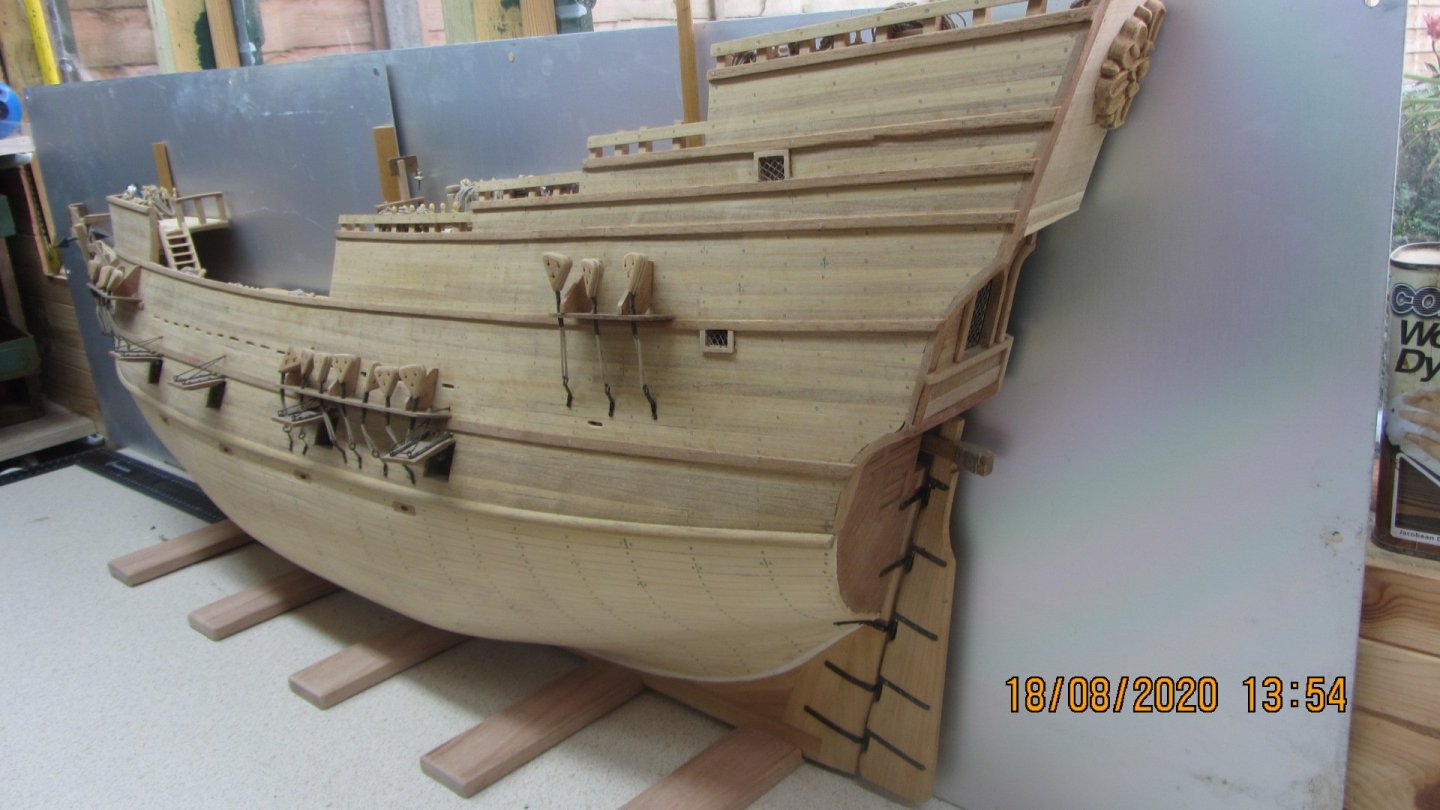
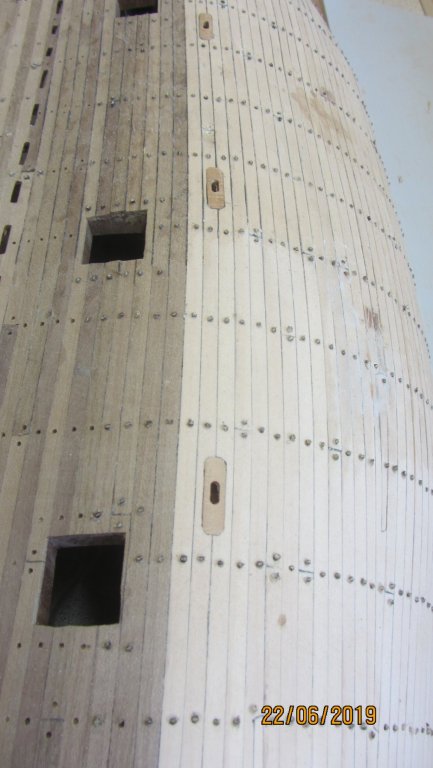
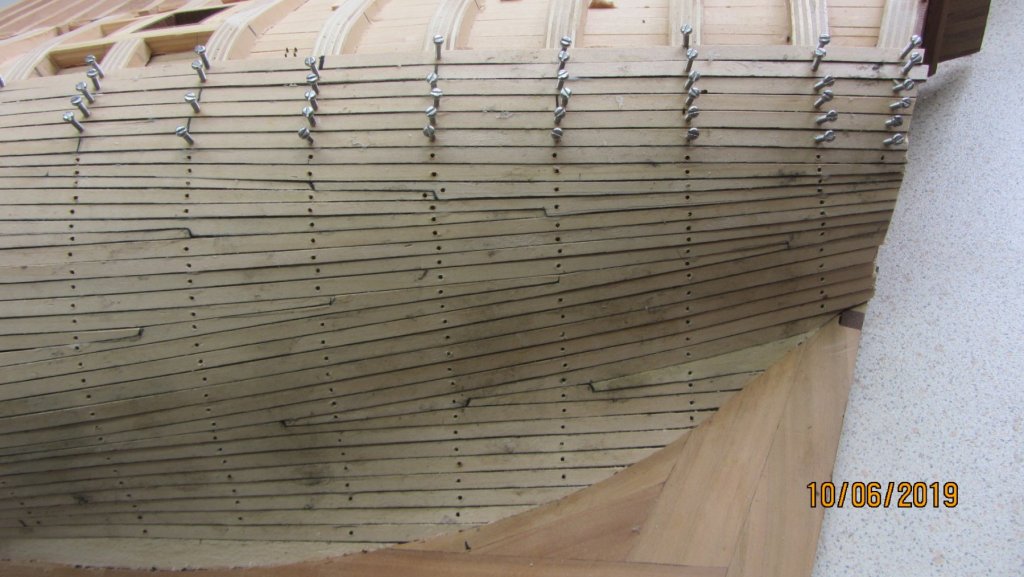
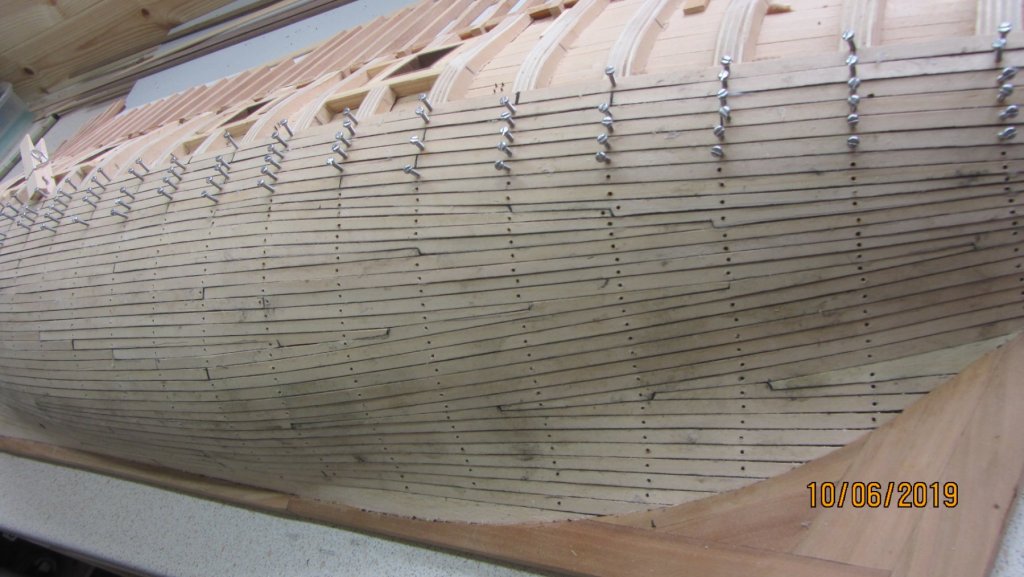
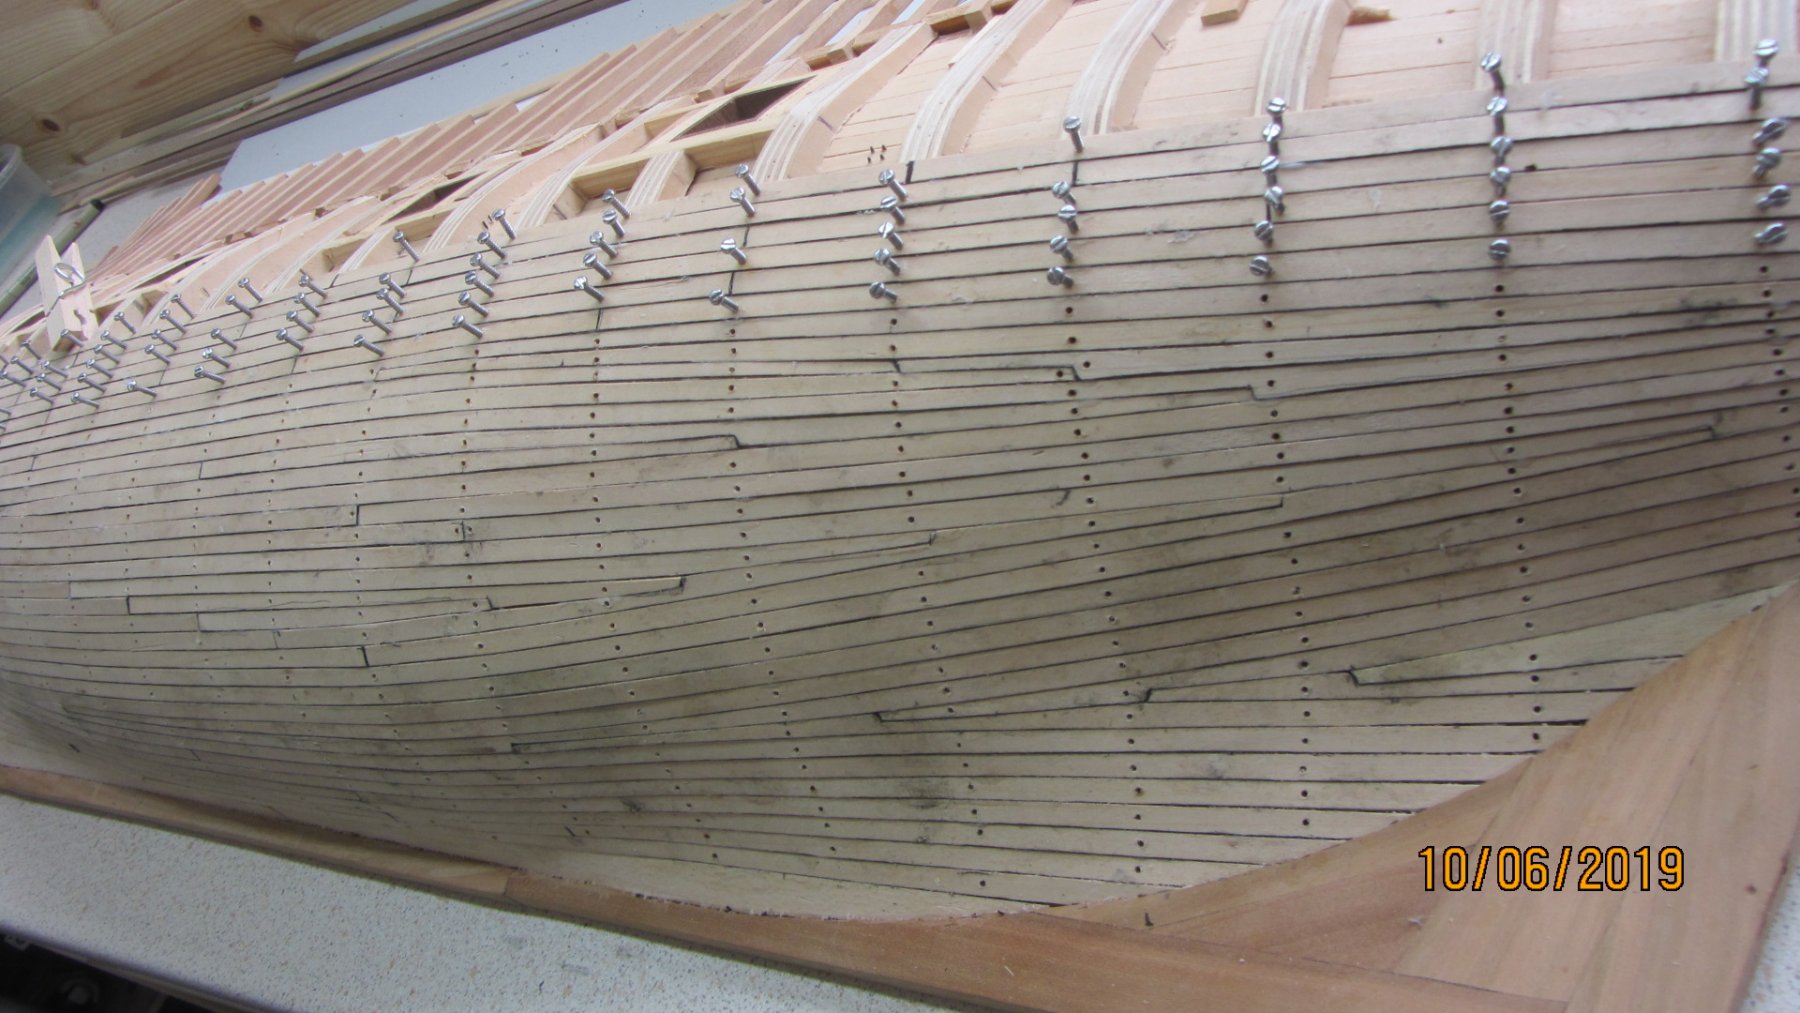
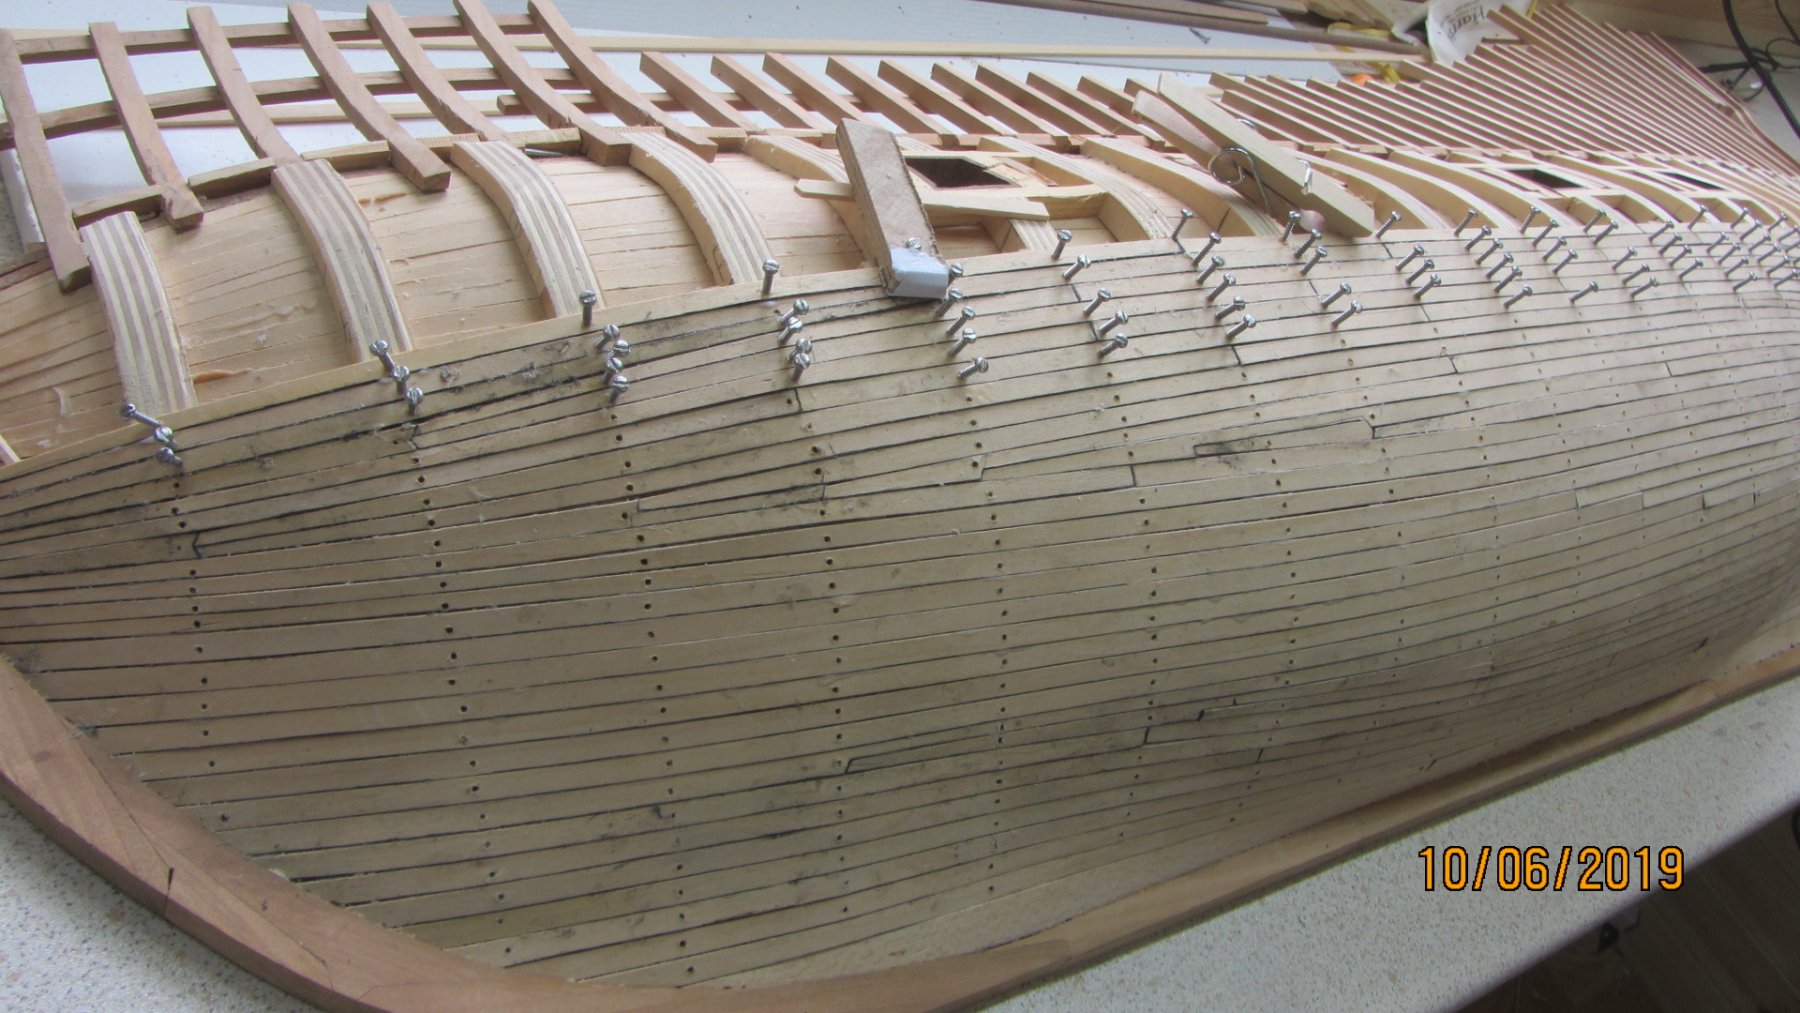
The planking is glued and as yet no work has been done to finish it off.
I will just sand and clear seal it after completing the tree nailing. (With 4 coats of clear Danish Oil)
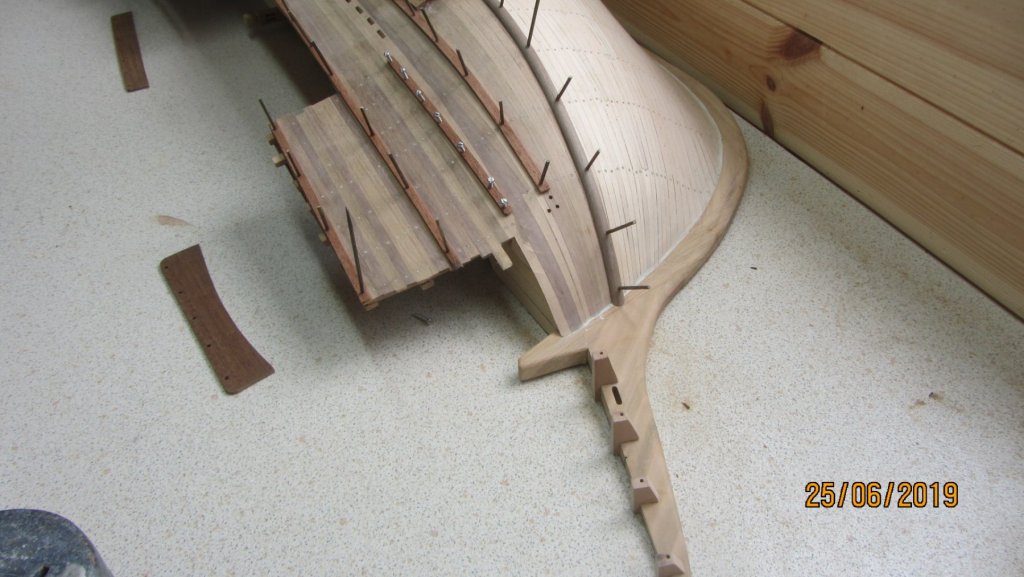
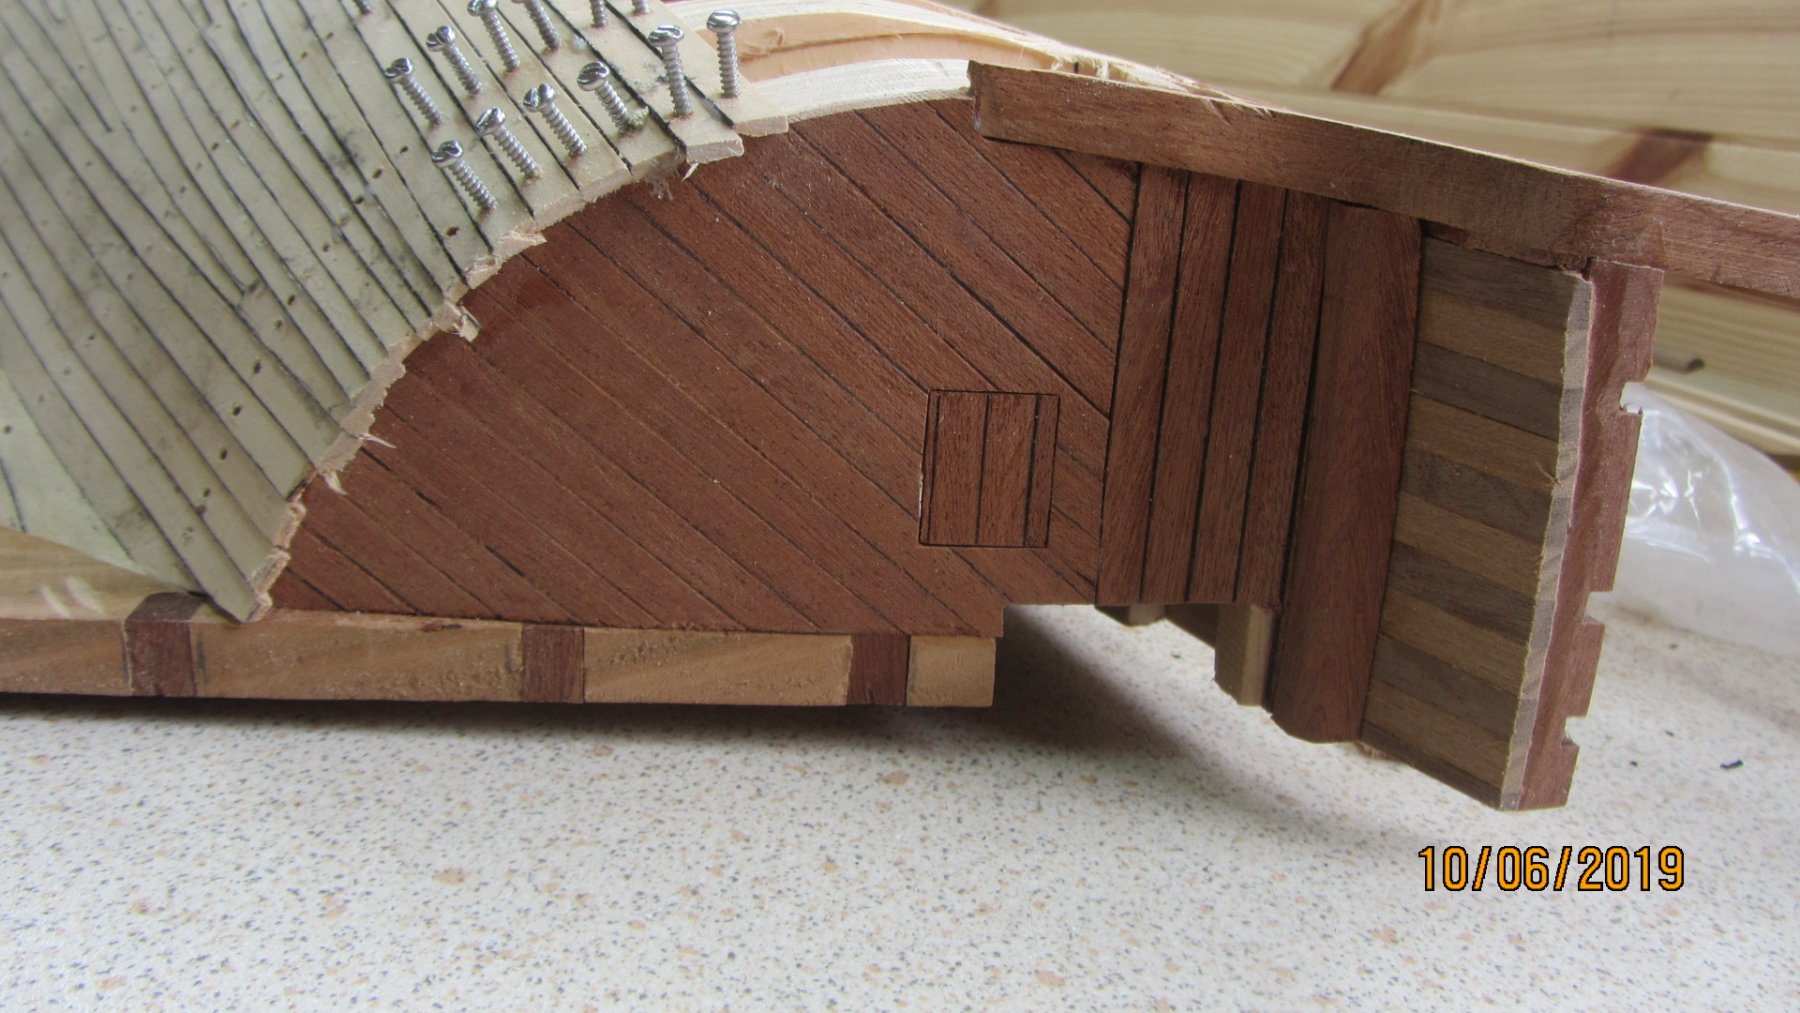
The Stern area with lots of stealers 1 length had 4 stealers in it ..
Another shot looking forward/
The Bow area.

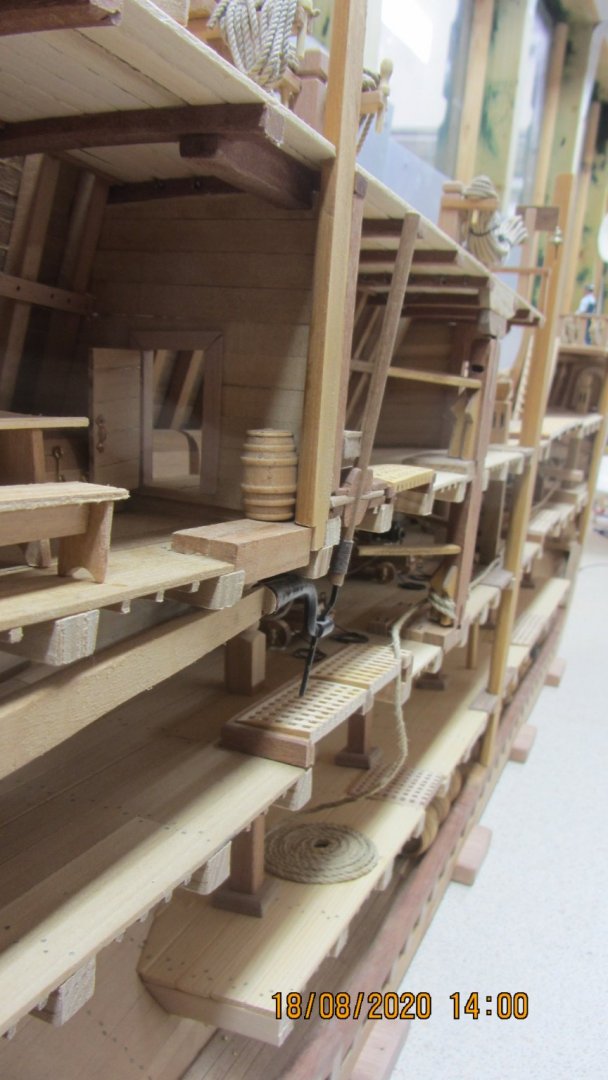
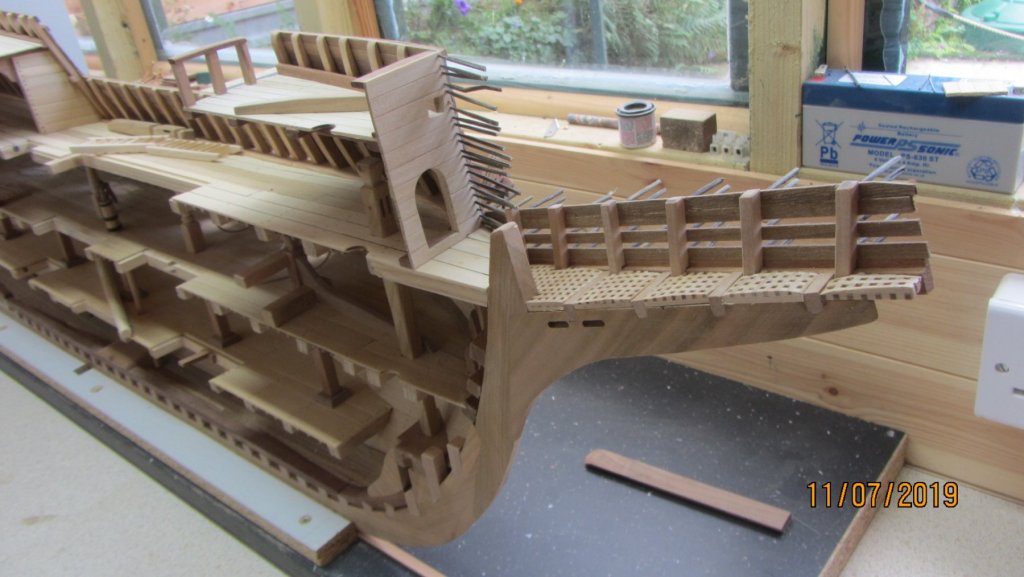
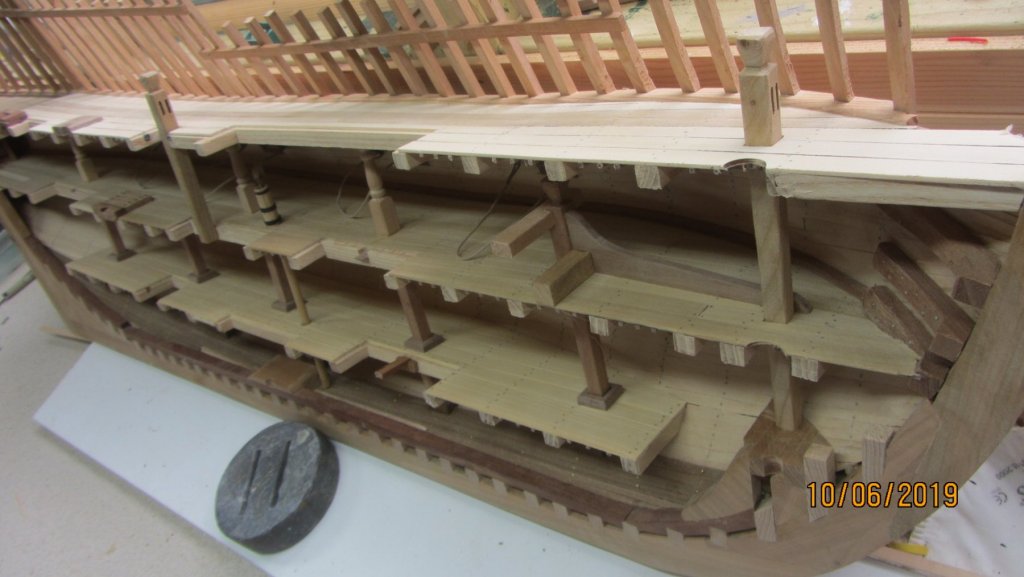
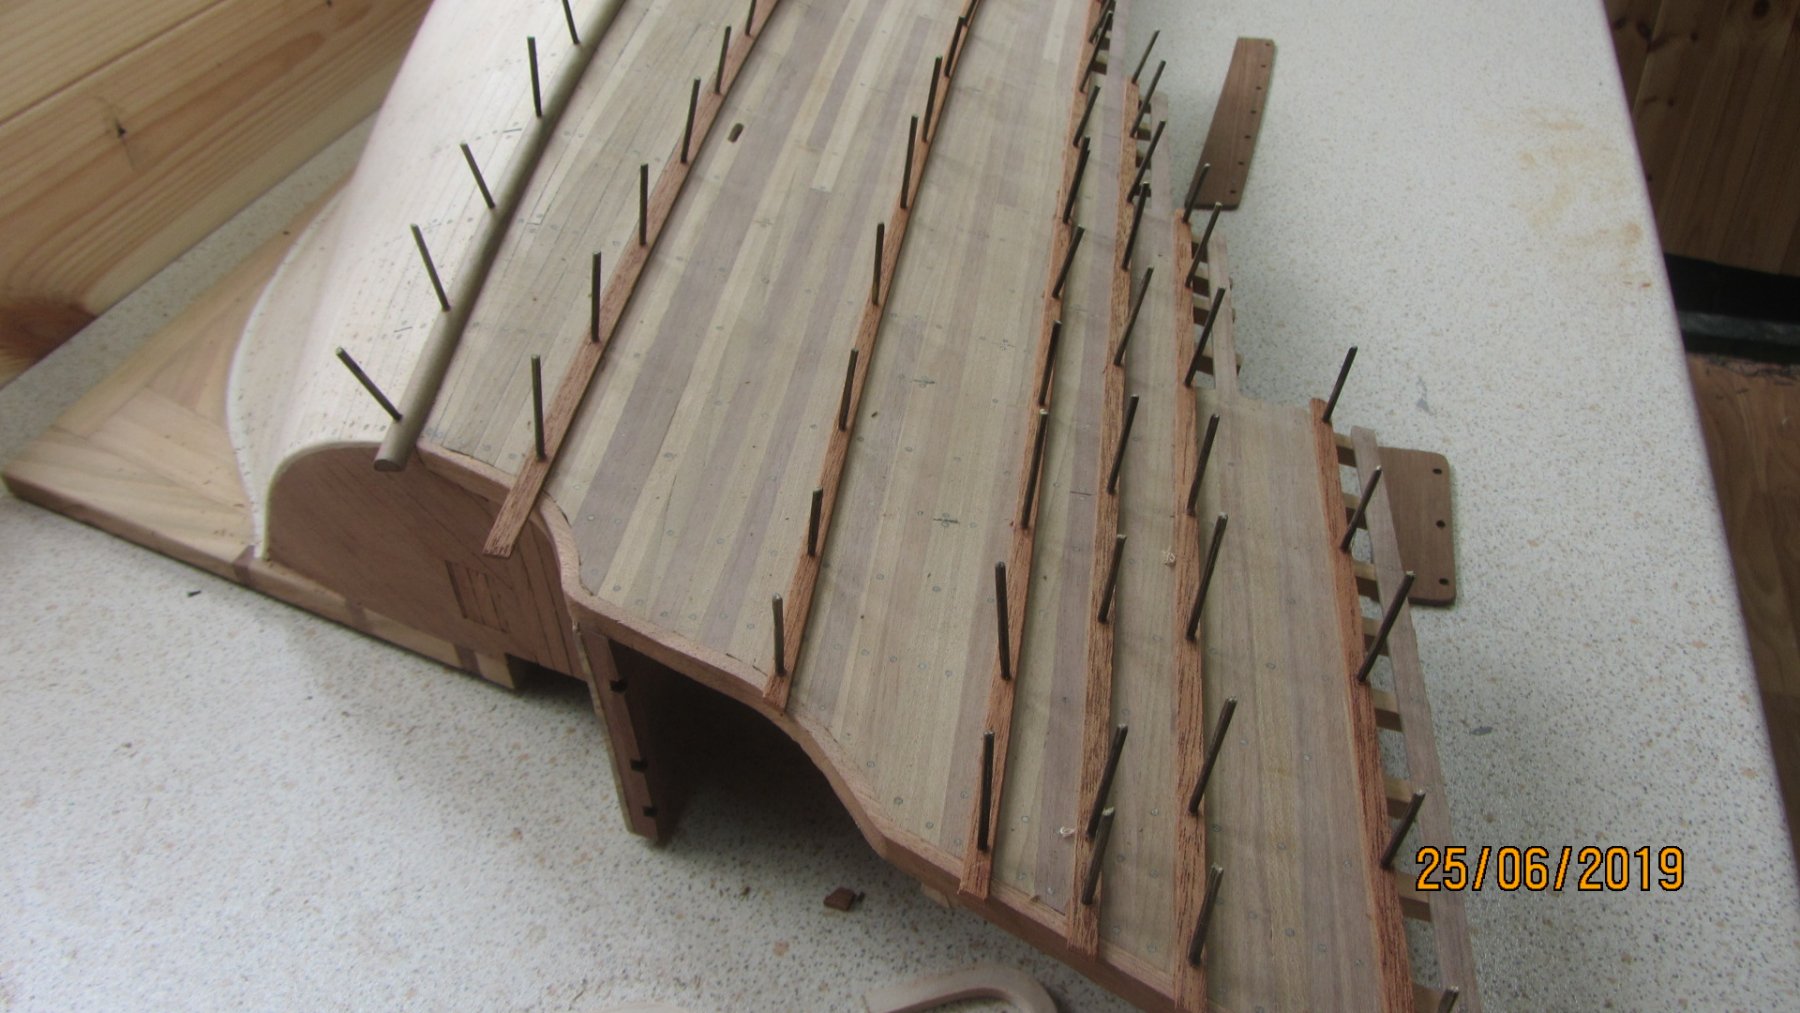
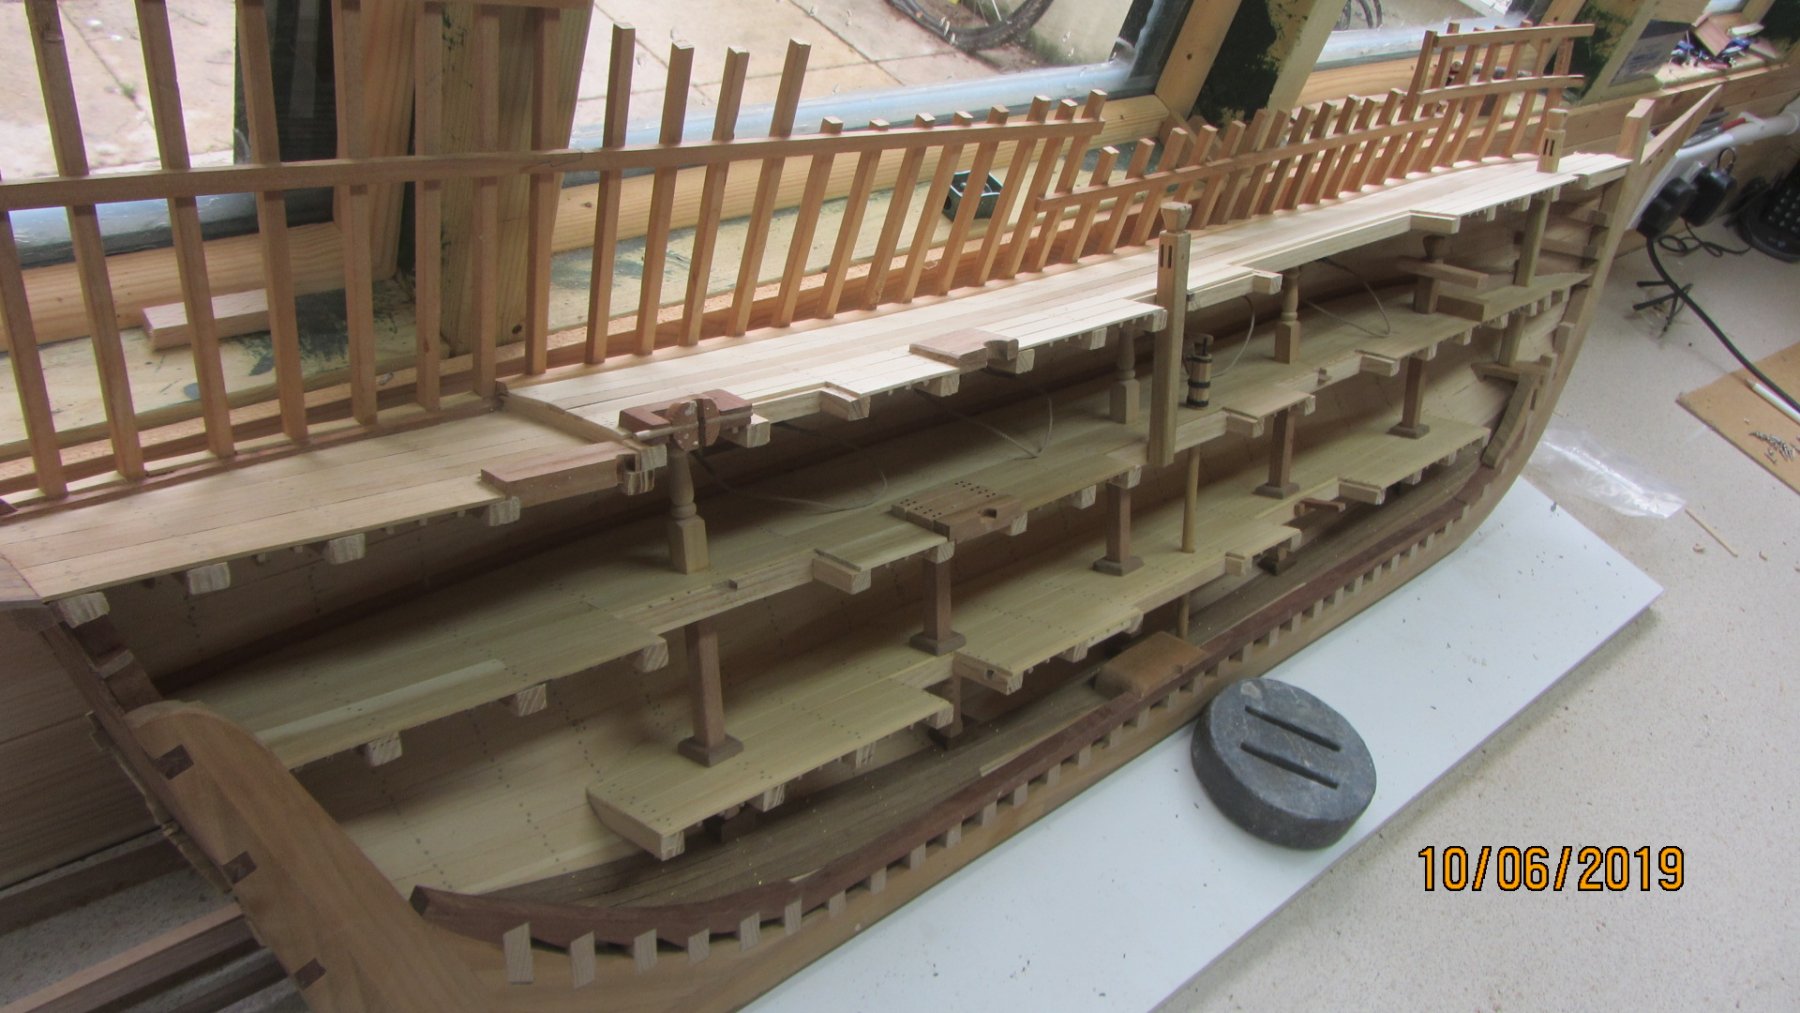
The internal works to date. Stern to Bow.

Another shot Bow to Stern.
A closeup of the stern area.
A Shot of the lower stern area (Transom)
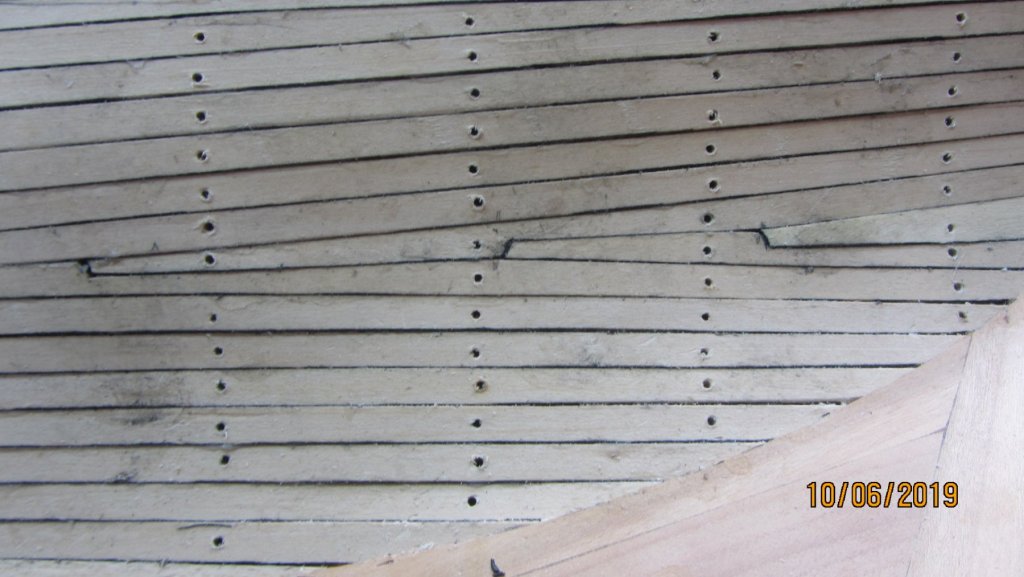
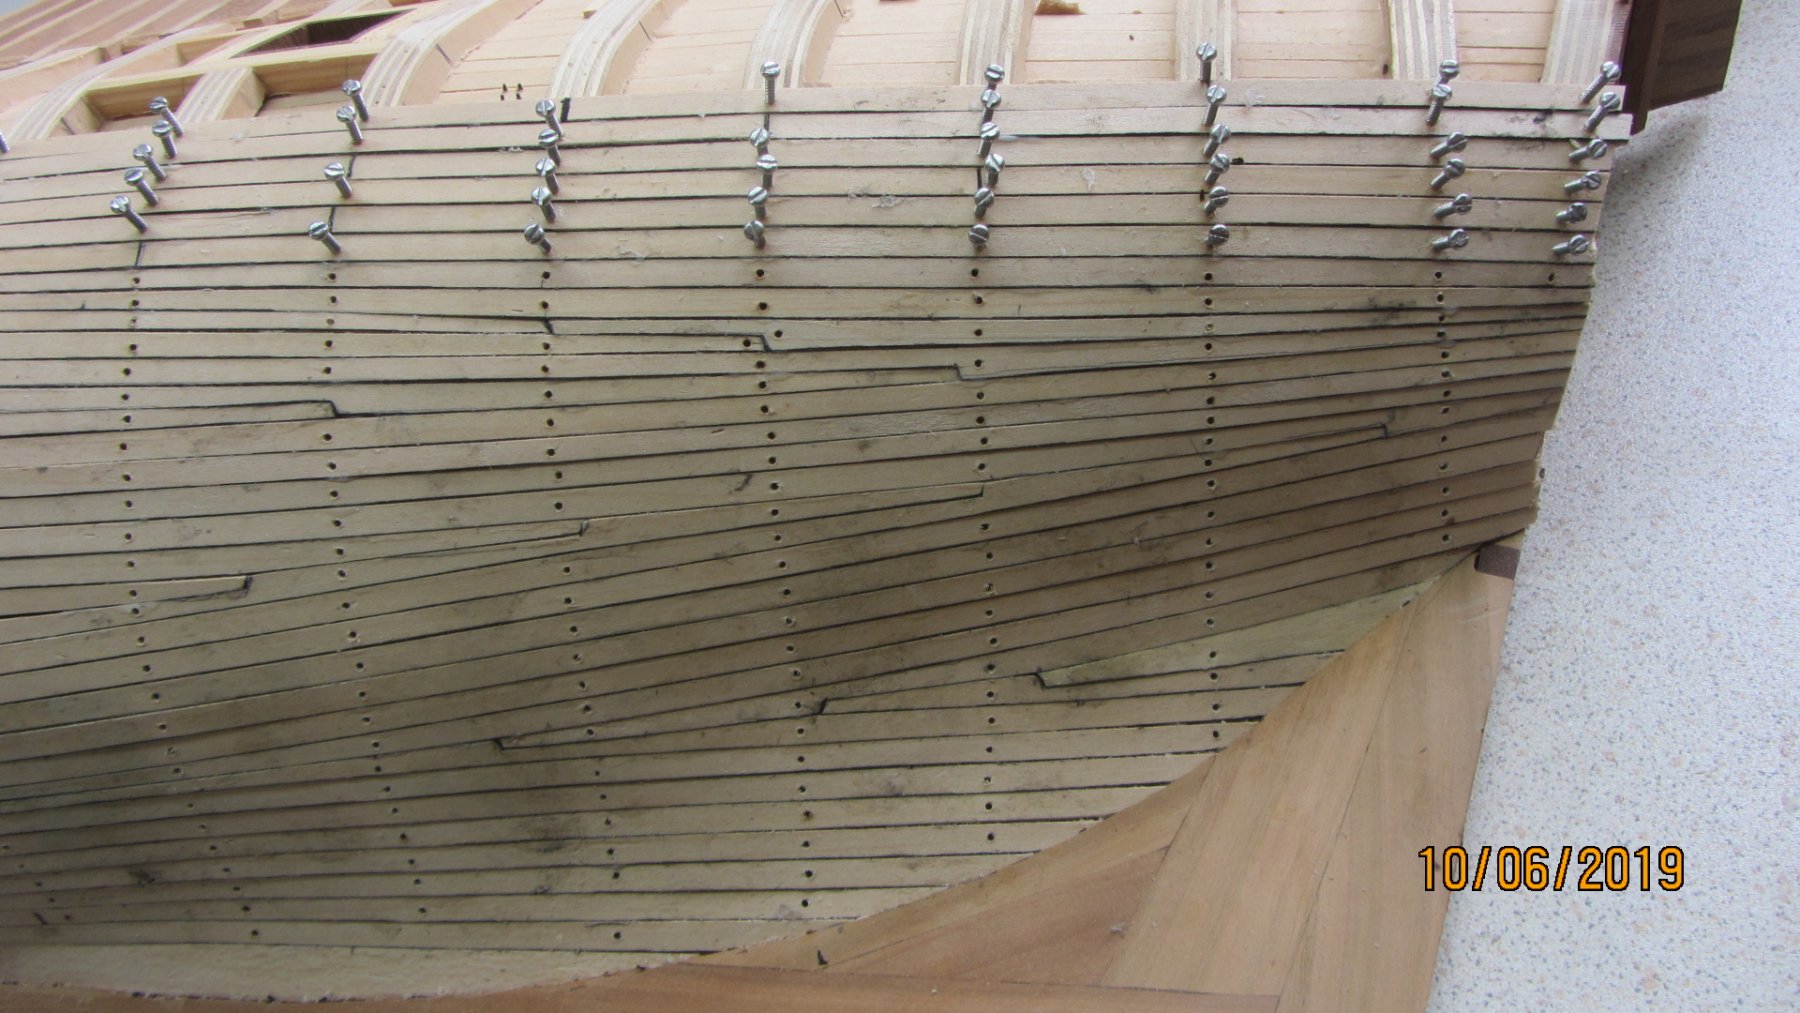
As you can see I use miniature self tapping screws to hold the planks in place then they are removed ready for tree nailing. The screws are quite long as it helps to hold them in place while fitting them.
The holes are predrilled and so far I have has NO splits in the planking. Its NOT the screw head that holds the planking in place.. Its the thread.
Lots on Ebay listed as Micro self tapping screws. from 1mm upwards.
Will show more progress as the planking continues upwards.
Regards Antony.
- tarbrush, yvesvidal, GrandpaPhil and 8 others
-
11
-
HI.
After a extensive break from model building.. Im'e back
Hi Nick. Yes I will contact you tomorrow .
No photos today … But I will post some tomorrow afternoon.
Started the external planking with Ash stripes 6mm X 1.5mm Yes small for the scale But the effect is nice. I started from the garboard plank and working up slowly.
At the gunwale I will use walnut strips up to the main deck handrail then I will use Mahogany strips. Should look Nice... (NO PAINTING...)
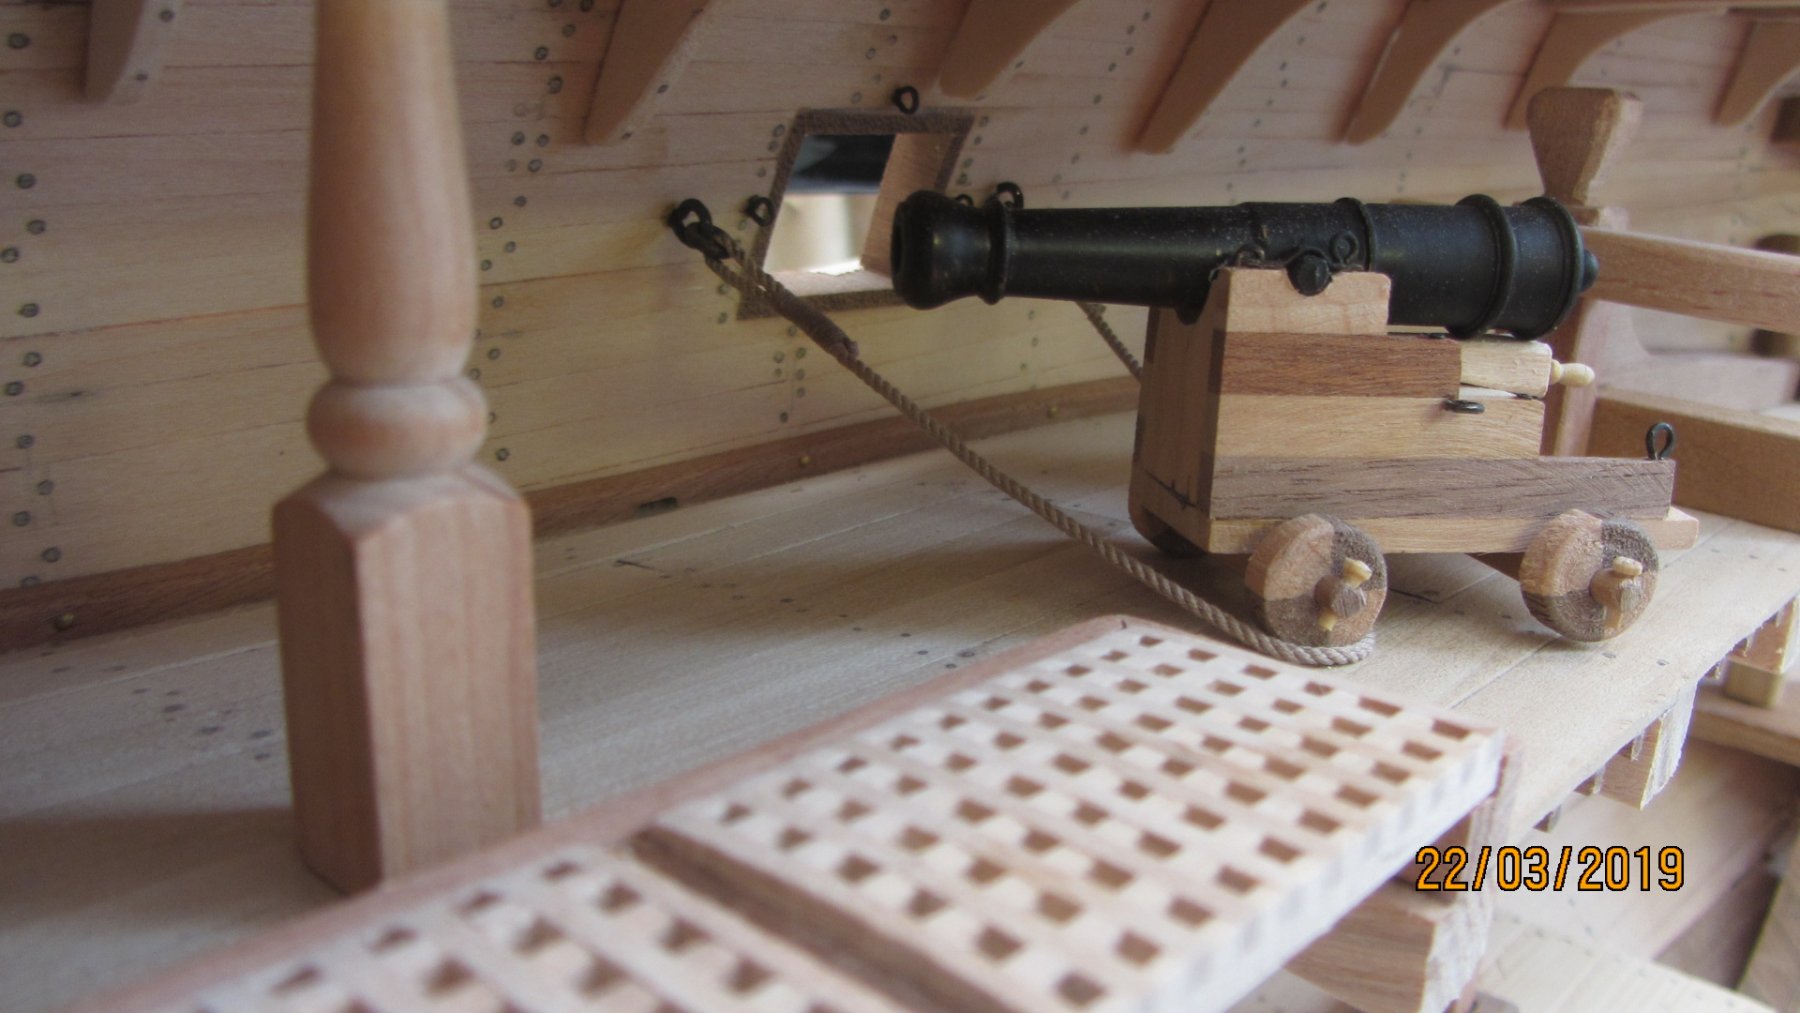
All the decks up to the Main deck are completed and will need the small bits adding on model compression. Cannons are made and Rigged ready for installation.
That's it till tomorrow.
Regards Antony.
- egkb, Fernando E, mtaylor and 1 other
-
4
-
Hi Jo.
Just catching up on your build log..
I am most impressed with you build and humour.
On 6/6/2019 at 5:06 AM, SHIPSCAT said:Jo (with bleeding finger tips).
A first class job on the planking to the hull.
41 minutes ago, SHIPSCAT said:Thank you for your comment, it was hard going for me but I am happy with it (I think).
But look at the quality of the finished product
All the best.
Regards Antony.
- popeye the sailor, src, mtaylor and 1 other
-
4
-
HI.
A nice man cave And a load of tooling to get the job done
A good start on the Victory.
Are you using any books for reference ??
Will be interesting to watch the lighting with Fibre optics. Not tried this yet.. So will be watching with interest.
Will follow along and I have the kitchen stool on the right booked as my front row seat.
One assumes you were a submariner ?? with the Name and the bulkhead door.
Regards Antony.
-
Hi.
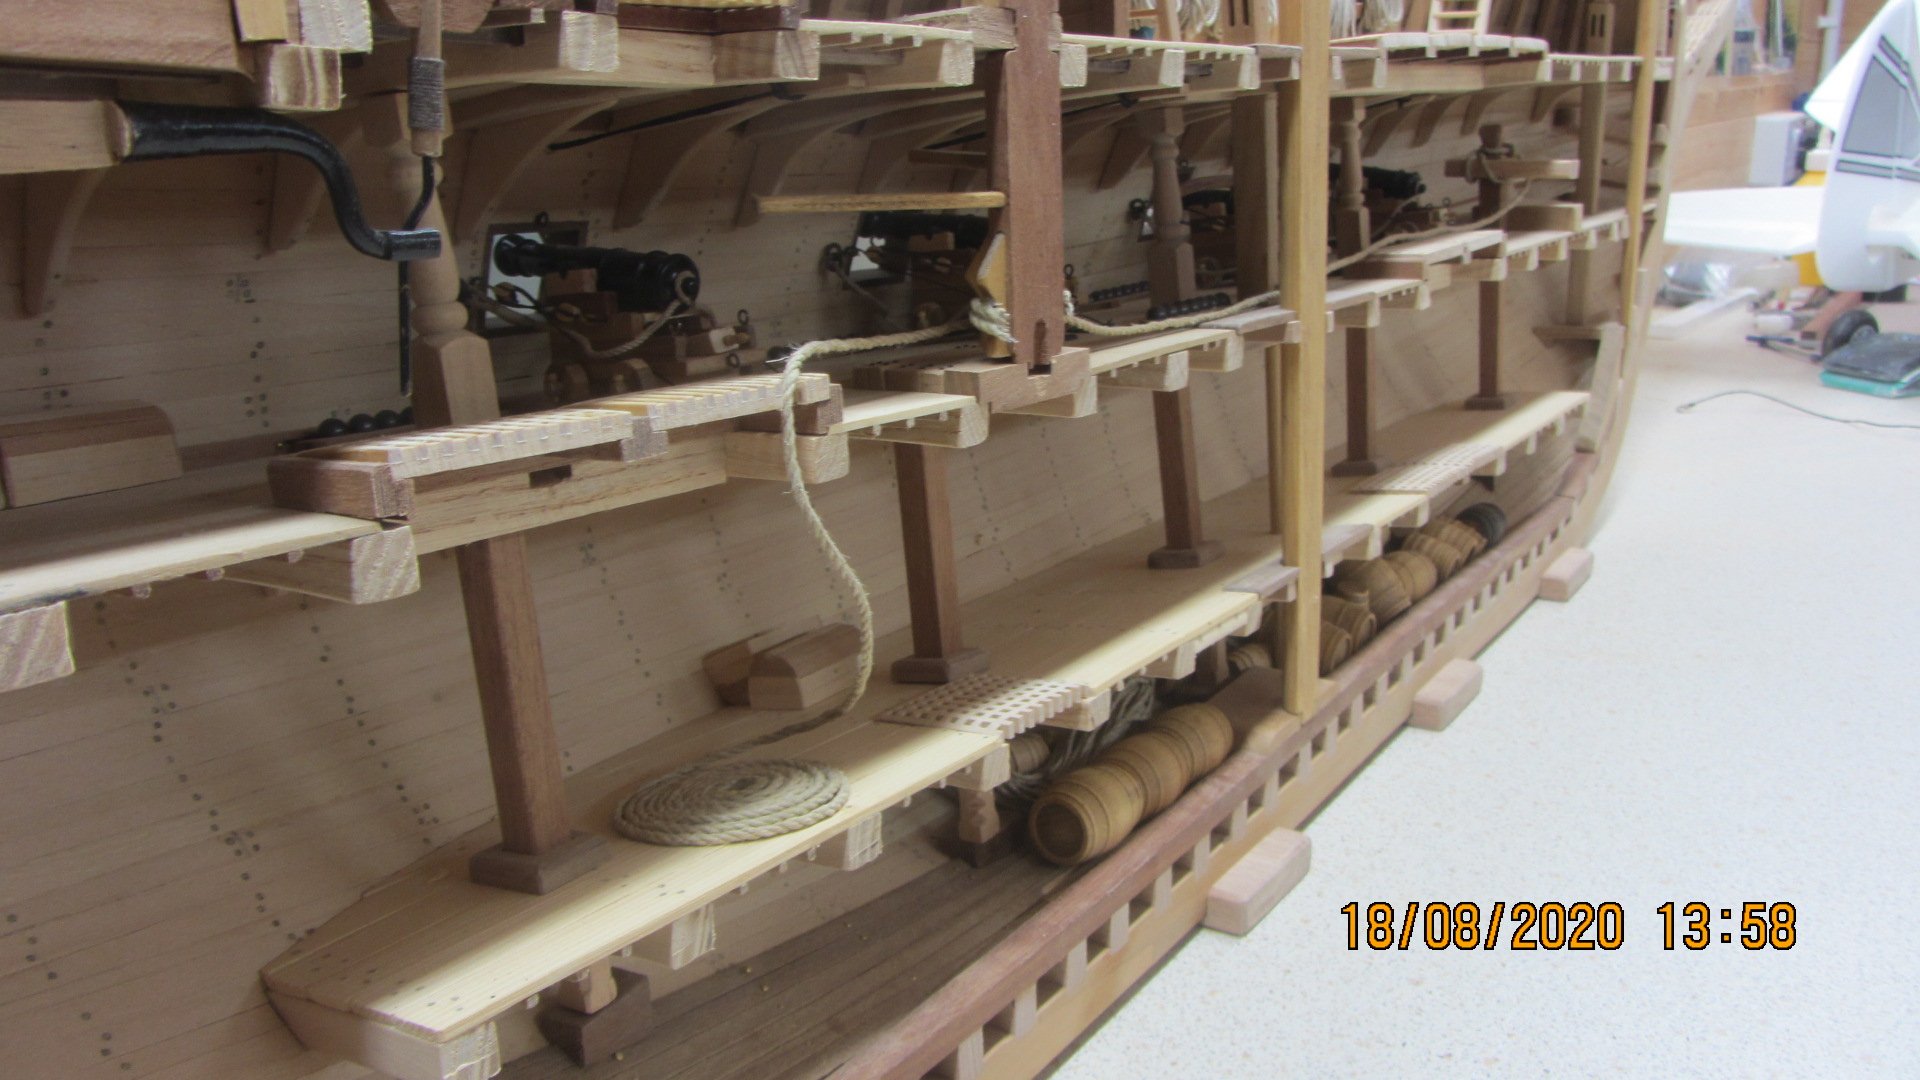
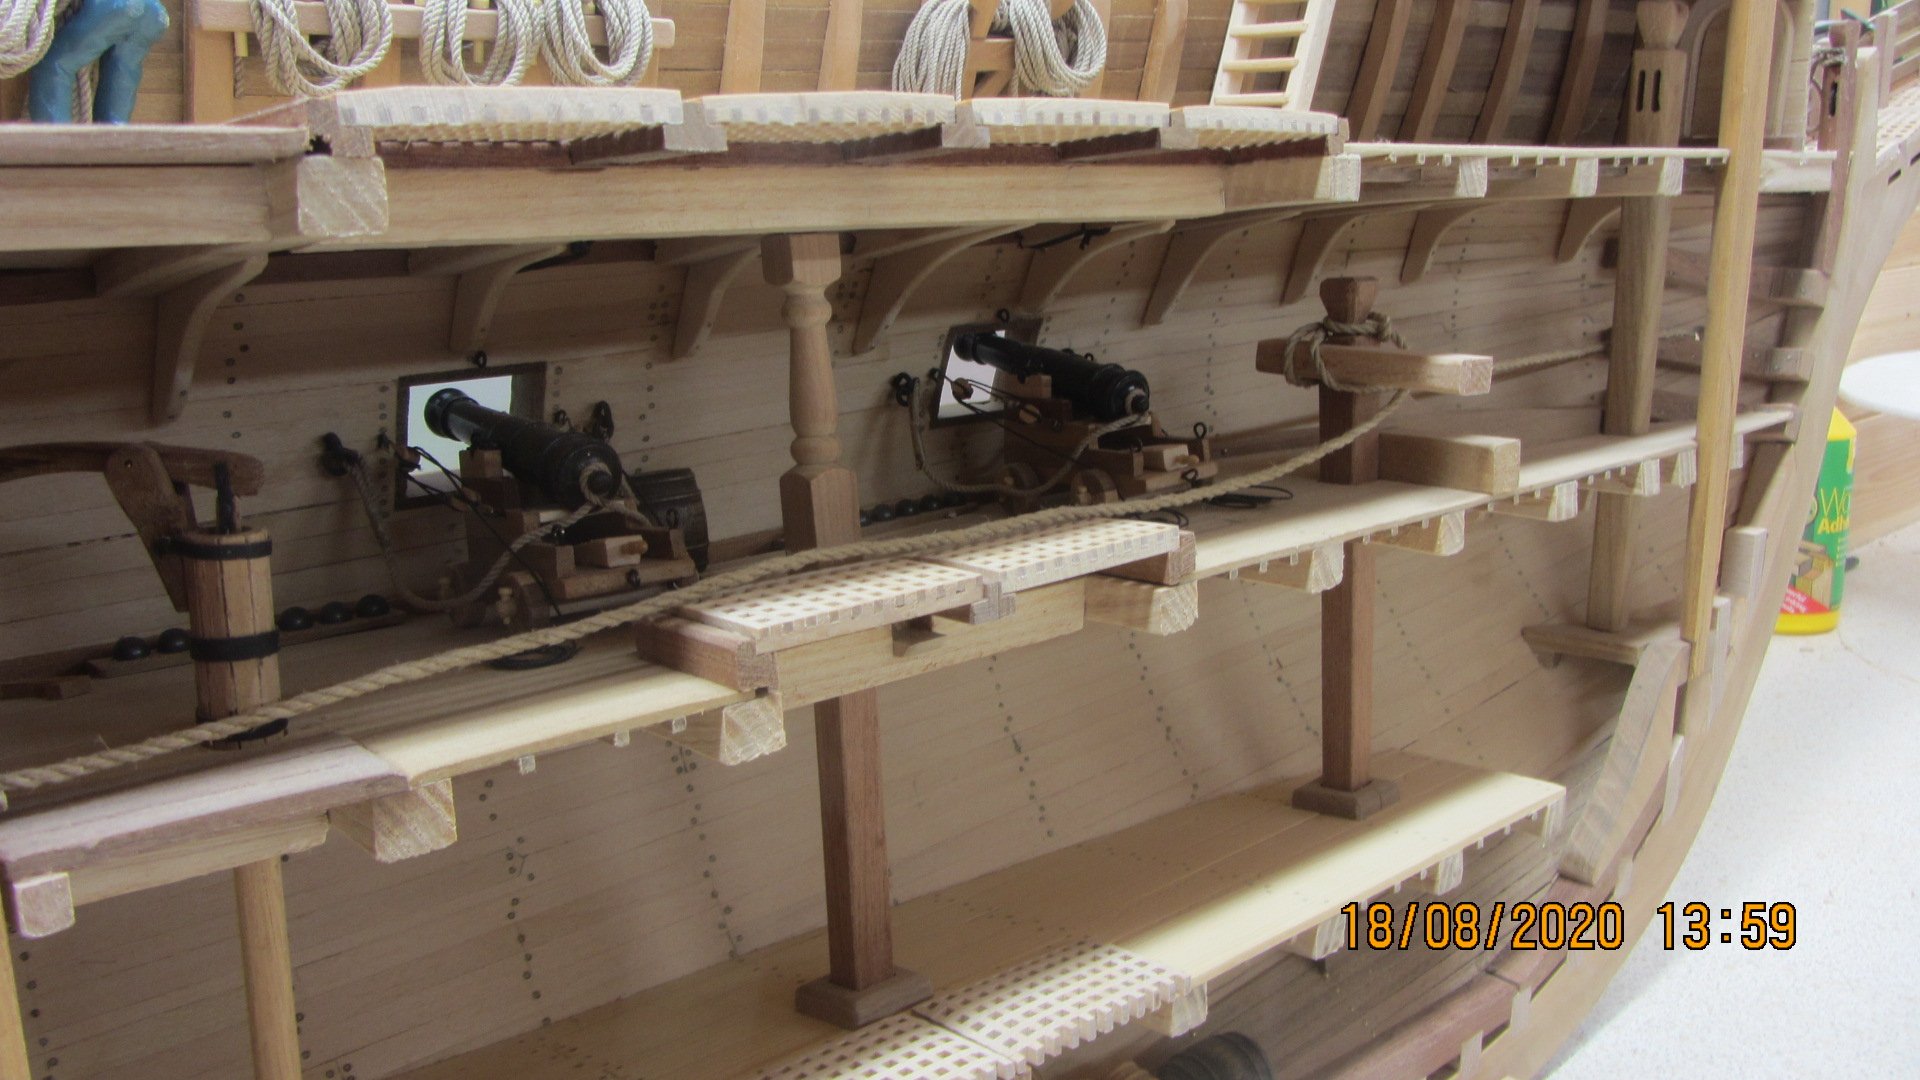
Thanks Keith. Yes this is going together very quickly as there has been a lot of planning on how things will be constructed. Also lots of the timber has been pre milled ready for use.
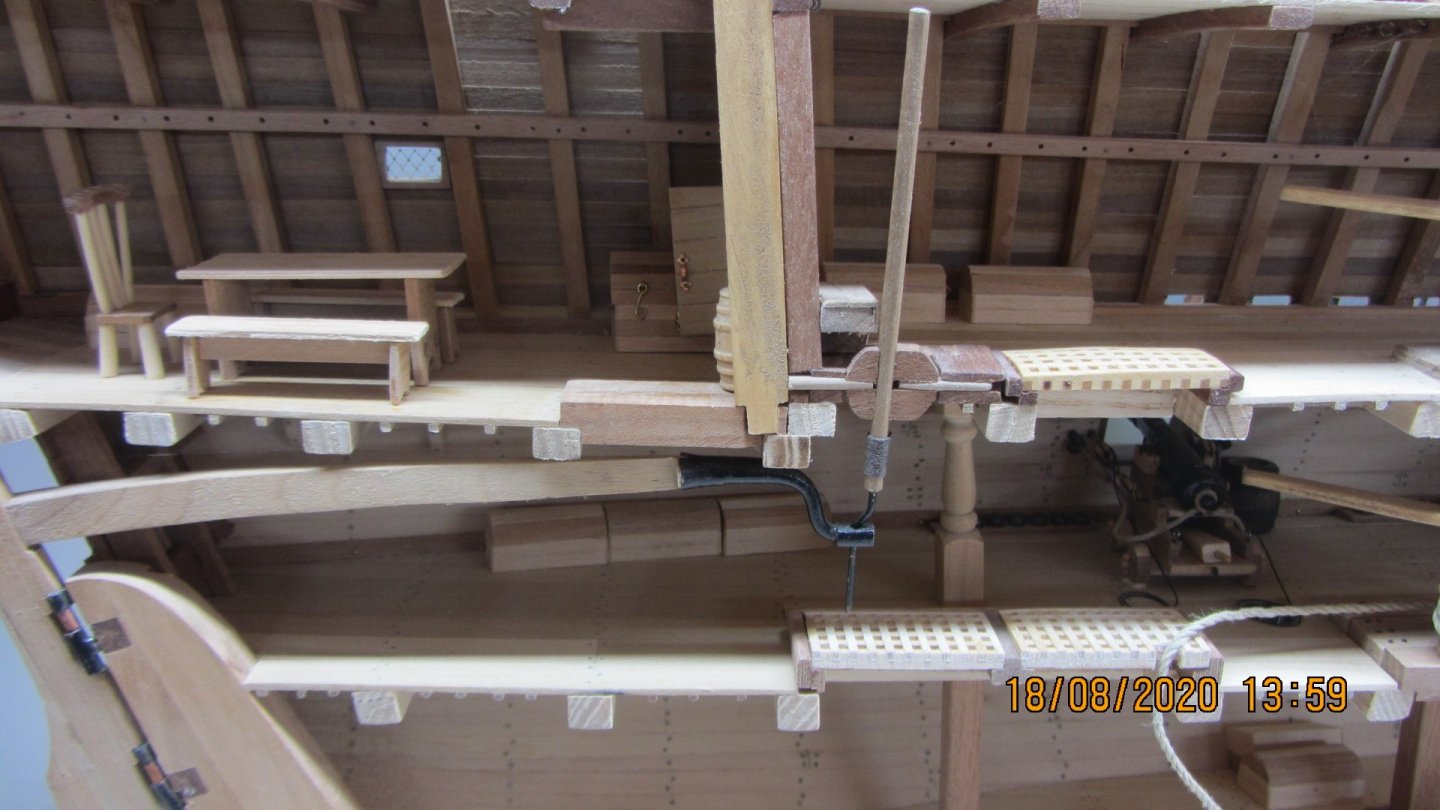
Another update.
Lots of little bits made since the last post.
And main deck is complete. Was done in the two weeks as most of the timber was already prepared and milled.

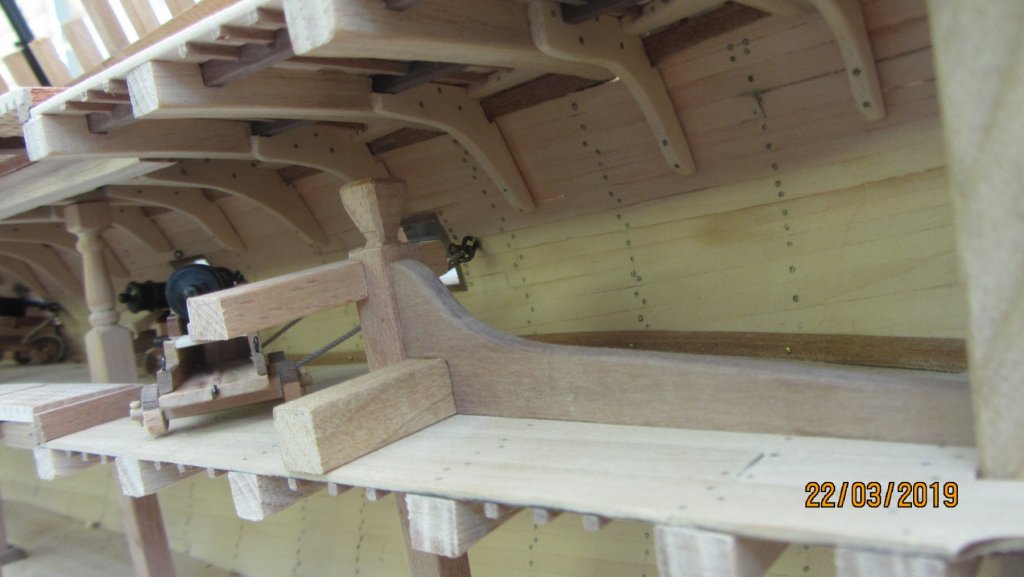
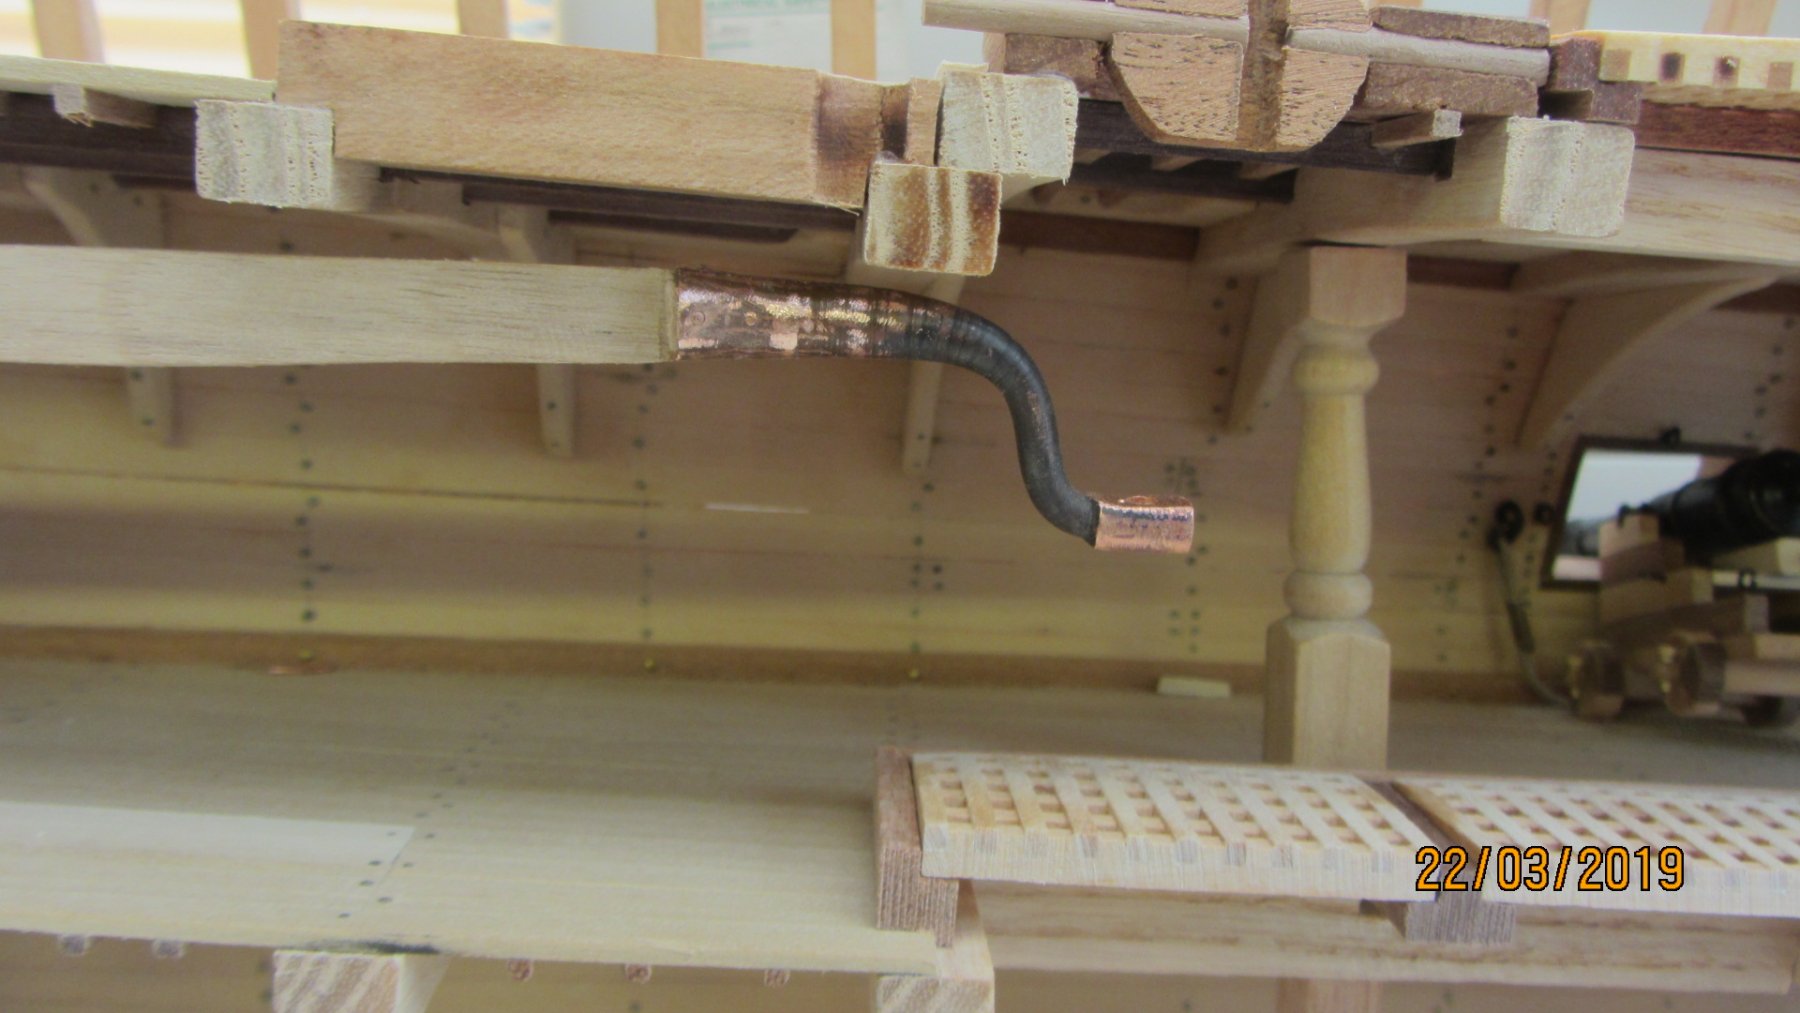
The whipstaff steering was a new thing I have not encountered before.

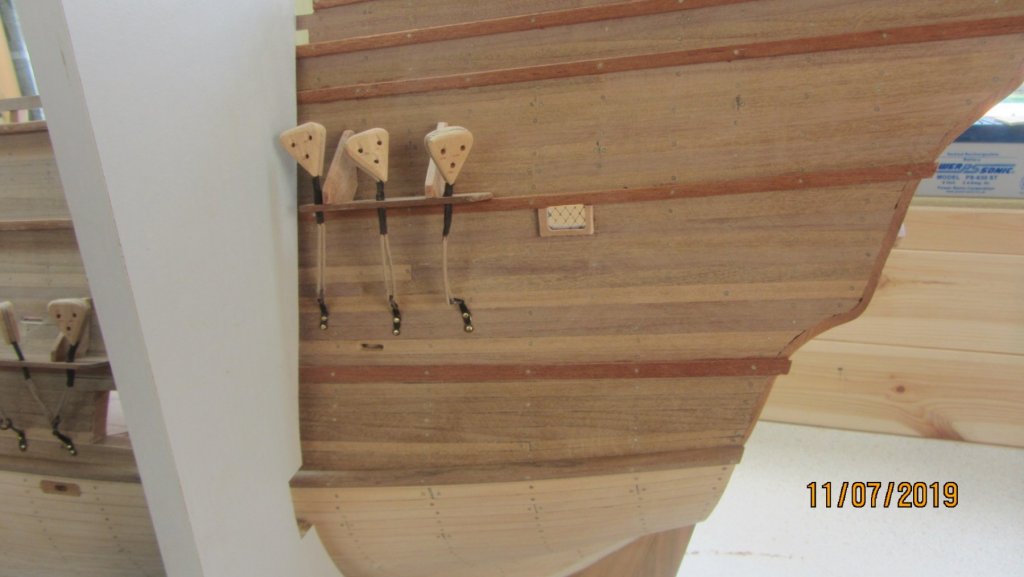
Two pumps of this ship. The other one is on the other side of the ship and will not be visible.
Only 4 of these on each side of the ship.
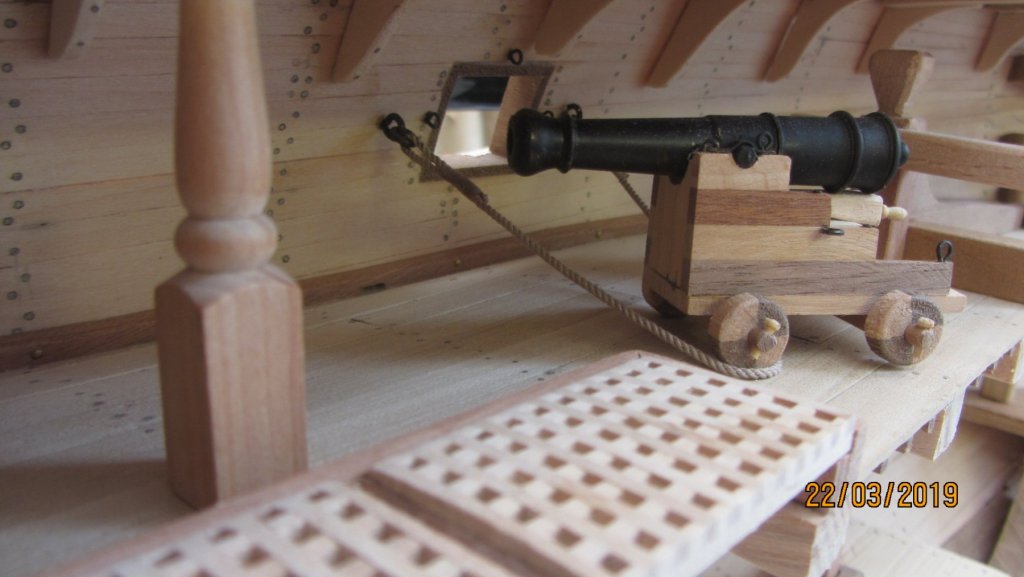
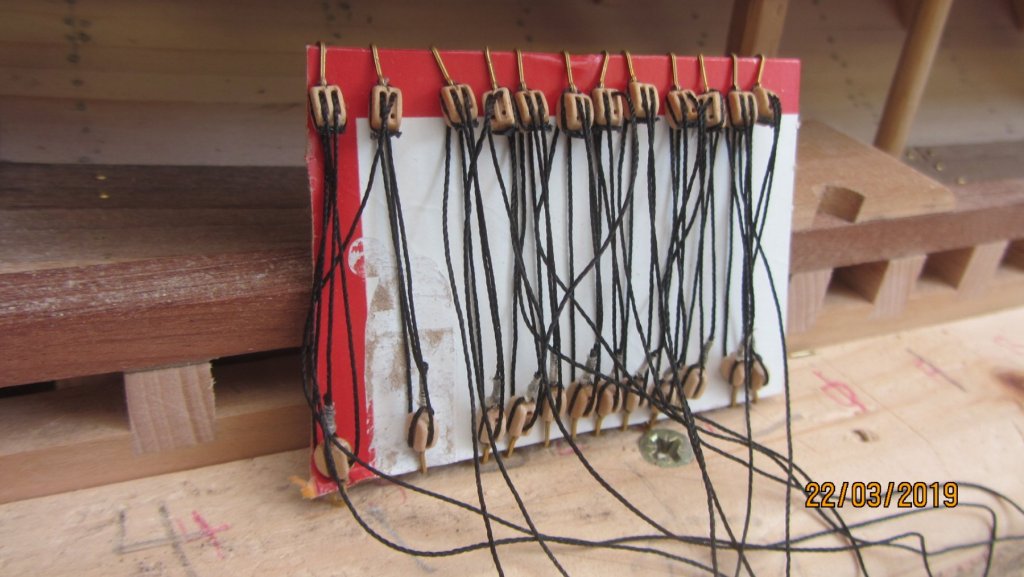
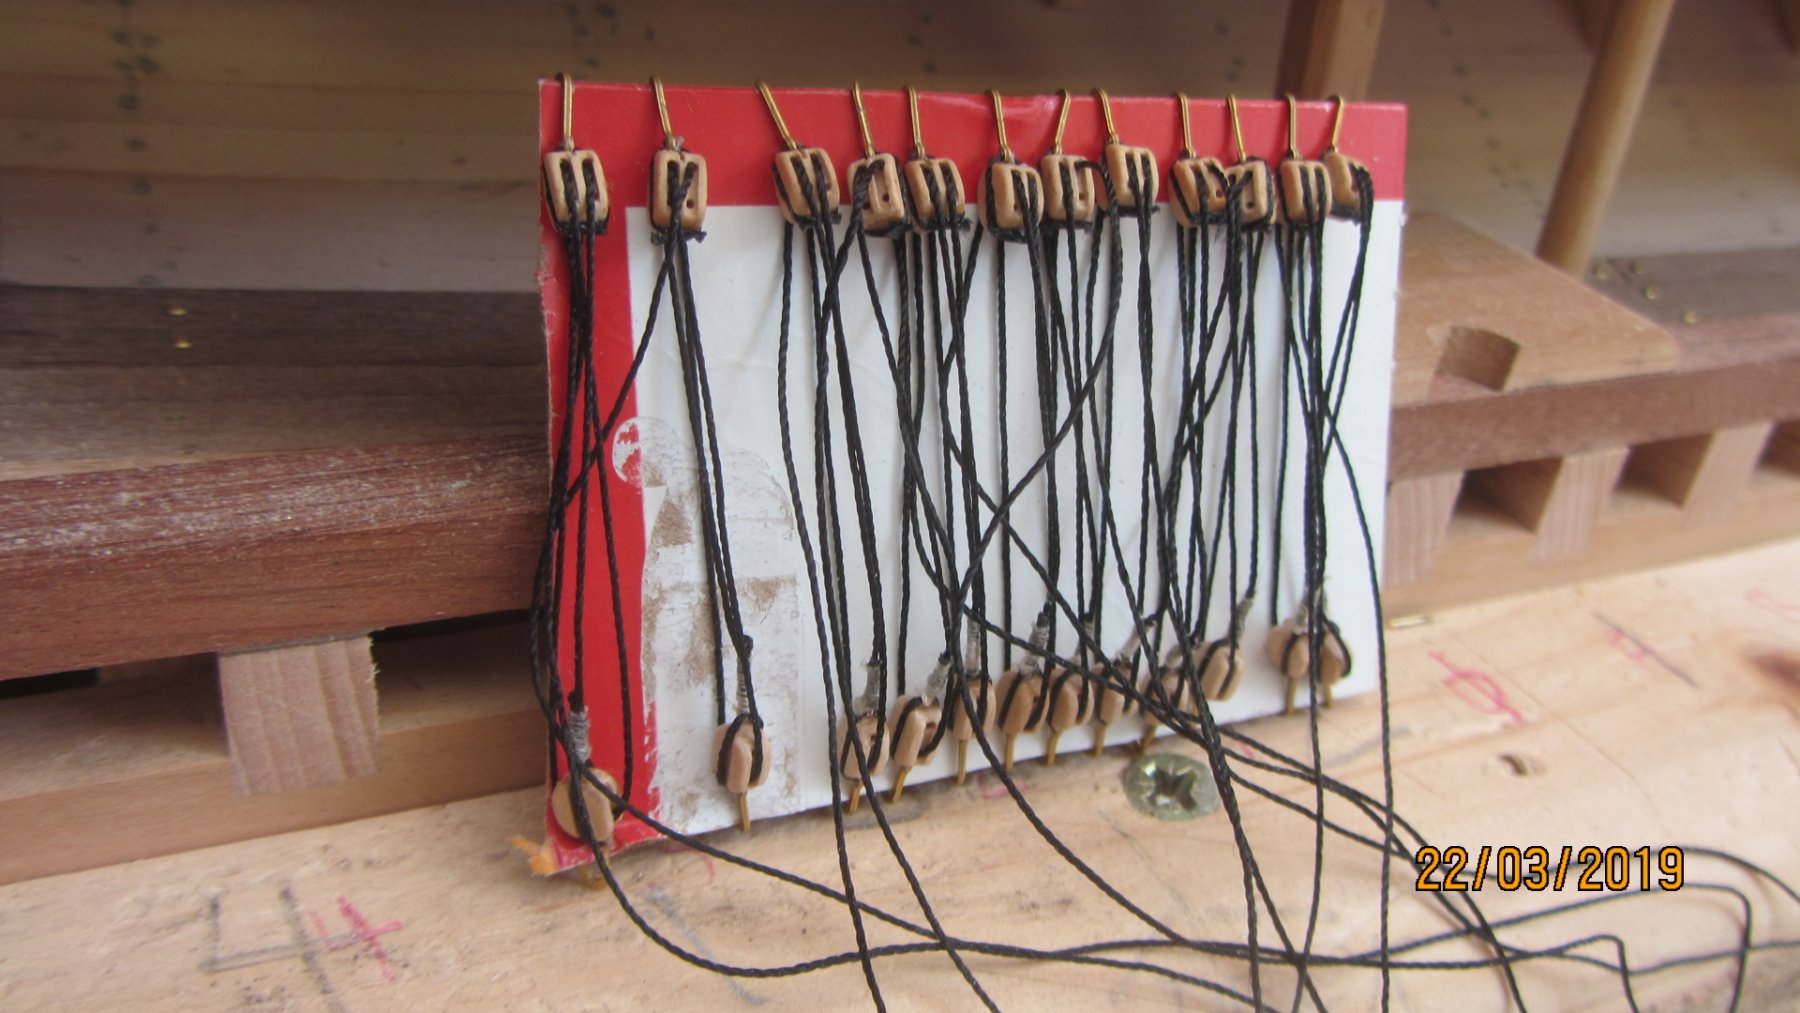
The rigging for the guns ready made up.
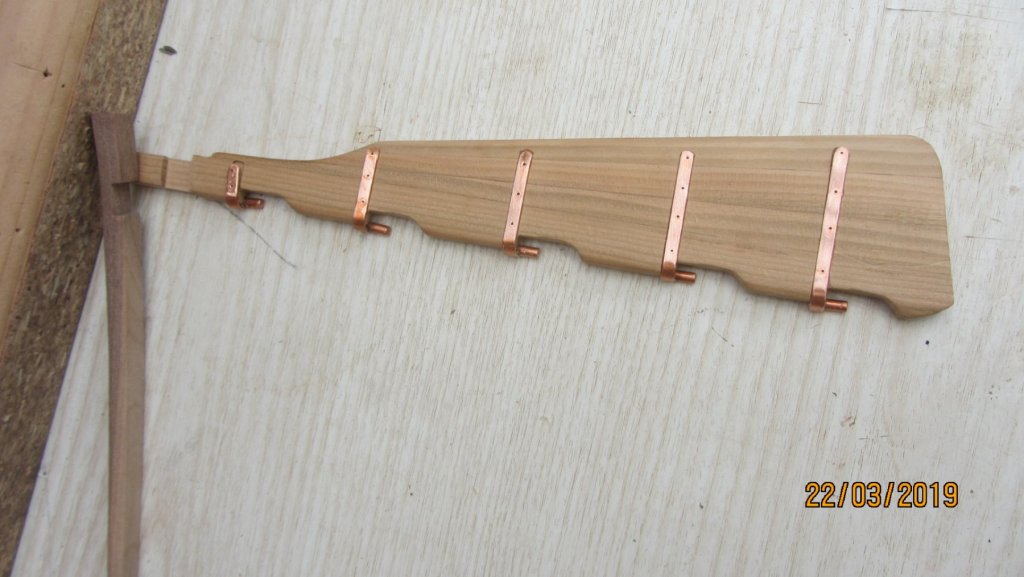
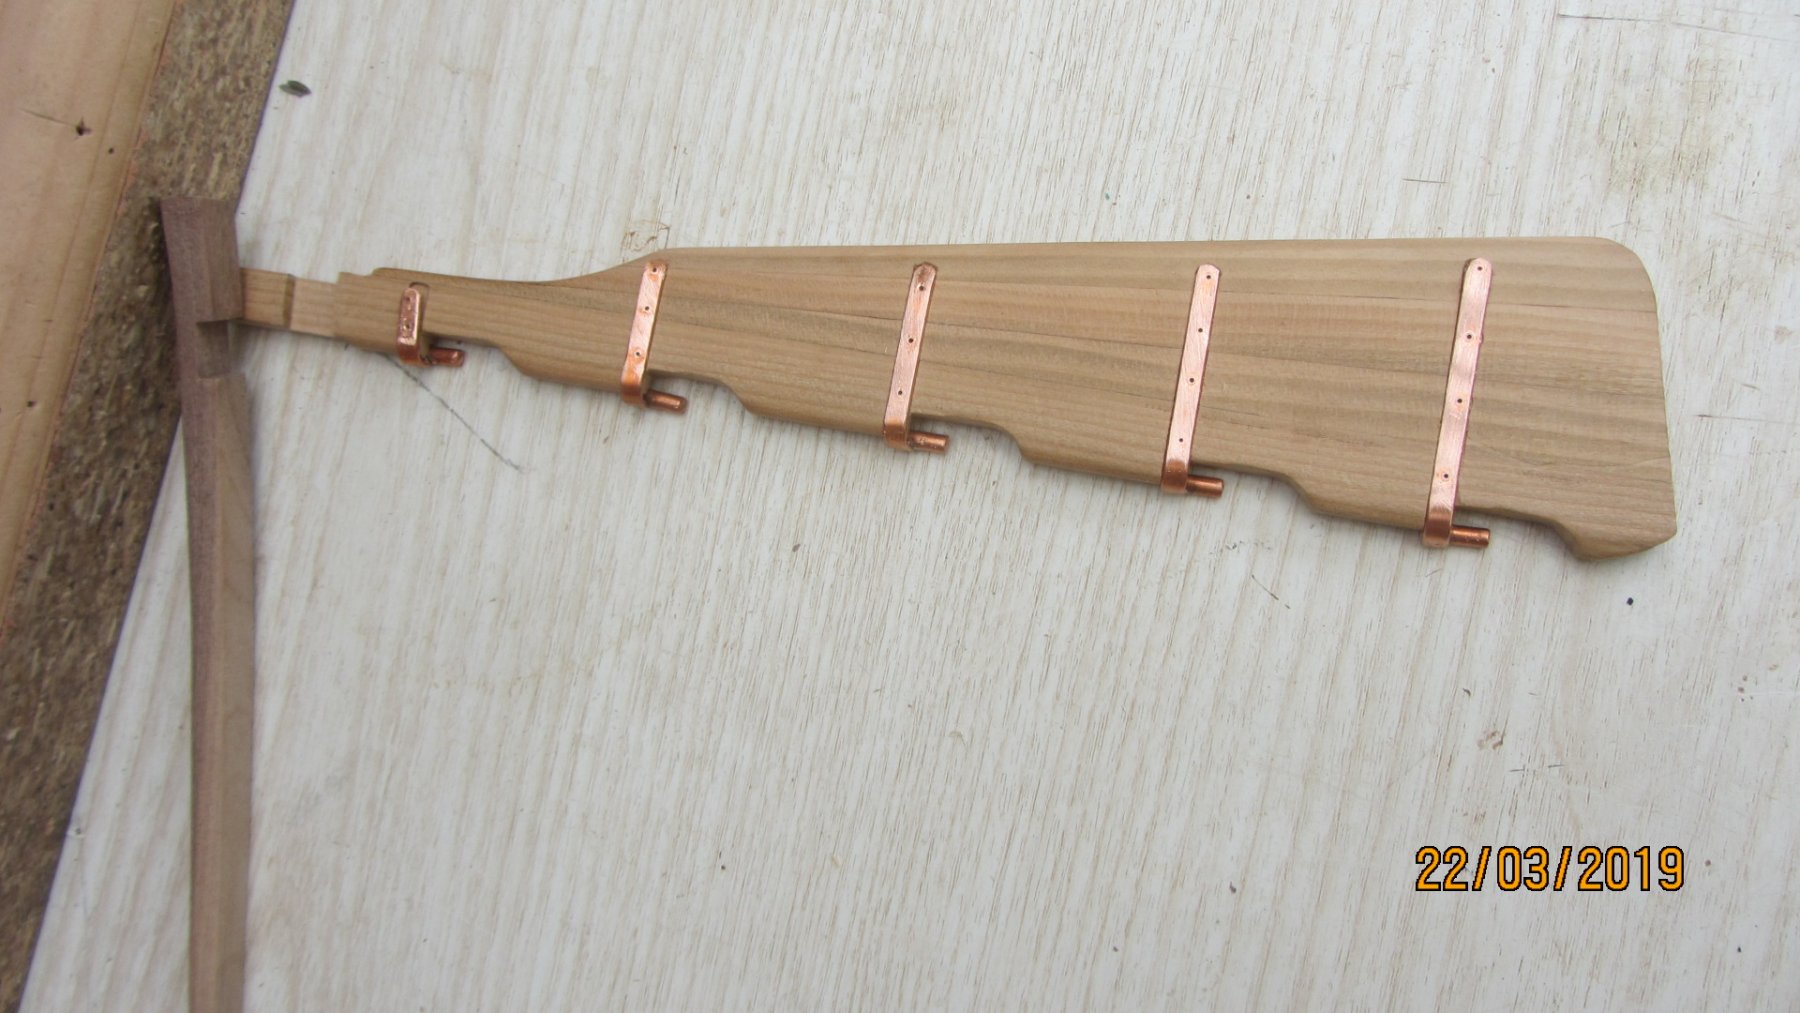
Rudder and tiller arm. Copper will be blackened after making the opposite set of hinges (The ones that fit onto the ship).
Whipstaff area. This will also be blackened when finished.

I have lost count on the number of different timber types I have used so far. I like to mix the woods types to give a better contrast.
The next step will be to plank the exterior of the ship. This will mean removing the ship from its jig and laying it onto a flat surface and clamping it as not to let it warp while doing the external planking.
I will use 3 different types of timber on the exterior planking.. Walnut, Ash, and Cherry.
Thanks for looking in.
Regards Antony.
-
Hi Jo.
Painting will spoil the look of the boat ..But saying that it might be a option you might take after planking.
Advice... Read the instructions and compare with the kit. Test all assembles as many times as it takes to satisfy yourself that you are doing the right thing.
It's a nice ship when finished and makes a very nice display.
I built a Leudo some time ago. Check my builds below.
Regards Antony.
-
Hi Mark.
Nice start to your build. And a nice ship as well.
On 2/17/2019 at 1:26 AM, mfrazier said: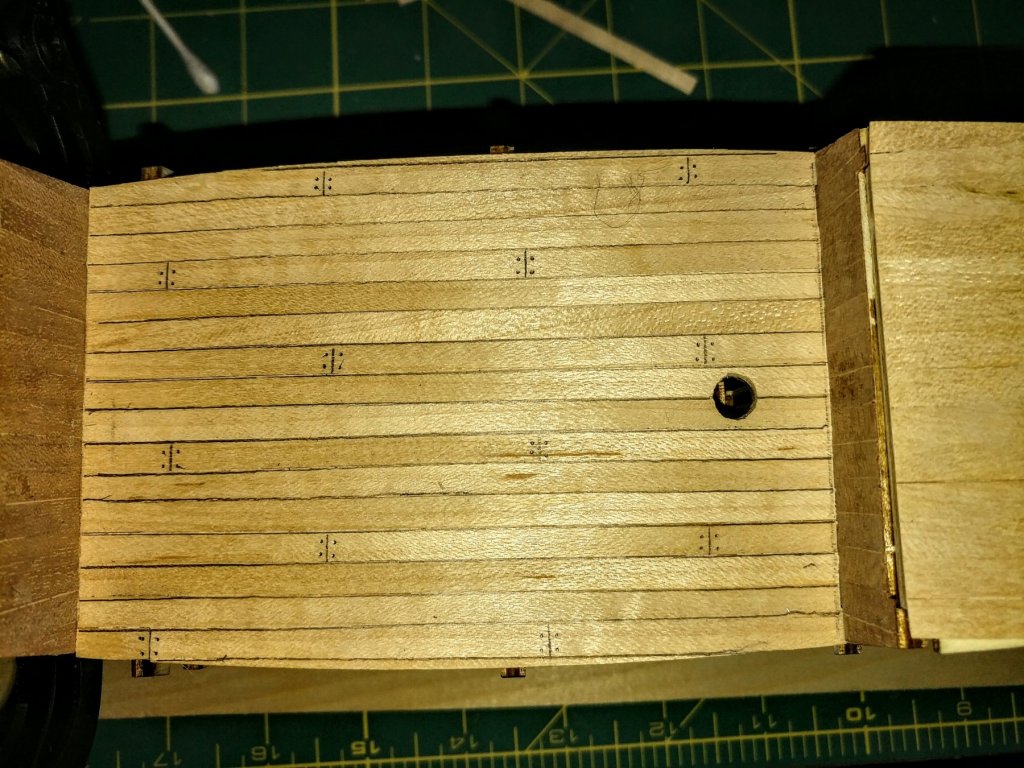
Ok, after trying several things, I found a way to get the look I wanted. I used a .5mm mechanical drafting pencil. It makes a very fine line and did the nail marks really well. I will do this on all the decks.
On planking the planks are also treenailed at each beam. Not just at the ends of the plank.
The pencil looks perfect for your deck.😀
Regards Antony.
-
Hi Again.
Thanks for stopping by. and the kind comments.
Had a good 2 days on the deck... Now finished.
Carlings and Ledges in place. Not glued at this stage..

Close up of the woodwork. Messy as not yet sanded or fixed.

Big jump to Completed Gundeck. just the trimming to do.
looking at the underside of the Gundeck.


Waterways in place
As it is right now.

Will trim the deck tonight and install the hatch surrounds.
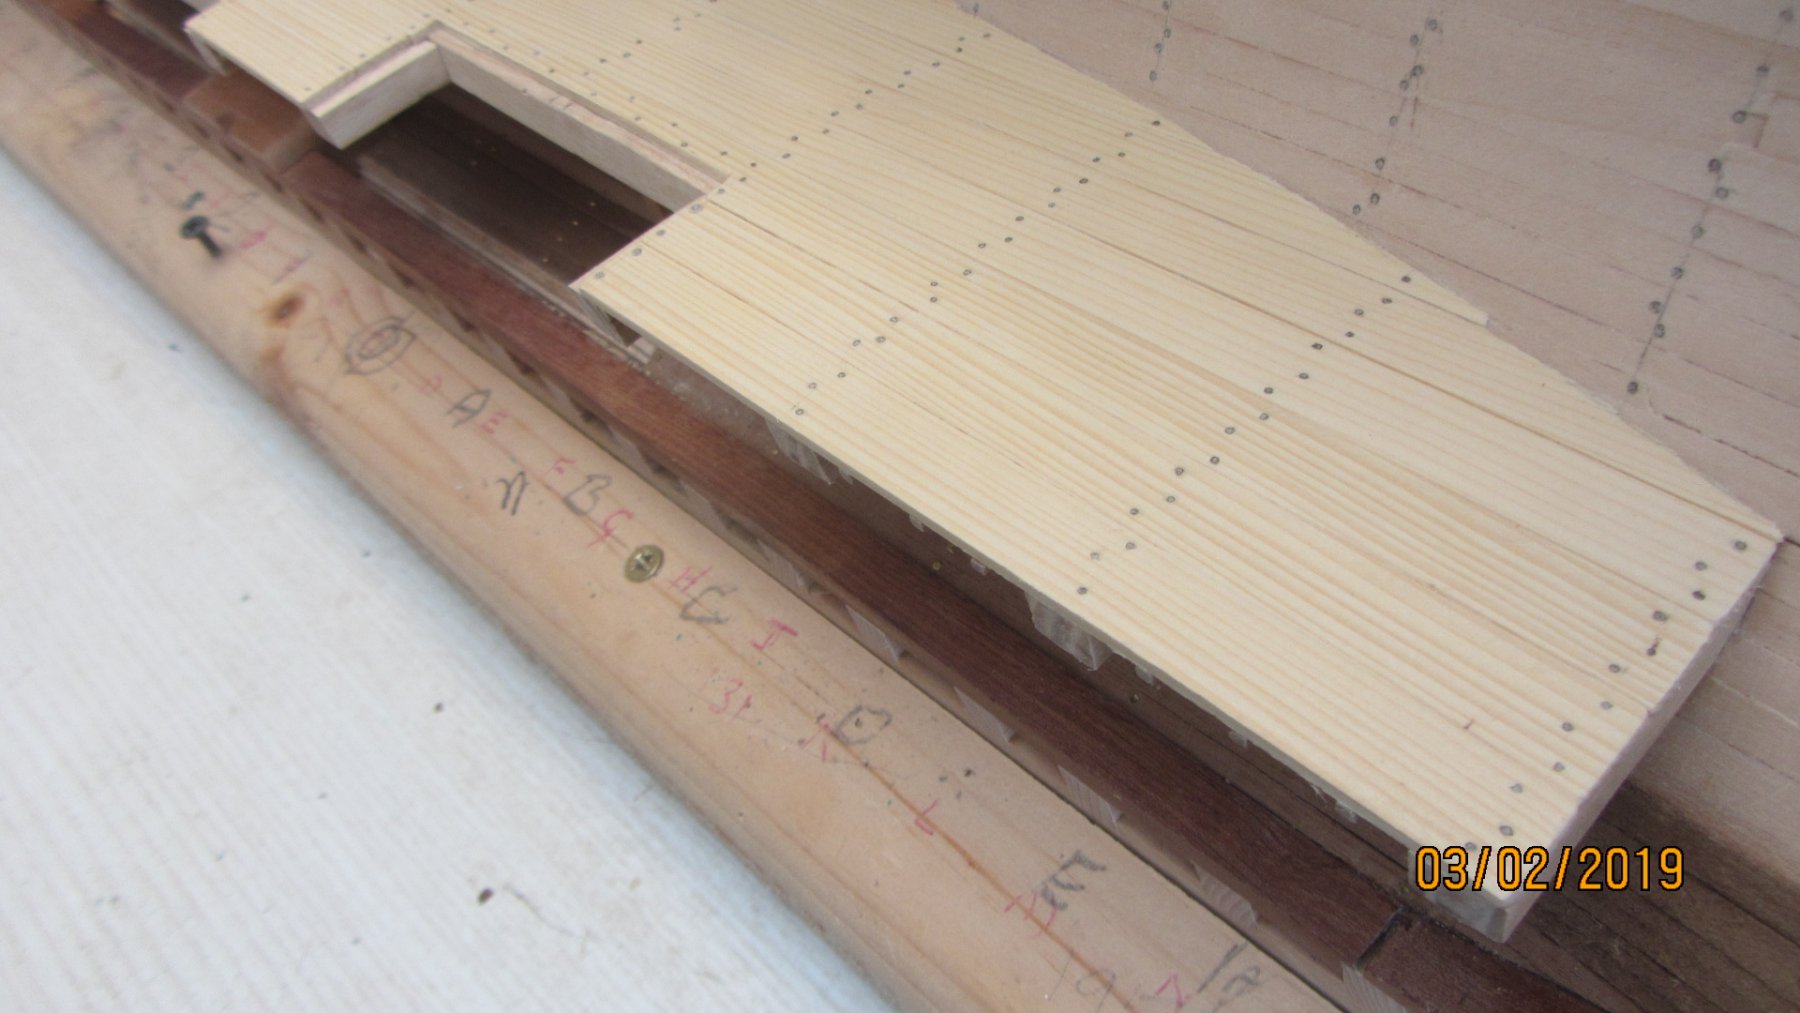
Next is the Main deck. This has a step at the 3/4 of the way towards the stern. Also there are a lot of furniture bits on the main deck.
I think 2 weeks might see it through. But we will see.
Regards Antony.
- SJSoane, DORIS, FriedClams and 15 others
-
18
-
Hi Fernando.
Cheap cocktail sticks soaked in dark stain for 3 mins then thoroughly dried. Hole was drilled with 0.6 drill bit.
Then glued in place. Dried for a couple of hours then Cut with small side cutters then sanded.
BTW The scale of this model is 1/26.
Will be using Tulip wood for this deck as I like the hint of green in the wood.
Regards Antony.
-
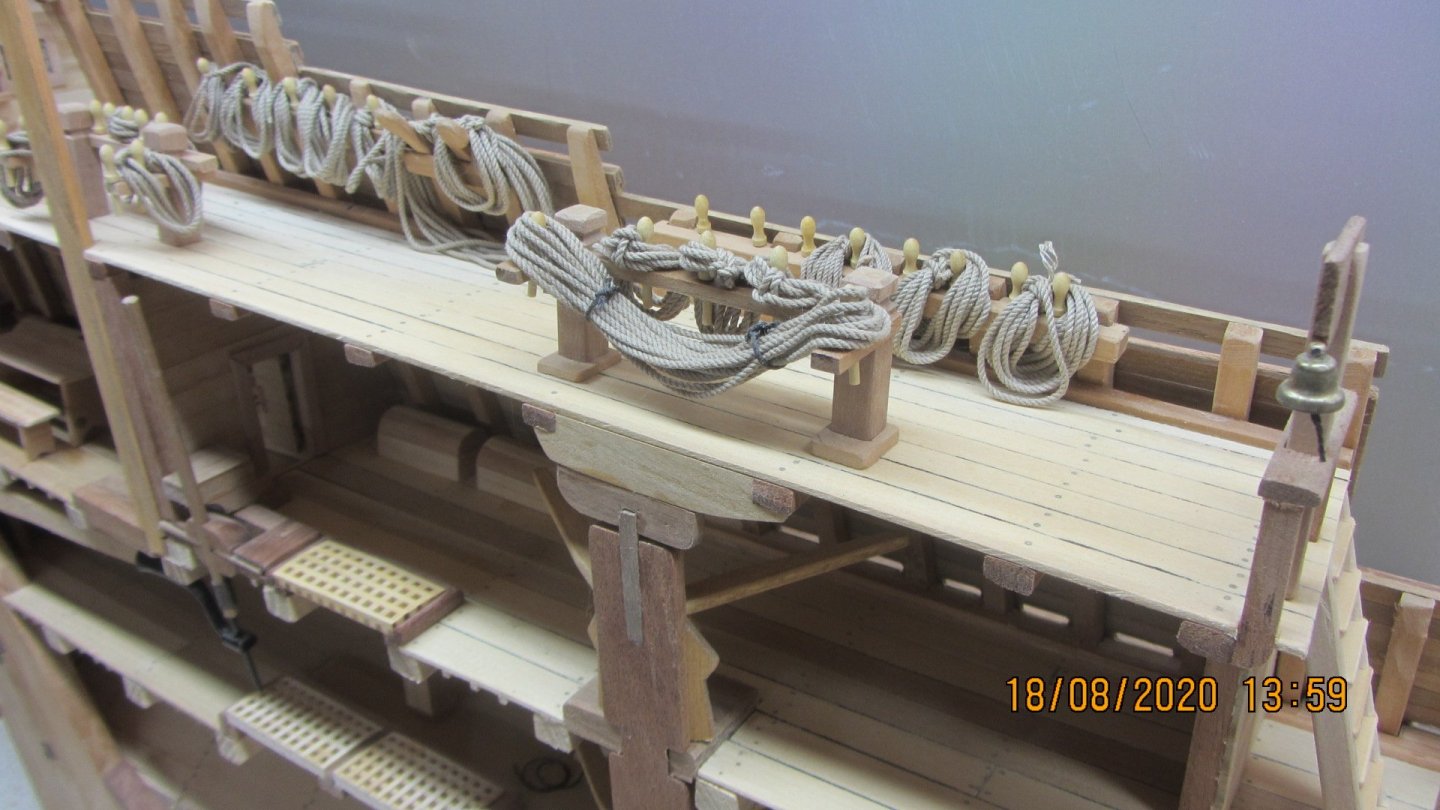
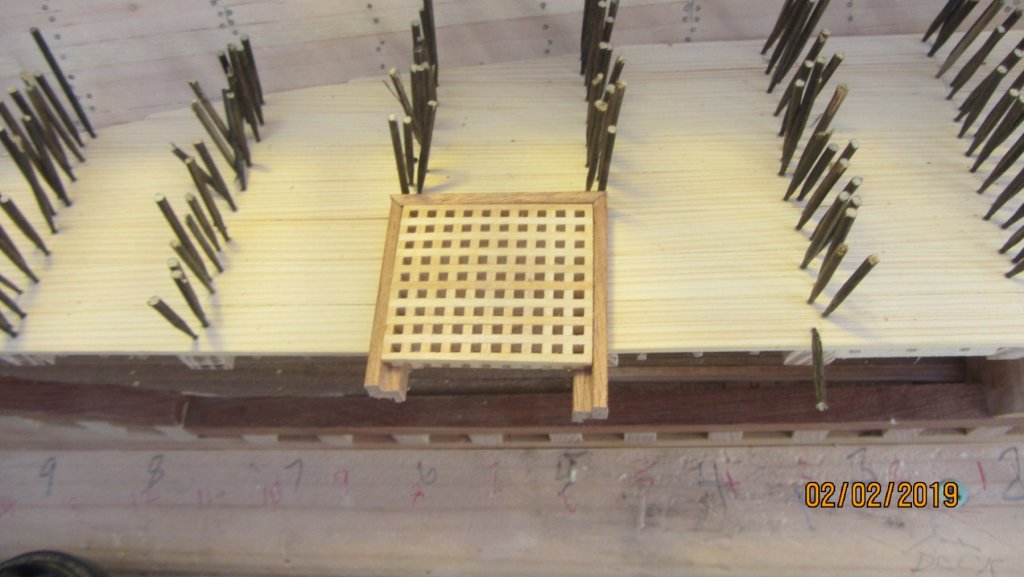
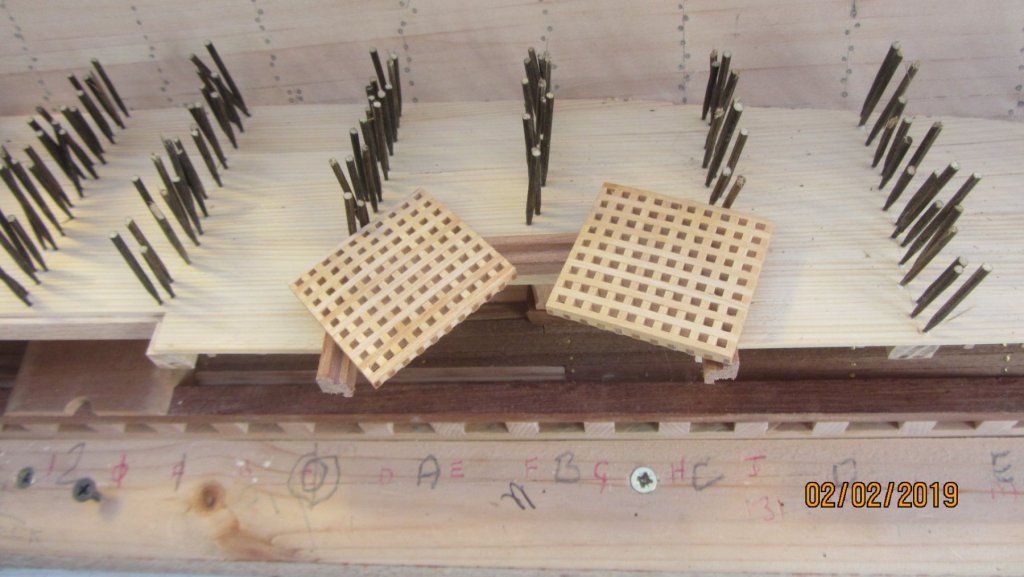
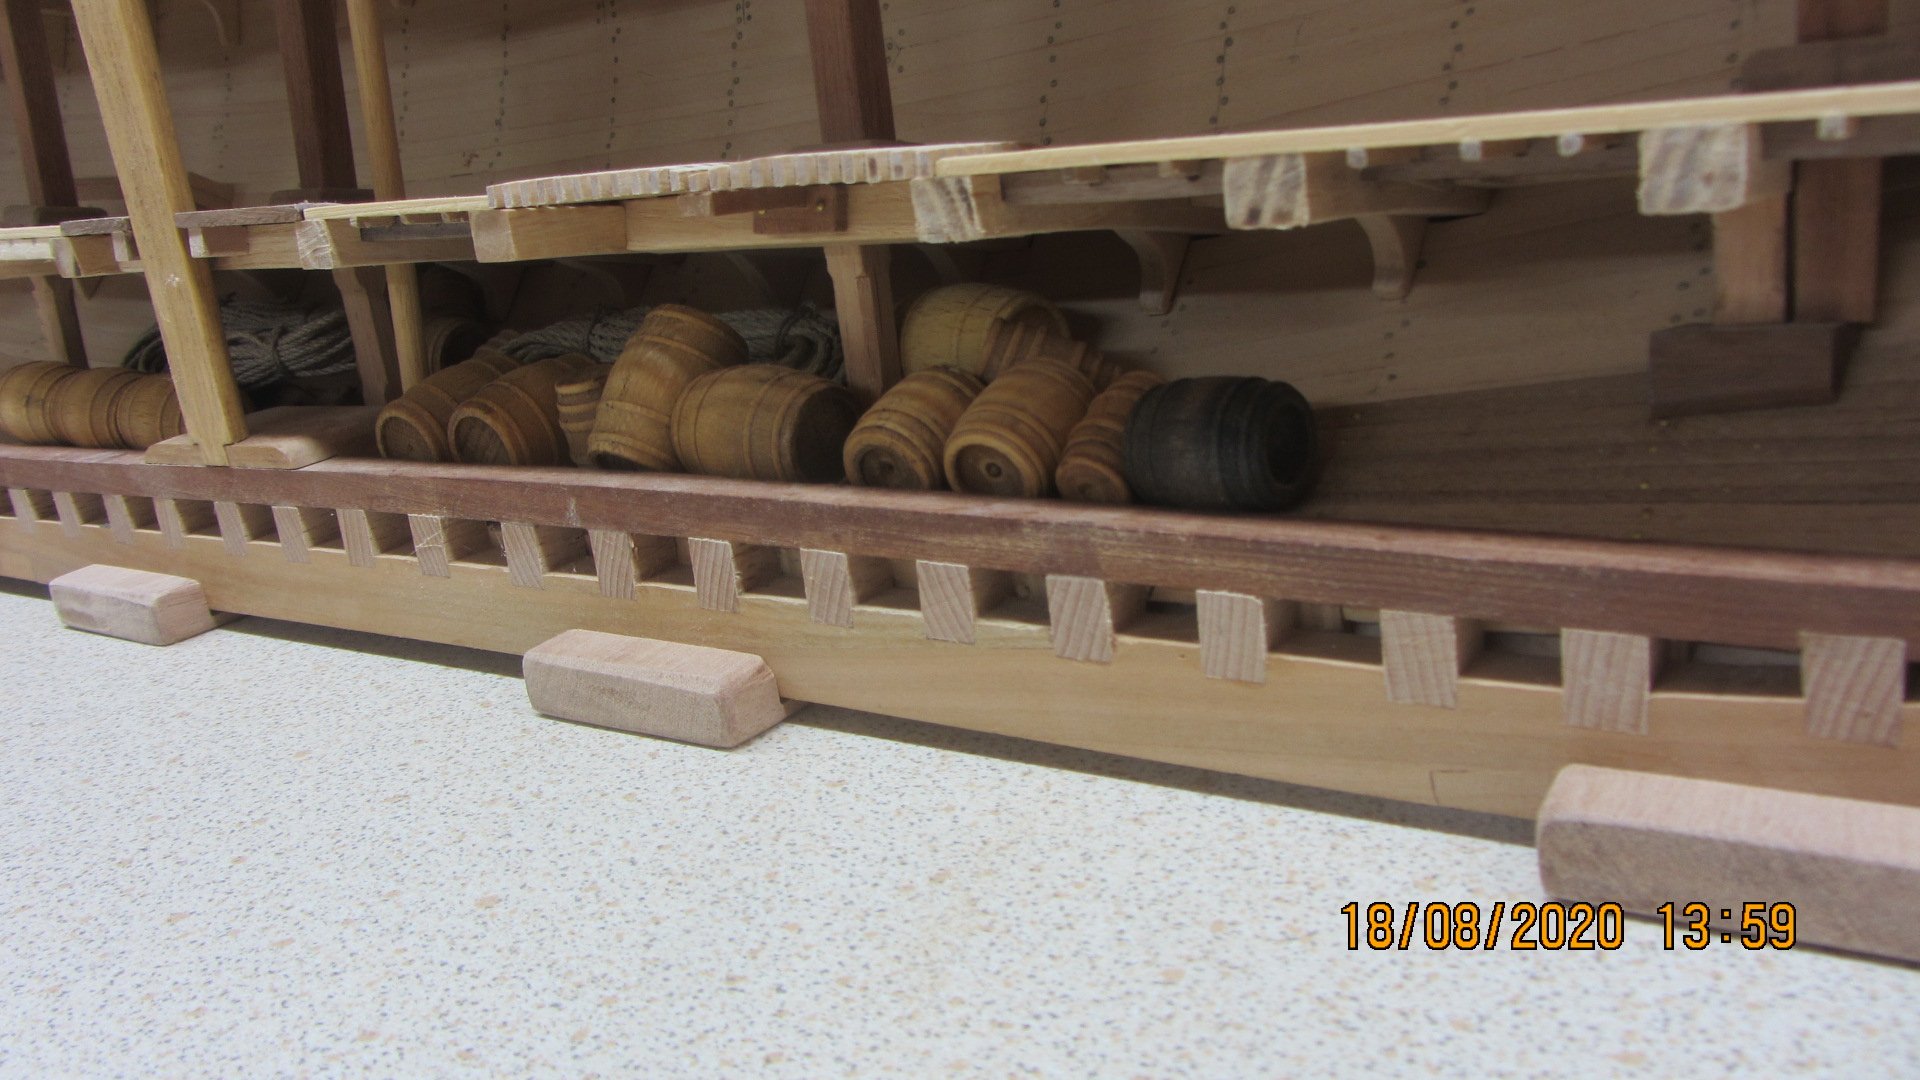
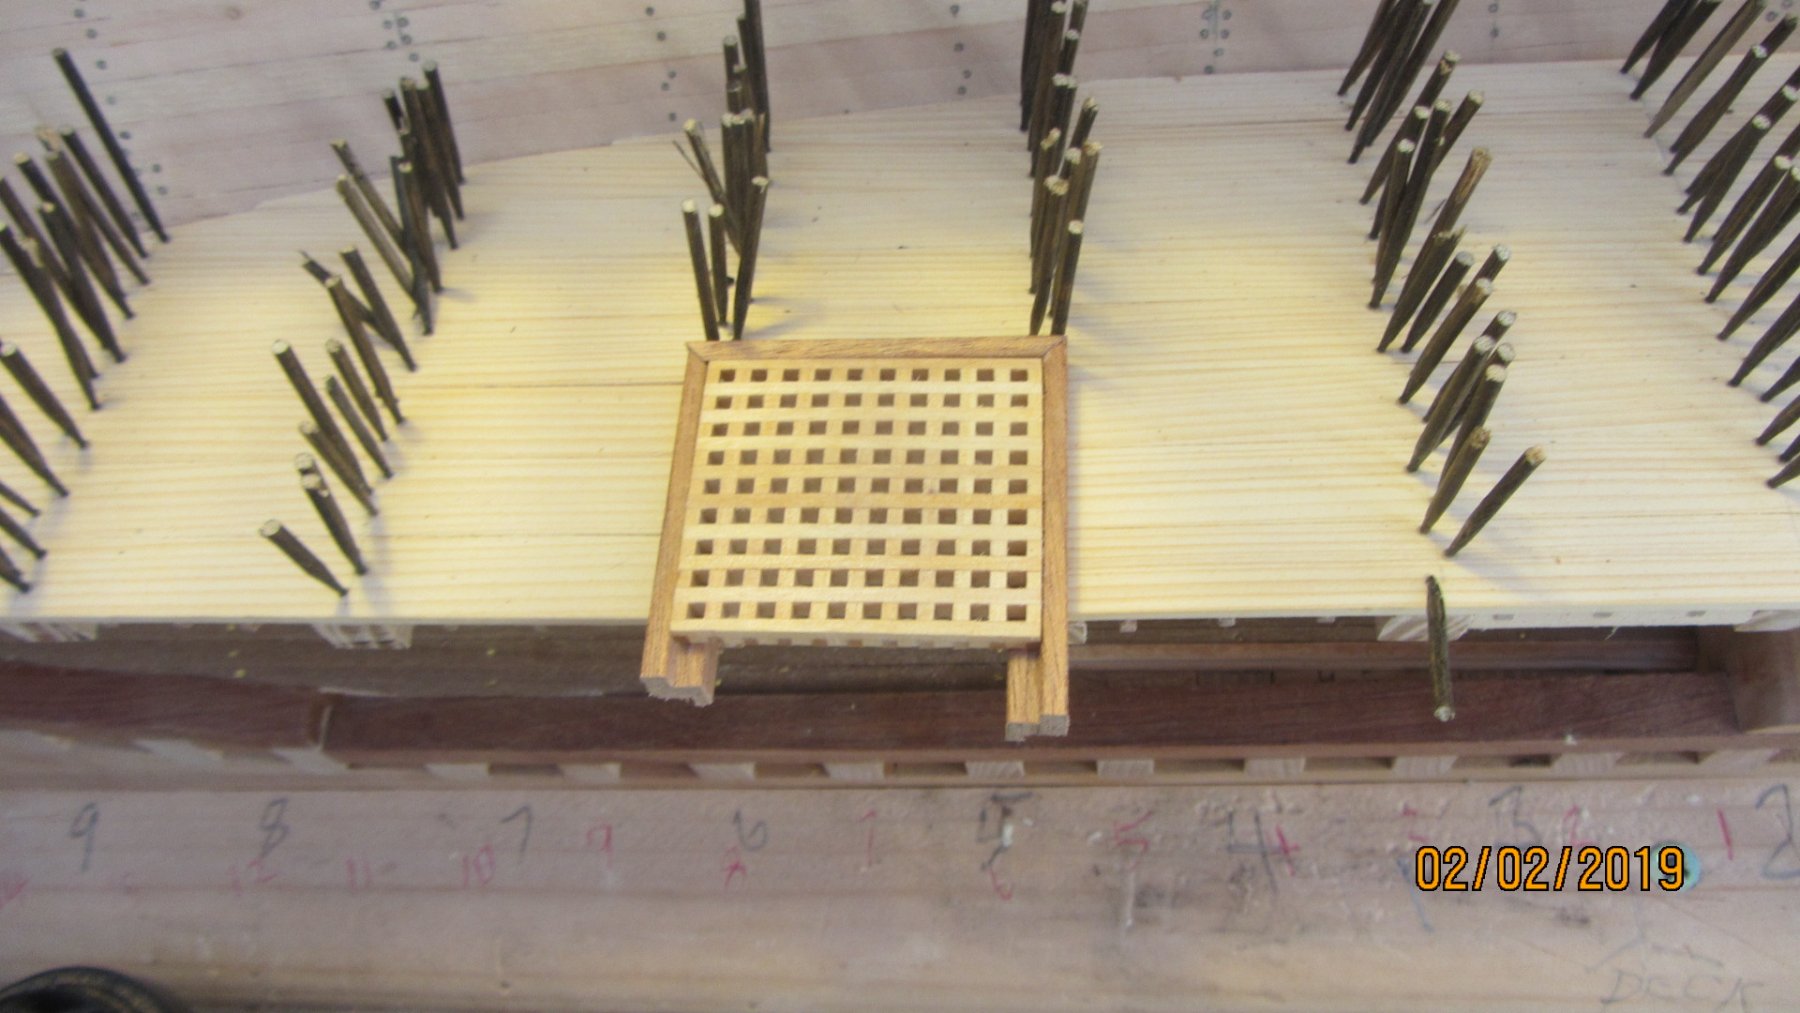
Hi.
Another update..
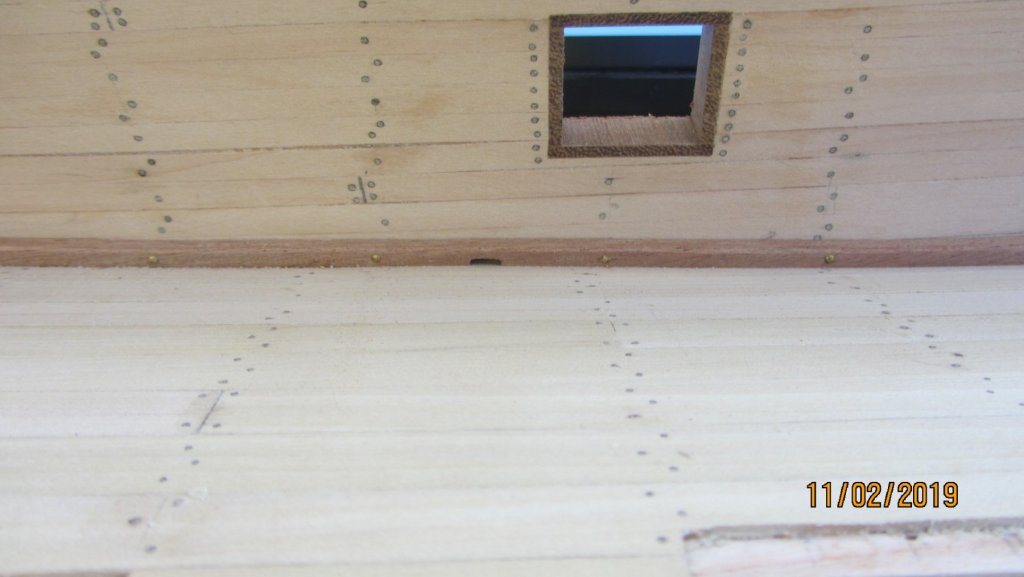
Tree nailing the deck and adding the gratings.
Drives me nut's treenailing..
All cut off and sanded.

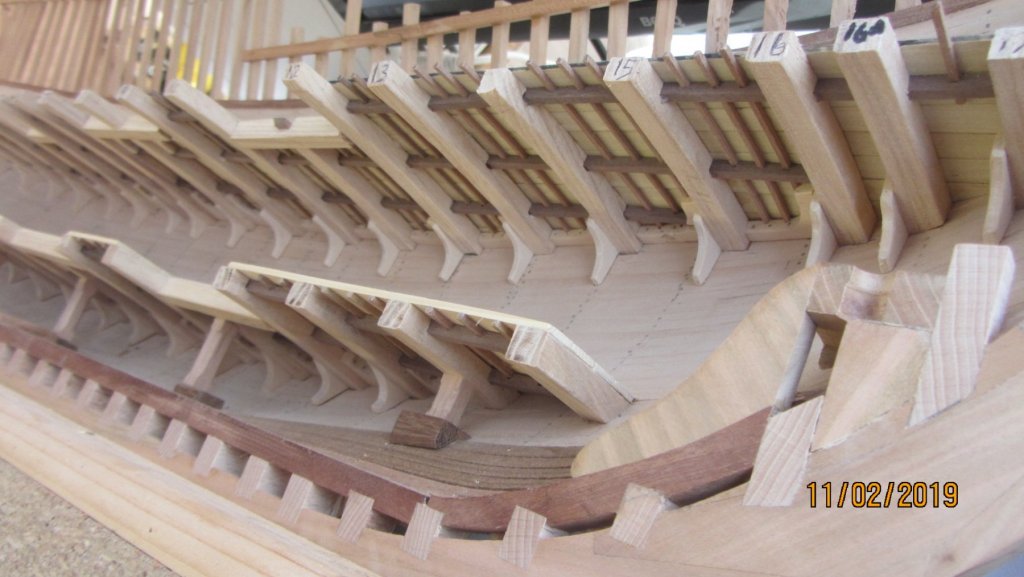
Spent a little time this week marking out the beam positions for the second deck.
This deck was much easer than the first deck as I did not have any thinking and planning to do..

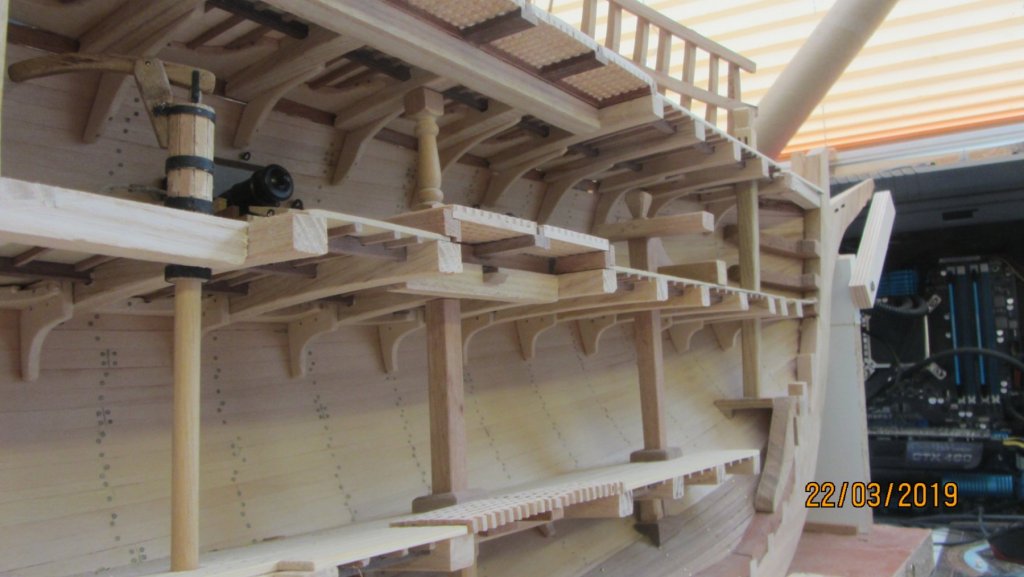
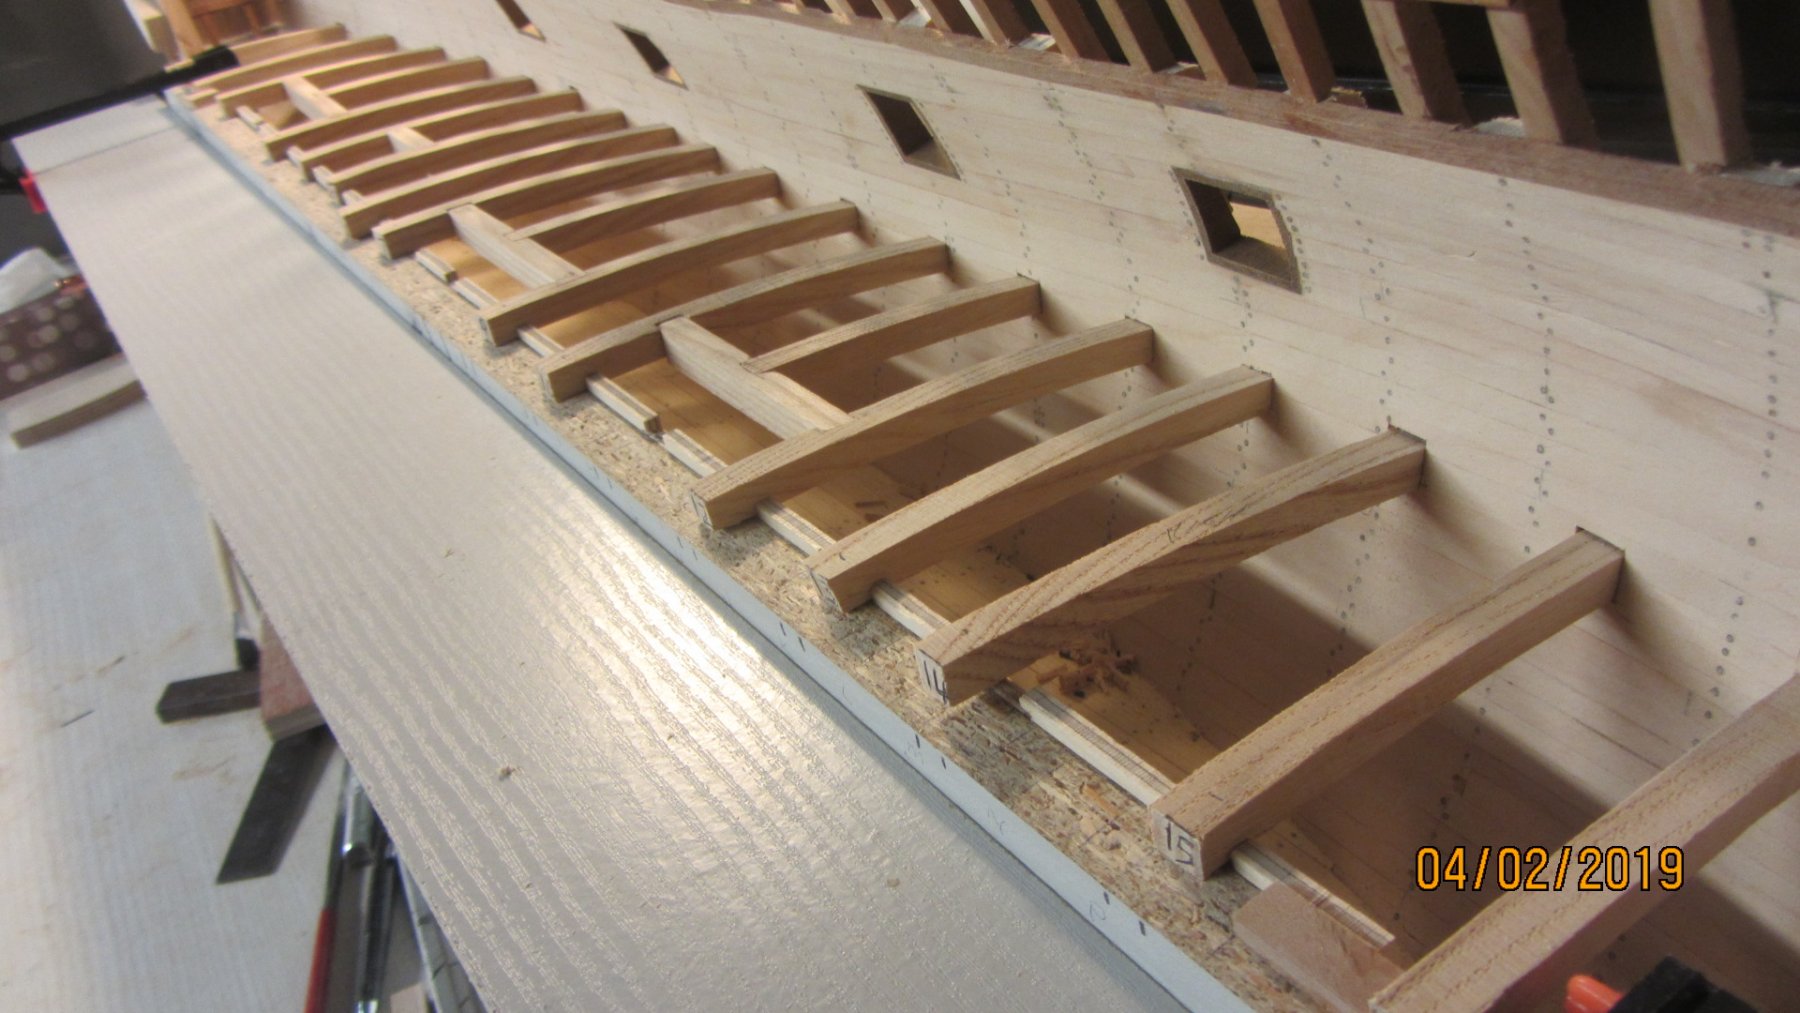
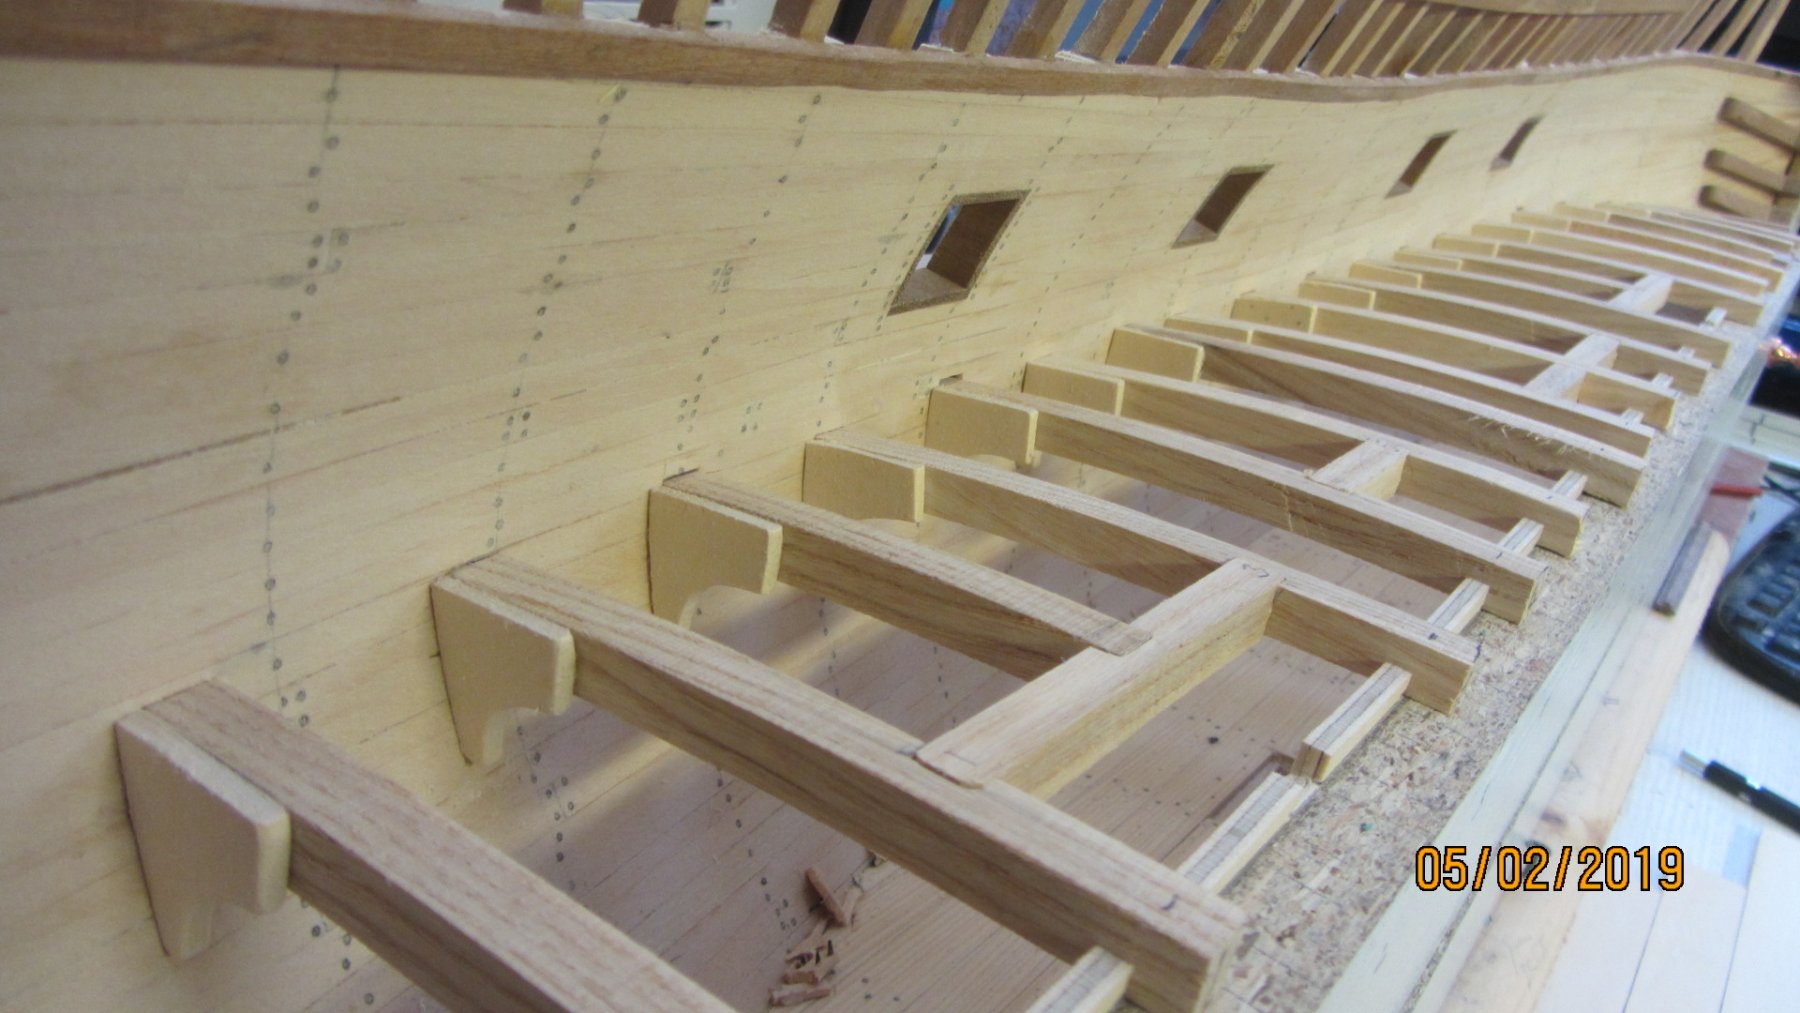
Hanging knees are glued to the deck beam at this stage. Nothing of this deck is fixed to the hull.
Knees have been pined and retested for fit.

Will be fixing the beams and the Lodging knees next.
and tomorrow I will fit the Carlings. and if time and fitting go well then I will also add the Ledges (already made).
Thanks for looking in.
Regards Antony.
-
Hello Peta.
Stunning work.
I bet the grandson is missing his Lego ? Or did you purchase it just for rope making.
On 2/1/2019 at 11:51 PM, Y.T. said:Hey. These are perfect ropes. So far you are one who does ropes better than anybody I had seen.
I've got to agree with Quote above. First class.
Regards Antony.
-
Hi.
Thanks for your kind comments.
Second deck is now under way and the method of marking and positioning the deck beams is real easy and full proof. Making easy work for each deck.
Will post pictures mid week with details on how the deck build is going.
Regards Antony.
- Fernando E and mtaylor
-
2
-
9 hours ago, druxey said:
The quality of your work look terrific, Antony! Hopefully you are not snowed in.
Hi Druxey.
No no snow for us yet. Some I can see on Dartmoor. But it's only a dusting.
Thanks for looking in and for the likes.
Regards Antony.
- zappto, Mirabell61 and mtaylor
-
3
-
Hi.
Did you try https://www.trinityhouse.co.uk/shop/lighthouse-prints
They are responsable for most of the lighthouses in the UK.
Regards Antony.
Edit also Google photos
- John Allen and mtaylor
-
2
-
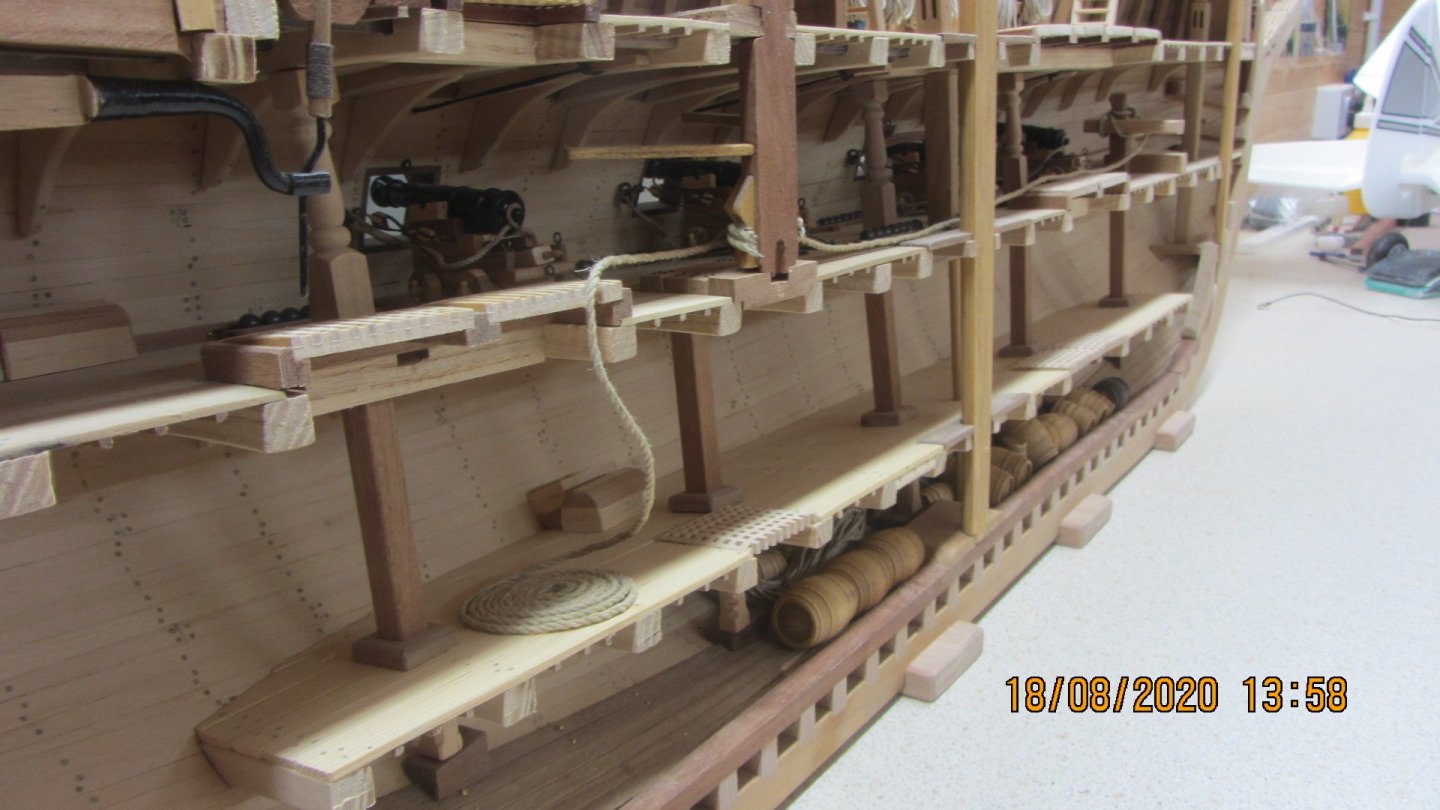
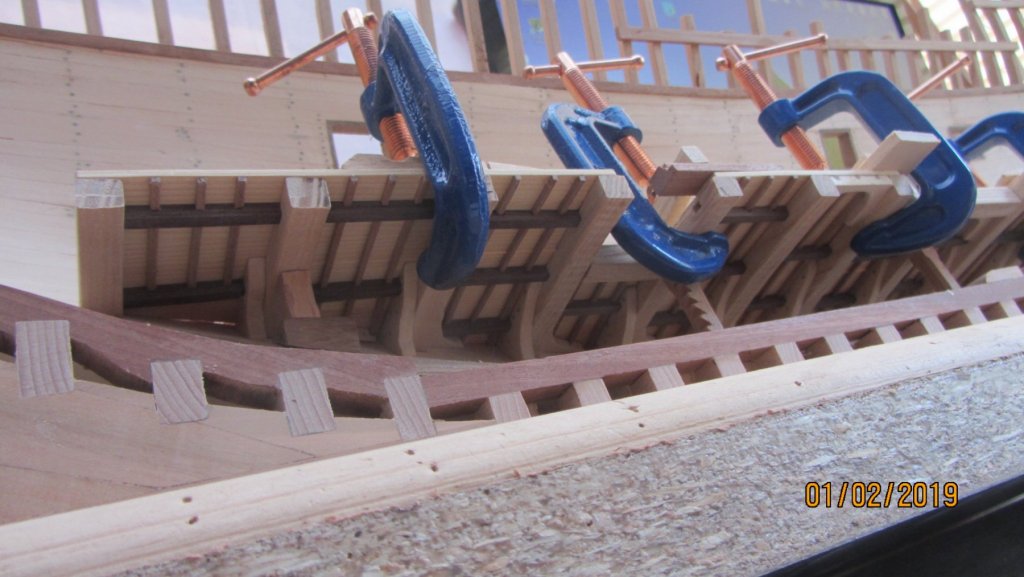
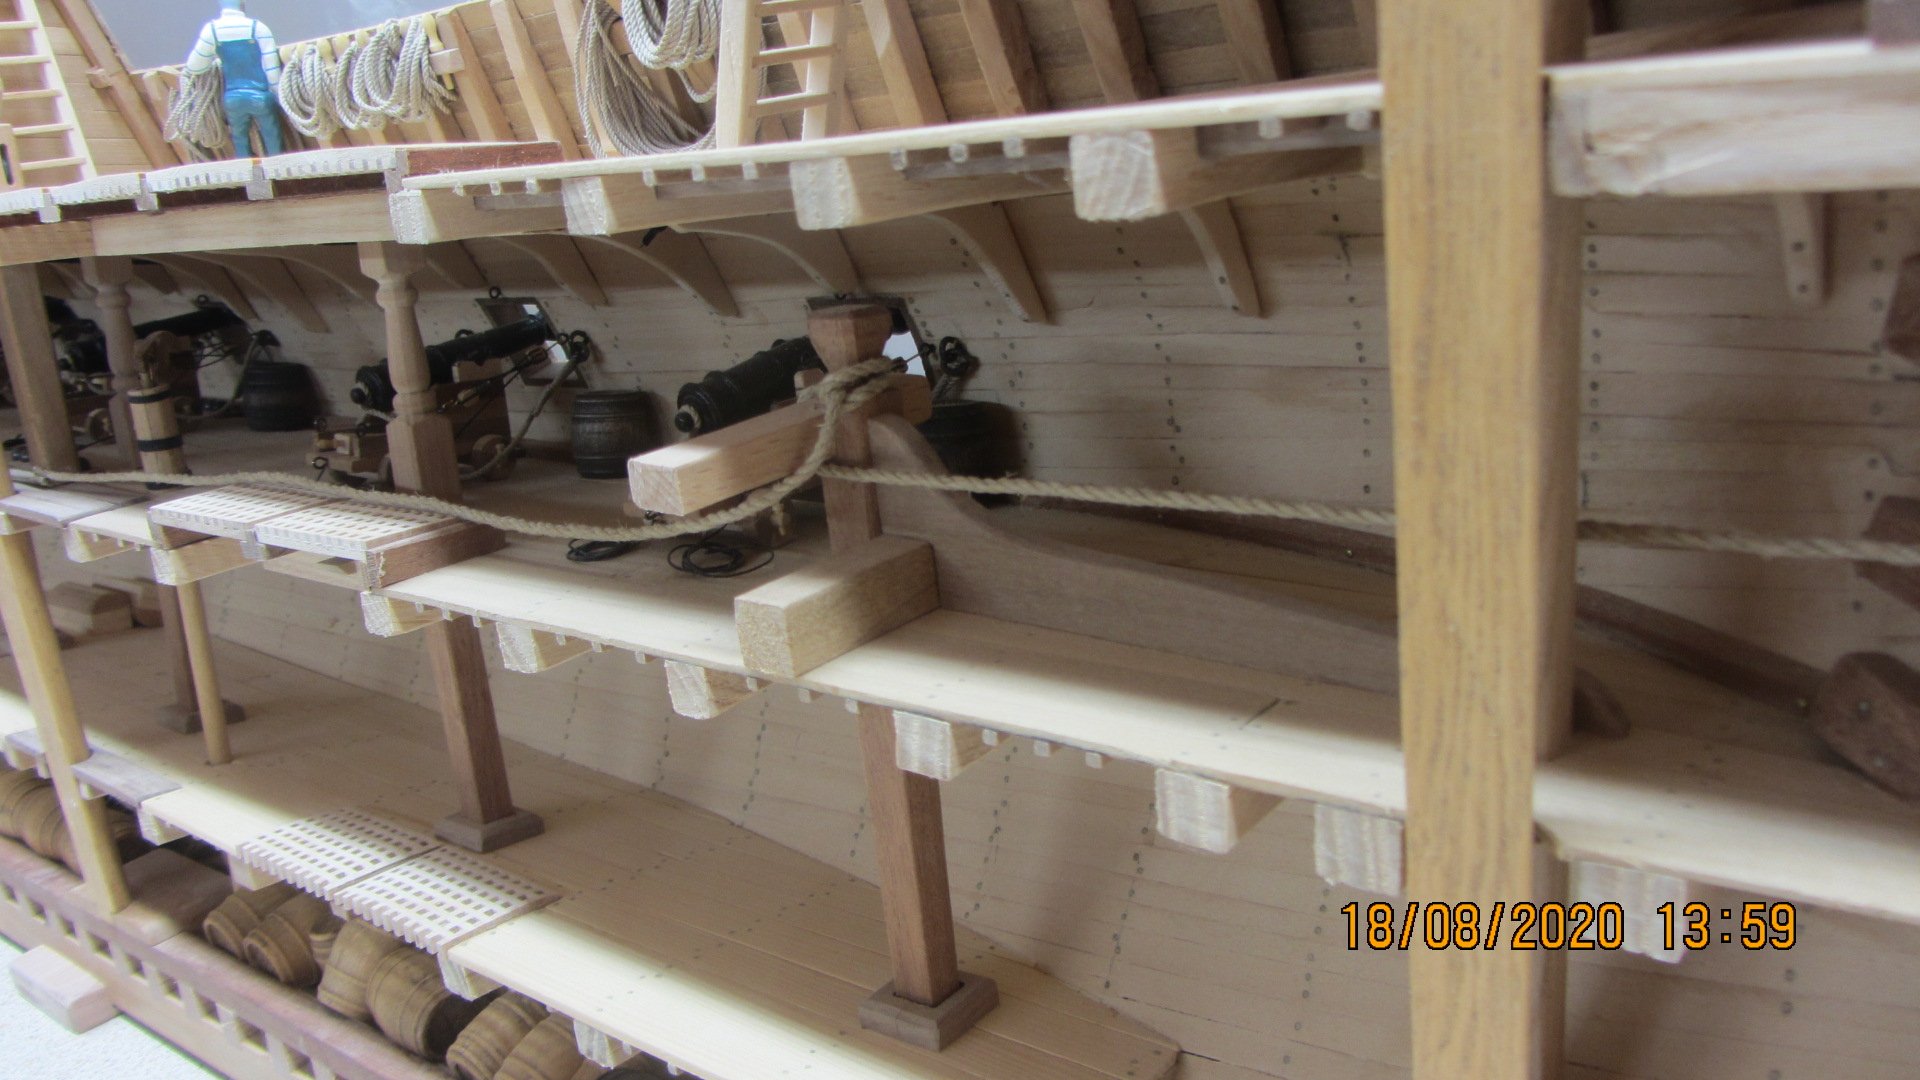
Hi.
Sorry for the delay in posting... Lots of work done on the model and Starting to decorate the lounge.
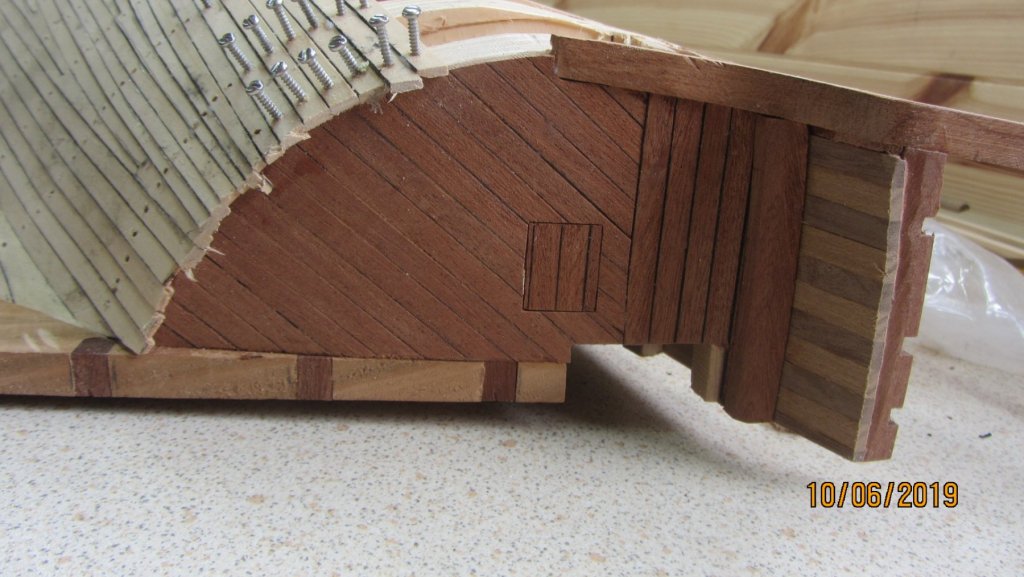
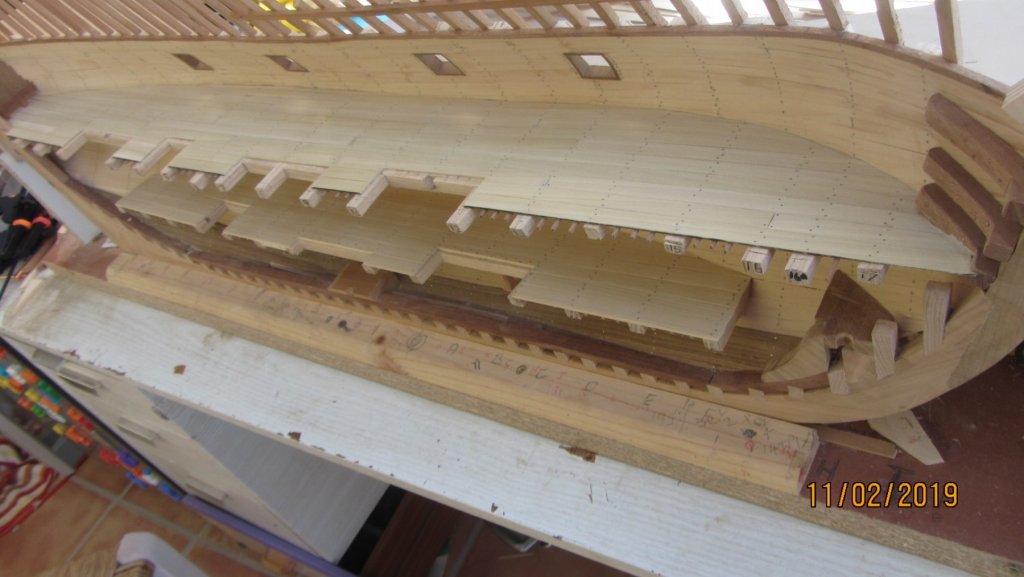
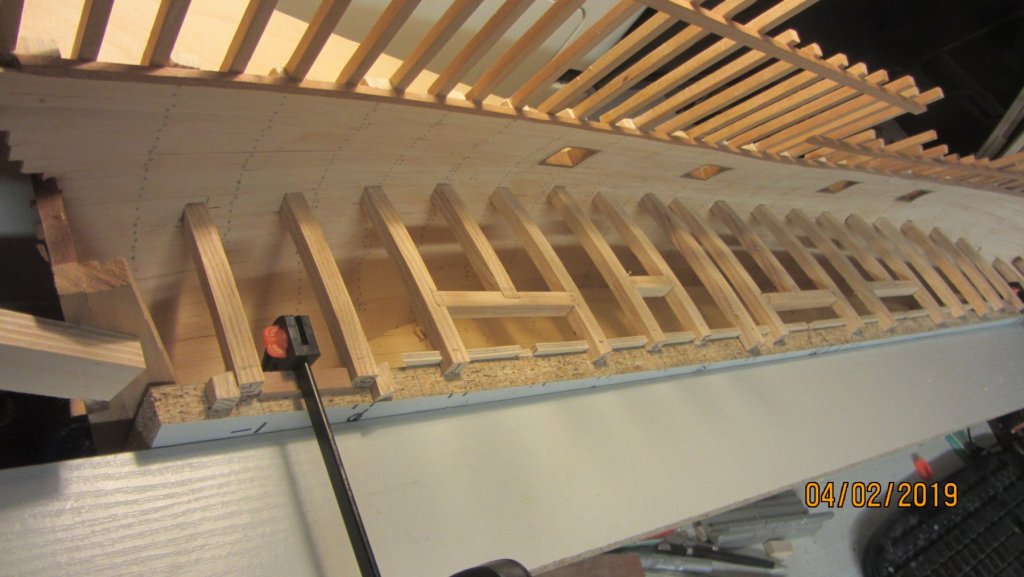
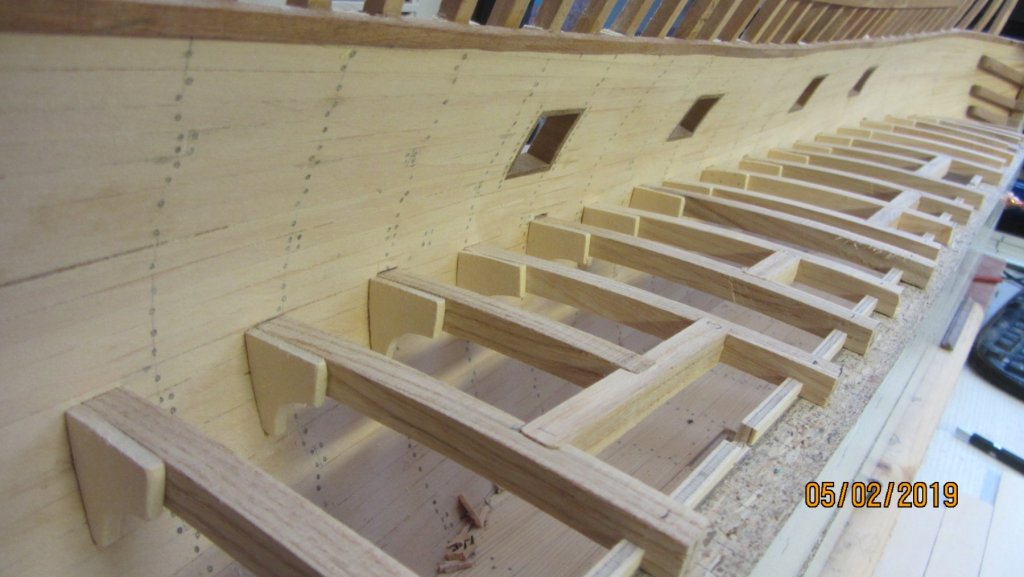
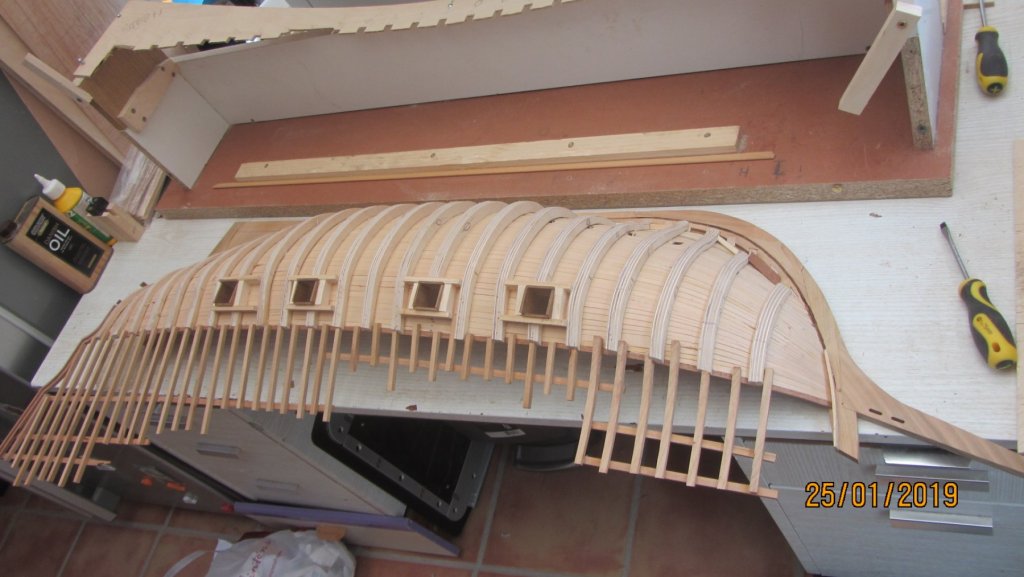
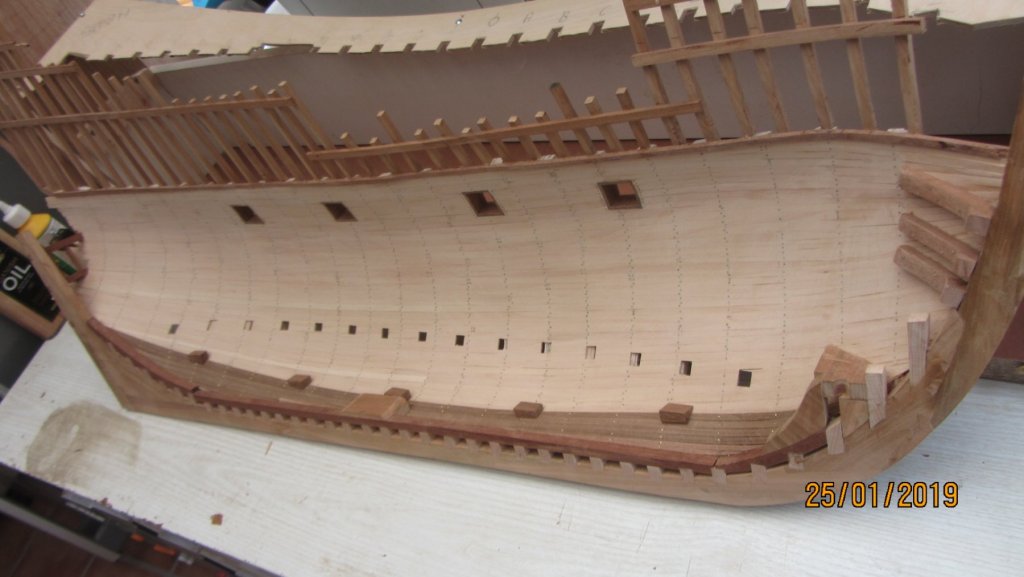
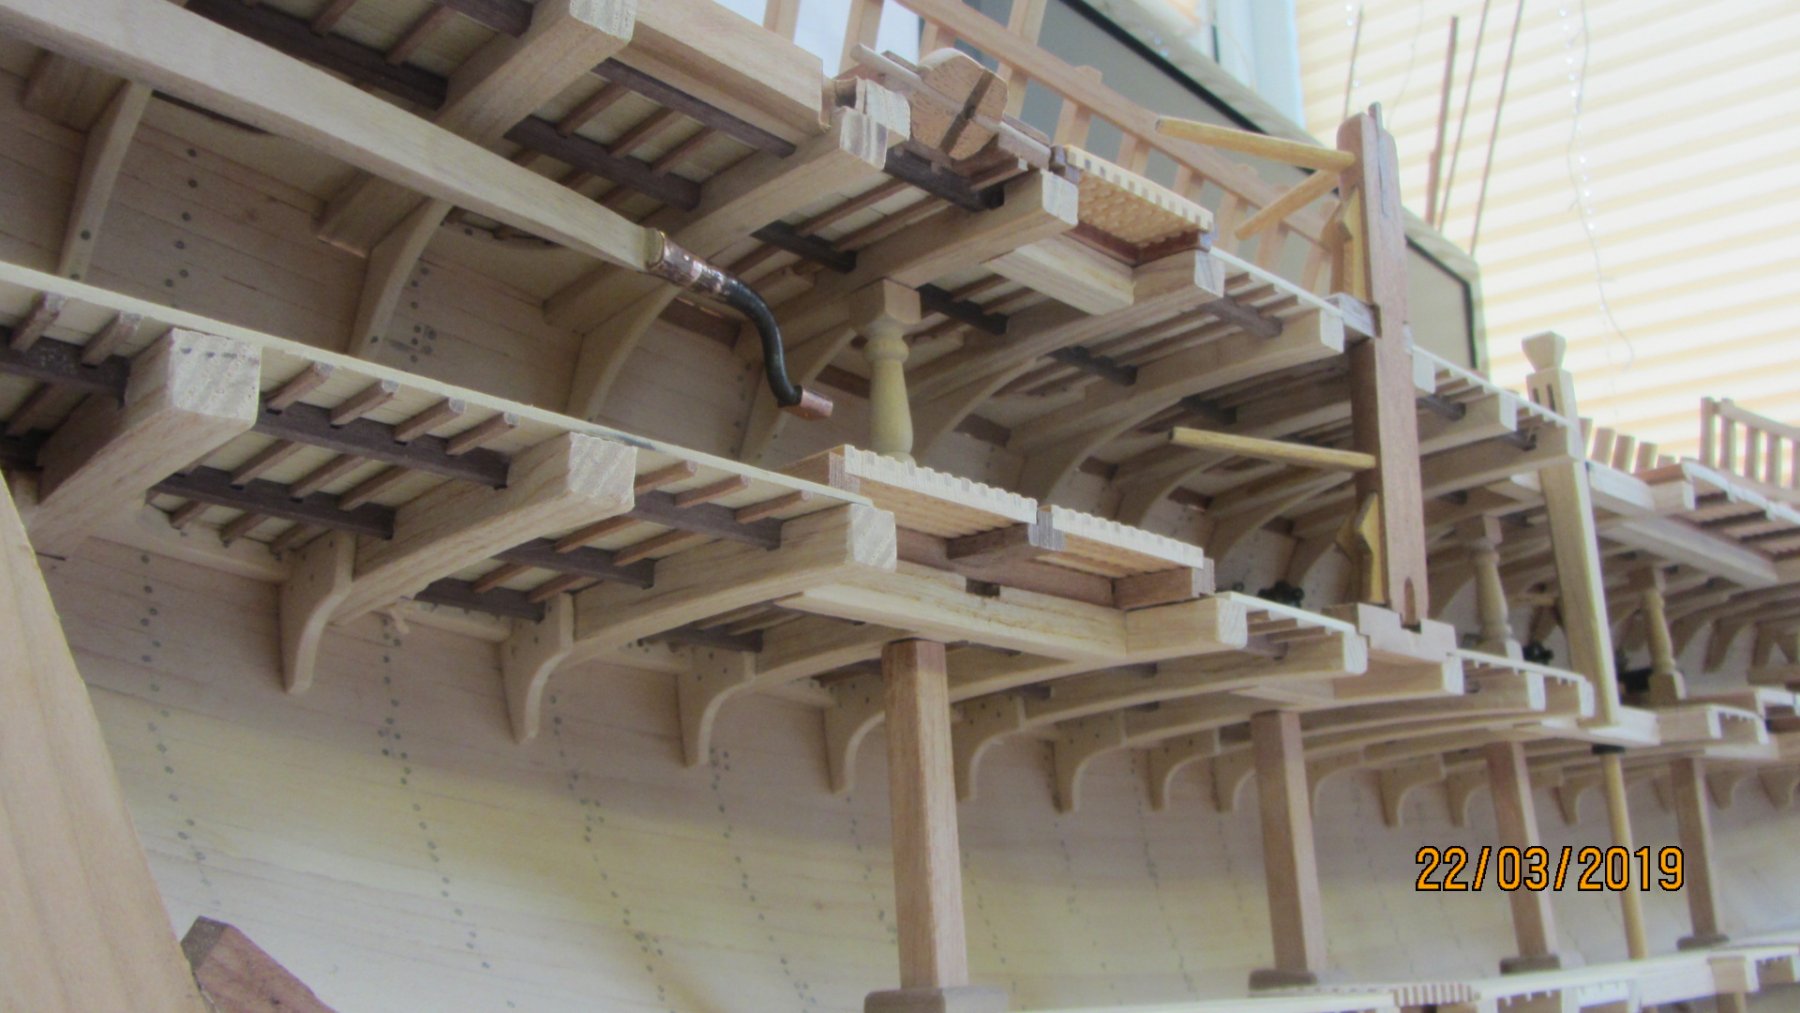
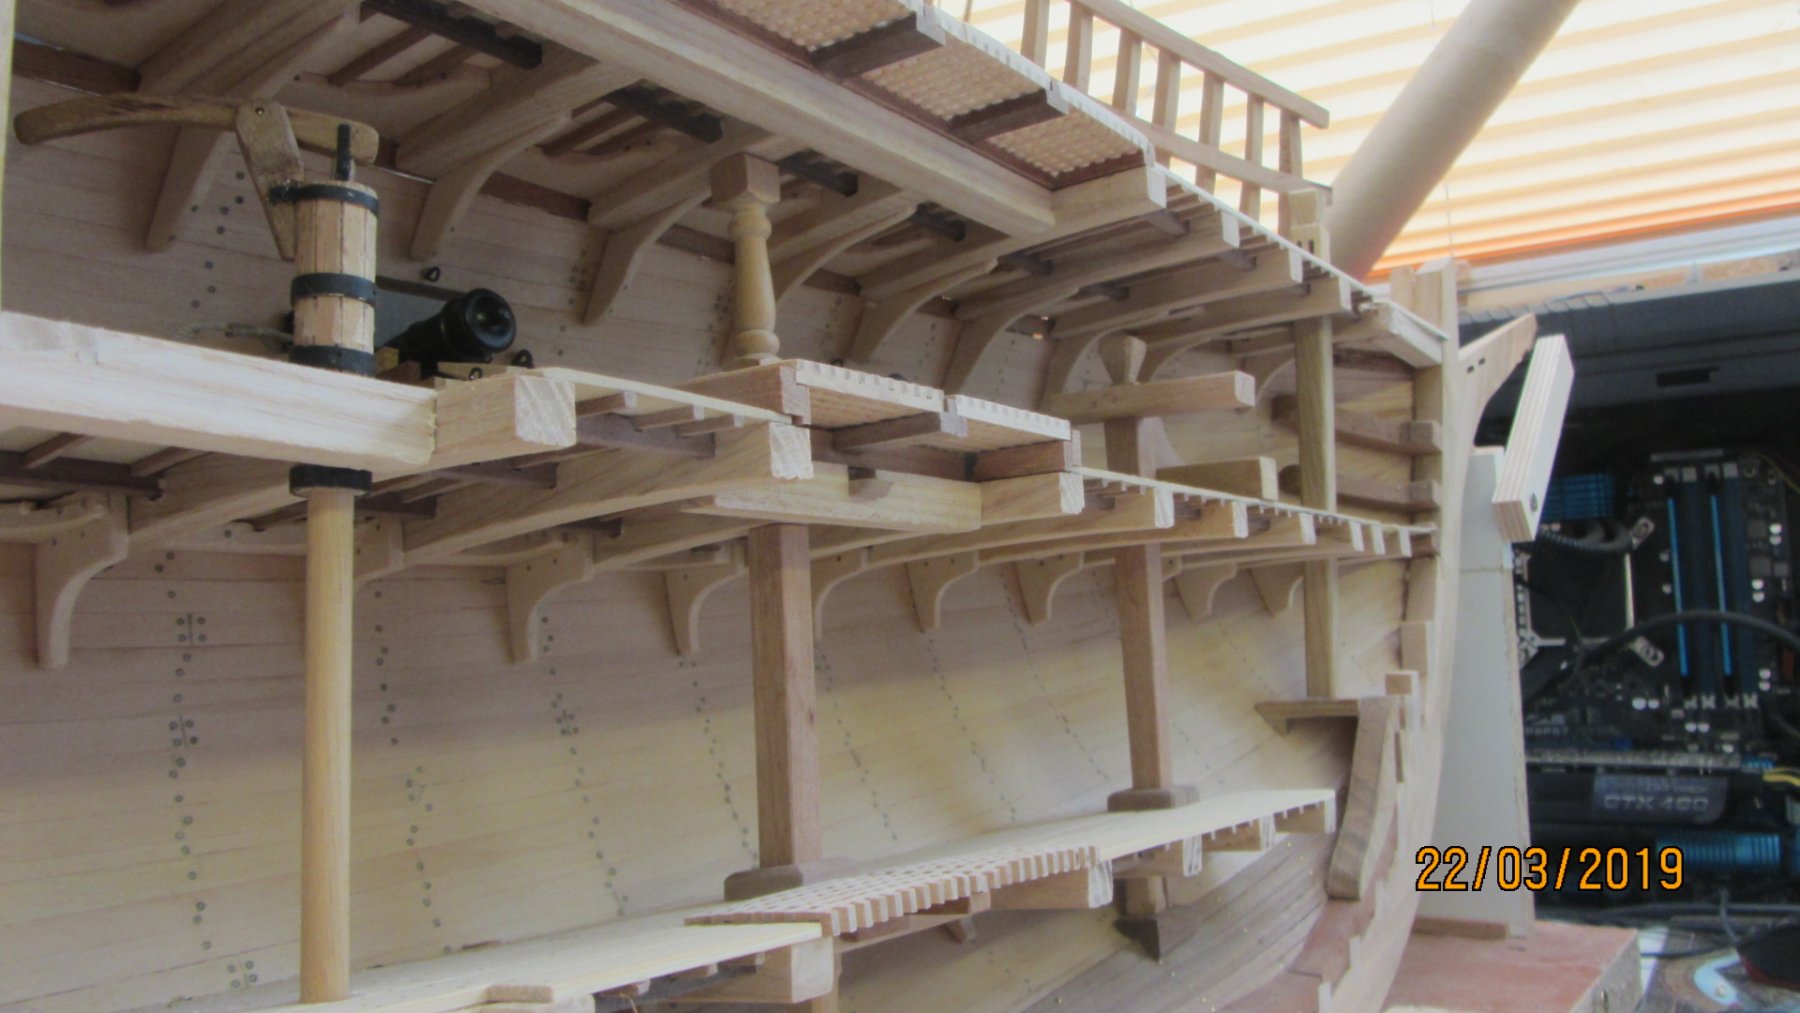
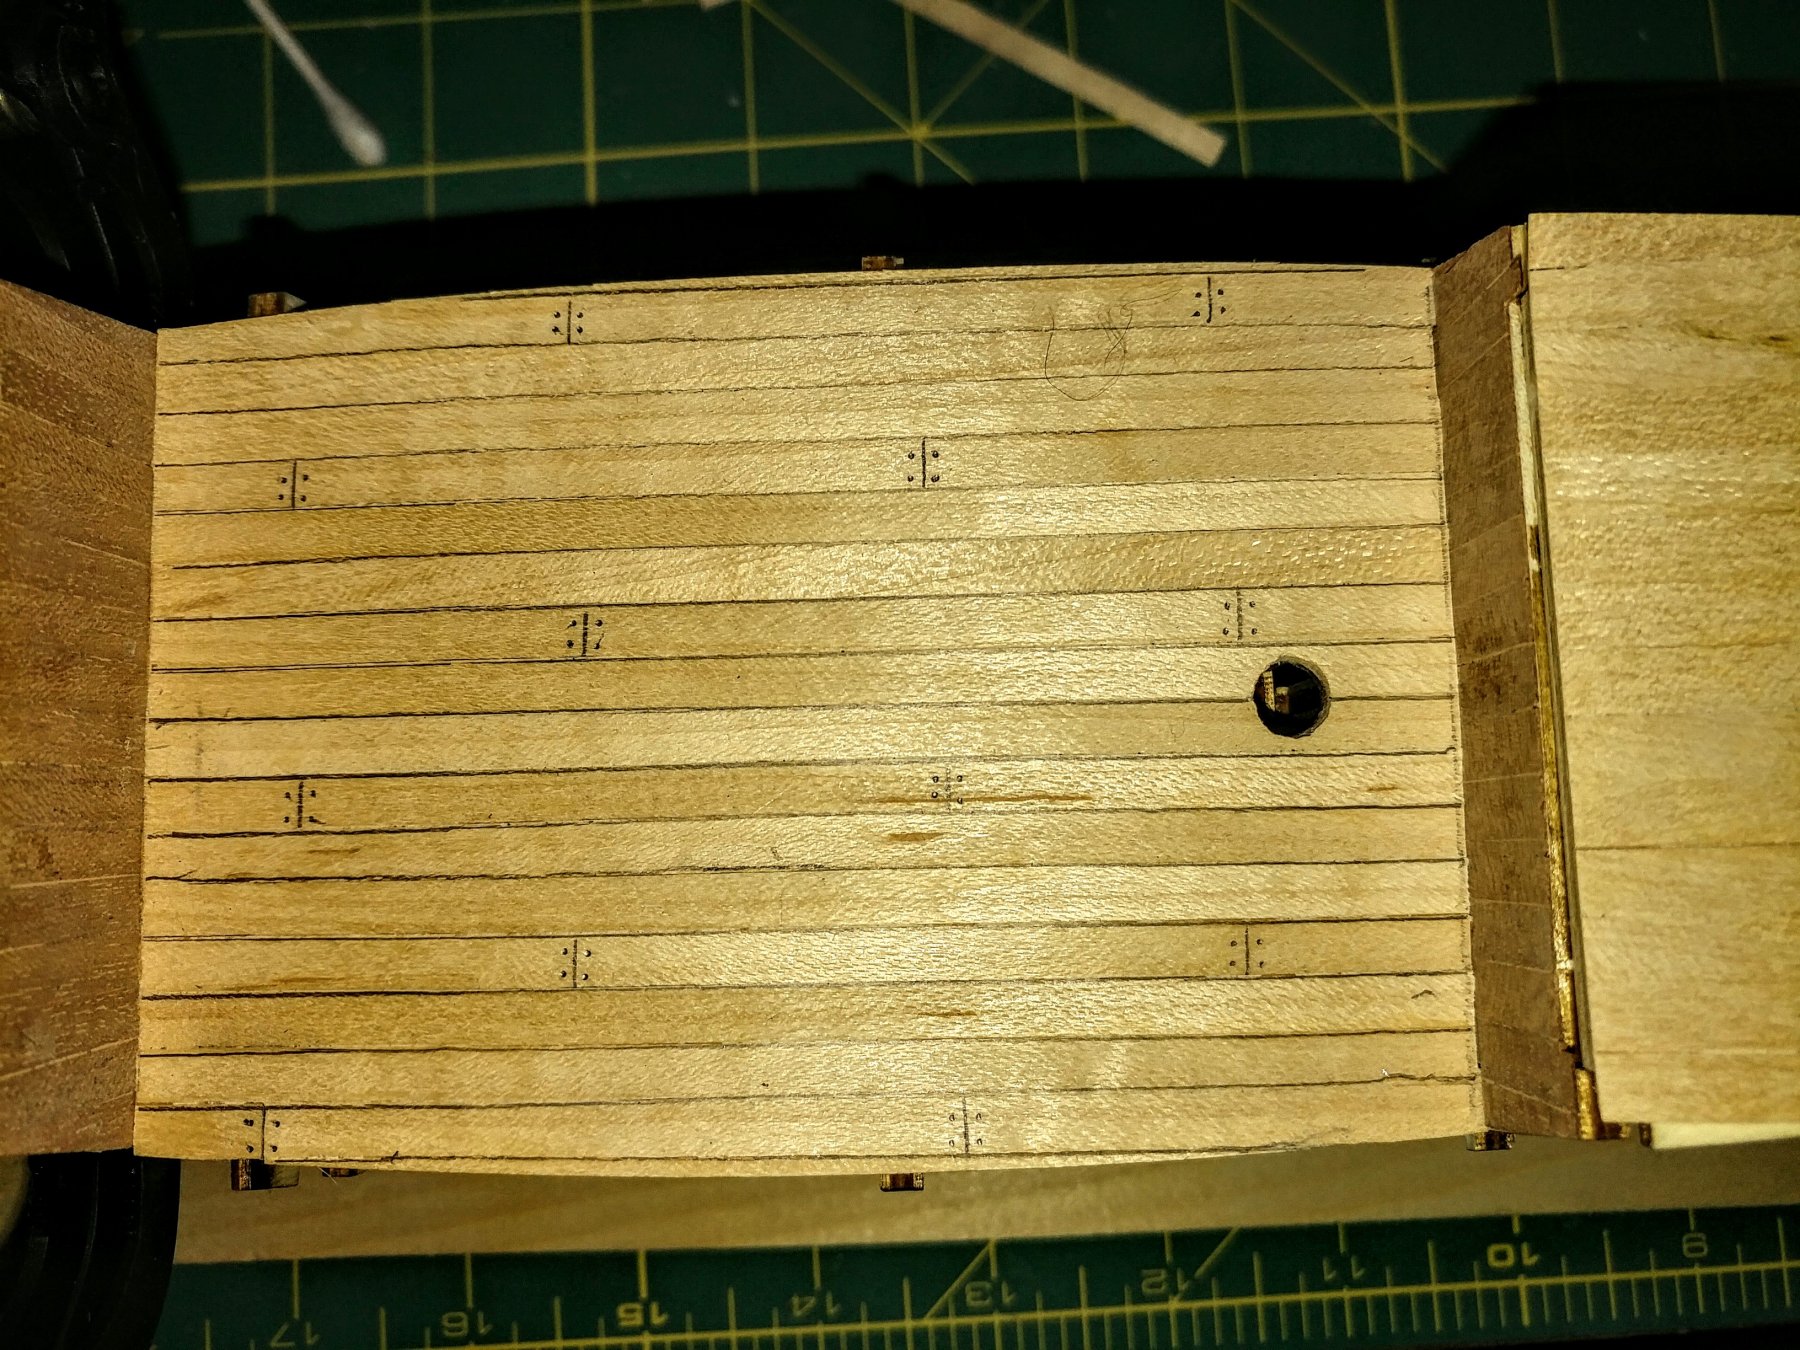
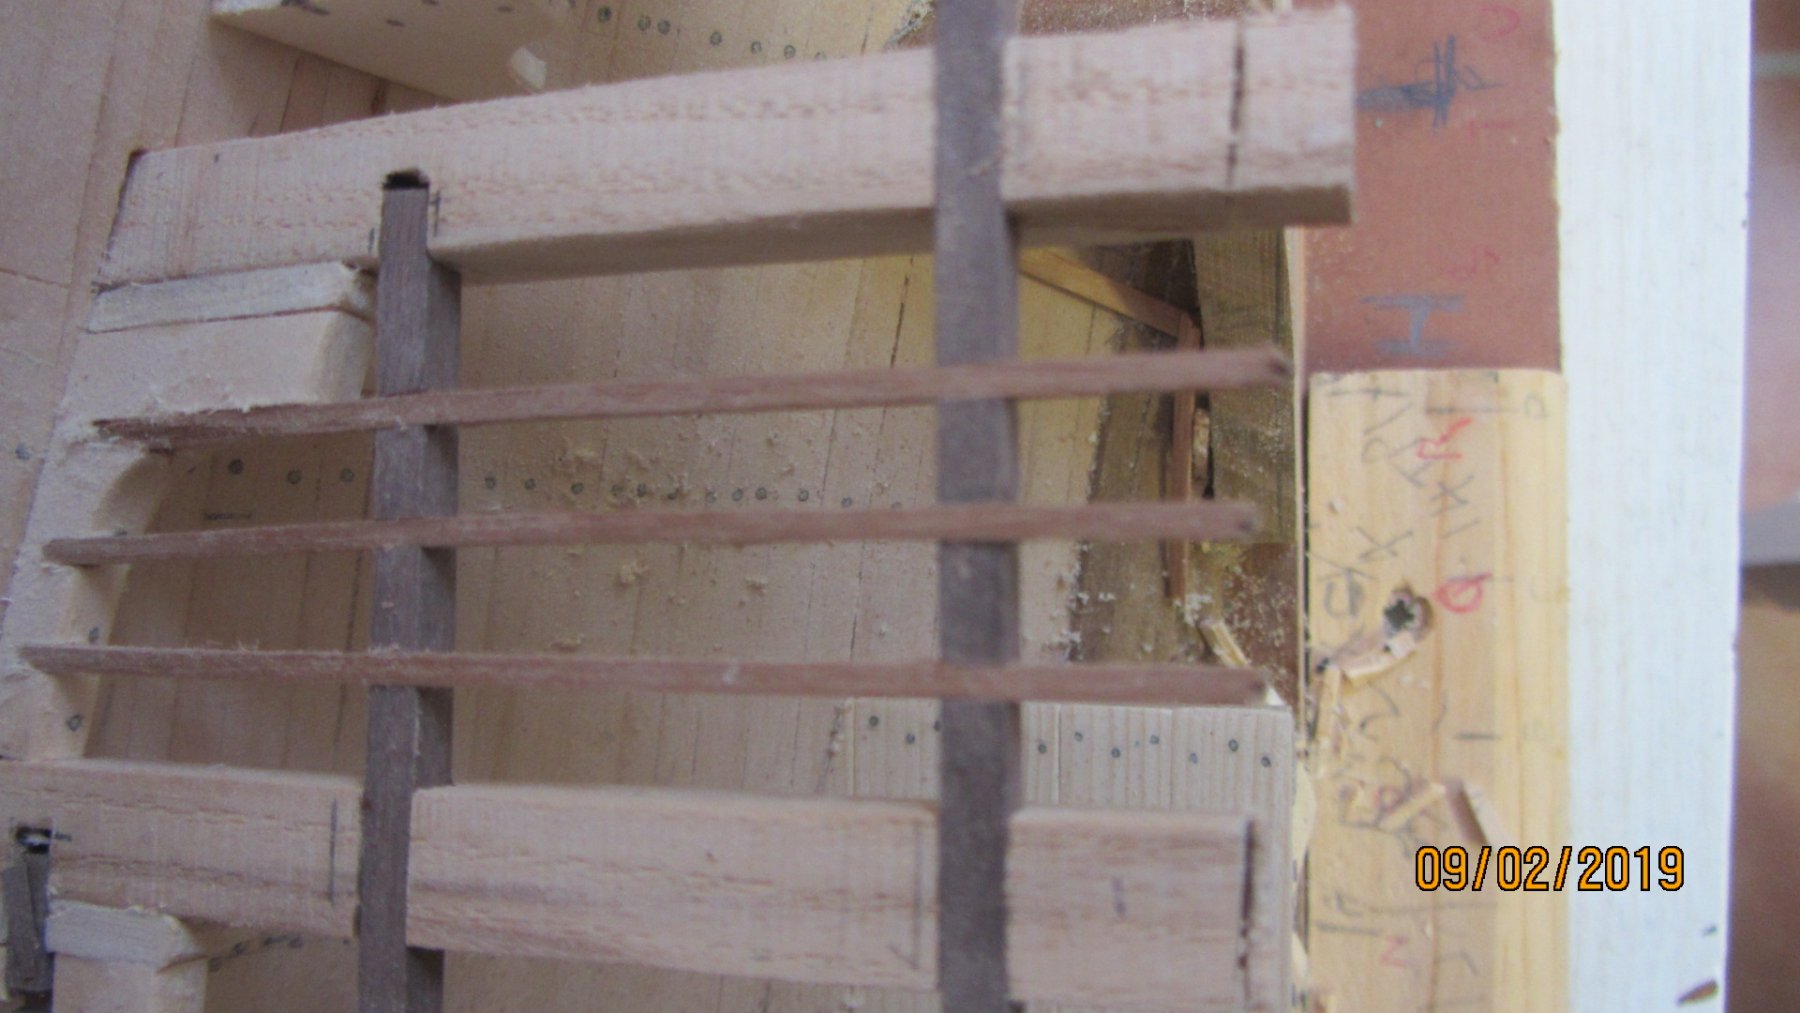
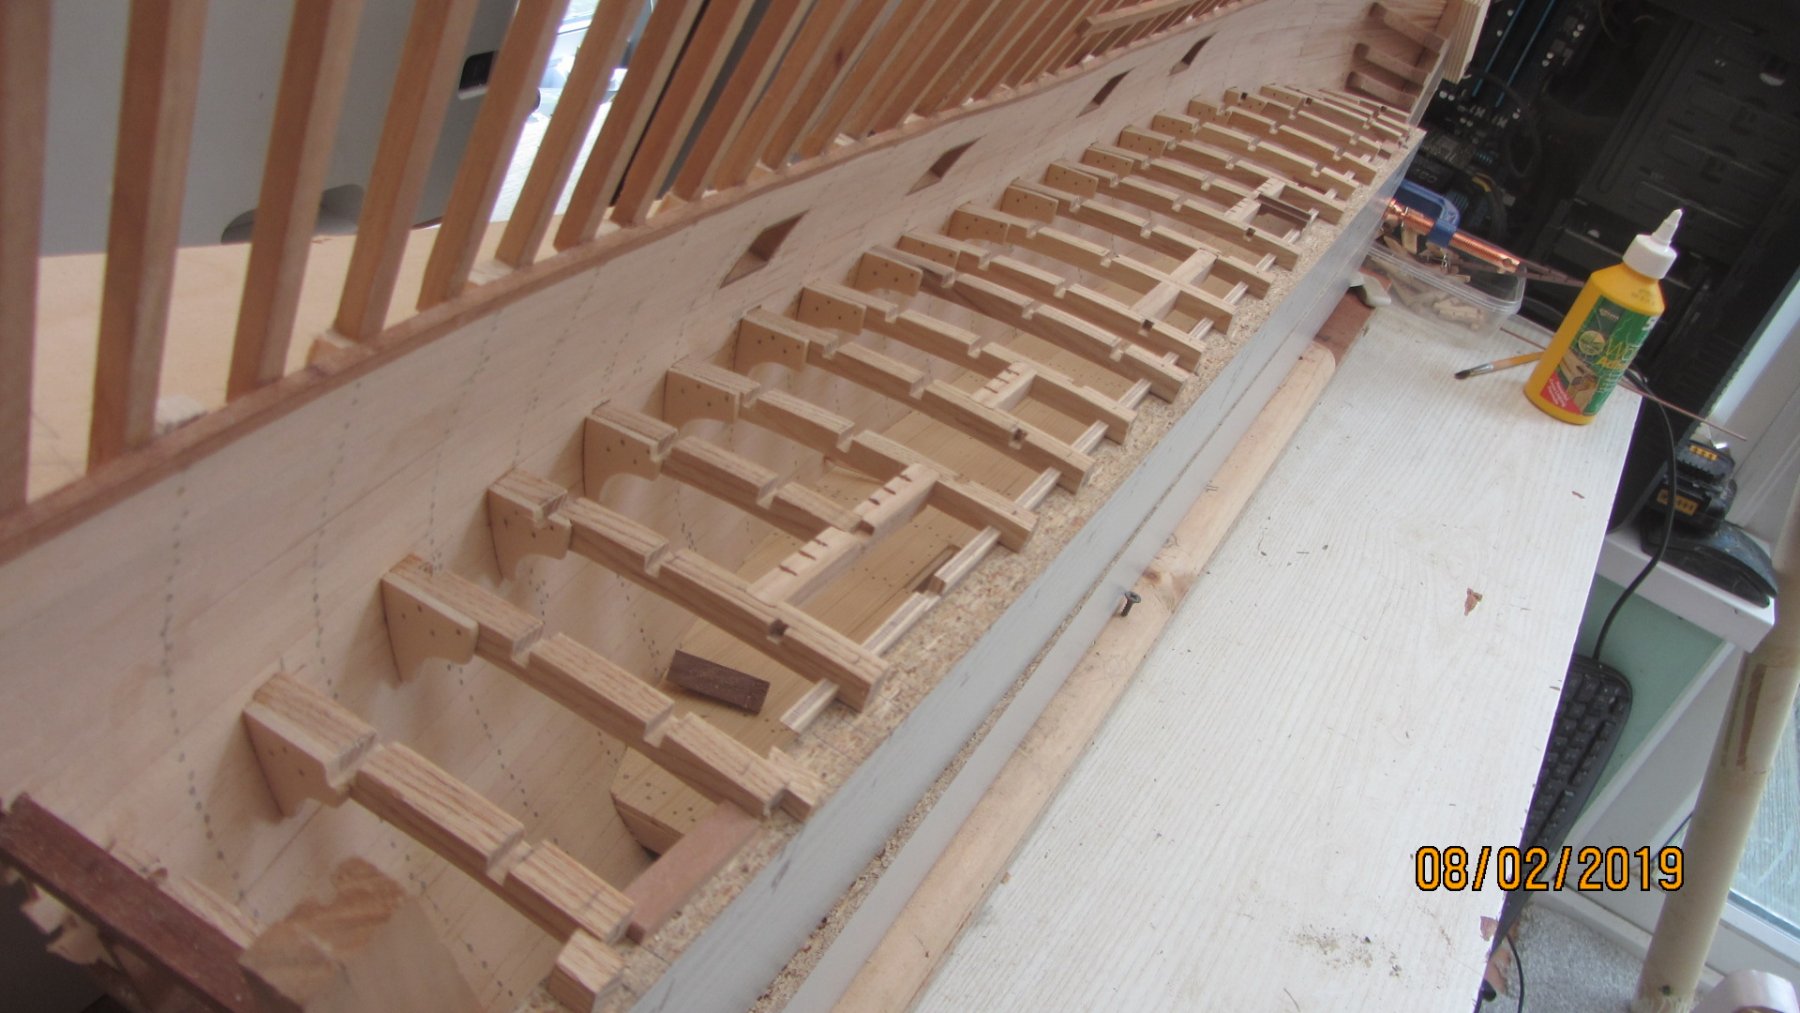
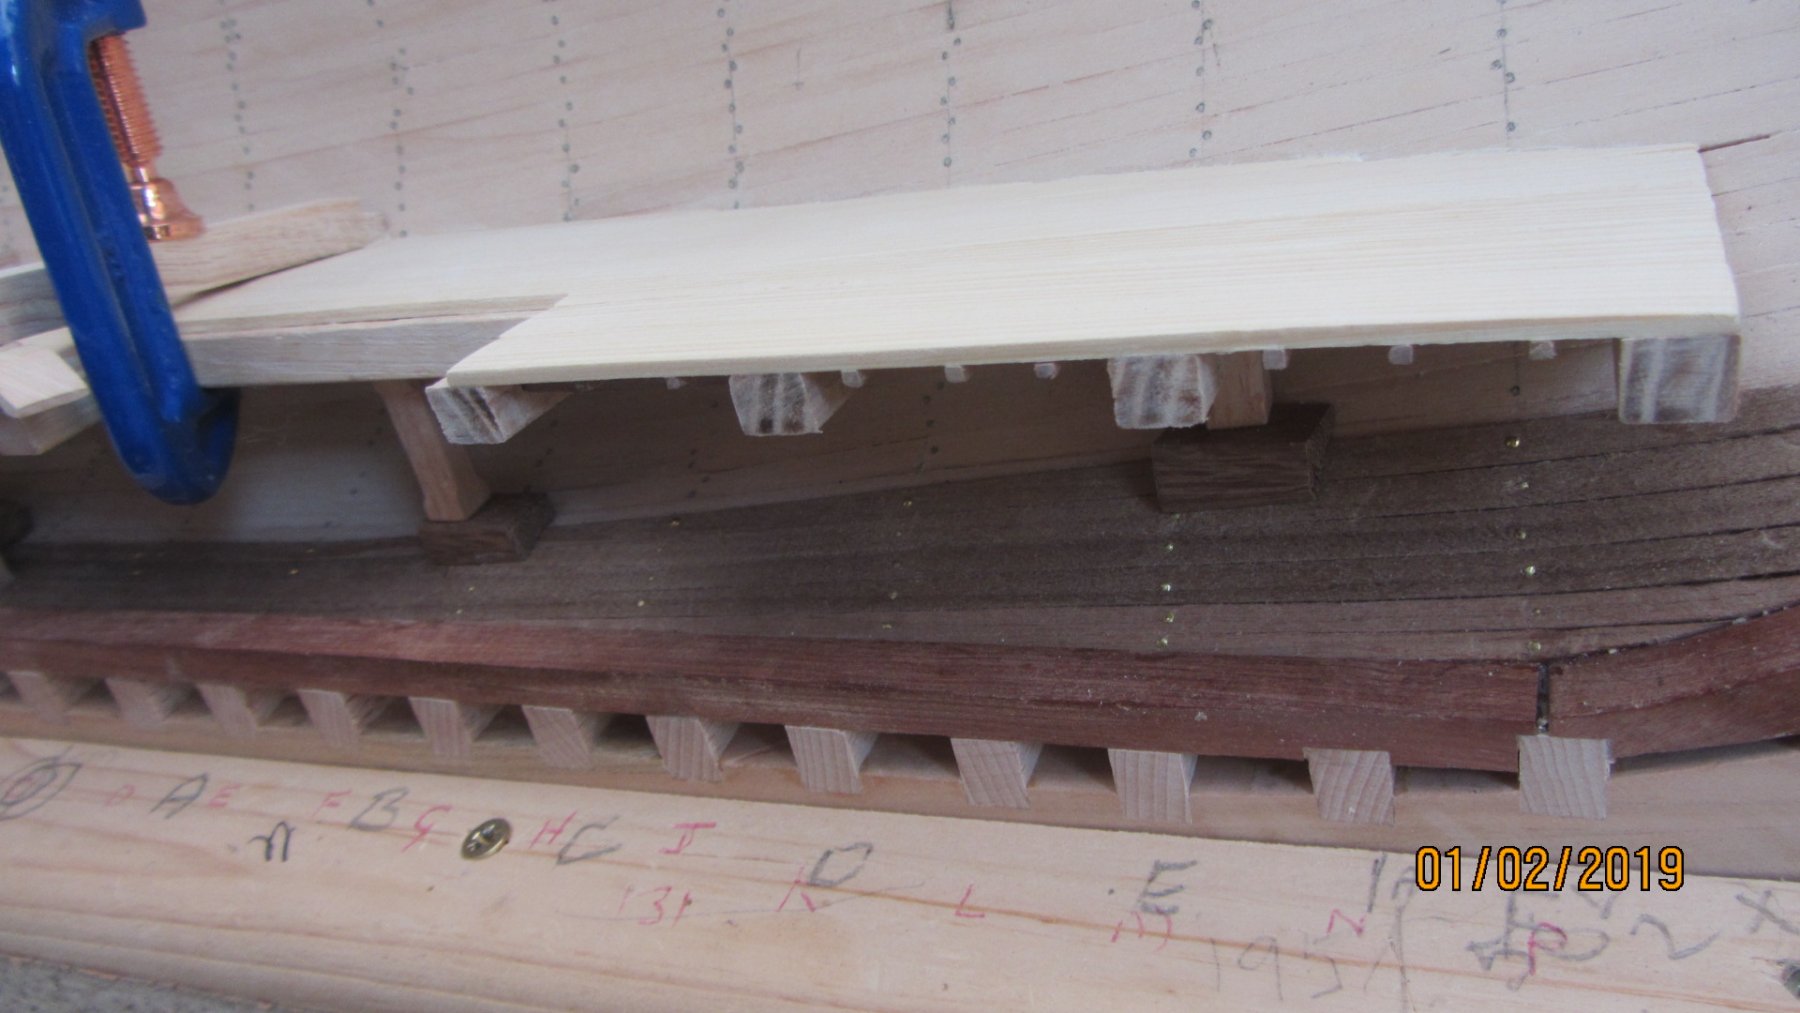
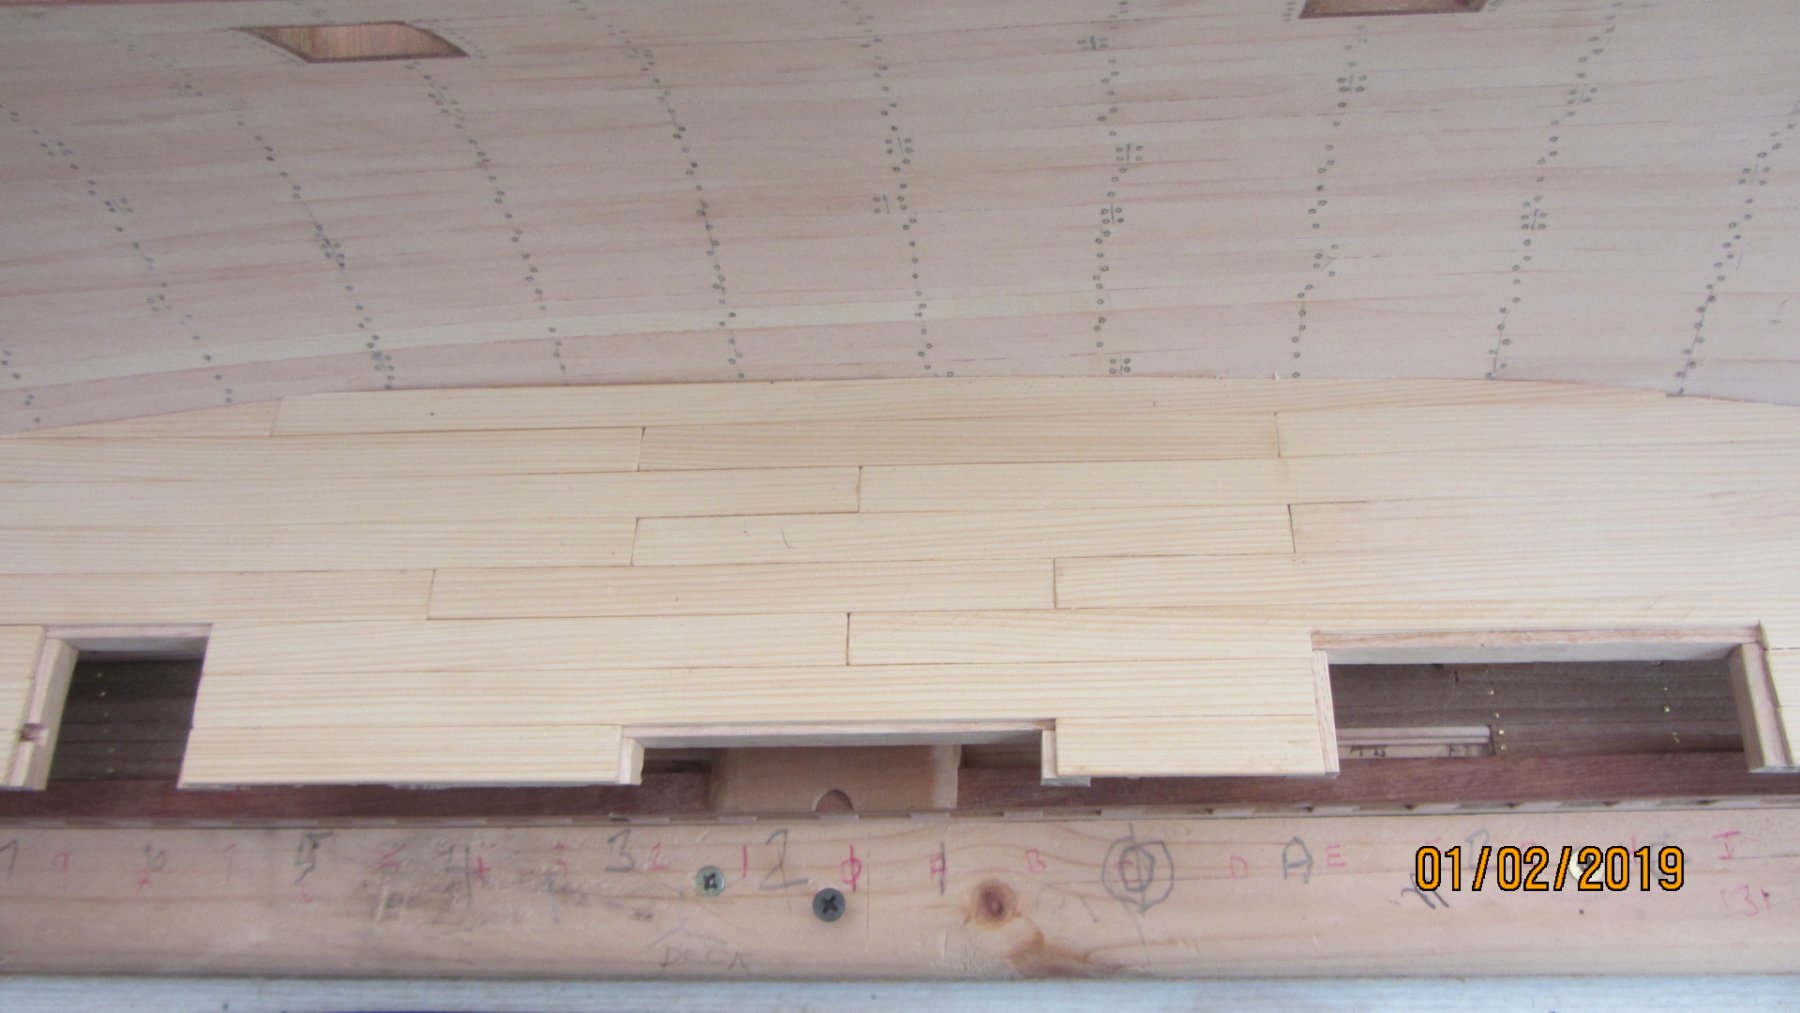
Internal planking completed now and model released from jig for first time.
Gunports need trimming down and I shall leave like this until lower deck is in place. Then reinforce the deck beams by adding filler between the beams and the ribs.
View of the completed planking. Lines drawn on for treenails.
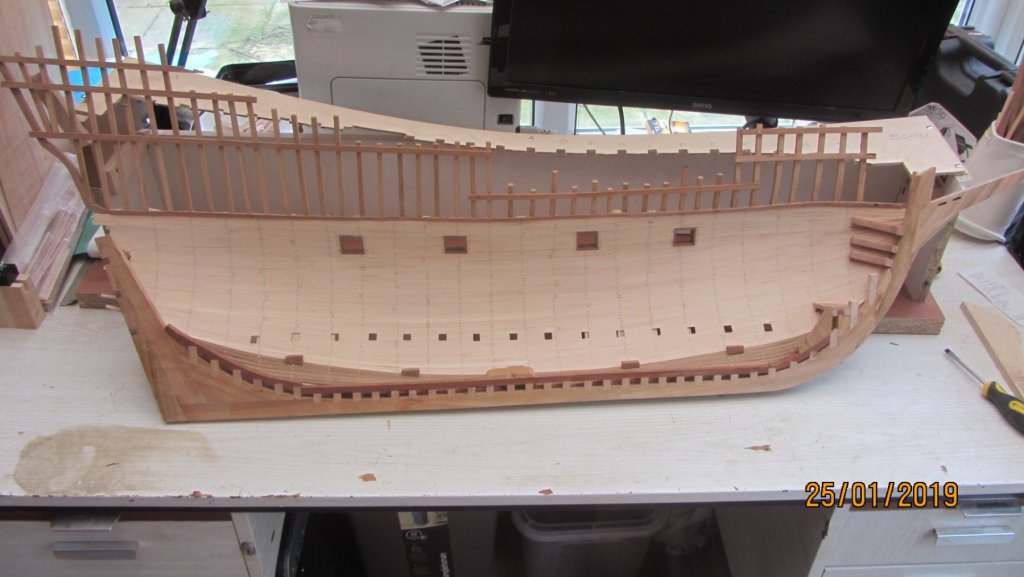
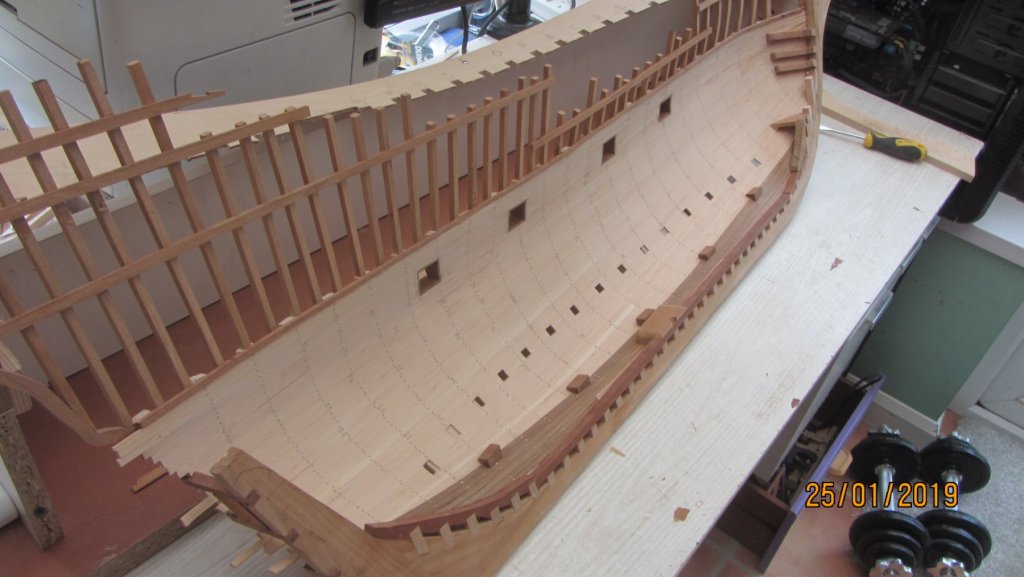
Square holes are for deck beams.
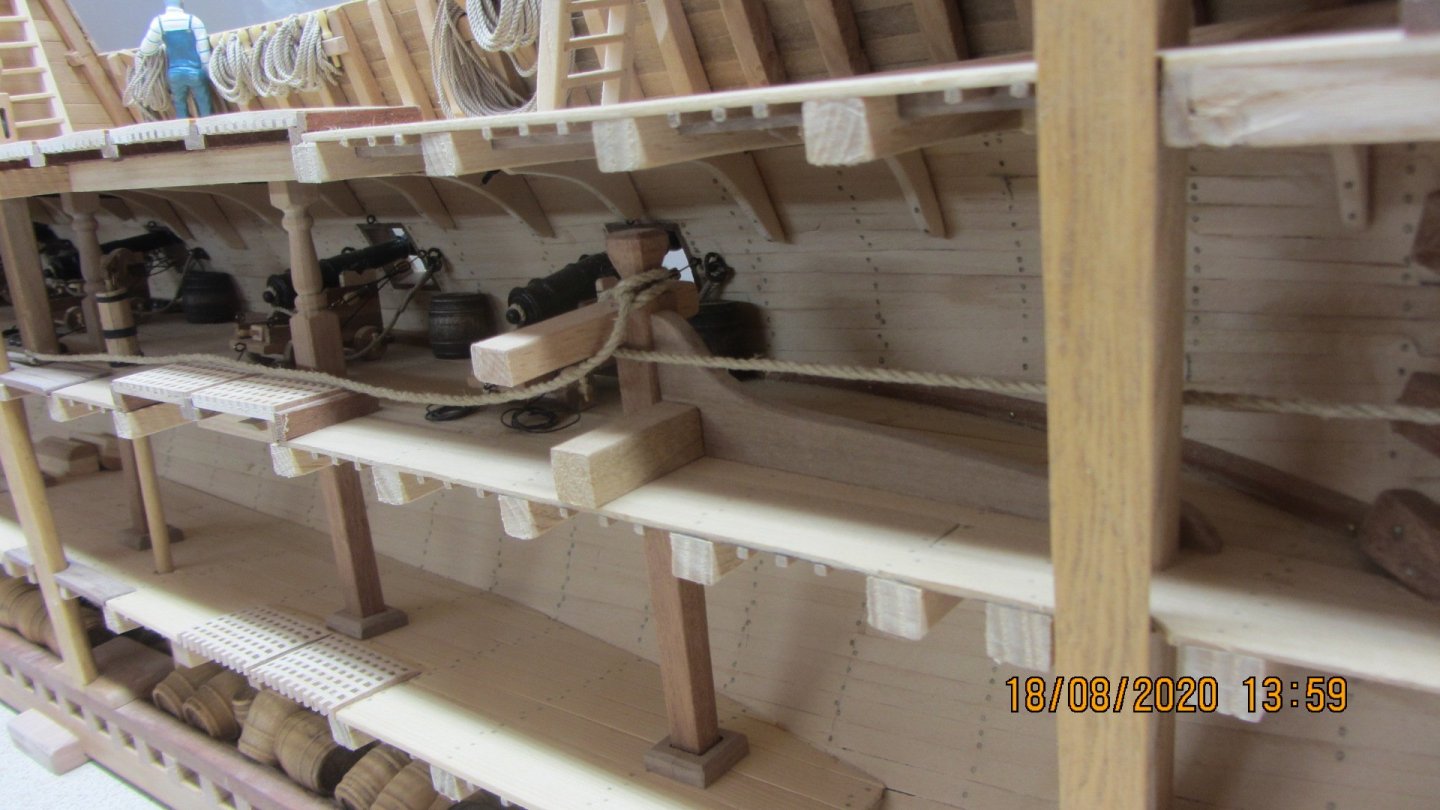
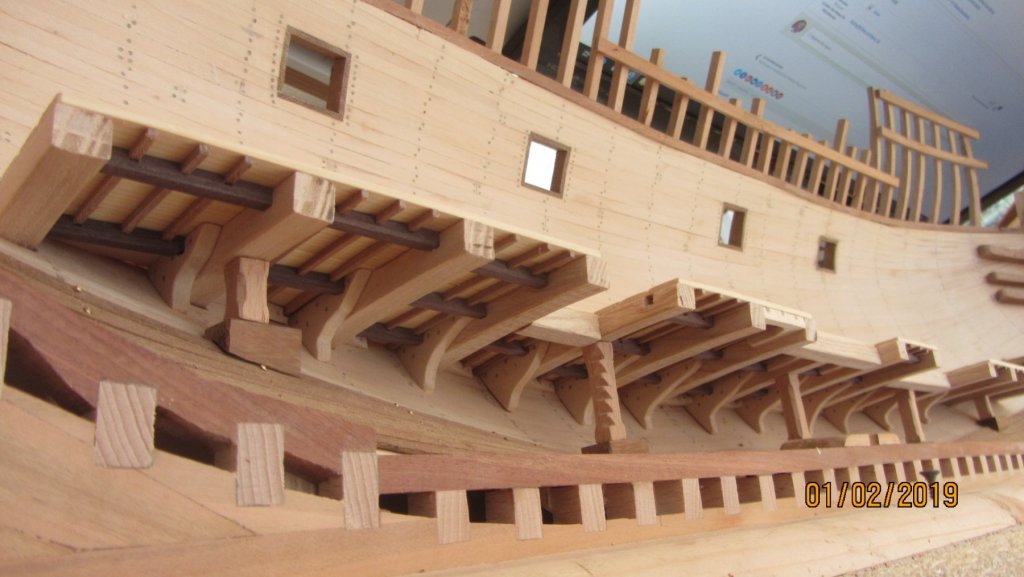
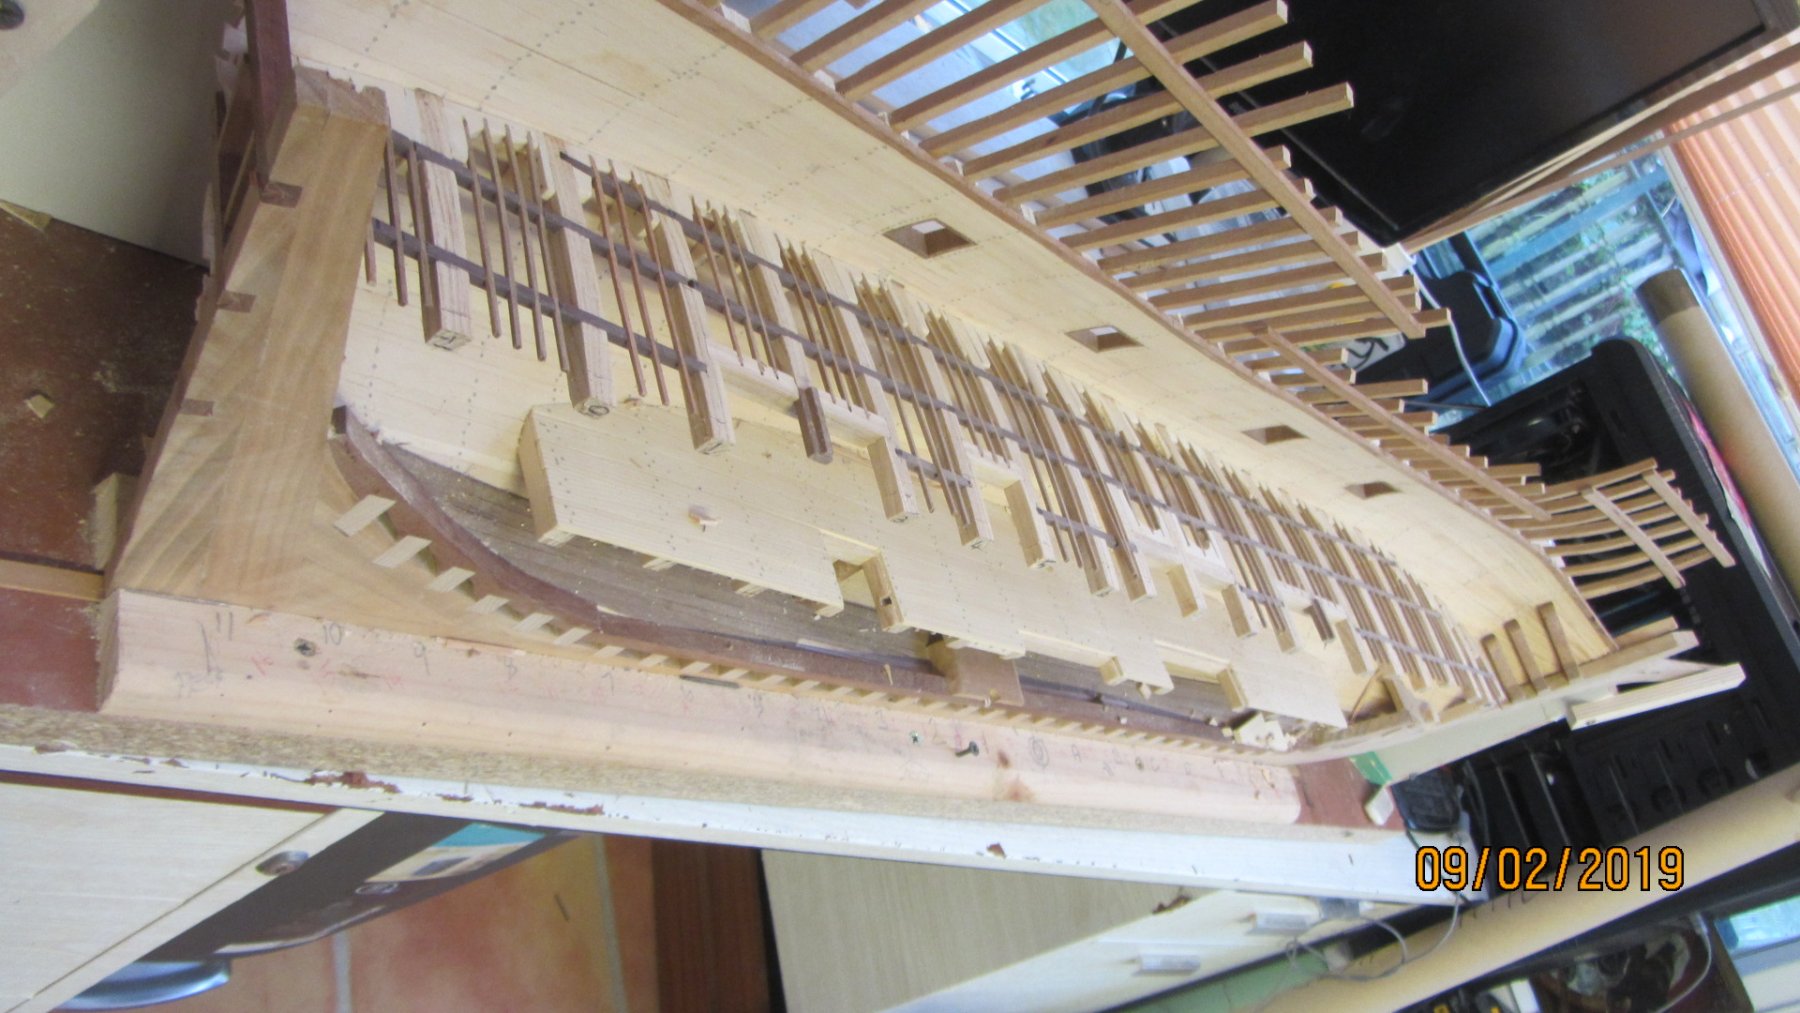
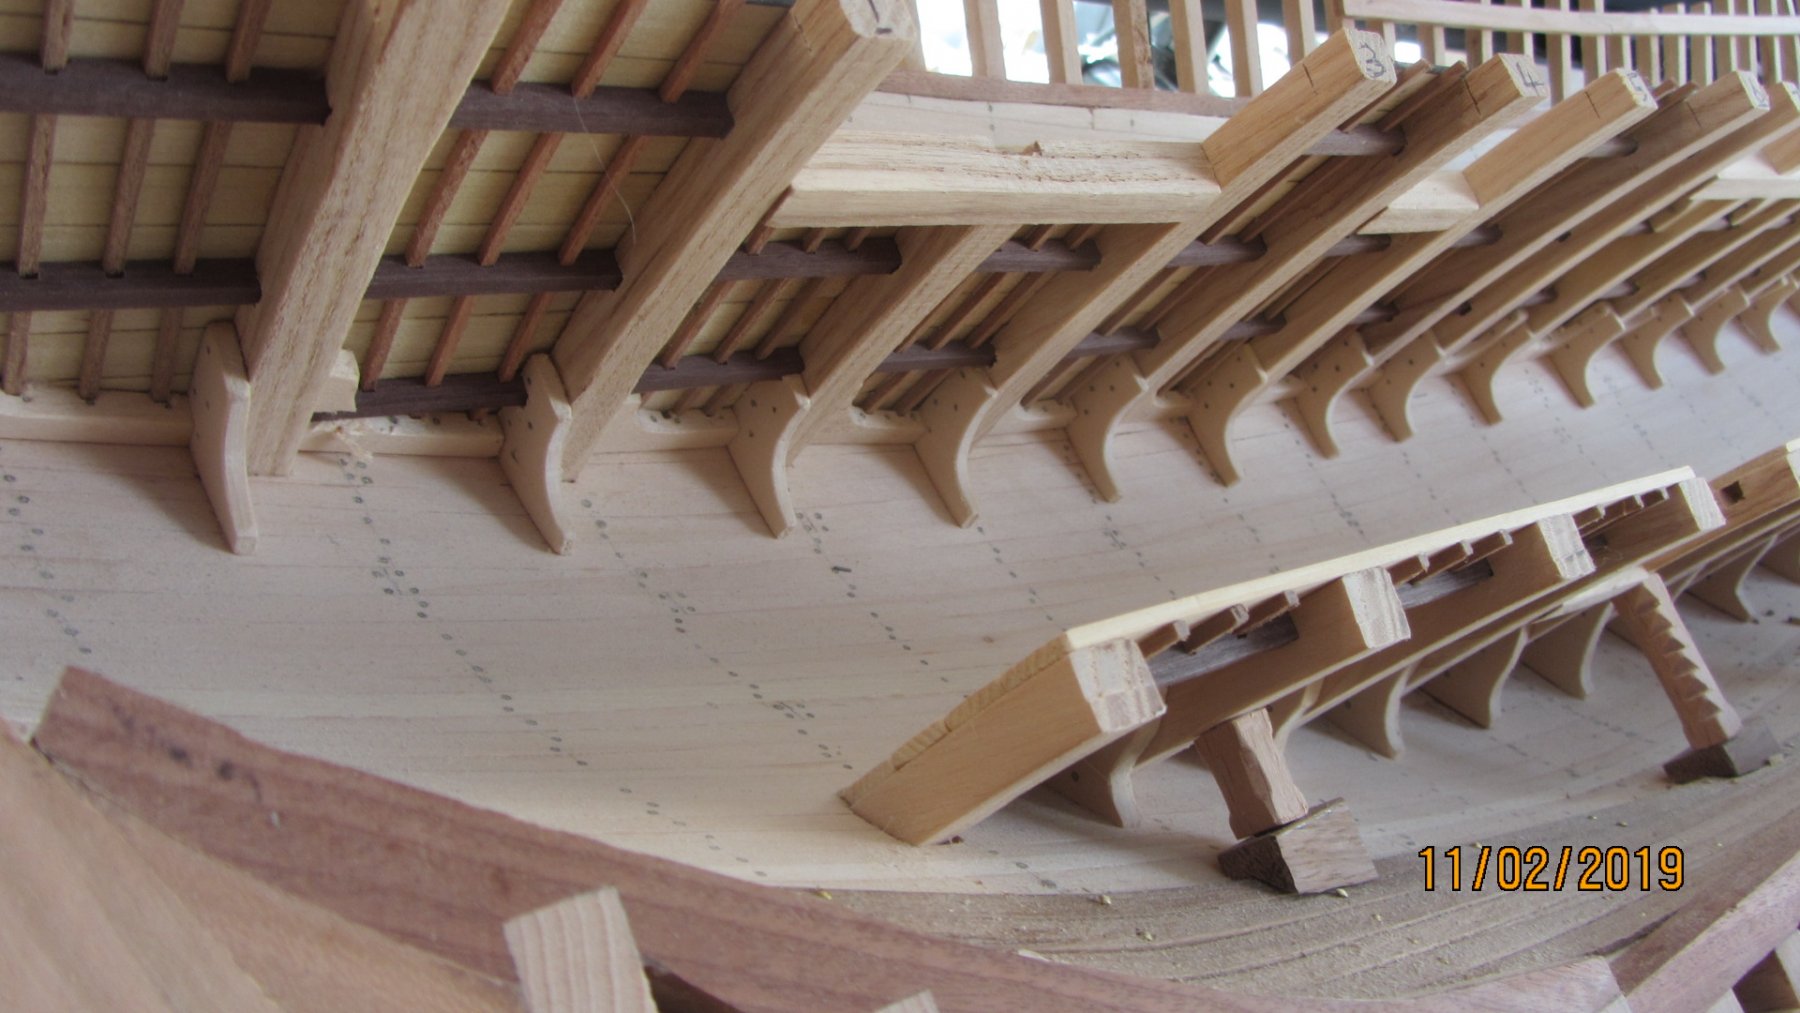
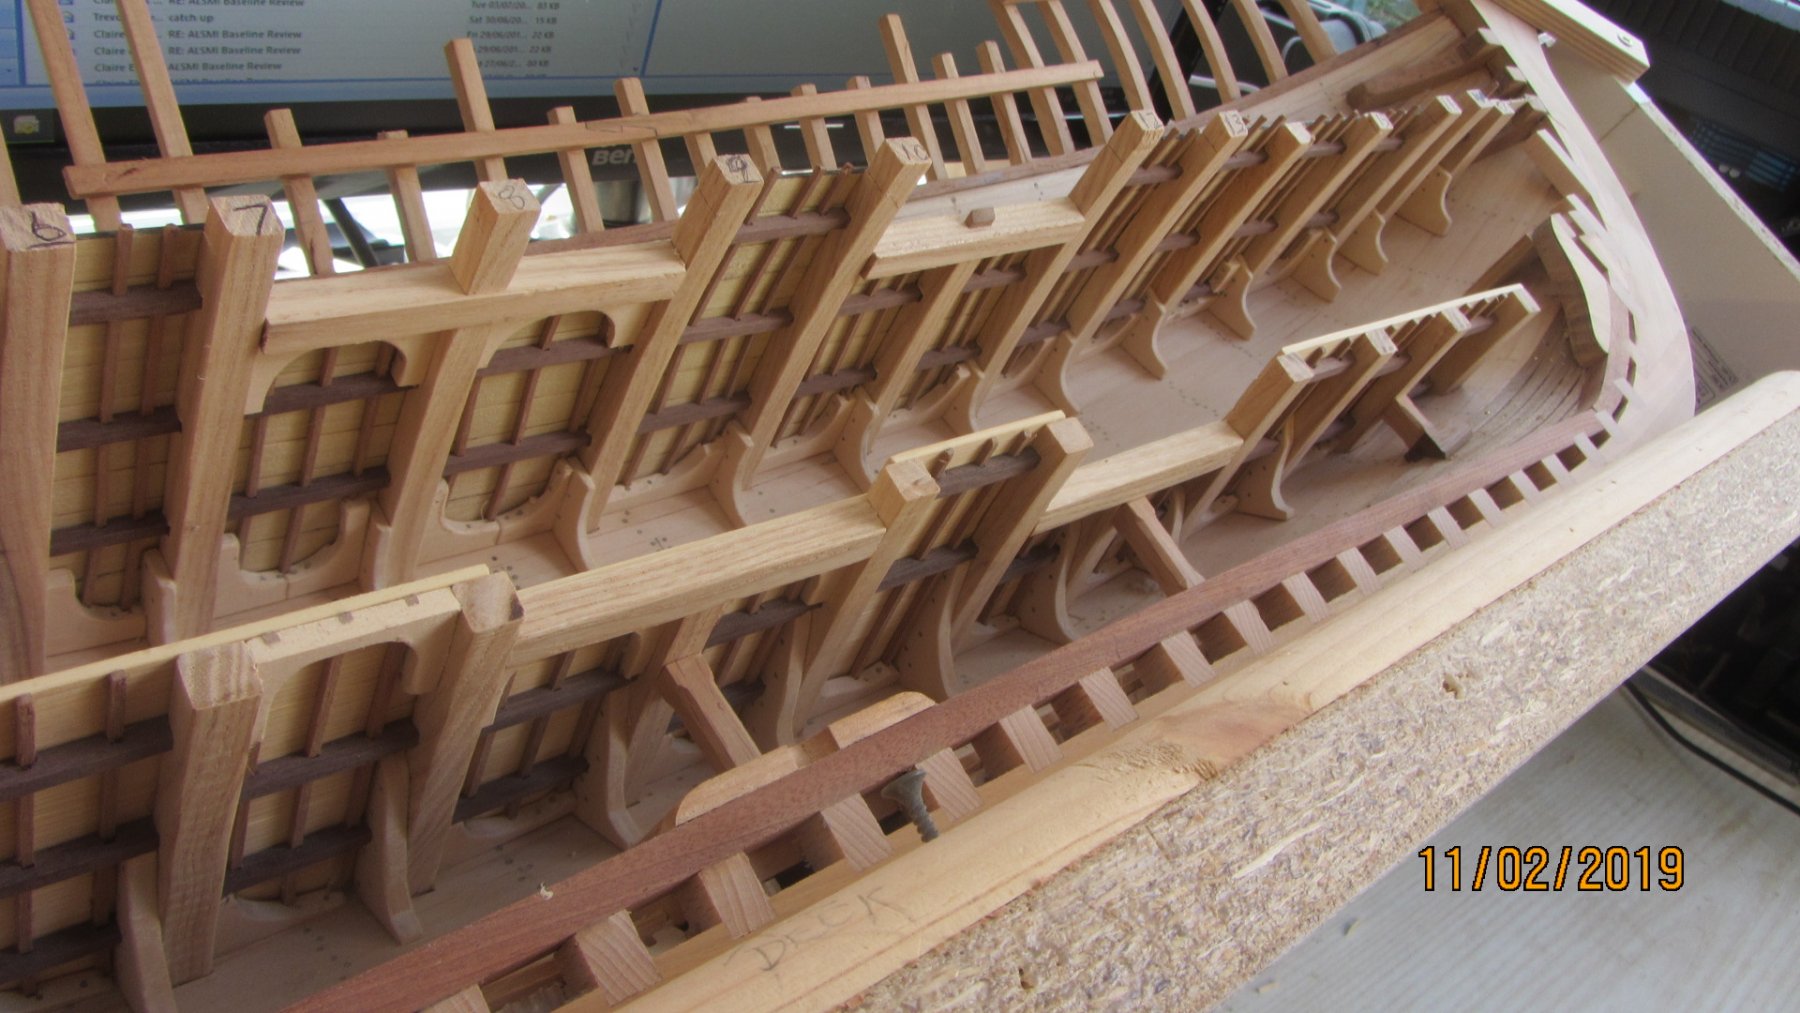
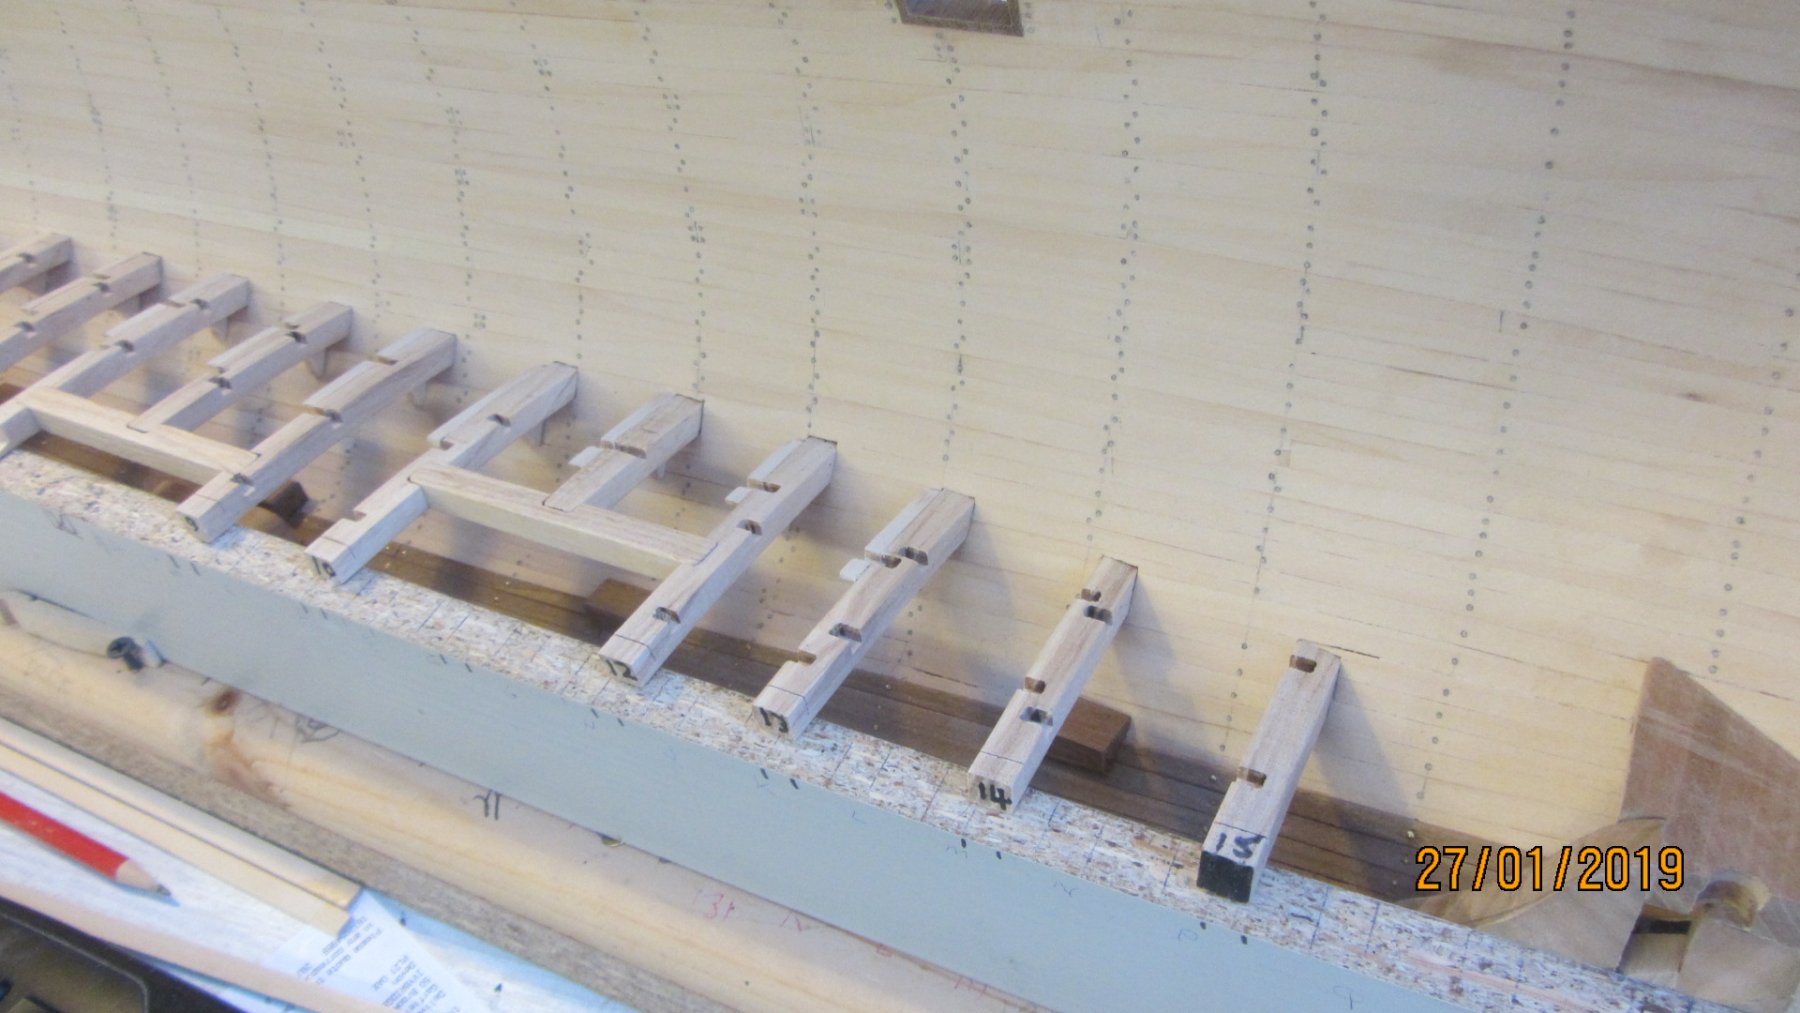
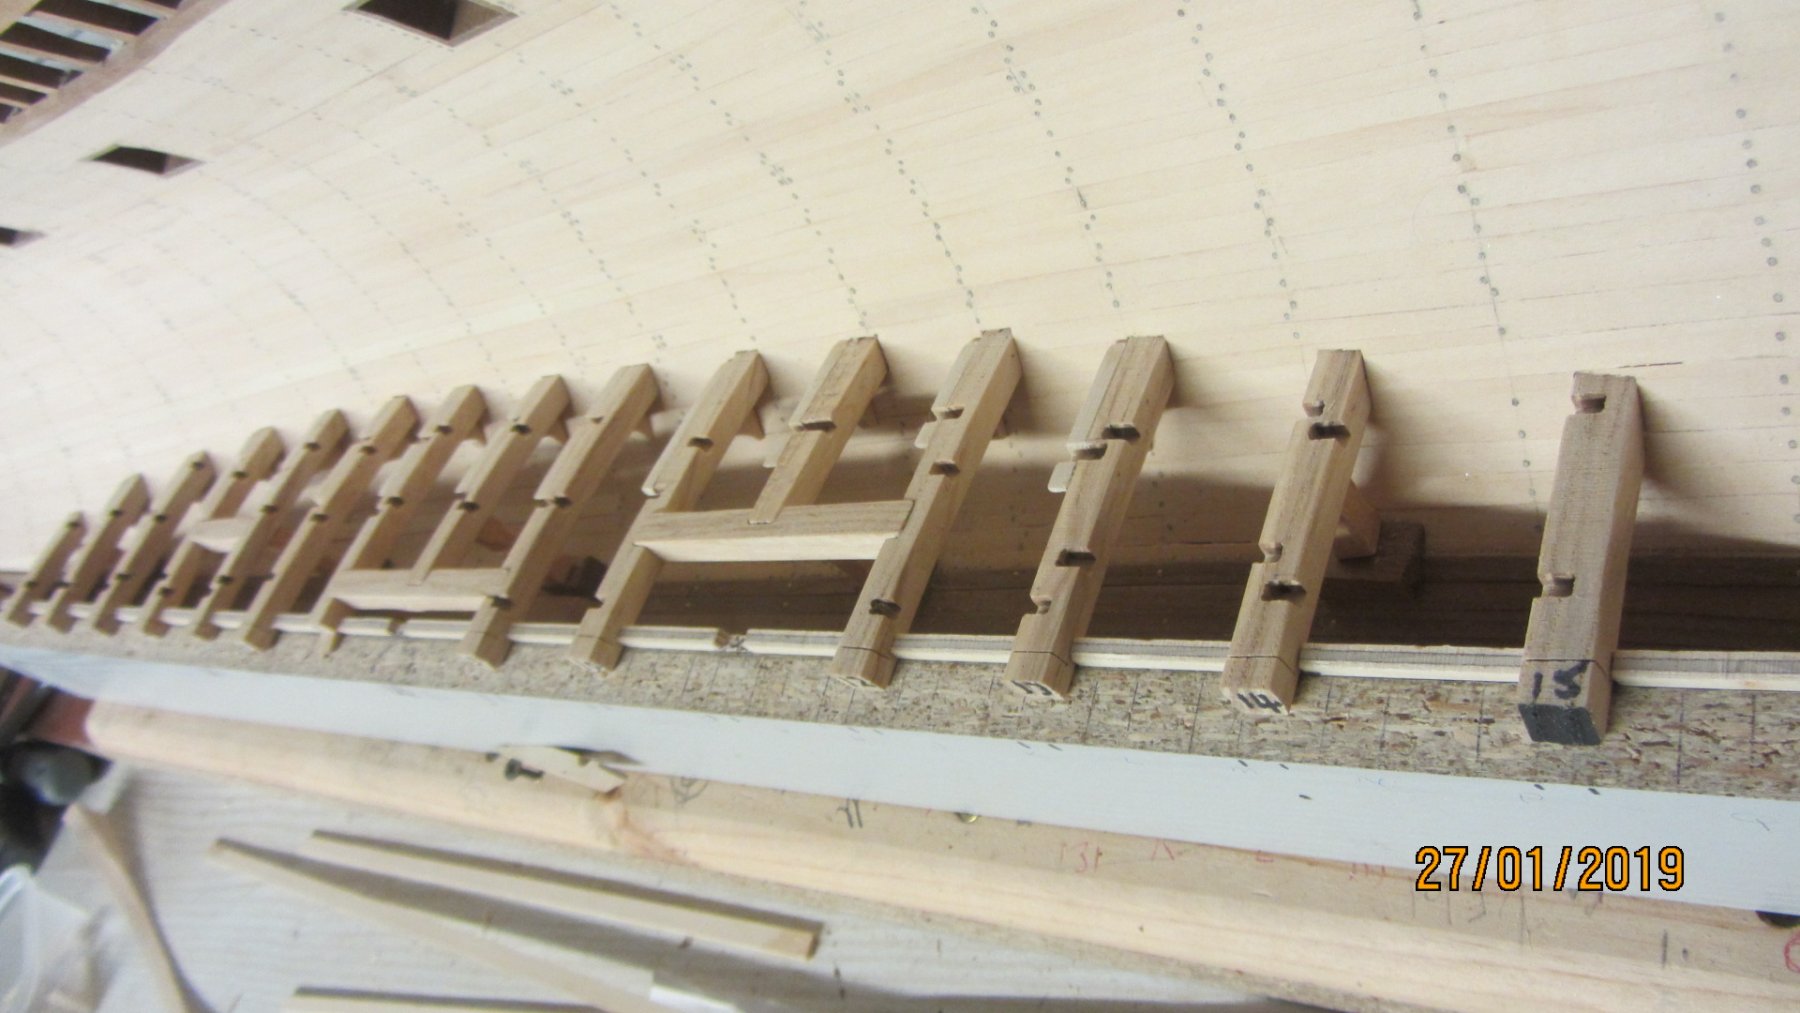
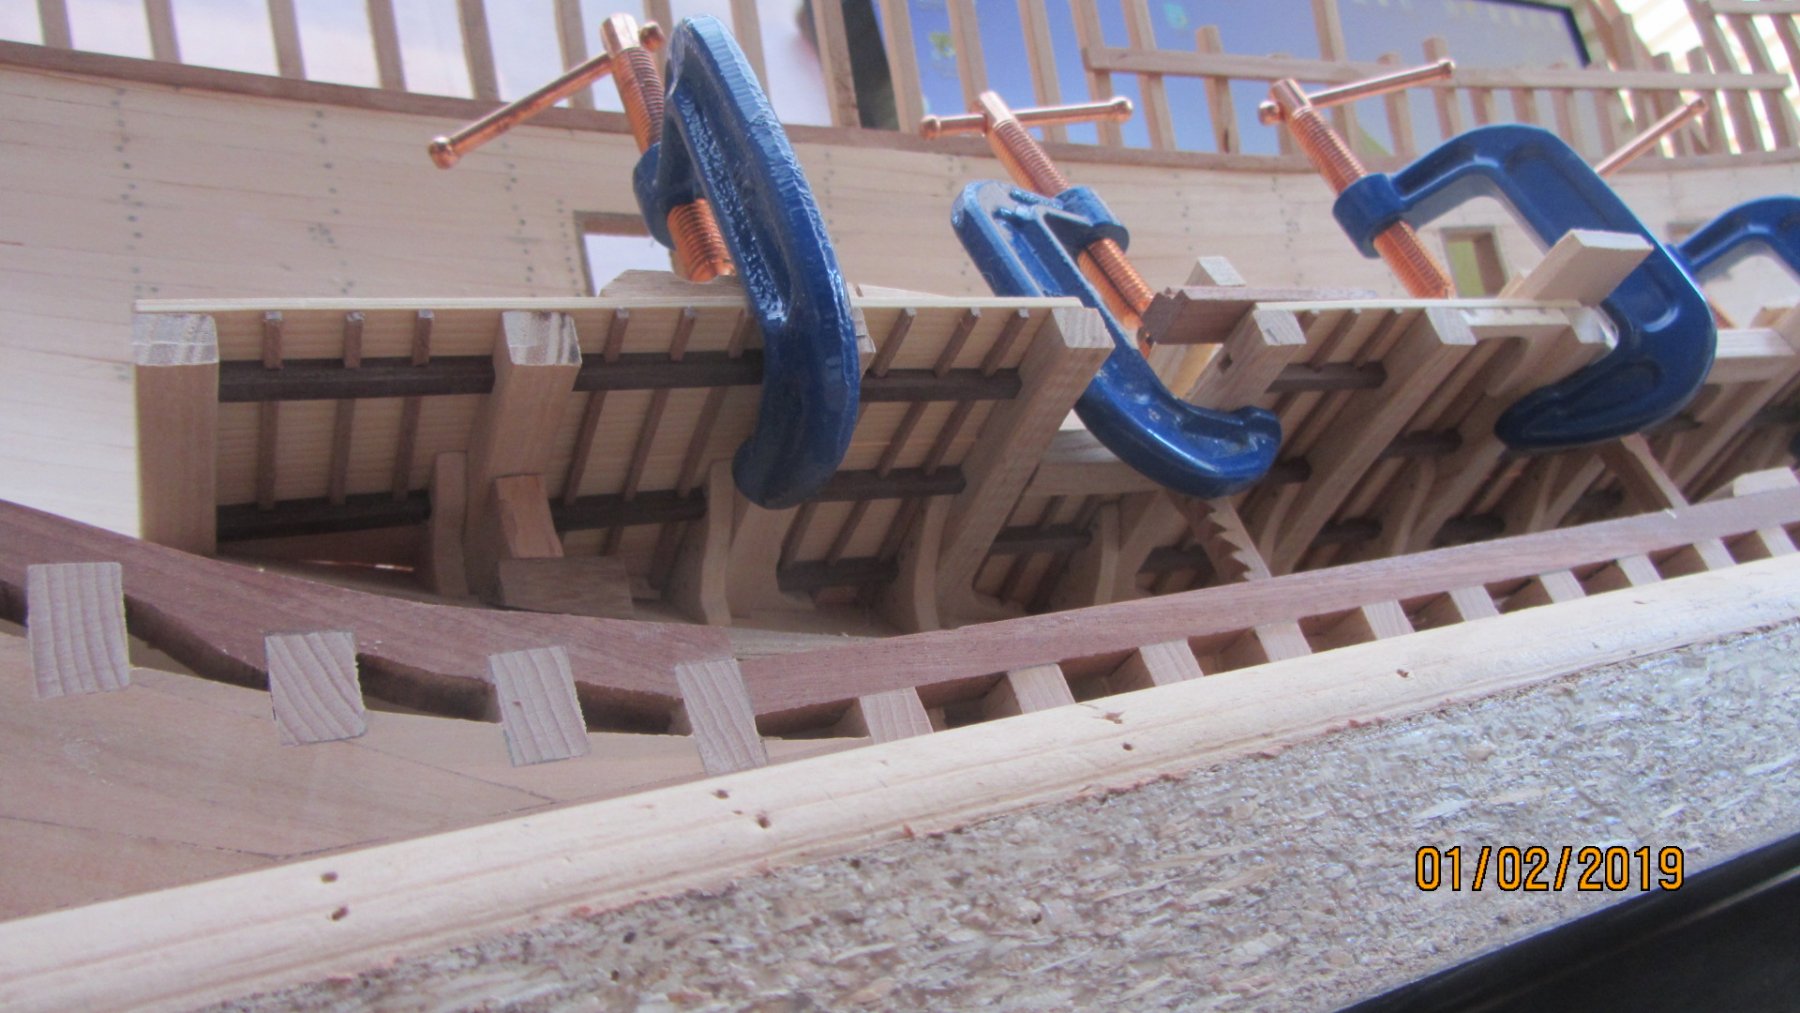
Deck beams now in place but not glued yet.
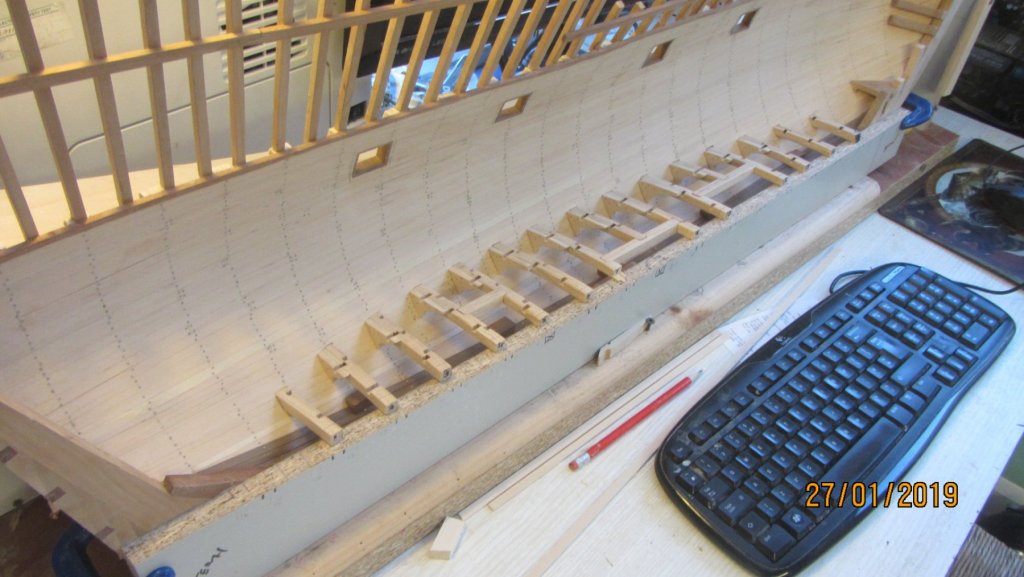
Notches for carlings are machined in. Will be using 4mm sq dark walnut for these.

Jig to hold deck beams at correct height and distance made and fitted to support.


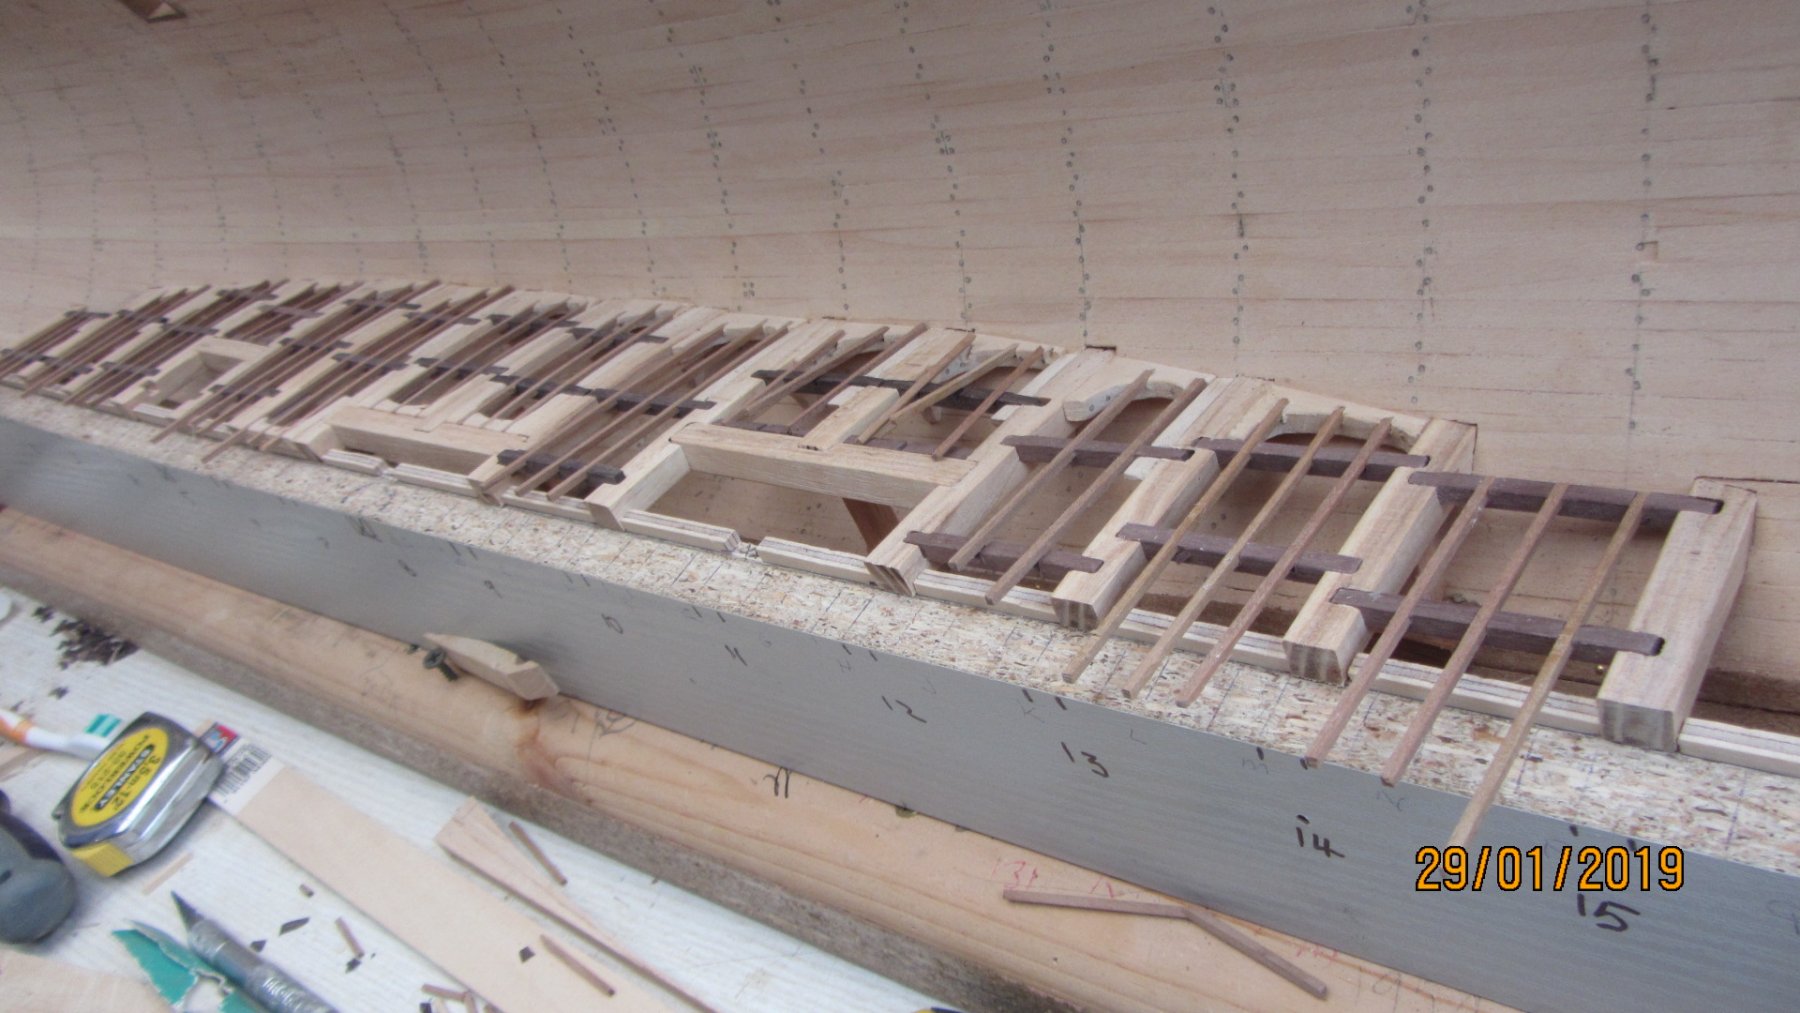
Carlings and ledgers all cut but not glued yet.
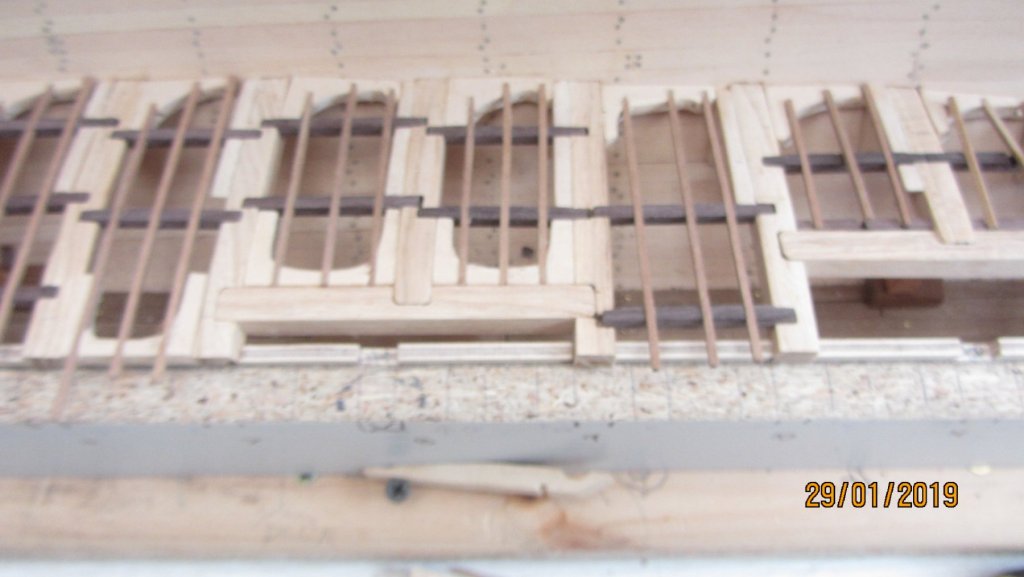
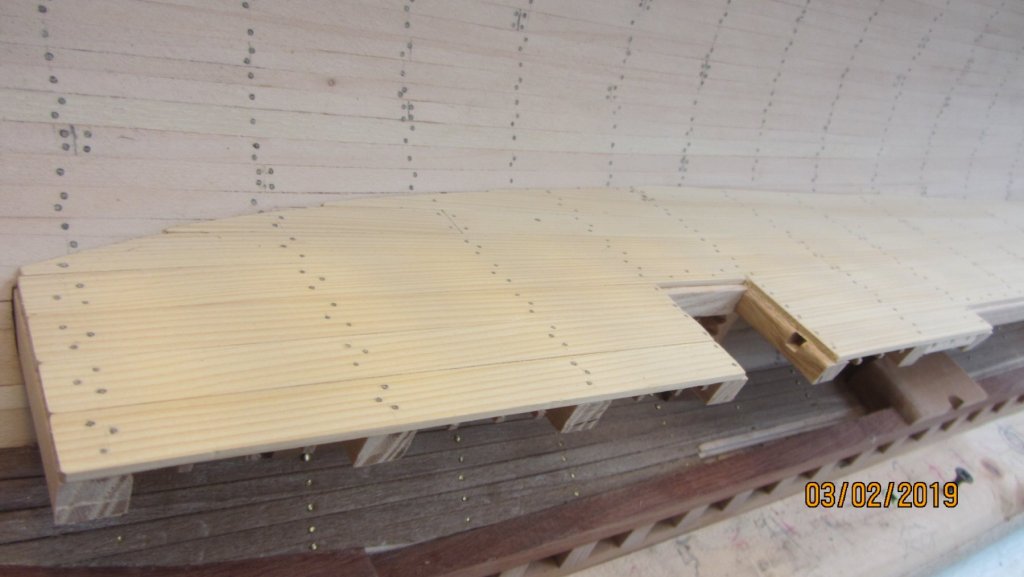
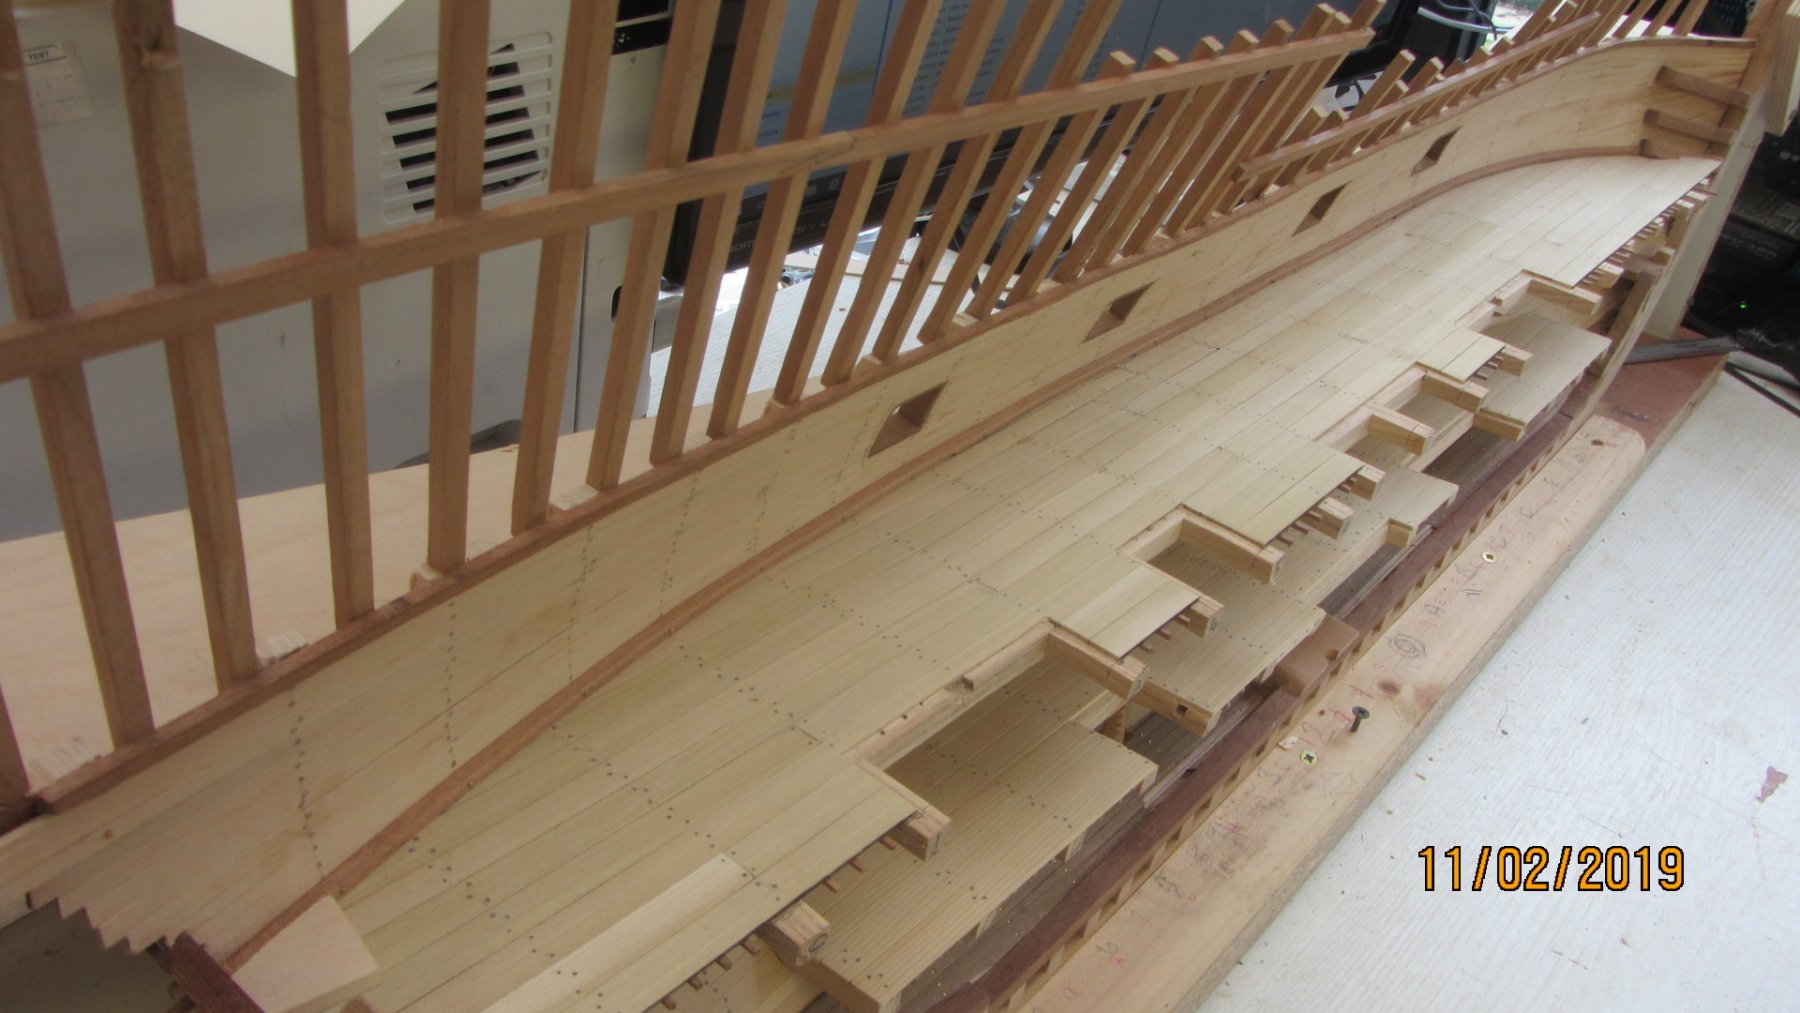
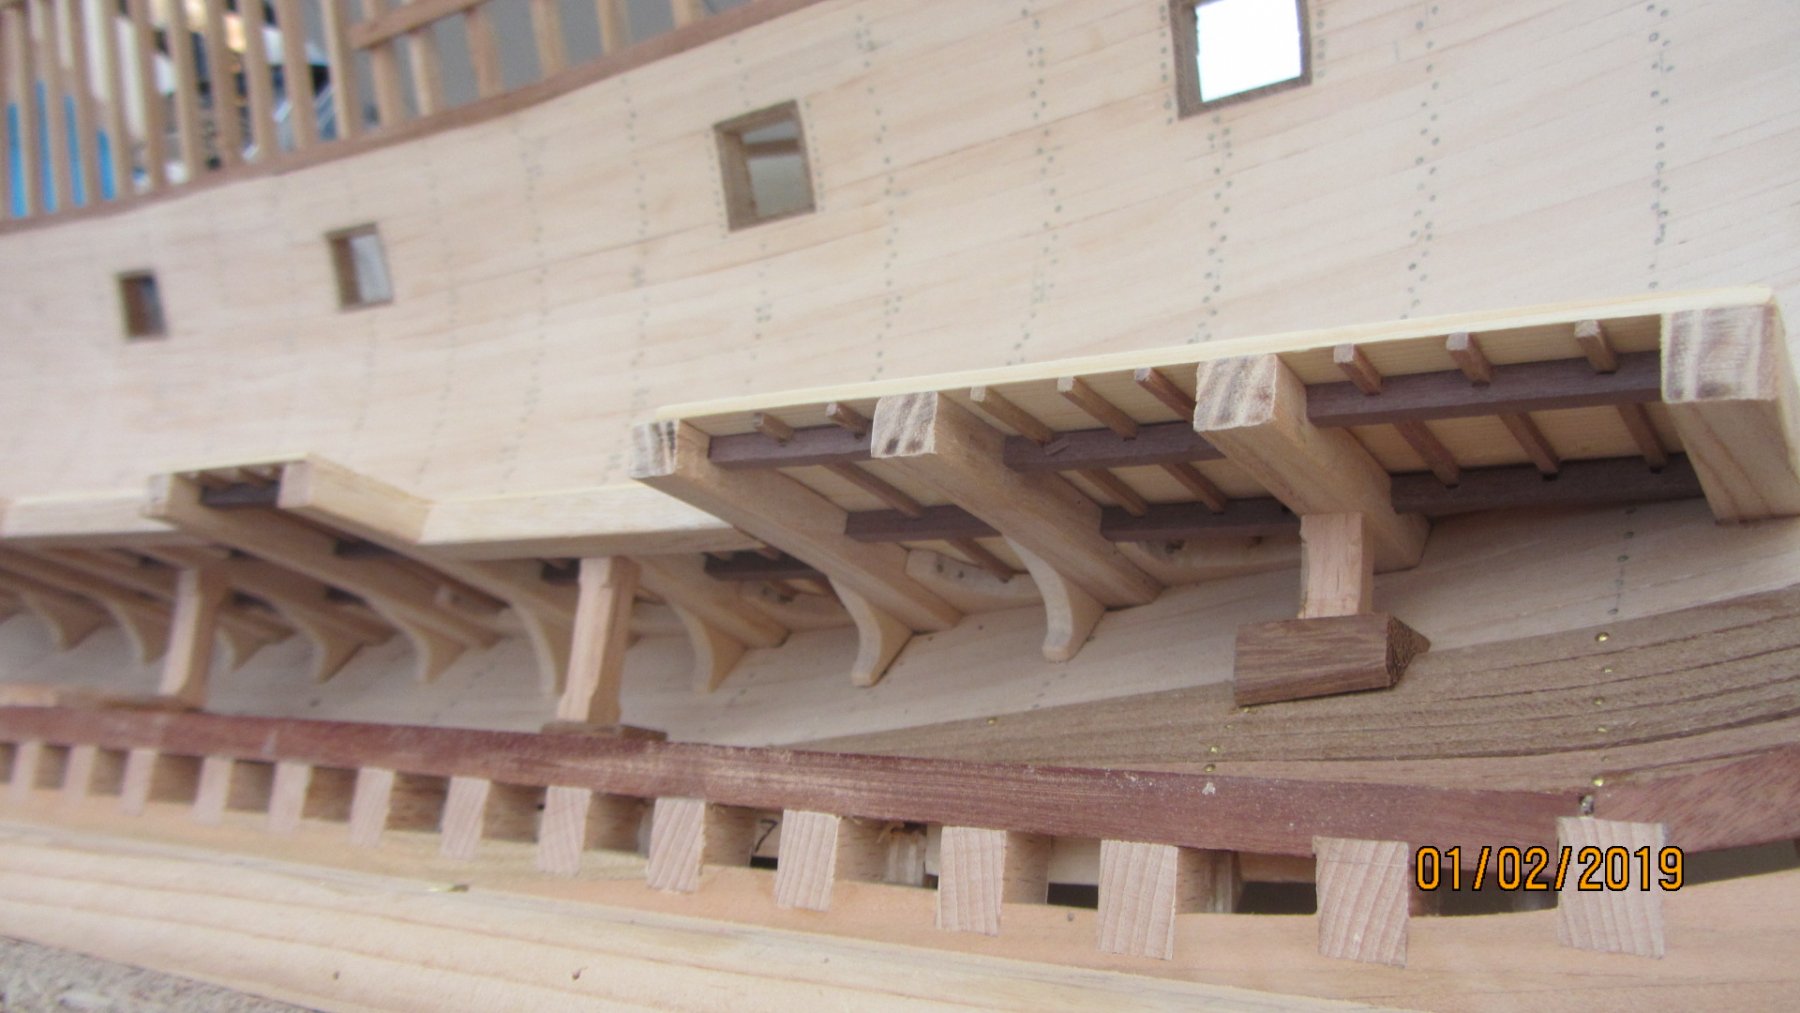
Deck construction well under way. Deck is Alaskan cedar. First time I have used this wood. Very impressed with the quality and grain.
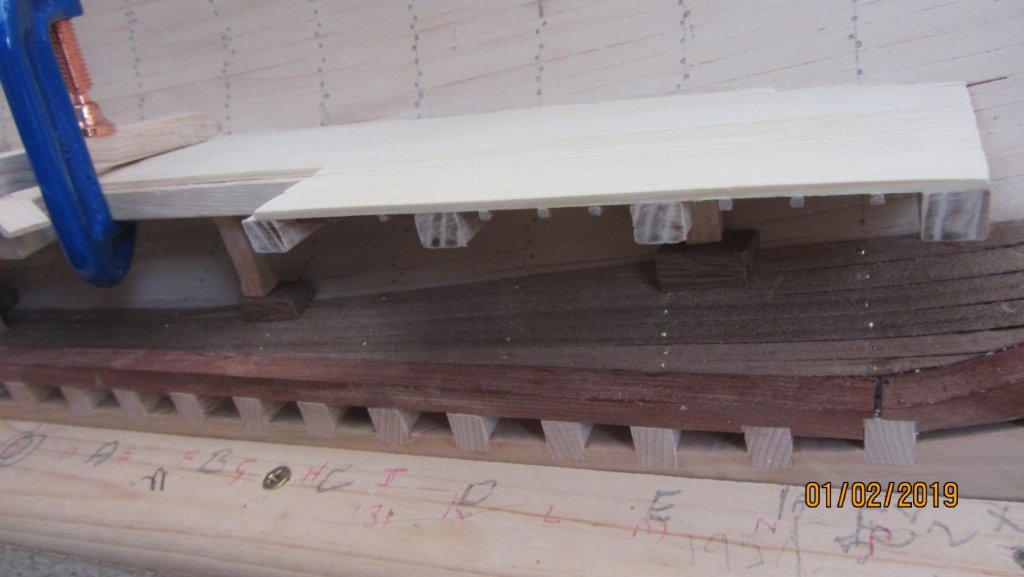
Last planks on this deck are fixed and will need treenailing and sanding.
First deck
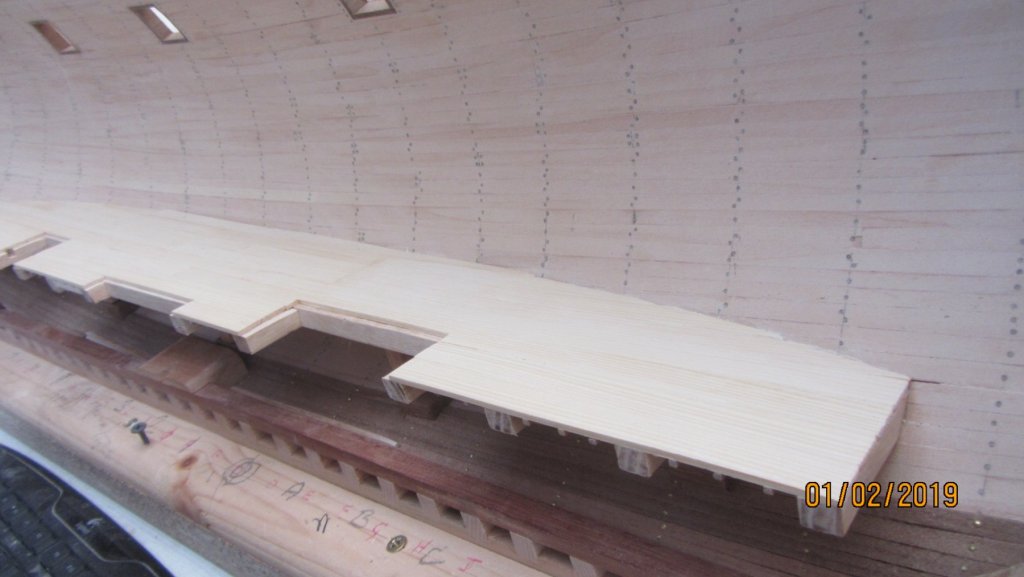
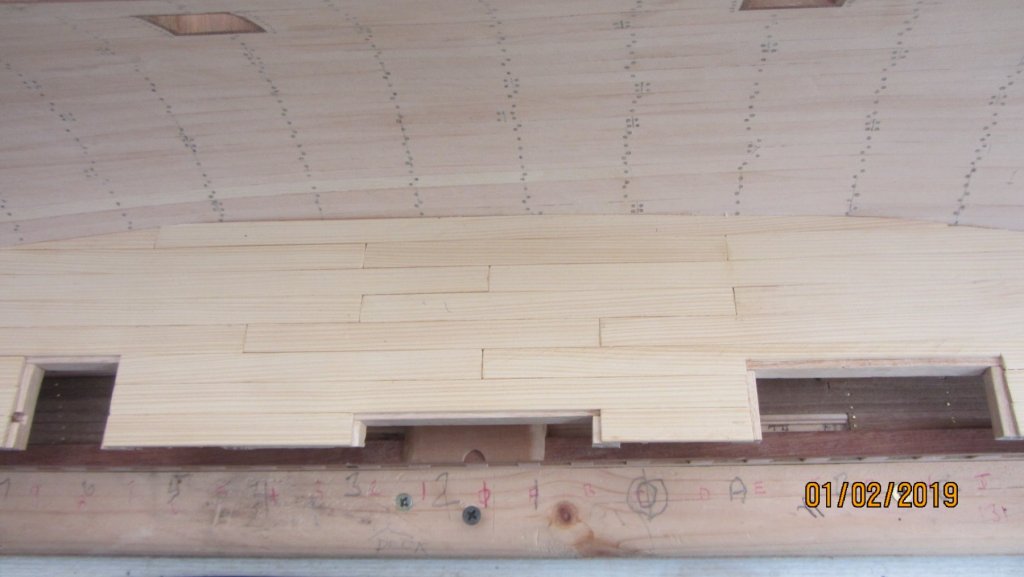
I like this shot...
A bit of tidying up and I will be happy.
Will start treenailing tomorrow and post a update more often.
Regards Antony.


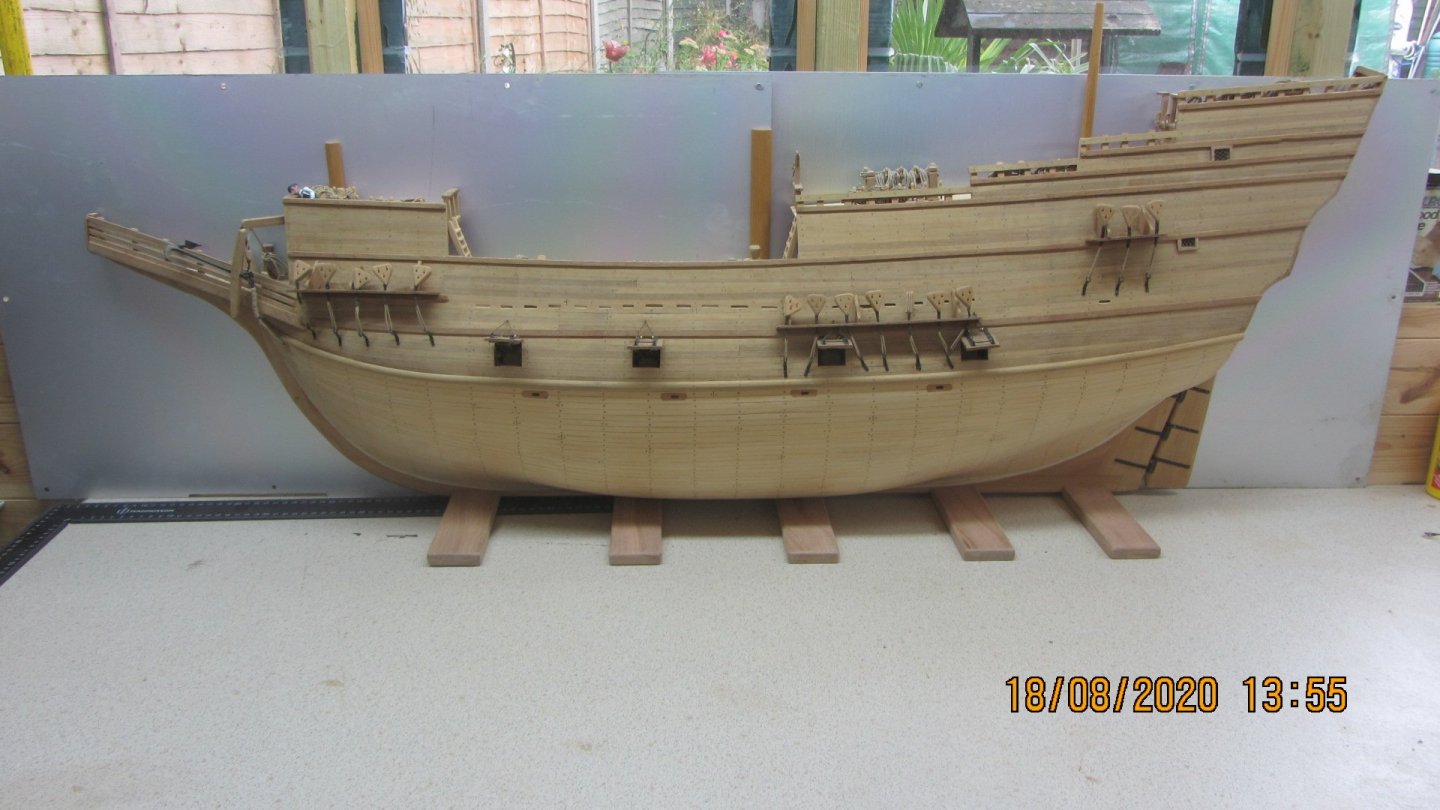
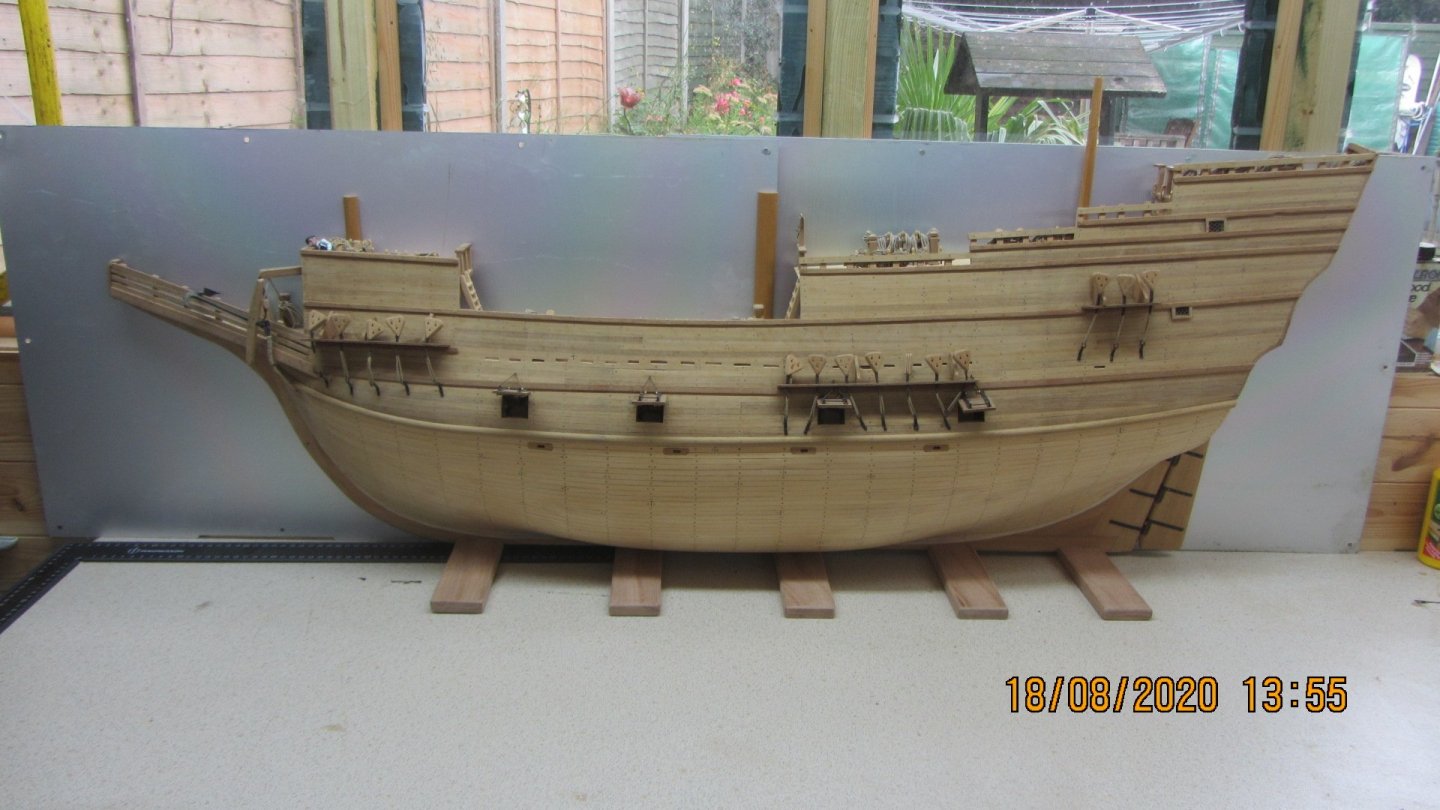
Mayflower by AntonyUK - FINISHED - half-hull - as first built c.1600 in Harwich UK - all guess work
in - Build logs for subjects built 1501 - 1750
Posted
Hi.
Well its a nice conclusion to the build.
Today the Model has been collected after waiting some 18 months for the Covid to calm down.
The nice thing is my work area is free again and its time to start researching something else to build.
A BIG thanks to all for your support and Comments.
Regards Antony.