HOLIDAY DONATION DRIVE - SUPPORT MSW - DO YOUR PART TO KEEP THIS GREAT FORUM GOING! (Only 13 donations so far - C'mon guys!)
×

bruce d
-
Posts
3,043 -
Joined
-
Last visited
Content Type
Profiles
Forums
Gallery
Events
Everything posted by bruce d
-
... and don't ask me why I believe you. Thanks!
-
Mine arrived today. I am totally satisfied with the solid construction and the range of the movement. I probably won't use it for blacksmith-style jobs but it really does look a lot tougher than I expected. Glad I got it.
-
Welcome to MSW
-

Hello from the little town of Woodland Washington
bruce d replied to Roberts Orca's topic in New member Introductions
Welcome to MSw Roberts. I agree, that is a fine looking kayak . -
Hello Michael, welcome to MSW
-
Hello Stuart, welcome to MSW. You will find plenty of people here will empathise with your fondness for memorabilia. Some even share tales of hiding recent finds from the admiral (forum speak for significant other 😉). Glad to have you aboard.
-
My thanks to @Thunder for pointing out this range recently: http://www.rodlangton.com/index-2.html
-
Welcome to MSW, glad to have you aboard. The work on the Constitution log is looking good.
-
Sutcliffe 1/72 vac form Coronado
bruce d replied to Lucius Molchany's topic in Non-ship/categorised builds
Glad to see Gordon's work is still getting attention. 😊 He had to make a couple of guesses on this one and they turned out to be absolutely correct! -
Copied and pasted exactly as I found it: I of course have no first hand experience in these matters. Spruce Beer Vice Admiral Samuel Graves to Philip Stephens "Sir … Being on the Subject of provisions it is indispensably become my Duty to represent to their Lordships that the custom of supplying New England Rum to his Majesty's Ships is in my humble opinion highly prejudicial to the State. The use of it destroys the Health and Faculties of the People and debilitates them surprizinzly [sic]. The Seamen always continue healthy and active when drinking spruce Beer; but in a few days after New England Rum is served, altough mixed with four or five Waters, the Hospital is crouded with sick, and those on board are pallid, weak, and incapable of doing half their Duty. I appeal to the Captains of the Squadron that this is always the Consequence of their Crews having New England Rum." Since 'spruce beer' is basically boiled and fermented wood, we can only imagine what qualities the New England Rum must have had to prompt this plea. Ho-Ho-Ho, Bruce Graves's Conduct, Vol. I, pp 130-132 [BM]. Transcribed by Lars Bruzelius
-
HMS Terror by Broden - OcCre - 1:75
bruce d replied to broden's topic in - Kit build logs for subjects built from 1801 - 1850
It is looking good. The 'EDIT' facility is in a dropdown menu in the top right corner: HTH Bruce
-
Mark, I have gone back through this build to catch up. I think this will be a magnificent ship, I had no idea the Ancre plans were for a POB build. I will pull up a chair if you have room for one more?
-
That is what blue paint is for ...
-
Thanks, I have ordered one and wonder how I survived so long without this tool.
-
Ben, welcome to MSW. Looking forward to seeing your Danmark.
-
You are off to good start, and it looks like choosing a kit from Chuck supplied by Model Expo was a good move. I always like the pinnace and considered it as a first kit, will be watching.
- 123 replies
-
- 1
-

-
- Model Shipways
- Pinnace
- (and 1 more)
-
Hello Pieter and welcome to MSW. It is a great place to learn and, don't forget, you may have something to 'teach' as well. Your solutions to your issues in your build may be exactly what another builder is looking for. Glad to have you on board.
-
Bob, while you chill out on the beach I think I will be reading this blog from post #1. That is a fine looking model. Bruce
- 421 replies
-
- 1
-
-
- caldercraft
- granado
- (and 1 more)
-
Hello Mike, and welcome to MSW. That looks like another interesting water-hot-rod project, why not start your own build log and post a quick 'hello' in new member introductions? I will be watching to see what you do with that iconic hydroplane. Regards, Bruce
- 51 replies
-
- 2
-
-
- miss unlimited
- dumas
- (and 1 more)
-
I am just catching up on this. That is a good looking boat, those colours really pop with the wood. Good job, looking forward to what happens next.
-
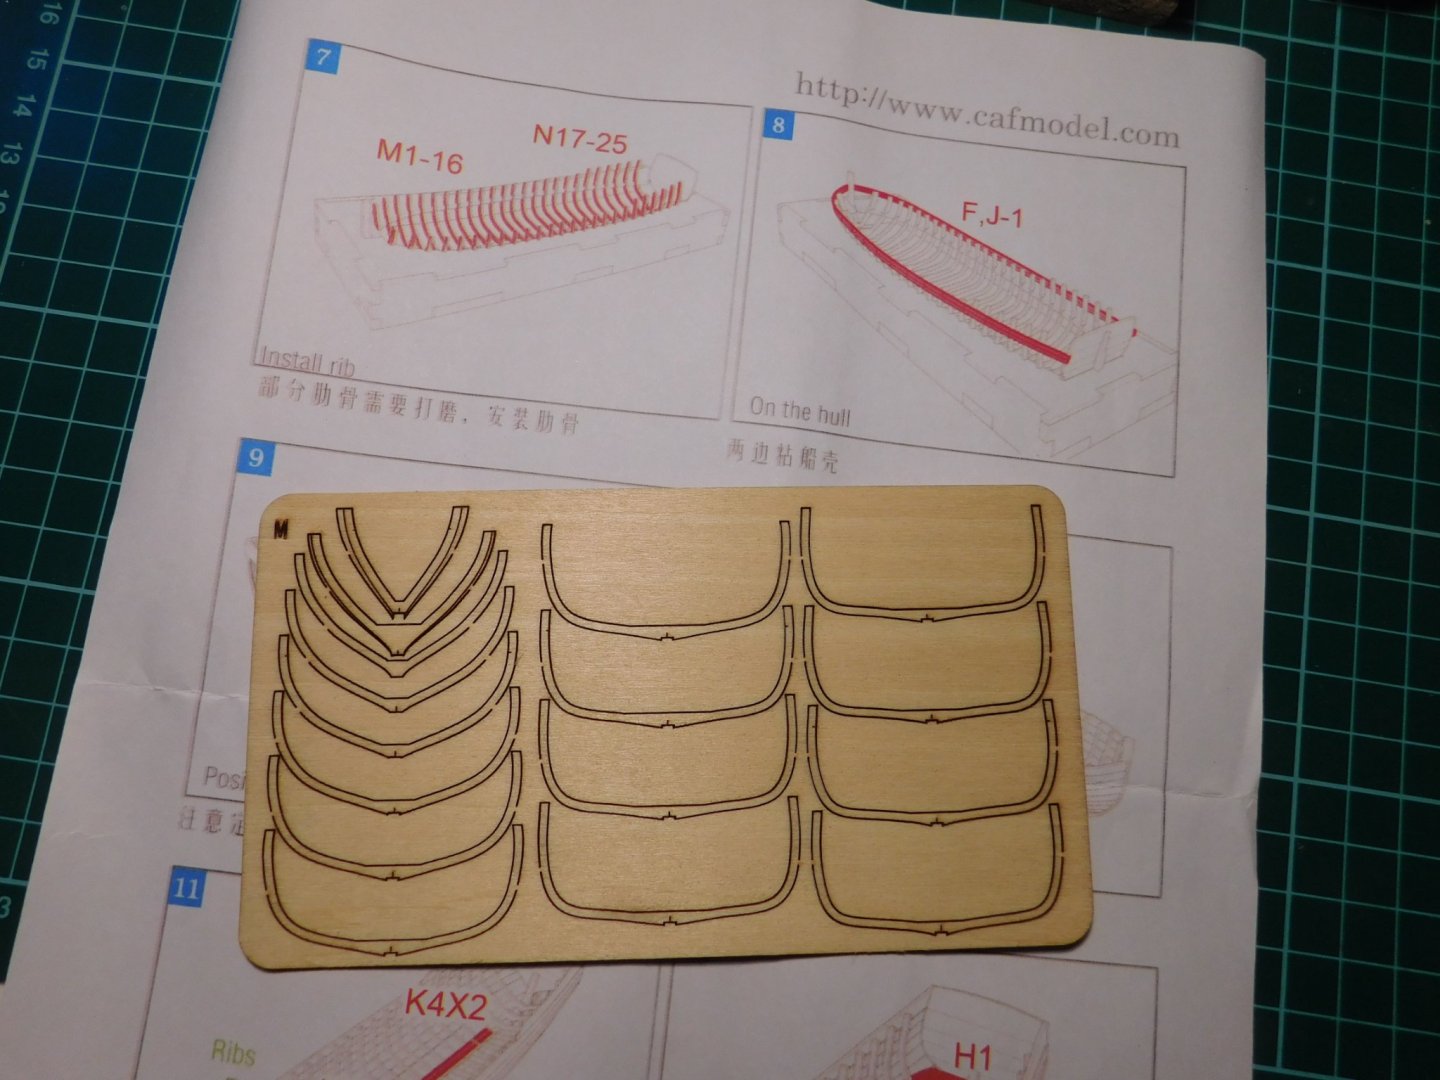
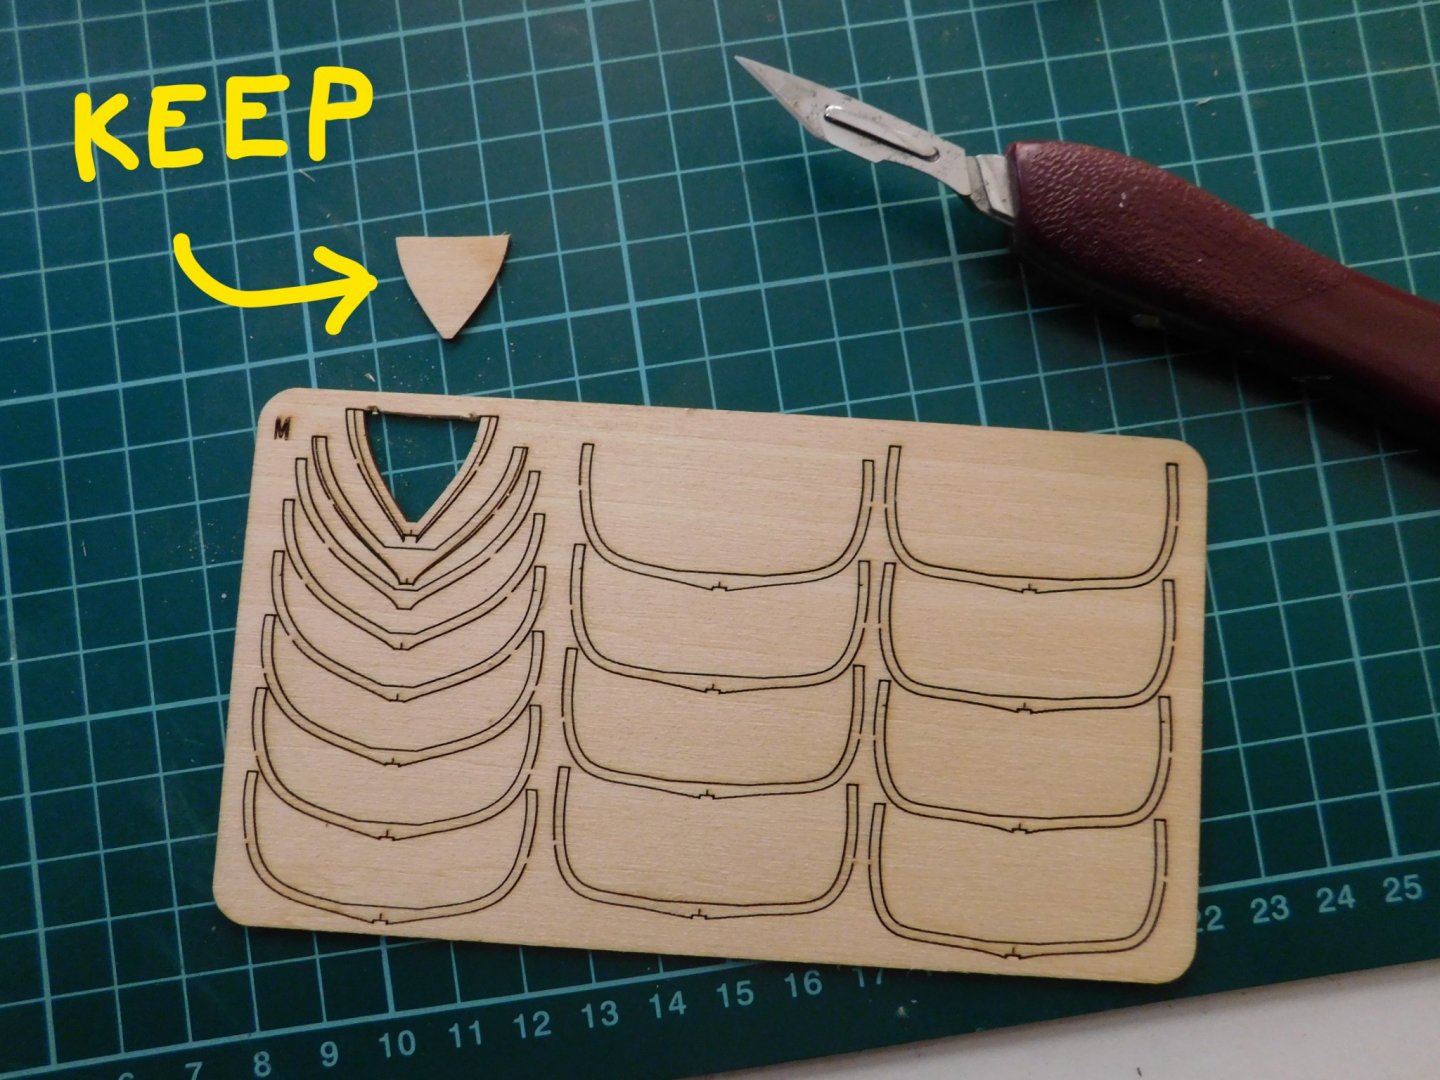
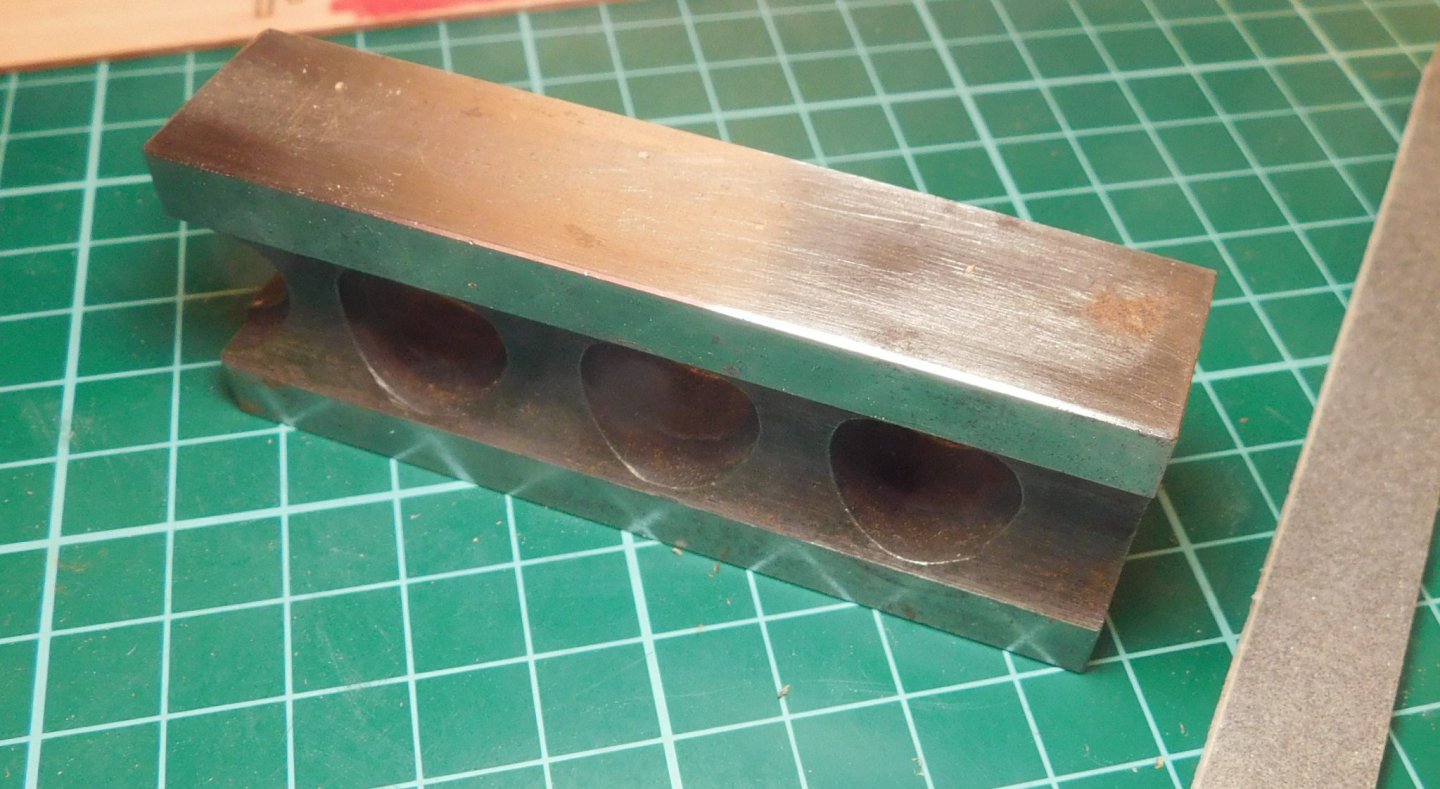
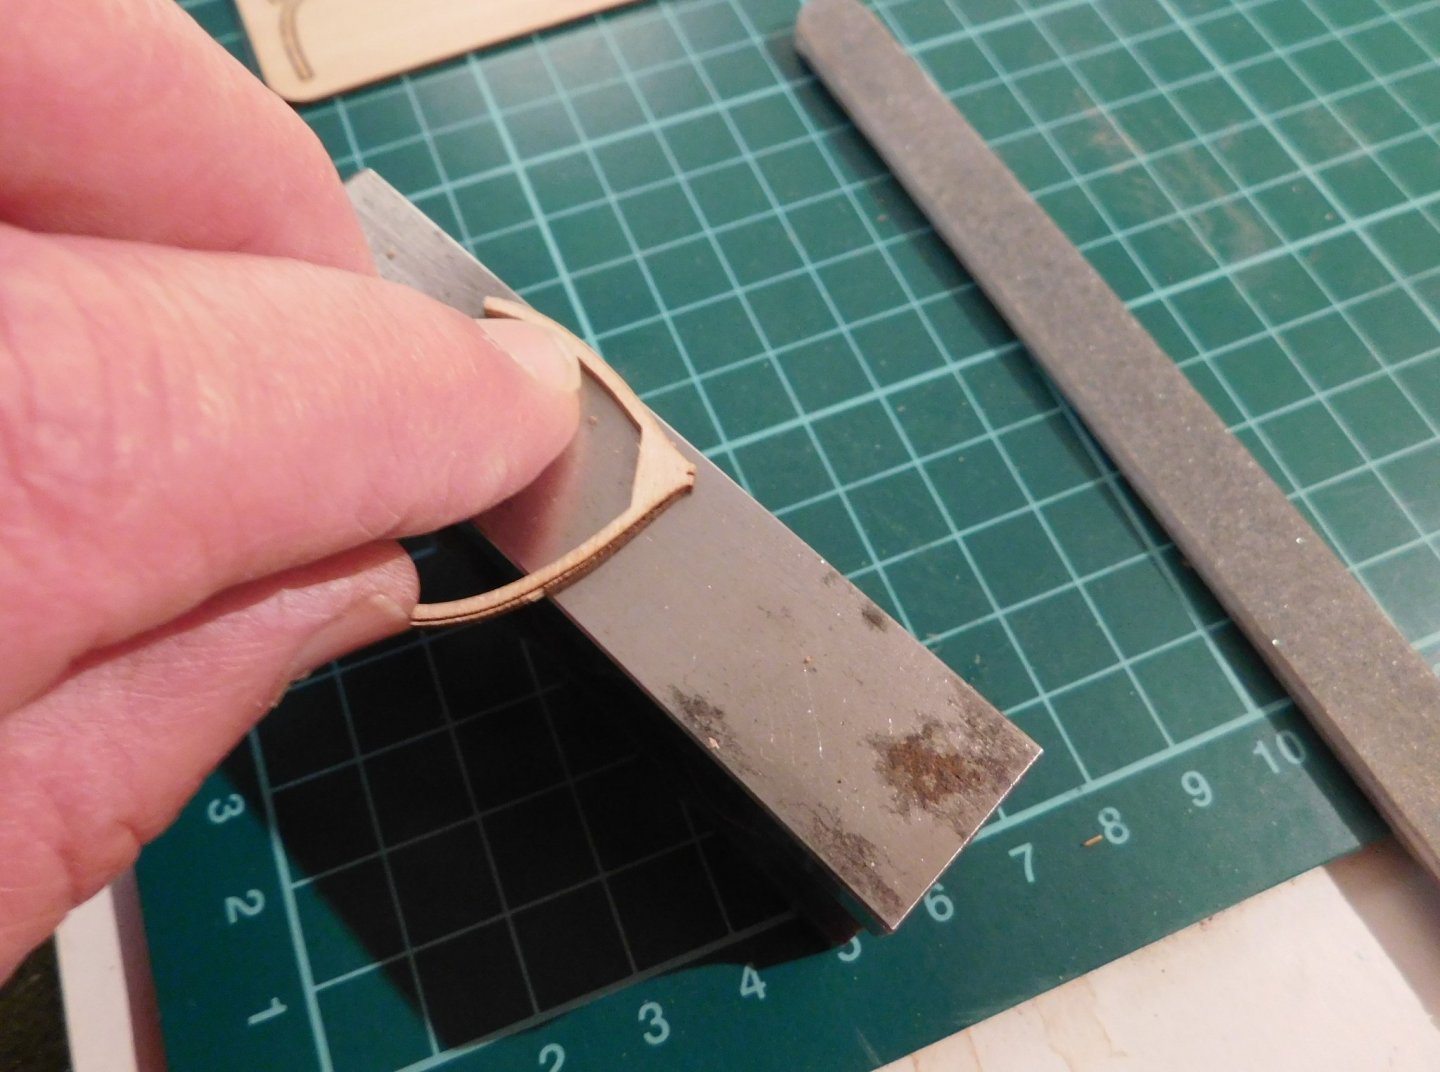
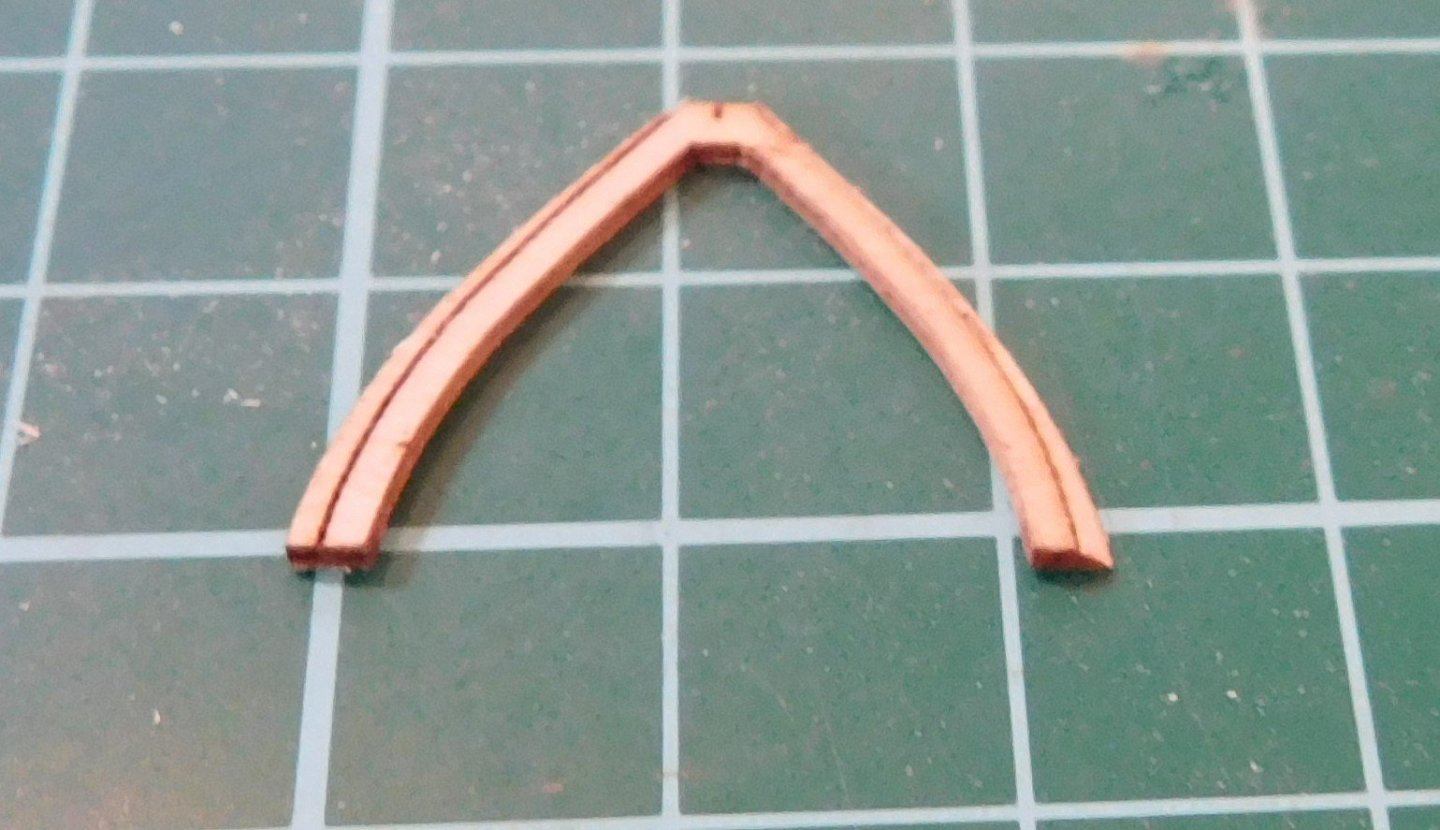
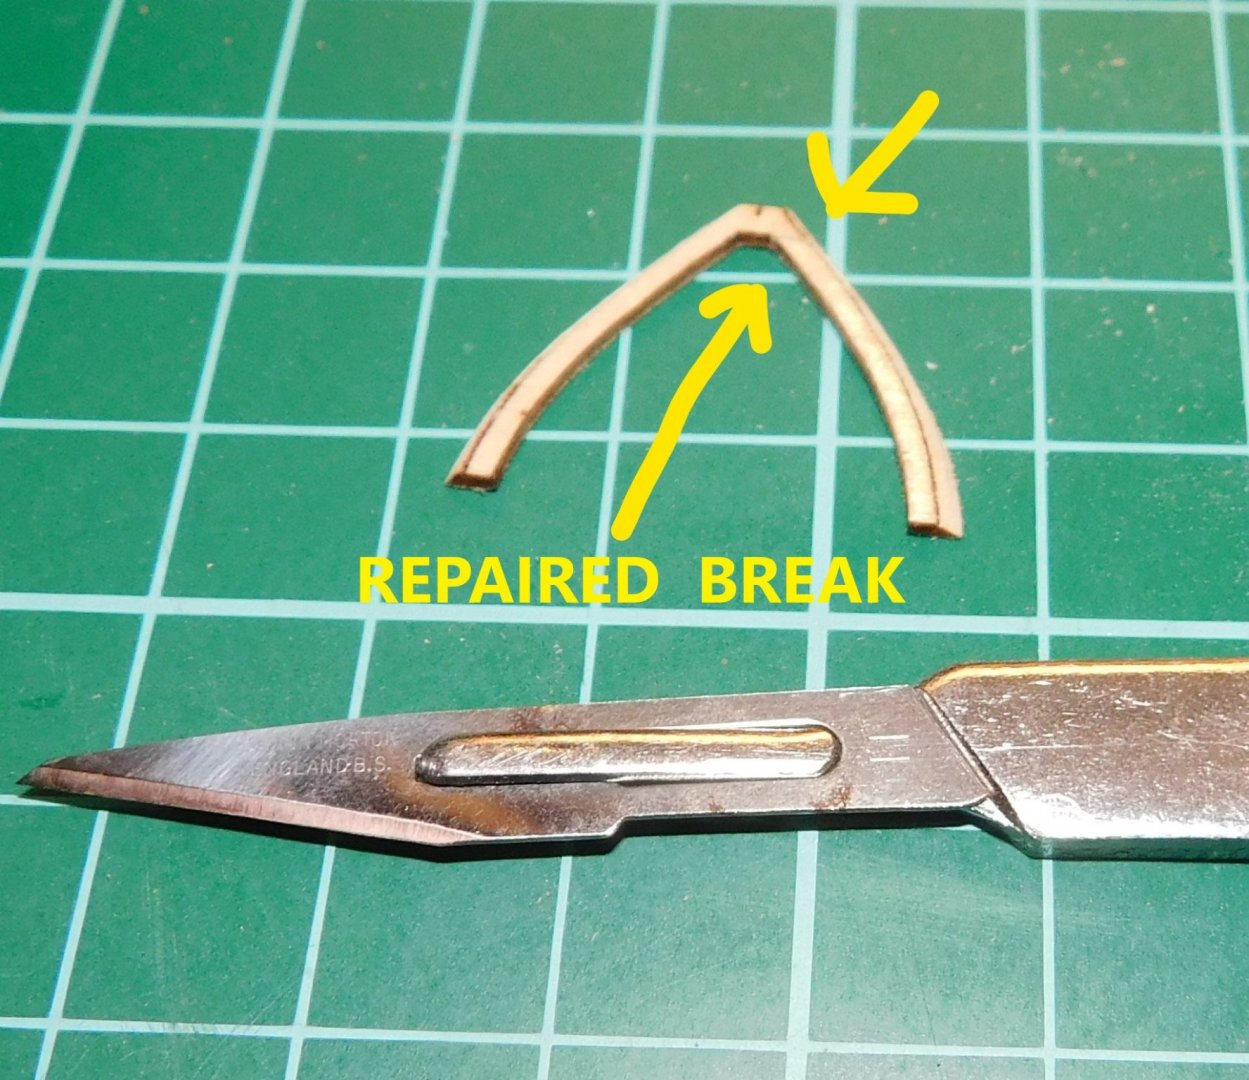
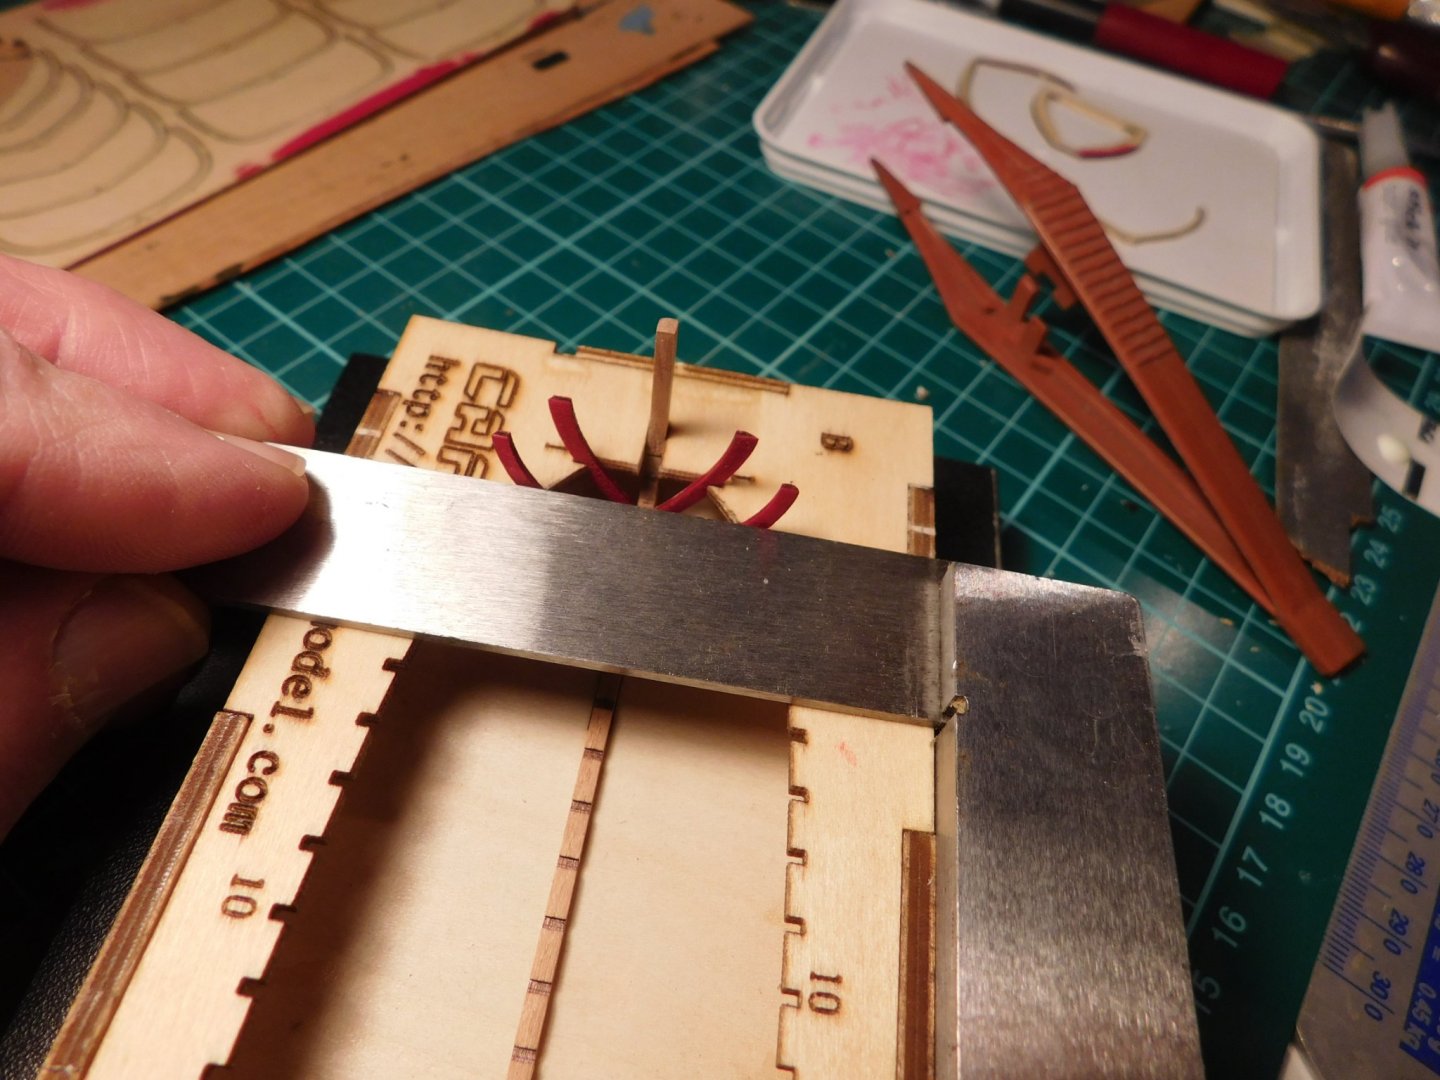
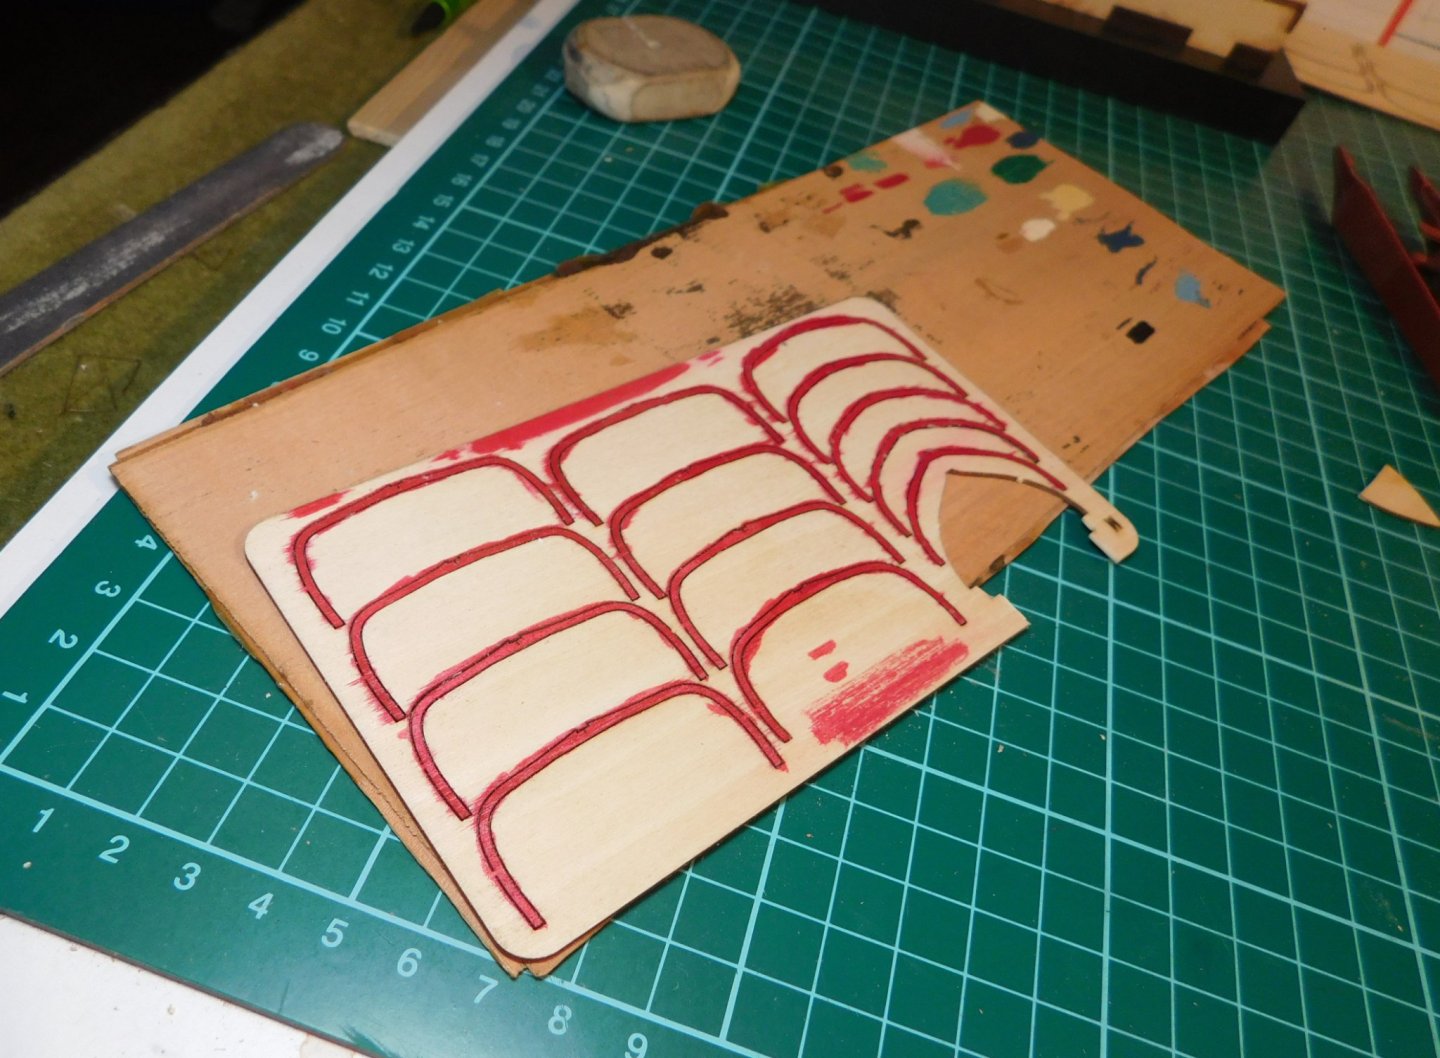
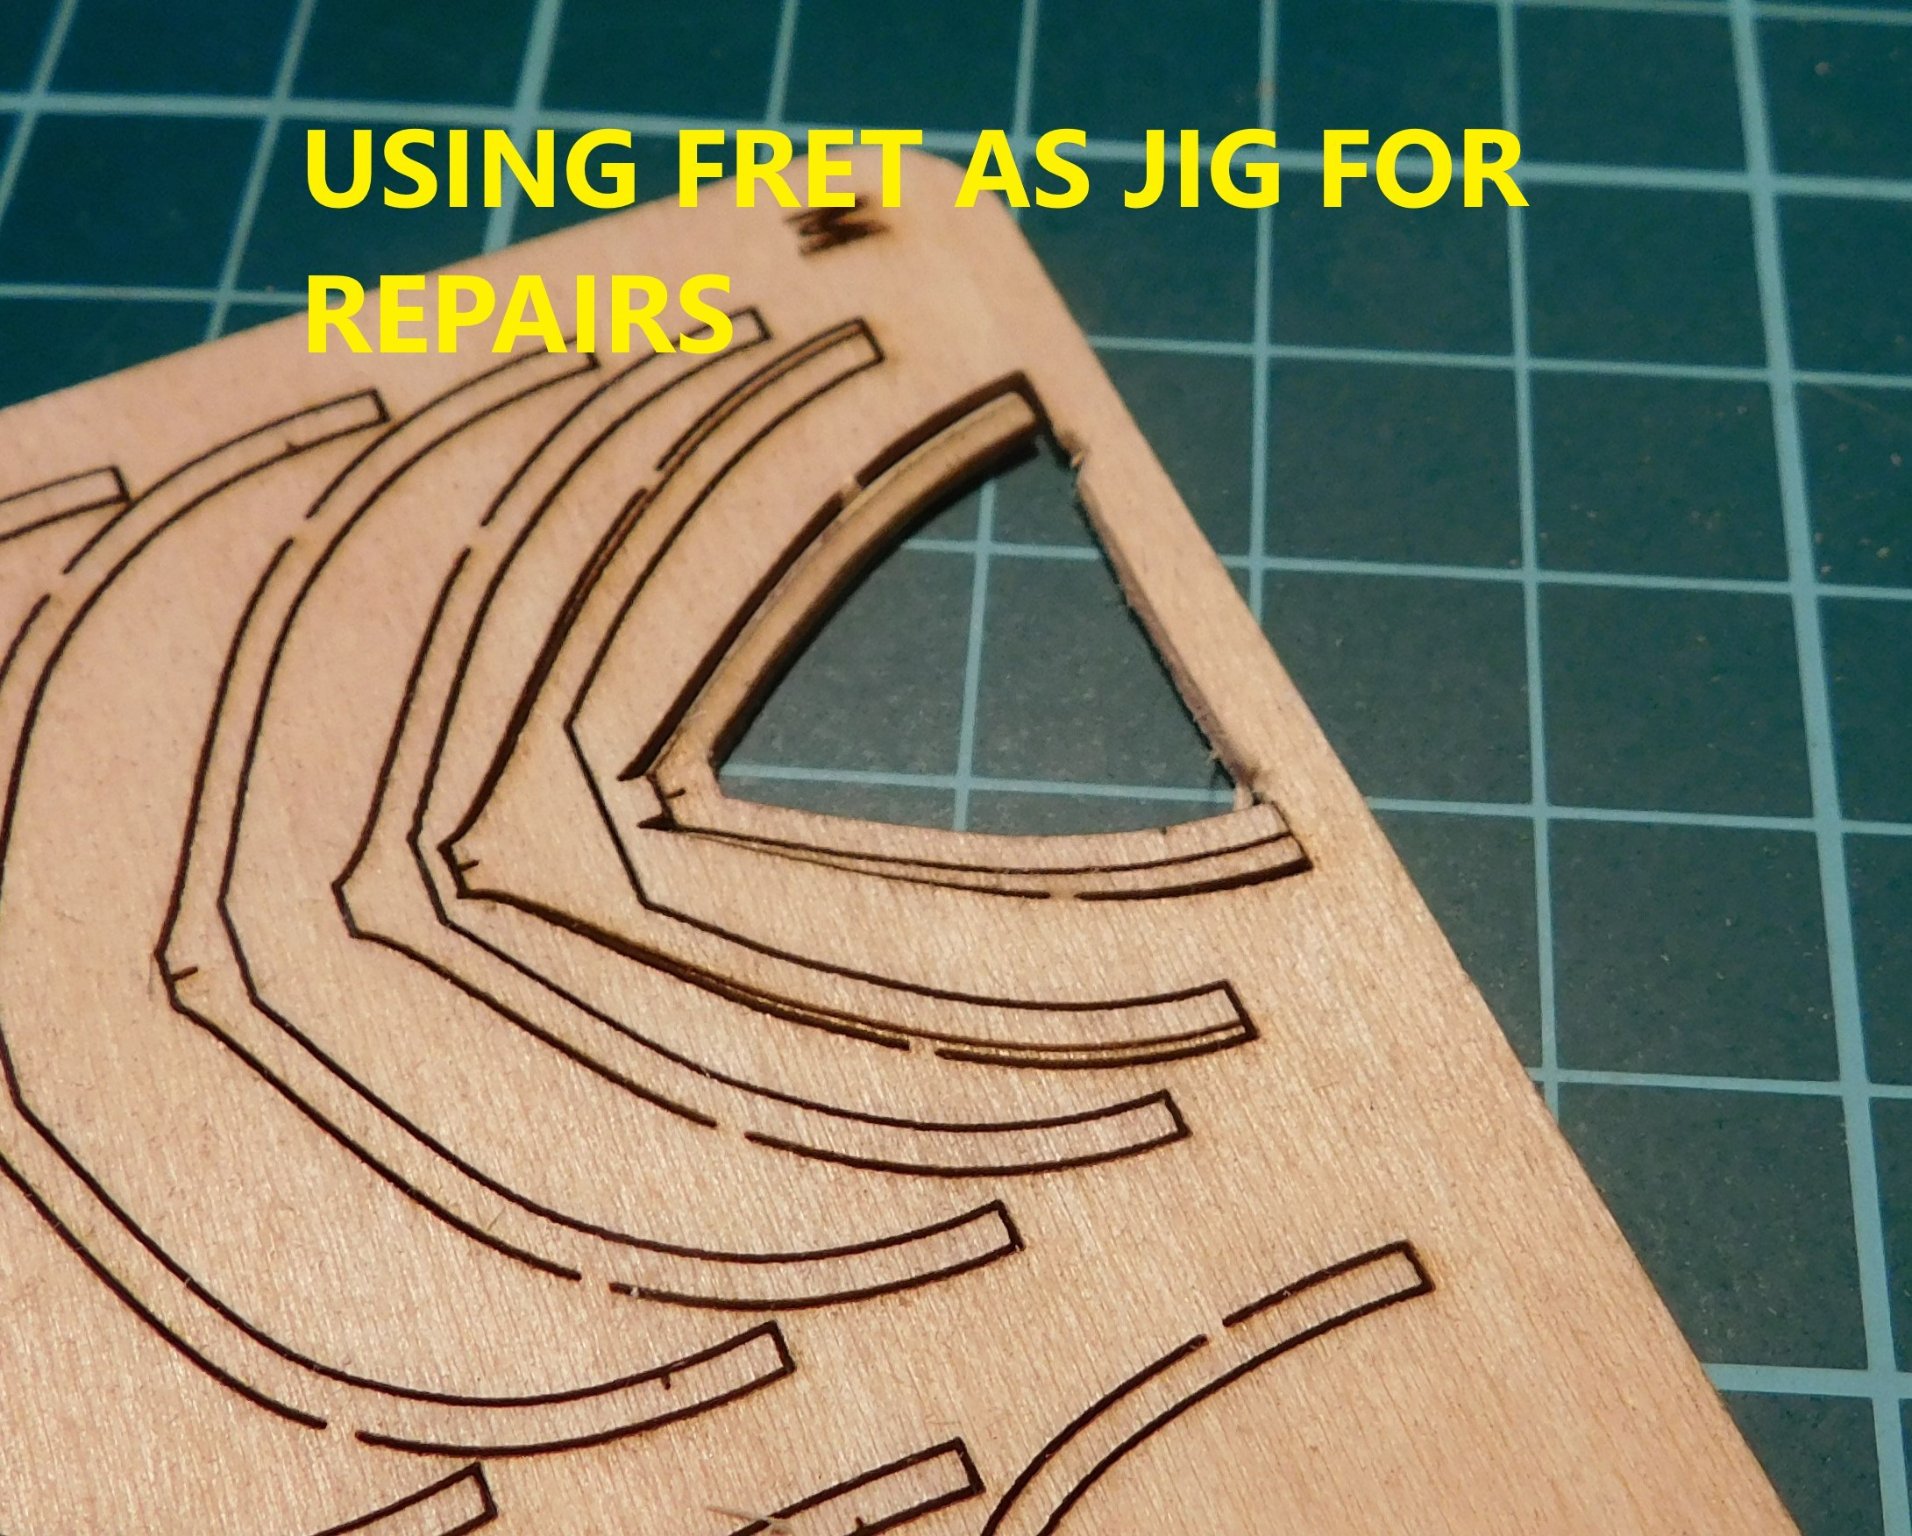
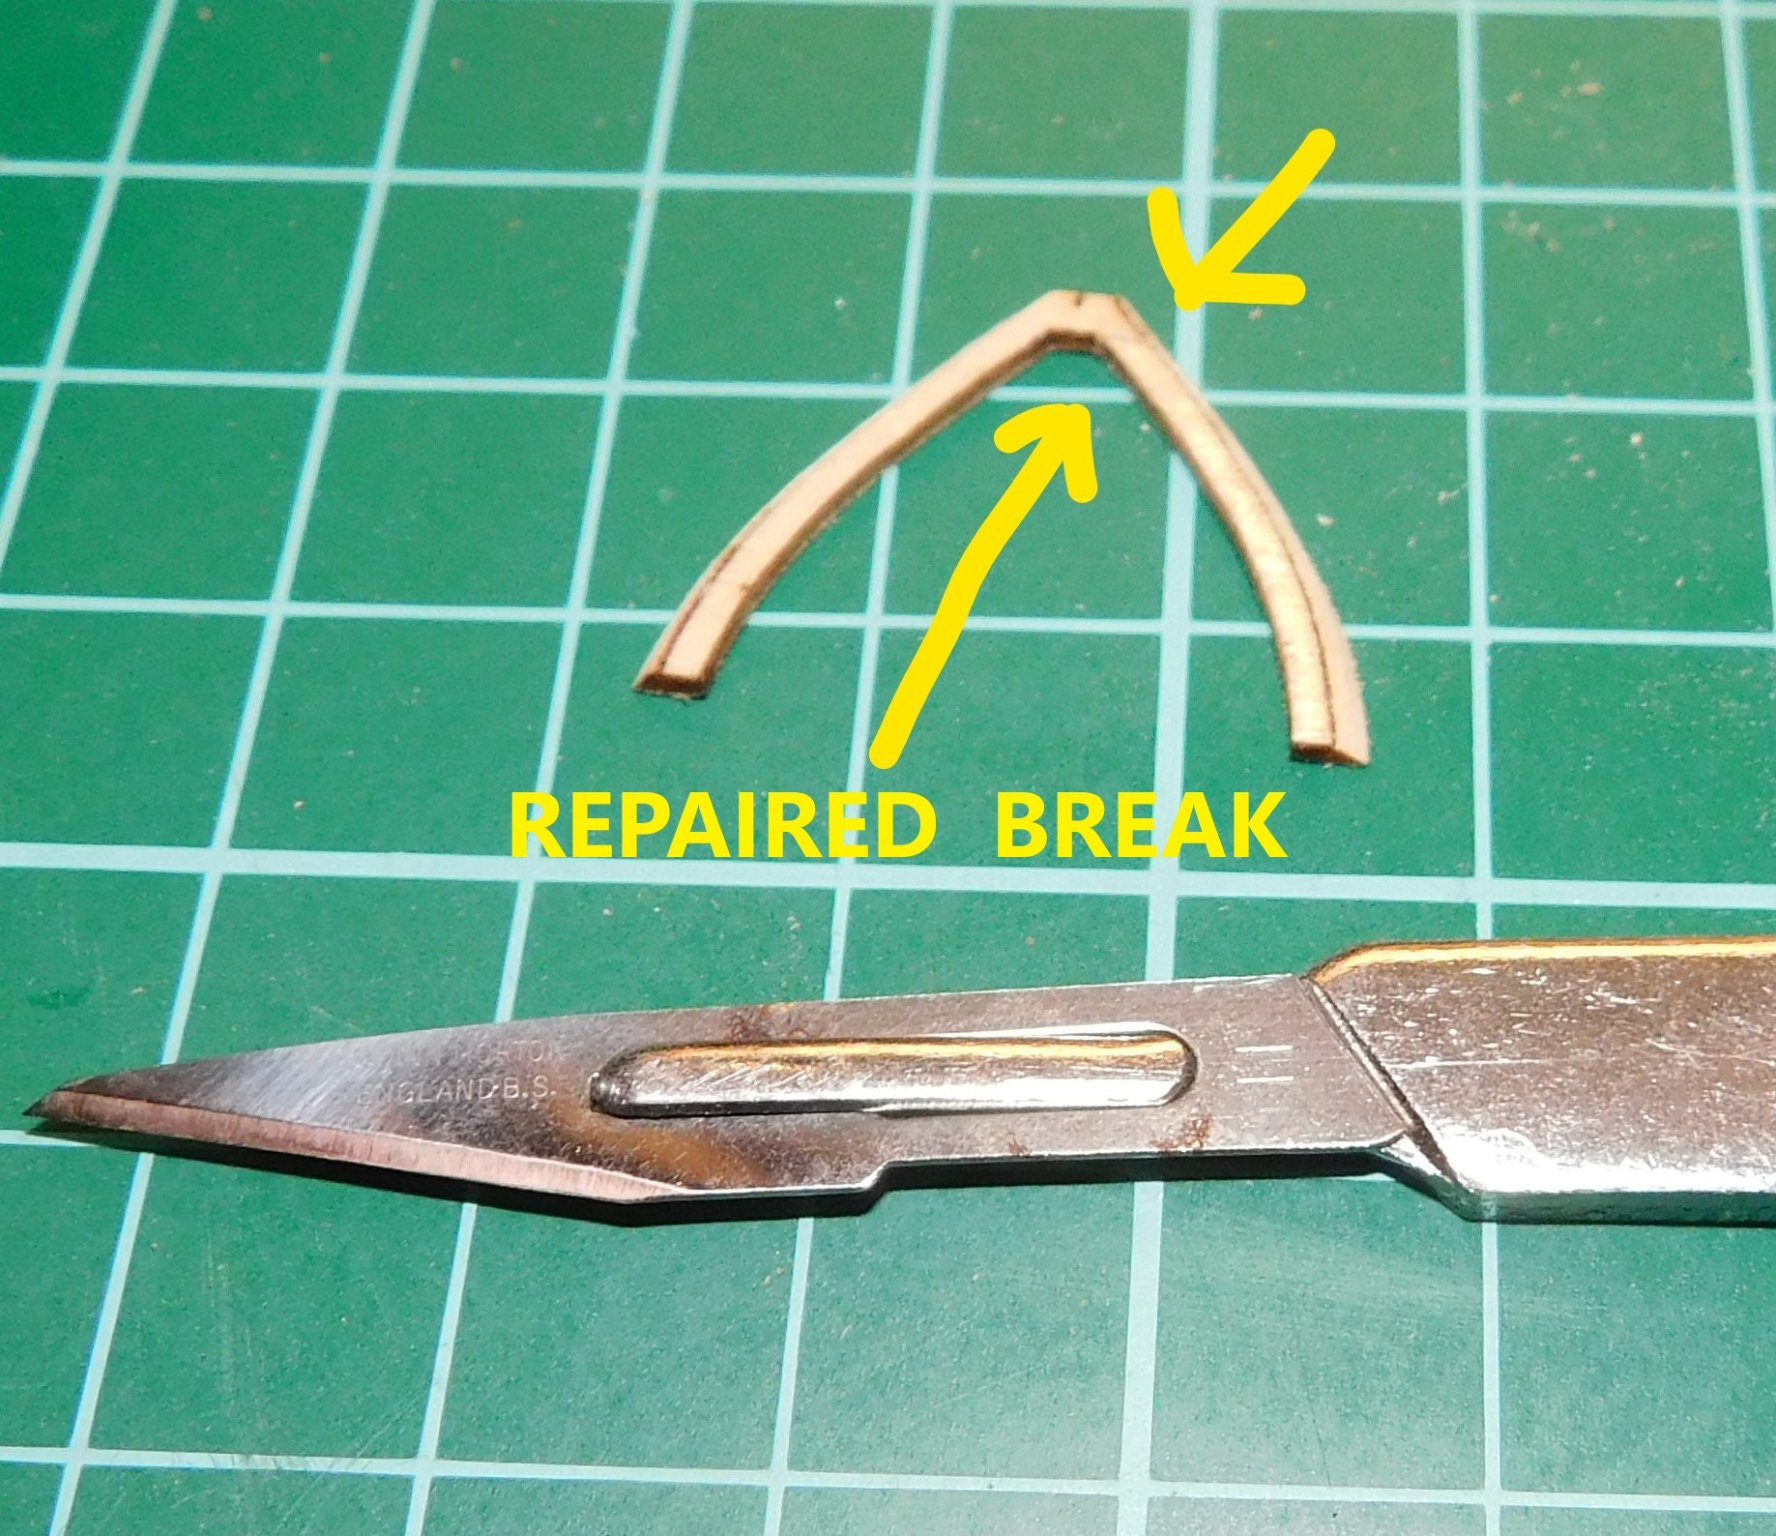
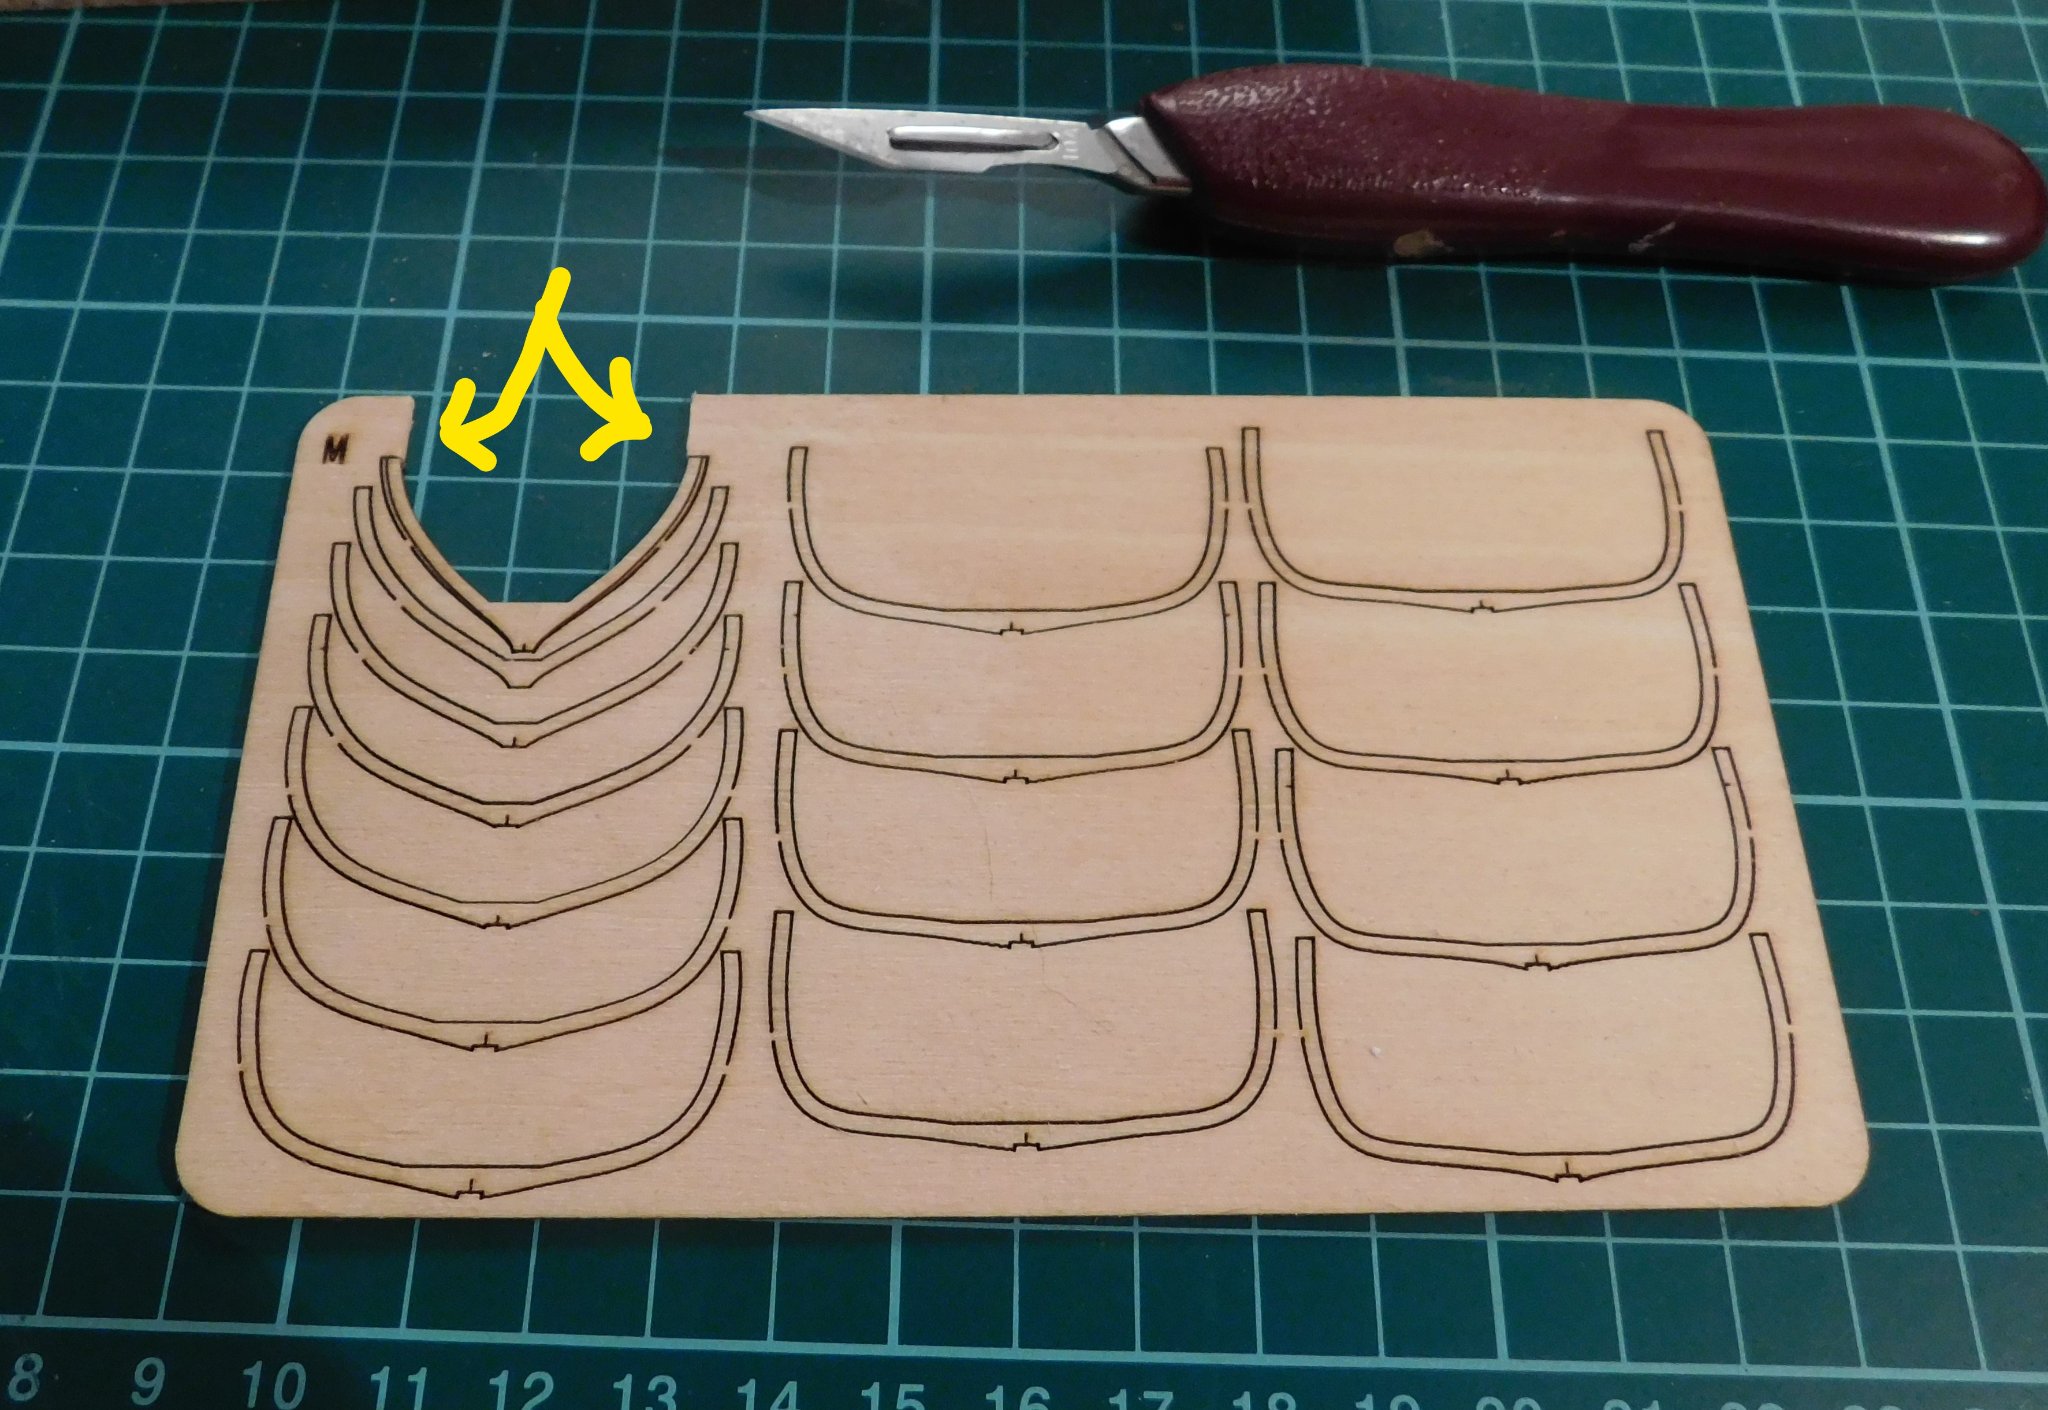
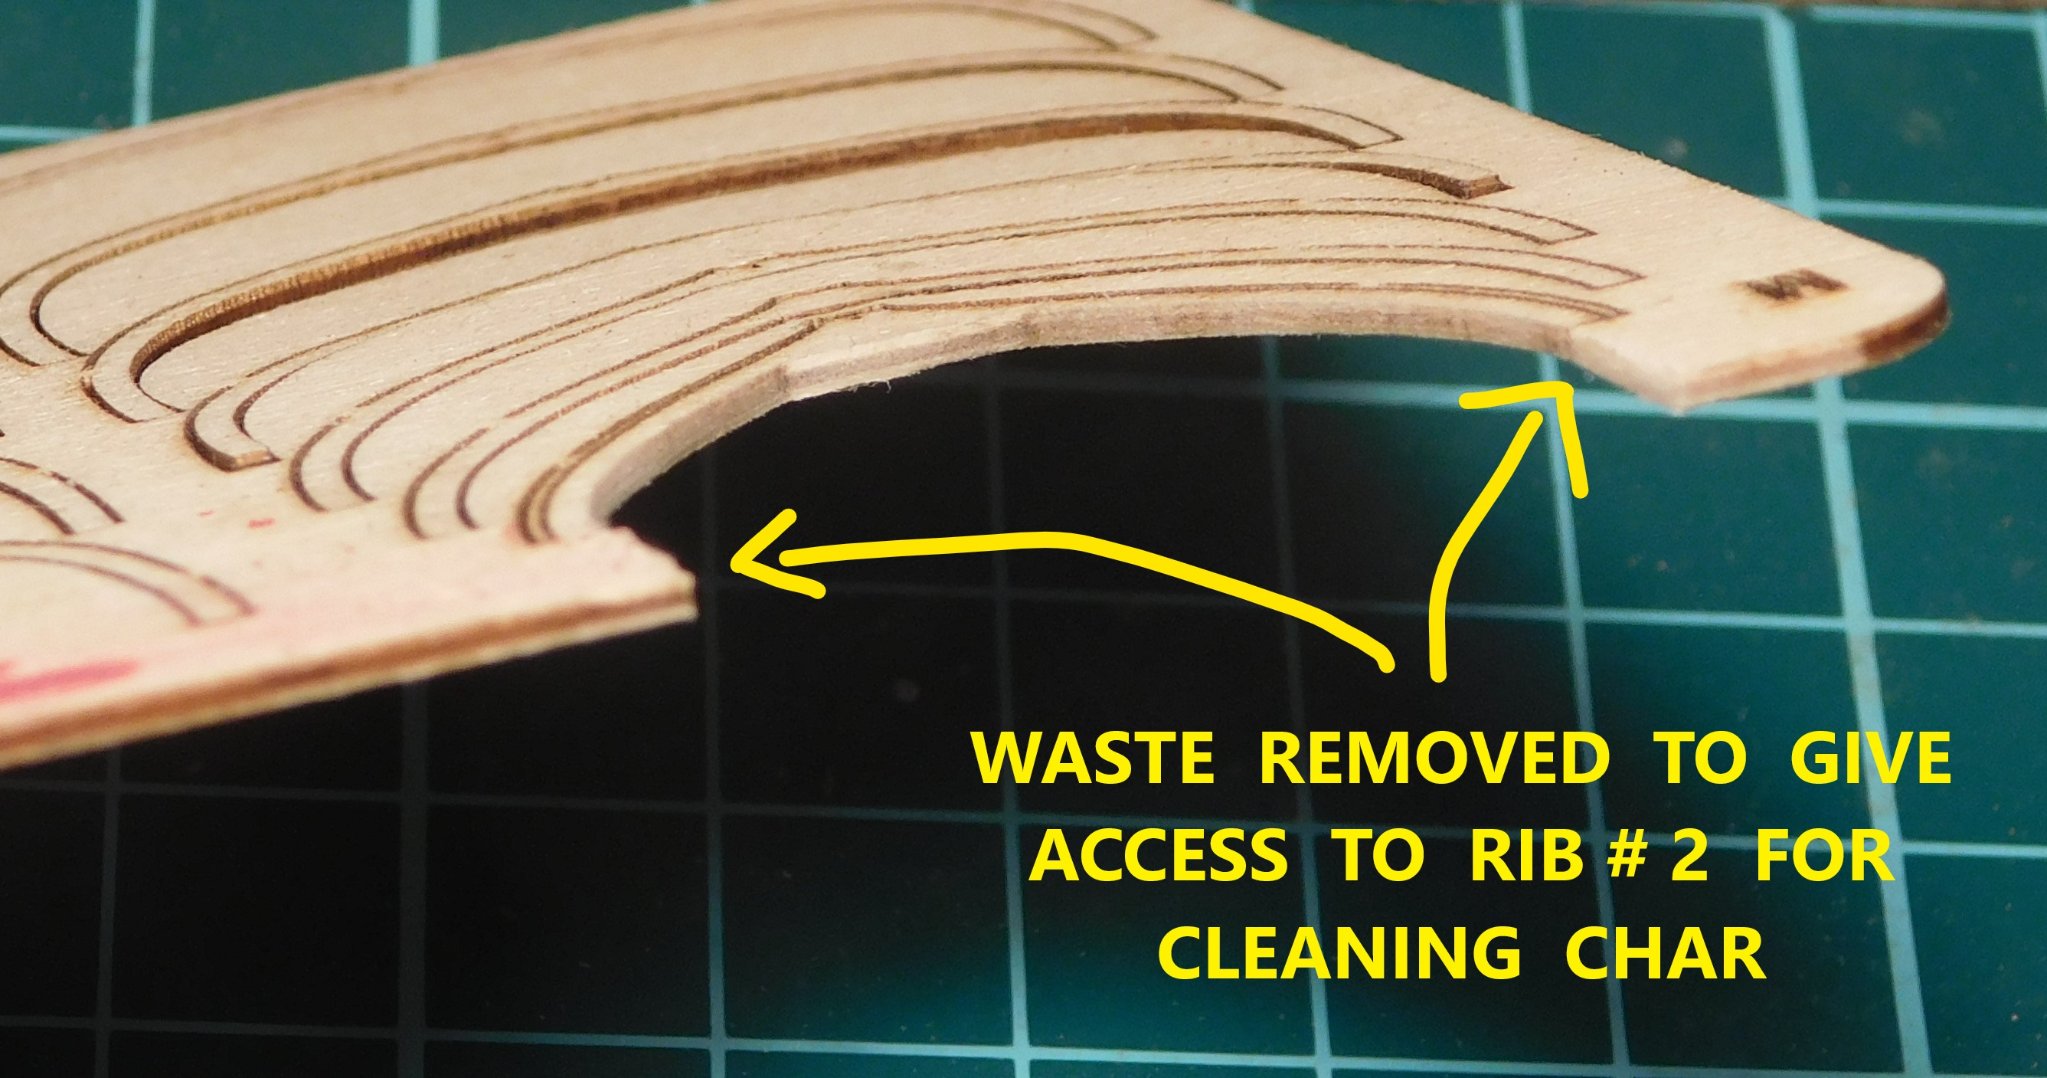
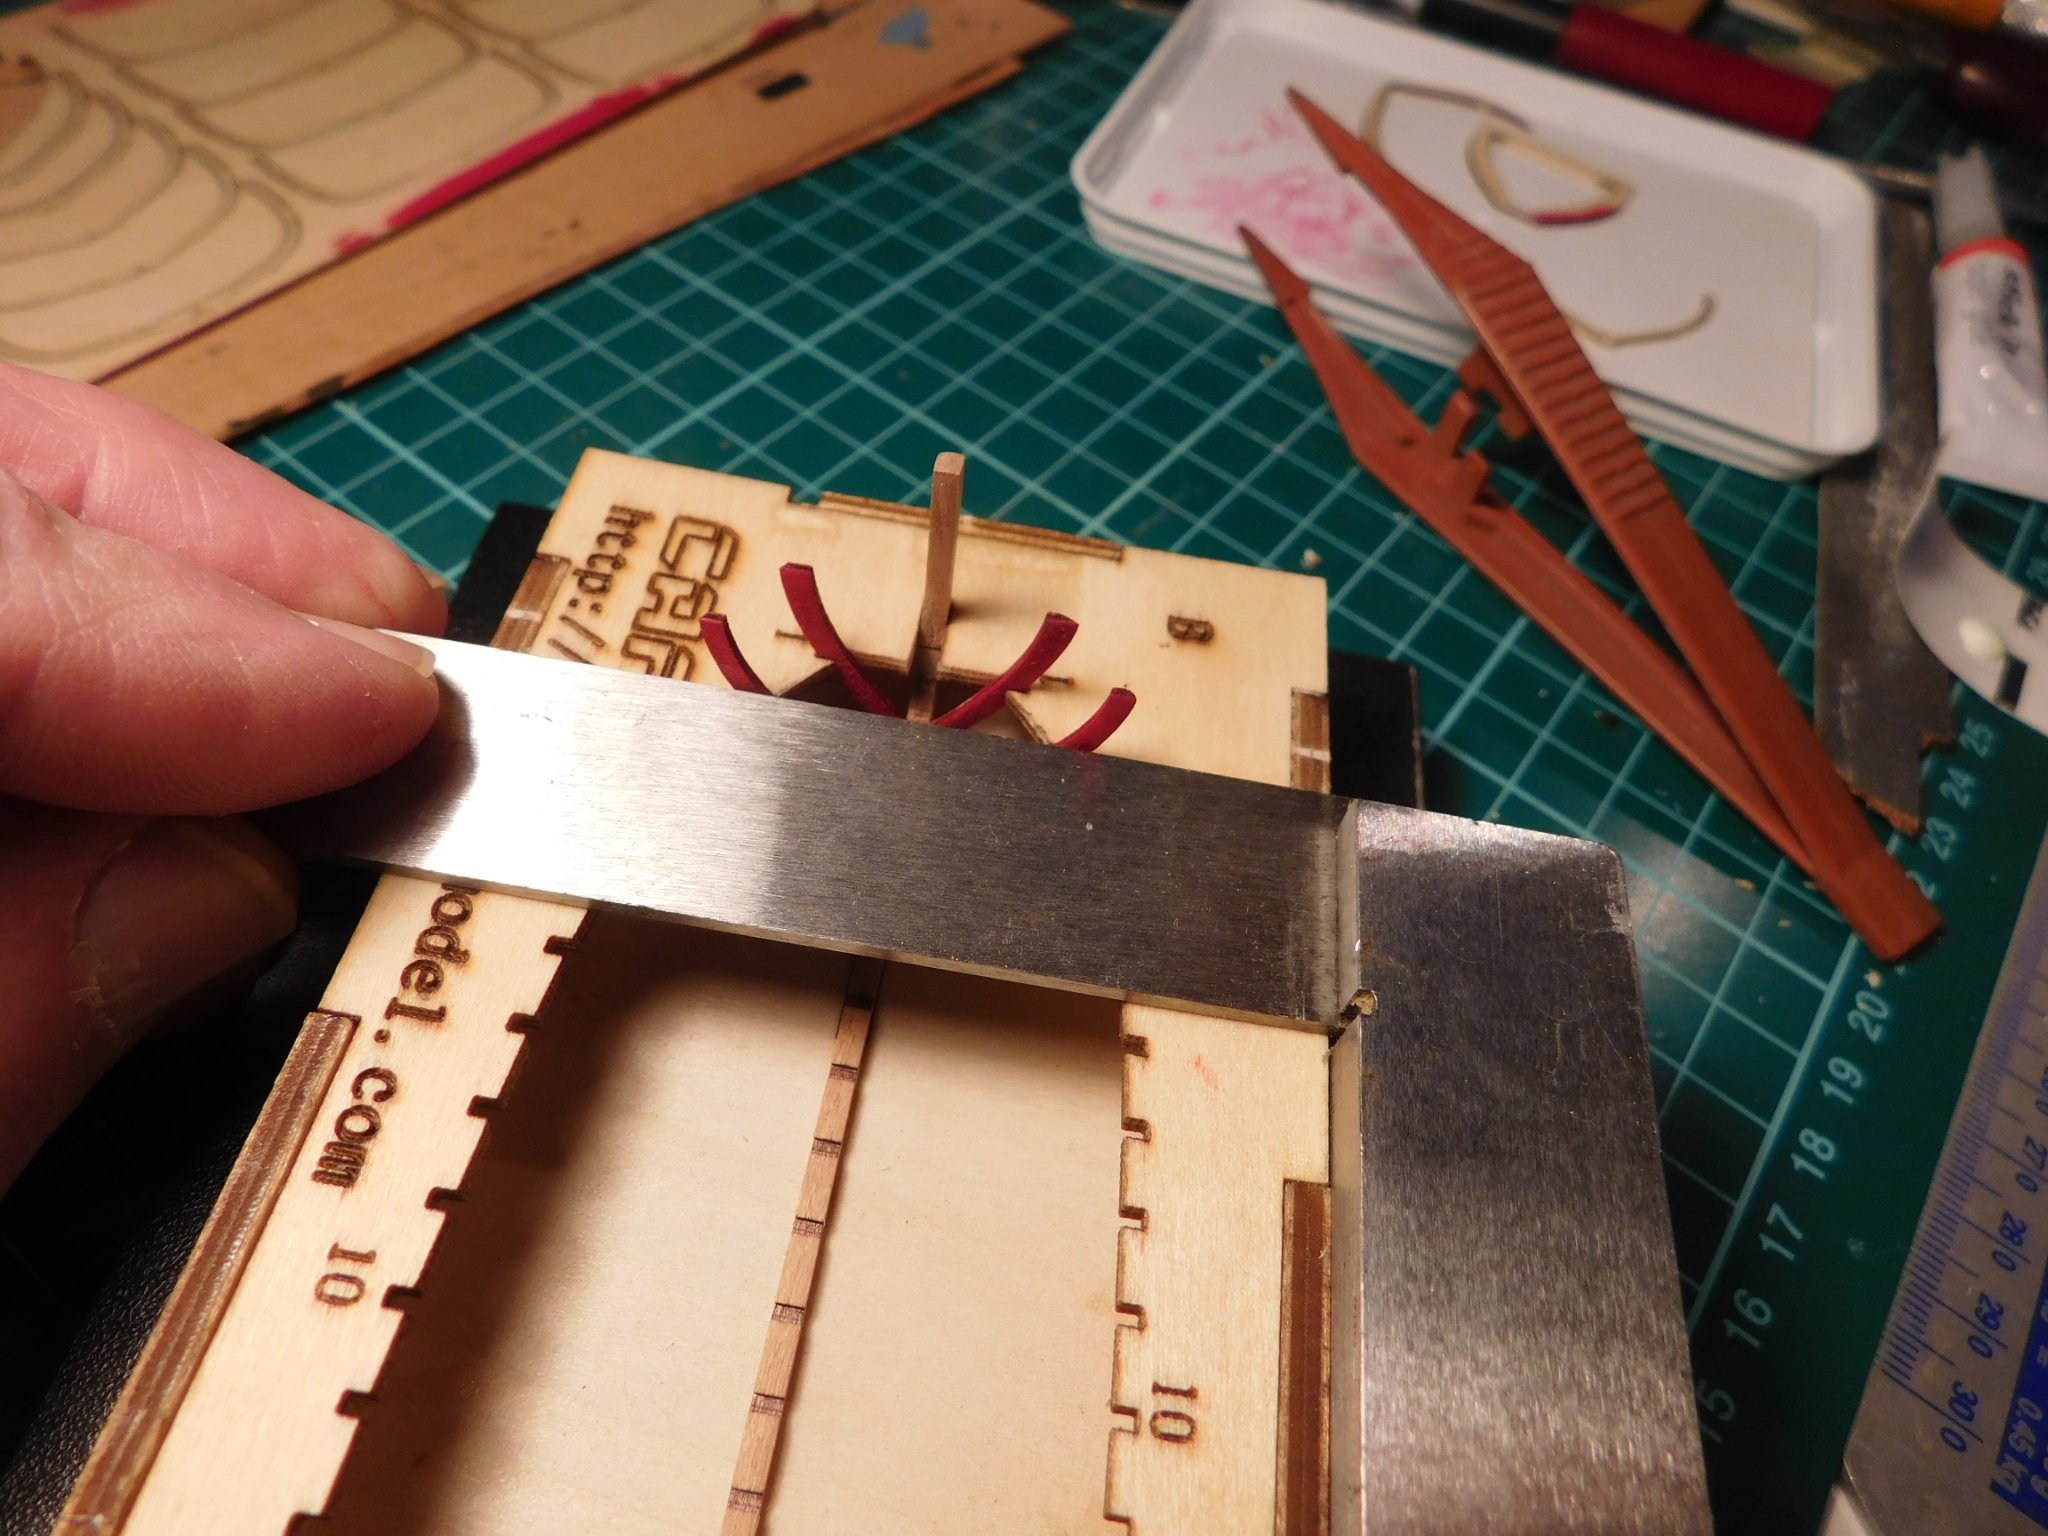
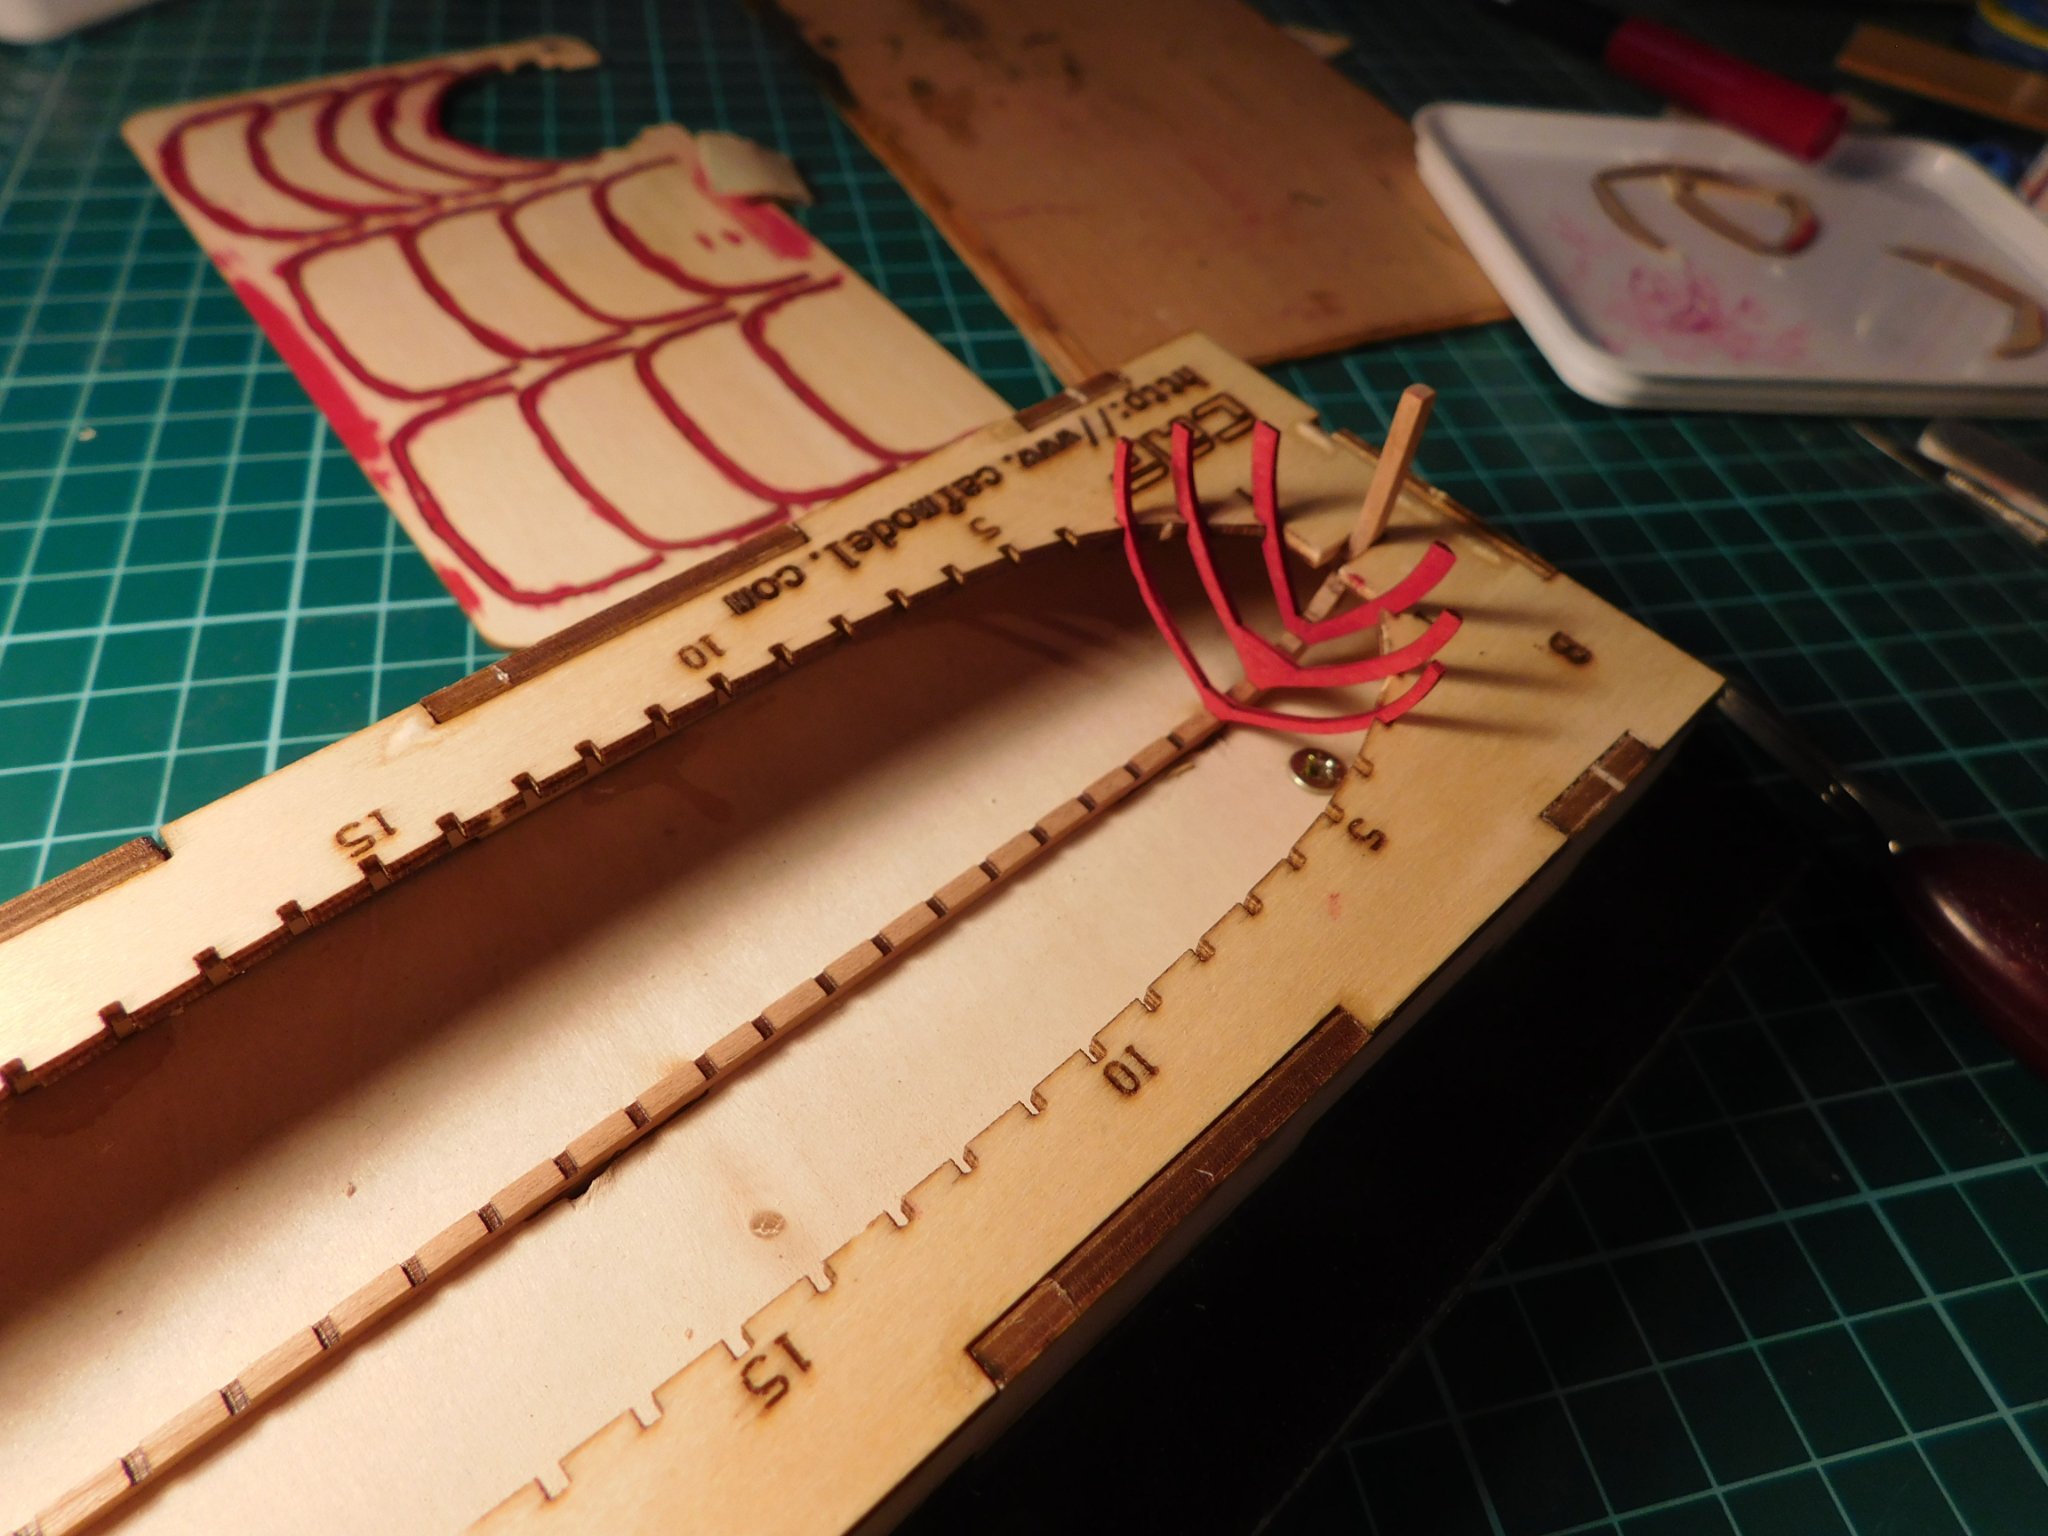
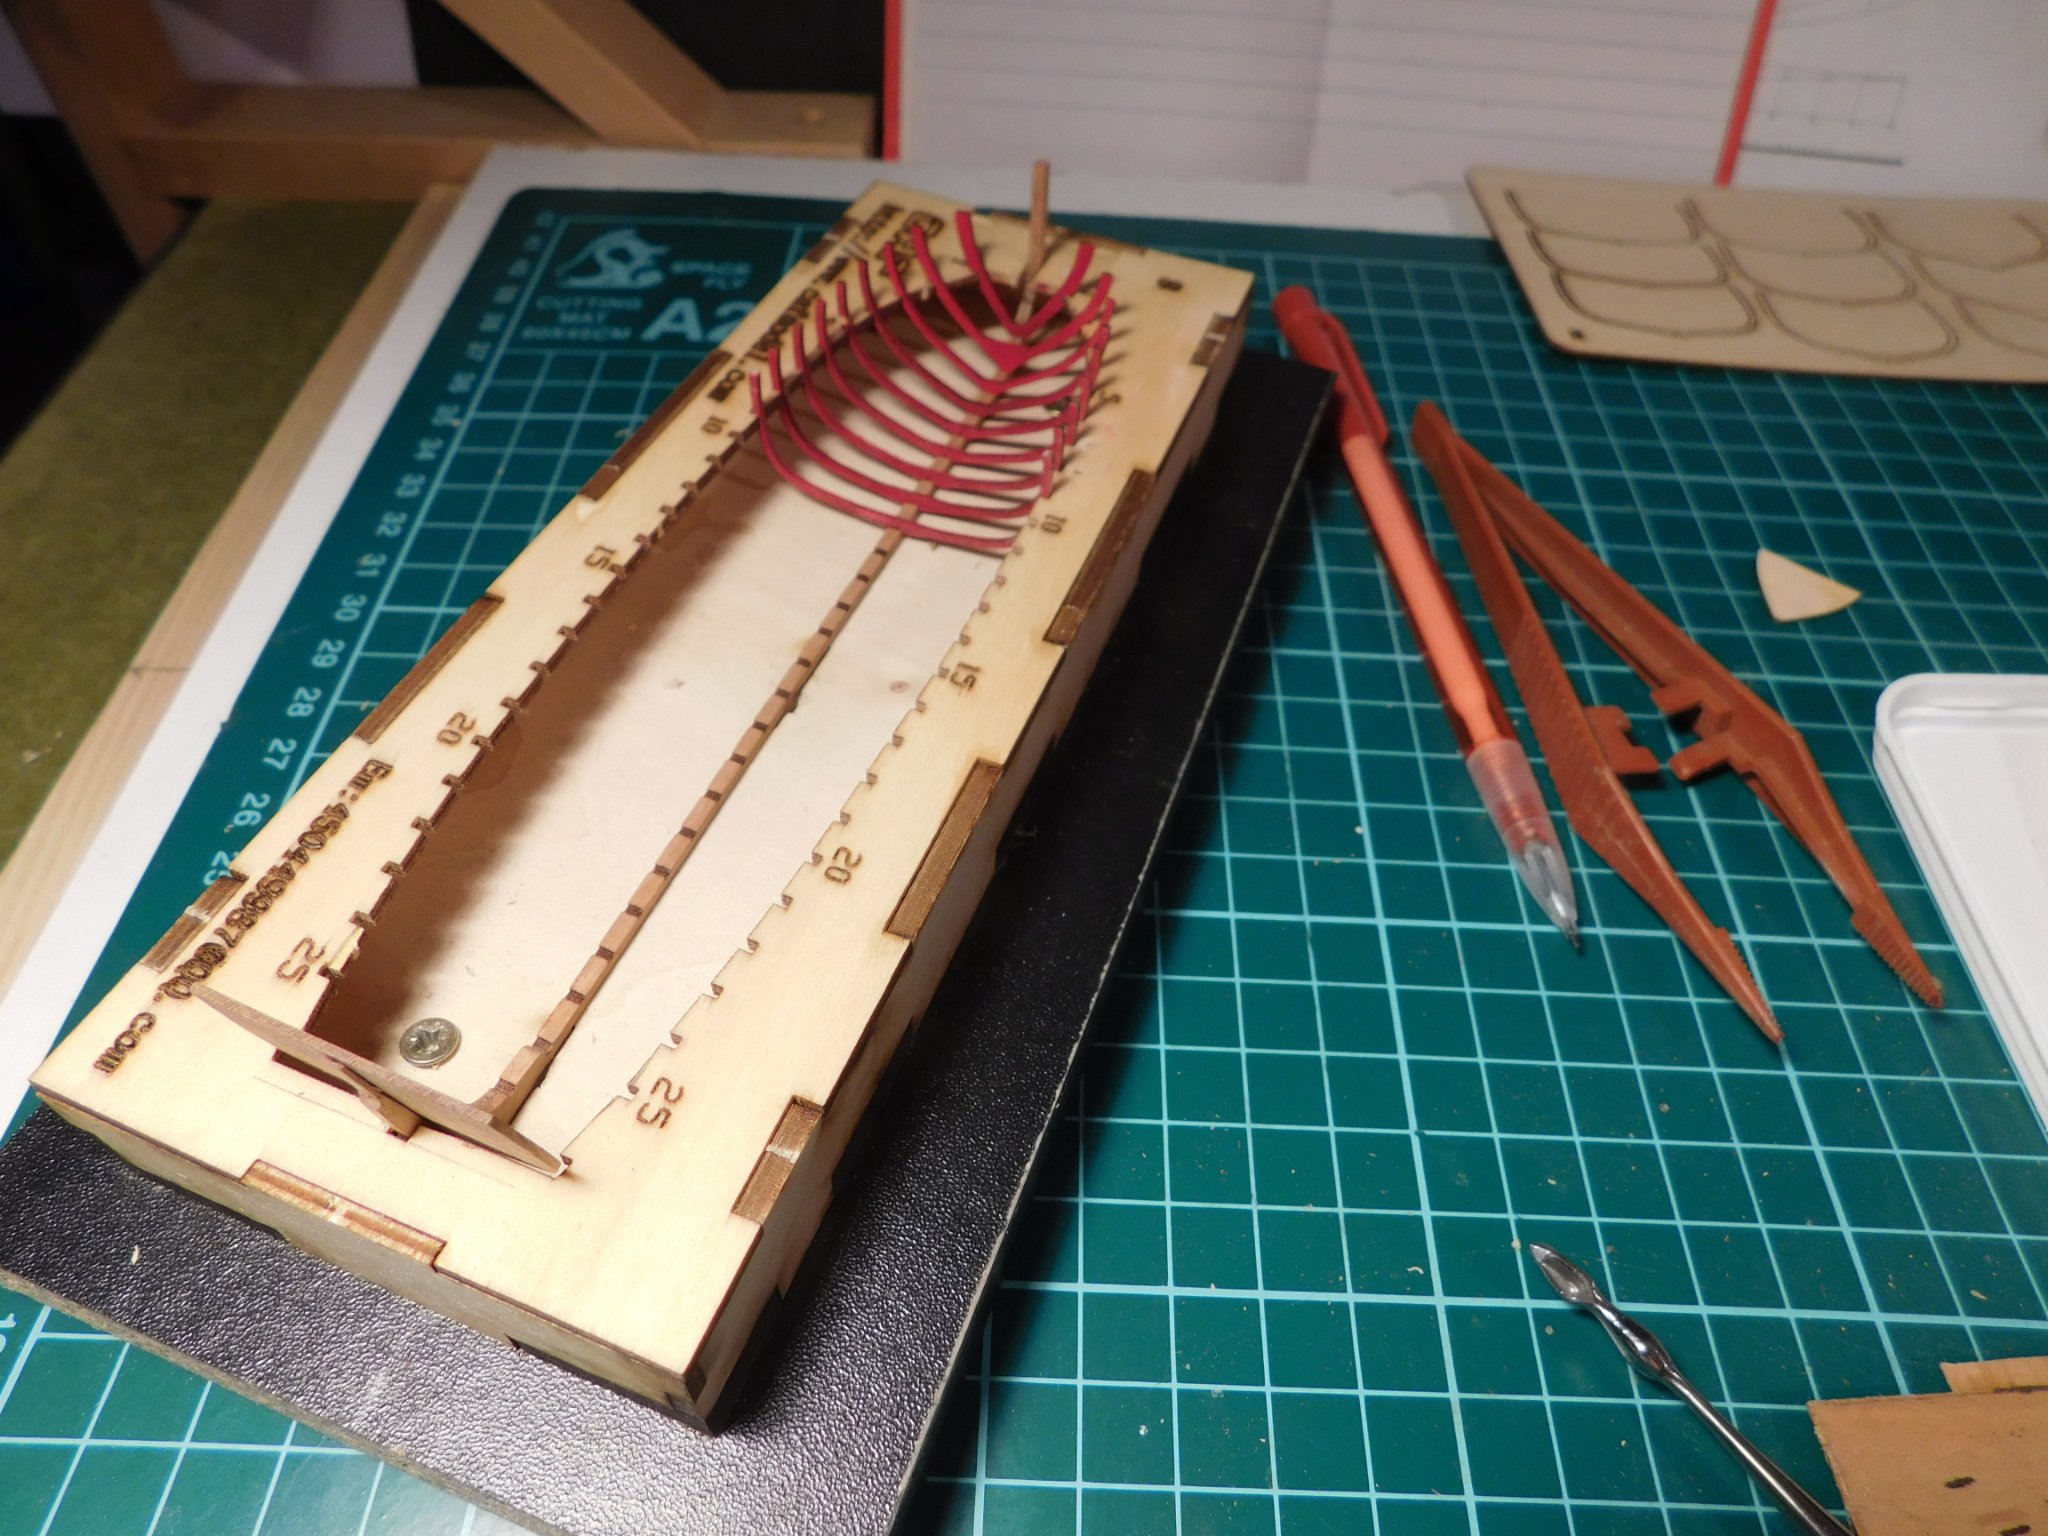
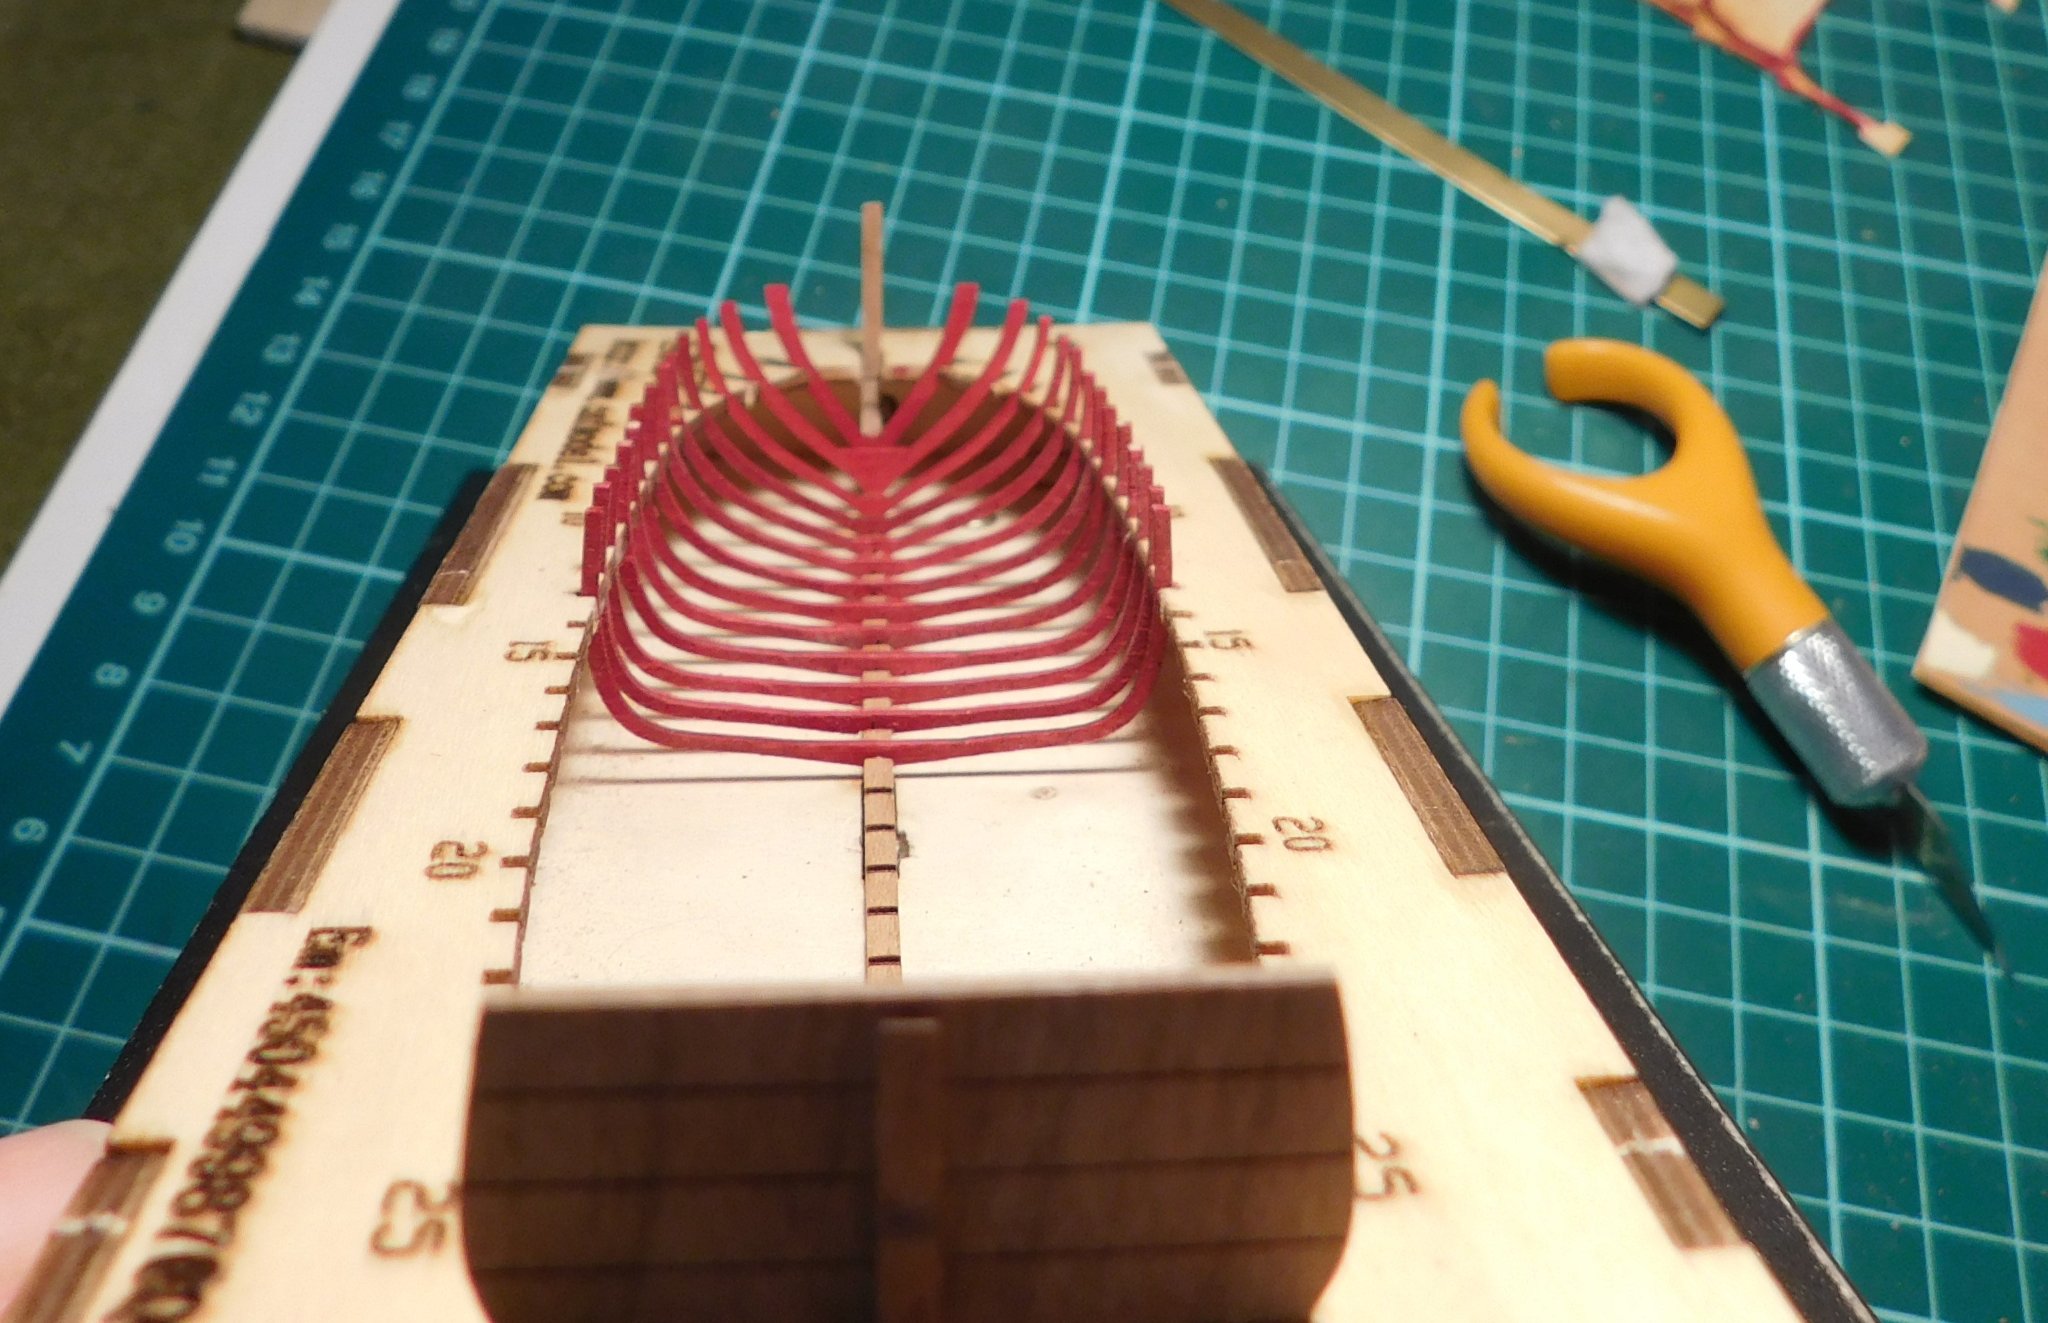
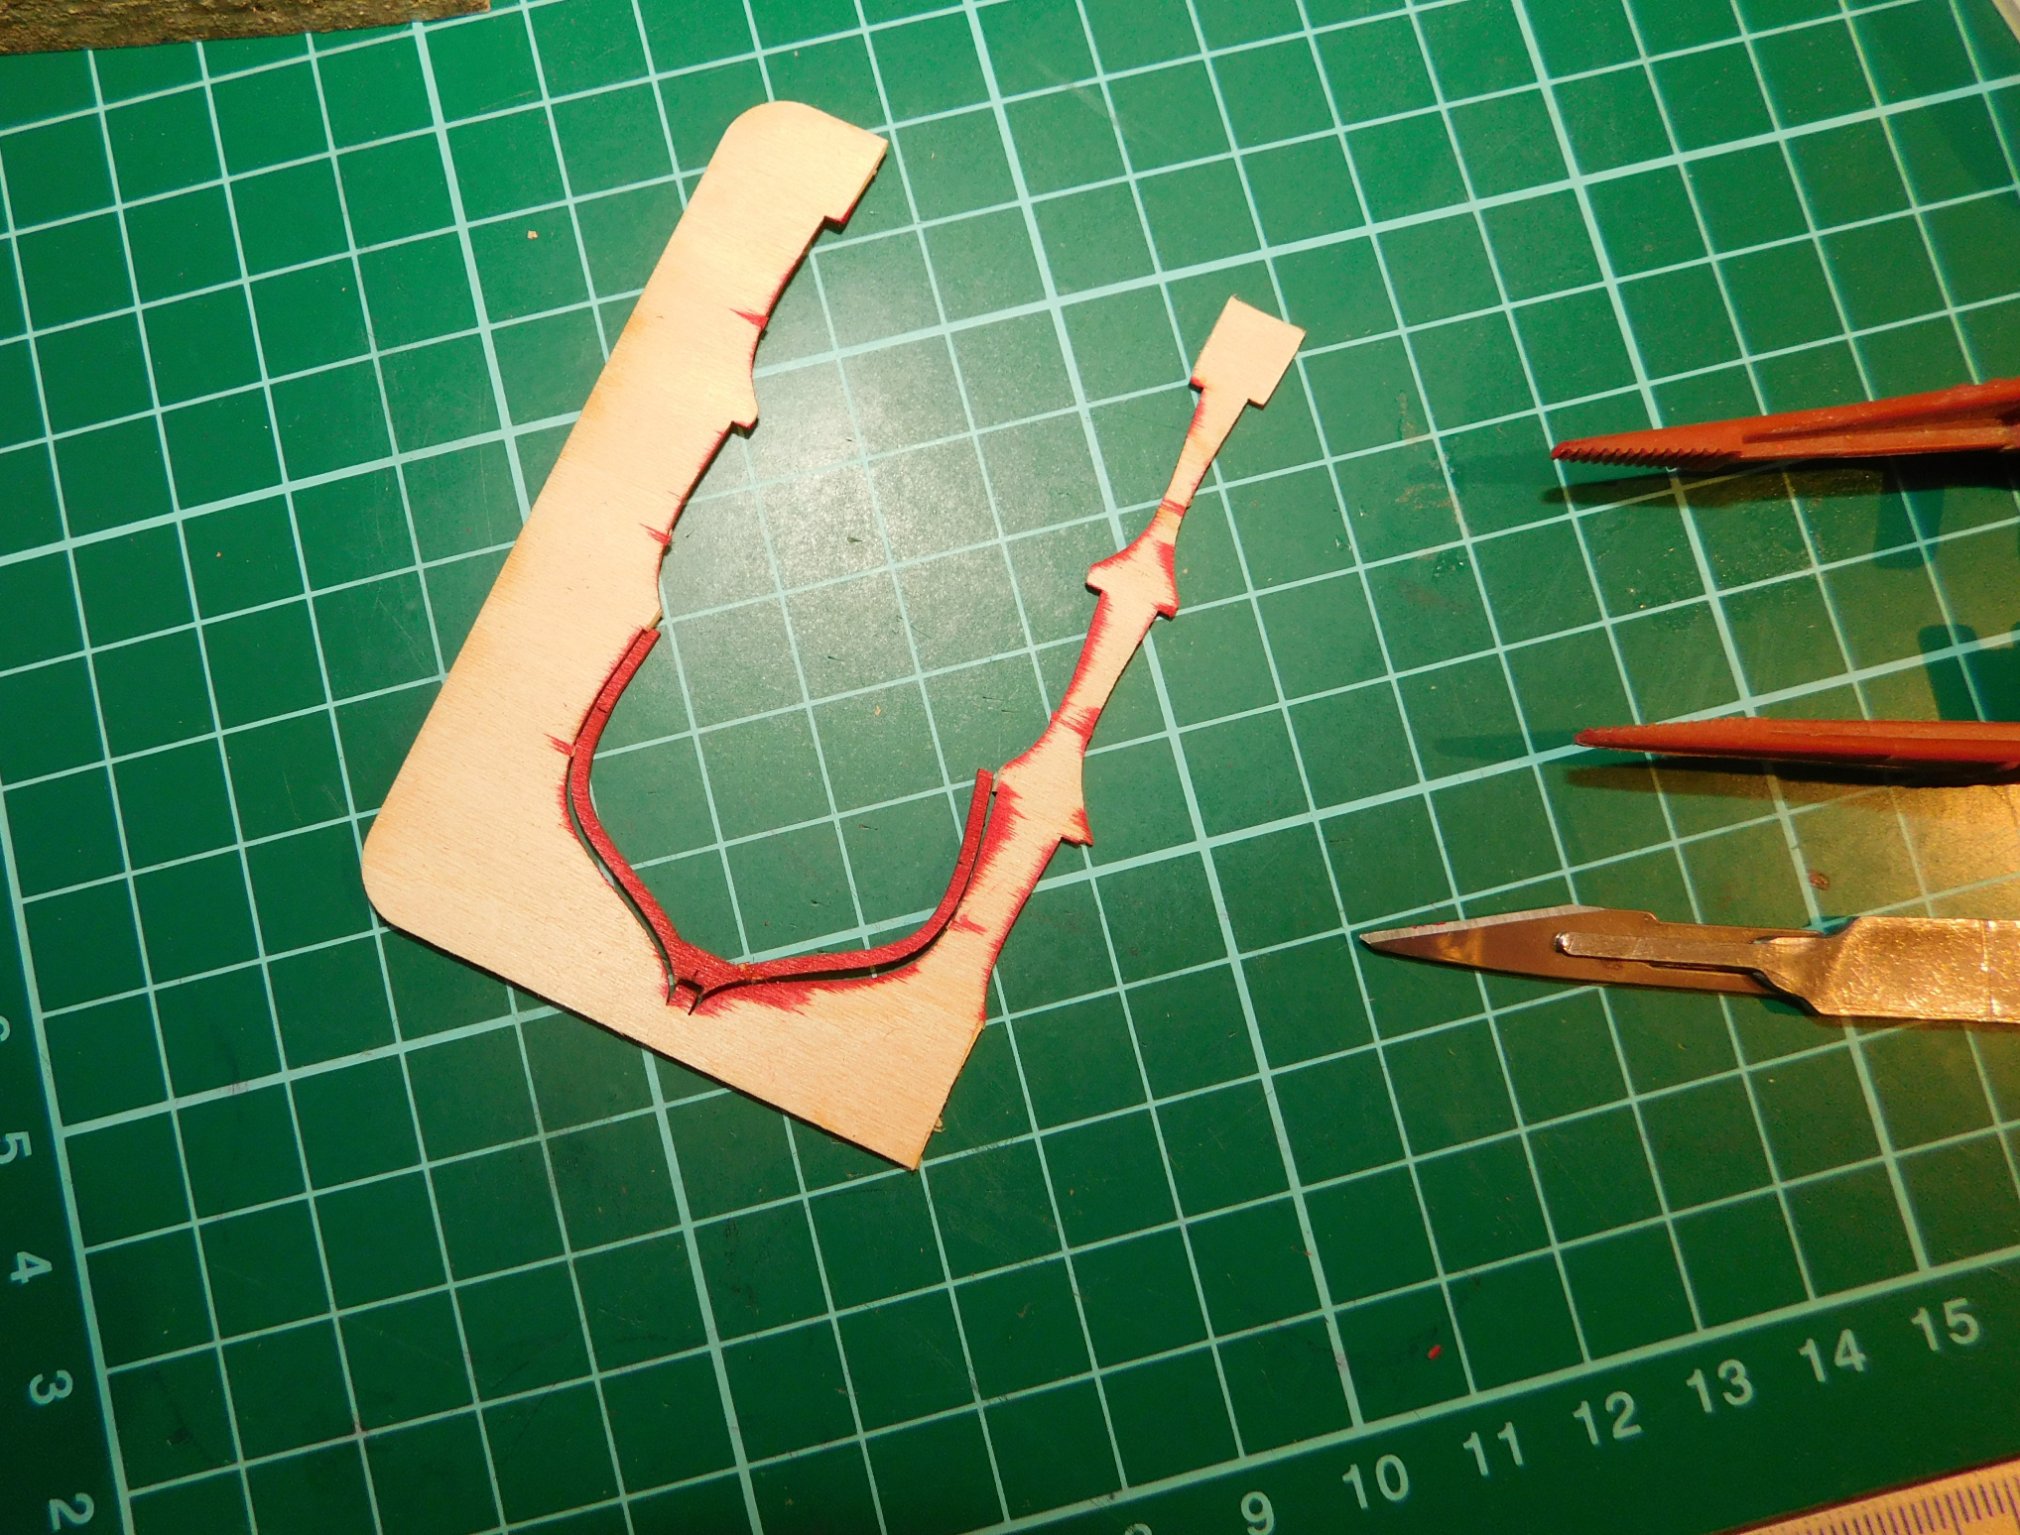
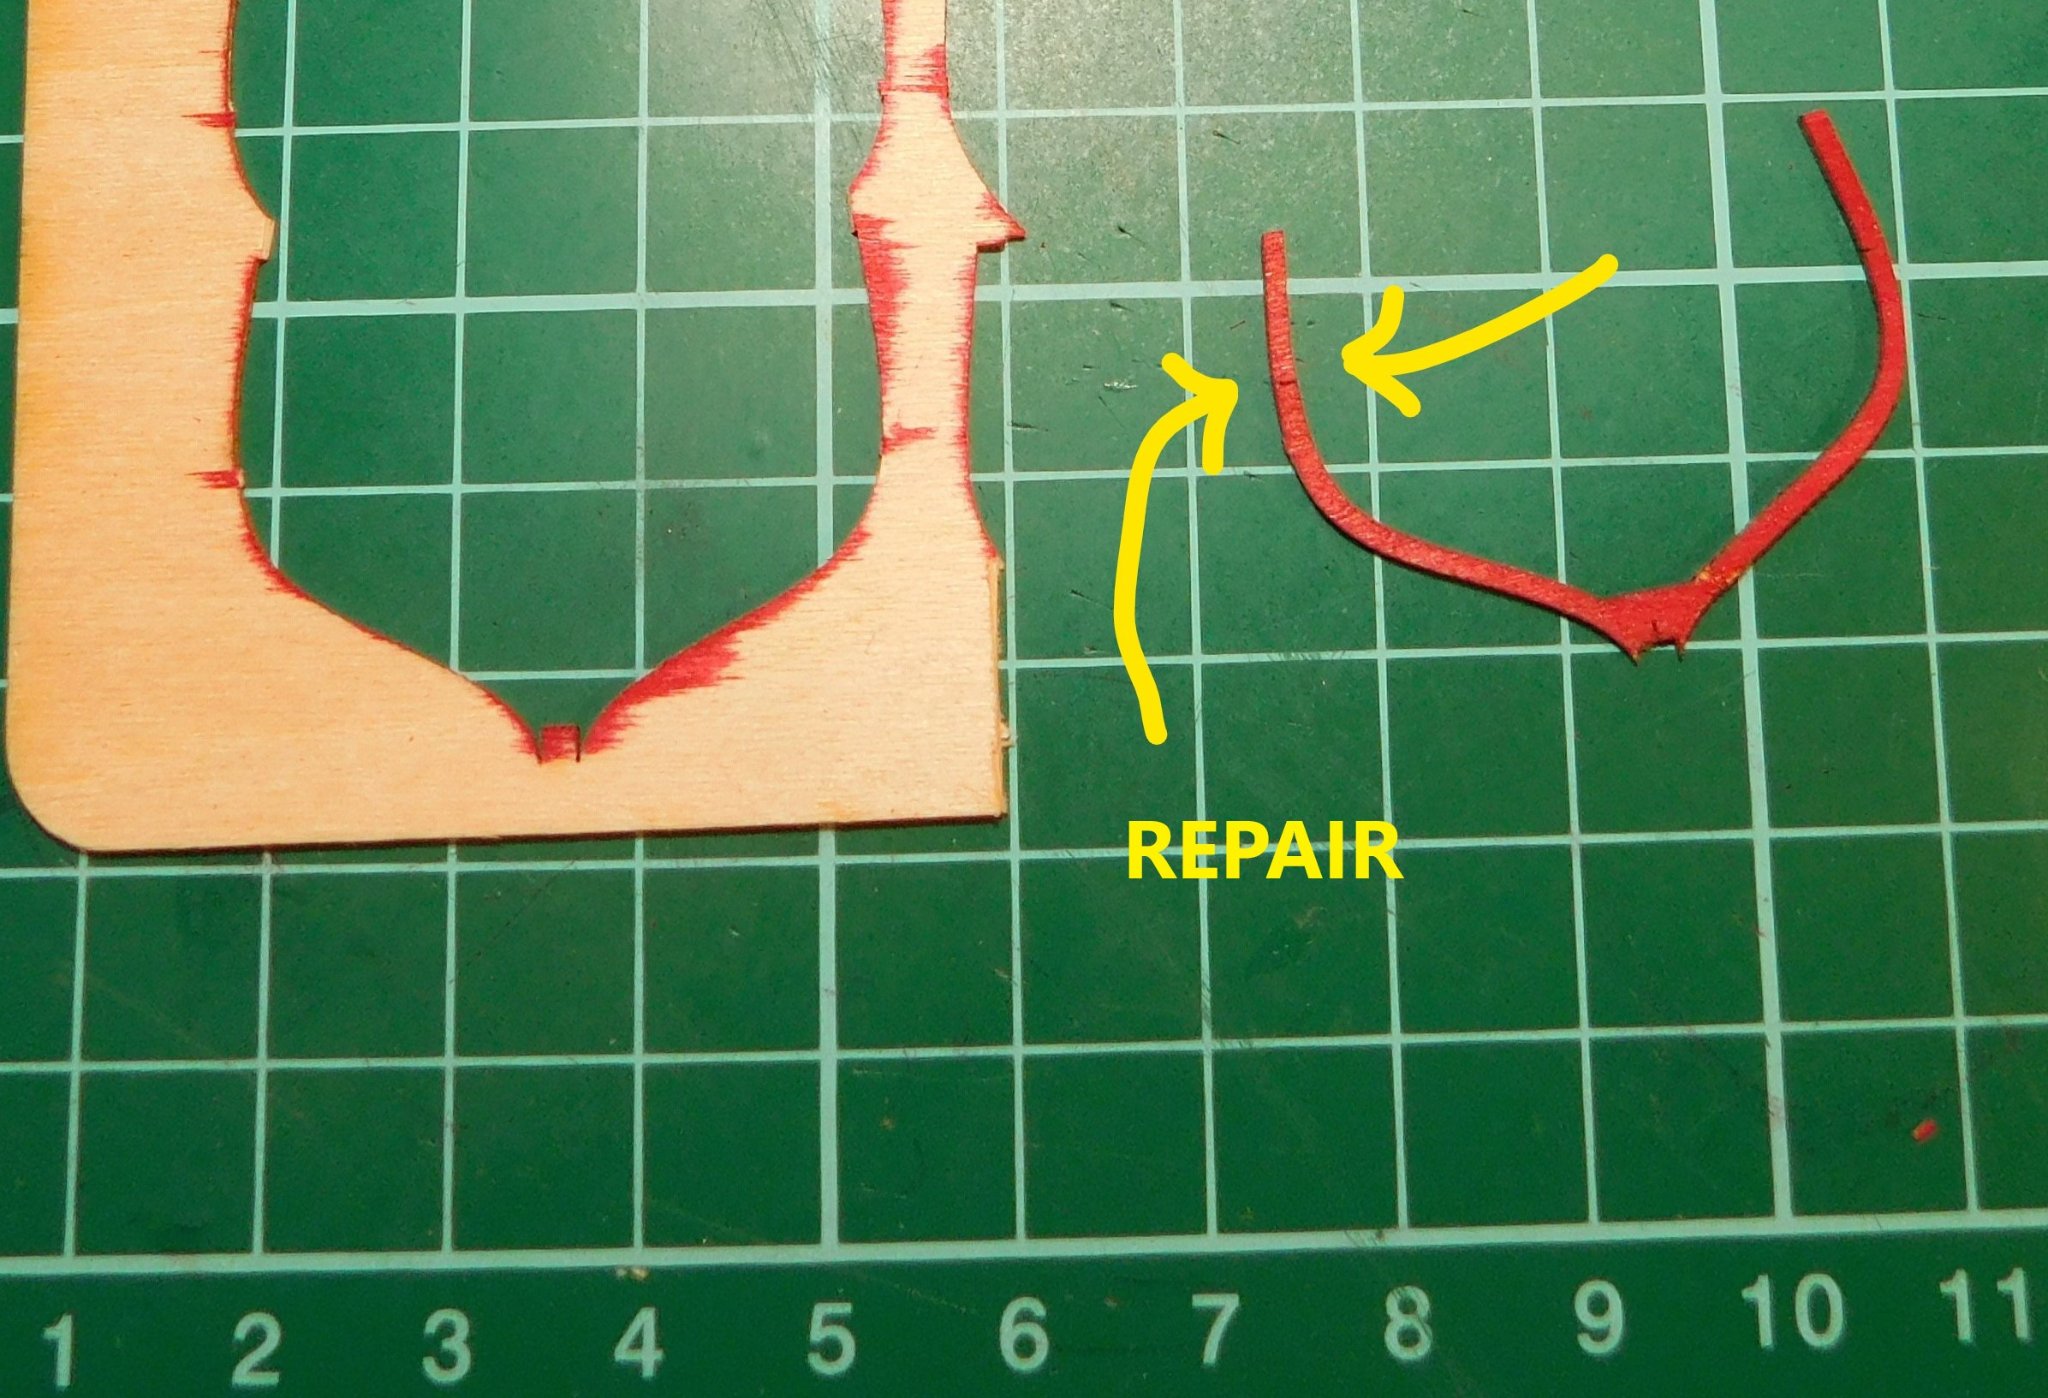
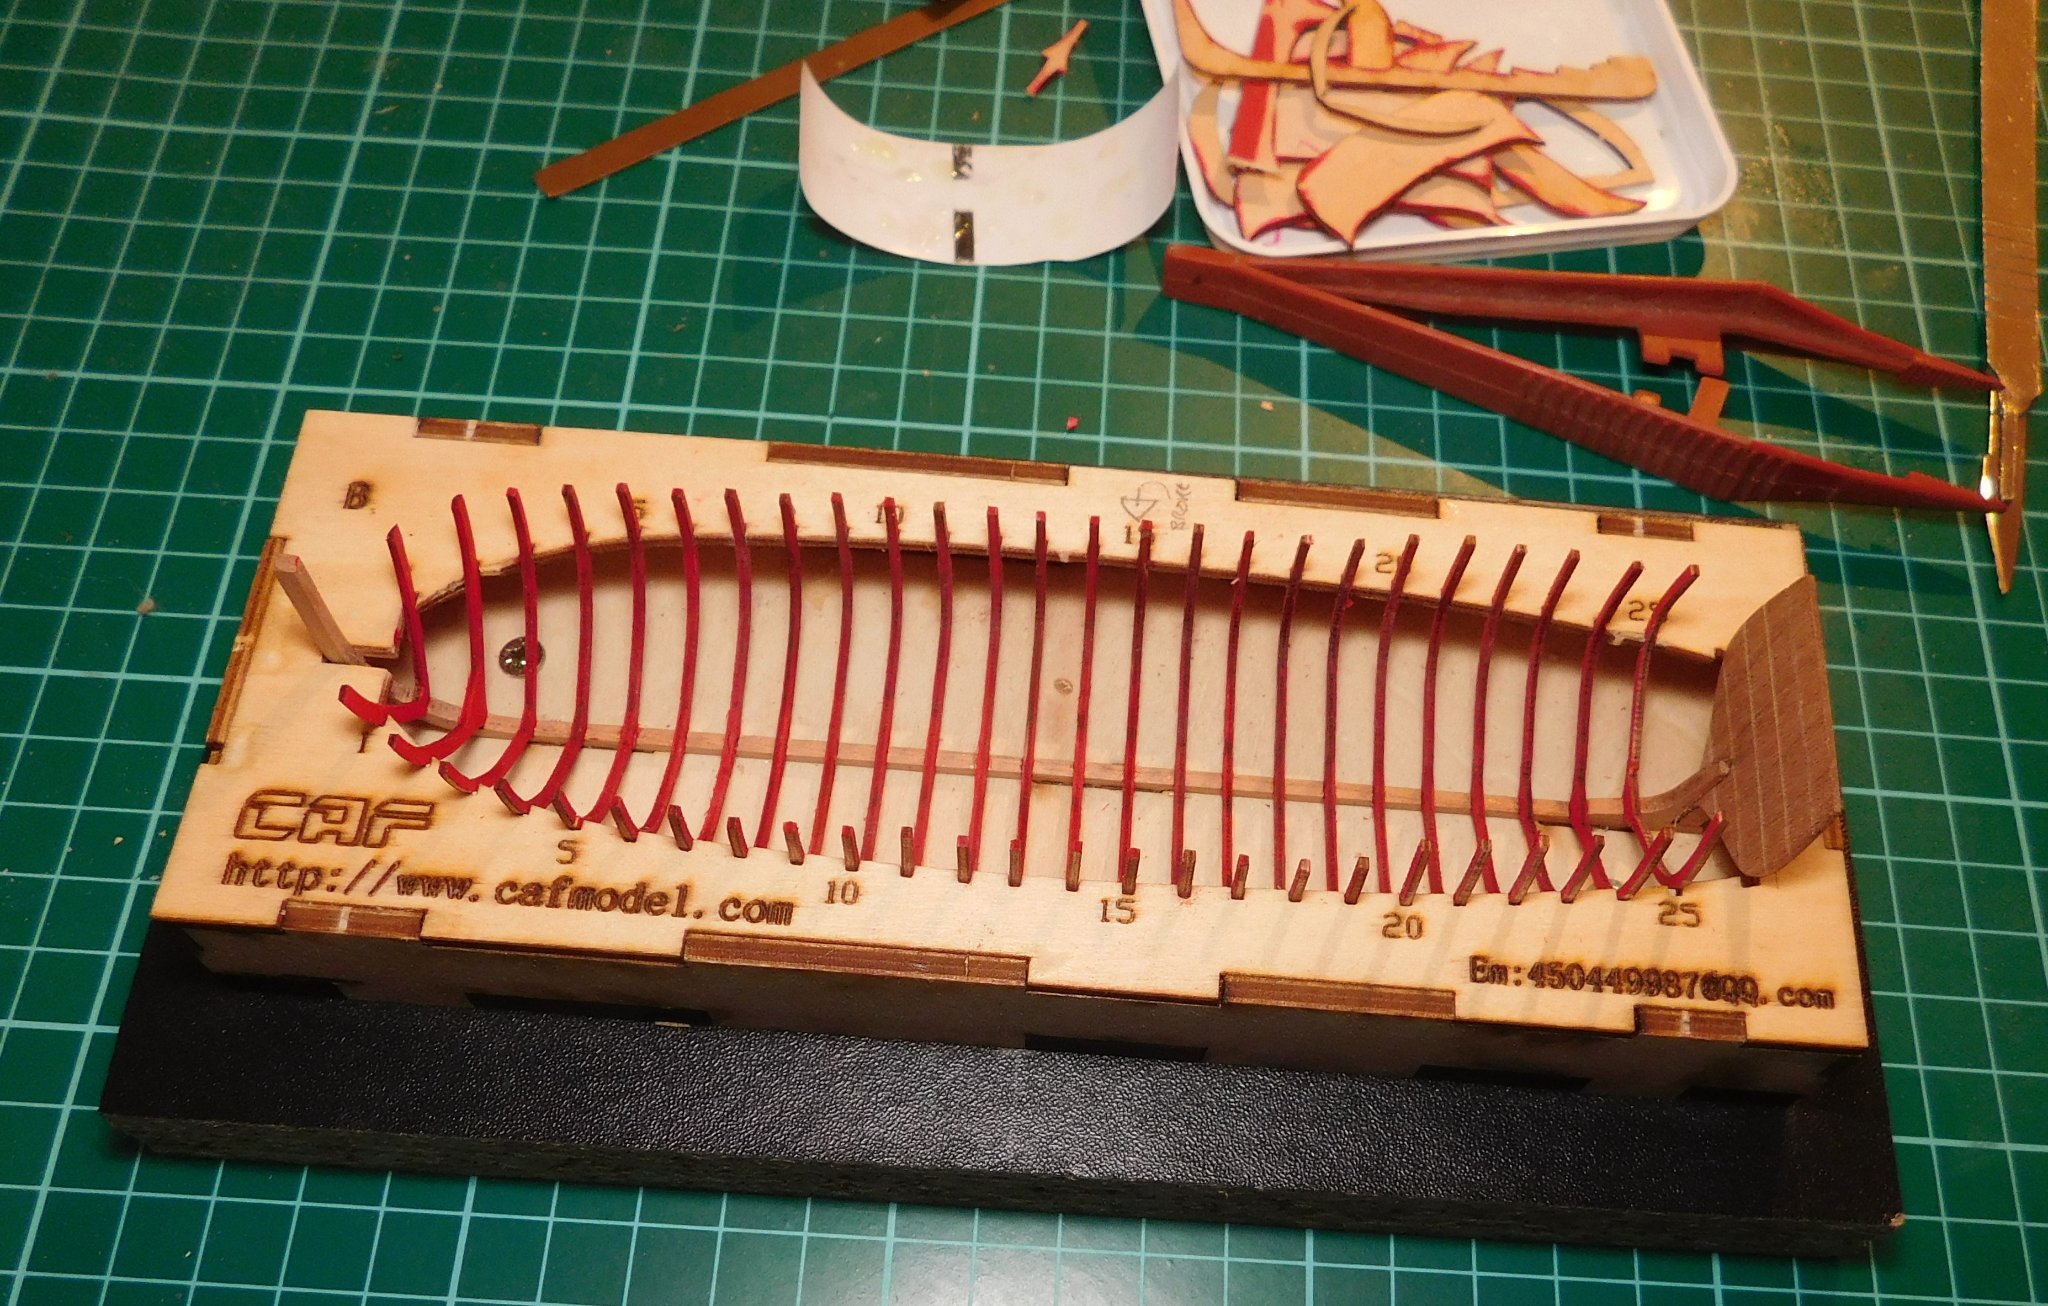
The ribs are well made but fiddly. The material is 1mm cherry plywood of good quality. There are etched lines on one face of the first two ribs as an aid to fairing. Rib number three also needs a small amount of fairing but marks are not needed. I suggest anyone who is considering building this kit should read the next bit carefully; this is where the ‘three-cups-of-tea plan’ kicks in. Since the successful fairing of the first three ribs would be the trickiest part of the build, and the possibility of breaking any of the other 22 delicate ribs was equally intimidating, I was happy to see a way to [A] reduce the risk of breaking ribs and [B] repair any damaged ribs easily. The trick only works if you do one rib at a time, start to finish, no exceptions. Even though the first two are the ones needing the most fairing, I followed the same process for them all and it paid off as you will see. This is what I settled on: Leave all ribs on the fret and, starting with the first rib at the front end, cut away only the redundant piece of wood that fills the inside of the rib. Set aside the piece you just removed. See photo and leave the rest of the fret untouched. It is important to keep all the pieces of the frets which would normally be considered waste and thrown in the bin. They are used to make jigs to retain the correct shape of any broken ribs while glue dries. Carefully hold the entire fret with the chosen rib still in place. You now have access to the inside of the rib to remove char while it is still attached to, and supported by, the main piece of the fret. Once that inside char is removed you cut the tabs that hold the rib. Set aside the fret without doing anything more to it. If anything breaks (like mine did), return the rib to the perfectly shaped space on the fret you took it from and you can make repairs there (see example later in post). The fairing of the first ribs makes repairs highly likely. I needed to make repairs to ribs using this ‘jig’ method a total of three times and it worked each time. To do any fairing or further removal of char on the rib requires supporting the piece. I placed the rib on the flat face of the steel parallel as shown in the photo and used only downward strokes with a sanding stick. It was the only safe way I found for this task. All of my breaks came from bad handling while fitting, not fairing. The results can be satisfying; right side of photo is faired, the left still to do. And then it broke while I was handling it. Emergency protocol initiated: a touch of Titebond glue on the fracture; place the rib back into it’s space in the fret; when satisfied that I had recreated the original shape, I allowed it to cure overnight. It worked. This is the repaired rib. Photos below: after rib # 1 was faired and glued in place, I removed the now redundant section of fret that had held it in order to gain access to rib # 2. I kept the pieces that had been cut away in case of problems later on. I do not know if the designer intended builders to use this process, or for that matter if everyone else knows a better way, but this is what worked for me. Things moved quickly (hooray!) as soon as I was past the third rib since no more fairing was required. Bookbinders glue was used for attaching all ribs to the keel. It has a very quick grab but gave enough time for levelling as long as long as I didn’t dither. I continued with the same method of cleaning the inside of the rib before removing it from the fret. Then cleaning the outer edge was mostly done by supporting the rib on my finger and rubbing 120 grit sandpaper along the length of the rib, never across the rib. All ribs sat nicely in their slots in the keel, it was easy to level them up and the building cradle proved to be true and effective. The interior will be finished in red. The safest way to colour the ribs without getting paint on the narrow edges where the planking will be glued was … don’t use paint! Tests showed that a red water-based ink marker (Tombow ABT number 847) looks right on both the planking veneer and the rib ply. I left the option open of using acrylic paint on the inside of the planking after assembly and found a good match. I will decide later. A word of caution, however: the plywood turned a bit ‘wooly’ when the water-based ink was first applied. After it dried the effect disappeared and the ply seemed as strong as before. I coloured the ribs with the minimum needed to get a uniform finish and left them to sit for a day. Progress: Then the ‘ouch’ moment. Perhaps I became complacent after my earlier success. Somehow I snagged the last rib (number 25, at the stern) after it was firmly in place and it snapped. A touch of IPA released the rib and it was repaired in the ‘fret-jig’ (there’s a new word). It was then returned to the keel with no damage evident. Apparently the ply did not suffer any ill effects from the water-based ink. Planking is next.