

.jpg.d84ec4dad1d7791e855dca06210ab6f3.jpg.40b7a0ea2cc62bf0a3ec2a716005383a.jpg)
hollowneck
-
Posts
1,365 -
Joined
-
Last visited
Content Type
Profiles
Forums
Gallery
Events
Posts posted by hollowneck
-
-
Mark,
Thank You. I appreciate your additional information. You've called it a "coat."
Perhaps I can make a rudder coat out of black bear skin(fur)...that way nobody will be able to notice any details...and I will have "nailed it."
Ron
- chris watton and mtaylor
-
 2
2
-
Thanks for all the suggestions, gentlemen.
I LOVE my Ibex too, Glenn....
...and, you're correct...there's not enough "play" in my rudder boot. I need to revisit the bagginess (and B.E.'s remedies), and start over.
No problem; I used acrylic adhesive (Liquitex Matte Medium) for attaching the foil piece to the transom. It will peel right off without damaging anything.
Thanks to Jason too; there are a couple excellent logs to guide me on a better solution.
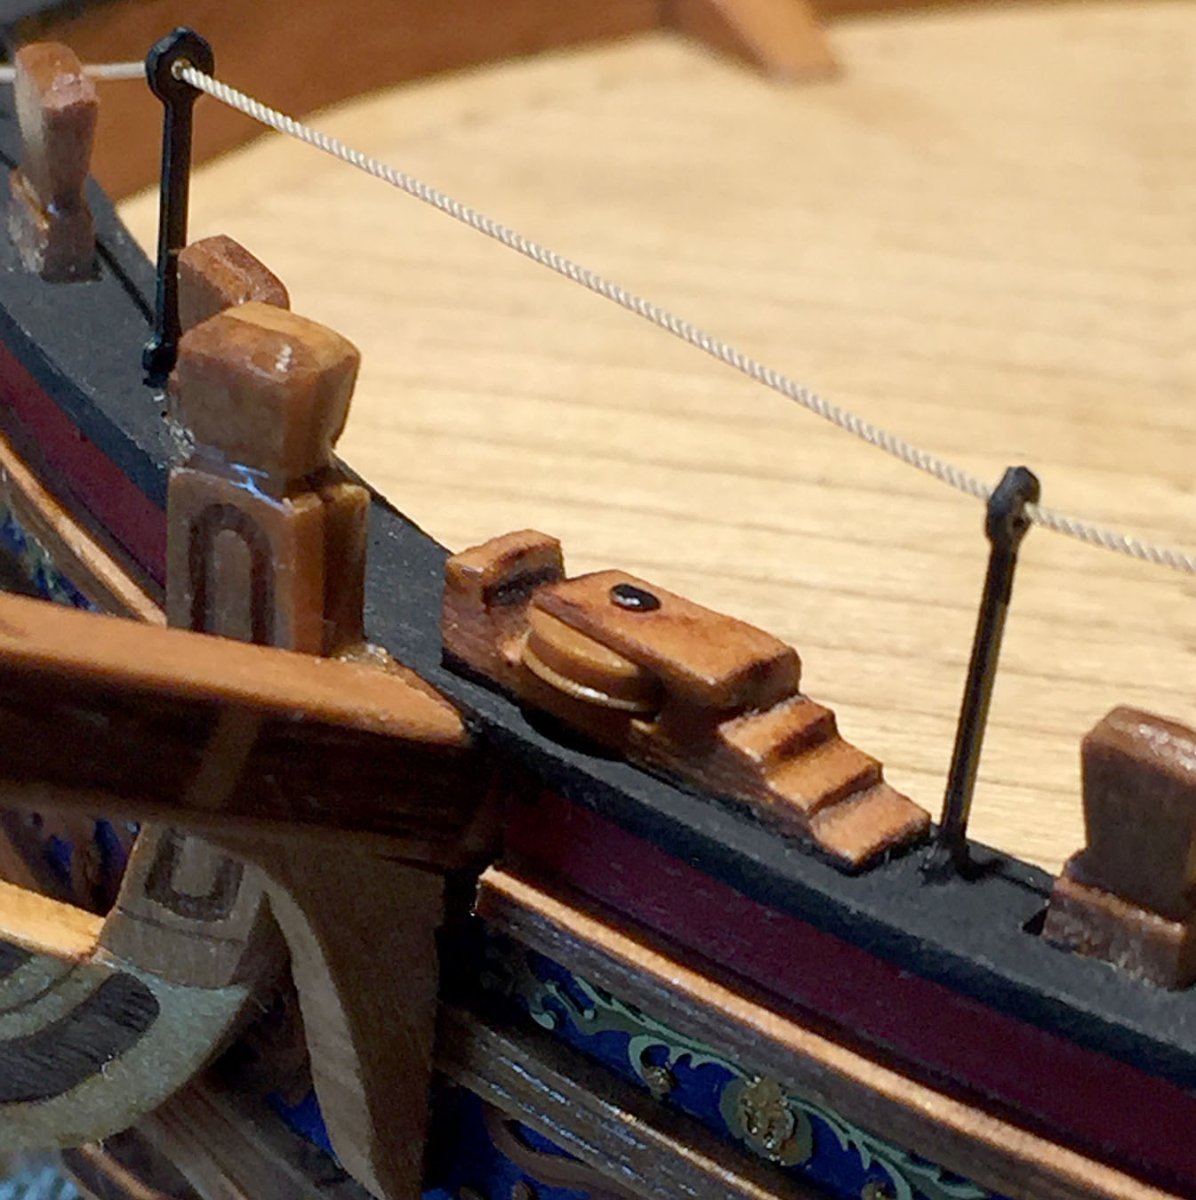
On the snatch block B.E., I purchased these well-made pulleys from....wait for it, Falkonet (CraftySailor). I believe they are turned from pear stock, available in multiple sizes. Camilla's capping rail is now coated in satin poly and looks good, like it should!
Happy New Year's - All...and thanks again for the tips.
Ron
-
An Observation: Never attempt to "out pun" an Englishman. They invented the language.
I never blame my dog since I don't have one now. But I do have a black hole in my shop floor.🤯
Ron
- bruce d, mtaylor and Blue Ensign
-
2
-
 1
1
-
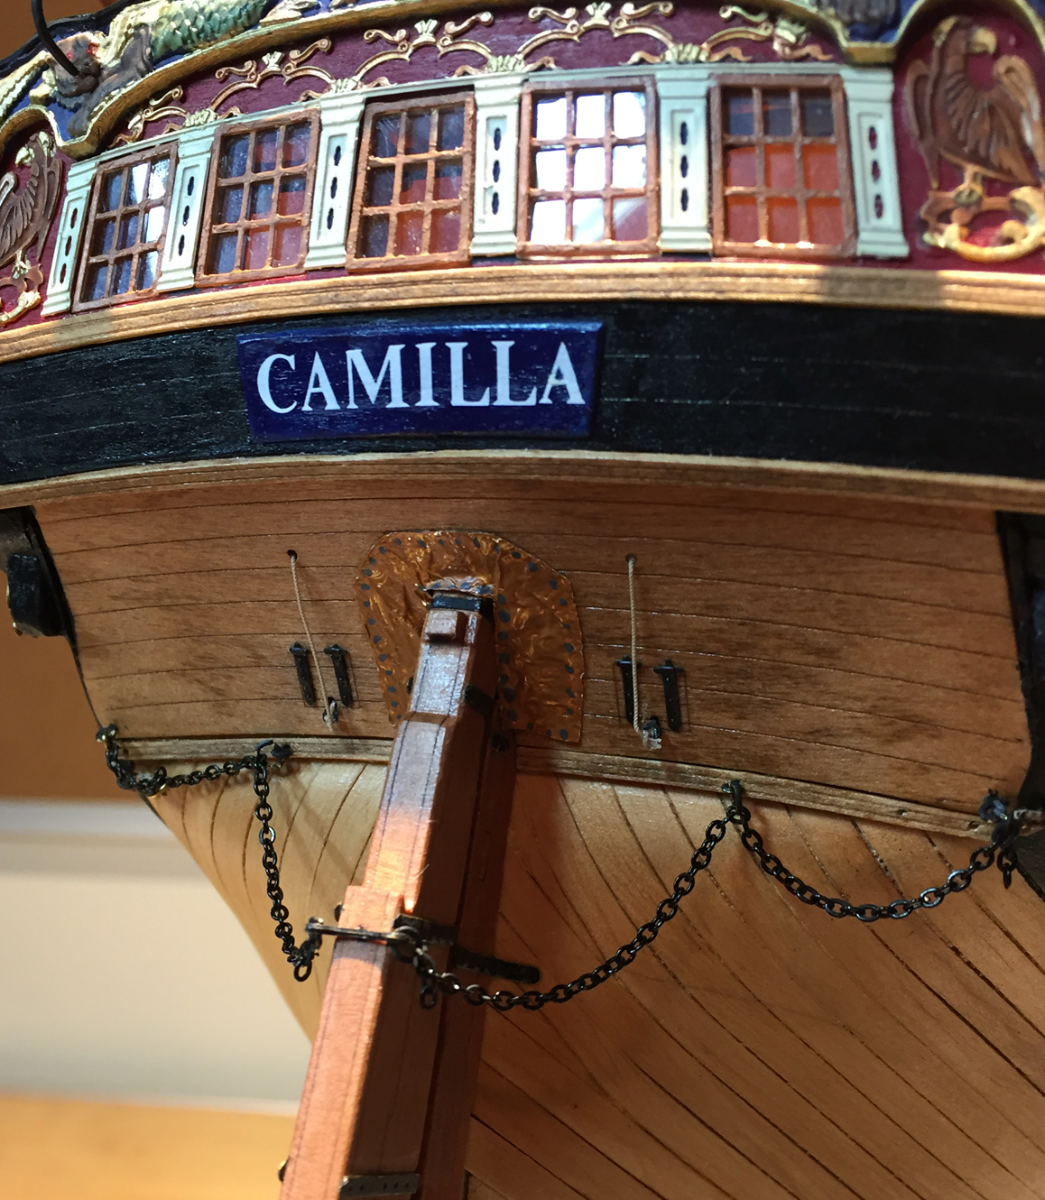
HMS Camilla gets her nameplate! Also, in this update, a few fixes and some additional stern detail before moving onto masting. Uploading weirdness continues; four files wouldn't upload. However, I found that re-saving images in .png format (rather than standard .jpg) allowed uploading the same photos. Oh well....curious glitch.
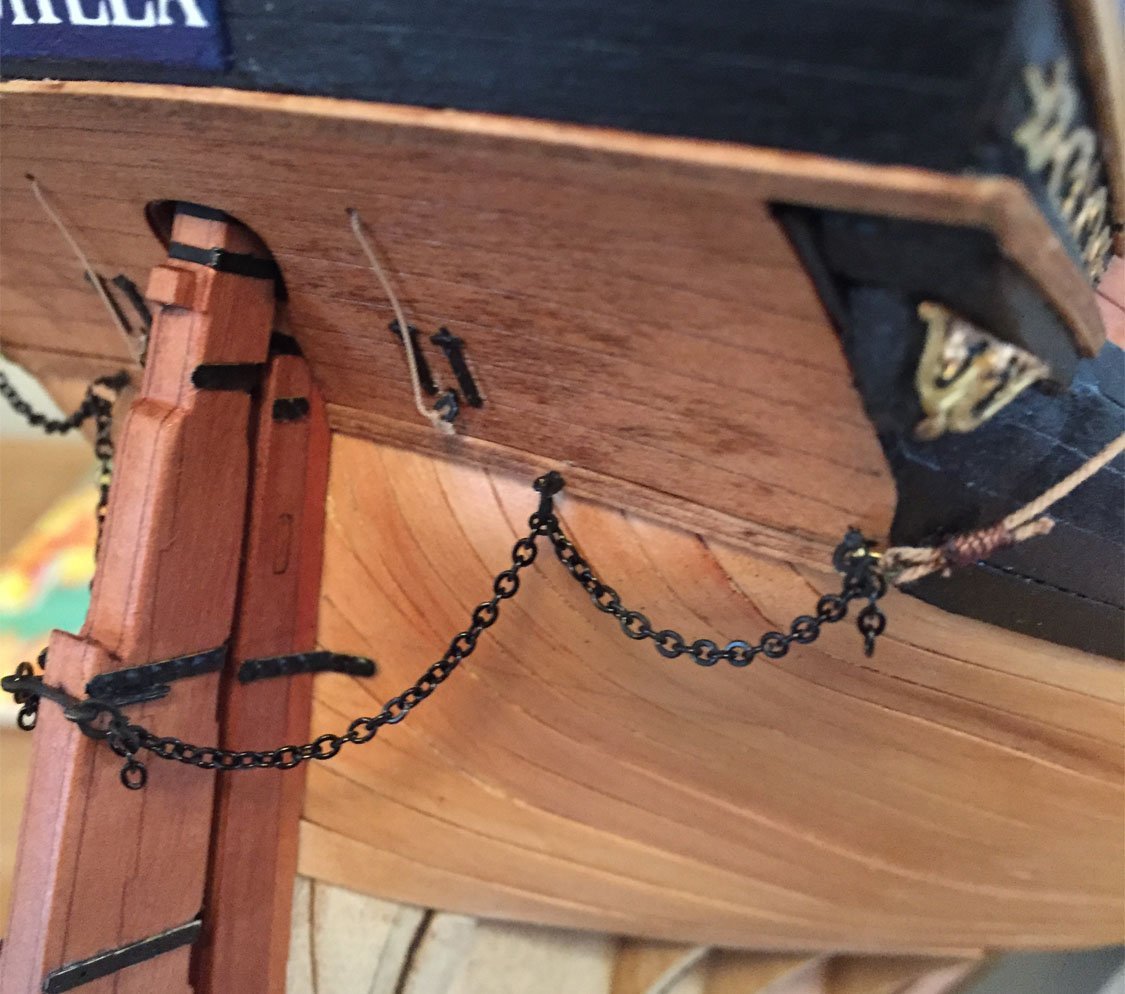
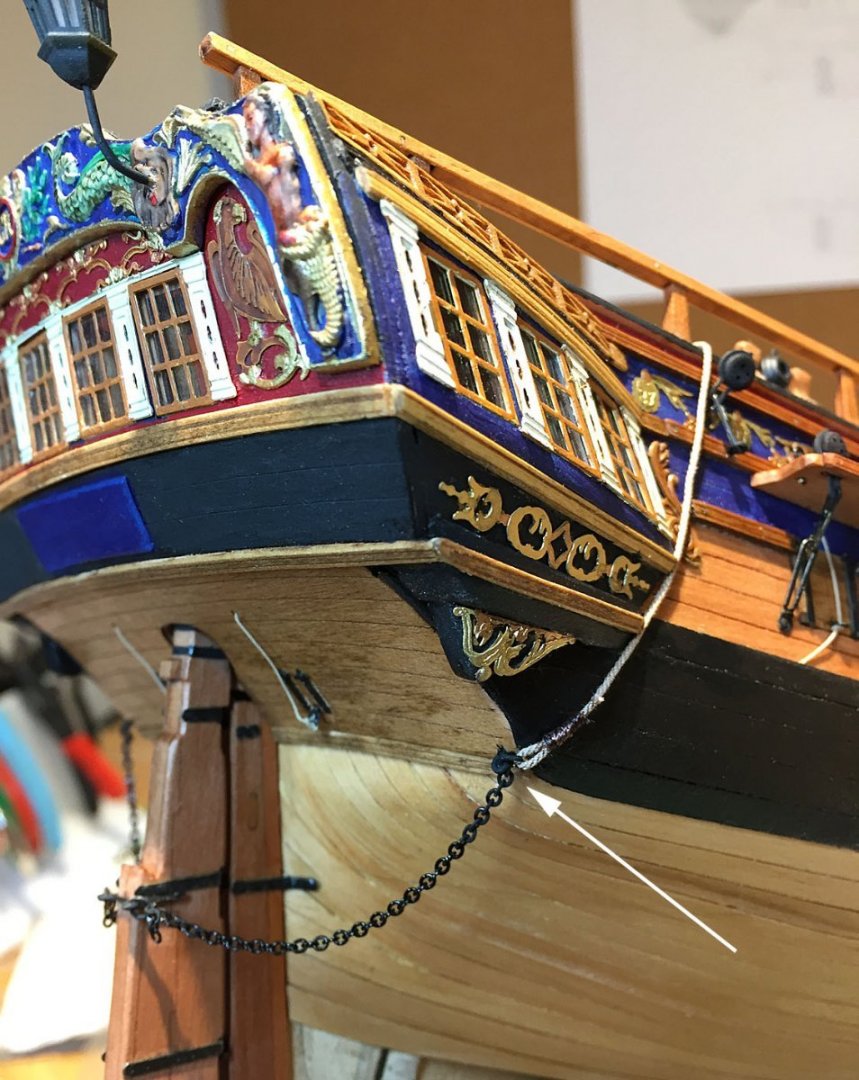
I fixed the rudder chain mounting by adding an additional mounting iron (mid lower transom point, both sides). I looked this detail up in Lees Rigging "Bible" for confirmation. It definitely looks better and is historically accurate now. I added additional chain to get the extra length required for the rudder pendent usage. Thanks to B.E. here for the tip on where the rudder chains would be tied-off (in the mizzen channels). If the ship lost normal steering control for whatever reason, these rudder pendents would have tackle mounted to them and then be subsequently fed into an open port - and presumably, lashed to the internal steering system as an emergency, jury-rigged steering fix.
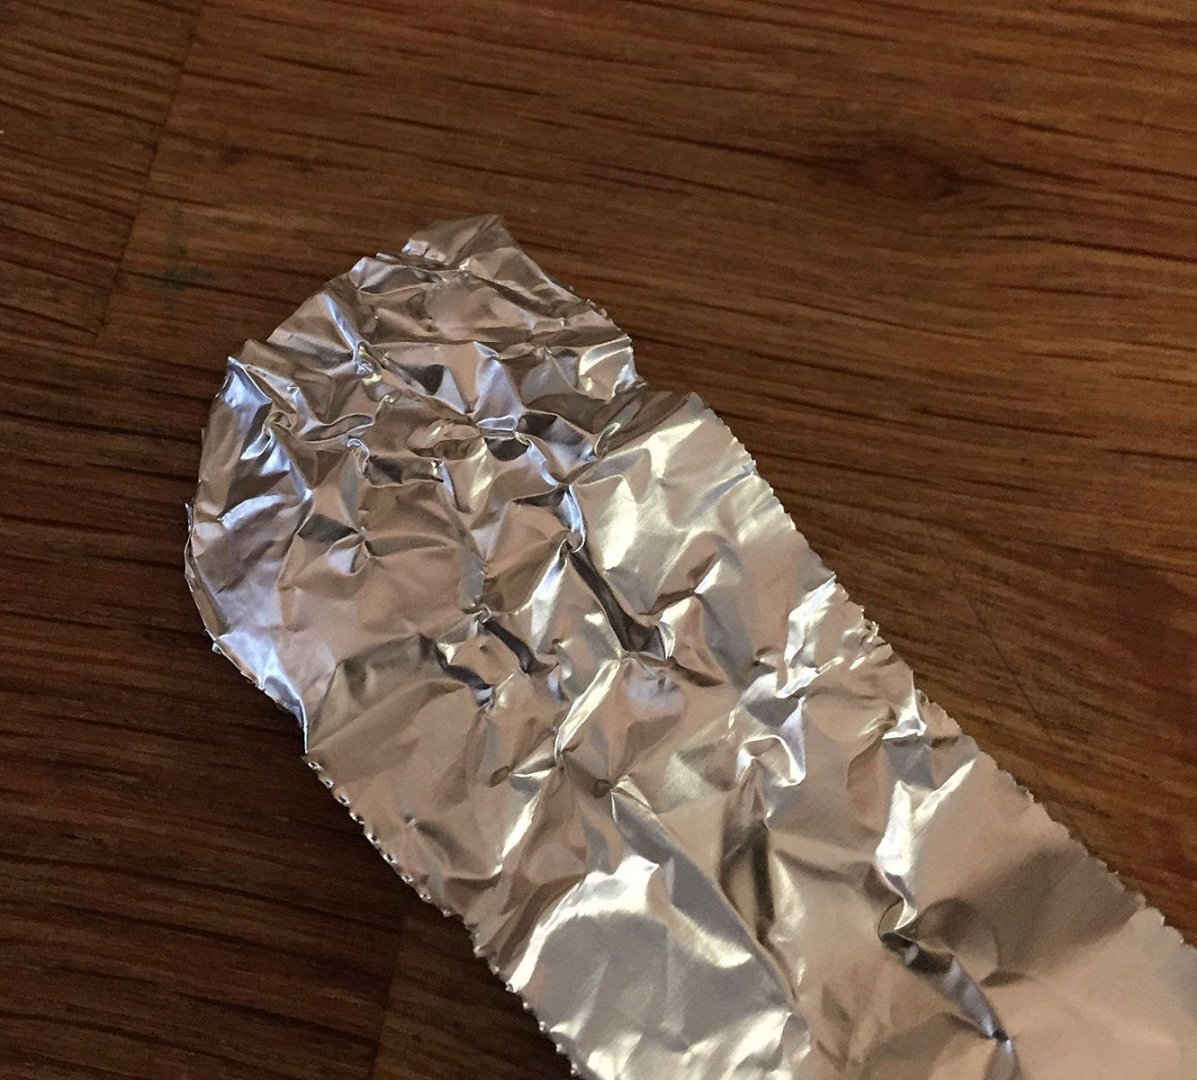
A small piece of aluminum foil to be shaped and cut into a rudder boot. After mounting it gets some acrylic paint so that it appears to be leather. I went to our kitchen cabinet for this item...it's good to have a supportive Admiral.

I forgot to show a photo in an earlier post that I added a genuine pulley to the snatchblock assemblies on the foc'sle. Anchor lines will feed through the pulleys. Genuine, three-strand rope looks good. It's .30mm dia. from Falkonet. I should mention here that I use rope from three different vendor sources: Ropes of Scale (new), Falkonet (CraftySailor) and SyrenShipModel : Thank You All. I would be highly bummed-out if I had to make rope for my ships.
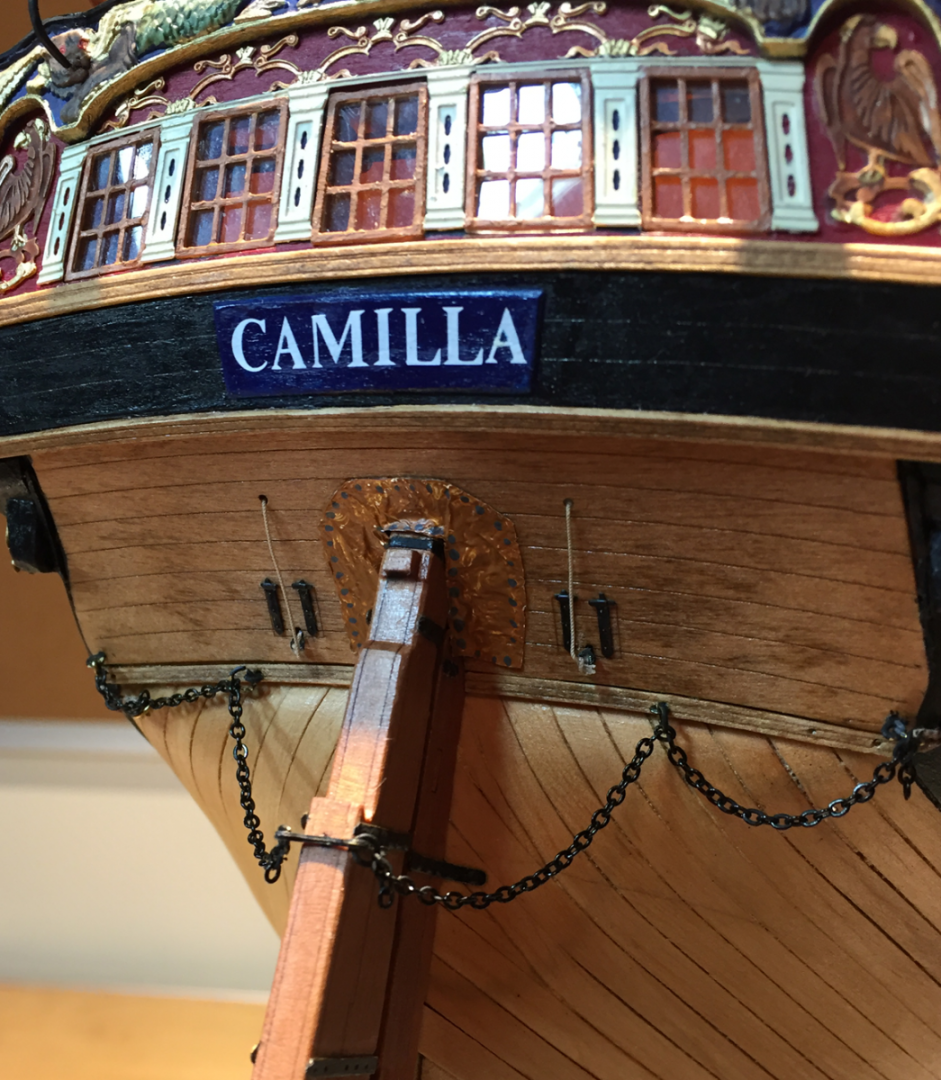
Ta-Da! HMS Camille gets her identity. I've carefully coated the lettering with satin polyurethane using a detailing swab to seal them. This photo clearly shows the "leather" rudder boot. The boot helped to keep water from rushing up into the rudder trunk. My intention is to show Camilla in choppy water with a following sea behind her stern, her cutwater crashing into the next large roller. Thanks again to B.E. who pointed out the necessity of this addition. The Captain's cabin would likely have been swamped without it! As far as I can figure-out and after researching this detail, I think the large leather boot was simply nailed to the transom and also onto the rudder at the same time. Anyone with additional details, pipe up! (please)...
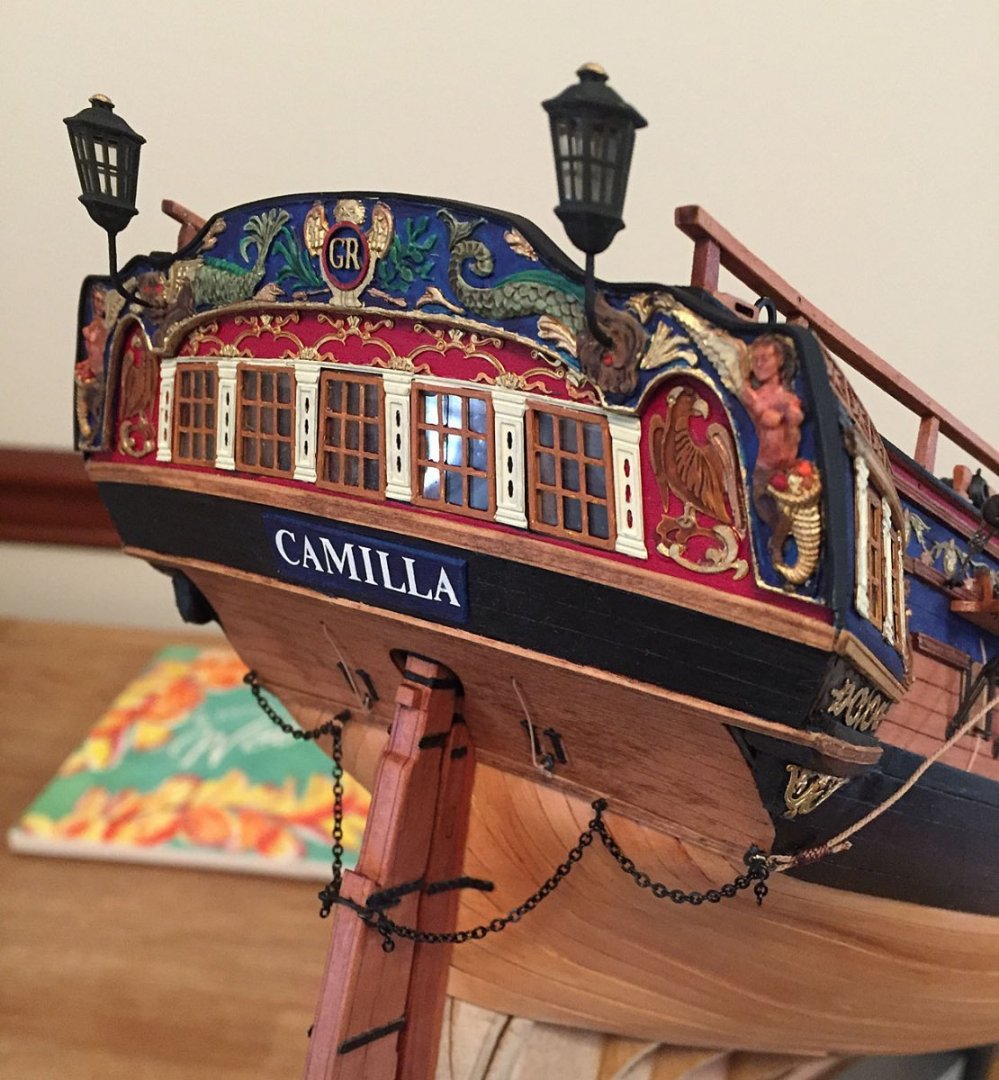
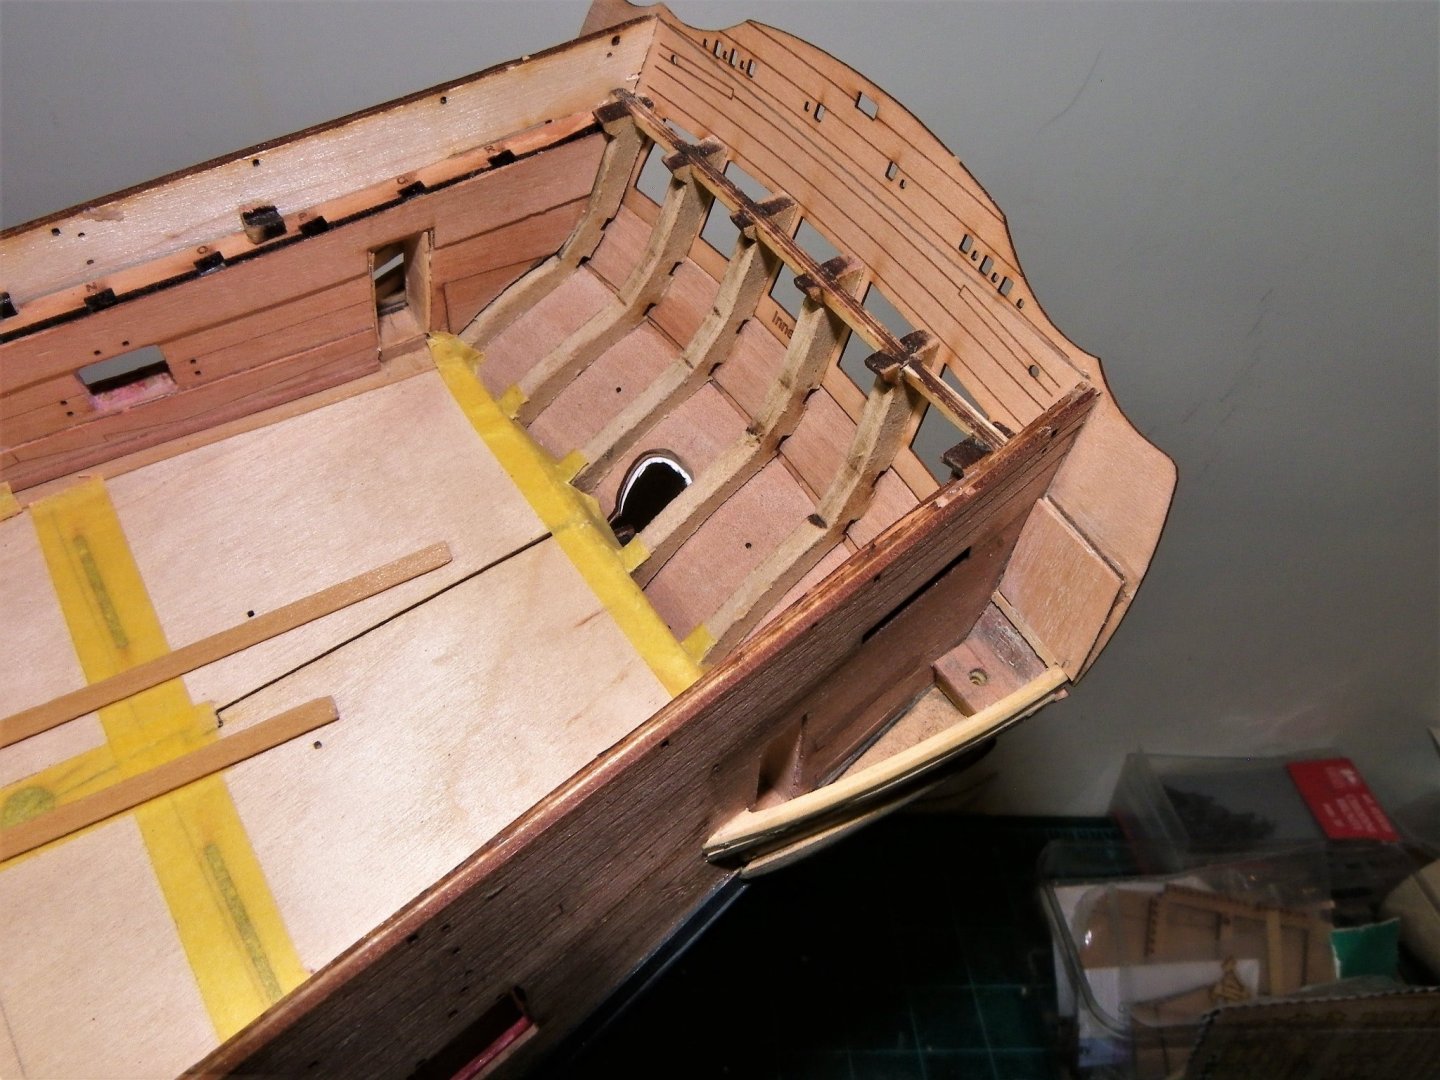
This view clearly shows the improved "Tafferal" atop the upper stern decorations, before I added the rudder boot. I'll also coat the flat black strip I used to improve this area of my build with satin poly. The .4mm thin pear wood strip didn't work well, despite soaking and heating. I went forward with a solution I've used in the past - and also suggested by B.E. - a thin section of white styrene. This did a decent job by conforming to all the topside undulations and continuing on over the rather sharp bends required to wrap all the way to the bottom of the galleries; all accomplished with a single piece of the substituted plastic (Evergreen Plastics) from port to starboard.
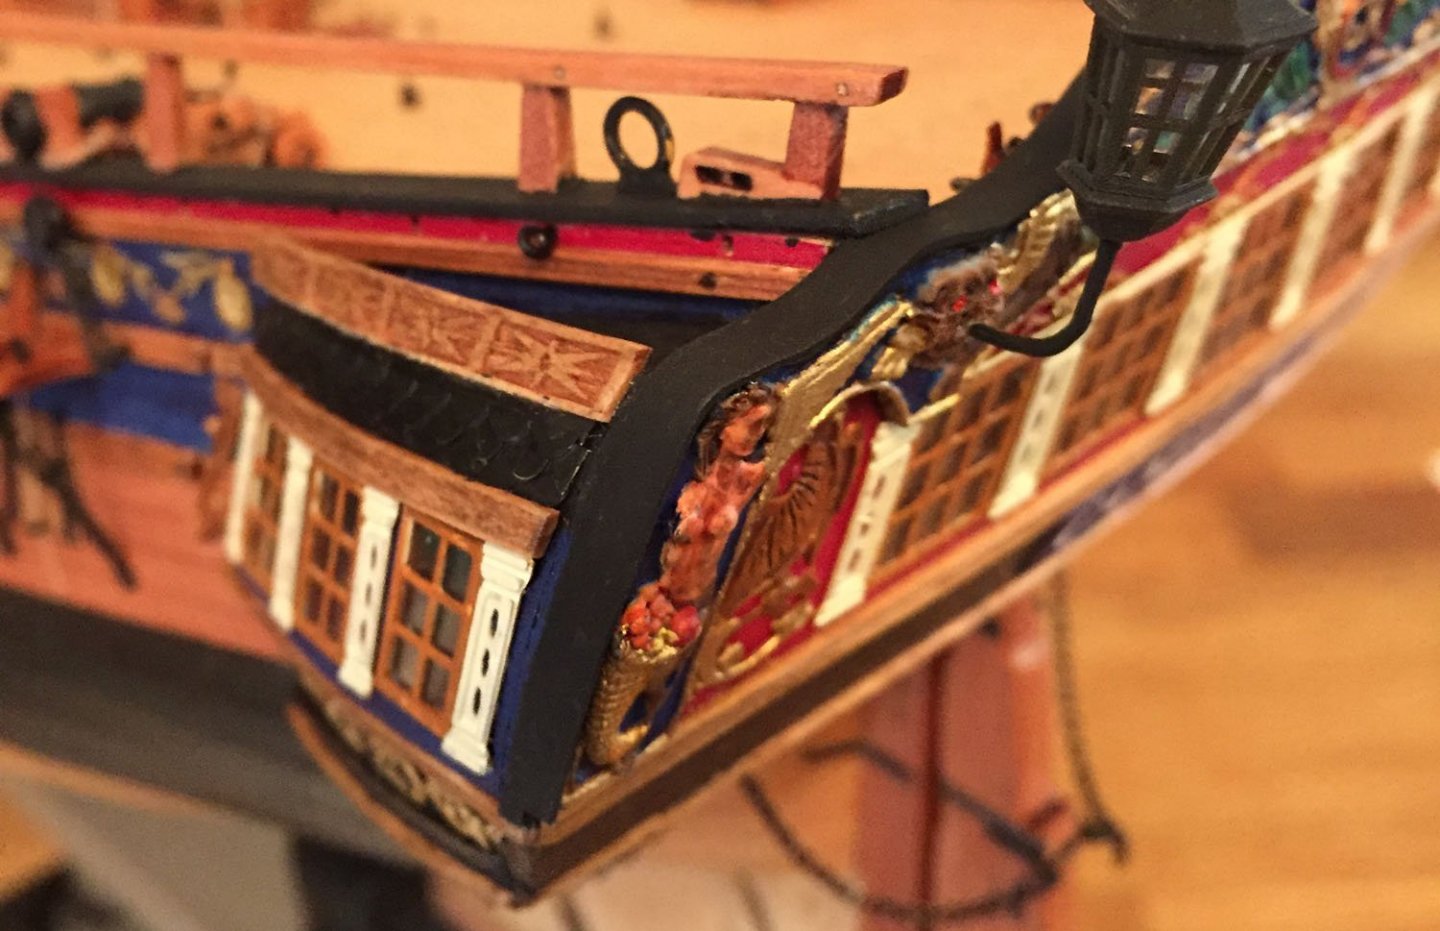
Another view of the styrene capping I used to cover the not-so-nice looking stern layers. This "scratched" addition has dramatically improved the presentation of this part of the model. Other builders of this kit may want to seriously consider adding this easily scratched additional piece not included in the kit. Adding it in advance of how I've done it here will be much easier task to accomplish. My model will now appear more like most legacy models of the era. This added Tafferal will get a coat of satin poly after the black paint has dried.

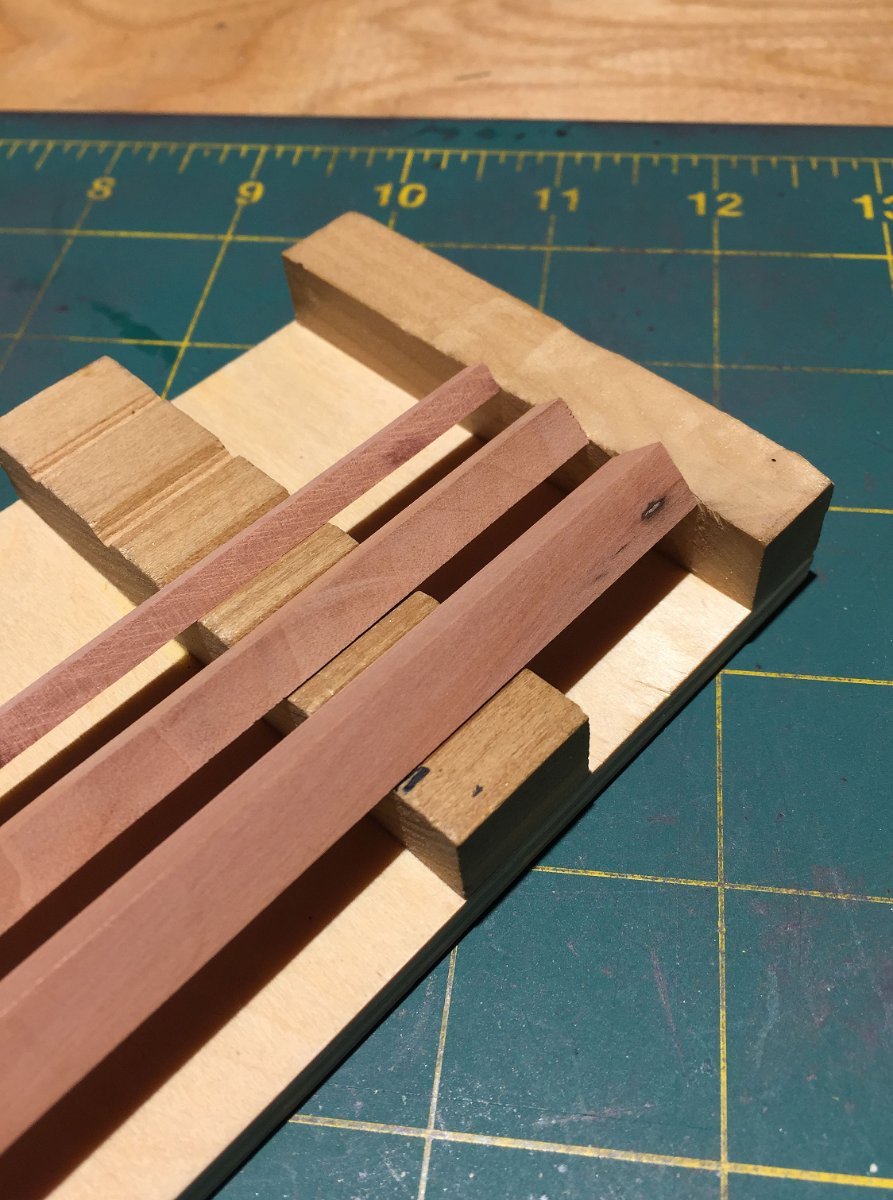
The Swiss pear square stock that I will use to create Camilla's three (technically, four) masts. Shown here are the three main sizes: 4, 6 & 8 mm. The pear stock rests in my planing jig. These 18" long pieces are dead-straight!
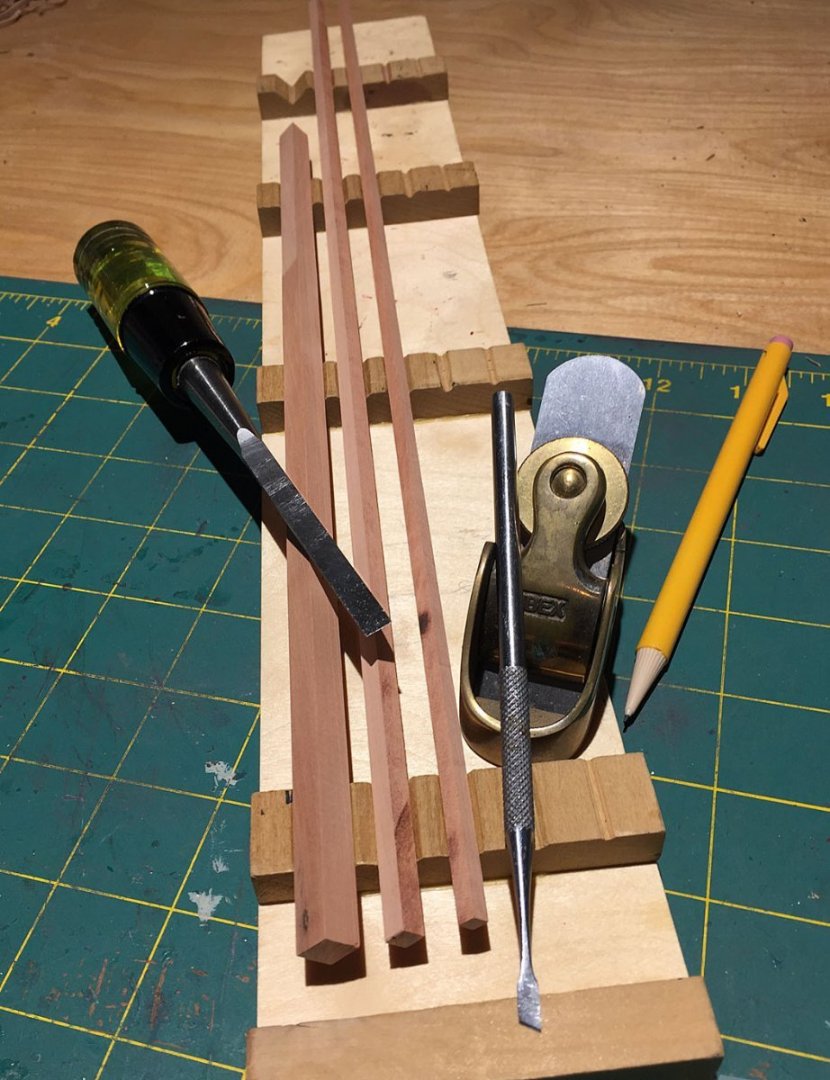
The tools arrayed on the planing jig I use to shape the square stock for the masts. I use the small Ibex finger plane mainly, but on smaller square sections I use smaller chisels (bevel side down). I also use a sharpening stone before shaping work to keep the blades very sharp; minimal tool pressure is required to remove thin, even slices of wood. A square can become an octagon quite easily. An octagon can become a round easily as well...
As I progress with the creation of my masts (including the bowsprit), I'll show how the various sections (round, square and octagonal) are fashioned. In reality, masts were very complicated carpentry wonders comprised of multiple sections with complex joinery. I've read that these specific dockyard workers were the highest paid.
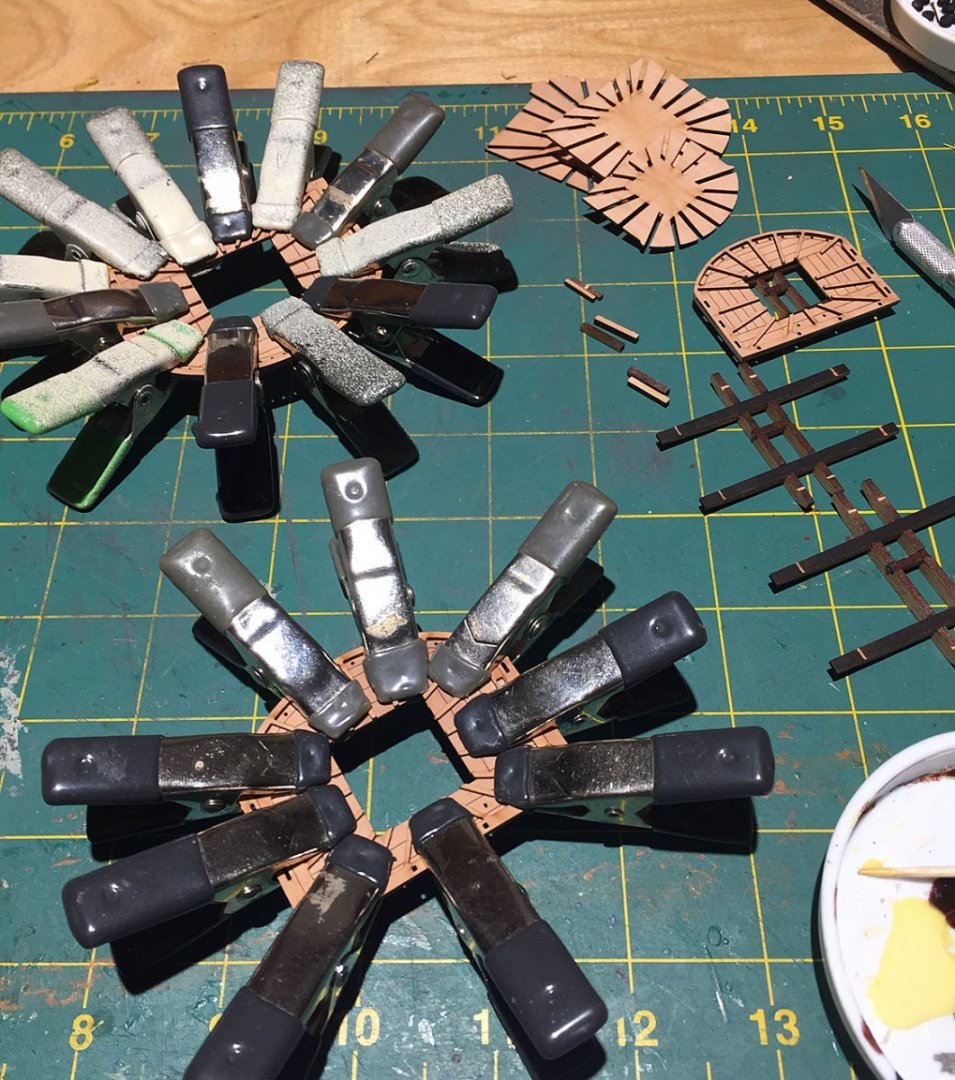
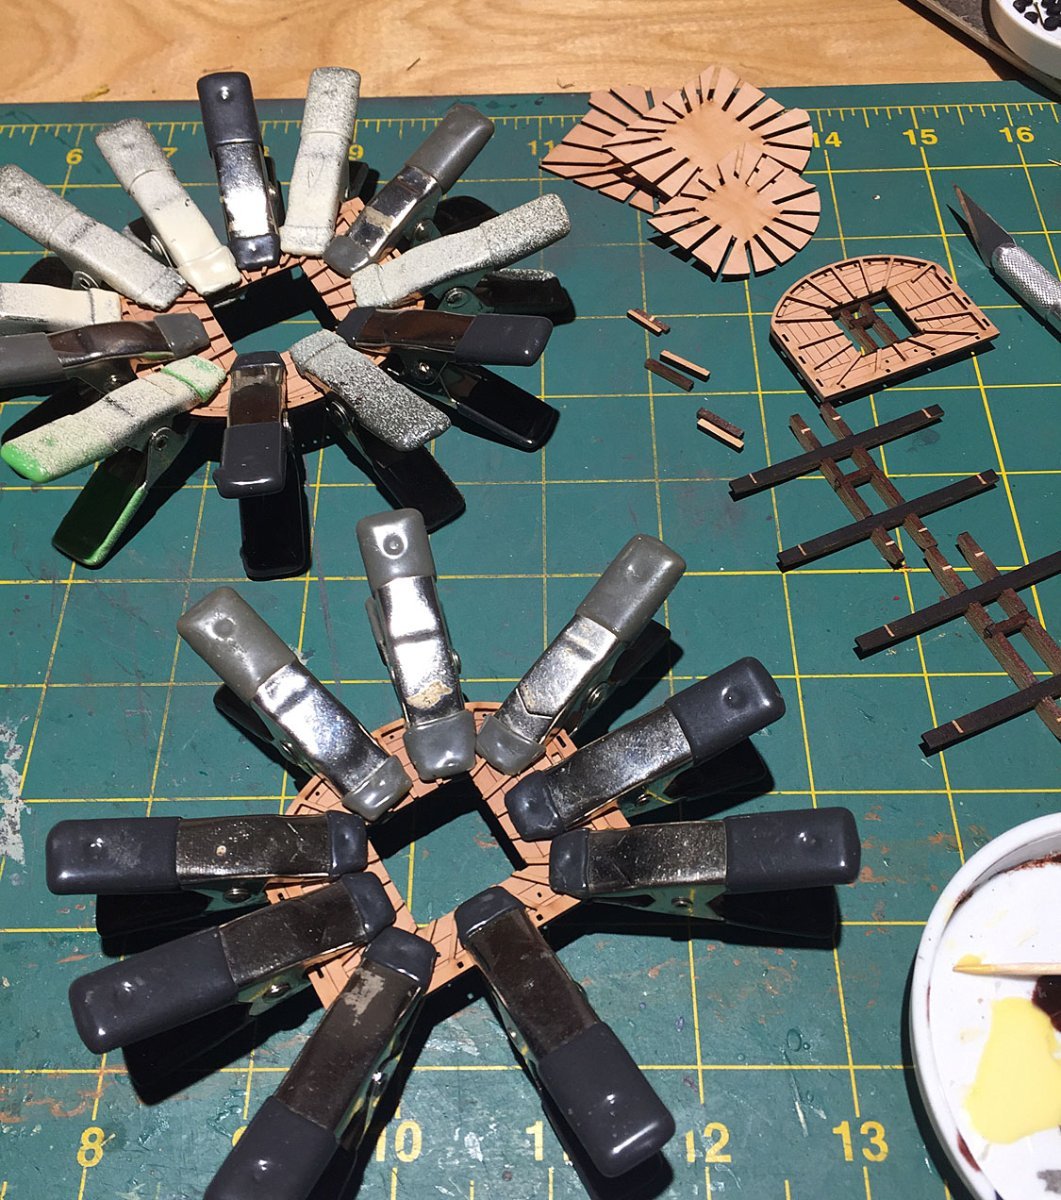
The kit's tops are being glued in this photo; I have purposefully indicated that you'll need several small clamps to get these properly glued together. After I rubbed white glue onto the top pattern piece with a fingertip, the piece wanted to curl and pop-up immediately from the base pattern. If clamps were not used there would be a lot of fiddly and messy aftermath of re-gluing of the thin support strips.
These detailed pear pattern tops are laser-etched with loads of nice detail which you can't see here (later). When completed, these will be painted black but the laser etch detail lines will still show up, similar to the ship's wale patterns. The crosstrees for the tops have been assembled and the small square pieces alongside are the crosstree bolsters; once dry, I'll remove the "char" from all... 🤣
That's all for now, MSWer's.
Ron
- JpR62, KARAVOKIRIS, BobG and 11 others
-
14
-
11 hours ago, Blue Ensign said:
Good progress Ron,
Those rudder pendants were also used to steer the ship were the wheel or steering lines lost or damaged. The pendant was usually secured in the Mizzen channels, and if required tackles were attached to help steer the ship.
I used thin Evergreen styrene strip for the stern Capping rails on my Pegasus build. It easily follows the curves of the Tafferal, and as it was to be painted the material type wasn’t critical.
As your Camilla is to be sea-set do you intend to fit a Rudder coat? That’s a big hole for a following sea to enter.🤔
B.E.
Thank You, B.E.
I am aware the rudder chains (and ropes) could - in a pinch- steer the ship if the normal steering were out of commission. I wasn't aware that the pendant ropes were tied-off in the mizzen channels; makes good sense, tho! Thanks for this specific info.
Presently, I've got these rudder pendants temporarily secured to a brace cleat on the q'deck which I did suspect wasn't the right spot. You've helped me suss out this detail. Correction forthcoming...
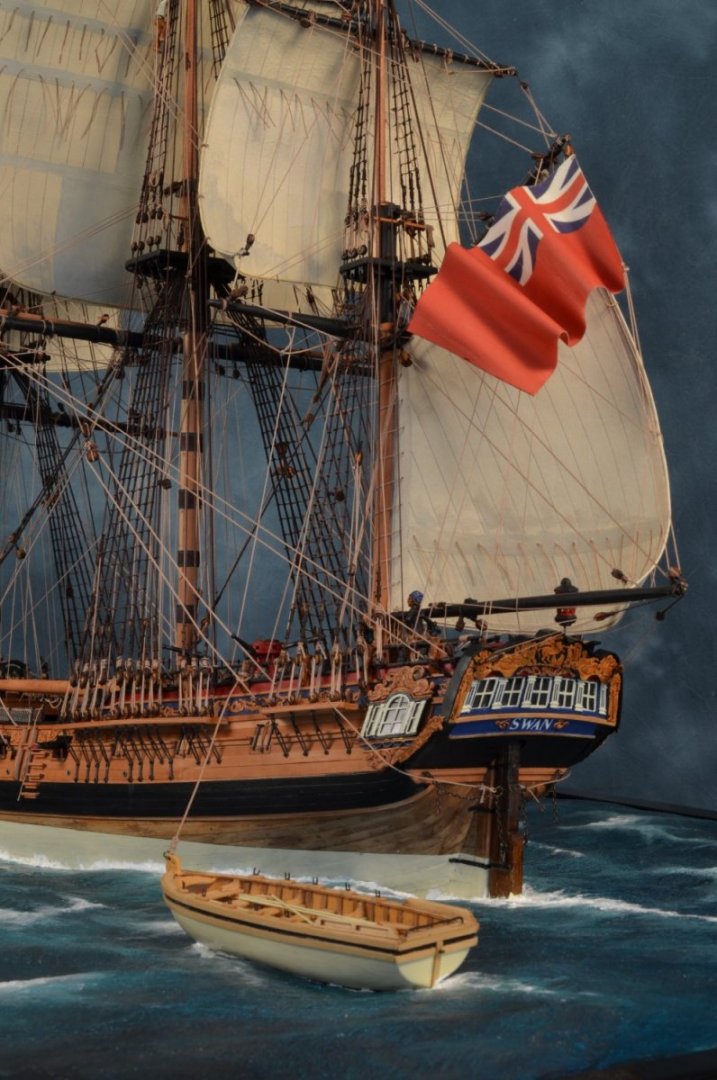
Ah, yes, the curvy Tafferal. I also solved this identical issue with a thin strip of styrene for my HMS Swan build (neé Pegasus); the attached shows the capping piece in action, so-to-speak. If my thin pear won't do the trick, I'll use some styrene strip since that did work well. I encountered a similar problem years back that I partially resolved with some pear strip (HMS Ardent).
Another Yes, I plan to add a small piece of shaped aluminum foil to fashion a rudder boot. I tried other materials but this worked the best in the past. I'll paint it to appear as flexible brown leather. I've envisioned the diorama placing Camilla in a nasty weather trough, between large waves, a large following wave at her stern! 😳
Ron
- Blue Ensign, KARAVOKIRIS, yvesvidal and 2 others
-
5
-
Found a little shop time post-holidays. This update shows a number of small fixes to various hull areas before the masts are created.
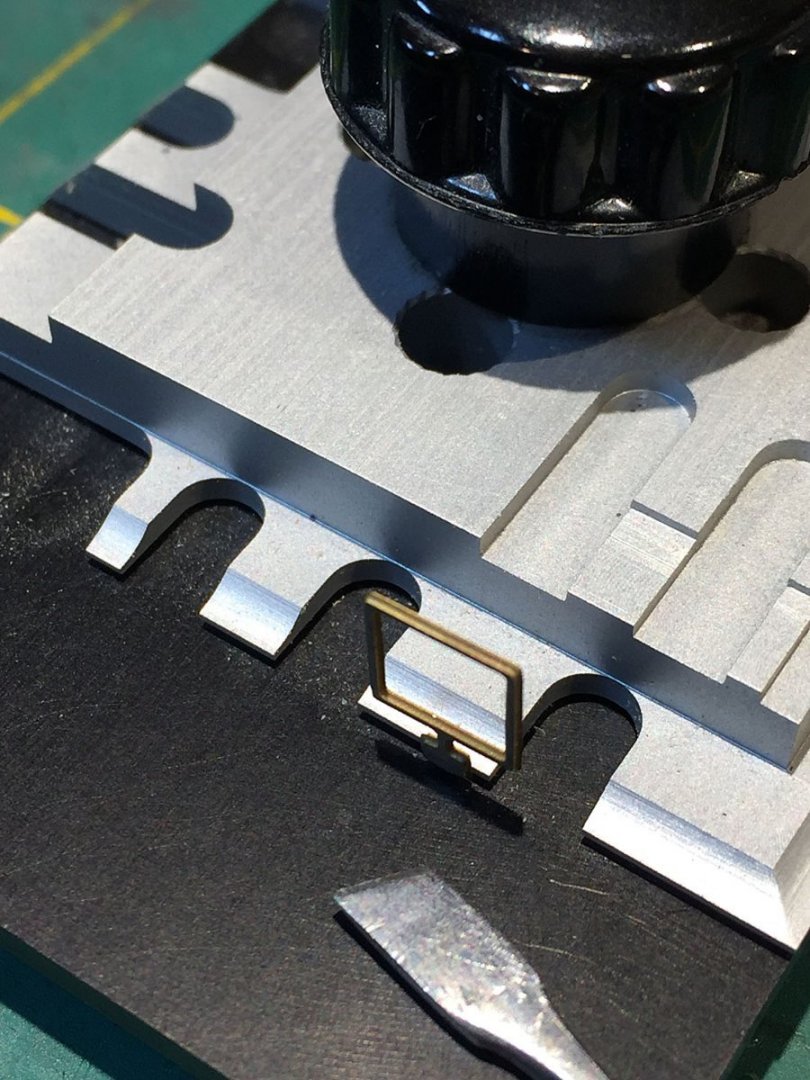
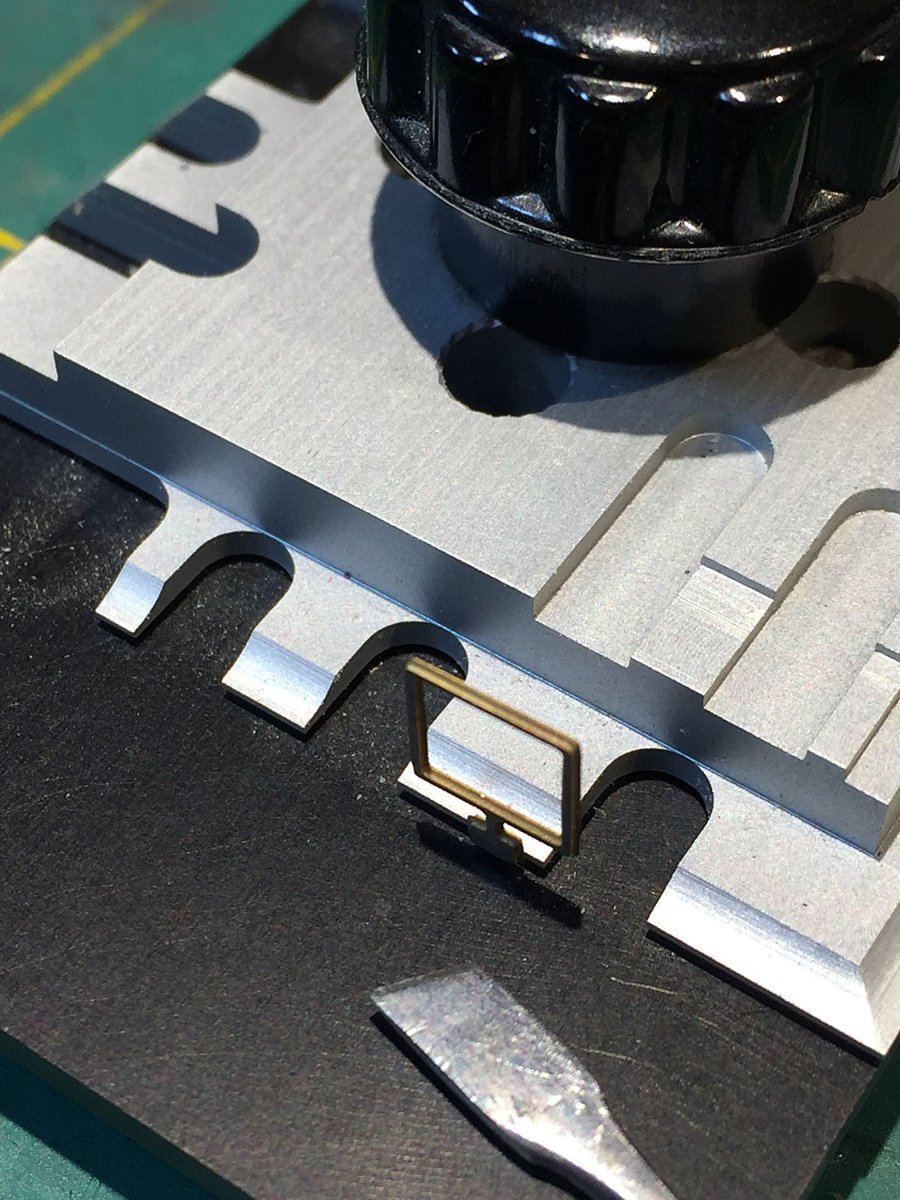
I acquired a photoetch bending jig a couple years ago for precise folding/bending of small P/E parts. Shown here is a spanshackle after it's been bent to form its deck mounting pin. This piece will be mounted along the centerline of the foc'sle deck. A little earlier in my log the subject of fish davits and spanshackles came up.
On a hunch, I trolled through several leftover stash boxes and found this small P/E piece from an earlier build; it's a scale-accurate spanshackle! After painting it black it gets mounted on the foc'sle deck, near the foremast.
Lesson: save all your kit leftovers. I suspect most builders do. I store mine in various sizes of compartmented plastic pill boxes and divider boxes. Like various sizes of clamps, you can never have too many of these either...

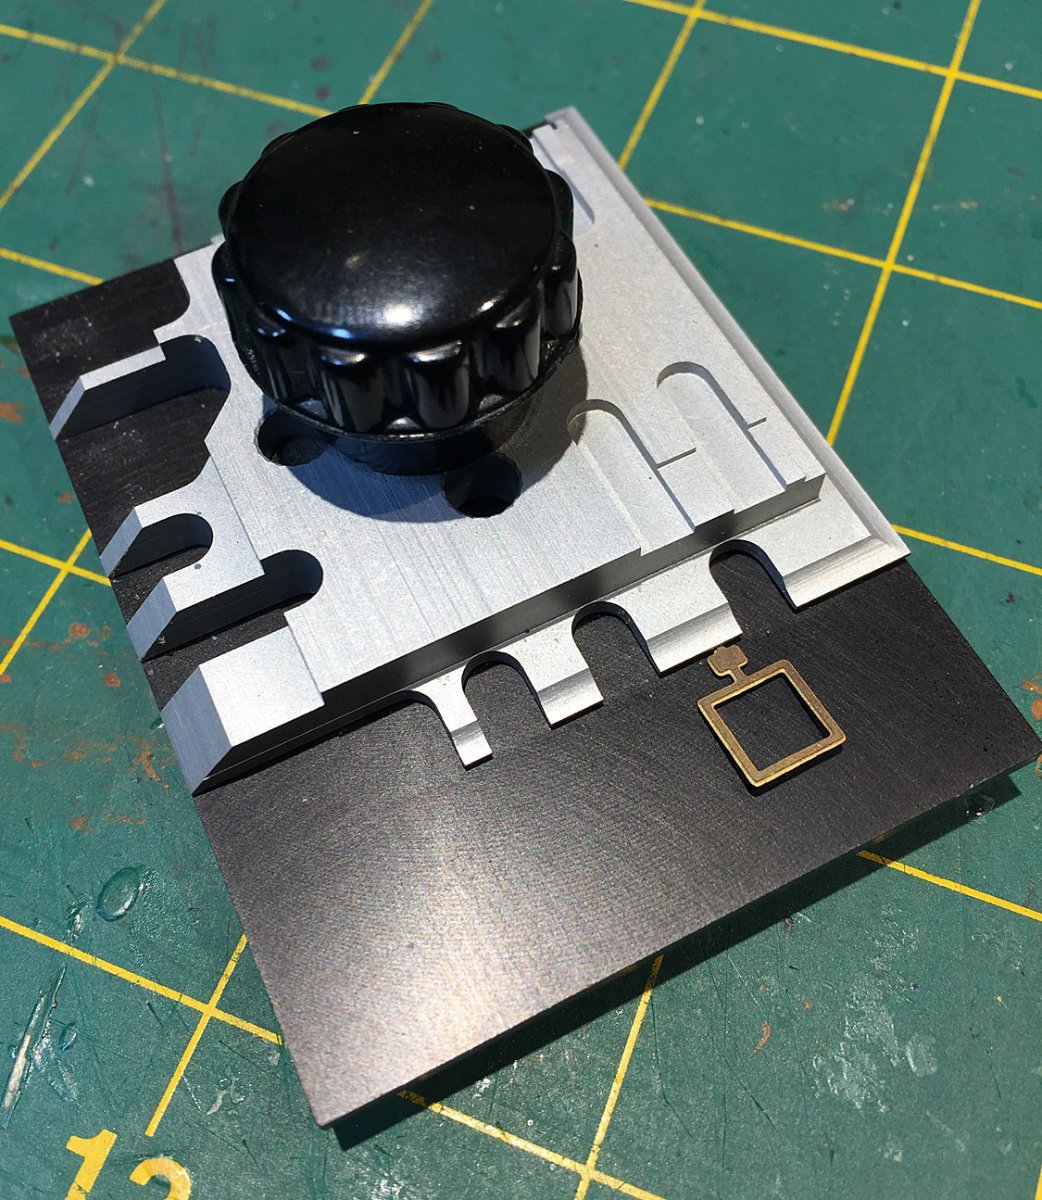
The flat P/E here is ready to be folded upward; a "lifting" tool- either a single-edged razor blade or the tip of a thin chisel - is used to form the various angles required on flat P/E pieces like this one. The multiple size"fingers" permit an unlimited variety of angles and clamping options; the aluminum clamping bar can be easily rotated to select various sized fingers to suit the P/E forming task.
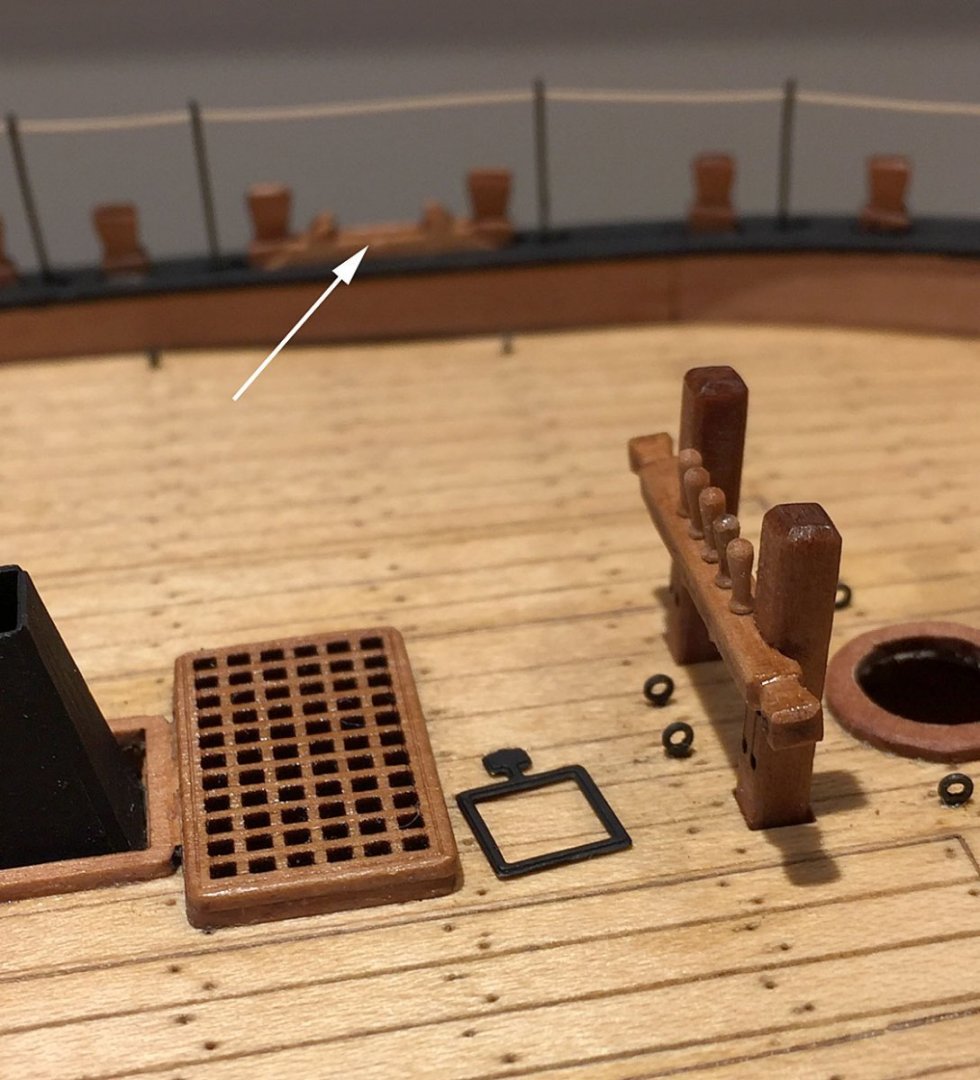
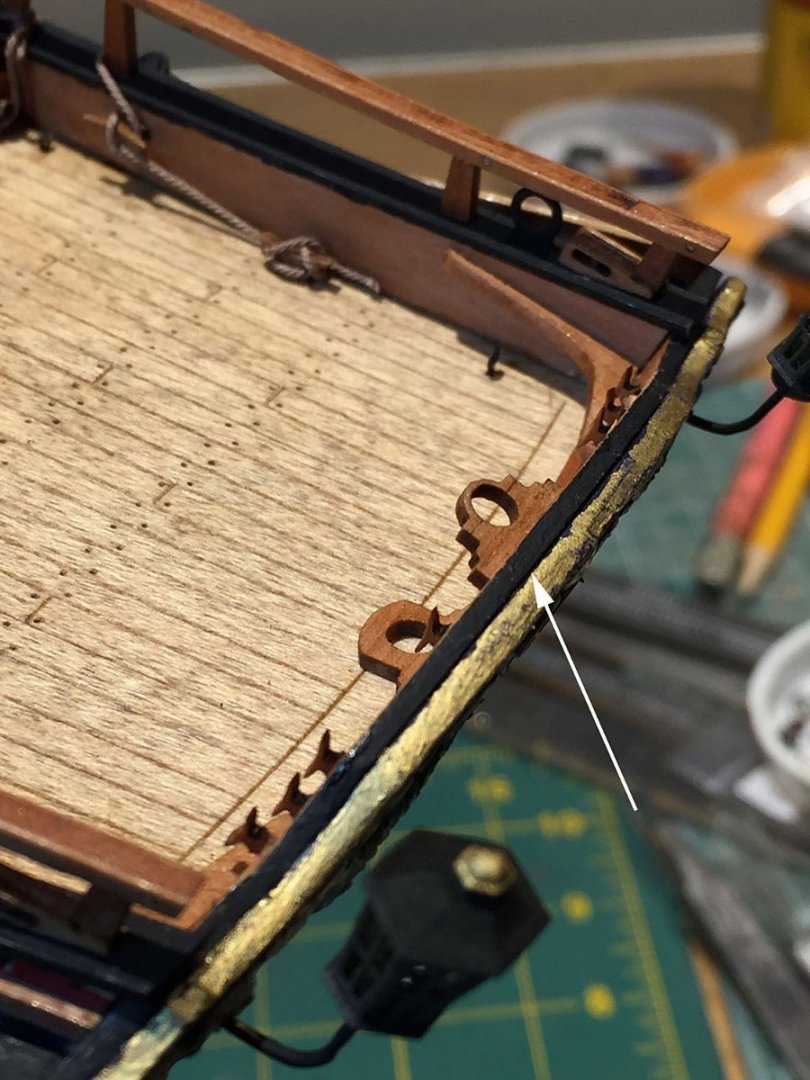
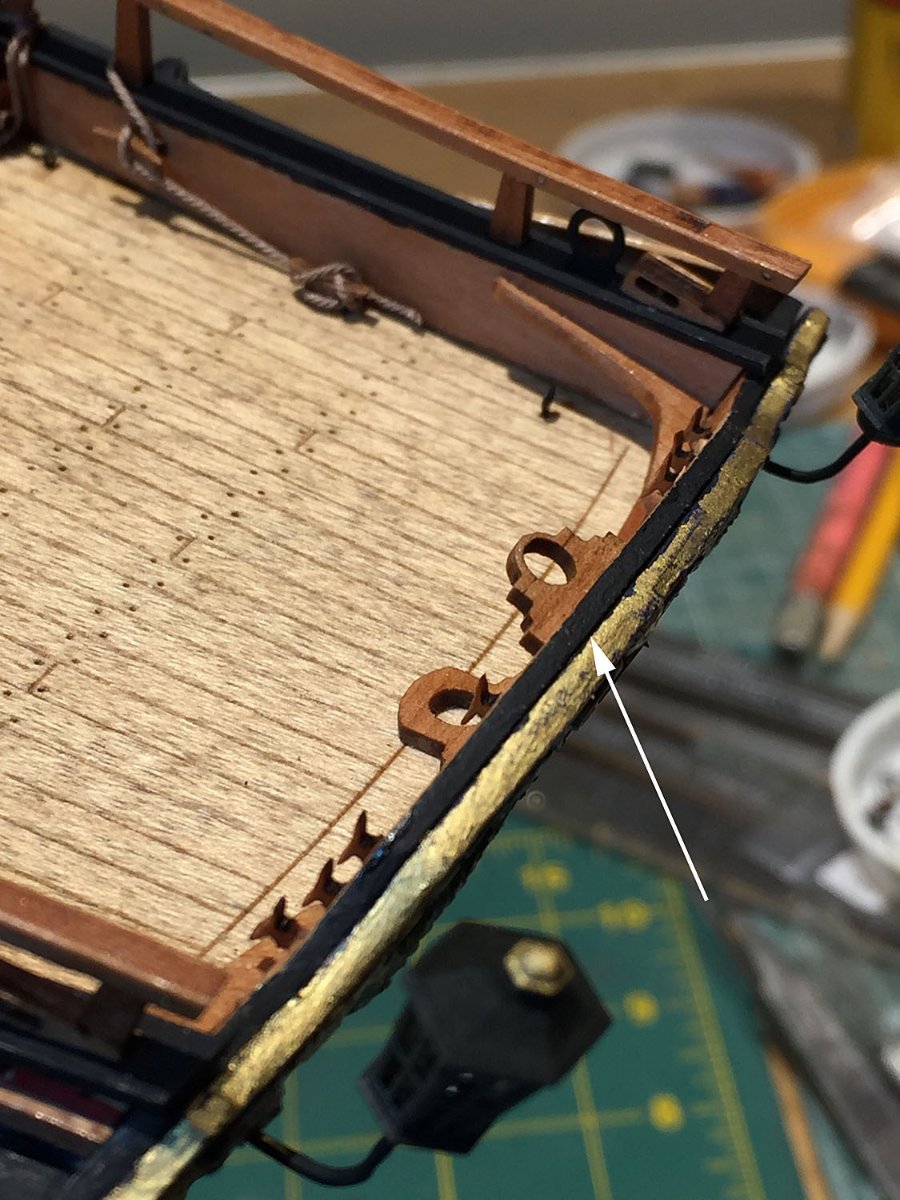
Here's the spanshackle, painted and mounted to the foc'sle deck. The square iron "shackle" could be raised (presumably a hinged asssembly) and one end of a fish davit would be held captive in this iron ring while the length of the davit rested on the "crutch" (indicated by the arrow). The davit beam was quite long and would thus extend well over the bulwarks to aid in hauling anchors. Davit crutches are mounted on the starboard as well as larboard gunwales.
I decided to paint the scuppers a light grey color to simulate lead outlet pipes. Earlier in my build they appeared as copper piping. As I'm nearing completion of the hull I'm changing the color of some elements to be more historically accurate as well as more aesthetically pleasing.
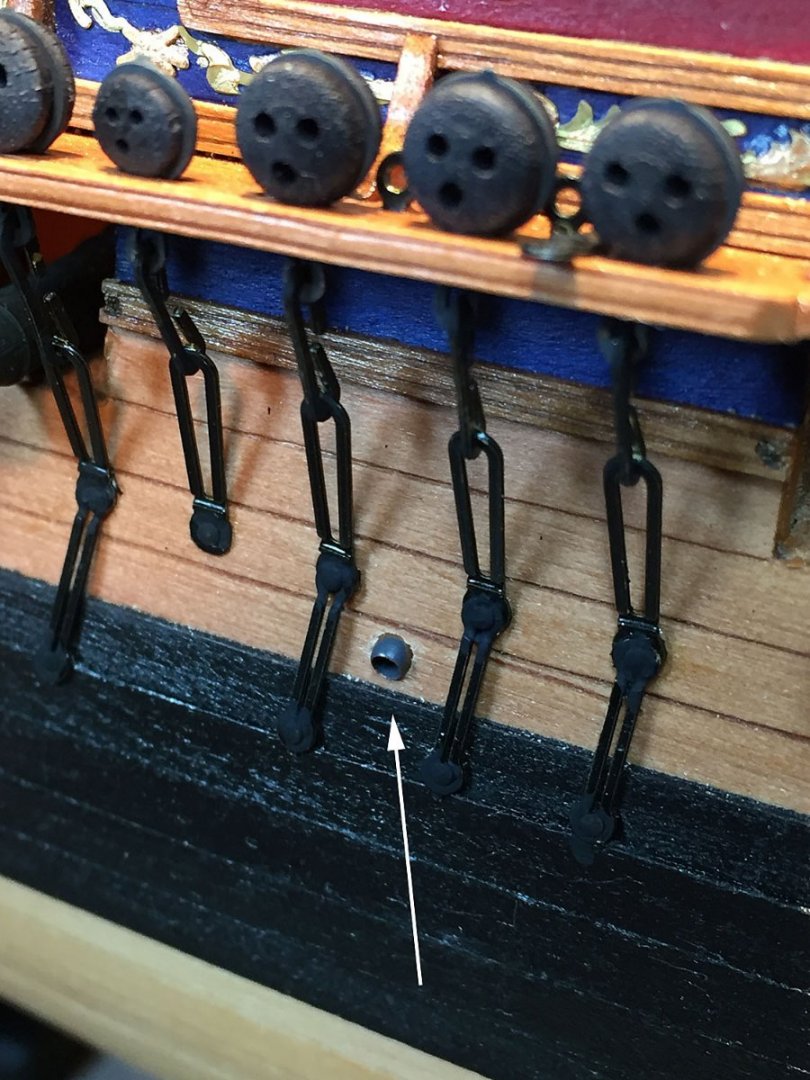
A NOTE: don't forget to close up the ends of the chain straps once you've mounted the deadeyes.

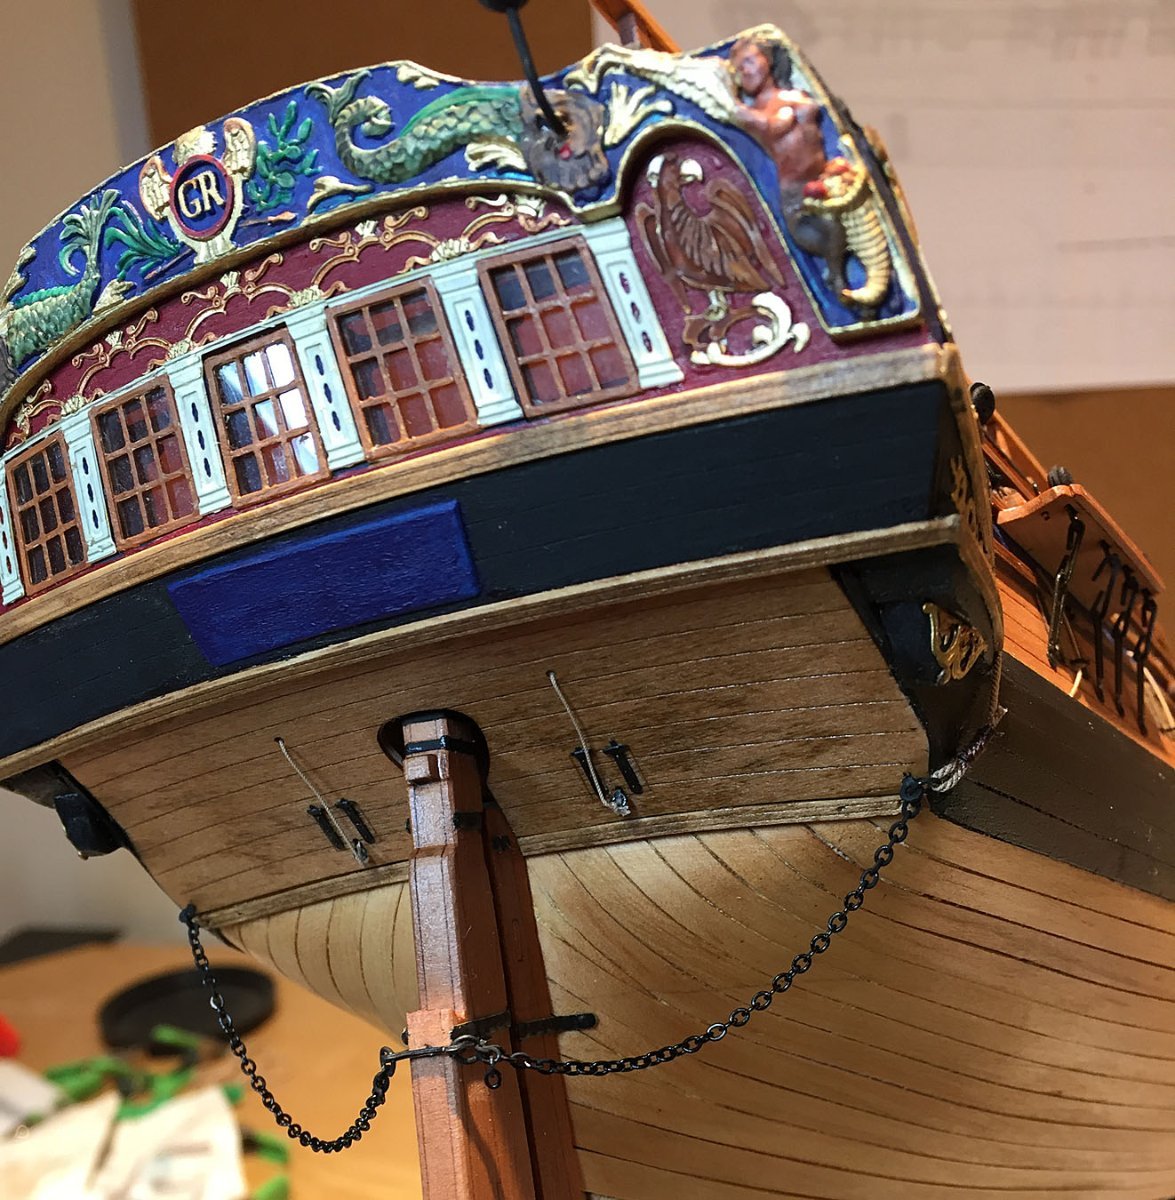
I've mounted the rudder chains shown here but I'm doing some additional research now on the accurate depiction of these. Many legacy NMM models show rudder chains "draped" fully across the lower transom at two or more support points, rather than the single point of support shown here near the edge of the finishing piece.
Rudder chains were critical. In heavy seas or with an unfortunate bottom scrape to the keel - or a good shot by an enemy- a rudder could suddenly become "unhinged" from its iron hull straps (pintles & gudgeons). I believe the stress that would be associated with a large, heavy rudder coming "unshipped" (the nautical term) would be tremendous and thus require multiple supports to keep it from breaking away completely from the stern - and thus floating away. Obviously, if this happened, a sailing ship was in rather deep doo-doo.
The kit's supplied chain (besides being a little too shiny for my taste) isn't quite long enough to achieve the additional length along the transom, so I'll need to find a replacement that's long enough for both sides... hopefully there's some spare chain in my leftover stash boxes!
YIKES! Reviewing my photos here, I just noticed on this particular photo (above) I omitted closing-up one of the mizzen chains, second one to starboard, beneath the channel. As I've commented previously, taking extreme closeup photos of one's model and looking at them critically will definitely reveal details that need more attention.
The arrow points to the single point of attachment for the rudder chain, per the kit's plans. I will likely add two additional support eyebolts to show three points of support (per side), not just one and add the lengthened chains. There was heavy rope lashed to the chain to help retrieve an unshipped rudder from the ship's wake.

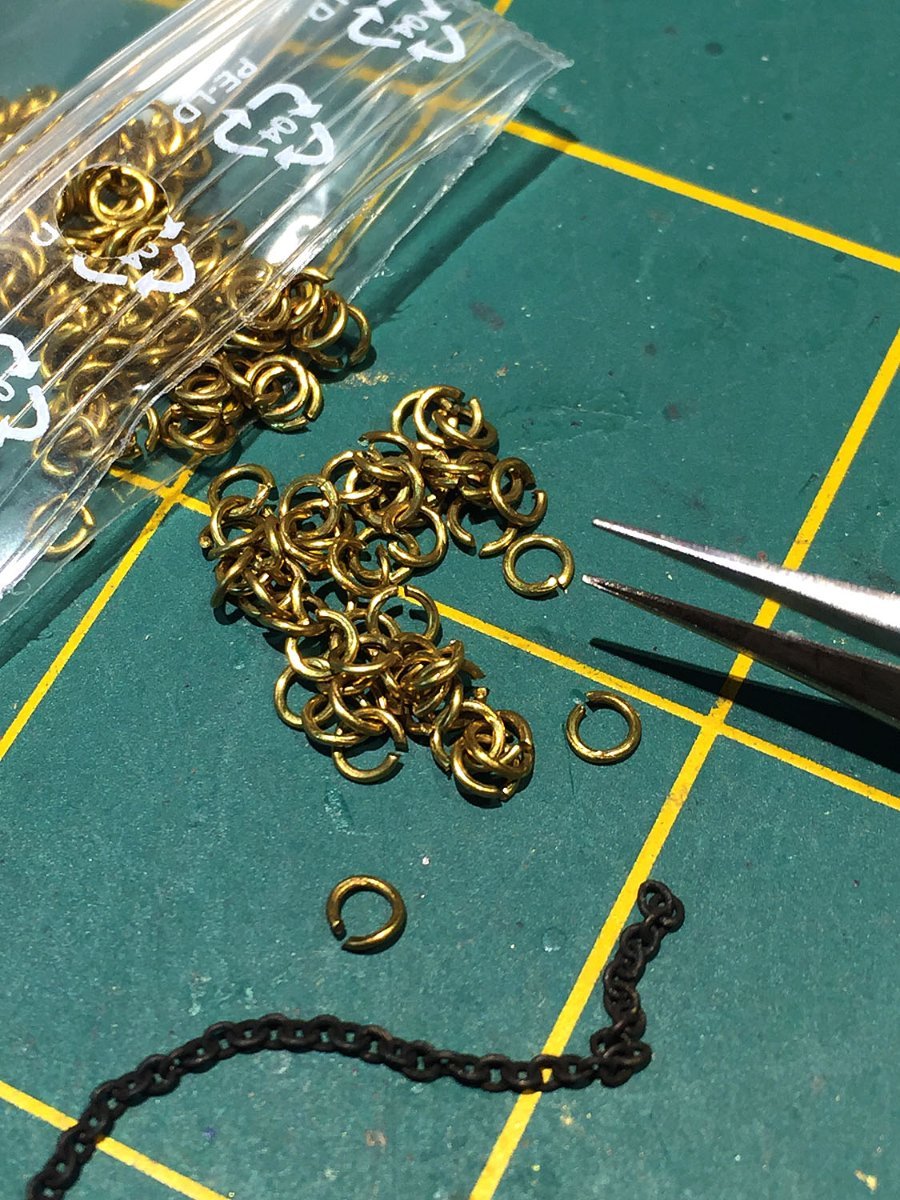
"Jump rings" for attaching the rope to the rudder chain. These are handy little pieces I often use for other rigging tasks. There are none of these in the kit. I typically blacken them chemically (rather difficult to paint). These handy pieces can be found in the "beading craft" section of hobby/craft stores; I buy them (in different sizes) from Joanne's Fabrics. They can also be sourced from jewelry suppliers.
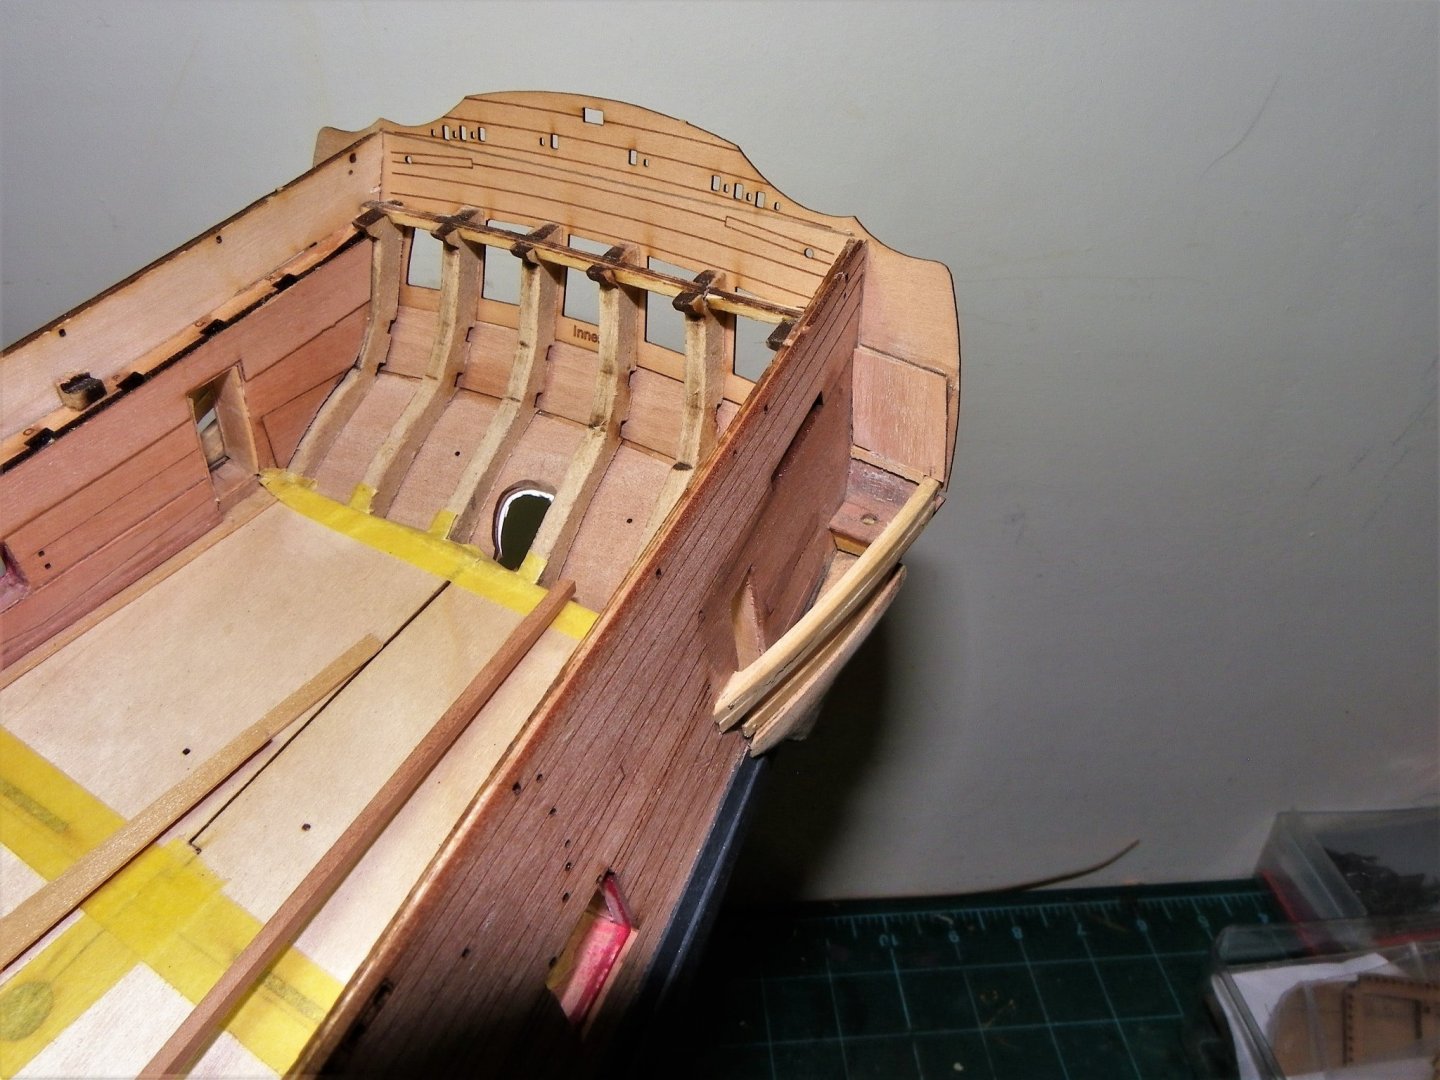
Ugh! I am not happy with the funky, raw, unfinished look of this stern area. It doesn't look correct, appears incomplete and more important, doesn't represent a decent shipwright carpentry solution. Needless to say, it needs fixing. Unfortunately, I'll have to work around the stern lanterns to accomplish my fix and also be very careful to not break or scratch other adjacent details.

Here's how I intend to deal with this "sore thumb." I have in my pear wood stash several strips of .5mm thick X 4.5mm strips. I need only a single short length to mount along the full width of this curved stern taffrail section (as the temporarily placed piece here shows).
I plan to soak the pear wood strip in hot water for only a few seconds and then form it with my fingertips along the existing curved sections while gluing it in-place with some CA. There is no good way to mount this with aliphatic glue and clamp it, so the solution must be CA. Even Bondic won't work. The wetted, warm pear strip - in addition to being extremely pliable and flexible - will activate the CA. Once tightly pressed along the wood and resin edges beneath it, the pear strip will hold fast...at least that's my plan...stay tuned.🤔
Should this work out to my satisfaction, I'll paint this stern capping (taffrail) in black to match all the others. There will also be some inevitable touch-up to the decorative piece.
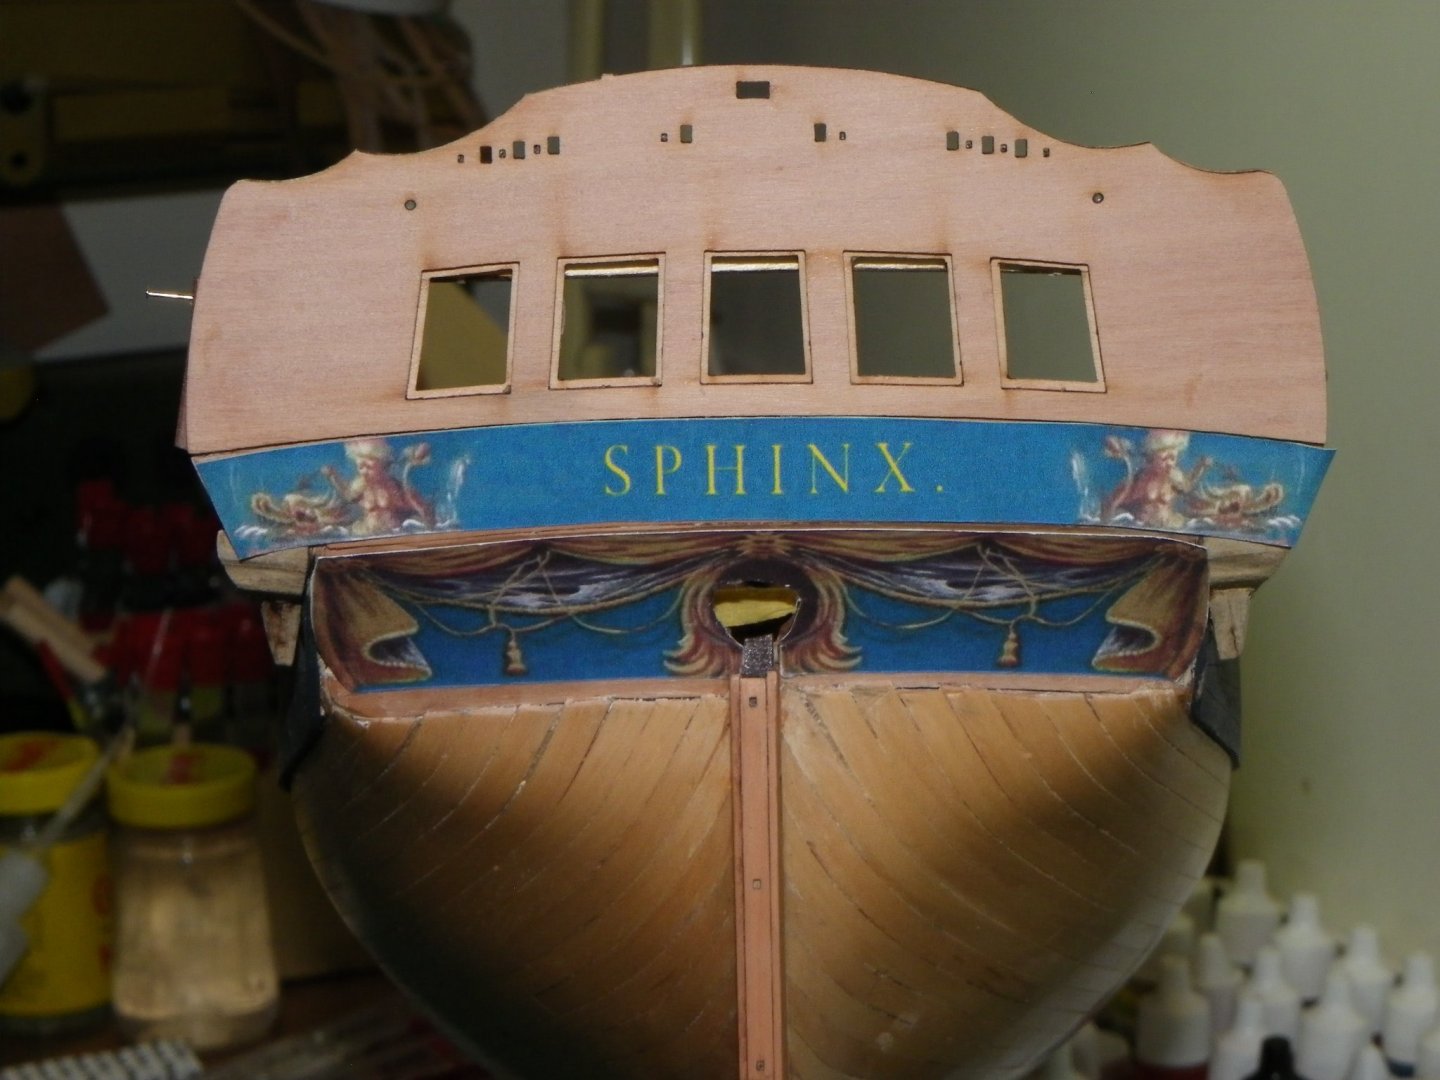
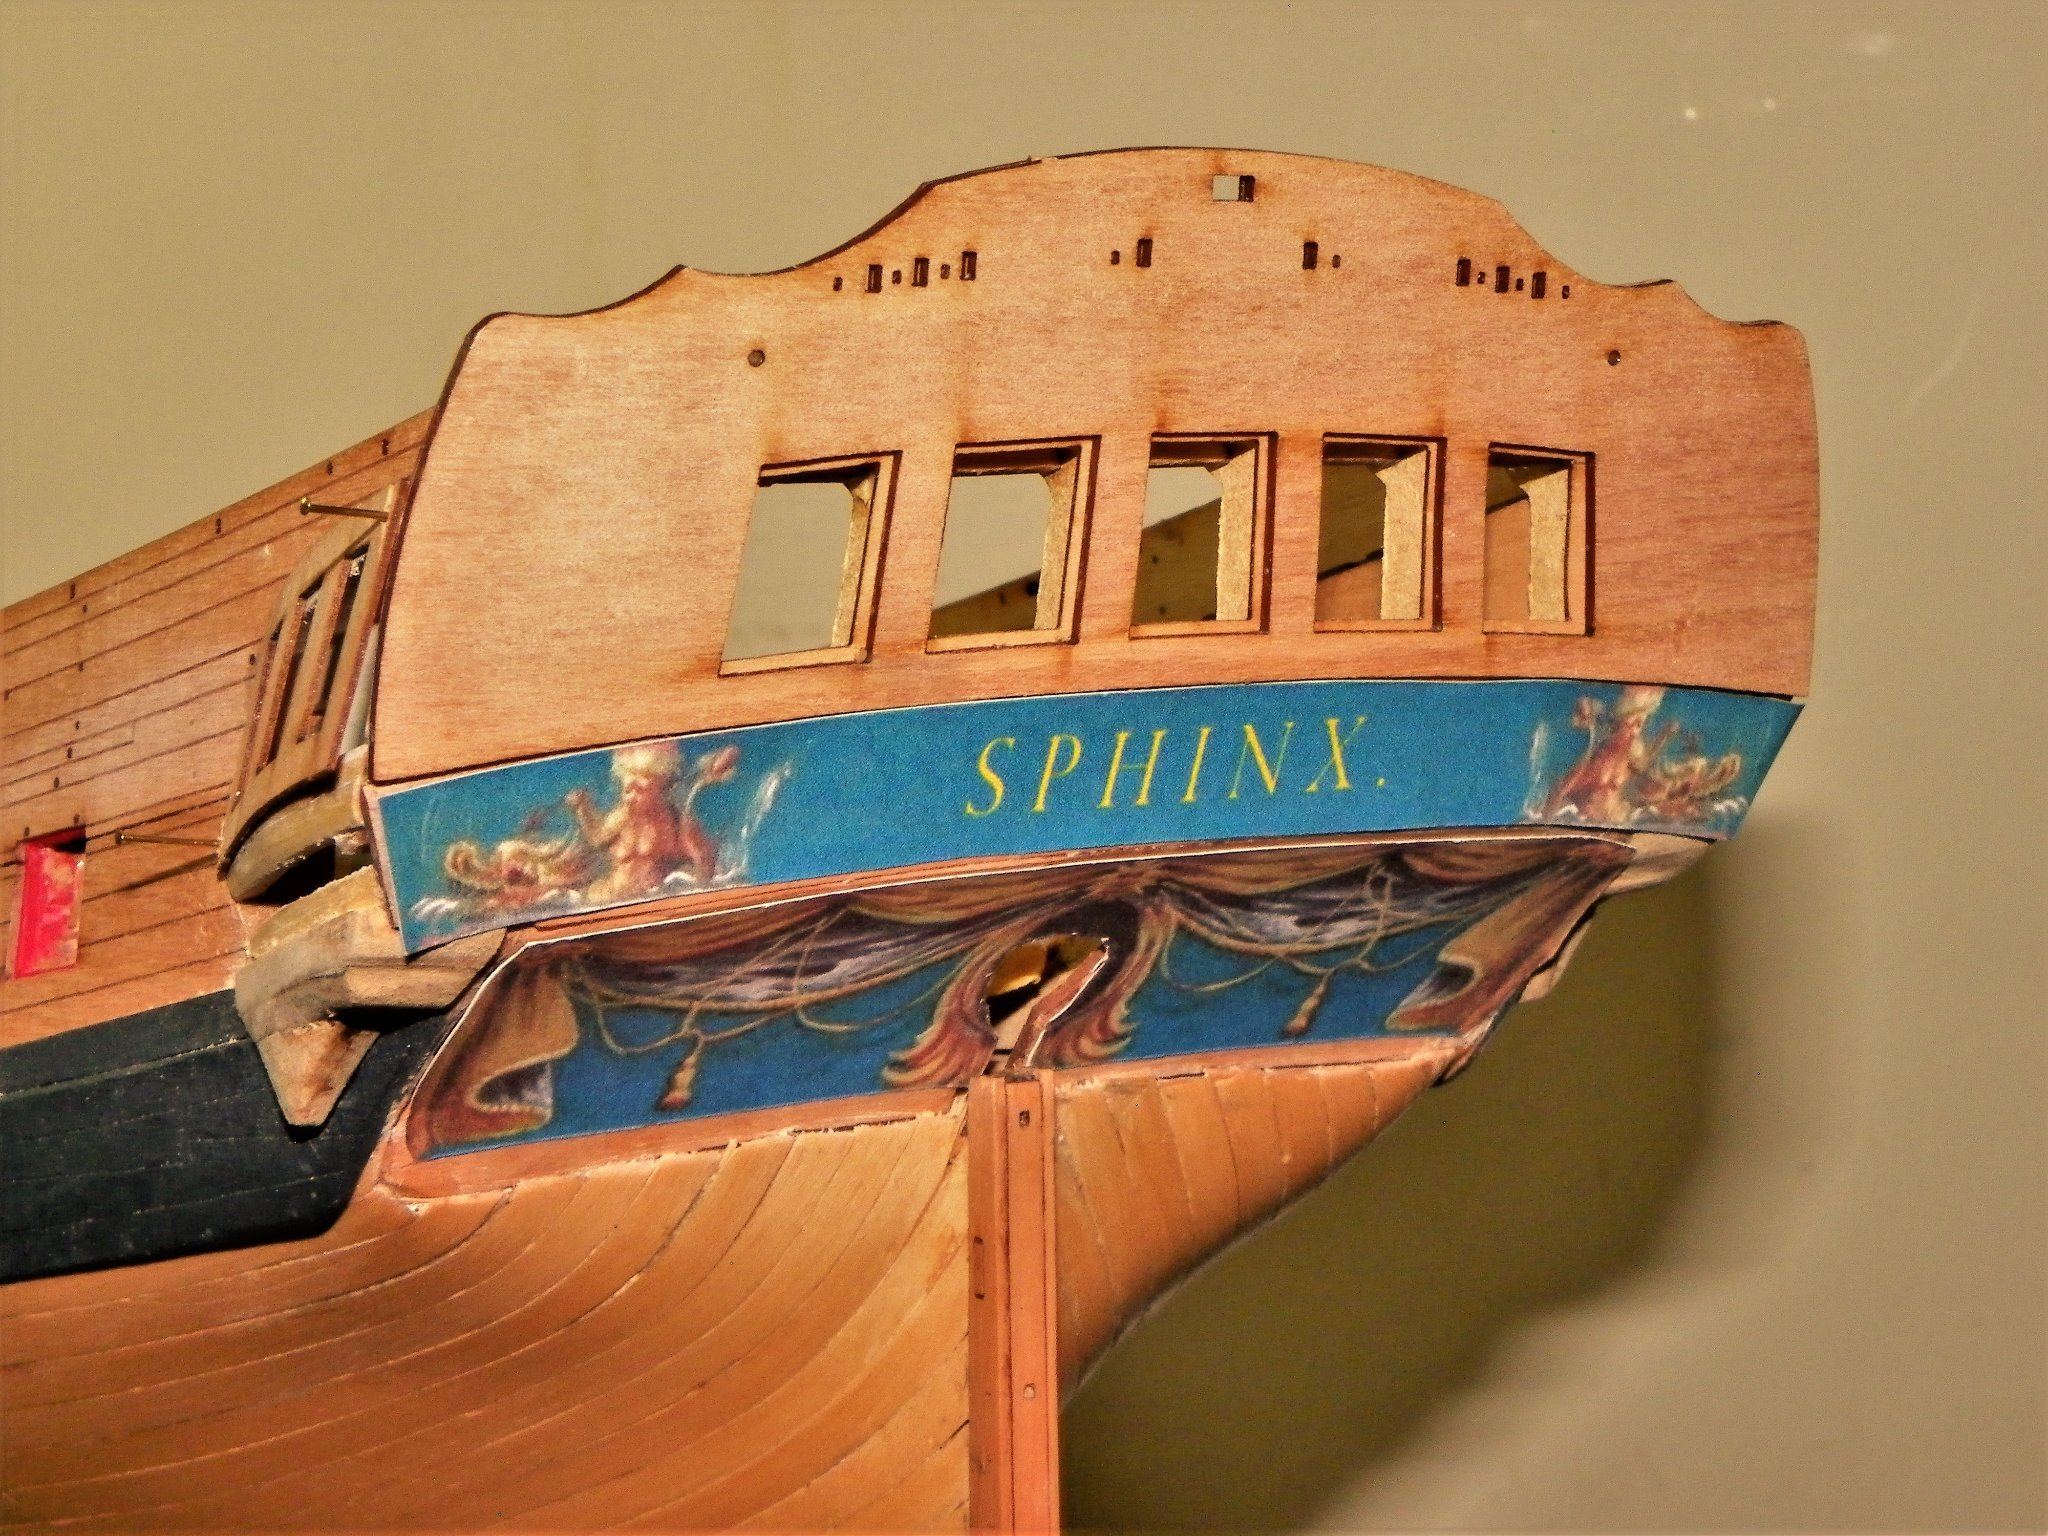
Some may have spotted HMS Camilla's stern signboard badge has been colored in Pthalo blue, the hue I've used in my build. I've chosen this color to be consistent with the background color of the upper stern decorations. The lettering for her identity (in white) won't be added until the additional work at the stern has been completed, taffrail capping as well as rudder chain modifications.
I've started gathering my pear wood square stock and planing fixture for mast making - which I hope to get started on in the next few days. I'll show this important fixture in a future post.
Ron
-
I’m commencing from completion of second planking as much has been covered in other posts. This is my second model and I’ve tried to follow the build manual verbatim, nevertheless a few mistakes have been made.
Glad for any feedback
----for some reason, the above text didn't import as a "quote" from the earlier, first post by Paul. NO biggie....
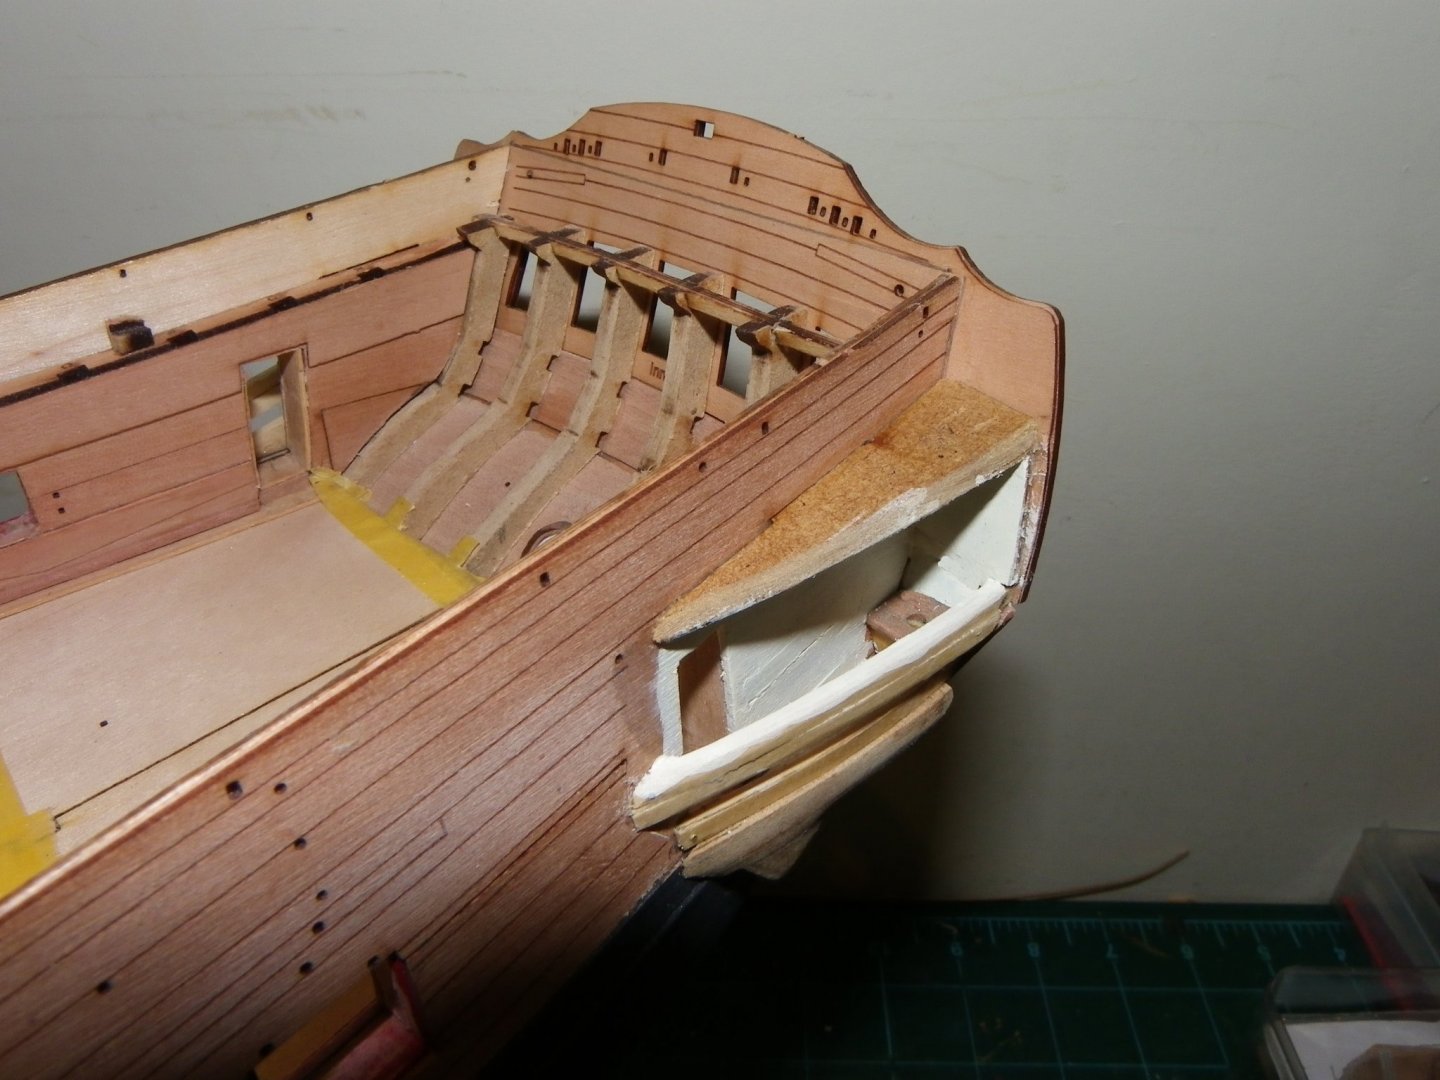
Welcome to MSW, Paul. From your photos it appears you've done a fine job thus far. Good planking. Congrats! On a scale of difficulty for high quality kits, I'd place the Vanguard Sphinx at about a 7 or 8 on a scale of 10; a definite challenge for a ship modeler's second build. Although it appears you are off to a good solid start, there are several good Build Logs here you that should help you with the balance of this challenging project.
My other recommendation is to seriously study all of the many large plan sheets provided in the kit. If you've never rigged a large square sailer, you'll soon come to appreciate these drawings; they will be very helpful for this aspect of completing your model, particularly if you don't have detailed books on this topic. One more piece of advice: DO look ahead in the excellent Build Manual. This exercise follows very closely with spending time with the plan sheets as you continue your journey.
Cheers,
Ron
(hollowneck)
-
11 hours ago, Blue Ensign said:
Thank you, Bob, Kirby, and Jean-Paul.
I think the black coamings will be enhanced once the Boxwood deck planking is down, while I wait for the new gratings to arrive I am looking at panelling for the Great cabin.
B.E.
Very nice work on the upgrading scratch work for your coamings and hatches, B.E. The "roundup" will be considerably more evident on the weather deck pieces, but adding this "reveal detail" in your build will certainly add to your next level execution of this kit. The black finish will look very nice with the contrasting red painted elements and offers a visual consistency that will be appreciated by many (MSWers)...impressive addition!
Ron
-
On 12/26/2021 at 7:05 AM, Blue Ensign said:
Square stock allows for nicely profiled heels and heads on masts, and forming octagons on yard centres, but the round sections obviously have to be turned.
This may be beyond the remit for your target kit market, but simple masts such as on your Fishing boat kits would benefit from such an enhancement as Pearwood dowel.
In preference to the standard Walnut (too dark for my taste) or Limewood dowel (tends to warp) I use Ramin for lower masts and Boxwood square stock for Topmasts.
A Pearwood alternative I would find appealing.
Cheers,
B.E.
I also prefer square stock for all my masting - preferably pear wood - but boxwood would also work; adding this cost to your top-level kits is not a deterrent IMHO: I spend the "extra" money in any event on additional stock to finish my models. As B.E. says, doing the various profile work necessary for accurate-looking masts and yards is best accomplished with square stock; however, I agree this may not be desirable for your target market. The exception, as noted, would be the smaller craft you're offering which don't have the complexity involved with modeling Royal Navy warships.
Related to this question, I have noted in my Build Log for the HMS Sphinx that I'm including only one of the boats, not all three offered in the kit. Indeed, your pre-production and tweaked resin cutters look very nice. In compatible scale length, I'd have no problem including them with my models; properly detailed -thwarts, oars, etc.- and finished to resemble actual wooden craft. They'd work a treat in my world...
Cheers,
Ron
PS Check this photo out; Chris should recognize it instantly: it's a 22' Caldercraft cast-resin cutter hull, a kit they've offered forever. I love these well-done little guys; carefully detail them and they're respectable additions to any larger model.
- coxswain, BobG, GrandpaPhil and 6 others
-
9
-
You're in the right spot (and the best) for the right reasons, Michael.
You'll find lots of support and genuine appreciation here for your upcoming creative work. It will be interesting to see what you choose to build and I hope that you seriously consider creating a Build Log for that ship model.
A Warm Welcome,
Ron
-
2 minutes ago, mtaylor said:
Thank you all.
I'm pondering the rest of the build. Not stopping it but "modifying" it. I'm going to not do the masts and rigging as display space is an issue so how far do I go? An example would be the channels. I'll add them but not the deadeyes though that is subject to change. So I'll make decisions as I go..
My long term goal is after Sphinx, to finish Belle Poule (no masts or rigging) and then make some choices. Maybe Vanguard's razee or more likely CAF's Bellona. The idea of a big 74 is very appealing at this point.
A lot of pondering going on while waiting for glue to dry.
Mark, I'd encourage you to add the channels (whether or not you decide to add deadeyes). To me, a stripped-down Admiralty-style presentation would look naked without both of these critical components. My Confederacy with stub masts looks great w/o!
Happy Holidays and My Best Wishes to you for a good, solid recovery as we all roll into the New Year,
Ron
- BobG, mtaylor, Ryland Craze and 5 others
-
8
-
2 hours ago, glbarlow said:
You should consider not tree nailing the hull. It is very beautiful as it is. My opinion is the tree nailing gives the hull a case of the measles. I’m still quite happy with my decision to forgo tree nailing on mine.
I concur with Glenn. As stated elsewhere on the forum, the "trunneling" of hulls - even at 1/4" scale - is aesthetically over-the-top. Besides, if you omit this dubious procedure, you'll not have to worry about giving her a shot of the Shingles vaccine in her old age.🤣
Ron
- Ryland Craze and FriedClams
-
2
-
2 hours ago, Landlubber Mike said:
Looking really great Ron. Happy holidays!
Thanks, Mike. The same back at'cha - you & yours. And a Happ(ier) New Year!
Ron
- Landlubber Mike and mtaylor
-
2
-
Bruce d, I'm already there....
Doomed ships, or not, your thread immediately got me thinking that I'd like to build a 5-masted schooner being hauled across Panama on railway tracks.
What a diorama this would make, an intriguing combination of a model railroad with a ship model. Probably not HO scale though....the medical tents and staff to deal with the results of mosquitoes would be a vexing challenge.
I know! to bring the diorama into the 21st century, what about a 600ft. long Maersk container ship being dragged across Nicaragua by Teslas?
Ron
-
Thanks Derek.
I've just had another closer look at some of your models and you are a fine modeler. The Sphinx will be a very rewarding experience and a good match with your previous projects.
As you've likely already noted, my Build Log won't be helpful until you get to the later stages as I didn't start until most of the kit's skeleton/structural bits were completed. I do suggest looking-in at Build Logs for others who've posted in the early stages. There are a couple "gotchas" that are discussed and well documented ( I'm thinking virtually ALL the other builds ), mostly around the fitting and position of the stern patterns; this is a critical part of this build and others have explained their tribulations and subsequent solutions. As I've noted a few times in my Log, once you crack open the box of goodies and start fitting you'll soon discover the very close tolerances of all the pear wood pattern pieces, the beefy MDF parts. Like other recent Vanguard kits, the extensive P/E and the superbly-cast resin/3D printed components are a delightful step up.
Good Luck on your journey. This kit rewards its builders with a "next-level model" of striking beauty and complexity in its presentation. Friends and family will exclaim: "OMG! Did you build that!"
I suggest a confident, warm smile as your response.
Cheers,
Ron
-
Nice log, Clare. Lots of interesting things going on here- as well as solutions.
Ron
- catopower, Canute, thibaultron and 1 other
-
4
-
4 hours ago, Blue Ensign said:
A wealth of interesting info in the last couple of posts, Ron, she should look very impressive set in her seascape. 👍
B. E.
Thank you, B.E. Your build has given me excellent tips n' tricks: much appreciated.
I'm one of those sailing ship era dudes who gets excited in anticipation of the next steps: rigging, set sails. Then...making the box and the H2O to set Camilla at sail.
I am ever thankful my wife appreciates my need to display my model in a 24" X 48" diorama base to be placed somewhere in our house (as yet undetermined).
For a few months, every sailing ship model is a beguiling Mistress, taking me out to sea, but she understands. I am a lucky man.
Ron
-
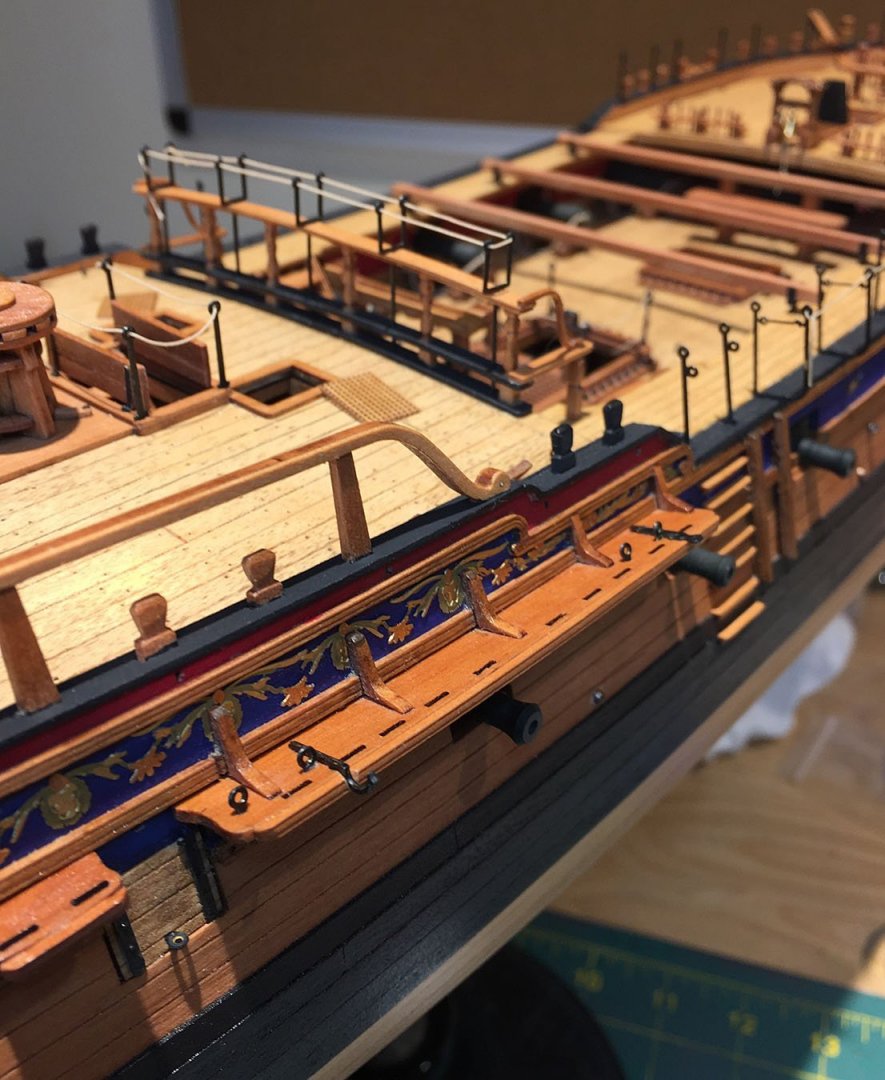
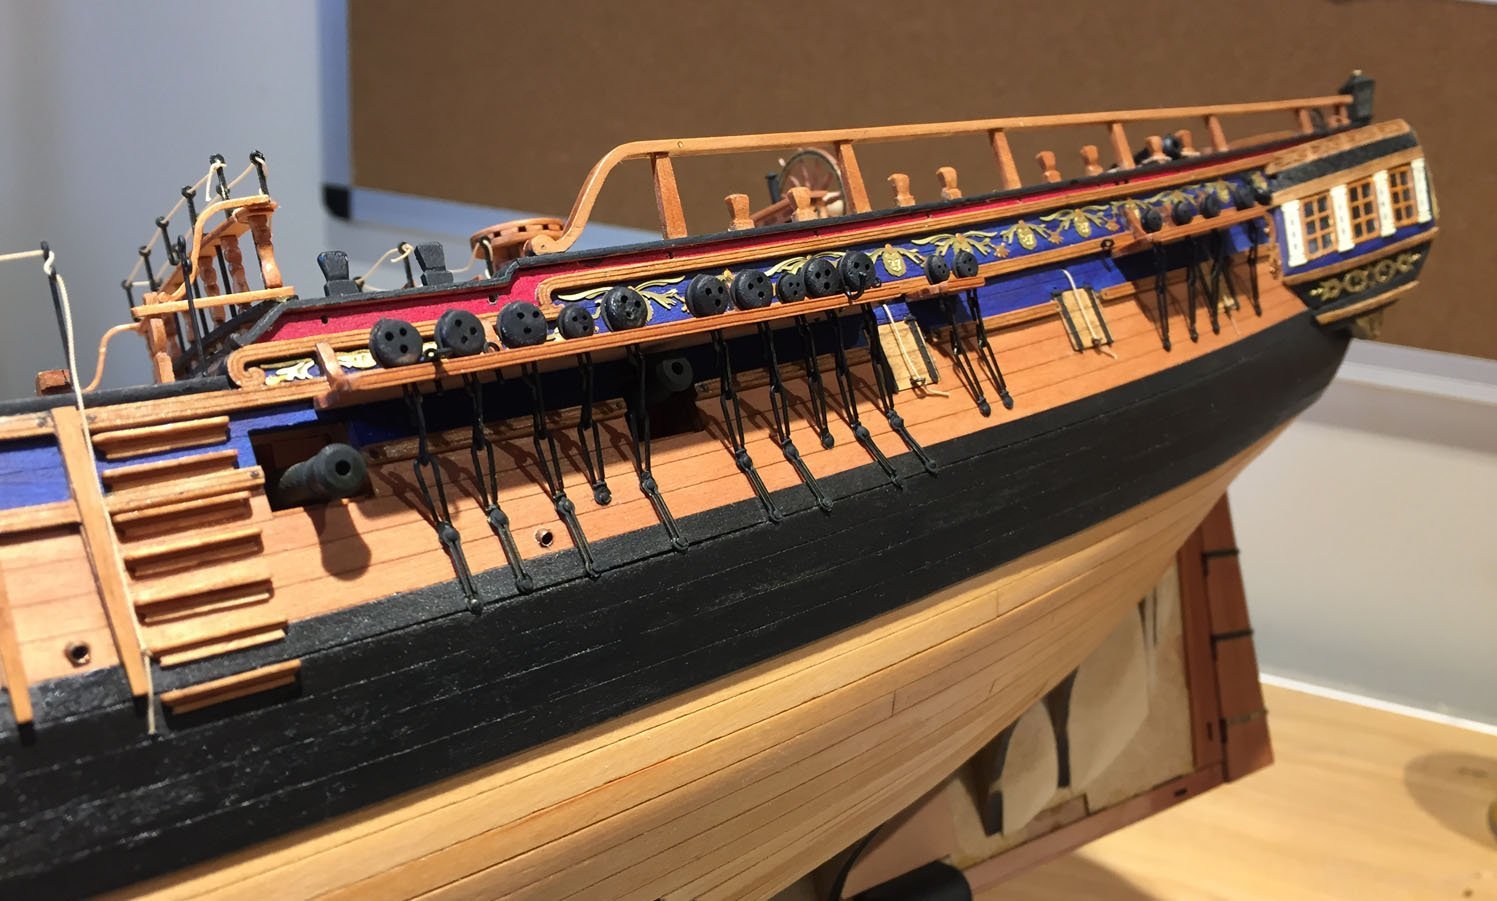
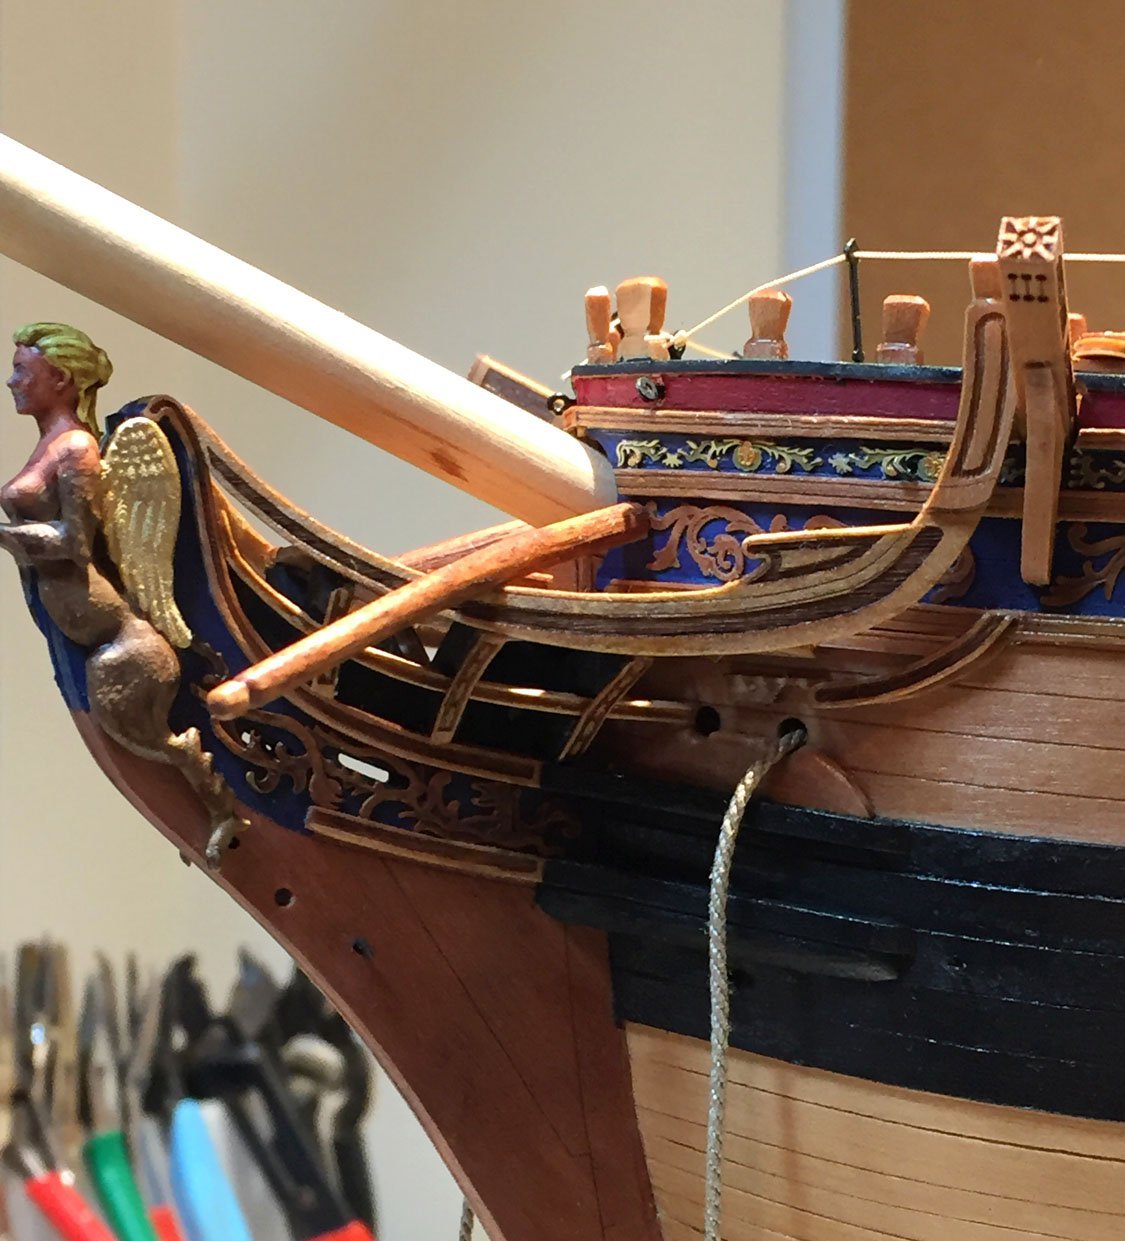
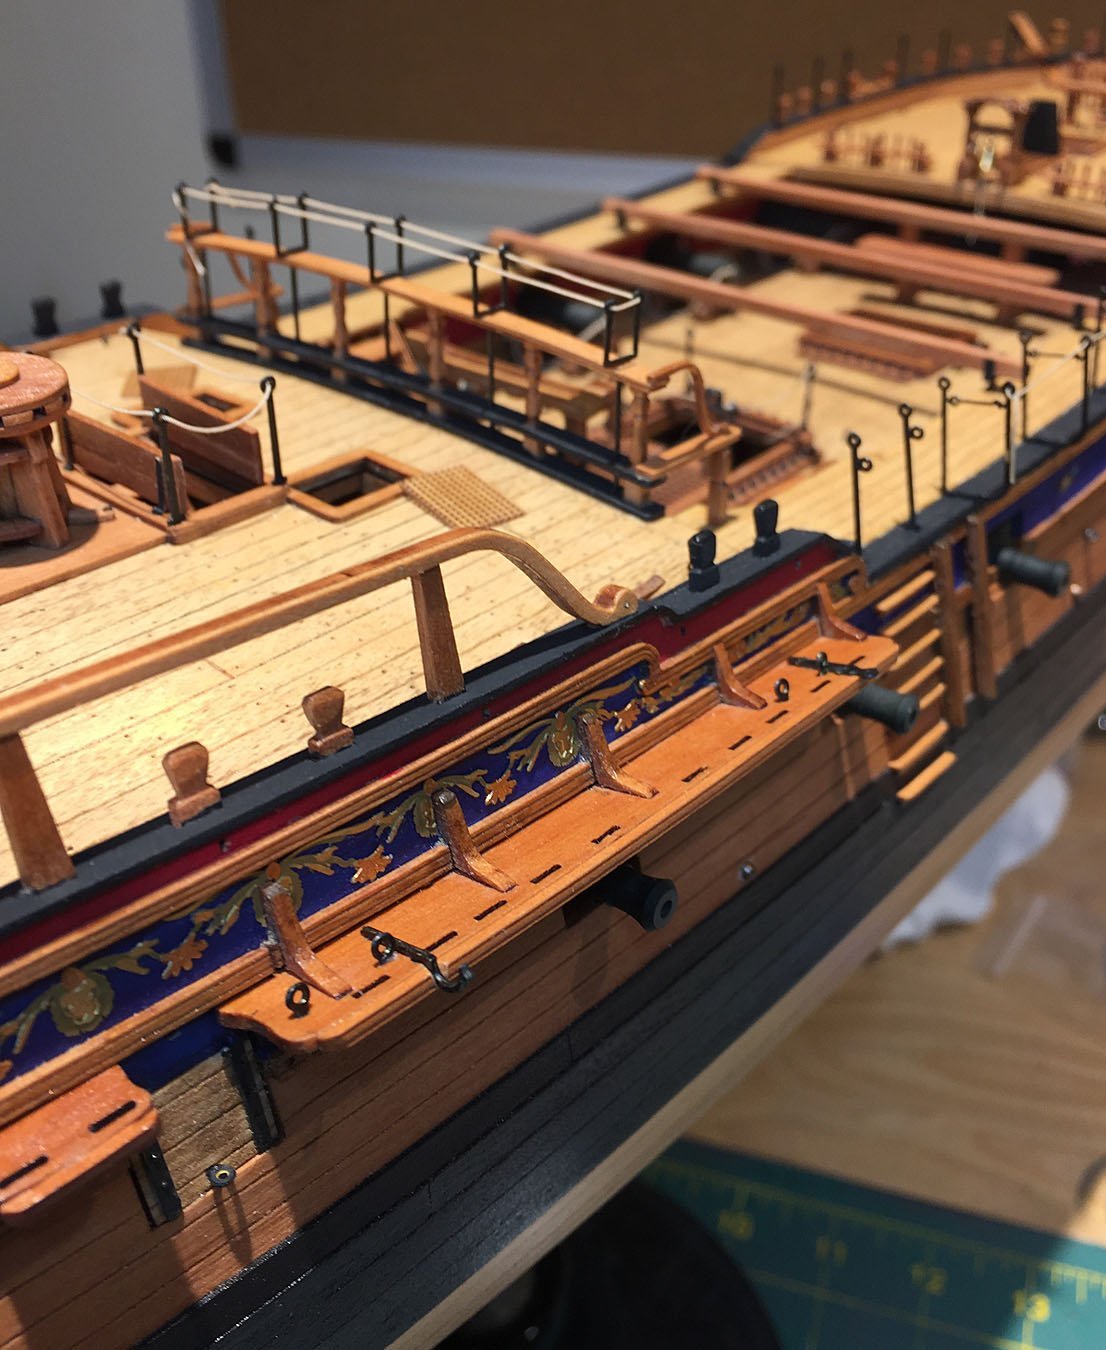
Boomkins, Chains and a Full Deck…

As Aretha sang: "Chain, chain , chain...chain o' " ...Port side chains completed. I may satin poly finish the deadeyes, haven't decided yet. My incomplete lower hull might confuse look-in modelers; HMS Camilla will be displayed in a waterline diorama.

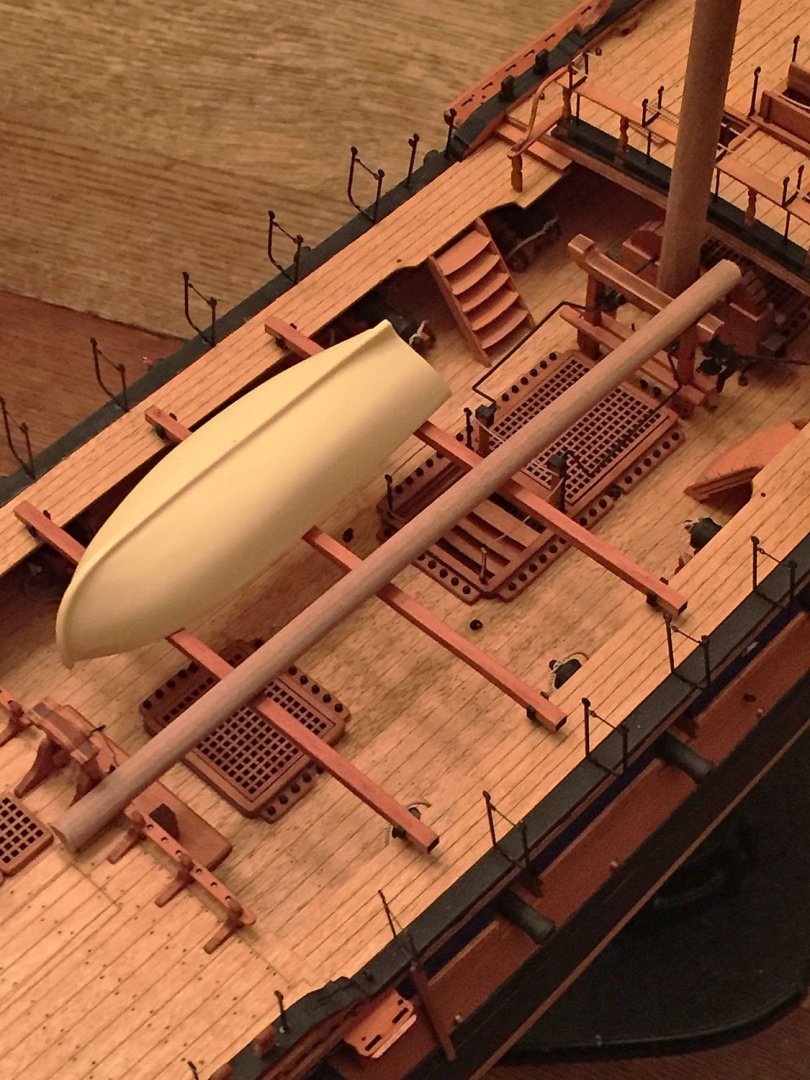
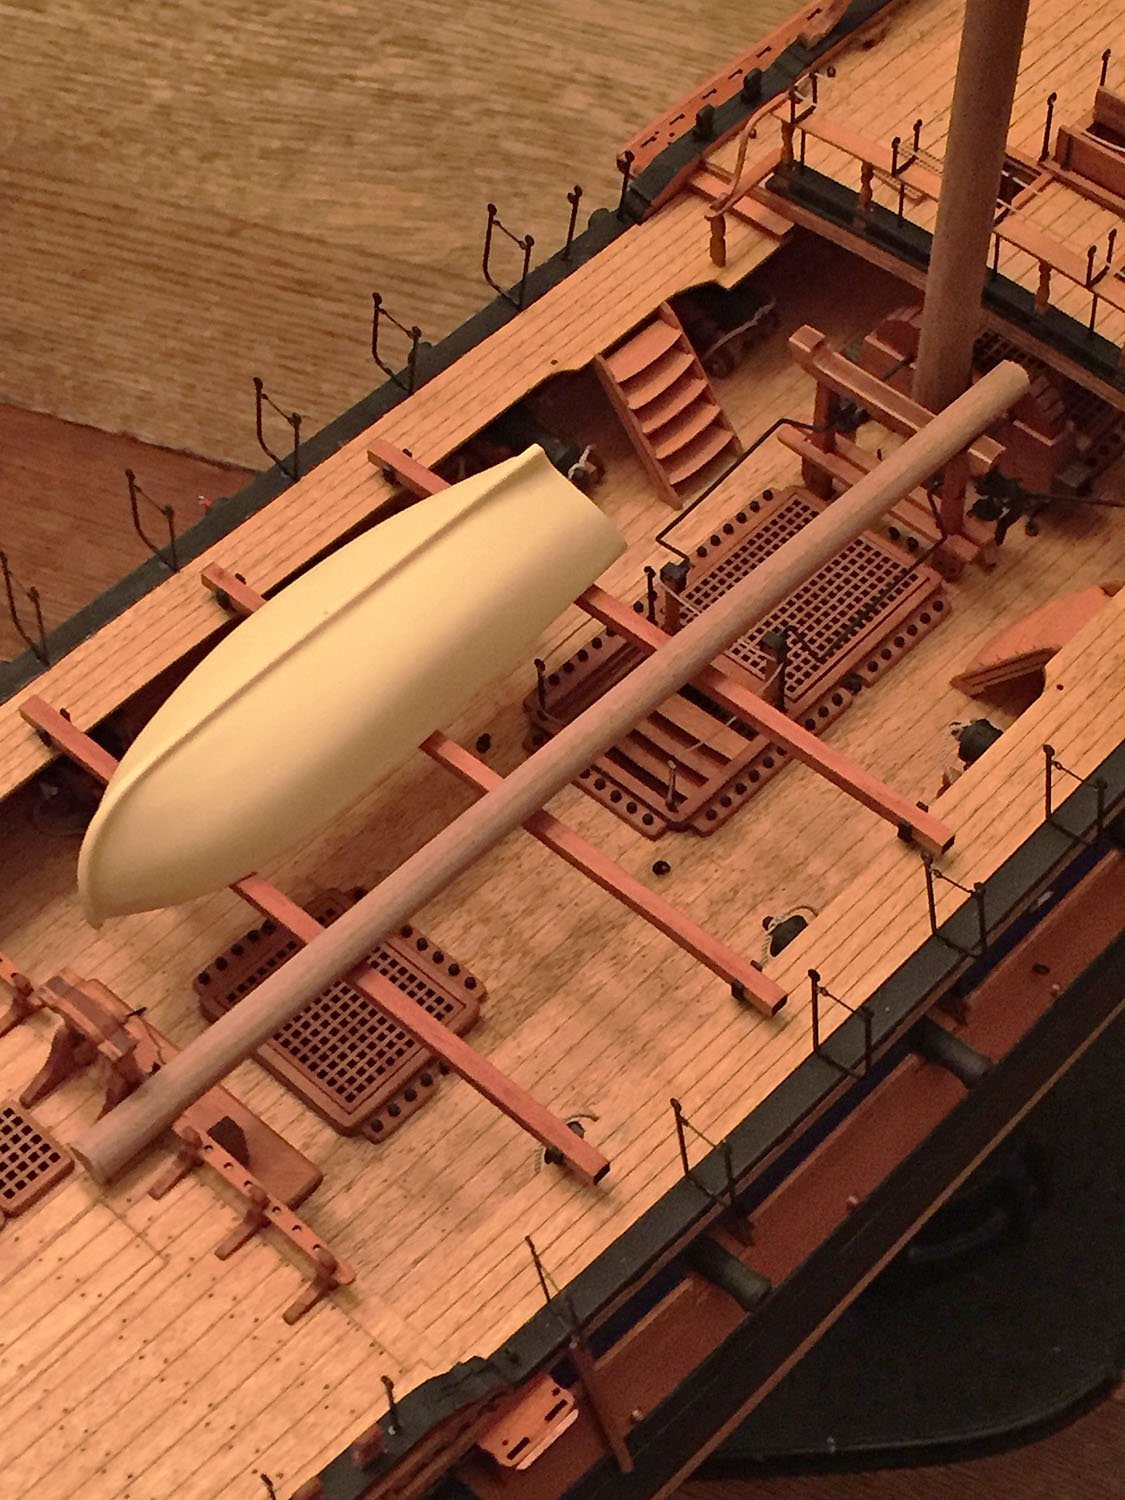
A boomkin, tapered and "bent" in its gentle curve; I used some scrap birch dowel for this piece. In very short lengths, the supplied walnut dowel didn't cooperate very well for me when it came to giving this prominent component a graceful arc. Process: after tapering and notching the end for the block rigging, I soaked the shaped dowel in hot water, devised a simple bending jig and used a heat gun to set the curve and then, when dry, some chestnut stain to finish it off (then the poly finish). The bowsprit is a temporary placeholder "stub." Gammoning this mast is going to be fun...🤯
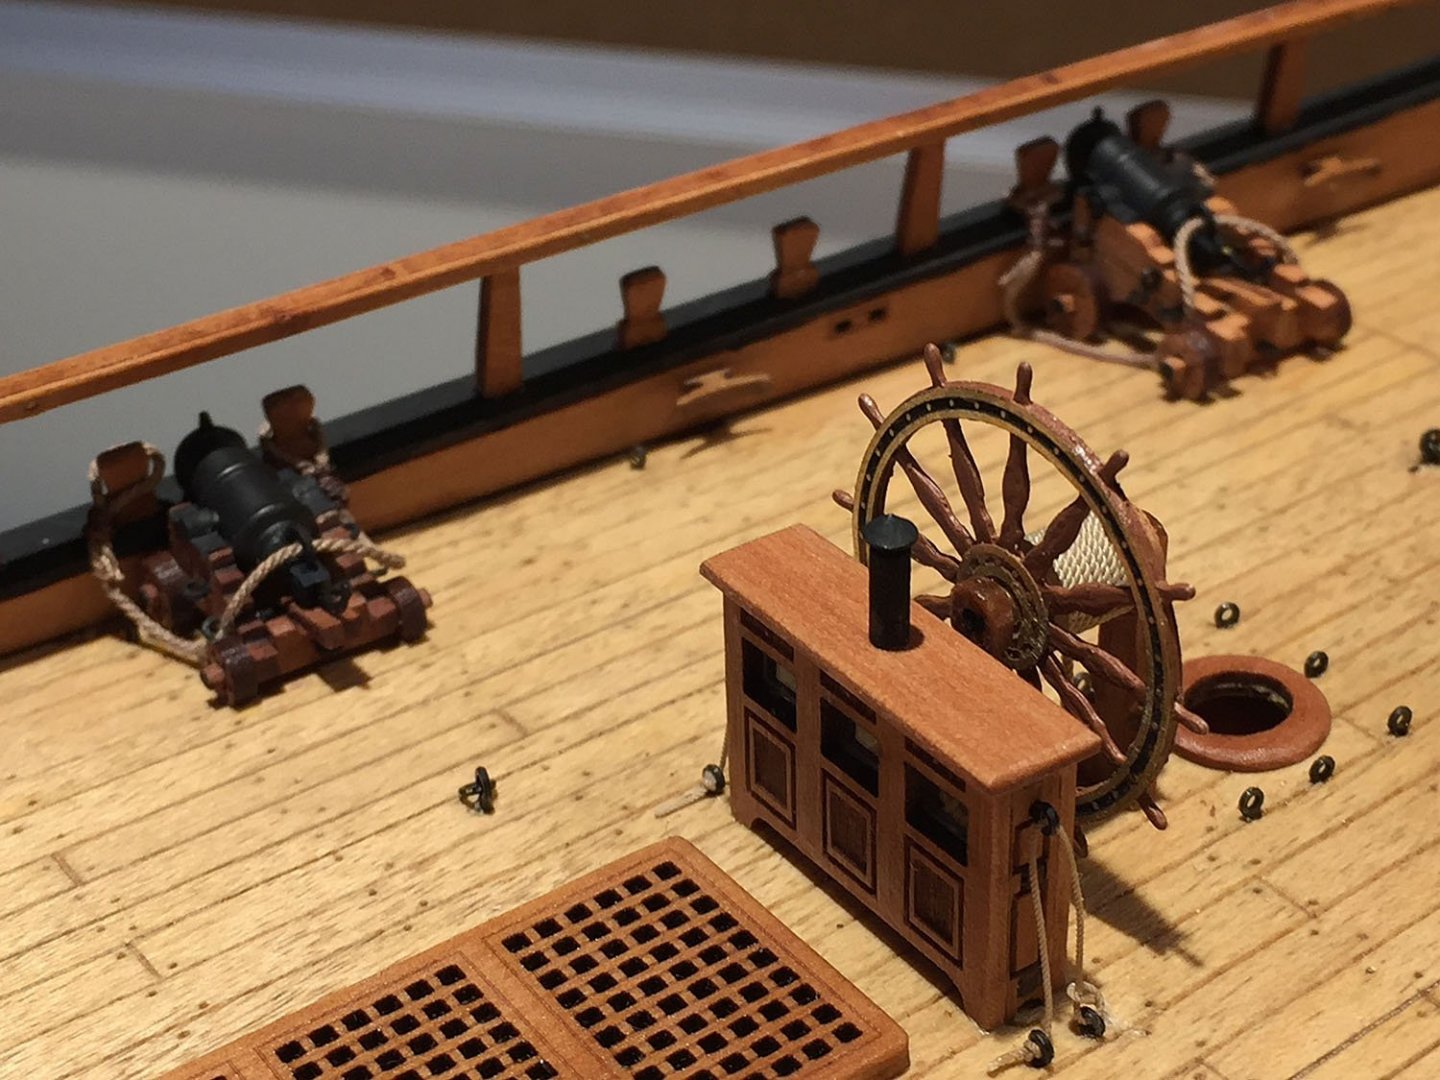
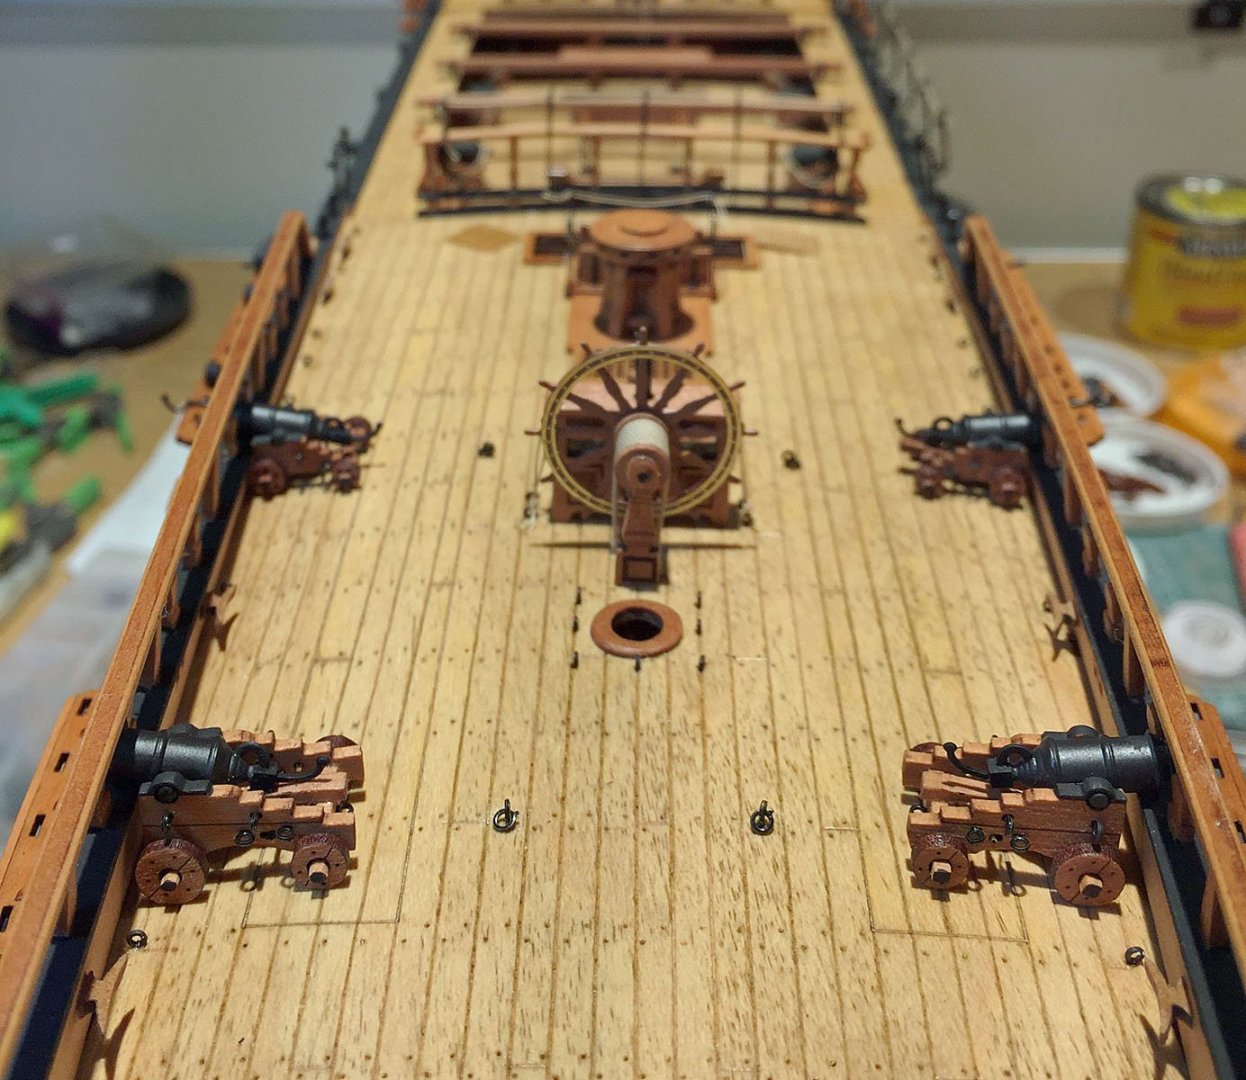
The starboard q'deck carronades; as my wife says: "cute little buggers." Now mounted with their breeching ropes, ready for action! The ends of the ropes are simply tied-off and then looped over their respective timberheads.
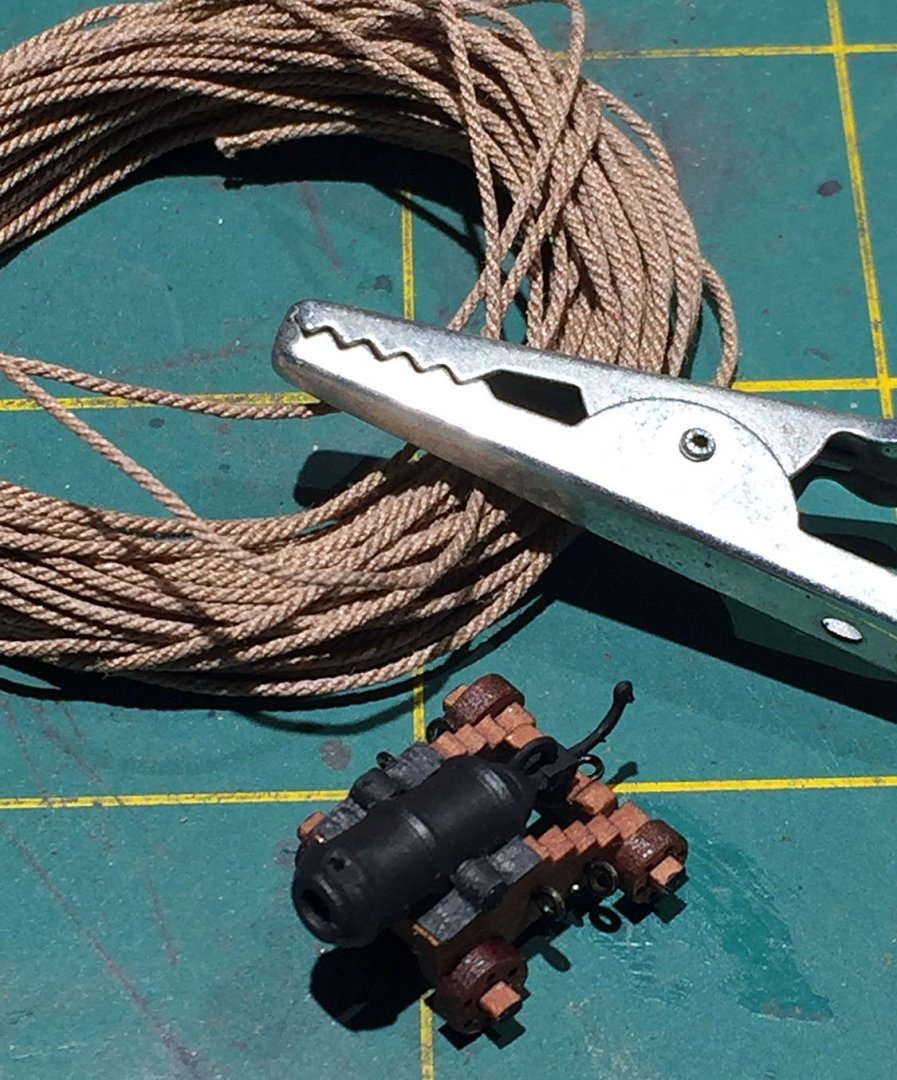
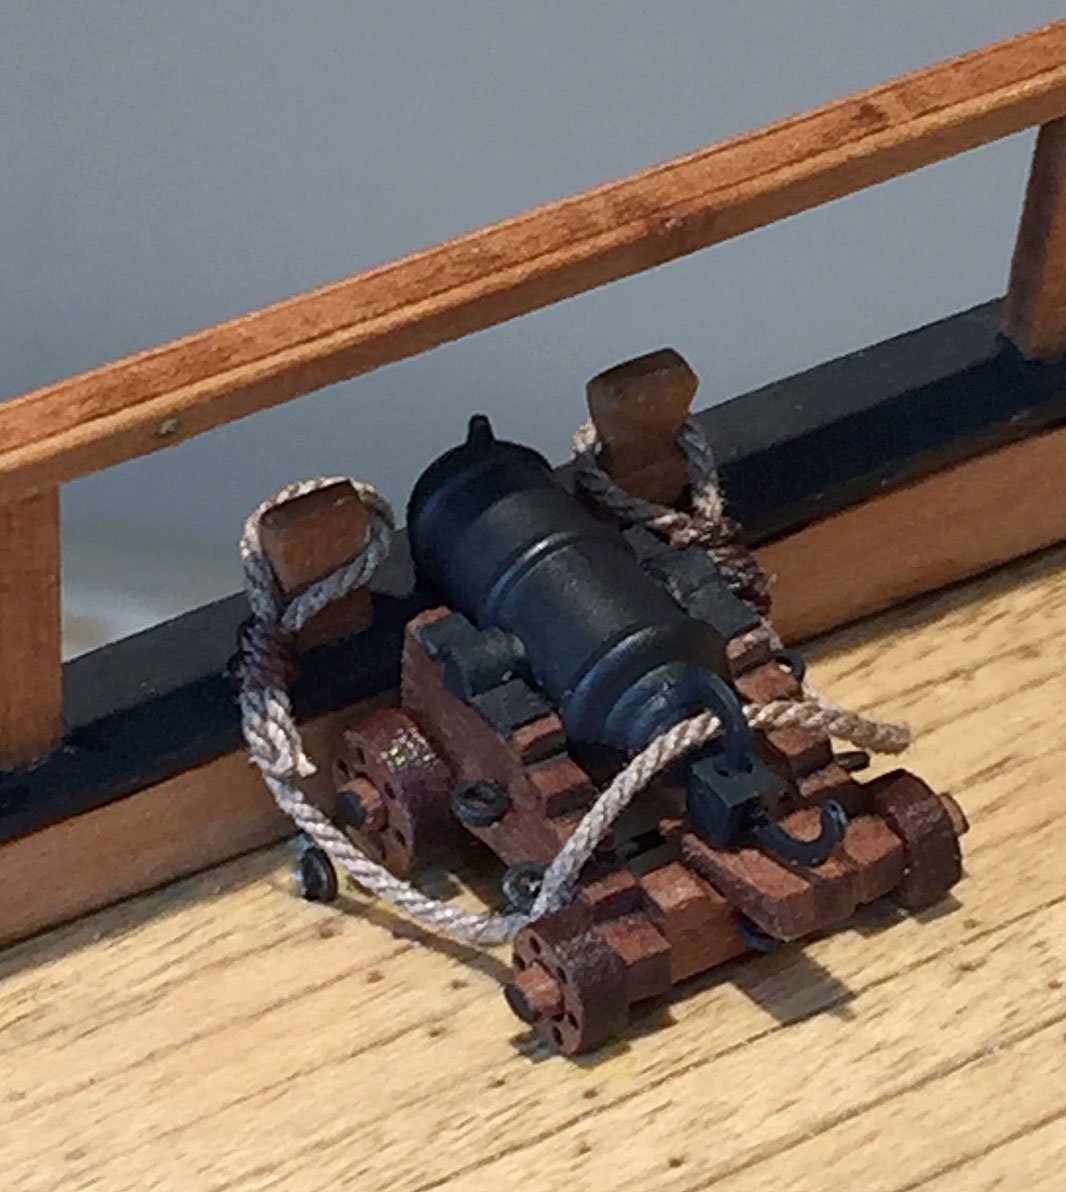
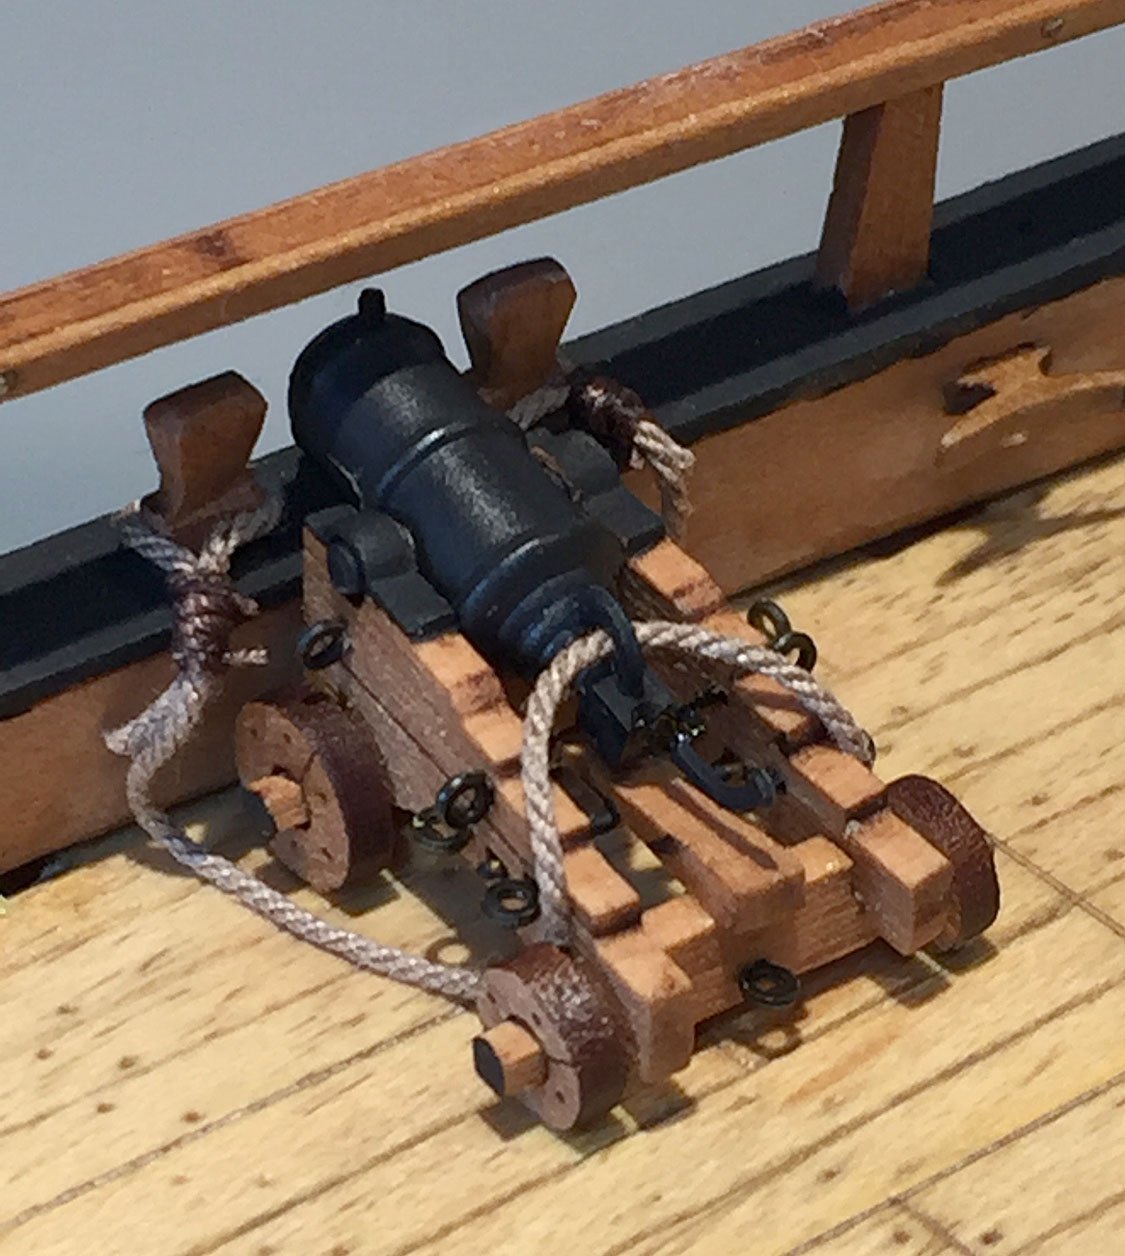
The smallest of the 12lb carronades in its carriage. The rope I used for it's breeching line and a small alligator clip (for scale). Like their larger siblings, I attached the served breech rope to the final assembly before I mounted it to its quarterdeck station.
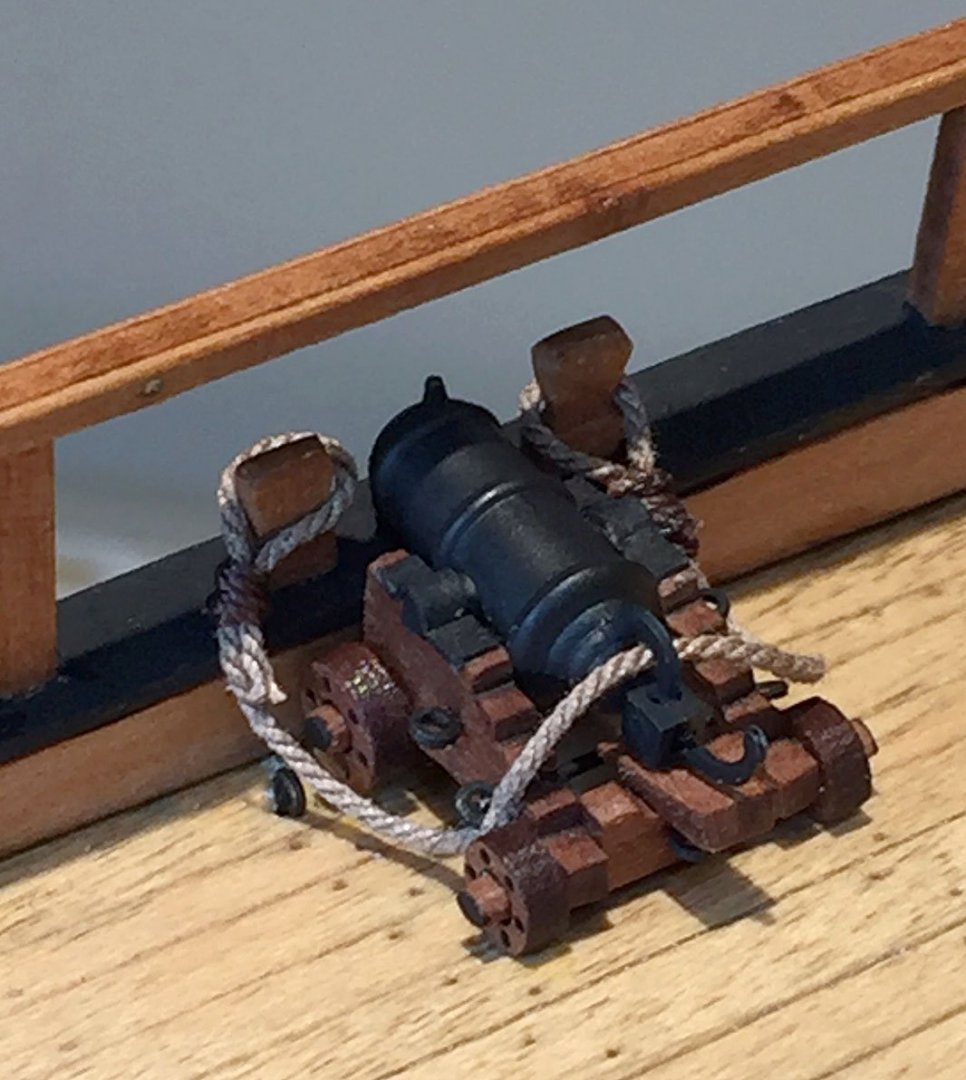
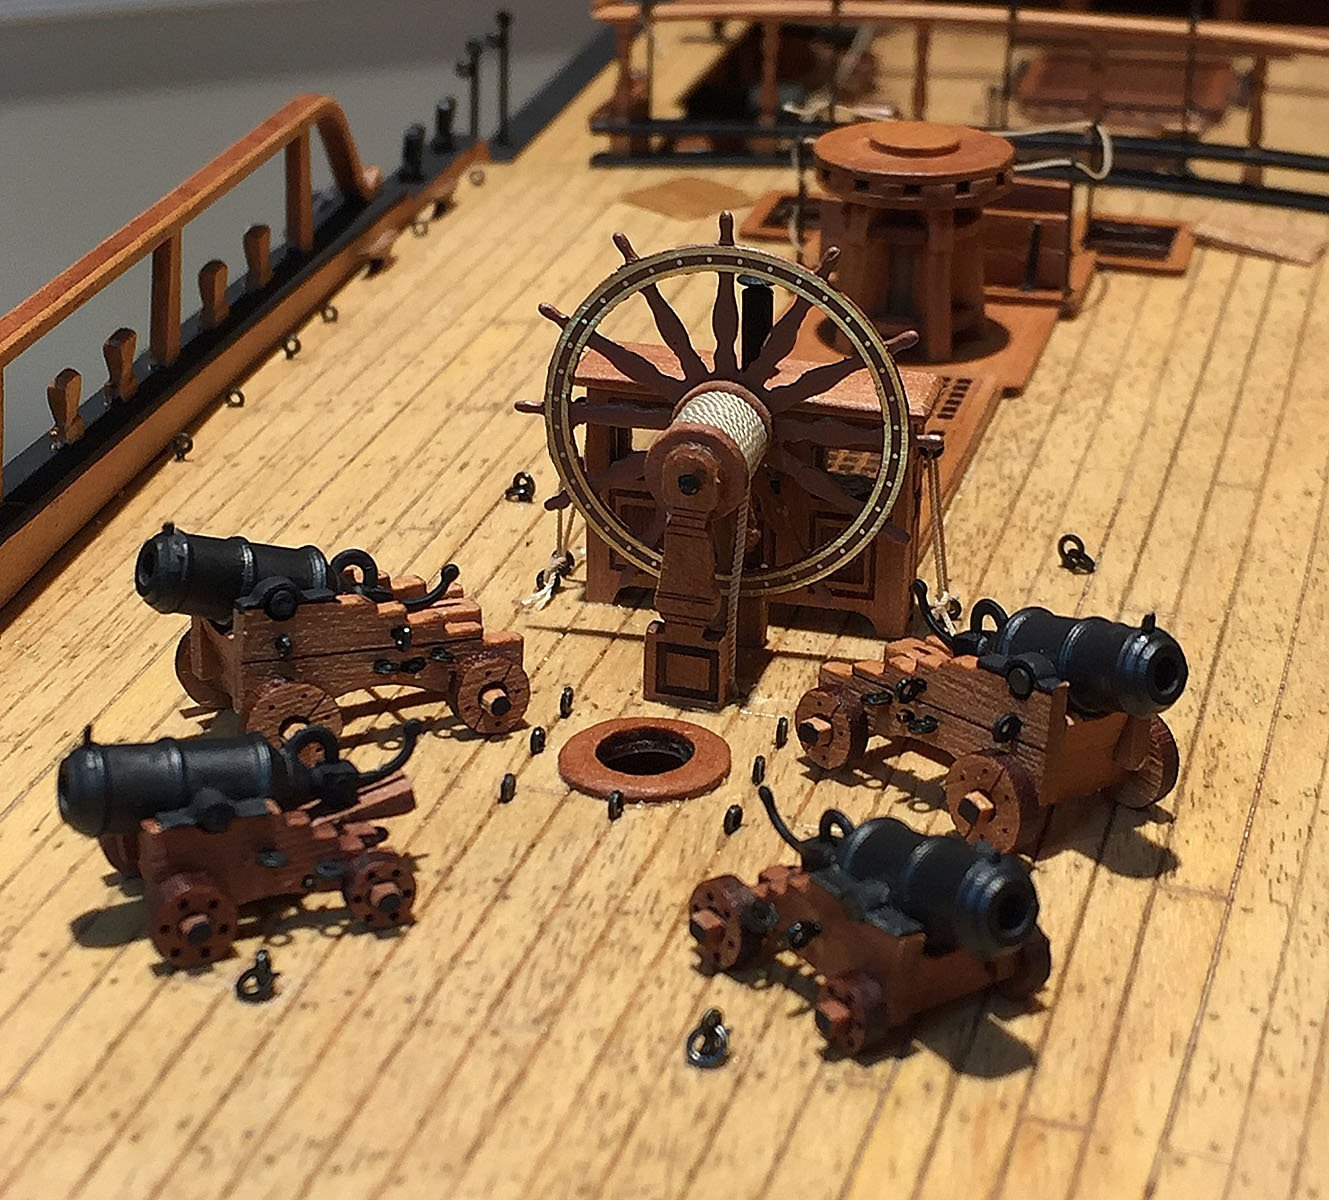
12lb carronades on carriages: what a fun little mini-project - X4! There's a rigging eyebolt very close to the carriage wheel (and rope) I'll have to deal with before I get too far into Camilla's rigging. Worst case, I'll just move its position over a few mm's.
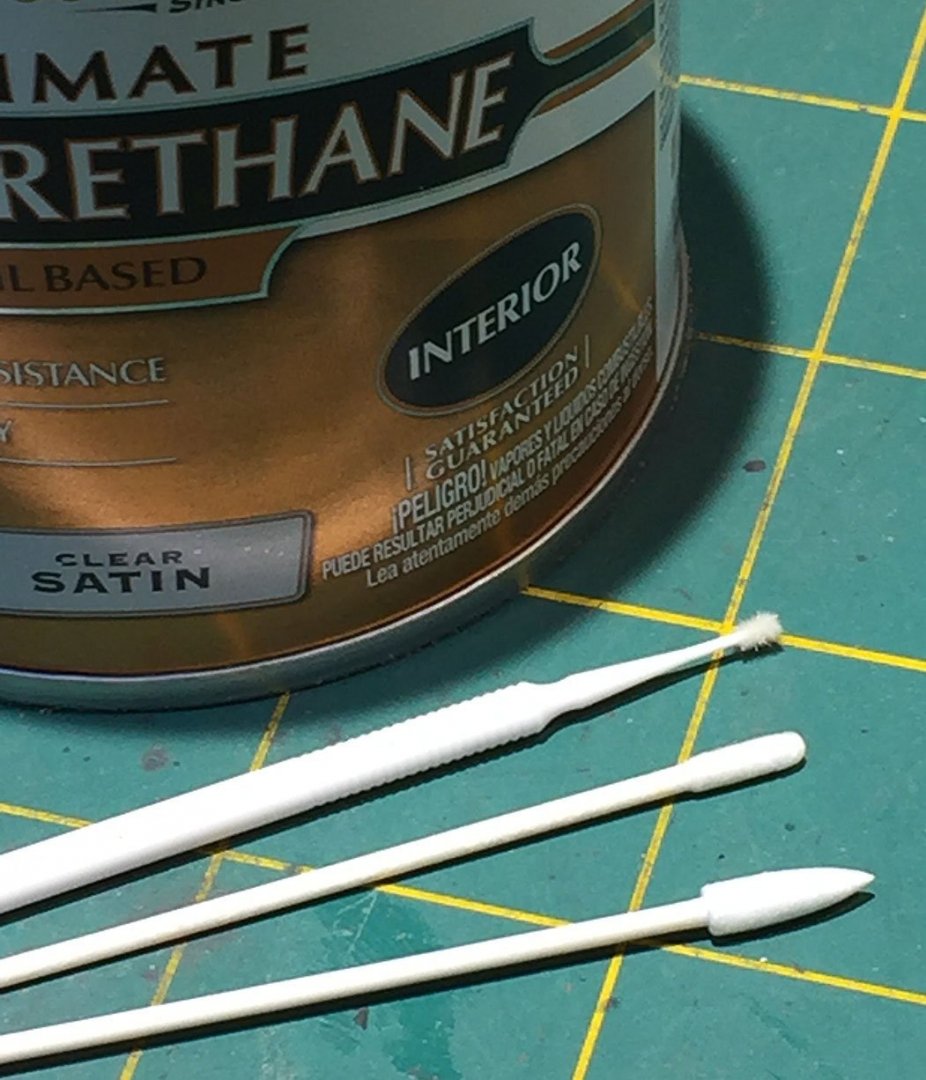
A random pic just to show the different tiny swab brushes I use to paint and do final poly finishing. Each tip has its own utility in tight spots. These are available from MicroMark - or other hobby stores that do a lot of plastic kit accessory items. Invaluable - and for me- easier to use than holding small paintbrushes at awkward angles.
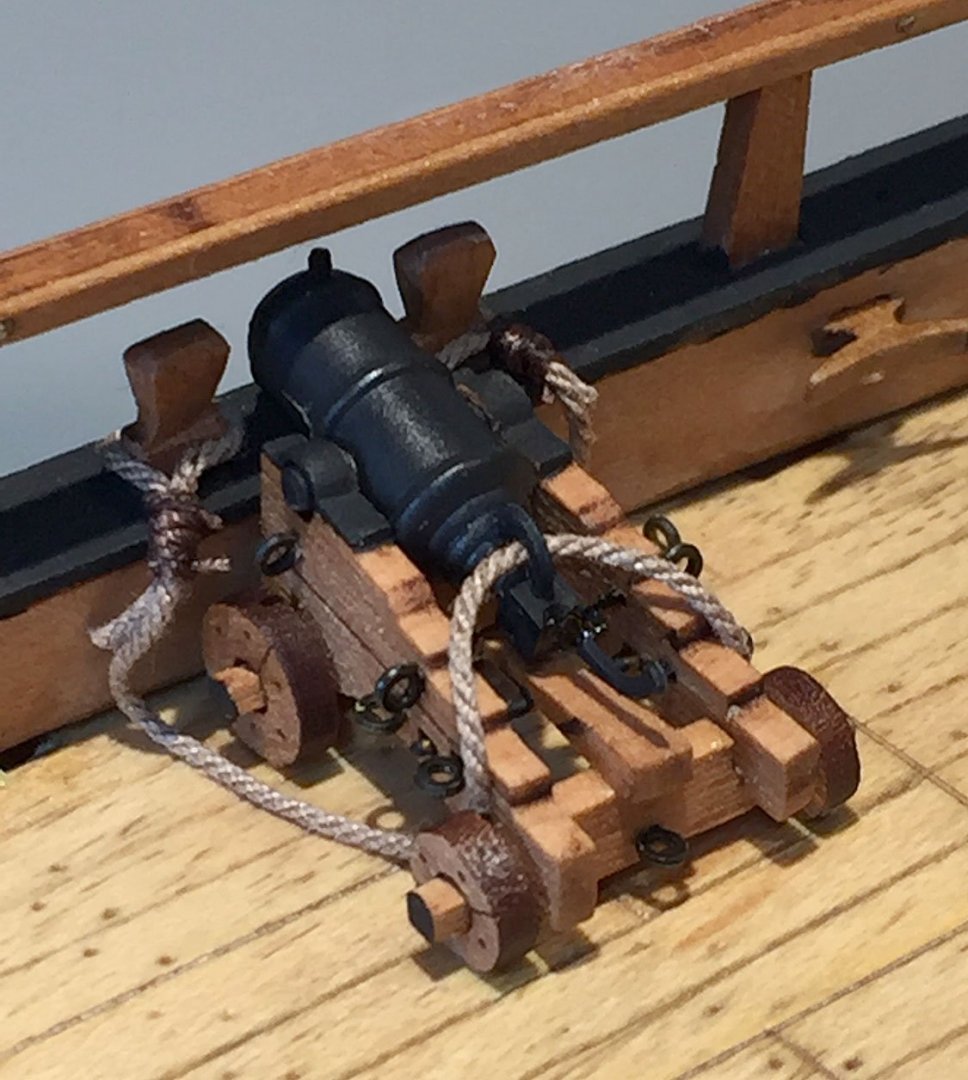
Another cameo for Mr. 12lb Carronade (this one is mounted and roped on the larger carriage so it can aim over the elevated bulwarks position...)
This early weapon incarnation still used a quoin to elevate the muzzle to a guessworked firing elevation; I'll bet this was fun to do in the heat of battle. Not. A few years later, some brilliant bloke figured out that an elevating screw mechanism was faster, safer and a lot easier to raise and lower the stubby and heavy muzzle-loading artifacts. This improvement became imperative for the Royal Navy as the carronade evolved to be a 24 lb - and in a few cases - a weapon that lobbed a 32 lb projectile.
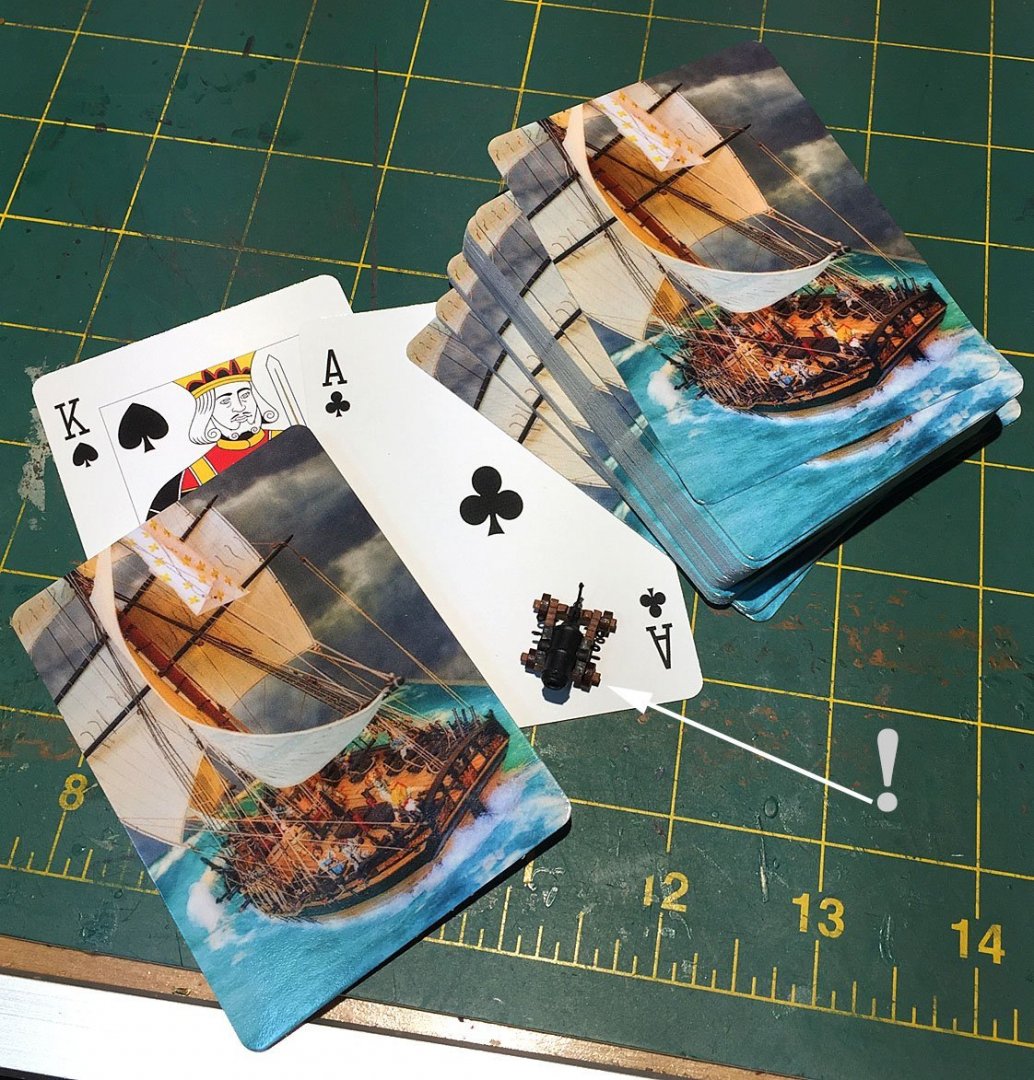
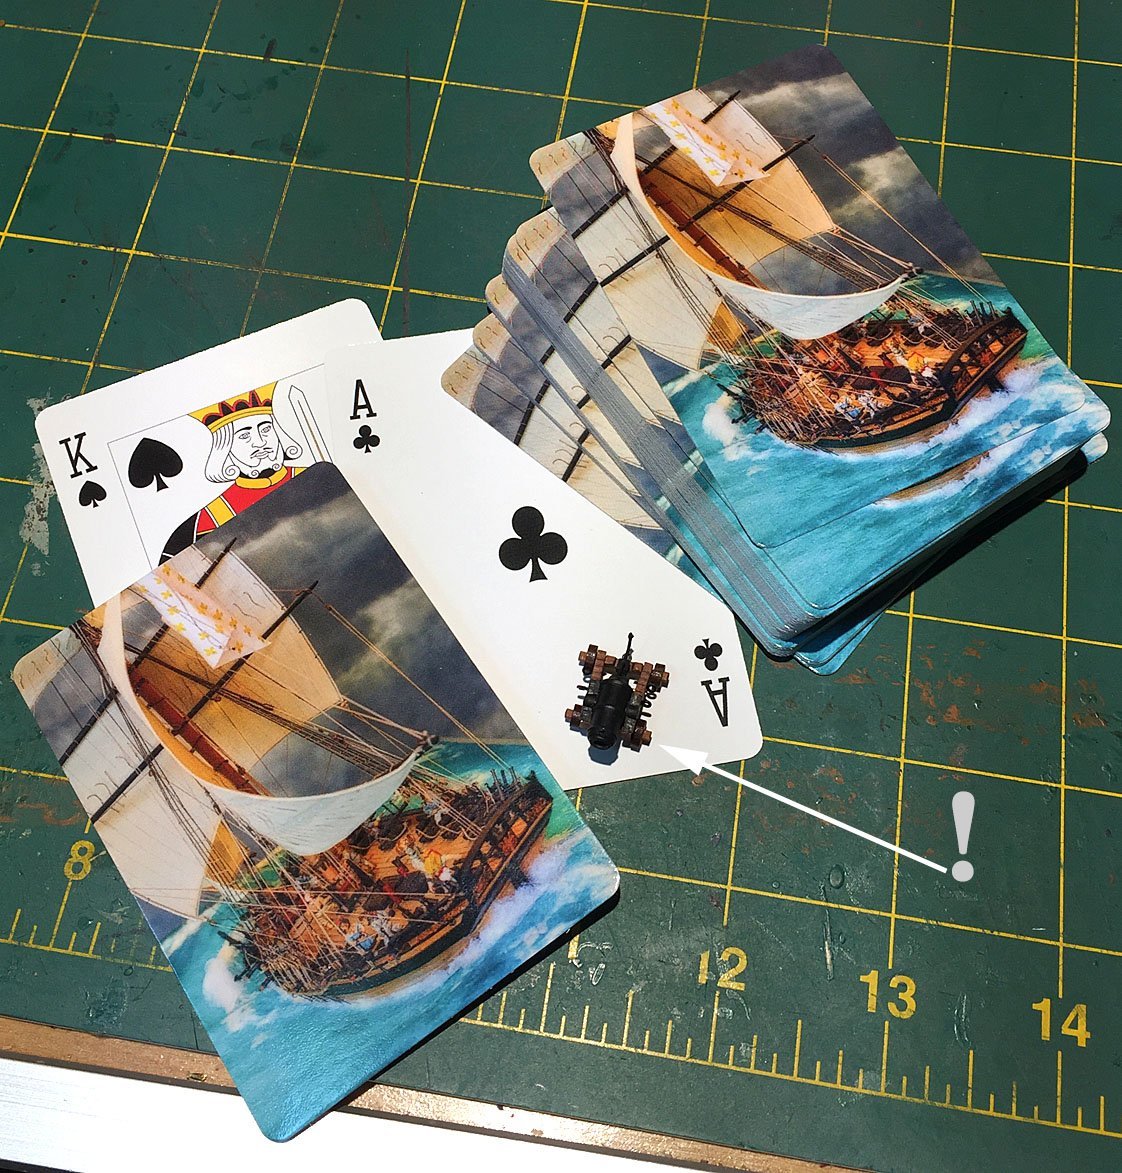
Work'in on a full house. A 52-card deck: caulking not required.
A couple weeks ago I uploaded a photo of my last project (LeTigre) to Shutterfly (.com) just for the heck of it since they were pushing a special deal for $10.00 customized playing cards.
I always take numerous photos of my models when they're completed since another past time is photography. I use my model photos for "coffee table books" as well as for other things, like large, framed decorative prints. The "photo books" I subsequently create and publish tell a background story on the ship, the history and other anecdotal references to my overall modeling project.
I bit on the recent Shutterfly promo (heck, it's Christmas!).
Impress your friends, intimidate your enemies. Bring them to the bridge or poker table; great for whist aficionados. That little rascal of a carronade keeps popping-up in different spots on my bench; I'd better tie him down soon...
Happy Holidays Everyone. Let's hope that 2022 is the year that The Plague retreats for good and waves the white flag.
Ron
- mtaylor, Landlubber Mike, BenD and 9 others
-
12
-
13 hours ago, glbarlow said:
BE, how did you come to have the black & white floor? I think it looks great but may over power the rest of the model based on what’s around it. I’m sure time will tell.
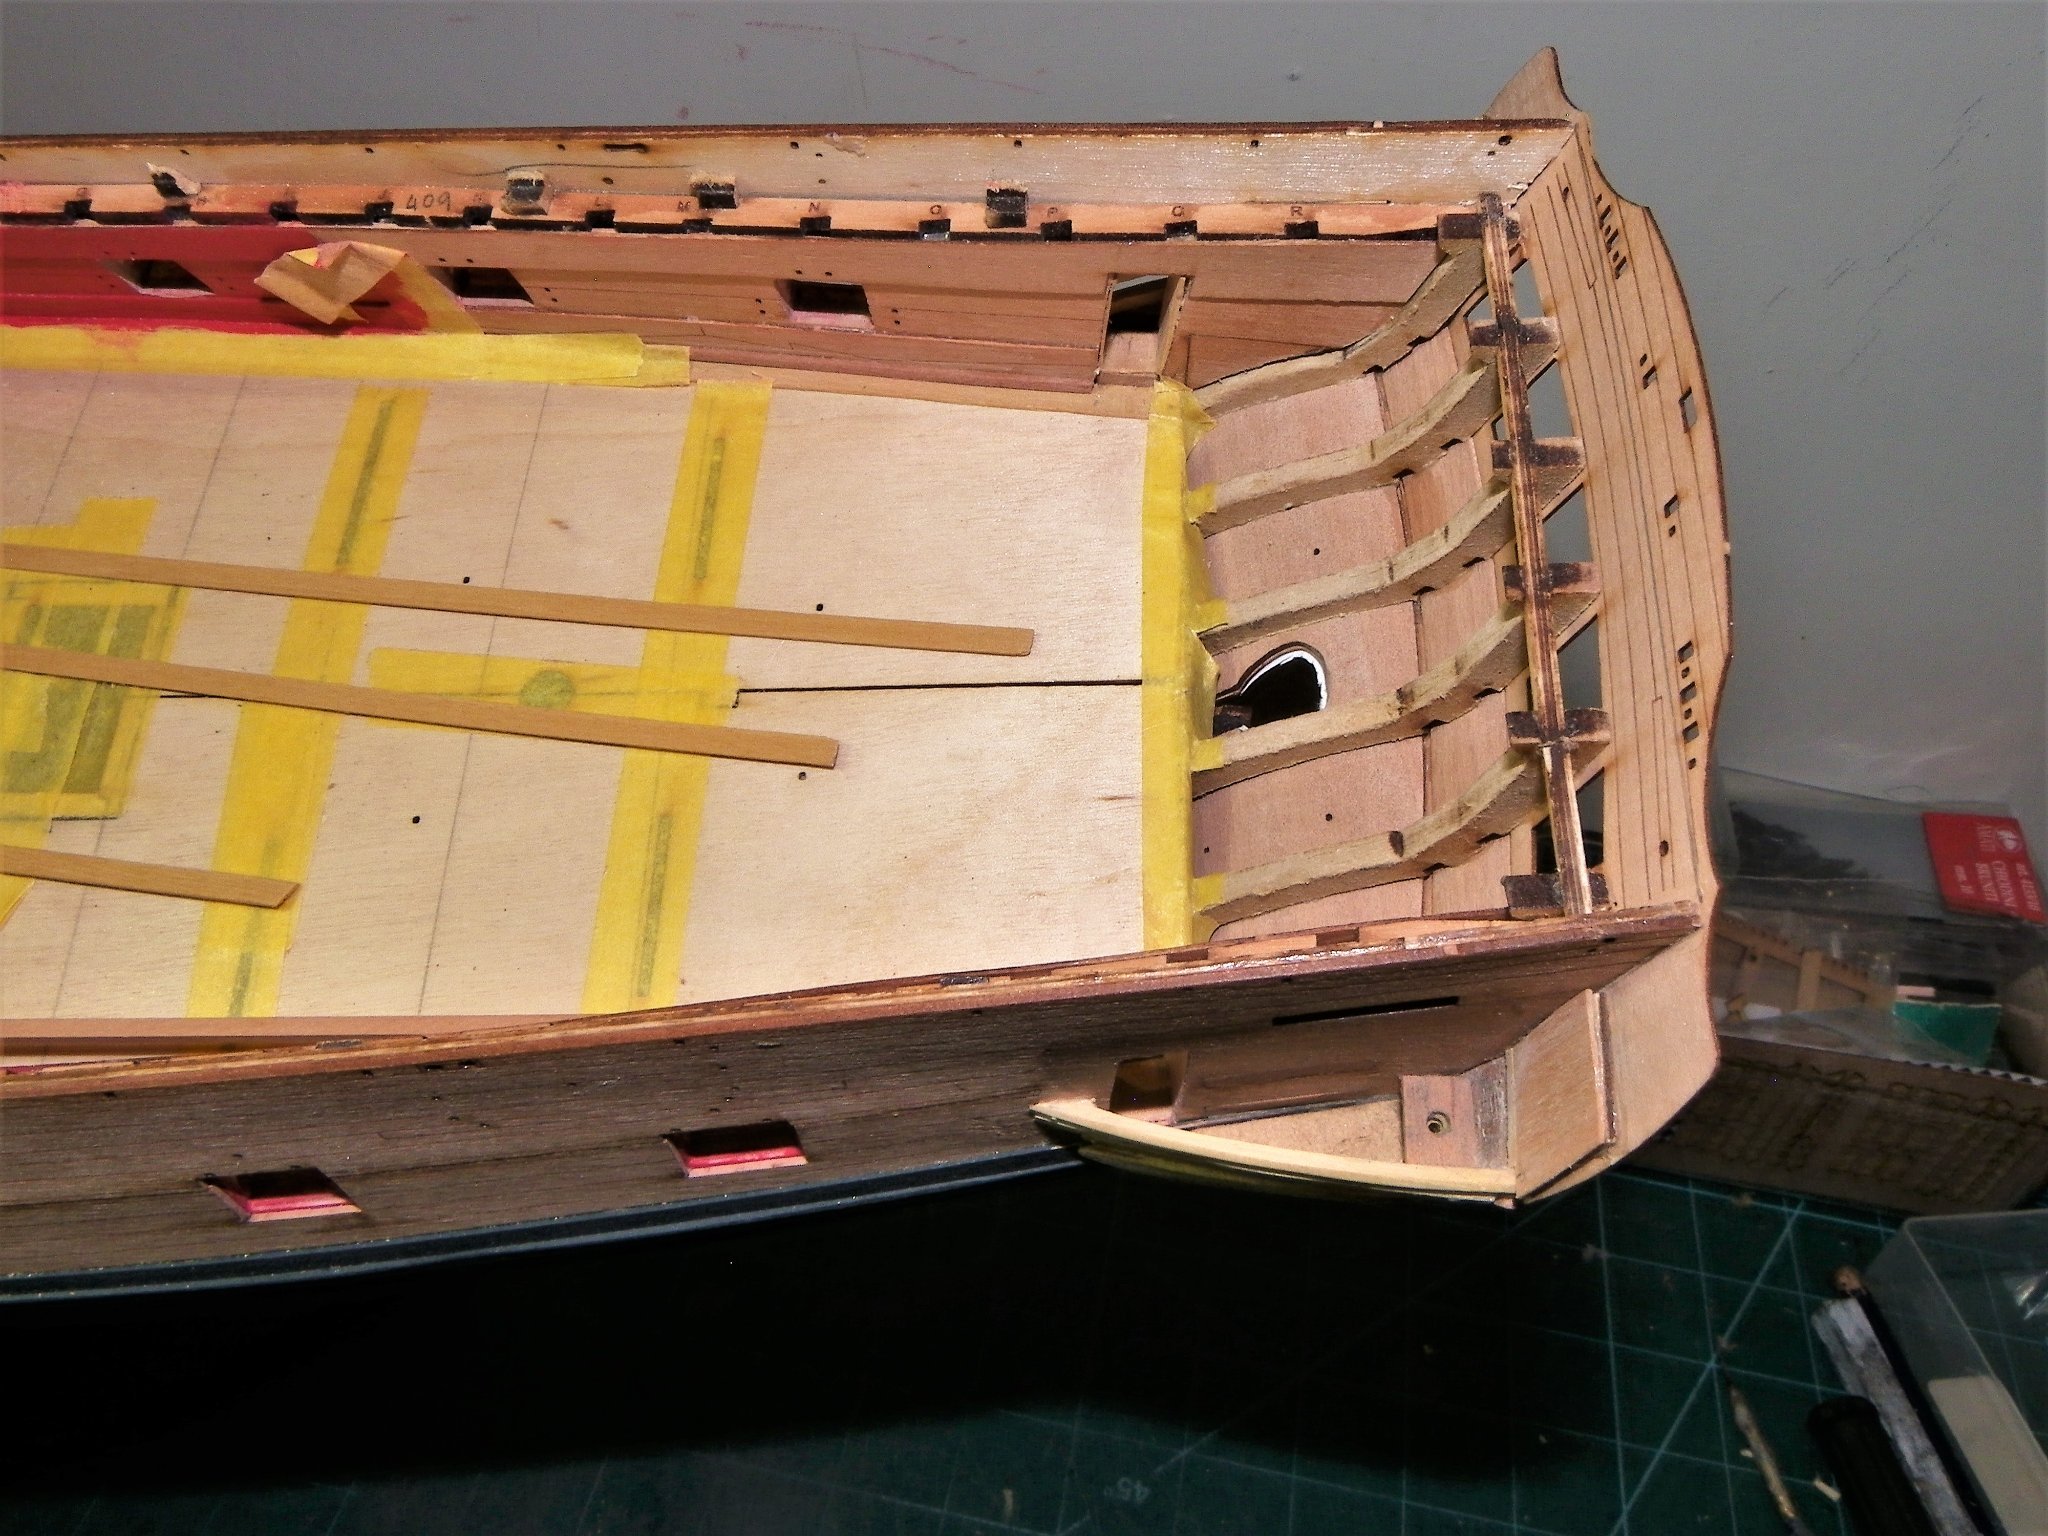
The black & white checkered floor for the captain's cabin is printed, in scale, on a sheet of the Sphinx plans. Although not delineated in the build manual, I'm pretty certain the intention was to provide a printed and scissored "cut out" to simply affix over the laser-etched floor pattern on the one-piece gun deck, or as B.E. indicates, perhaps not use it at all. I haven't had to make this decision since I'm not building this kit as a quasi-Admiralty dockyard "reveal" model. Had I gone this direction, I would have stained the pear flooring slightly darker and chose - as B.E. also says: "…the understated look…"
As many are witnessing on other HMS Sphinx logs, this kit includes many nice touches and encourages various levels of "scratching" enhancements.
Really nice work, B.E.
Ron
- DelF, dunnock, Beef Wellington and 3 others
-
6
-
12 hours ago, Blue Ensign said:
Thank you Christian and James.
@ Christian - This is a great kit and the design is such that rapid progress can be made from the early stages, but it is a two edged sword.
Great care and forward thinking is required to avoid poor fitting and compounded errors. The danger is that the many pre formed parts can beguile you into thinking it is a simple fit and glue job, in my experience it certainly is not.
@ James - I now remember your good advice, but as it happens I forgot to do it, 🙄 fortunately there was no bleed..
Cheers,
B.E.
Indeed, it's also my experience that this kit is no "fit and glue job." As my own log of this excellent kit attests, there are several critical points in the build that have required a good forward look at the plans as well as the actual kit elements. Seeing various "bits" on the extensive P/E - and on some of the pear pattern sheets as well - ahead of when the build manual calls for them - has been a required exercise and a saving grace of sorts. Needless to say, other Build Logs, like this one, are revealing that this is no "slam dunk" of a kit (even for those of us who have long experience of creating models of this era)!
I can also attest that Chris' innovative design has permitted a quicker (as well as more accurate) build for such a complex model.
Cheers,
Ron
- chris watton, Barbossa, mtaylor and 1 other
-
4
-
Nice job. I'd love to get my hands on that wheel, steer her through some rough seas.
Looking closely at your model, I was struck by the small size of the planking treenails; at this larger scale they appear to be quite accurately-sized. The reason for commenting about this aspect of your very nice model is that so many others, in their zeal to be accurate right down to the...uh...planking treenails, make them too large, and, if I may add another personal observation about this accuracy, much too pronounced: there are too many beautifully made ship models whose hulls and decks appear to have caught a serious case of the measles.
I applaud that your representations of this over-worked detail appear to be "just right."
Happy Holidays!
Ron
- mtaylor and usedtosail
-
2
-
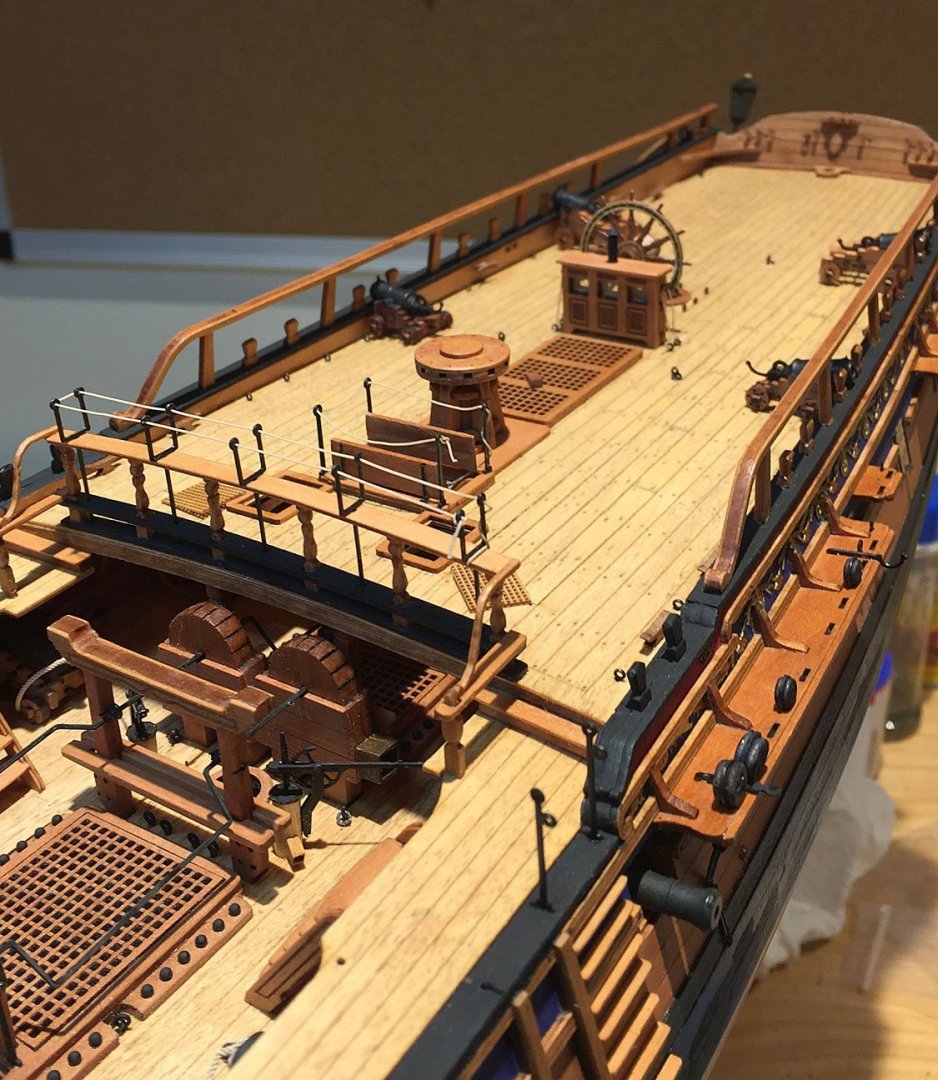
More detailing and the addition of Quarterdeck Carronades.

Four 12-pounder carronades awaiting their breeching ropes. The Vanguard carronades are cast resin to which you add small P/E parts for the cascabel breech loop, an elevation arm and a sight at the end of the muzzle. This last item - the tiny sight piece - is the smallest item I've yet to encounter in ship modeling! In the case of the smaller carriage assemblies, the straps to hold the carronades were made from 1.5mm wide black card stock which was considerably easier to fashion and mount than the small P/E pieces that didn't like the compound bending required to get them right.
Two carriages are the smaller configuration (foreground) while the other two are similar to the larger long cannon carriages...because...
... the carronades at the aft most position needed the additional elevation to aim above the bulwark capping. This view shows all four in position, muzzles protruding between timberheads and clear of the subsequent shroud and backstay rigging. The breeching ropes (next on my mini-list), will have served loops that hook over the timberheads.
Adding the carronades to the quarterdeck gave the 5th & 6th rates even more intimidation power during close encounters. The evolution of this technological and manufacturing armament refinement led to even more carronades being placed on the ships; the Foc'sle got two additional carronades and as the ships were modified or re-designed with additional built-up bulwarks (to protect the fighting gun crews), the calibre of the short-range weapons increased to as much as 24 lb capacities (a doubling).
I decided to show HMS Camilla in this later era of adaptation to technology; as the British Navy entered into even greater conflict with France at the end of the century, the new weapons (and superior expertise of the sailors), gave the entire English navy decided tactical advantages.
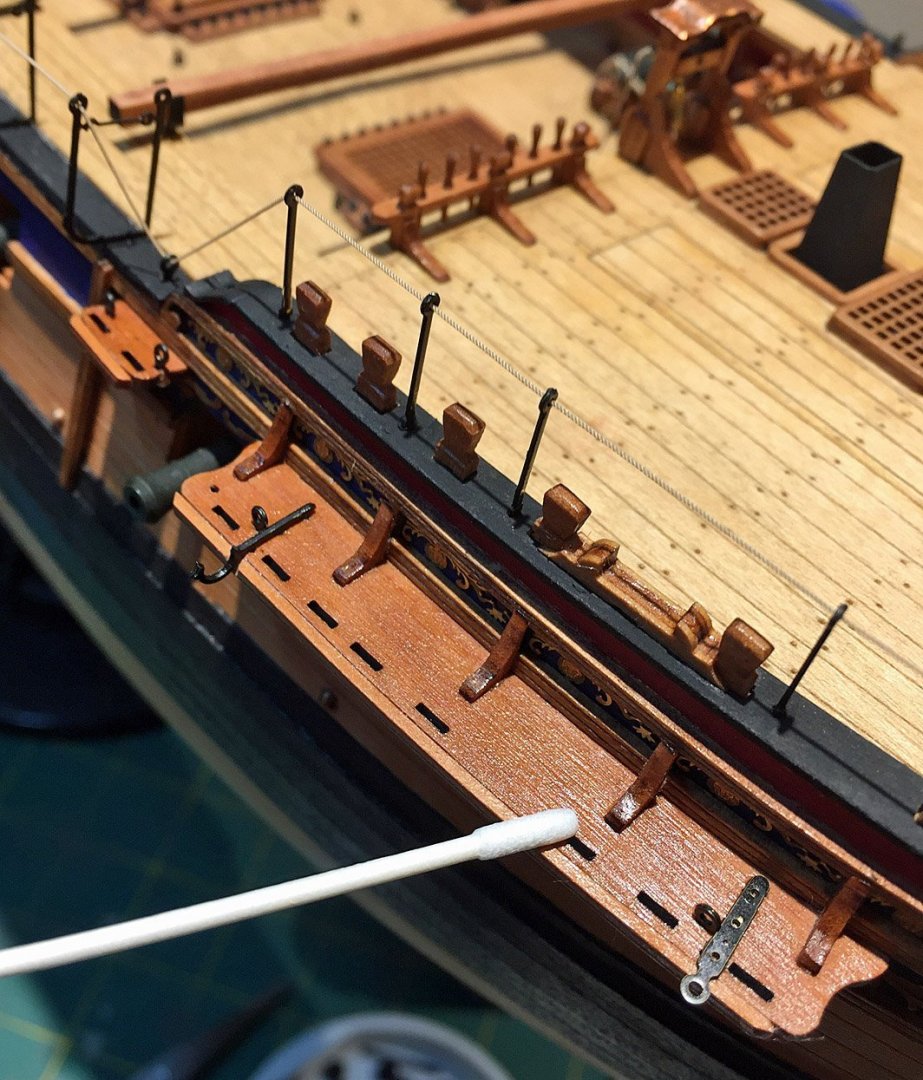
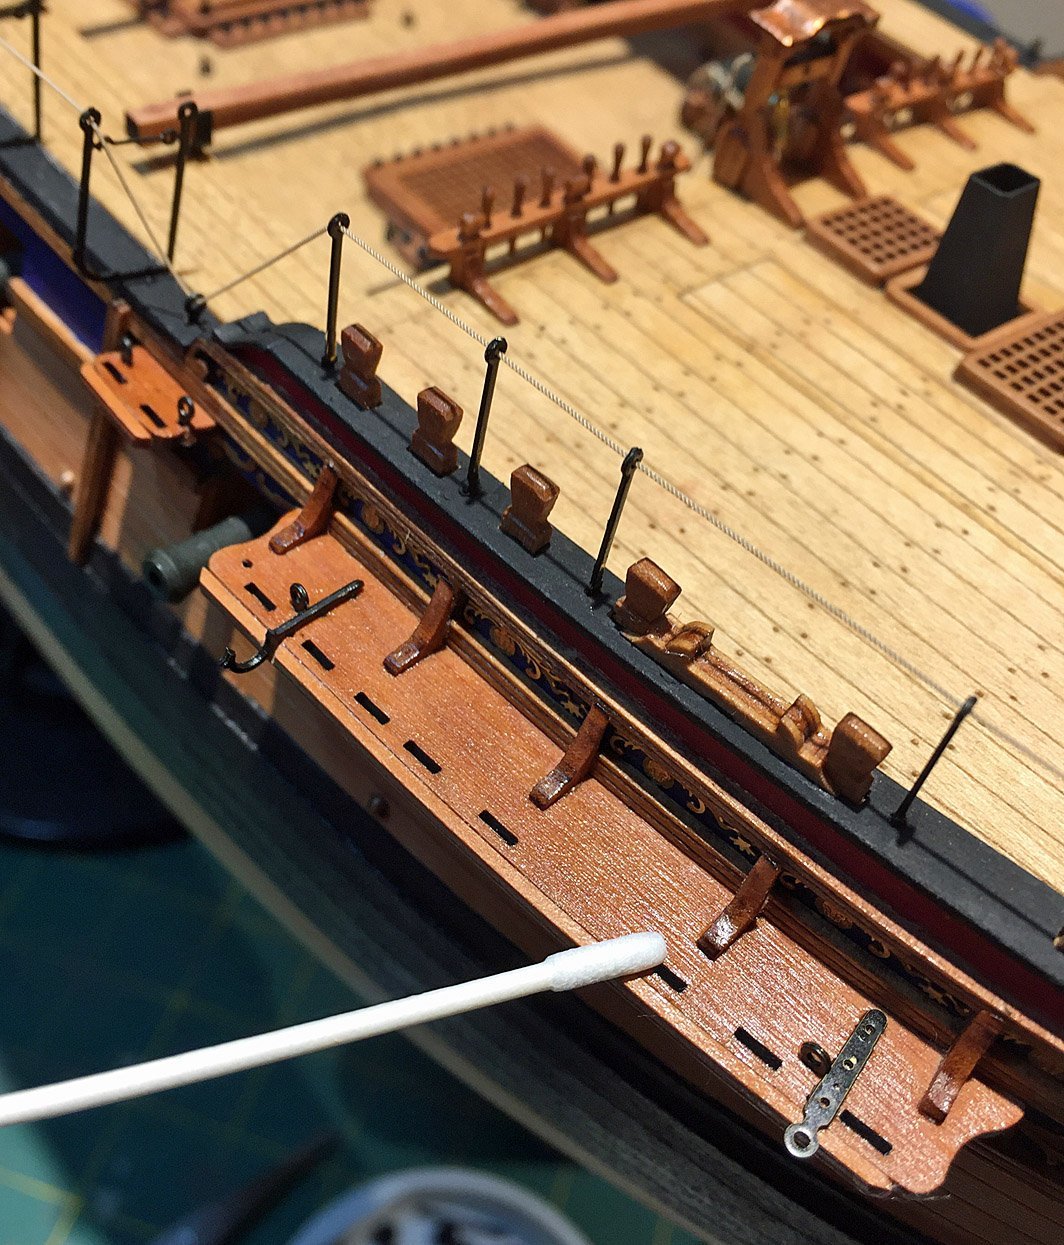
Swabbing the channels...with a Wipe-On polyurethane, except it isn't wiped-on. I use compact swabs for detailing the components I want to have a polyurethane finish (Satin). These come in mulitple packs from Tamiya. This is a final step before attaching the deadeye assemblies on all the channels.
Another view of applying the satin polyurethane to the exposed pear pieces. I choose this finish, in part, to emulate the old-school finishing that typically used either varnish or shellac on models, both natural wood finishing materials.
Don't forget to mount eyebolts to the channels before you rig the deadeyes and chains. The same applies to the stunsail boom hardware shown here.
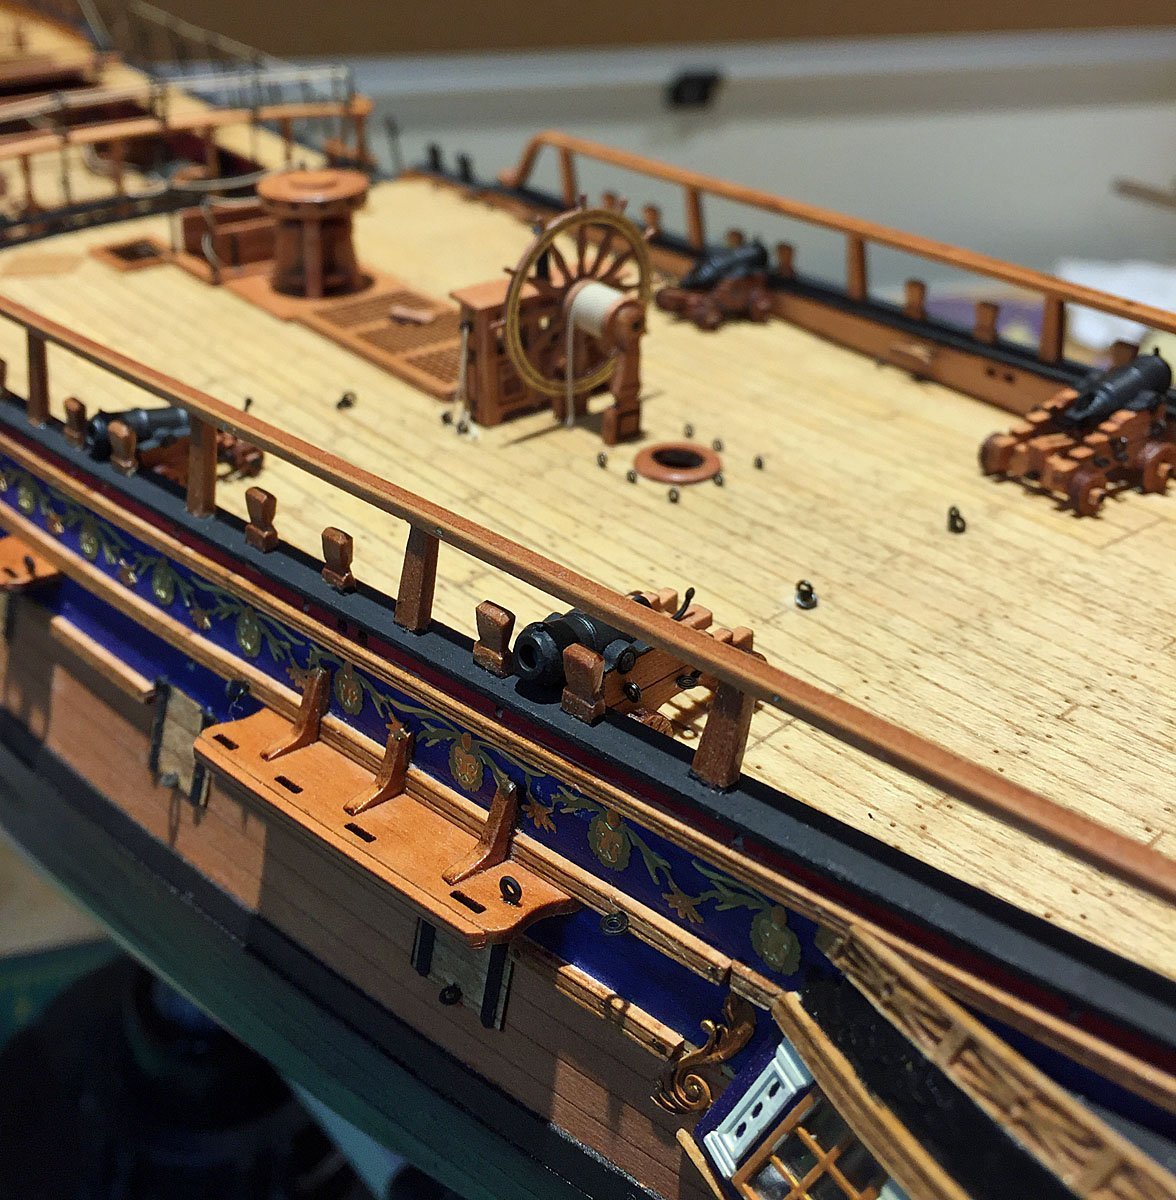
Carronades in-place, some deadeyes mounted. The majority of the model's pear wood components have been carefully coated with a satin finish and left to dry for at least 24 hours before proceeding with any additional handling (thinking the chains and deadeyes).

12 lb carronades on the quarterdeck. These stubby cannons could lob salvos of various metal bits at an enemy ship in close range. This subsequently became known as "schrapnel." Certainly, the deadly shards of metal could kill or wound an enemy's sailors but the prevailing tactic was to aim the beefy, short-range cannon at rigging and sails. If the enemy ship's propulsion system became compromised, it usually led to their subsequent capture - a priority for many a captain and his crew - and, in many instances, prize money for all.
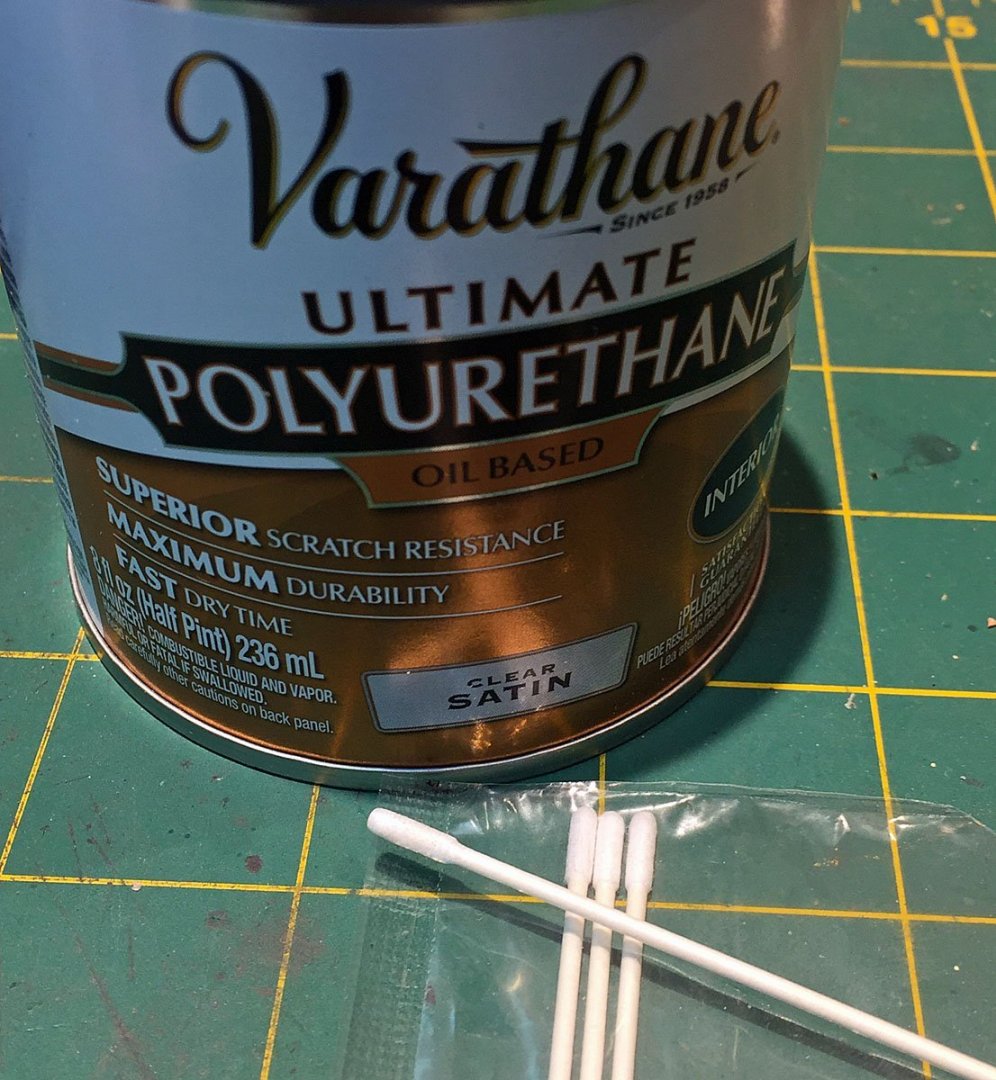
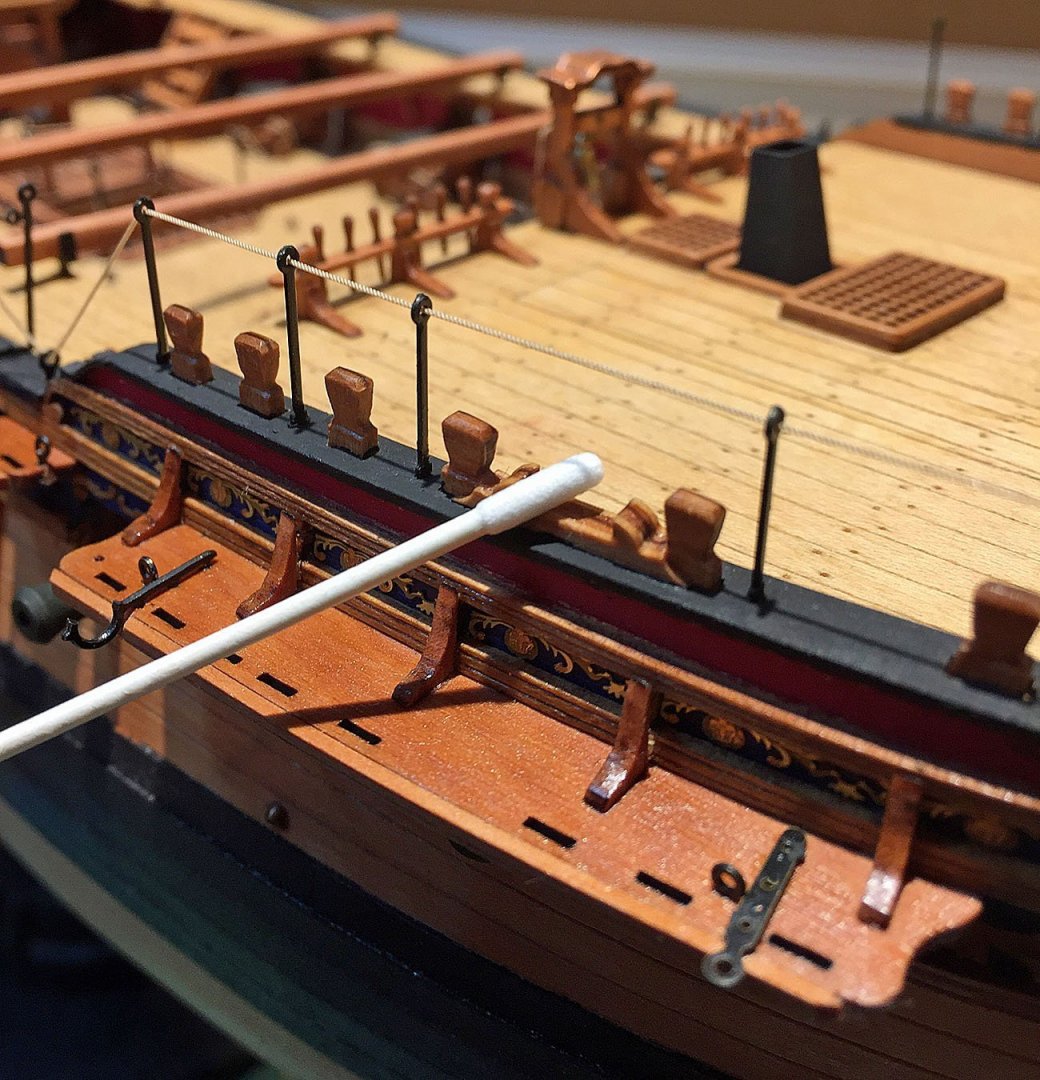
My preferred poly finish. Oil-based, it takes a while to fully dry, especially in cold months. The cotton swabs from Tamiya shown here for scale; the swabs are very narrow and allow one to apply the synthetic finish in tight spots. Once dry, the poly finish is very tough; to my eye it also appears to deepen the underlying colors of the surfaces to which it is applied - a benefit in addition to protecting the hardwoods from moisture, ultraviolet light - the ravages of time...
Don't forget to attach the various eyebolts and the stunsail boom stirrups and brackets to the fore and main channels before mounting the deadeyes and chains. A handful of midship hammock cranes have been rigged with their ropes. In addition to the exposed natural pear woods, I've also applied the satin poly finish to the wales.

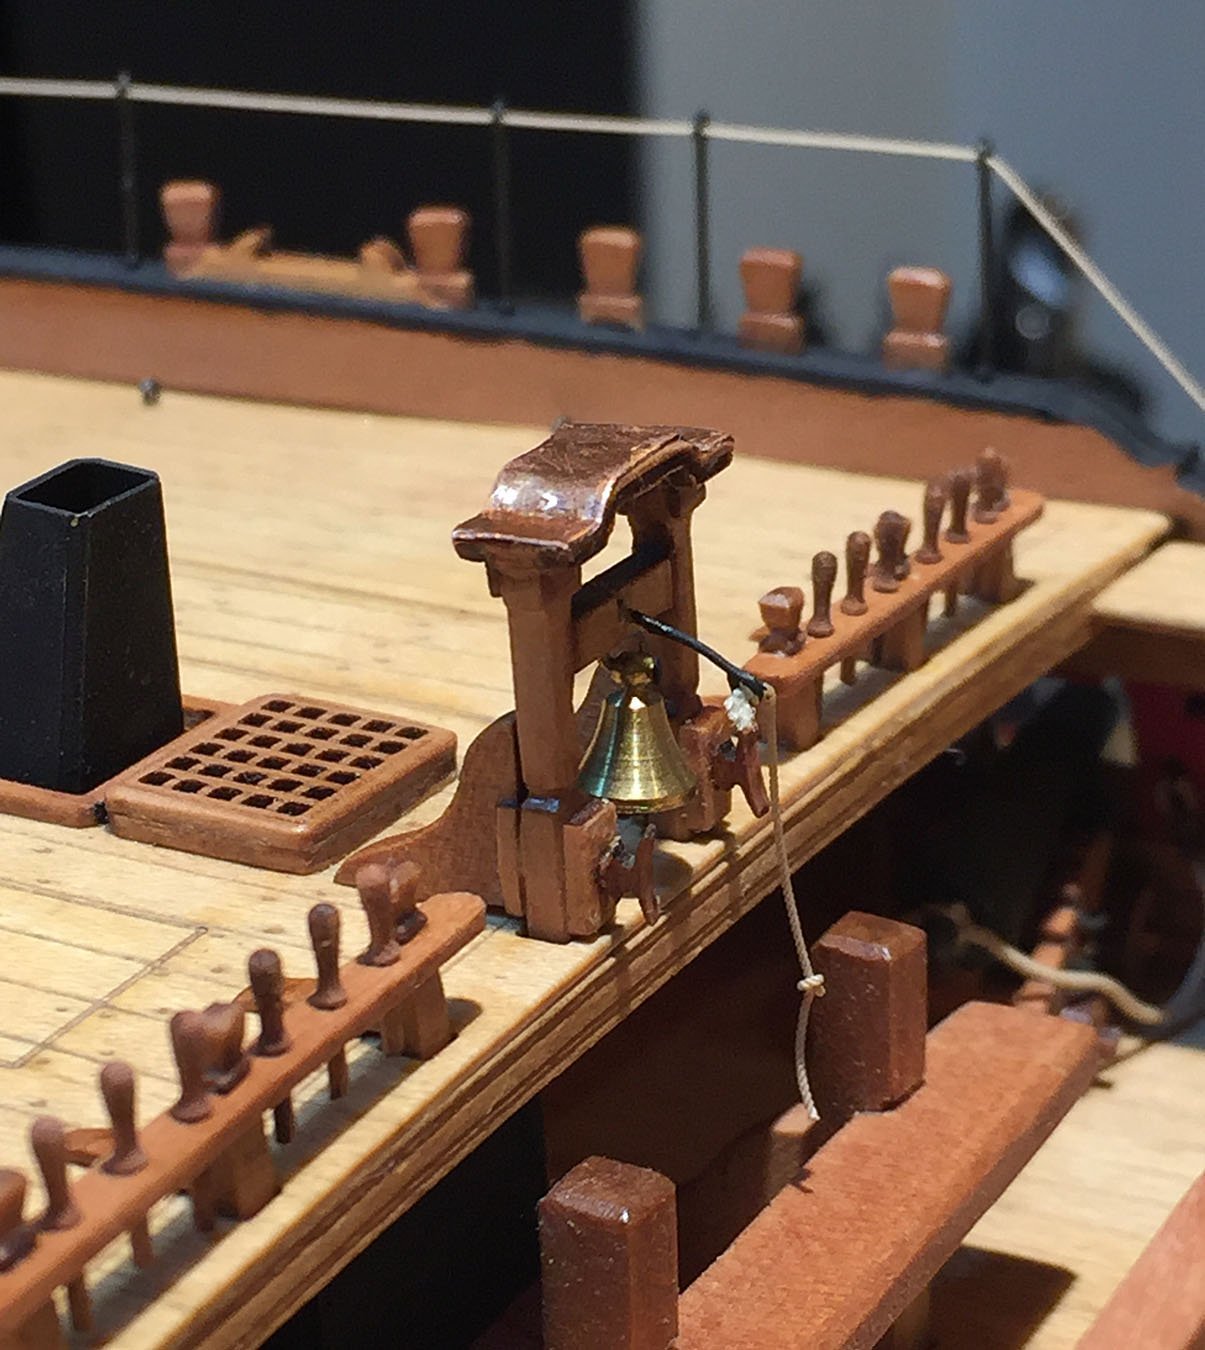
I decided to add even a little more pizzazz to my über-detailed belfry: a copper sheath on the fancy capping piece. I added a little darkening chemical to "age" it. I like the look of the belfry's contrasting brass bell. The Falkonet 9mm pear belaying pins are in-place and stained. The foc'sle safety rope stanchions have been rigged.
I'll note once again that these 300- 500% close-up photo magnifications have the effect of raising one's game. When I download the photos from my iPhone to my computer, I'll see all kinds of things my normal vision doesn't catch. I'm using the "zooming" software in my phone for the enlargements; this is not ideal since it lowers the resolution, however the benefit is very effective for evaluating where I need touch-ups - and in a worst case, a do-over...

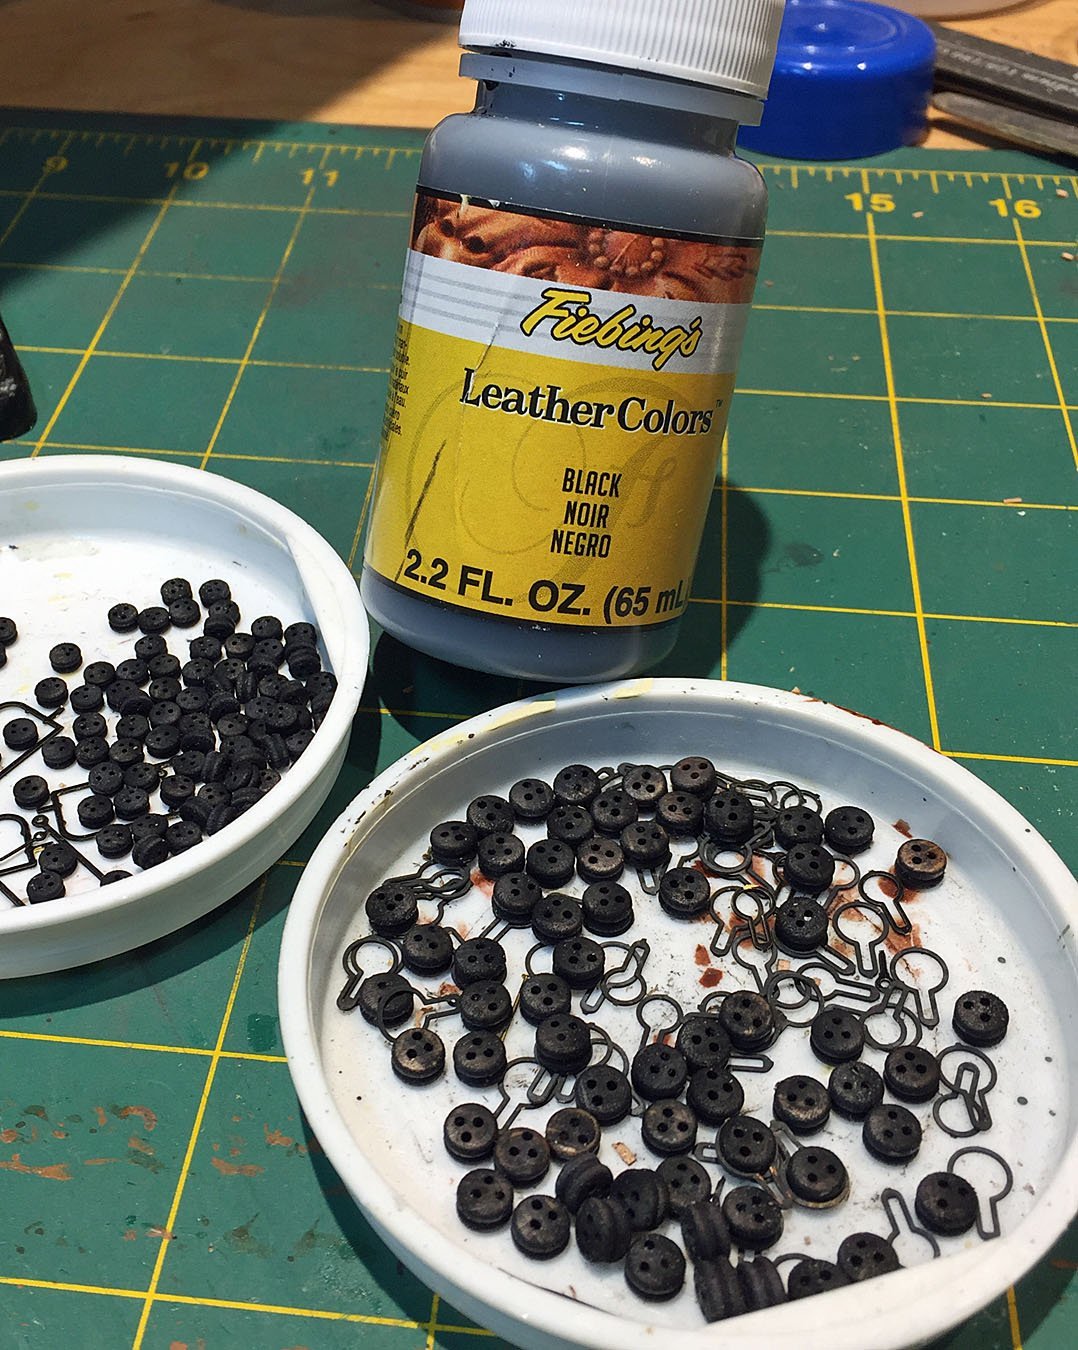
I've chosen to make Camilla's deadeyes black; to accomplish this I use Fiebing's leather dye in their black solution; the company makes a number of colors. The dye penetrates tight hardwood grains, is permanent and dries flat. Get some on your fingers and it will be there for a month or two (just kidding, but it does GO DEEP)!
Before dipping the deadeyes into the dye, I gently sanded-off most of the finish on the kit's supplied deadeyes (large and small) with a small nail file. This is quite fiddly and time-consuming indeed, but worth it to me. If the shiny finish on the deadeyes isn't removed, the dye only gets into the holes and the routed exterior rope channel effectively, which isn't where I want it.

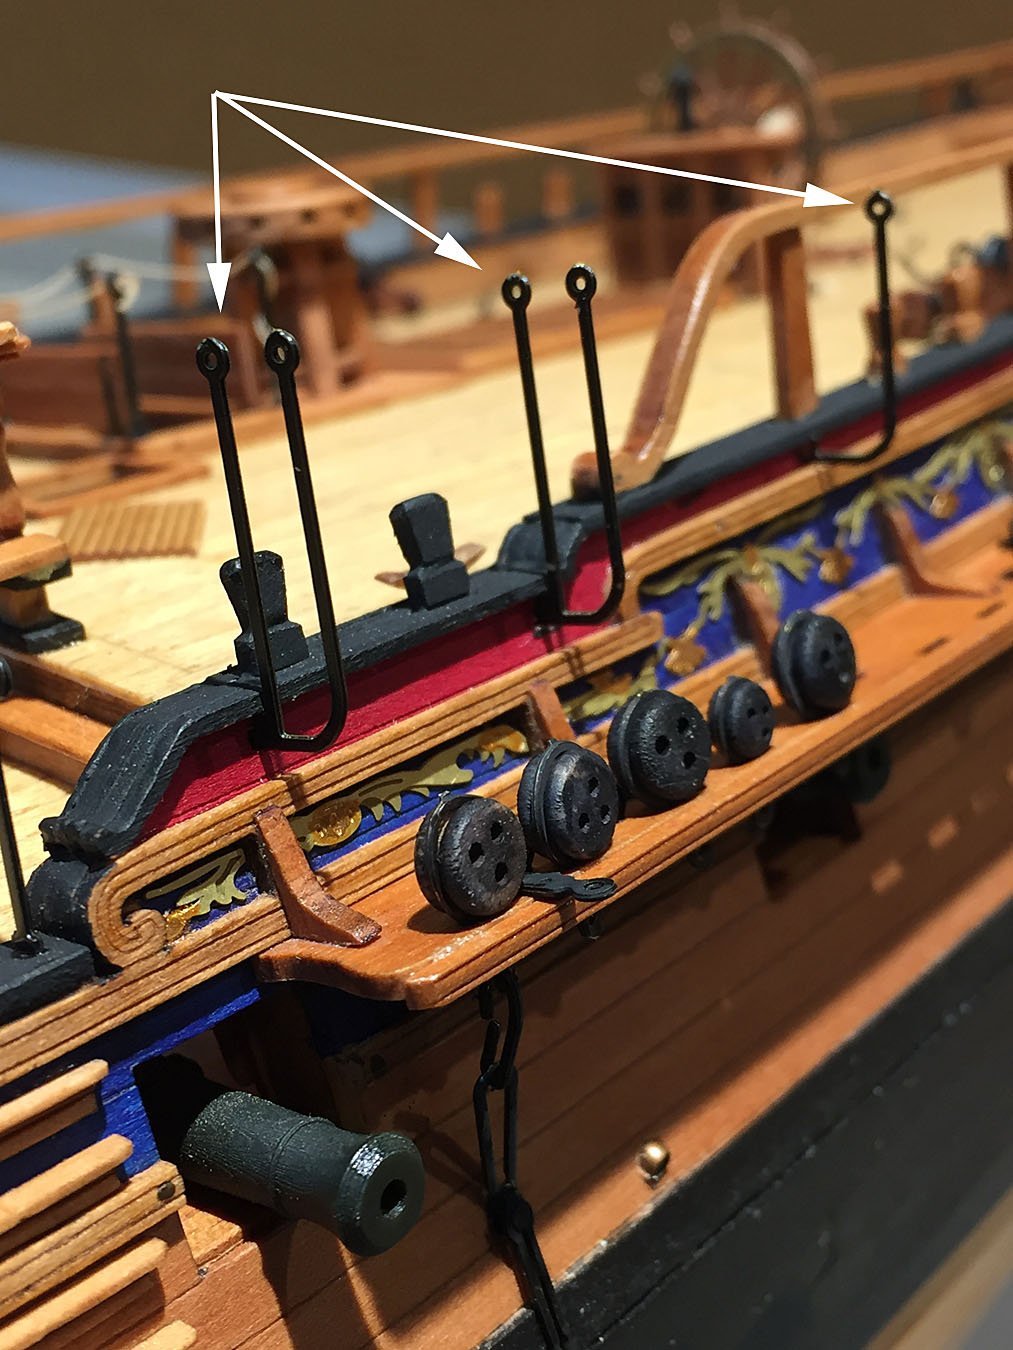
A mild dilemma: the arrows point to a selection of rope stanchions on the quarterdeck bulwarks; I'm not certain these were used for hammock cranes in addition to being safety lines, but possibly. The position of these tall metal bars appears to interfere with the shroud line rigging for the mainmast. I've mounted them temporarily and I'll soon find out if they interfere.
I like the look of the black deadeyes matching the black bulwark capping, the sharp contrast with the pear channels and other pear bits. I don't know how historically accurate this is; however, I do know that I've seen dozens of Royal Navy models of the era with black deadeyes!
I await my black eye from someone here who can offer more detail on this bit of arcana!
Ron
- yvesvidal, chris watton, Dfell and 14 others
-
17
-
I like it! The font looks spot-on: an excellent, historically-appropriate choice. A suggestion: when you come to finalizing the artwork take a look at (slightly) tighter letter-spacing (also called kerning). This will also allow you to enlarge the characters by approximately 1, perhaps 2 points.
Personally, in conjunction with all the embellishments you have planned, I like the yellow/ochre for her badge; however, I'm not certain that this color choice was used in the era. I'm sure there are members here who have some knowledge of this historical detail.
Your model is coming along very nicely. Kudos.
Ron
- Blue Ensign and mtaylor
-
1
-
 1
1
-
On 12/7/2021 at 10:06 AM, Blue Ensign said:
Post Forty-nine
Gallery-Part three
A seat of ease is constructed using Box and Pear and is fitted to the Portside Gallery.
Brian Lavery (Arming and Fitting) suggested that only one gallery was fitted out as a head, the other used for storage and observation of the sails.
1652

1657
1658
I can now fit the top Qtr gallery pattern (45) followed by the outer stern facia pattern. This now protects the somewhat flimsy inner pattern.
.thumb.JPG.aac88e730a49eeb68b0a80f7848bb332.JPG)
1672(2)
On the kit version inside the gallery is painted black to hide construction detail. On my open gallery style I have painted the insides Vallejo Ivory which will help light the interior.
1665
At this point I’m not sure about fitting the Upper outer counter pattern as I’m not a fan of the raised etched Name lettering provided in kits.
My favoured approach is to use dry-rub lettering which has a more authentic and period look to it.
I had a play around (with Chuck’s permission) using the decorative friezes and panels applicable to Winchelsea.

1689
1677
The name was replaced using Photoshop and Paint, only mock-ups at present, and the letter style needs adjusting, but I’m rather drawn to the paper frieze approach.
I will return to this much later in the build.
The next post will hopefully see completion of the gallery assembly.
B.E.
07/12/21
You may want to ask - or PM - "druxey" about the most likely font that would have been used for a ship of this era. Great idea to include the lower counter painting details ala' Passaro; this will certainly enhance your very nice build.
Ron


.JPG.35216e035a2f3a0ff73f82f534399dc9.JPG)


Chris Watton and Vanguard Models news and updates
in Traders, Dealers, Buying or Selling anything? - Discuss New Products and Ship Model Goodies here as well!!
Posted
I agree that the Vanguard small boat option is a good one!
I intend to order a 24-footer from Chris and tie it down on my Sphinx (HMS Camilla) model. After some painting and minor detailing, the clinker hulled launch ("turned turtle") will look really nice as well as more historically accurate. Personally, I have no particular desire to make one of the supplied boats in the kit although these lasered pear items look very nice. The construction pieces and manual all look good for those who want to follow the entire kit to it's finalé with all the boats presented (whether Admiralty-style, or masted & rigged). These additional little "mini builds" in the Sphinx kit will please many modelers I suspect.
I've noted Chris' small figure on the deck here; I've been researching scaled figures for my model over the last few weeks. I'm hoping there may be a new source for 3D-printed ones that I can use since I'm placing my model in a fairly dramatic diorama setting. The NRG Store is now offering scaled 3D figures that I'm looking at seriously, but only a handful are in my build scale (1:64). I may resort to the same 'ole Italian castings I've used previously...
Ron