VTHokiEE
-
Posts
1,528 -
Joined
-
Last visited
Content Type
Profiles
Forums
Gallery
Events
Everything posted by VTHokiEE
-
 Ah, sorry, what type of wood is it? Some are much more flexible than others unfortunately. How big is the taper at that point?
 -
Have you taken a look at edge bending the planks? I believe it addresses this situation very well.
-
Welcome from the east coast of FL!
-
Great job, it looks beautiful! This looks like such a neat model.
- 77 replies
-
- 4
-

-
- morel
- master korabel
- (and 1 more)
-
I believe that I have seen a “boot” around the mast at the deck (I’m not a sailor so please forgive my nautical terminology ignorance) that could cover any issues. Here is a link to a picture of one: https://i.pinimg.com/originals/c0/fa/6d/c0fa6d475f2afd11957436fcb1a06df0.jpg I added something similar in my Sharpie build which you can see here: I believe I saw that you had some reference books for this subject. Do any of them depict anything like that?
- 155 replies
-
- 1
-
-
- opium smuggler
- Authentic Models
- (and 1 more)
-
I’m very interested in building this kit one day so I’ll be following along. Looks good so far!
- 20 replies
-
- 1
-
-
- panart
- battle station
- (and 2 more)
-
That ensign is a really nice addition! Thank you for the very thorough and detailed explanation; hopefully I can do something similar when I get there.
- 335 replies
-
- 1
-
-
- alert
- vanguard models
- (and 1 more)
-
Nice job on that planking fix! I hope I didn’t over look it, but do you have to use a special glue so avoid any issues with the paper crinkling? I keep staring at the Papegojan kit (none of the lighthouses really caught my eye, they need some North Carolina Outer Banks lighthouses and I wouldn’t be able to resist); these cardboard kits seem really neat.
- 175 replies
-
- 4
-
-
- hanse kogge
- shipyard
- (and 1 more)
-
Looks really nice to me! I’m amazed how quickly you seem to be working through this. Nicely done!
-
Have fun! Here is a search that brought up a handful of the started logs: https://modelshipworld.com/search/?q=18th century merchantman&quick=1
- 44 replies
-
- 2
-
-
- half hull planking project
- half hull
- (and 2 more)
-
Nice to see another planking log; if you look hard you probably can find 2-4 more (but none are finished aside from Toni’s). I would like to get back to mine but the siren’s call of my other kit was too strong. One thing to keep an eye on is that the thick ply has (at least for me) quite a slope due to the kerf of the laser. Make certain to get that leveled out. I had a few comments in my log that I would do differently if I started all over. Have fun!
-
a tin/lead mix - some RadioShack electronics solder; not optimal, but sufficient, or so I thought. I use this currently: https://contenti.com/1-2-oz-silver-solder-paste-syringe there are topics about a lower temp silver solder. I tried something I found in homedepot for plumbing first and it didn’t work for me. Your build is really looking nice. The paint job is real nice. I wish my lines were as smooth.
- 155 replies
-
- 1
-
-
- opium smuggler
- Authentic Models
- (and 1 more)
-
That’ll look really nice, I’m planning on rigging them for my Alert as well after seeing the beautiful job the Blue Ensign did on his. I’ll be looking forward to see how you rig yours (I’ve never done it before and am trying to learn as much as possible before I get there).
-
Looking good! Are you planning on rigging the cannons?
-
I don’t know that I would’ve picked up on the thickness if you hadn’t mentioned it, but now I think it does seem thick to me.
-
It’ll be very exciting to see the Bristol; I’m looking forward to seeing the updates on that when they come out.
-
What solder did you use? I assume this is the joint that broke later in the log? I was making some rings to strop my deadeyes and the joint kept breaking until used silver solder and a torch. Some people have had luck without that but it worked well for me.
- 155 replies
-
- 2
-
-
- opium smuggler
- Authentic Models
- (and 1 more)
-
Take a look at this post, it may help with the supplies question: Aside from the sponsors https://www.cornwallmodelboats.co.uk/ is a good source. Even though it’s in the UK shipping to the US at least is pretty reasonable.
-
I should pick one of these up for my build. I'd be interested to know if you find out any tips/tricks as you start learning. did you take a look at this thread?
- 170 replies
-
- 2
-
-
- medway longboat
- Syren Ship Model Company
- (and 1 more)
-
Are pre-sewn sails on the expensive side? I wonder why they aren’t included in more kits. I’m leaning towards not making sails for the Alert (still undecided though), but I think I’d be a lot more inclined to add them to a build if I didn’t have to sew them. I’m not much of a seamstress, on the other hand it is good to learn new skills 🙂.
-
It is looking good though! The time taken certainly shows and it really is about the journey so why rush 🙂
-
Thanks Edward and B.E.! It is this slip: It is way overkill for what I need right now, but I would like to build a large ship someday and I’m hoping that it will be very useful when I get there so I think that for me it will be a good investment. It wasn’t very expensive, but it’s so large that if I fully realized how much space it took up on my modest bench I would probably have waited to purchase it.
- 436 replies
-
- 2
-
-
- vanguard models
- alert
- (and 1 more)
-
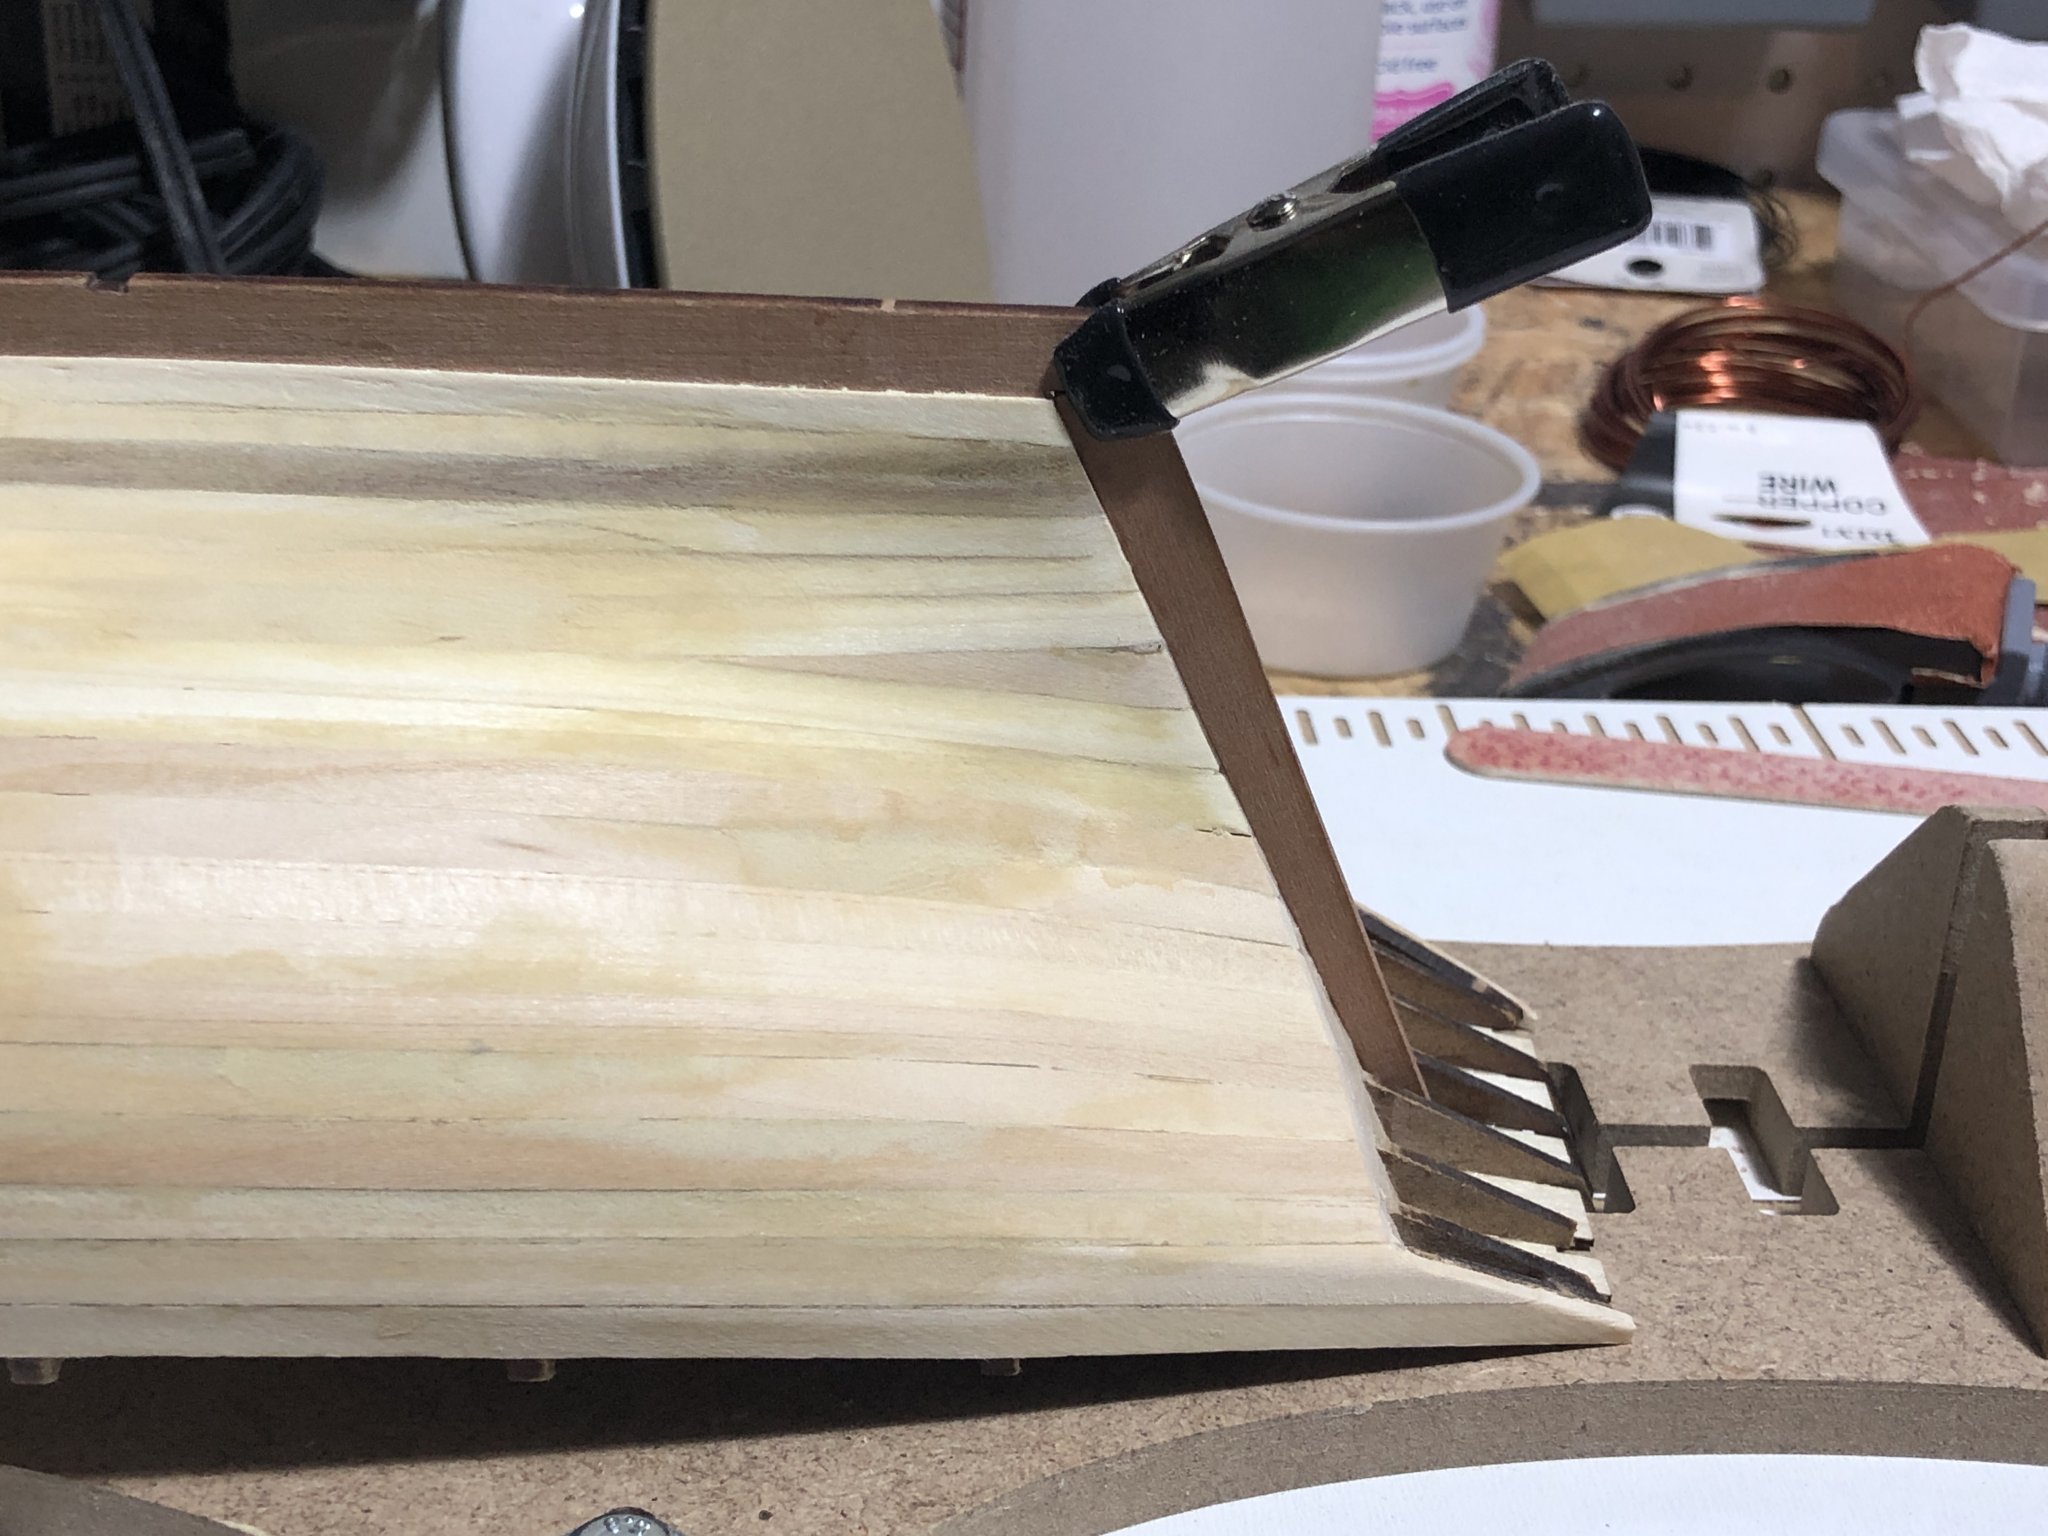
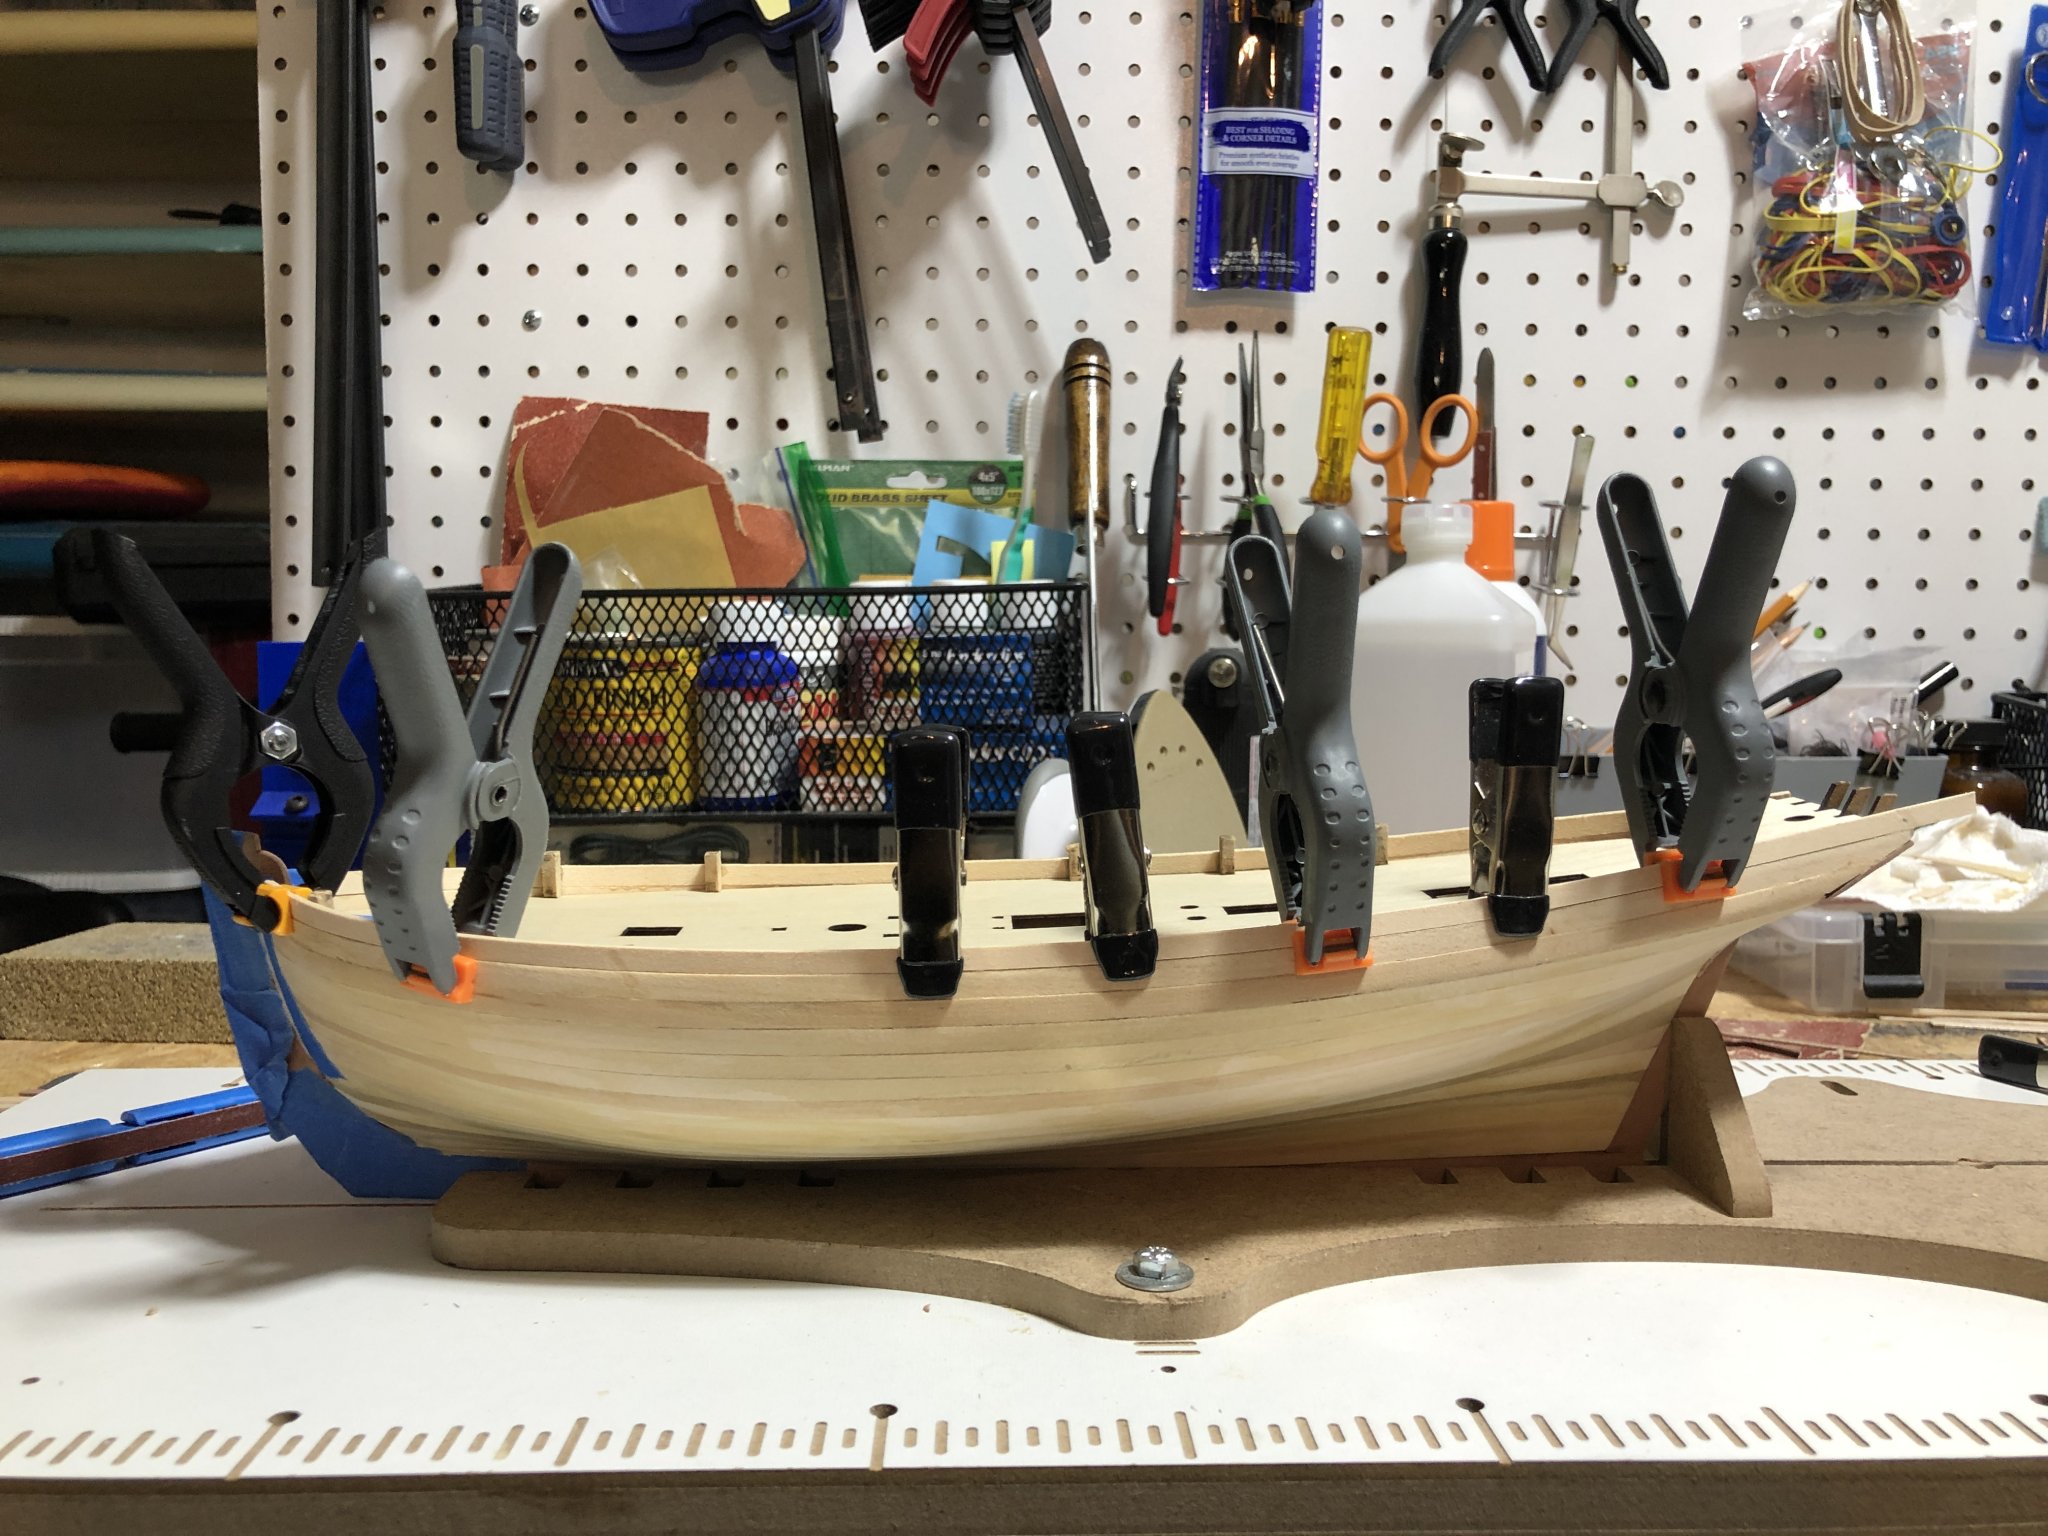
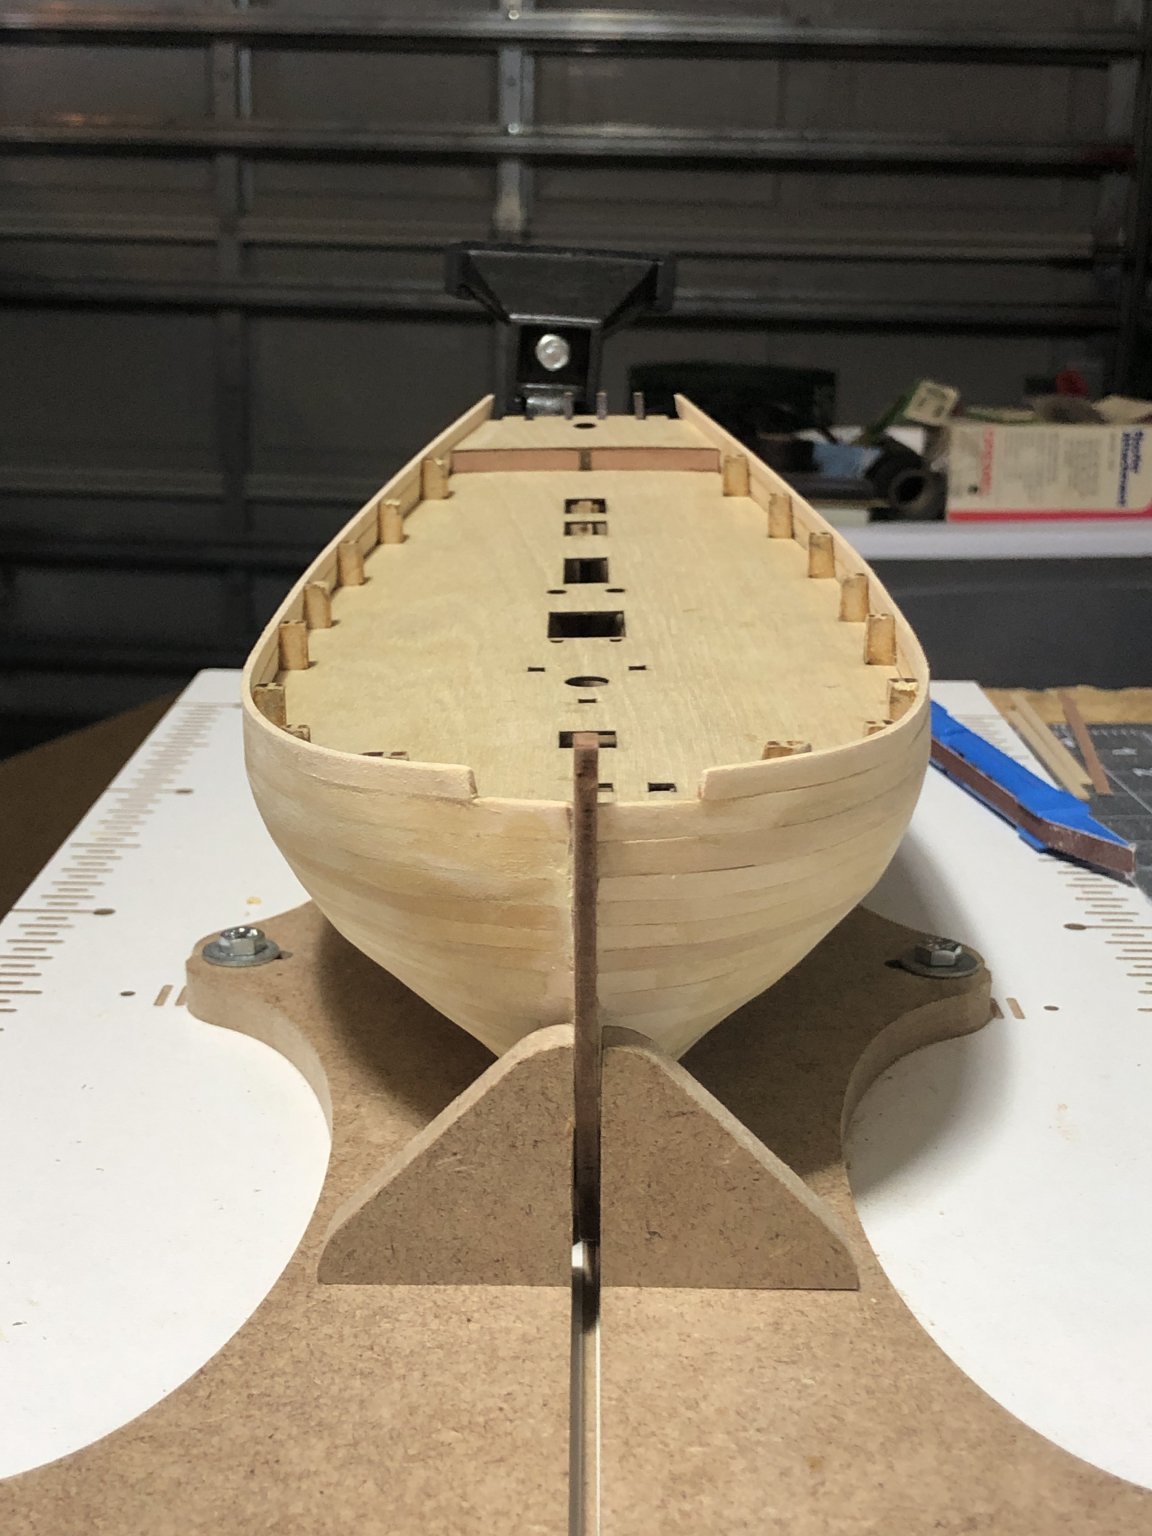
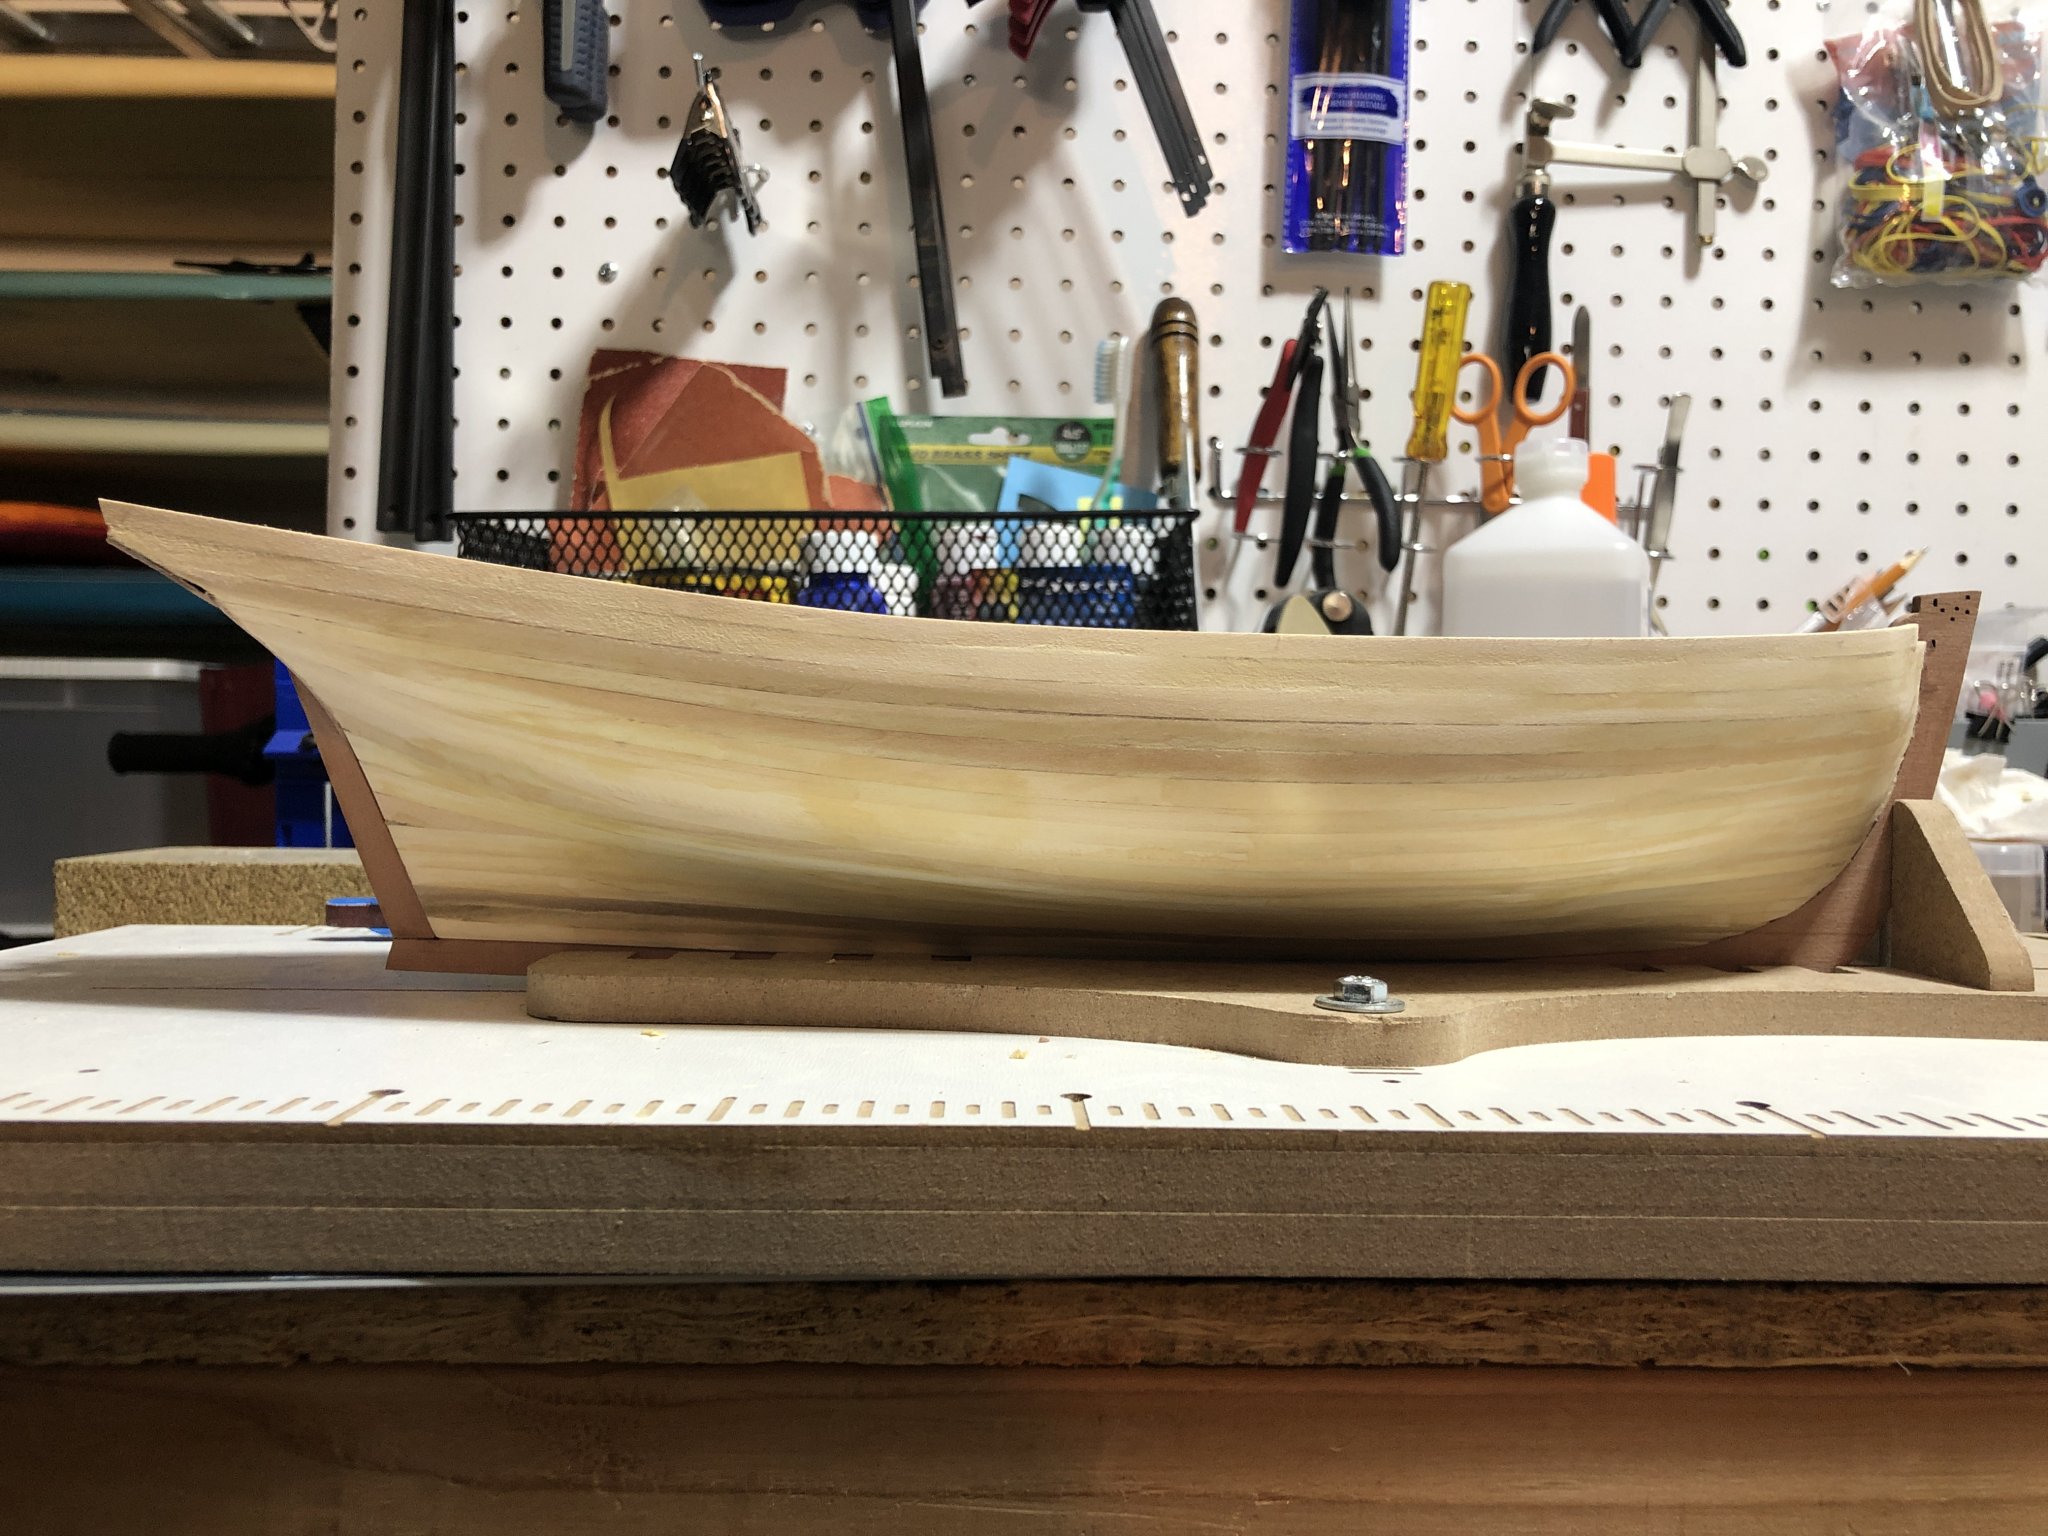
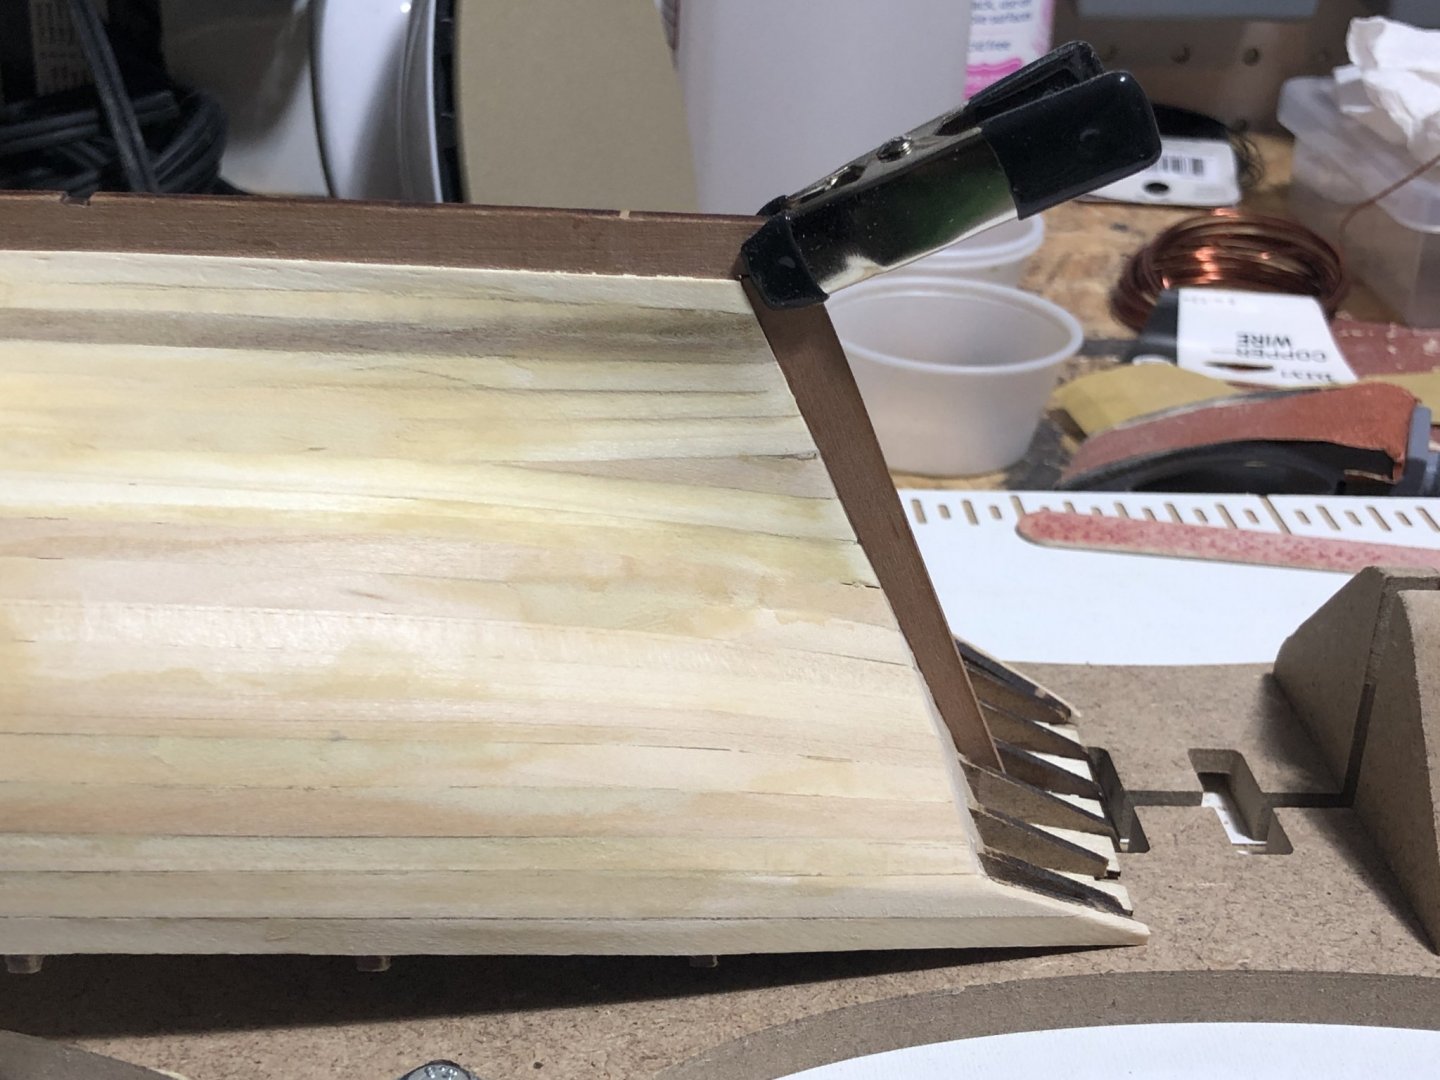
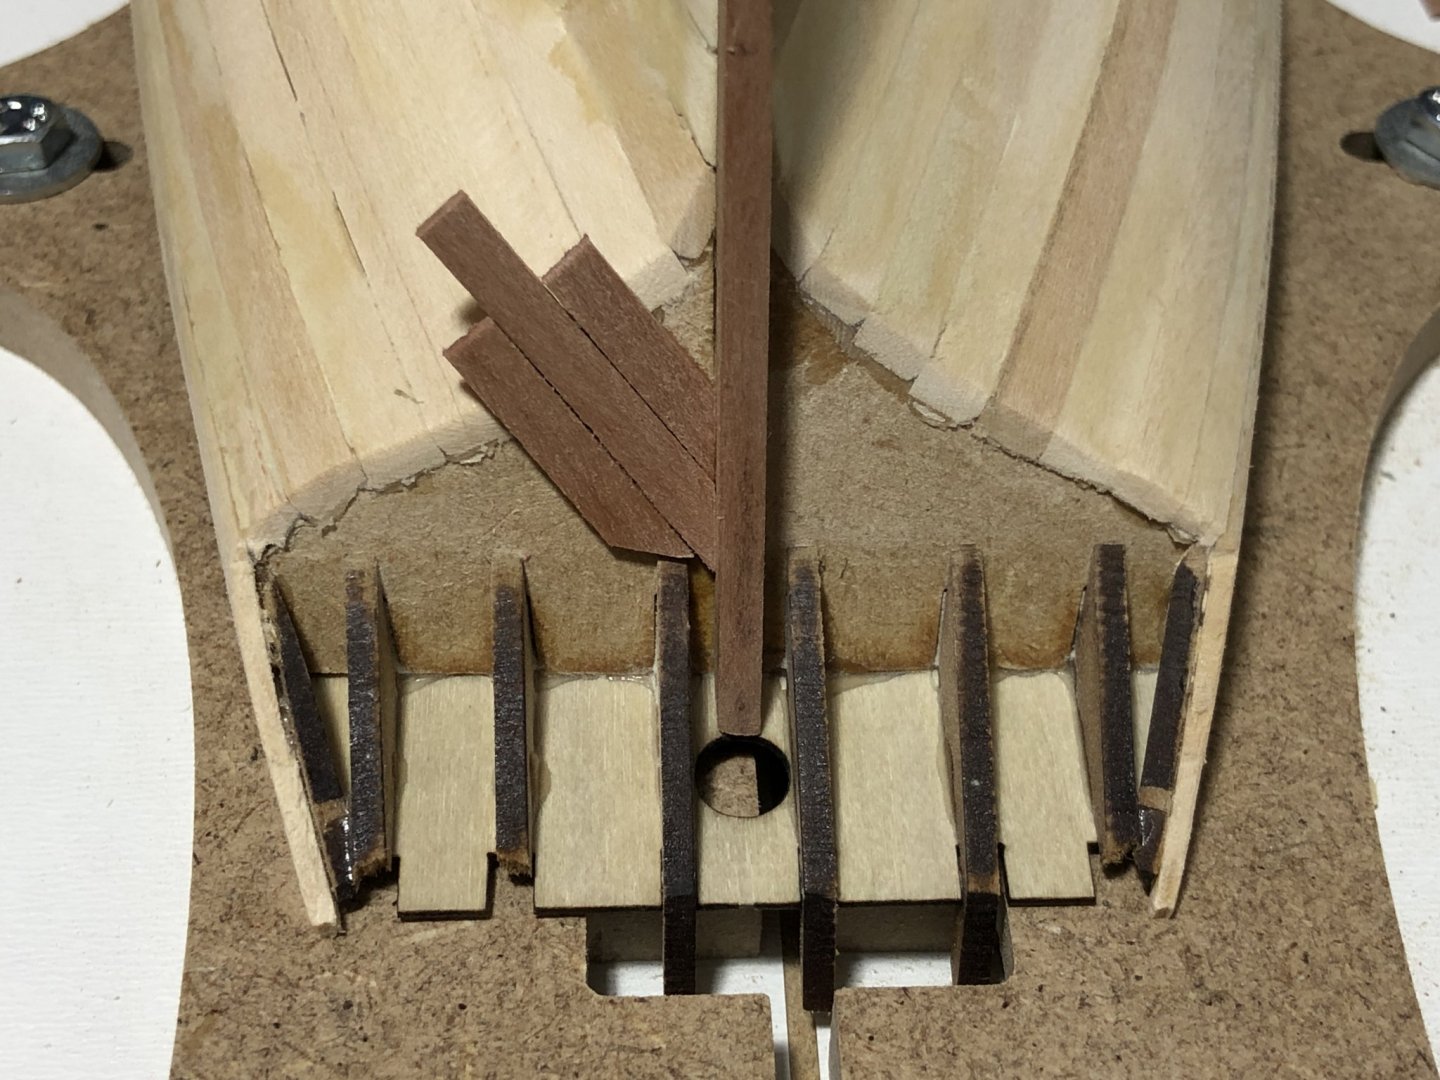
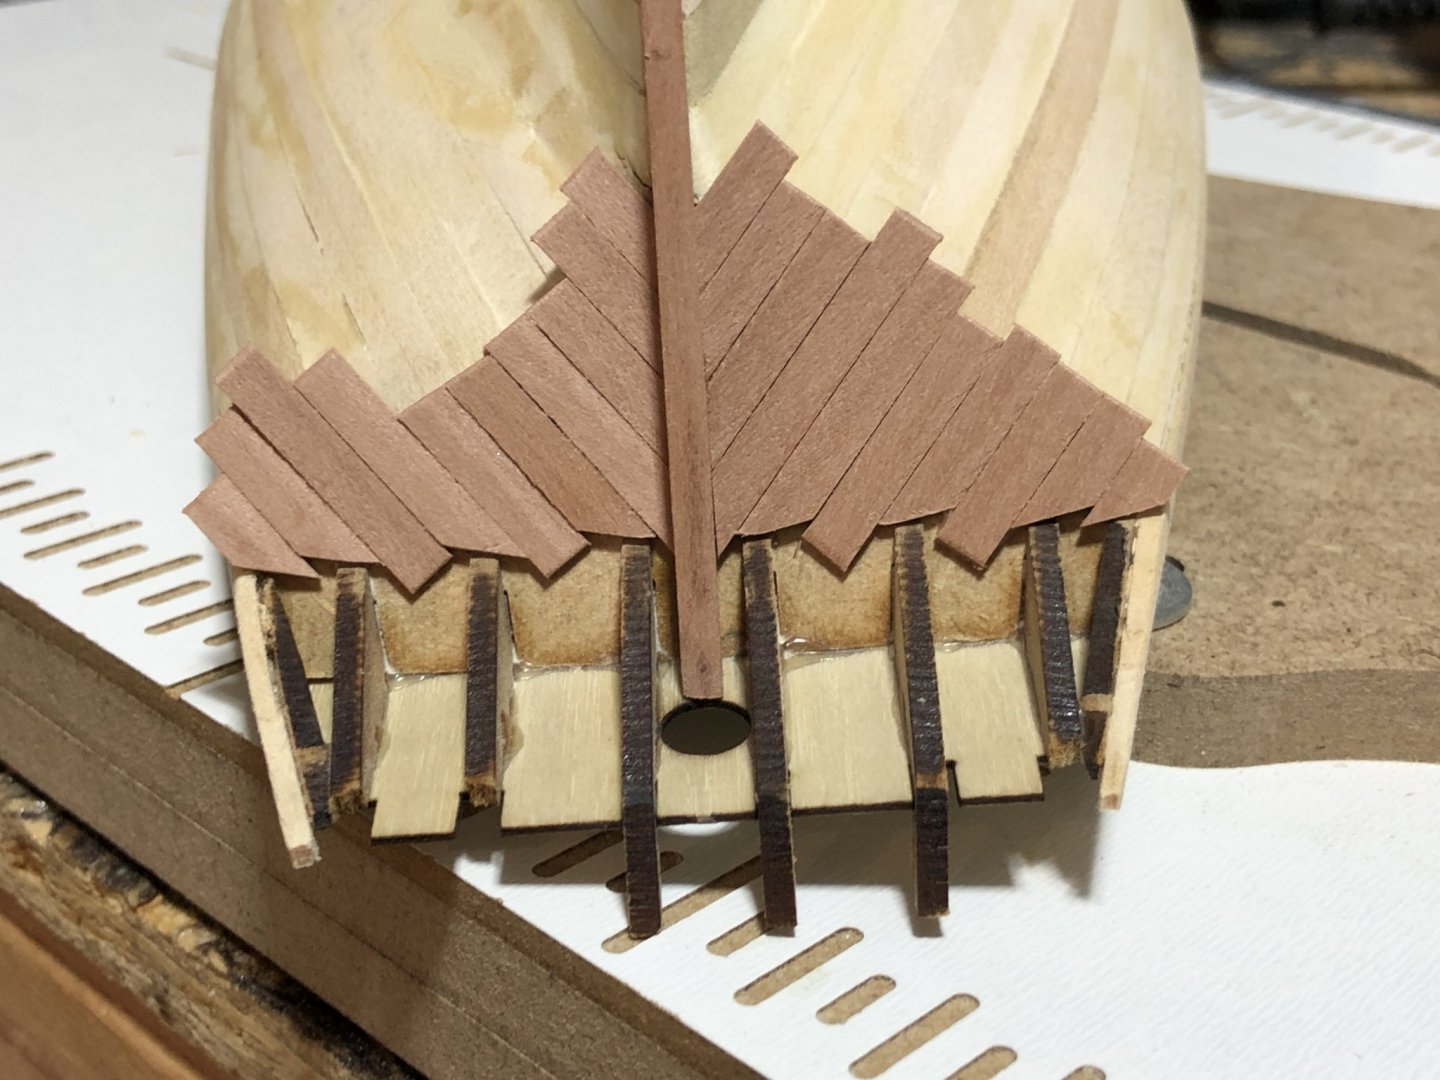
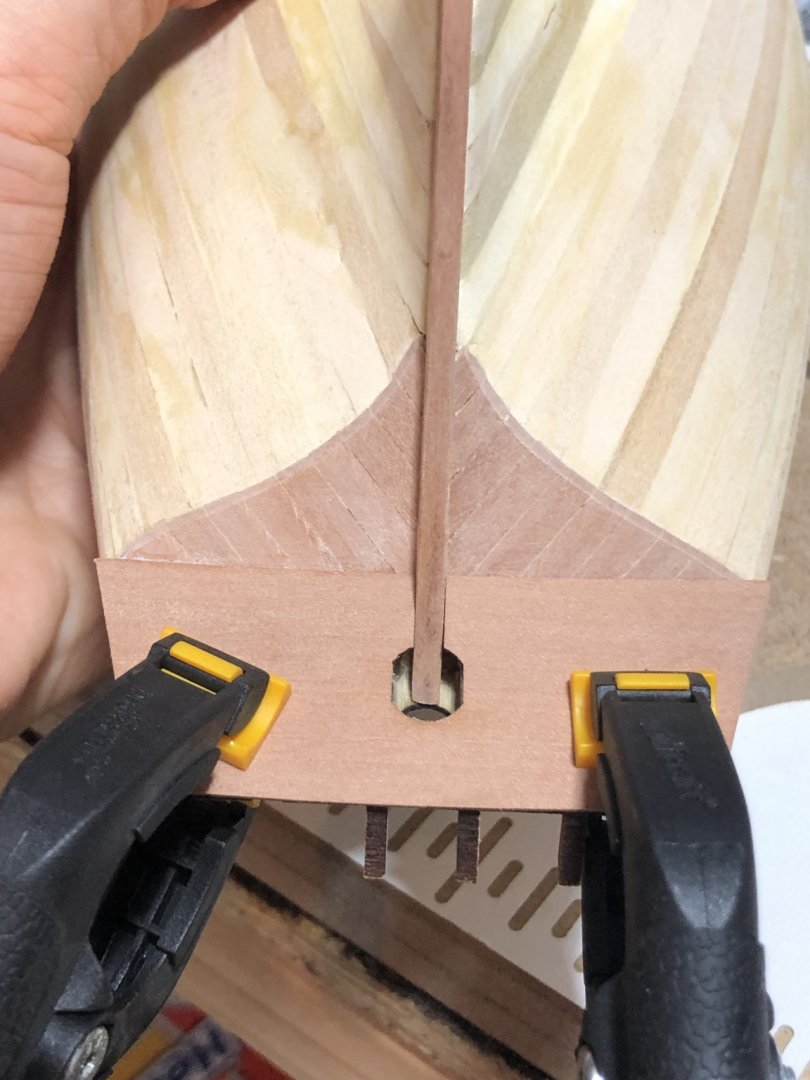
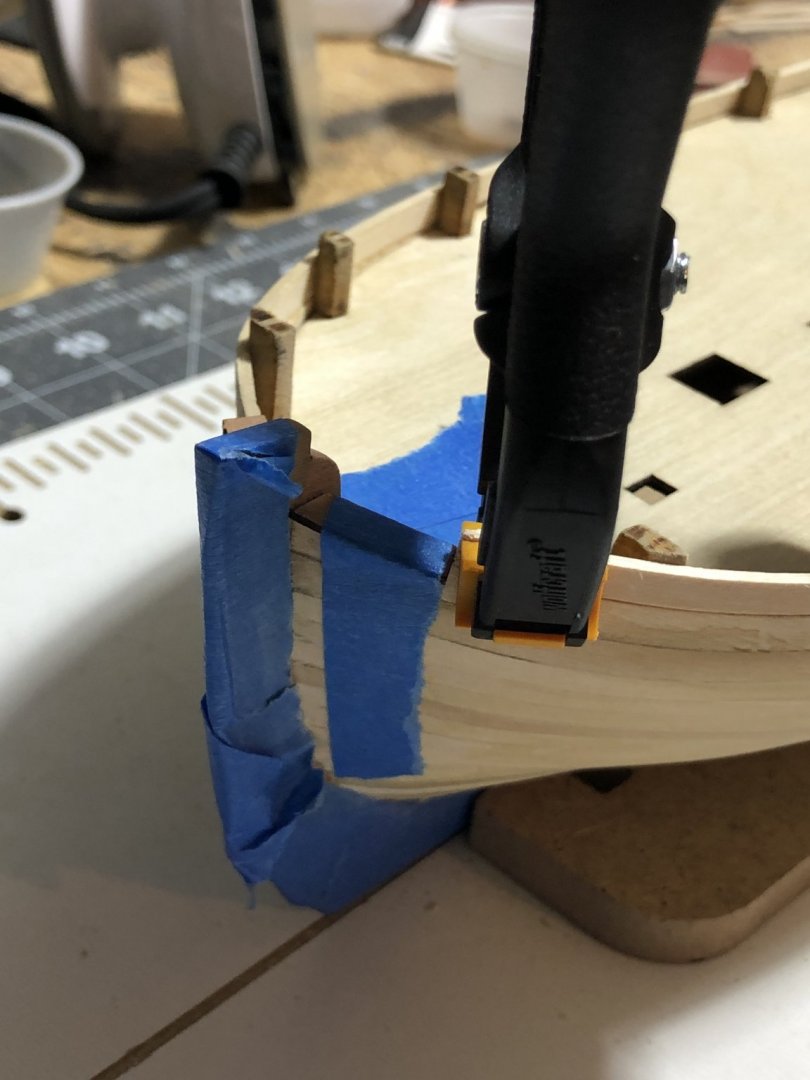
Time for an update, I followed B.E,'s advice and after smoothing the hull a little further I attached the stern post: Next I started planking the transom, attached the counter and sanded it all. I didn't know the best way to temporarily attach the spacers for the final plank, so I went with painter's tape and it seemed to work alright. Then after some final sanding I think I'm ready (deep breath) to start the second layer of planking.


- 436 replies
-
- 16
-
-
- vanguard models
- alert
- (and 1 more)