


popeye the sailor
-
Posts
16,007 -
Joined
-
Last visited
Content Type
Profiles
Forums
Gallery
Events
Everything posted by popeye the sailor
-
 really super progress Frank.....the deck is awesome! nicely done on the weathering too
 -
looking really sweet Augie.......very nice! I love how neatly done, it looks
- 2,191 replies
-
- 2
-

-
- confederacy
- Model Shipways
- (and 1 more)
-
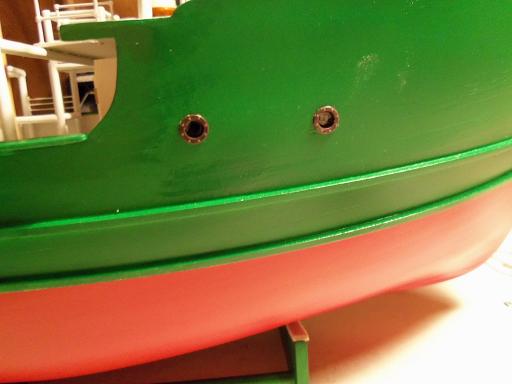
yea......the idea is to make pilot holes. I'll use a smaller drill to locate them. I'm done with the work week.......now I can play. not to worry Augie, the port holes are fixed........no harm will come to them. looks like I need to make sure my fingers are clean of sawdust though, before I touch the hull love the sawdust smudge in one of the pictures
- 956 replies
-
- 6
-
-
- andrea gail
- trawler
- (and 1 more)
-
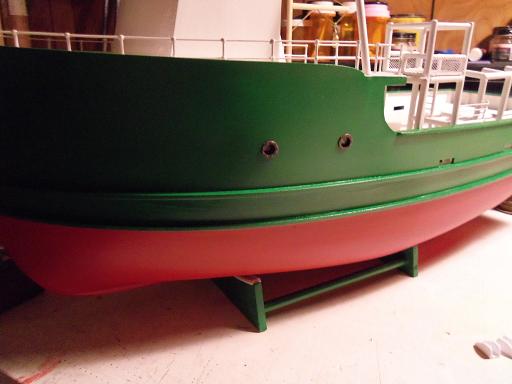
thanks to you all and those who hit the like button. actually, I didn't even bother to paint the portholes. they come in that dark brown color, and in the pictures, they look kinda blackened.......so I left them like that. I'm just as curious Carl......there is one picture that I'm itching to do........perhaps in the next update I think I figured out how to drill the holes for the 'eye' shackles. the problem is that the drill tends to want to walk off the side of the dowel, putting them in the wrong position and angle. more on this soon thanks again all!
- 956 replies
-
- 2
-
-
- andrea gail
- trawler
- (and 1 more)
-
Cutty Sark by NenadM
popeye the sailor replied to NenadM's topic in - Build logs for subjects built 1851 - 1900
well done on the bow spirit Nenad........she looks super- 4,152 replies
-
- 1
-
-
- cutty sark
- tehnodidakta
- (and 1 more)
-
congrats on the finish of these two fine builds Dave........I'll look forward to your next one
-
ahhhhhh....the dreaded detail threshold.......to infinity...........and beyond! looking real sweet Patrick........nice!
-
nice progress Tom
-
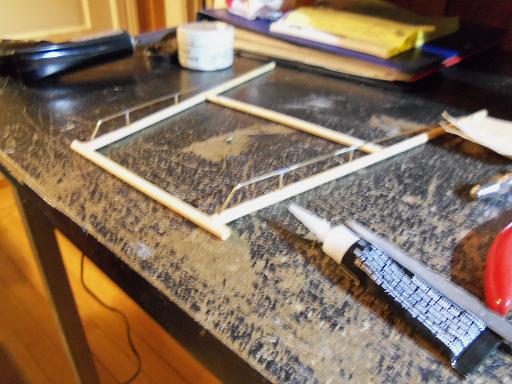
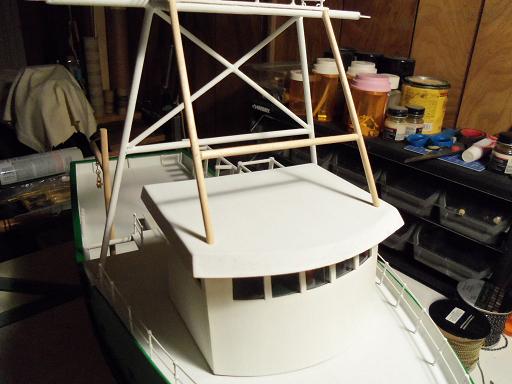
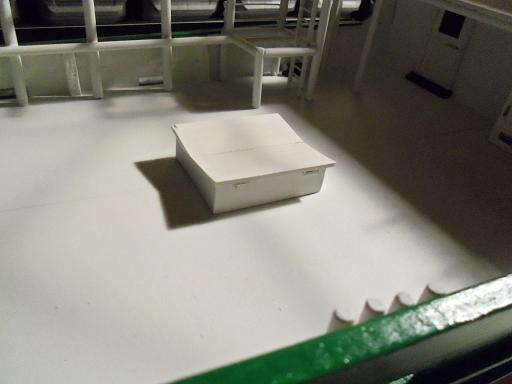
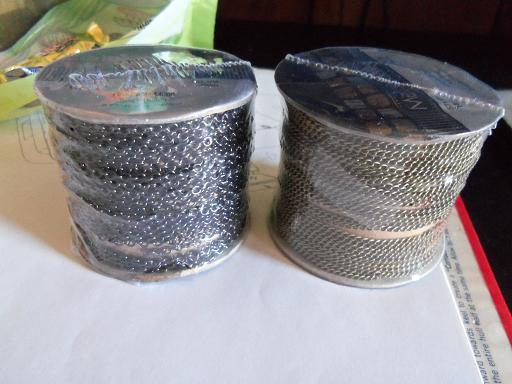
a big thanks to every one for the likes and the kind comments I'd have been around yesterday, but my monitor decided to kick the bucket.........I'm reduced to using our old stand-by........a 12 X 12 LG VGA monitor. everything looks so tiny a warm hello to you Sal.......always glad to see new faces. I try to be as descriptive as I can. if someone benefits from the info.......I feel that's a big plus that bevy of chain Carl is for the trawl rig.....or a major part of it. as a matter of fact, I bought some more Friday......another type...'antique copper'. I'm always on the look-out for something cool as for the engine......I want to pull the heads to see if there is any piston damage.....and to see if the right side head has been replaced as well. I'll go with anything that's cheaper to do. it's a wait and see thing. I'll keep that in mind Patrick.......I would like to do something about it I've even thought of filling them with white glue and dusting them with fine sawdust. could also be a case of the wood shrinking. I did a bit more on Friday......most of it had to do with the aft section of of the trawl rig. there is a bit of framework involved with it. first went the outer support framing. the rest of it was soldered in place...I used a file ans sandpaper to clean it up. a brass pin was installed at the base of the scaffold and dry fitted in place. there is still a bit more to add to it before it sees any paint. the portholes were finally put where they belong.....before they got lost on the table the second picture shows the 'glass' better, I think the front support bar was added to the first section of the trawl rig.......still more to go. as for the hold.....simulated hinges were added and painted. it is now permanently in place on the main deck all was fine until I attempted to add the eye 'shackles' to the top of the aft section of the trawl rig. I ended up cutting the botched top off and fitting another one.


- 956 replies
-
- 20
-
-
- andrea gail
- trawler
- (and 1 more)
-
thanks Carl......yea.....I needed this like a hole in head. the engine replacement far exceeds the value of the truck, but the body is in very good shape, and it has no value in the shape it's in at the moment. can't sell it......can't junk it anyway, because there is still a loan on it. I wonder what they would say, if I called them and told them their collateral is gone! they'll call me anyway, because I took almost all the insurance off of it, seeing as it will be stored and not on the road. the only thing that's on it, is if something were to happen to it, like a roof collapse {if I should be so lucky } now if only warmer weather would come.
- 956 replies
-
- 3
-
-
- andrea gail
- trawler
- (and 1 more)
-
I find this very interesting.......I've never seen them on the mizzen shrouds........only on the fore mast shrouds. looking very nice John!
- 2,250 replies
-
- 2
-
-
- model shipways
- Charles W Morgan
- (and 1 more)
-
I liked that one picture of her on the table.......the light set her up beautifully! you've made some really great progress there....moving right along in fine shape! about the tool.........after I posted that picture, I was going to set up and cut a few circles to try it out. I think that repeated light cuts, it should do quite well. I'm sure that 2 mm will be more than adequate for the crows nest base......heck, you can even go to 1.5 mm {1/8 to 3/16}, I use basswood quite a bit.........take your time, take small bites, and it should all turn out alright I may still try to do it........very curious
-
thanks Patrick.........I was starting to get 'modeler's envy' watching you fine folks making progress. glad to be back
- 956 replies
-
- 2
-
-
- andrea gail
- trawler
- (and 1 more)
-
very interesting that you can show the individual component. it would be true that most entrances to the lower deck would have a coming, but it is in an enclosure........the enclosure would have it. any and all holds would have one as well. it's amazing how much detail you have in just that one assembly I would leave it as is very nice progress!
-
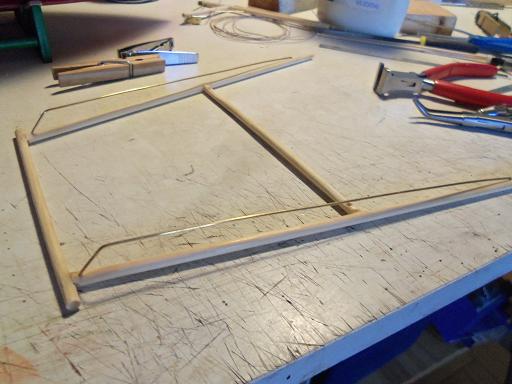
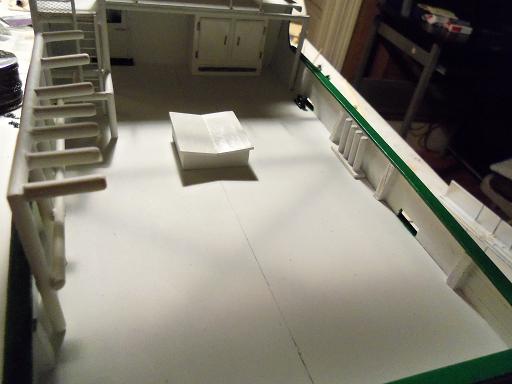
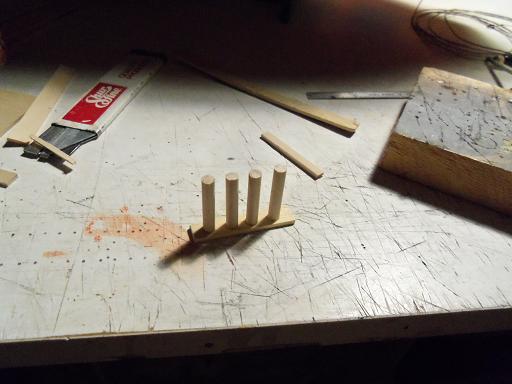
I did make a little more progress yesterday........with the roof not being glued down, it may prove to be a problem. I think it will be alright though to the first part of the trawl rig, the front support uprights have been cemented in place. dry fit, it is now a self standing assembly the posts were cemented in place at this time......the hold is just placed there, because I have one more idea about that stubborn crack. I have a feeling it will never get resolved.......between the bouncing temperatures.......it may never get resolved. I have a couple of things to do here around the house.........I may get more done today fingers are crossed!

- 956 replies
-
- 14
-
-
- andrea gail
- trawler
- (and 1 more)
-
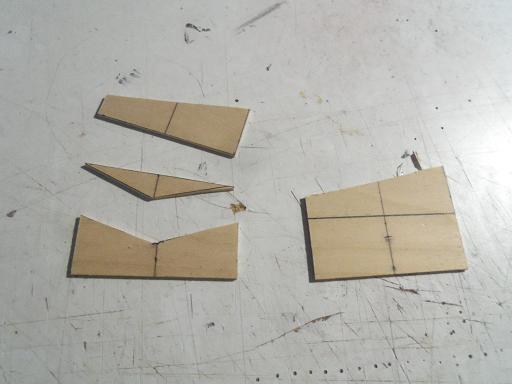
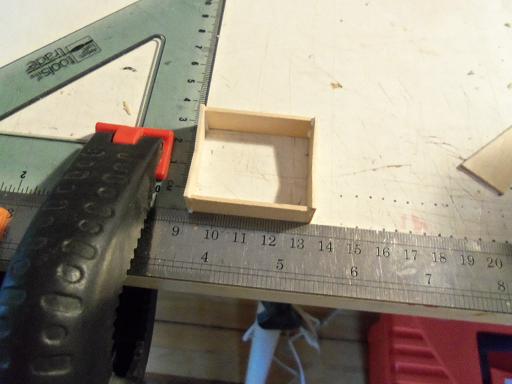
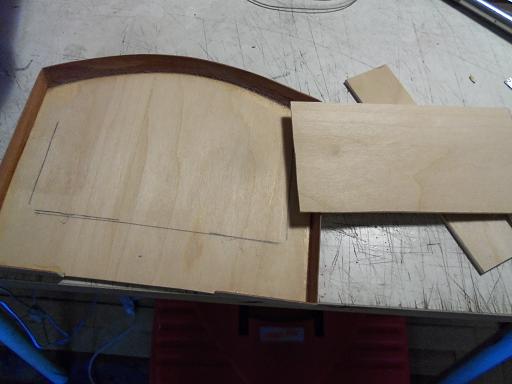
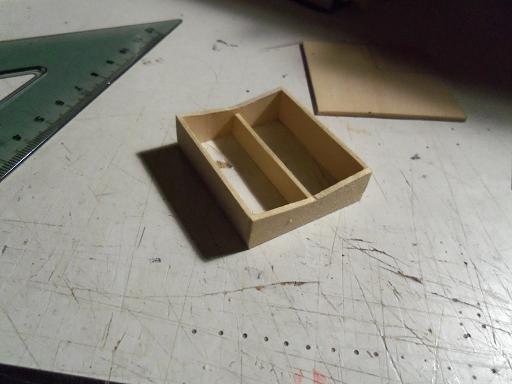
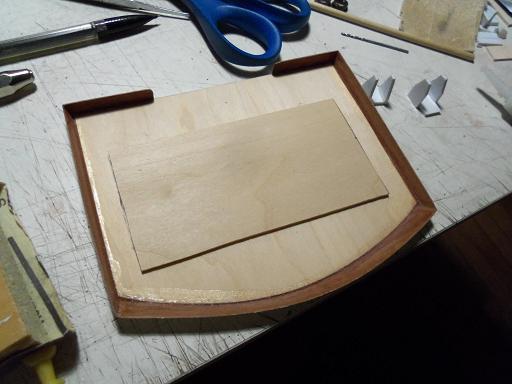
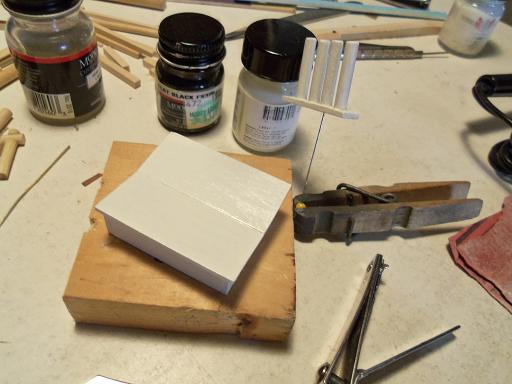
thank you Lawrence, Nenad and Patrick for the concerns. snow has been an issue........biggest issue is where to put it anymore! but the biggest issue I have been busy with, has been the Isuzu {my SUV}. I had mentioned breaking down on the highway a couple of weeks ago. at first, I thought it was a problem I could handle here at home, but in starting to tear it down, I found bigger problems. it was shipped to a garage, where they confirmed that the engine is trash. I have a warranty on it, but they denied the request......lubrication being their scapegoat. so I ended up having to buy another car, and bring the Isuzu home, since I can't afford to have the work done {quite a price tag}! it will sit in the garage until the weather gets warmer, and then I will work on replacing the engine myself. actually, I already knew that the engine was bad......I needed a certified garage to confirm it, so I could use the warranty. had I known beforehand that the request would be denied, I wouldn't have spent the cash. there's quite a history on this truck.......so much has come to light since this happened. I've always had my suspicions..........they are all confirmed now. to bad the place I bought it from is out of business. anyway........this week has been on the positive side......I managed to get back to the table for short sprints, shoveling snow in between. there is to be a hold on the main deck....looks a bit different than what I'm used to making. I started by cutting out the parts for it. these turned out to be too large, so I had to scale it down a little. when I had the parts I needed, they were cemented together. my thoughts were also on the pilot house roof. to make centering it easy, and to beef it up in case there is any drilling to be done, I added a pad of flat stock to the inner ceiling. I even got to go on another scavenger hunt......for chain and hollow round stock, for making vents for the cabins below deck. I need to make three of them. I have some horn type vents, but they do not fit the style. ahhhh, but again I think I have to catch myself.........the round tube may be too large. more to think about. mean while, I added a center spine to the hold and sanded it smooth. I also made another part......not sure what it's use would be. I first thought it would be made up with hollow tubes, but it shows them as solid in the instructions. the pad that I cemented on the inner roof was dry.......... now it's ready for paint........the lids for the hold were made by this time, so they both got a coat of primer. once dry, the lids got a coat of gloss white.

- 956 replies
-
- 12
-
-
- andrea gail
- trawler
- (and 1 more)
-
gonna be a sweet looking helm room! nice technique in cutting out the windows nice fittings on the mast as well.......very well done.
-
yea......if you like to read stereo equipment manuals I look at them as kind of a 'read between the lines' sort of instruction. I built the Cux87 and the Mary Ann........both of these kits are advanced beginner kits. the panel diagrams didn't match the Mary Ann's parts panels.......but if I looked in the Cux instructions, the diagrams matched to a 'T' I found that to be rather funny
-
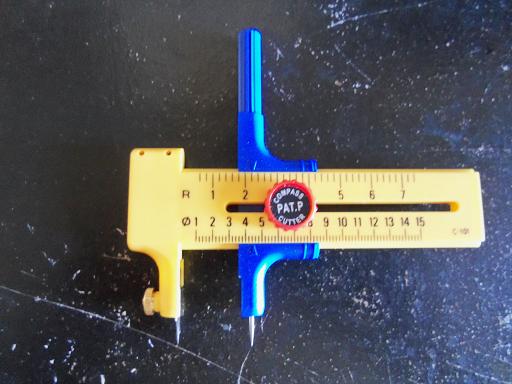
this might be a useful tool for you. I acquired this tool a while ago.......funny that I haven't tried it yet. it works much like a compass, but it has a cutting blade on the radius end. this tool is put out by Model Craft www.modelcraftcollection.com Billing Boat sells this particular product line. you can go here to see if they carry it Ages of Sail - Product Catalog Billing Boats USA Ages of sail purchased the Billing Boat franchise a while ago.......they still support the site itself, so I think you can check out either one to find it. on the top is radius, and the bottom line is diameter. hope this helps you out.
-
I like to think we're all friends here .......even us crazy ones
- 2,250 replies
-
- 2
-
-
- model shipways
- Charles W Morgan
- (and 1 more)
-
that's what those markings are...........easy reference in case something is damaged. what I find that Billing's needs to improve on, is to include measurements in the instruction sheets.....I've done a couple that were poor in that dept. another thing, is that comparing the diagrams in the instruction sheets and the actual parts panels, they might not be identical.........why this happens, I have no idea. I suppose someone in the laser cut dept had better ideas
-
I agree with Frank.......it's so hard to be constructive, and not sound critical. it's the nature of the beast. I feel the same way whenever I point something out........but it's one of the best way to share experience and knowledge. it shows that your a constructive person John, and that's a very good trait to have your build is too good, to let anything slip by soak up the sun and have fun!
- 2,250 replies
-
- 2
-
-
- model shipways
- Charles W Morgan
- (and 1 more)
-
make the change if you want......but in my book, if it's going to cause too much damage.......leave it I think your doing a swell job so far.
- 1,616 replies
-
- 6
-
-
- caldercraft
- agamemnon
- (and 1 more)
-
yea......winter is hard for me, since I don't have a booth either.........I just spray in the cellar. warmer days are much better, when I can do it in the Garage wide open spaces is my booth! any progress is good progress.....good to see your back!