HOLIDAY DONATION DRIVE - SUPPORT MSW - DO YOUR PART TO KEEP THIS GREAT FORUM GOING! (Only 75 donations so far out of 49,000 members - C'mon guys!)
×


popeye the sailor
-
Posts
16,007 -
Joined
-
Last visited
Content Type
Profiles
Forums
Gallery
Events
Everything posted by popeye the sailor
-
 looking very nice Dave
 -
Cutty Sark by NenadM
popeye the sailor replied to NenadM's topic in - Build logs for subjects built 1851 - 1900
well.......at least you have the smart phone, to take your mind off the ants.........sad to hear about your friend -
thank you good sir
-
looking very nice indeed Dave! I like the way the hull decorations came out.........really add to her looks!
-
the concept of the dead eyes all being of equal height, has become the norm in model ship building. there are many techniques out there, all aimed at achieving the same result. you've done a great job of it Nils.........if any of them are a minute bit off, then you've achieved the more advanced technique of 'optical detailing'
-
FOOD!!!!!!! the other great Hobby!
-
what size are those? I like the way they look.......and the rest 'o the booty as well!
-
hoping for a speedy recovery!
-
thanks to every one and the likes........now that I got this computer up and running again.......feels so good to be able to hit the like button again! I'm just glad that my coming in here the other day, didn't affect the site. I lost the use of functions here on the site........highlighted ad words......ad squares that wouldn't show up until you passed the cursor over them {I did my best to x'em all out}. I knew I was in trouble, because I showed the admiral that it was happening to all of my websites. after that I got off the net and tried to do searches to isolate and delete the culprits......that was a complete s***show! now I have Vista, and I am almost back to normal. I thank my admiral {who would've liked to kill me a couple of time there...} it IS a good thing we don't live on the third floor......it would have been so cool to see it hit the pavement! gussets........another good word for them.......thanks Augie! thanks Mark, Adam, and John for the good word! thanks Sjors.......I needed the nudge......the race car wasn't hitt'in the spot mo' sawdust..........com'in right up! thanks Nils............say? how about you get that Cux sea worthy.........we'll run out an' get us some fin......whadya say?!?! thank you for the good word. funny.....there was an ad for a job on a lobster boat, the admiral read about.......ohhhhhh, don't I wish I could change careers like that {snap} thanks for the good word Keith and Wayne....at the moment.......definitely sawfish! I'll get more into the more delicate catches later on awwwww......it was only a small cut Mobbsie......not even 1/4 inches long thanks for the good word, my friend. all good reasons why we do it careful with the sweet words, sugarbumps......your liable to make me break out into poem I'm rubb'in Dave.........I'm rubb'in..........Honey........can you bring me the cheeze grater.........thanks for the good word! {I can even use emoticons again,,,,,,,,,,,,,whooopee! the greatest show on earth!
-
ohhhh wait! was that a wood pixie? darn........I hate it when they throw the sawdust in your face :D a Sultana......depending on the scale and how much you want to put into her.......that's pretty ambitious it's a tough question.......some folks can really put the time in, on a plastic build, adding detail that the kit lacks. but considering what needs to be done, I would say that a wood build takes longer. on a build like that......at best, you can double the time factor. sailing ship or fishing boat........the type of vessel you going to do, will also indicat how long it will take to build it. but, I will say this.......be careful with time frames.......they can suck the life out of any build. this hobby isn't based on how long it takes.....it's based on enjoyment. to rush through a build, you can miss out on total comprehension of some {if not all} of the techniques, in building a wooden ship. folks model for a variety of reasons......but the best reason by far, is that you want to see that box of sticks and parts come alive. take the time to savor and enjoy this wonderful medium of ours your coming along quite nicely with the build. you really know how to tempt someone..........don't you
- 55 replies
-
- 2
-

-
- jolly roger
- lindberg
- (and 2 more)
-
hee....hee........that's the same reaction I got from my admiral, after she saw what the wood builds look like. only two of my build left the house......and she hated to see them go! I simply told her........get me another kit sounds like a splendid place for her to reside.
- 555 replies
-
- 2
-
-
- sovereign of the seas
- mantua
- (and 1 more)
-
so well understood Matti....I've been on hiatus as well..........I've just recently gotten back to the table. feels great making sawdust again hope to see you back soon.
-
gonna look great with the rigging very nice photos you've done there. pretty simple and effective slip.........I used to make my own as well. now I have one of those Billing's slips. it's OK in the beginning.......but once you get to a certain point, it's outlived it's usefulness . by that time though, I usually have built the stand, and then I just tranfer it to the stand it'a a great looking vessel Vivian.........really interesting!
-
the deck came out fantastic Augie........I really like how the galley floor looks mated up to it very nice color tone!
- 2,191 replies
-
- 1
-
-
- confederacy
- Model Shipways
- (and 1 more)
-
I had an article about this kit.........read all about it. it was not good.......you assessments about the kit are correct too bad I tossed the article out.....I'd post it for you folks to read. the experience that you gained with this kit.....and others like it, will serve you well when you try your hand with a wood kit I did plastic for many years. did quite a bit of bash work with existing kits and parts.....never knew about plastruct and evergreen.....so I hardly got into scratch building. when I'd go to a hobby store, I'd look at these wooden kits and think to myself, that they were way over my head. then one day, I got a wood kit thrown in my lap......an old kit of the Billing's Nordkap. it was already started and the parts weren't even laser cut. talk about look'in like a deer in the headlights! well......I built it.......even did some bash work........and even a bit of scratch. the kit was so old, the parts I couldn't use, I had to make. all this came about, because someone saw my work and thought I could handle a wood kit. I am just trying to pay it forward the beauty here is....you don't need any special tools to build one. sure......a pin pusher is nice........and power tool are a plus.......but personally, I've been getting along just fine with simple hand tools. I have found the most fun in taking these 'hard to deal with' kits, and make them work. I've always found them the most challenging. the funny part about it, is that it was the admiral who saw this kit.......liked it, and wanted me to buy it then I read all the dirt about it.........what a hoot! OK.......now hold out your arm........and let the wood bug bite you........ caution: there is no antidote.
- 55 replies
-
- 4
-
-
- jolly roger
- lindberg
- (and 2 more)
-
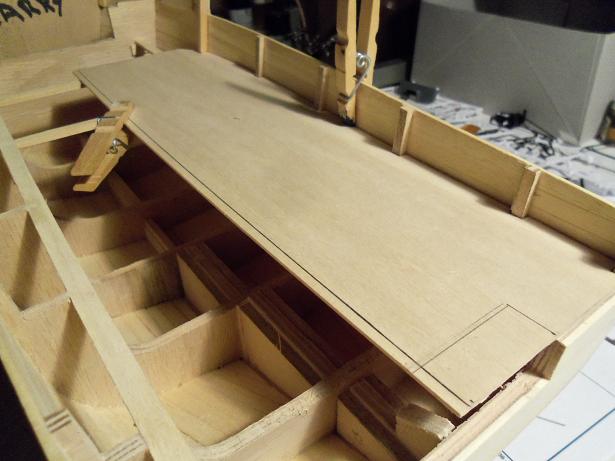
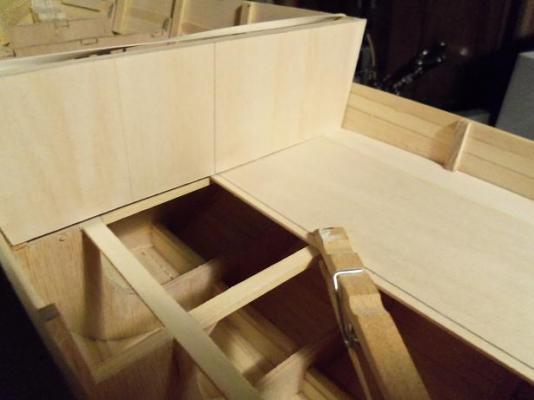
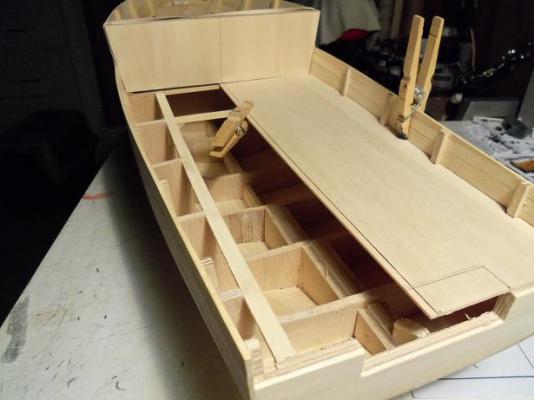
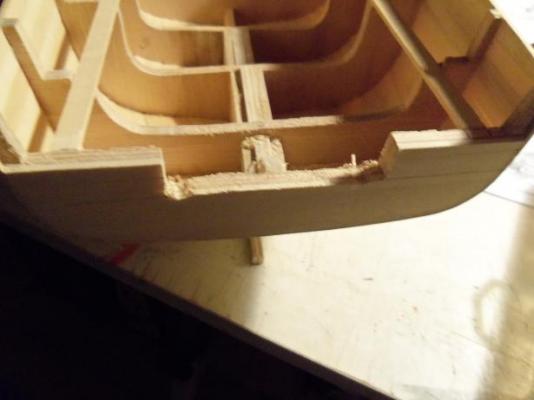
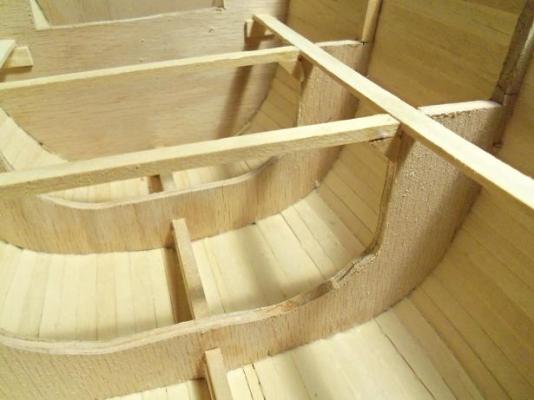
as for the hole in the deck........I marked off the area. when I see something more conclusive, it will dictate how large it is. it certainly can't be any wider.......that I am sure of. there will be some net reels located in front of it. the outer fore deck/bulkhead beam was cemented into place.......knees were used here as well did some fancy measuring to trace out the bulkhead wall after some trimming and dry fits, it was done. above the bulwarks, I did not go all the way to the edge.......there are curved inserts that have to go there,. an overall shot..... here it shows how the main deck platform juts out from under the bulkhead. lower support tabs will be here a shot of the open cavity


-
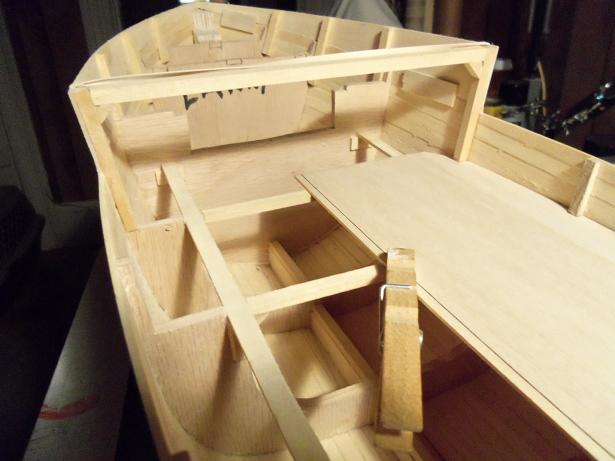
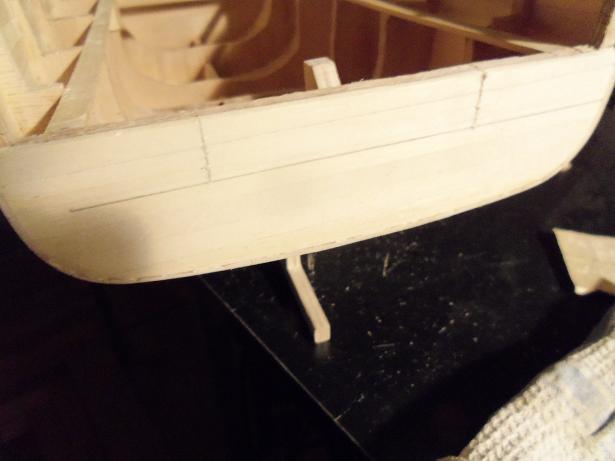
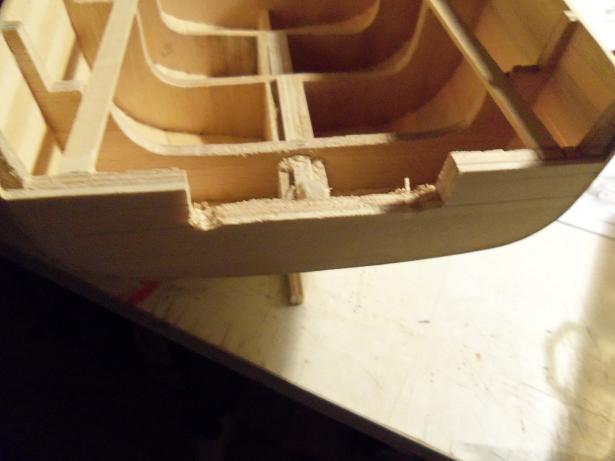
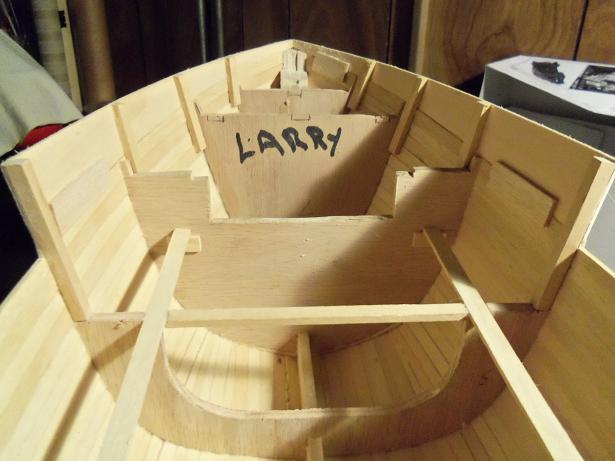
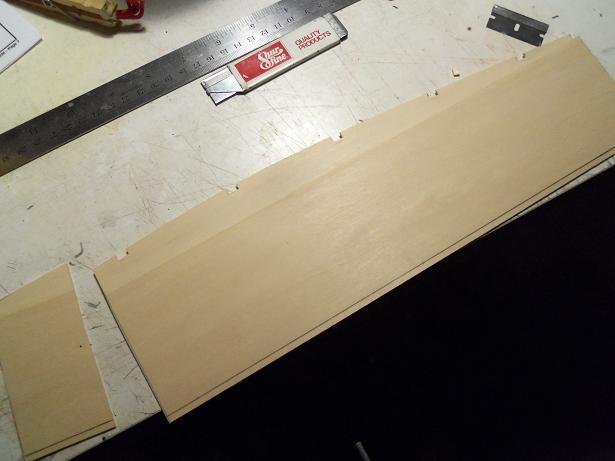
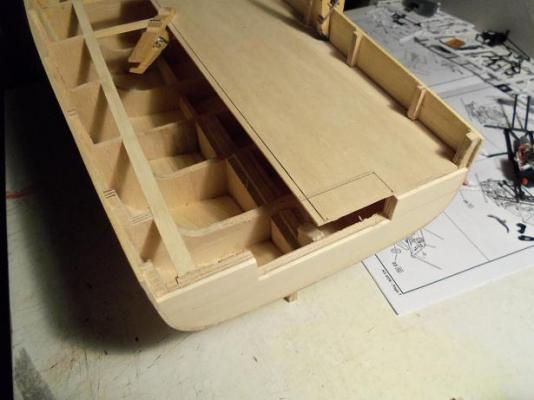
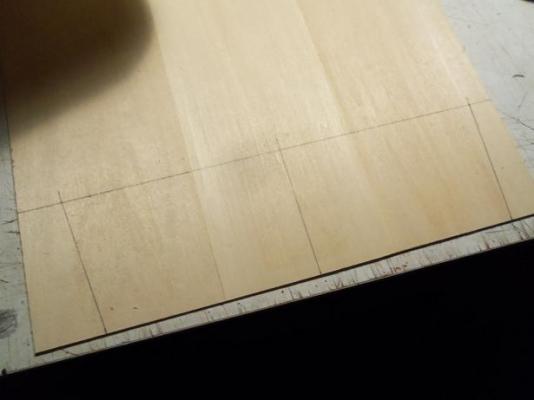
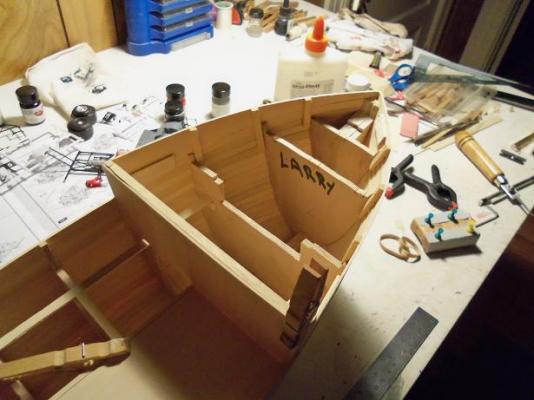
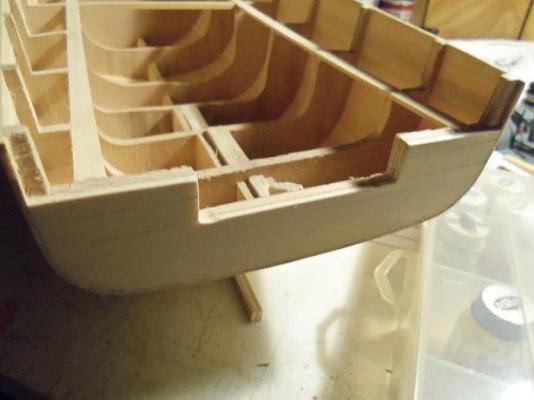
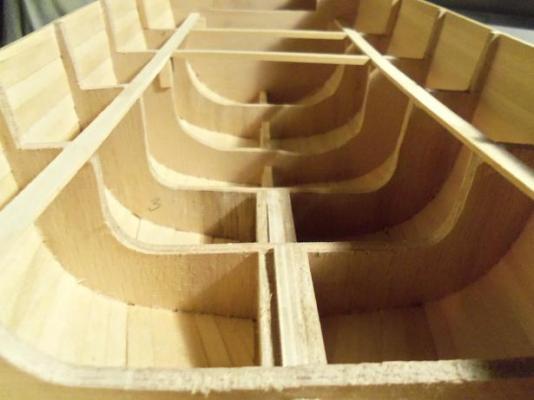
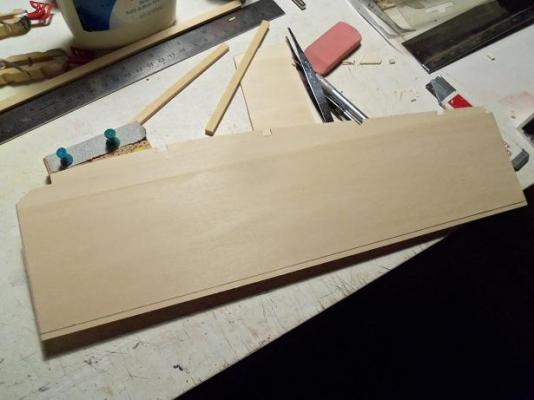
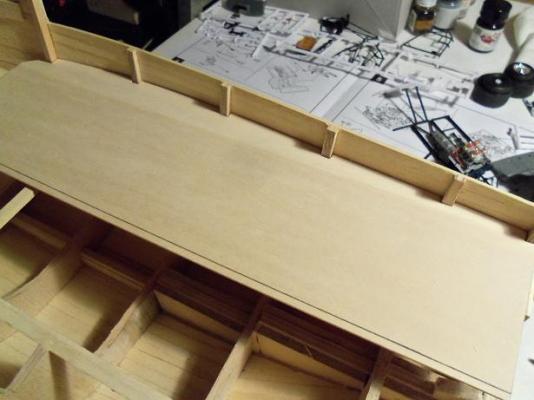
yes Sjors.......it's for that plastic build I'm doing for another site. don't ask for another picture........this is a ship site remember.....CHOO>>>>>>>>>CHOO! :D :D this should make you very happy.........what else can one do, when his computer is on the lamb! so.......Larry's necro job is going as good as I suspected it would......but with one small setback. I don't have a copy of the plans in front of me........one set is in my computer......the other one is on a memory stick. I can't access either one of them. there is to be a net chute in the transom........as my memory goes, it sits just above the waterline. I used a bit of logic to deduce that there must be an opening in the deck........at a angle. I had cleaned up the stern transom posts, and remove the last bits of the planks I ripped off. I took a wild guess at how wide the opening is in the transom, marked it, and cut down the sides. with my cordless drill, I two pilot holes for my keyhole saw.......I even took that center tang out of there.......cut ata downward angle. It won't be needed. then the opening was cleaned up, making sure the sides were square all of the flat areas along the sides of where the deck platform is to be, were either cut down or sanded flush woth the deck beams. I sitll need to put in the rest of them. I did a little sanding along the bow walls....the excess posts were cut off. there is a little room still for adjustments.....once the fore deck platform is on....... it's for keeps. to strengthen all the beam joints, I'm going to install knees I know it's a bit early for this.......but I began to cut and trim the main deck platforms. this is the starboard side, all notched and ready for about um-teen dry fits. a small section of the front area has been cut off. these were done during the concept of the Holiday Harbor build.......this part is not needed, but I left enough so I can add bottom locator tabs for the bulkhead. this is what it looks like after the um-teen dry fits. you might notice the line drawn on it........that is supposed to be cut off, but I'm leaving it as a bit of insurance for a snug fit. the fit came out better than I expected


-
I will Michael......and thanks! I did get a tiny reminder.........but it was quite superficial......and minor. well.........I guess the longer I linger here........the longer it will be before you all see the progress! off I go.........to learn more about Vista {wish I could throw some necromantic arts at this computer....grrrrr}
-
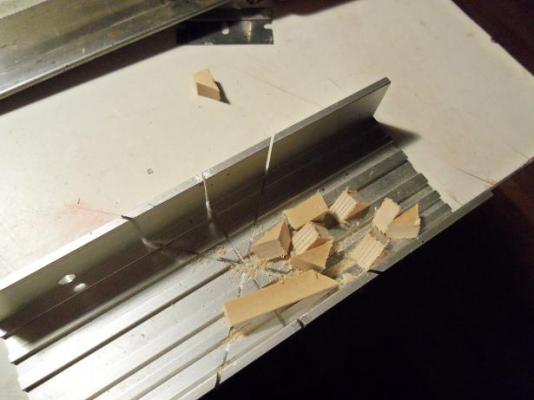
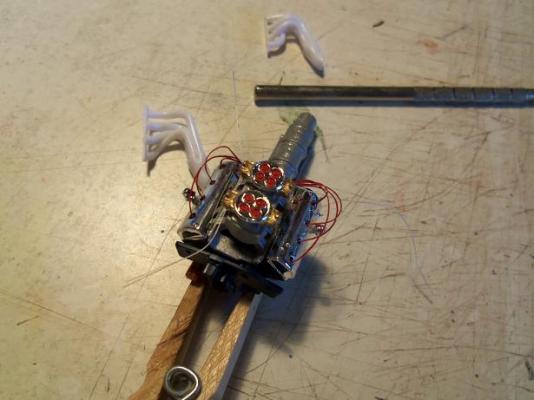
thanks Keith.......the bow is probably the worst place to clamp. I don't know how many time, clamps came flying off of there on some of my other builds I'm doing the Jukebox for another site......I keep promising them I'd do a plastic build. not too many wood builders on there. here is an example of the work I'm doing on it. I haven't done one of these in sooooo long......currently working on it as well. I have more progress to show, but my computer went down. I ended up having to dump XP, and am now running Vista. I'm in the process of getting all my stuff back in order........the ability to post pictures is one of them. I see I'll have to get used to the new function I'm going to HAVE to print these plans........all the while I was doing what I did, I couldn't look at them, because they were in......you guessed it........my computer. so I went from memory....I think I did OK though. chills........from what?......the ripping......sawing......and cutting? it's good that I only need to do this in the beginning phases. why, when I get done, you won't even know the boat ...........or....maybe, you will {devil's horns starting to show}
-
in the Billing's kit, the posts have a 'fife' board on them. to me...they kind of remind me of a sampson post
-
Cutty Sark by NenadM
popeye the sailor replied to NenadM's topic in - Build logs for subjects built 1851 - 1900
did you bring'em home? what's the story? nice gungeons and pintles -
just checking to see if you've got your latest up yet.............
-
looking good! steady 'er she goes!