HOLIDAY DONATION DRIVE - SUPPORT MSW - DO YOUR PART TO KEEP THIS GREAT FORUM GOING! (Only 20 donations so far - C'mon guys!)
×


popeye the sailor
-
Posts
16,007 -
Joined
-
Last visited
Content Type
Profiles
Forums
Gallery
Events
Everything posted by popeye the sailor
-
 checking as well my friend........but I'm also rebuilding my watch list.......my computer went down.
 -
my second love are funny cars and dragsters........I've been on a hiatus of sorts, and I though I'd do one for another site I frequent. the box says that a ten year old can do it......I tend to disagree if you haven't started a wood kit yet......I think you'll find them a bit more involved than plastic, but the rewards are so much more from what I'm seeing though, if you can make heads or tails out of this kit......you'll be right at home with a wood build.
- 55 replies
-
- 1
-

-
- jolly roger
- lindberg
- (and 2 more)
-
looks great Vivian.........you must know the 'mother of invention' very well congratz on the masting......sweet!
-
looks very good plastic kits are 50/50........you get some that fit well.........and then there are some that fit.........well?!?!....I call it 'determination out loud' your making me want to pull my kit out......but that would be suicide, with all the builds I have. the admiral would kill me!
- 55 replies
-
- 1
-
-
- jolly roger
- lindberg
- (and 2 more)
-
ohhhhhhhhh...........hurt my hand {from slapping my knee}
- 1,616 replies
-
- 1
-
-
- caldercraft
- agamemnon
- (and 1 more)
-
port side looks awesome Sjors! {don't know what the heck your talking about} love to be there and see what happens when the sunlight comes streaming through the window on it...........pretty prisms on the ceiling! super workmanship!
- 1,616 replies
-
- 1
-
-
- caldercraft
- agamemnon
- (and 1 more)
-
yepper! really coming along nicely Den.........I'm still in awe of the style of rigging.........the mechanics of them are so cool!
- 555 replies
-
- 1
-
-
- sovereign of the seas
- mantua
- (and 1 more)
-
very well done Adam.......sounds like a neat process, if one needs to mass produce parts. the deck layout is really coming along nicely!
-
it's a very nice take on this kit I think as long as one stays with the era in which this style of ship would be found, it really wouldn't matter what you called it. I have this kit as well, and I have read many accounts of poor fit and bad design. heck.......one fellow even did away wit the plastic decks and made them from wood {like I've done with my United States}. you've done a great job thus far
- 55 replies
-
- 1
-
-
- jolly roger
- lindberg
- (and 2 more)
-
thanks Vivian and John......it's great to be play'in with wood again! thanks Piet...I think on this build, I will try and make most, if not all, of the parts I'll need....I'll try and make you proud! thanks Lawrence......with build like these it's easy......I haven't made the parts yet hardly any parts to keep track of. glad to have you follow along! come on Sjors........I just woke up! look at the bright side......I didn't add a boat to the number of builds I have going.......I just added a subject! more to do...thank you my friend!
-
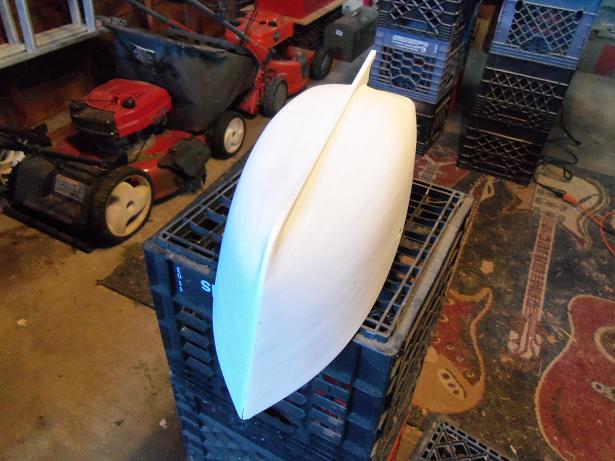
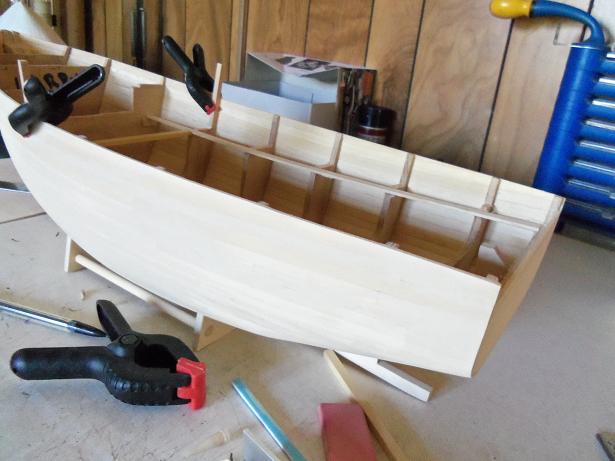
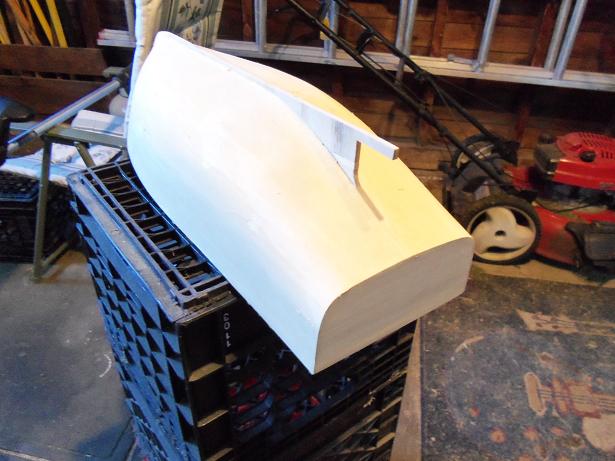
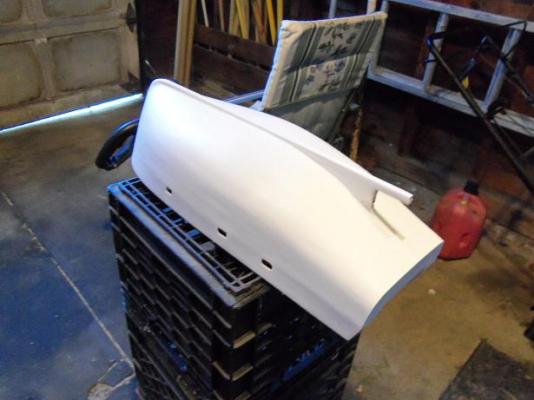
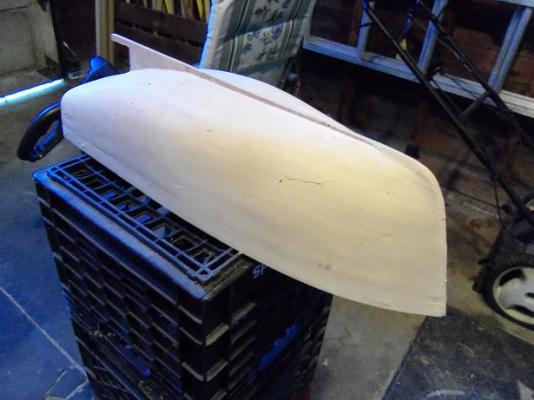
I took a couple of pictures of the Boulogne while she was out in the garage. both hulls are back in the hallway now. it's a good thing humidity didn't wreak havoc with them. the boulogne still needs a bit more filler in spots, but the hull feels pretty good. I gave it a shot of primer.


-
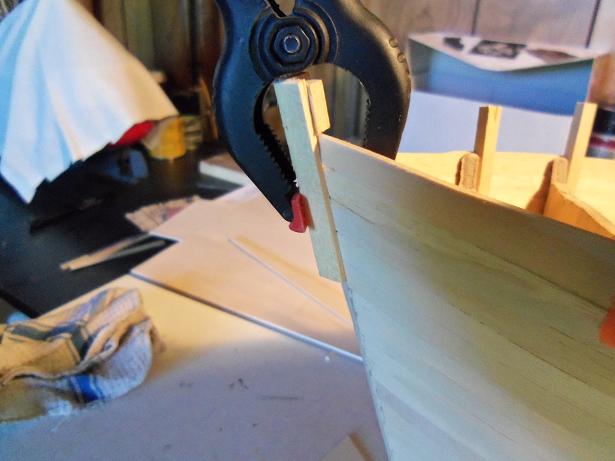
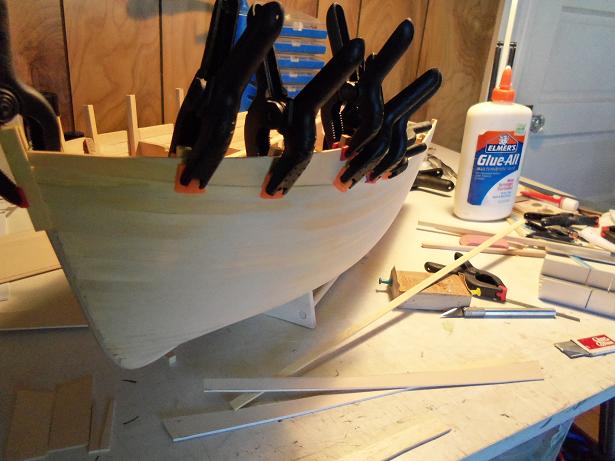
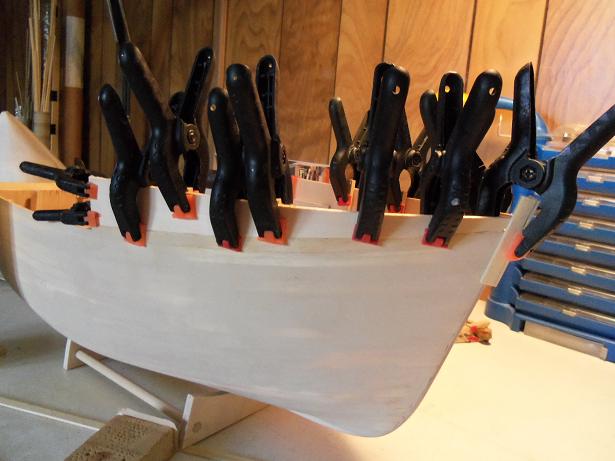
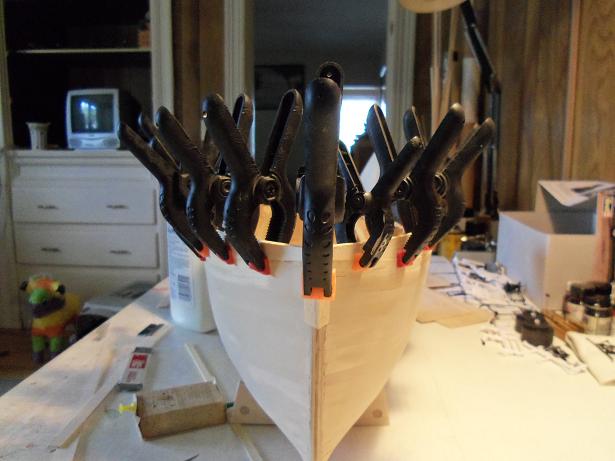
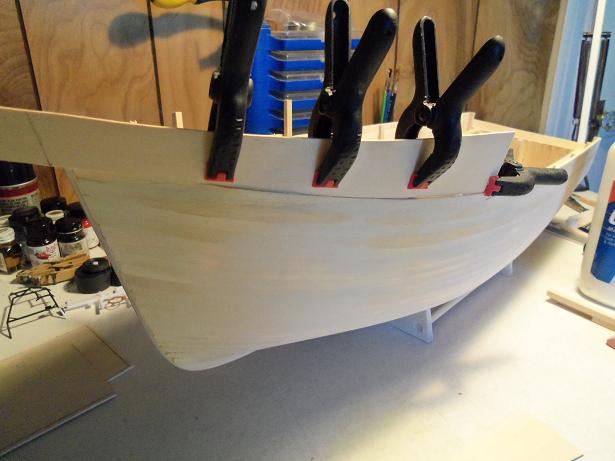
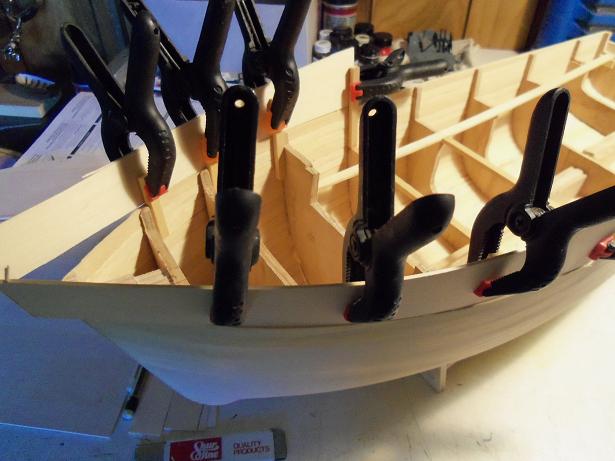
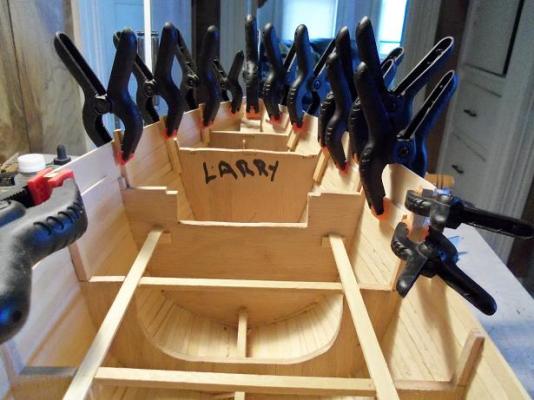
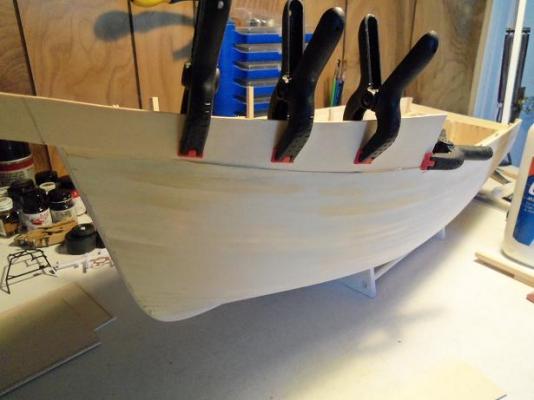
the jig was quite simple really.......two pieces of planking, CA'd together length-wise, with a piece of square stock cemented in one end as a pressure point. the port side panel was cemented in place. the jig did it's job splendidly! this was allowed to dry before the starboard side panel was cemented in place. the starboard side was fitted and glued in place.......the jig held the panels down just as I wanted it to. it left hardly a gap there at all jeepers! looking through the clamps, you can get a good idea of how flat the bow has become. there was a minor cut to my left thumb......the blood on the starboard panel is mine....not Larry's. even the admiral looked at it......she said....."you'll live!" I had to wait for all this to dry, so I could remove the clamps and take these last pictures. the Boulogne was kind enough to stand in for me, so I can show you the transformation that has taken place so far. ha..ha..ha..ha..ha! to cut.......to rip! all in the world of necromancy is good!


-
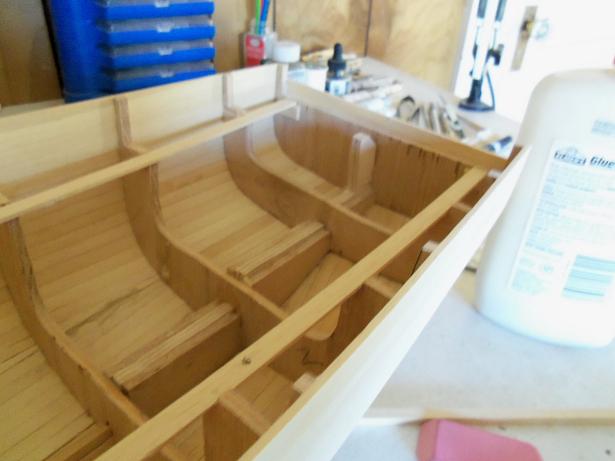
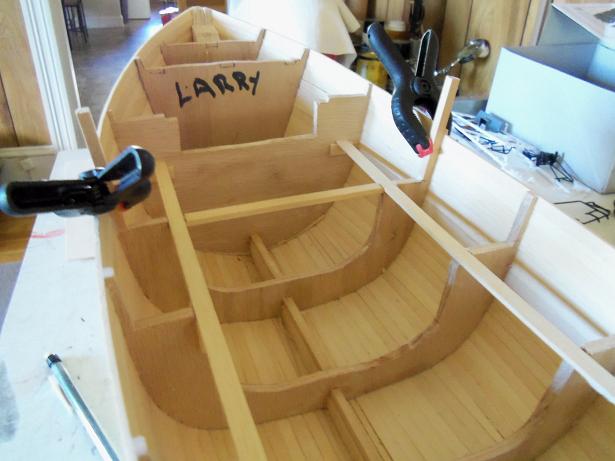
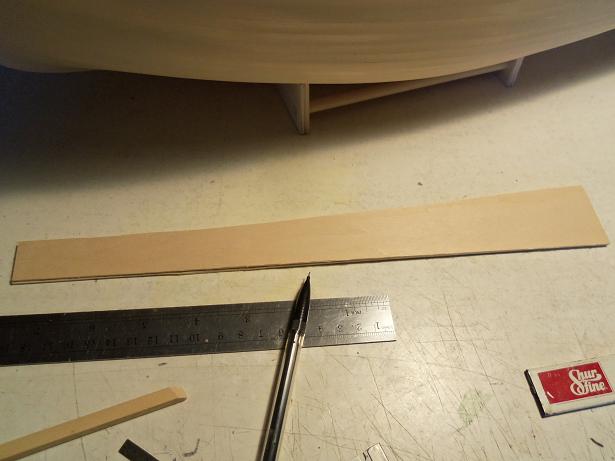
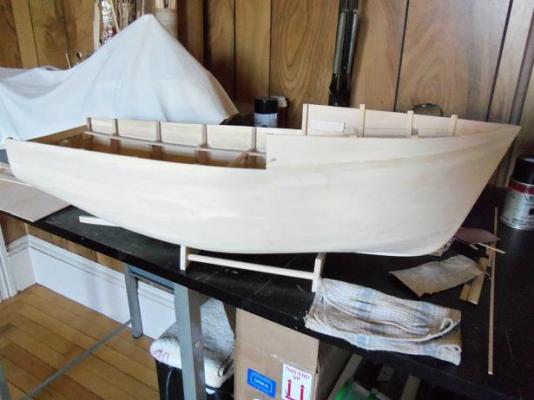
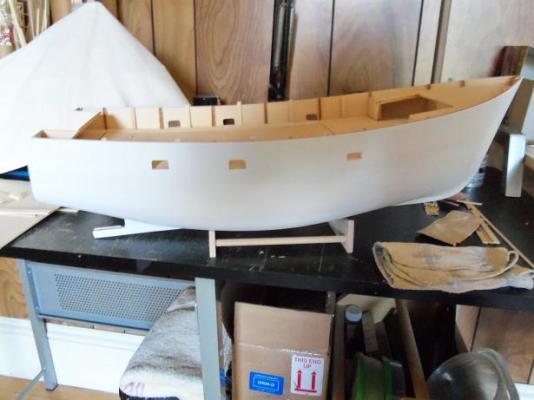
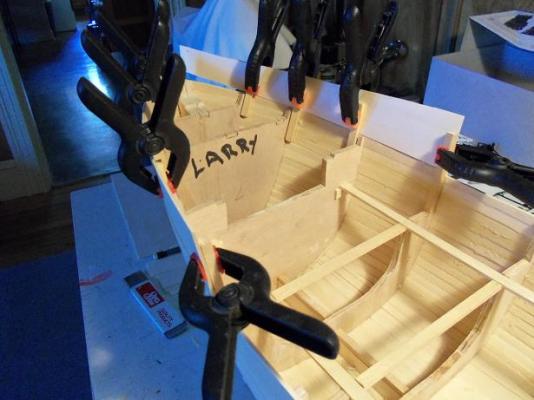
there is to be an upper bow deck, but it needs to be further back.......say, about one rib. there is to be a bulkhead there, and so I will need to wall it off. the order of the deck platforming will be: the main deck, the bulkhead, and then the fore deck will cap it all off. the main deck will require deck beams I notched the one that will support the bulkhead, and cemented it in place. I still need to do the rest, but not until I alter the stern. in my planning.....it was quite obvious that the curvature of the stern needed to be flattened out, as well as being notched at the bulkhead line {this little area needs to be flattened as well}. how to do it........how to do it <ponder> I know....I will use the belt sander! out to the garage.....set the belt sander on it's back, locked on......and off I went! I wasn't concerned with the stern transom, as it's getting altered anyway. after some frequent checks......I think it's in the ballpark the bulkhead is to be defined at this point......if you look where the posts are cemented, you can see where I notched the bulwarks. the aim here is to flatten out the bow and make the rise for the bulkhead.....the curve has to go! here is a shot of the overall bulwark layout.....I left room for a little more sanding. I have to measure the height at the transom to make sure both sides are even. more posts were added to the bow section. instead of planking these areas, I will make full panels for them. the start of making the side panels when the posts were dry, the panels were dry fitted to see what I would need to do next. you can see that I also added a second deck beam to the main deck area. the port side bow panel was cut to shape......the height of the bulkhead post, tapered to around 4mm at the bow stem. this will leave a very slight up sweep to the bow....it will hardly be noticeable. this was mimicked on the starboard side panel, which was left a tad longer, to lap over the port side and create the tip of the bow. I need to make a jig for the tip of the bow, to hold the two panels together when I cement them in place.


-
sitting at my computer......staring at the screen......this 'not knowing what to do next' is killing me. I look over at the tables, to the mess....the reminiscences of where I had left off.....with no breadcrumbs left for me to pick it back up. I decided to pick up a plastic car model to help jump start me....a pro modified drag model of the Jukebox Ford. I got to what I feel is the mid point of the build, and the thoughts began to cloud my mind again. it brought me back to the movie I saw about the boat......I already had a copy of the Billing's plans for it. I went back online to the Billing's site in Danmark {this was quicker than to access the PDF I have of the plans}, and looked up the plans again. I was amazed to find that these plans are different than the ones I have.......two sets of plans??? I down loaded them. the shape of the hull.......the whole concept.......makes it so doable taking stock of the situation here: the hull dubbed Moe is in the hallway, the hull planking isn't even finished. this is the one that is made with the real good plywood. it would be a shame to modify this one. to give it a subject name now.....I will christen this one the 'Christmas tree boat' {I'll give it a snappier name later} no pictures for this one of late. the hull dubbed Curly has been residing in the garage since late spring, along with the Boulogne Etaples. the hull has gotten a sanding and a coat of filler....now it waits for the second sanding. the deck platforms have already been installed....the layout somewhat planned. to give this one a subject name now......I will christen this one 'the Jingle Belle' a caroler's boat. you know......a bunch of carolers on the deck, singing.....getting splashed with sea spray.......should be a hoot of a build this one so far into it's being......nawww.....can't do it to this one either. then there is the hull dubbed Larry. sadly, I can think of no third subject for this hull. I had thought up a skater's rink theme......but a wise sage brought me to my senses. yes.....logic dictates, that you can't skate on a rolling boat, not unless your THAT good the hull is fully planked and has been sanded....it does need a little filler, but the hull is quite smooth the way it stands at the moment. I had planned to remove all the excess raised ribs at the bow and flatten the entire deck out....from the bow to the stern. to do what I need to do, in this new venture, I wouldn't need to do anything like that.......just a nip and tuck at the bow and stern. ........and so it came to be, that the hull dubbed Larry, was to undergo some rather aggressive necromancy......origami of the wooden kind. there are three major changes that must occur, for the hull to become a suitable recipient, of such an advantageous build. let the game begin

-
there are various forms of sampson posts and fife rails, which is what you have pictured above. I have a few pictures of the ship, but they don't show these aspects very well. I'm going with what the Billing supplied parts produce........once the deck is sealed, I can start fitting out the deck layout. I like what you did with the dead eyes.......not sure what I want to do, but I may just keep with the supplied parts here as well. very nice progress!
-
thanks Lawrence.......I had a very nice B-day.....kinda stunk that I had to work, but the evening made it all worth while! I did finally get back to the table.......but there has been an {hopefully} interesting turn of events. I will post soon! thank you as well Hlipplaa. I have some ideas I want to throw at this build.....should give it some cool detail. the Half Moon is in turn......I need to fix the bottom paint first, as there are some thing I'm not happy with. I hope that by getting back to the table, I can start the ball rolling again. I thank you for your interest....the momentum will pick up, I'm sure
-
I've done that as well.....I use a decal bonder on mine to lock in the ink jet image. the decal can be painted over though, I've not had any problems doing it. with all the variants of any one color, it's hard to get'em just right. I've tried it.......and scrapped many of my attempts. if you have another set, take a razor and score the affected area......then when the decal is ready to apply, remove the scored area, and apply. something to try.......maybe?
-
looks super!
-
your build looks really great with the added fittings.......I like the deck shot once you finish the repairs to the aft deck, then there will be nothing to distract from it masting will be a huge step forward, it will be very interesting to see!
-
looking good Dragzz......now to keep them even, level, and square
-
nice job along the hull Ron.........that really looks sweet!
-
thank you Lawrence. I know some find these boats {plastic or metal} in their kits, and lament. I just hope I've shown them that this minus can be turned into a plus. I've always said that bash is the basic form of scratch building. learn this, and they'll be scratch'in before they know it! I do apologize though....I have not been to active of late. this summer has really put a crimp on my style. I hope to pick up where I left off soon thanks for the good word!