HOLIDAY DONATION DRIVE - SUPPORT MSW - DO YOUR PART TO KEEP THIS GREAT FORUM GOING! (Only 13 donations so far - C'mon guys!)
×


popeye the sailor
-
Posts
16,007 -
Joined
-
Last visited
Content Type
Profiles
Forums
Gallery
Events
Everything posted by popeye the sailor
-
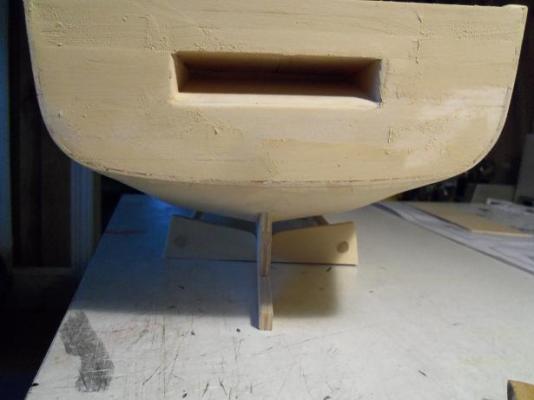
 thanks Pete.........had a look at your Volvo........very nice didn't get to see it all though, my dog Gibbs is bugging me to go outside {I'll look again later } thanks for the good word thanks dave.......had a chance to bring it out to the garage. got it's first filler.....but since filler is softer that the actual wood {basswood}, I began to see some scalloping starting to occur. I got a handle on it by cupping the sandpaper in the palm of my hand, and did some full length strokes.....light pressure. I gave it a shot of white primer. it still need a bit more in the way of filler and sanding, but the shape and contours look a lot better. got some pictures of it, I should have them up shortly {I hope} thanks for the good word
 -
yea.....Santa........."he got the magic dust!" .......hee.....hee thanks Bob....John, and all you who hit the like button. ohhhhh, what it looks like now
-
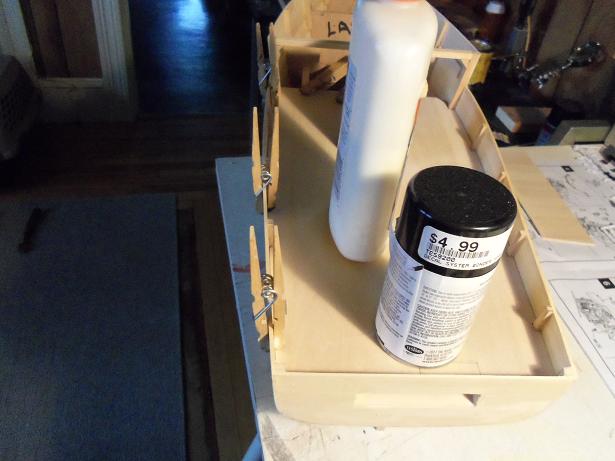
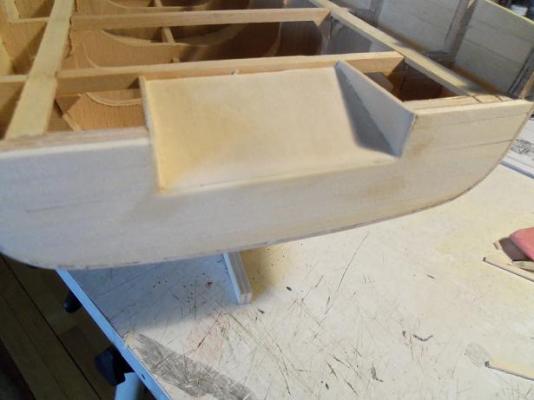
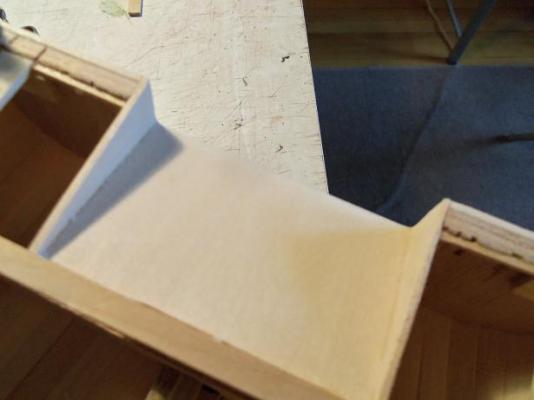
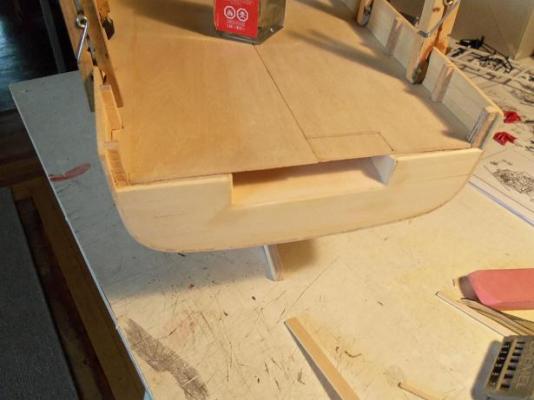
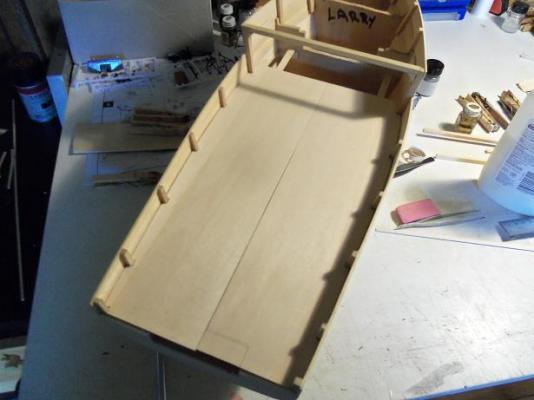
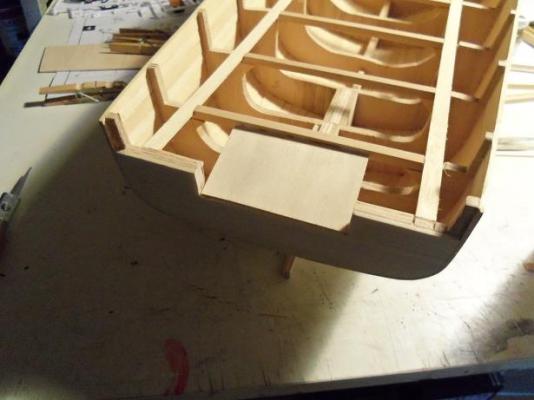
thanks to you all for the good word and the likes. I've been hit by a few 'waves'.......but not bad enough that it would stop me, by any stretch of imagination I'm really not that far in finishing the mods to the hull.......pretty soon, I can start treating it as a normal build {if there is such a thing) the mod goes on with refining the chute........can't do too much right now, because there is still the filler work to the transom. here, the edges are somewhat rounded off. with the deck in place......this will be the size of the chute. the stern bulwark is put back in place at this time. for that minor short coming along the transom with the deck, I decided to cut both deck halves even to one another, and add in a strip of square stock, to fill it in. the starboard side platform is cemented in place at this time when it was dry, the port side was installed while I was waiting.......I did the filler work on the transom. most of this will be sanded off any gaps in the deck platform got some filler, especially the seam down the middle. again, most of this will be sanded off I need to run a few errands with the admiral..........when I get back, it out to the garage. I don't want to sand this in the house. perhaps I can do some of the hull work while I'm out there pictures later........if I survive!


-
sweet job! I'd be very proud of that kind of talent!
-
yup.......that confirms it! no matter WHAT scale it is Nils.........this is ONE beautiful build. are you aware though, that the fore stay is wrapped around the sill where the cap is to be {fore mast top}
-
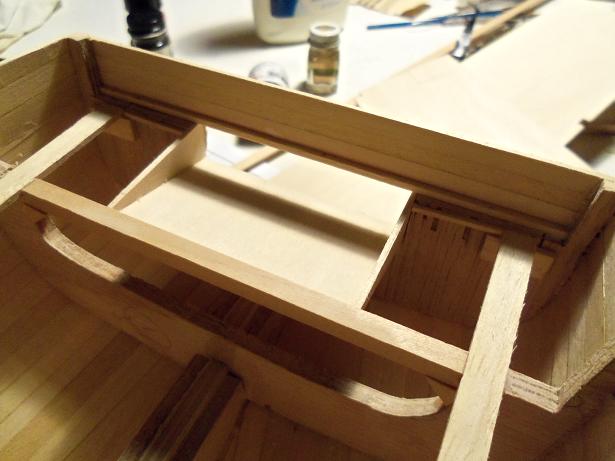
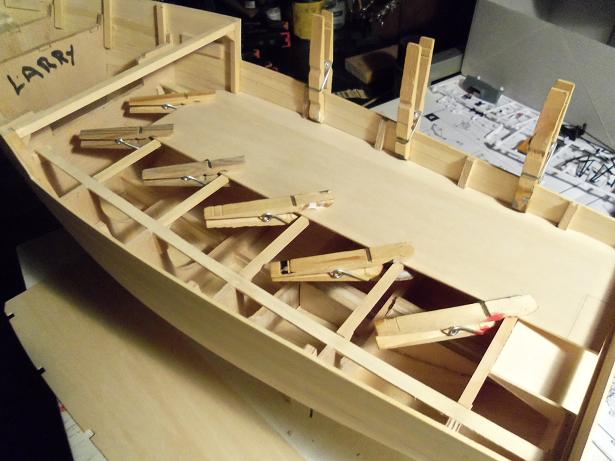
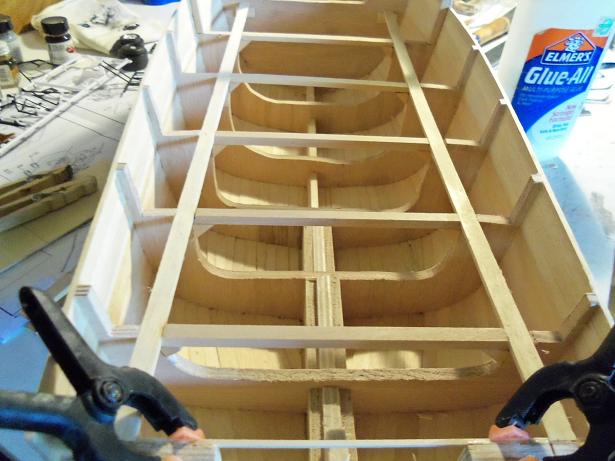
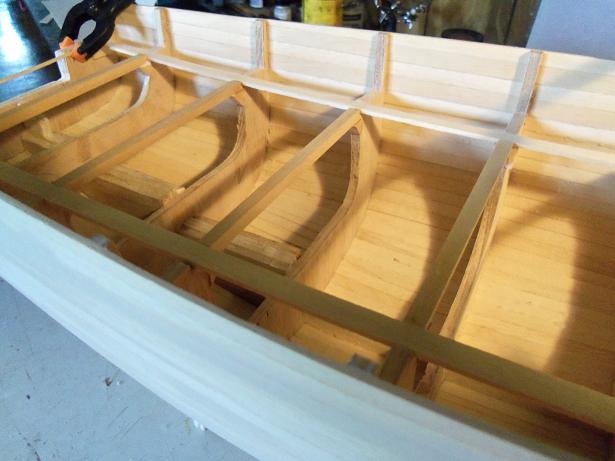
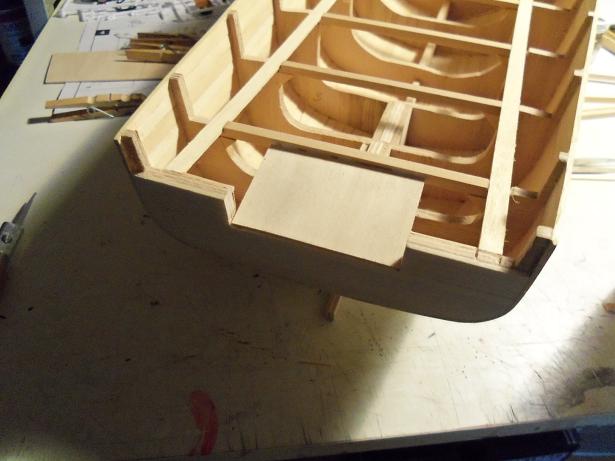
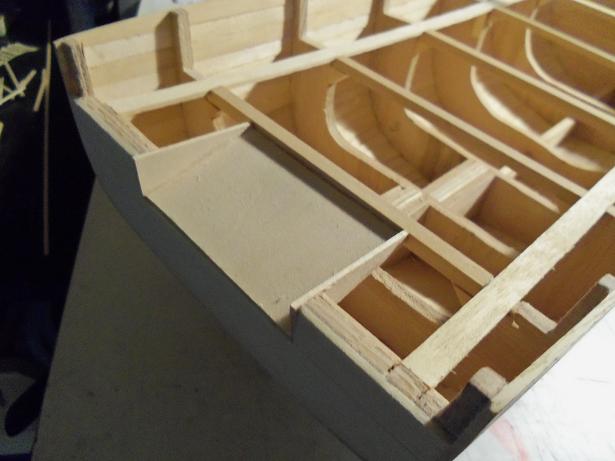
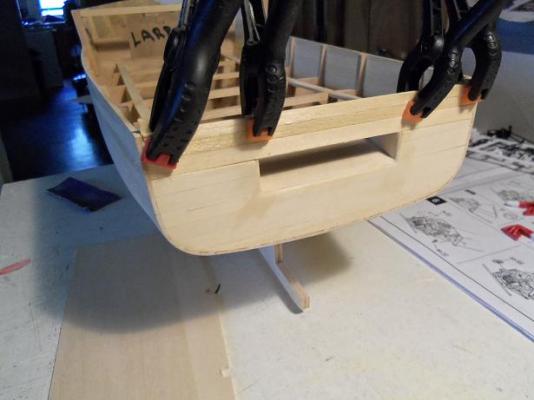
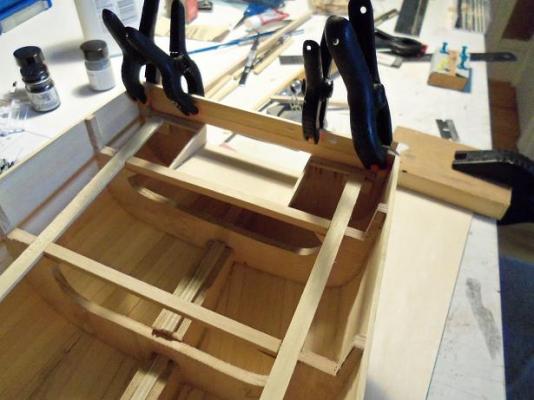
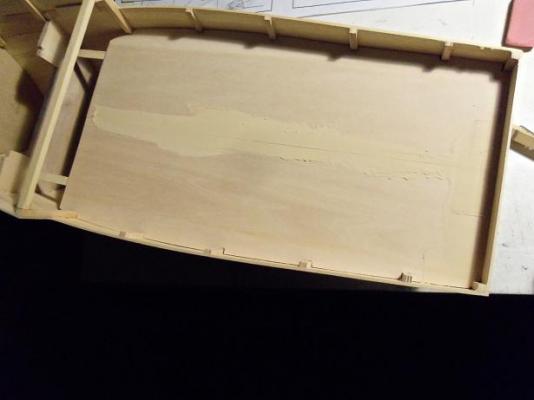
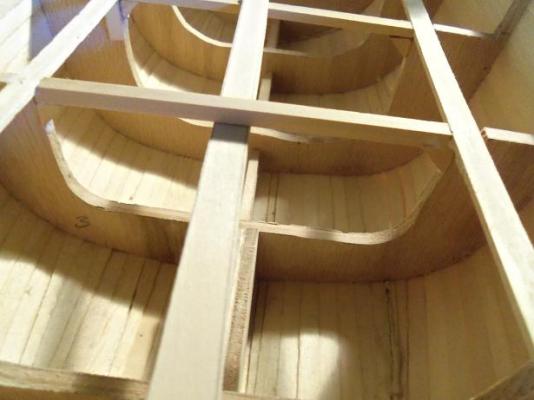
you know.......it's a good thing I'm not working with dogwood........all this teasing, and it'd have probably bitten me by now bada-boom.....bada bing! O...K..... I already showed you how the deck is going to mate at the bulkhead and what the bow tip looks like. with that completed to the point that it is, I guess the rest of the cross beams need to be installed. I was able to start this the same way I did the first ones......a piece of stripping leveraged under it to hold it in place. figured I'd better get the other half of deck platform cut and notched out when it was trimmed well enough, they were both laid into place, to see how it would look. looks like I'll need to compensate the starboard side to match. by this time, all of the other cross beams were installed. I ran a small strip across the transom, because the edge was splintered a little........no big reason aside from that. the center of it will be cut out anyway. the rest of the gussets were installed as well I did a bit of looking around on line for ideas on the net chute. most of what I saw, were models of this vessel, and the instructions were no help either. along the transom bulwark, there are three reels....leading to the thought that there must be an opening further in on the aft deck. so, while I'm still looking {I'll check out similar stern trawlers}, I do this and plan a hinged hold cover for it. I can always change later if need be. first, the bottom of the chute was laid in place. then the sides were cut out and cemented in place now......to wait til it is dry, so I can shape the outer lip of the chute. then, when the deck platform halves are in place, the roof of the opening can be finished out. with the inside painted flat black, one will never know how far in it goes.


-
my bad..........I corrected the spelling. just figured to help the gent out of a tight spot
-
looking very nice dave. I hear ya on the photography thing funny you should mention how long that drill bit is.............the other day, I was taking Gibbs across the street to the field, and I found one in the gutter! chrome
-
most ship of this era stowed them in much the same way. you could look at Dr. Dafi's diorama.......you can even see how the puddening looks
-
the other two are reserve anchors.......they are not rigged as far as I know. they are just lashed to the sides of the bow. on this scale, it may too much to do the anchor ring puddening, but with thin enough thread, it can be done. puddening is done by merely wrapping the anchor ring with the thread, to make it appear so. the hawse hole adjustment will be very easy to do.....do it slowly, without a lot of pressure, and you'll be fine. actually .......I thank you I had looked at the kit, but i never noticed it. I will keep these pictures and add them to my reference folder. the more I know.......the better it will go! it even got the admiral squawk'in.........."you know...........I picked out that kit..........an' you haven't even built it! what's up with that?" who need a can o' worms, when all I need is a box
- 55 replies
-
- 1
-

-
- jolly roger
- lindberg
- (and 2 more)
-
gotta love that mahogany! I do my deck layouts the same way........when the structures are in place on the deck, there are no separation lines you've made some splendid progress there..........no matter about time........take your time, and enjoy the build one of these days, I'll get another kit myself!
-
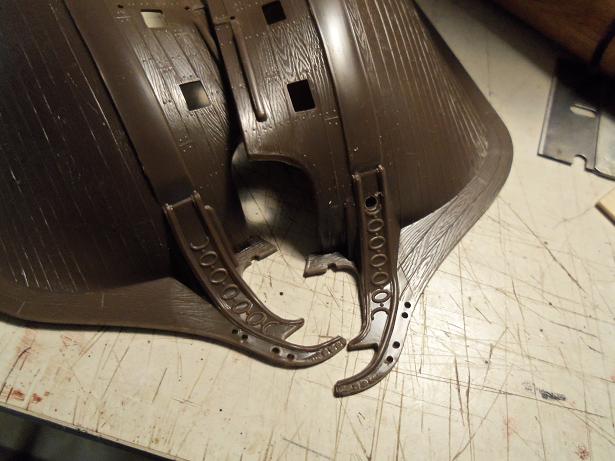
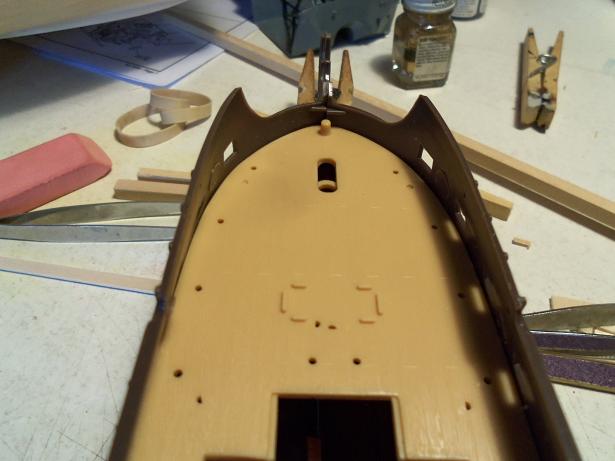
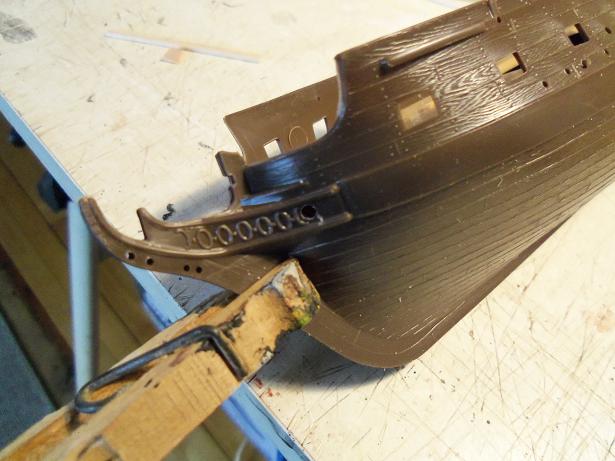
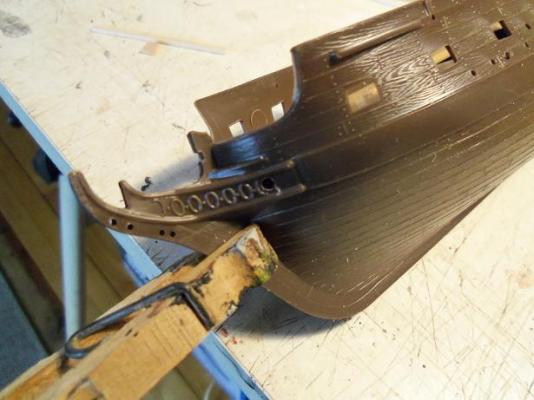
I went to my kit.........I was appalled that the case is true.....NO HOLE!!!! these guys should be shot at sunrise! for a quick and easy way out of this one, we'll just do this. I used a 3/32 drill for this......at the end of the trail board, there is a half moon curvature......just drill it there. {I used this size because it is close to what the printed detail looks like} you can use a smaller size if you wish. I cleaned up the gun deck and put it in place.......the hole is below that. rerig it with a single piece of thread {or chain, if you prefer), using a wire as a snake, threading it though both holes. another method for rigging this is to make a large knot and simply push it through the hole........you can add a spot of glue to the knot from the inside with a needle applicator {Testor's sells them}........they fit on the tip of the tube. I like to use those applicators for my tubes of wood filler...........cut the tip so it fits snugly, and I can extrude a fine bead if filler along edges and corners.


- 55 replies
-
- 3
-
-
- jolly roger
- lindberg
- (and 2 more)
-
very nice progress Wayne........makes me wish I was doing another P.O.F. there's so much more planning involved with them. looking forward in seeing the hull planking........are you going to use the scale length method?
-
a obvious statement: "nothing looks as great during the process, as the end result!" the structure looks superb Tim......the detail your putting into it is really going to dress up the hull. now that I think of it.........are there any pictures of it dry fitted on the hull? <nudge and wink> I'm sure you've seen it
-
wonderful job on the yards and rigging Mobbsie.........finished my catch up on your build, and I'm quite amazed with the work you've done! of all the different methods out there for doing yards and rigging..........I'm happy to see you've chosen ALL the right ones!
- 1,279 replies
-
- 1
-
-
- agamemnon
- caldercraft
- (and 1 more)
-
B.E. has a point there........are there hawse holes in the bow? {I'll have to look at my kit to see}. other than that.......I think you've done a splendid jog so far! rigging looks great as well. if you don't plan on doing sails.........the yards straight across is good. if your going to do sails, a neat little detail point would be to turn the yards port or starboard {whichever is her better side}......about 20 degrees in that direction {or as close to it as the ratlines will allow}. if both sides are good ........I can't help you there
- 55 replies
-
- 1
-
-
- jolly roger
- lindberg
- (and 2 more)
-
neat way to do the catheads Bob. I really like how the inner bulwarks came out
-
yes Augie.......I do you can also see where my guitar carpet ended up.....the admiral finally got her way I was sad to see that I didn't learn my lesson. the grain of that center area I filled in is going the wrong way........the humidity in the garage caused it to buckle. I can still save it.......it's just going to be a bit more work. I'm happy with the outer hull though.......even though it feels rough from the primer, the hull has a real nice shape. there's only a couple small areas I need to touch up on............another sanding..........and then the second primer. I was quite happy with how the Nordkap came out {when I goofed on not cementing between the planks}.......so I might give this a coat of diluted white glue {and a fine sanding} before I paint the color coat. you can also see the minute crack at the bow stem.........another product of my leaving it out there for so long. I'm hoping I can get back to her soon John.........I can get back in the saddle..........but, can I ride?
-
the way Chuck shows the assembly of those dead eyes is really cool. an added step you could do, is to trim the wood sprues from the center layer, before cementing the outer layer in place. it would cut down on the finish trimming before the tumbler. the build looks great Adam.........you've picked up the pace without a stumble yea.....it's never good to make any changes in the finishing process. you kept such a nice even tone from bow to stern. almost done with the length is good to hear........and especially nice to hear that soon, you'll be tackling the height! very nice!
-
simply fabulous Daniel.........your diorama is a huge slice of daily life on a sailing ship. so much action packed into that small frame! congratz, my friend...... very well done!
-
well......I'd say your little inconvenience didn't hold you back! looks really good you can refine the ports while you do the second planking. are you going to do the wales and rails before you do the second planking? if your second planking is .5 mm, there would still be sufficient rise in the different thickness of wood. they can also be used as a guide..........like banding the different quadrants.
-
looking good Ron......the divisions of wood grain and color is really eye catching. you did invite more work for yourself though, putting the brass on before the color.........just means that you'll need to be a biut more careful in painting. very nice jog so far !
-
I tried my hand at embossing sail cloth. made up the design with the decal maker program {size, color, etc} and ran the cloth through the printer. perhaps you can create the flags with paint shop and do the same thing. http://wenzelswharftips.wordpress.com/2014/04/29/embossing-sails-part-1/
-
looks superb Bob.........your a lot farther than you let on lots of metal detail throughout........nicely done!