druxey
-
Posts
13,383 -
Joined
-
Last visited
Content Type
Profiles
Forums
Gallery
Events
Everything posted by druxey
-

NAIAD 1797 by Bitao - 1:60
druxey replied to Bitao's topic in - Build logs for subjects built 1751 - 1800
That is a lovely job you have done! -
Looking fabulous. Belaying those lines must be tricky in those confined spaces.
- 3,560 replies
-
- 1
-

-
- clipper
- hull model
- (and 2 more)
-
Again, real wood will change appearance with weathering, age and other wear and tear. If you wish to imitate 'real world' wood, you need to study photographs and imitate the results with paint. There are some amazing examples on this site. For instance: https://modelshipworld.com/topic/20162-new-england-stonington-dragger-by-friedclams-finished-148-pob/page/13/
-
Well done! A lovely clean model to be proud of.
- 90 replies
-
- 1
-
-
- Model Shipways
- muscongus bay lobster smack
- (and 1 more)
-
Just don't make it too tight to the model.
-
I was lucky enough to score my copy some years ago before it was as expensive as it is now.
-
There were a lot of experimental carriages in the early years of naval carronades. My information was mainly from Caruana Volume II, The Age of the System, 1715-1815. He draws on primary sources.
-
Thank you, Graham. The links work fine! Looks as if it is in good condition as well.
-
Looks like you are having fun! Nice work on the paint and oars. Upgrading the line is a good idea.
- 23 replies
-
- 2
-
-
- Model Shipways
- Shipwright Series
- (and 2 more)
-
Looks authentic, but the glass dome over the lion seems a later addition one would think.
-
Despite misuse and neglect, the 1922 photo shows how well constructed she was. Most ships would have hogged badly over time. Her sheer still looks good.
- 3,560 replies
-
- 1
-
-
- clipper
- hull model
- (and 2 more)
-
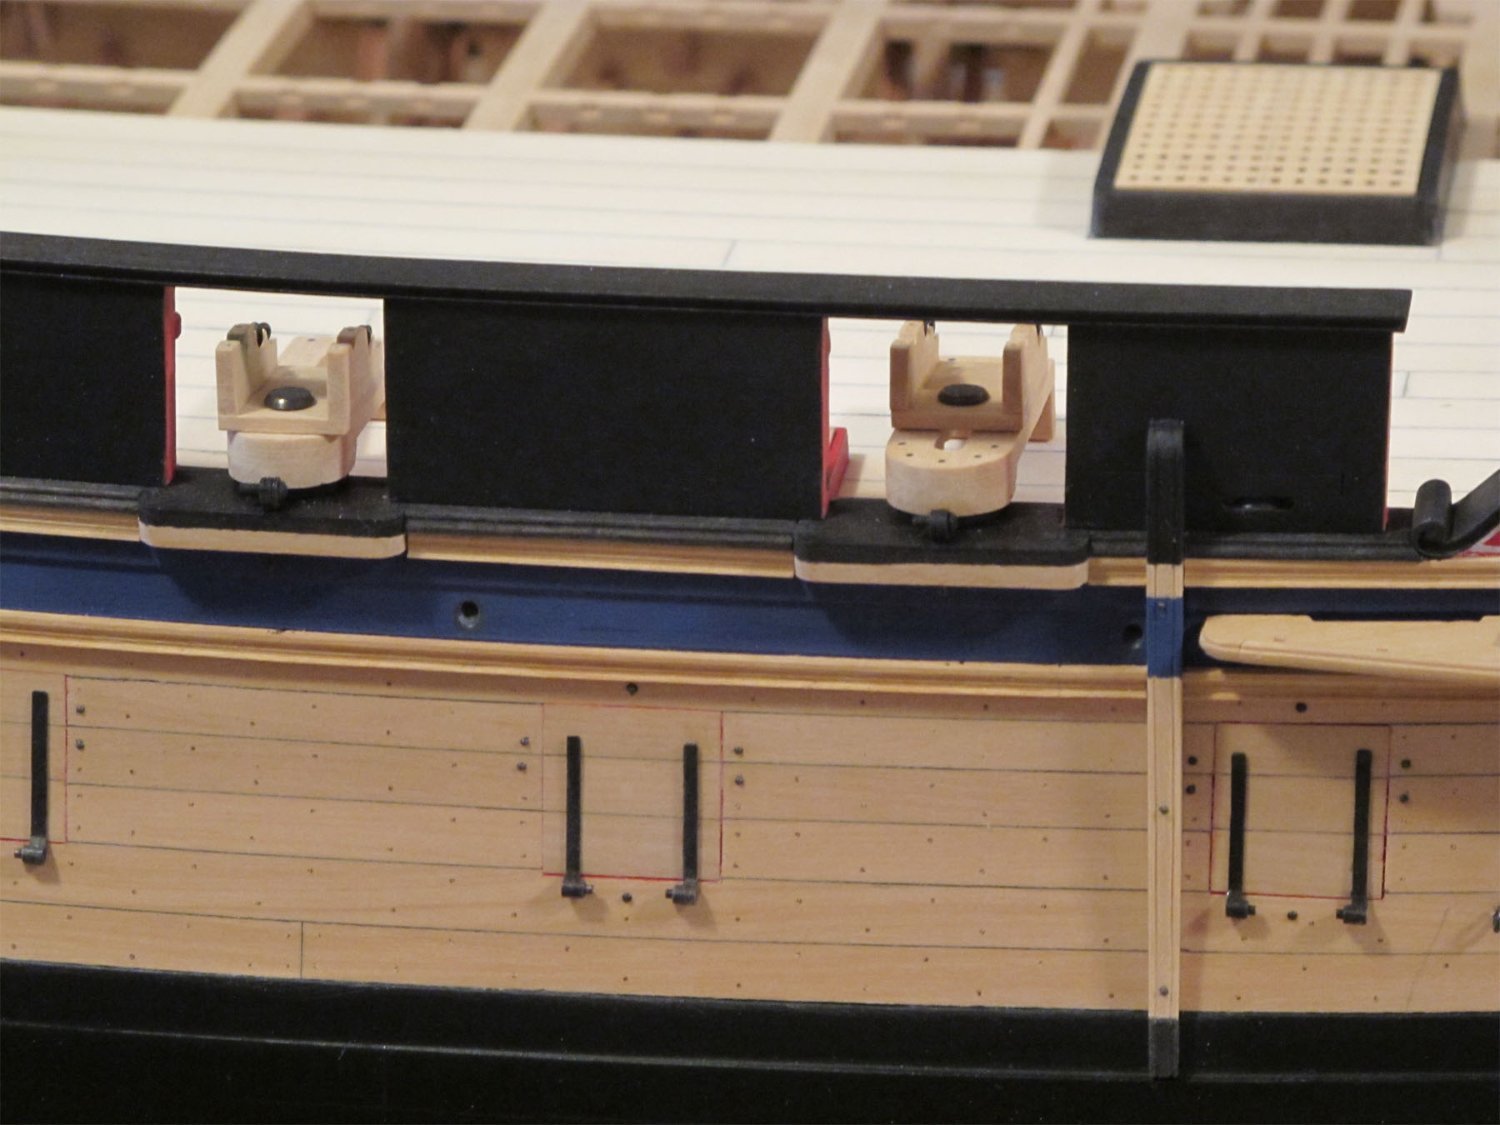
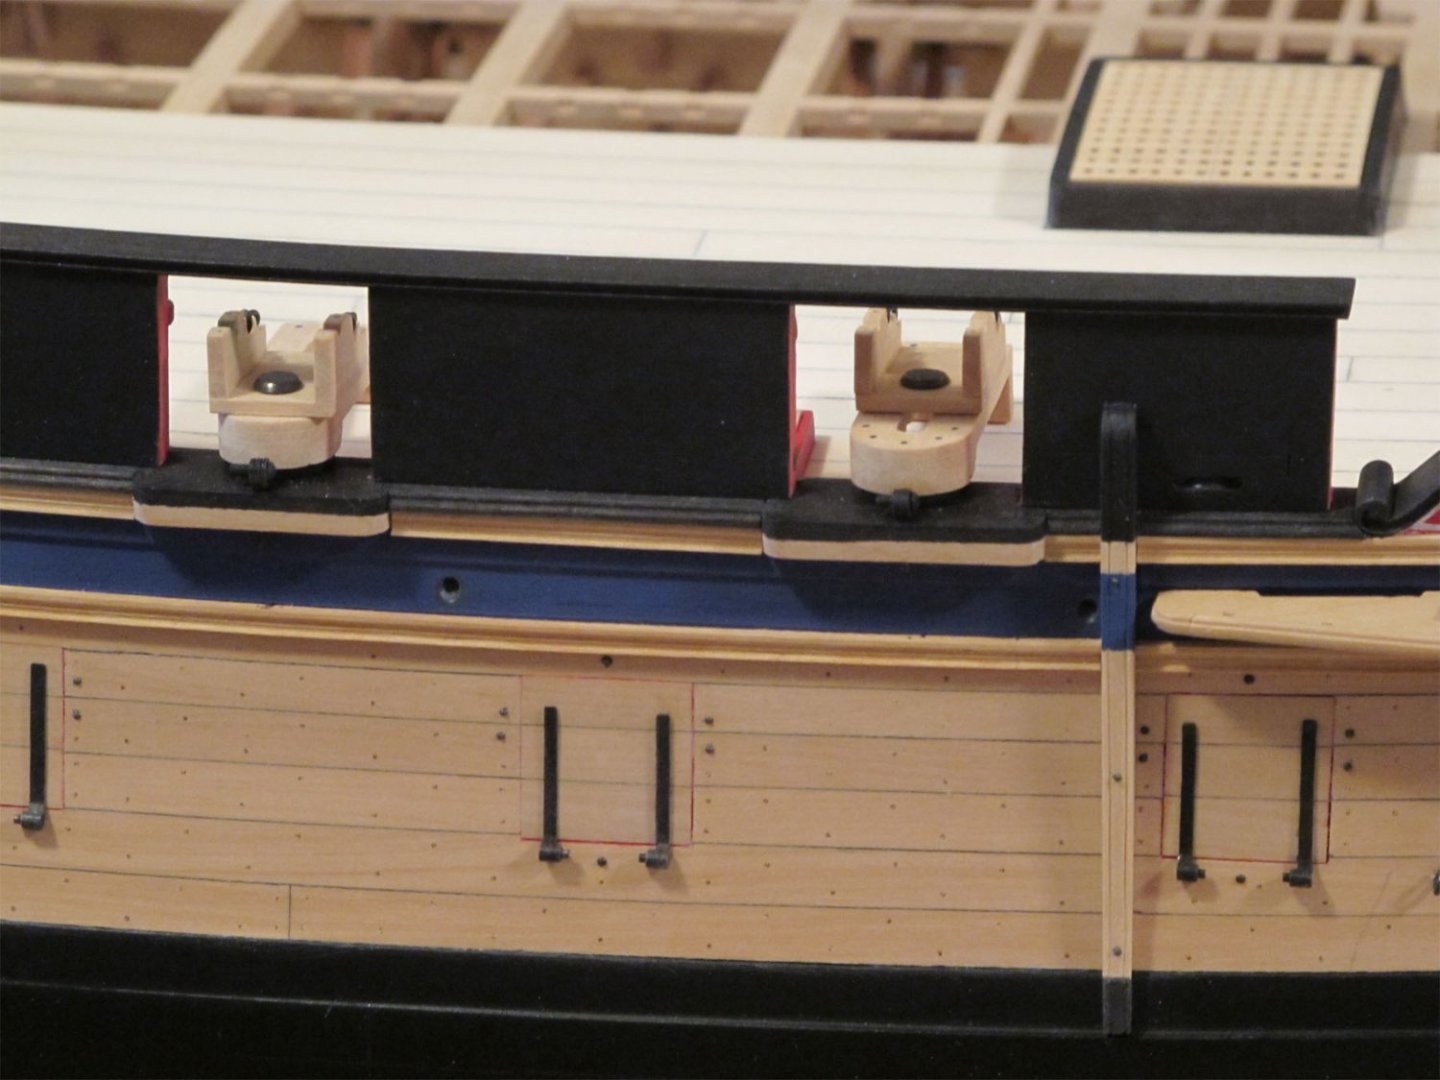
Ah, that! I've never seen any other model or reference to such a pissdale. Any other was always on the ships's side, usually in the waist.
- 1,784 replies
-
- 2
-
-
- winchelsea
- Syren Ship Model Company
- (and 1 more)
-
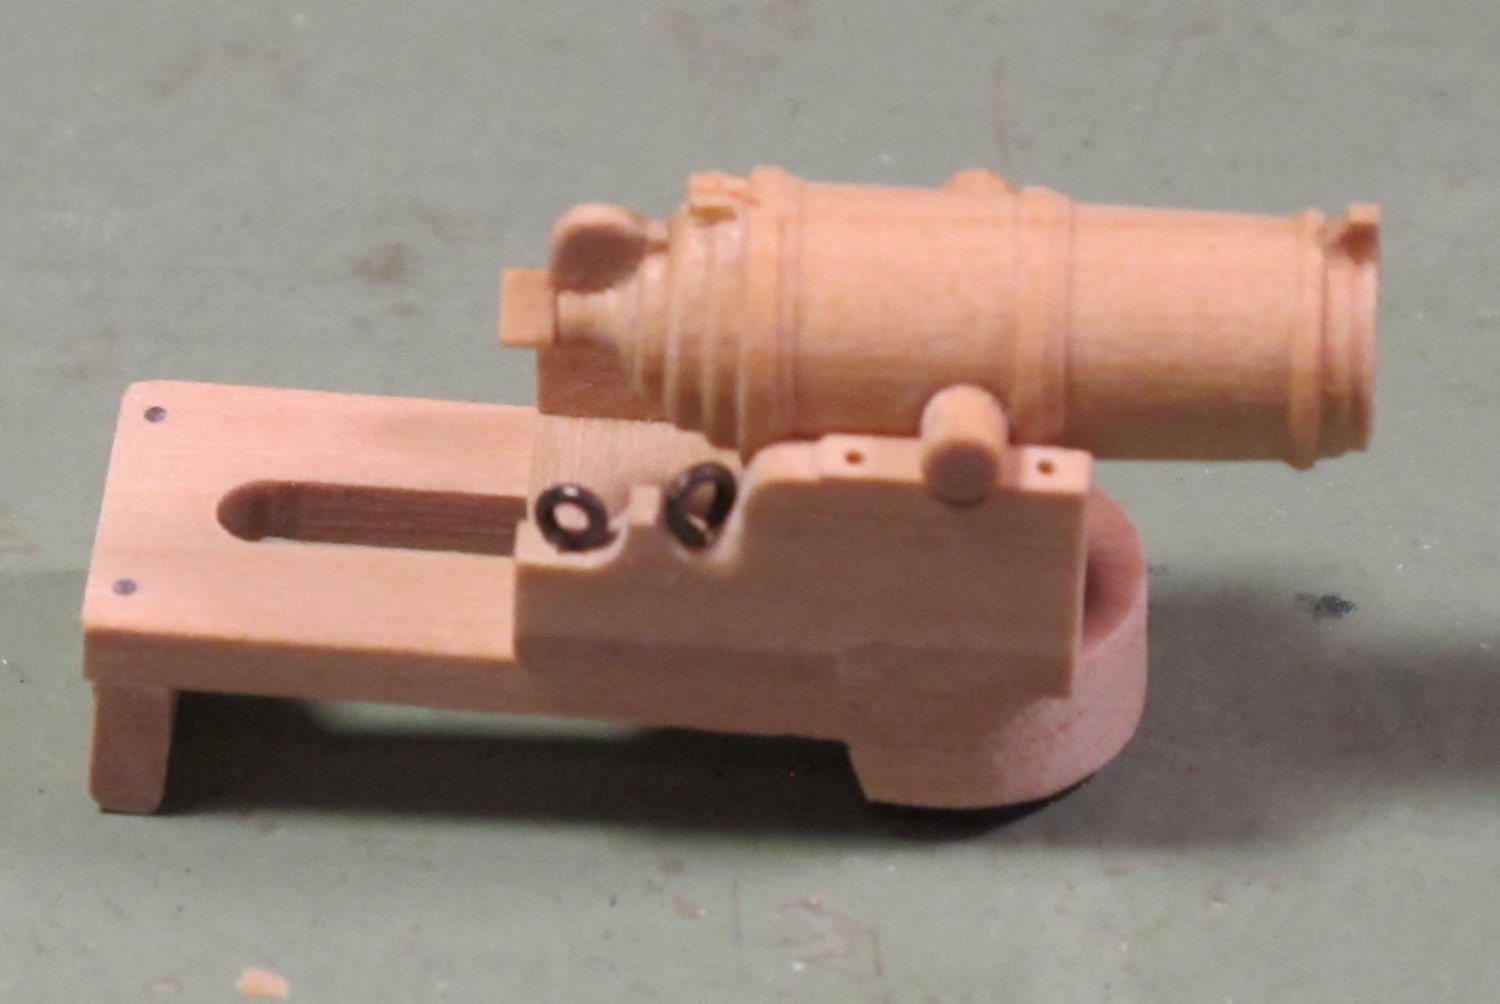
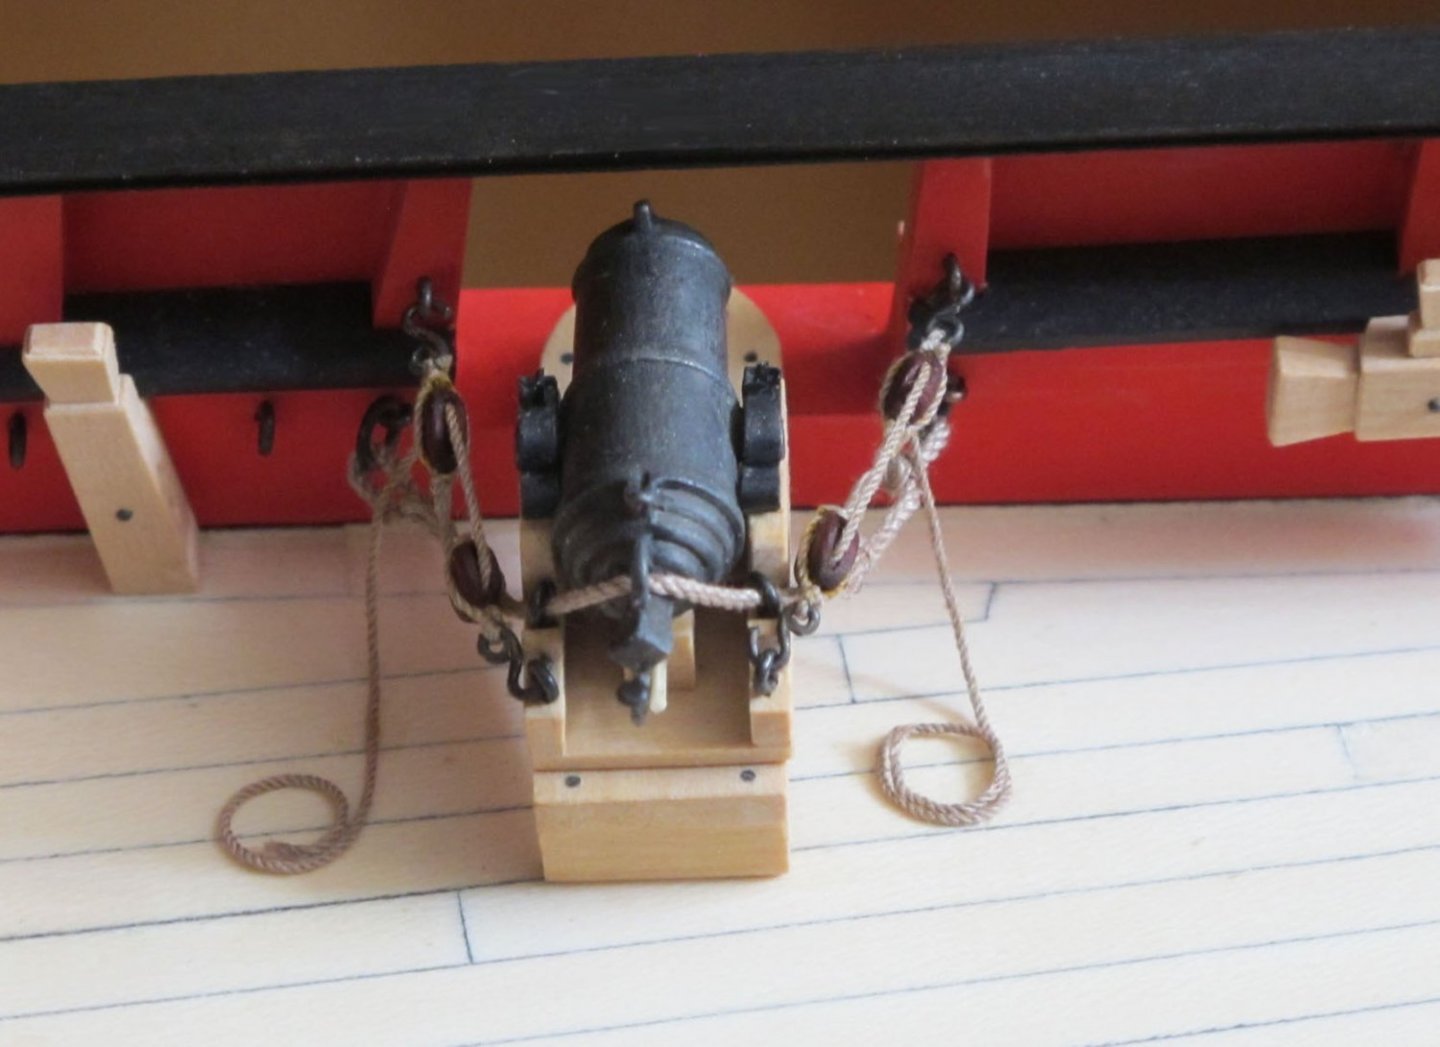
The earliest carronades were mounted on the 'outside principle' with the pivot point outside the port. Also, early carronades did not have a muzzle extension to direct blast away from spreading to rigging. Photos are of carronades for Comet, 1783. I did quite a bit of research on these when I built that model.

-
If, by 'funky seat' you mean the red painted ones, they do appear on other models. I recall seeing one contemporary model with a two-level pair of seats - like steps - in the corners. Can't imagine both in use at the same time. Wouldn't want to be the lower user! You'd have a leg on either side of you.... I suspect that idea was quickly abandoned!
- 1,784 replies
-
- 1
-

-
- winchelsea
- Syren Ship Model Company
- (and 1 more)
-
If the mizen stay is attached a bit higher up the main mast, would that give just a little more clearance?
- 740 replies
-
- 3
-
-
- Tudor
- restoration
- (and 4 more)
-
Welcome aboard!
-
Very, very lovely, Gary! And you've fitted her out beautifully as well. Congratulations on completing her.
-
Interesting story so far!
-
NAIAD 1797 by Bitao - 1:60
druxey replied to Bitao's topic in - Build logs for subjects built 1751 - 1800
This is watchmaking level work! Beautiful.- 371 replies
-
- 11
-
-

-
Welcome aboard, Dave!
-
An excellent result of a very interesting kit and subject. Thanks for sharing this with us.
-
That annoying voice.... Sorry about that but, as I say to my wife, "I'm always right." Then things go black for a while. When I regain consciousness.... On a more serious note, your drafting skills are exemplary.
- 2,699 replies
-
- 6
-
-
-
- heller
- soleil royal
- (and 9 more)
-
Well done. That ceiling work inside is not easy to achieve neatly.
-
Coming into ship modelling from a unusual angle
druxey replied to von_bednar's topic in New member Introductions
Welcome aboard indeed, Fred.