HOLIDAY DONATION DRIVE - SUPPORT MSW - DO YOUR PART TO KEEP THIS GREAT FORUM GOING!
×


mtaylor
-
Posts
26,273 -
Joined
-
Last visited
Content Type
Profiles
Forums
Gallery
Events
Everything posted by mtaylor
-
Just beautiful. The mounting shows her lines of very well.
-
She looks like she belongs on the water, Walter. Will you use a keel ballast that's removable or just put it inside?
- 77 replies
-
- 2
-

-
- robert wiltsie
- sloop
- (and 1 more)
-
Cutty Sark by NenadM
mtaylor replied to NenadM's topic in - Build logs for subjects built 1851 - 1900
Wonderful work on the deadeyes, Nenad.- 4,152 replies
-
- 6
-
-
- cutty sark
- tehnodidakta
- (and 1 more)
-
Siggi, If I'm understanding this, you edged glued the planks? What else did you put on the mold besides white paint to keep the glue from sticking to the mold?
- 58 replies
-
- 1
-
-
- barge
- ships boat
- (and 1 more)
-
Here's the drawing area.. hopefully you'll have access: http://modelshipworld.com/index.php/forum/39-hms-triton-downloads-area/ All the drawings you need should be in there. There's a timber list for the cross-section here: http://modelshipworld.com/index.php/topic/643-triton-cross-section-timber-list/
-
I checked Thurston and while they sell 2" and 3" (51mm and 76mm) diameter blades, the smallest hole size is 12.5mm. I think that hole size might limit you. I did get a number of hits using the following in Google: https://www.google.com/webhp?sourceid=chrome-instant&ion=1&espv=2&ie=UTF-8#q=slitting%20saw%20blades%2010mm Just click the link and it will open.
-
Brig Eagle by robnbill - 1:48
mtaylor replied to robnbill's topic in - Build logs for subjects built 1801 - 1850
We'll be patient Bill. The important thing is for you to recover and be well. -
Wonderful on the design and beautiful on the execution E&T. Your research into this ship is really paying off.
- 346 replies
-
- 3
-
-
- terror
- polar exploration
- (and 2 more)
-
Here's a link: http://www.olsonsaw.net/cat/scroll-saw-blades/scrollsanders/ What I like is they're smaller than even the Proxxon belt sander. They also take off material slower so one has more control than with a belt or disk sander.
-
THE 74-GUN SHIP by Jeronimo
mtaylor replied to Jeronimo's topic in - Build logs for subjects built 1751 - 1800
Stunning work on the gun, Karl. I'll ask the same question as Druxey and also ask "was it painted or is just the light"? -
Looks good, Tom. Rule of thumb... figure out your needs and then increase it to 1.5 times teh amount you think you need. And get a large scrapbox. At least that's been my experience. Disclaimer: Some will say double it, others get the amount you think you need. Any leftover wood and go towards the next build.
-
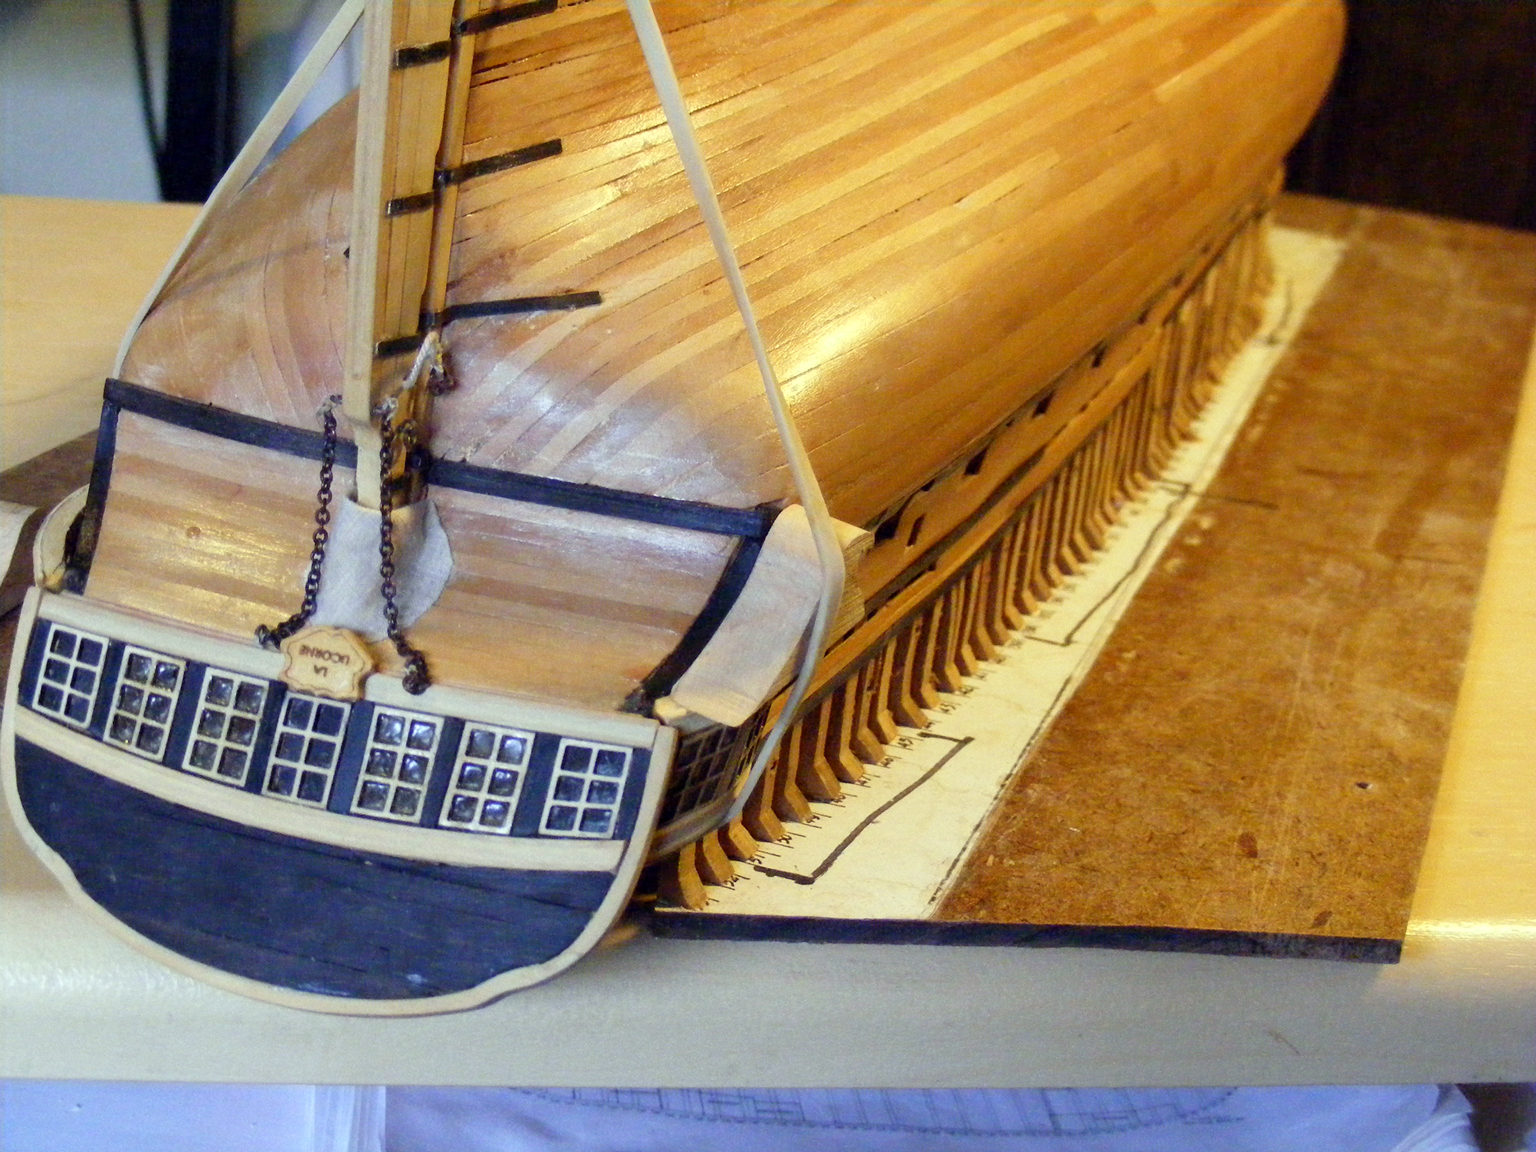
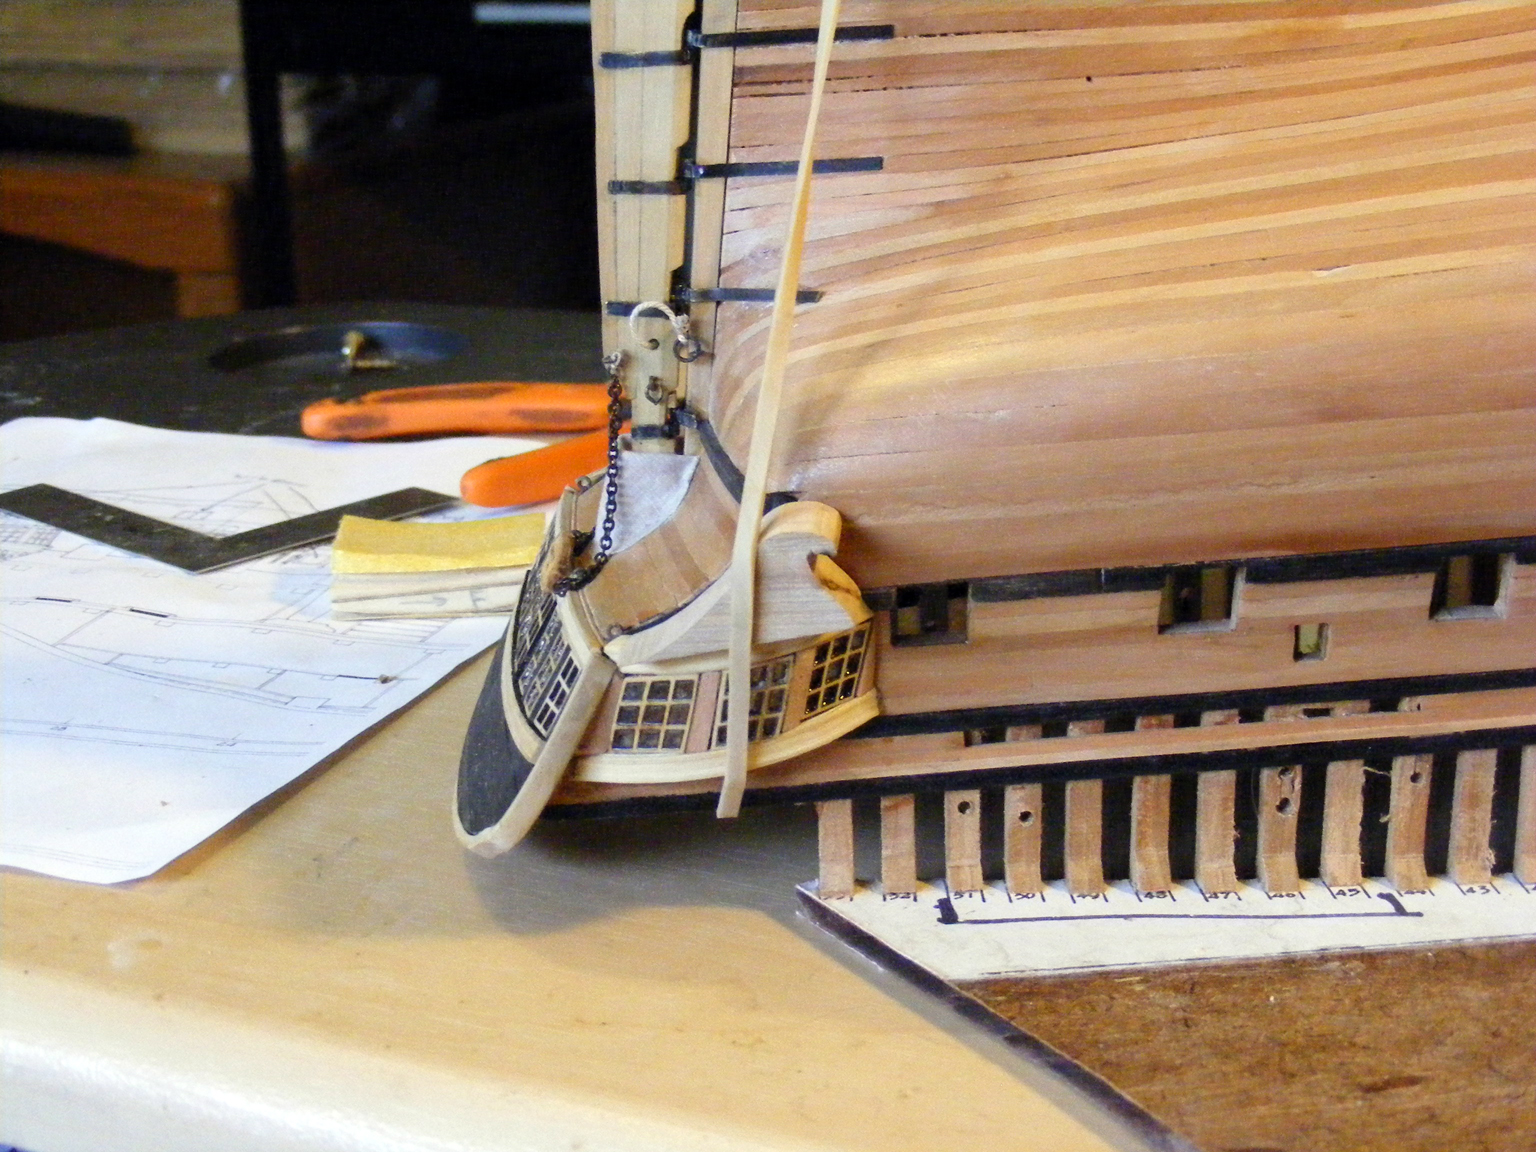
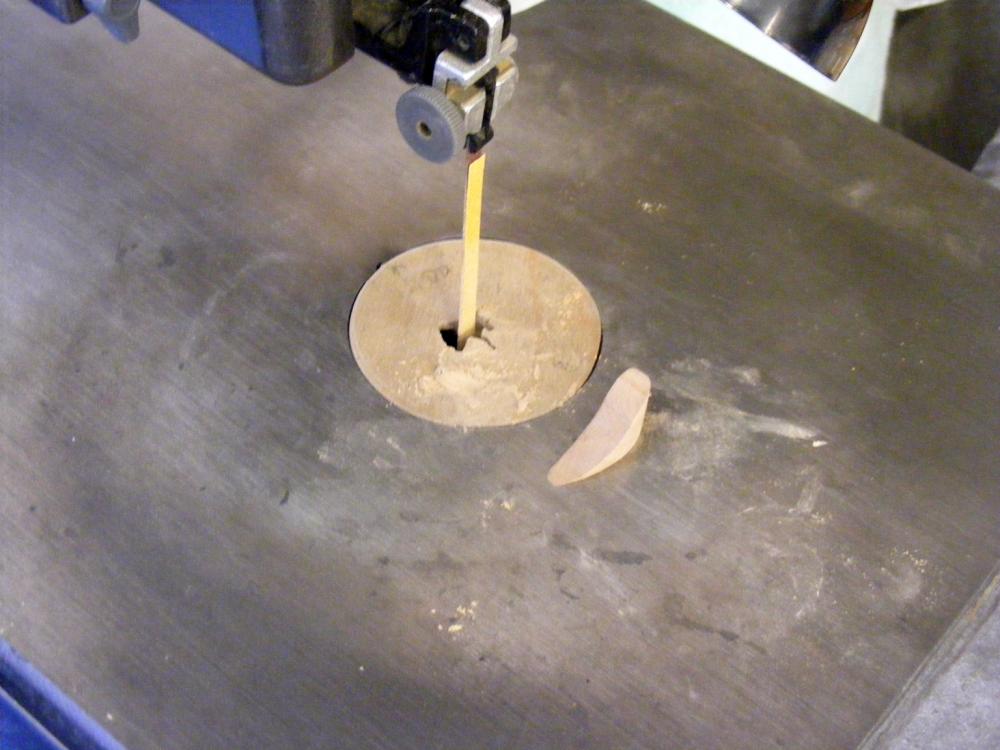
This part that I'm working on now is probably one of the most relaxing parts I've done. I think I've chilled out on things. The drops... they not only have their shape when viewed from the side, but also have to sit flush to the hull and also have to be rounded to match the gallery. Then there's the outside shape from top to bottom which I can only describe as a rounded bevel. Thick at the top, thin at the bottom. Here's some pics of the work in progress. I'm making both at the same time to shoot for uniformity I started with blanks cut to the shape when viewed from the side. I then set up the scroll saw with sanding blades instead of cutting blades and did the fit to the hull. I'm currently doing the shape from side to side to match the gallery. Here's pictures of the process (not complete as I forgot to fire up the camera in between tossing some in the scrap box and starting over. First.. rear view to show the fit to the hull. Side view to show the shape and fit to the gallery. Lastly, the rounding to match the gallery. Being cheap frugal, I have some 120 grit Olsen Sanding Blades that I've turned around and stuck a strip of 100 grit stickyback to. Works like a charm. More when I get the final shape done and after finessing the final fit.


-
Thanks for that Walter. I think I missed that in the log somewhere about it being sailed. My brain must be overloaded.. or just going to mush.
- 77 replies
-
- 1
-
-
- robert wiltsie
- sloop
- (and 1 more)
-
Hi Mehmet, That is some great weathering you're doing on this model. I have to look twice lately to make sure you're not showing the real ship.
-
Are asking about the short carved fashion piece on the outside of the counter or do you mean the sternpost? The drawing looks like where the sternpost connects to the keel.
-
Opinions on Sherline DRO for Lathe
mtaylor replied to rtropp's topic in Modeling tools and Workshop Equipment
I've seen some of this Keith, back in the 70's when I worked for a defense contractor. All prototypes were done manually and then if the parts were successful, the data was taken, drawings reworked and offset tables (I think that's what they called them) were punched into tape and fed to the big Cincy Millicron milling machines for the production run. CAD was a gleam but many companies were doing in-house things on mainframes to get things to the machines. The CNC of today and all the digital measuring equipment was only a gleam in the machinist's eye back then or maybe a dream. I've also done some milling the old way with engines as most auto machine shops used old manual equipment. Lots of fun and I've probably forgot more than I want to admit as it was (to me at least) a long time ago. -
131 year old iron hulled ship Wavertree being restored
mtaylor replied to captainbob's topic in Nautical/Naval History
JerseyCityFrankie is covering this here also: http://modelshipworld.com/index.php/topic/11248-full-rigged-ship-wavertree/ He's involved iwth her as a volunteer. -
TurboCad or graphics display help
mtaylor replied to JohnLea's topic in CAD and 3D Modelling/Drafting Plans with Software
John, Do a test and print out a sample. It should a lot better than what's on the screen. -
Mobbsie, I think you're right. I'm looking at it as I'm shaping and offering up the drops and natural woods do seem better. Back to the land of sawdust....
-
Superb work, Grant. Hmm.. damaged tooling.. expendable... crap happens. Yeah.. that's it... crap happens. At least you got the threads turned before finding out about the disaster. But I do feel your pain.
- 339 replies
-
- 5
-
-
- dumas
- Chris-Craft
- (and 3 more)
-
That's bad news on the damage but you are right, it could have been worse. I think we've all done that.. in my case, more than once. Everything is just beautiful and amazingly detailed.
- 2,625 replies
-
- 4
-
-
- kaiser wilhelm der grosse
- passenger steamer
- (and 1 more)