MORE HANDBOOKS ARE ON THEIR WAY! We will let you know when they get here.
×


Old Collingwood
-
Posts
12,076 -
Joined
-
Last visited
Content Type
Profiles
Forums
Gallery
Events
Everything posted by Old Collingwood
-
 Another excellent build - I have my chair all set up mate. OC.
 -
You should be proud of that - what a fine job. OC.
-
She is looking Superb mate - the extra effort with the weathering sure makes all the difference. OC.
-
I diluted in the jar - if you have an empty jar I just put half the original paint in and top up with distiled water, then just thoroughly mixed it, that way I have a half jar of un diluted for small areas than need a thicker bit of paint, and a full jar - diluted. OC.
-
Another welcome from the UK. OC.
-
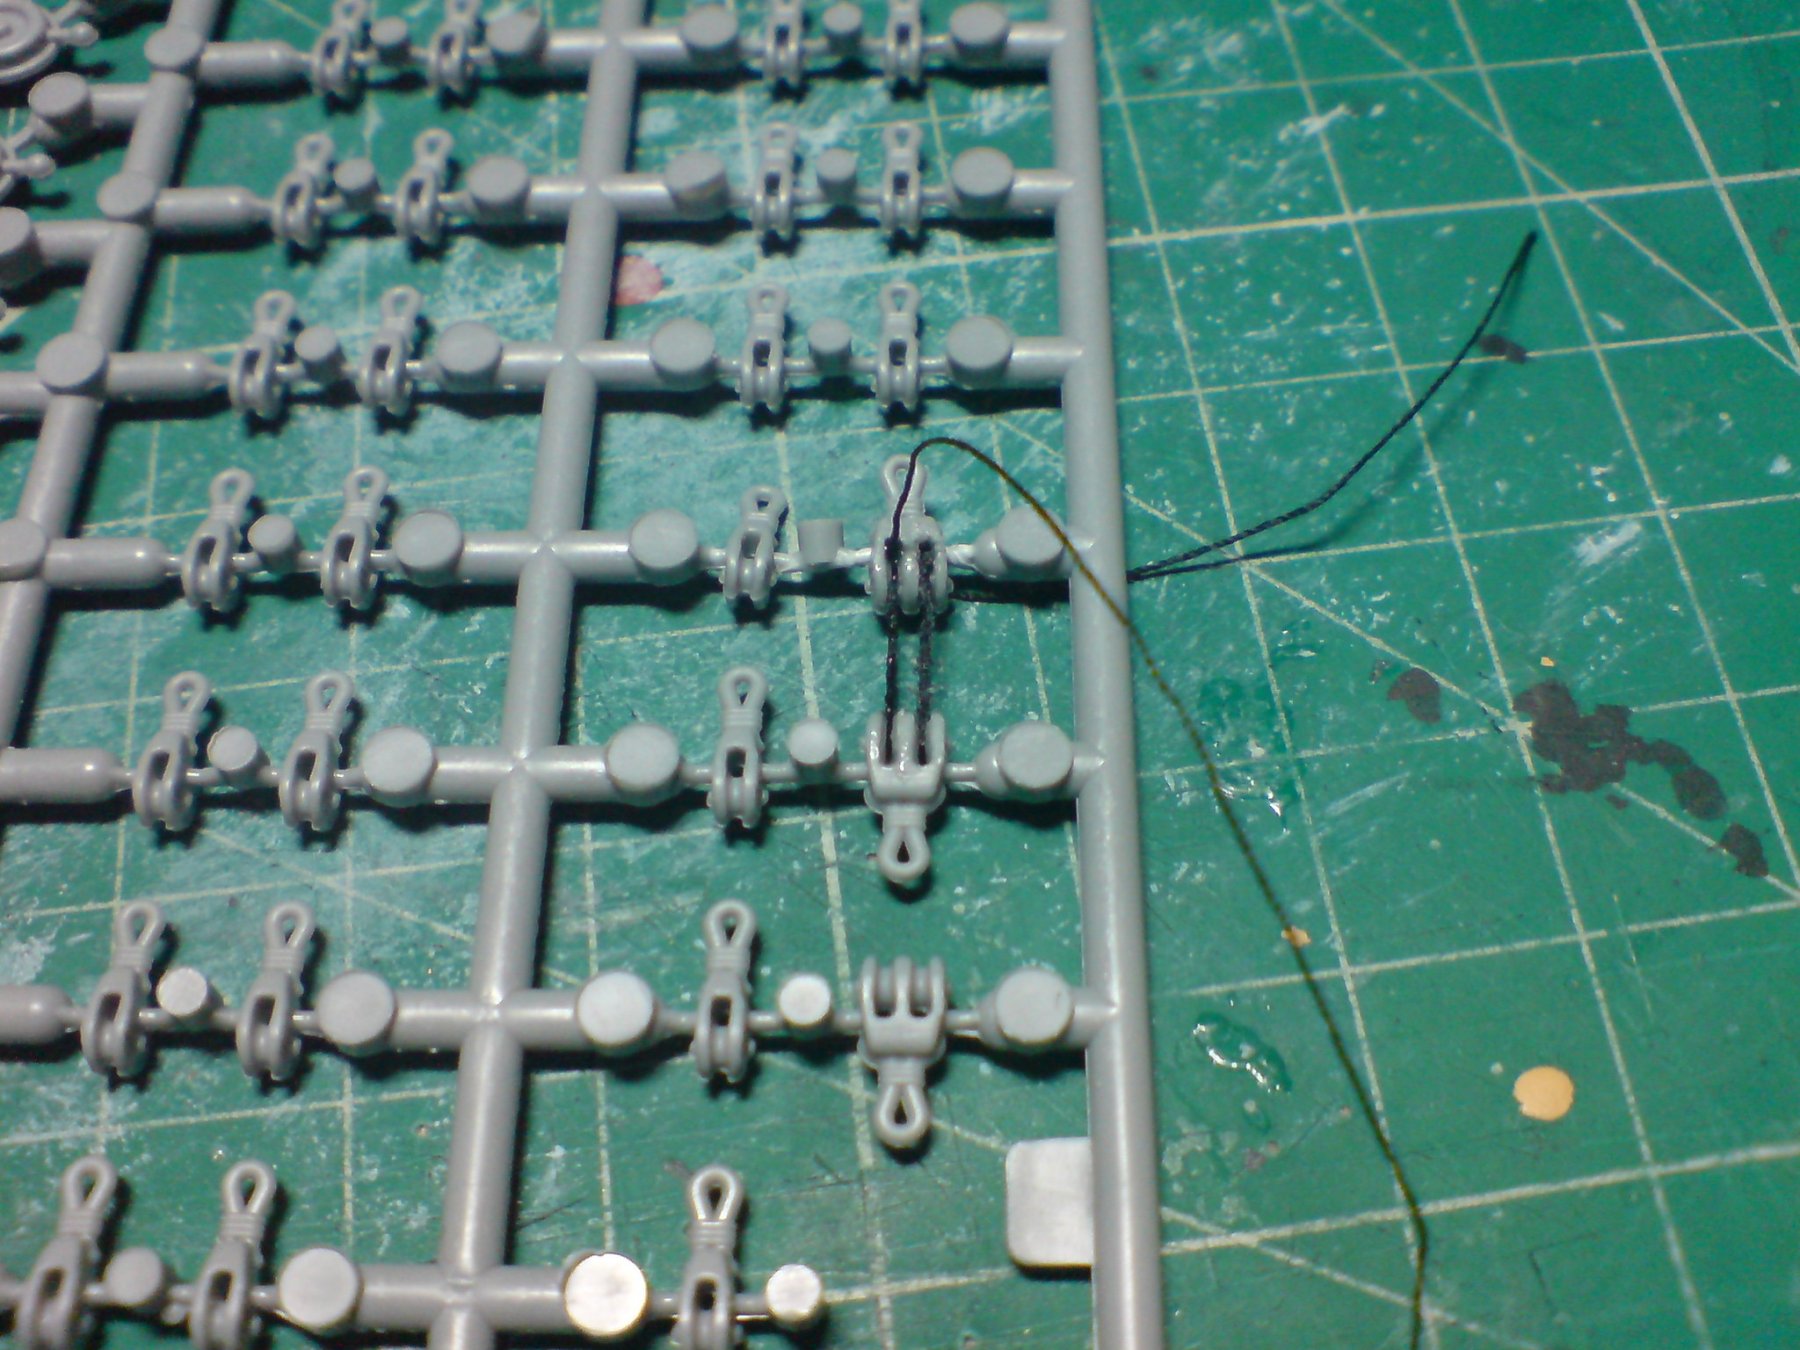
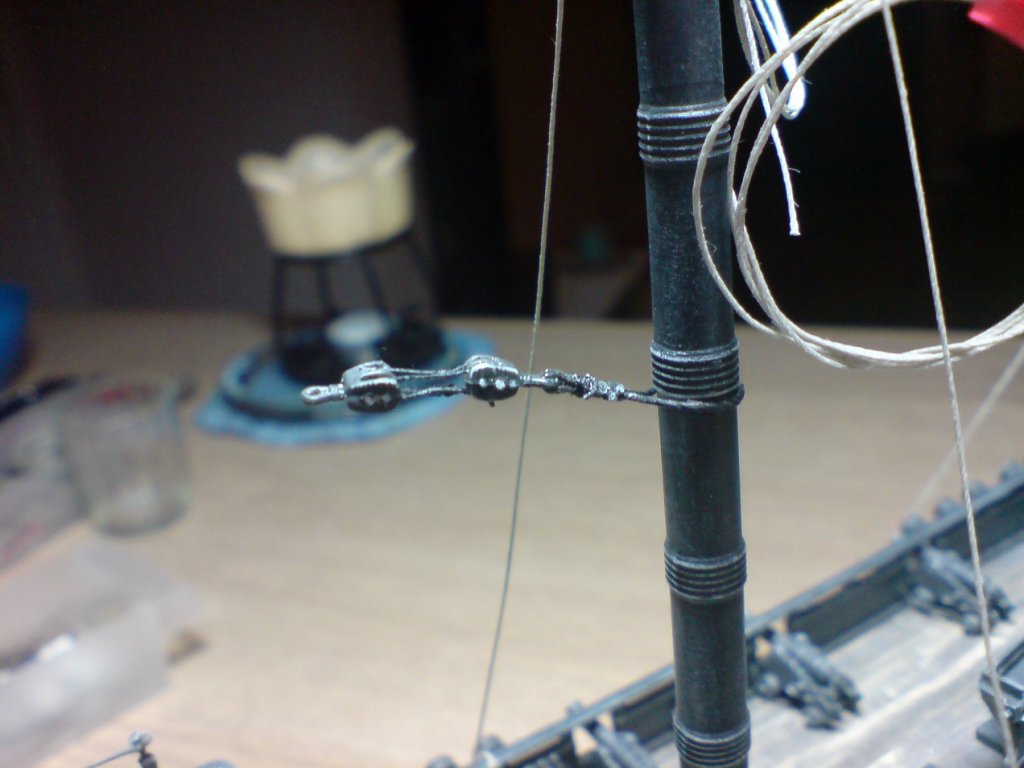
Carl, EJ what I did was to bend the one block over till it was facing the other one (carefully not to break it off) that gave a controled way to fit the ropes - I just dabed abit of ca on each end of thread then squeezed it between my fingers, this gave a finer point to the thread - I then passed it through both blocks then back through the same hole and glued both sides - then cut off the ends and pushed the small offcuts into the holes and added an extra dab of ca - it worked ok I think. OC.
-
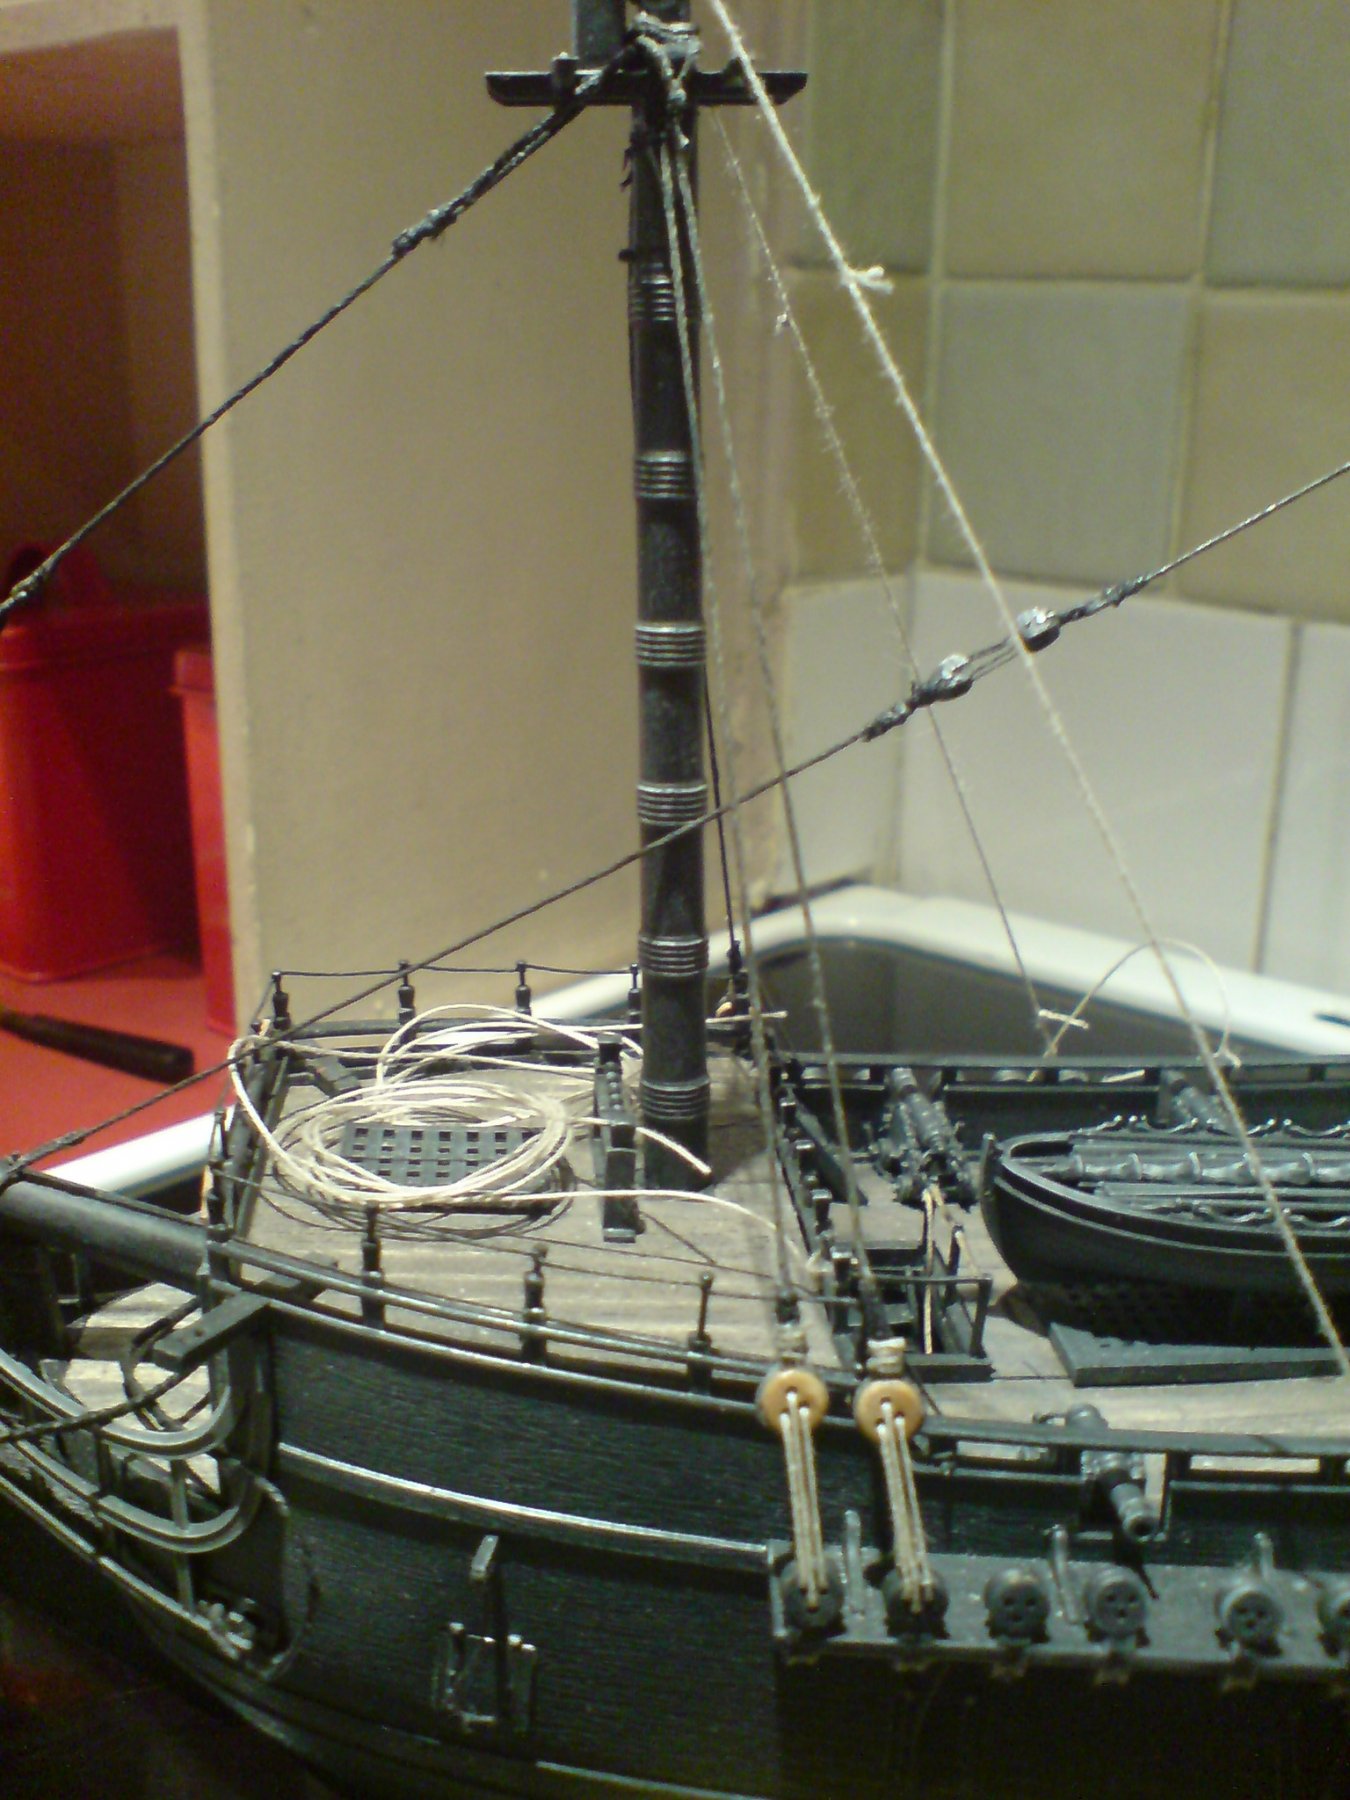
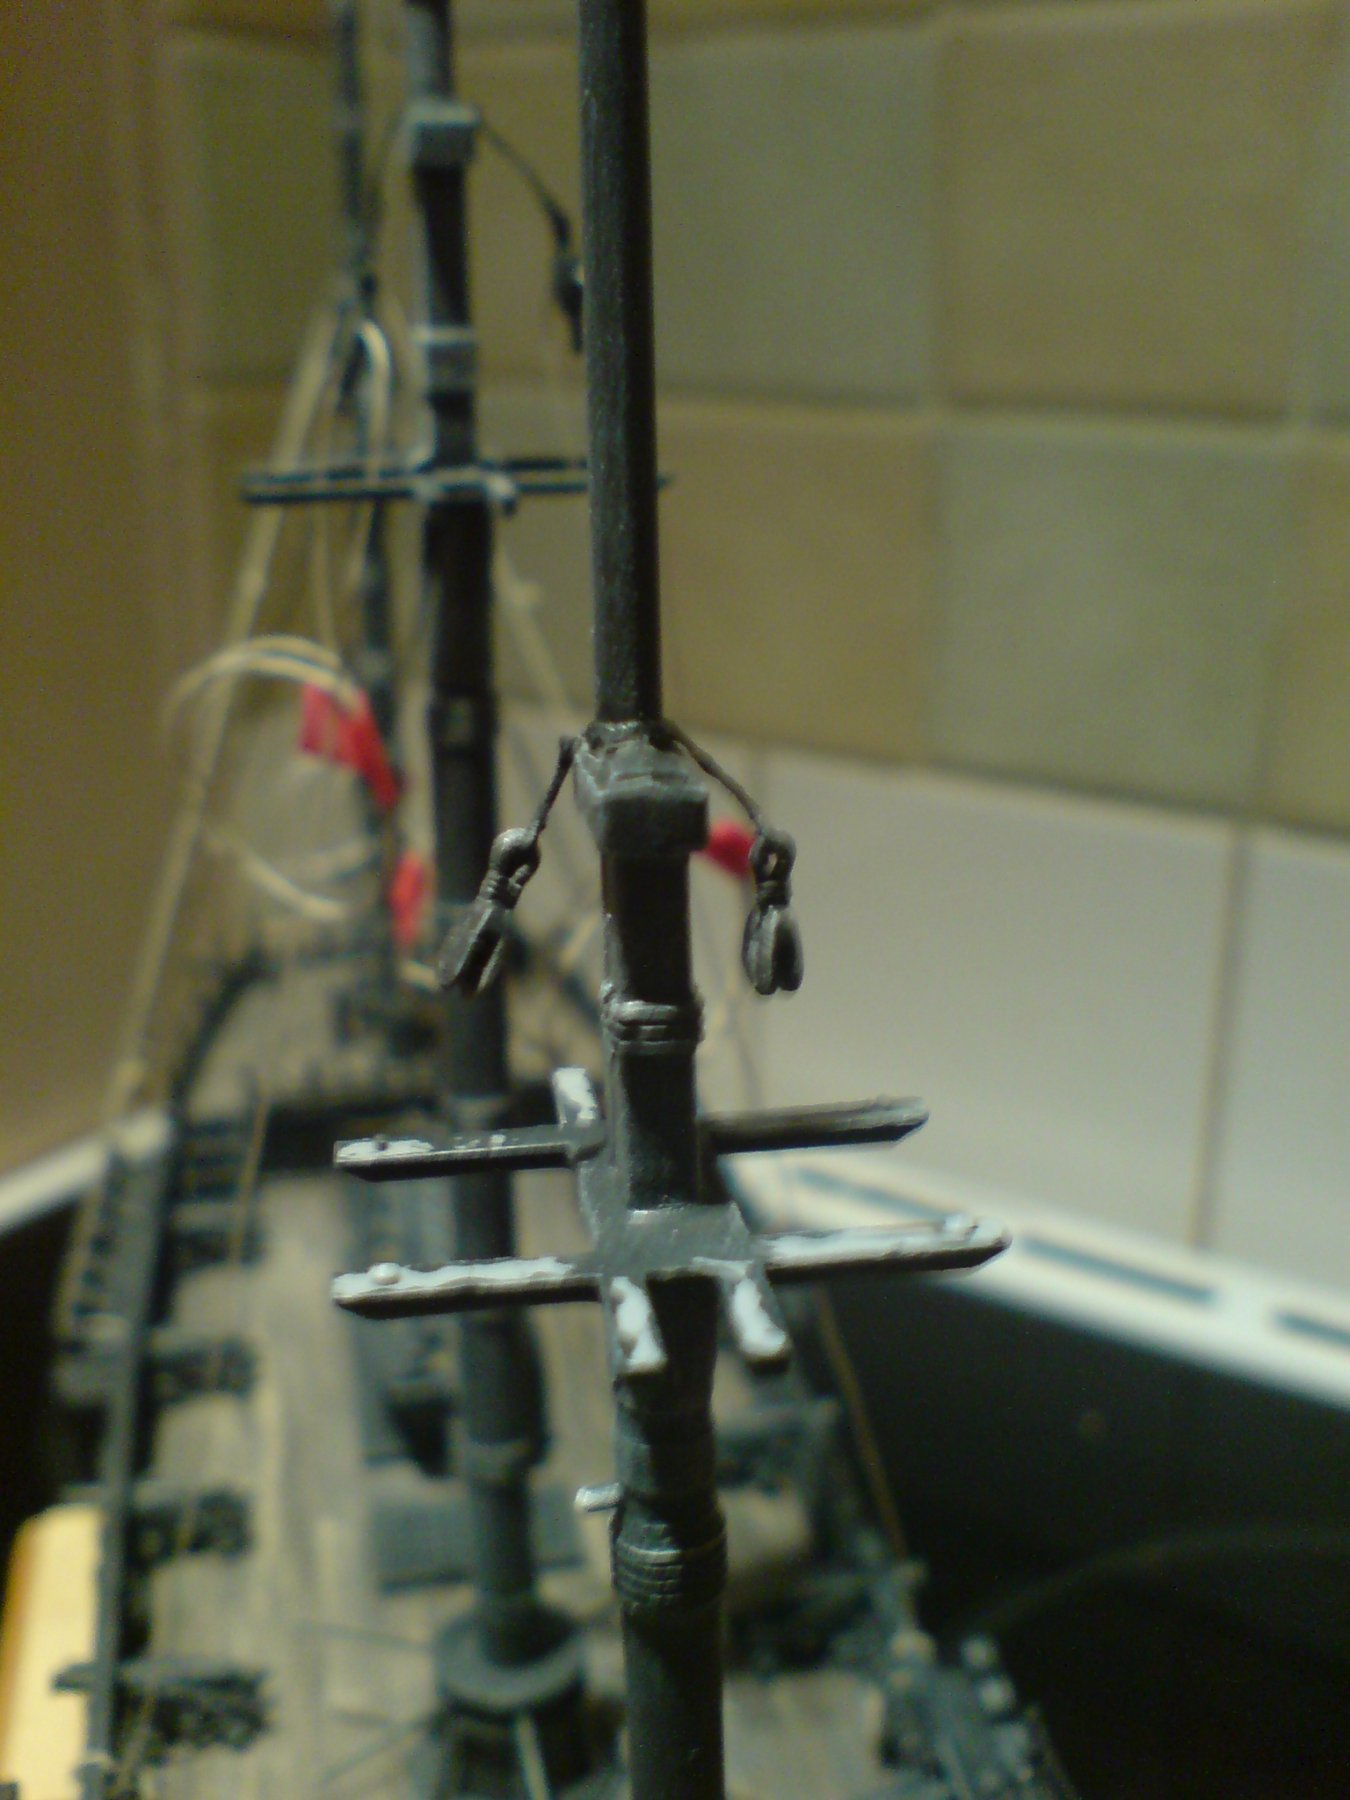
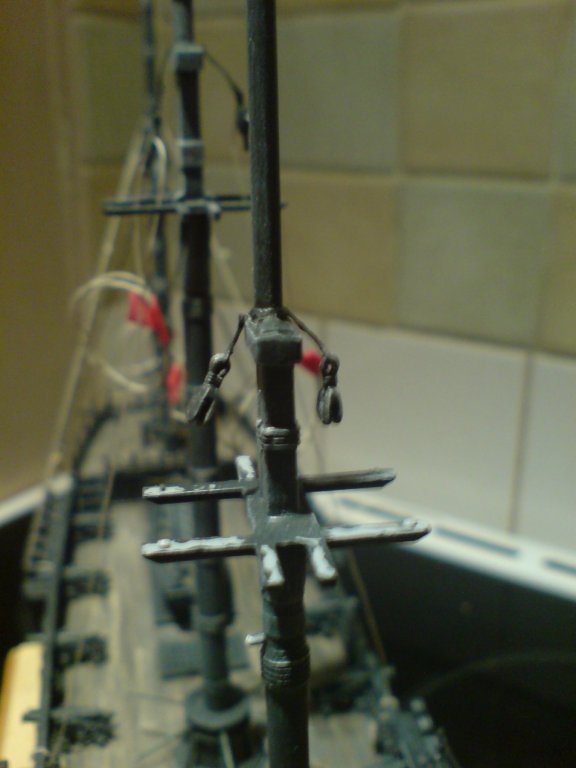
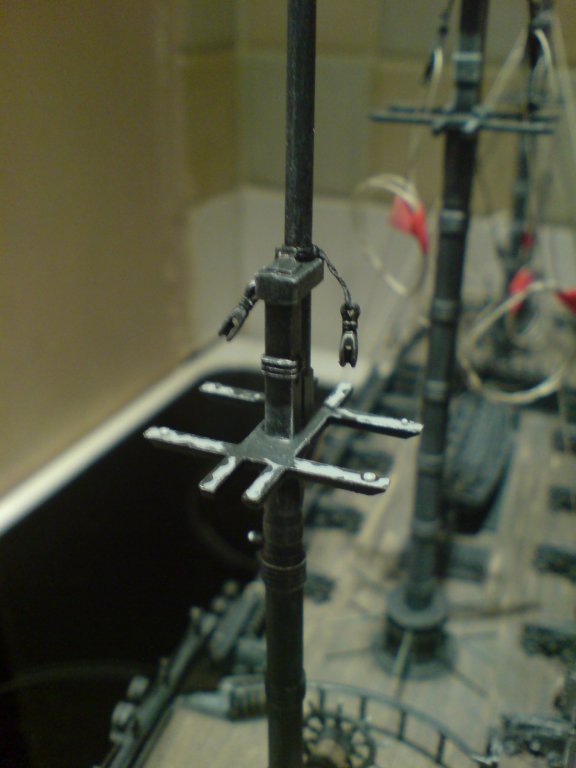
Evening all, a bit more progress on the pearl today - my next move was to create the mizzen - main stay block, this was again done using the kit plastic blocks that where laced with black thread while still attached to the fret, after attaching and adding a few dabs of ca, I then painted the block assembly. After doing this I fitted the mizzen stay and looped and tied it off with a dab of ca - then I did the same to the mainmast with the block, after I tentioned it and connected at the block. Just the three pics including firstly the block assembly. OC.

-
Have a read here - Its a well documented situation. OC.
-
I used Lifecolor Acrylics for my Warspite build and brush painted all the top and hull with them, my tips for this was diluting the paint 50/50% with distiled water - then apply thin layers that at first look patchy, a dried inbetween layers and soon the thin layers smoothed out with a good flat layer. My rules to myself was - to work in controled areas, not to load too much paint onto the brush, keep the area to be painted clear from dust (drying with a hairdryer helped this), and not to go back over an area when it was becoming tacky during its drying. OC.
-
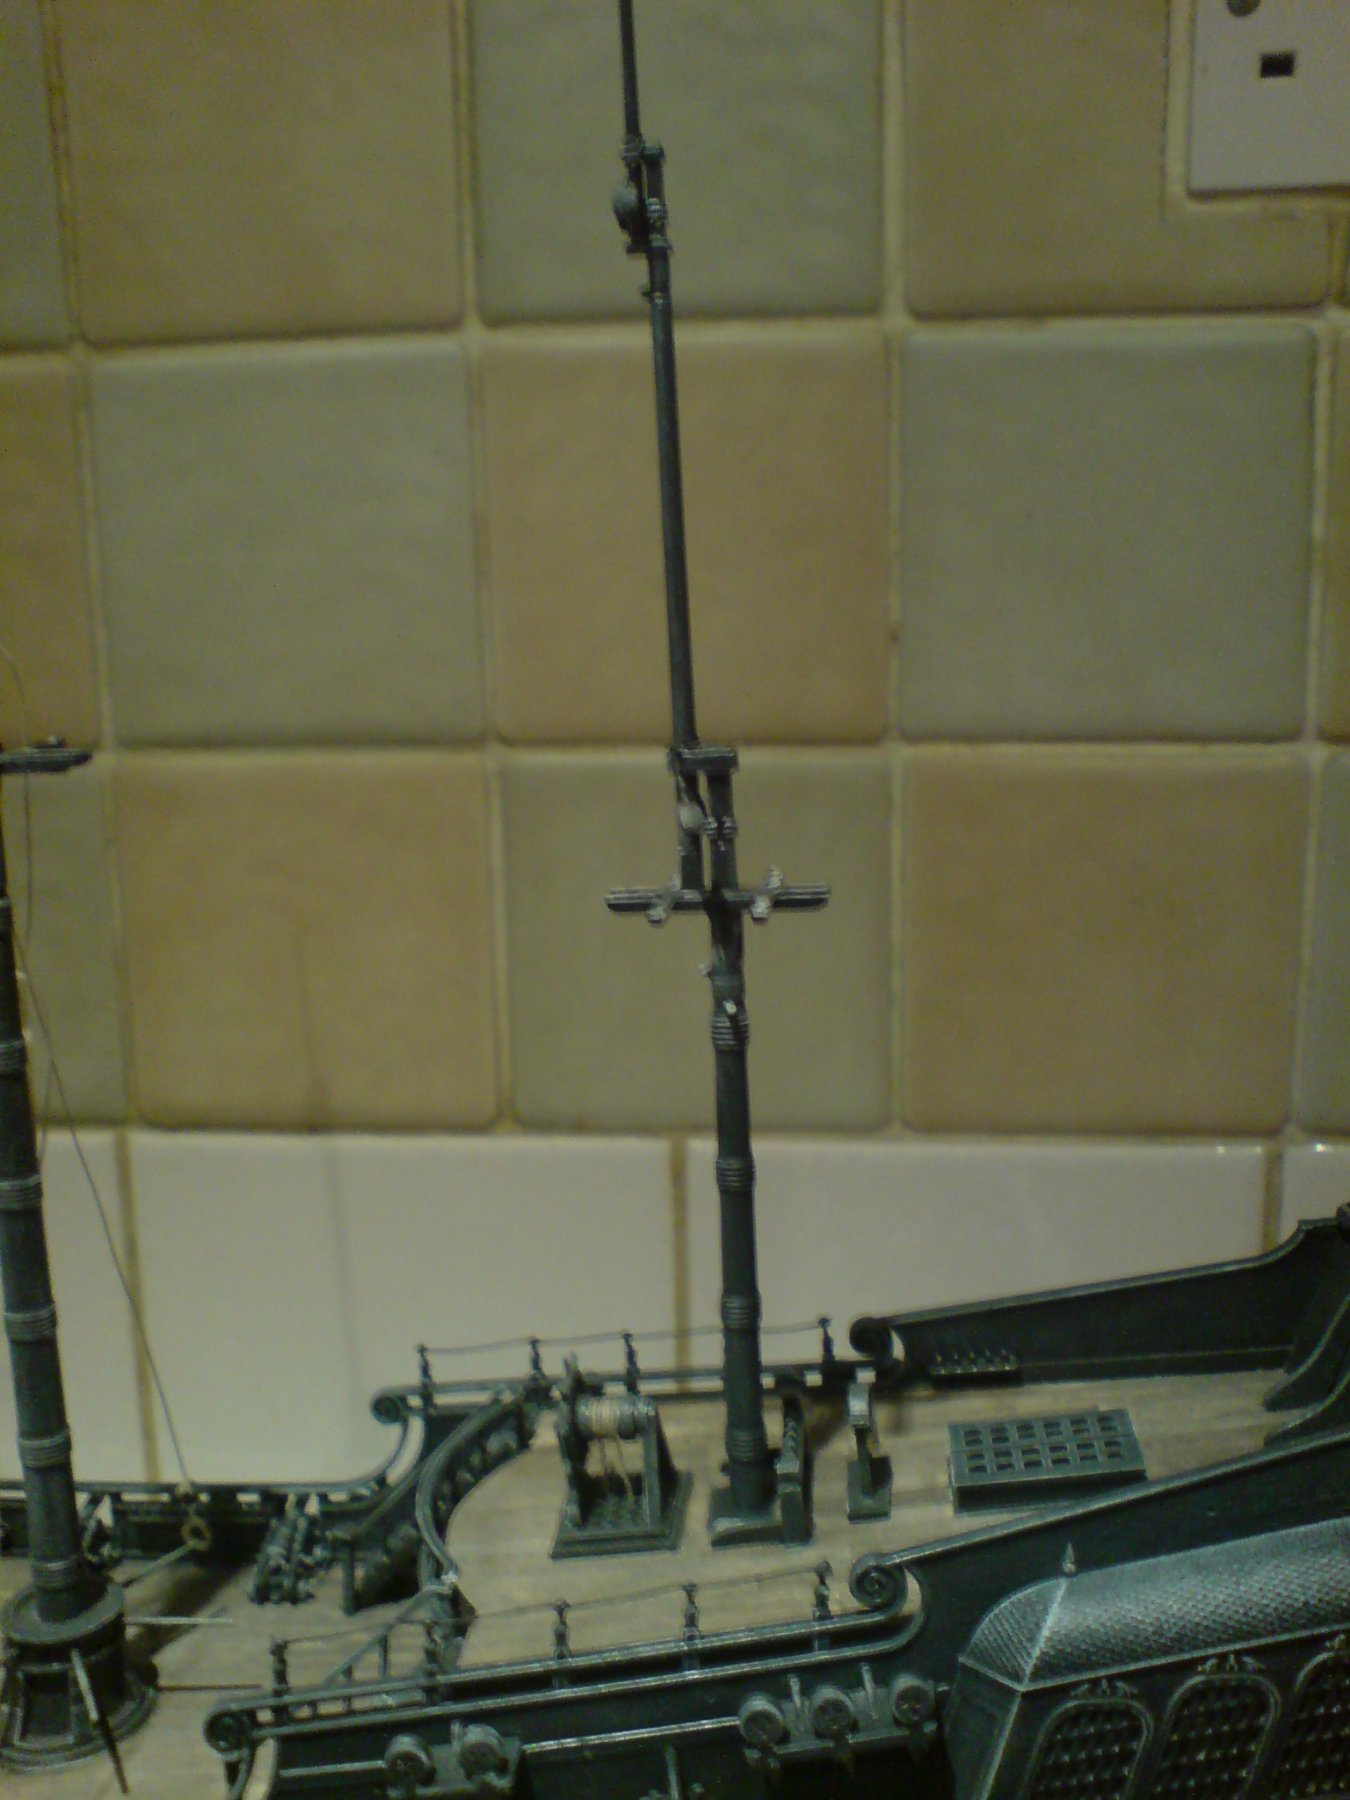
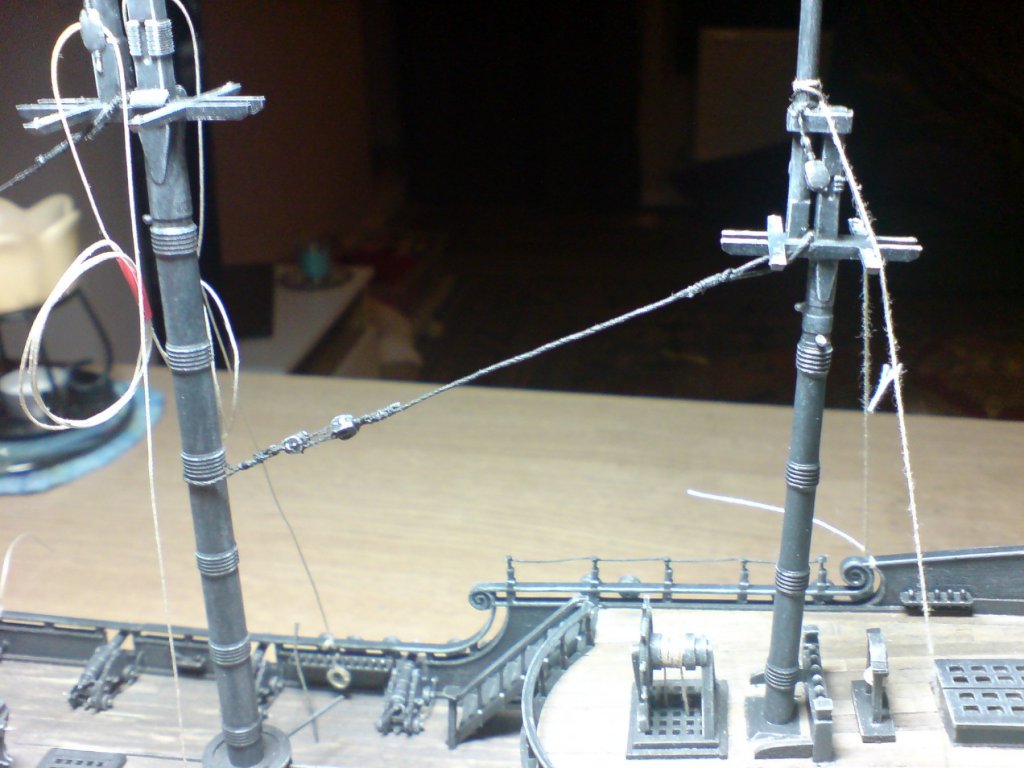
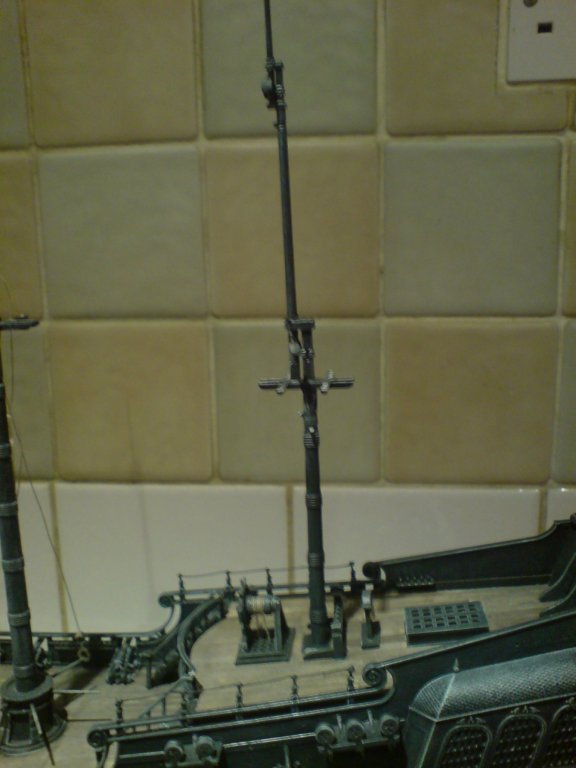
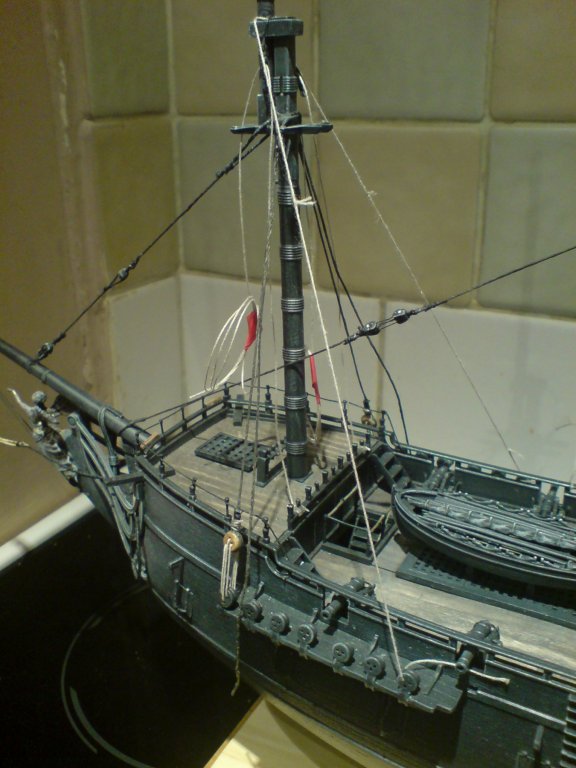
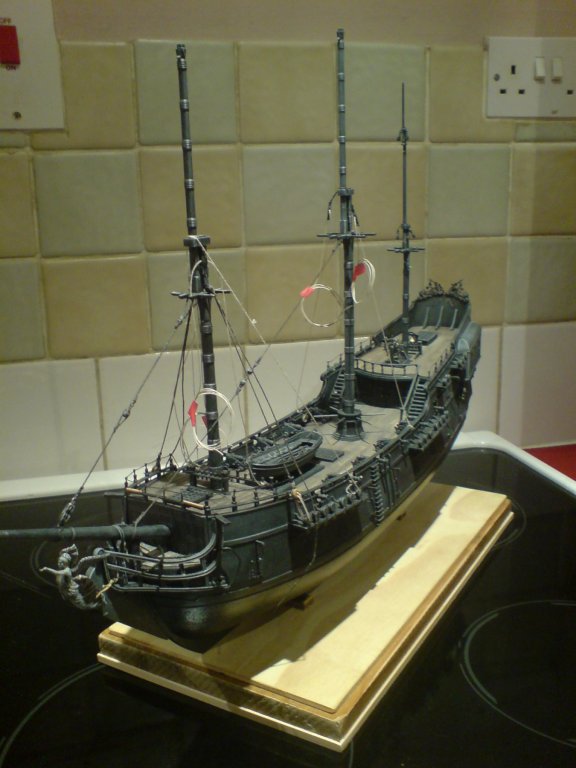
Evening all - more progress on the pearl, I decided before I could continue with the foremast shrouds - that it would make sense to build and fit the mizzen mast including the two sets of lifting blocks, after painting and weathering I glued it in place. Next I turned my attention to the foremast - the idea is to brace both sides and forward so its tentioned correctly for the rest of the shrouds, I did this with a length of thread wraped around the head and ran down each side tentioned and tied, this is just a temporary line and will be cut away when all the fore-shrouds are inplace. Heres the pics - OC.
-
Crikey - Thats an Armada - what a Superb collection not to mention all those thousands of hours building them - amazing. OC.
- 331 replies
-
- 1
-

-
- nuestra senora del pilar
- occre
- (and 1 more)
-
Such a strong plane and so versatile no wonder they carried on for so many years. OC.
-
She is looking Superb craig great painting also. OC.
-
Cutty Sark would be good with her being local for reference photos, I went over her when I was very young and was equaly impressed just like Vic. OC.
- 1,319 replies
-
- 3
-
-
- caldercraft
- Victory
- (and 1 more)
-
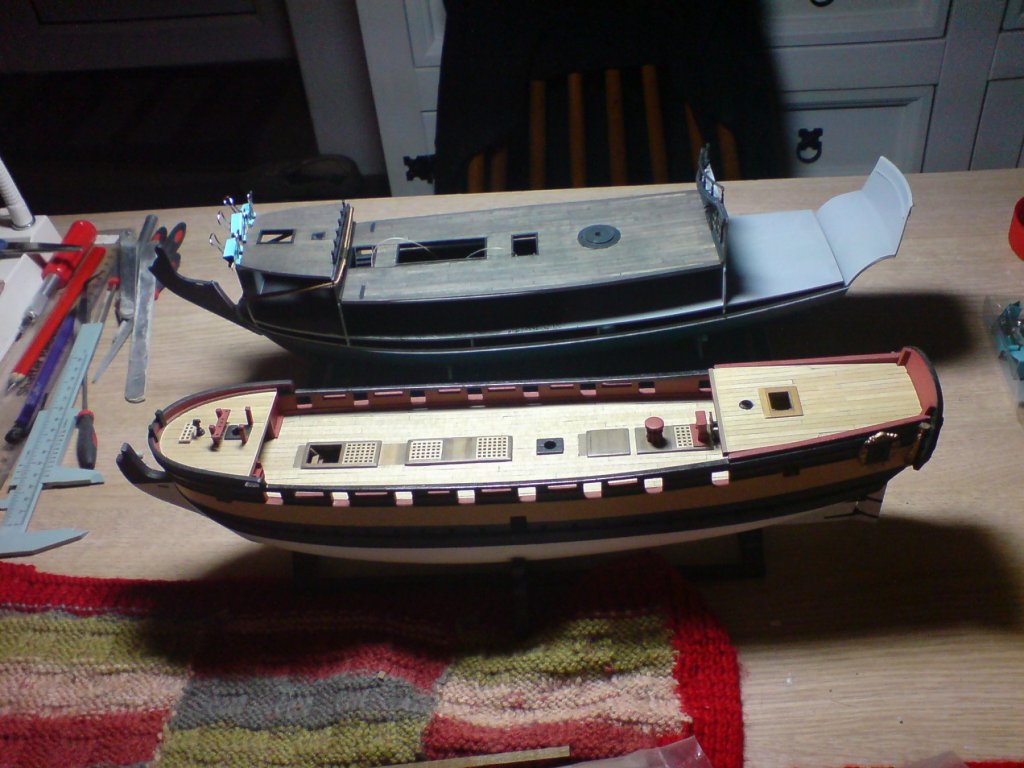
The only pearl wood kits I have seen are pirated and not welcome on here I understand and I am not skilled enough to scratch build one, I will use what I am learning with rigging the this pearl - and put it into my two other builds - the one thing I have learned from my model of the pearl - I think my Greyhound is too scale width (short) her scale beam should be wider I think as she looks far too narrow. OC.
-
Thank you so much Kevin, I still have my Corel Greyhound and Peregrine - both wood kits - both roughly 1/90-1/100scale builds. This other one Kevin - OC.