ccoyle
-
Posts
8,579 -
Joined
-
Last visited
Content Type
Profiles
Forums
Gallery
Events
Everything posted by ccoyle
-
 Step 23 This step didn't require too much work: searchlights, signal lamps, Carley floats, and a couple of lockers. The next step will include construction of the depth charge racks. 😮
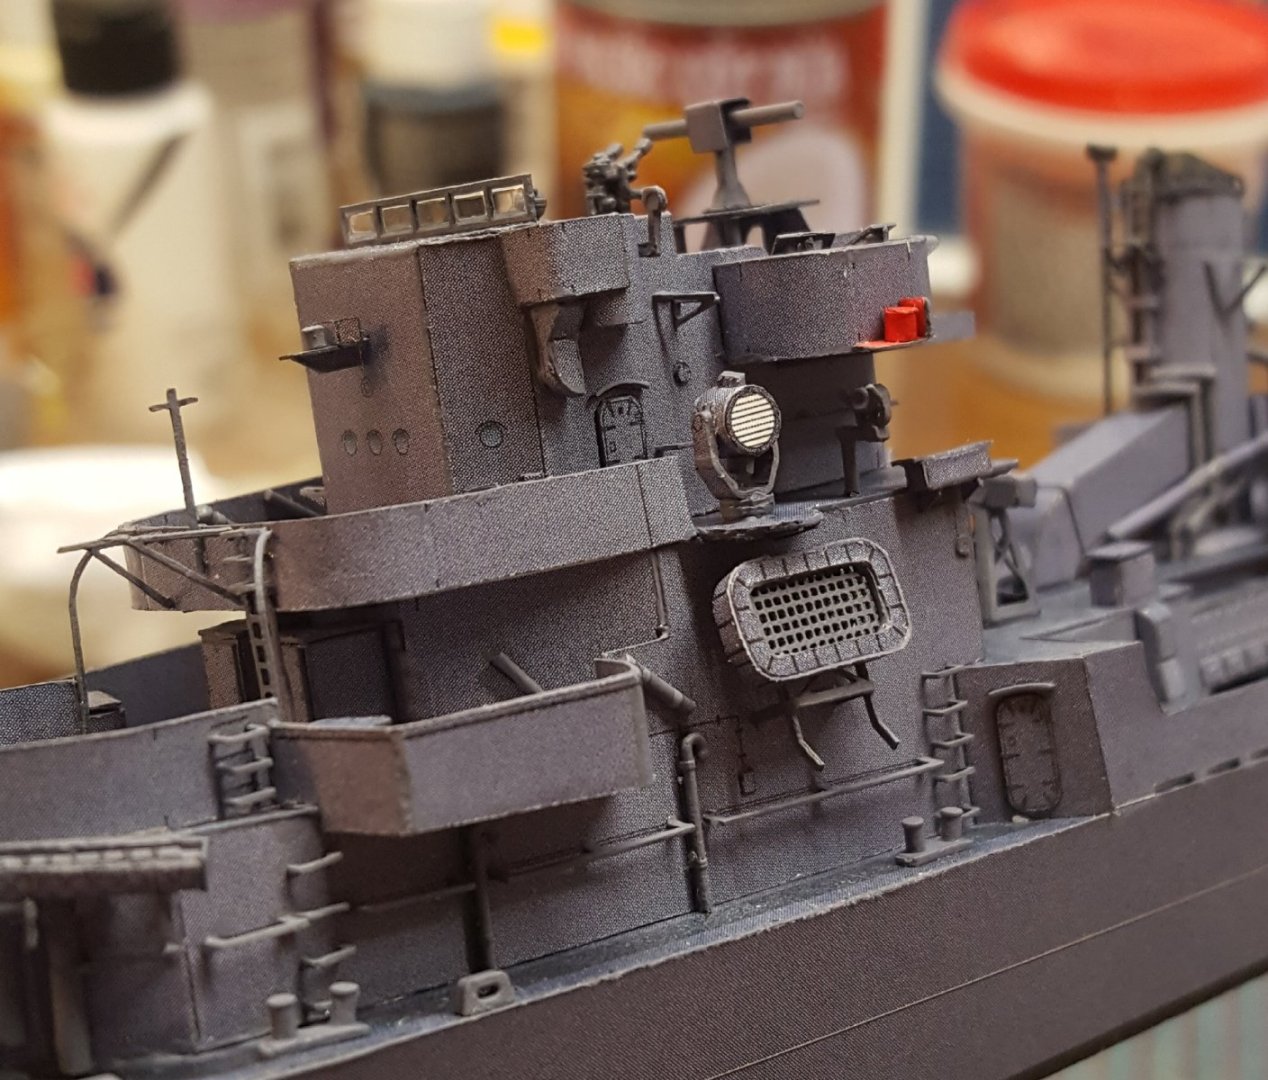
- 331 replies
-
- 20
-

-

-
Welcome aboard!
-
Yes, this is covered under fair use. Be mindful that there is no standard definition of how much use of a work is considered fair and how much goes beyond the limit; fair use is considered on a case-by-case basis in the event a copyright holder wishes to mount a legal challenge.
-
On Hold - Nakajima Type KO 3 by CDW - Answer - 1:33 Scale - CARD
ccoyle replied to CDW's topic in Non-ship/categorised builds
Quite often, actually. Forming rounded parts is one obvious use, but it is also useful for creating neat petal joints (if you haven't done a petal yet, rejoice!) and rounding the open ends of tubes, plus the variety of handle diameters is great for rolling larger diameter tubes, like fuselage sections. -
Having never done a restoration, I can't advise you on how to proceed, but I do wish you well on your project. Enjoy!
- 38 replies
-
- 2
-
-
- Thermopylae
- Revell
- (and 3 more)
-
Rick, The difficulty with copies is their provenance. If the original owner purchased them from, say, the NMM, then passing them along to someone else would not violate copyright, since the NMM was compensated for what is called the right of first sale, i.e. they received their money but are not entitled to the proceeds of any subsequent re-selling -- it's one set of plans = one fee paid to the NMM. But if the original purchaser copied his copies, kept his original copies, and then gave you the second set off copies, he would be guilty of defrauding the NMM by creating a second set of copies in lieu of a first set you would have had to purchase for yourself in accordance with the right of first sale, i.e. two sets of plans were made but only one fee was paid to the NMM. The upshot of this is that if you can't verify the provenance of the plans, both the law and common courtesy require that you do not distribute the plans.
-
Did you stain your paneled parts after gluing them with the 3M? I had a similar experience with 3M spray on my Wuetender Hund model. 3M is solvent-based, and the stain simply undid the glued joints.
-
On Hold - Nakajima Type KO 3 by CDW - Answer - 1:33 Scale - CARD
ccoyle replied to CDW's topic in Non-ship/categorised builds
Most of the time, the scoring is done on the printed side. Many kits include different lines (e.g. solid vs dashed) to distinguish between scoring the front or back of a printed part. A fold does create a slight buckle on the side opposite the scoring, so there are instances where scoring the back is helpful even if it's the front that's indicated as the side to be scored. -
Beautiful model, B.E. -- a tribute to your skill and dedication!
- 858 replies
-
- 3
-
-

-
- Sphinx
- Vanguard Models
- (and 1 more)
-
On Hold - Nakajima Type KO 3 by CDW - Answer - 1:33 Scale - CARD
ccoyle replied to CDW's topic in Non-ship/categorised builds
Yep, scoring is essential. A variety of tools can do the job. I used a scribing tool for years, but it was actually a bit too sharply pointed for the job. These days I'm using a manicurist's dotting tool, believe it or not. They have round tips and come in a variety of sizes. Cheap, too. The set seen below is available from Amazon for $4.98. Rolling tubes is always a challenge. Some tips to try out: Can replace with styrene rod. Dampen slightly before rolling. Roll around tube-shaped objects, e.g. pencils, paint brush handles, metal or styrene rod. Start with a larger-diameter object, then move to smaller ones. -
Welcome aboard, Phil!
-
Hi, Maxx! We encourage our members to tag there RC builds with the word "radio." If you click here, you'll see what we've got so far. A few of them are even tallships, like your own project. Good luck!
-
On Hold - Nakajima Type KO 3 by CDW - Answer - 1:33 Scale - CARD
ccoyle replied to CDW's topic in Non-ship/categorised builds
It just occurred to me that your framing might be too thick, since 1mm = 1/25.4 in. -
Welcome aboard, Jack, and good progress on your model. I have tagged your log as a "first build." This we do primarily as a service to other first-time builders to make it easier for them to find out what models other newcomers to the hobby are building. Cheers!
-
Beautiful, Mike -- a majestic and inspiring piece of work!
- 150 replies
-
- 3
-
-
- agamemnon
- caldercraft
- (and 1 more)
-
Nasty chest pains can be symptomatic of an inflamed gall bladder. I know, cuz I just had mine removed in July for that very reason.
-
Step 22 (done -- sort of) The bow is looking busier and busier with the forward gun tub completed and many white spots "killed" by the addition of bollards and fairleads. I say "done -- sort of" because I left off a few details that I think should be left until later, namely the mounting of the anchors and jackstaff. Step 23 will encompass the addition of many more details.

- 331 replies
-
- 21
-
-
The famous test pilot -- nice!
-
Congratulations! That is a sweet fleet!
-
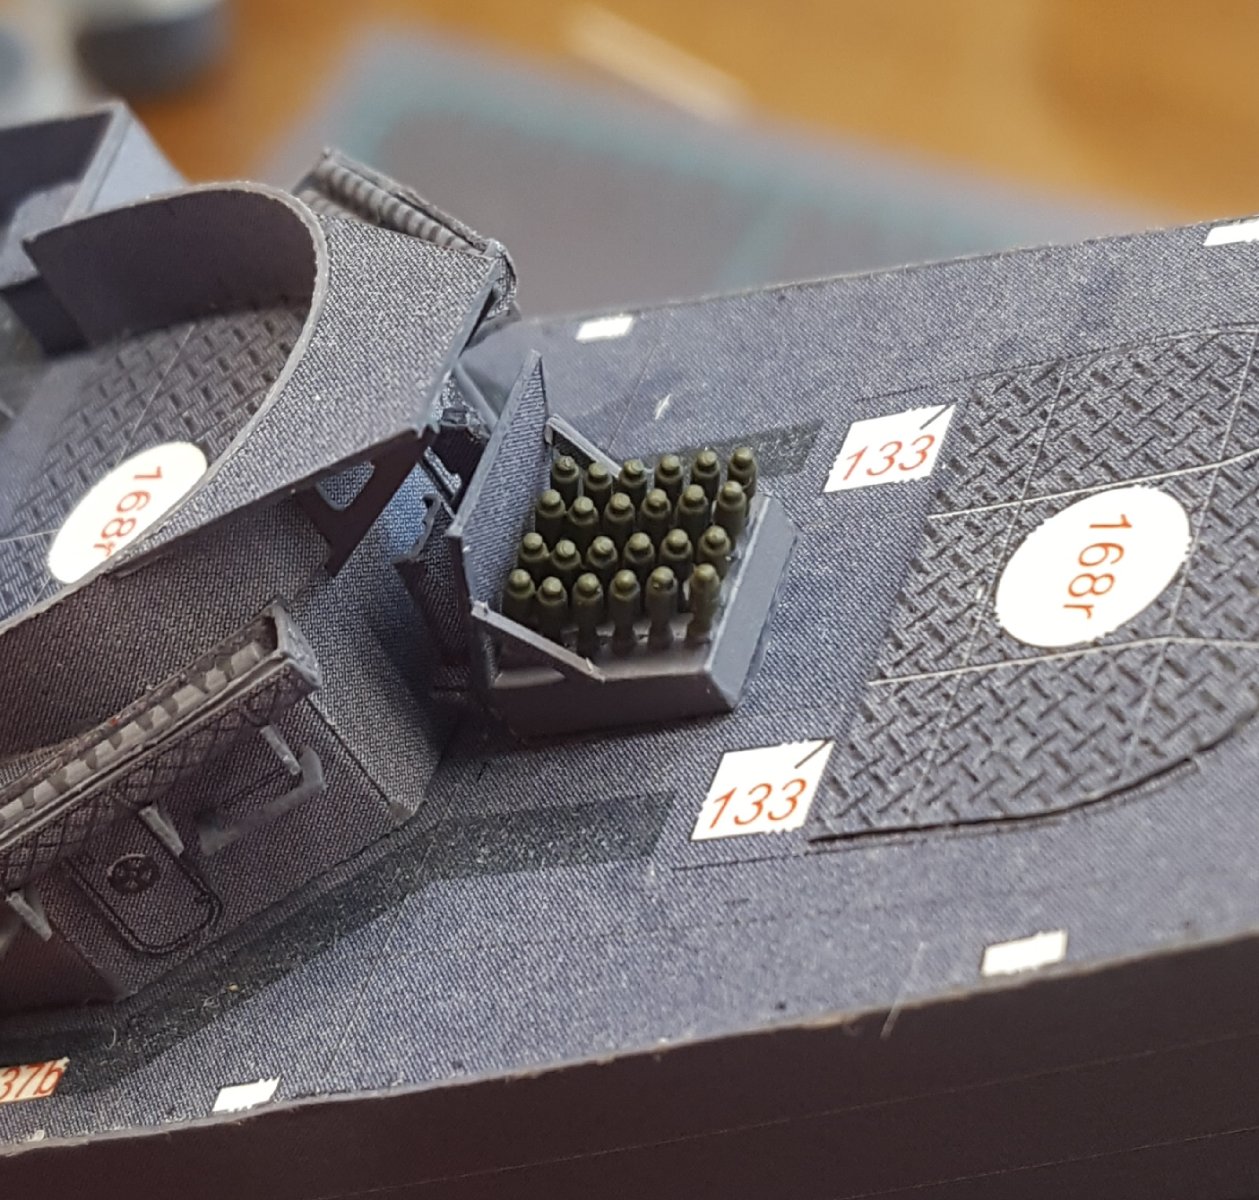
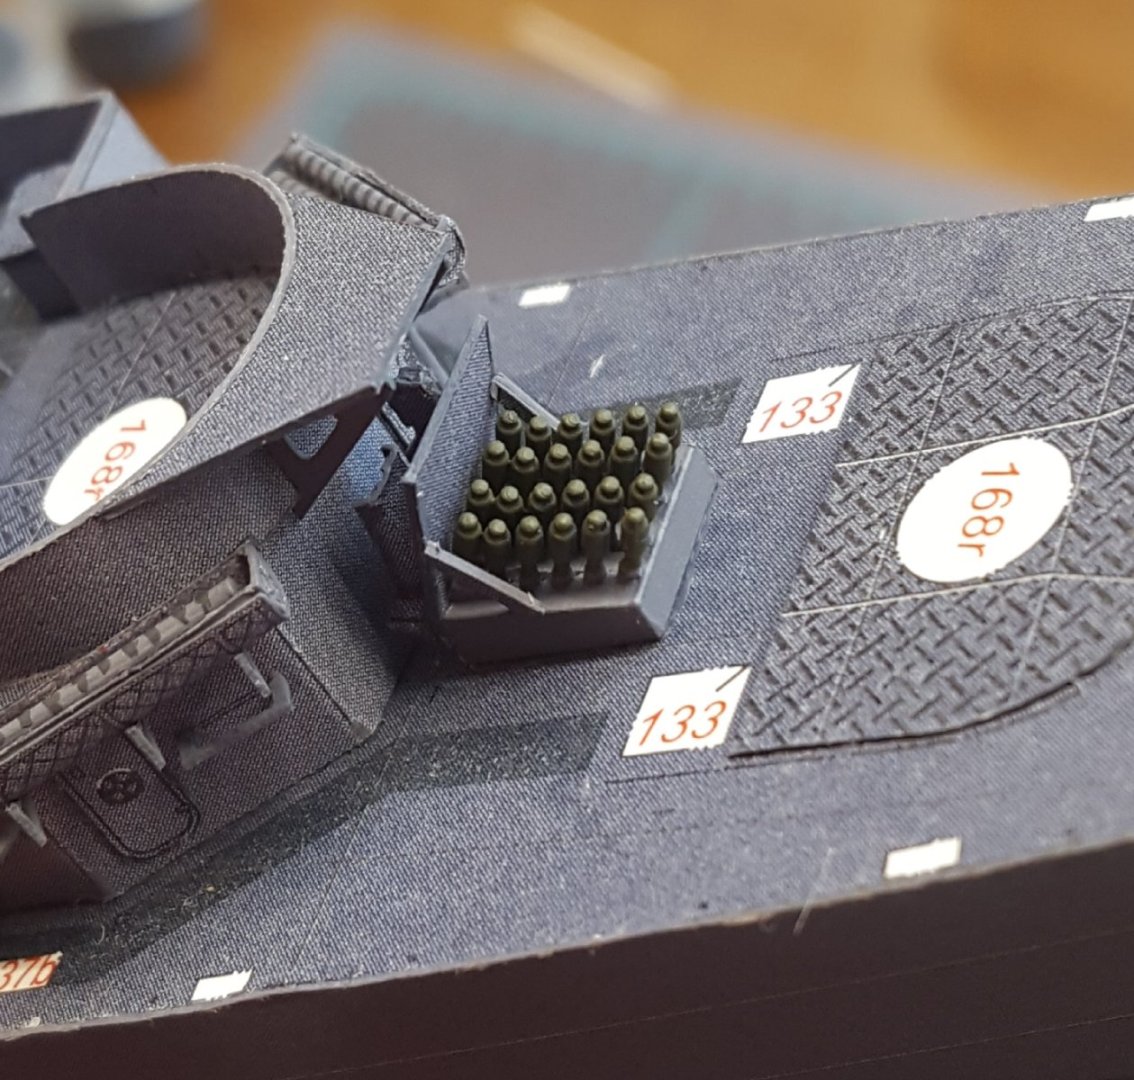
Step 22 (cont'd) Over the last few days, I have been replacing some of the already-installed paper parts with their 3D-printed counterparts. It hasn't been a cakewalk -- some of the parts are incredibly tiny. On two separate occasions, I thought I'd even lost a part, only to discover that it was stuck to the oil on a hand or finger, and too delicate to even notice! I also went back and painted over some of the red parts (valve handles, hoses, etc.) that folks in the know said should be gray. Once that was done, it was time to move on to new construction. Next up was the hedgehog mortar. Only the mortar bombs and base are resin, the rest is card. According to what I could find online, the bombs (technically missiles, according to the USN) were either gray or olive drab; I went for olive drab. With that installed, work can now commence on the forward gun tub.
- 331 replies
-
- 19
-
-
A masterpiece -- very well done, sir!
- 1,784 replies
-
- 7
-
-
- winchelsea
- Syren Ship Model Company
- (and 1 more)
-
Roter Löwe 1597 by Ondras71
ccoyle replied to Ondras71's topic in - Build logs for subjects built 1501 - 1750
Praying for a speedy recovery. Get plenty of rest! -
Henke, I hope your sessions will do you good and that you may soon rediscover your modeling mojo. Your model is lovely!