

dgbot
-
Posts
3,993 -
Joined
-
Last visited
Content Type
Profiles
Forums
Gallery
Events
Everything posted by dgbot
-

USS Essex by spongbob - American Frigate
dgbot replied to spongbob's topic in - Build logs for subjects built 1751 - 1800
You are starting well Bob. Your bulkheads look pretty good. If you have any questions just ask. David B -
I am finding out that the drawing for a 3d printer can be very hard on ones nerves. I remember when we got our waterjet at work ad the ork our supervisor had to do to learn how to draw for the program. and he was just doing a 2d drawing. I The home office had an extra CNC lathe for maching plastic ad almost sent it to us. He almost had a heart attack. David B
-
Pete I like the way your hull is coming out. You are giving me the courage to aske my brother to co into the storage and go throught all the books they boxed up and see if they packed my book on Herreshoff's yachts and maybe try and find the plans for one of them. David B.
-
Looking good Max. As for sails if you add more furl them otherwise forget about them. David B
-
Nice job Siggi, How did you make your lanterns inquiring minds would like to know. David B
-
I like the way you made your capstan Ed. A different way of doing it than what I have seen before. David B
- 3,618 replies
-
- 4
-

-
- young america
- clipper
- (and 1 more)
-
Nicely done om the weathering. It tells a tale of a vessel that has seen many days at sea. David B
- 83 replies
-
- 3
-
-
- sponge boat
- finished
- (and 1 more)
-
Old Man, I think it depends on the model and the modeler. Many years ago I took a trip up to the northern tip of Lake Michigan and dropped by the museum in Sturgeon Bay on the way. I saw many models of the vessels made there. Many of them were immaculate. However several were also put in dioramas then weathered. Case in point I saw a model of a dredge that was very nice and then saw that vessel in a diorama working a harbor. It was rusty and looked used. The weathering was well done. It all depends on what you are trying to achieve. So long as you are satisfied that is all that counts. David B
-
Buying an Expensive Kit and throwing most of it away
dgbot replied to pirozzi's topic in Wood ship model kits
I built several kits over the years and the main reason was the tools and equipment needed to do it any other way. I remember doing a Harvey by A&L the wood was dry brittle and warped and the fittings were horrid. This was when I started to bash the kit. I gave the finished model to my mother who was thrilled. Since then I have bashed every kit I got. However over the years I was able to accumulate the tools that would help me to replace or rebuild the parts I was not happy with. At the Chicago clubs we always encouraged kits and working with them. David B -
Nicely done Craig. Neat and crisp. Whenever I went to a show I always looked at the steel navy models as well as the sticks and strings. Both styles take a different set of knowledge and skill. And I have always admired them. Keep up the good work. David B
-
Looking good Marcus, wish I could inspect it up close. As for mixing colors have you tried a color wheel? David B
- 165 replies
-
- 4
-
-
- cape cod catboat
- Finished
- (and 1 more)
-
I concur with all that has been said Phil. And never be afraid of making a mistake or asking a question. If someone does neither then they have never learned or done anything. David B
- 2,625 replies
-
- 7
-
-
- kaiser wilhelm der grosse
- passenger steamer
- (and 1 more)
-
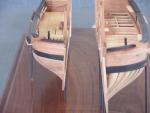
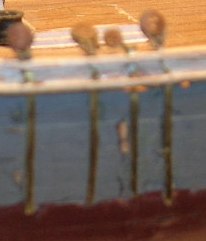
Nicely done Jack. however my advice would be to solder everything together before you install them on your model. I assume you used CA for gluing and that does not have the tensile strength for rigging. I found a photo of what I was talking about but it is pretty bad. David B
- 203 replies
-
- 4
-
-
- artesania latina
- marie jeanne
- (and 1 more)
-
Thanks for showing that photo Michael. I did not find the one I needed to show off the becket. David B
- 203 replies
-
- 4
-
-
- artesania latina
- marie jeanne
- (and 1 more)
-
Jack, I would follow Mobbsies advice. The strop would either be a wire loop pinched and soldered or a becket with a pin. My advice would be to take a look at photos of other craft of that time period and choose the one you need. David B
- 203 replies
-
- 5
-
-
- artesania latina
- marie jeanne
- (and 1 more)
-
I nave seen finished models of subs many times but rarely how they were built. I think I will pull up a chair and follow along. I hope to learn many things. David B
-
Harbor Freight Mini Wood Planes
dgbot replied to grsjax's topic in Modeling tools and Workshop Equipment
A sharp mini plane is very useful in the shaping and finishing a part when you cannot use a blade or a sanding stick. David B -
Cutter Cheerful 1806 by rafine - FINISHED
dgbot replied to rafine's topic in - Build logs for subjects built 1801 - 1850
Nice job on your rudder Bob. A bit of advice on enhancing a rudder the next time you make one. After shaping it take a very thin pen and a straight edge and draw lines along the length of the piece. David B- 525 replies
-
- 3
-
-
- cheerful
- Syren Ship Model Company
- (and 1 more)
-
Back in 2012 The Naval War College gathered up all the communications and letters of Adm. Chester Nimitz. from the attack on Pearl Harbor to just before the Japanese surrender and digitized them. This is a fantastic read and can give one insights on how the war in the Pacific was carried out. plus what motivated Nimitz and why He did things. These documents are published in 8 volumes as PDFs so they can be downloaded easily. http://www.ibiblio.org/anrs/graybook.html David B
- 1 reply
-
- 5
-
-
You have done a lovely piece of work so far Mark. I can just imagine how the hull will look when you put a finish on it. David B
-
You guys have me scared. I have not seen my lathe for a long time My sister packed it so I know it is around someplace. I wonder how bad it has gotten. I used to use a good paste wax used for cars. David B
-
Do not worry Greg, to your 10 yr old the battle with the forces of evil can be tiring and he will have to rest a bit before he can continue. As for the props, have you experimented with reducing the blade size? David B
-
What I have done is to take the angle off the plans and make a fixture. This would help me to make the hole. plus I would increase the diameter of the hole so I could make adjustments.