HOLIDAY DONATION DRIVE - SUPPORT MSW - DO YOUR PART TO KEEP THIS GREAT FORUM GOING! (Only 51 donations so far out of 49,000 members - C'mon guys!)
×


gjdale
-
Posts
4,891 -
Joined
-
Last visited
Content Type
Profiles
Forums
Gallery
Events
Everything posted by gjdale
-
 Great to see this log back up and running Slog. Looks like you have your work cut out for you with all the brass etched detail. Should build into a fantastic model though.
 -
Looking really good there Bug. I like the finish you have achieved.
-
Thank you all for the very kind comments. The repair job seems to be holding okay. B.E. - I think a Board of Inquiry would make a finding of extreme negligence and proceed straight to Court Martial. Sherry - I hope you are right about the rule of threes! Mobbsie - send him on down. I could use an extra pair of hands when it comes to belaying some of these lines!!!
-
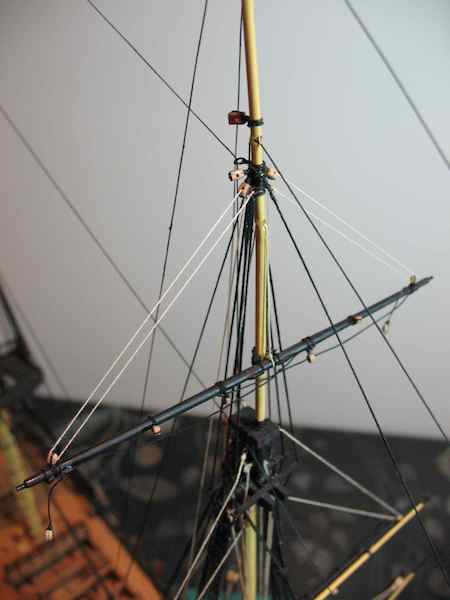
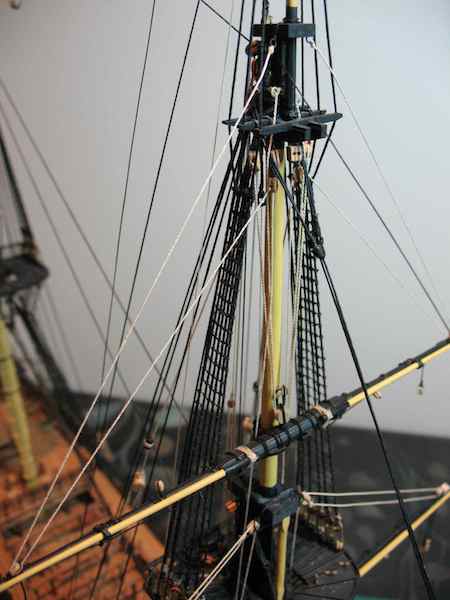
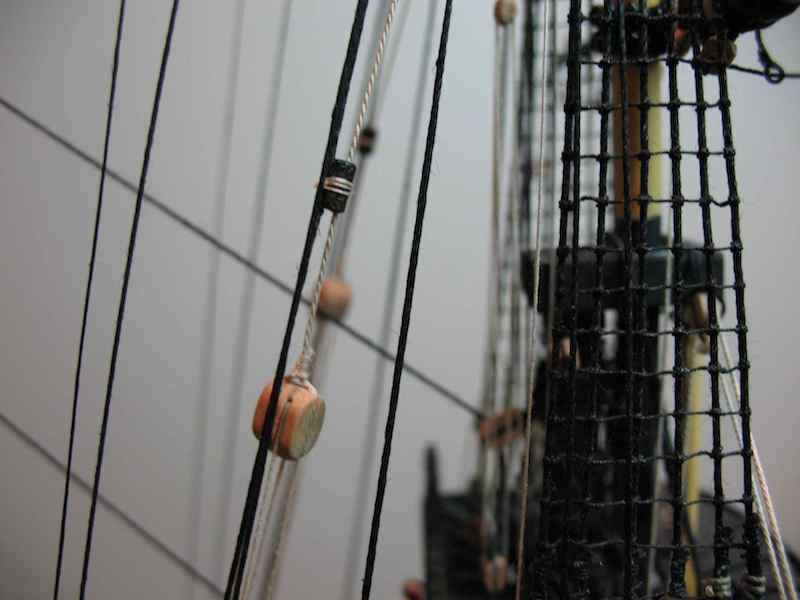
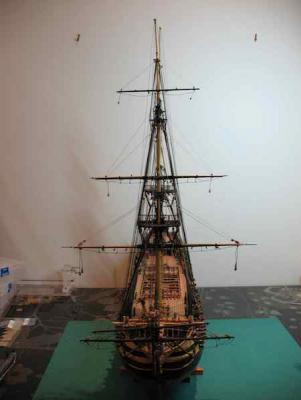
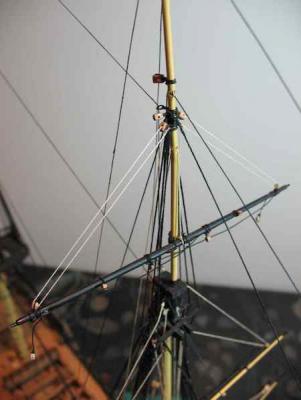
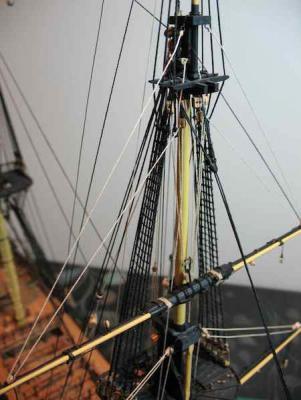
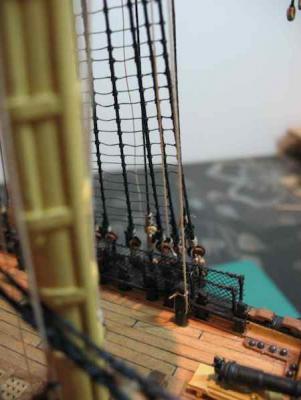
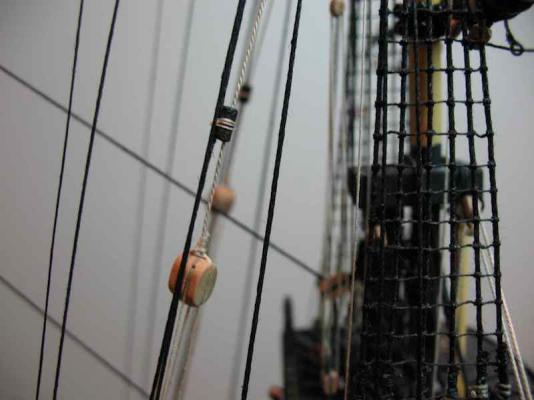
Thanks Mobbsie, Lawrence, Augie, Sjors, Joe, Mark, Mike and Mick, and also for all the "likes". Well, I'm finally back to the stage I thought I was at some weeks ago! But it wasn't without mishap ....... As I was attaching one part of the rigging today, I managed to knock the Fore Topgallant Mast and snap it off - again . It actually broke in a different place to the last time, proving that my repair job last time was stronger than the original mast. This time it broke right across the hole drilled to simulate the sheave for the topgallant yard tye, making repair a little tricky. I used the same method with 2-part epoxy and it seems to be holding alright thus far. In re-mounting the yards, I decided to use Gil's idea of pinning the yards to the mast with a small brass/copper wire pin. This worked even better than I thought it would and makes the process a lot easier, especially when applying tension to the lifts of the topsail and topgallant yards. Thanks Gil So here's a few shots to show the current state of play........ First up an overview. You will see that I haven't yet decided how I'm going to finish off the Yard Tackle Pendants on the lower yard. This is the Fore Topagallant Yard. If you look closely you will see the repair job where the tye runs through the mast. A general shot showing the Fore Topsail Yard: This shot shows the Shroud Cleats being used to secure the fall of the Topsail Lifts: And this is a close-up showing the Shroud Trucks in use on the Topsail Yard tyes: I think I'm now ready to do this all over on the Main Mast........
-
Sorry to hear it got to this point Mark, but think of it as just another "do-over" (only on a larger scale)!
-
Oh Sherry! I'm so sorry to hear of that. The only consolation I can give is that wood is very forgiving and very repairable. You might recall that Danny had a similar oops with his Vulture a while back and managed to create an undetectable repair job. Good luck with the repairs - I'm sure you'll get plenty of advice if you need it.
-
Hi Vince, Nice progress. If you are going to replace any timber at all, I suggest you contact Jeff at Hobbymill there in the US. (Link to the website on the home page of MSW). Jeff mills all his own timber and will provide you with whatever you want milled to exact dimensions. His customer service is second to none and his prices are reasonable. If he doesn't have Tanganyika, he will give you some alternative suggestions. And believe me, he knows his stuff. If you email him, he will respond promptly with advice and questions to make sure you get exactly what you want/need. While not wanting to bag Modellers Shipyard in Australia, I will just observe that they are essentially a mail order company. Timber that they sell is generally imported from kit manufacturers overseas (eg AL). I know this from first hand experience. I live in Australia, but buy all my timber now from Hobbymill in the US.
-
Excellent work Mobbsie. Your ratlines look superb.
- 1,279 replies
-
- 1
-

-
- agamemnon
- caldercraft
- (and 1 more)
-
If the upper row of slots didn't line up properly, it's unlikely that the other two will. I would suggest you choose one around midships and use that as your "datum" and then make sure that the others are either a consistent distance below the upper ports, or place a batten (temporary) along the top or bottom of your new datum port to ensure a fair line. The use of a batten is probably how I'd go with this, but check distances as well and also stand back and see if the line is pleasing to the eye.
-
Looks good from here John
-
That's the right way to go about it Sean (if you REALLY do want to use those metal ports ). Wish I could convince you otherwise, but it's your build and your choice. Making sure they get placed at the correct height is critical here. What approach are you planning for aligning the ports on the lower gun decks, with the false guns?
-
I'd have to say I think the full amount is a little overwhelming Gil - I'd vote for the original.
-
Just excellent Andy. Popeye - I'd like to be a fly on the wall for THAT conversation!
- 382 replies
-
- 4
-
-
- stadacona
- sylvan scale models
- (and 1 more)
-
Very nice work Nick. All looks very clean and precise. Your little jig for helping rig the catharpins looks like an excellent idea.
-
Craig, Perhaps I should have prefaced my comments with a disclaimer as I have never built an AL kit. My comments were based on experience with other kits from a variety of manufacturers. I just assumed they would all do it this way (which seemed logical to me). It may be that AL have their own way of listing kit inventory.
-
Think I'll pull up a chair for this one too. Pass the popcorn please Mark.
-
Fantastic Gil. Thanks for sharing your technique.
-
ancre LE BONHOMME RICHARD by Jeronimo - FINISHED
gjdale replied to Jeronimo's topic in - Build logs for subjects built 1751 - 1800
Beautiful, as always, Karl.- 662 replies
-
- 1
-
-
- bonhomme richard
- frigate
- (and 1 more)
-
Impressive work Andy, even if it does get a little repetitive for you.
- 382 replies
-
- 1
-
-
- stadacona
- sylvan scale models
- (and 1 more)
-
Or, you could make such a mess in the lounge room that the Admiral actually orders you to make whatever changes are necessary in the guest room (thus re-named as the shipyard). Worked for me....... Good to hear you've got a proper set-up in the garage too - you'll make use of that as you progress, especially if you start scratching some parts.
-
Lovely planking job there Augie. If you get bored with football, try tuning in to the Cricket and watch us giving the Poms a severe thrashing (which they thoroughly deserve!) Don't worry if you don't understand the game - you'll soon pick up that we're winning, and that alone will provide many hours of satisfaction. :D
- 2,191 replies
-
- 3
-
-
- confederacy
- Model Shipways
- (and 1 more)
-
Great result Mark. See, I just knew that you'd come up with an inspirational solution! Gaps? What gaps? I see nothing! (To quote SGT Schulz......if you remember that show......)
-
I've used pretty much the same method for blackening as Bob described, although I do thoroughly clean the parts first using firstly white vinegar, and then acetone. Might be overkill but it works. I also use the solution uncut (100%). Rinsing thoroughly in water (I use distilled water) afterwards is very important to halt the chemical reaction. I've previously had all sorts of problems with chemical blackening, but since I switched to the Casey Birchwood product after a recommendation from Danny Vadas, I've had no problems at all. And the best thing about chemical blackening........there is no waiting for the paint to dry!
- 1,477 replies
-
- 2
-
-
- essex
- model shipways
- (and 1 more)