HOLIDAY DONATION DRIVE - SUPPORT MSW - DO YOUR PART TO KEEP THIS GREAT FORUM GOING! (89 donations so far out of 49,000 members - C'mon guys!)
×


Mirabell61
-
Posts
7,409 -
Joined
-
Last visited
Content Type
Profiles
Forums
Gallery
Events
Everything posted by Mirabell61
-
 Hi B.E. just looked up your Pickle build once again, what a lovely model. The Color composing, deck planking, coppering, deckhousings and -hatches, all Fitting out deatails look so authentic and great Nils
 -
Thanks to both Bob + Bob for your Kind words Nils
-
A beautiful build Sherry Well done !! Nils
-
Thank you Nigel, for you nice and appreciative words I will now concentrate on my Pegasus again... Nils
-
Beautiful build Doug, a wonderfull sight your Brigg Supply Nils
- 92 replies
-
- 1
-

-
- finished
- caldercraft
- (and 1 more)
-
Mauro, this Hand sewing of yours is amazing, so accurate and precise every stitch the same distance and the fastening of the bolt rope tops all... Well done !! Nils
-
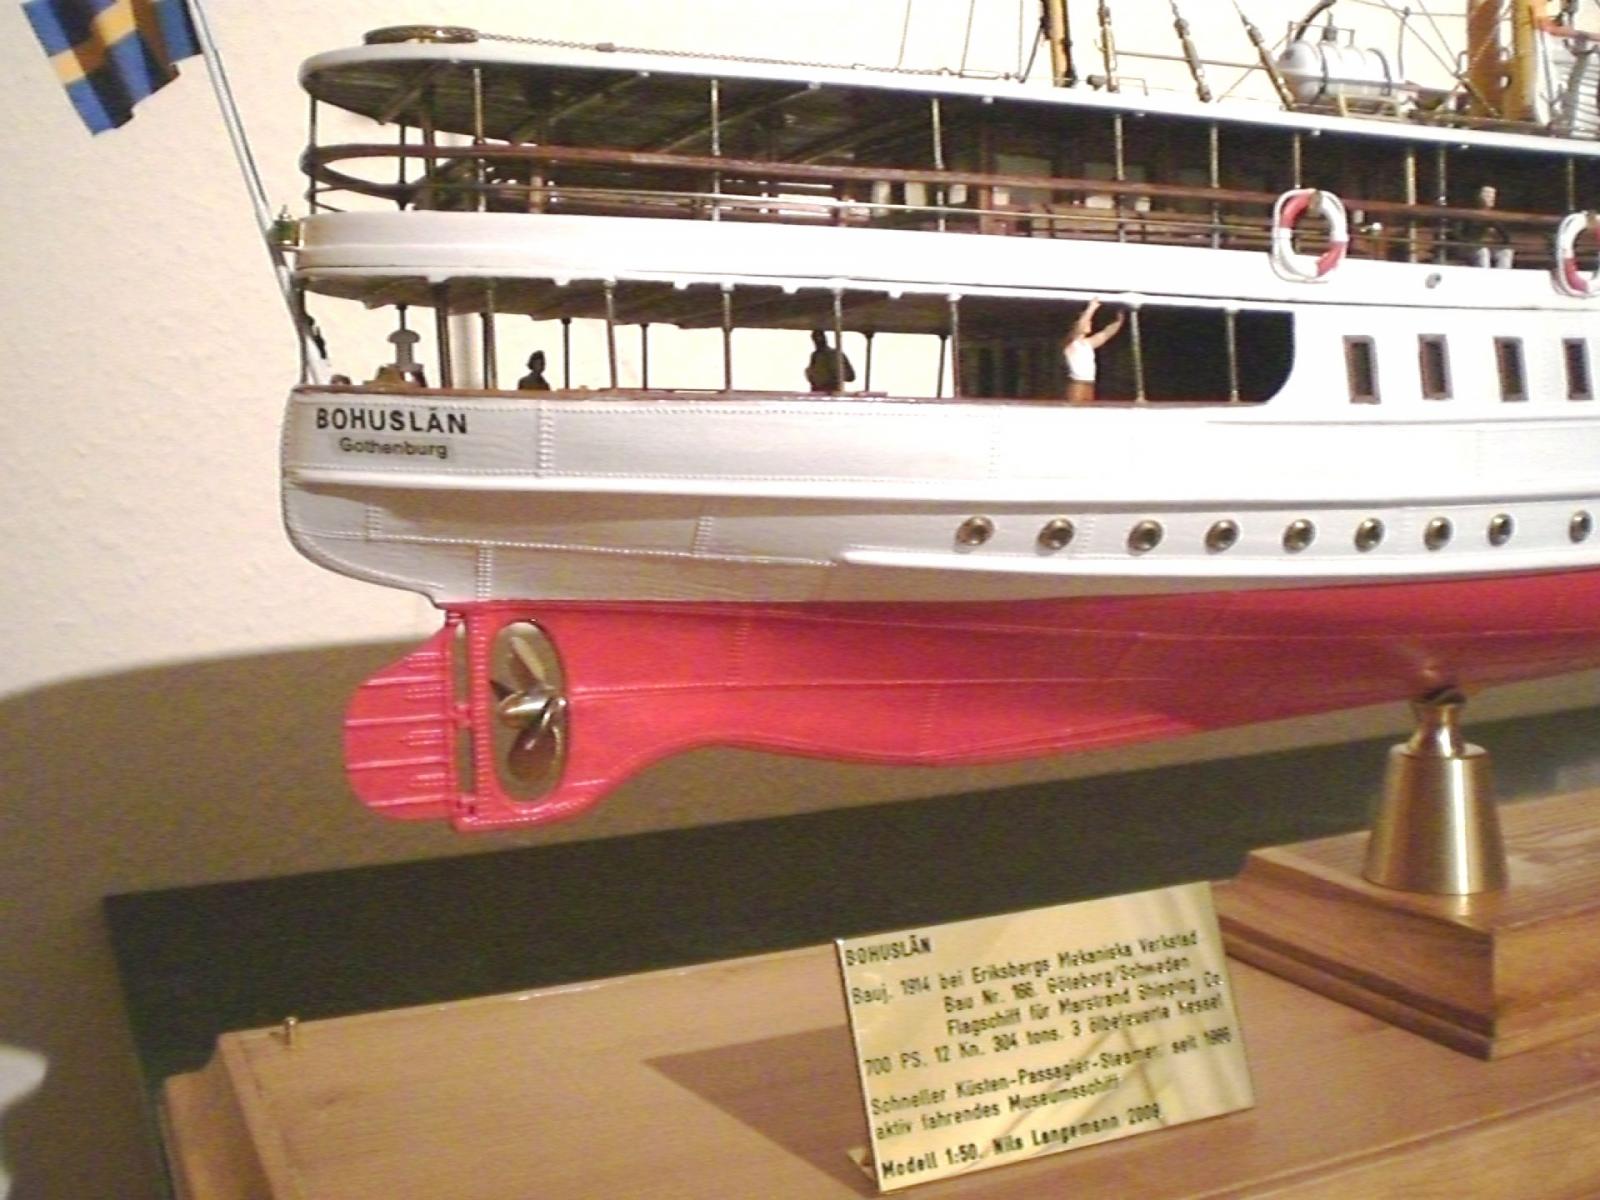
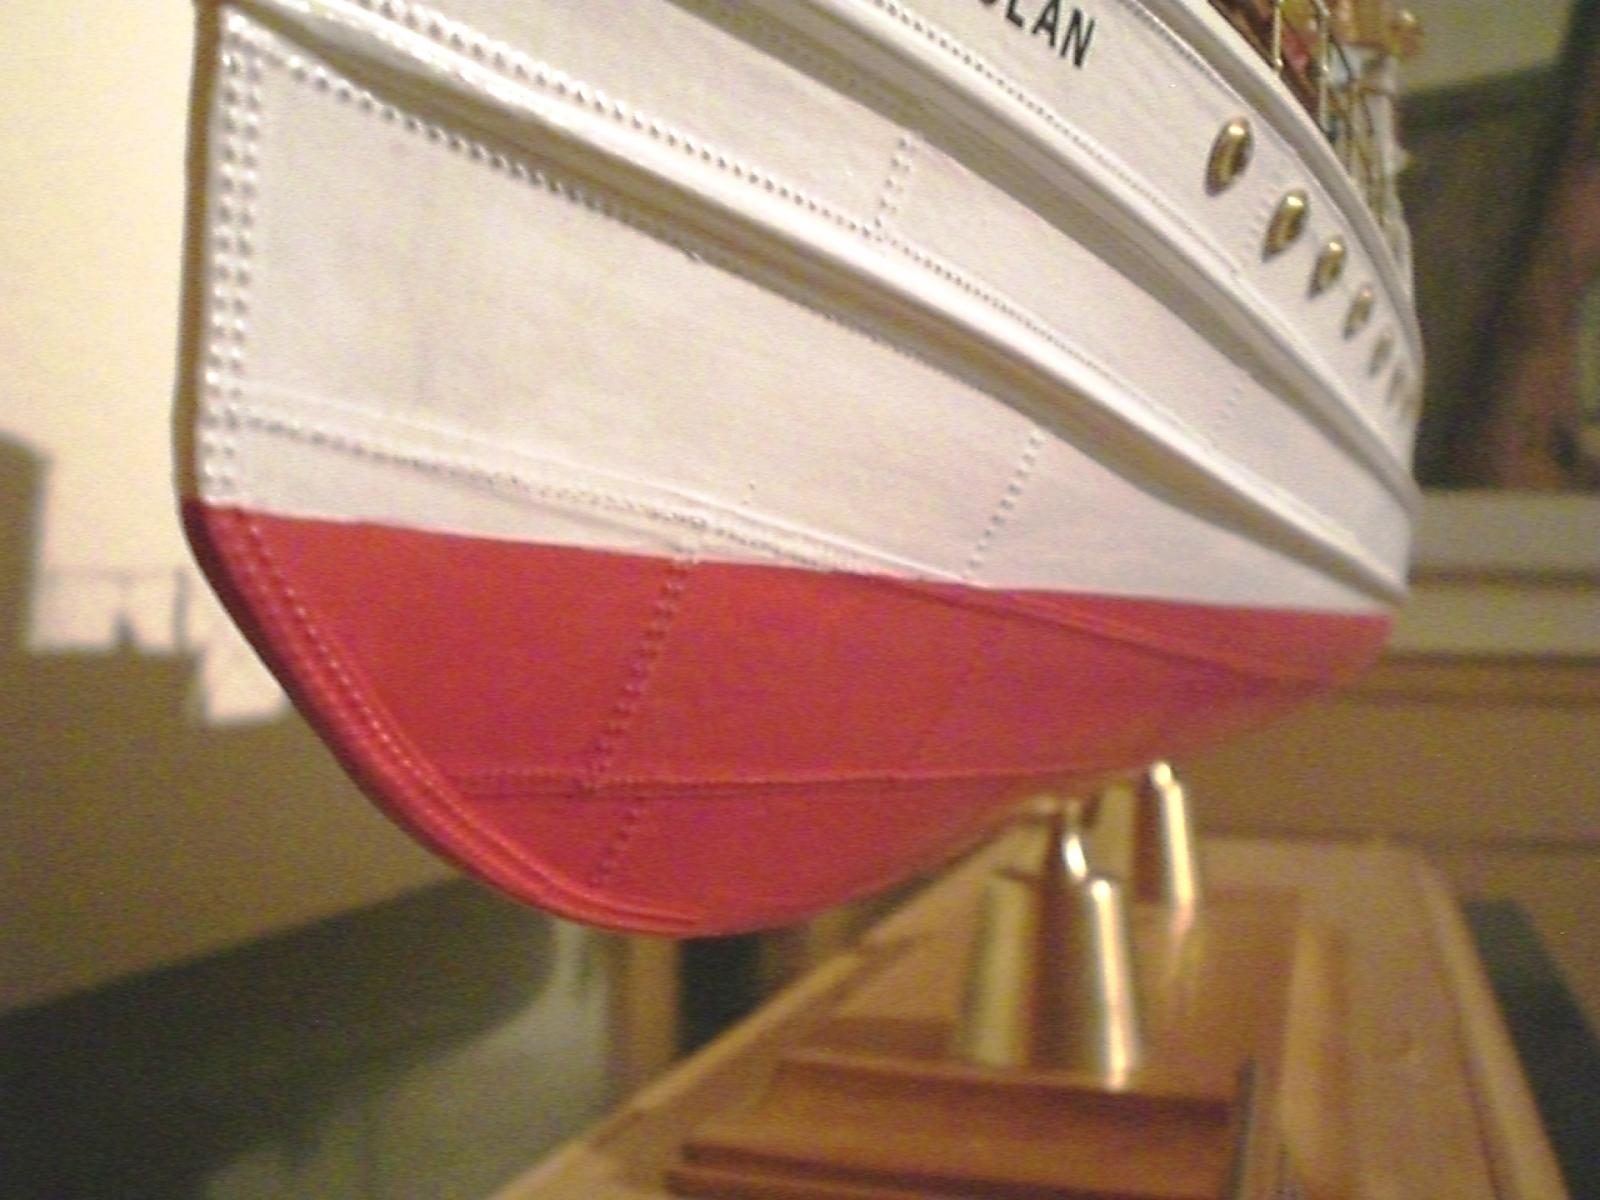
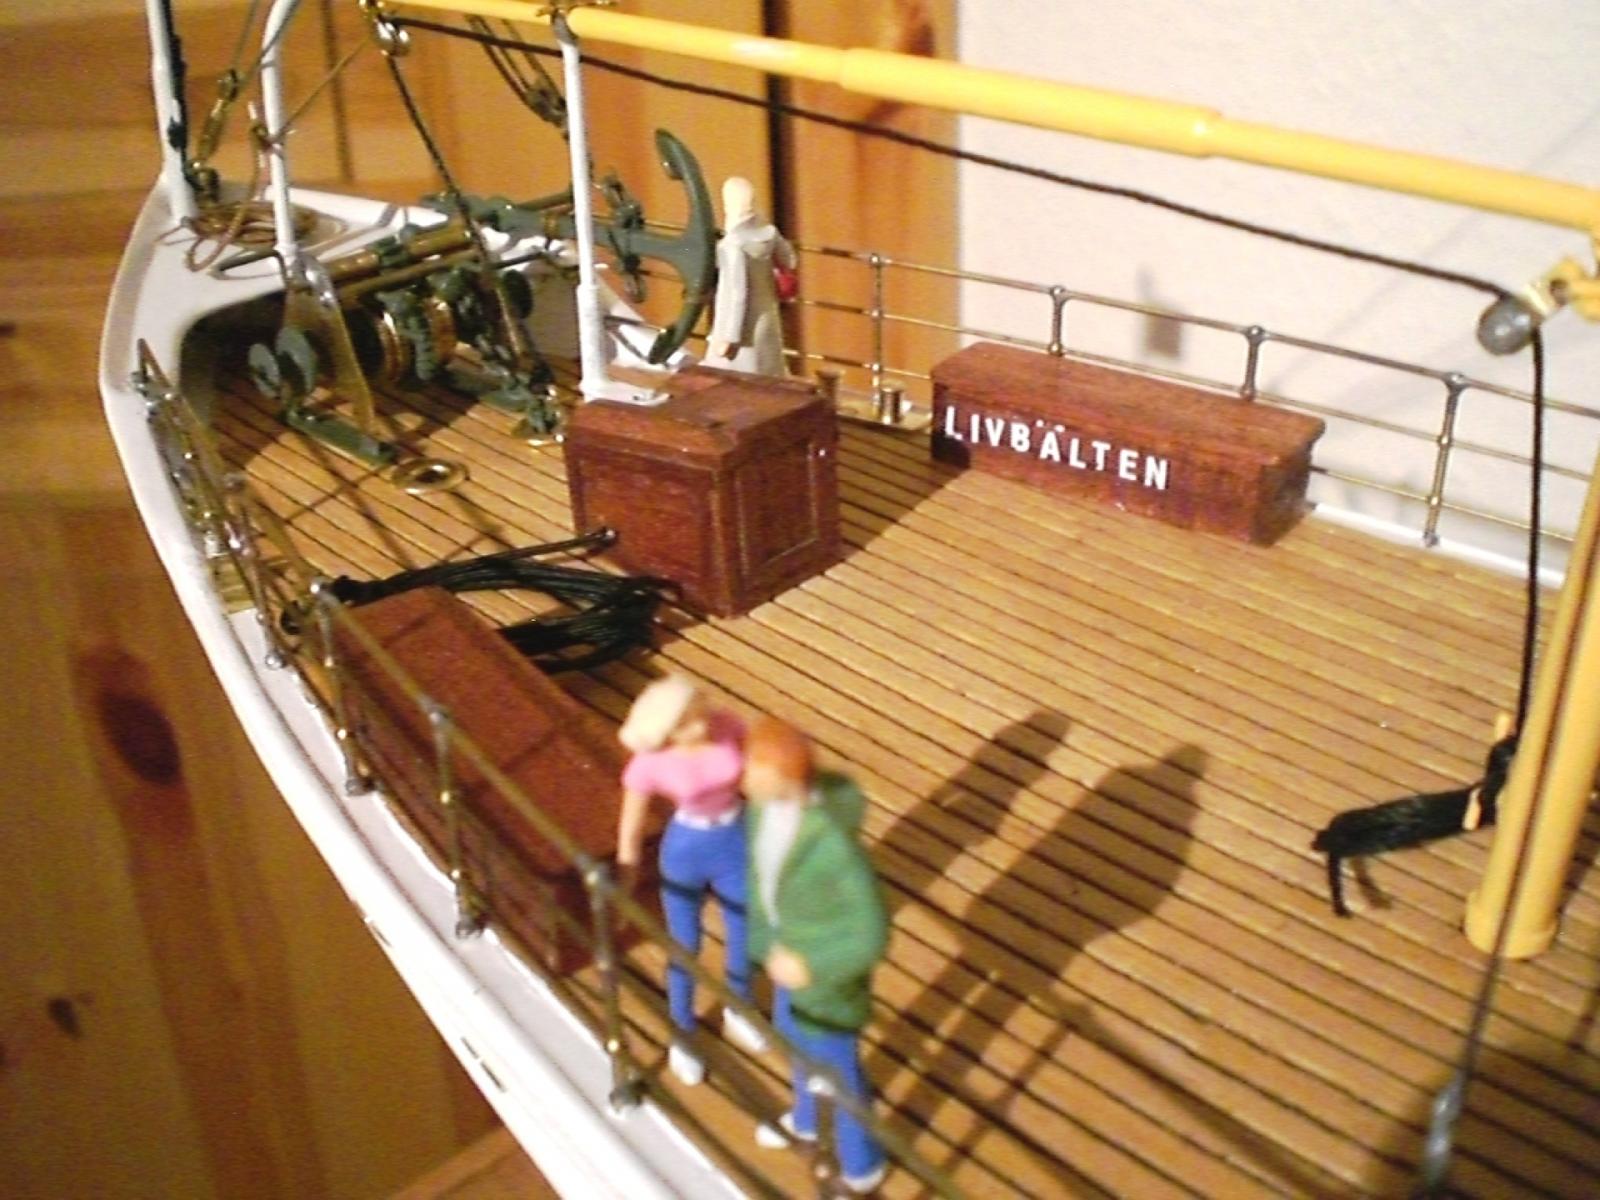
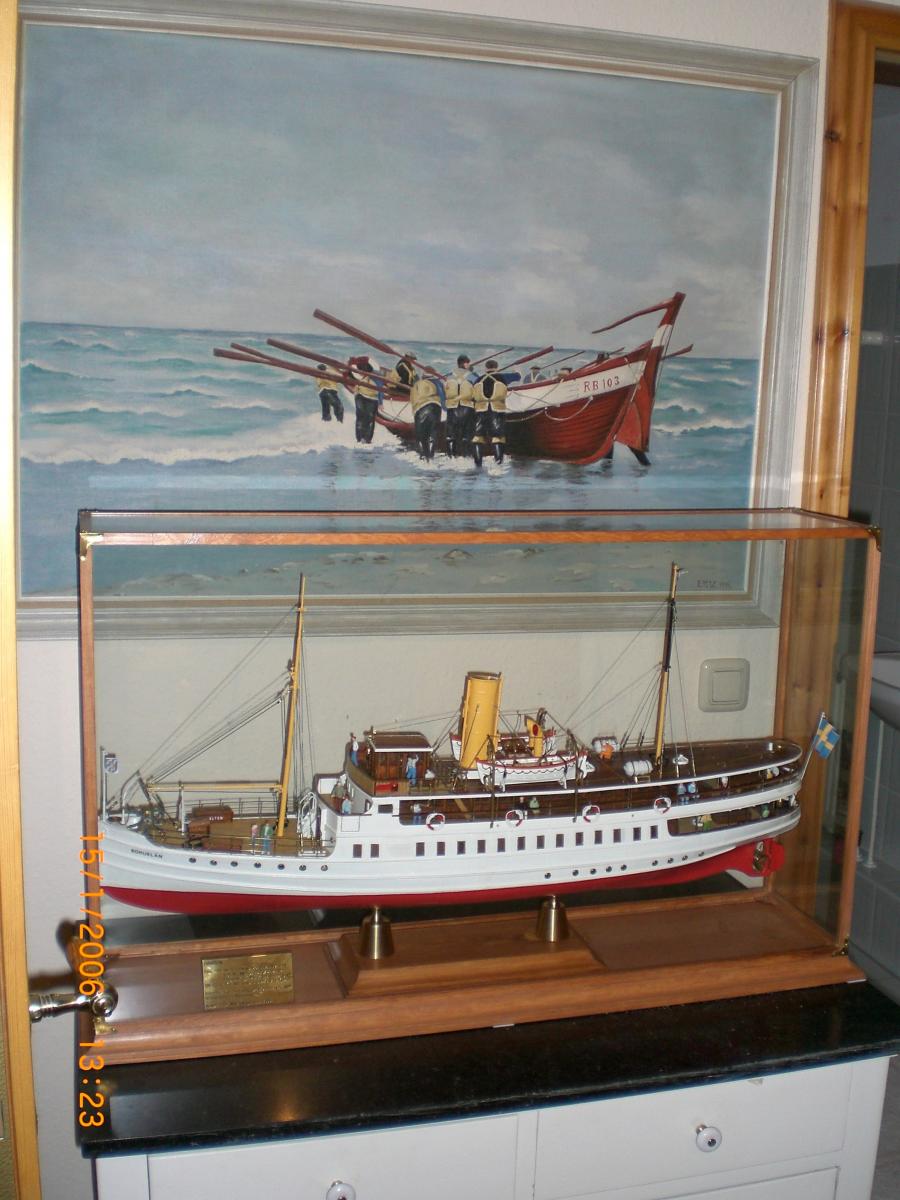
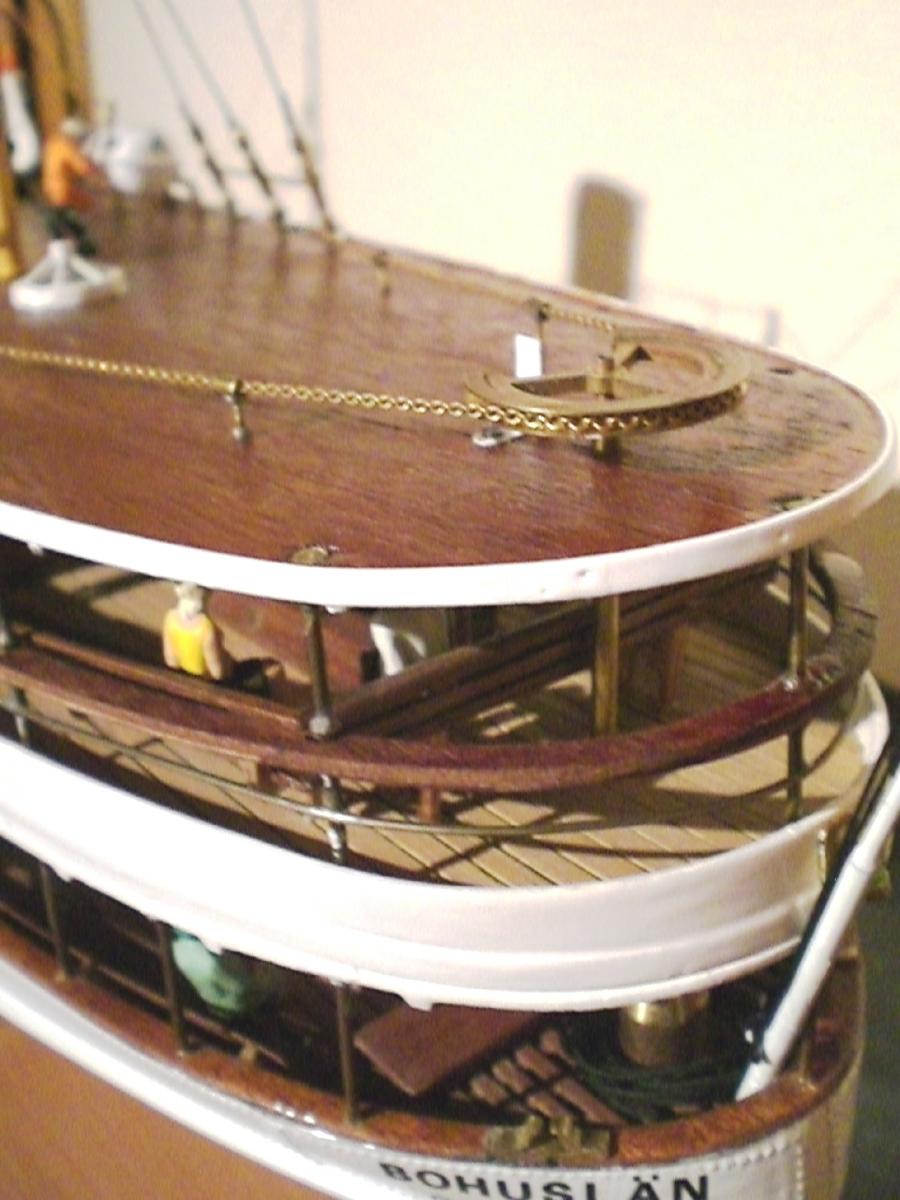
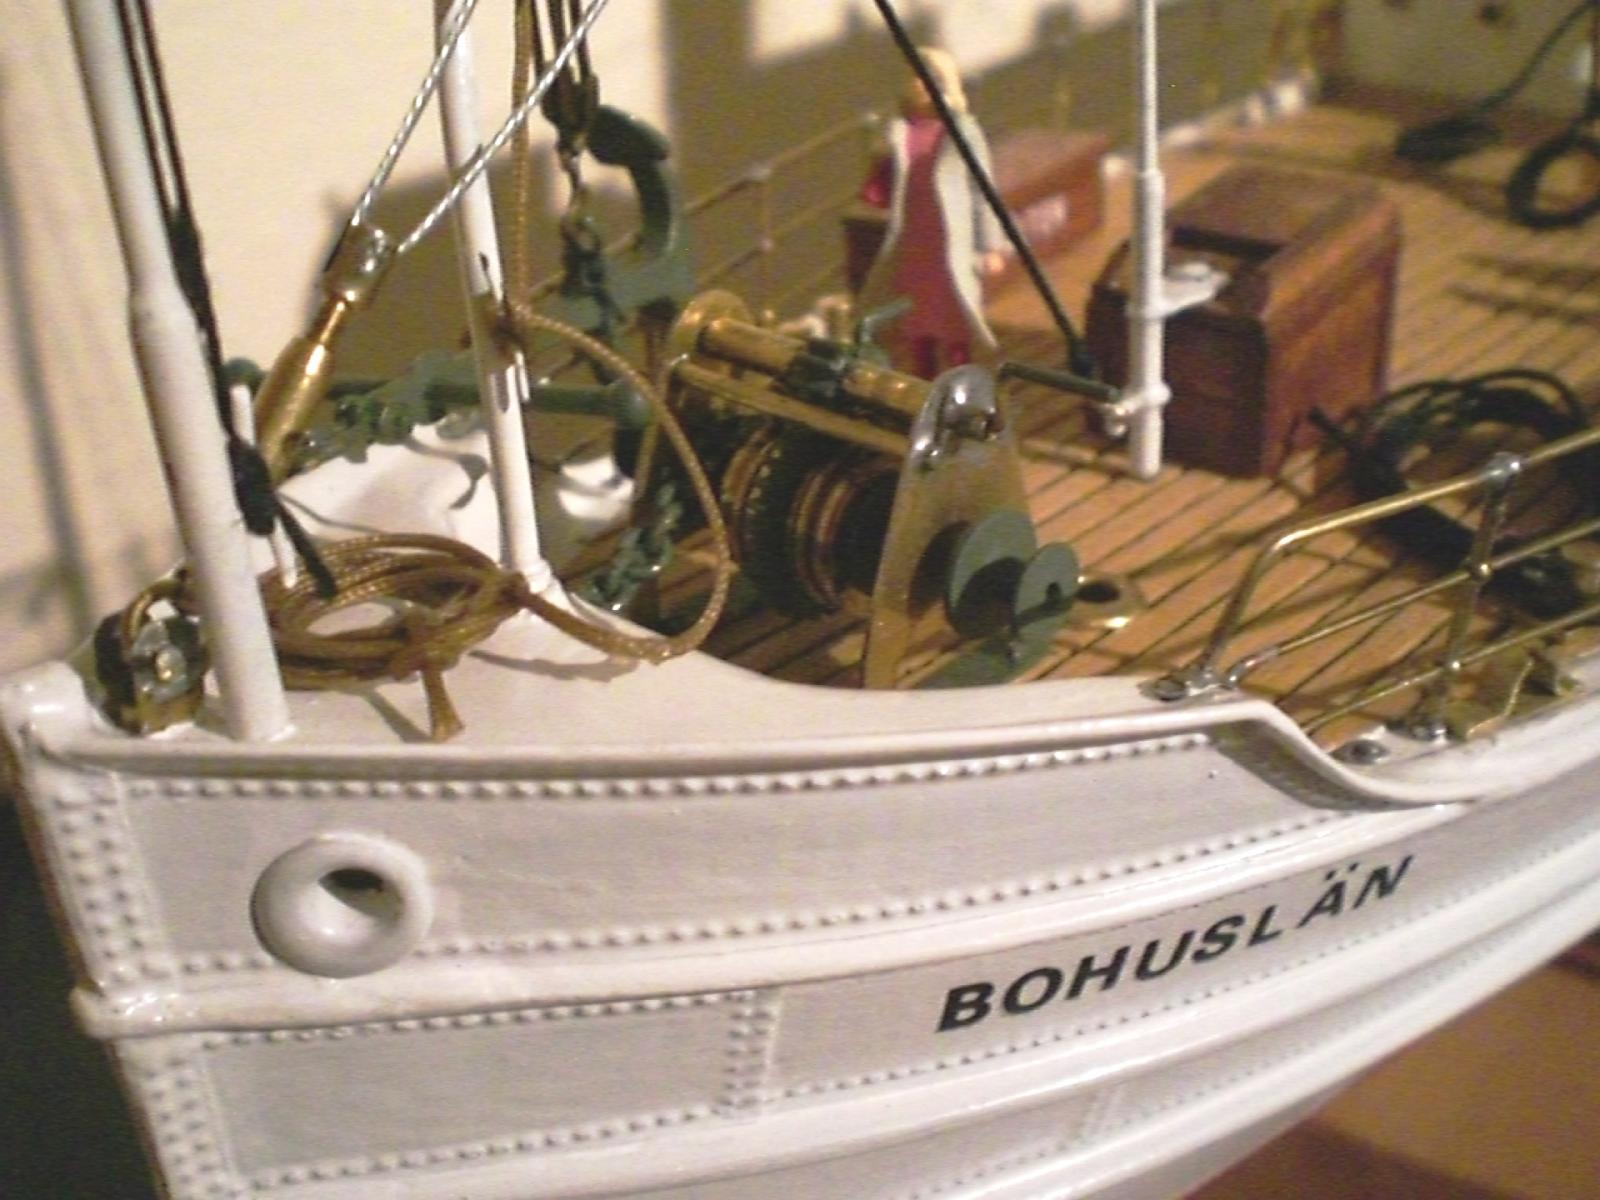
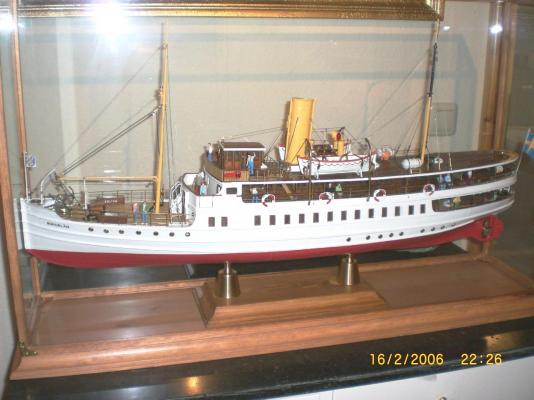
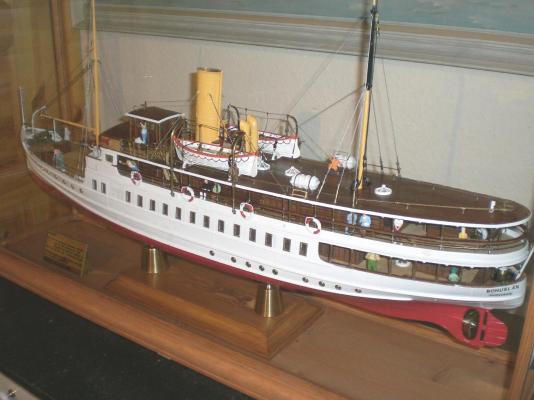
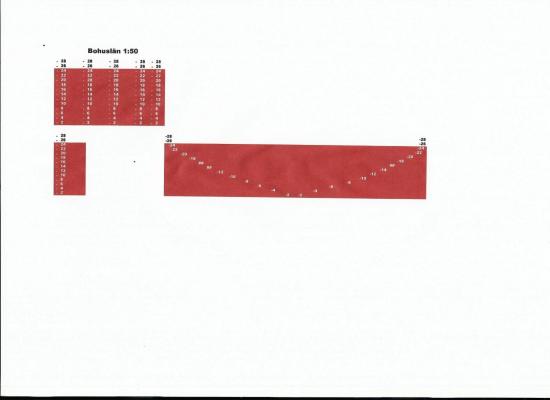
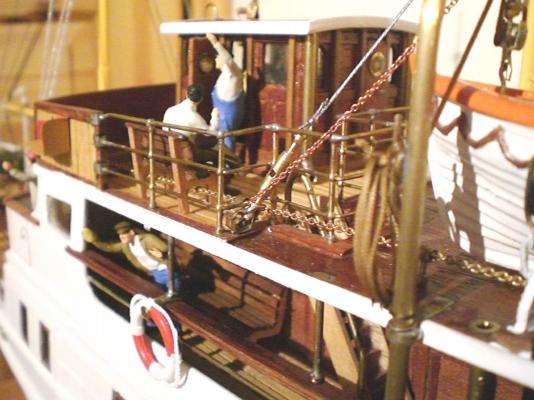
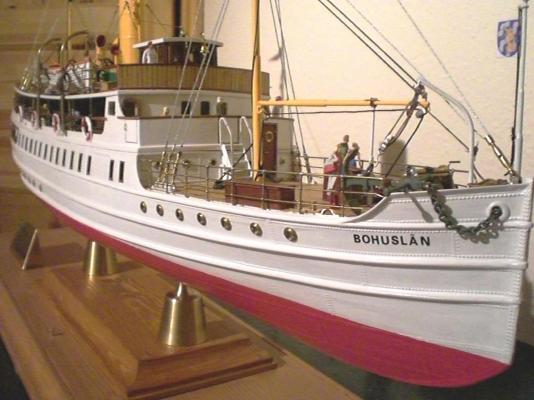
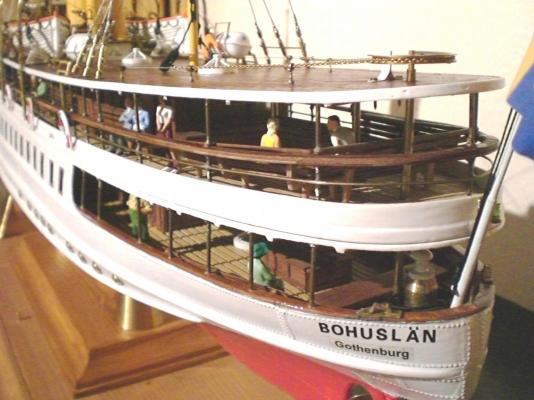
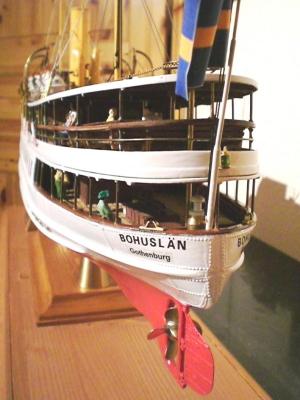
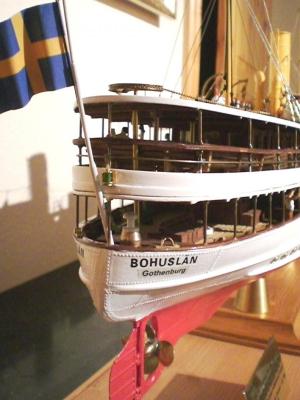
Build log part 9 this is the last part of this build, although the are some Little things I would like to add, or to Change next time I open the glass case I was quite happy that the glass case fitted exactly on the wardrobe it is Standing on the brass data plate is fitted within the case Impression of the plating bow area and Stern area this Position is concentrating, nearly interfearing on railing, funnel stay, steering chain, Davit tackle, but all is properly fastend to it own tackle point foredeck is a nice Meeting place for Young couples foreseen anchoring place the depth marking is made with regular Mirosoft Excel and to be printed out on one side adhesive transparent foil, or on Photopaper. Shall save this up to the next opening of the glass case, when the sternlight is also to be changed from green to White. I hope the presentation of my Bohuslän build log was liked, even though the framing, planking and hull building was not shown in this case due to lack of photos Auf wiedersehen Nils


- 70 replies
-
- 23
-
-
Great tutorial Karl, I never used Silicon moulds yet, but this is very encouraging, wonderful gunbarrels Nils
- 662 replies
-
- 2
-
-
- bonhomme richard
- frigate
- (and 1 more)
-
thank you Bob, I got her out of the dark when I was looking for an object to do Trial metal plating on. I was satisfied with the result and transfered the technique to the other follow builds. At that time I recognized what a gem that old Lady was, and I decided, it was definately worth finalising her. Many of the original kit parts had gone lost, the Panels for cutting out the small parts were wavy, but the lifeboats I built in the early beginning, and they were carefully wrapped and secured in a drawer in my bedroom, and I still had the overview drawing Nils
-
Nery nice build Ships88, your Peregrine Looks great thanks for reposting and for sharing These Pictures Nils
-
Joe, the compressed building time was appr. 1,5 years but because many of the started parts have been laying around idle in boxes, on cupboards, it spread over a period of at least 10 years, it was nearly forgotten by myself Nils Thanks David For your comment Nils
-
Thank you for your words Joe, I am glad you like this old Steamer, it is quite a rare kit... Nils
-
Bob, well done painting on the Stern decoration, precise and accurate ! Nils
-
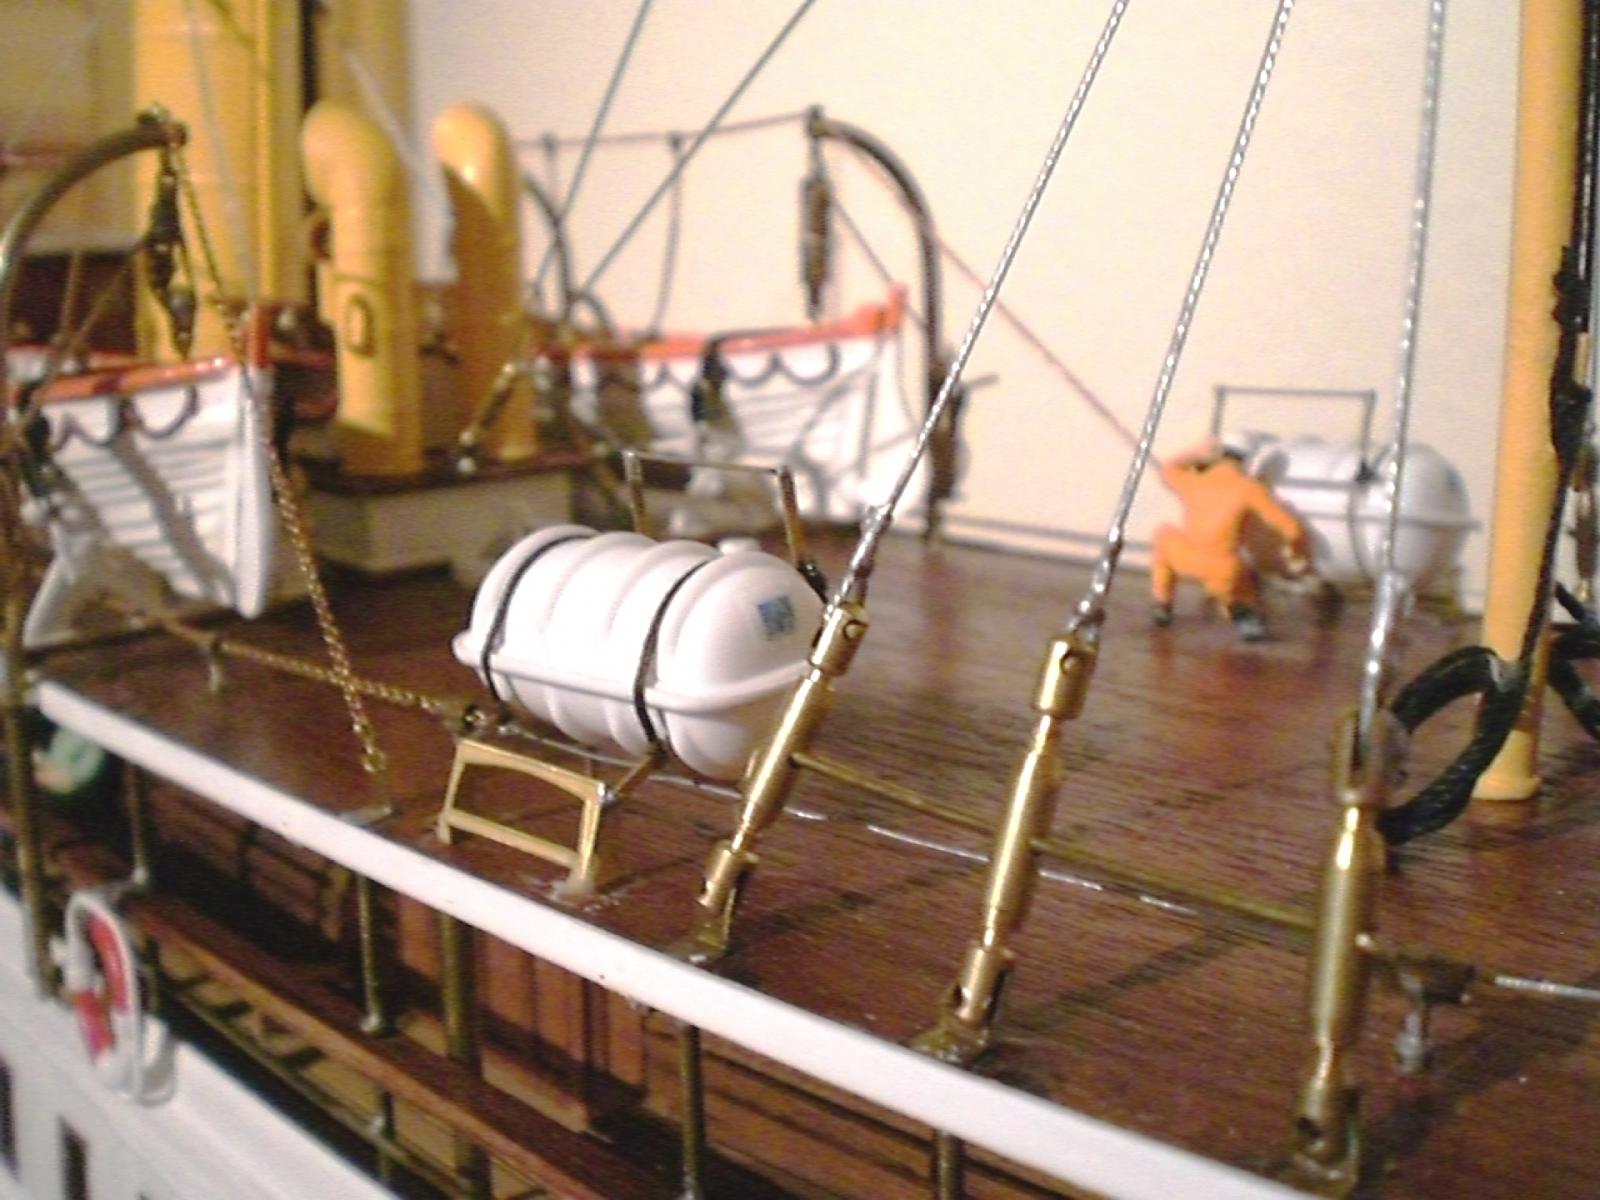
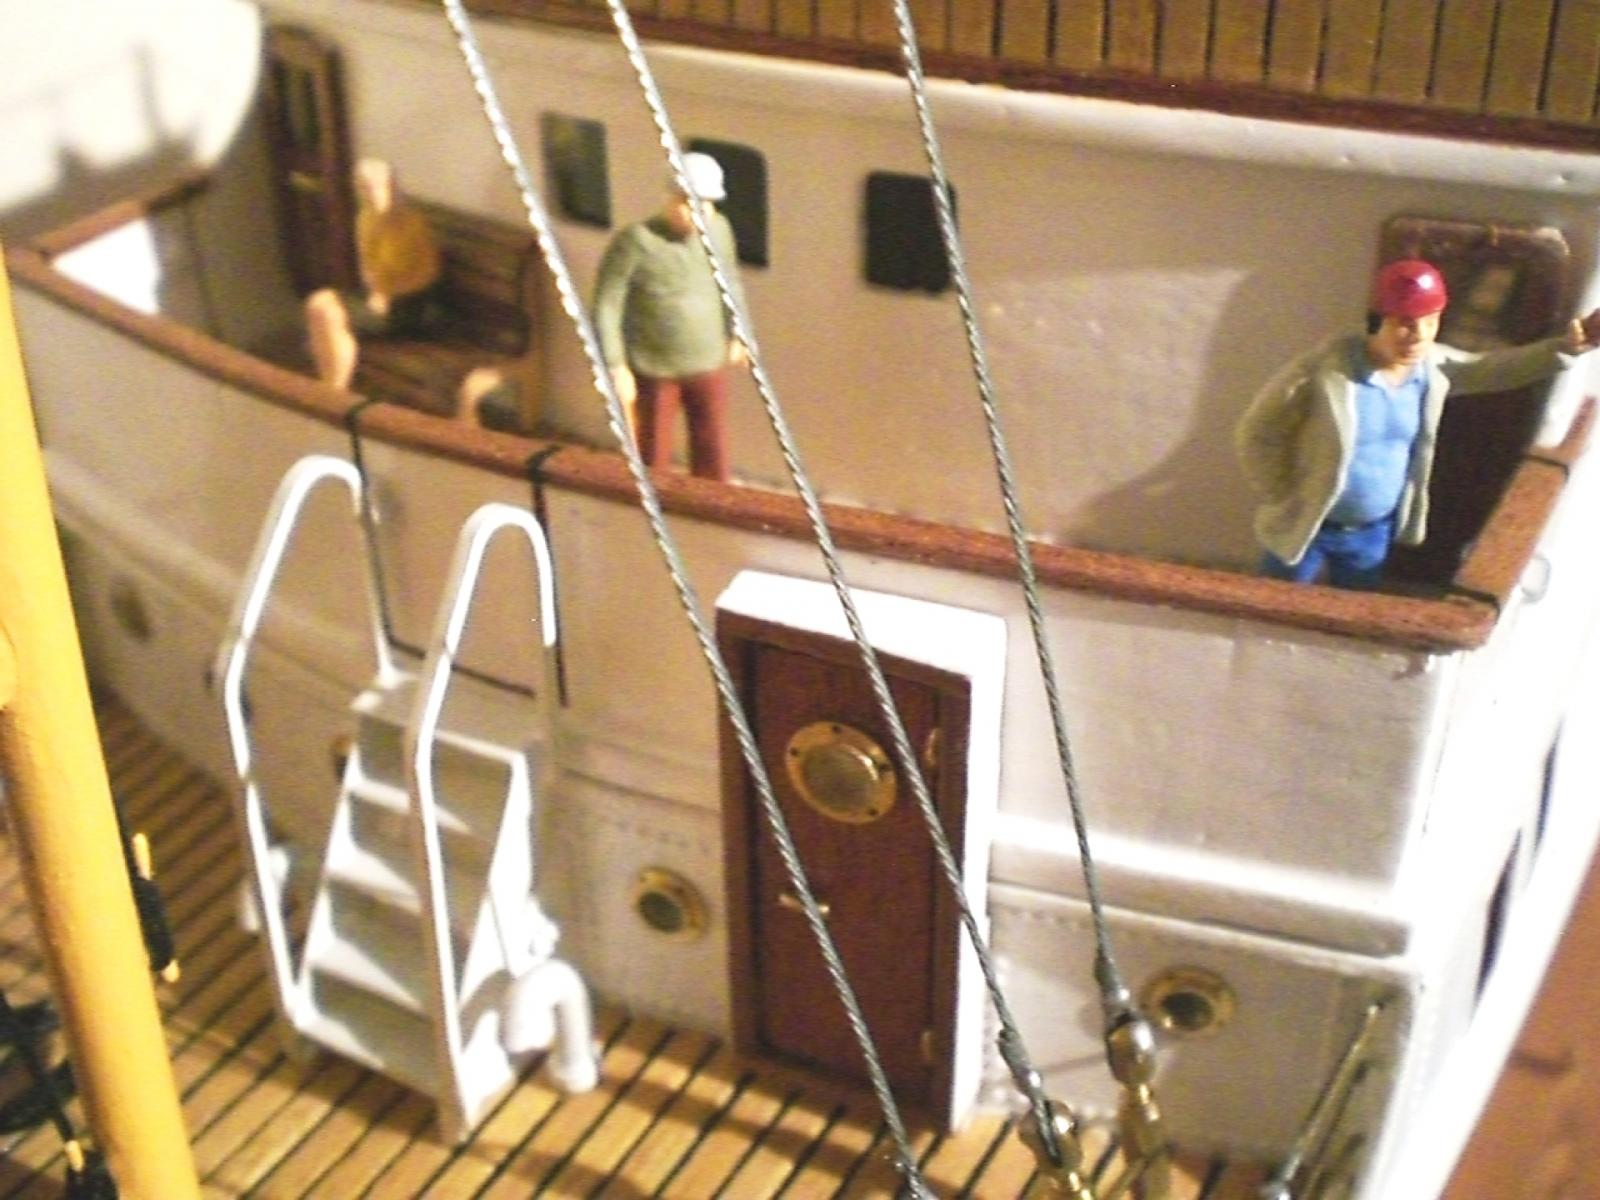
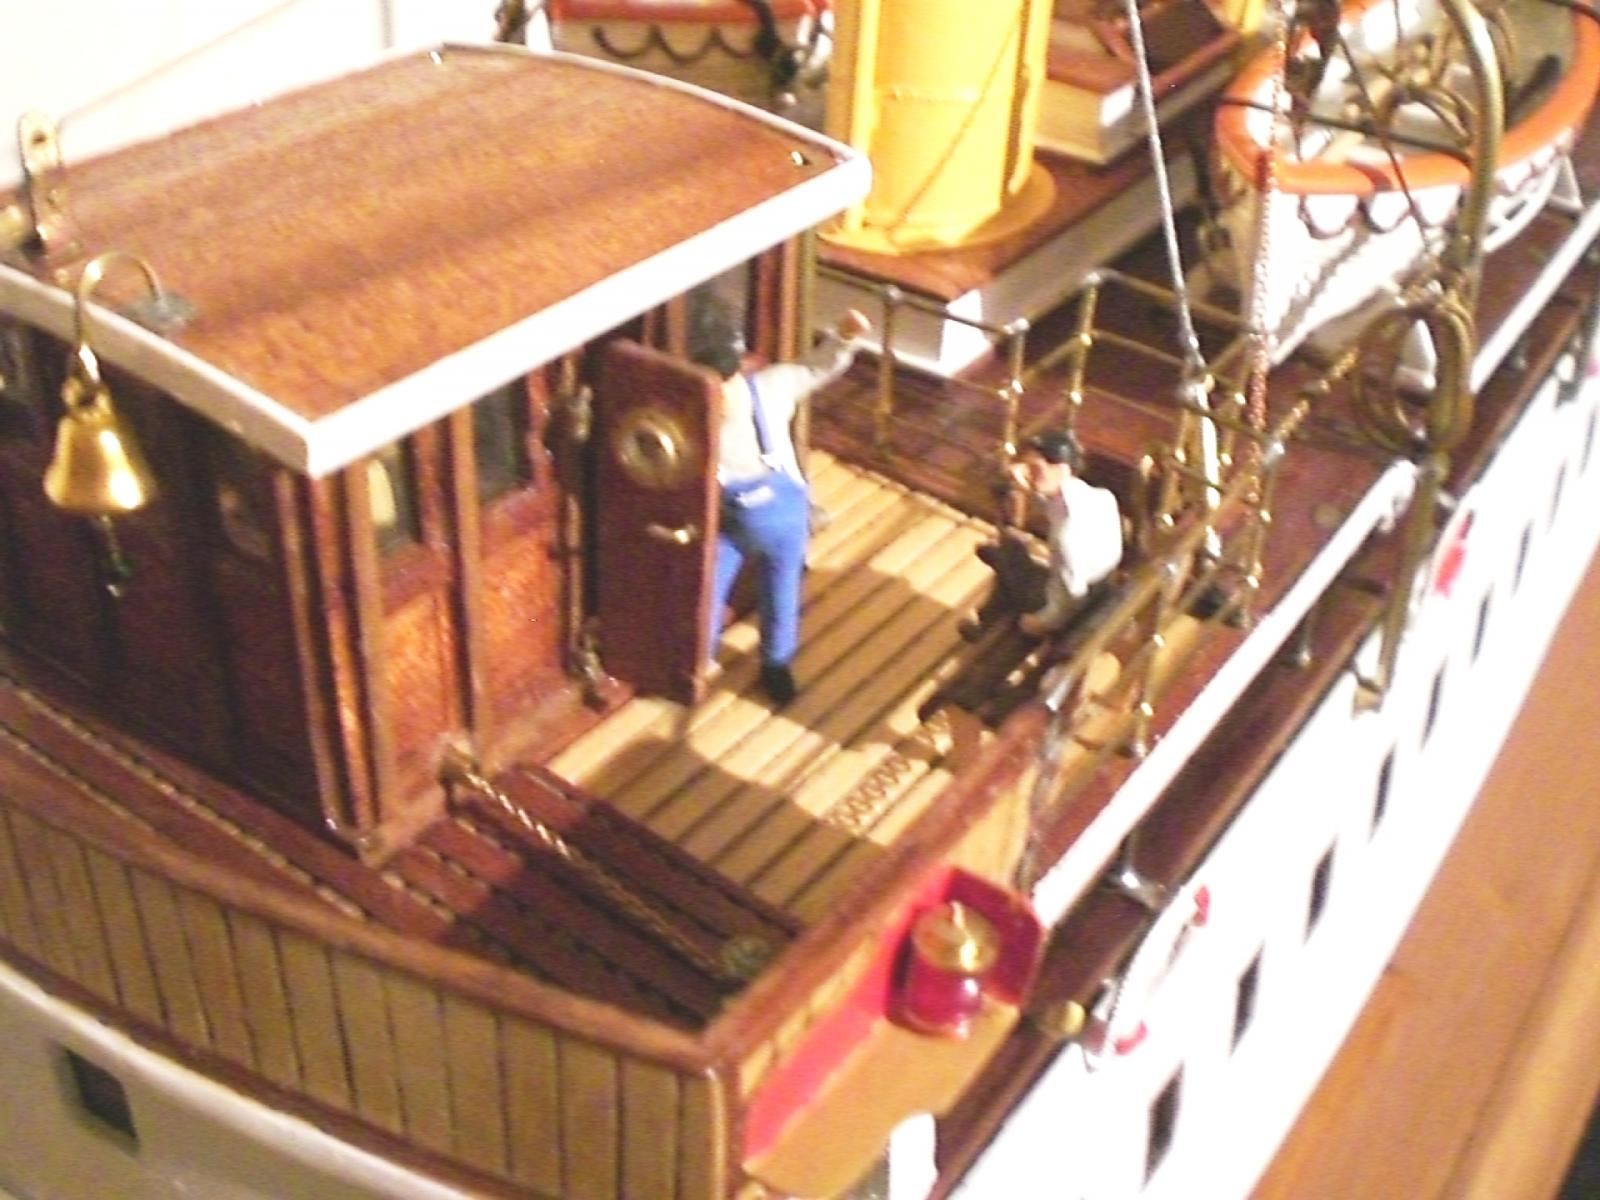
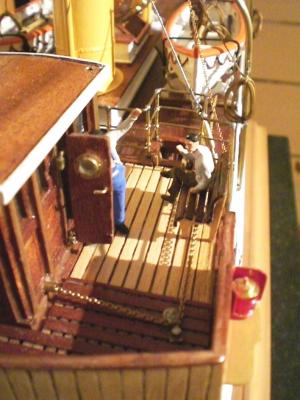
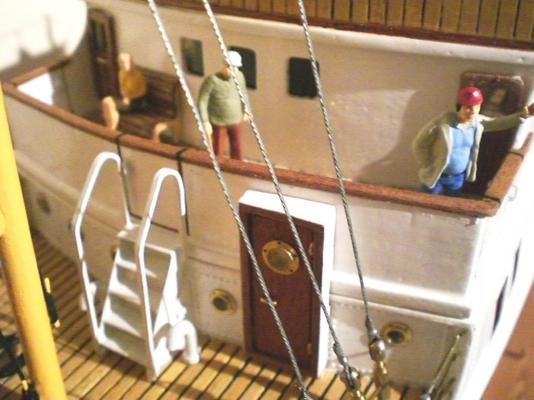
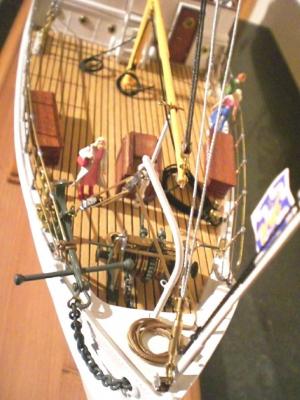
Build log part 8 the horizontal steering Segment is made from a clockwheel of on old mantel clock. Belaying clamps on lower deck railing fitted Sven is just inspecting the starboard inflatable liferaft Containment. Here for Popeye..., slotted turnbuckles for the aft mast shrouds Davit and lifeboat rigging, wooden oar sets to the boats Position of the stairway from lower deck to bridgedeck. Right bottom Corner... the drainpipe opening on deck here the steering chain leaving the wheelhouse can be better seen the upper deck was designed in the way that the stair and its rail as well as the entrance (door and its Frame stay Standing when the comlpete upperdeck is removed. Because I made a static model of it the upper deck is now fixed on with two small hidden screws the riveting gives the real 1914 look... to the hull Build log part 9 (last part) tofollow with next post.... Nils


- 70 replies
-
- 16
-
-
Popeye, I get These functional turnbuckles in different sizes, lengths, from M1 thread onwards from my Hobby shop and in two Versions (slotted and with eyes) Nils
-
Nice answer Bob, that ist he true model builder speaking... well done ! Nils
-
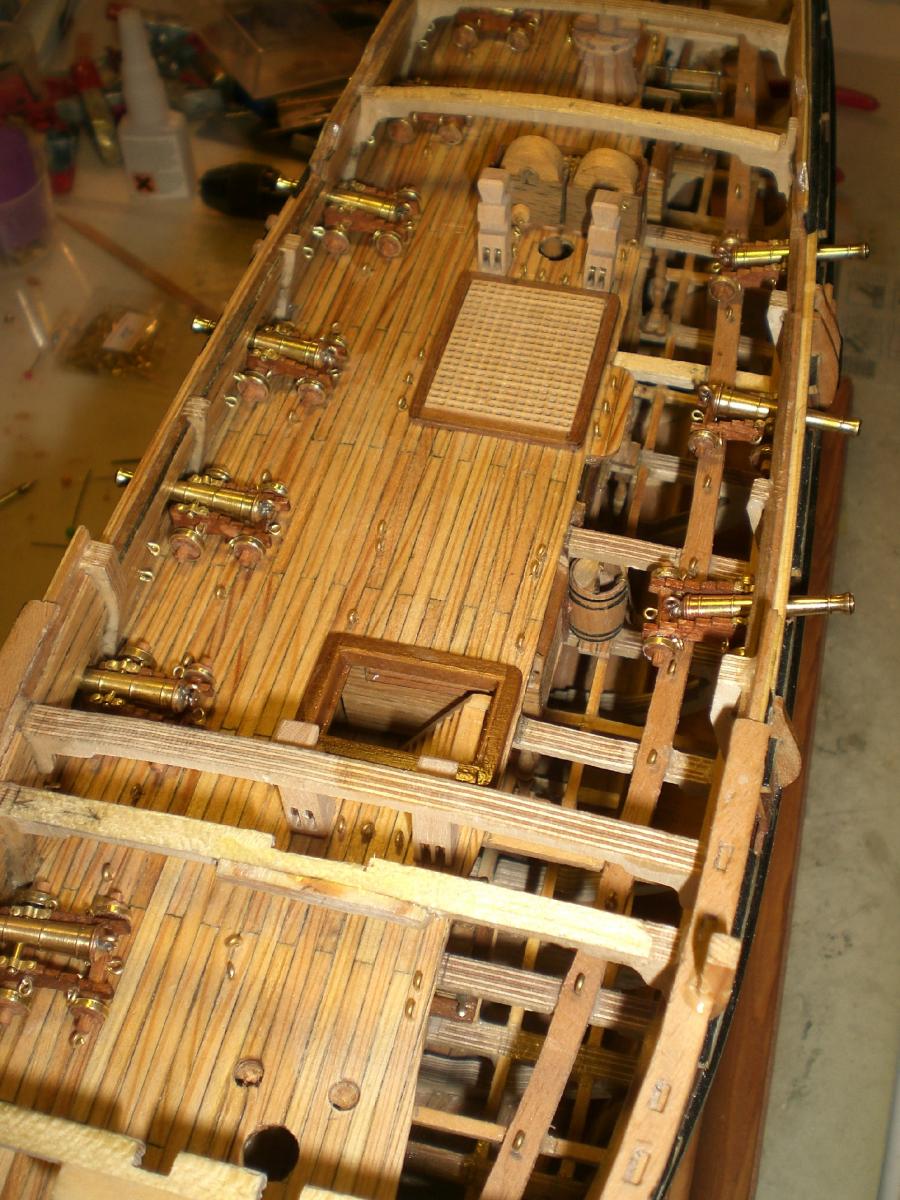
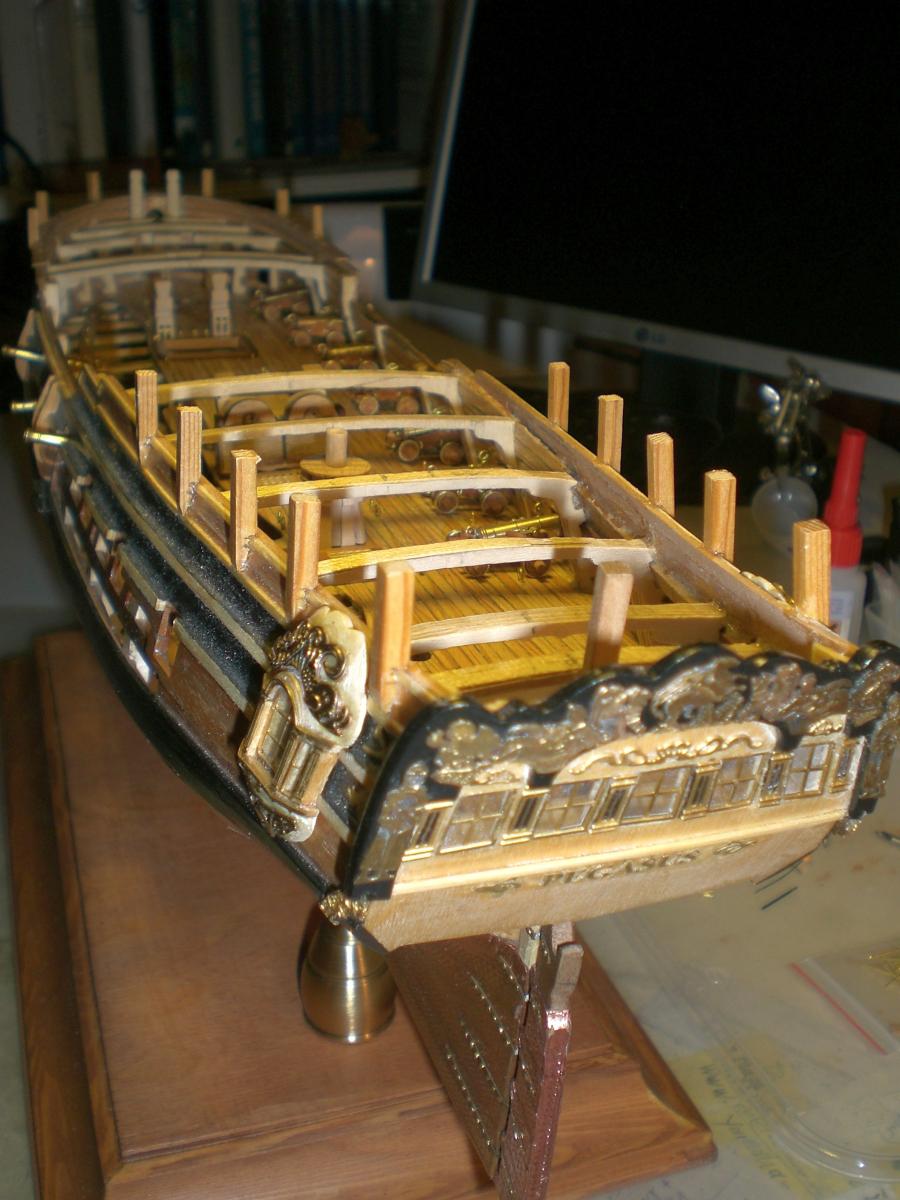
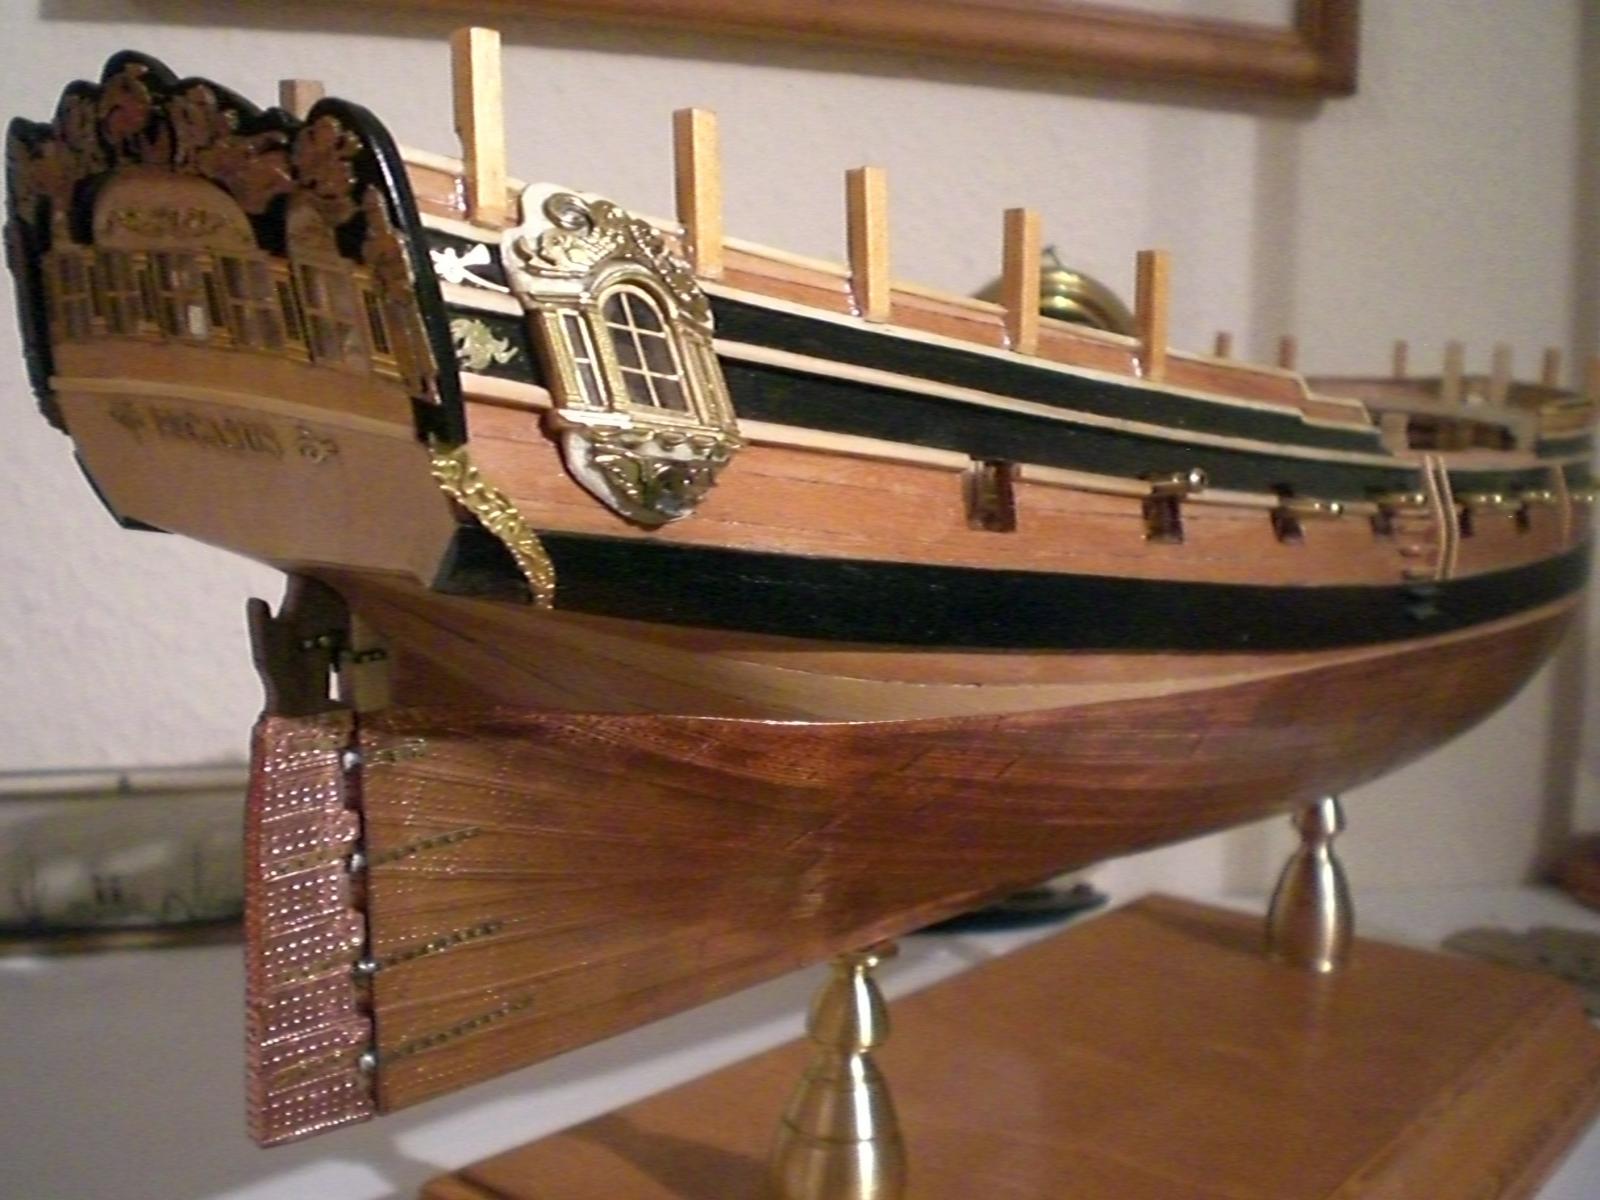
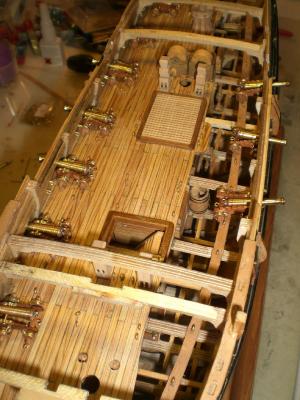
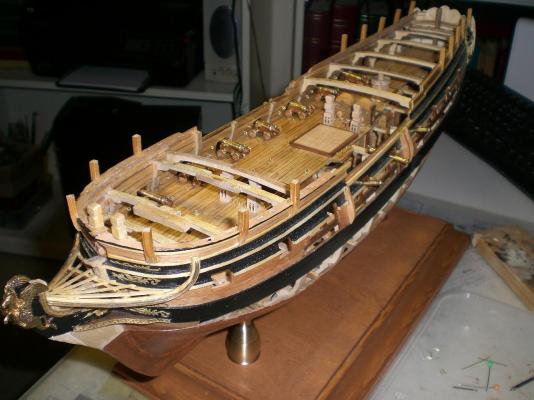
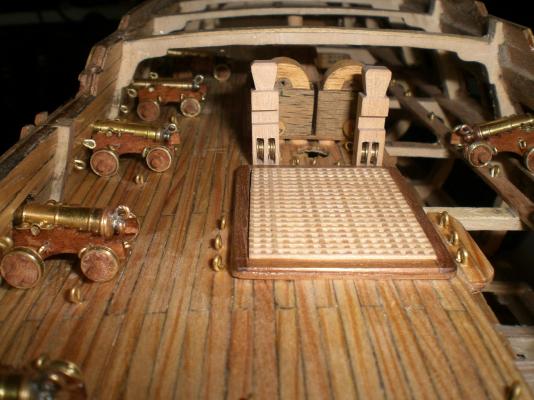
Build log part 23 I would so much like to carry on with the bow area, but realize that there is a lot to still be done underneath the forecastle deck first. Think I will have do the stove and other Details in near future the portside guns will be rigged Standing on the Support rails under the carriage wheels all te svivel gunposts are only in "raw" condition, may want to get them 8-sided in upper portions Status overview just Setting the new guns in place for Dimension checking I tryed to get the rudder coppering only, shiny again, used Lemon concentrate Juice, it works very easy but I don`t know if I should have done that. I love the greenish Patina look like some others have tryed already Nils


-
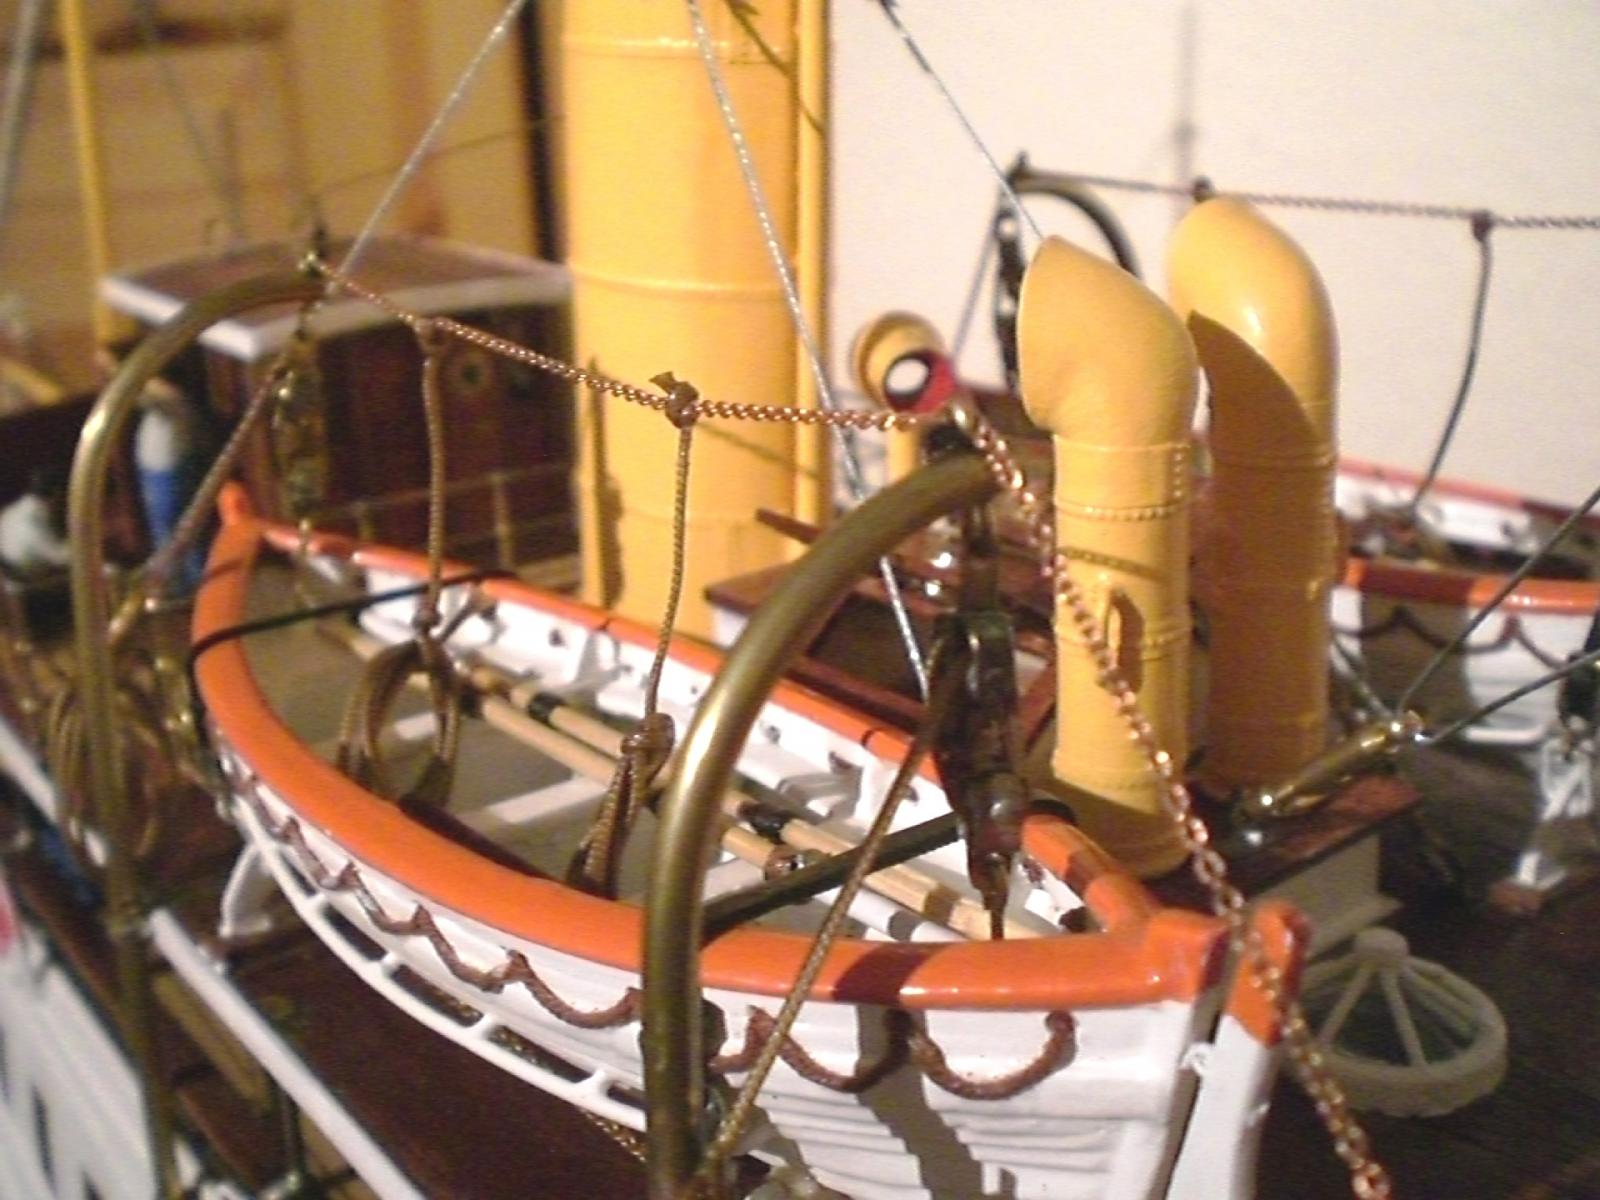
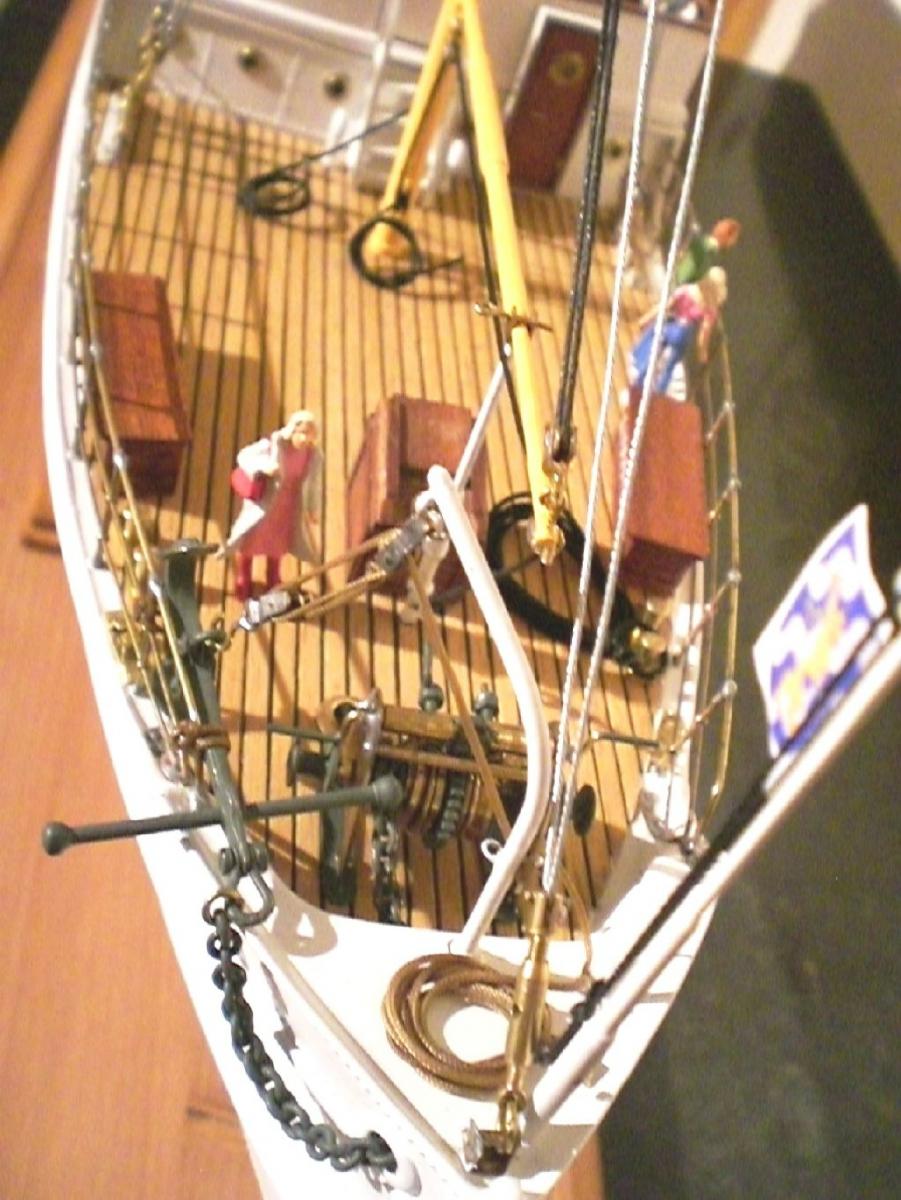
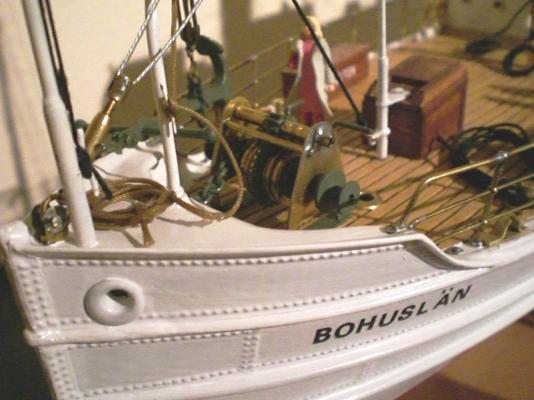
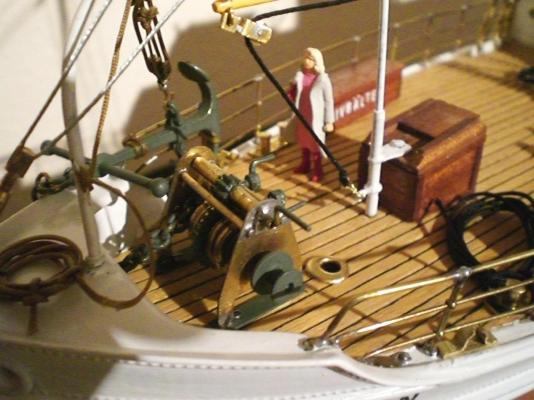
Build log part 7 here the baseplate for the casing, the standplate and the two pedestals have been made (pedestals again made from old candleholders) foredeck completed together with the selfmade anchor winch the steering chain leaves the wheelhouse, is turned 90° over a block, under the Little bench, and heads under the lifeboat towards Stern over the boats deck in guided stanchions Stern flagpost and capstan added, and two life-raft Containments in their launching racks on the boatsdeck. The ruddershaft in its sleeve-tube goes through all decks anchor winch who saw the mistake ? (Sternlight should be White instead of green) Build log part 8 to follow.... (part 8 + 9) shall be the last two intended parts for this build Nils

- 70 replies
-
- 11
-
-
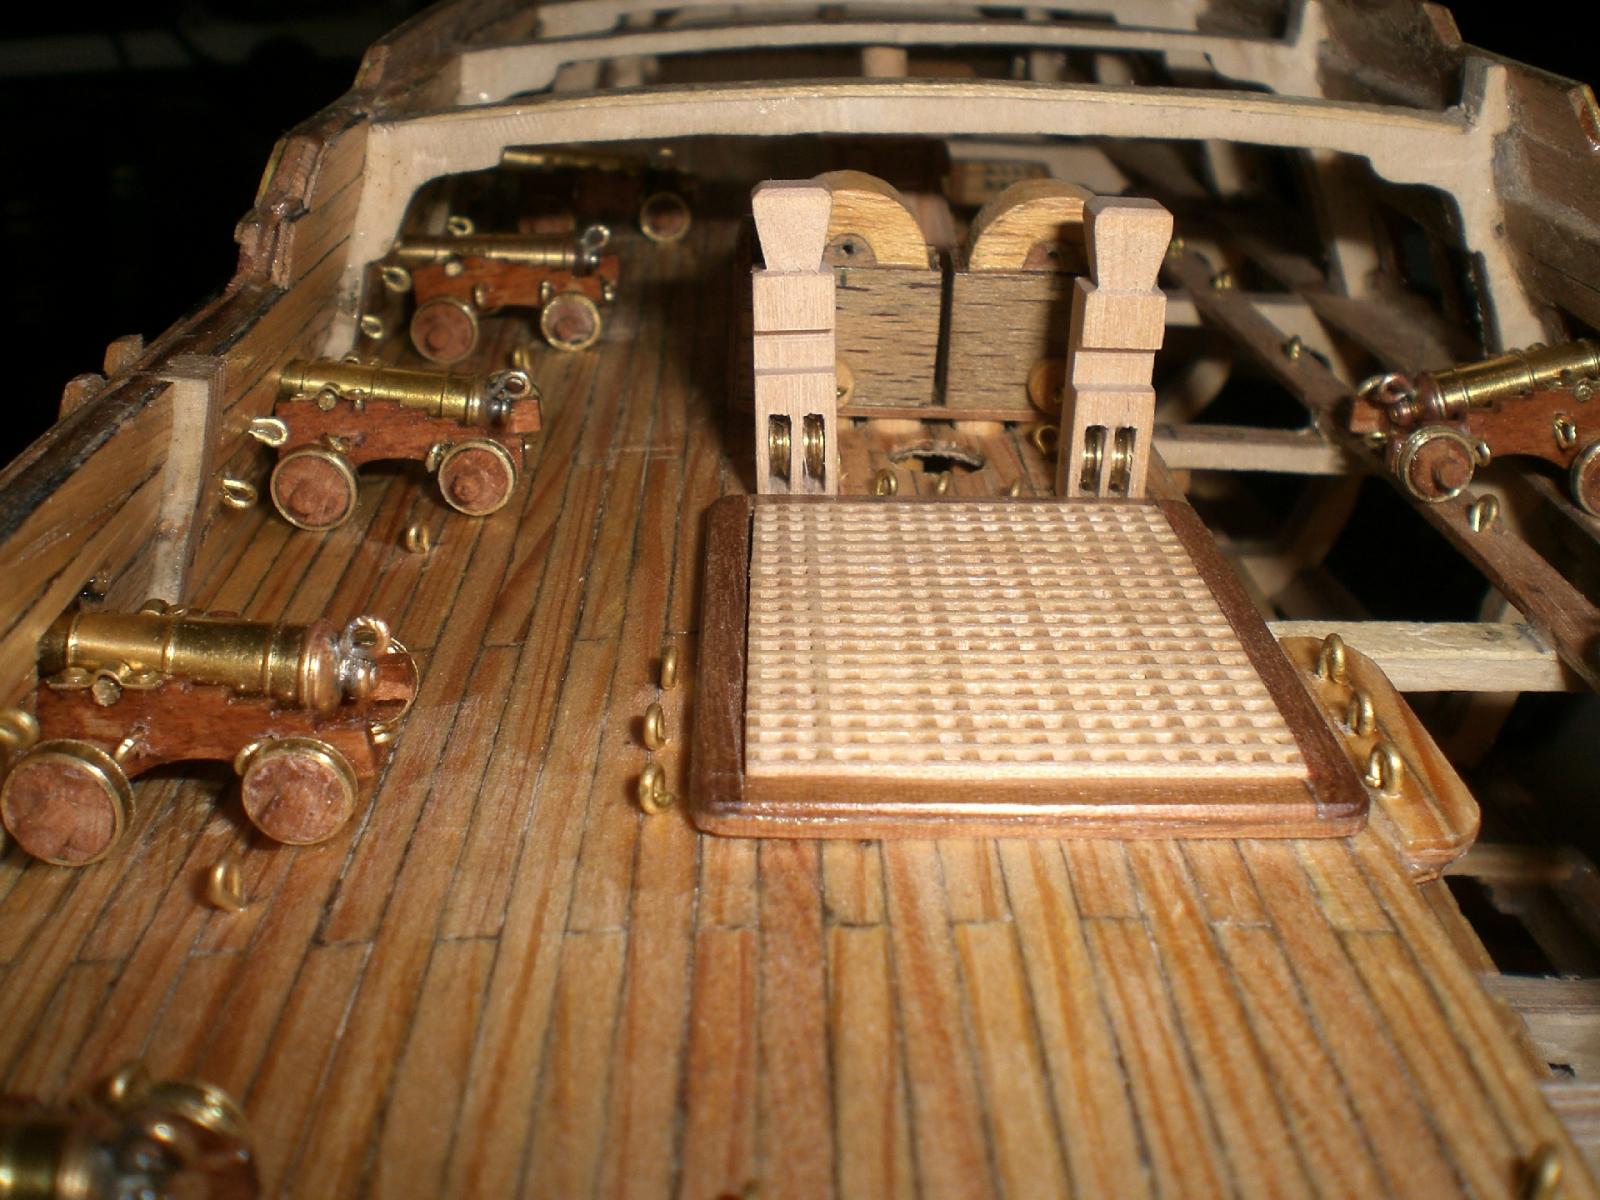
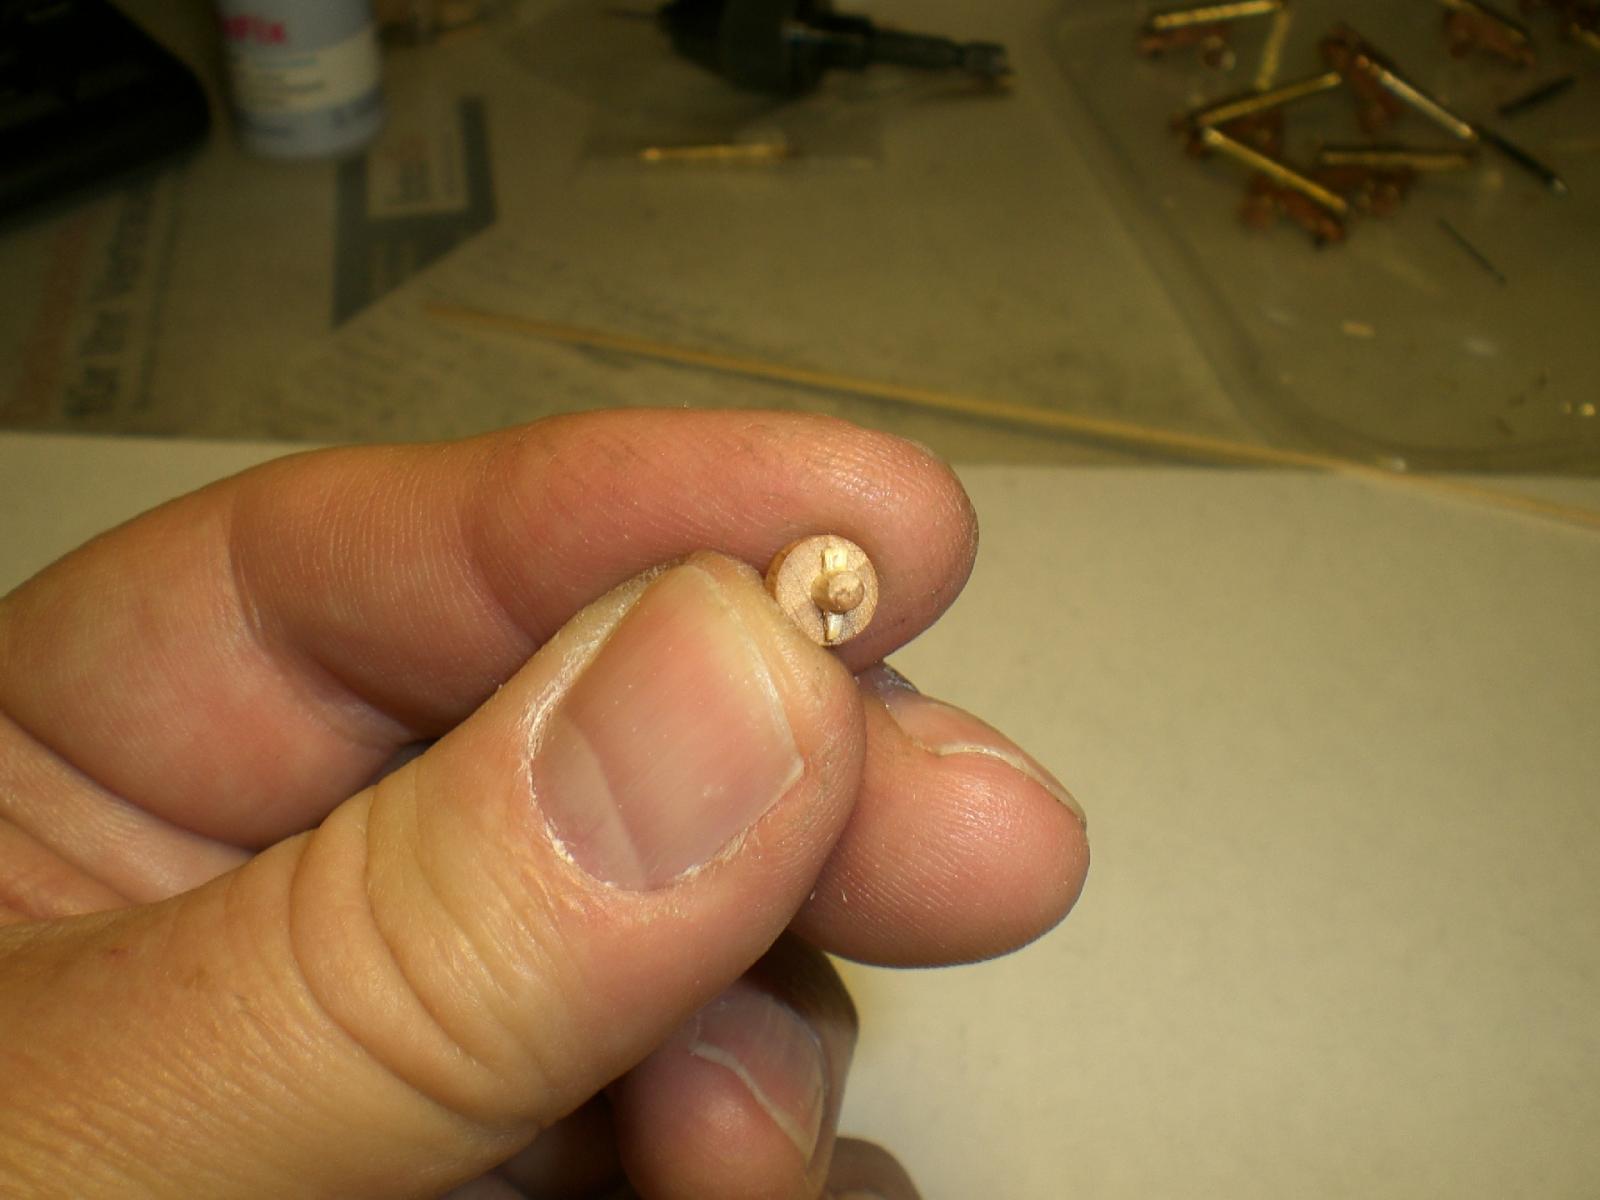
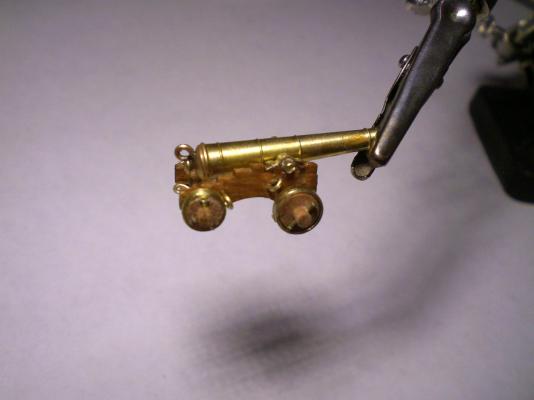
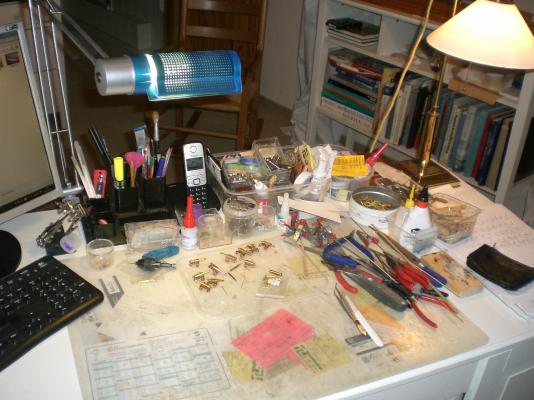
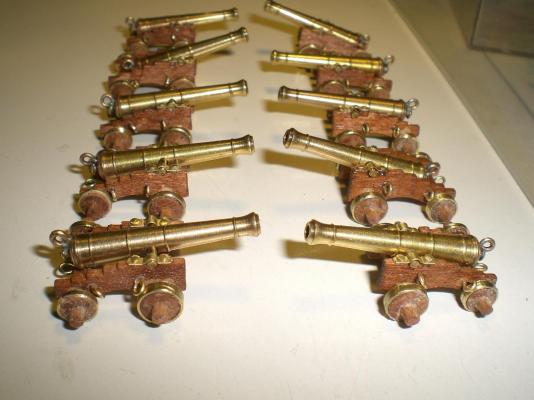
Doing the guns in repeatable mode saves some time, once the method is on track... My work desk is quite a mess, since I have my own room and do`nt have to clean up during the day, and I still have 4 more to do. Am thinking of adding small wooden splints to the axis close to the wheels, but shall do that as last Action Nils Trial #1, small wire Pins secure wheels on axis Trial #2, small wooden splints hold back the wheels (I prefer this Version) Gun builders desk have 10 done so far, 4 more to go..

-
Popeye, a very nice looking build your Gothenburg. I`m not up to date with Billing Boats.... is this an older model ? The kit Looks to be quite precise and comprising Details to the score Thanks for sharing this one, shall stay tuned for more Nils
-
Bob, nice method of doing the deadeyes, respect, but lots of spanning, drilling and Fixing work.... Question, why do These yourself, is it because of "throughout scratch build" ? Nils
-
Congrats to your completed build Peter, the Irene is a wonderful built Little gem Nils
-
Thank you Popeye, The use of These turnbuckles is a great help to strumm set the cables and stays Nils
-
Well done planking Ken, your neat built model in all is looking wonderful Nils