allanyed
-
Posts
8,149 -
Joined
-
Last visited
Content Type
Profiles
Forums
Gallery
Events
Everything posted by allanyed
-
 Paul, Your workmanship is a delight to follow. Victory models have been done so many times, including two that I did, lo those many years ago but yours is exceptional in the details. Allan
 -
Red, Your first time out is really good, better than most of us (meaning mostly me) did when we got the bug to get into this hobby of ours. Hope to see more from down the road. Allan
- 436 replies
-
- 1
-

-
- Syren
- Model Shipways
- (and 1 more)
-
As a big fan of schooners I love seeing a framed versus bulkhead model progressing so well. She looks really good Maury! Do you plan to leave off a few pieces of planking to show off your work on the frames? I think it would add a very nice touch and give viewers a better appreciation of what you have gone through. Allan
-
Thank you very much for posting these photos. Worth far more than a thousand words to be sure!!! Allan
- 436 replies
-
- 1
-
-
- vanguard models
- alert
- (and 1 more)
-
The use of high quality, very sharp chisels shows through very clearly!!! Allan
- 433 replies
-
- 4
-
-

-
- open boat
- small boat
- (and 1 more)
-
Gaetan, Your work is some of the best we have had the chance to see, and I have new found respect in cell phone cameras after seeing your post a few months ago. Allan
-
MONTAÑES by Amalio
allanyed replied to Amalio's topic in - Build logs for subjects built 1751 - 1800
Amalio, All the adjectives on how beautiful your work has been have been used. Just wanted to say I am enjoying all of your posts!! Allan -
Rom, Seven miles of rope, oh my. At 1:85 scale that's over 400 feet of combined sizes. Having a rope walk is starting to make more sense!! Allan
-
Check the following episode of Trafalgar Squared! https://www.icloud.com/attachment/?u=https%3A%2F%2Fcvws.icloud-content.com%2FB%2FASTi5XZHNCrbapCiuhER4xP0Cv8NAYt8NrqwqGfuUfoivb6rGl5FMWG-%2F%24{f}%3Fo%3DAn-NdYmLOZXLu2WnfEfd2mFb8oa6QCrPwq7ey8lKctuv%26v%3D1%26x%3D3%26a%3DCAogCcAiVz0PpWQ8VAiQ2lFbUYUn21WcPXgAt6z2A8V2hxASeBDyhczwmS8Y8pXHxKMvIgEAKgkC6AMA_ymSMk9SBPQK_w1aBEUxYb5qJpCYMnHcgR8lEkPvuggEFgwjNZ1UcN6mJuUZHOdH2wLERkFT7QJTciaYBHLOuO4iDTOHY0khd-r3fLI2e7w2FfL5Ak1igoaJCf0kEAIJ5w%26e%3D1624446716%26fl%3D%26r%3DCC200114-6D51-4F3C-AB00-31A03BCA4BE0-1%26k%3D%24{uk}%26ckc%3Dcom.apple.largeattachment%26ckz%3D2B15FC09-AF0B-4E4C-946B-9BC81AE52F29%26p%3D16%26s%3DULhvfq1WZ8A17HxYIS8sLM-v0Iw&uk=eNMEEulzILK9kQW-YzRREQ&f=Trafalgar Squared Episode 2.mp3&sz=59972739
-
Ulises I have never been a fan of sails on a square rigger model, but your furled sails are giving me second thoughts for the future. 😀 I would probably go with silk span sails as they are closer to scale but yours are very well done!!! Allan
- 786 replies
-
- 3
-
-
- Royal Louis
- Finished
- (and 1 more)
-
VTH, Great to see another beautiful piece of work from Florida!!! The acrylic case was new for me and will be in my back pocket for future use. Do you have pics of the jig set up that you used? Thanks Allan
- 436 replies
-
- 2
-
-
- vanguard models
- alert
- (and 1 more)
-
Deck beam spacing
allanyed replied to Don Case's topic in Building, Framing, Planking and plating a ships hull and deck
My personal order of preference for scantlings starts with contemporary AS BUILT drawings and original contracts. Other drawings that were not as-built would still be a preferred guide in many cases. The Establishments from 1719 through 1750 would be next in line if the timing is appropriate. The Shipbuilder's Repository and Steel's scantlings in The Elements and Practice of Naval Architecture are great if a contemporary drawing or contract does not provide all of the information. I have never seen any detailed and complete Establishment scantlings after 1750, but perhaps others may have. I have no idea if the SBR and the EPNA were used by a few, many, or any shipwrights as the Establishments had supposedly been guides that were used previously. For that matter, I have never read why the SBR and/or David Steel even prepared these treatises. I just looked on line for information and only found a few copies for sale but no information on the purpose of the book and draughts. I almost fainted when I saw the prices for the Sim Comport edition of Steel starting at over $800. The Foreward in the Sim Comfort 1977 reprint edition of David Steel states that Steel wrote principally, of course, for the mariner and the shipwright who sought to broaden his knowledge of his profession and the one thing common to both: the ship. The publisher also notes that no other work, has in any language at any time, the theories and practicalities of designing and actually building a Man of War at the time of Nelson. Of further interest is that The Elements and Practice of Naval Architecture involved a good bit of plagiarism of the SBR. -
Michael. Great idea. We do have a Zoom meeting with the NRG set up for next month to discuss how to get the word out to more folks so your post timing is spot on. Thanks!!
-
Hi John, Your plank strakes are really nice and tight against each other, well done. I really have no good solutions for this common problem and I realize kit builders are looking to make a profit, but I believe if they stopped using unrealistic open grain/porous wood and supply the kit with a closer grain material and a bit thicker than 1mm they would get more business. I understand some of the newer kits from other manufacturers have made big improvements. Thankfully your "oops" is in area to be painted.
-
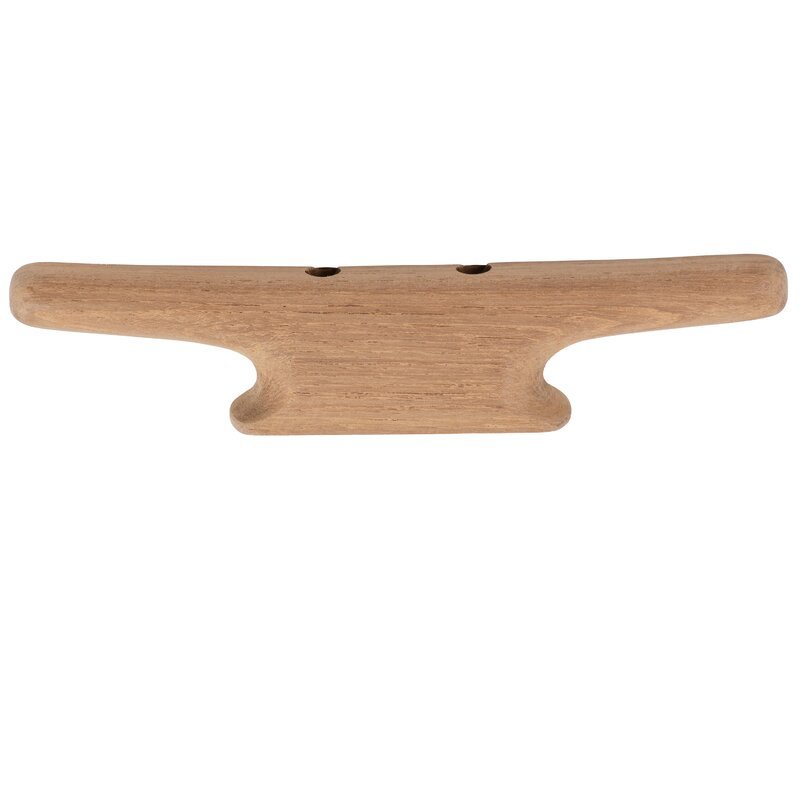
Jezza, First, welcome to MSW, glad to see another new member!! Are speaking of cleats or blocks? Wooden cleats usually did not a hole. Metal cleats often have an opening between the legs but the line does not go through this opening if secured properly. Which cleat of the below do yours look like? Sorry for the size disparity, I just grabbed these off a Google search for wooden and metal cleats.

-
Kevin, I was in touch with Dafi and I am sure he will respond. I am now a proud member of the German Group!!!! 😀 He has been very kind to guide me to get the word out to their membership!!
-
Kevin, He joined MSW earlier this week and wrote a long post. See the string "New podcast/tv series about Nelson and Maritime Britain during the Trafalgar period." here in the Nautical/Naval History section. It is just below the original post started by Noel Colledge Thanks for signing up!!
-
Thank you Mitsuaki, I hope you signed up to the program. Adam has the backing and funding once the company picks it up, be it Netflix or some other. He just needs us to get signed up to show the producers there is an audience for their investment. If there are any ship model organizations in Japan I hope you will post this information. I just signed up to a site in Germany at the suggestion of another member here at MSW and will be posting the information there as well. Thanks again!!!
- 126 replies
-
- 2
-
-
- victory models
- amati
- (and 2 more)
-
Thanks Piet!! I wonder if 3D in Turbocad would work as well?? I have NO experience with 3D so maybe time to learn. Thanks again!
-
Hi Mitsuaki Your build and photos of the details are inspiring!! As you no doubt are aware of the history of Bellephoron and her participation at Trafalgar, I think you and your build log followers would be interested in the TV series under development regarding Nelson and Trafalgar. Please be sure to take a look at the posts in the Nautical/Naval History section here at MSW and check out New podcast/tv series about Nelson and Maritime Britain during the Trafalgar period. You will be able read all about the proposed series, including a post from the screenwriter heading this project, Adam Preston who has recently joined MSW. Thank you!
- 126 replies
-
- 2
-
-
- victory models
- amati
- (and 2 more)
-
Hi John, As you are no doubt aware of the history of Pickle, including the fact that she was the first ship to bring the news of Nelson's victory at Trafalgar to Great Britain, arriving at Falmouth on 4 November, I thought you and your build log followers would be interested in the TV series being written by screenwriter Adam Preston. If so, please see the Trafalgar post in the Nautical/Naval History section here at MSW titled TV series about Nelson and Maritime Britain during the Trafalgar period. The various posts, including the post from Adam explain in detail. Thanks!!
-
Internal stuff
allanyed replied to Don Case's topic in Building, Framing, Planking and plating a ships hull and deck
Thanks Don, but I do not see any of the items you asked about earlier against the frames. This figure confirms the earlier post that only the deck hooks (and ekeing, which is actually an extension of the deck hook,) fay to the framing. The breast hook in the sketch does not. The steps, riders, and crutches fay to the thick stuff and ceiling just as the breast hooks do. -
Internal stuff
allanyed replied to Don Case's topic in Building, Framing, Planking and plating a ships hull and deck
Hi Don! Are these drawings contemporary?. I would love to see these if you would be so kind as to post them. VERY interesting. TIA!! -
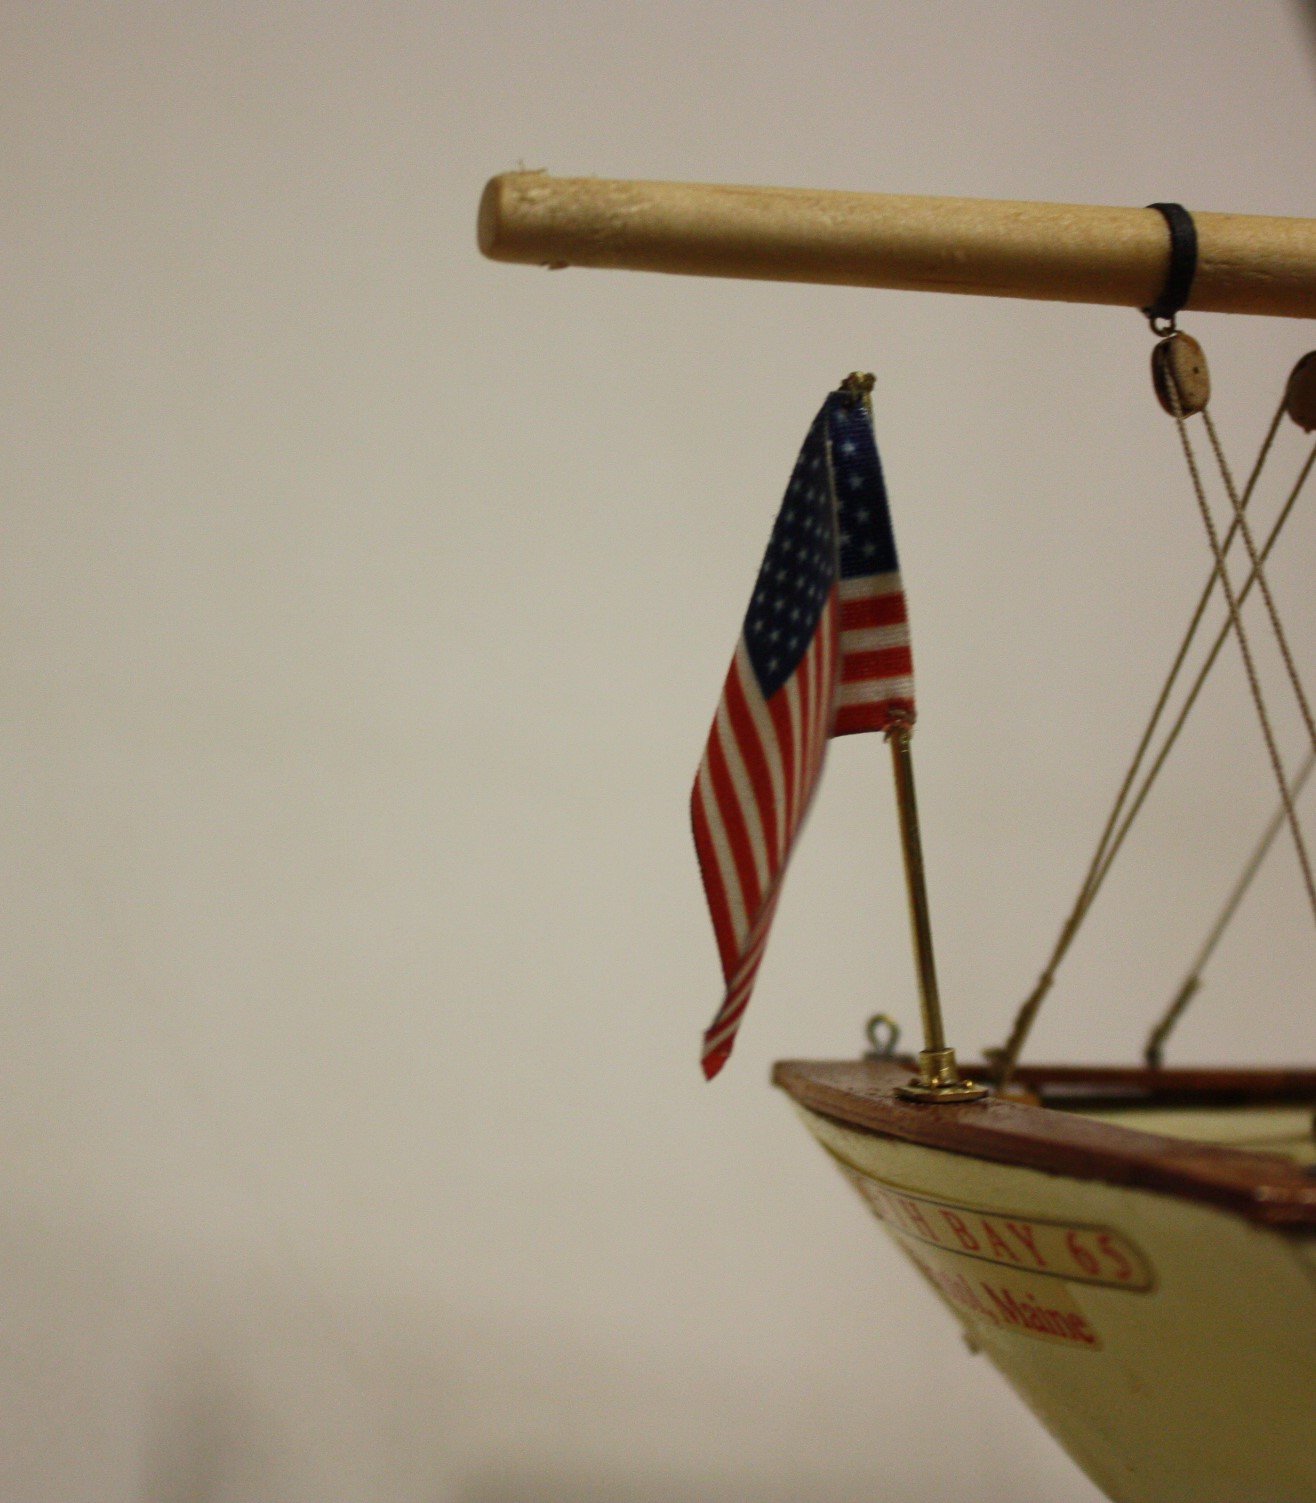
Flags supplied by Amati look to be too big
allanyed replied to DaveBaxt's topic in Masting, rigging and sails
If you have any kind of CAD program, including Paint which is standard on many computers, you can prepare your own and print on paper or better yet, silk span. Tape the span to a sheet of regular printing paper. Alignment takes some time as you choose to print on both sides, or you can print mirror images and fold over on itself once printed. Once the ink is dry, (takes a little longer on silk span than regular paper) wet the flag with matte medium and it can be shaped to drape naturally. If you wind up with cloth sails, the matte medium is still a good way to go to shape the flag in a natural position.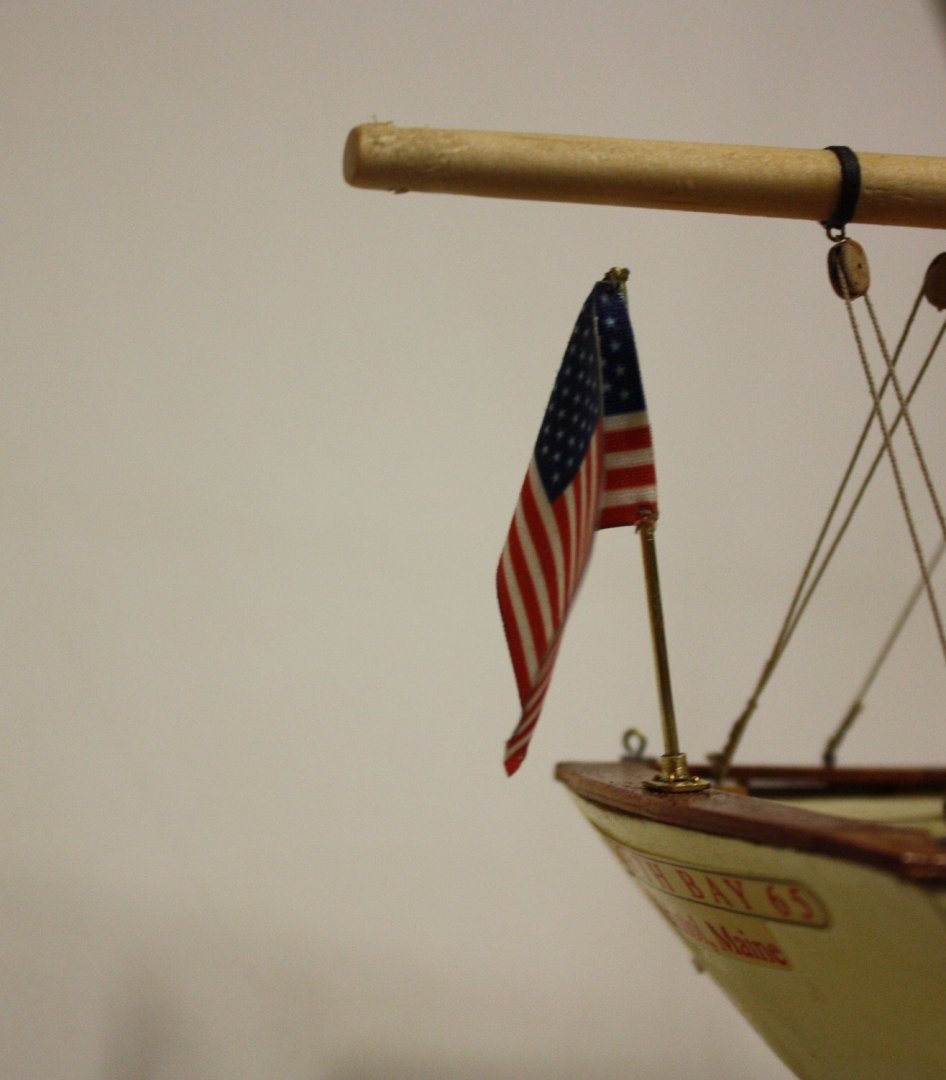
-
Piet, What drawing format did you use? I have never done 3D drawings but have drawings in three views in 2D. Would that work? Thanks