HOLIDAY DONATION DRIVE - SUPPORT MSW - DO YOUR PART TO KEEP THIS GREAT FORUM GOING! (Only 13 donations so far - C'mon guys!)
×


dvm27
-
Posts
2,457 -
Joined
-
Last visited
Content Type
Profiles
Forums
Gallery
Events
Everything posted by dvm27
-
 Appreciate your using the palm of your hand to provide scale Keith. Makes those small blocks even more impressive!
 -
Those resin painted castings looks terrific Chuck. May I ask who makes those powders?
- 269 replies
-
- 6
-

-
- Queen Anne Barge
- Syren Ship Model Company
- (and 1 more)
-
Well done Chris. Your model came out beautifully. Any thoughts on your next project? The twins must be no work at all at this age, allowing unlimited shop time : -)
- 290 replies
-
- 1
-
-
- confederacy
- frigate
- (and 1 more)
-
It appears that our French and Italian building friends construct those difficult hawse and counter timber assemblies off the models. This certainly seems like a simpler (and probably more accurate) method then building in place. Lovely work Matiz.
-
Pandora by marsalv - FINISHED - 1:52
dvm27 replied to marsalv's topic in - Build logs for subjects built 1751 - 1800
Your quarterdeck detailng is spectacular, Marsalv. Keep those photos coming! -
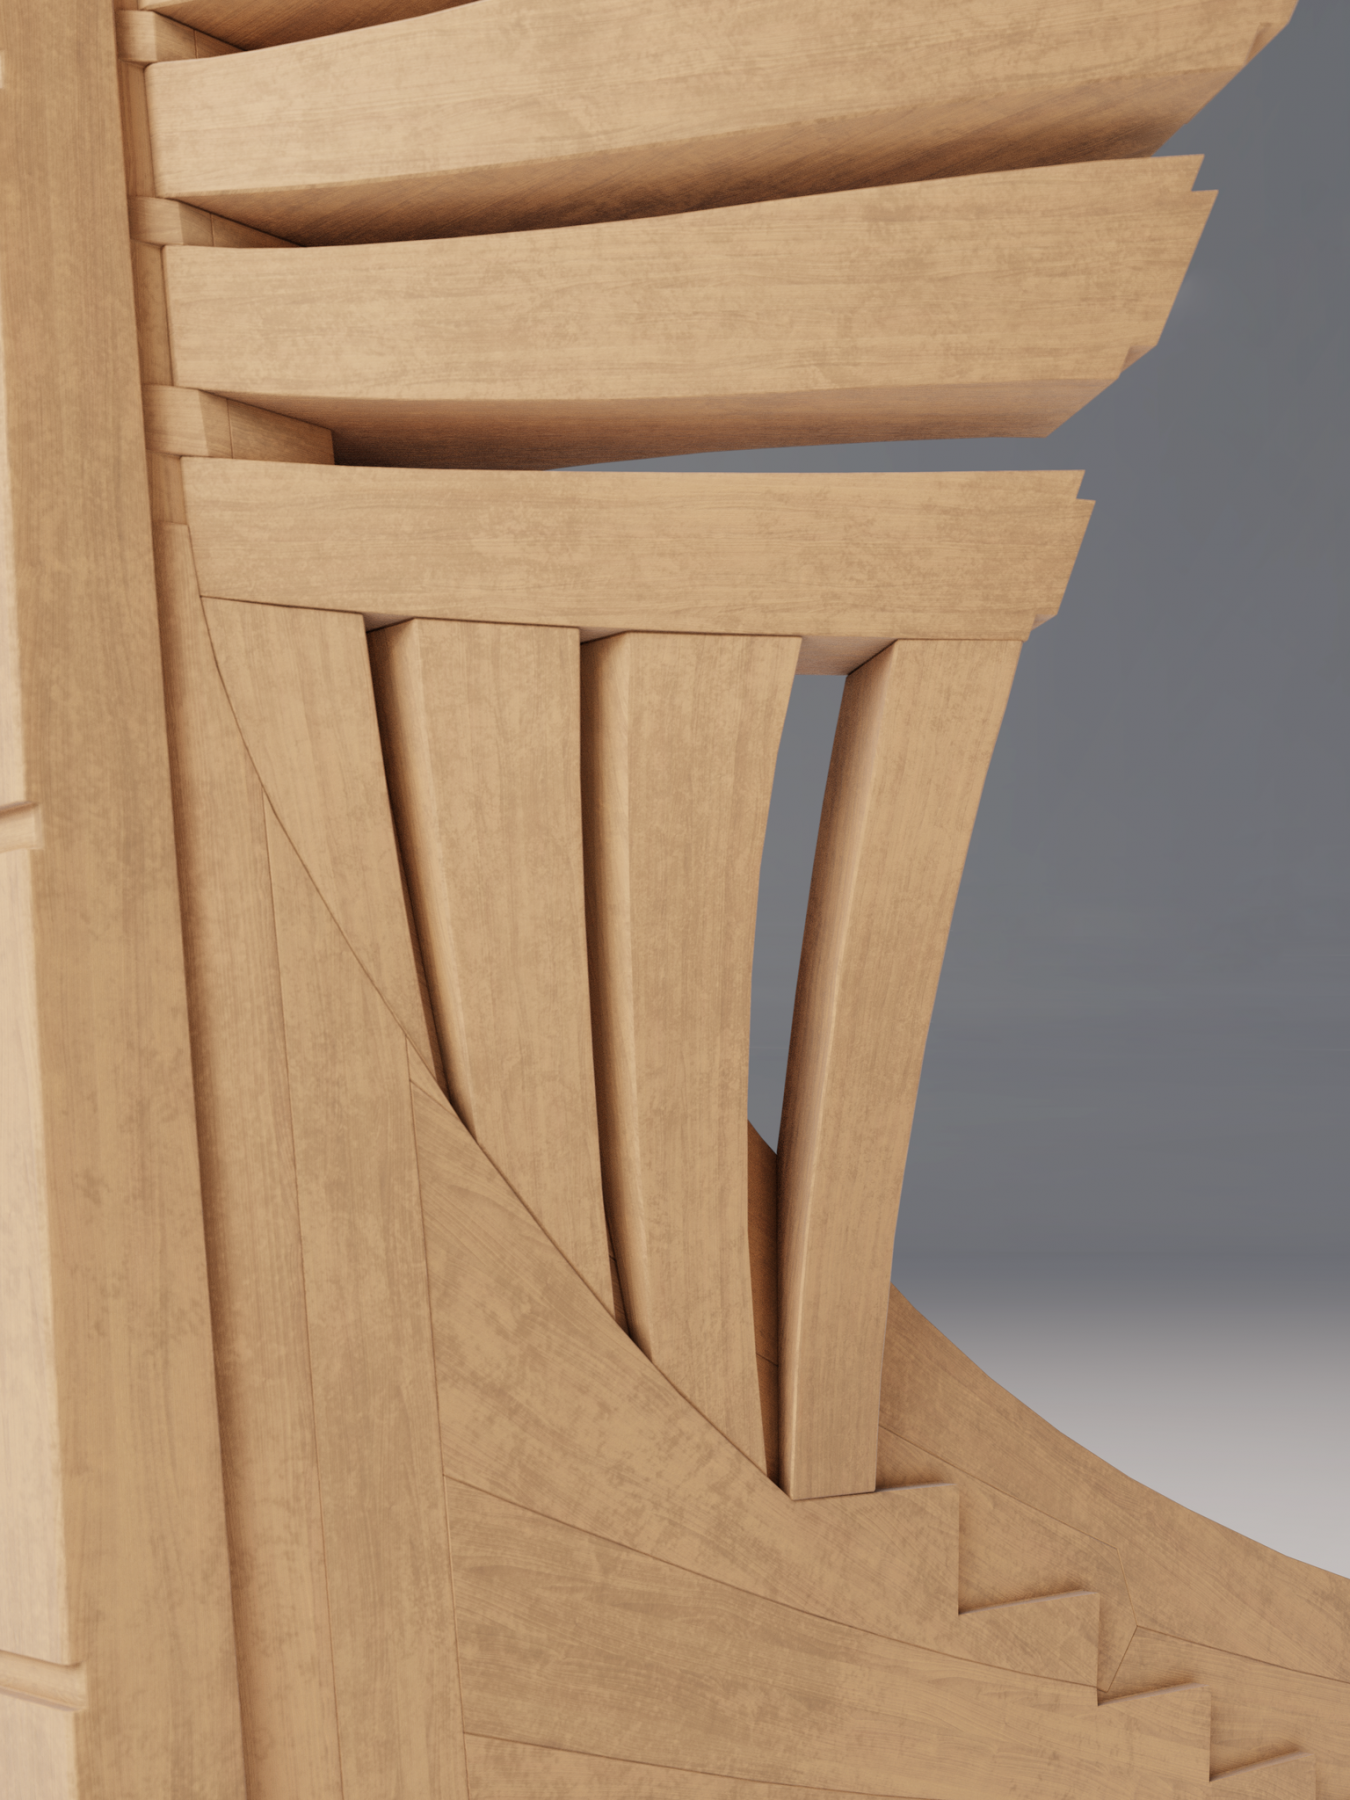
Your building technique requires all the varying angles and surfaces fay perfectly into each other. Extraordinary work you are doing!
-
Swan class 3D model in progress
dvm27 replied to dvm27's topic in CAD and 3D Modelling/Drafting Plans with Software
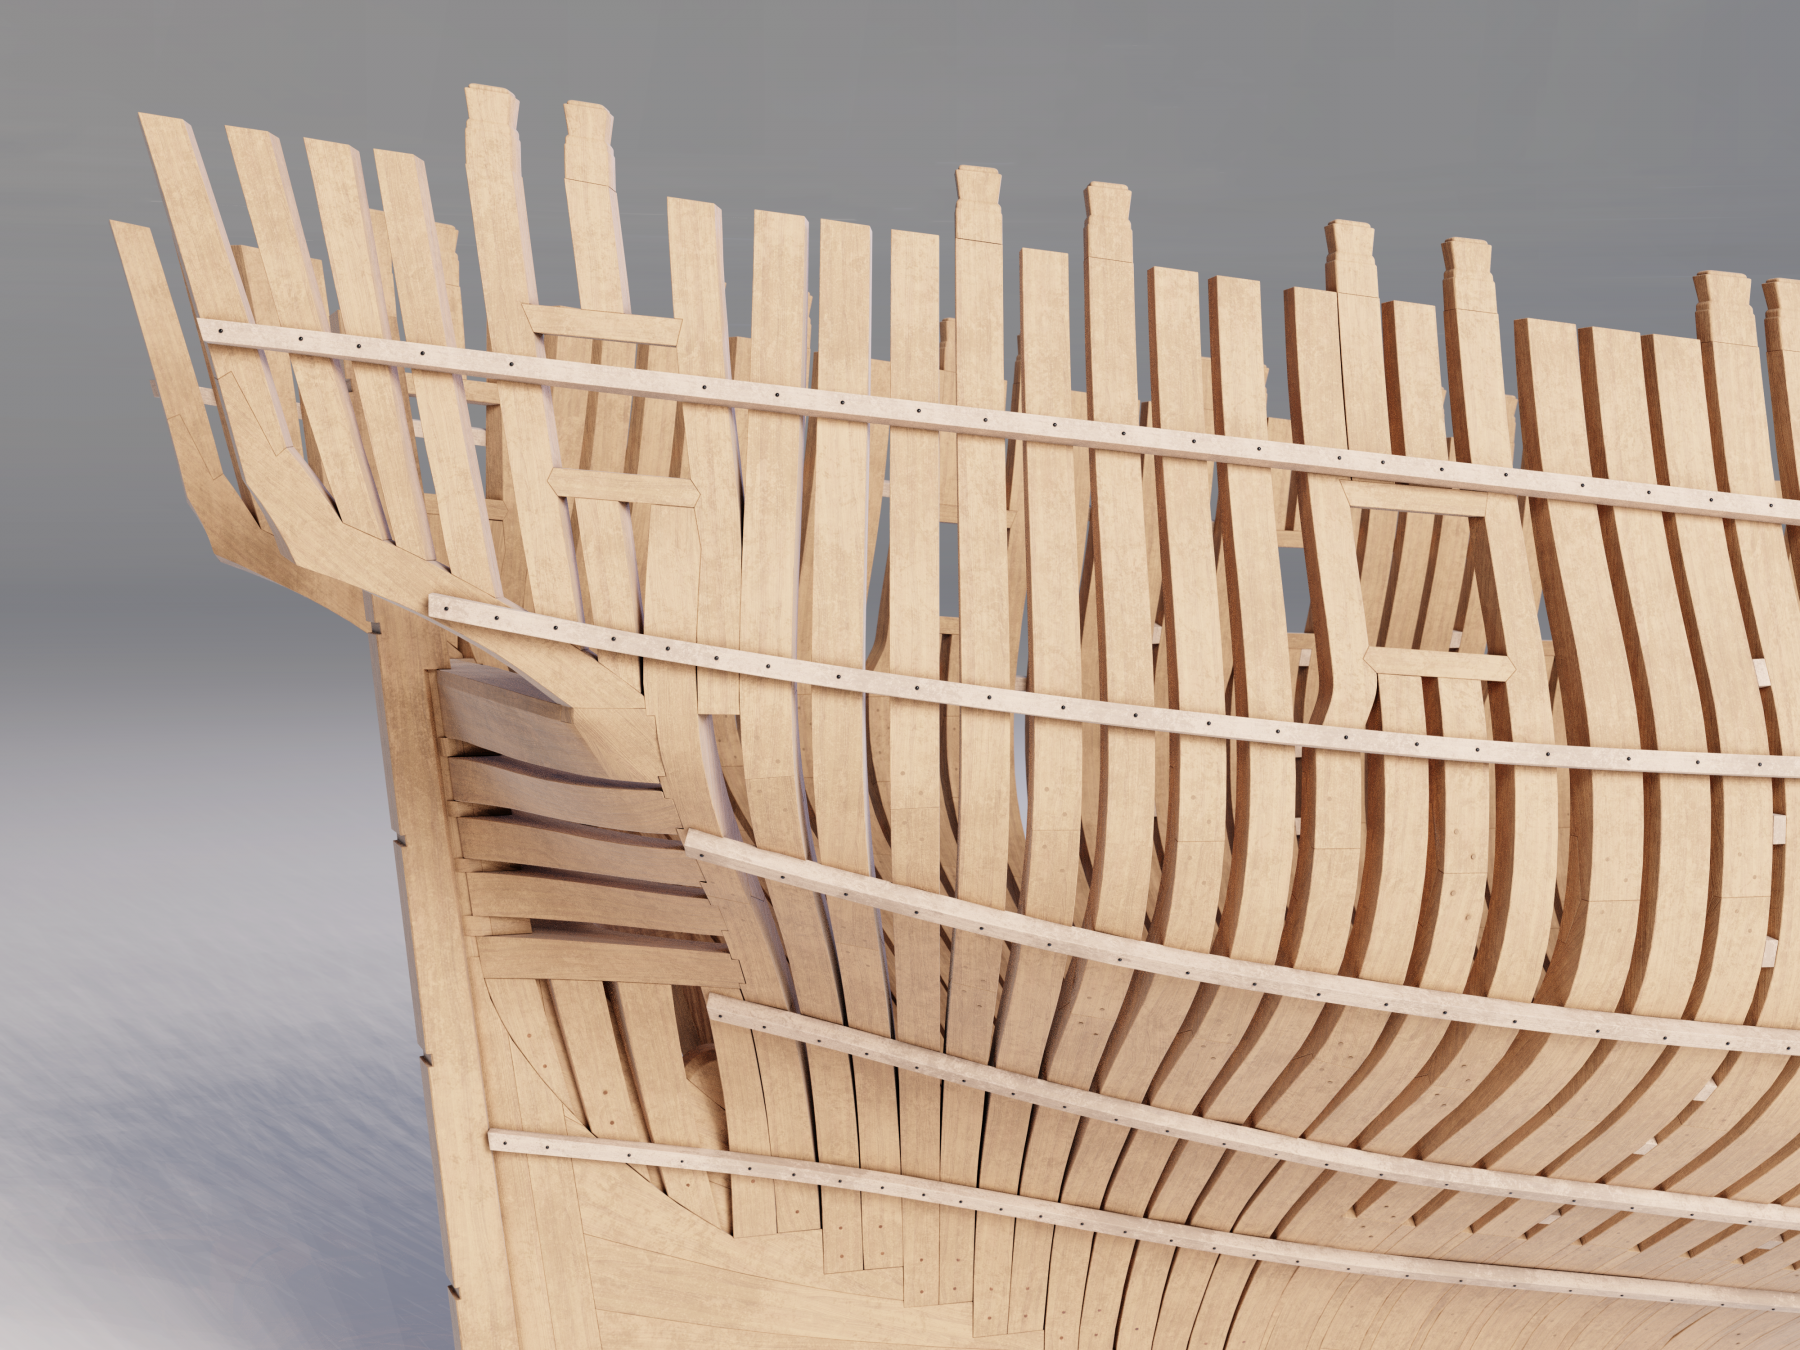
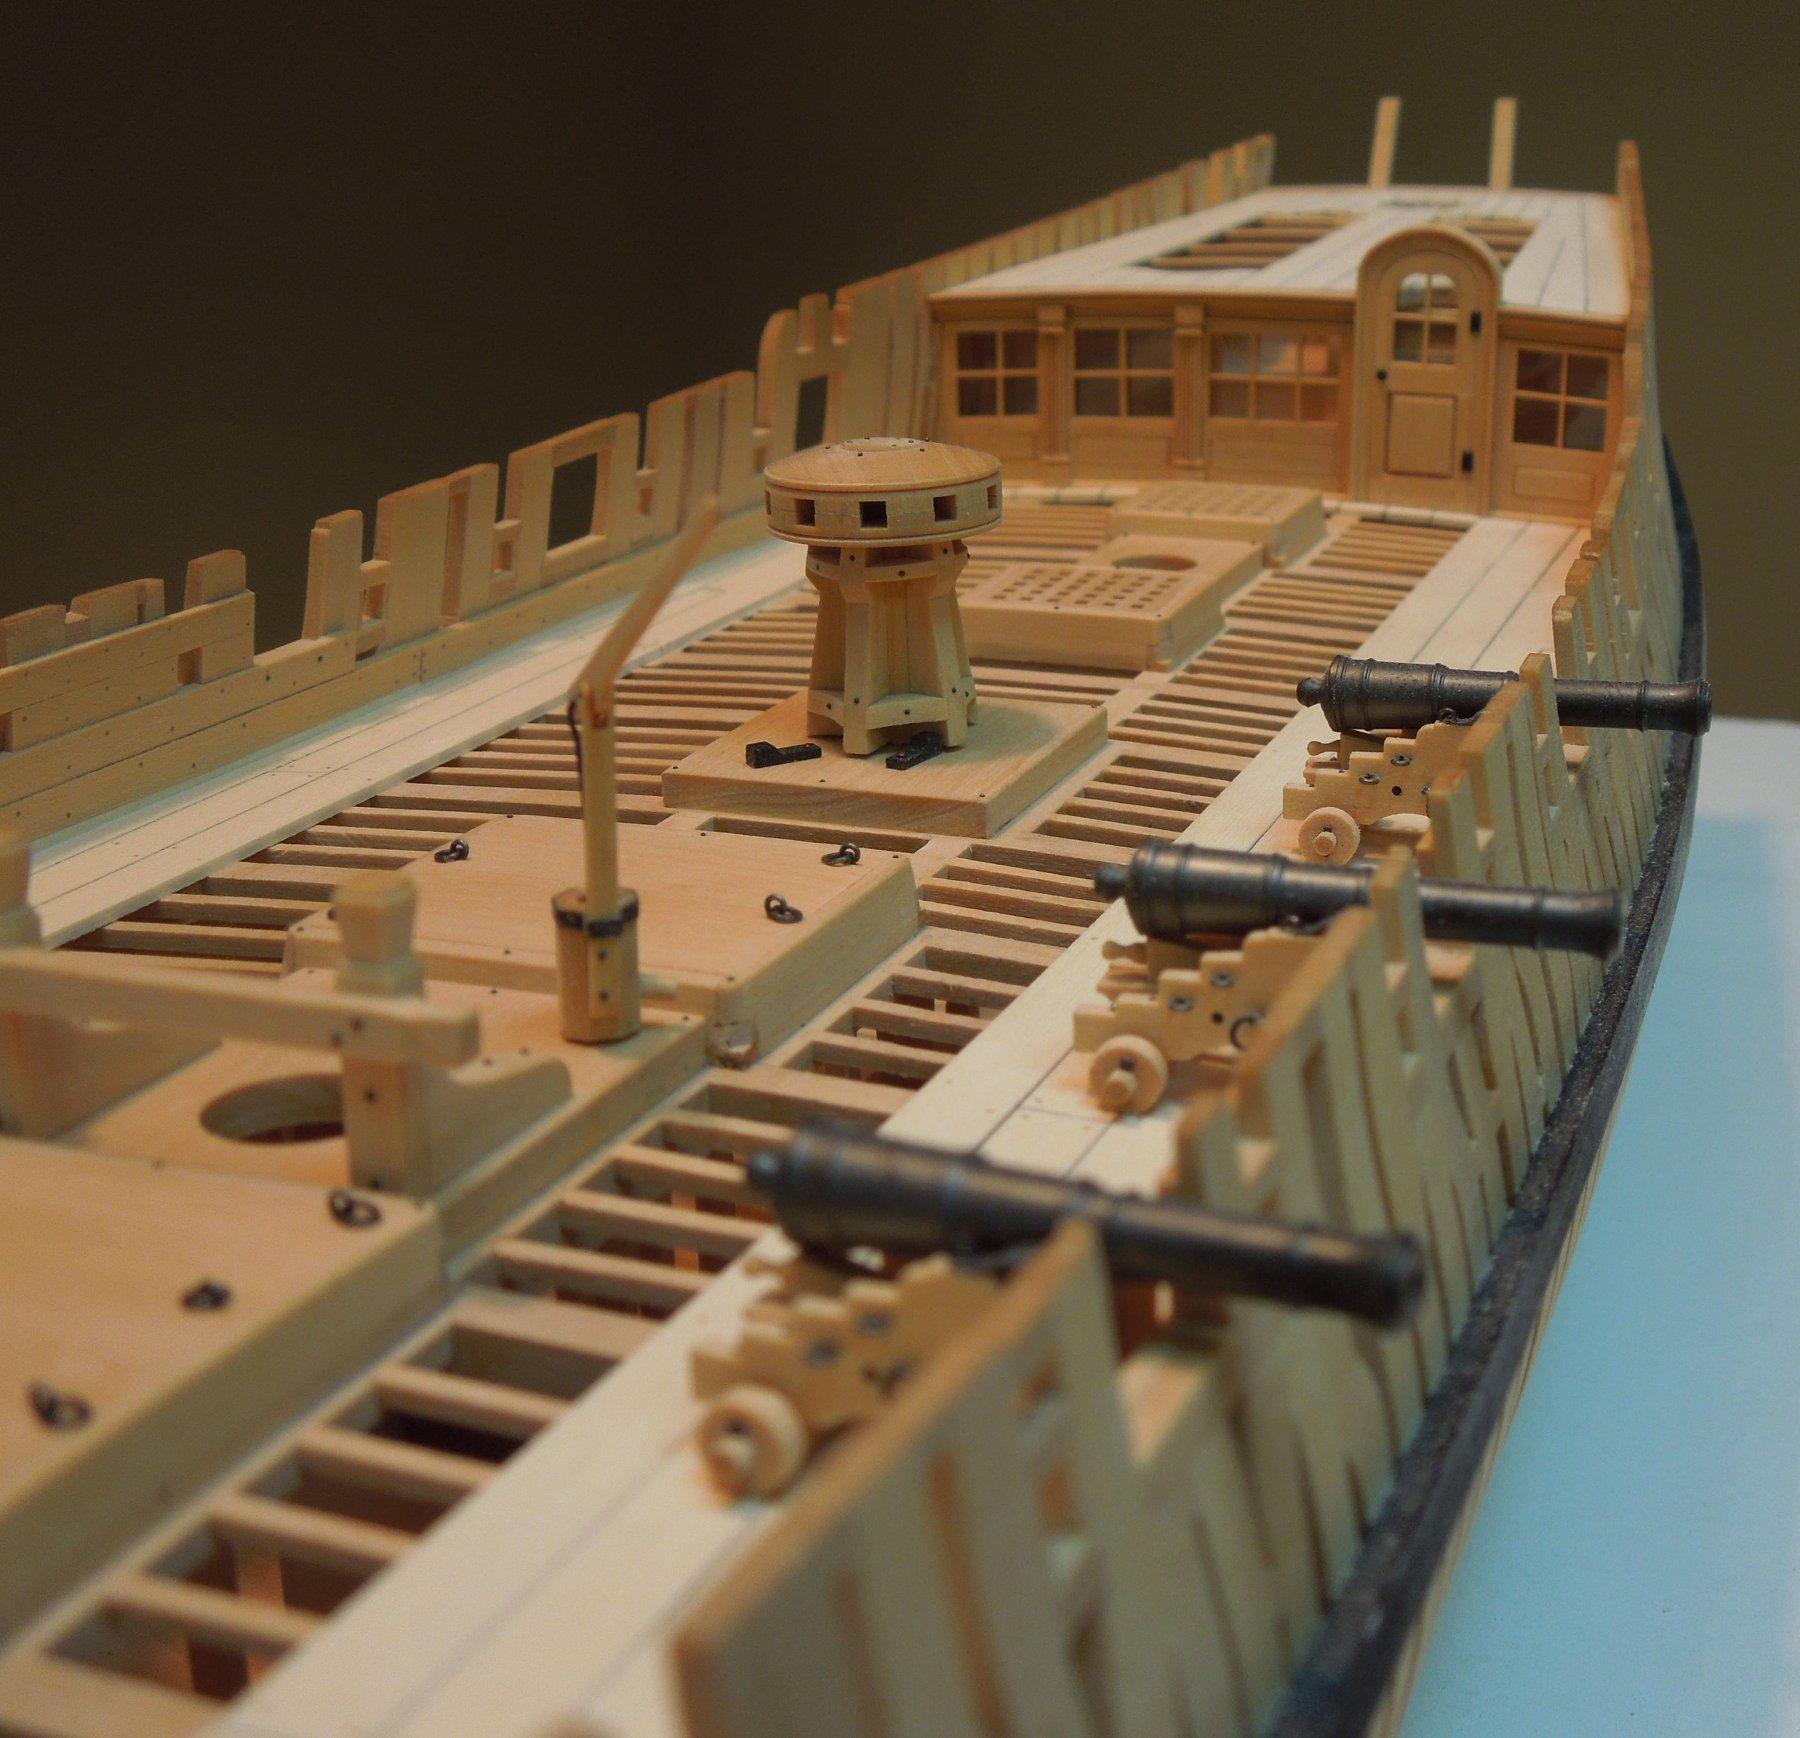
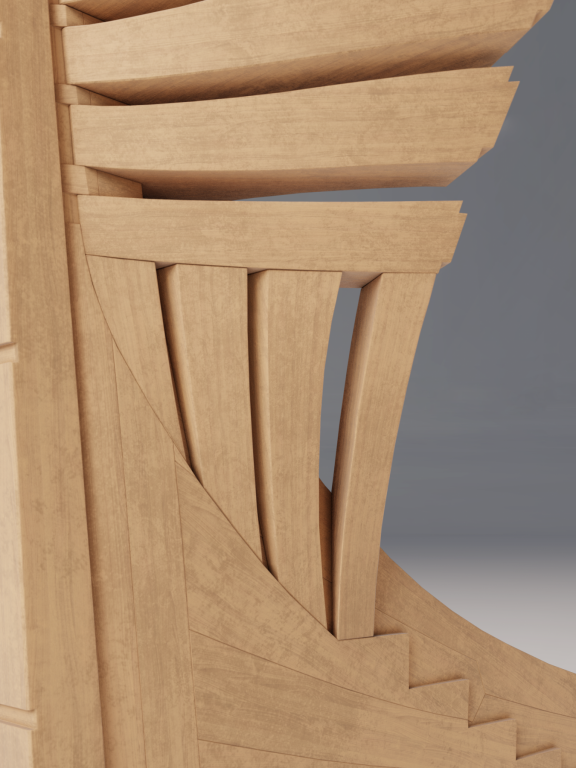
I could tell you Wayne...but then I'd have to kill you! Seriously, our renderings are being done by a very talented individual in Europe. I have no idea what software or computer he uses and wouldn't understand even if he told me. But I honestly can't tell whether the photo below is his rendering or my model.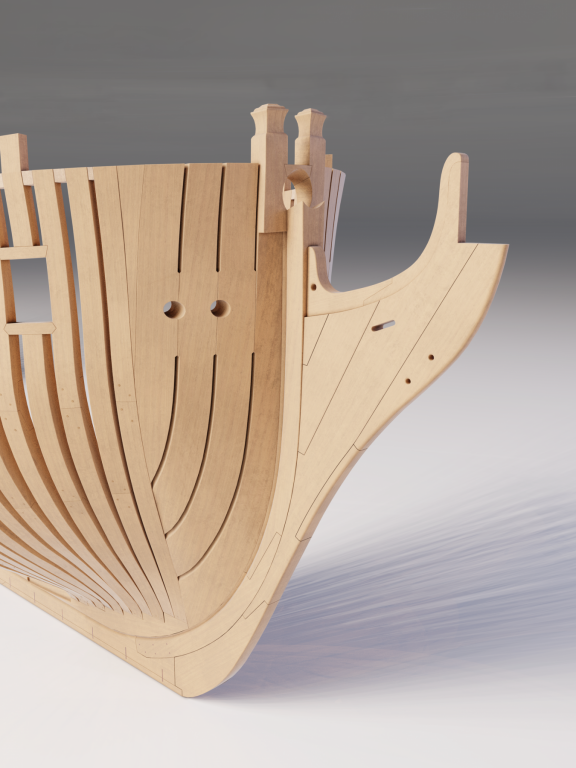
- 141 replies
-
- 21
-
-
- pof swan series
- swan
- (and 1 more)
-
Swan class 3D model in progress
dvm27 replied to dvm27's topic in CAD and 3D Modelling/Drafting Plans with Software
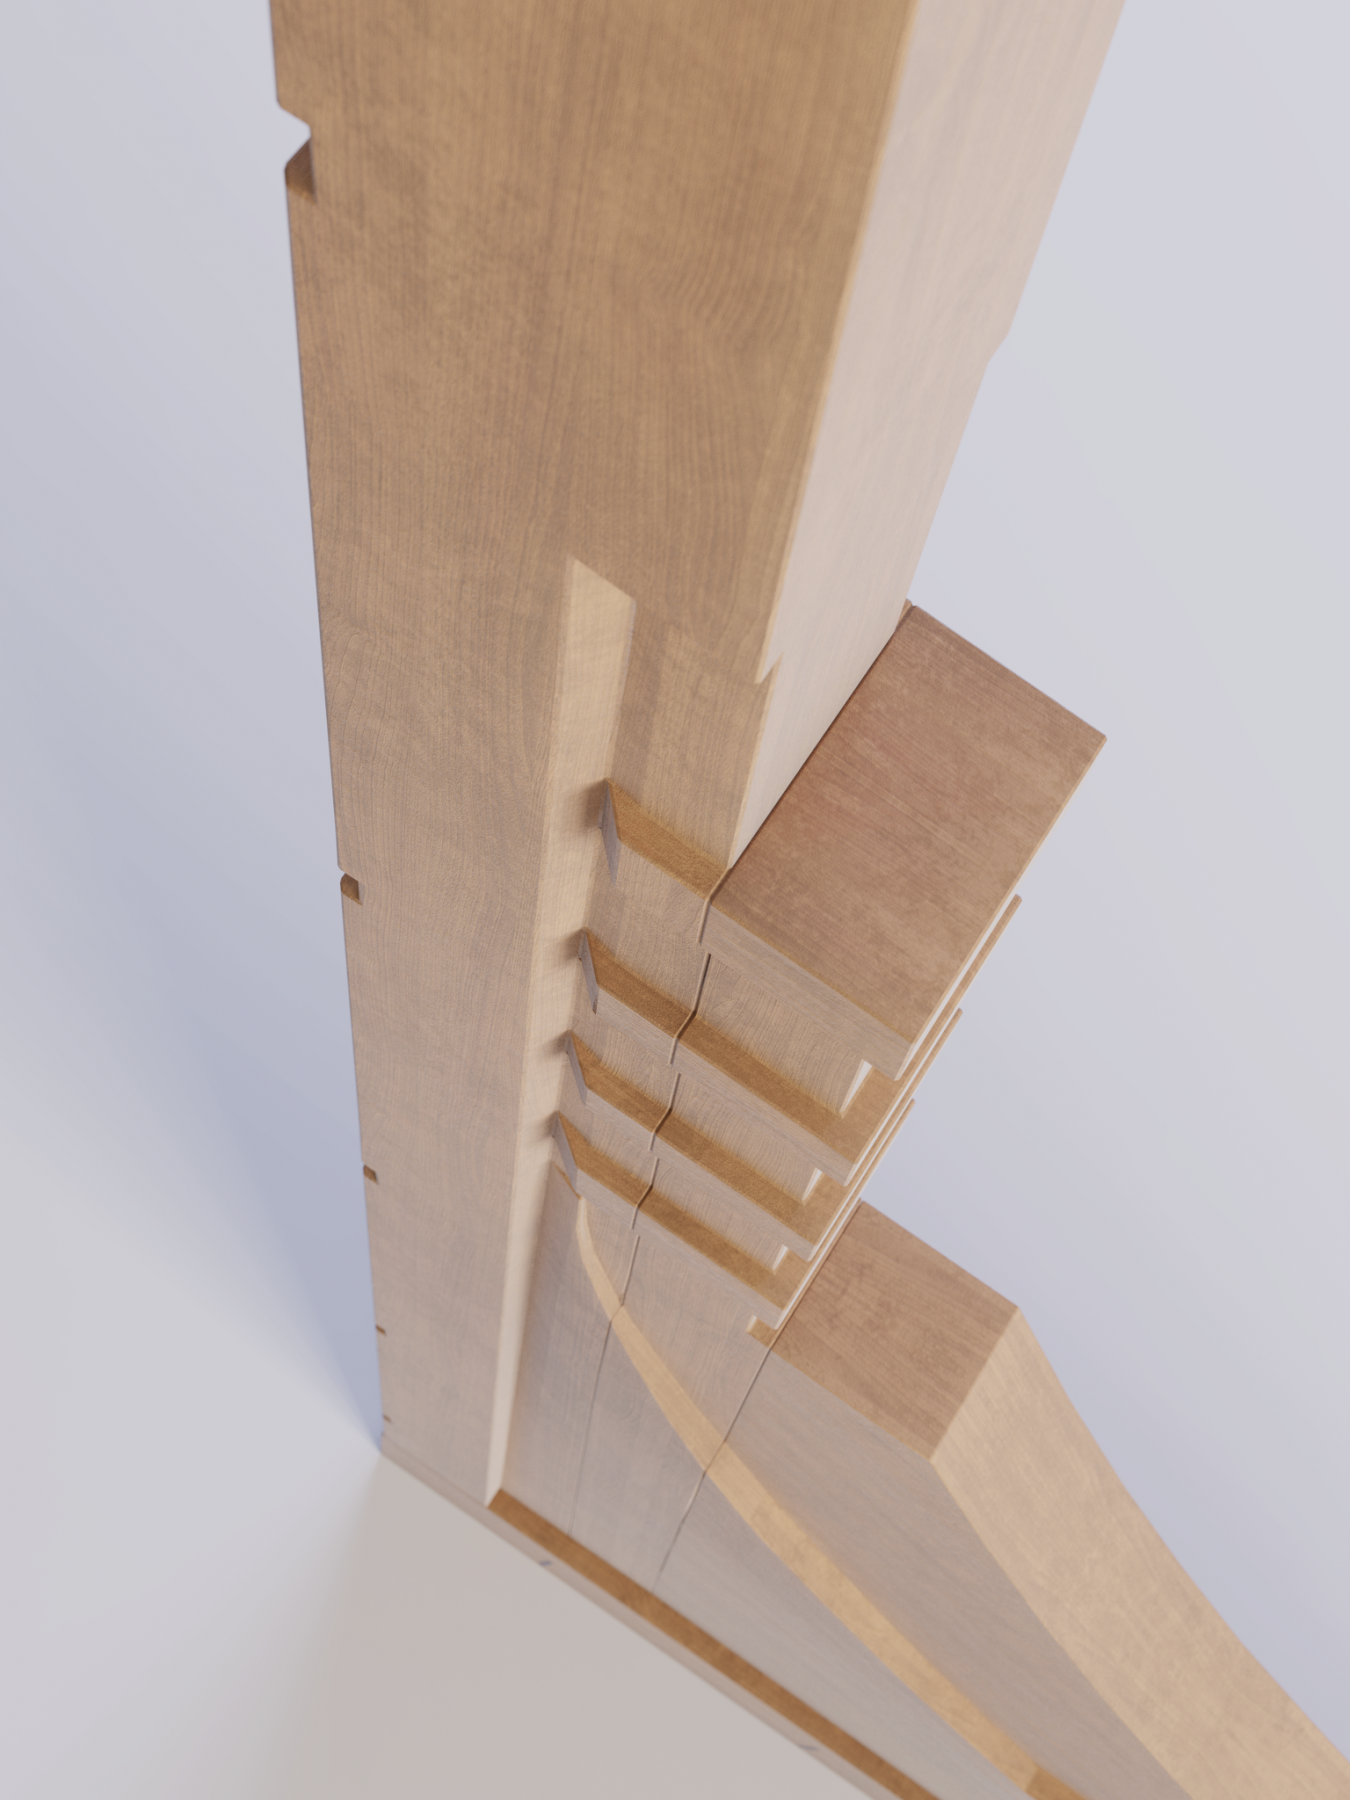
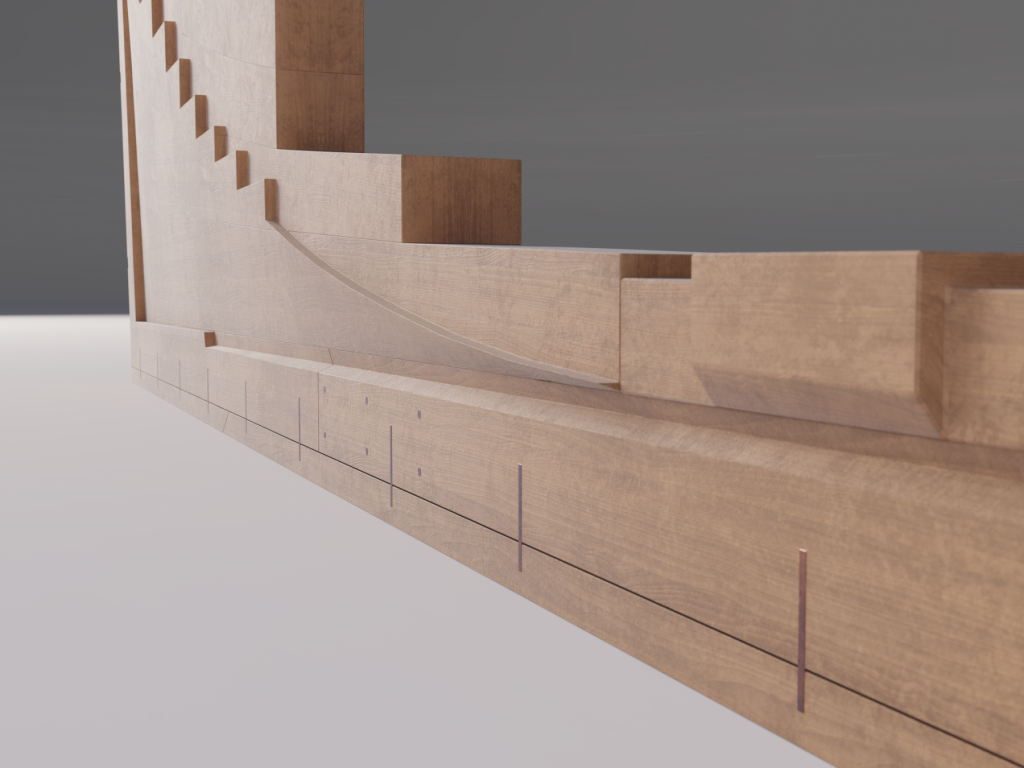
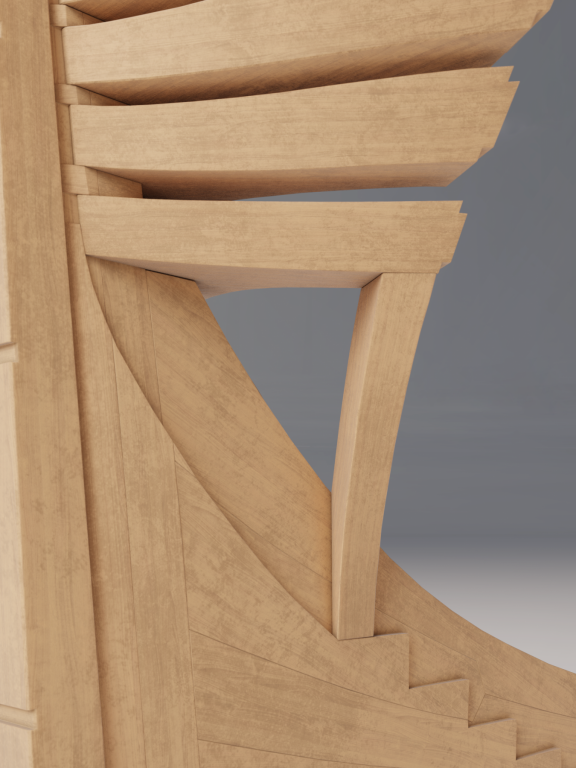
I know what you mean, Danny. Remember that wicked sternpost and aft rabbet transition? David's illustrations were awesome but how helpful would these photos have been!
- 141 replies
-
- 21
-
-
- pof swan series
- swan
- (and 1 more)
-
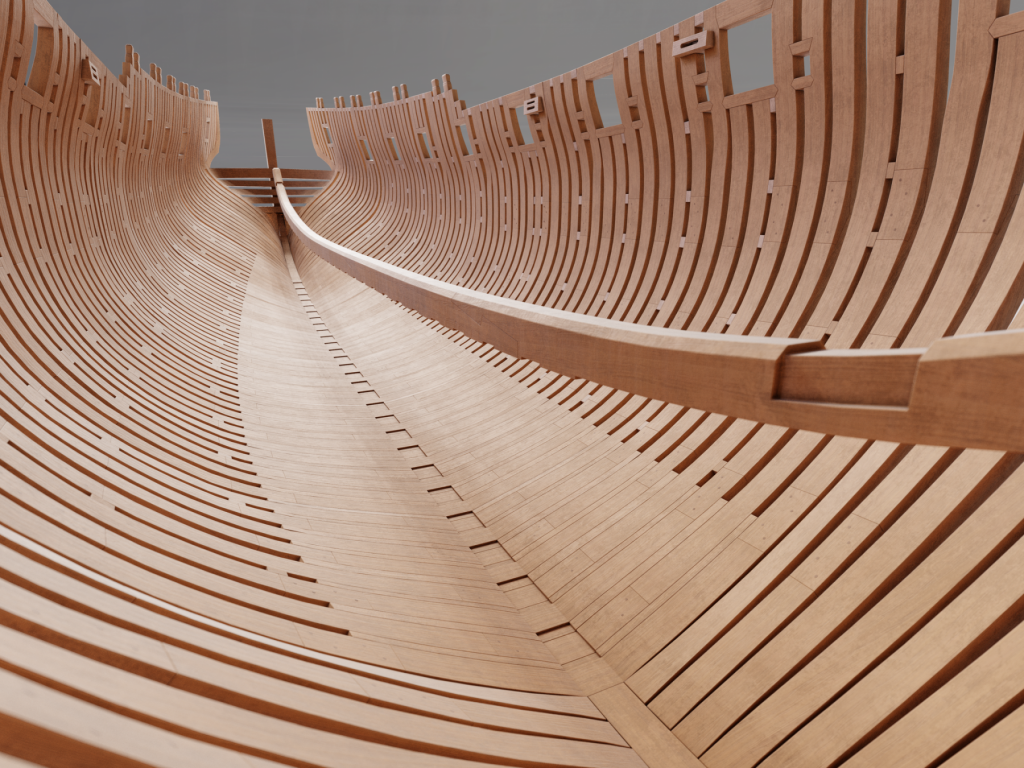
Admiralty Models has been working with a very talented 3D computer modeler who is building us a Swan class ship model (Pegasus). Besides the exceptional quality of his work, I can see the enormous benefit of a 3D model in showing how all the various pieces fit together. As the model's construction closely follows the actual vessel, it's build may be viewed in sequential layers. Our builder is precisely following the four volume Fully Framed Ship Model series of books, bringing David Antscherl's seminal work to life. In the near future, we will be offering the fully framed and fitted out computer model to those in the process of building a Swan class model or are contemplating building one. Between the Swan books and computer images I believe we will have the most comprehensive instructions and photos available for building a fully framed ship model. Stay tuned!

- 141 replies
-
- 30
-
-

-
- pof swan series
- swan
- (and 1 more)
-
Gary's suggestion above The Wooden World is a very good one for your needs. For example, Chapter VII, Officers contains the following topics: A career at sea, Patronage and Promotion, Authority and Duty.
-
Sweet work, Mike! Unless I'm mistaken you cut those steps on them mill...and finished with a chisel. Although it would be great if there was a way to make square corners on our mill. I'll bet Keith or Michael could figure out a way.
-
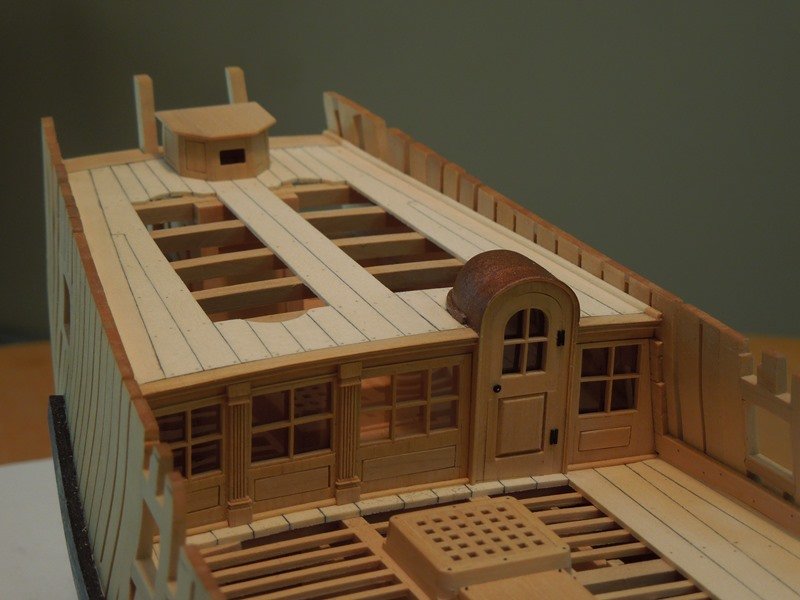
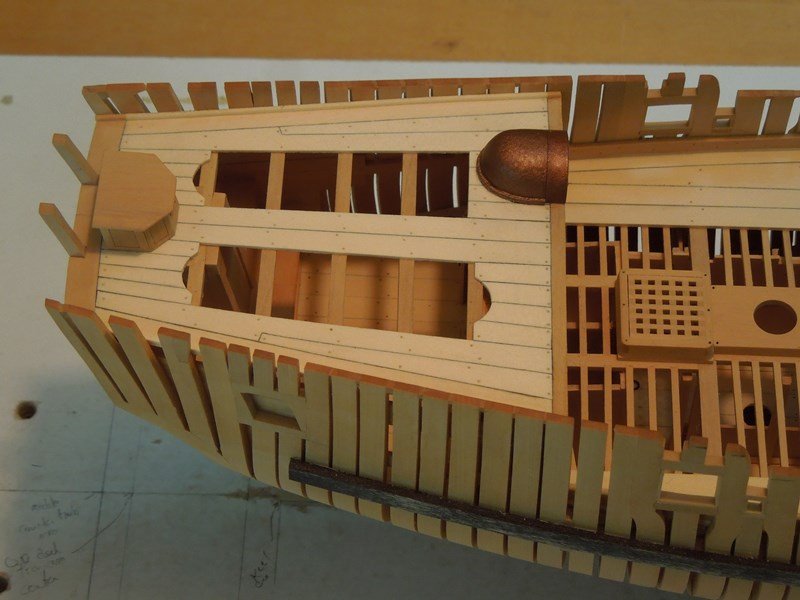
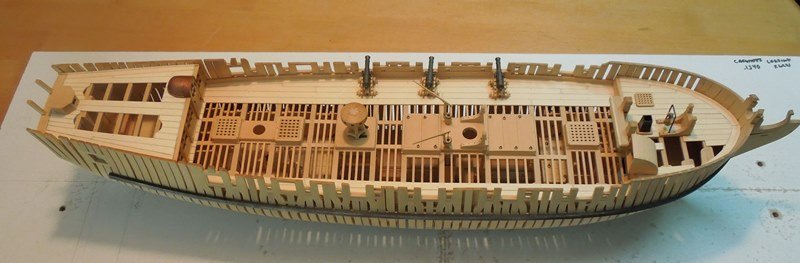
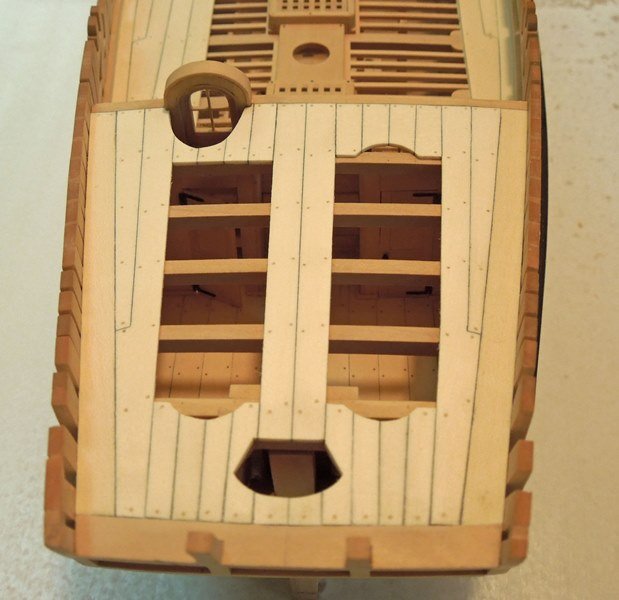
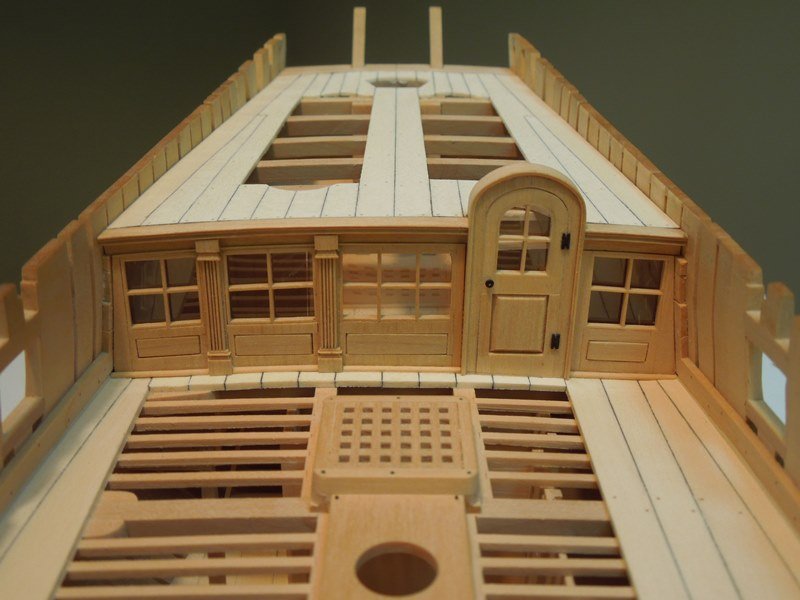
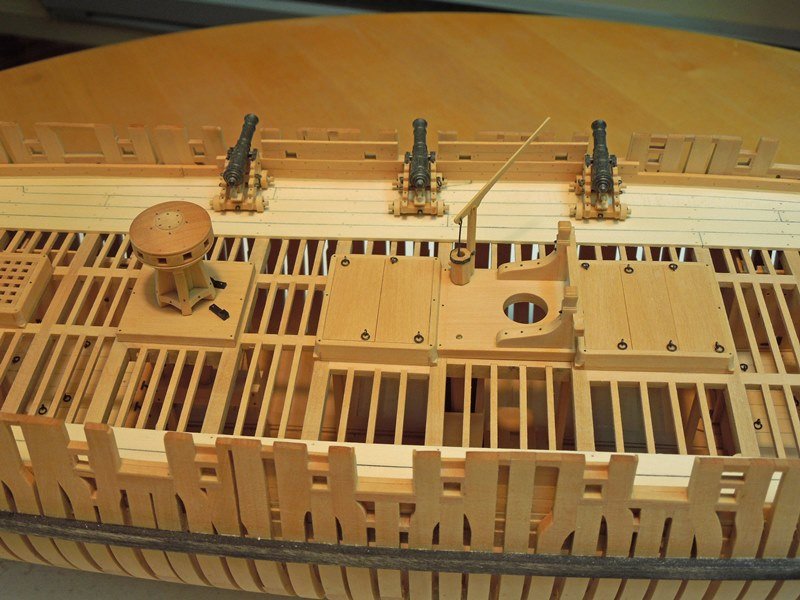
As many of my favorite modelers are posting updates this weekend I thought I'd share some recent progress on Speedwell. She is now sporting her copper cupola (say that three times quickly!) which arches over the steps to the "Great Cabin". I use that term in quotes because, after the lockers are installed, there is little room for the commanding Lieutenant. But this little vessel was designed for shore duty and was seldom used for sleeping. The cupola was shaped from a square of holly, hollowed out then spray painted with a hammered copper finish followed by matte varnish. The rudderhead cover was also shaped from a holly plug which was then hollowed out. The panels were added to each side. Each one was a different dimension and all are hand fitted. A little more work on the inside and outside of the hull and Speedwell, Volume I, will be off to the press!
- 345 replies
-
- 45
-
-

-
Pandora by marsalv - FINISHED - 1:52
dvm27 replied to marsalv's topic in - Build logs for subjects built 1751 - 1800
Fantastic Marsalv! The difficult planksheer with those seemless moldings is First Rate. -
Lovely, Alex. And now its on to everyone's favorite task...treenailing!
-
Honey Bear by albergman - FINISHED
dvm27 replied to albergman's topic in - Build logs for subjects built 1901 - Present Day
Let me get this straight. You made this beautiful model from scrap synthetic wood offcuts , bondo, cardboard and leftover scraps of various materials? I am truly humbled!- 18 replies
-
- 2
-
-
- honey bear
- fishing
- (and 1 more)
-
Looks great, Chuck, and certainly reflects other contemporary models. The blue looks a bit vivid to me but perhaps I'm used to a deeper blue on the Navy Board models I've seen.
- 269 replies
-
- 2
-
-
- Queen Anne Barge
- Syren Ship Model Company
- (and 1 more)
-
Headrails are the icing on the cake and yours look very nice, Toni. I've found that any small imperfections I'm stressing over tend to disappear as work on the next section gets underway. For those about to start work on those tricky headrails, please check out our next Admiralty Models workshop in October http://Www.admiraltymodels.com. We will be covering the expansion drawings and construction of this challenging area using laser cut pieces by Chuck to compare to your efforts.
-
Let me know how that works out for you, Keith. Then I'll do the same. Of course playing pool will be a bit more difficult but it's a small price to pay when all those little bastard escapees end up in the bucket!
-
I'm following another hoy build and it is a powerfully built vessel. I look forward to this build, Mike. Extending those cant lines will certainly come in handy when raising those frames!
-
Been awhile since my last Speedwell update. David and I were hoping to have volume one of her construction in book form by the end of the year but I suspect it might be a tad later. I do envy you retirees!


- 345 replies
-
- 44
-
-
Definitely one of my favorite books, with all color magnificent photographs of one of the most beautiful Navy Board models. If only every one of these priceless antiques could undergo similar restorations!
-
Miniature Russian carving tools
dvm27 replied to druxey's topic in Modeling tools and Workshop Equipment
I have had my set for a couple of months and I can honestly say they are the best set of chisels I have ever purchased. They are honed to perfection and come in just about every shape or size one might need. I have made great use of them and my model looks all the better because of them. Well worth the investment!