


popeye the sailor
-
Posts
16,007 -
Joined
-
Last visited
Content Type
Profiles
Forums
Gallery
Events
Everything posted by popeye the sailor
-
 coming along nicely Chris
 -
back in the day......minor issues like blocked doors would never be noticed. now that PE is being use to enhance certain aspects, it seems to bring these problems to light. but if there is enough extra detail......it could quite possibly hide it yea....that's some stand you got there......did someone say drydock?!?!?!
- 122 replies
-
- 4
-

-
- tamiya
- King George V
- (and 2 more)
-
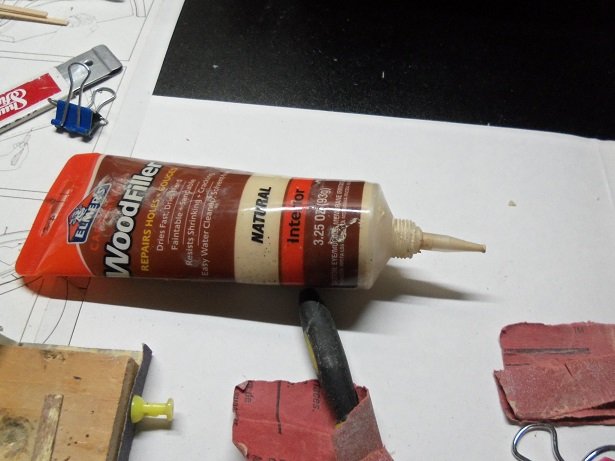
thanks Ben........if you do try it out, be sure to thin the filler to the consistency of a thick cream so it will extrude well enough. it will dry just as fast, if not faster, so no worries there. the tips can be purchased separately, or combined in assorted paint sets. the next update is shaping up to be quite fun. stay tuned thanks to all who hit the like button as well!
- 171 replies
-
- 5
-
-
- krabbenkutter
- authentic models
- (and 1 more)
-
I could hear the toast now.........."you didn't just gain a brother in law.........you gained a modeler in law!" congratz my friend......marriage is only as good, as how many times you goof up ........at least, that's what MY admiral says live long and prosper

-
you know.......I meant to pass this along, but Billing Boats http://www.billingboatsusa.com/ now carries the fitting kits for these models. for Christmas, I got another 'old' Nordkap kit. the older kits do not have the fittings included, so I thought I was going to have to do another scavenger hunt to locate the fitting kit. I just happened to go to the site to price out the parts, and there it was !!! ....along with the Mary Ann, and I think the Cux is there too. even if you don't need all the parts, you can add the rest to your inventory. I'm going to order a second fitting kit for the Nordkap........I have pictures of another model that a fellow did, and it is a variant of the Nordkap. I believe it is an older Billing kit too........love to get some conformation on the info I already have. I can understand......you want to keep much of what the other gentleman did. so far your doing a splendid job of it keep it up........this was a fun kit.....I enjoyed it very much!
- 51 replies
-
- 1
-
-
- krabbenkutter
- billing boats
- (and 1 more)
-
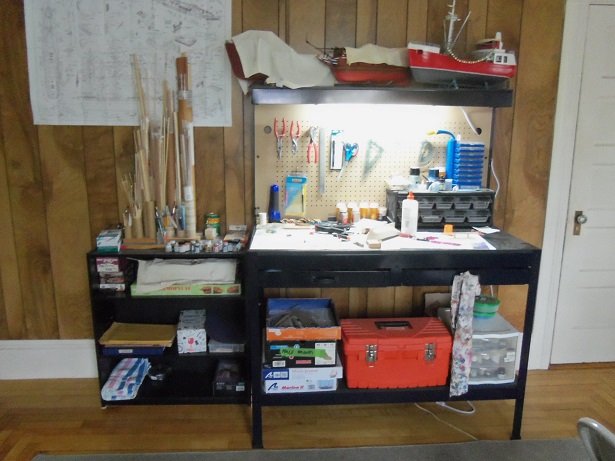
hey there Marc! so good to see your continuing and posting you must never think that a step your doing might be boring.......we miss out on ideas that may be a stroke of genius I thought I had a huge inventory of parts..........I'm definitely NOT hoarding enough! your work area looks really good...very functional. I'd die for an area like that.......totally green with envy. I don't feel so bad now for the thoughts I've had.........down in the cellar, the landlord has a corner section of counter top. it's a big section.....'L' shaped, and I've had the major urge to bring it up, now that our youngest has moved out. what keeps me from doing it, is I think the landlord would have a fit....even if I brought the idea up to him still love to see the look on his face! my god!!!! I'm working on a 1:124 scale Thermopylae at the moment......I see all the lines you've got set up there, and I think to myself that I'd never get all those lines on the model. your Cutty is much larger.......awesome progress you've done so far! I believe though that you encountered the rigging issue when you last posted progress........glad to see you've gotten past it and are moving ahead. looking forward in seeing more.......
- 525 replies
-
- 2
-
-
- cutty sark
- mantua
- (and 2 more)
-
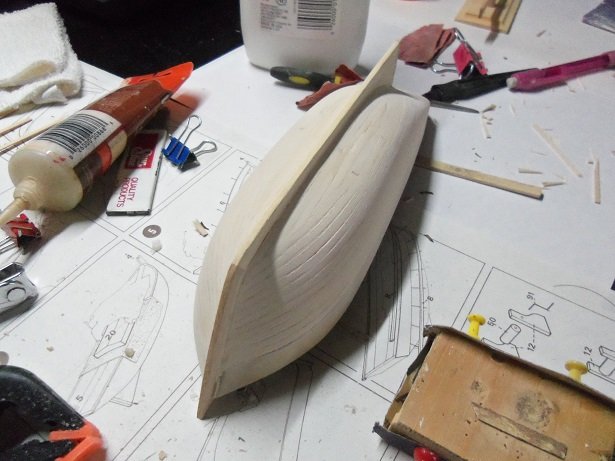
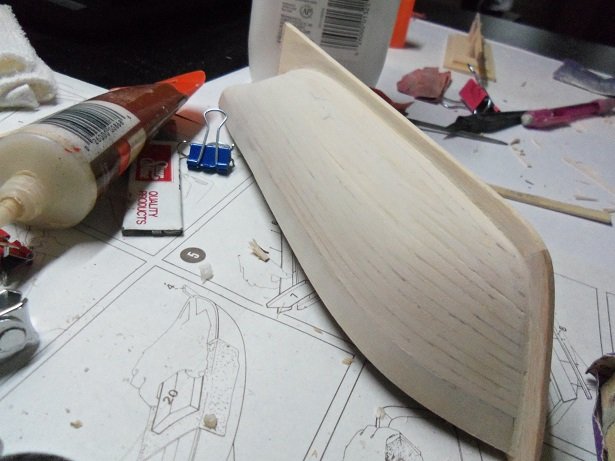
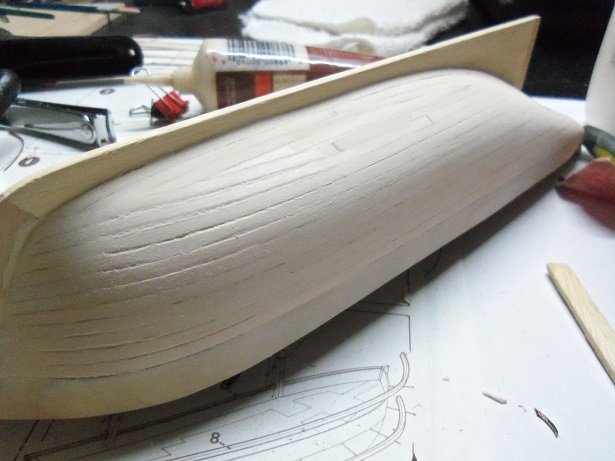
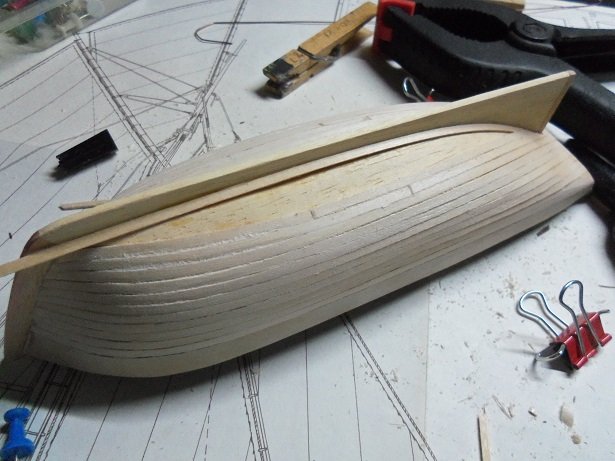
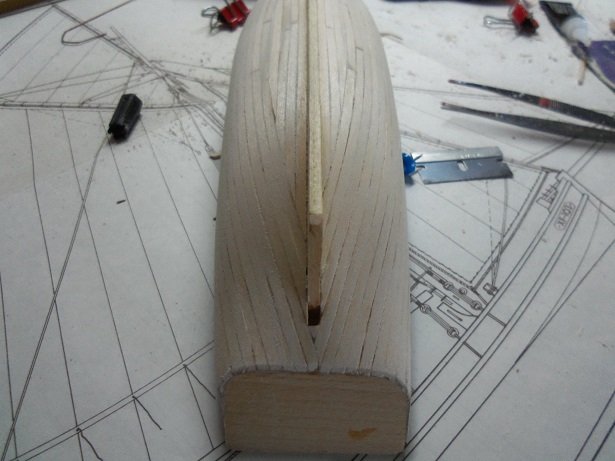
thanks for the kind comments gents this one was 'one of those things'.......I was going to get back to the Thermopylae......then I was going to bring out the Half Moon, but I was in question about the dead eyes....and then there was the Trawler. I ordered life raft bins for her.....deciding against an open boat, but they are too small in my opinion {I should post a picture so you folks don't think I forgot about her...again}. I found this model sitting on my door step one day. I have never heard of the manufacturer..looked old.....so I did some digging and found this: https://authenticmodels.com/nautical/sailing-ships/ I also think it looks really nice......that is, until I found that it's a solid hull model. I only have one in my stash.......a Marine Models kit of a PT boat {PT 10}....I have never done one before. after some deliberation, the box ended up on the table, and I went off to get the table in the spare room back in operation. that ended with me play'in in the Nordkap box, separating all the wood {I so want to start it....ohhhhh, the plans I have }. back at the main table, the box opened and I found myself looking over the hull and plans....I saw what is there......and isn't there......and that was enough......it had me with the planking idea. I know this is a lot of ishkabibble......and I don't advise anyone traveling the same wormhole that I do, but I find it fun......crazy, but fun. the other day, I whipped up notepad, and listed all of my projects and kits I have.....you know, I'm afraid to show you my signature doesn't tell the whole story....good thing......there wouldn't be room. hello John........what the heck was I working on when you left?.......oh yea....the Norden >giggle< glad to have you back and look'in in.......I hope all went as you hoped. thanks Patrick.......yes, I have a couple of them. two I have named....the Half Moon and the Thermopylae.......I have the Gothenborg, but that model has taken a couple of falls, so I'd have to see if it's salvageable {I'm sure it is}. I'd have three others, but I'm steadfast in not starting that project yet {hard for me....gotta tell ya that} I have a 'what if' in the planning stage for a cloning of the Thermopylae hull, but I'm keeping that on the back burner as well. so.....no, they're not out of the realm for me...there are some plastic kits too {but they're still in boxes}. thanks Piet......I enjoy them too. the gent that sent me this kit, thought it would compliment the Norden. I'm making it a point to display them side by side. with any luck, I might be able to add a few bells and whistles to this model, and make it a bit more interesting thanks to those who hit the like button the planking came out surprisingly well........as usual for me, there are a few spots that need attention. I didn't think I'd enjoy this new table as much as the old main table, but it looks more 'lived in', now that I've build a model on it. the hood above had turned out real handy as a storage shelf. I did manage to repair the light {cheap fastening clips}, even though I don't like how little light it lends to the work surface. I might figure out some way to host a crane light, sometime down the road. I did manage to do the filler work........I use those tips that Testor's supplies for their tubes of plastic cement. I'm able to extrude a fine bead every time, which in some cases, it's better than slathering a hull in it, and then having to sand it all off. terrible waste I thin the filler down with water too, so I can scrape some of the excess away, or better define a corner. the hull has undergone some sanding, being careful to leave some of the plank lines. the starboard bow needs a bit more to lose some of the larger lines.......I've added more filler since the pictures were taken. I'll touch it up and move on towards trimming the stern and transom, and other things external on the hull. paint may also be in the plans.......ya never know.
- 171 replies
-
- 18
-
-
- krabbenkutter
- authentic models
- (and 1 more)
-
well....he said something less complicated.........I don't think he can do it bound to be some twist in there somewhere
-
Crosby Stills Nash and Young had a song, but isn't spelled that way......Guinevere
- 378 replies
-
- 4
-
-
- java
- pacific crossroads
- (and 2 more)
-
comgratz Greg......awesome job ! the weathering and all the extra detail really adds a lot to her. a simply fantastic job
-
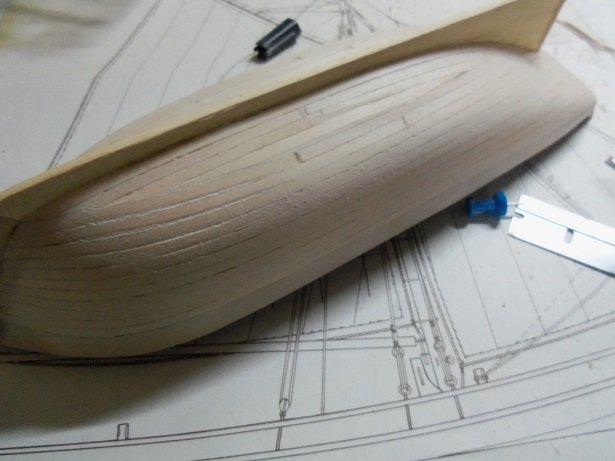
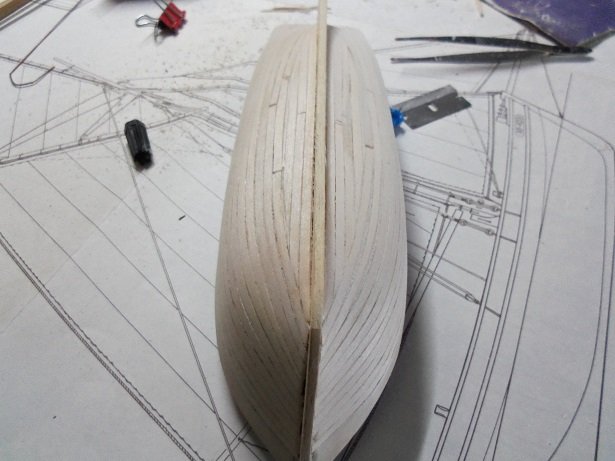
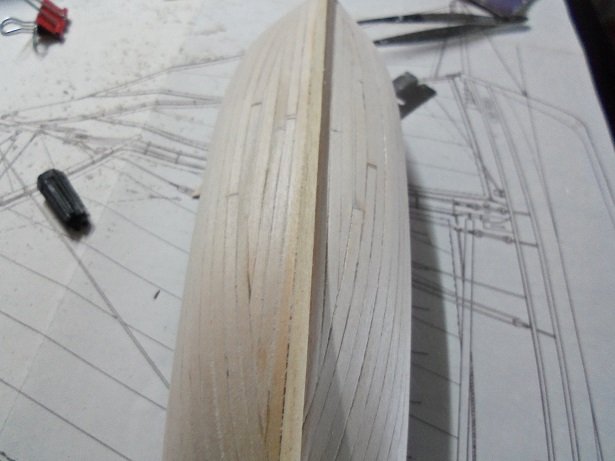
I did get to play with the hull a little bit during the work week. a couple more strakes were laid, before fitting in the garboard. I finished filling the rest in last night. I will do some minimal filling......I want to keep the plank lines more soon
- 171 replies
-
- 18
-
-
- krabbenkutter
- authentic models
- (and 1 more)
-
nice work on the masts the kit has a bit of a problem with the aft mast...there is no hole drilled for it. when I did some customer service for Tom, I fielded a question about it. the fellow did a great job drilling a hole and anchoring it to the back of the pilot house, as I suggested. with mine, I made a platform for the shrimp cooker to sit on......the hole was drilled in it and I anchored the mast to the back of the pilot house. was it your idea to move the pilot house inward on the base? it worked out just as good and looks super. are you going to make the goose necks for the booms on the main mast? nice progress so far
- 51 replies
-
- 1
-
-
- krabbenkutter
- billing boats
- (and 1 more)
-
bulwarks and transom looks good Bob neat and tidy!
- 359 replies
-
- 3
-
-
- prince de neufchatel
- model shipways
- (and 1 more)
-
really nice job on the weathering .......are they both the same scale? is that what your questioning?
-
congratz! the time has finally arrived...... when you get to unpack 'er...I wouldn't toss the crate. you'll need it for when the ship goes to the museum really top notch! hope everything goes smoothly for you.
- 1,354 replies
-
- 1
-
-
- constitution
- model shipways
- (and 1 more)
-
deck framing looks super........very nice progress!
- 193 replies
-
- 5
-
-
- wilhelmina vii
- fishing
- (and 1 more)
-
nice work on the sail Nils.........all three done like that will look super! really nice detail attached to the yards! .....make that......TWO sails!
- 692 replies
-
- 3
-
-
- eagle of algier
- chebec
- (and 2 more)
-
great progress Ben.......nice to see your beginning to frame out the wall petitions
-
very nice improvement on the statue..... the garments......even the shape of the hands lend a more life like appearance. while I do agree that your first rendition of the statue could have been better, I think your first one was fine. if you look back at most of the carving that have ever been done on ships {figureheads etc}, they were not carved to resemble like like figures. done freehand, some had a sort of cartoonish approach........some were carved to be intimidating. very seldom, it was a stroke of luck that any held some degree of positive facial recognition. you've certainly shown that you can improve.....your artistry is amazing and so very intricate the rest of the stern decorations are exquisite! first thing I though of when you wrote you lost your drive.....is it couldn't have gone far I really can't tell from the additions you've added to the stern, that you need to brush up on your research, but I can relate to the way you feel. it happens to us all from time to time....if you do pause.....I hope it's not long
- 1,035 replies
-
- 8
-
-
- royal katherine
- ship of the line
- (and 1 more)
-
Michael speaks true.......don't second guess it! you did an admirable job the paint work came out great...and you did so much to enhance the rigging! I did a double take to make sure that it was a Billing's kit. I do the same thing with the life rings......a tip I got from one of the moderators here. she's a beautiful vessel...I had to show it to the admiral.......you have her approval as well. do you have your eye on another project? I've enjoyed following along
- 101 replies
-
- 1
-
-
- L Toile
- Billing Boats
- (and 1 more)
-
looks really good