HOLIDAY DONATION DRIVE - SUPPORT MSW - DO YOUR PART TO KEEP THIS GREAT FORUM GOING! (Only 36 donations so far out of 49,000 members - C'mon guys!)
×


mtaylor
-
Posts
26,273 -
Joined
-
Last visited
Content Type
Profiles
Forums
Gallery
Events
Everything posted by mtaylor
-
I think we've been fooled and it really is the real thing. It really does look that good and where it's sitting gives that extra spark of reality.
-
Ah.. got it. I just use razor blade for the moulding cutter that's been shaped using some standard Dremel grinding disks and cut-off wheels. If I need something smaller, then a small file.
-
I see you posted this twice. So I'm moving this one to the proper forum and deleting the other.
-
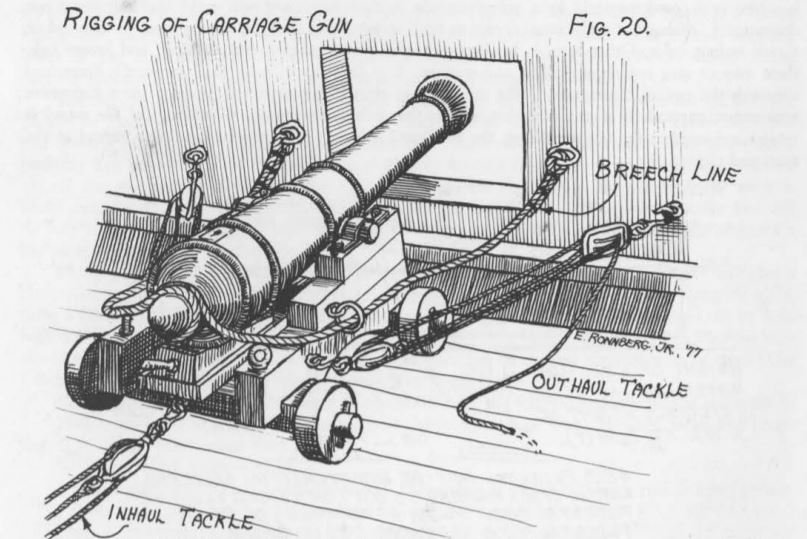
To "rotate" the cannons there was a set of "training/outhaul tackle" on each gun. Most models only show the basic one for recoil. The training tackle had pulleys and they also used a handspike to move the rear of the gun for training. The outhaul could be used for training. On some ships, there was an extra eyebolt on each side further from cannon to make training easier.
-
Congrats on a great job of a (IMO) rare model.
-
Looks factory fresh to me. I remember in the showrooms many times you couldn't get with 5 feet of one unless you showed them your bank account. Though I do recall sitting in the driver's seat of a Ford GT (whatever the commercial name of the GT-40 was) for about 10 minutes once. I knew the sales droid.
-
Like a desk at the office, a clean work bench is the sign of a sick mind and work not getting done. I'm curious what you'll find in rotary cutters as I have yet to find any that will do the moulding.
-
I hope all goes well, Alan. May the surgeon have steady hands and you a fast recovery. Dan, ask your question in the Masting Area. I think more eyes will see it.
-
Stealers
mtaylor replied to Sheerline's topic in Building, Framing, Planking and plating a ships hull and deck
I was going to post what Druxey said. It looks like at your bow end, the planks are too wide. A tutorial will help you. -
Thanks for another fascinating glimpse of history, Stephen. I, for one, appreciate them.
-
Welcome to MSW, Tom. I hope you can find the info you need to finish and it looks like you've recieved a lot of help so far. Sorry, but I removed your phone number. Please us a PM to the other person when giving out personal info.
-
Looking at the detail at this scale boggles my mind. Stunning work, Marc.
- 2,696 replies
-
- 3
-

-
- heller
- soleil royal
- (and 9 more)
-
Nothing wrong with being the "mental" section with the rest of us, Edward. She's looking quite fine.
-
Wonderful work, Gary. And the figures give it a sense of perspective as to the size of the ship.
-
Beautiful and interesting work, Anthony. How are you going to display her? I just can't see hanging her on a wall like other half-hull models.
-
Super nice work, Hellmuht. This is something totally eye catching.
- 158 replies
-
- 1
-
-
- byblos ship
- Egyptian
- (and 1 more)
-
Not a twit, Steven. We've all done that kind of thing. "Oops" followed by a few choice words. I do love the way this is looking.
-
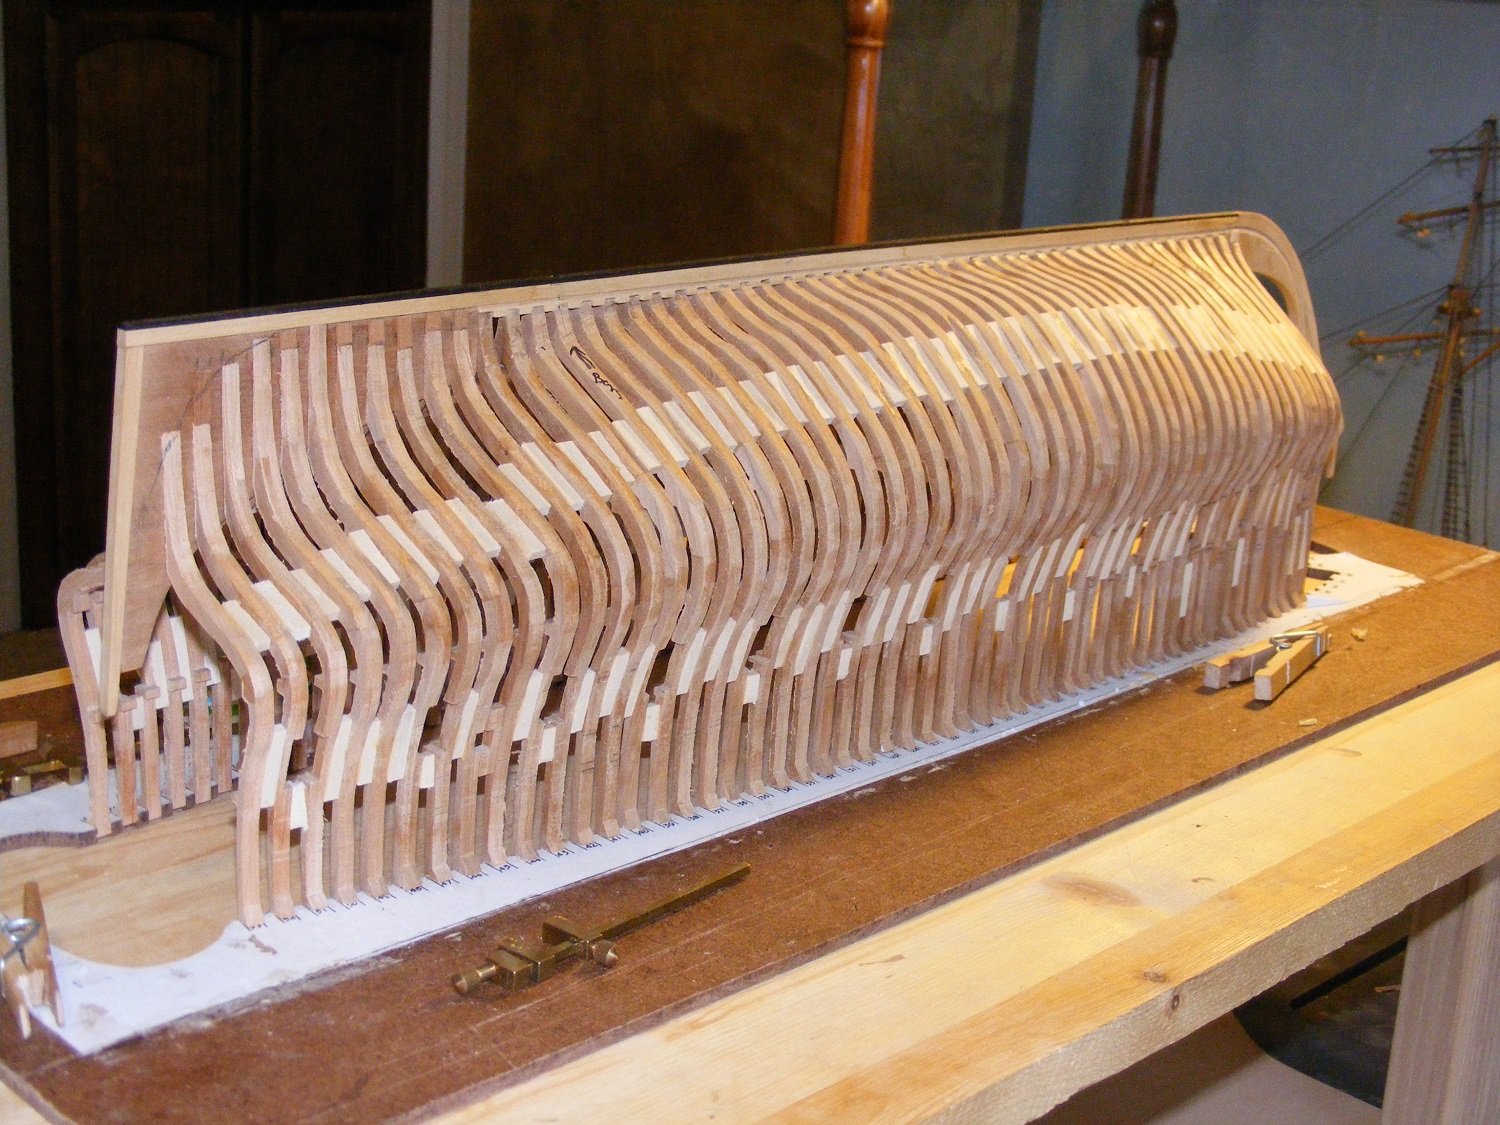
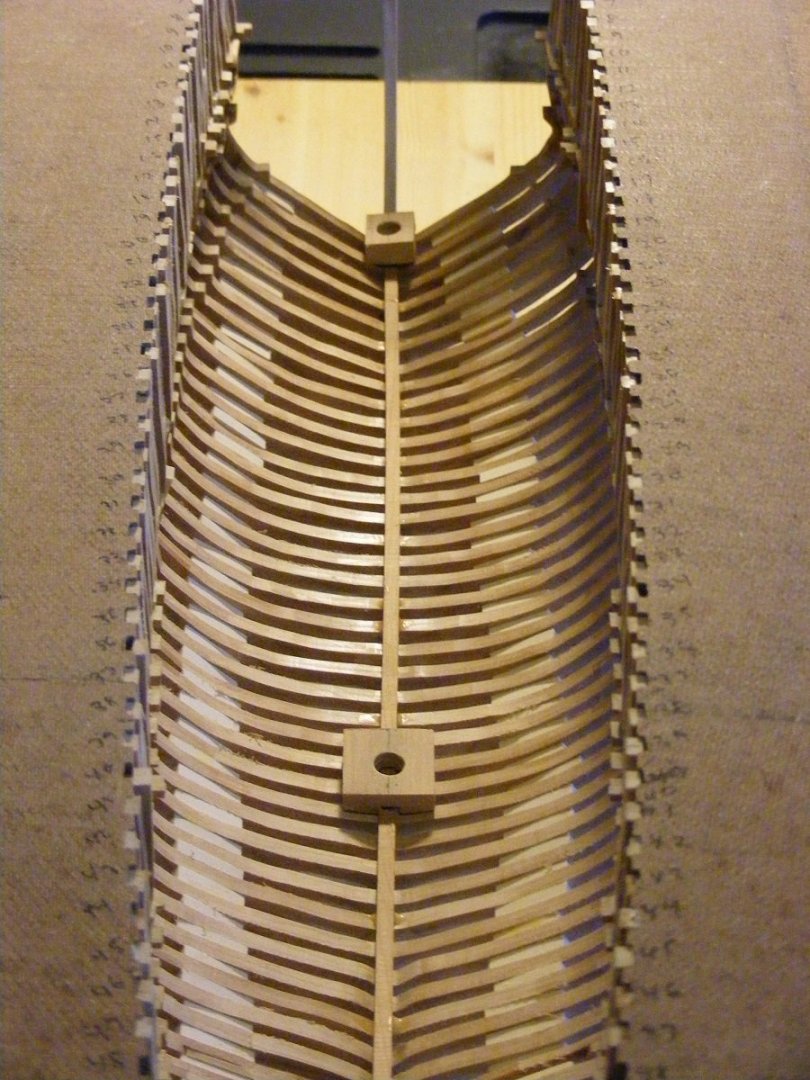
You might give some thought to something like a Hahn jig. Cut out the center around the upper part of the hull, notch it for the beams. When making your frames, add an extension to the top of the beams so the hull is above the board. Here's two photos of one of my builds using this method. By cutting out the center around the inside of the hull when doing the board, you have access to the inside.

-
I can't add to what's been said, but Welcome to MSW.
-
Welcome to MSW, Doug.
-
Ripping Planks - what I've learned from others
mtaylor replied to glbarlow's topic in Modeling tools and Workshop Equipment
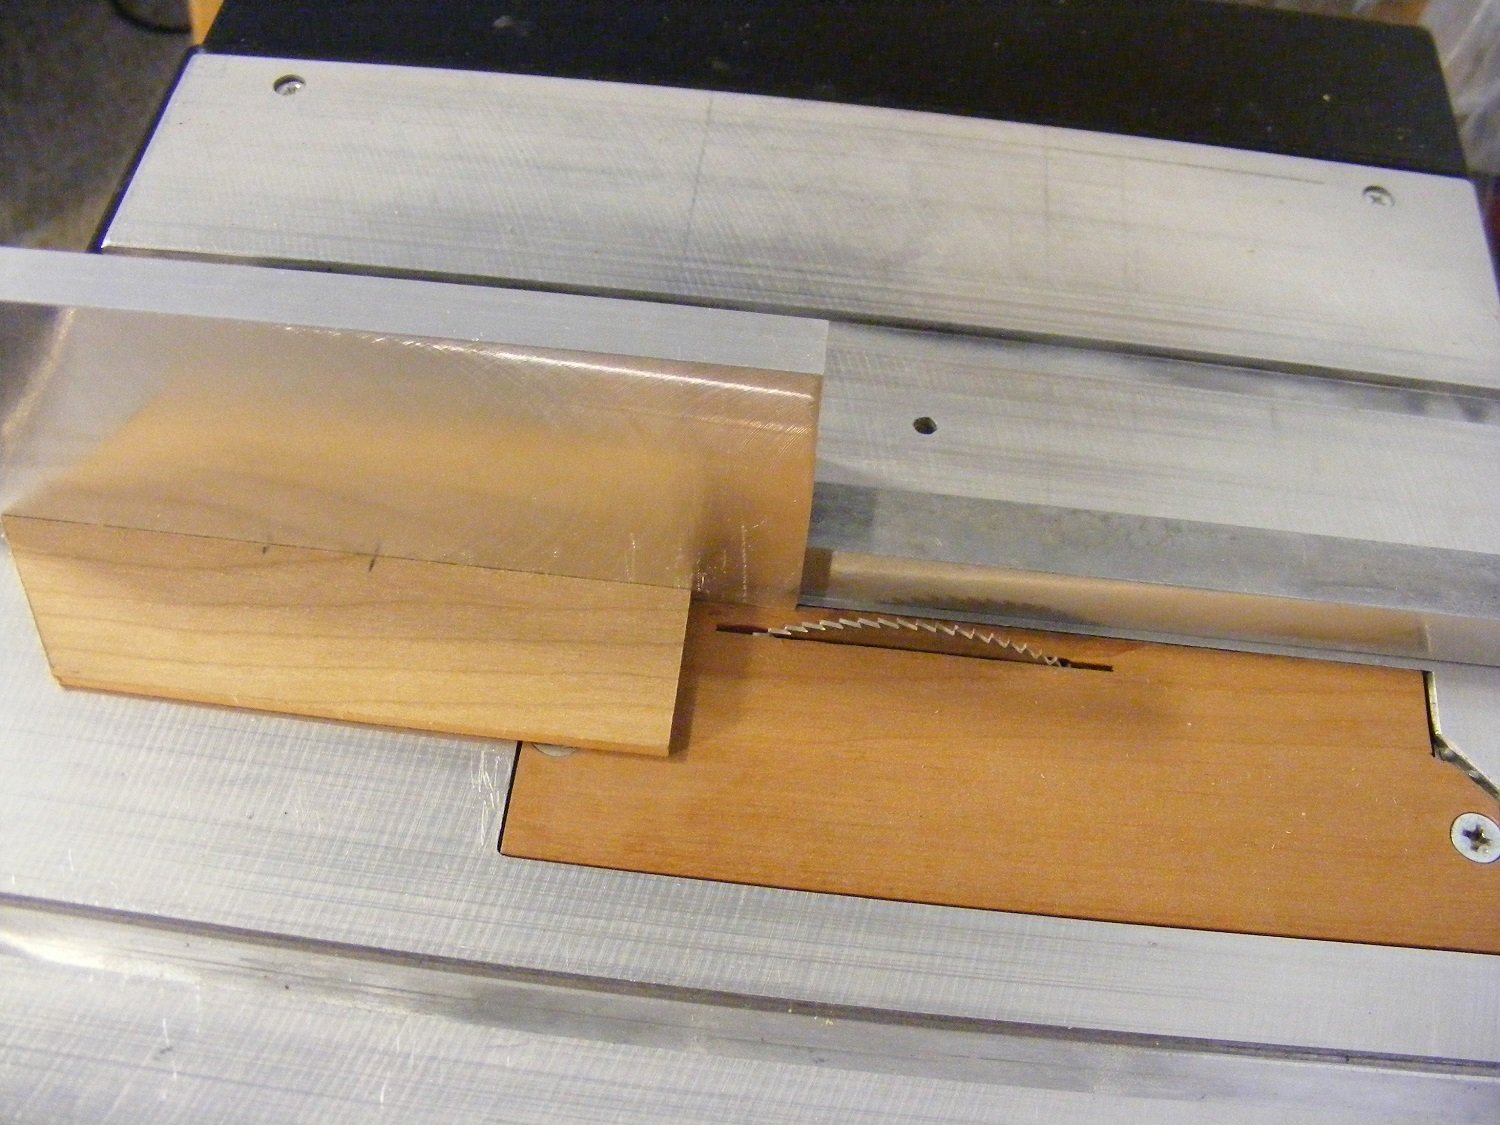
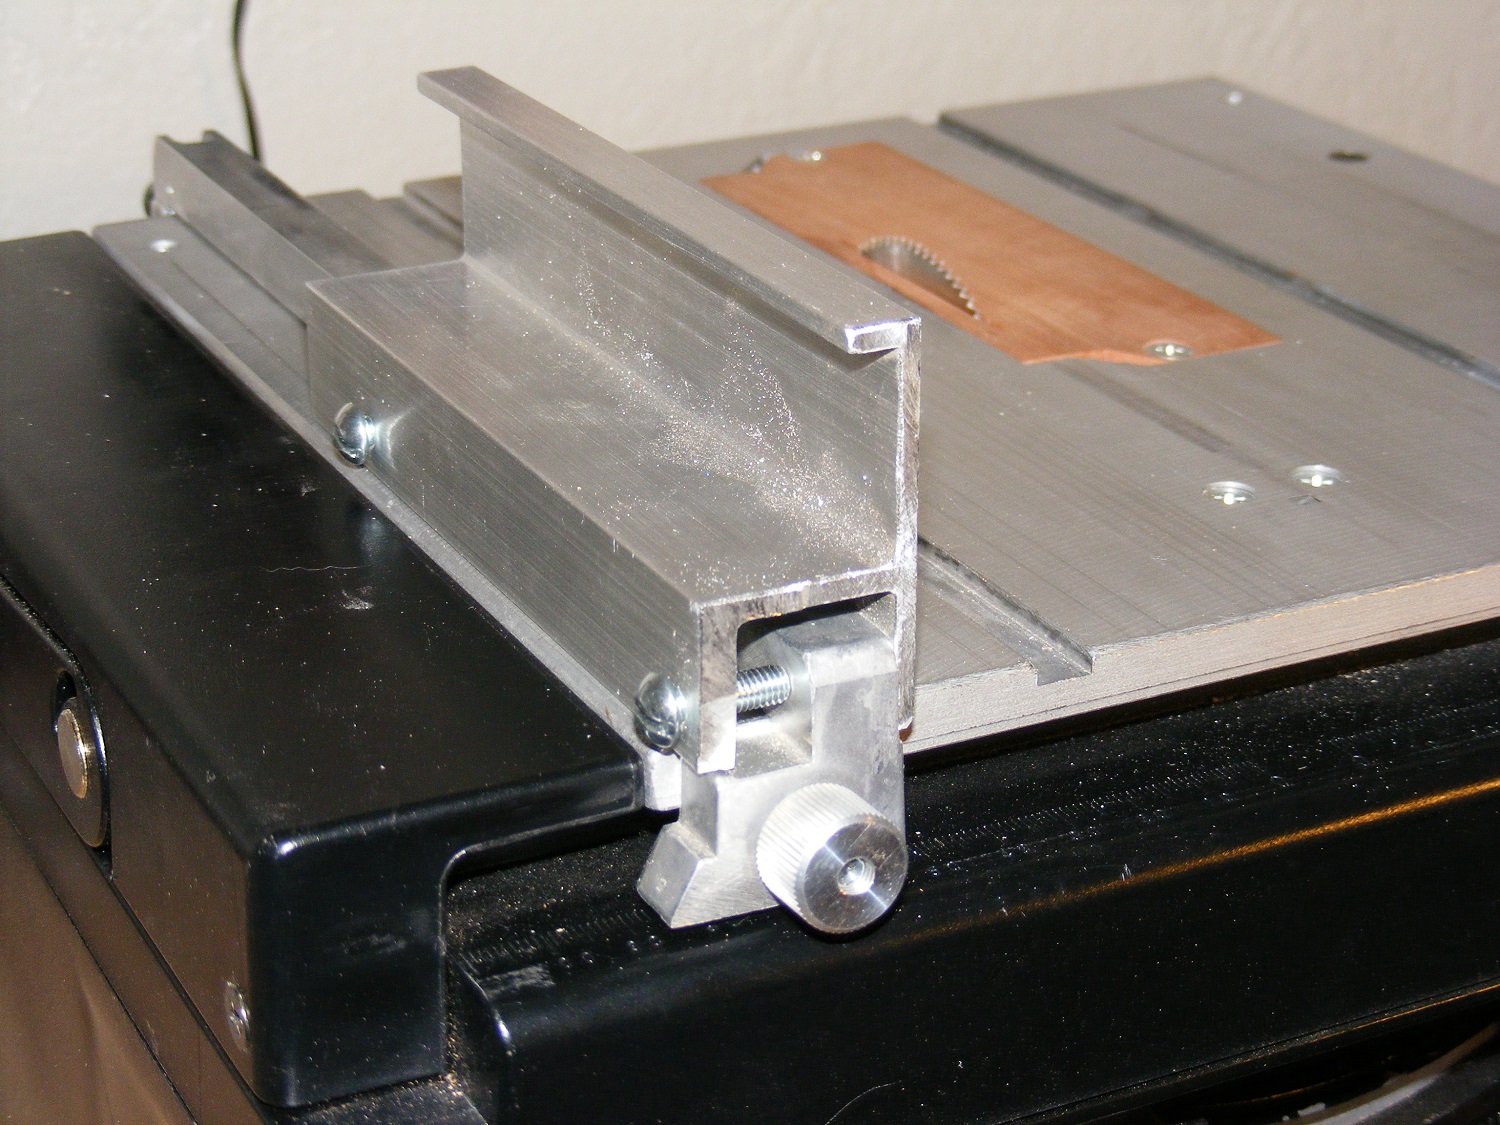
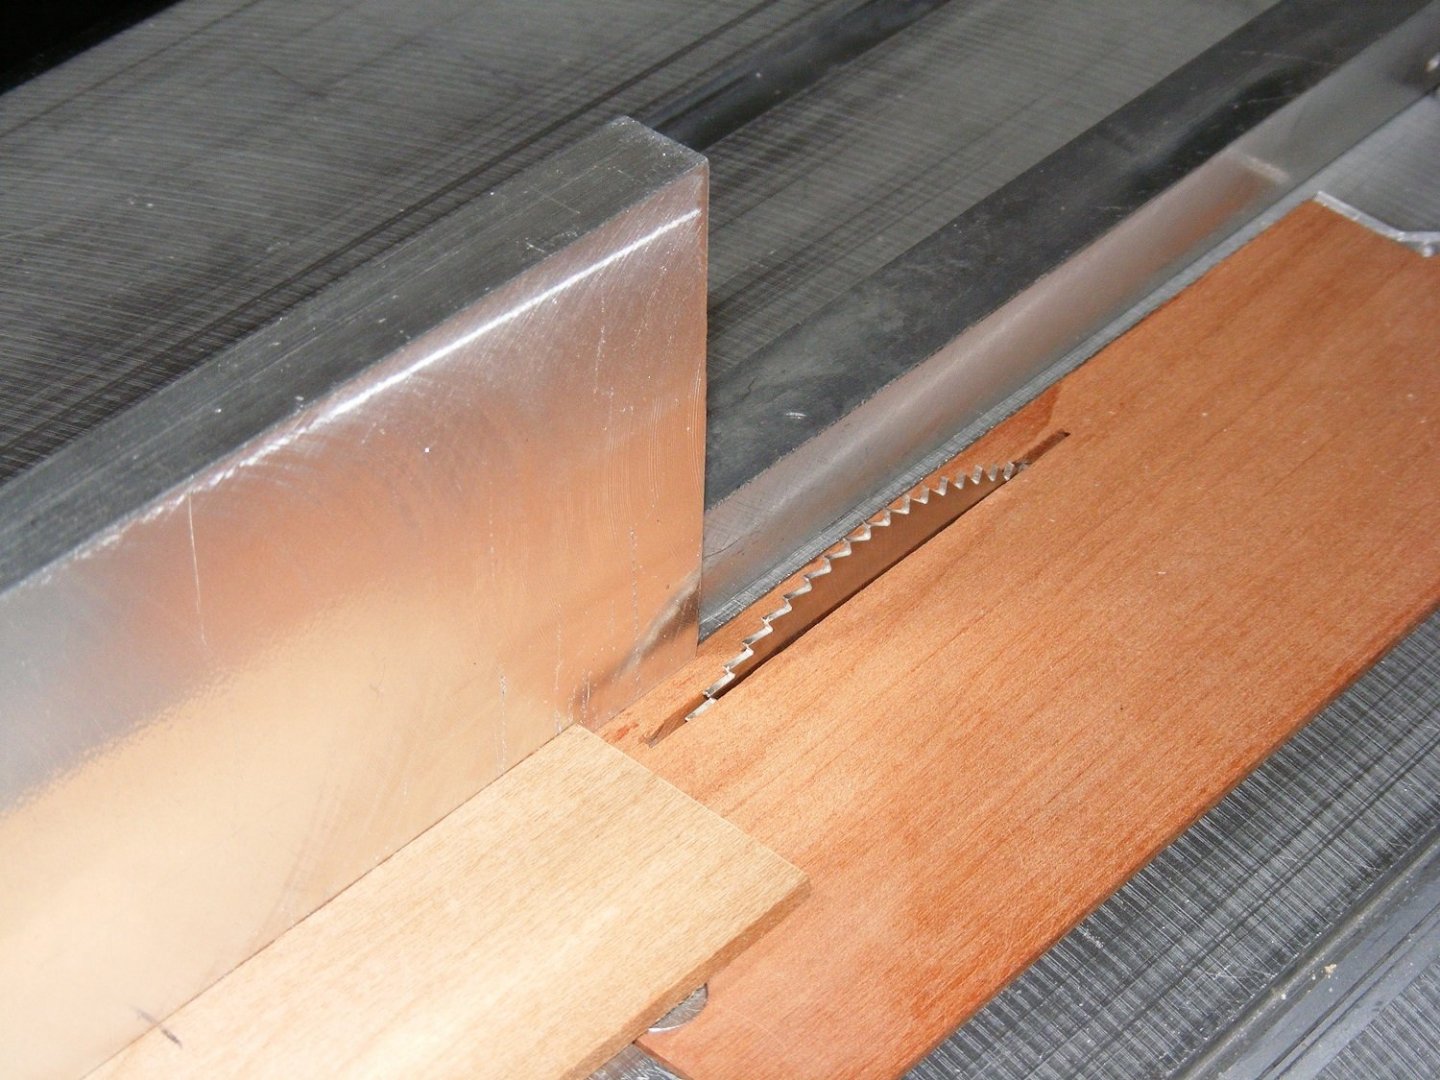
Glenn, Don't regret this. Excellent topic and presentation. BTW, here's another way similar but different from Kurt's and some others. I use a short tall fence over my long short fence. I then set the tall one such that it is about halfway (usually less) down the blade. Kickback is basically a thing that never happens with this. Usually push sticks on sort pieces and fingers on big ones.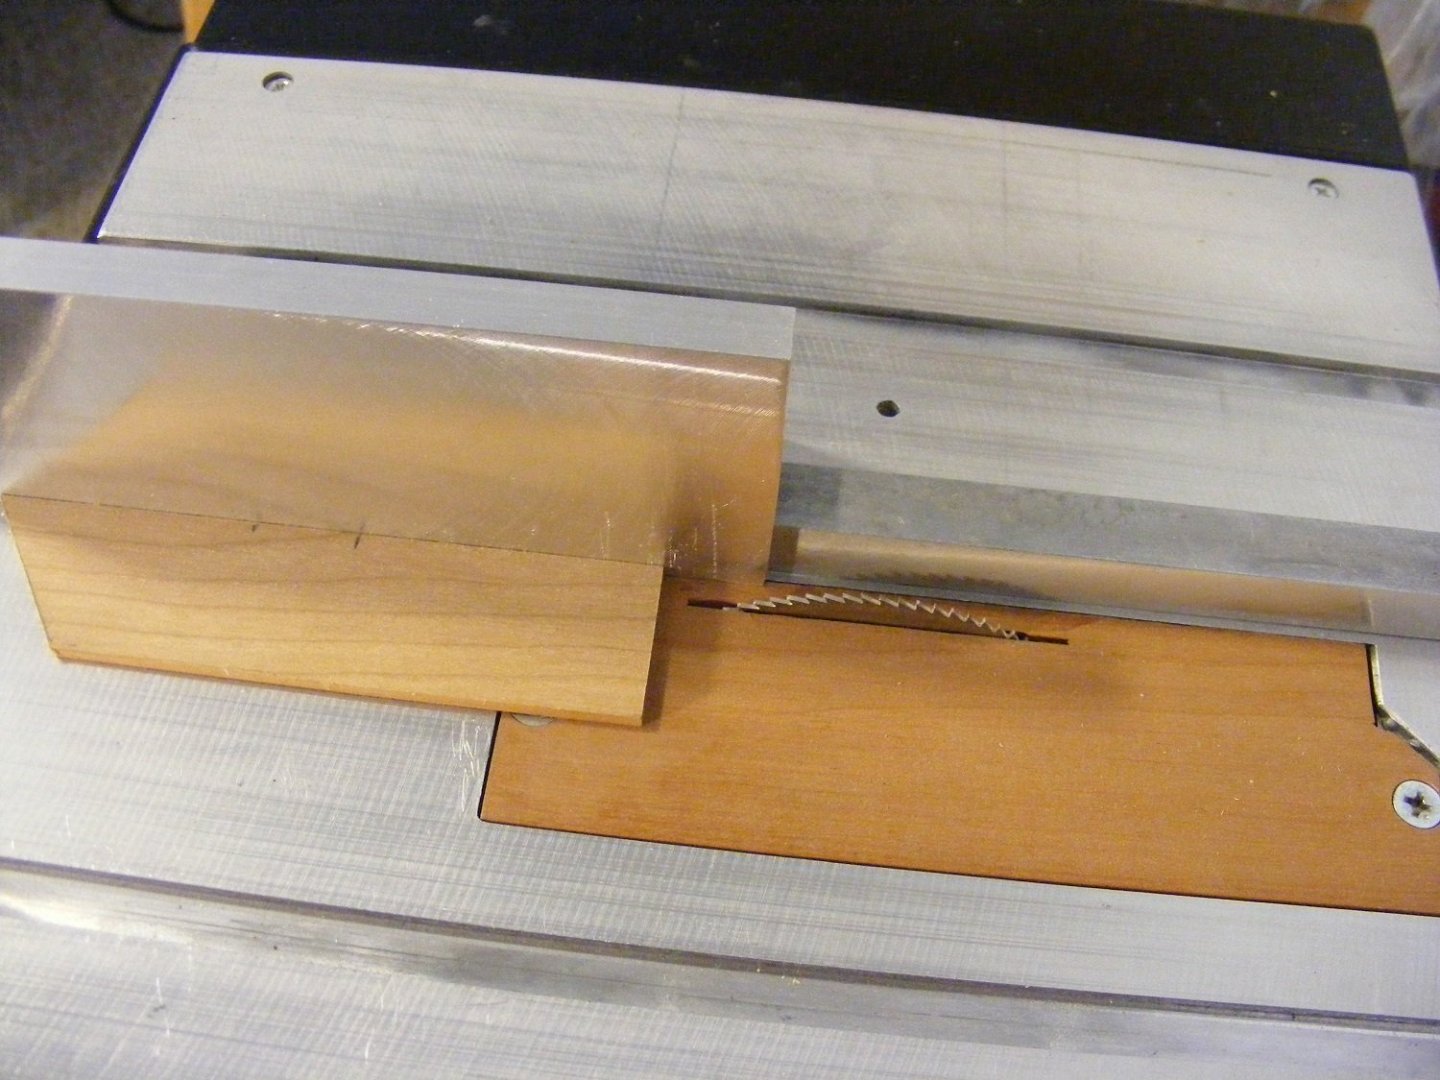

-
A DIY thickness sander
mtaylor replied to Kris Avonts's topic in Modeling tools and Workshop Equipment
Now that's a different way to put the sandpaper on the roller. Looks like a great way. -
Dornier Do-217K-1 by Papa - FINISHED - Revell - 1/72 - PLASTIC
mtaylor replied to Papa's topic in Non-ship/categorised builds
Two bristles? I vaguely remember seeing brushes with only one. Maybe they don't make those anymore as it's been along time since I was really into plastic.