

jhearl
-
Posts
355 -
Joined
-
Last visited
Content Type
Profiles
Forums
Gallery
Events
Posts posted by jhearl
-
-
Another site with some pretty awesome stuff is from one of the sponsors here - Scale Hardware
https://www.modelmotorcars.com/museum/scale-hardware-model-museum/
If you're into cars, there are several other pages of models that you can get to from the top level of their site - https://www.modelmotorcars.com/
Click on the Museum button at the top of the page.
-
10 hours ago, Tom in NC said:
Now it's rumored that Bluejacket is planning a new high-end model of that and it's going to be #1 on my shopping list if & when it becomes available. I'll do a much better job on it this time around.
Al, at Bluejacket, is working on a large-scale cross-section of Morgan. See this newsletter from them -
Cheers -
John
-
The Dumas Chris Craft kit included styrene strips for the caulking. See this video -
-
If you decide on Latham, you might want to consider getting a copy of American Fishing Schooners by Howard Chapelle. It's a tremendous resource for these boats. https://www.amazon.com/American-Fishing-Schooners-1825-1935/dp/039303755X/ref=sr_1_1?ie=UTF8&qid=1537706149&sr=8-1&keywords=american+fishing+schooner
It's an expensive book, but well worth it in my opinion.
Another model to consider is Bluejacket's Smuggler. Similar boat and same scale as Latham but solid-hull construction instead of plank-on-bulkhead.
http://www.bluejacketinc.com/kits/smuggler.htm
Cheers -
John
-
Another option from Micromark called Sand-It.
- mtaylor and Jim Rogers
-
 2
2
-
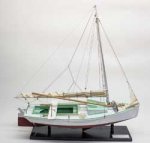
I'm a little surprised you didn't mention any of Bluejacket's entry-level kits. The first kit I successfully completed many years ago was the Grand Banks dory. As well, I think some of the easier solid-hull kits, like Yankee Hero are a good choice for those with little or no experience.
Cheers -
John
-
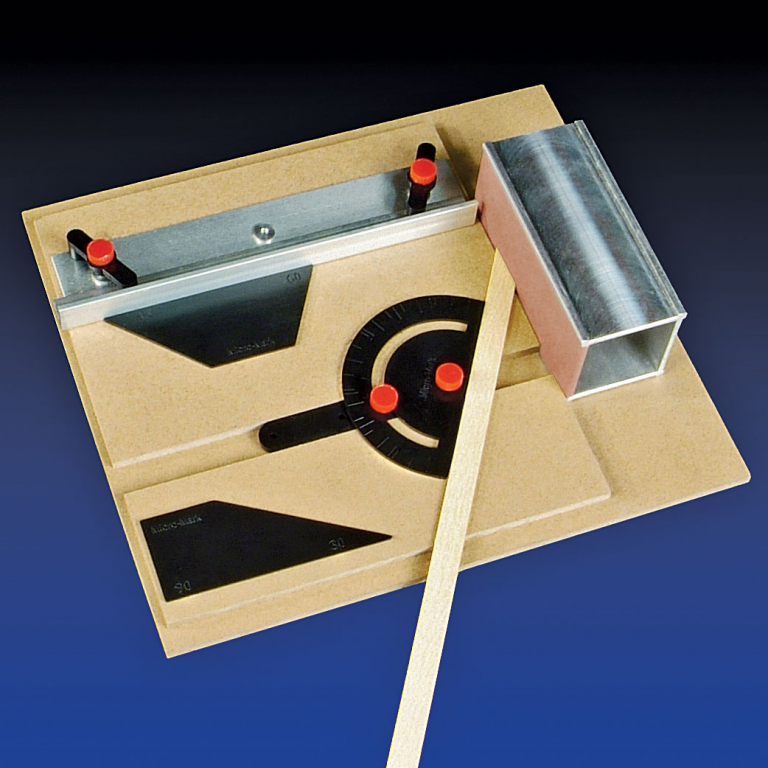
I would suggest getting the tilting angle table (3750) over the right angle attachment. It's much more versatile since you can set it to any angle between 0 and 90.
Cheers -
John
- PeteB, Landlubber Mike and Canute
-
3
-
I have this quaint habit of looking at real ships when I want to know how something is done. Here are a few examples:
Cheers -
John


- jud, MEDDO, JerseyCity Frankie and 5 others
-
8
-
4 hours ago, MrBlueJacket said:
We never started to build the Wyoming, but it is in our kit development schedule. I expect it to come out in about 1 1/2 to 2 years. It wioll be 1/8" = 1' scale, and be 55 inches long.
Nic
My bad - I mis-remembered a newsletter last year where you were working on Notman and then there was a picture of Al holding plans for Wyoming. That's going to make one helluva model!
Thanks -
John
- mtaylor, thibaultron, coxswain and 1 other
-
4
-
This is off-topic, but I'm curious - whatever happened to your build of Wyoming?
Cheers -
John
- Canute, thibaultron and mtaylor
-
3
-
-
I thought I'd make one other suggestion that, in retrospect, makes me feel dumb that I didn't think of it immediately. You don't always need that depth stop part. I mean the little hangy-down part on the right. I had gotten into the habit of removing it and laying the piece of metal and the screw down on the bench. Doubtless, everyone elses' workbenches are neat and tidy at all times, but mine quickly becomes a disaster zone while I'm working. So small parts like that can often get moved out of sight or separated from each other by the gremlins who live in my shop. The simple and obvious solution is to simply turn the part around and hang it down on the back side of the fence. Like I say, I feel dumb that it didn't occur to me to do that until yesterday, but maybe it's something that hasn't occurred to someone else yet either. (Not saying you're dumb!
") )
)
Cheers -
John
- Landlubber Mike, AntonyUK, Canute and 2 others
-
5
-
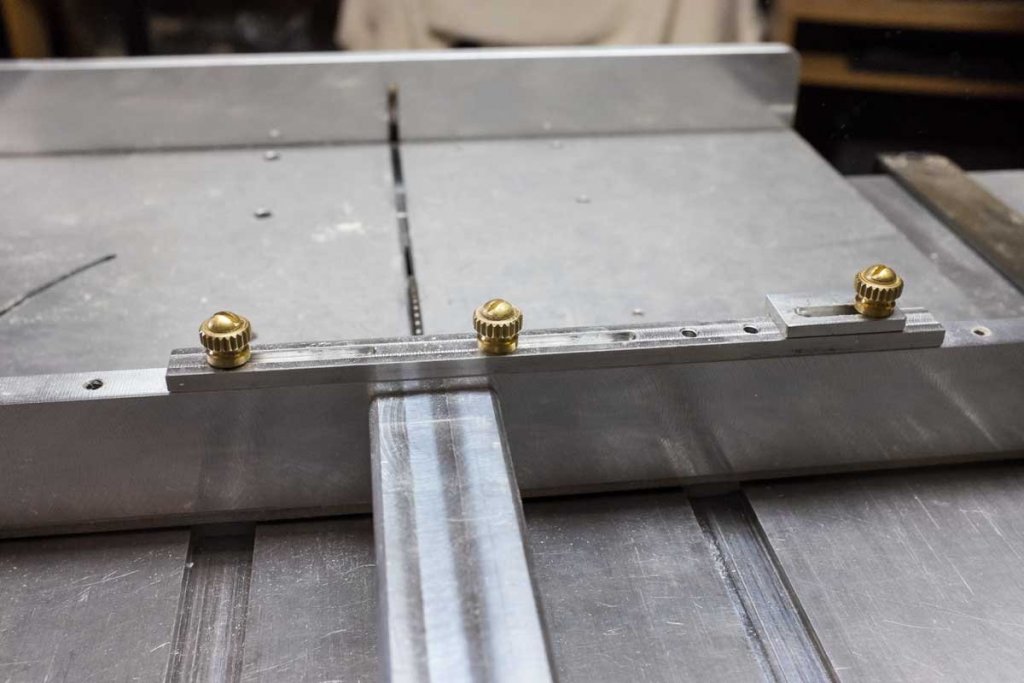
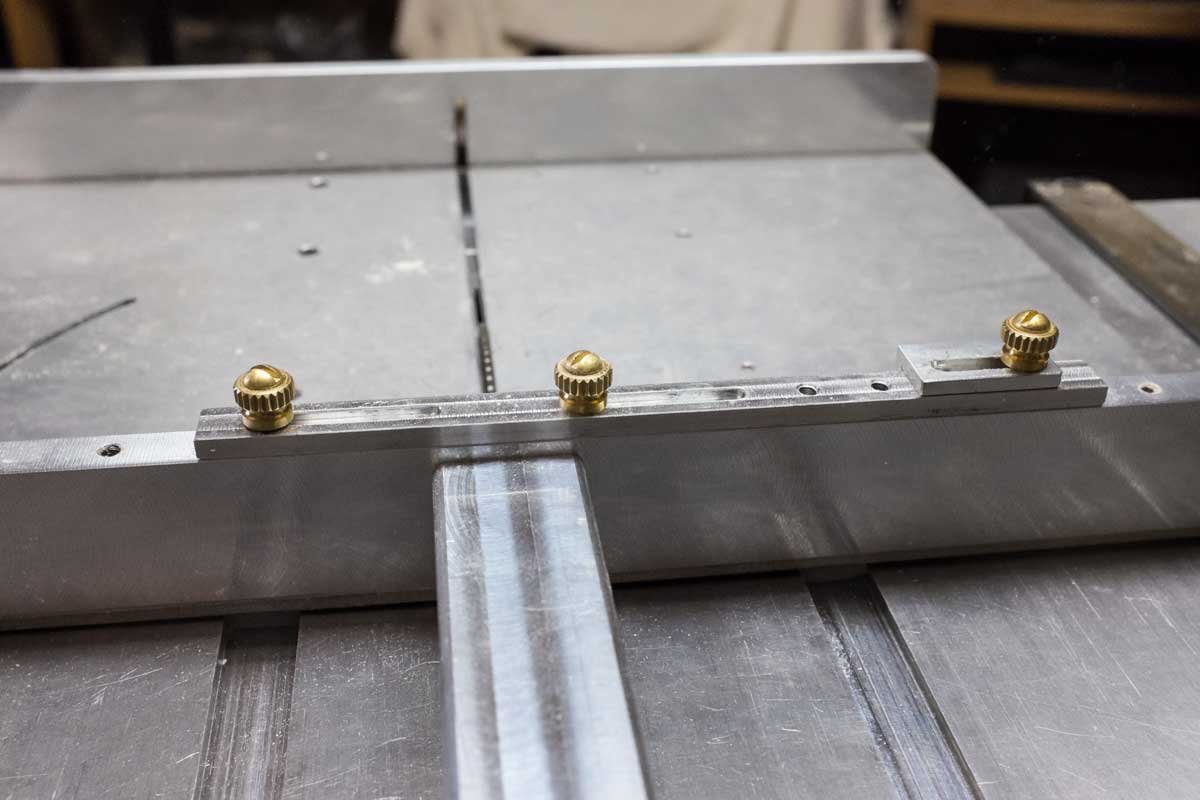
I got my sliding table last week. The little plastic-topped screws for the depth stop really annoyed me - too hard to grab and start in the holes. So I went to the hardware store and got some brass 6-32 machine screws and knurled brass nuts. I glued the nuts to the screws with a bit of medium CA. I find these way easier to use.
Cheers -
John
-
I am no expert on glass or much of anything for that matter! During the time I was there, the house underwent a major restoration and a great deal of effort was put into determining what parts of the house were original. There is also a well-documented chain of ownership of that house. The majority of the window sashes were determined to be original to the house. There was at least one replaced after the American Civil War because a cannonball penetrated the house, largely destroying at least one window. In any case, the experts were able to determine which panes were original and which were replaced in the 1880s. Exactly how, I can't say. Perhaps through examination of the paint and glazing around them or perhaps some sort of examination of the glass itself. As best I can recall, they didn't remove any of the panes during the restoration but the restoration started about 2 years before I went to work there. Window glass in the 1700s was made in a different way than glass made in the 1800s so it had a different appearance. A web search on "dating window glass" will turn up a good bit of interesting material.
-
13 minutes ago, shipman said:
What we accept as glass today as probably very different back then. I have read it was quite opaque, similar to lightly sand-blasted glass. Few if any modern models reflect this, if you'll pardon the pun.
I spent 12 years working in a Colonial American house museum. http://kenmore.org/ The house was built in the 1770s. Most of the glass in the 16 large windows in that house still have the original glass. Some of the panes were replaced in the 1880s. It was easy to tell which glass was original because it looked much better than the 1880s glass. It was as clear and transparent as any glass you would see today. The 1880s glass had a number of blemishes and bubbles. It was still clear however.
Cheers -
John
-
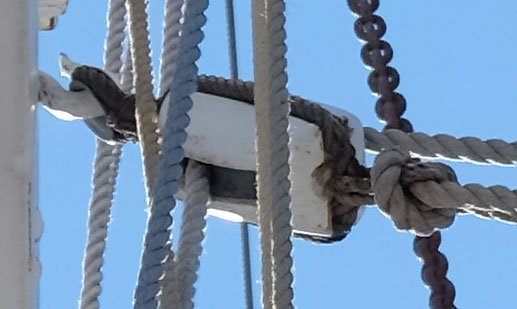
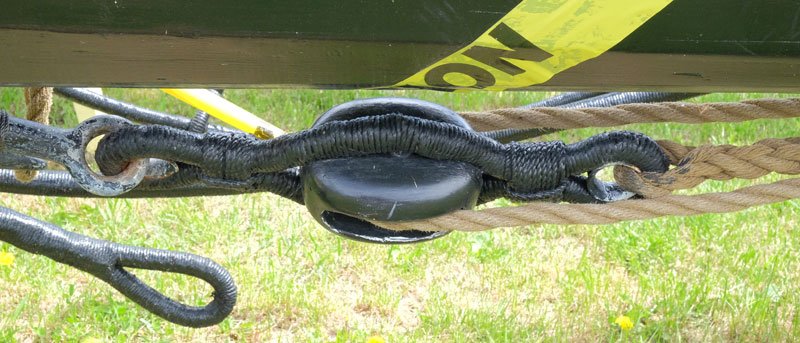
For the rubber bushing, if you can get to a hardware store, you can find a large-diameter rubber o-ring of the appropriate thickness and cut a small slice out of it. A large diameter is desirable because the smaller the diameter, the tighter the curve. A small slice from a large o-ring will appear to be straight. You can drill a hole through the center of that slice so it will slip over the tiller shaft.
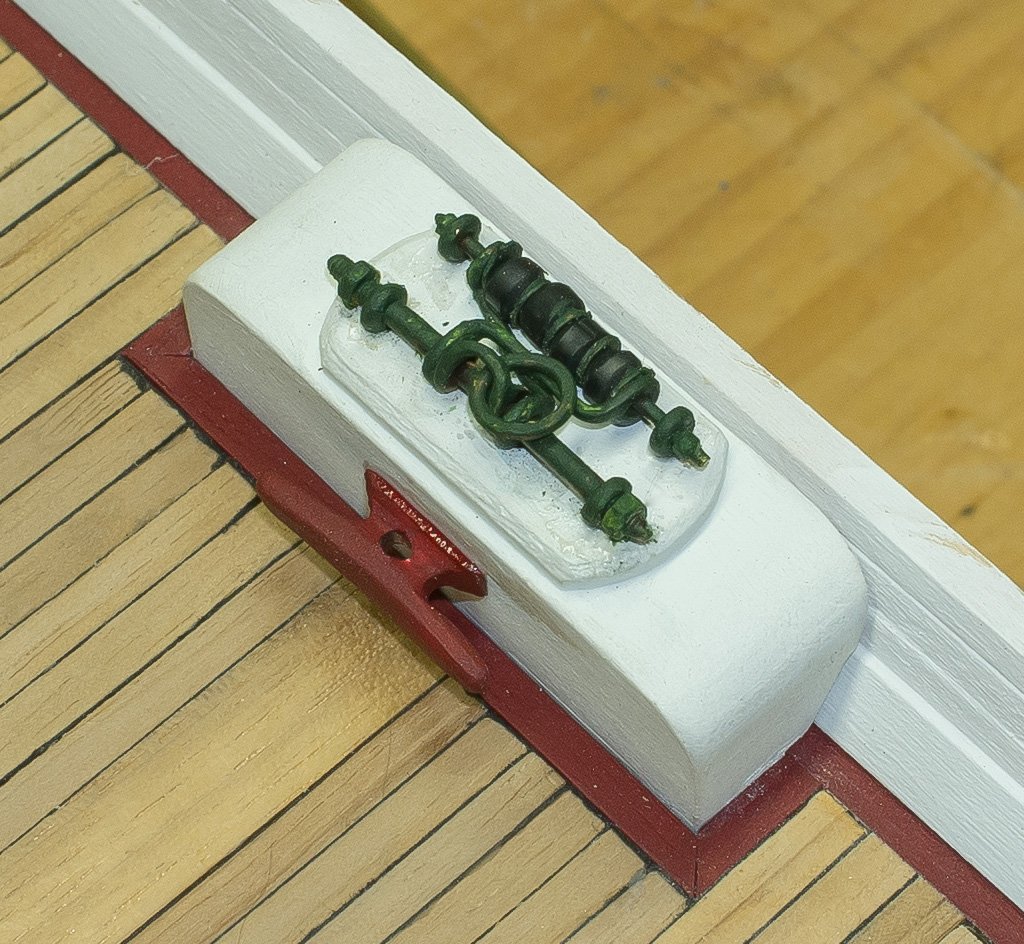
Below is an example where I used an o-ring to make the rubber bumpers on a main-sheet horse. This was at a scale of 1:32.
Cheers -
John

- hexnut, flying_dutchman2, Canute and 4 others
-
7
-
Very interesting article here about the windmill at Colonial Williamsburg in Virginia:
http://www.history.org/foundation/journal/autumn02/windmill.cfm
Some great videos of the same mill here with an article about its restoration:
http://www.dailypress.com/features/history/dp-nws-cw-windmill-update-20160215-story.html
Cheers -
John
-
Actually, it was:
"Who knows what evil lurks in the hearts of men? The Shadow knows!" (this followed by a rather sinister laugh)
One of my favorite radio programs when I was a kid! Yes - I'm that old. Yikes.
 Actually, it was re-broadcasts in the '50s, but still....
- mtaylor, John Allen and Canute
-
3
-
I kind of wound up with the opposite situation - inch lathe and metric mill. I use metric a lot in modeling, so I thought it would be good to have a metric mill, purchased a year or two after the lathe. However I didn't think about the fact that the end mills that come with the tool are in inch sizes as are most edge finders and much of the stock I work with. So I have to keep a chart next to the mill that shows the size of the cutters in mm. Sure - I could replace them all with metric end mills, but the ones that came with it are perfectly fine, so I haven't done that. And if you want to move to the center of, say, a 1-inch part, you have to convert that to mm as well. So a minor annoyance but if I had it to do over again, I'd just get an inch mill.
Since my name was mentioned above with regards to the 17" lathe, I'll say I still wish I'd gotten the longer bed. It would only have been $100 more up front but the cost to change out all the parts is around $300. While I don't often need the length for parts I make, getting that tail stock out of the way would really be helpful when I have something like the 3-jaw chuck and a drill bit in it.
Although I would probably use the DRO on the lathe if I had it, I really can't say I've missed it. And because I don't have room to leave my lathe out all the time, it would just be an extra effort to move the DRO box and plug in cables. The two machines don't sit anywhere near each other. Just wouldn't be worth the cost to upgrade the lathe to DRO to me. Your mileage may vary.
Cheers -
John
- Canute, Landlubber Mike and mtaylor
-
3
-
If it's in your budget, I'd suggest you buy a copy of American Fishing Schooners by Howard I. Chapelle.
It will answer many questions about these type boats as you move through the build. It's available at Amazon and can be had used as well. https://www.amazon.com/American-Fishing-Schooners-1825-1935/dp/039303755X/ref=sr_1_1?ie=UTF8&qid=1522363869&sr=8-1&keywords=fishing+schooners
Also, if you want to see the ultimate build of this model, check out Bob Steinbrunn's version - just incredible and certainly something to aspire to!
Cheers -
John
-
Go to YouTube - you'll find many videos on the technique. https://www.youtube.com/results?search_query=plastic+look+like+wood
Of course, seeing something done and being able to do it yourself are often two different things!
Cheers -
John
- CaptainSteve, druxey, paulsutcliffe and 3 others
-
6
-
-
Would someone who has this already be kind enough to tell me the thickness of the base plate? I have the 17" version of the saw so the sliding table would fit without having to remove the fence. But the question is whether any long stock laid on the table would clear the fence, which is about 9/64" high (without the extended fence).
Thanks -
John
-
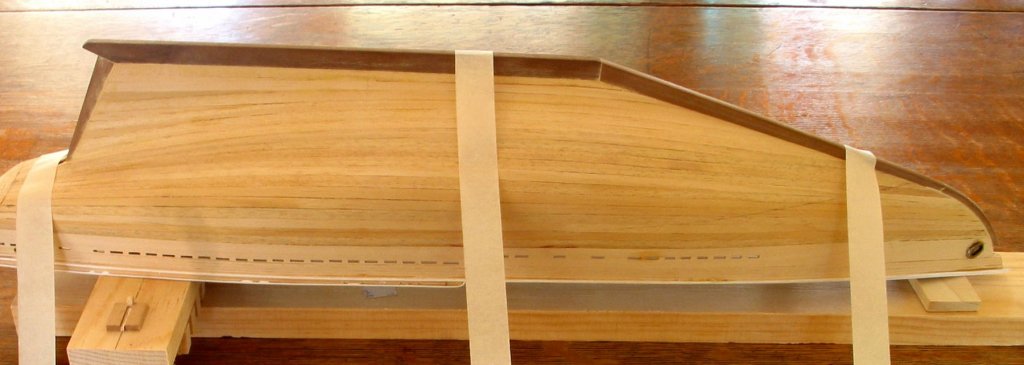
This is stretching my memory a bit, but I'll do the best I can. You want to wind up with the thickness of the false keel and planks being no wider than the width of the exterior keel. That exterior (visible) keel is added on top of the false keel so it and the outsides of the planks should blend together. The false keel and exterior keel are both 6mm thick, so that means you have to taper the false keel some to allow for the thickness of the planking. It's not easy to see in the attached pic, but it's the best one I have.
It looks like you need to add more shim material to bulkhead 2 in the pics above. One tip about shim material - instead of cutting the material so the grain runs in the direction of the bulkhead, cut it so the grain runs across the bulkhead (fore and aft). That will make it much easier to bend around the curve.
However much fairing you do of the bulkheads, the outer edge of the bulkheads at the false deck should match the outer edge of the false deck. So, for example, in the pics above, it's clear you're going to have to narrow the false keel as discussed above, so the false deck will have to be narrowed right at the end as well.
Hope that makes some sense -
John
- Osmosis, iosto and Tigersteve
-
3


Best glue for paper templates?
in Modeling tools and Workshop Equipment
Posted
I second glue sticks. I used to use rubber cement, but it always dried out between boats and is messy to use anyway and it is expensive. Glue sticks are cheap, work very well and there's no wait time between applying the template and cutting the wood. I'd never go back to rubber cement.