Ryland Craze
-
Posts
1,570 -
Joined
-
Last visited
Content Type
Profiles
Forums
Gallery
Events
Everything posted by Ryland Craze
-
 Your dory turned out nice. It looks like a fun build. This would probably be a nice kit to use in teaching an introduction to wooden ship modeling class.
 -
Beautiful model. Congratulations!
-
Hello Ben and welcome to Model Ship World. Please share your experiences with your Danmark kit. I am sure the MSW members will like to see your progress.
-
Hello from Long Island NY
Ryland Craze replied to Charlie Masone's topic in New member Introductions
Hi Charlie and welcome to Model Ship World. The America builds in to a very nice model. Please post some pictures of your model as we would like to see your progress. -
Your Pinnace is looking good at this stage. I look forward to following your build.
- 123 replies
-
- 2
-

-
- Model Shipways
- Pinnace
- (and 1 more)
-
You have made a lot of progress. Looking forward to the painting.
- 8 replies
-
- 1
-
-
- Finished
- Model Shipways
- (and 1 more)
-
Congratulations on finishing your Bluenose. It is a beautiful model. I am looking forward to your next build.
- 38 replies
-
- 1
-
-
- bluenose
- model shipways
- (and 1 more)
-
Hi Dan and welcome to Model Ship World. There are many MSW members from your part of the country. Please post some pictures of your Harvey as we would like to see your progress. It is also a good idea as suggested to start a build log on your model. We are glad to have you aboard.
-
Nice start on your build. Looks like the kit is in good shape considering its age. Should be a beauty once finished.
-
Congratulations on finishing your Sherbourne. It really looks nice. I will be looking forward to seeing your HMS Snake build.
- 46 replies
-
- 2
-
-
- caldercraft
- sherbourne
- (and 1 more)
-
Hi Martin and welcome to Model Ship World. Since you are an experienced modeler, you may want to check out the Vanguard Models Fifie Lady Eleanor. There are several build logs of this model on MSW and it looks to be a good kit for an experienced first time ship modeler. Here is a link to their site: https://vanguardmodels.co.uk/product/order-fifie-lady-eleanor/
-
Good to hear from you Remco. I am sorry to hear of the changes in your life, but hope that things improve for you in the coming year. We have missed you here and look forward to you staying in touch. We have a section for non-ship builds that is ideal for you to share your work on your 1/12 Tamiya motorcycle builds. Knowing your attention to detail, I bet they are outstanding builds.
- 1,215 replies
-
- 3
-
-
- sloop
- kingfisher
- (and 1 more)
-
Congratulations on completing your Armed Virginia Sloop. You have built a nicely crafted model that you will be able to display in your new home. It has been great following your build log and I wish you well in your future endeavors.
- 108 replies
-
- 1
-
-
- armed virginia sloop
- model shipways
- (and 1 more)
-
You are off to a great start on this build and your detailed build log is going to be a pleasure to follow.
- 208 replies
-
- 1
-
-
- kitbashing
- Woodcarving
- (and 4 more)
-
Glad to see you back working on your Longboat. I like your method of lining off the hull. It looks much easier than using the paper tick strips. I will file this away for future use.
-
Here is a video showing its use: Like Bob said, it was real easy to use and very therapeutic.
- 263 replies
-
- 6
-
-
- Medway Longboat
- Syren Ship Model Company
- (and 1 more)
-
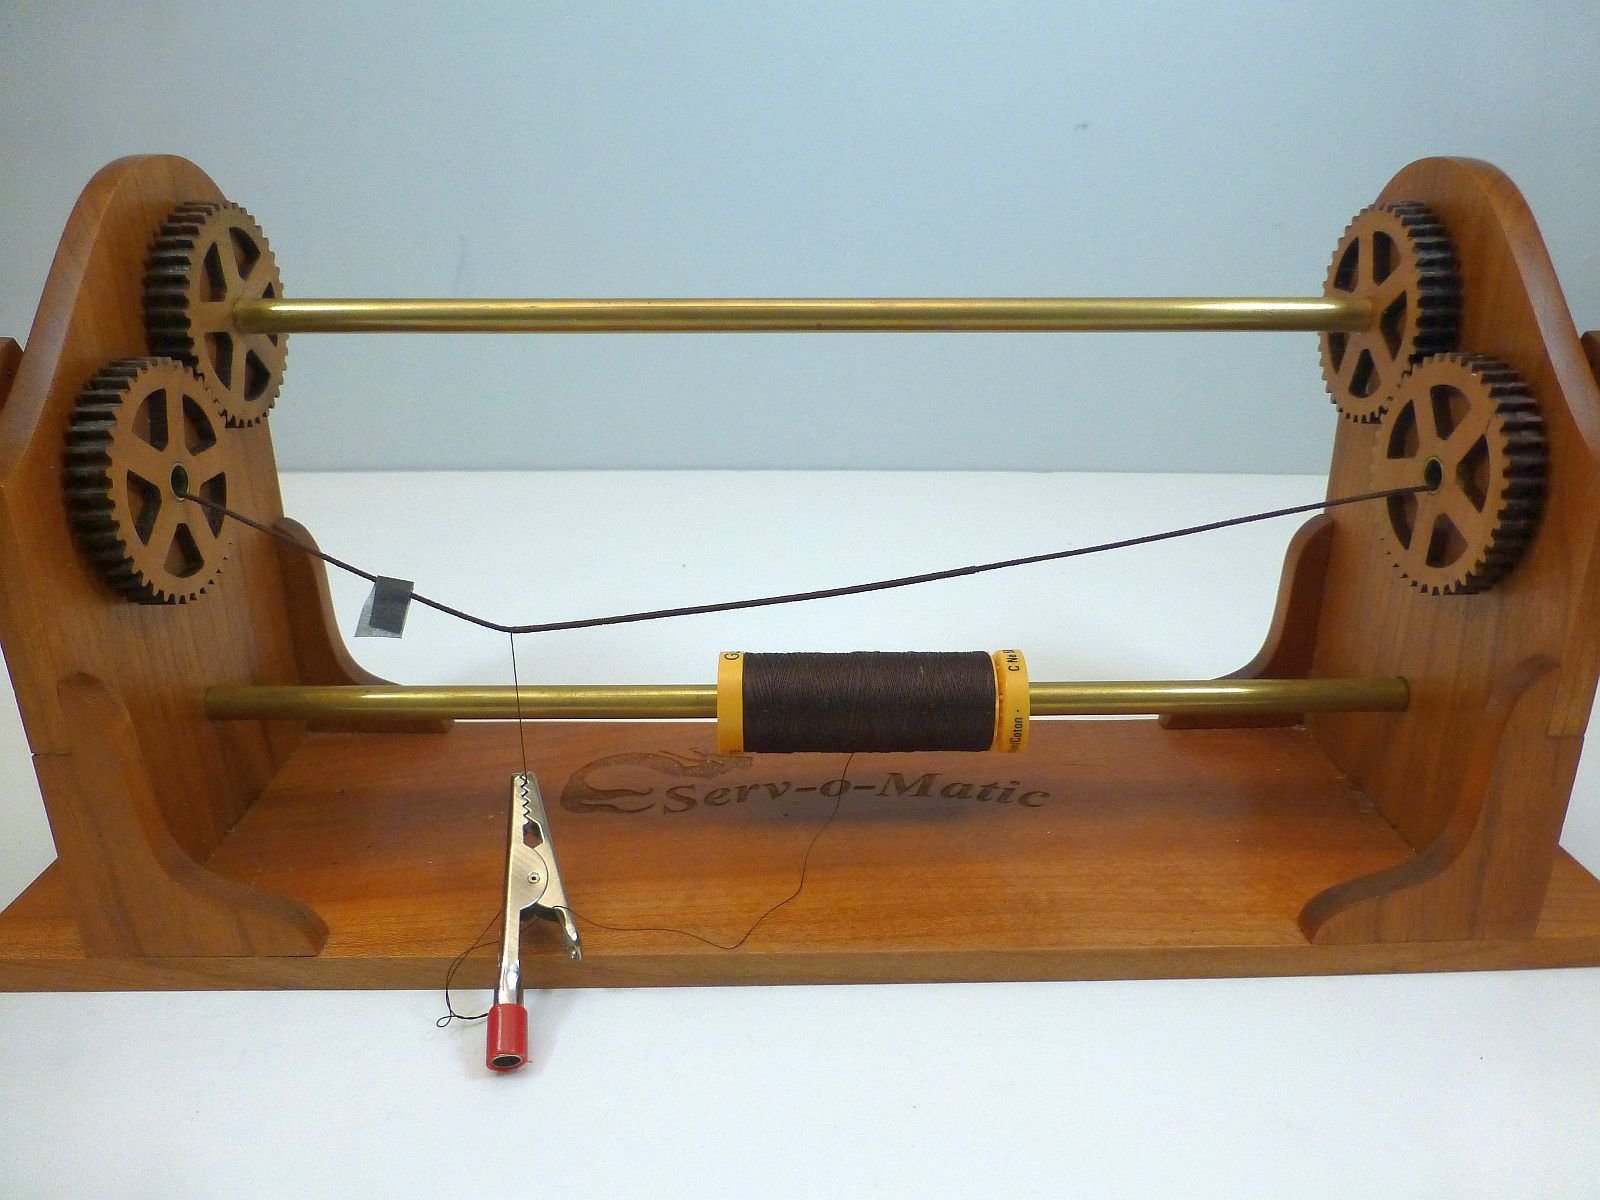
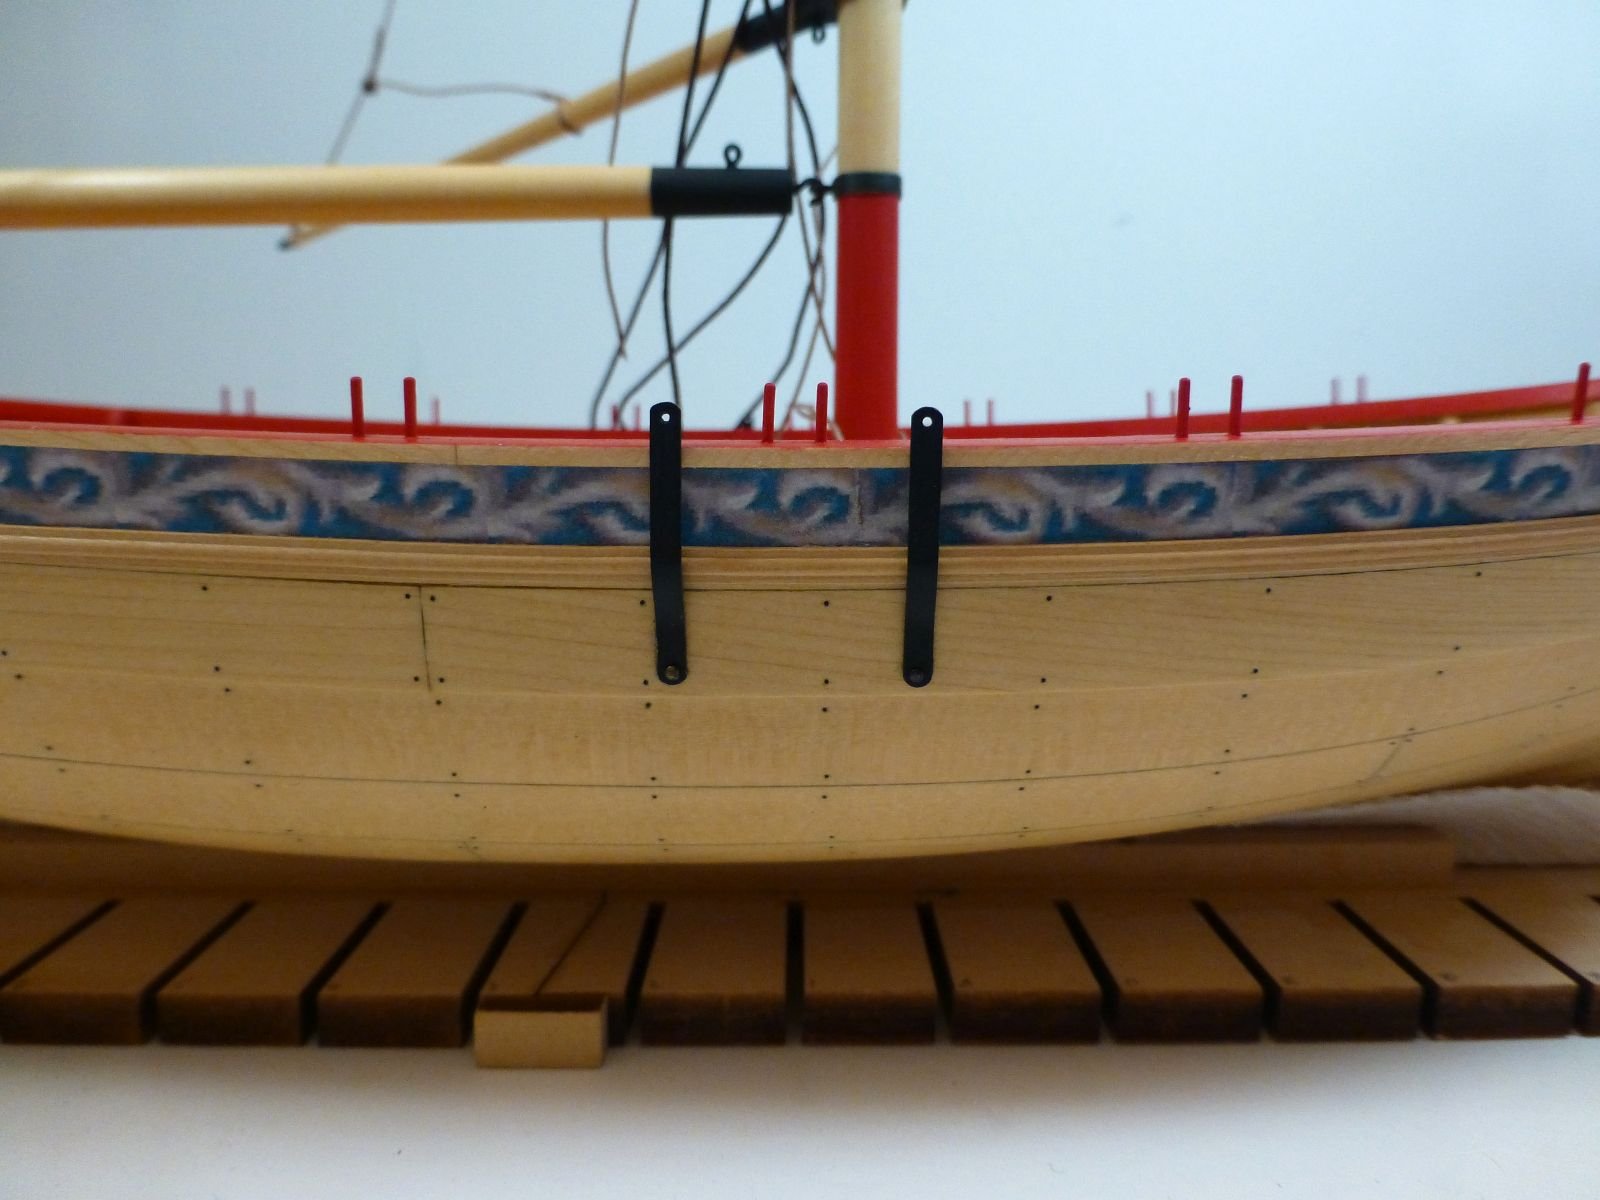
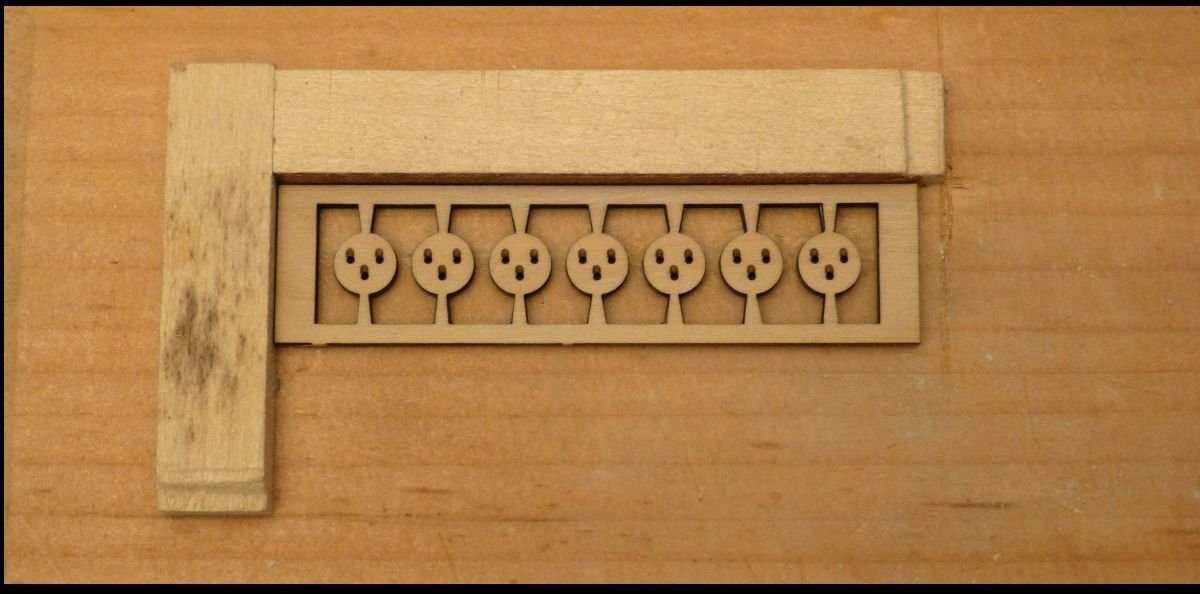
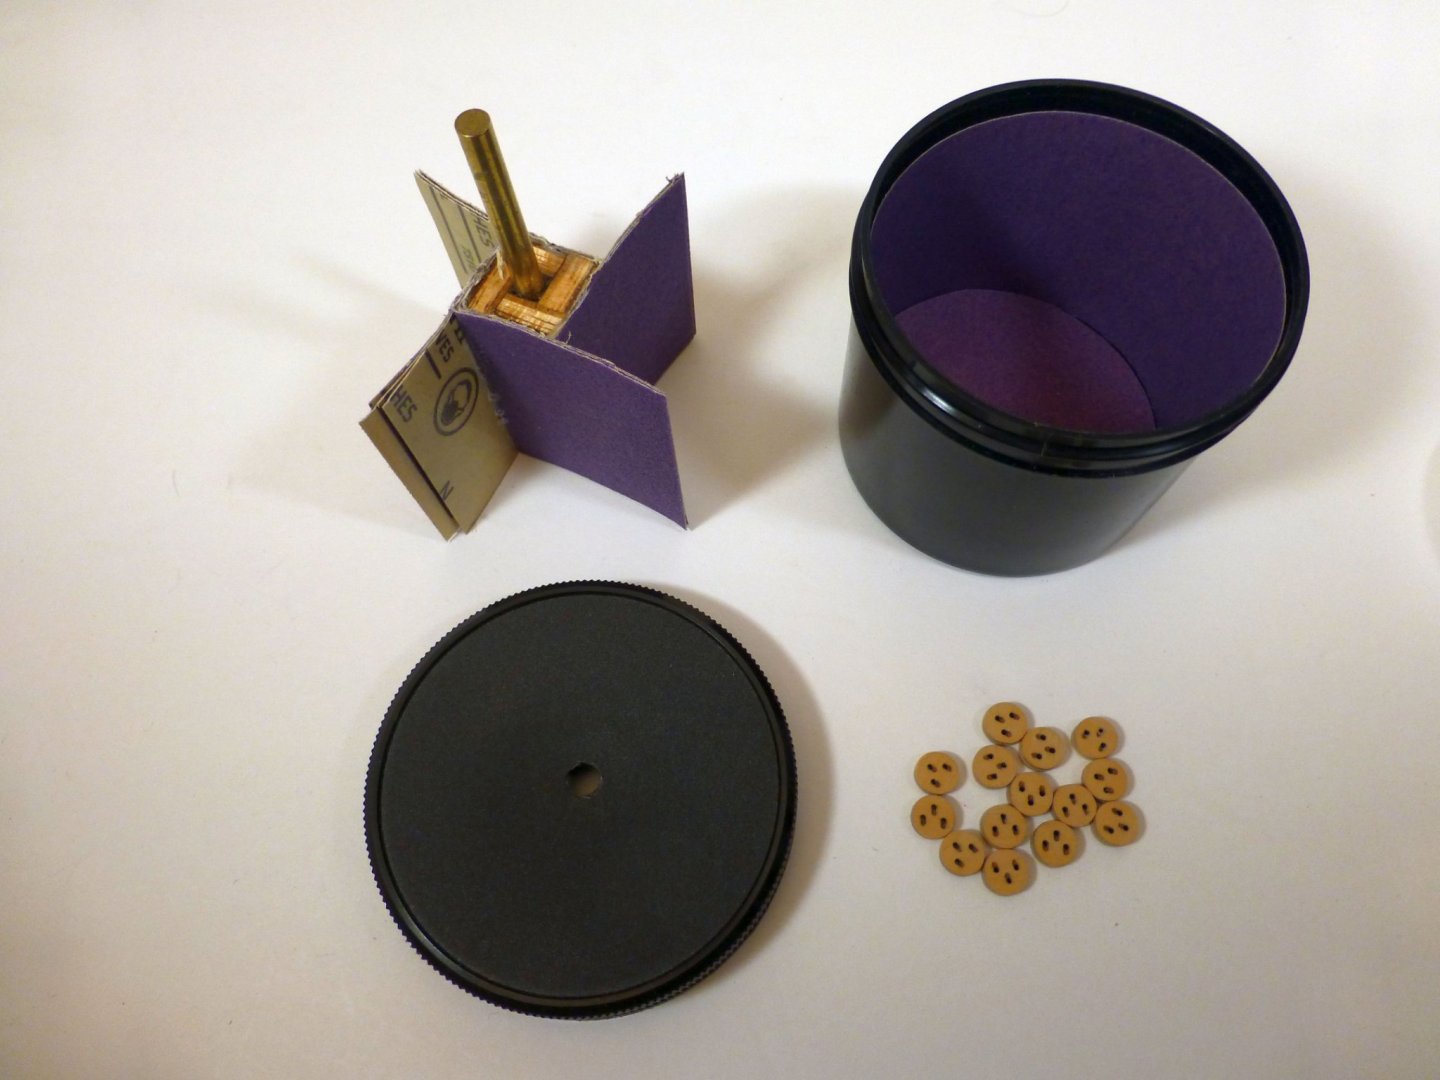
Not much has happened since my last post but thought I would give an update on my progress. I have started to work on the shrouds and the first thing that I did was to make the deadeyes. The Syren deadeyes are made up of three layers that are glued together. I made a simple jig to hold the layers as I glued them up. Once glued up, I separated them from the frame that was holding them. I sanded off the laser burn on the edges being careful not to change the shape of the deadeye. I then placed them in my Model Expo block tumbler to soften and round their edges. Here is a picture with the deadeyes stropped with 24 gauge wire and the hooks added. The next step was to make the straps that hold the deadeyes and nail them to the wales. I pre-bent the straps around the molding before I installed them. I then tried blackening them, but failed miserably. So I wound up priming them and painting them with matte black paint. Then I installed them per the instructions. The next step was to use my Syren Serv-o-Matic serving machine to serve my shrouds and backstays where they are seized around the mast. This was my first time using the machine and it worked great. I had no problems and I am pleased with the results. Next up is the installation of the shrouds and the backstays.


- 263 replies
-
- 19
-
-
- Medway Longboat
- Syren Ship Model Company
- (and 1 more)
-
It is looking good. You will be surprised at how well it looks once the hull is sanded. I have never wet sanded a hull and in my opinion I would just sand it starting with 220 grit and maybe finishing with 400 grit, but no wet sanding.
- 13 replies
-
- 2
-

-
- half hull planking project
- NRG
- (and 1 more)
-
Stephen, You order this project direct from the NRG. Here is the link to the kit: https://thenrgstore.org/collections/plans-and-projects/products/half-hull-planking-project Toni Levine is active on MSW and she is always willing to answer any questions you may have.
-
Absolutely a work of art. I love the second picture. It is so realistic.
- 1,784 replies
-
- 3
-
-
- winchelsea
- Syren Ship Model Company
- (and 1 more)
-
Great progress so far. Your attention to detail will turn out a fine model.
- 8 replies
-
- 1
-
-
- Finished
- Model Shipways
- (and 1 more)
-
It's looking good Grant. I cannot wait to see the thwarts and cockpit added.
- 109 replies
-
- 2
-
-
- medway longboat
- Syren Ship Model Company
- (and 1 more)
-
That is a fantastic build. It is so lifelike. You are a master at building these planes.
- 12 replies
-
- 10
-
-
-
Welcome to Model Ship World Rick. YouTube has many videos on building the OcCre Polaris which may be of some help. I hope you start a build log on your model so that we may follow your progress.
-
Spitfire MK I by Danstream - Tamiya - 1/48 - PLASTIC
Ryland Craze replied to Danstream's topic in Completed non-ship models
Beautiful model. The finish is excellent, nothing over done. I admire the skills of the plastic modelers on MSW.