HOLIDAY DONATION DRIVE - SUPPORT MSW - DO YOUR PART TO KEEP THIS GREAT FORUM GOING! (Only 20 donations so far - C'mon guys!)
×


donrobinson
-
Posts
1,909 -
Joined
-
Last visited
Content Type
Profiles
Forums
Gallery
Events
Everything posted by donrobinson
-
Wonderful work Nils, your ideas and work always amaze me
- 2,625 replies
-
- 6
-

-
- kaiser wilhelm der grosse
- passenger steamer
- (and 1 more)
-
Thanks Mike, . I guess we are even......because I blame you for getting me started on the Pegasus!!
- 653 replies
-
- 9
-
-
- trabakul
- marisstella
- (and 1 more)
-
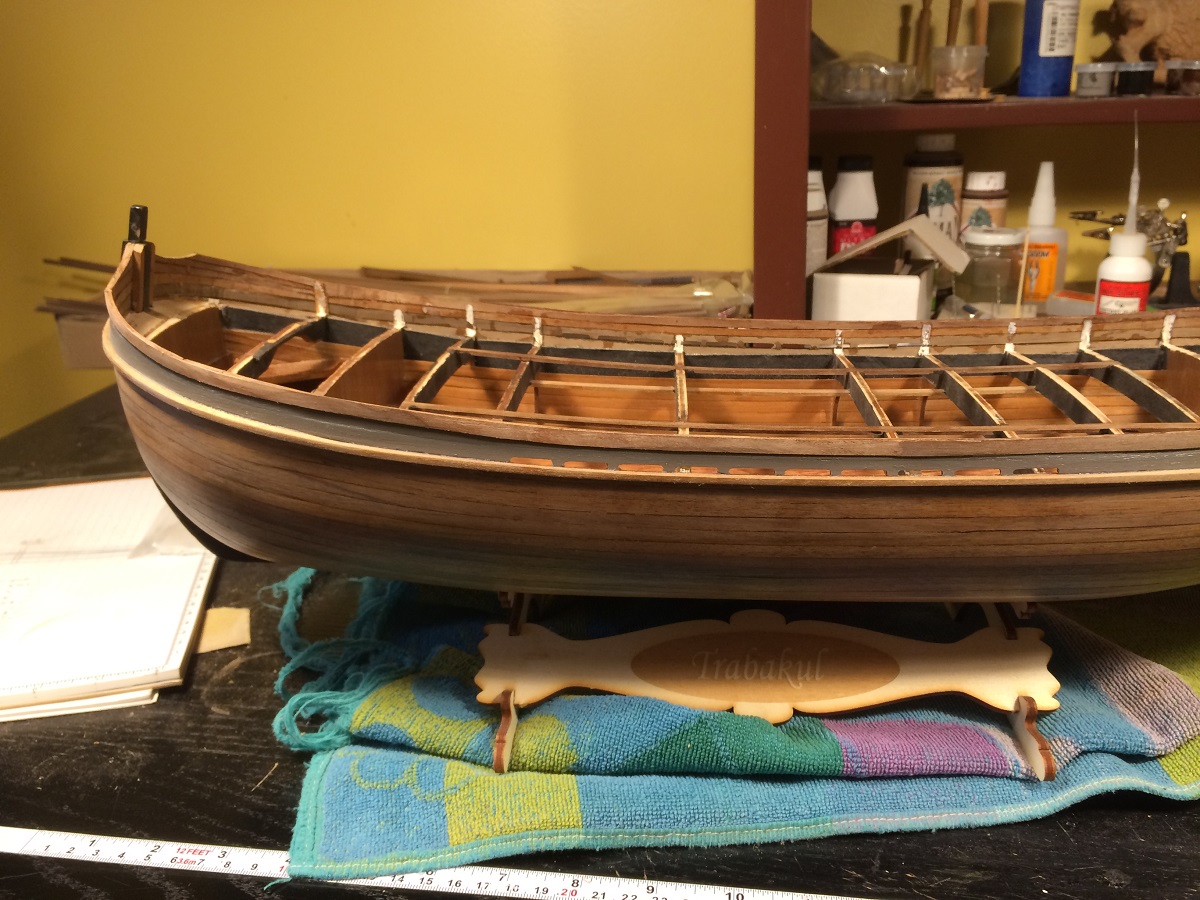
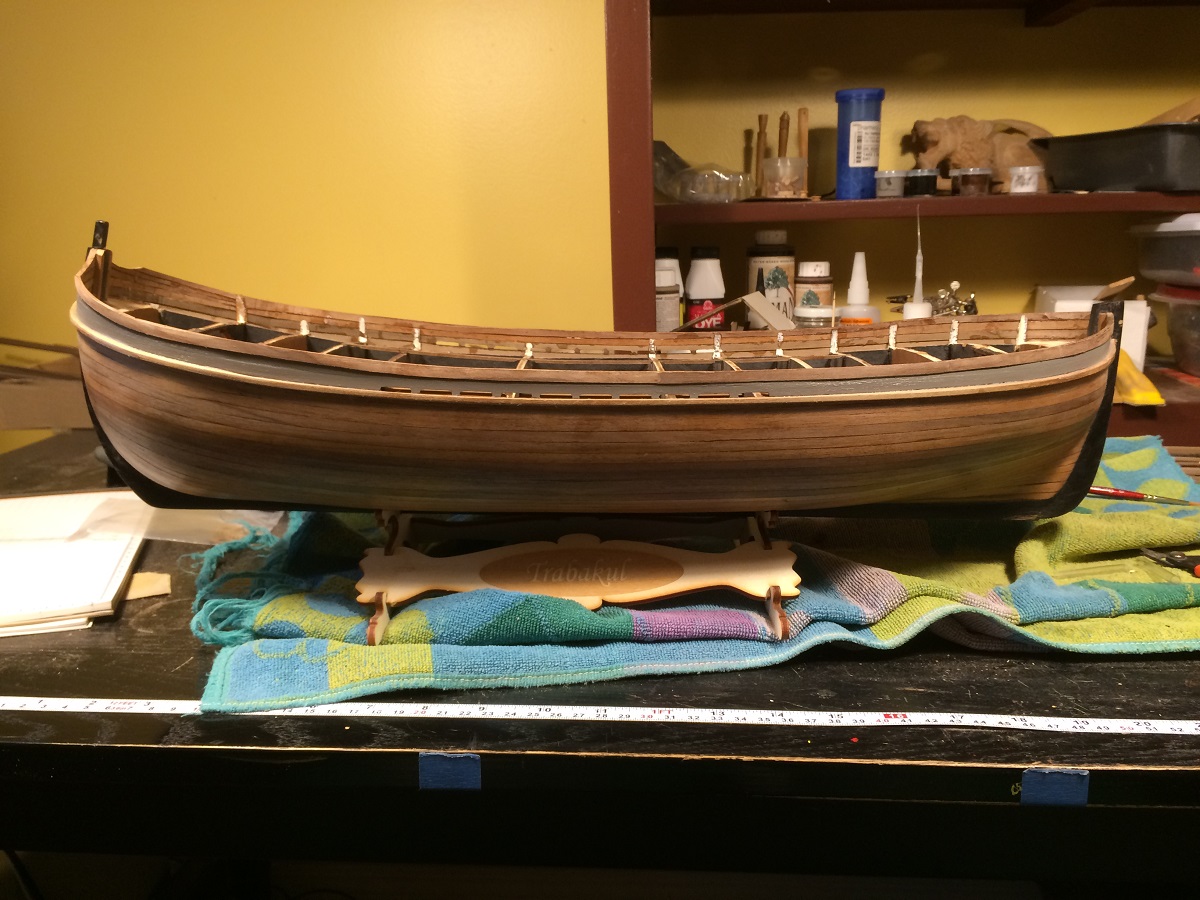
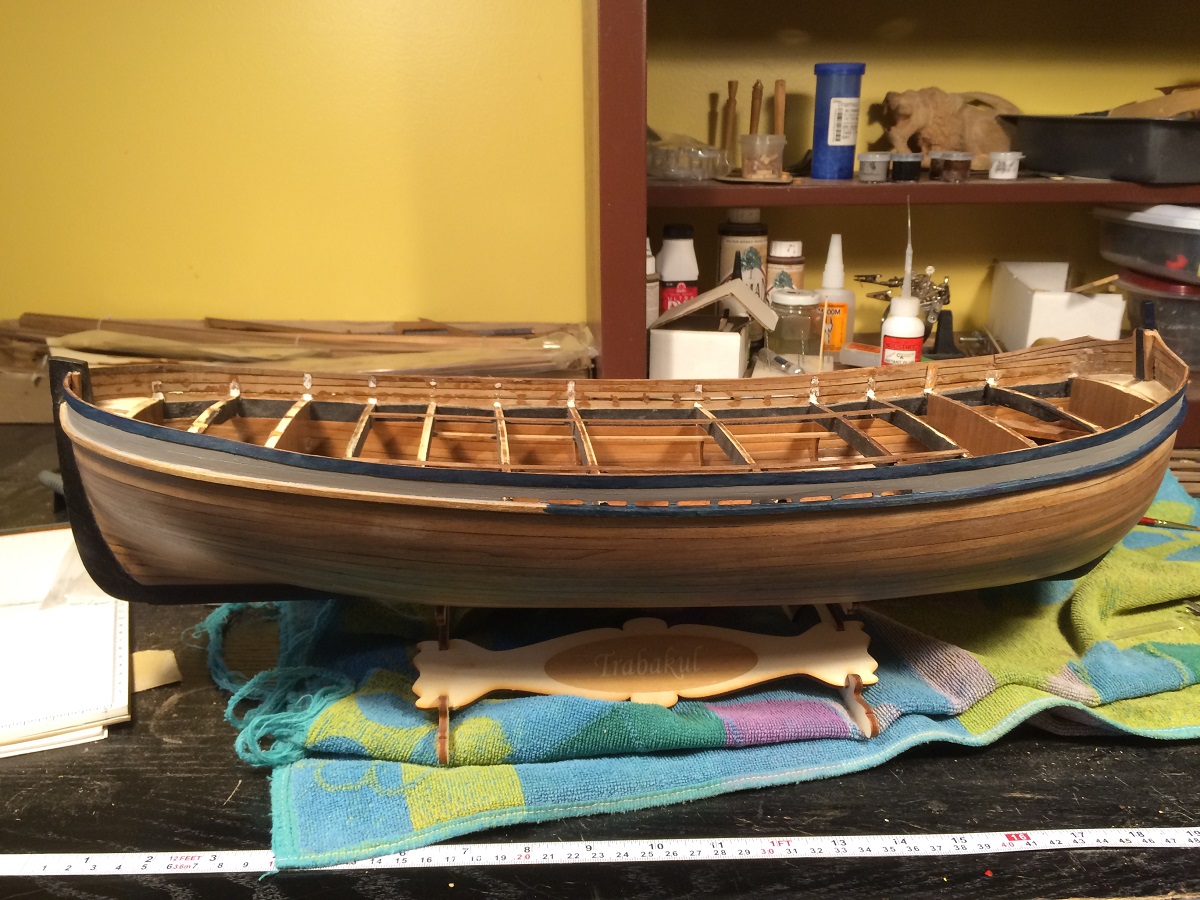
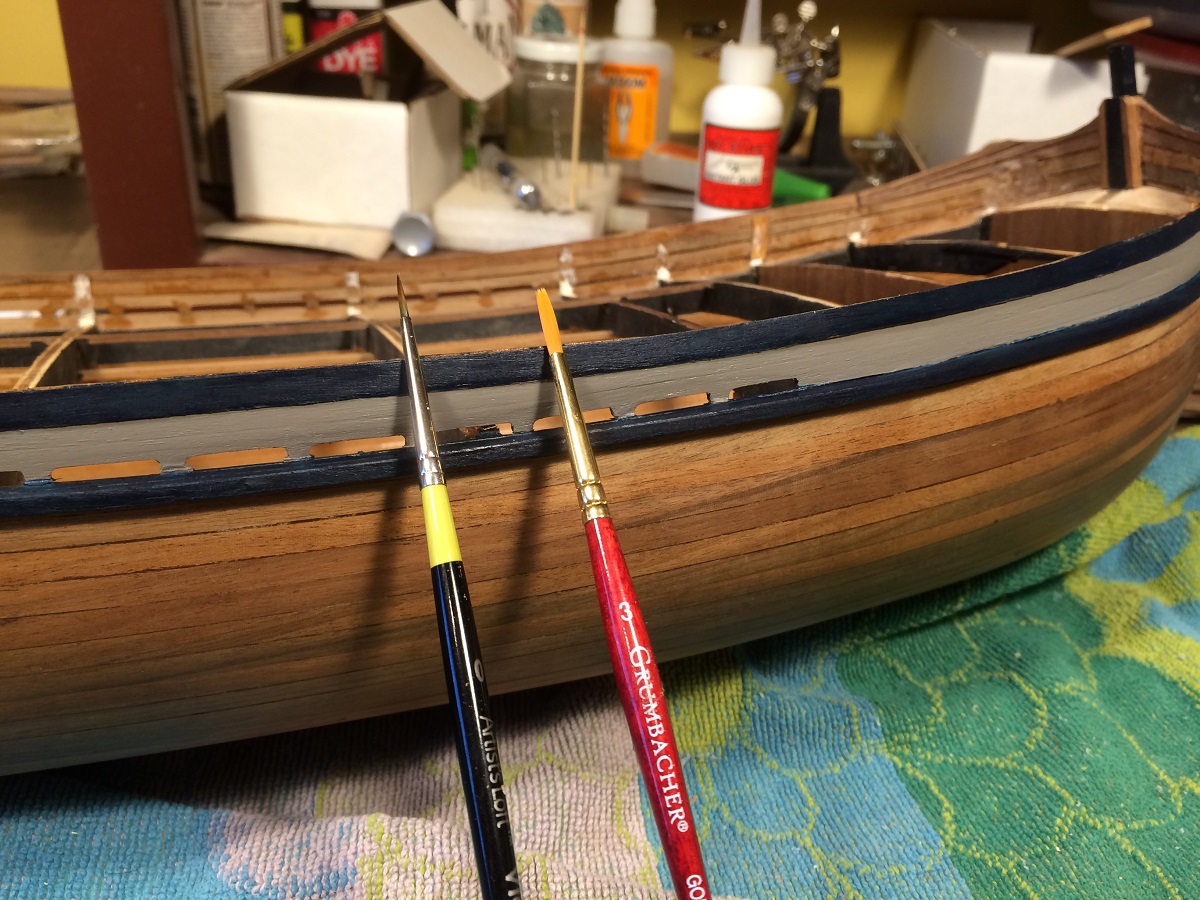
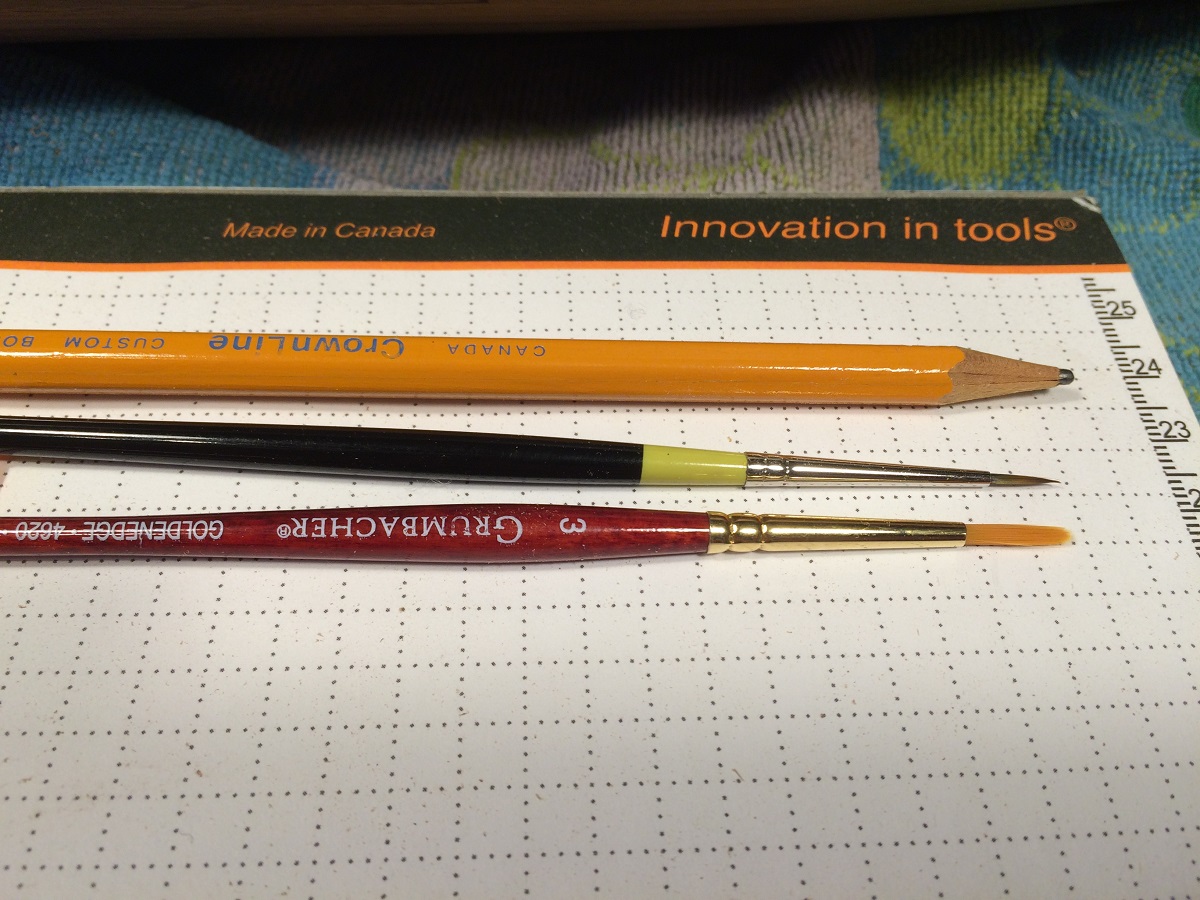
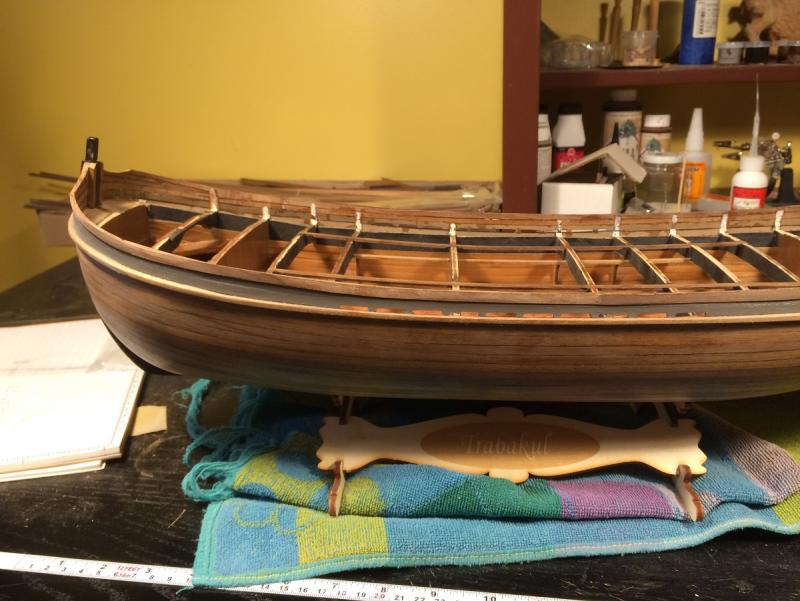
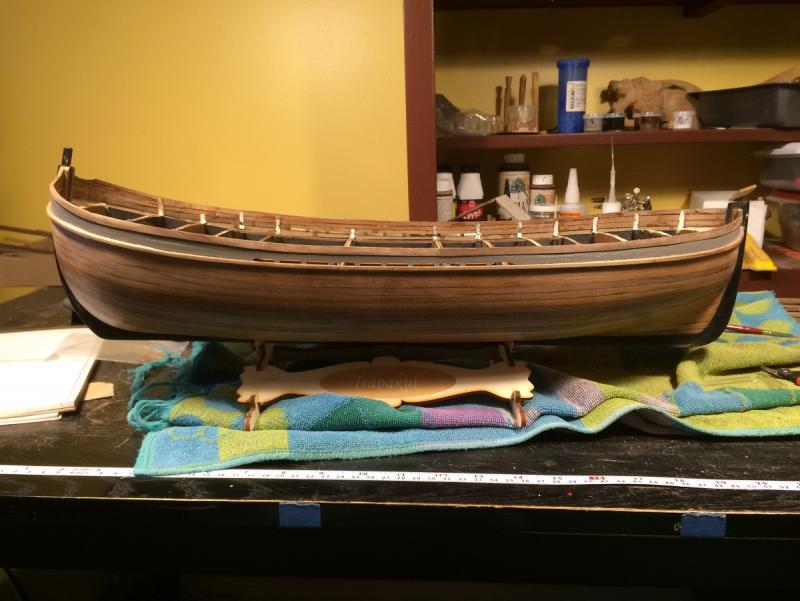
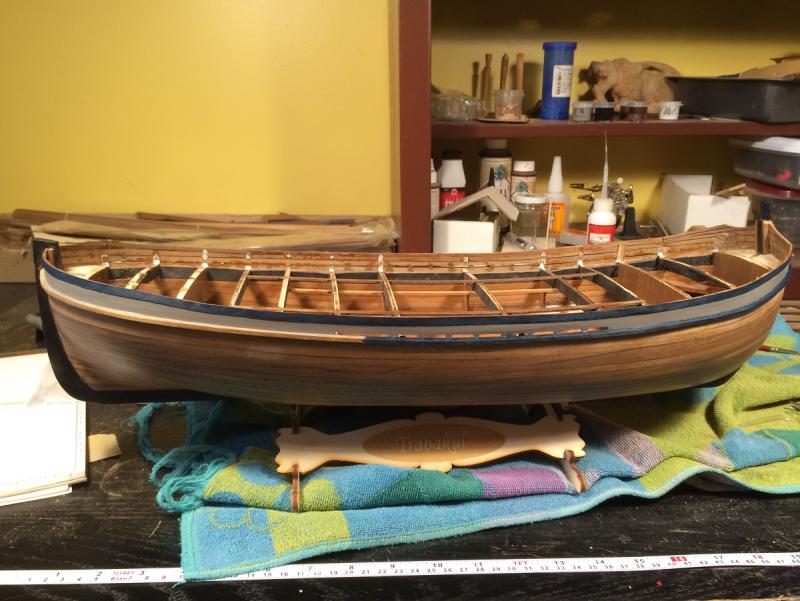
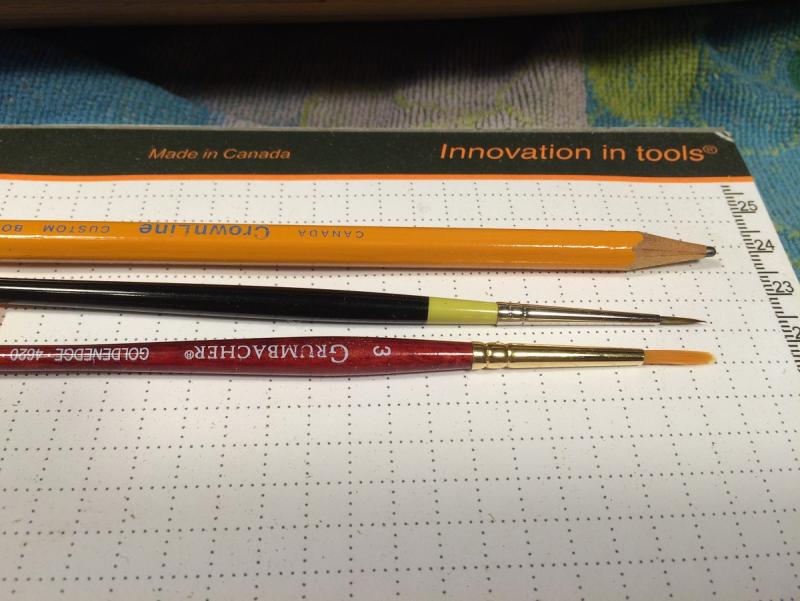
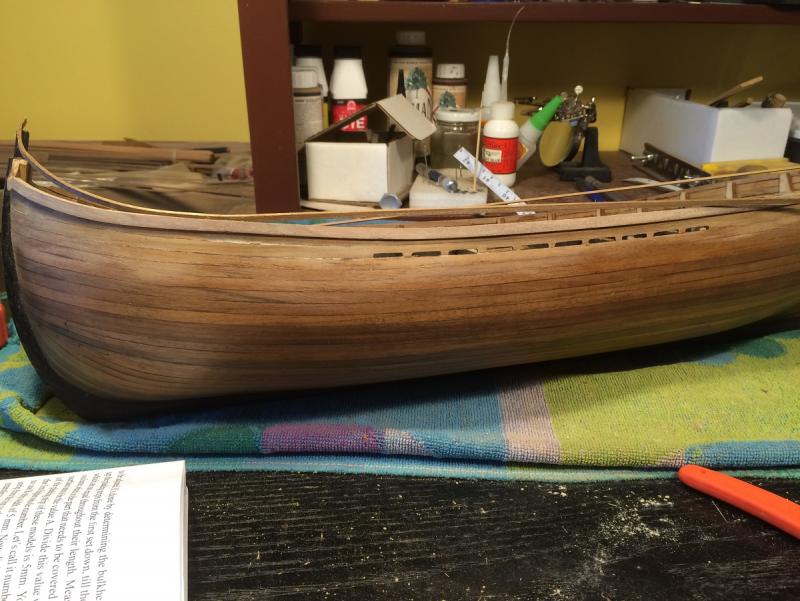
I just noticed there are no pictures of the rubbing strake installed so here are some pictures, the painting has just begun with four coats of grey so far and three coats of the blueish black. The paint is just cheap acrylic paint from Michaels, the grey is steel grey and the blue/black is a mixture of midnight blue and black. These are the brushes I used, also from Michaels. I didn't bother to mask as I am not very good at that so there are a couple of little touch ups to be done. The grey still needs a couple of coats and the blue will probably need another 4 or 5 coats

- 653 replies
-
- 22
-
-
- trabakul
- marisstella
- (and 1 more)
-
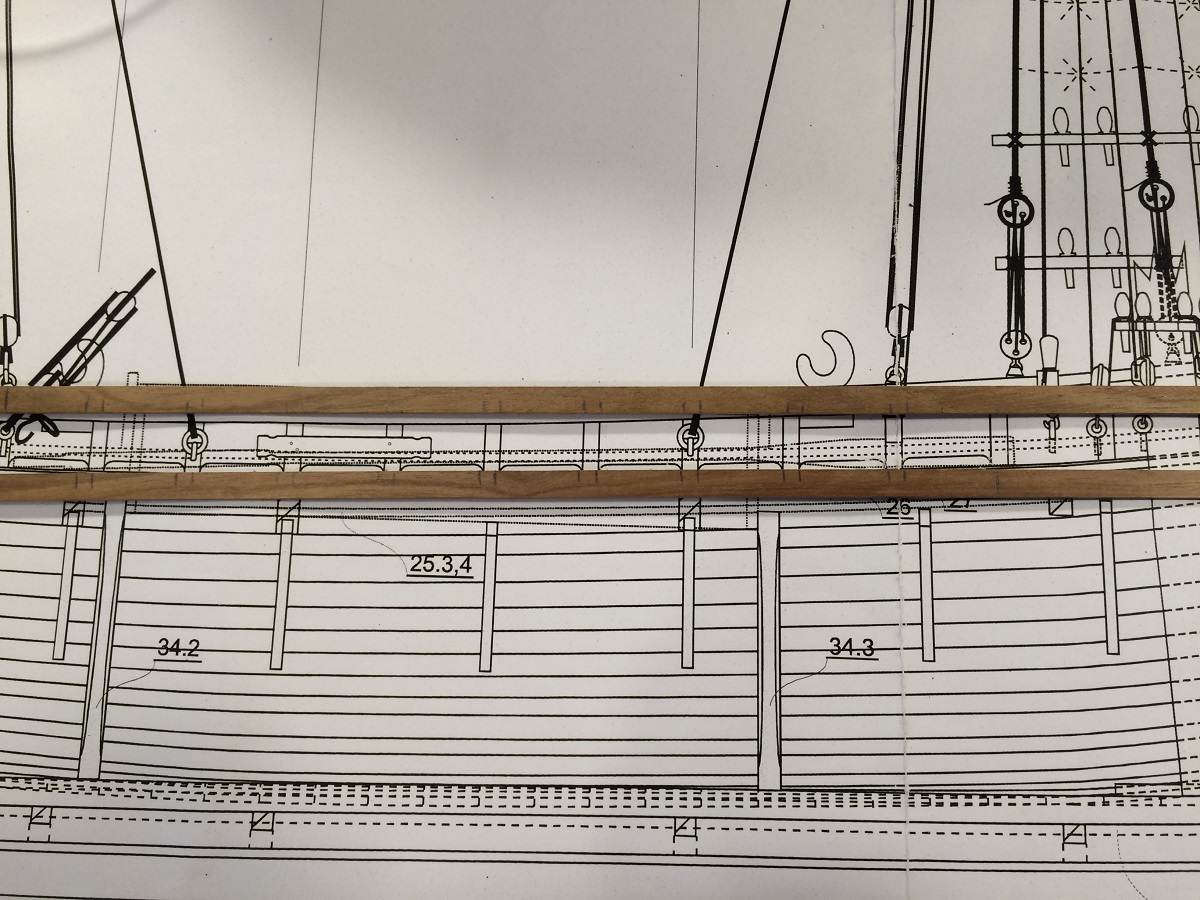
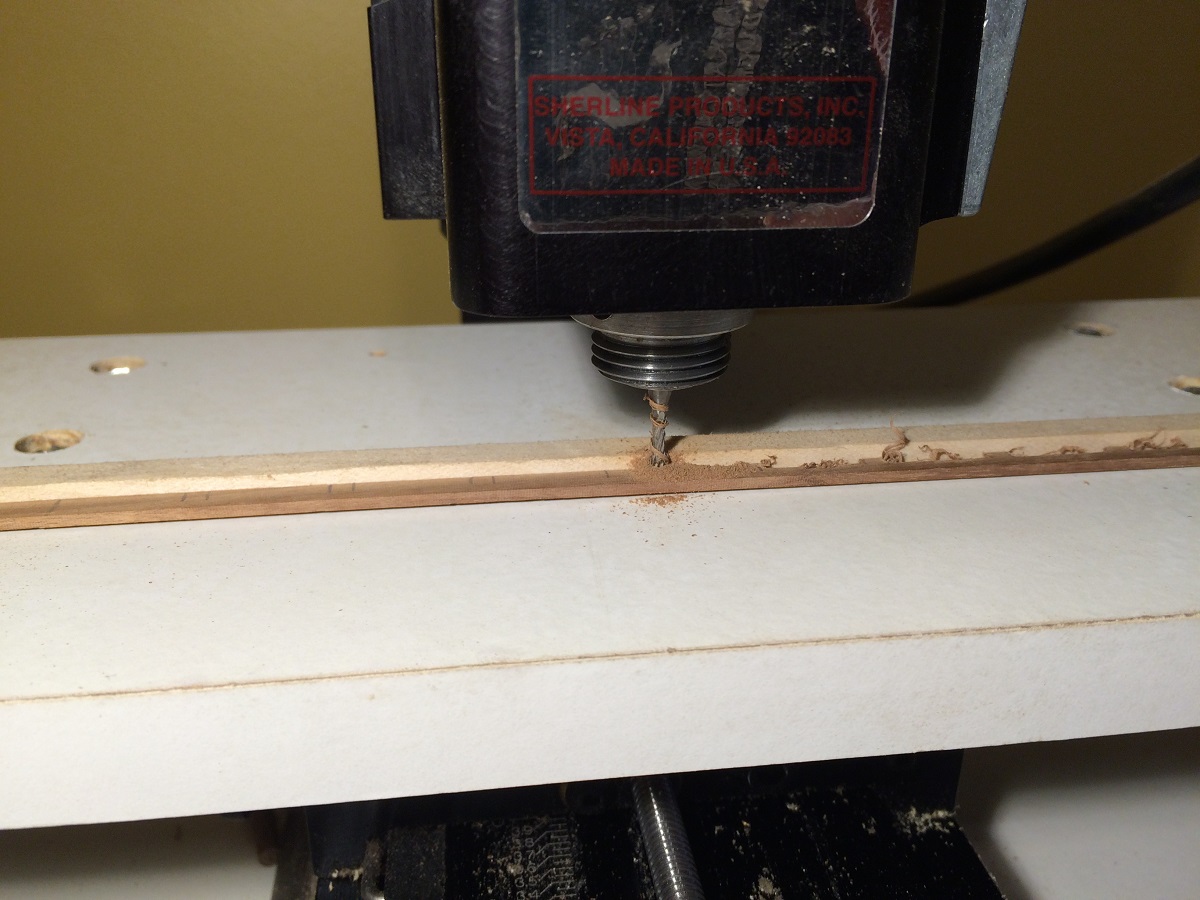
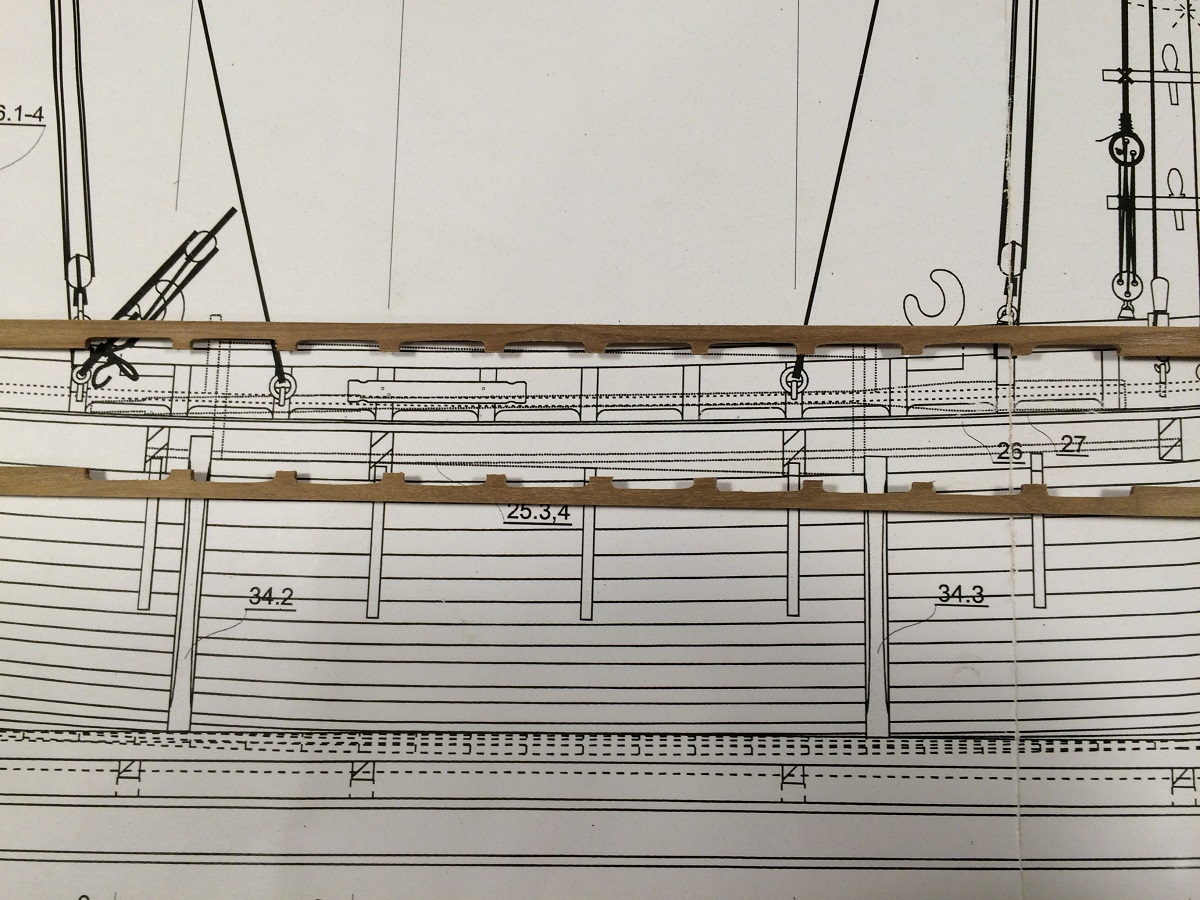
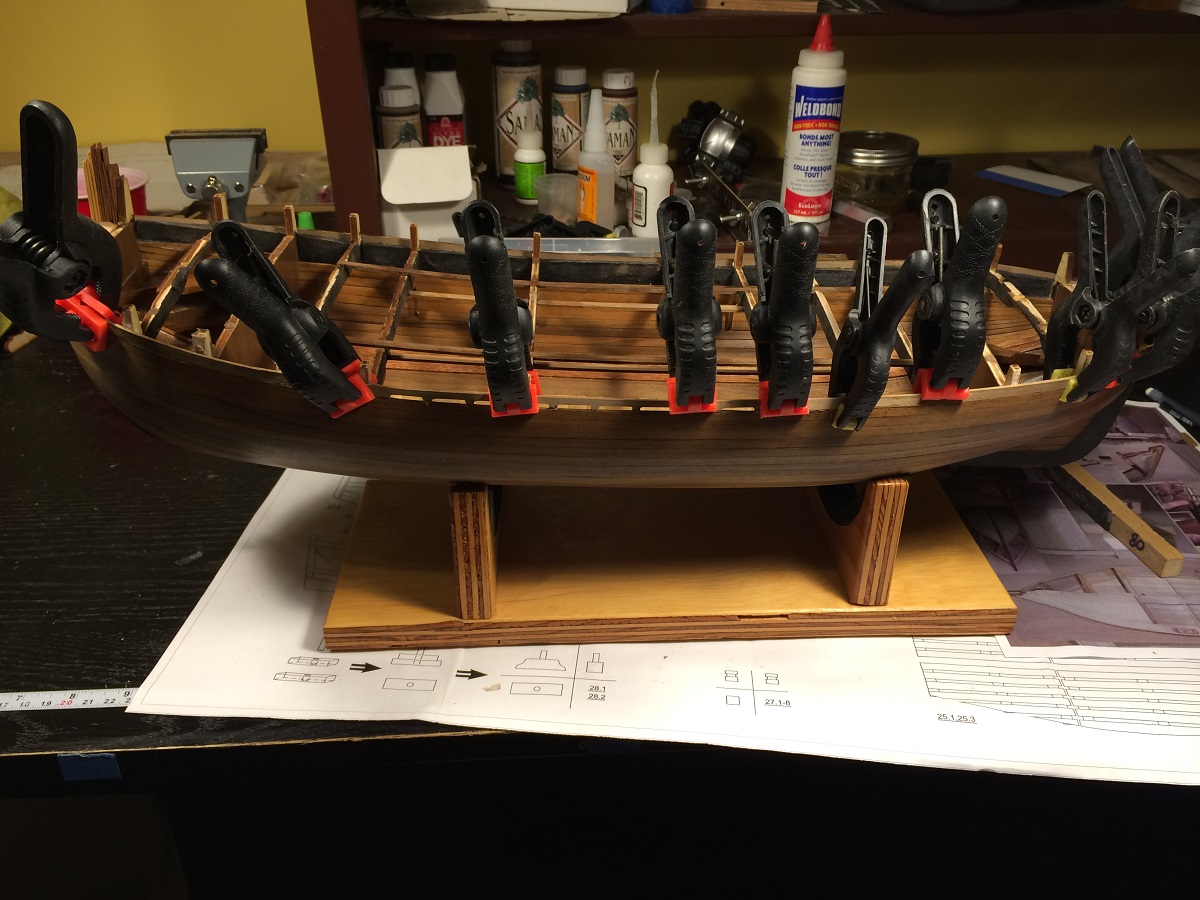
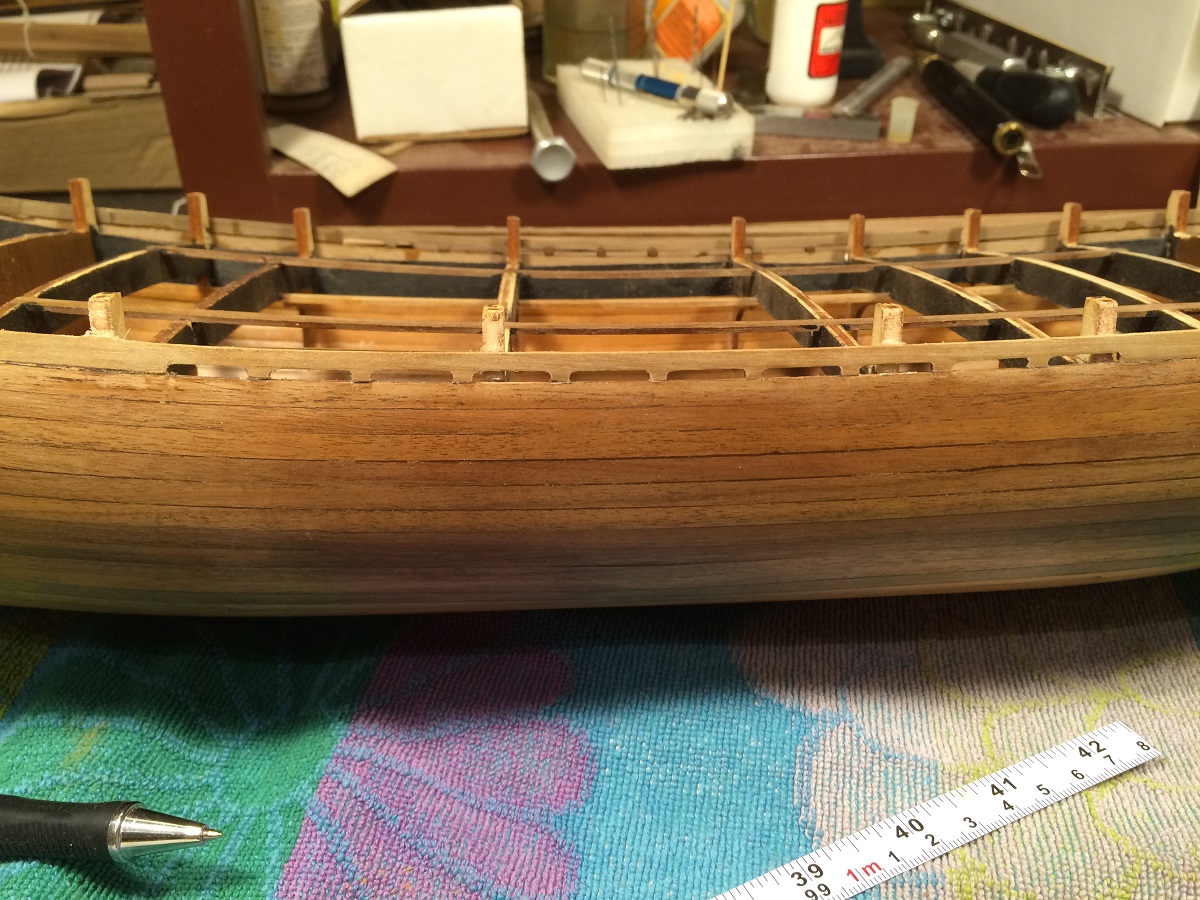
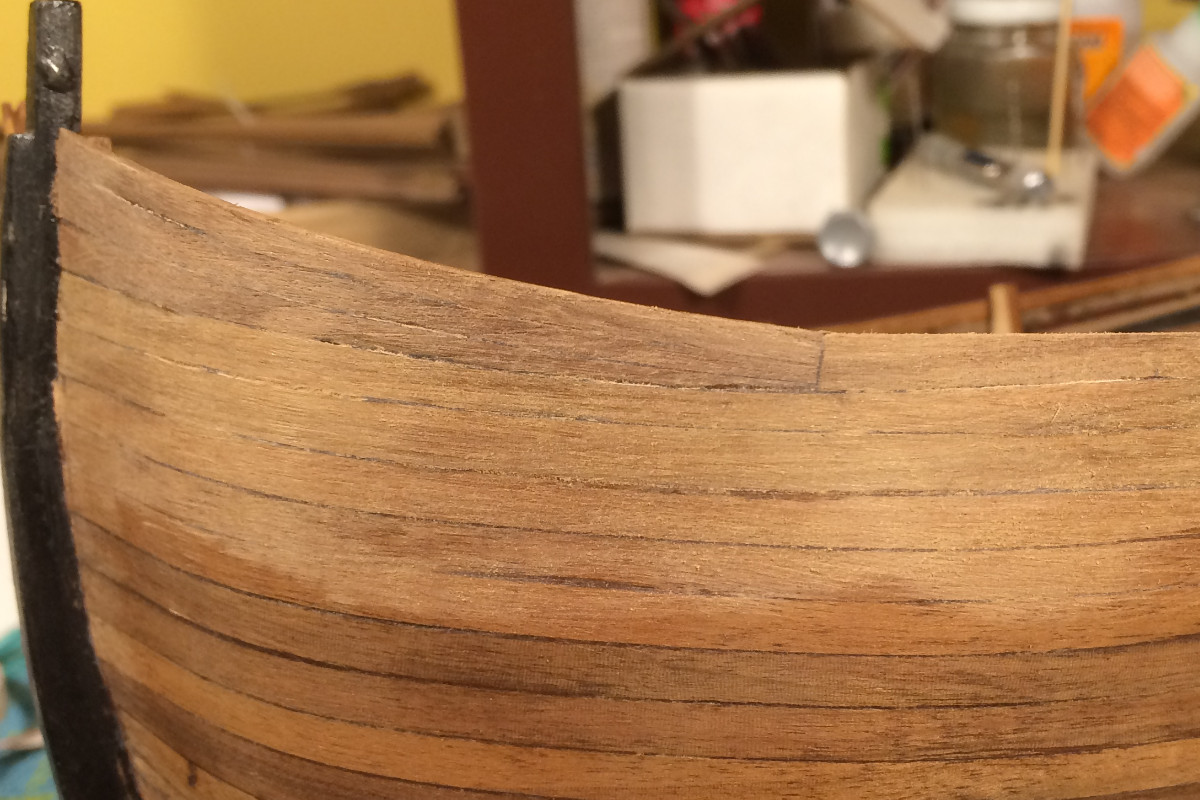
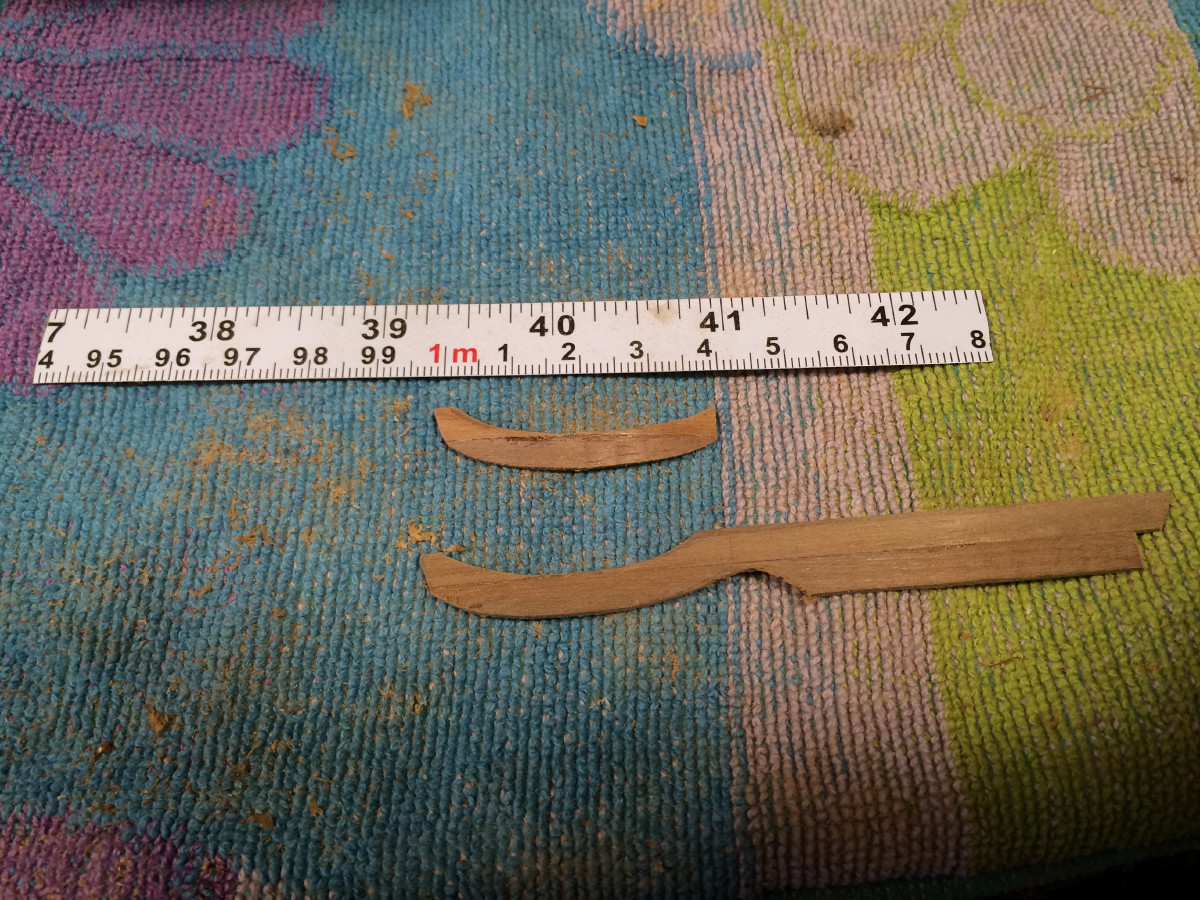
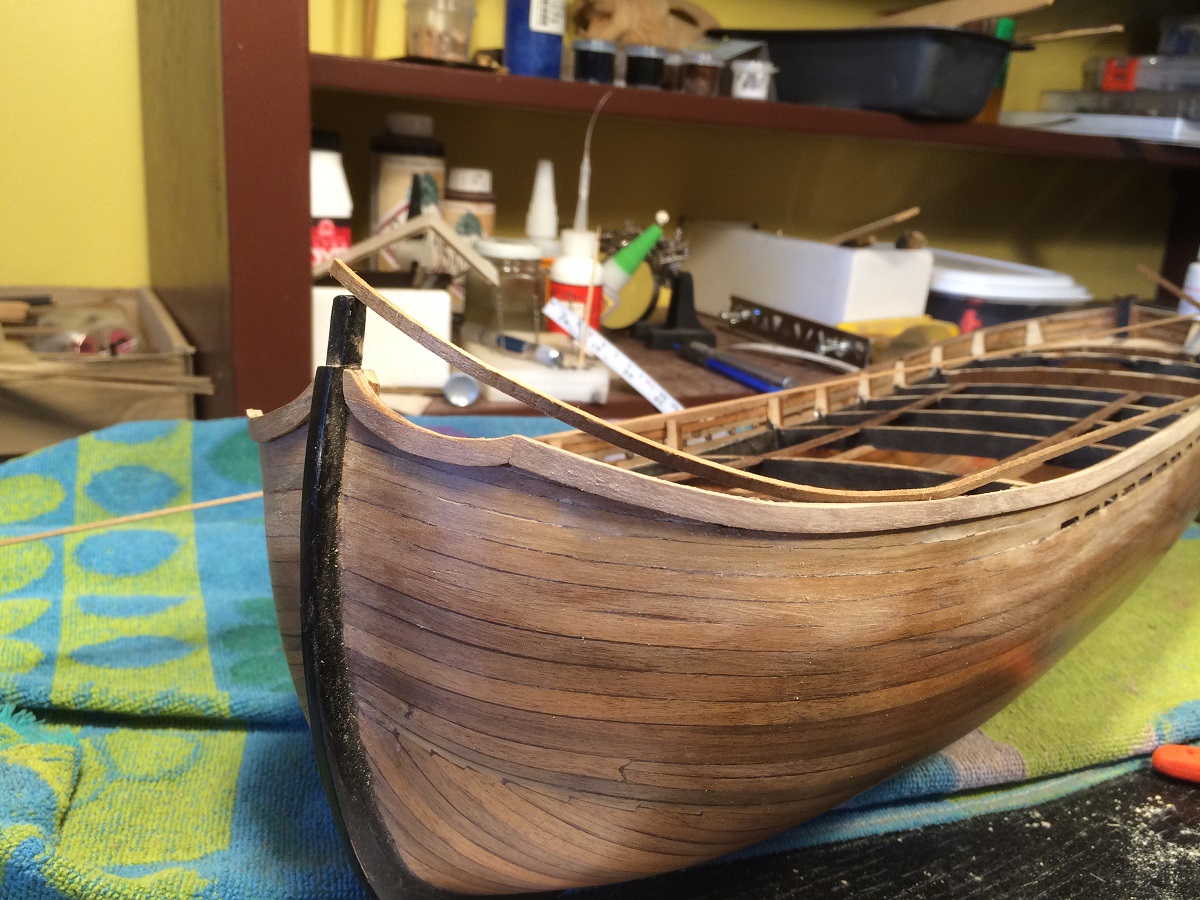
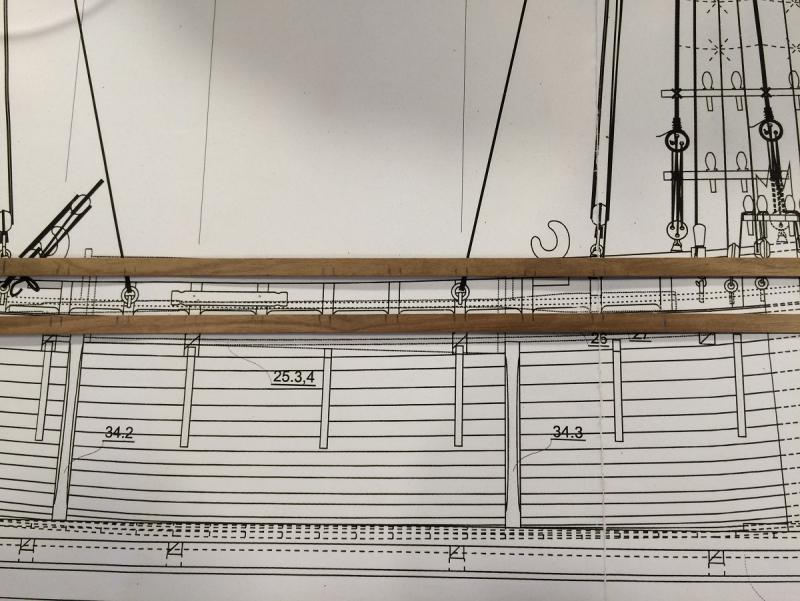
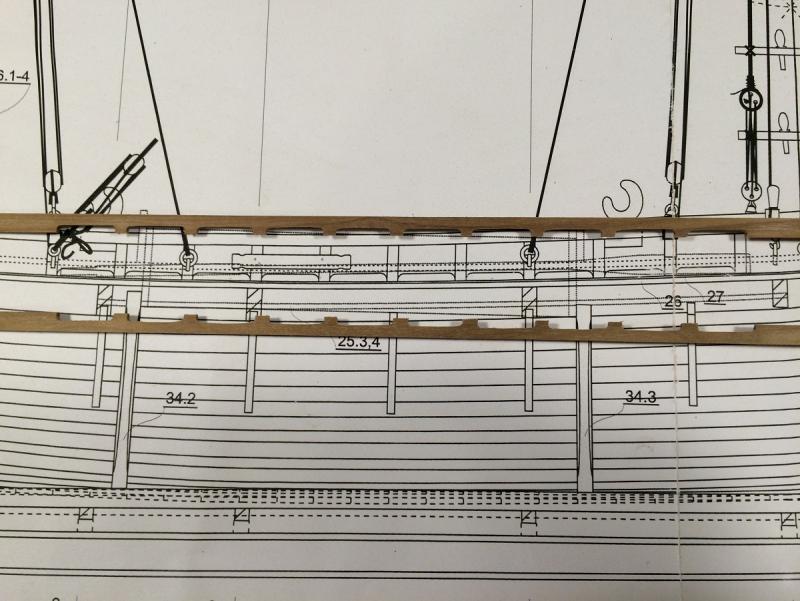
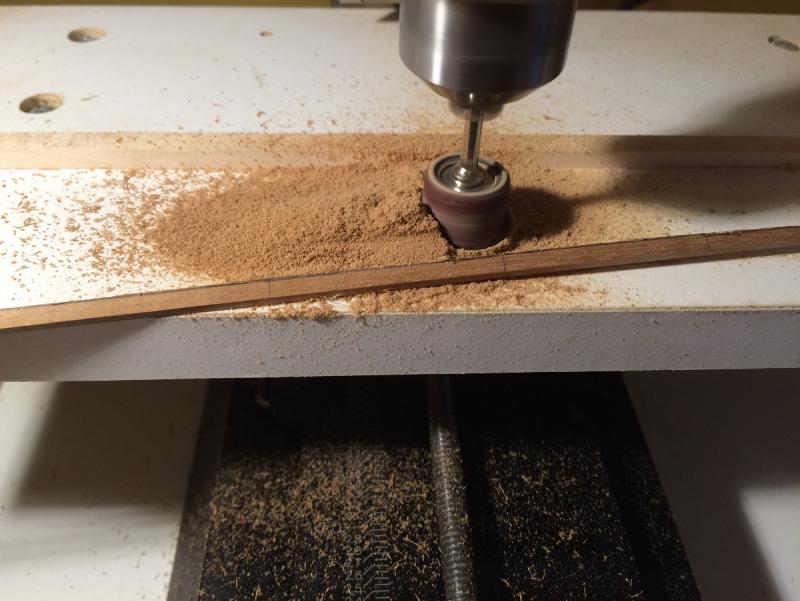
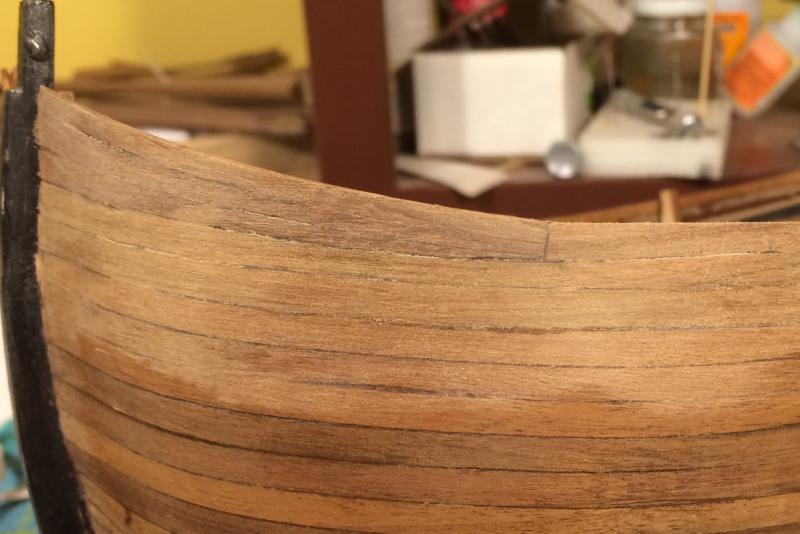
Good morning all, it's been some time now and I don't really have much to show for it. I'm really not sure how my time has been used as of late but production is very slow in the shipyard, hopefully this will change as the weather cools off. Since last time I have finished the planking, added the scupper plank upper wale and the rubbing strake Here I have marked and measured the scupper openings then cut them out using a 2 mm bit on my mill. As you can see I just made up a little table for the mill added a fence then just cut the openings free hand. This is so much easier cutting in the scuppers off the ship, good design by MarisStella Clamping and the end result Shaping the top . ] Building up the bow Here the bow is being shaped and the final planks for the upper wale installed. It was at this point I ran into a little snag.....the upper wale plank was supposed to be .5 mm thick and I installed 1.5 mm thick pieces . I was thankful that I used not only ca but also weldbond to glue these pieces on so no one method would get the pieces off without major damage . Next option was to sand off 1mm of the strake so, when I finally found my happy face, the sanding begun using a dremel. I suppose I was smiling so much I could not see that I sanded right through it in one spot thus requiring me to glue another piece on in this spot and do some more sanding......by hand. The good part of all of this is I live in the country with no neighbours close by to hear my "sounds of joy" and my dog has finally returned home. The pictures show the plank before sanding Next step is painting the rubbing strake and upper wale and the space in between them(not sure of the name for this area) I have begun this I will have some updates hopefully soon. Take Care and Thanks for stopping by


- 653 replies
-
- 19
-
-
- trabakul
- marisstella
- (and 1 more)
-
Looks real good Mike. I am thinking that redheart is much the same as blood wood as it also is brittle and full of oil making it burn easily. I am interested in how you are going to do your coppering as I have seen it done plate by plate and also by strips. I have never done copper yet and am looking forward to see what your approach will be.
-
Congratulations Dave, she is simply beautiful. Thanks for the wonderful log that you have done, it was an enjoyable voyage.
- 306 replies
-
- 4
-
-
- armed virginia sloop
- Patrick Henry
- (and 2 more)
-
Very well executed Al, the rails look perfect and thanks for the tutorial.
-
Right on Bob!! This will be great to watch, looking forward to following along
-
How do you keep up this pace Frank? I may have to go for a nap, all this work is making me tired . Nice work, and she will look great in a window
-
Works for me
-
Just got caught up on this Frank, she really is looking great. The speed you are going is incredible!!! Nice work though, looking forward to more
-
She looks real nice, good work
-
A real sweet model you have there. Fantastic workmanship, congratulations. What's going to happen on the bench next?
-
I know it's been years since this build Bob, But I just found this and would like to say what a beautiful build and amazing work. I have the LSS AVS on my shelf that someday when the skill level is better I'll start. I would also like to add the rigging like you did on your Kingfisher, however, I'll need a few more builds before all this happens. Have a Good Day
- 81 replies
-
- 3
-
-
- kingfisher
- lauck street shipyard
- (and 1 more)
-
You are moving right along Dave, great work. I like your idea of leaving the top side naturel.
-
Hi Mike, Thanks for the gracious comment. Yes we do get long cold winters with lots of snow, but now that I am retired as you say " perfect modelling weather"
- 62 replies
-
- 4
-
-
- batelina
- marisstella
- (and 1 more)
-
I agree Dave, no need to take away from that superb ship! Beautiful work
- 306 replies
-
- 3
-
-
- armed virginia sloop
- Patrick Henry
- (and 2 more)