
DONATION DRIVE - SUPPORT MSW - DO YOUR PART TO KEEP THIS GREAT FORUM GOING! (91 donations so far out of 49,000 members - C'mon guys!)
×


popeye the sailor
-
Posts
16,007 -
Joined
-
Last visited
Content Type
Profiles
Forums
Gallery
Events
Everything posted by popeye the sailor
-
 wow.......you've come along since I last saw her! the rigging looks neat.........really adds a lot of detail. I have some of those dead eye rings too. if you have some really thin wire, wrapping around the narrow part will keep them from opening up. if they were going through a chain plate, you wouldn't have had that problem......but with the set up you've got, binding them somehow would be your best bet. she's looking really good Jack!
- 250 replies
-
- 2
-

-
- willie l bennett
- model shipways
- (and 1 more)
-
planking looks great Andy.......that's a big hull to cover
-
thanks for the positive comments....and to all who hit the like button. the work week is done.......I've been sitting at the computer today, catching up on news and stuff.........all the while, dressing out the main deck structure. one more part to go, then perhaps a light stain for the roof......and then I can give it a coat of lacquer. I'm still making adjustments to the aft cabin......I've marked out the roof for planking. I'm sure I have a picture or two in the camera......I'll see if I can scare them up for you thanks OC.......and glad to be back Patrick. thanks Nils........but I haven't gotten to see it on the deck yet I really need to get to the hull and start flesh'in her out. I do feel that the bilge pump is out of scale.......but that's what I got in the kit, so there's little I can do about it. I will simply have to live with it. thanks for the good word thanks Zoltan......it's one of the things I'm improving on. it will look even better once I get the rest of the roof done. we shall see thanks Lawrence.....I think just about everyone built this vessel in one form or another. glad to have you following along I'll get 'em on there somehow Sam
- 453 replies
-
- 8
-
-
- thermopylae
- sergal
- (and 1 more)
-
catching up Bob on your fantastic project. you've made a lot of progress and your rigging is so very well done! clean and neat so much goes into one of these vessels....amazing!
-
catching up on your project Dave........the lighting came out super! nice idea with the cannonballs
- 601 replies
-
- 2
-
-
- constitution
- revell
- (and 1 more)
-
catching up with your progress Carl..........you've done extremely well with the P.E. detail! very nice indeed!
-
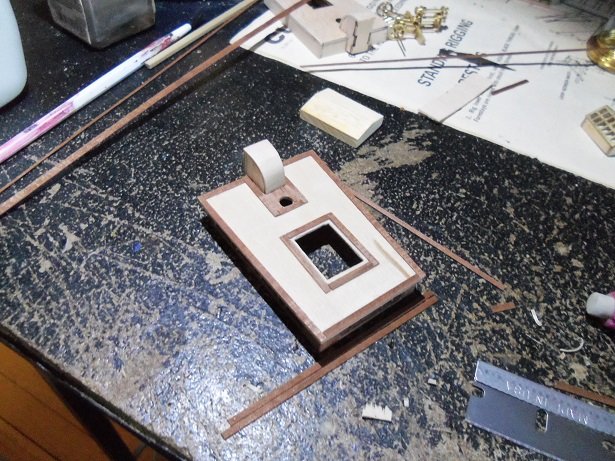
thanks all for the kind word and to those who hit the like button. it feels good to be back tinkering again. while I was play'in with the aft cabin, I thought about the main deck structure and figured I'd throw that roof into the mix too. I need to add the doors to it as well, so this will be as good a time as any. sorry 'bout that John.........I've always know that structure as the galley....I'll stick to aft cabin in the future in regards to the companionway and the skylight.......I cut the companionway parts from the original parts, tracing them out on sheet basswood. assembled here......the two aft cabin companionways have about a 0.5 mm difference in height. looks like it might be a hatchet job to me. as for the skylight, I wasn't keen on the roof pitch, but to drop it any more than what it is now, would make it wider than the plans.......I already adjusted the size of the roof hole to accommodate it. as mentioned......some of the part scale sizes are off.......not much I can do with them. what I can do with the skylight, is sand the bottom and drop the height that way. Footnote: since taking Gibbs out, some form of redo is in the works. this is what you get when you put a Revell Thermopylae on your Christmas list Sean. the scale seems to be my biggest throwback, with the kit itself with it's own assortment of pho-pars. we'll see what me and my limited talent can do with this model thanks Vossie........we'll see how it looks after the adjustments I make
- 453 replies
-
- 9
-
-
- thermopylae
- sergal
- (and 1 more)
-
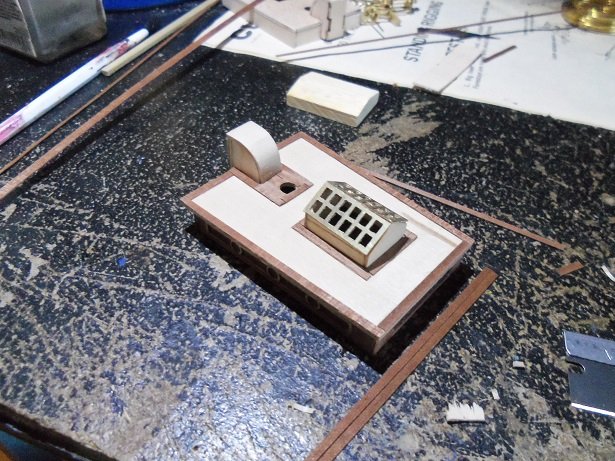
the last thing I did here, was case in around the edges of the roof. inside the border will be filled in with light pine colored 0.5 x 2 strip........I wish I had 1 mm strip.
- 453 replies
-
- 21
-
-
- thermopylae
- sergal
- (and 1 more)
-
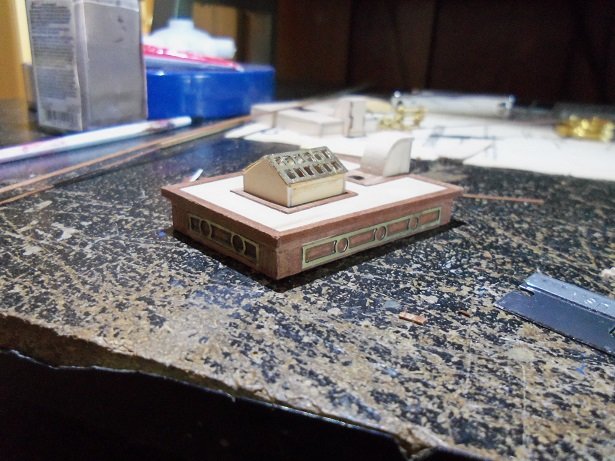
I have an idea as to what I want to do with the roofs. for the galley roof, it was bordered off with mahogany.....even around the skylight. I still need to fill in the front walls and the companionway, but the roof is a good start. the skylight opening was made larger, and the inside will be painted. I'm planning to use window maker for the glass, so it will be clear. there won't be much to see anyway, but the trouble will be worth it.
- 453 replies
-
- 22
-
-
- thermopylae
- sergal
- (and 1 more)
-
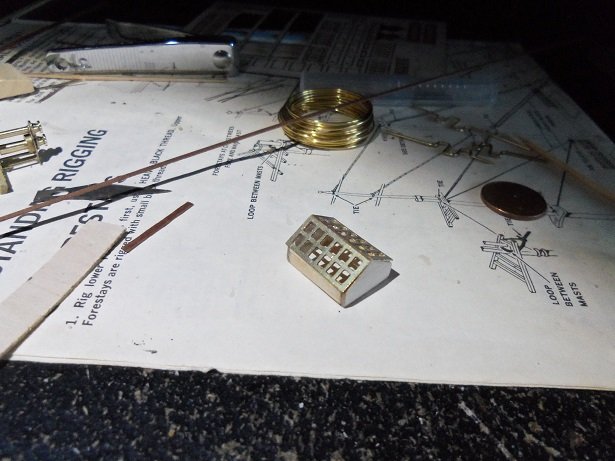
Hello Zoltan..........yes, I am feeling so much better....thanks for the well wish. yes, it has been a rough couple of weeks......not fun when I had to work through last week end. but I did get some tinker time in this week...something I haven't felt like doing. hello George....welcome to the site. I hope your finding your way around OK. also, welcome to the log.......I see you've persevered with one of these kits I've mostly dabbled with Billing kits, so this one is an introduction to another manufacturer. I really don't want to say it, but I will.........if you did the rigging to the diagram, then you may want to redo the braces........the diagram is wrong. reading back in this log, you'll read all about it......and a link will show you a good example of this vessel. hate to pop the bubble, but this is stuff we've already found out about this kit. I plan to add some missing bits, the correct rigging, and bash this kit a little. if you have pictures, or something you did while building her, by all means post it........all info is useful you built it, and proved that the kit makes a darn good looking vessel out of the box I was at the point of making the boxes for the holds and the skylight. the boxes didn't come out so good........using CA and having to scrape them off the table........well, you can say they didn't fare out too good. I will have to redo them. the skylight came out OK though. I made up the end walls........2 copies, and put the metal one together. it still needs to either have mahogany put on it, or paint it......haven't decided which yet, but the open glass concept looks good.
- 453 replies
-
- 15
-
-
- thermopylae
- sergal
- (and 1 more)
-
hello Greg! catching up on your fine build I must say that your paint work looks really super.........the weathering really adds to the overall appearance. you've made some great progress
-
planking came out looking super..........great job on the counter and transom too
- 714 replies
-
- 3
-
-
- lady nelson
- victory models
- (and 1 more)
-
very nice progress since I last saw her Sjors! rigging is very well done
- 1,616 replies
-
- 5
-
-
- caldercraft
- agamemnon
- (and 1 more)
-
this is good, but the old system was better. I could click on the customs tab, select logs that I'm replying to, and lock it, so whenever I went into the forums, the complete list of the logs I'm following would always be there. there is no lock feature for this........I have to make the change every time I want to view the ones I'm following. I'm not sure how many folks do it this way, but it beats thumbing through each page to find the logs I'm following. don't think there is a fix for it either.....it may require an added function.
-
very nice Russ.........hull frame is looking very nice too.
- 420 replies
-
- 3
-
-
- captain roy
- lugger
- (and 2 more)
-
fits in there like a glove amazing Patrick........such fine detail concerning the room divisions. you may want to cut the small strip going across the aft doorway........major trip factor the engine room looks great! keep up the wonderful work!
-
thanks gents.....and those who hit the like button. it was good to spend some quality time at the computer again..........even more to do a bit of tinkering no real progress as of yet, but I'm working on it. after reading the suggestion Michael gave me, I set up some of those shackles in my vise.........then I went out to get my propane torch. sadly, the bottle must have been low enough, and the cold of winter robbed the rest of it..........the bottle was empty. I'm shoot'in for a trip to Wal-Mart or some place to get a new bottle.........could've sworn I had one on hand. I'll see what I can come up with today
-
you had me confused for a moment there........I had to look in your signature to see which one was which very nice to see this complex model again.........I also see you've put 'er in the gallery as well. Shadow is shaping up to be just as complex. simply amazing the detail you add in these little beauties!
-
thanks for the good word gents.......it's been a couple of weeks since I've felt like doing anything. "things" are starting to look up {not literally}.......today, I've actually done some bead painting. I'm hoping to get back to a steady head of steam {toot, toot}. thanks Michael.......I never thought of that! have to give that a try
-
just ran that through my conversion chart. if I did it right, it came to about 8 pounds, 2.5 oz haven't converted anything in a while....I may be off.. when complete, you may be looking at a model that weighs in excess of 10 pounds!
- 2,625 replies
-
- 5
-
-
- kaiser wilhelm der grosse
- passenger steamer
- (and 1 more)
-
that's interesting..........how much would you say she weighs in at this point? yes........she may be a big girl.........but she's beautiful!
- 2,625 replies
-
- 4
-
-
- kaiser wilhelm der grosse
- passenger steamer
- (and 1 more)
-
congratz John on finishing the Pritt truly a gorgeous model! I'm sure she's already home.......the museum will snatch 'er up fer sure! the rigging looks really sweet
- 745 replies
-
- 2
-
-
- francis pritt
- mission ship
- (and 1 more)