HOLIDAY DONATION DRIVE - SUPPORT MSW - DO YOUR PART TO KEEP THIS GREAT FORUM GOING! (Only 27 donations so far out of 49,000 members - C'mon guys!)
×


mtaylor
-
Posts
26,273 -
Joined
-
Last visited
Content Type
Profiles
Forums
Gallery
Events
Everything posted by mtaylor
-
Lextin, It's great that you got everything sorted out but I am sorry to hear about Chica. Hydraulics is a good choice... I'm glad you got what you wanted and able to start a new adventure. Stay in touch with us occasionally, ok?
-
I can't say it's correct as I'm not familiar with these vessels. But the one piece keel that you have mocked up does look impressive.
-
Opinions on Sherline DRO for Lathe
mtaylor replied to rtropp's topic in Modeling tools and Workshop Equipment
Richard, The Sieg is pretty much the same one as the MicroMark version (out of Central Machinery in China) although the MM version has the more powerful motor but doesn't have the digital speed readout that the Sieg has. Not a bad machine and there's plenty of accessories. I have the MM version of the older 7X14 version.. I did need to true up the chuck a bit and then there's accessories... but that's another matter. Figure into your budget for cutting tools, maybe a 4 jaw chuck, live centers, tool holders (not required but helpful if you're changing cutters). I also bought the DRO's for my lathe. The Sherline doesn't have the autofeed... but, some of the packages for the Sherline could save a big chunk of change. It's easy to spend as much money or more on accessories than for the machine. Personally, I'd consider Sherline to be the "top of the line" lathe.... Follow your heart and your head on this. Go with the one you'll think you'll be most comfortable with as peace of mind is big part of the purchase. -
Frigate Boston by overdale - FINISHED
mtaylor replied to overdale's topic in - Build logs for subjects built 1751 - 1800
Beautiful work, Dan. -
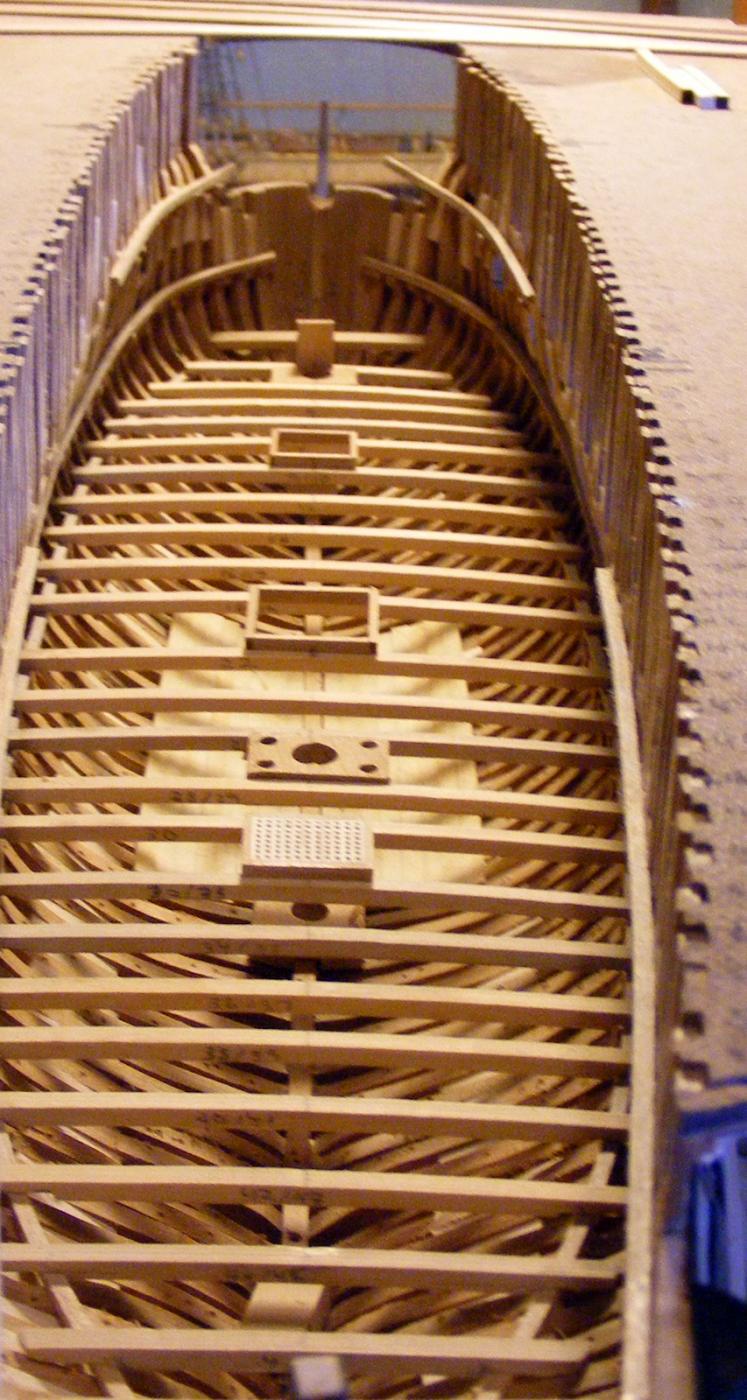
On an English ship, it probably would be the orlop. The French frigates at this time (prior to the 12 and 18 pdrs) only had two full decks, the gundeck and the lower deck. This be the lower deck. Currently, this deck is naked again. I didn't like the way things were sitting on it. I'm repositioning and still fiddling with waterways and cutting the deck planking. Yes, the entire deck (with two exceptions) will be planked, and cabins/storerooms, and breadrooms added. This is more of personal challenge than anything else. The two areas not being planked are forward of the forward partition which sits just behind the mainmast. There's some issues I need to work through in my head yet on bowsprit step. The second area is the gunroom. No issues but the plaque had to be moved. When I did some rework of the main mast step it came loose and I didn't want to rip out a bunch of beams to put it back. I will leave the gunroom door open though. Maybe if someone in a bunch of years looks in with an endoscope they'll find it. Sort of an easter egg. Oh, I am doing the ceiling also. Again more as a personal challenge.
-
The headrail may be a holdover from the spritsail times. With the spritsail there were belaying points using the rails. It also gives a sailor something to hold onto in rough seas when heading to the head or bowsprit. I'm just very impressed with the quality of work you're doing, Sean.
- 2,191 replies
-
- 6
-

-
- confederacy
- Model Shipways
- (and 1 more)
-
No waterways yet, Piet. I think what you're seeing is the clamps for the gundeck (next deck up). Didn't show any? I got lazy with the camera and figured everyone knows coamings and grates since that was what I made new. I reworked the main mast partner and am currently bending the waterways using the Chuck method... but I'm using a hot air gun instead of a hair dryer as the hair dryer just didn't work for me. Tomorrow, I hope to cut the planking for the deck and maybe get a waterway or two installed.
-
Steamboats and other rivercraft - general discussion
mtaylor replied to Cathead's topic in Nautical/Naval History
Druxey, are you suggesting that air gets trapped in the paddle box? There is apparently turbulance from the paddles splashing on front and the then tossing some in the air at the rear. Basically, re-reading what Wiki talked about, there's quite a bit that was reduced by the variable pitch blades entering and exiting the water rather cleanly in addition to being more efficient. I suspect that Cathead is correct about the variable pitch not being used much on the Western Rivers. A sandbar or snag would wreck havoc on a paddle. Hmm.. food for thought and more research now that my Curiosity Button has been pushed.- 281 replies
-
- 1
-
-
- Steamboats
- riverboats
- (and 3 more)
-
Mike, Looking good, sir. You'll find that jigs are very important for many things, not just framing. As for your Constellation instructions question.... Ask in this area: http://modelshipworld.com/index.php/forum/24-wood-ship-model-kits/ You might try emailing AL first.
-
Thanks for the likes, the comments, and just looking in.... Not a big update, but deck furniture (except for the mizzen mast step and the oven) are mostly done. The main mast partner is coming out as I'm not happy looking at the picture. Other than this partner, the oven and the mizzen step, everything else I salvaged from Version 1 for this build hit the scrapbox. The main mast partner should be following.

-
Steamboats and other rivercraft - general discussion
mtaylor replied to Cathead's topic in Nautical/Naval History
Cathead, What you say makes sense... The paddlewheelers I used to see in St.Louis did turn pretty quick, especially heading upriver but those were all sternwheelers. Videos of the Delta Queen and the old Mississippi Queen show some spray coming off the wheels and seems to be dependant on speed. We need a time machine and a designer from those years.....- 281 replies
-
- 3
-
-
- Steamboats
- riverboats
- (and 3 more)
-
Steamboats and other rivercraft - general discussion
mtaylor replied to Cathead's topic in Nautical/Naval History
At first glance at the pictures... some paddle boxes seem bigger than others. Following a few links and re-googling got me to a Wiki page which mentions the turbulence inside the box. This turbulence issue is due to the fixed blades. Once they went to the pivoting blades, the turbulence was much reduced and the efficiency of the paddles improved. So, I think you might be onto this with water being tossed up into the box.* *Caution... this might be the reason or might not be for the boxes being designed the way they were.- 281 replies
-
- 3
-
-
- Steamboats
- riverboats
- (and 3 more)
-
Looking very good, Pete. Clean, crisp, tight joints.
-
Looks great, Tom. It also looks like you're an old hand at scratchbuilding. It's that clean, neat, and precise.
-
All is well again.. we get our weekly fix. Just superb. Carl beat me to this but I'm curious also. Why were the arches and paddle box so much bigger than the wheel?
-
The tools and methods are just as much an art as what comes off them, Gerald. Just stunning work.
- 281 replies
-
- 2
-
-
- falls of clyde
- tanker
- (and 2 more)
-
Mylar? Check an office supply store for overhead projector transparencies. It not only comes in clear but a variety of colors.
- 396 replies
-
- 6
-
-
- Idea
- Bright Idea
- (and 1 more)
-
It's not as bad as you think, Roger... A bit of a later and.... "Consists of: An aggregate produced by a cold milling machine. The machine is used to remove the surface layer of a tarmaced area such as a highway or footpath. The resulting waste is loaded into a lorry and is officially known as Road Planings although many refer to them as Road Scalpings or Road Scrapings." "Road Planings are not suitable as backfill for drainage trenches due to the high fines content and care must be taken when sourcing them as older tarmac surfaces which have been deep planed may contain tars. The use of Road Planings is generally considered environmentally sound as Bitumen is a natural substance. Using them also reduces pressure on quarried aggregate stocks. Unfortunately the days of being to obtain Road Scalpings for free have gone as the pressure of the recession on local authorites has resulted in very little resurfacing work be carried out and thus Road Planings are not as abundant as they once were."

- 225 replies
-
- 4
-
-
- chaperon
- model shipways
- (and 1 more)
-
That whole album is excellent. I particularly like the B&W shots. Well, when the battle was over, did you have the problems with the gentry headed back to DC as they did in 1861?
- 648 replies
-
- 2
-
-
- niagara
- model shipways
- (and 1 more)
-
Congrats, Sean. You and the Santa Maria deserve it for a model well done.
- 274 replies
-
- 5
-
-
- Santa Maria
- Artesania Latina
- (and 2 more)
-
John, Looking good and well worth the effort. One question, since the wood is splitting, is the grain straight? Many times the kit wood is cut at an angle to the grain. I think we've all had our moments with wood splitting.. and then the air turns blue. Doc, There's no other video that I know of. As for lining off the hull, use his tutorial in the article database. He also includes a planking fan for the process in a separate PDF.