mtaylor
-
Posts
26,273 -
Joined
-
Last visited
Content Type
Profiles
Forums
Gallery
Events
Everything posted by mtaylor
-
I can't explain the differences, Tony. I know that all the plans for the Triton were developed on CAD and then a straight conversion to PDF's. The keel, keelson, and false keel are all the same width. I wonder if your printer is doing it?
- 132 replies
-
- 4
-

-
- triton cross-section
- cross-section
- (and 1 more)
-
Thanks Sam. Uh...buy it again...? No. It's been discontinued and there were really were not accessories for it. I've posted elsewhere on this that I think that when this one dies (or I just get tired of fiddling with getting things like vises to work) I'll get a different mill.
-
Tony, I'm not sure why redraw them? As long as you print them out and check that the scale on each plan measures out, you should be good.
- 132 replies
-
- 2
-
-
- triton cross-section
- cross-section
- (and 1 more)
-
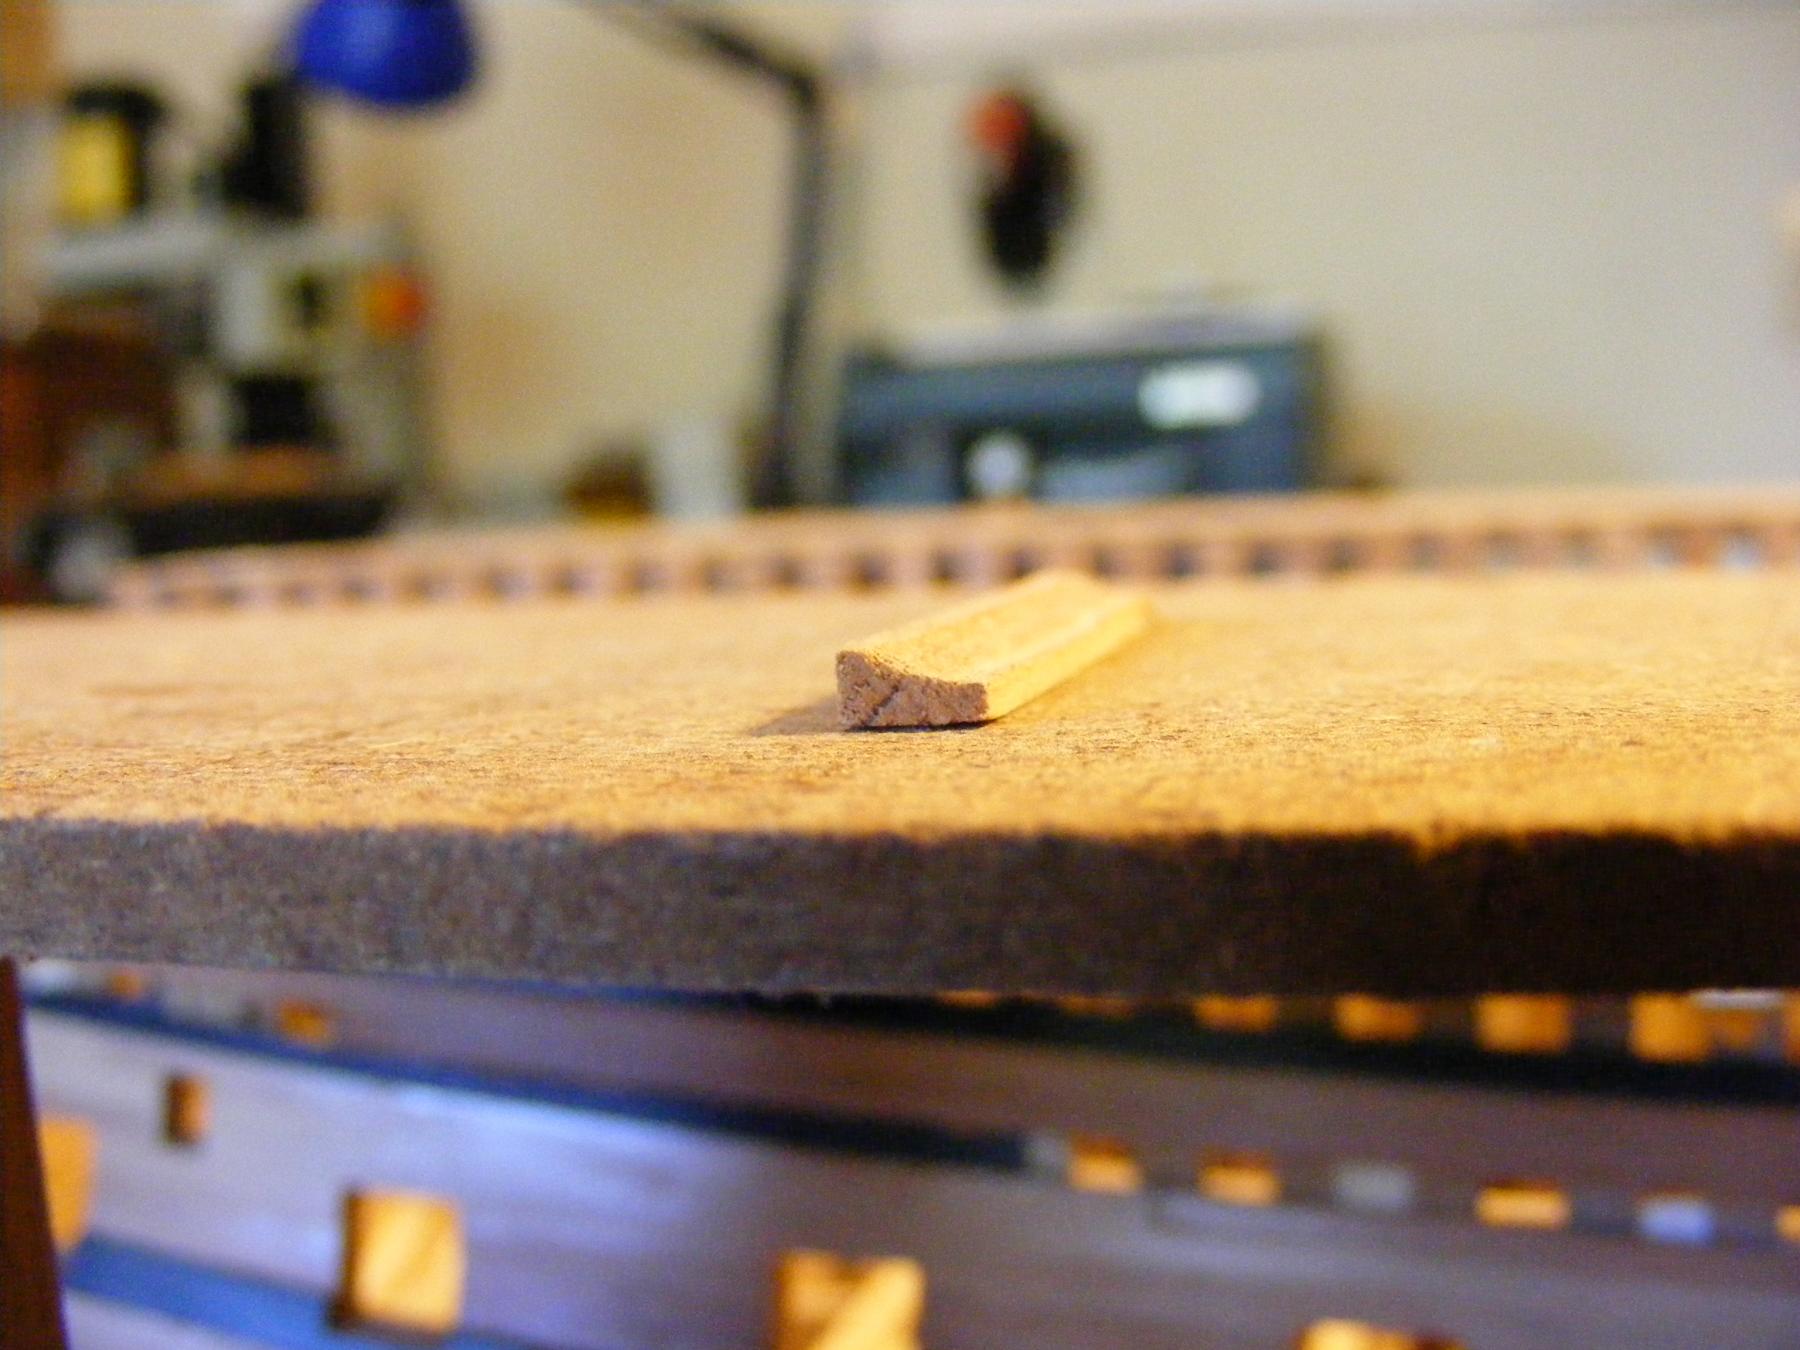
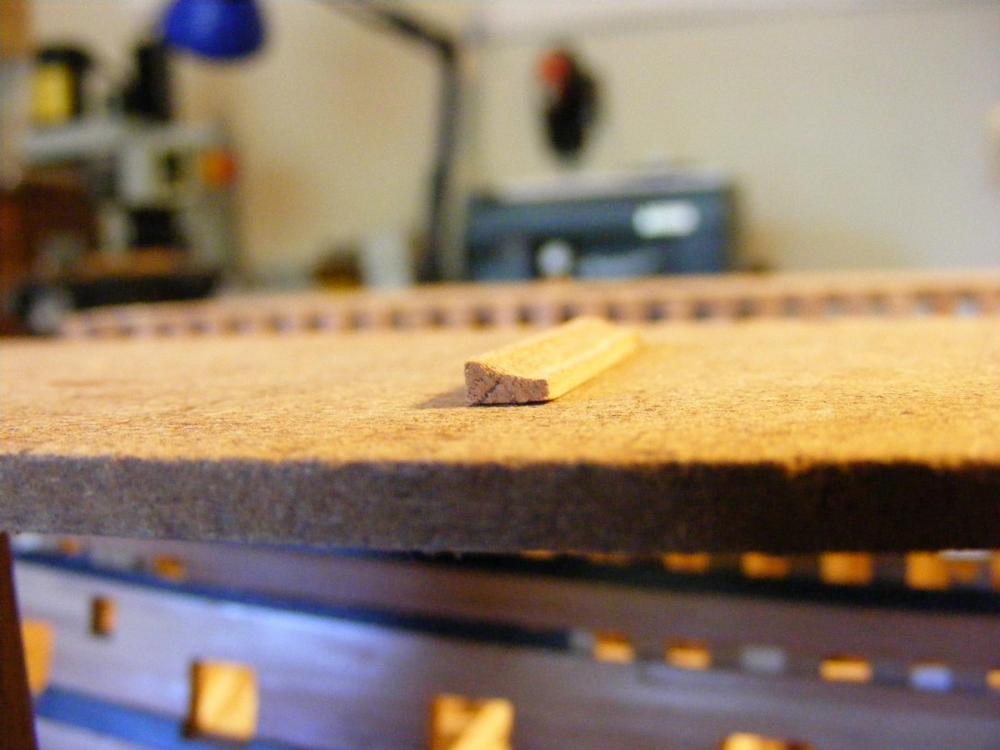
Thanks again for the likes and comments. This truly is a work in progress. The situation is slowly resolving itself... Today's update is somewhat tiny... waterways. The first picture shows the mill setup with the ball cutter. I pass each waterway piece through the jig and each time take off more material. Picture 2 shows the profile on a test piece that I'm aiming for. I'll need to profile the side against the hull during installation to get a good fit.

-
It might be that the hawse lines were run down through the main hatch and then when disconnected from the anchors, coiled in hold. I'm not sure if a ship this small would have had a cable tier. If you're doing full sails, etc. I'd just leave the anchor hawses off and if anyone asks, "they're properly stowed below".
-
Looks great, Jack. Since it's on the base, would a spot of glue where the oar goes through the hull and another under the bladetip work? Off the top of my head, that's all I can think of.
- 170 replies
-
- 4
-
-
- gokstad
- dusek ship kits
- (and 1 more)
-
Nicely done on the galleries... I like them... a lot!!!
- 608 replies
-
- 4
-
-
- la couronne
- corel
- (and 1 more)
-
Thanks for the likes and comments. They are encouraging... Thanks Carl. But if there's an error, I don't mind ripping things apart... Ask my scrap box about that. Actually, Denis, the round up continues to sternpost, but the deck gets a lot narrower. There's a rise in the planking according to the drawings but I'm currently one beam shy so I need to add that. I'm still debating while getting set up to make deck planks. Hahn simplified. I like that philosophy but I also want it look right. His decking is straight planks according the photos. The French used wide amidships and then tapered them. I studying the plans in the French monographs I have to see how and where they terminated the planking strakes. At the stern, I'm thinking I can put a false deck from the last beam to the sternpost. I'm still sorting out which will look better. I'm not a 100% yet, but I feel like that's where I should be headed. Maybe next ship will have all the bells and whistles and less simplification like carlings between the beams and knees. I don't fault Hahn.. I fault myself here. There's still a learning curve going on.
-
Gary, Nice work on the frames... She's coming together very well. As for the pictures.. after hitting "Attach", put the cursor where you want a photo and hit "Add to post" on the little thumbnail above "choose file". Then you can type below it.
-
The problem with laser cutting is the manufacturer, not the process. If they take the time to check the settings and calibrate it can be very accurate and relatively clean. Chuck (Syren Model Company) and some other companies are proof of this as are some of us who own lasers. CNC can only go so small due to the mechanical needs of the cutter. Both CNC and lasers are far superior to the old die-cut methods. The burn that you see isn't burn at all really. Some is smoke, some is char. With good drawings and care in cutting, a light sanding will remove the char and not change the dimensions. Yes, there is always some fitting to be done because it's wood. With some manufacturers, it's a problem of redrawing their drawings and investing in the cutter as well as the person(s) who will run the machine so they stay with die cut. Others have gone to CNC but from a manufacturing standpoint, it takes a lot of time to CNC as multiple passes must be made so as not to have tear out. I'm tickled with my laser as I can cut parts incredibly small that I couldn't cut using a scroll saw or a CNC.
- 1 reply
-
- 3
-
-
That makes a nice little model, Zoran.
-
Allan, What about fabric glue? Some of them are waterproof and pretty durable as well as remaining flexible.
-
Mike, Do the plans show a stern view? If they're rounded out like what Alistair did, I'd think you'd see a bit of them outside the taffrail. Maybe.... On your plan, I don't see anything to indicate the shape that Alistair used. The drops below the windows appears to be a different story. Due to the shape of the transom, those should be visible on the drawing if they're rounded outwards. At this point, either way could be right.
-
Congrats on passing the test and becoming licensed, Ben. That's a big step.
-
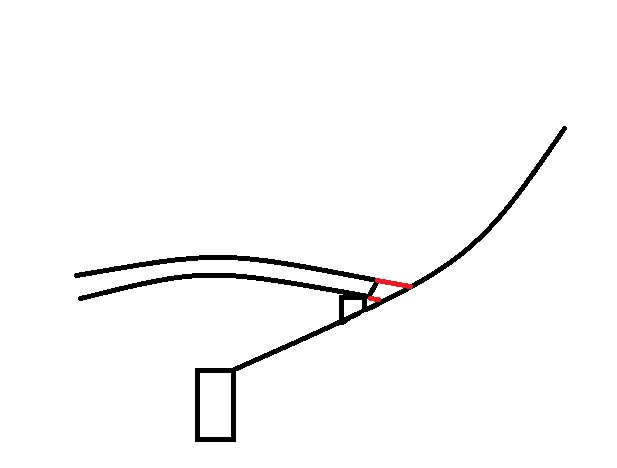
Thanks as always for the likes and comments. If I stare at something long enough, I'll usually realize what it is... It's my mistake.... the last beam I have is 2-1/2" long. On the drawing it's 3-1/2" long. I think the drawing is looking from waterway to waterway which, if the beam is tapered or faired into the frames properly it would go past the clamp and end up being 3-1/2" long. Not the end of the world... I may just shim out that area when I do the waterways and plank or I'll redo them. I'm leaning towards a rework. I'm having my moments here wrapping my head around some of this. In my crude sketch... the black beam is how it looks now. The red is how it should have been faired into the frame.]
-
John, Continue the tic marks forward and aft. You've established that you need 28 planks. Use Chucks fan-tool to get the widths of the planks as you move forward and aft. I'd use the second set with the battens for this. I think in the long run you'll be happier. I would lay out and install the wales and probably the planks above them first to establish where you need to plank between the wales and the keel and then line out the hull. The wales give the ship it's distinctive look.
-
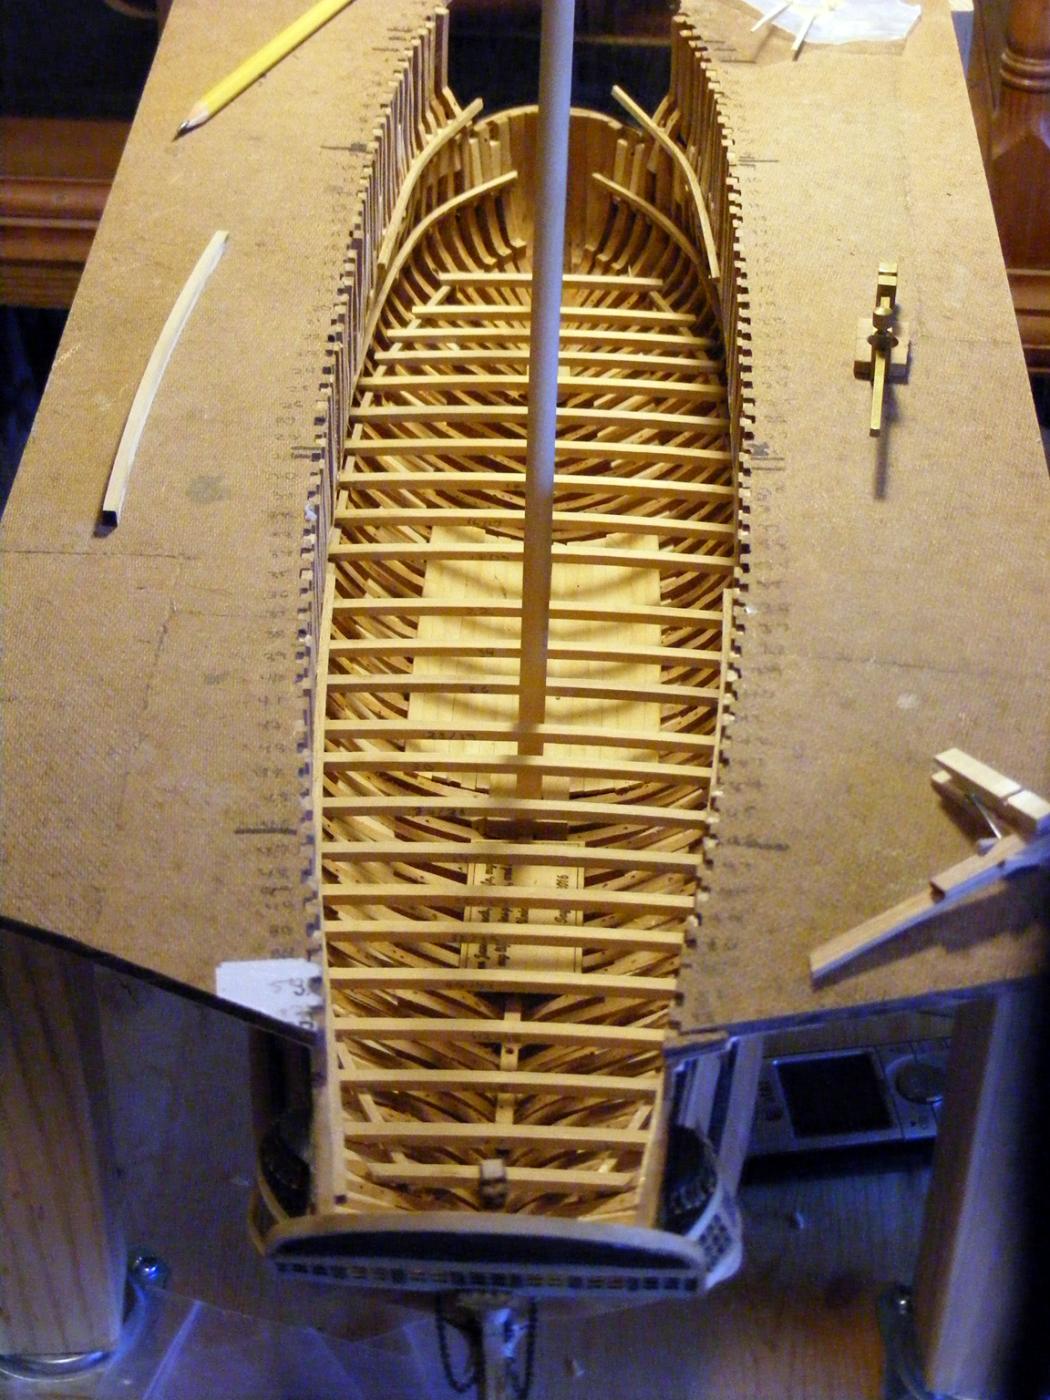
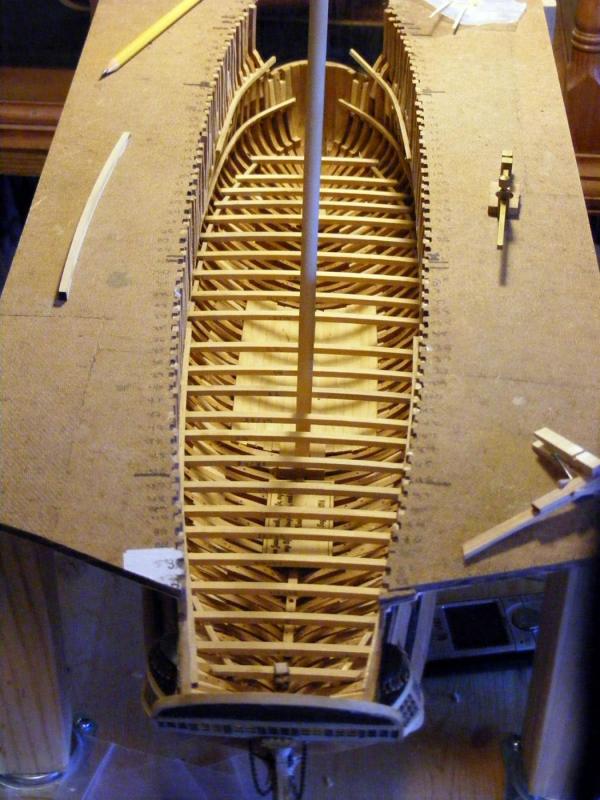
Thanks for the "likes" and commentary... Making progress. The beams are in for the lower deck. There's probably another couple that I'll need to put in once I figure out the shape at the bow and stern. The bow, not so much, but the stern looks different on the drawing than it does looking into the hull. i think it's not at deck level... just has me scratching my head as I know the beams are all at the right height. Anyway, I'm checking fore and main mast locations and then I'll be dropping a bit of string down the centerline to double check and pin down where I'll need the mizzen mast step, the three hatches, and the bowsprit step. I'm also plotting out the walls and cabins but won't get to far into that until the deck is planked. Which... I'm hoping to get started on this week as soon as I can get the planks cut. The actual next step with the waterways. The wood has been selected (cherry) and the appropriate sized pieces selected. Here's pictures. Feel free to point out any stupidity or errors on my part.

-
It's great to see you back, Dave. And good luck and wishes for the show. The SoS is coming along beautifully.
- 962 replies
-
- 7
-
-
- sovereign of the seas
- ship of the line
- (and 1 more)
-
False Hull Fillers
mtaylor replied to achuck49's topic in Building, Framing, Planking and plating a ships hull and deck
If you use balsa for the blocks, hit them heavy with PVA and water mix or even thin CA. It'll toughen the surface up a bit. -
It was good to hear from you Kees. I'm sorry things didn't work out at the hospital. Well be here, waiting patiently and hoping for the best for you and your family.
- 434 replies
-
- 8
-
-
- pelikaan
- beamtrawler
- (and 2 more)
-
I wonder if the port lids were removable? If we look at the split lids used on many American ships, the up lid was. Also, the French on their frigates late in the 18th century had lids that were only used during foul weather. No hinges on those though. There's precedent but I'm not sure if it applies.
-
That is a breathtaking display, Siggi. A feast for the eyes.
- 58 replies
-
- 4
-
-
- barge
- ships boat
- (and 1 more)