mtaylor
-
Posts
26,273 -
Joined
-
Last visited
Content Type
Profiles
Forums
Gallery
Events
Everything posted by mtaylor
-
Another masterpiece almost done, Igor. Looking superb.
- 154 replies
-
- 3
-

-
- colin archer
- lifeboat
- (and 2 more)
-
The only gold leaf product I ever used (other then the real things) was a "gold leaf" paint I got from Micheal's. I was doing some lettering on a car and it worked a treat. It might be a little too thick for you boat though and I'm not sure how it would look thinned out. The varigated is lovely paint.
- 641 replies
-
- 2
-
-
- greenwich hospital
- barge
- (and 1 more)
-
Thanks for the feedback and support.. it means a lot and shows what we have at MSW. I guess I need to connect the TV and watch Game of Thrones... I won't look back as I don't want to know what's gaining on me (Famous baseball player quote). The decision was easy Grant. The finding the materials is/was an issue. Brass tube and rods the right size, Some more boxwood... I've gathered things up and starting to make way. Let's go back to when we were kids.... Do-Over!!!!!!! I quite agree, Ken. We need to make ourselves happy first.
-
I agree that sometimes we're gluttons for punishment. And actually I do like knowing when I've messed up as it points out where my skills/attention/etc need improving. Anyway, destruction went well. Just holes in the planking to fill. It seems that nothing really sticks to Wipe-on-Poly and it cleaned up nicely. I've sanded those areas down to bare wood, made a new cutting template and will be proceeding (and remembering to take photos) on the morrow. And I'll get the rudder coat on this time.
-
Well... I did the self-beating and now that I've calmed myself down, I took a long hard look. No excuses. It's not right. So... once again.. DE-CONSTRUCTION TIME. Stay tuned.
-
They did. There are also battles recorded where the gunners would reach across and take the other guys tools... fight each other with swords and pikes. Sometimes they were that close together.
-
Tools and Supplies for My "Shipyard"
mtaylor replied to daveward's topic in Modeling tools and Workshop Equipment
I had that cut-off saw and binned it. Sloppy tolerances on the miter and cutting head were the reason. Even the markings on the mitre were off. -
Thanks for the likes and comments. That's what I had on the plans for cutting the rudder... HIndsight...it's wrong. Also, I used the wrong size pintle and cudgeon material. I'm adding this to my "lessons learned". I take another look and see if I can fix it although without destroying the stern planking, I'm not sure.
-
Whoops... ok.. I tapered the edge of the garboard towards the keel at the bow. The rest of the plank(s) for the garboard strake to the rear are untapered. My bad....
-
Greg, I had to think about what you were asking.... the quarter galleries go there to hide the ugliness. We can't just have a doorway from the Great Cabin to the water can we? Or maybe I can forget the gallery and add a diving board.. hmm.... what would Popeye do???
-
Cutty Sark by NenadM
mtaylor replied to NenadM's topic in - Build logs for subjects built 1851 - 1900
I too am grinning from ear to ear... looks spectacular.- 4,152 replies
-
- 7
-
-
- cutty sark
- tehnodidakta
- (and 1 more)
-
Dave, I'll take a shot at what I can... I'm by no means an expert. I'm building my first ship using spiling... the rest were.. shall we say, not following any known method. The thickness is a big variable. It depends heavily on what thickness the ship needs and more so on the scale. A 1/16" thick plank would be way too thick for a 1:96 model and way too thin for a 1:24 in most cases. The garboard is usually straight on the edge along the keel and tapered on the upper side. Your mileage may vary depending on the ship/boat design. Most folks do start at the wales first as this a key dimension. Some go up next, others go down depending on their preference. Bending the wood is a matter of water and heat... some use steam, others just soak, others a combination of soaking and heating (using everything from a soldering iron to a curling iron to electric plank benders. Tapering is also a judgement call.. taper both sides, top, or bottom. As for spiling.. wide planks get cut down to fit (tapered). If the plank is narrow enough, sometimes it can be tapered and edge bent. I know... nothing definitve.. right? I'd use the Beginner's Guide first to get a feel for the wood and process and then on your next ship, use one of the other tutorials for spiling, etc.
-
Seeking information on determining load waterline
mtaylor replied to trippwj's topic in Nautical/Naval History
Bruce, I think I agree. It's sort of like in certain states in the US that for taxation purposes there's a formula for HP of an automobile. It has zip to do with real world measurements and (in this case, autos) it's seldom the same from State to State. -
Cathead, Rule of thumb here applies: Get the Admiral's input first!!!! I'm sort of an all-wood type so I won't vote due to built in bias.
- 64 replies
-
- 5
-
-
- 18th century longboat
- model shipways
- (and 1 more)
-
It's great to see you back, Michiel. Good looking workshop you now have.
-
I love the way it looks in that bottle. And the mini-ship in the top... Beautiful work, Igor.
-
I hope you don't mind, I'll stand over out of the way and follow along.
- 649 replies
-
- 3
-
-
- dunbrody
- famine ship
- (and 2 more)
-
Looking great, Gary. I think the "just in time" approach is a good one. I can see cranking them out en masse and installing all at once later if speed is needed or if one has done this before several times and is comfortable doing that.
-
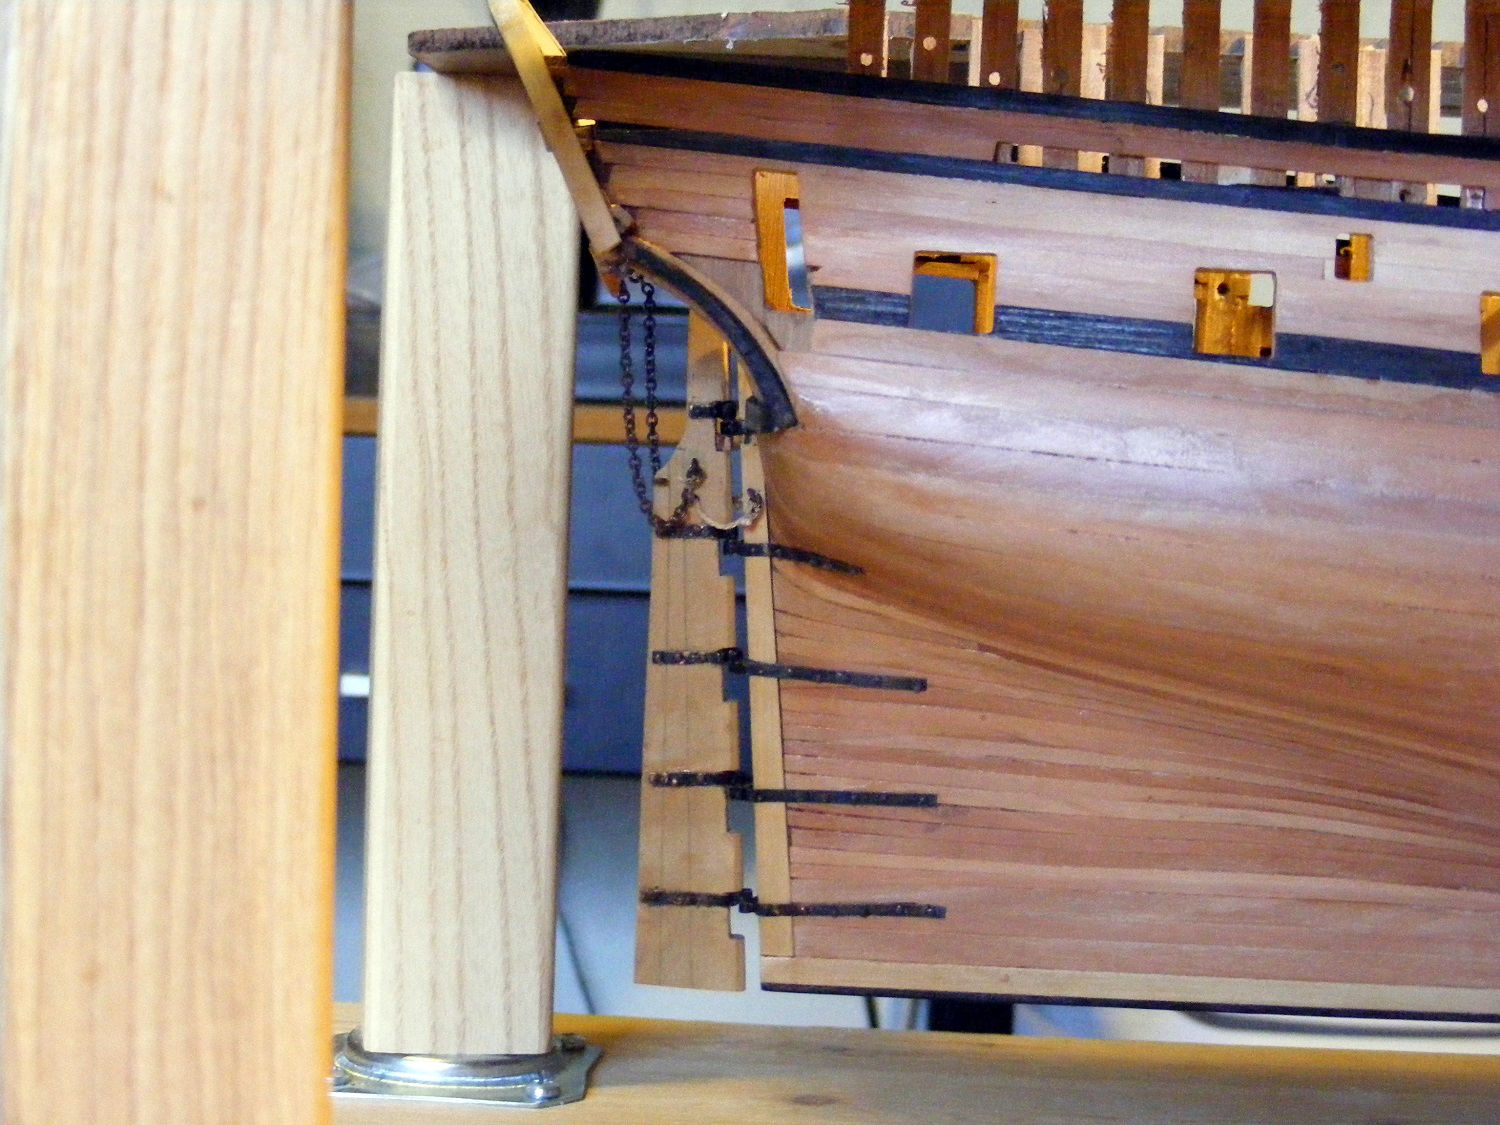
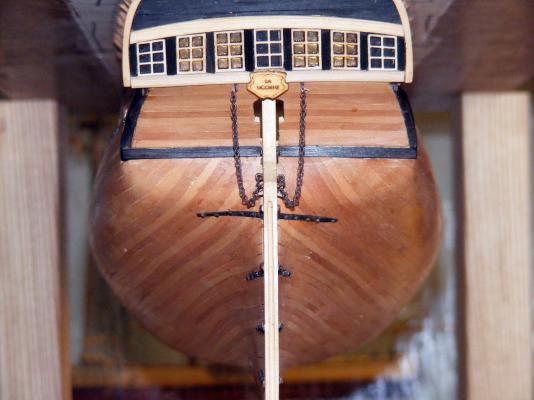
Thanks for the likes, the comments, and the ideas. Carl, I think you might be onto something. I never thought about coming in from the top. I'll take another look this week and see. Pat, I seem to recall that build also... too many years ago,.. <sigh> Oh yes, I'm logging the lessons. Here's the rudder in it's not quite or maybe it is, final form. (Rudder coat notwithstanding). I've added the strop and the chains. Now that's back in it's jig, I'm going to attend to several things... the rudder coat install from the top, the carvings <takes a deep breath>, the quarter galleries, and a bit if finishing up the sanding on the inside of the hull. And the pictures. I'm pretty happy with it even with some issues that the macro brings up..

-
For English ships, the breeching rope is the same size as the cannon bore. And (I hope I'm recalling this right) 2 and 1/2 times the length of the bore. Thus, when the gun is fully run in, there's about 18" to 2 feet between the muzzle and the the port cill.
-
Seeking information on determining load waterline
mtaylor replied to trippwj's topic in Nautical/Naval History
Since this is a "working notebook" it might be that the earlier version of his calculation was his equivalent of thinking out loud. -
I go along with what Pete said. Wood is wood and the color will vary even across the same piece. Run some sandpaper across that area (if you haven't already) and see if the color changes a bit. As wood ages with light and air flow, the color can change because of that.
-
That is a great looking wheel, E&T. And an very interesting method of designing and building it.
- 346 replies
-
- 3
-
-
- terror
- polar exploration
- (and 2 more)
-
Mike, Welcome to the "Let's flip it over and see what it looks like right side up" club. She's looking very good.
- 969 replies
-
- 4
-
-
- hahn
- oliver cromwell
- (and 1 more)