mtaylor
-
Posts
26,273 -
Joined
-
Last visited
Content Type
Profiles
Forums
Gallery
Events
Everything posted by mtaylor
-
Pennsylvania by threebs - 1/72 scale
mtaylor replied to threebs's topic in - Build logs for subjects built 1801 - 1850
Hi Greg, Welcome back to MSW and it's nice to see the Pennsylvania again. Ratlines... I remember reading that they're usually 16" to 18" inches apart. About the distance on rungs on a step ladder. -
Cutty Sark by NenadM
mtaylor replied to NenadM's topic in - Build logs for subjects built 1851 - 1900
Nenad, Her Majesty is looking more proper every time you work on her. Stay off the roof and stay healthy.- 4,152 replies
-
- 1
-

-
- cutty sark
- tehnodidakta
- (and 1 more)
-
Very well done, Karl. Interesting method for making cannon barrel. And, I love the detail including the number on side of the carriage.
- 662 replies
-
- 1
-
-
- bonhomme richard
- frigate
- (and 1 more)
-
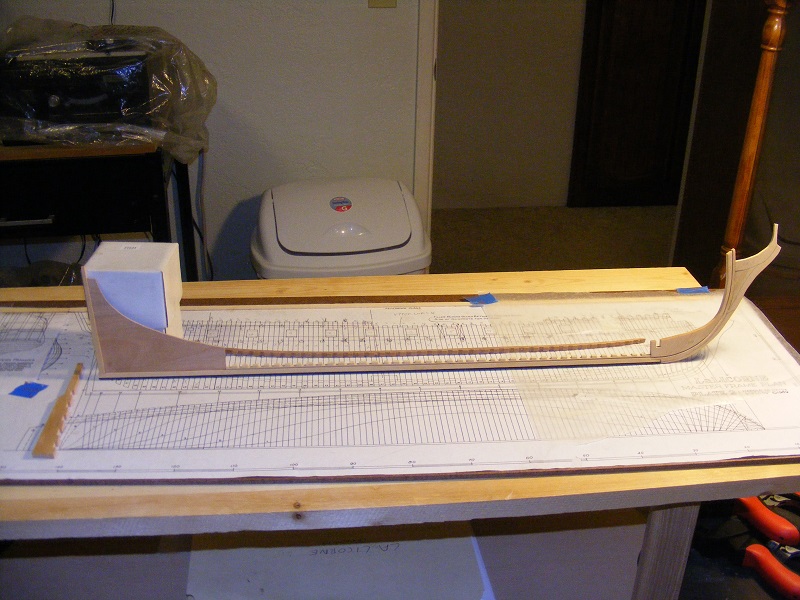
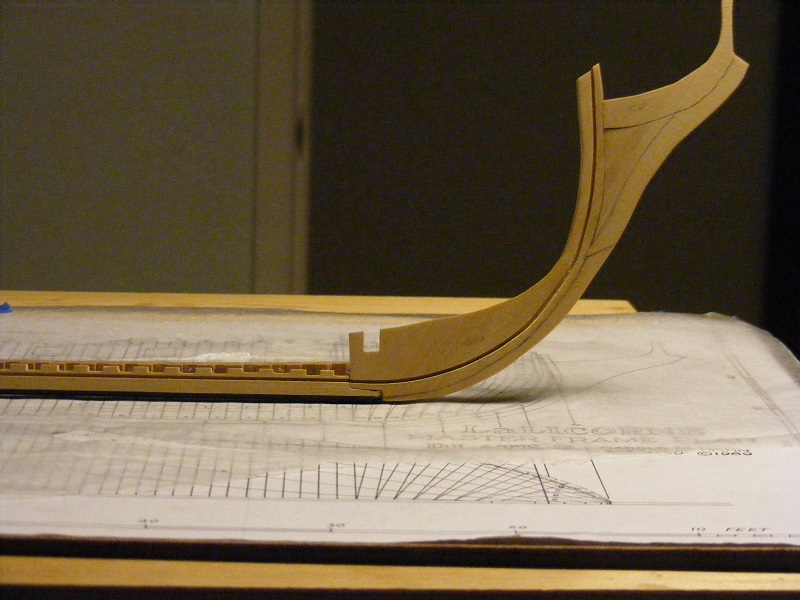
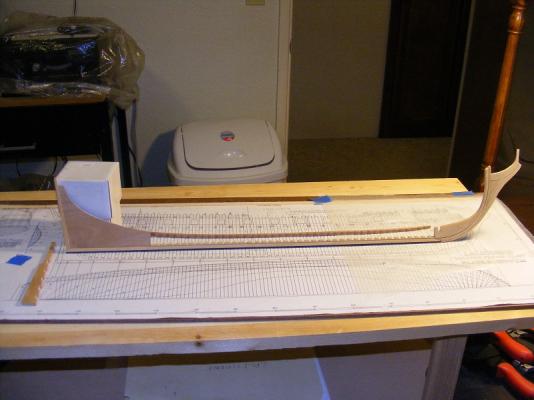
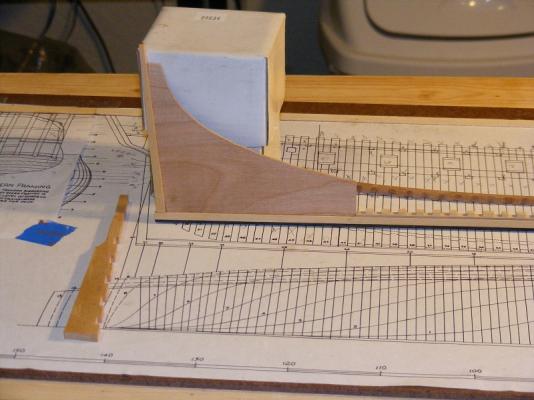
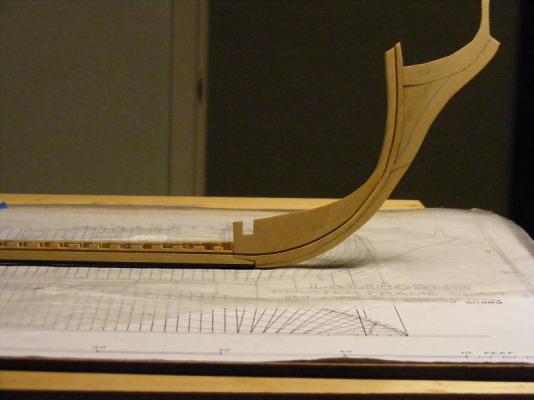
Thanks for the "likes"... Sam, I'm happy with the way this is going. Really happy. Mobbsie, I was hoping for some wise words... but I'm glad you like what you see. Update time, yippee!!! The backbone is complete. (Almost.. forgot to finish trim the keel at the stern according to the picture). The stem has been appropriately (I think) tapered and now attached to the keel. The deadwood was made from the cherry since I didn't have any boxwood thin enough and attached along with the sternpost. And, an rudder blank has been made. I discovered that misinterpreted the plans on V 1.0 for the stern deadwood and the sternpost. The deadwood on V 2.0 isn't tapered but the sternpost and keel need to be. It appears that the best way will be after planking when the planks, keel and sternpost can all be done at once. Or least that's the way it appears in the Hahn photos.... I can now go wander off and fiddle with cleaning up the salvage parts, maybe make some bits and pieces, etc. while waiting for my framing wood to show up.
-
Lovely work, Ed. Treenails? I don't envy you on that one.
- 3,618 replies
-
- 1
-
-
- young america
- clipper
- (and 1 more)
-
Nicely done on another tricky area.
-
Nicely done on another tricky area.
-
You didn't learn patience in the Marines? As I recall, everything was "hurry up and wait"....
-
Richie, If you go here: http://modelshipworld.com/ you'll see various forums/sections, etc. Down a bit are the "Member Build Logs". What you'll want for your kit is in this section: http://modelshipworld.com/index.php?/forum/10-kit-build-logs-in-progress/ I suggest you read the pinned topic and look over the logs to get an idea of how they're done. Here's a link to how to do things: http://modelshipworld.com/index.php?/forum/47-questionsinstructions-on-how-to-use-and-post-to-this-forumsite-problems-or-suggestions/
-
Richie, If no one else has said it.... open a build log. Overall, it will be the best way to get help and encouragement and make some friends along the way. It really is the best tool in the toolbox. As for your query... can you post a pic or two?
-
Budget DIY Table Saw?
mtaylor replied to Q A's Revenge's topic in Modeling tools and Workshop Equipment
Looks like it might. The only questions would be about the accuracy of the fence, blade wobble, etc... -
Do a search for JerryTodd's builds. He does large scale RC frigates and his homepage in his sig as well as his build logs have a lot of good info.
-
ROYAL CAROLINE 1749 by Doris - 1:40 - CARD
mtaylor replied to DORIS's topic in - Build logs for subjects built 1501 - 1750
Your work just continues to be amazing, Doris.- 883 replies
-
- 1
-
-
- royal caroline
- ship of the line
- (and 1 more)
-
Bob, Sorry to hear about the accident but happy that you're well. Thanks for posting this. Might I suggest you also post in the Metalwork sub-forum as I think this is pretty important bit of safety info.
-
Rusty, I'm pulling up a chair and going to follow along. Good luck and happy building. You're off to a good start and I predict a great finish.
-
PROXXON DSH 2 SPEED SCROLL SAW – REVIEW.
mtaylor replied to Blue Ensign's topic in Modeling tools and Workshop Equipment
B.E., Nice saw.... very nice. A couple of hopefully some helpful tips. 1) That clear plastic guard is for the lawyers. I had the same issue and question on my scroll saw and the various people I talked said to take it off, and keep your fingers off the blade. 2) The hole through the table for the blade... does it have a ledge? I'm thinking you'll want to make a zero (or at least a very small) clearance insert to go in there. 3) The blow tube... move it as close to the junction of the wood and blade as you can. The closer it is, the better it will work. Seems most of these saws use a bellows attached to the blade arms to pump the air. 4) Wax the saw table with a good grade of paste wax. The will slide easier. -
Wood lathe templates or jigs
mtaylor replied to rtropp's topic in Modeling tools and Workshop Equipment
Sorry Richard. I know there's been some who use either a bought duplicator (Vandalay) or make their own for the metal lathes. I'm thinking it wouldn't be much different for wood... or would it? -
We buy books on how to build, why not a DVD. I've been considering this one but haven't bought it yet.
-
Barry, They never did really have any dedicated tools for this mill. Basically you buy the R8 (or equivalent from other manufacturer's/sellers) and adapt them. A real PITA since the bigger machines use the M8 hardware and this one uses the M4 hardware..... Coolant? For what? Unless you're milling metal, coolant isn't needed.
-
Kats. Heal first, ship comes later. Your post indicates you're doing better and I'd like to see what you come with for workspace.
- 237 replies
-
- 1
-
-
- cutty sark
- revell
- (and 2 more)
-
Nice work, Popeye.
-
Wow! Impressive work, Gary. You got quite a bit done.
-
I'll add another voice to the appreciative chorus. Thanks for sharing this beautiful build, Nils.
-
Thanks for looking in, the comments and the "likes". The Thurston saw blades came in and so far, the testing looks great. I'm not seeing the scoring on the cut like the MM blades. I slept on it and dug out a bit of boxwood. I'm going to replace it. Dave, I'm trying EdT's method of pigment. Here's my test post: http://modelshipworld.com/index.php?/topic/5339-licorne-by-mtaylor-pof-316-french-frigate-hahn-version-20/?p=164373 The cat has landed.... Enjoy the popcorn. We have plenty and this will be a long journey. Thanks Ed. I also thought about a bit of the "v" groove between joints... I don't like the paper idea due to the strength issues, but I'll do some testing. I think more pigment, when I get to the planking, might be good. I'll be testing this also during the framing. Why waste a good pot of glue? Thanks Dan, I think you're right on the glue lines... the stem gets overshadowed by the rigging and all the headwork. I think I'll follow your advise on the bobstay holes. There's a unicorn that needs to fit in there... yikes! The gammoning hole would be close to put them in now, but waiting is probably a good idea.