DONATION DRIVE - SUPPORT MSW - DO YOUR PART TO KEEP THIS GREAT FORUM GOING!
×


Beef Wellington
-
Posts
2,249 -
Joined
-
Last visited
Content Type
Profiles
Forums
Gallery
Events
Everything posted by Beef Wellington
-
 Looking amazing Wayne. The Jackstaff looks great, one thing BE pointed out in his log is the fact that the bowsprit cap would have been asymmetrical to allow additional space on the stb side to mount the jack staff. Looks like you made it work perfectly. Another tid-bit, the union jack is only flown on ships in harbor or at anchor, not sure your plans there. I think the obvious explanation is that it would be rather impractical with rigging and sails billowing...
 -
Nice cheeks Joe I agree the kit parts on the head are a not that accurate and I wish I'd known what I was doing when I did mine, looking forward to seeing how yours turn out.
- 136 replies
-
- 1
-

-
- caldercraft
- Cruiser
- (and 2 more)
-
Cruizer-class Brig-Sloops of the Royal Navy
Beef Wellington replied to molasses's topic in Nautical/Naval History
Thanks Chuck for sharing, a very interesting read. There are couple of topics that I think I would have expected to be commented on or explored more but weren't. The similarity of the model to existing original plans is not really explored, nor the fact that these workhorse brigs probably changed significantly over the course of their commissioning for those that lasted, there were at least a couple of these that switched from brig to ship rigged and back in the course of their lifetime, so additions of stern deckhouses doesn't seem too much of a stretch, and again, this is a feature identified on original plans. Although not really on point, the model in the NMM is least like any of the available plans so reliance on comparison to that is probably a sticky wicket. I suspect that the figurehead is a later addition to appease some owner's ideal that a "ship model should have one", but no evidence to back that up other than other documentary evidence to the contrary in surviving plans. Of course any captain or owner of the actual ship could have added a figurehead.... Bottom line, its a beautiful model. -
Thanks all for continued interest. Pat - jury has still to render a verdict but hope I'm on the right track, thanks for your support. Druxey - welcome to my log and your kind comment BE - Rudder is far from perfect, I'll post a picture next update that I meant to post here, but I'm happy to move on... Christian - you have already been down this road with such great results, I hope that I can get far as you. At times I feel very overwhelmed that there is so much yet to do but I'm hoping the foundations are there. Your beautiful model is one of the inspirations for me along with Ray and others who've built this already.
-
Nice progress Mike,really nice work. Interested how framing up the the bulwarks goes for you. I'm sure it takes extra time to get right but help but feel that the planking will be a little more satisfying for some strange reason. The waterway sure is hefty on the Morgan, guessing its the super heavy industrial design to cope with all the whale gore.
-
Cruizer-class Brig-Sloops of the Royal Navy
Beef Wellington replied to molasses's topic in Nautical/Naval History
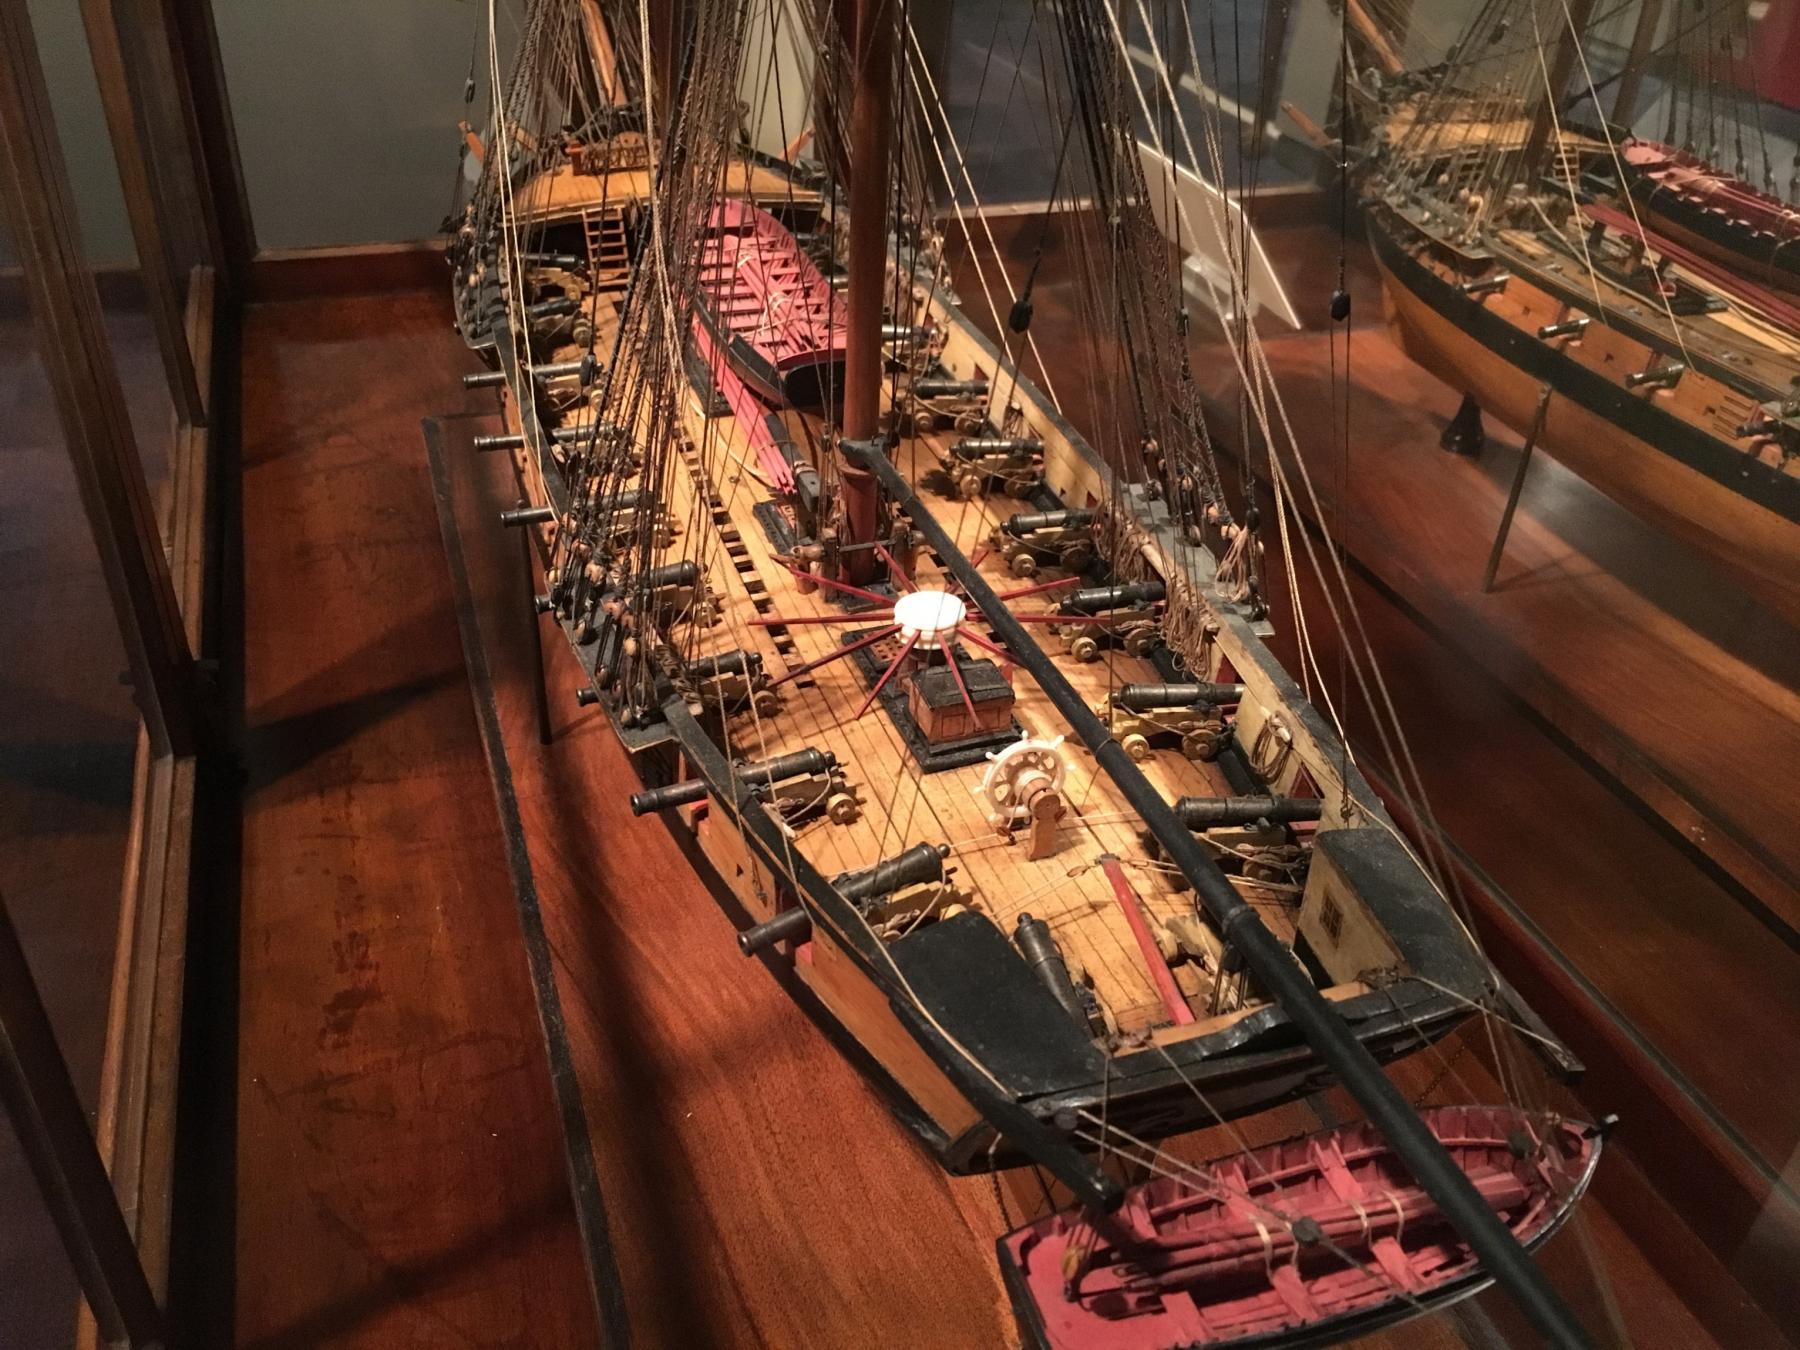
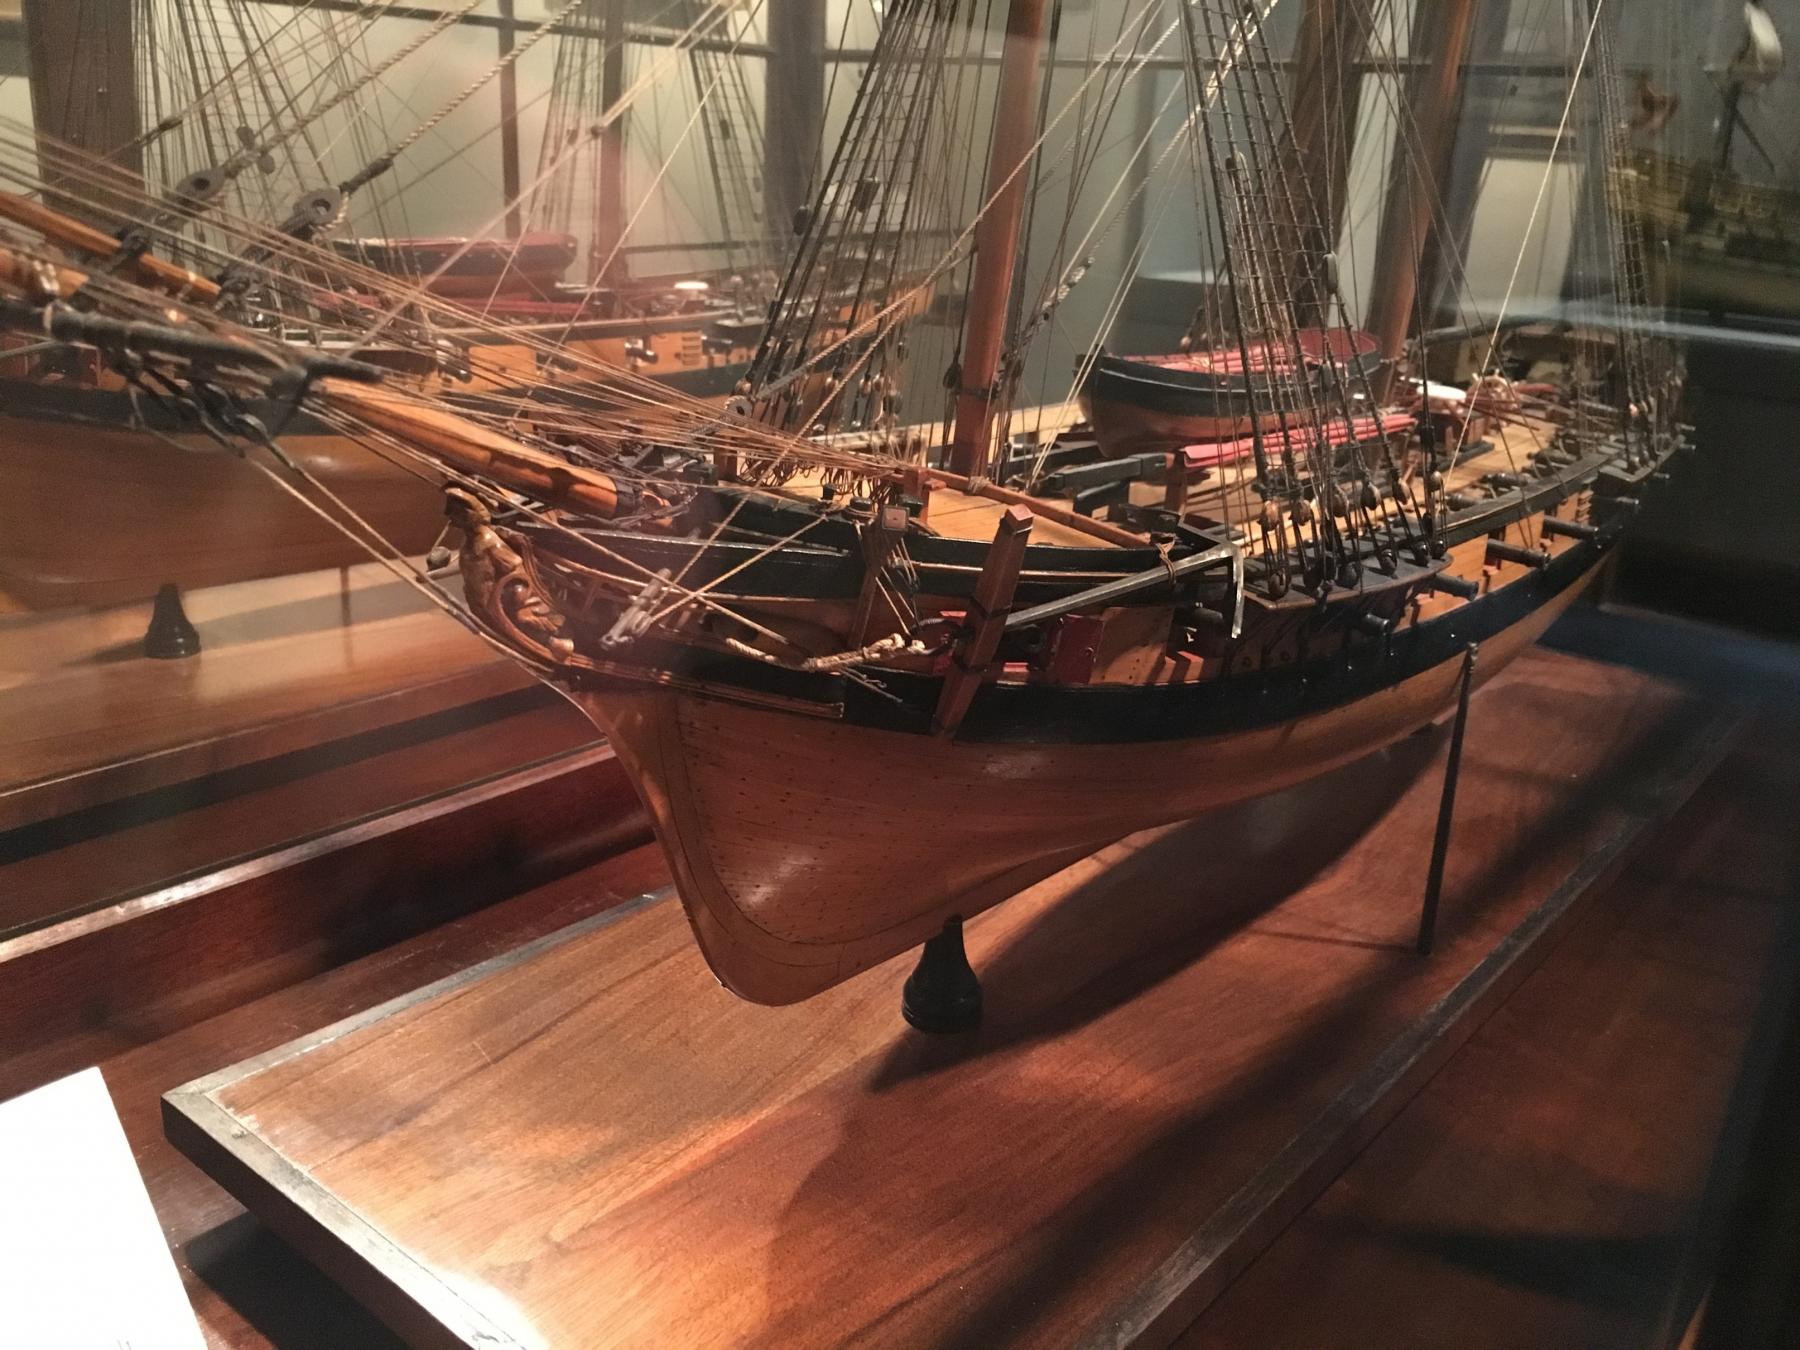
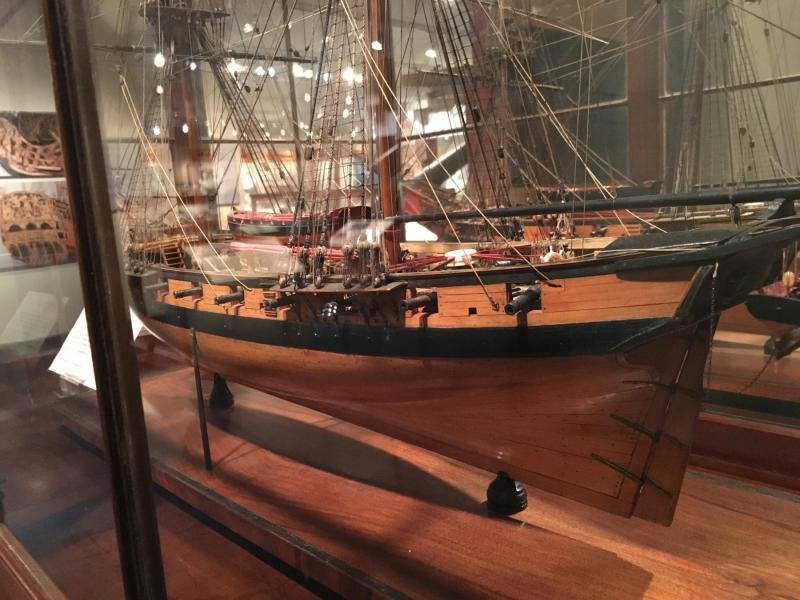
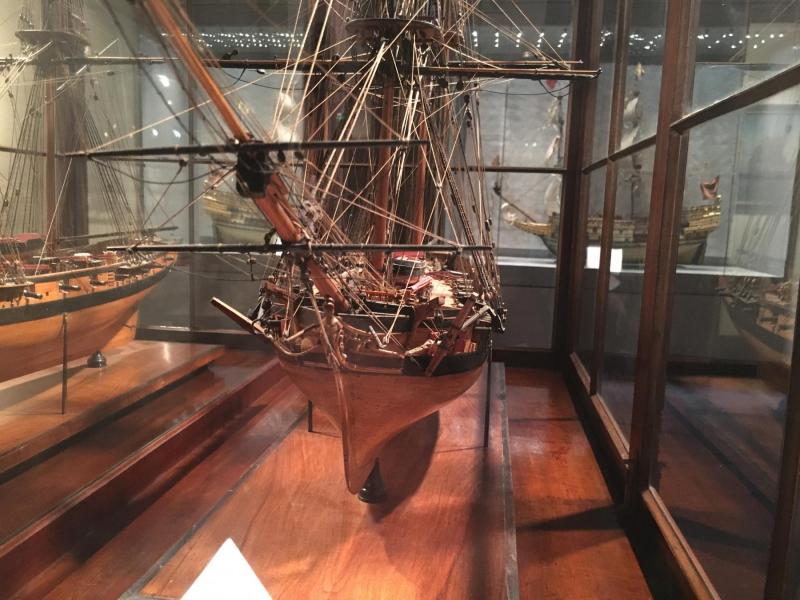
Wasn't quite sure where to put these pics, but here seemed as good a place as any (Sorry these aren't exactly professional quality). One of the interesting models in the Rogers collection at the Annapolis Naval Museum is this the following model of a Cruizer Class sloop. I curse myself because I forgot to take picture of the plate, so if anyone else has that info then please share. I'm not going to analyze, but the following jumped out at me. I wonder how much of this was reflective of reality and how much was model makers whimsy.... Dare I say, the square tuck.... The presence of a Spritsail Topsail Yard Figurehead which are not shown on any plans Cannons rather than carronades, and the inclusion of 2 additional stern chasers Stern deck houses appear consistent with those shown on many plans Presence of fore platform, and bucklers on the foremost gun port Capstan placement consistent with plans and more logically located toward stern Aft davits which were RN anathema


-
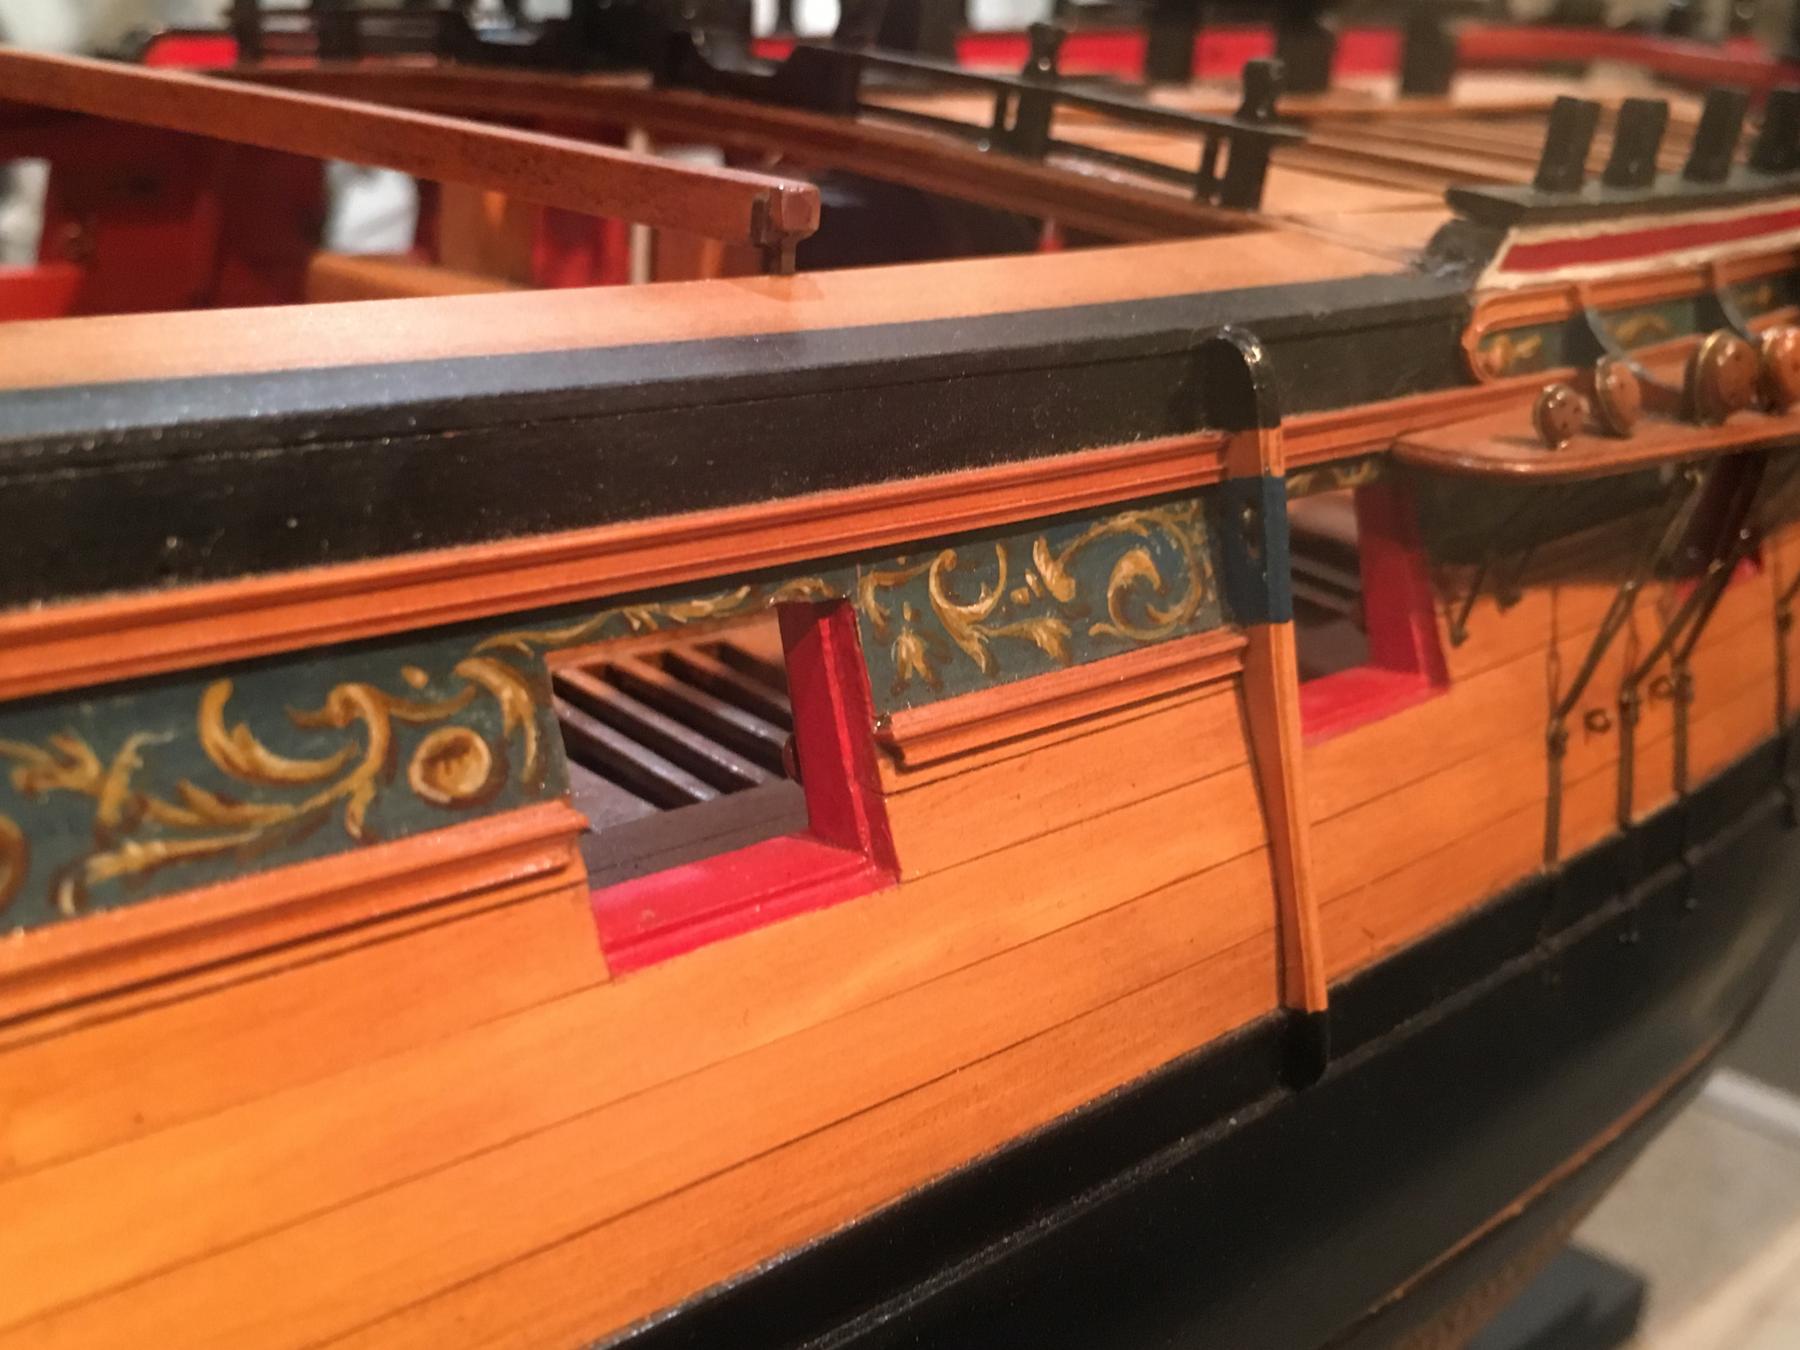
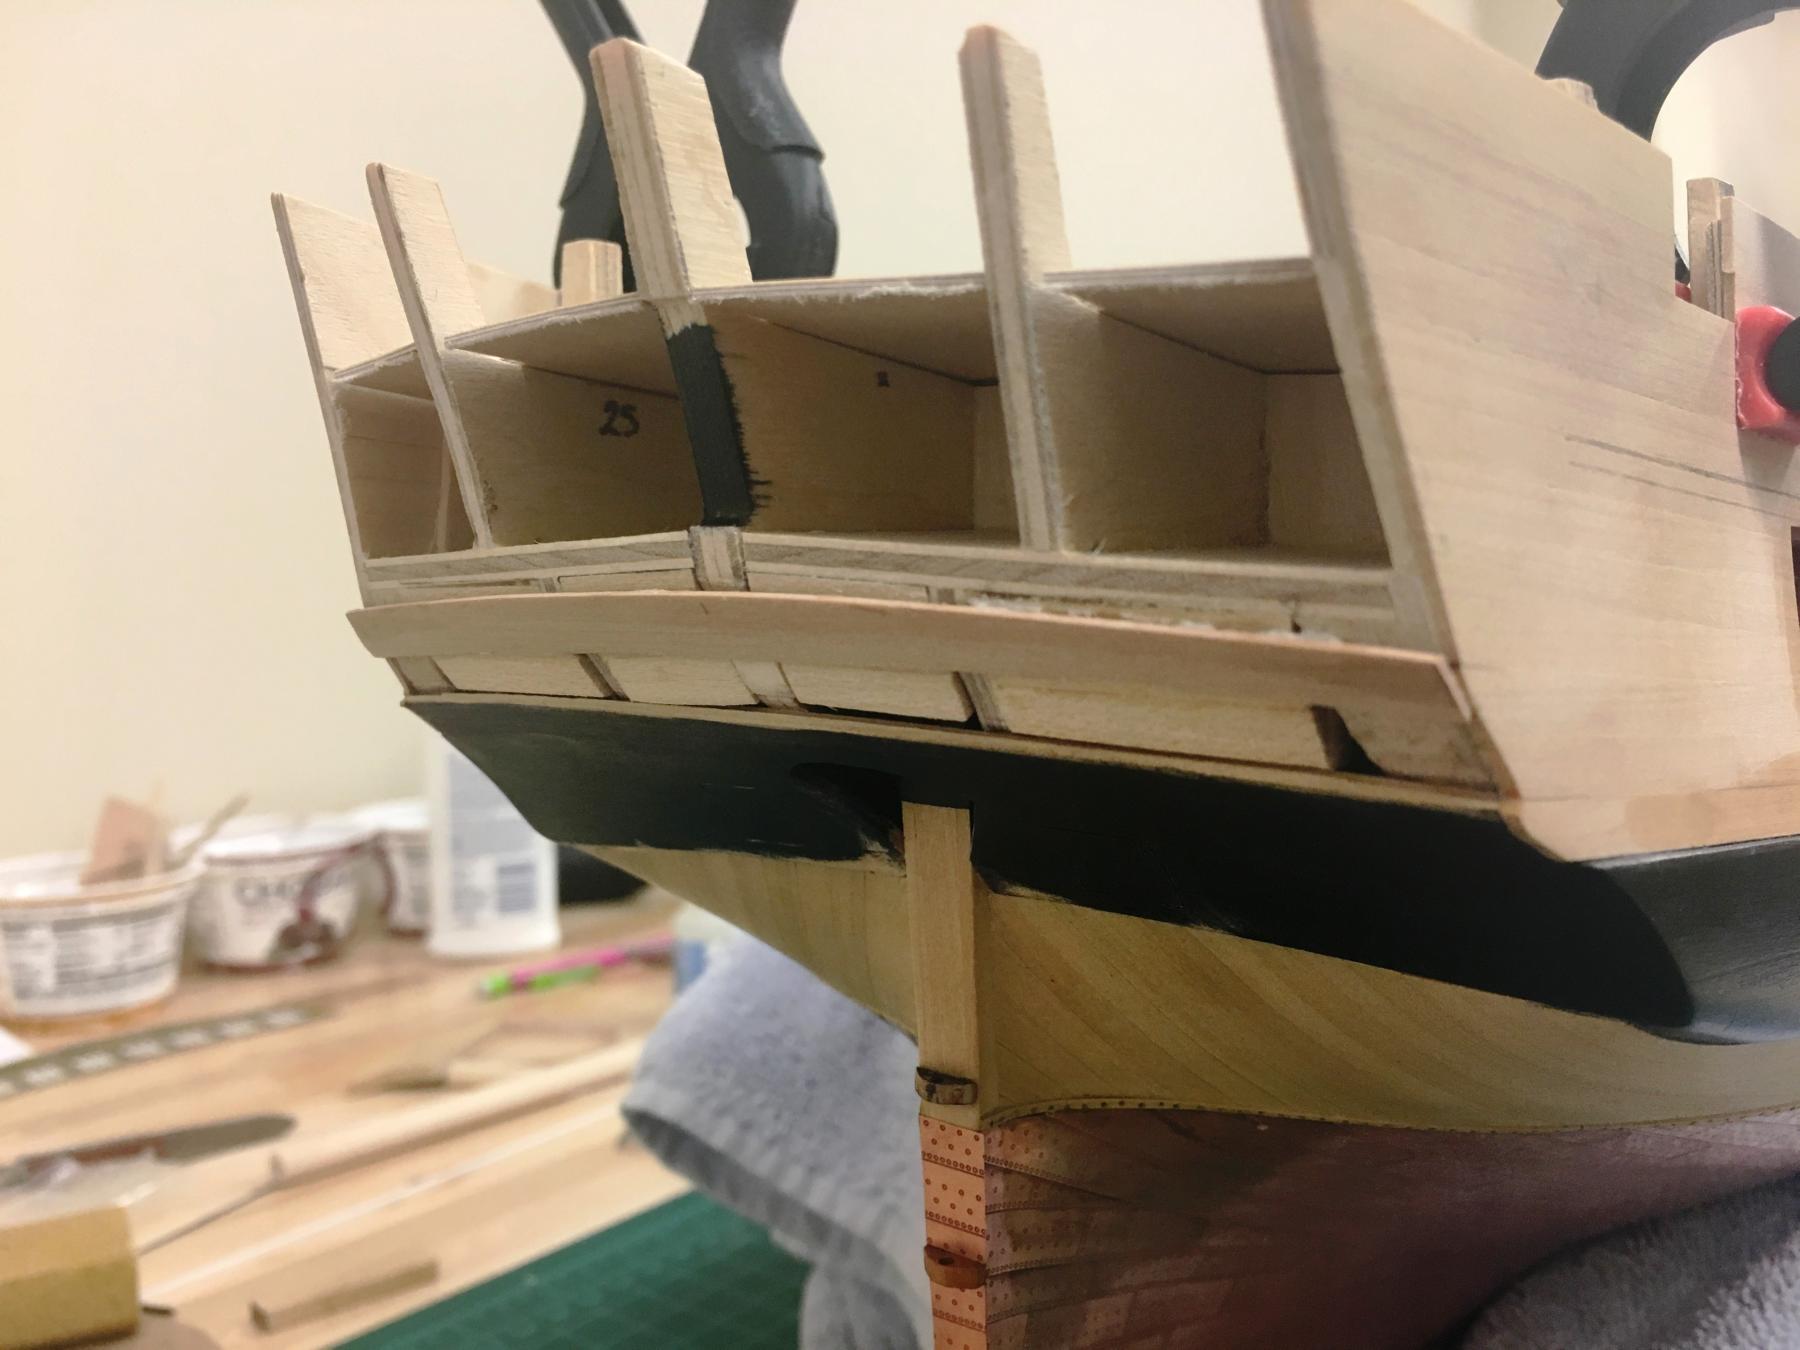
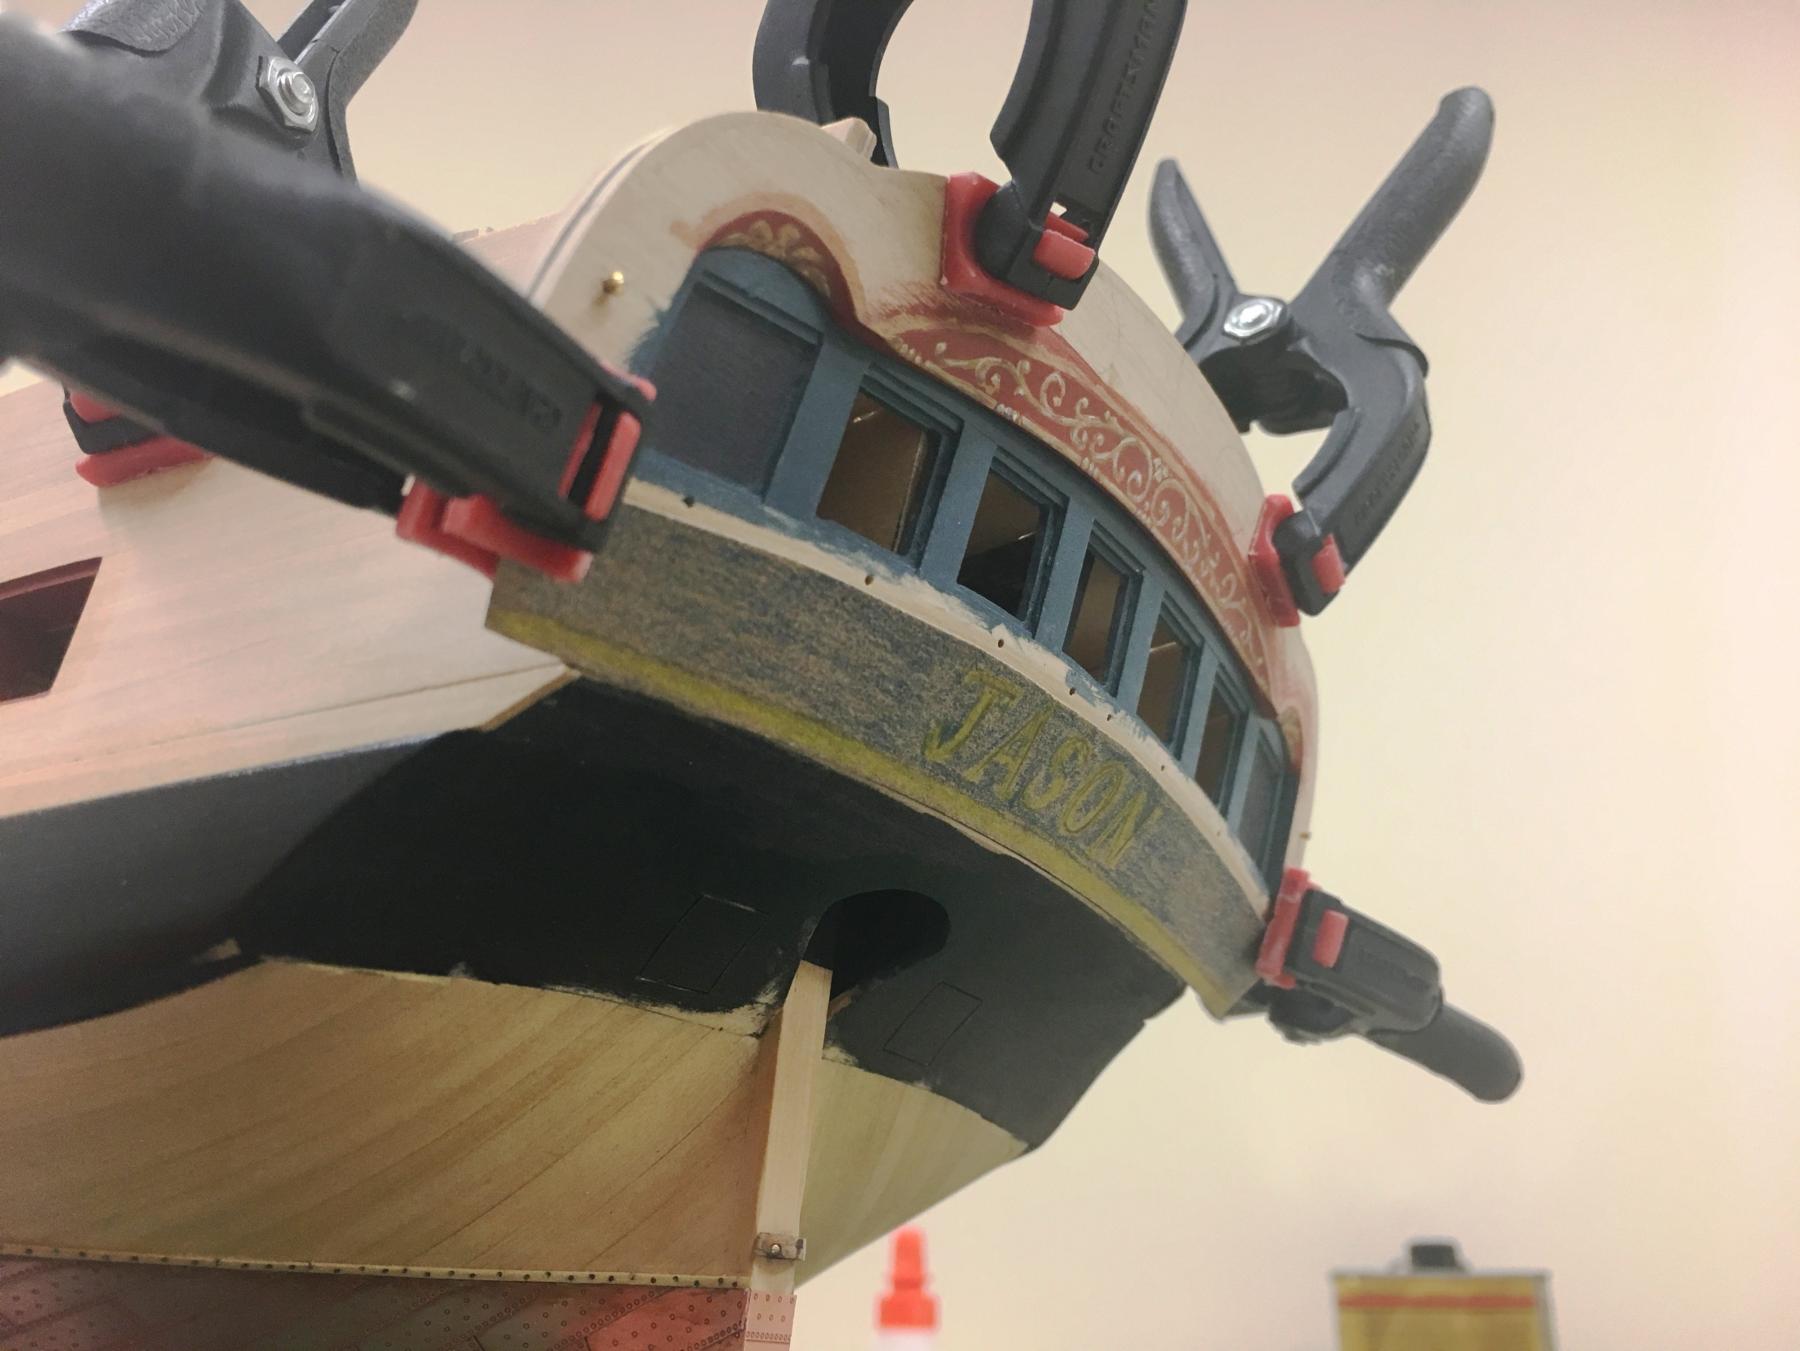
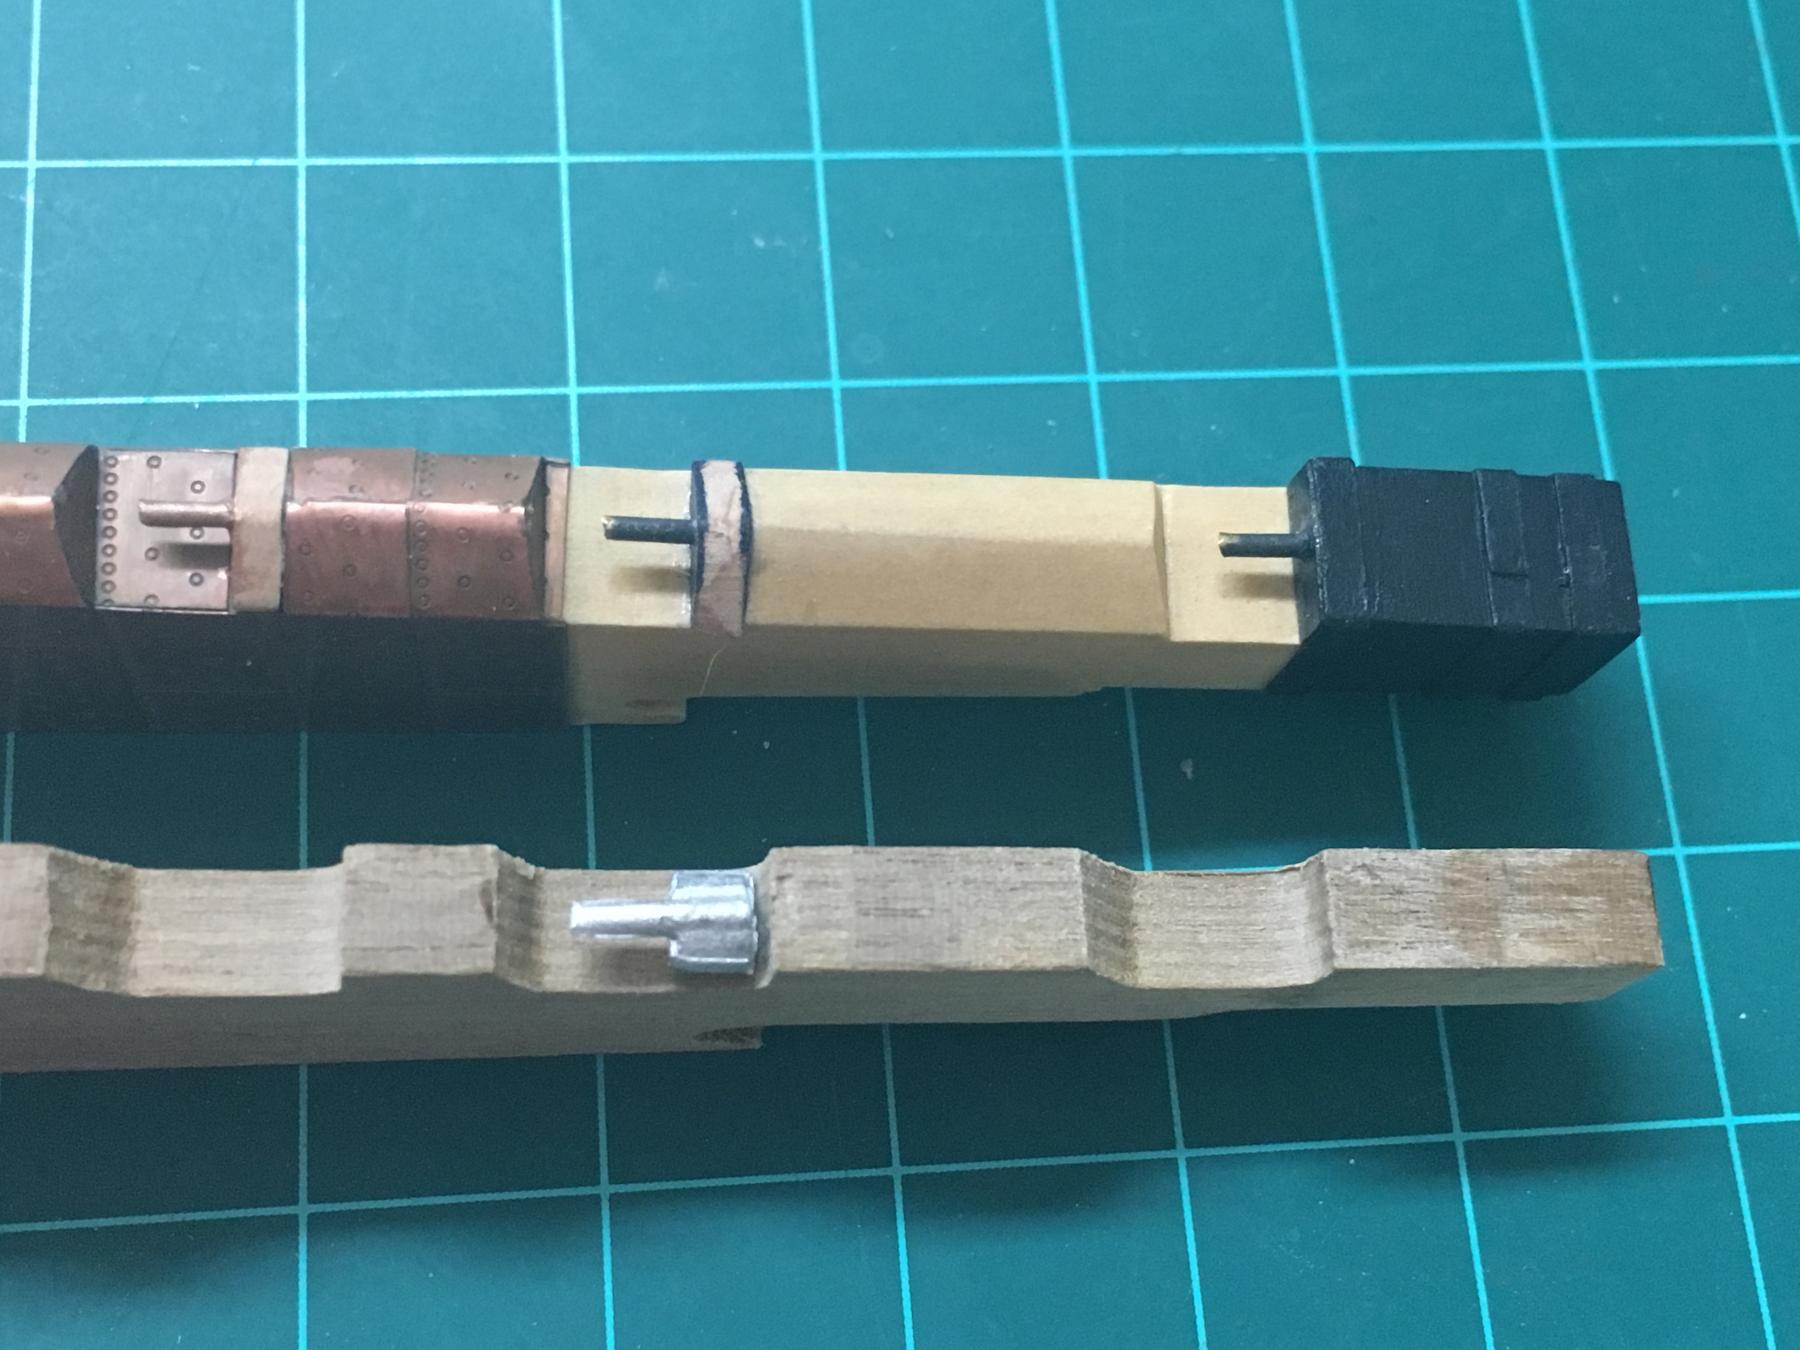
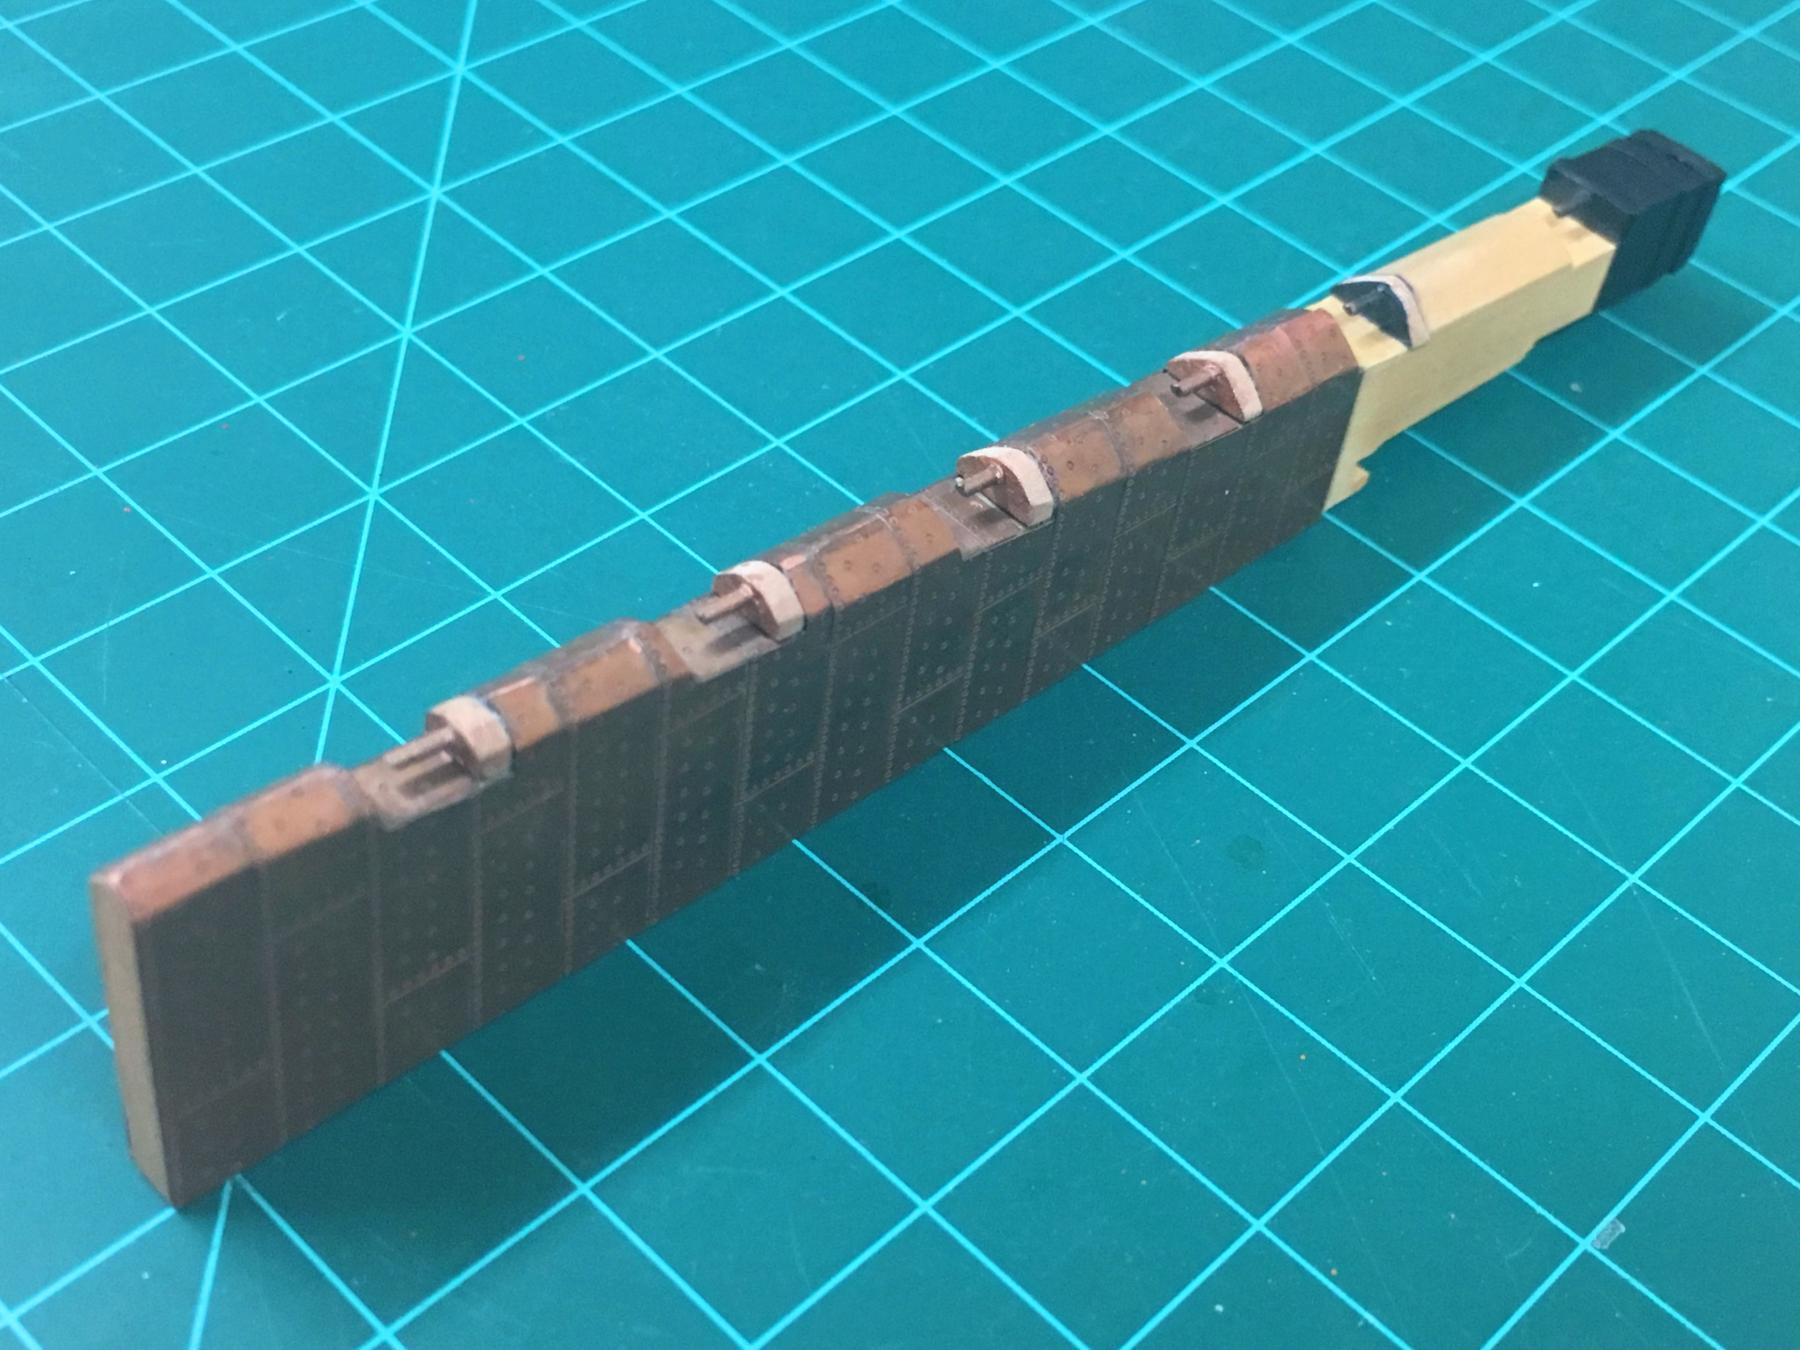
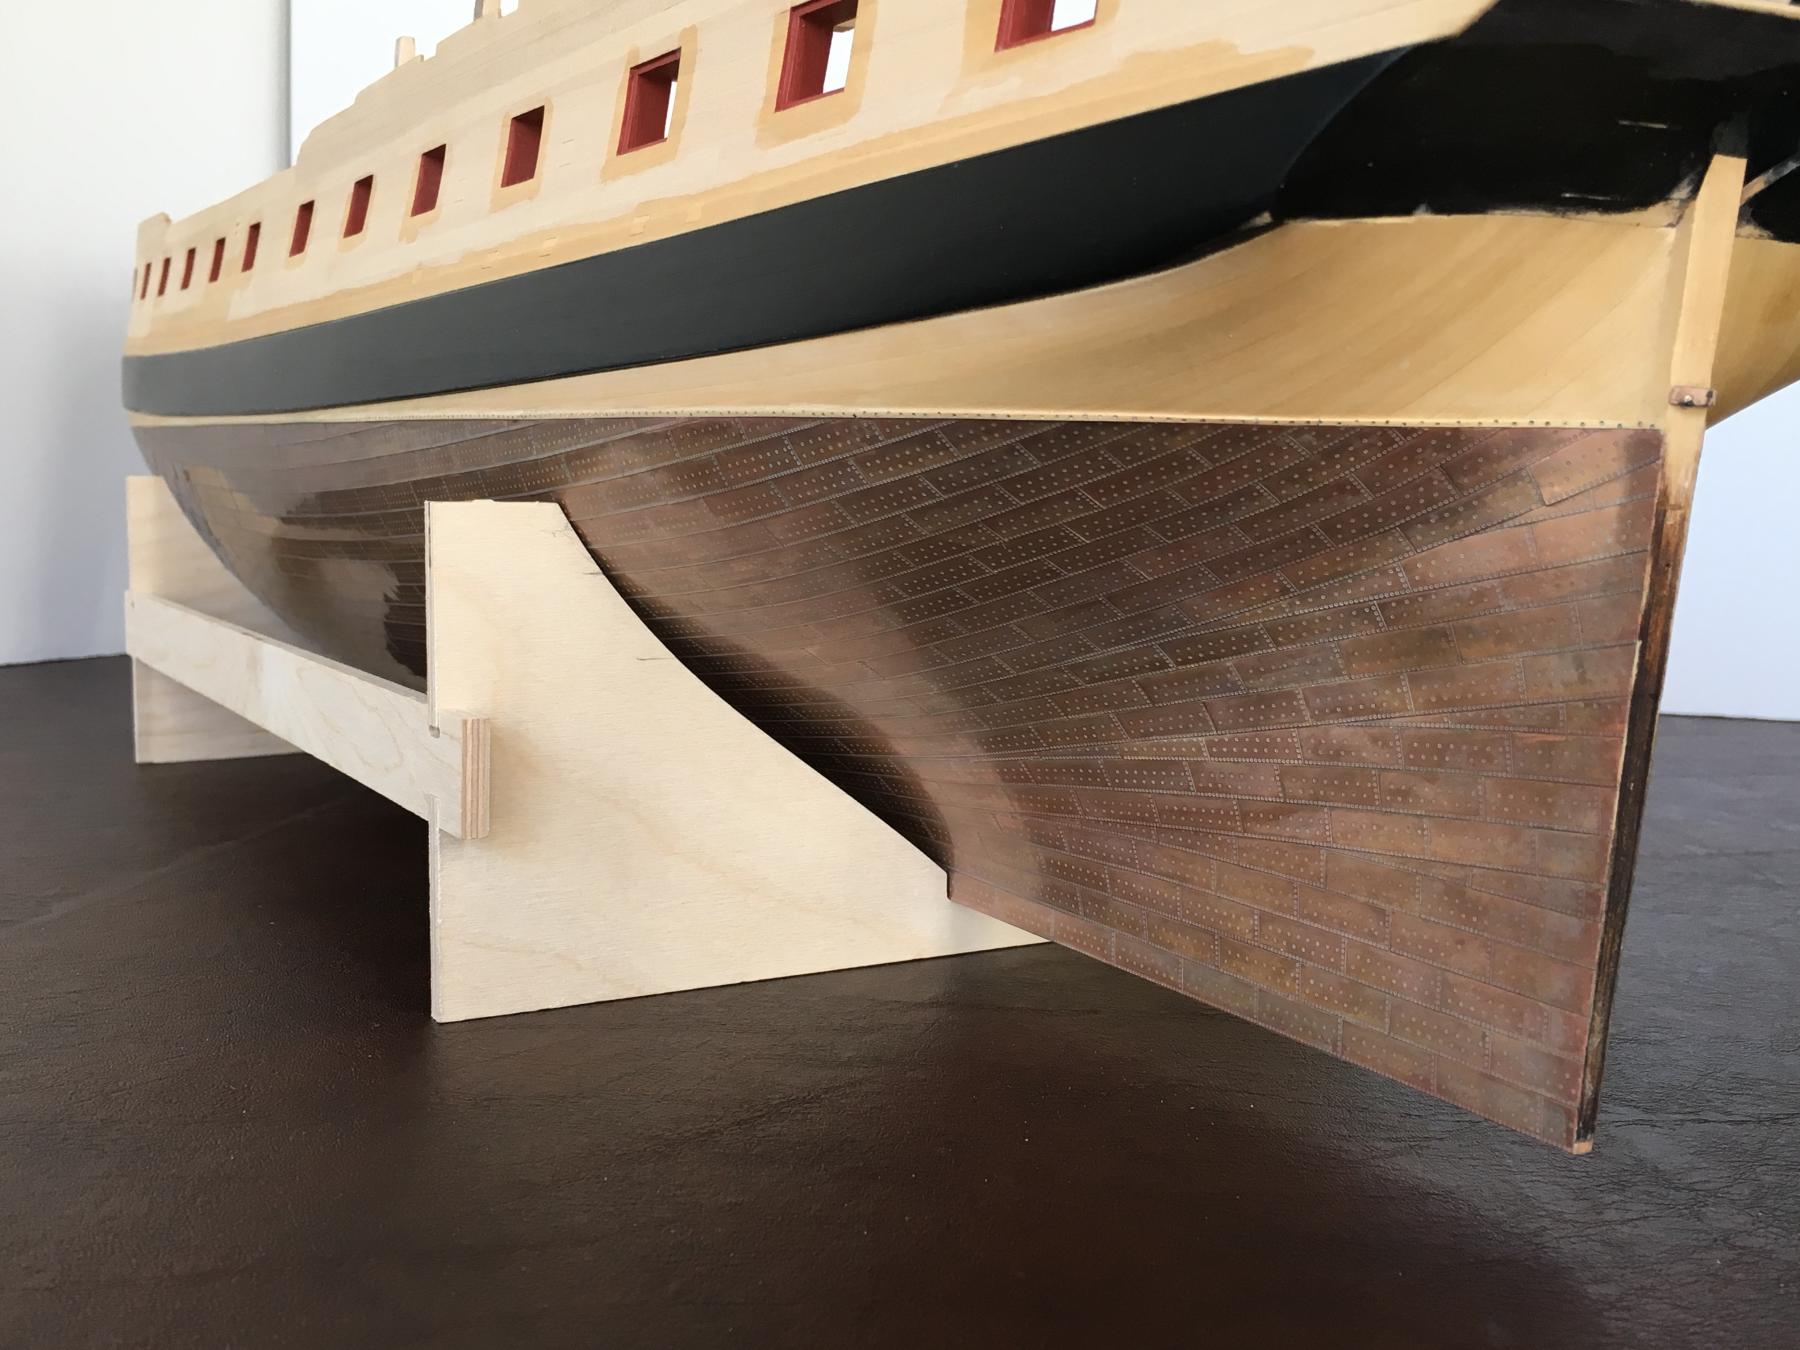
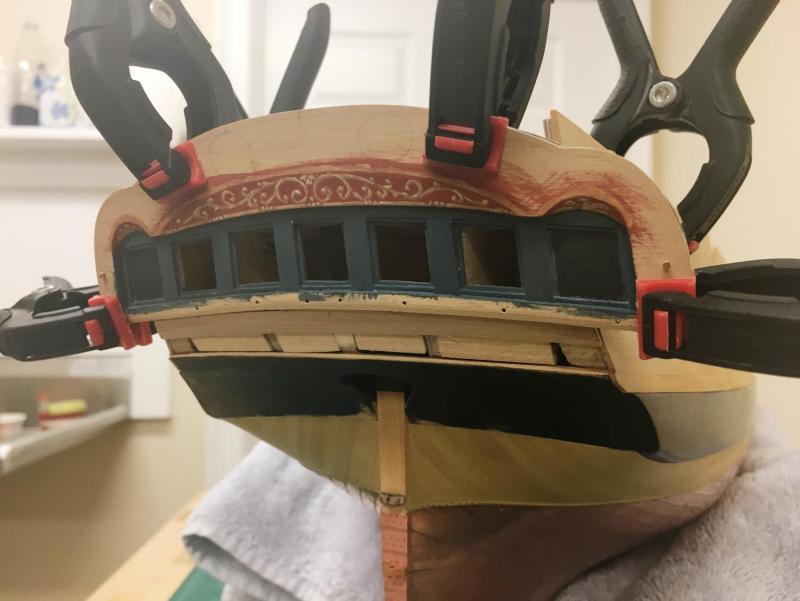
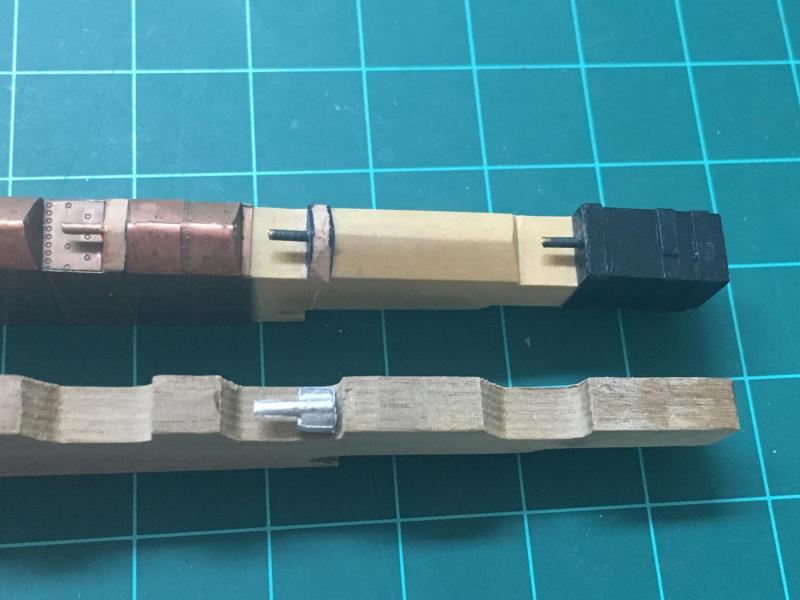
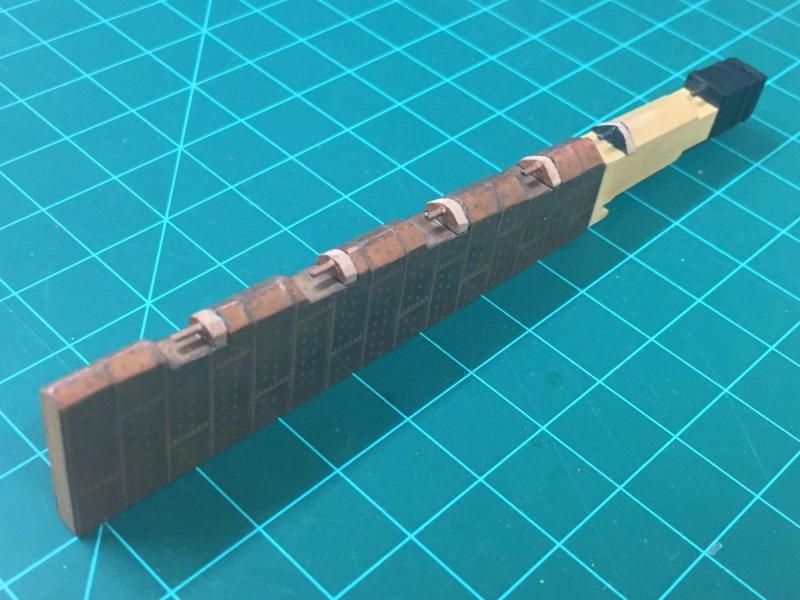
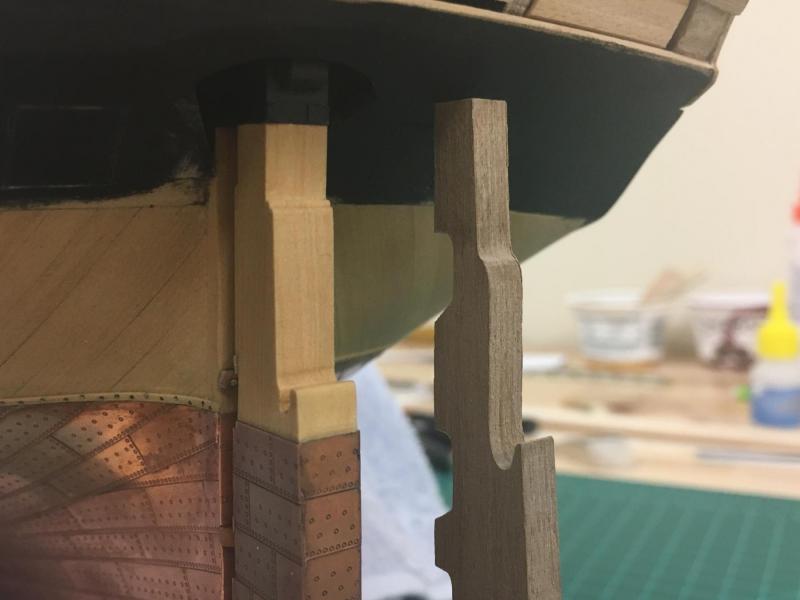
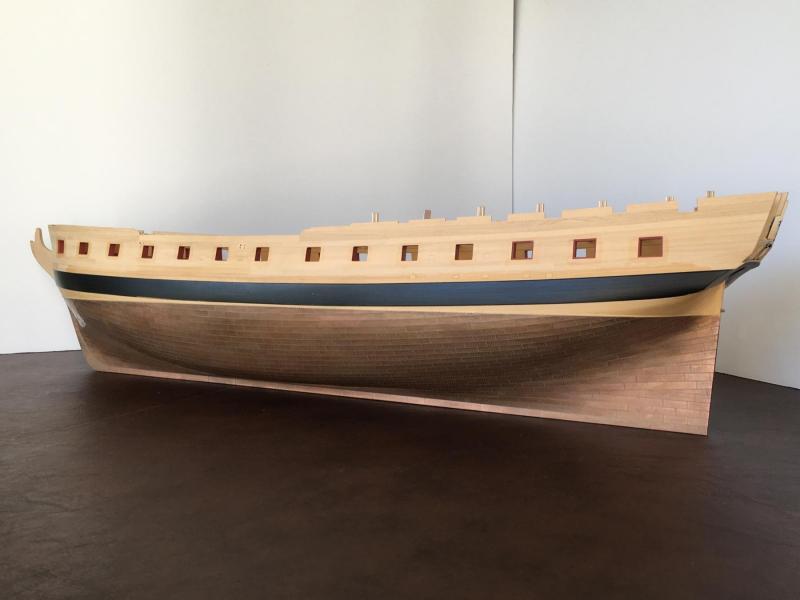
Started to work some more on the stern and its positioning as well as trying to get the rudder finalised. Hopefully photos are self explanatory. First off though going to revisit a question raised earlier, i.e. whether ports without lids should have lips...consensus was that they didn't as there was no need, however I did get a chance to visit the Rogers collection at the Annapolis Naval Museum, and voila, the ports clearly have lips, maybe not as pronounced as those with lids but they're definitely there - I can only assume that this mirrored reality. Side note, this collection is just incredible and very inspirational, a must visit for anyone who is able. Stern Fascia Placement of the stern fascia seems so important to the look and feel. This is still not glued (hence the clamps), but I'm starting to get a sense for where I'm going with this. I epoxied a curved piece of wood to ensure consistent placement, this still needs to be fine tuned to shape. To get the appropriate position I came up with a compromise between the a number of dimensions on the plans as well as estimated from AOTS. Having built up my own stern template I shortened the stern by 2mm to ensure appropriate angles with the upper and lower counter (basically because there is a shelf built up under the lights which extends 2mm beyond the fascia proper. This was as much look and feel as anything and if I need to adjust upon reflection I can easily enough. Last photo shows a cardboard template in place for the upper counter which illustrates the complex multiple curves joining in this area. Pintles and gudgeons An unforeseen issue with making my own rudder was that the supplied cast pintles and gudgeons aren't the correct size (being uniformly 5mm wide, phots below show comparison to supplied rudder). I ended up making my own out of wood strip. Pintles weren't too problematic, but the gudgeons were very fiddly and hard to figure out how to secure properly because they are so small. In the end, I CA'd all of these in place, but reinforced the top ones with pins to take the weight. Holes in many of the 'non structural' gudgeons were drilled bigger than necessary to make it easier to mount the rudder. Coppering this irregular monolith took quite some time and many choice words. The gap between the rudder and sternpost is the smallest I could manage, and completing this took many redos. With the rudder finally in place (at least temporarily), I was pleased this turned out the way it did and in retrospect I'm glad I tried this modification despite the many extra hours of work and pondering. The last photo shows the dramatic difference between the one built to AOTS dimensions and the kit supplied piece which to my eye looks too flimsy in comparison.


-
Stergios - went with three stirrups on the main yard only becasue of its size, just two in the foreyard.
- 1,144 replies
-
- 1
-
-
- snake
- caldercraft
- (and 1 more)
-
No update as such, but Merry Christmas to all. Thanks Mike, BE, Carl, Stergios, Pat, Jesse, Doug, Sjors and all the like for continued support and kind words. I've moved on to solving some rudder issues and will post more in due course. Have had to take a little step backward in that I need to redo the copper finish . Funnily enough, after I had brought the ship upstairs for a photo shoot I left it there and after a couple of days the result was a couple of small areas that had become rather mottled. I can only guess that this was because our main level is more humid (normally work in a basement) and I hadn't cleaned off all of the reactant - purely guesswork, as the ship had been sitting in my work area for a week before that. You live and learn, must do a much more thorough job ensuring any reactant is removed.... Mike - see message from Sjors, don't think that will be necessary but definitely an option, continuing to noodle this one.. Sjors, will send you a PM.
-
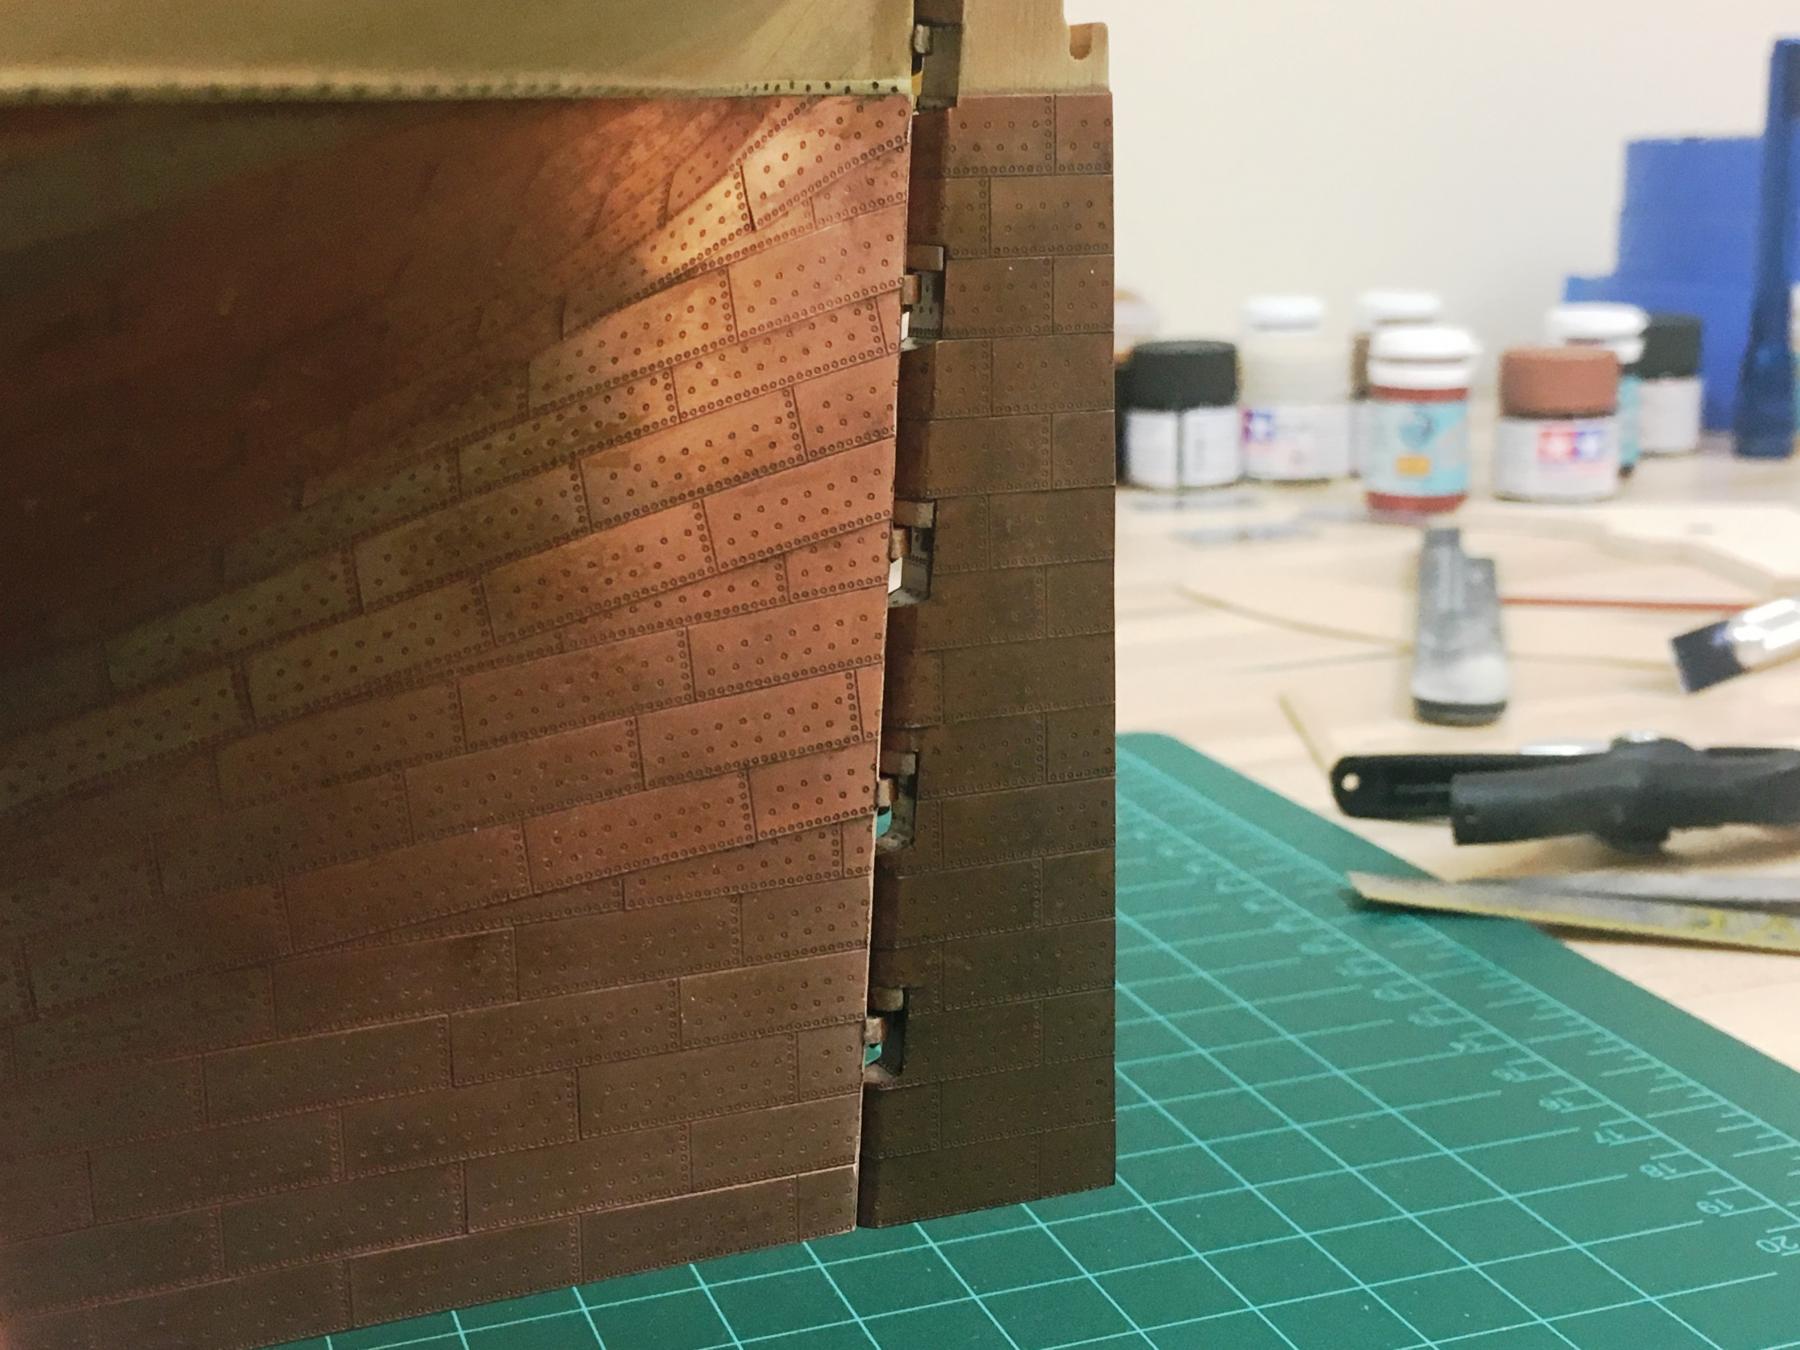
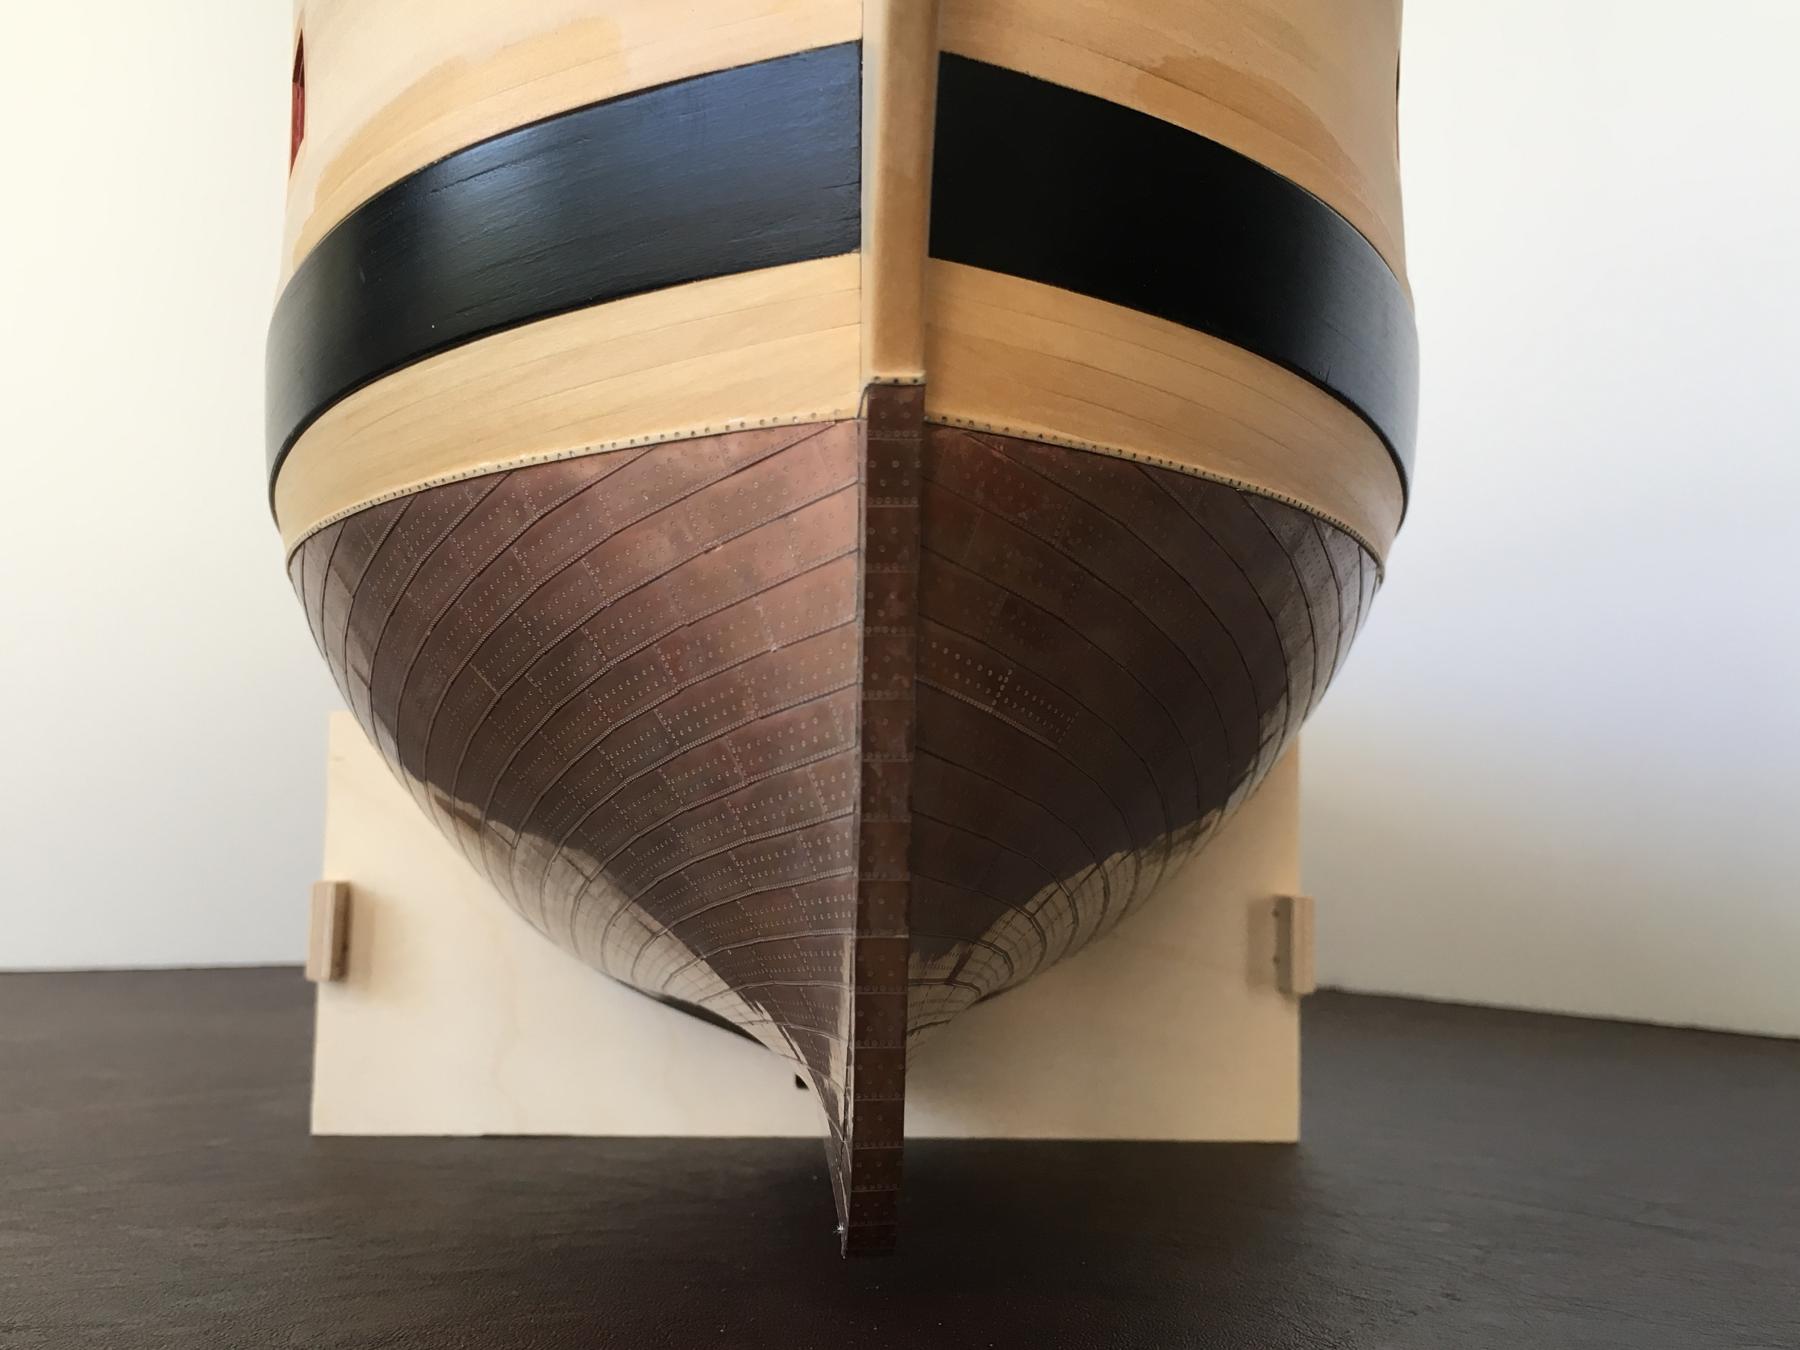
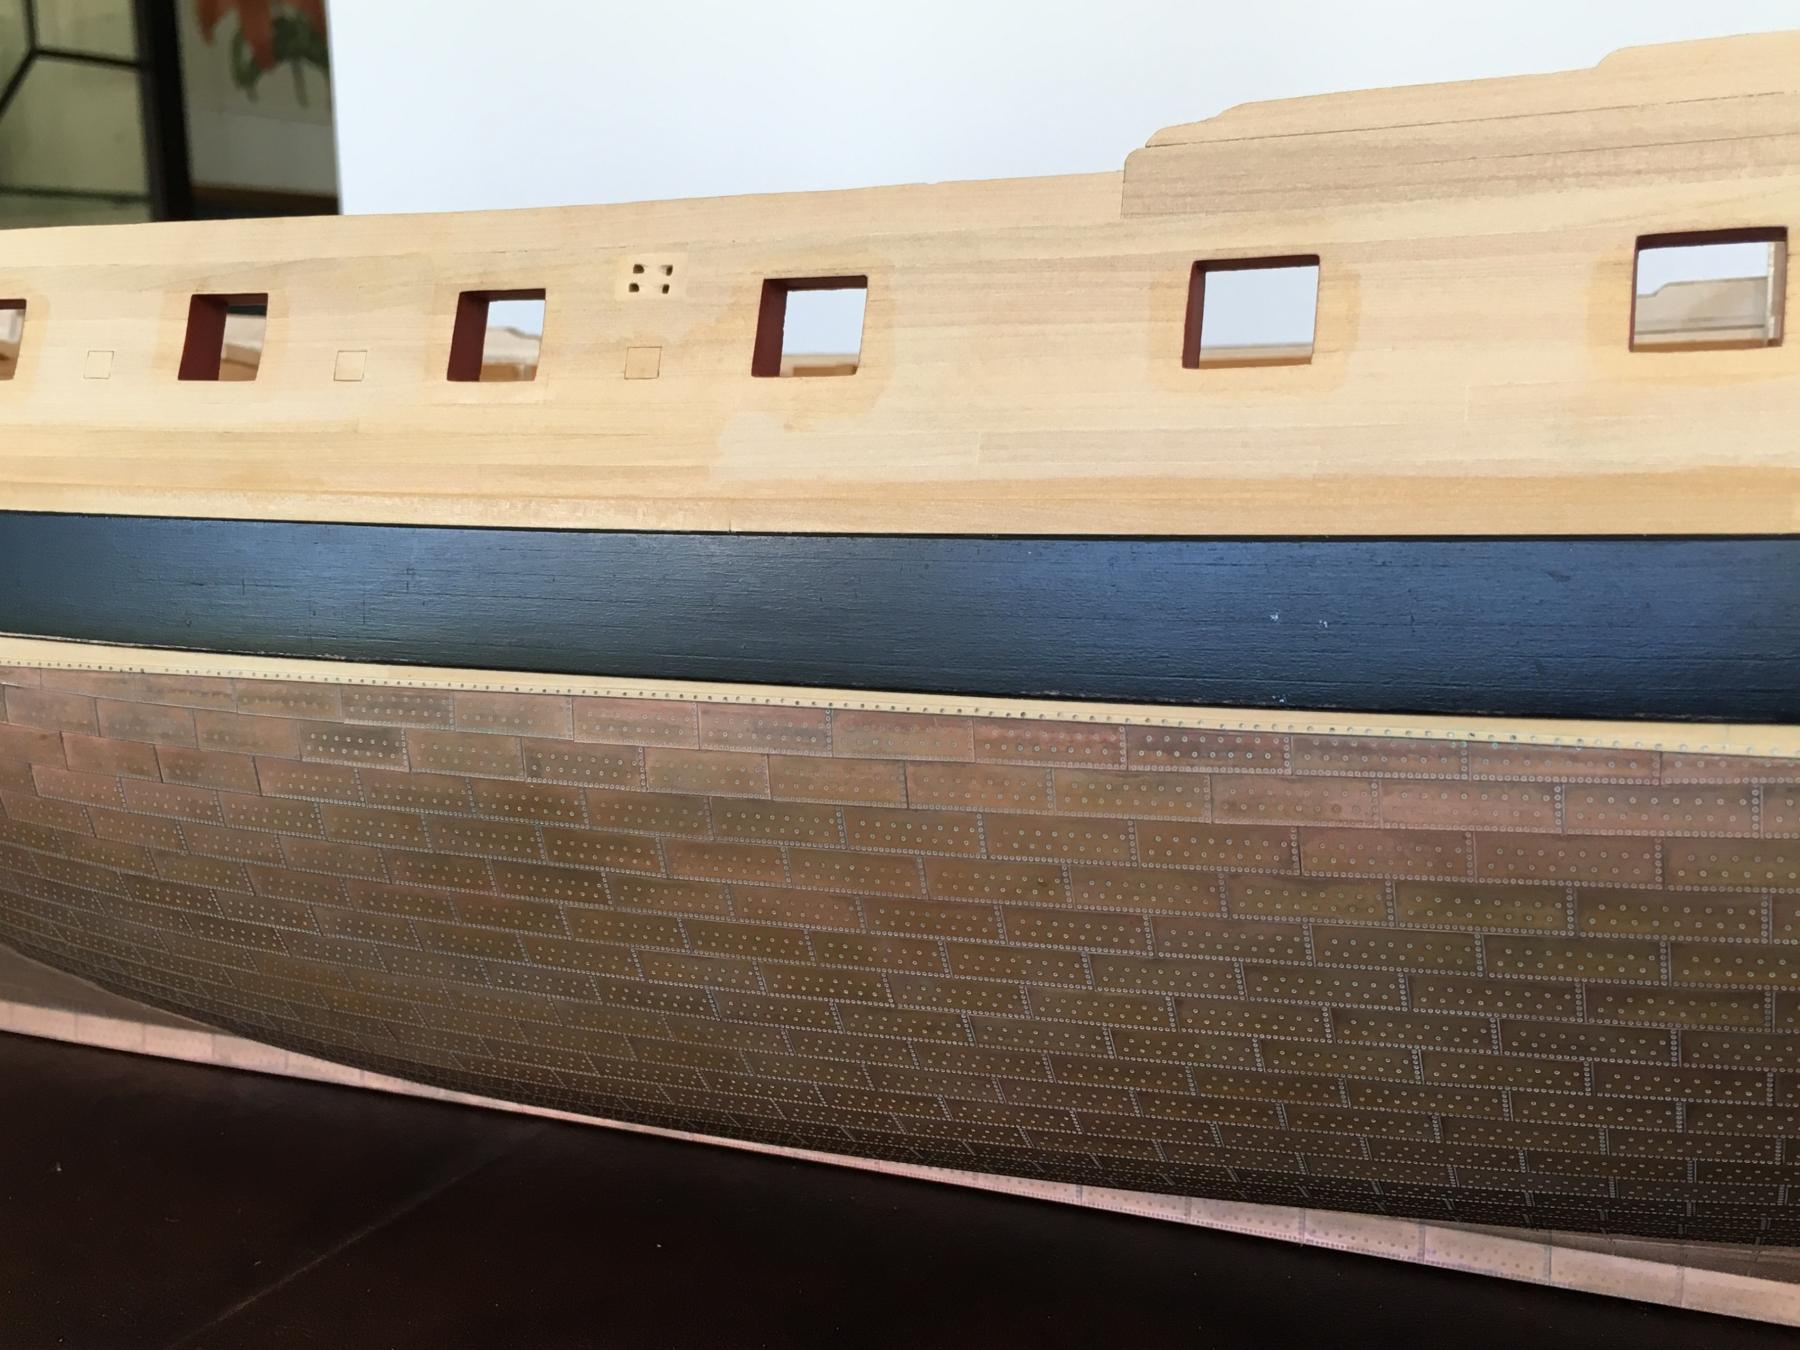
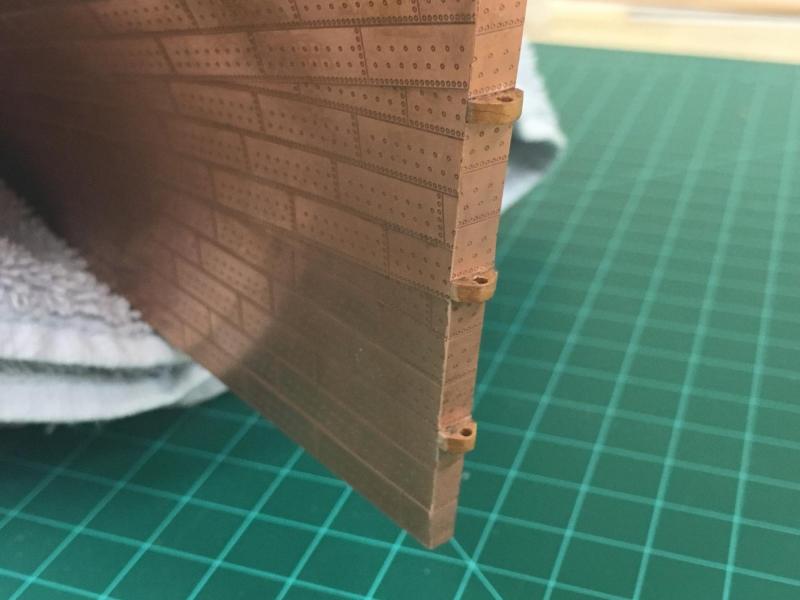
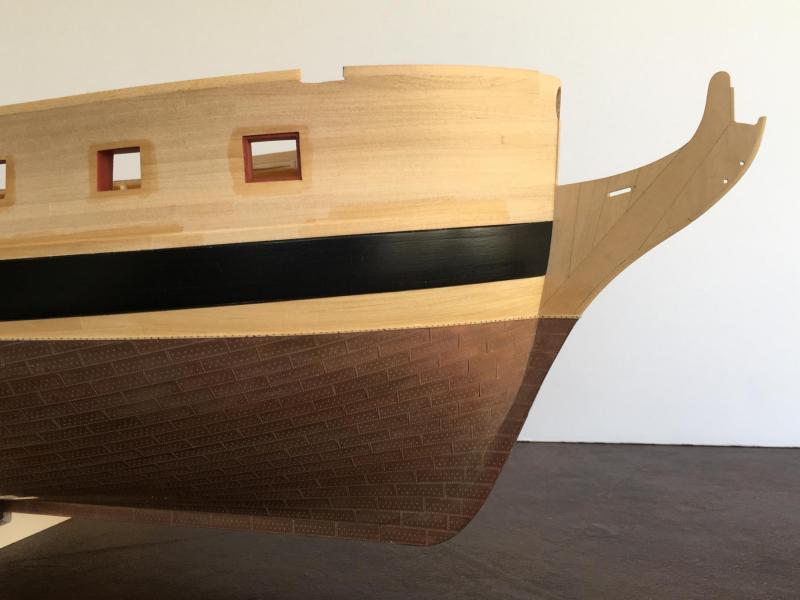
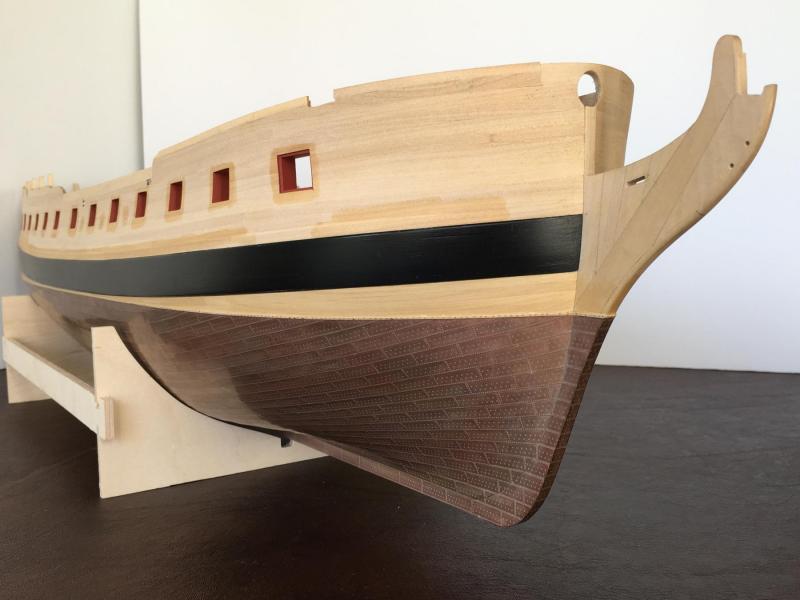
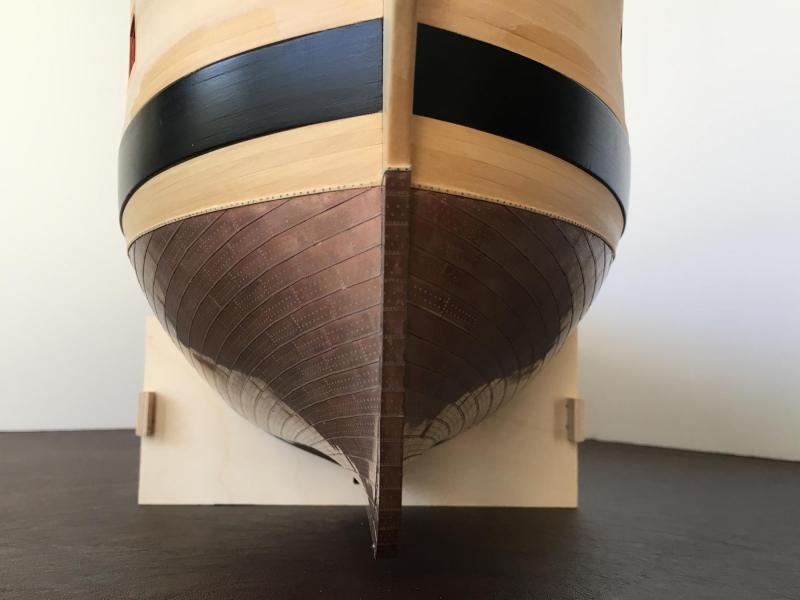
A little update to what must be the worlds slowest moving build log. Coppering on the hull is pretty much done, the only piece still to do is the aft side of the sternpost which will need some work done on pintles/gudgeons finished before I can do...more to come on that in a follow up post. Just for a cathartic moment for me, pictures of where I'm at. Like others, I wanted to give the copper more of an aged patina, all personal taste. Rather than following the bodily fluid method used by others (I must confess to being worried my model would smell like a car park for evermore!) I experimented with a chemical from JAX called - BROWN Brass, Bronze, Copper darkener (they also make a 'BLACK' version which seems to work well). I diluted this to around 25%-33% by experimentation which seemed to give the best results. It takes a number of applications, and I simply 'painted' it on with a modeling nylon brush. Found that rubbing and agitating the surface while doing this gives best results. Initially, the surface is very hydrophobic, but once the oxidation starts, its becomes much easier to keep a consistent surface covering and beading is not desired as it leads to dark spots. The more dilute solution tends to green more upon drying, but this can be easily wiped off with water and/or rubbing alchohol. Personally, I didn't want a green monster, and was happy to have a little patina in the crevices/nail holes which is almost a negative effect for how the plates are supplied. I'm not planning to seal the copper (yet if at all) as this should then continue to age naturally, I very consciously forced myself to stop despite there being some patchy spots but these all blend in and to my eye have a natural look anyway. Bunch of photos which hopefully show the copper plate pattern in various areas, hope its not overkill, these are the kinds of pictures that I find useful from others. More to come soon on the rudder..


-
I'm not near my model or plans, but I can tell you that Peterson rigging book is much more usefully illustrated, I used the plans only for belaying locations as the details are not completely clear.
-
Seems a good approach Stergios, good luck.
-
Just found your great build Mike, lovely what you've done so far. Definitely want to see how you move forward with this.
-
Looking fantastic Bob! I apologize if this has come up before, but I wonder if you have considered changing the belaying pins. To my eye they look rather fat and out of scale compared to the really fine detail that is highlighted by those deck shots. Caldercraft provide similar looking ones in their kits, but also sell a thinner version that I think is much more in keeping, although 1:64, they may work at 1:72 as well. I in no way mean to criticize you wonderful work, so please feel free to ignore/rebut
-
Bob - it proves you know what you're doing when you catch the errors Despite the challenge, the quality and detail of the Amati rigging plans are definitely superior to the ones I've seen with Caldercraft, which are pretty good, its just that lines tend to end in "smudges" very often. Your rigging is looking great!
-
Great result Jesse, just amazing what you've done with that wheel. Now I'm even less happy with the one supplied in my kit and looks like you've just added another 'to do' to my list....
- 1,306 replies
-
- 6
-
-
- syren
- model shipways
- (and 1 more)
-
Hi Nils, its been a while since I commented, but your work is just so wonderful. I've learned so much from you and how you can create these details without relying on kit parts. Can't wait to see her in her final glory.
- 2,625 replies
-
- 9
-
-
- kaiser wilhelm der grosse
- passenger steamer
- (and 1 more)
-
The masts seem to match perfectly Bob, just beautiful work all around. The pin arrangement on the mast is not something I've seen before, very interesting.
-
Just catching up Jesse, that pump is amazing, such great work. Love your start on the wheel, interested to see how this plays out as the supplied ships wheels in many kits seem sub-par and its such an important feature.
- 1,306 replies
-
- 7
-
-
- syren
- model shipways
- (and 1 more)
-
Top drawer stuff Eammon. I tink, (tink mind'ya) that the doo-dah is called a saddle.
- 1,039 replies
-
- 1
-
-
- ballahoo
- caldercraft
- (and 2 more)
-
Looking good David. Are you planning to plank right to the back of the keel former or cut a rabbet?
-
Wayne, that is just stunning. Nicely done all around....everything looks just right scalewise, I'm very envious of you having the Irene book
-
Great looking deck David, well done. Now the planking fun begins